Something that caught my eye a couple of days ago really got me excited…. no not a new caravan ( I wish) but a Kickstarter project that I think is one of those simple ideas that has countless applications in all sorts of areas. In fact I keep thinking of more uses for it… and it’s not even my idea!
OK, so what has got me all worked up then? Well imagine getting messages direct to your email or phone telling you the voltage of your leisure battery, motorhome starter battery, canal boat battery, ATV battery, bike battery, solar powered shed battery, aircraft battery, golf cart battery, horse box battery or trailer winch battery. All from a little device that can simply be clipped on or permanently installed. Got you curious?
The company has recently been at the Scottish Caravan and Motorhome Show where they received lots of interest and loads of positive feedback. Still curious?
OK here the disclaimer thingy bit for Caravan Chronicles: I have no connection to these guys except I decided to back the project on Kickstarter. I have taken all the text and images below from IonOT’s kickstarter project page…
If you want to see the full project, follow the link toBatbot and see what you think.
Invented in Scotland by David Richie, Batbot came about from wearing two hats – one, from a career working in the technology sector, and the other, as a livery yard owner. With horse lorries stored on site in between use, he noticed a regular problem occurring. On the day of an outing, more often than not, there would be an early morning knock at the door from liveries needing help… their vehicle battery was indeed… flat.
They had walked past their lorry every day, but had no idea that the battery was running low. This sparked an idea. Wouldn’t it be great if there was a device that could avoid this problem?! Batbot was born. After many hours, days, weeks and months developing the concept and prototypes, here we are today, with a brand new product that will ensure flat batteries (and early morning wake up calls) are a thing of the past.
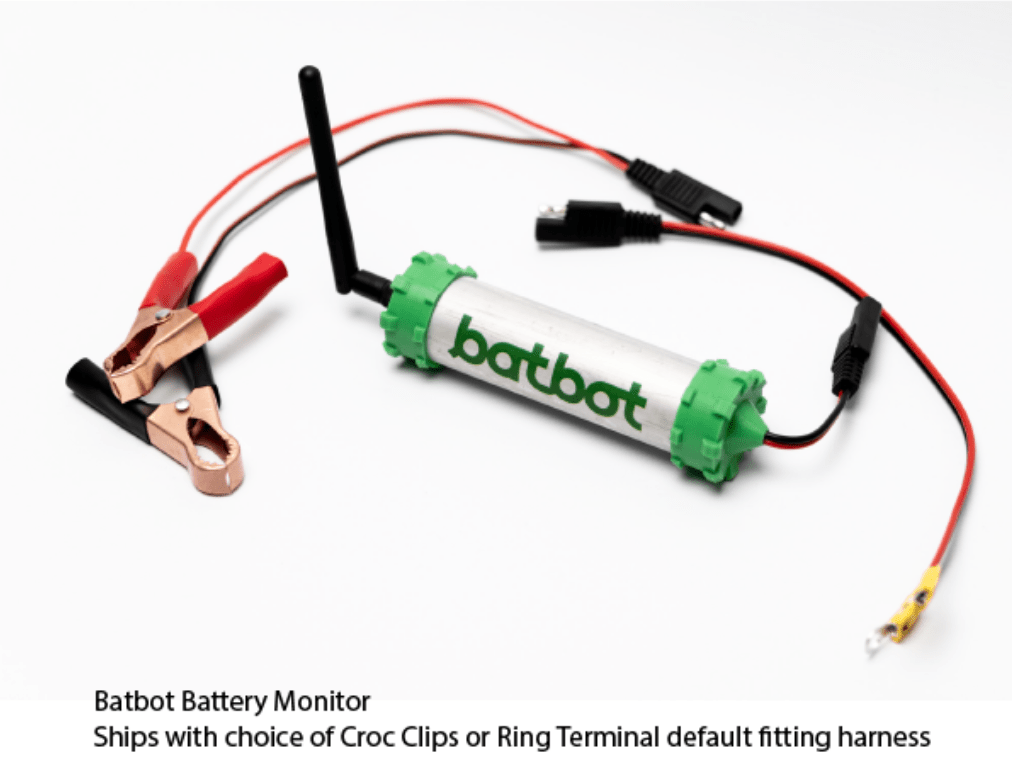
Batbot is a device that every equestrian, marine enthusiast, motorhome or vehicle owner has missed… until now.
This clever product monitors your vehicle’s battery and sends alerts to your mobile device or email when the battery requires charging.
How it works
Batbot simply hooks up via two croc clips (provided) to the battery points under your vehicles bonet and can be secured in place with a cable tie.
Once installed the device then sends your battery’s data to the cloud where alerts are generated and then sent to your mobile device or email address. Unlike other products, Batbot uses the Sigfox or LoRaWAN radio networks to send this data, so no bluetooth connection is required.
Key Benefits of Batbot:
Quick and easy to use
Keeps track of your battery state
Alerts you when action is required
Saves destroying batteries with deep discharge
Regular daily “All Ok” status for peace of mind
No monthly SIM contract
First year subscription included
Low further yearly subscription (£7 ~ £10)
Chose Sigfox or LoRaWAN version of product
LoRaWAN has Home Gateway option to provide cover in remote areas
Helps identify when your battery or vehicle has an electrical fault.
Avoids the vehicle not starting when needed for emergency or planned use
Save’s garage call out charges to jump start your vehicle
24V lorries can be difficult to find a suitable jump start source for, or require a garage call out. Batbot helps you avoid this problem
For all the details and to see the full project go and visit the Batbot Kickstarter page and maybe you too might want to invest a few beer tokens.
My email box tends to get a wide variety of questions covering all sorts of subjects. The most frequent one is to do with wiring and electrically related problems. Sometimes trying to diagnose issues via email and a few photos is a bit of a challenge, but hey who doesn’t like a challenge! One thing that I do see a lot of is electrical work that is…. well, quite frankly not up to scratch in my opinion. So here is my attempt at a basic guide.
So many projects start by adding one or two things… extra 12 volt outlet here… maybe another light and then something else comes along that needs adding in. Before you know it you have a mess of spaghetti that the local Italian restaurant would be ashamed of. It is all too easy to fall into the trap of adding circuits to existing fuses…. or installing a new fuse and a few weeks later adding another circuit to it as it’s easier than installing another fuse.
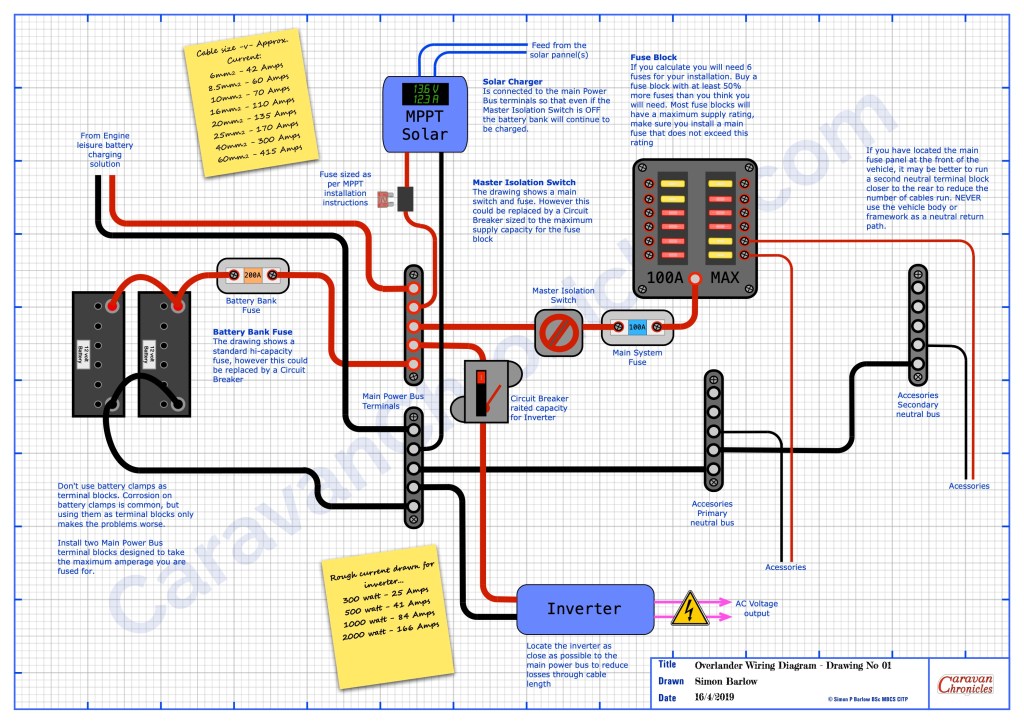
Start with a plan…
You can download these and other drawings from the Electrical Drawings page in the drop down menu under “Document Library”
You need to draw out how the major elements are going to connect together – leisure batteries, solar charger, DC to DC charger, inverter and include all the big fuses, buss bars and fuse box. Don’t think about where any of this goes for the moment just get the basic layout and how everything interconnects worked out. It might take a few goes but paper is usually cheaper and less frustrating than sorting out the mess afterwards.
Once you have all that figured out you can start working on the details… just how many fuses will be needed… and what ever number you come up with add half as many again as a minimum. Having a few spare fuse positions that maybe never used is way cheaper than in twelve months time having to install an additional fuse box. A this point you can start adding details…. what size cable is needed for each link, what sort of fuse box do you need.
You can also now start to think about specific facilities you might need. For example, many overlander vehicles will have a button on the dash that when pressed and held down activates a high current relay that links the house batteries to the engine cranking battery. Very handy to have… jump leads are not much use if you are 200Km from the nearest vehicle. If your only trip ‘off road’ however is the muddy car park at the local car boot sale than maybe not a priority.
Don’t use the vehicle chassis as a ground.
Modern vehicles are constructed using different materials and quite often panels and sub frames are glued together. Back when virtually all the panels were spot or seam welded steel, using the body and chassis as a ‘ground’…. which really isn’t a ground but the neutral return path… this was acceptable. However now, sections can be glued together and are often sub assemblies of aluminium and other light weight materials bonded together. Just because you see a neutral bonding point (earth terminal) don’t assume this is is capable of being a suitable point to bond the neutral side of a circuit or accessory you are installing. Modern vehicles often have small bonding straps between sections that can carry the current that the vehicle manufacturer rated the bonding point for. Adding additional equipment and accessories might exceed the original design spec.
I did see a spectacular failure due to a 3000W inverter having it’s neutral lead ‘grounded’ in the rear of a vehicle. Running at about 2000W the neutral side was trying to ‘return’ a current of about 170 amps through the body of the vehicle, which lead to serious damage to some of the vehicles wiring and a number of vehicle components… and a ‘repair’ bill of nearly £1500.Putting a riv-nut in a body panel that is mastic bonded to the body is not a suitable negative bonding point!
Additionally a number of vehicle circuits are now negative switching or operation and installing additional equipment or accessories could have unforeseen issues. Always from any accessory or piece of equipment you install, add the neutral return path back to a suitable single common point or buss bar you install for the purpose and connect this directly back to the leisure battery.
Ideally all the ancillary leisure circuits should never rely on any of the vehicle wiring and the negative side of the leisure wiring should only ever connect to the negative side of the leisure battery.
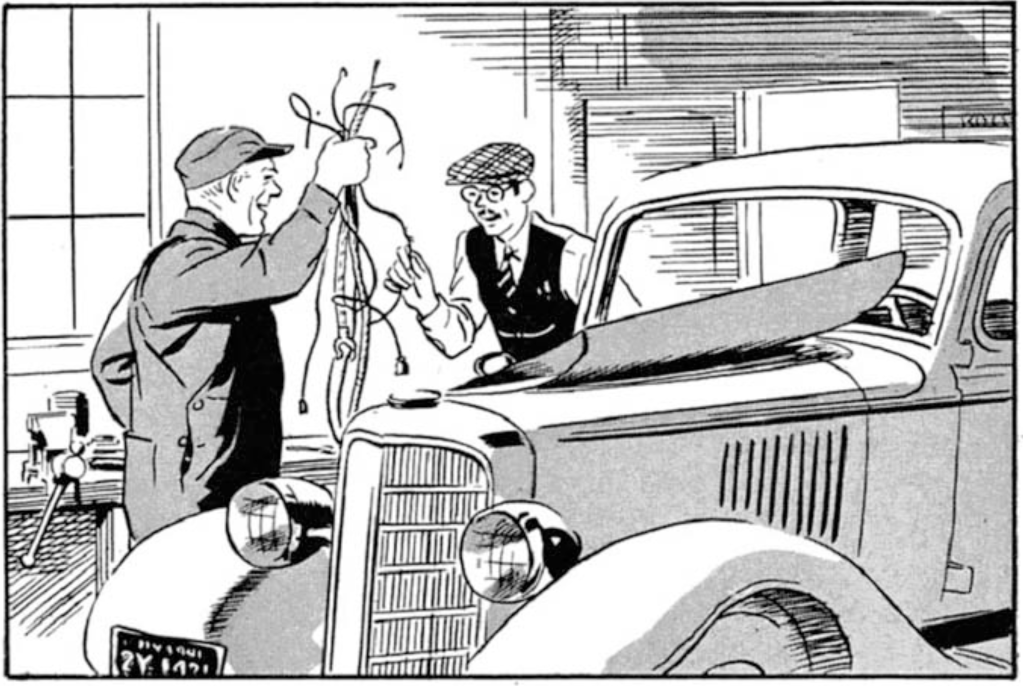
Don’t use battery terminals as a junction post.
Both the leisure battery and engine battery should only have connections that lead to either in the case of the positive terminal a master fuse /circuit breaker and isolator switch. The negative terminal should only have the connection to a master negative terminal point or buss bar.
Nope…..Not OK…. it’s a terminal not a junction post (image from the Internet)
If you want to install any sort of battery monitoring, it is convention to install the shunt on the negative return to the battery between the negative buss bar and the negative battery terminal. If you have multiple circuits terminated on the battery terminal it makes future changes and upgrades, including installing a battery monitor very difficult.
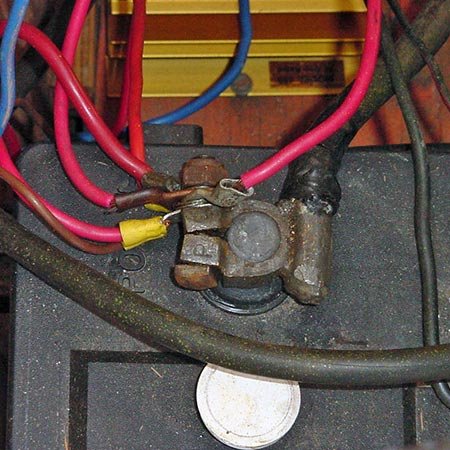
Just NO! (image from the Internet)
Using the battery terminals as connection points for multiple services also makes fault finding very difficult. Each circuit may or may not have it’s own fuse and it’s difficult to isolate circuits….. plus I’ve had enough sparks flying round when trying to disconnect a battery because someone did not install an isolator to know that it’s only a matter of time before one goes ‘pop’.
Just because it’s shiny…. NO!!! Not OK (image from the Internet)
Please, just don’t do it.
Have a think on this. If you had to go to an auto electrician to get a fault traced and corrected, they would immediately put at least an hours time on the invoice just to figure out what was going on with all the cables on the battery. Also, If you don’t have a battery master isolator installed, get one installed now. It’s a safety item that must not be missed out. Having the ability to quickly turn off all the leisure circuits in an emergency might just save you from the unthinkable happening.
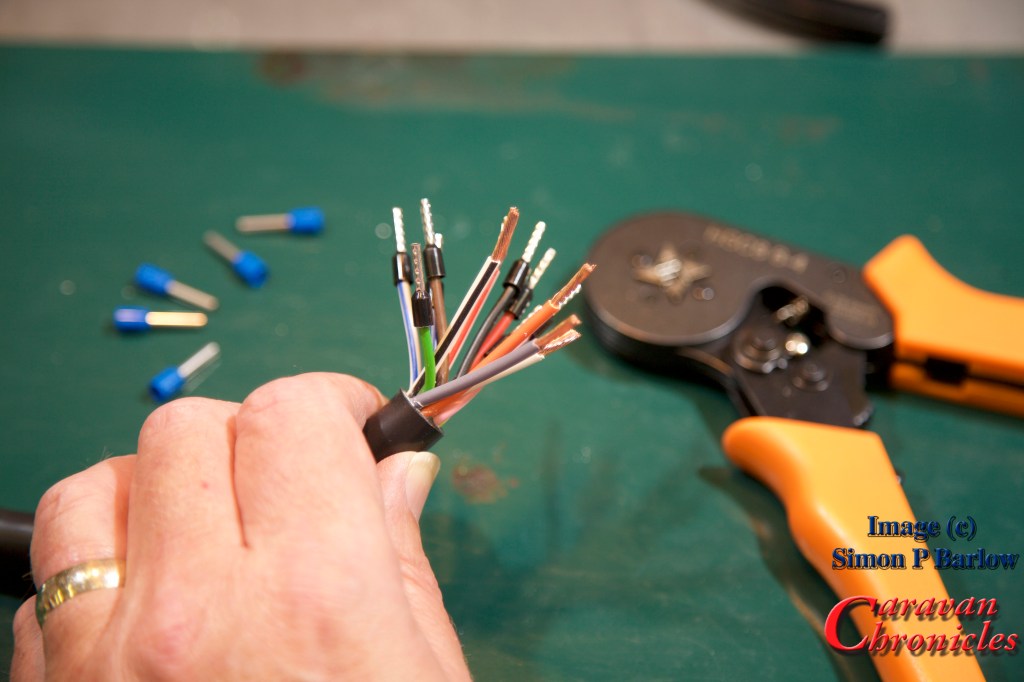
Cable Termination
Every cable should be terminated. Period. There shouldn’t be any cables in an installation that don’t have a crimped (or soldered) termination. Even if it’s a screw terminal such as those found in joining blocks or 13 pin plugs.
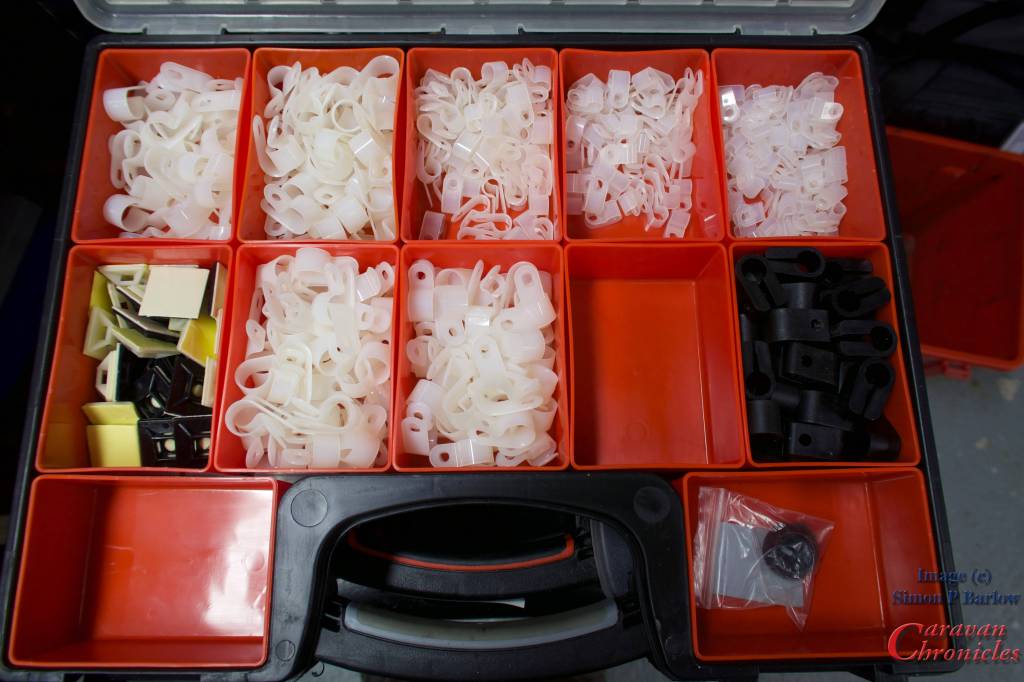
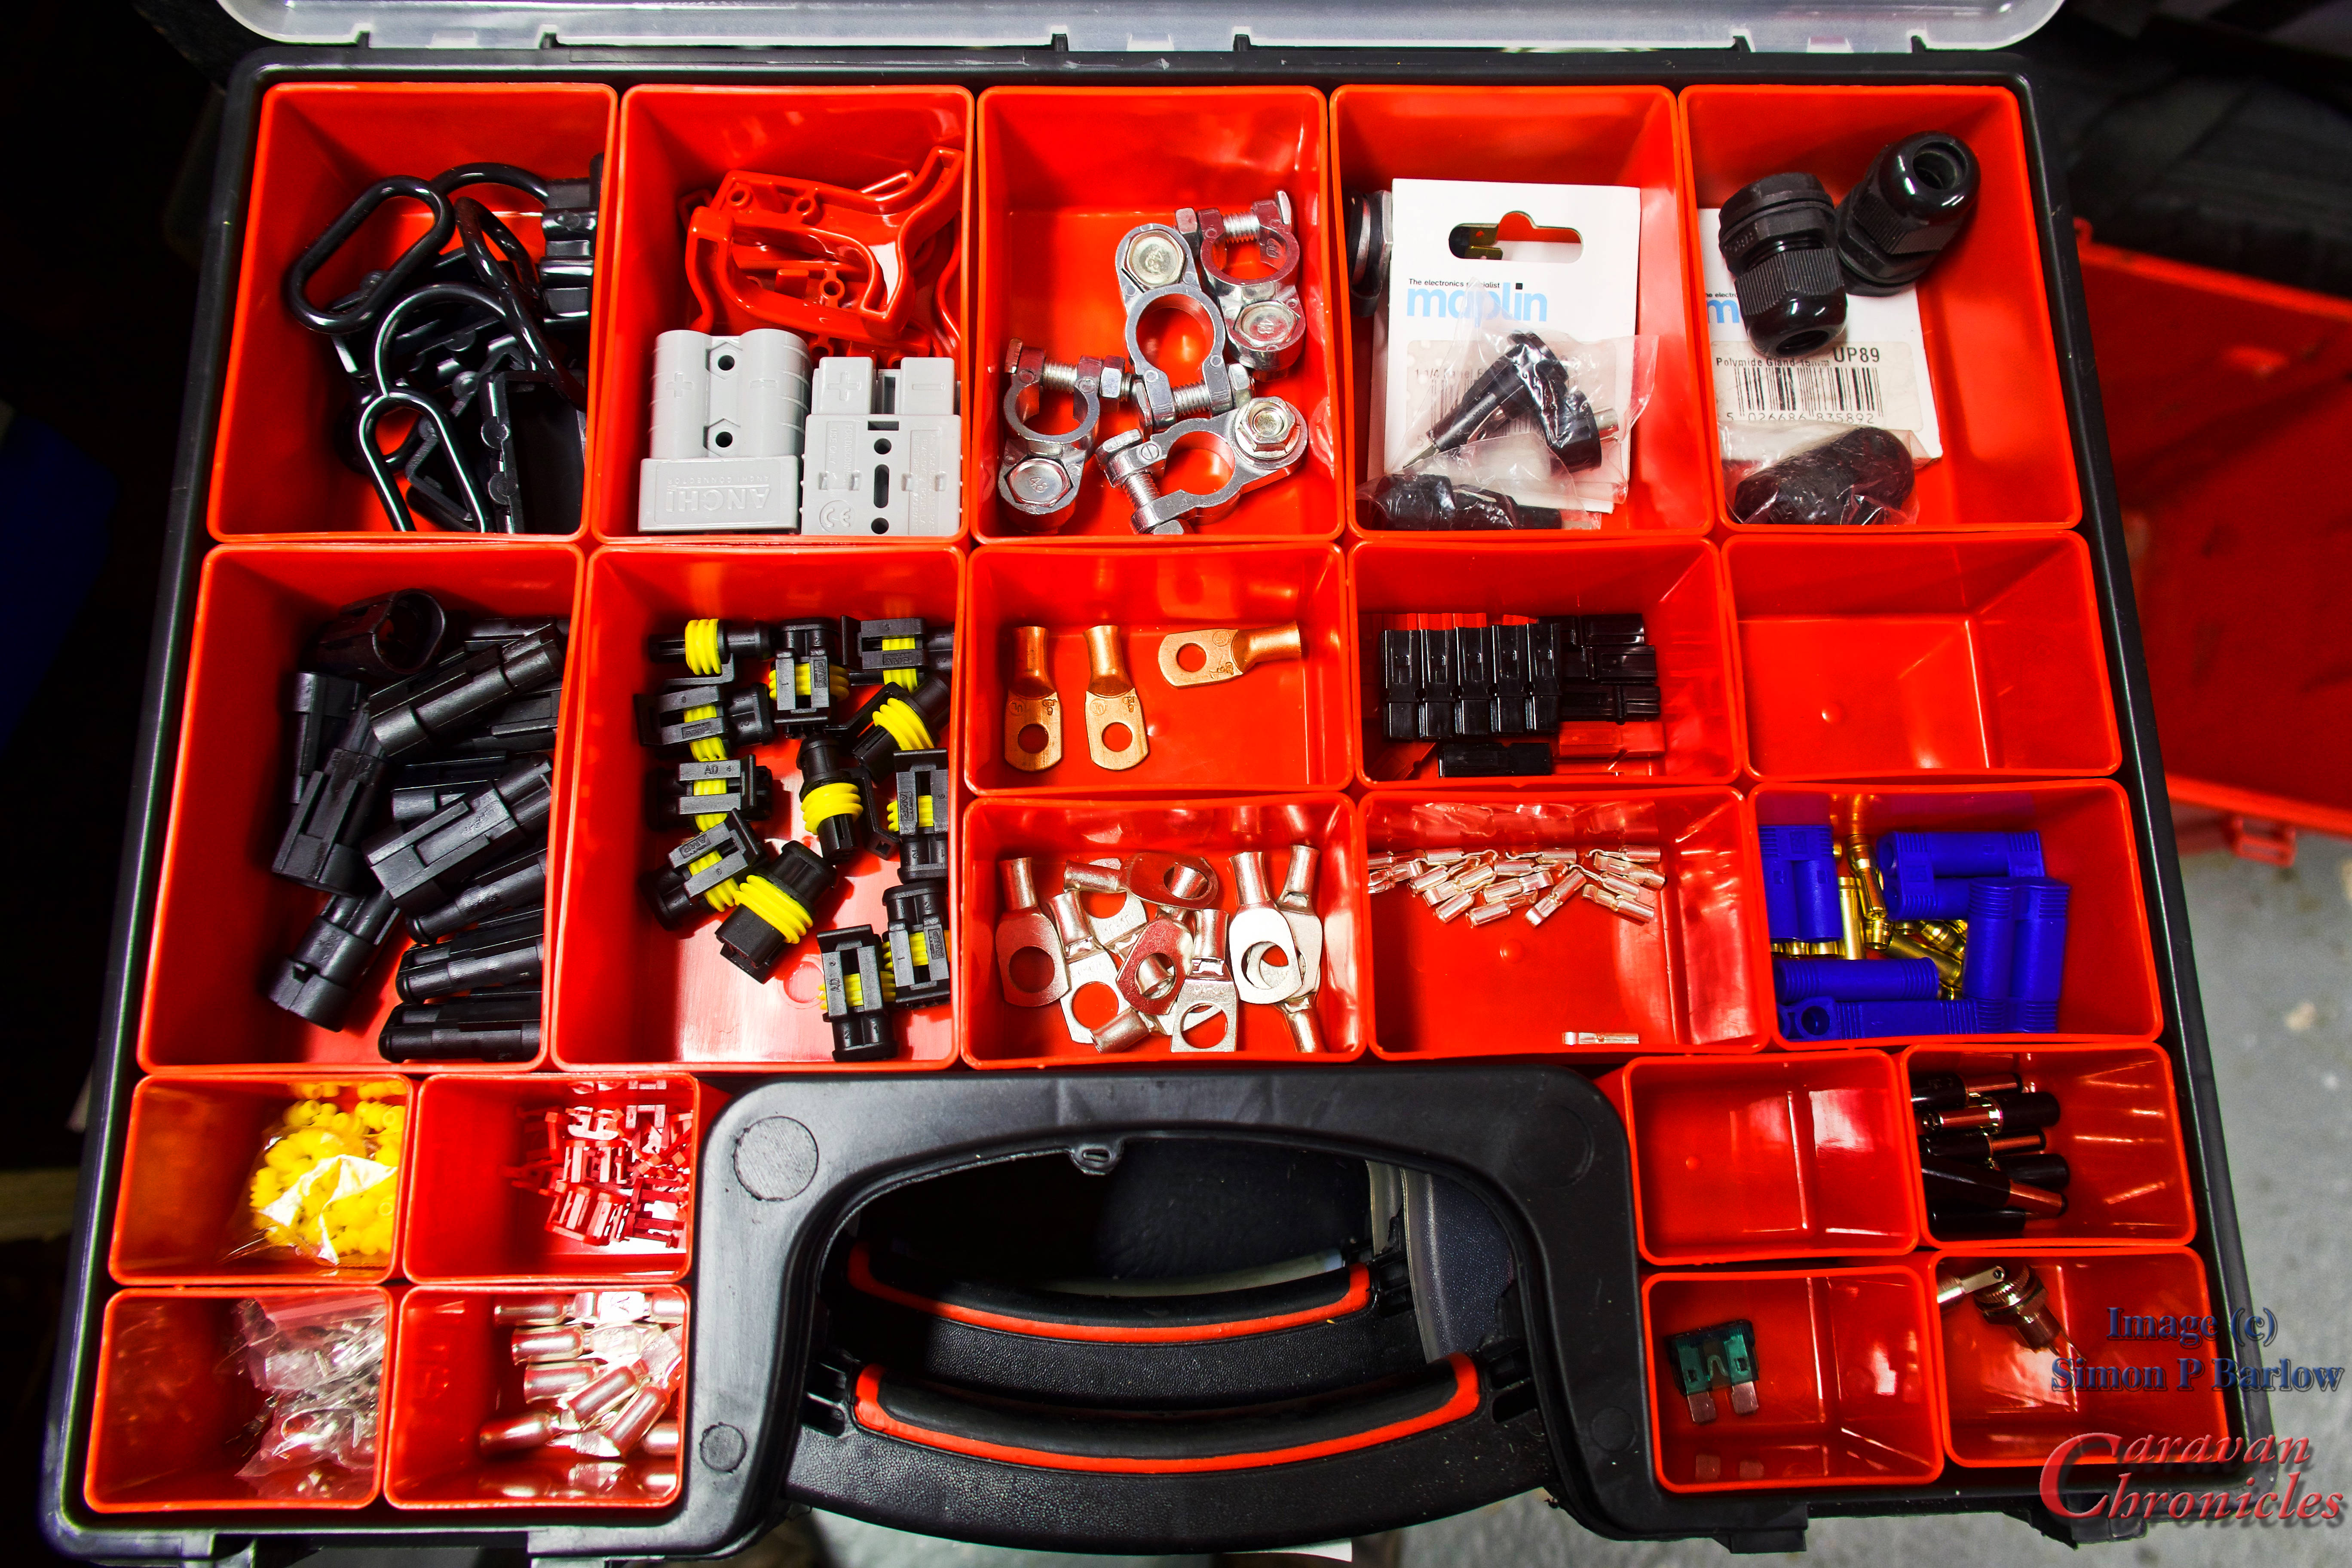
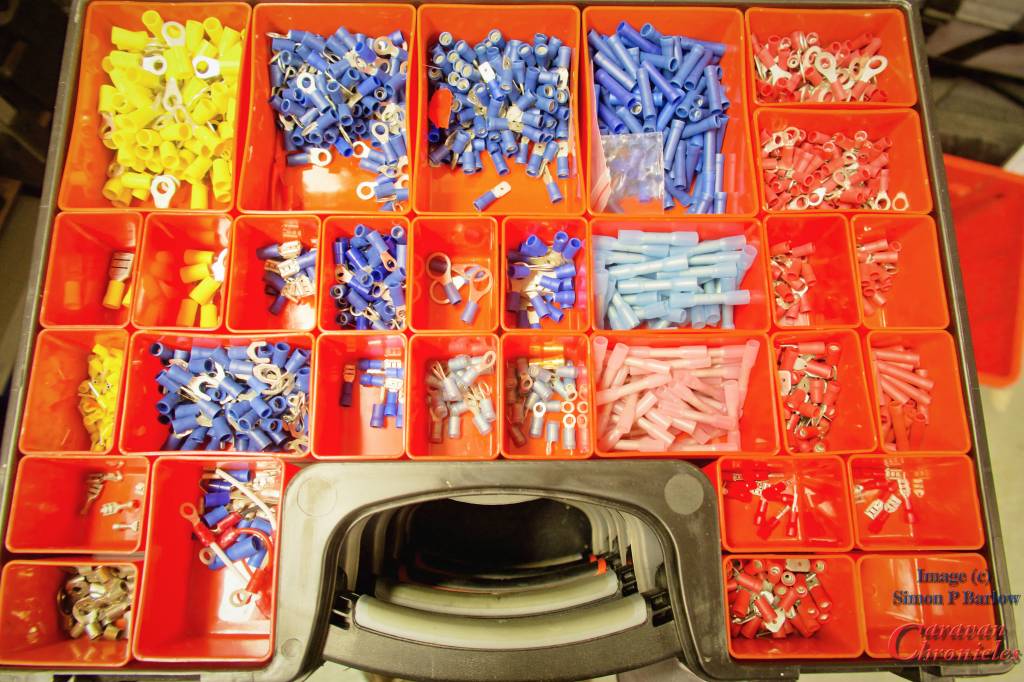
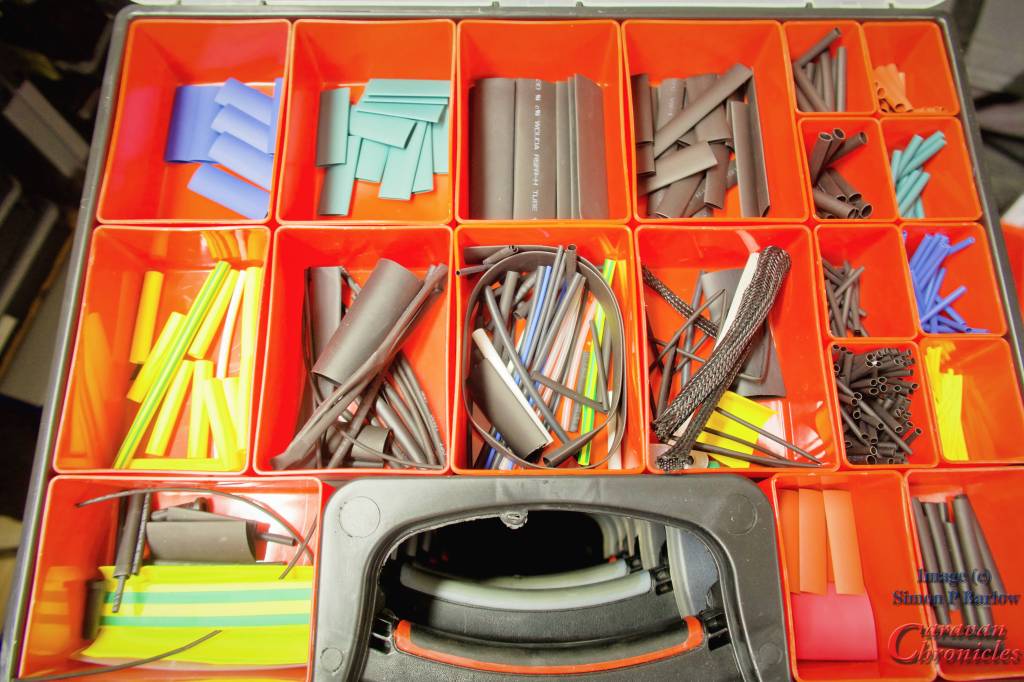
If you are embarking on a wiring project, its always best to start building up your stock of terminals. I usually buy selection boxes of terminals on line and supplement these with bags of single type connectors for the more commonly used ones. To keep everything organised tote organiser boxes are my preferred option.
A few of the 20+ of my storage boxes with wiring components
There is nothing more annoying than running out of the something and its always just as you want to finish a project off so you end up cutting corners.
For some of the larger cables, if you don’t feel up to making your own terminations there is usually a local auto electrician available that will terminate them for you for a small charge. However, a crimping tool that will terminate up to 50mm cable is not that expensive – around £27 and will probably work out cheaper in the long run. I’ve a link to the one I bought via Amazon and regularly use in the SHOP page.
Get the size right…
Selecting the right size or gauge of cable is critical. There are two factors that determine what gauge of cable to use for a installing any particular circuit. The maximum current that’s going to be drawn and the length of the cable. Once you have selected the right size cable then means you can select the right size fuse for the circuit. Never fuse a circuit greater than the current capacity of the cable.
Handy wall chart of cable size and terminal sizes.
You can download these and other drawings from the Electrical Drawings page in the drop down menu under “Document Library”
I generally tend to list what is going to be installed, then work out all the gauge for the cables for the circuits. From there it’s easy to see which is going to be the most popular gauge and rather than buy several different gauges of cable try to select a limited selection of gauges.
Always go for the safe option of over specifying the gauge of cable for any particular circuit. If it’s a 10 amp circuit and you have used cable suitable for a 16 amp circuit, it doesn’t mean however you need to use a fuse greater than the 10 Amp circuit requires.
Something else to consider too. Most 12 volt cables are copper, however if you are installing them in a less than ideal environment, such as a boat, you may want to opt for tinned copper cables. These are far less susceptible to cable corrosion. Even in the best marine installations I’ve seen copper cables corrode through in less than a couple of years.
Cardinal Sin! – Never ever use two smaller cables to make up the equivalent of one larger capacity cable. You would be surprised how many times I’ve seen this… sometimes done by “professional” tow-bar installers when reported poor leisure battery charing or poor fridge performance is reported and the voltage drop is too great.
Wiring Looms – wrapping it up properly!
Dressing cables into looms is not difficult nowadays. There are many options available on the market to help you produce a professional looking finished product. I personally like for looms within the vehicle using a felt finished looming tape. You don’t wrap it so it overlaps but at a sharp enough angle so as it spirals round the cable bunch it leaves some of the cables exposed.
Felt is good as not only does it keep the loom together, it allows quite a bit of flexibility and prevents cables from rubbing or banging on flat surfaces making a noise.
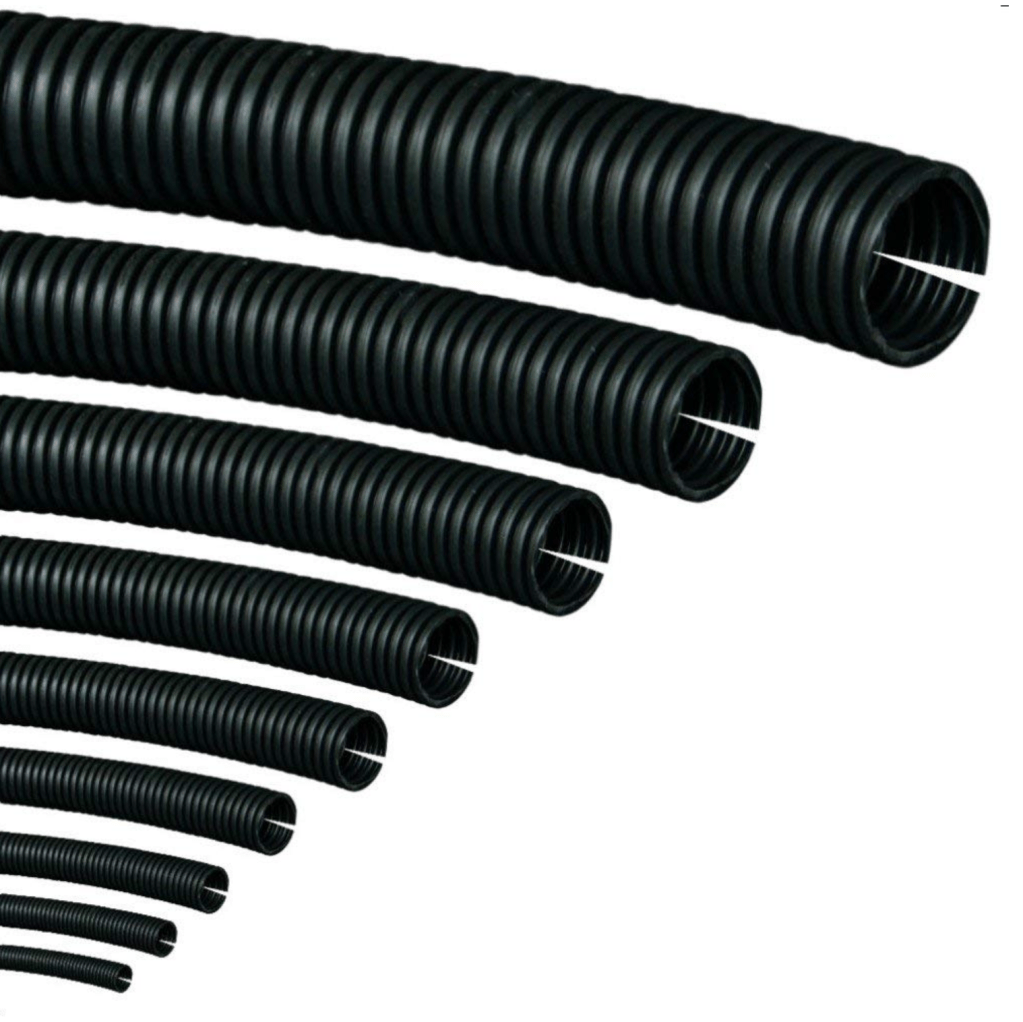
For any cables outside the vehicle body there are two options depending on use. In the main I’d go for split tube conduit. It’s available in various sizes and can be bought in either cut lengths or rolls. The other option is to use self amalgamating tape. It looks like ordinary PVC tape but as you wrap it round you stretch it and it releases a chemical which when overlapped onto its self becomes a permanent bond, effectively making a sealed tube. It is generally however fairly inflexible. Both have their place.
Anything in the engine bay or underneath the vehicle I use split tube and generally only resort to self amalgamating tape to seal inline joints.
Relays….. yes or no?
For me its Yes. I much prefer locating all the relays in one place therefore minimising the amount of heavy cable. By using relays to do the heavy switching you can use smaller and sometimes more attractive switches. I have in the past used 7 core trailer cable to connect 4 switches including LED indicators back to a relay bank rather than make up a custom wrapped loom.
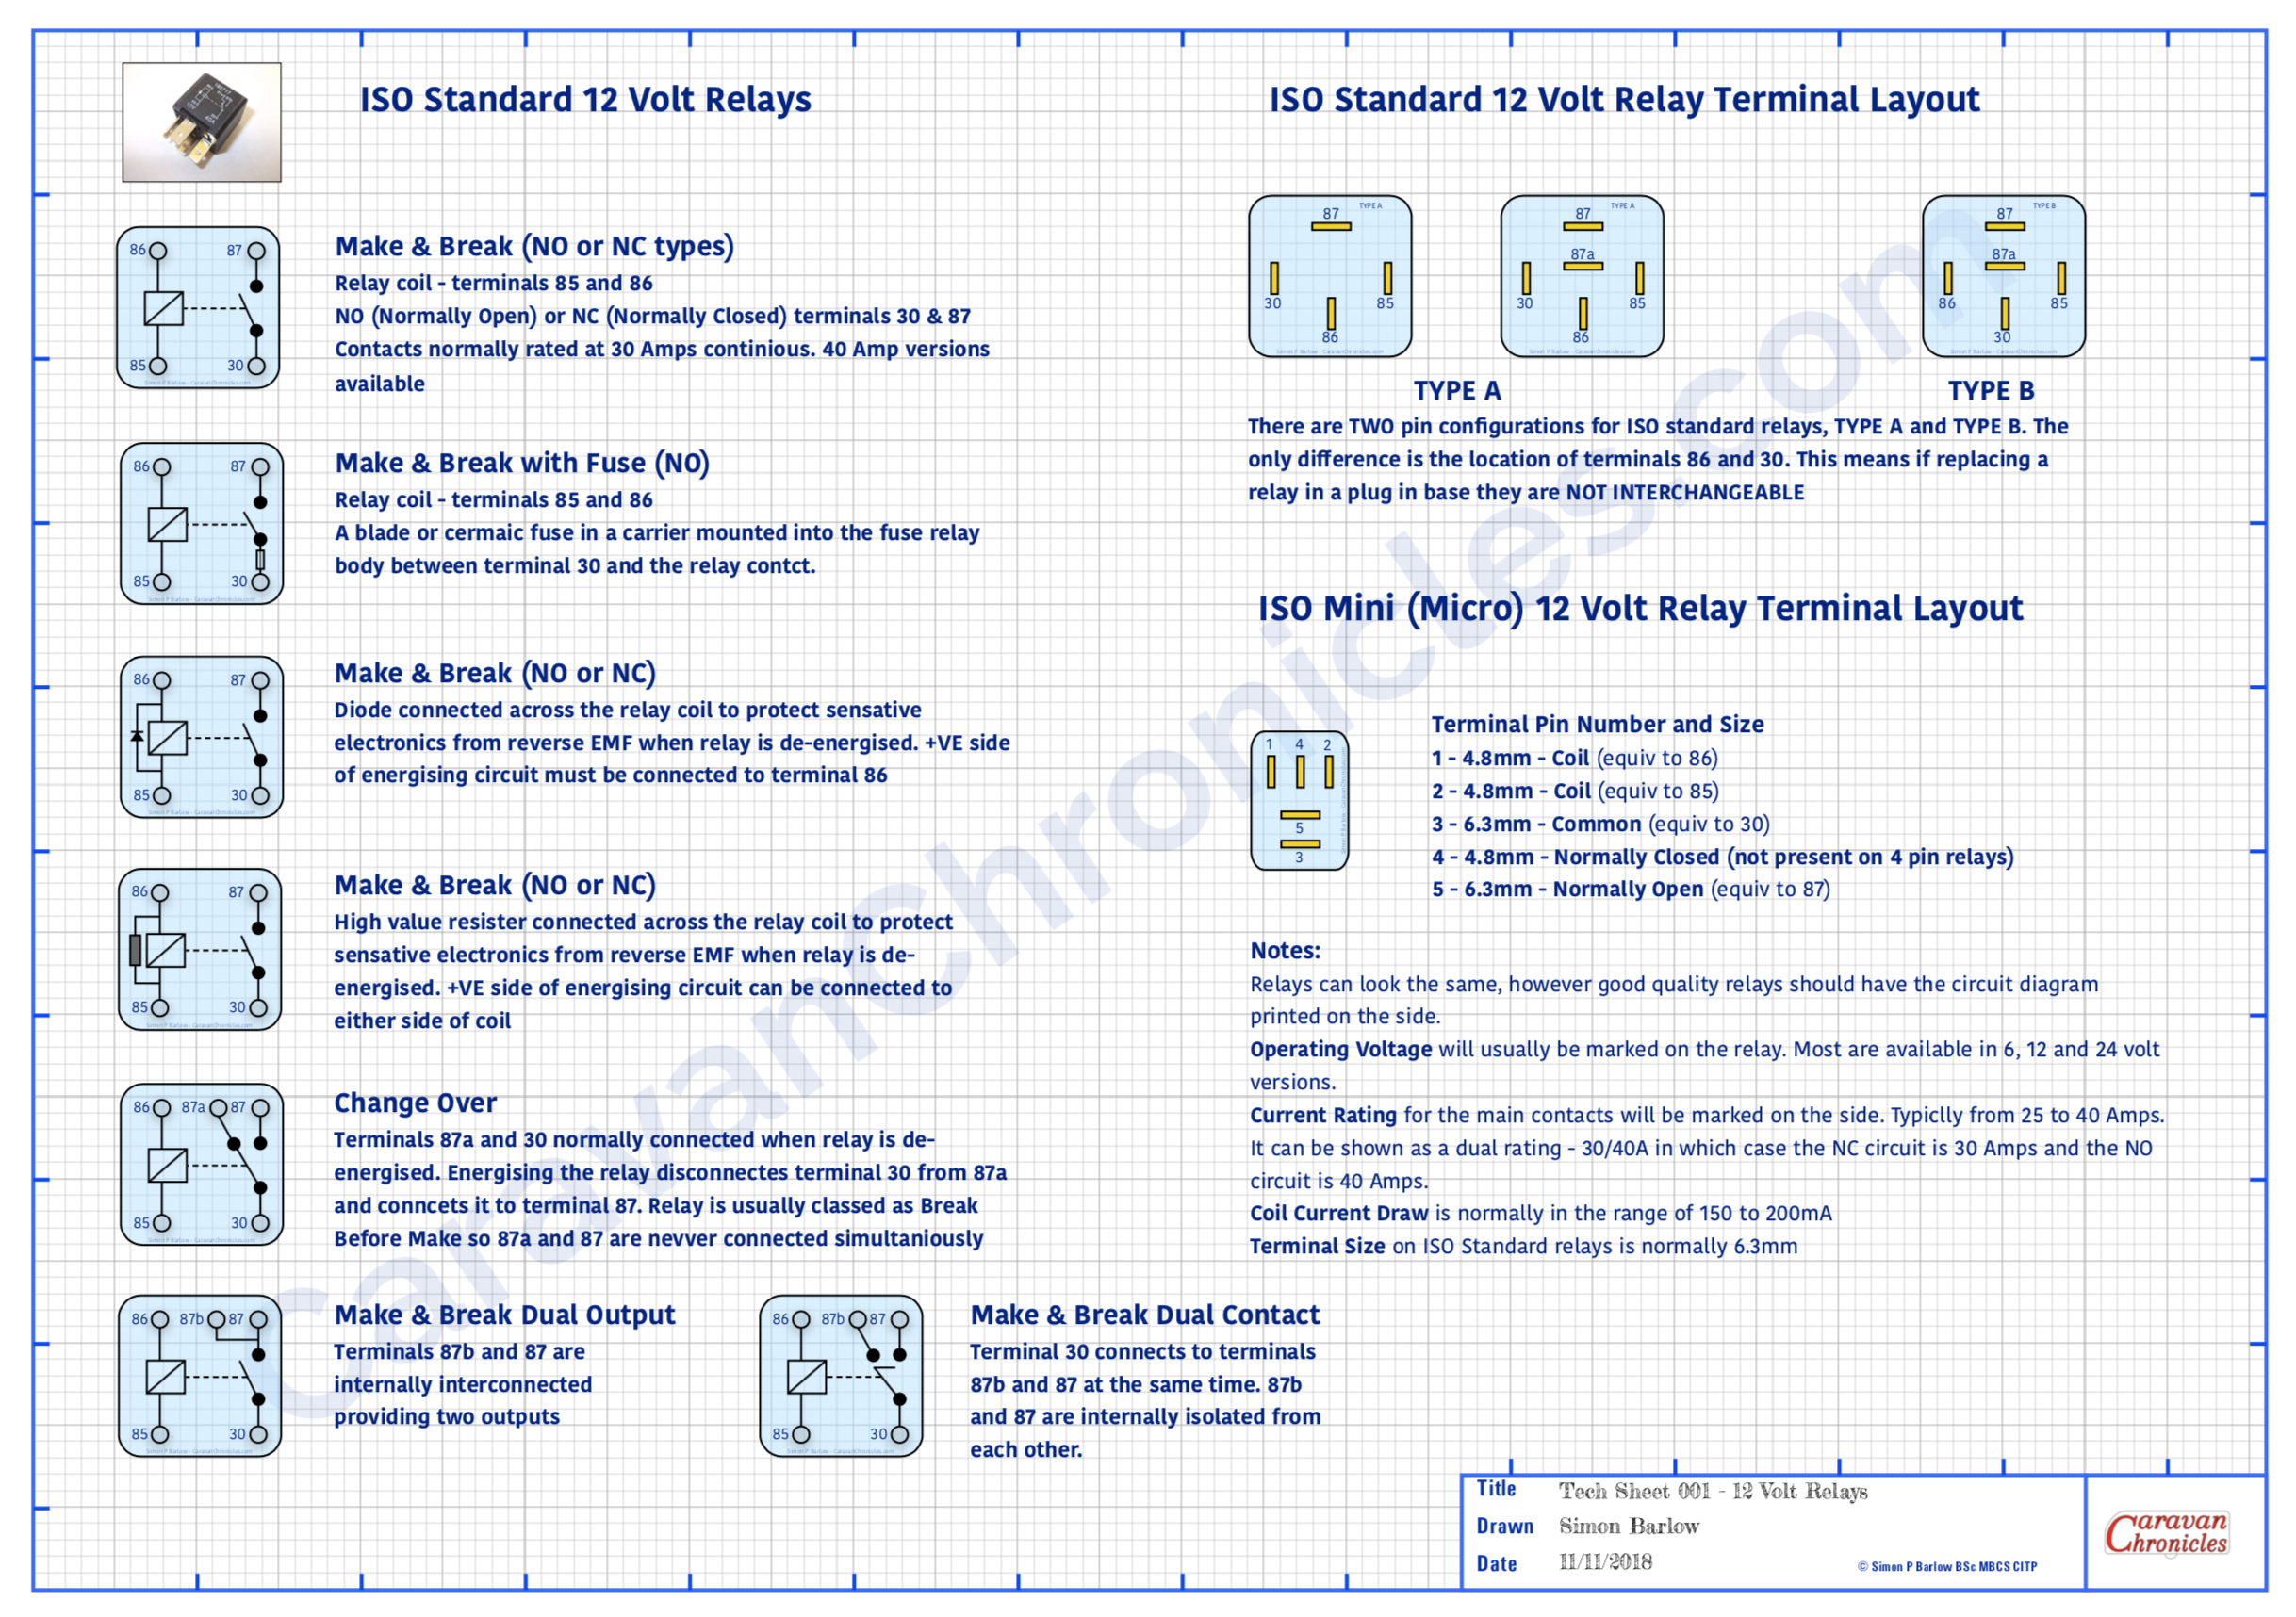
Handy wall chart of relay types
You can download these and other drawings from the Electrical Drawings page in the drop down menu under “Document Library”
It also makes tracing faults easier, as it’s simple to test if a switch is working, you can hear or sometimes feel the relay operating as you operate the switch. Its unusual to have a fault with a relay but quite simple to test… just unplug and swop over with a known working relay. If all the relays are located together it makes this task and testing the feed to the relays so much simpler. From that point all you need to check are the two wires going out to the device and the device itself.
Obviously some circuits don’t require a relay or if it’s designed to be turned on for a long period… such as a diesel heater, then adding a relay will just increase current draw, albeit small, on the leisure battery. A bit of common sense can easily determine if you should opt for a relay or not.
Grommet?…(no not Wallace’s friend!)
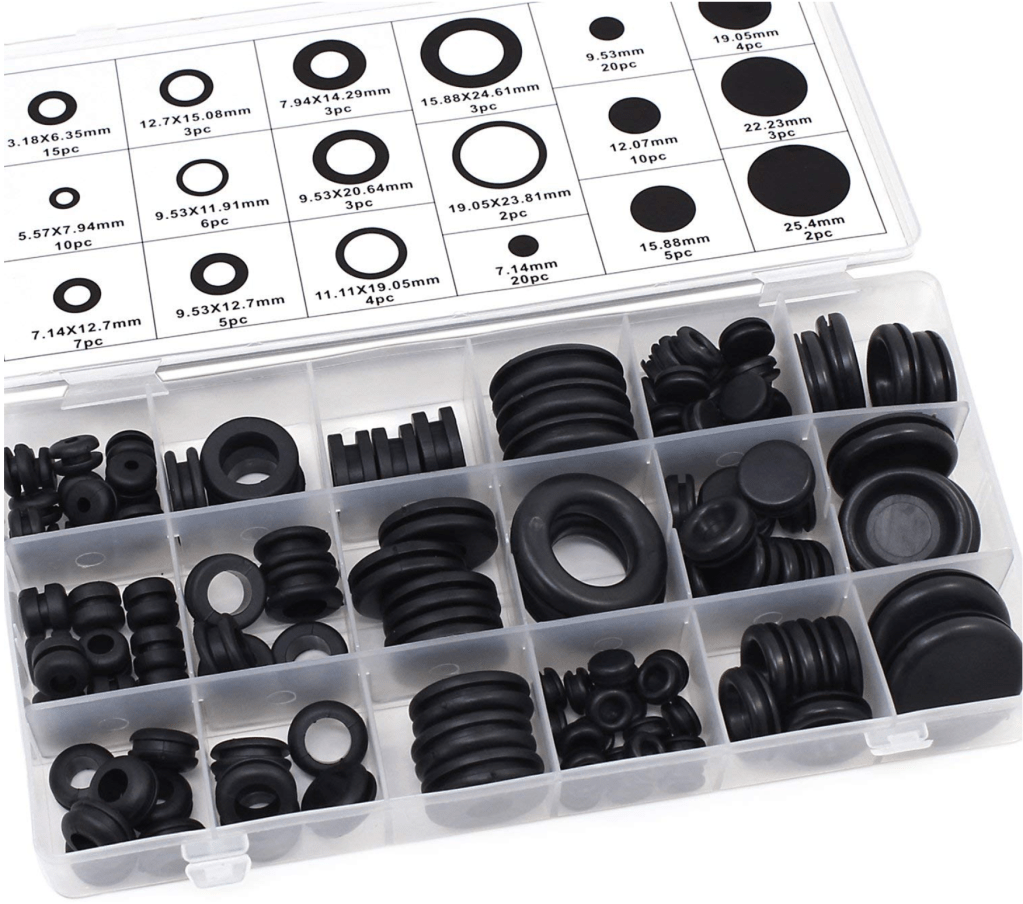
Whenever a cable or cables pass through anything solid you should use a grommet. You would be surprised at the amount of damage I’ve seen to cables due to either not installing a grommet to an insufficiently sized (too small usually) grommet.
When ever I pass either a cable or loom through a bulkhead for example I like to supplement a grommet with a bit of heat shrink sleeving over the cable as well. Even passing a cable through an existing grommet from the engine compartment to the interior, adding a length of heat shrink sleeve won’t do any harm.
There’s a link to these in the SHOP… only about £7 for the full box.
Having a handy selection of grommets available before you start threading wires through is far better than trying to install protection afterwards. You’d also be surprised at how many cables I come across that have been damaged while pulling through holes in metal and wood panels. Always better to start with a grommet or two! Where a cable or loom passes through a grommet, it’s aways best practice to try and anchor the cable or loom either side of the grommet to something solid using “P” clips. This will reduce the chances of ‘fretting’ with the movement of the vehicle.
While we are on grommets…. a quick note about cable-ties (zip-ties). Stop doing them up so tight! I’ve come across cables cable-tied to a chassis rail so tight that the cable-tie has cut into the insulation and is fretting the conductor inside. Cable-ties are generally made out of a harder plastic than the cable insulation so will over time wear away at the insulation.
Get yourself a cable-tie tool that not only allows you to precisely control how much tension you put on the tie but also cut the end off so that there isn’t a wrist slashing booby trap lying in wait for some unsuspecting person. I use a fairly cheap pair (left). I think they were around £8. So not really expensive. But they make a nice neat job of installing multiple cable ties with the correct tension and the ends cut cleanly off level with the lock tab. You can buy ones that have a tension dial built in so you can set them to a pre-tension, but I find after a bit you know just how much to squeeze the handles to get the correct tension.
So what is the correct tension… well if you are doing them up so tight an elephant could dangle on the cables then that is too tight. They should be tight enough so as not to slip but you should be able to spin them round the cable(s).
Cable-ties really should not be used to make looms or anchor cables or looms to anything solid. If you want to make a loom, wrap it in specialist loom tape. If you want to anchor cable or a loom to something solid use a “P” clip. If required… use a length of heat shrink to make the loom a tighter fit in the ‘P’ clip.
I know you are dying to ask…. when do I use cable-ties? Well generally at the installation stage to get things to stay in place before installing P clips or if I have to run a new loom along the same path as an existing loom, I generally opt for cable-ties to hold them both together (as long as the original is suitably anchored to support both)
While we are talking abut cable-ties… I have seen the worst kind of mistakes in the use of them. It is not OK to cable-tie anything to brake lines, fuel lines, vacuum lines, hydraulic hoses, coolant hoses or steering components (yep one bright spark cable-tied his front LED light bar wires to some of the steering components!)
Heat Shrink Tubing
An absolute must have in my opinion. There are two main types – plain and pre glued. The plain are the main one you would use, while the pre glued are great if you have to over sleeve a connection to make it waterproof. As you heat up the pre-glued type, the glue softens as the tube strings and bonds to the cable as everything cools. They can be a little more rigid when installed, so make a service loop in the cable. The finished covering is usually waterproof enough for brief submersion if done correctly.
Having a selection of sizes and colours is handy and assortment boxes of multiple sizes and colours can be bought on line cheaply enough. In the workshop I use an old paint stripper heat gun on low power as I find that is more controllable than a flame.
Bridging the gap… something in the future?
Although not so common in the UK, in Australia and the USA wild camping (boon docking) is probably as popular as campsites. To this end trailers and caravans usually have much larger battery capacities than anything found in Europe. It’s not uncommon to find outfits with 600 to 800Ah battery banks recharged mainly be solar, buy increasingly (especially in Australia) an additional bridge between tow vehicle and trailer is made using heavy duty “Anderson” connectors and cables capable of supplying upwards of 60 Amps from the vehicle to the leisure battery bank.
With the cost of lithium batteries reducing almost daily, I can foresee very soon that light weight lithium batteries will be installed in caravans. The down side of this currently and trying to retrofit Lithium is the existing charging setup of current European vans is not really suitable for looking after these type of batteries. We have a Sterling Power Wildside unit installed in our caravan which allows us to charge any type of battery chemistry, including lithium when connected to the tow vehicle. The draw back is the caravan’s inbuilt charger is only capable of wet lead acid or AGM. I think that a high capacity DC to DC charger installed in the vehicle and an additional cable to supply the caravans battery banks may not be too far away. It’s something you might want to keep in mind for the future. It’s something I’m looking into currently.
Well, that’s a bit longer than I anticipated and there is still a few things to cover. If you made it this far…. take a toffee out of the jar… well done! If you think I missed something or would like me to cover something specific, drop me a comment below.
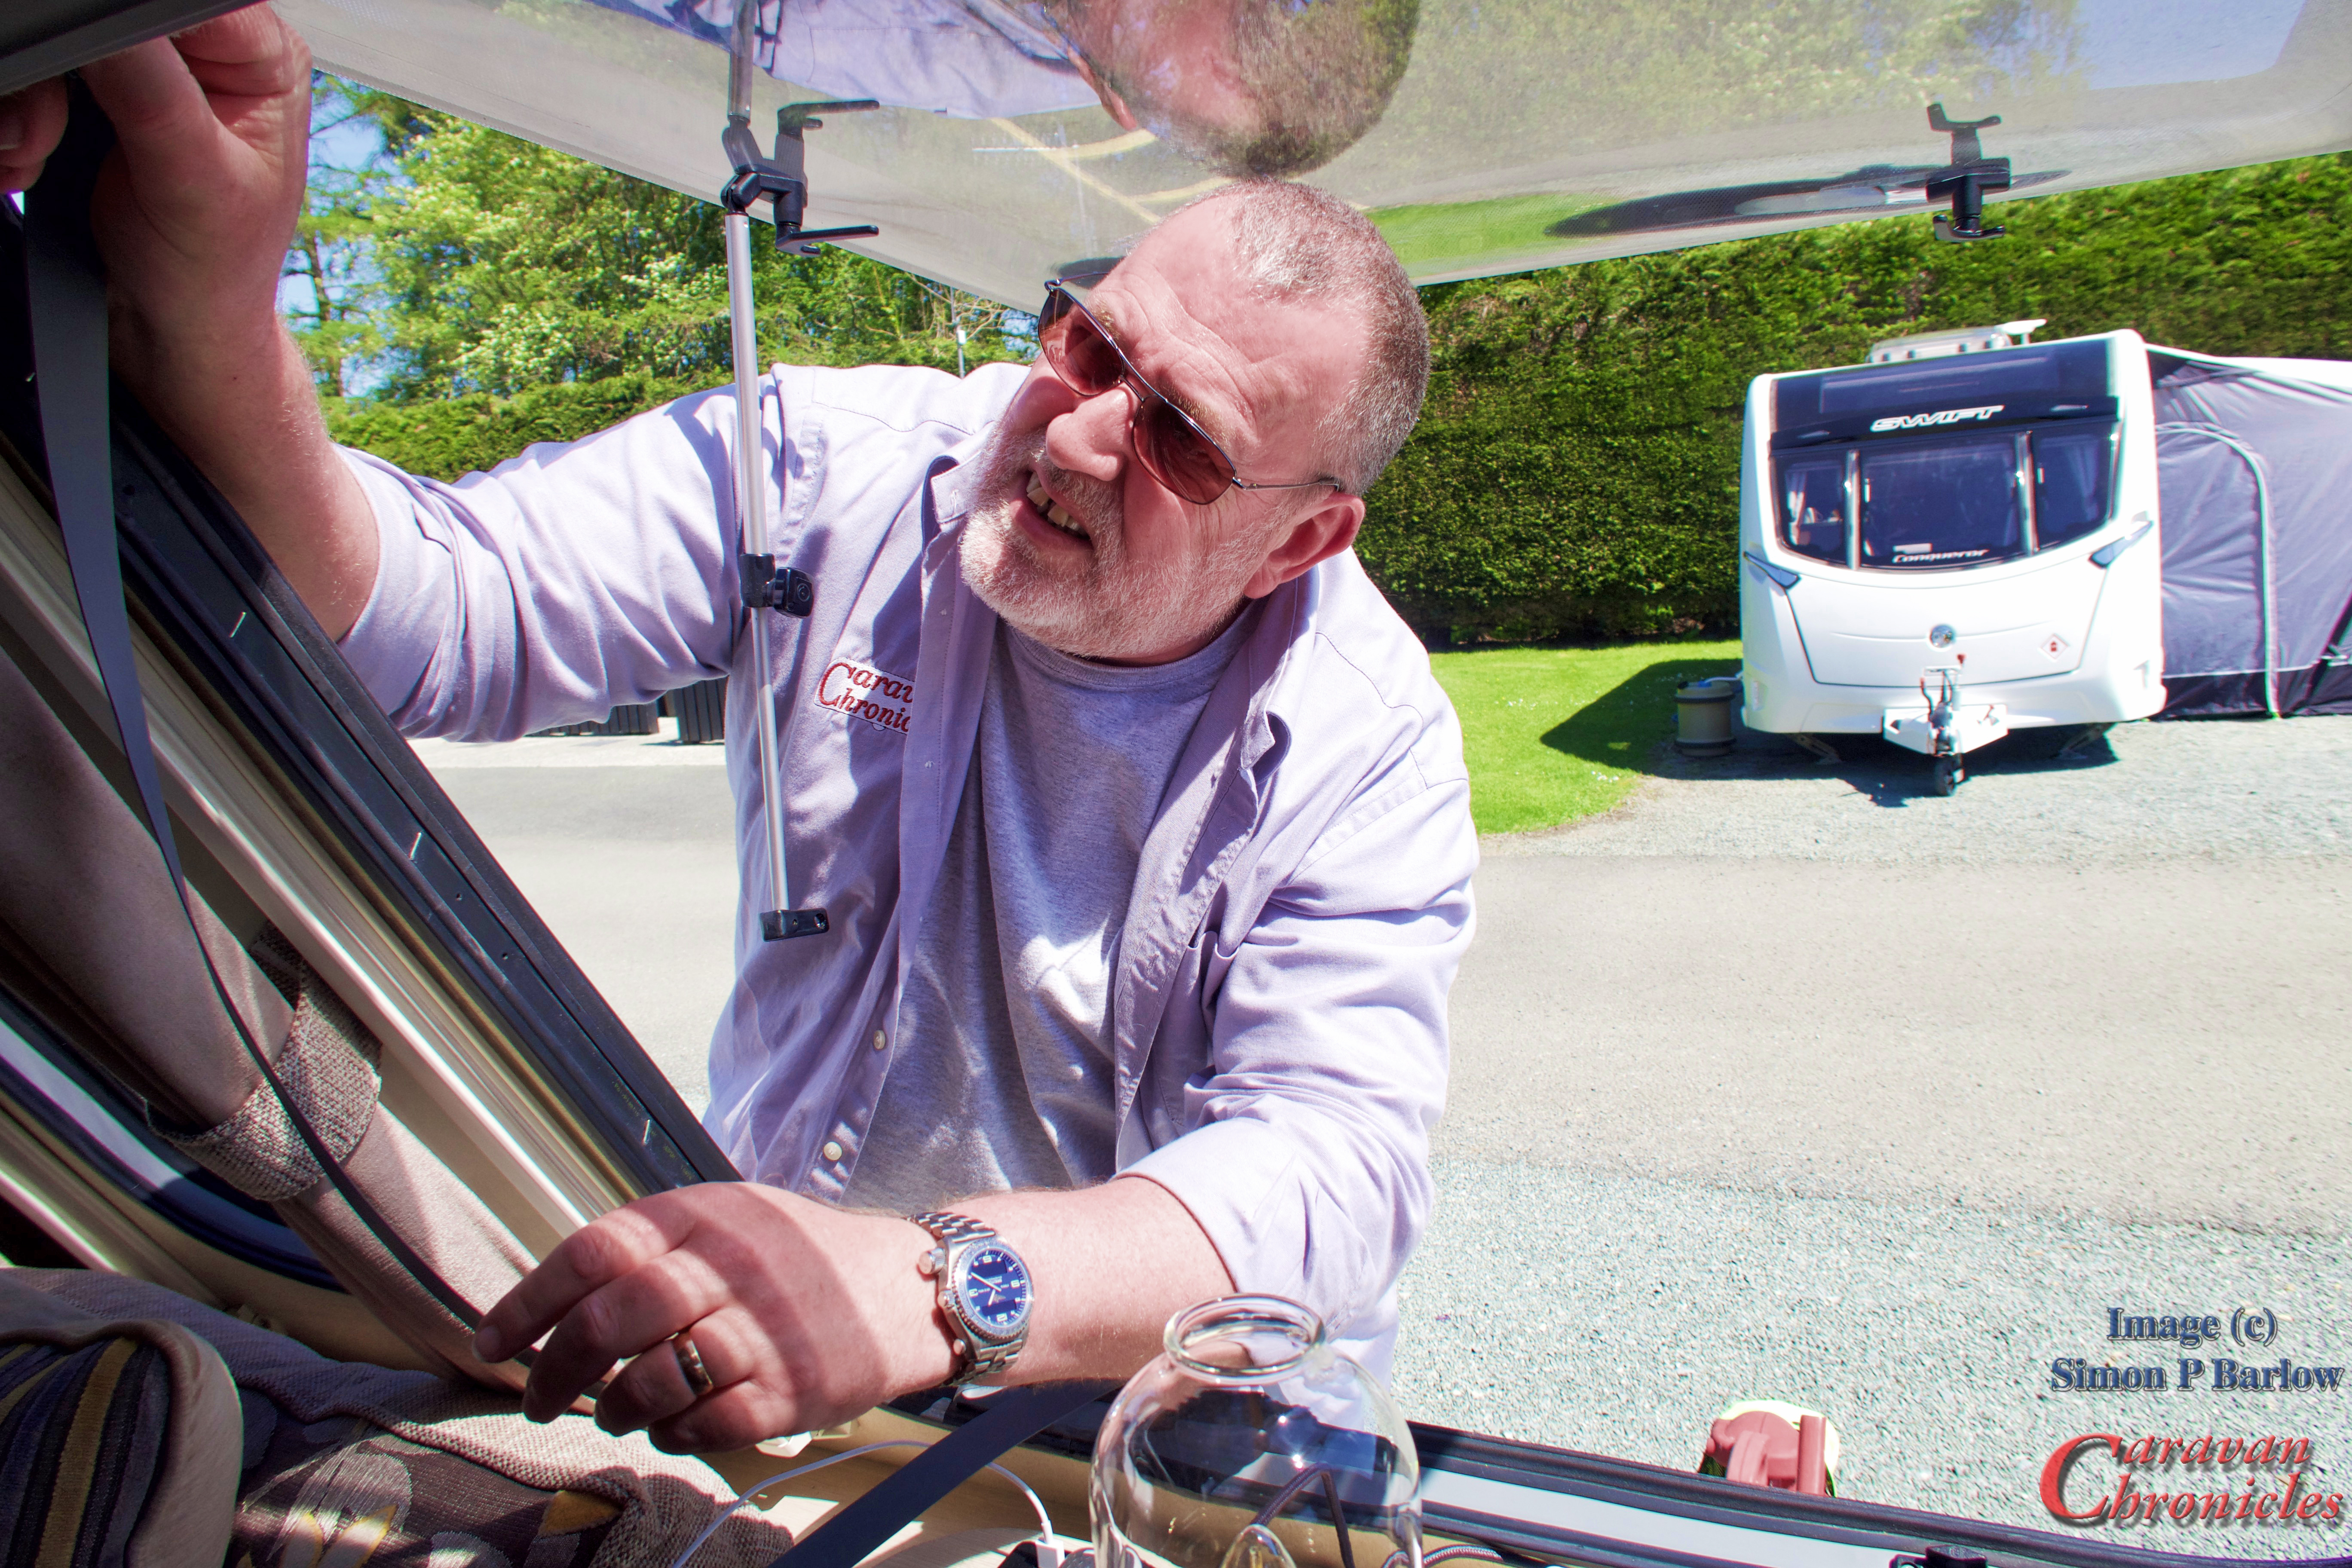
You know how sometimes those little jobs come along that you put off as you think that it’s going to be a bit of a pain to do…. well this was one of them.
On all three of the front windows the plastic insert trim for the rubber window surround was slowly pulling out of the corners. The worst was the front lower corners on the big central window. I’d ordered 15 metres of replacement from Leisureshopdirect.com(the part I ordered can be found here) for about 99p per metre. It was one of those jobs I’d been putting off for a while as I thought it was going to be a bit of a nightmare to do.
However on a recent jolly to Riverside Touring Park at Betws-y-Coed, one afternoon sat looking at it I decided I’d sat looking at it far too long and that it just had to be attacked head on.
Tackling it from outside, releasing the window hardware on one side – marking where the screw holes were on the rubber in pencil first, was easy enough. Two cross head screws held in each window latch and window strut to the frame of the caravan. The join in the old strip was in the centre at the top and getting a small flat blade screwdriver under the edge was easy and the the strip simply pulled out across the top and down one side.
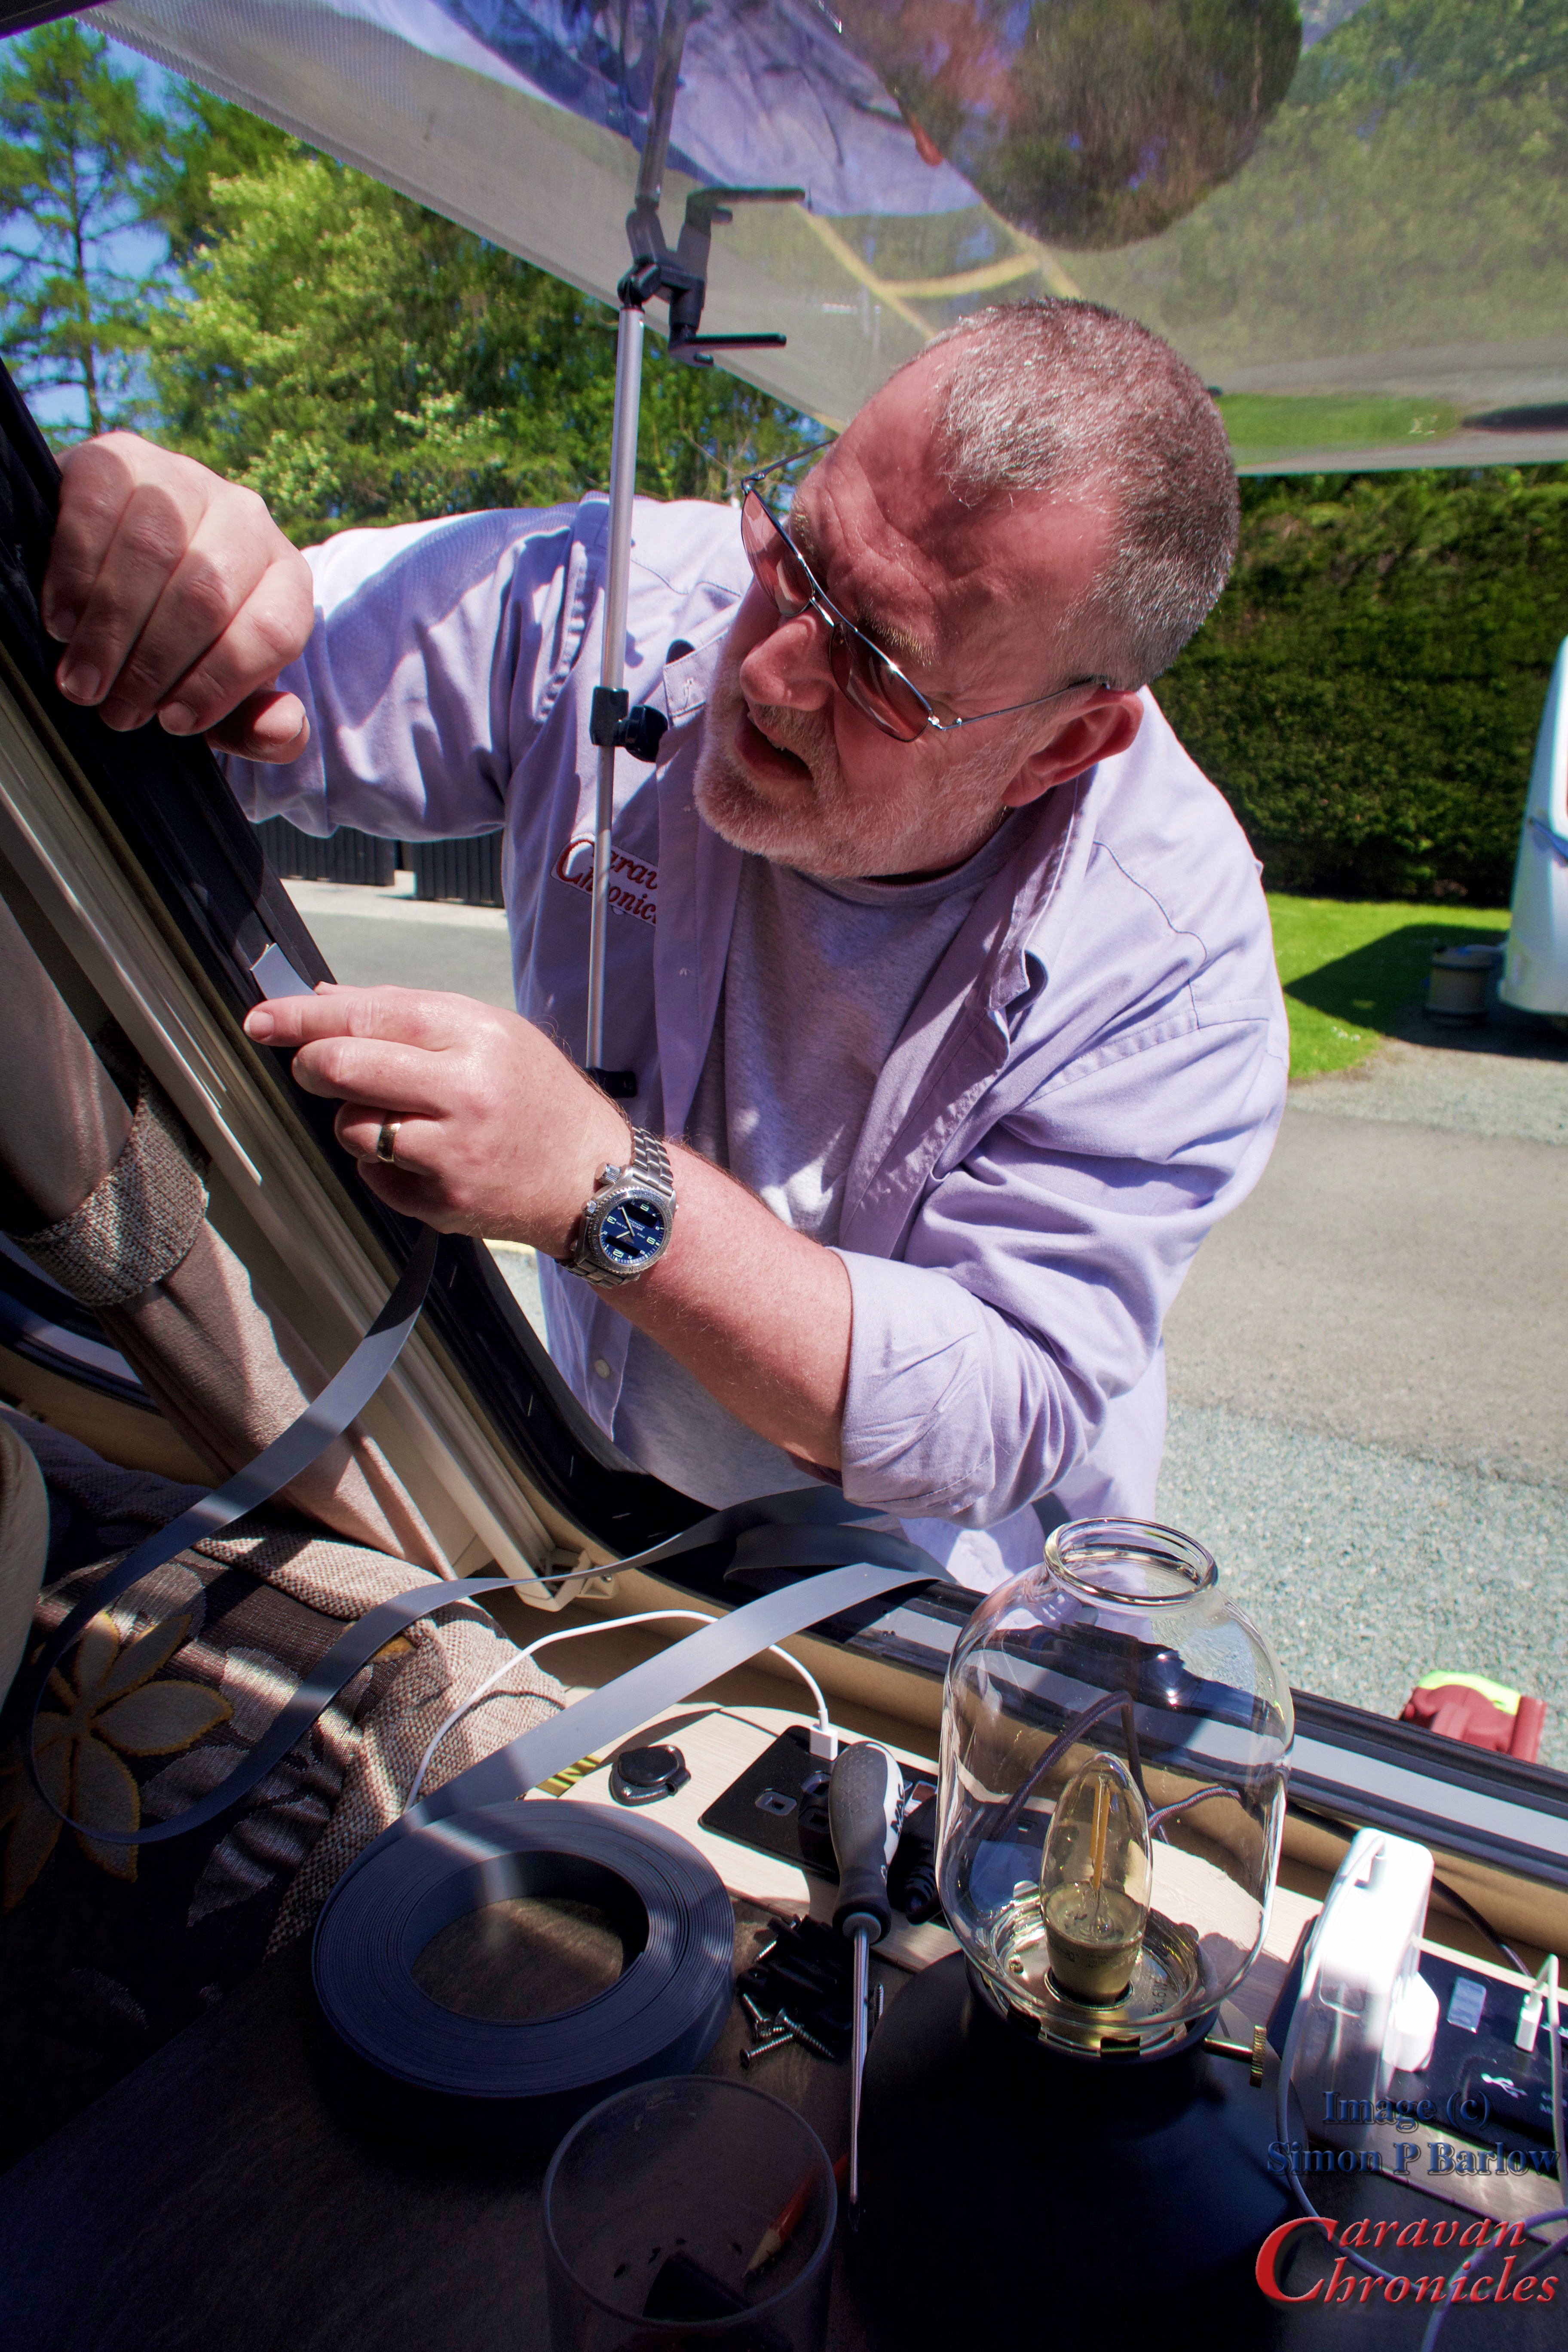
I started by checking the width. When you order there are two widths available and two colour options. I’d previously checked the existing strip and measured it to be about 23mm wide. On the web site it was listed as 23 mm or 25mm and available in grey air white.The replacement was however around 50% thicker making it a lot stiffer to insert.
However it soon worked out that this additional thickness was to my advantage. I could now push the strip into the recess on the caravan side and simply run a small cross head screwdriver round the outer ‘flange’ (I had to get “flange” in there somewhere… silent nod in the direction of Miranda Hart) and flip it over the edge of the strip. The first corner was a bit tricky but my technique was improving all the time.
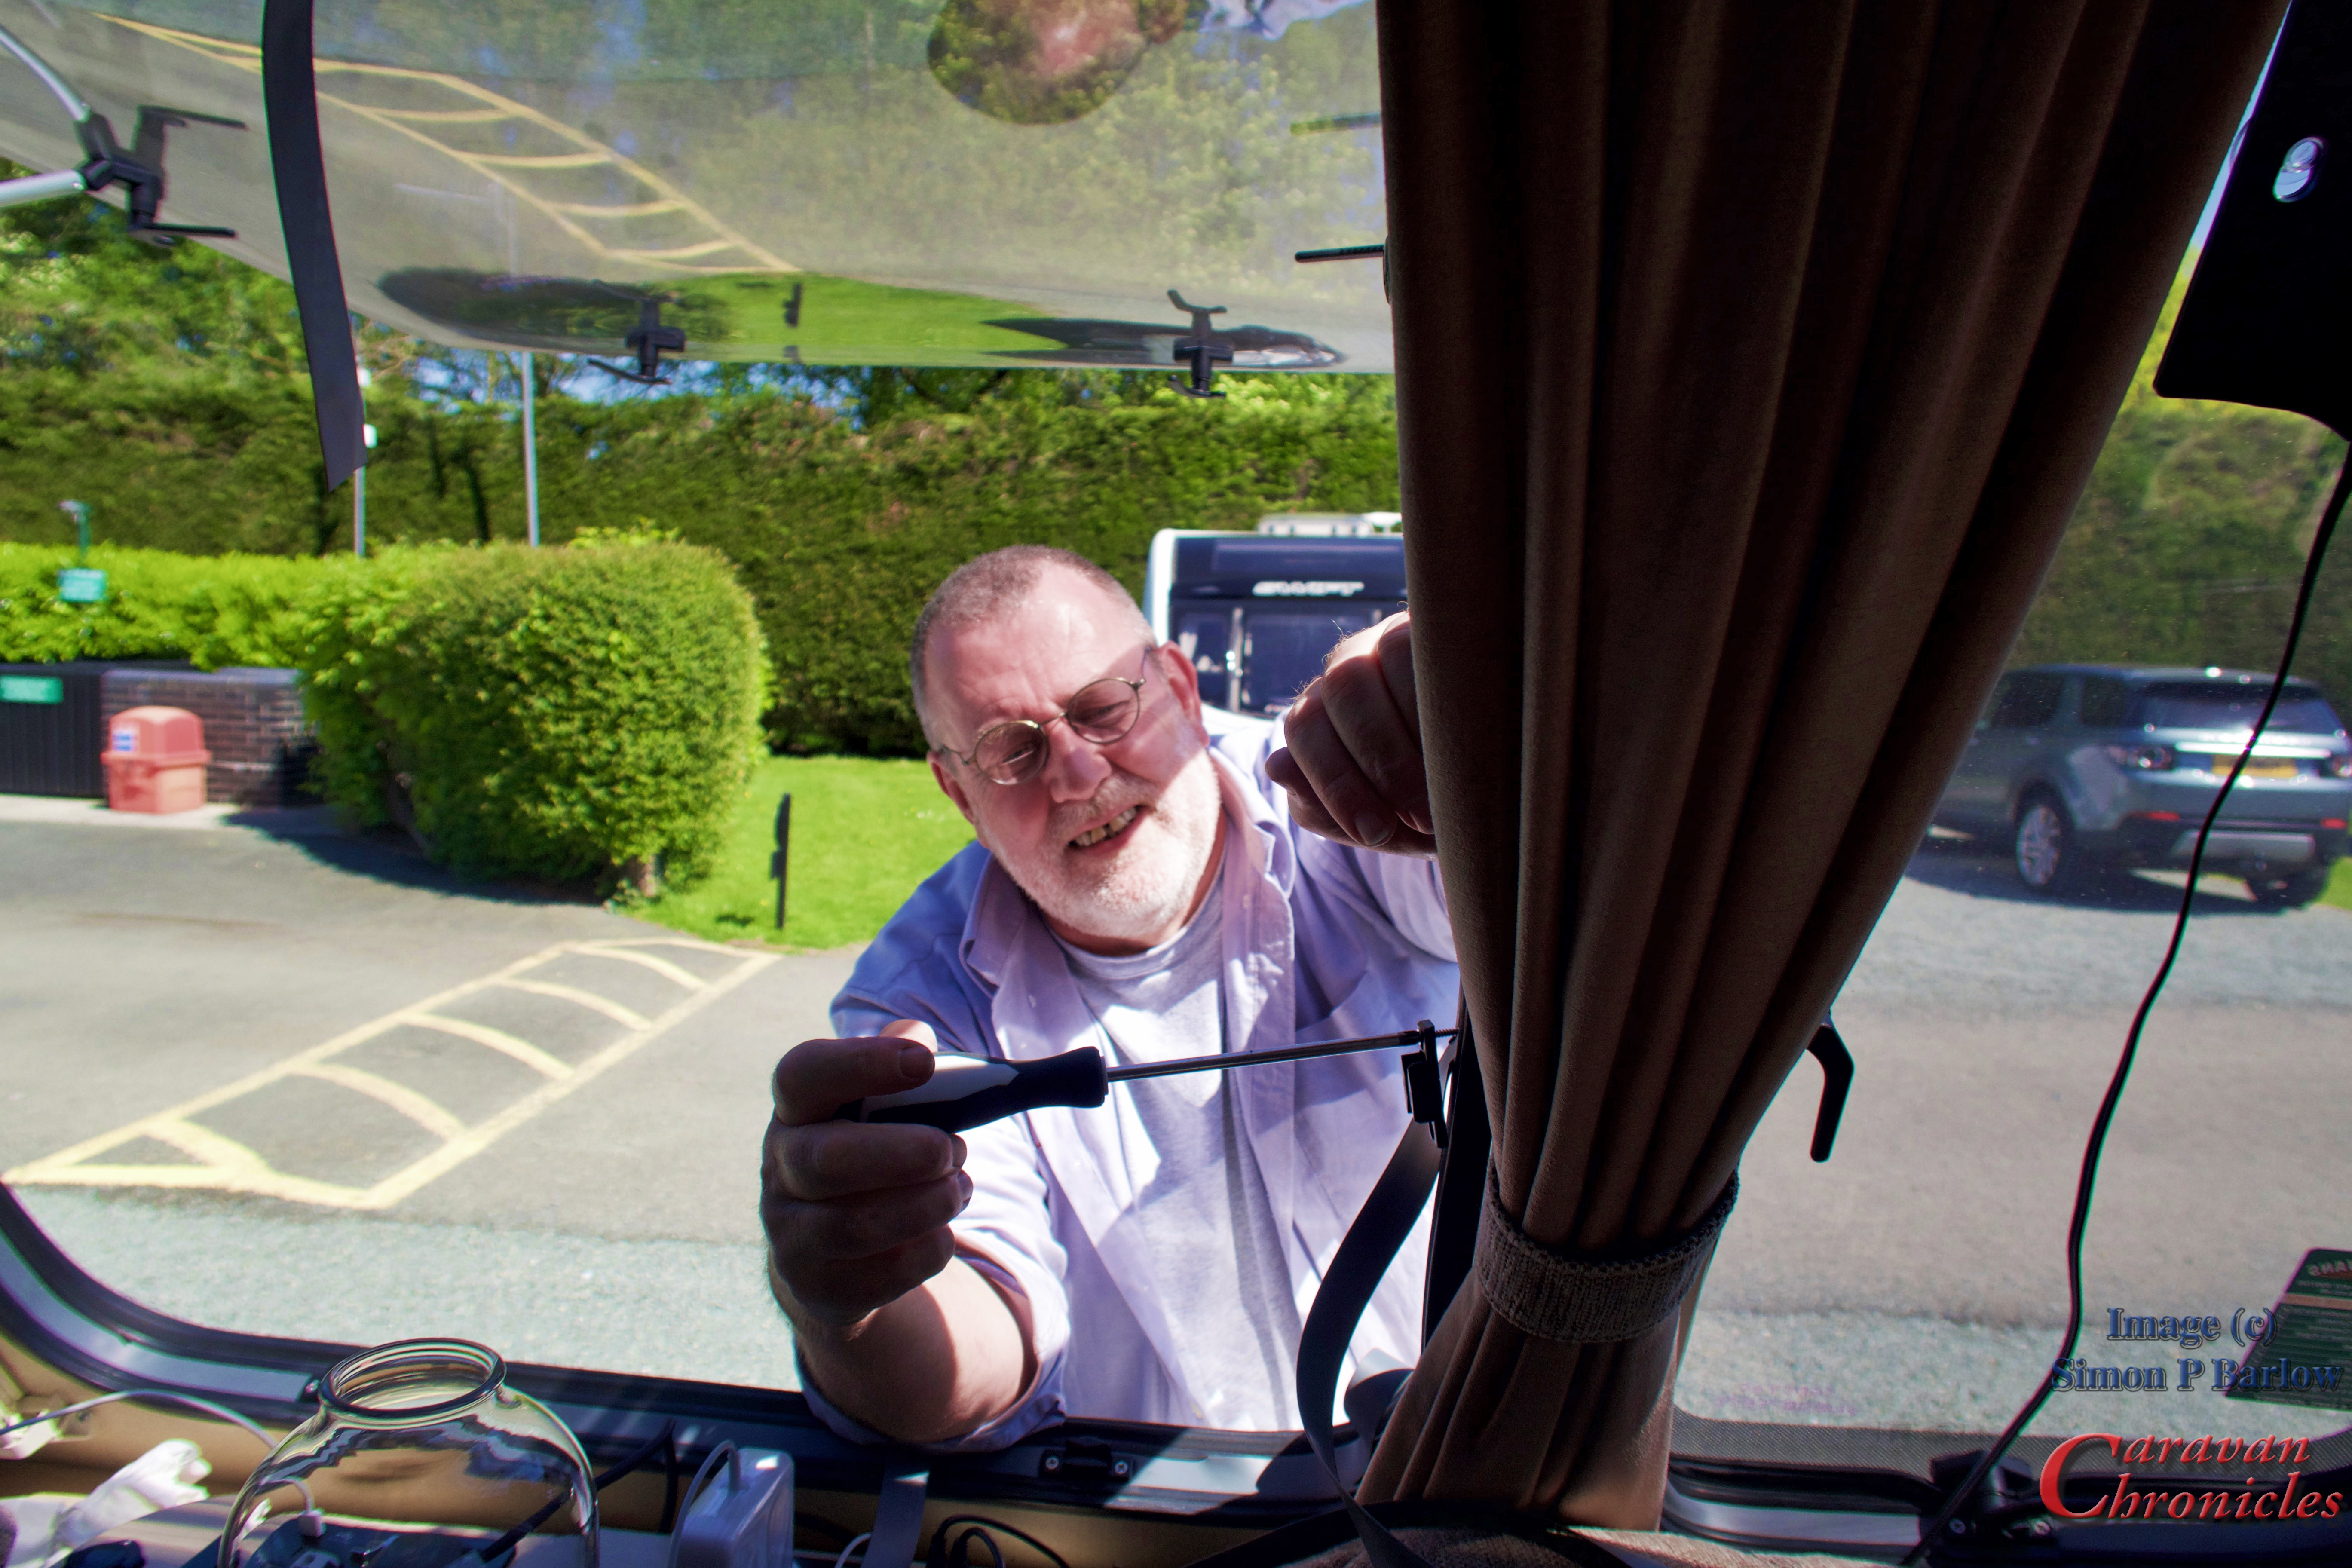
Once I’d completed the first section from the top down to the middle of the bottom of the frame, I re-attached the window hardware and removed the opposite side…
This was all going terribly well! It didn’t take too long to remove the hardware from the other side of the window, pull out the old strip and continue around the frame fitting the new strip in.
I wasn’t sure what caused the original material to pull out of the corners but I guessed there might have been some stretching when it was originally installed and maybe repeated heating and cooling over the last 8 years caused it to return to it’s original dimensions. With the new strip, I did try to ensure I’d not pulled it tight and used the handle of a large screwdriver to try and massage the strip into the corners as much as possible.
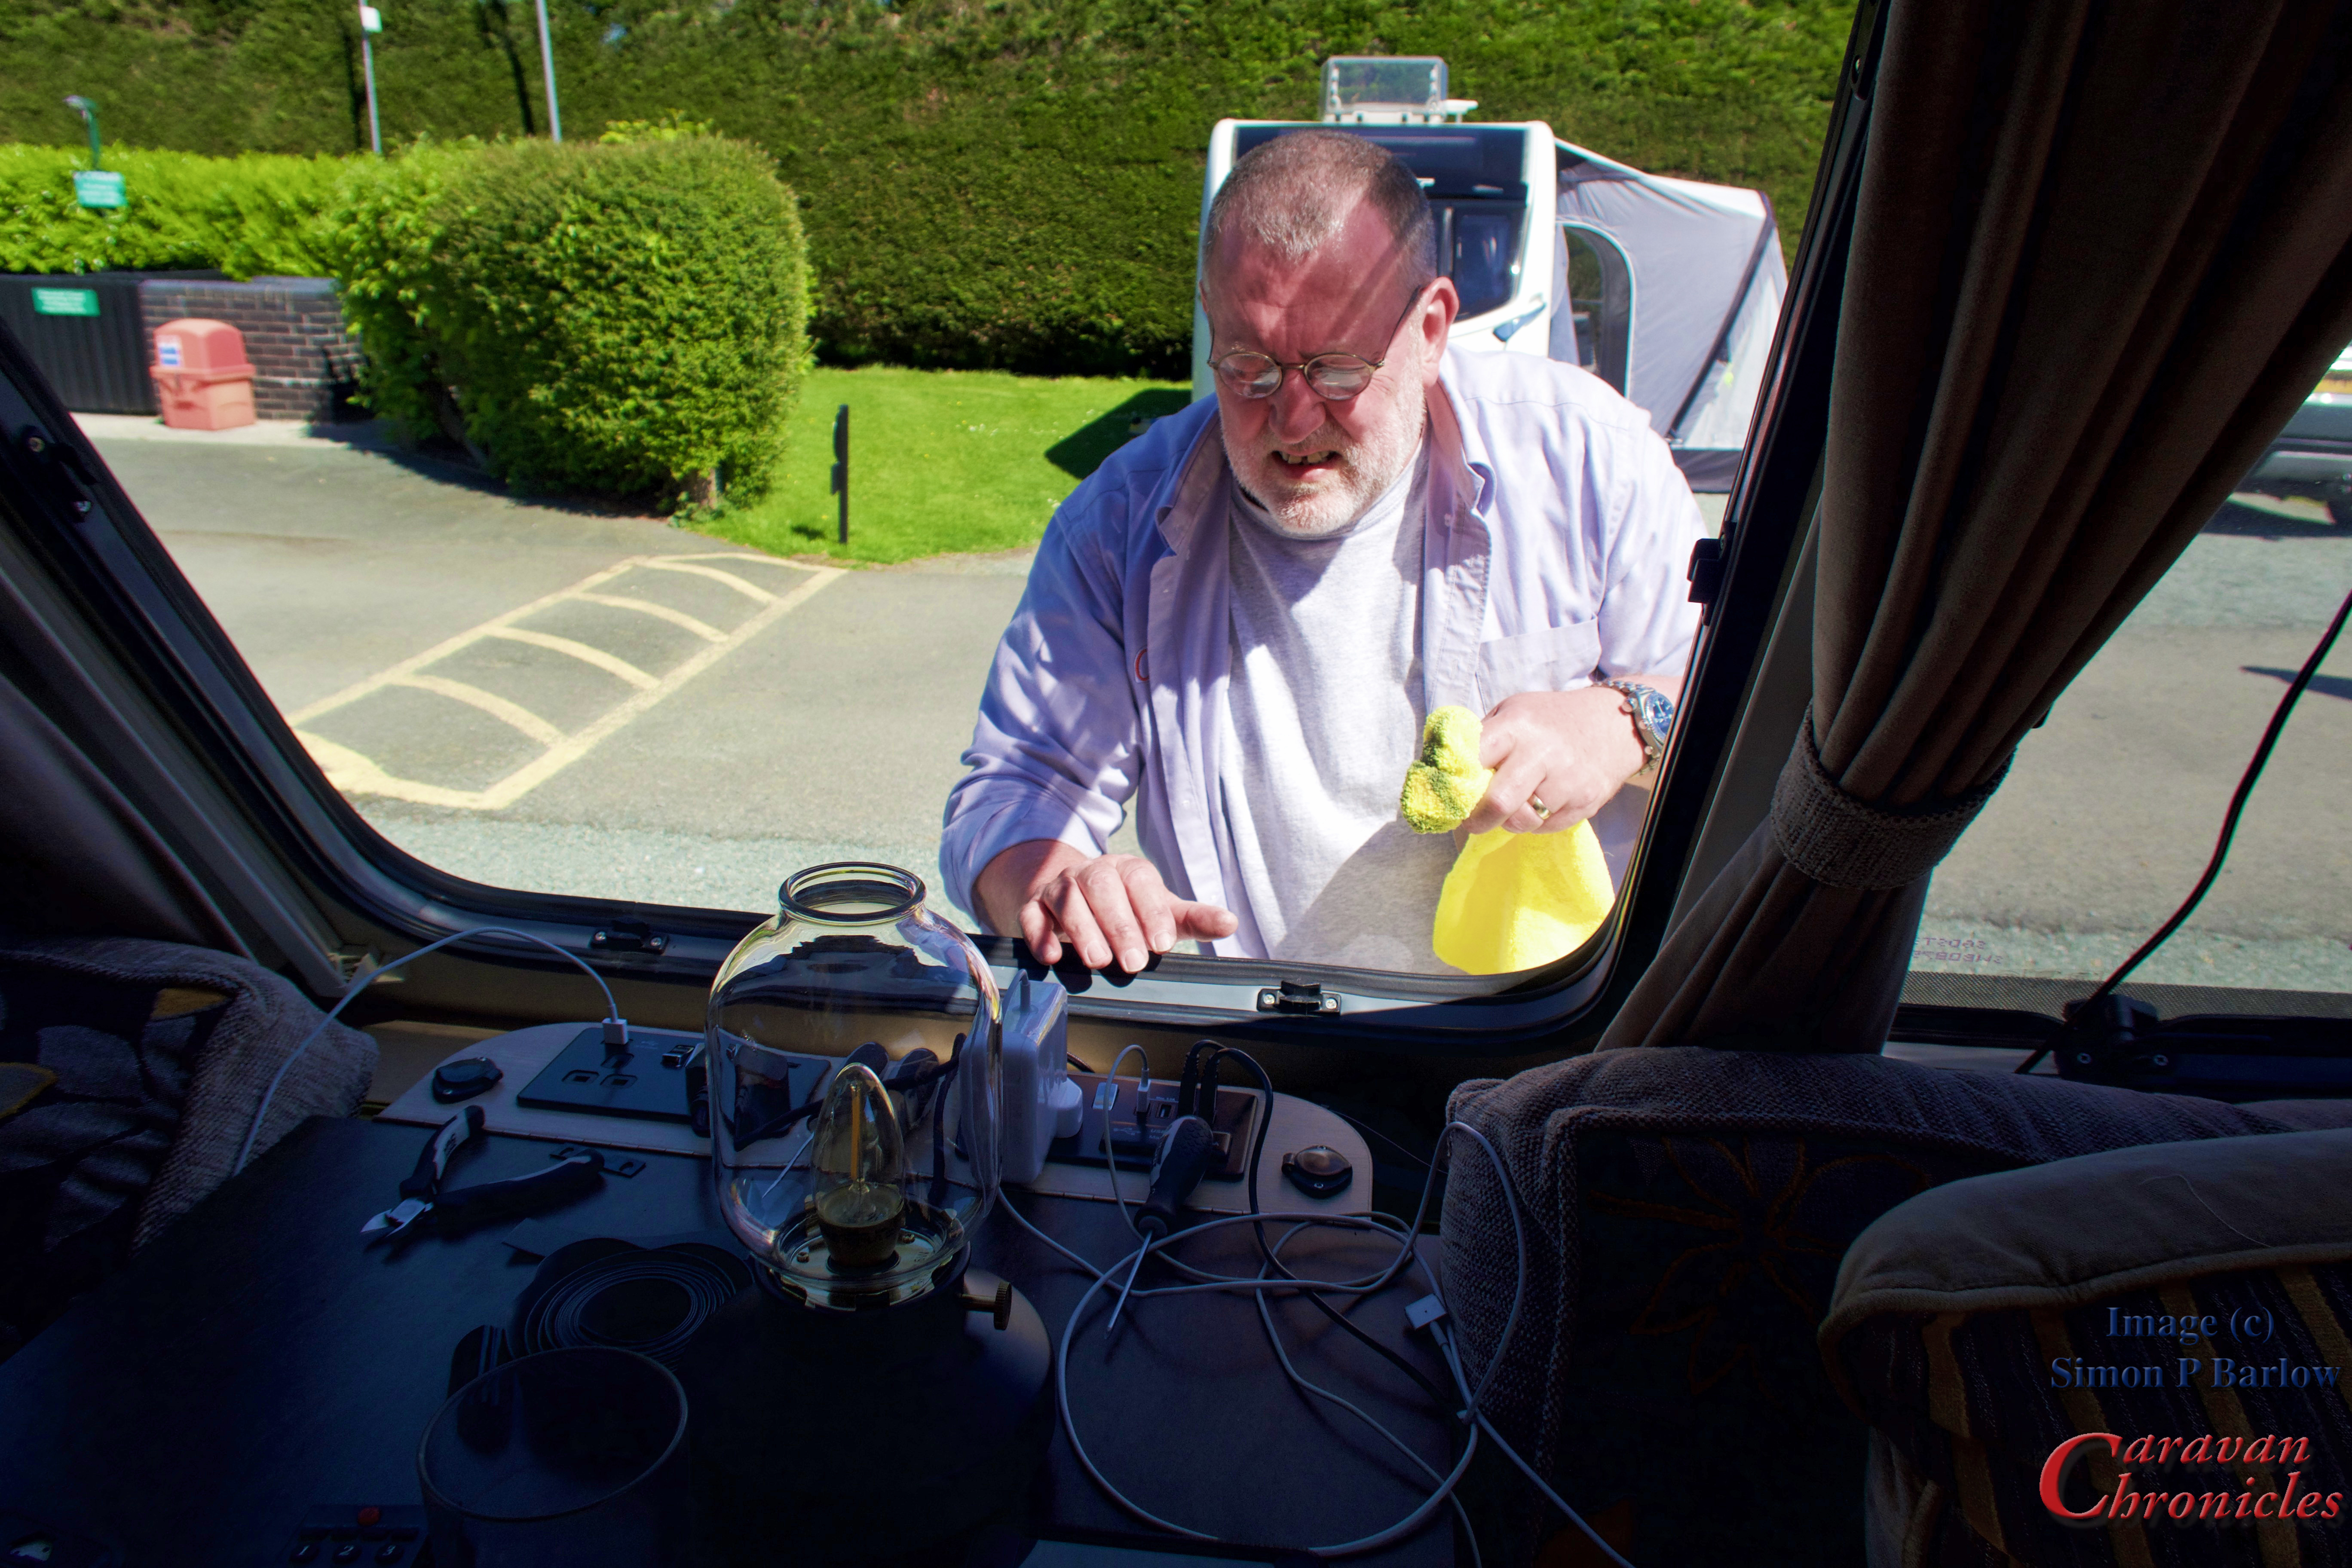
All that remained was to re-install the window hardware on this side and check for fit and finish. Everything seemed OK and Granville was summoned with his cloth…
A light squirt of silicone designed for rubber window seals and a quick polish with a microfibre cloth finished the job off nicely.
All totalled the main centre window took about 30 minutes to complete start to finish. Next trip out up to Barnard Castle in a couple of weeks time…. I’ll get the other two smaller windows done.
Finally, before anyone asks, yes I did choose to do this on the warmest day in North Wales so far this year!
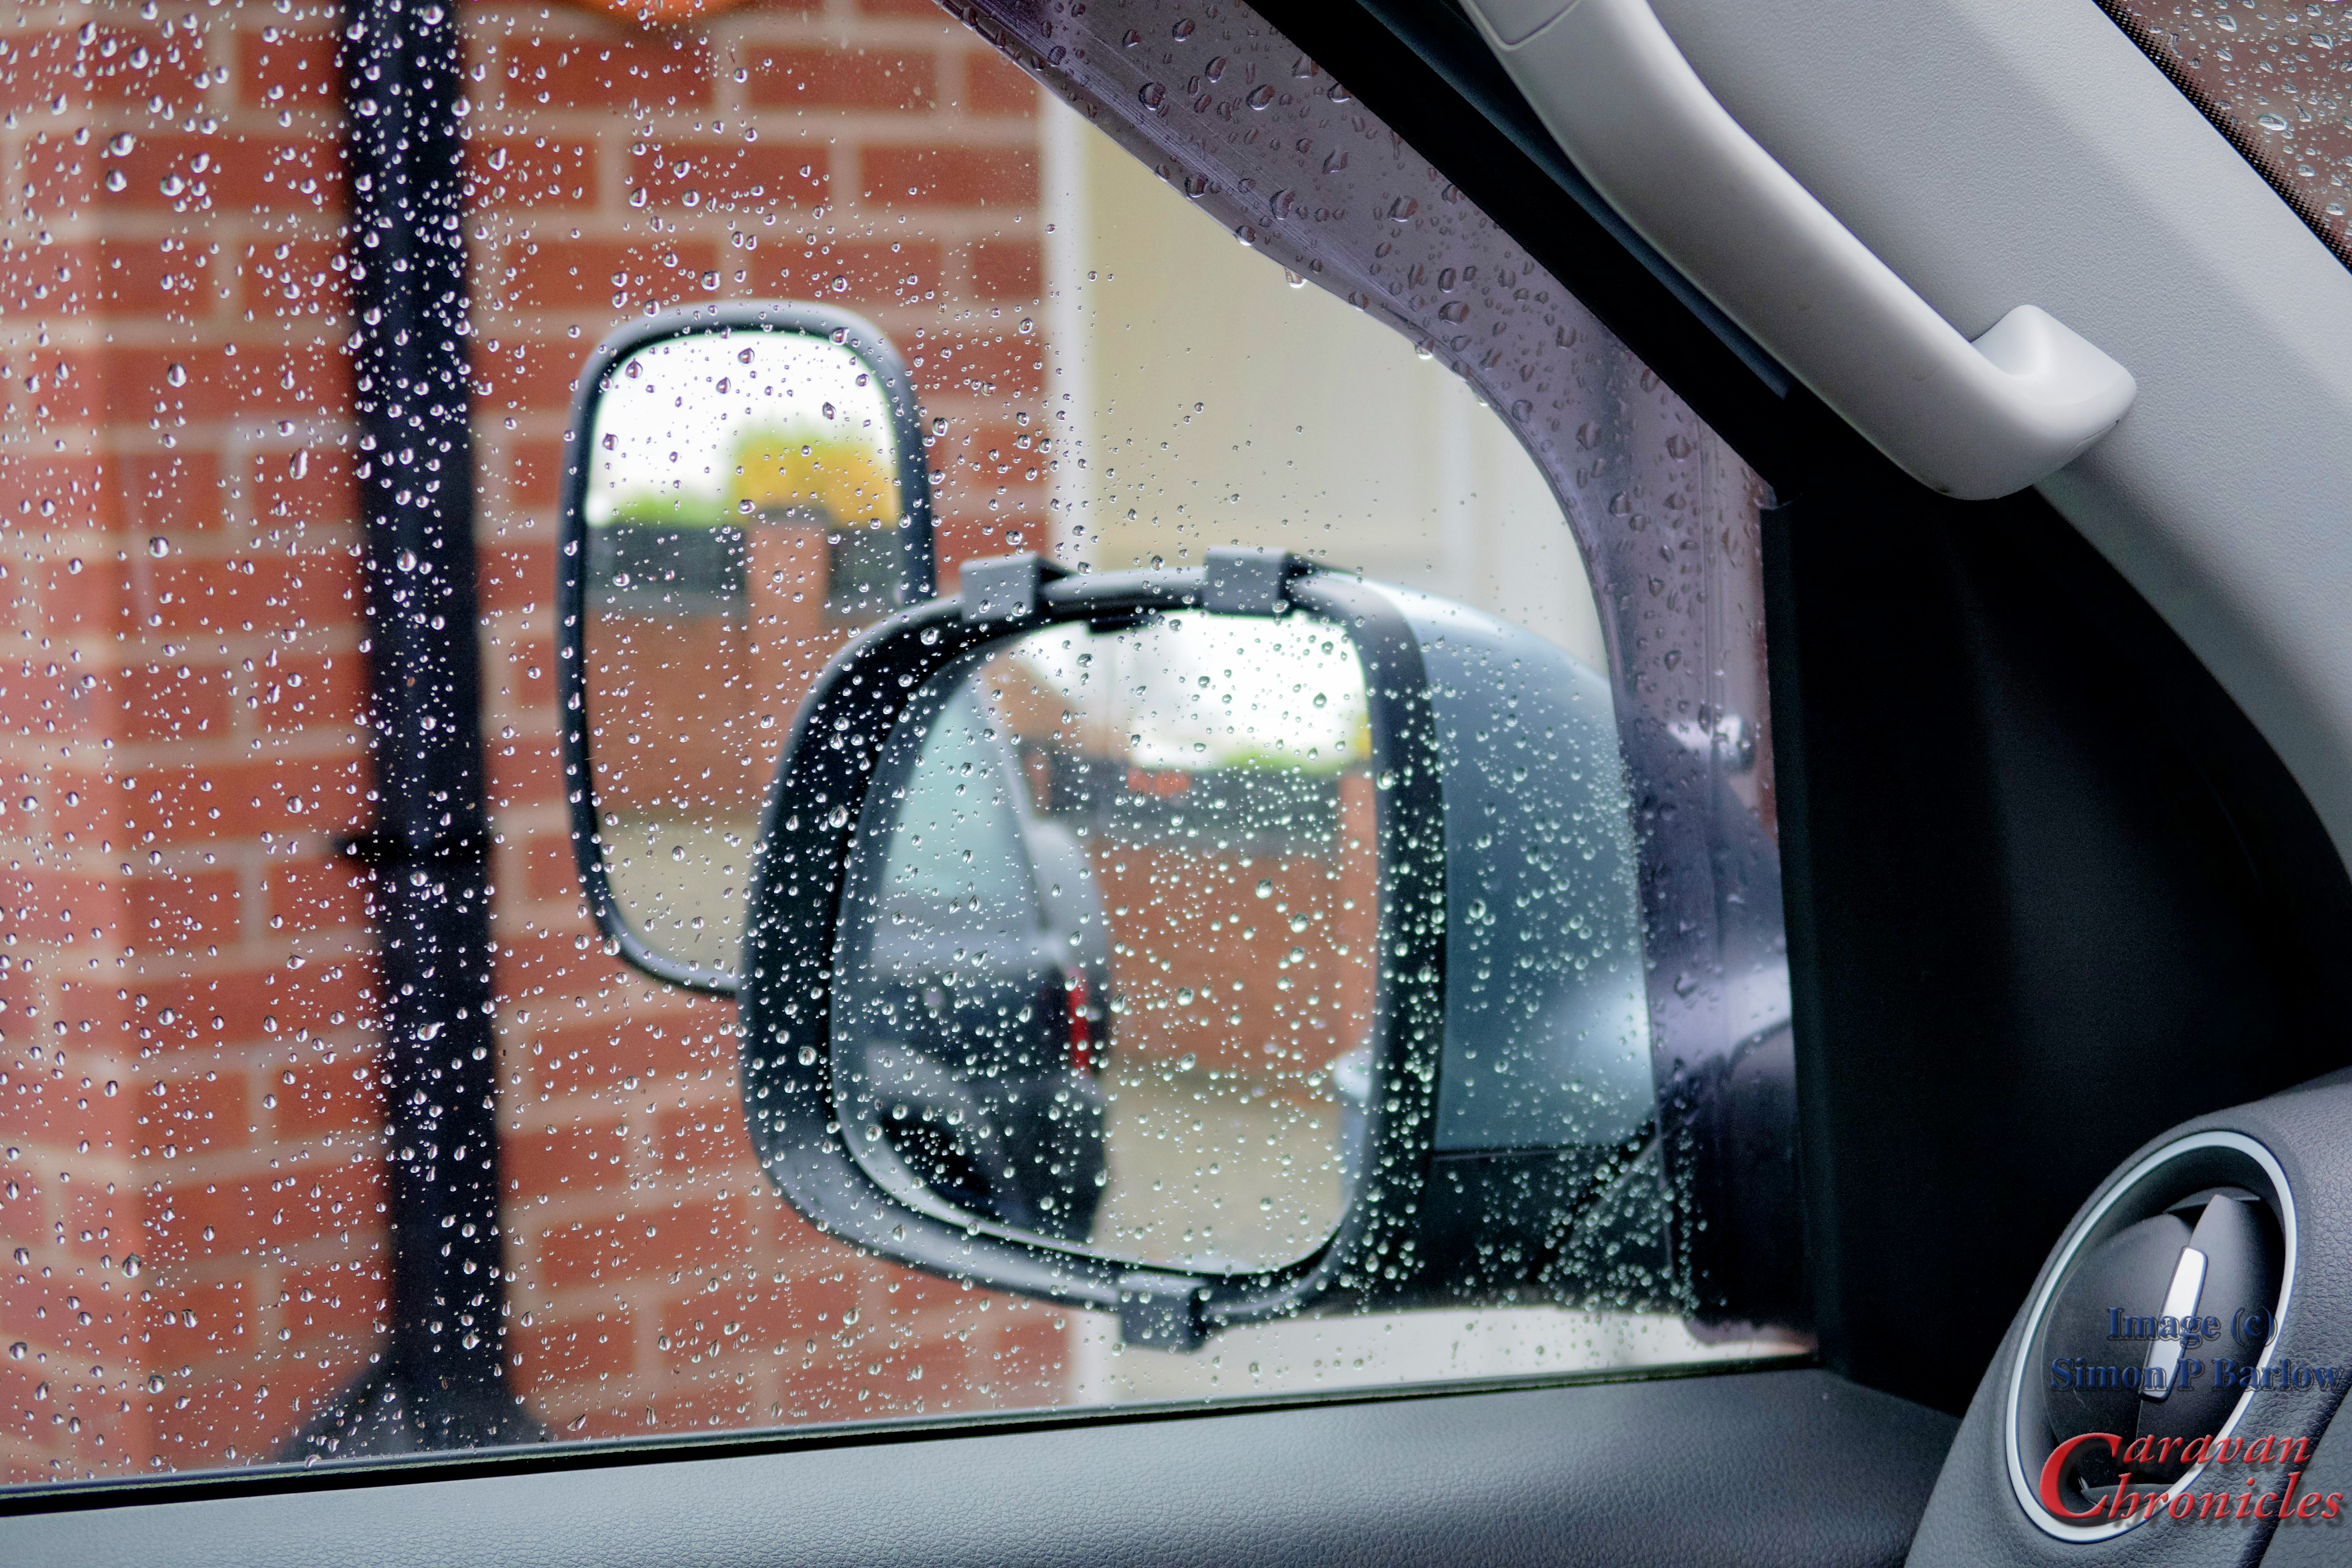
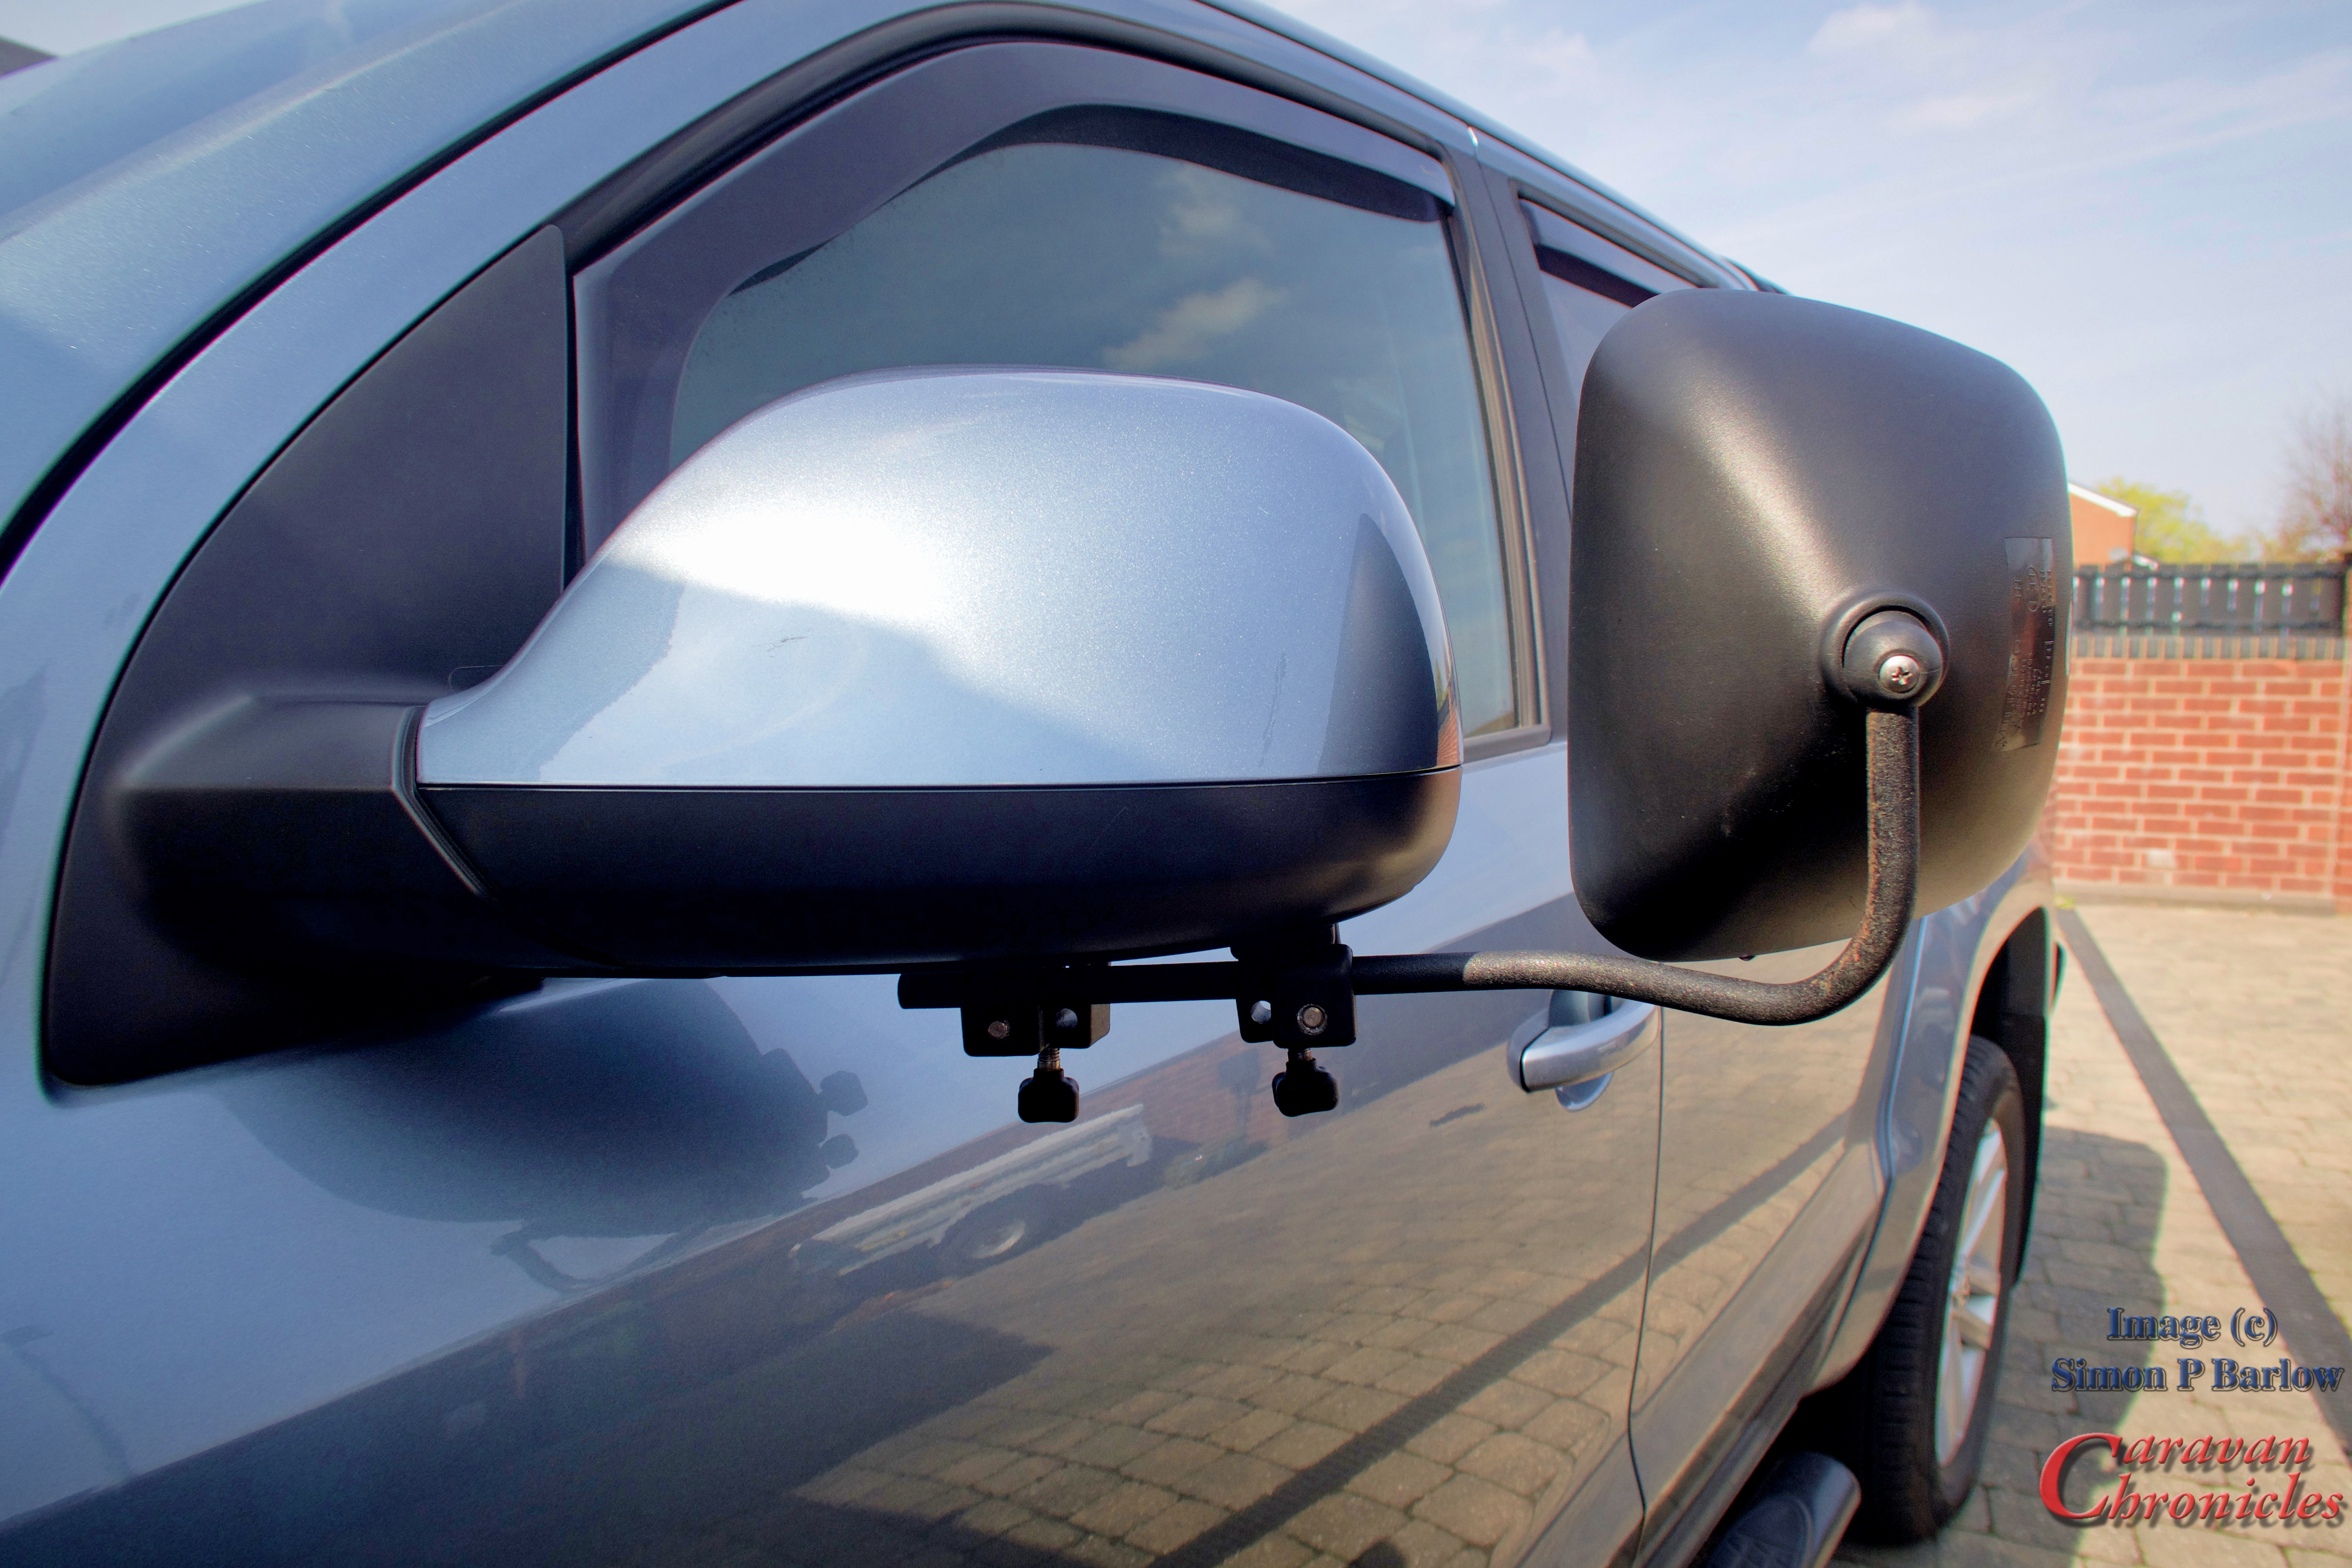
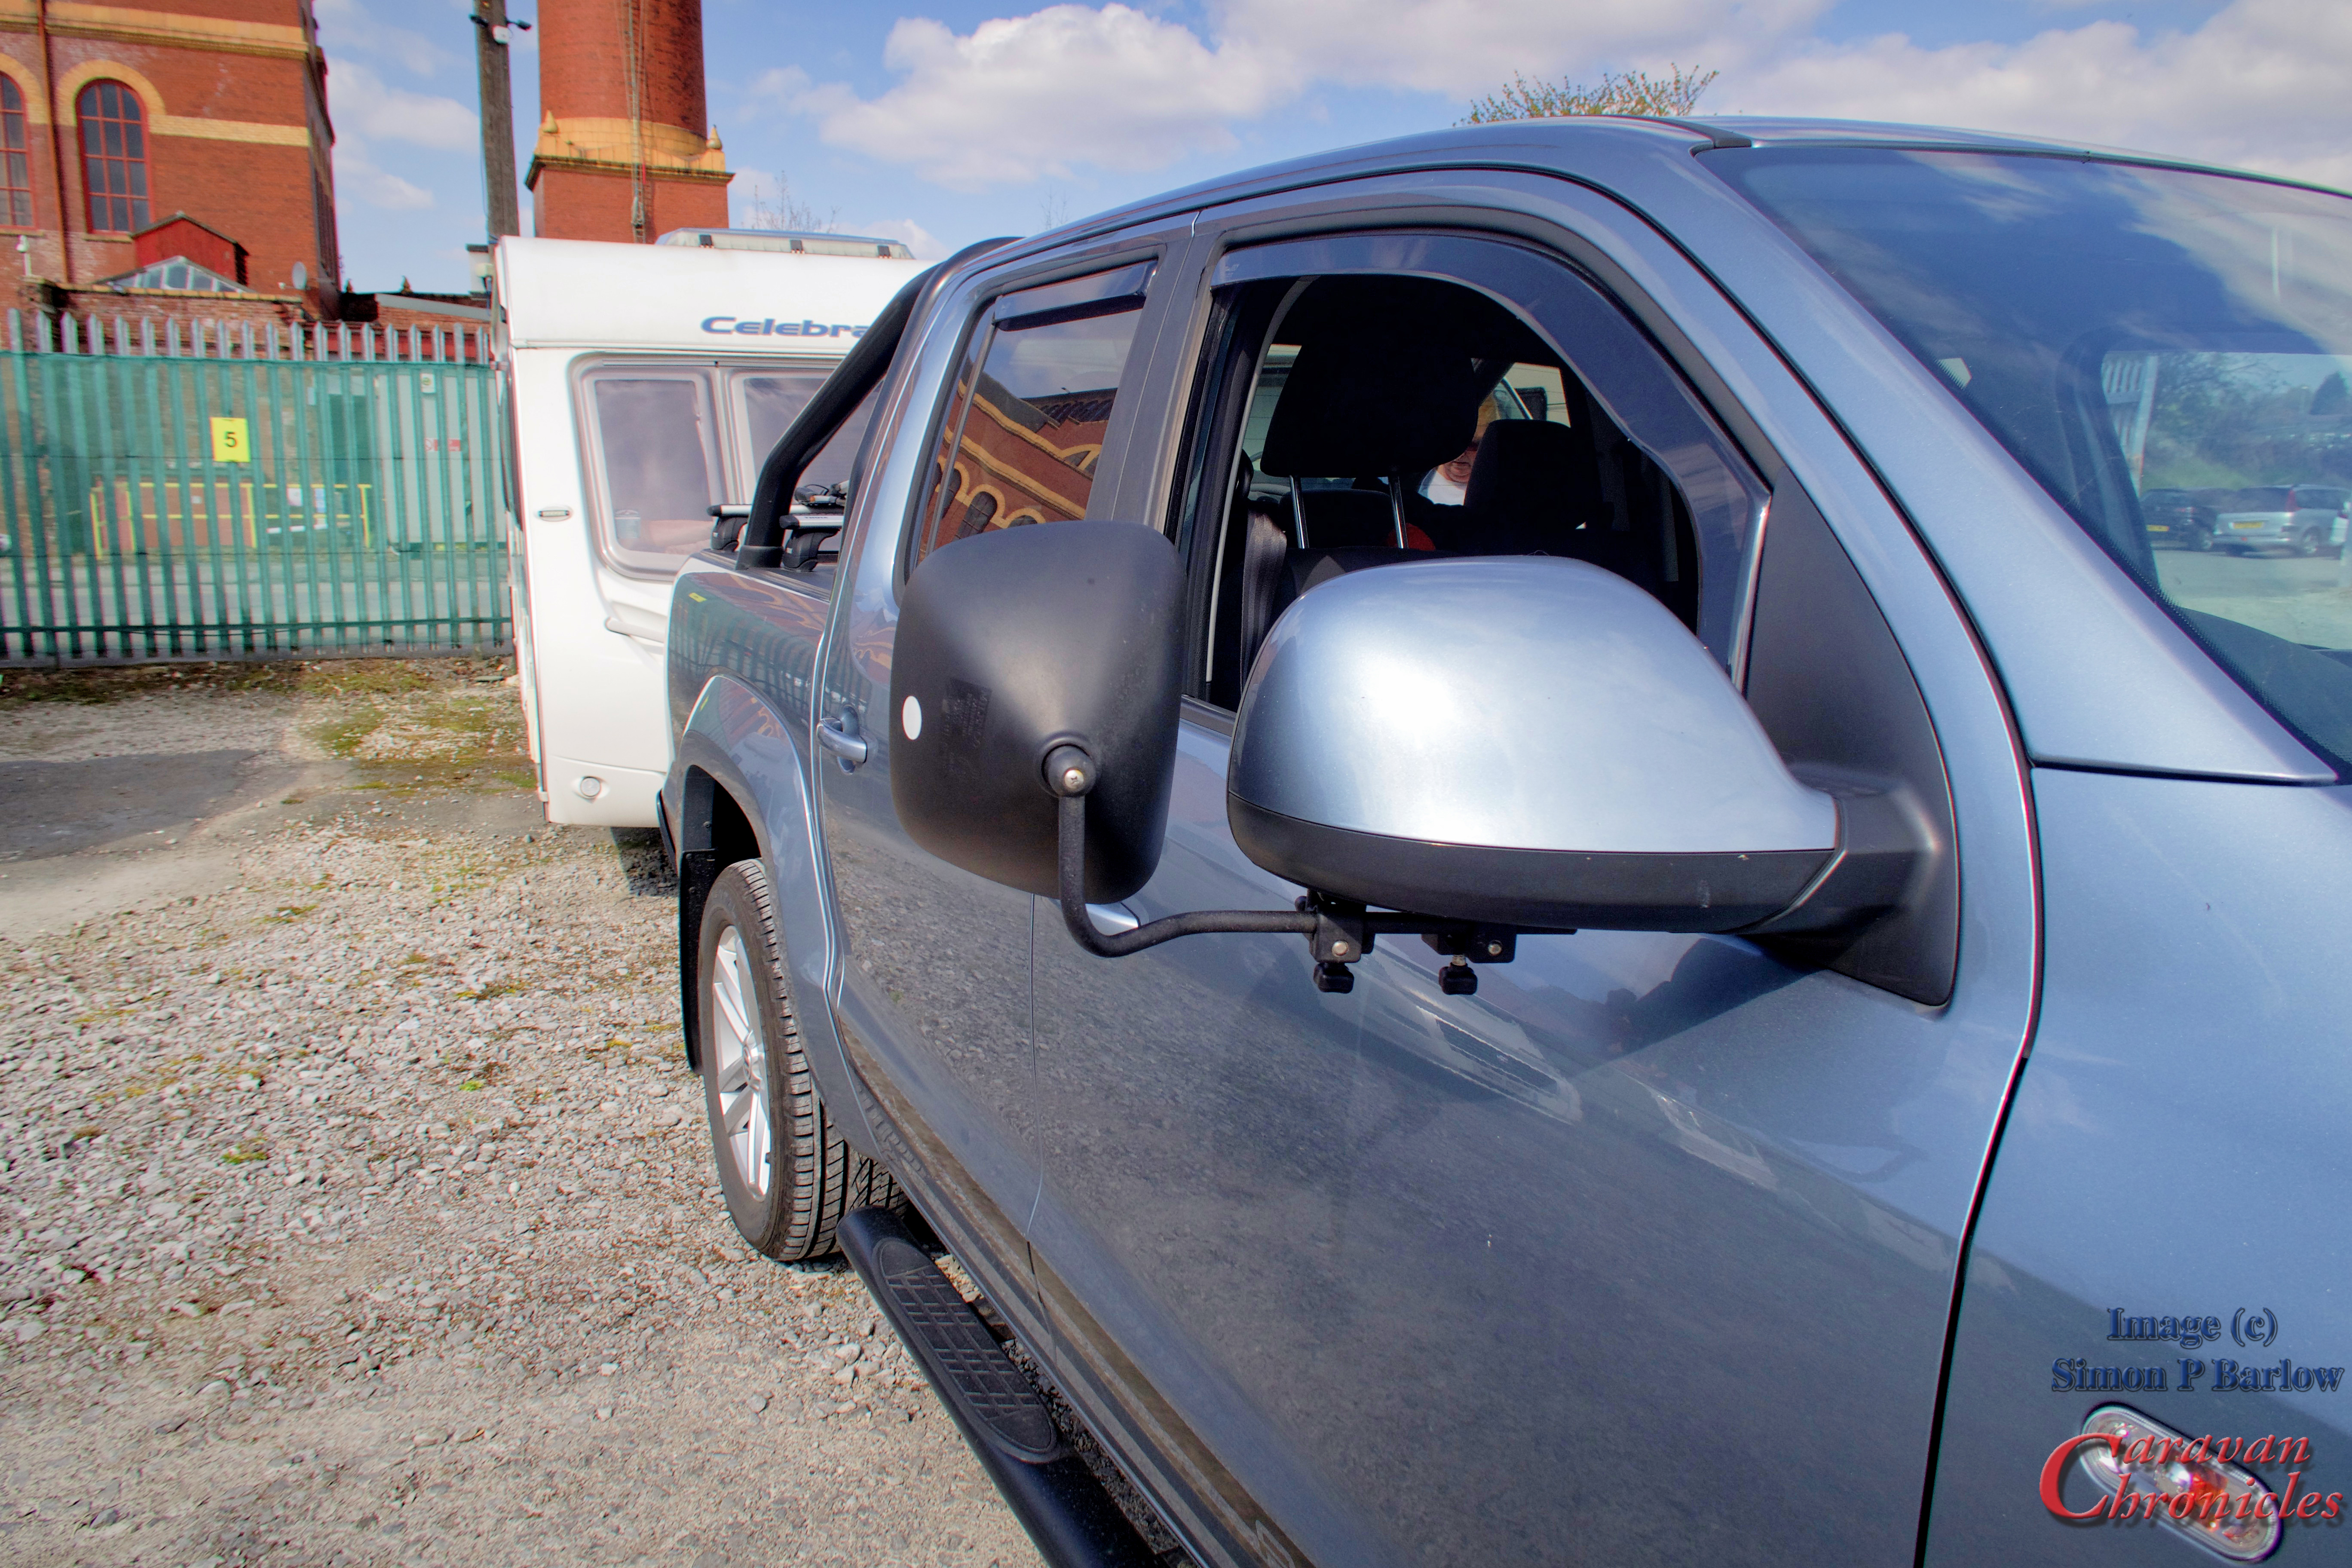
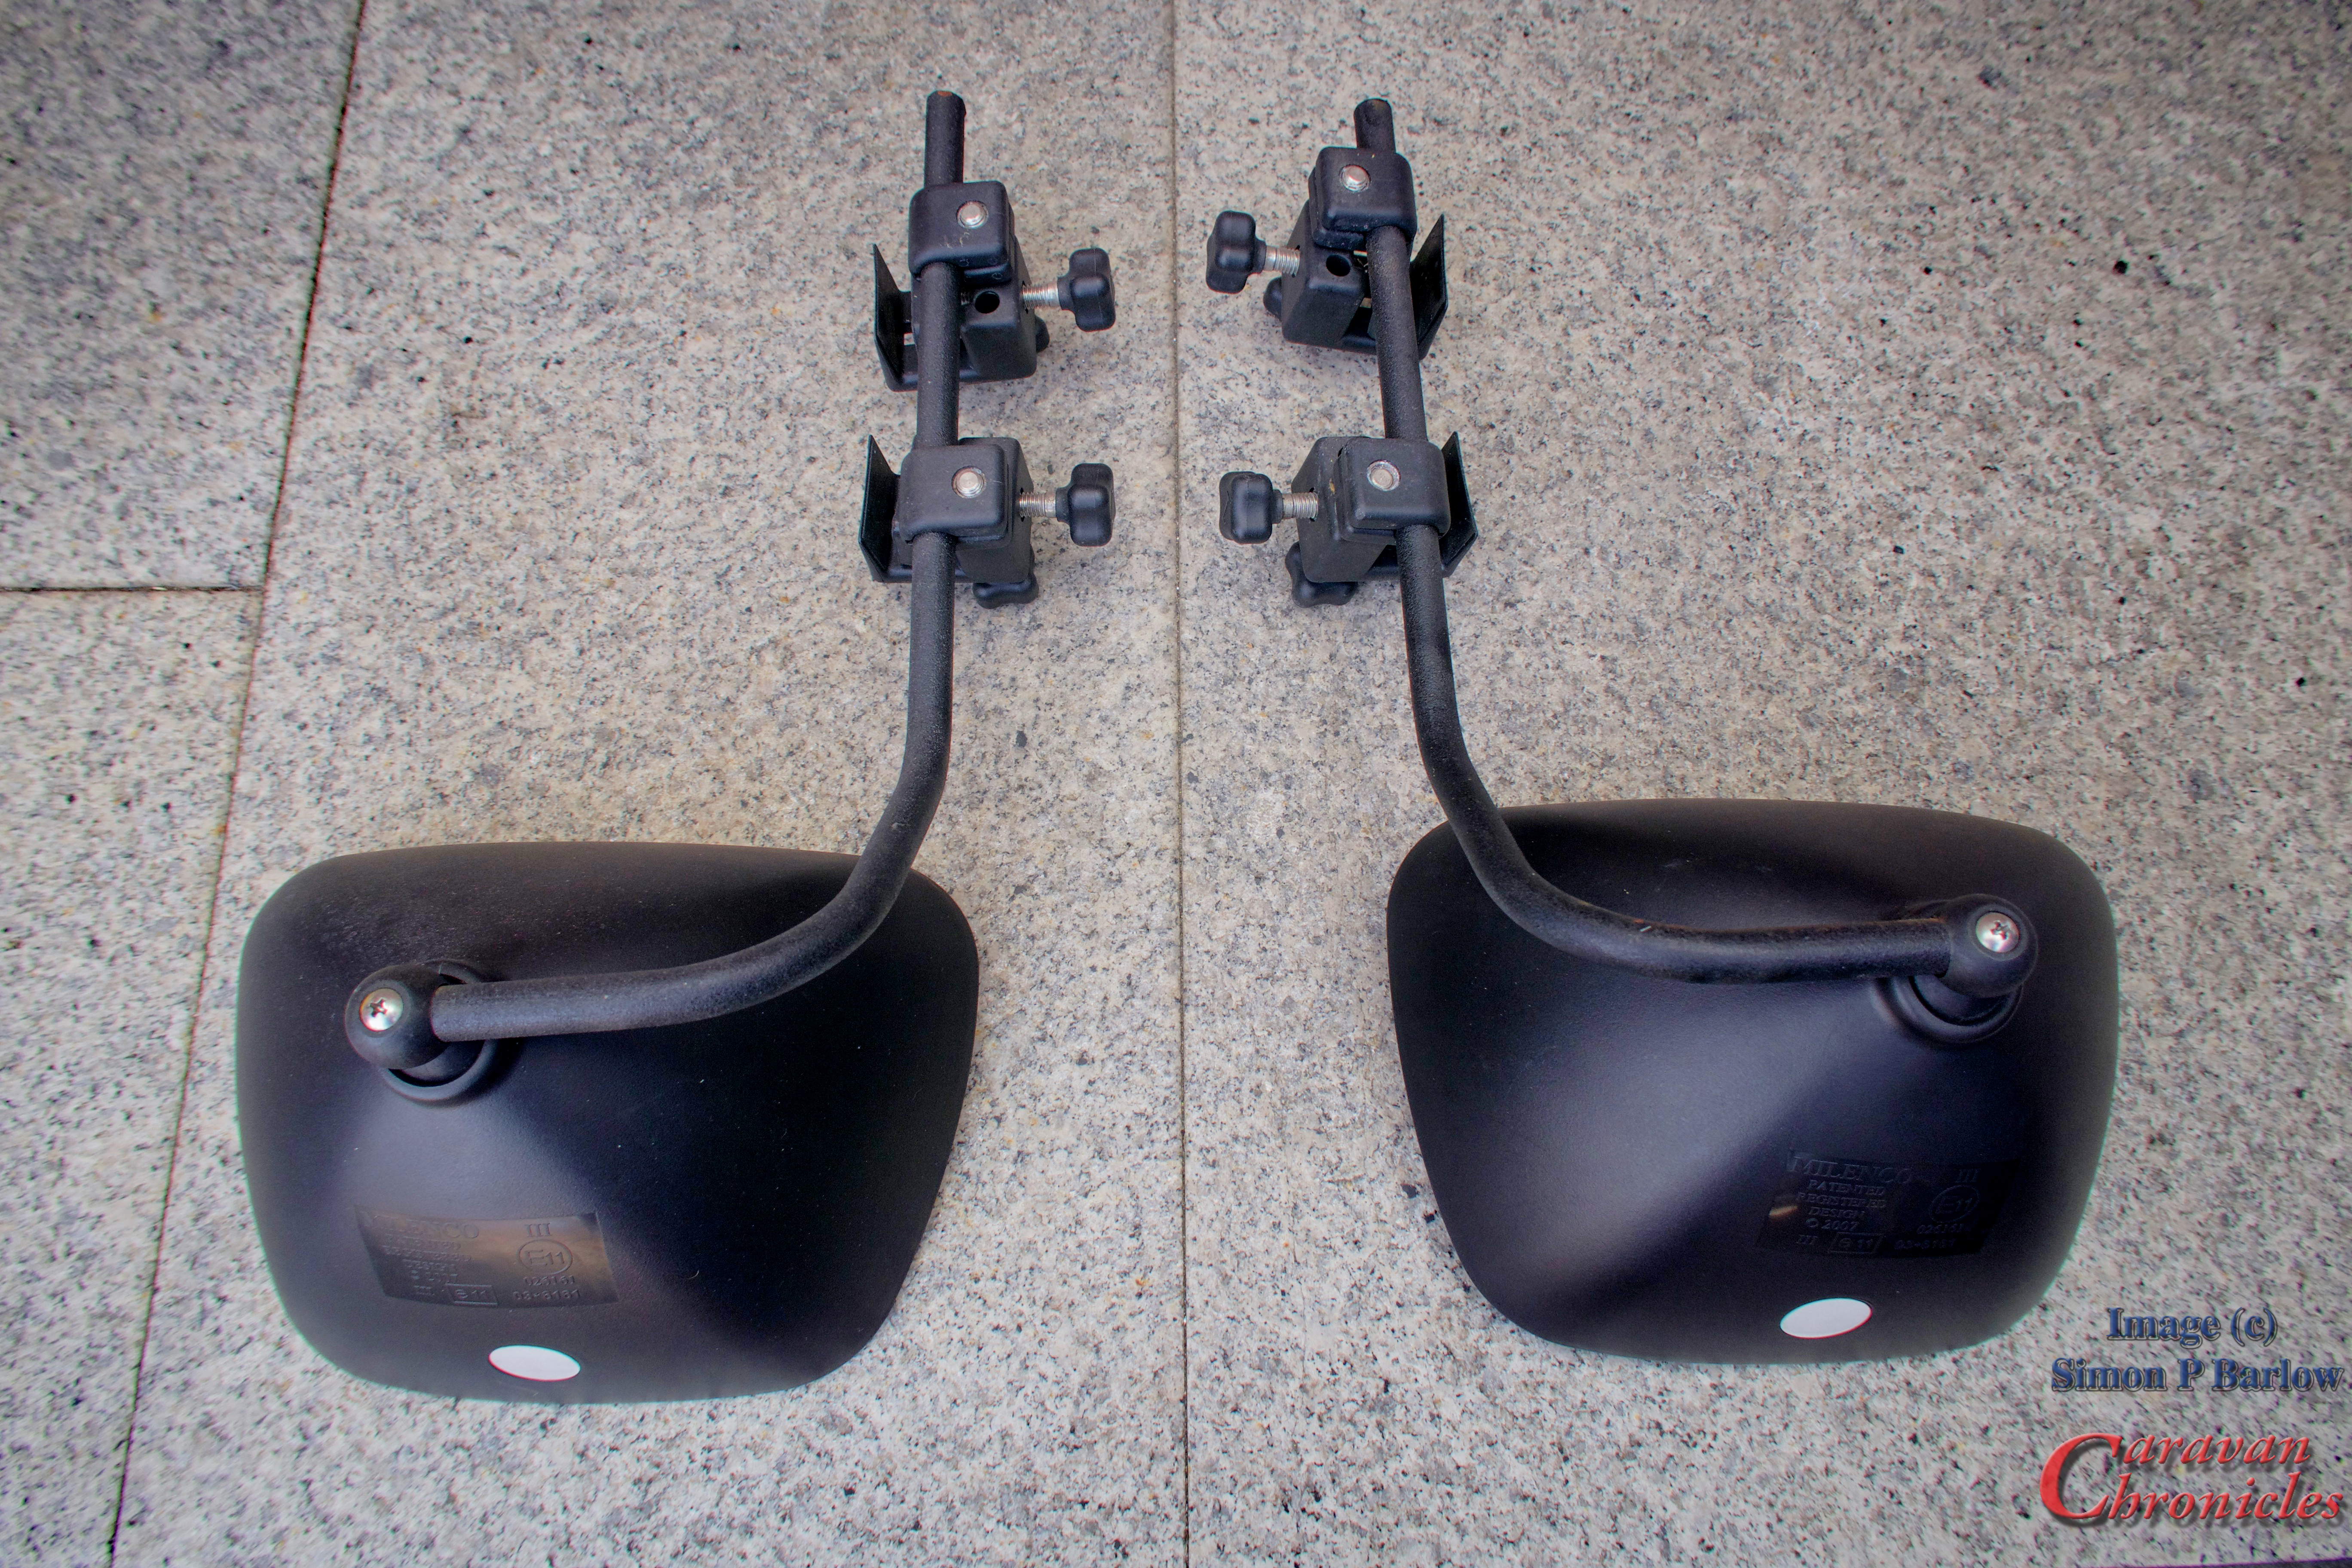
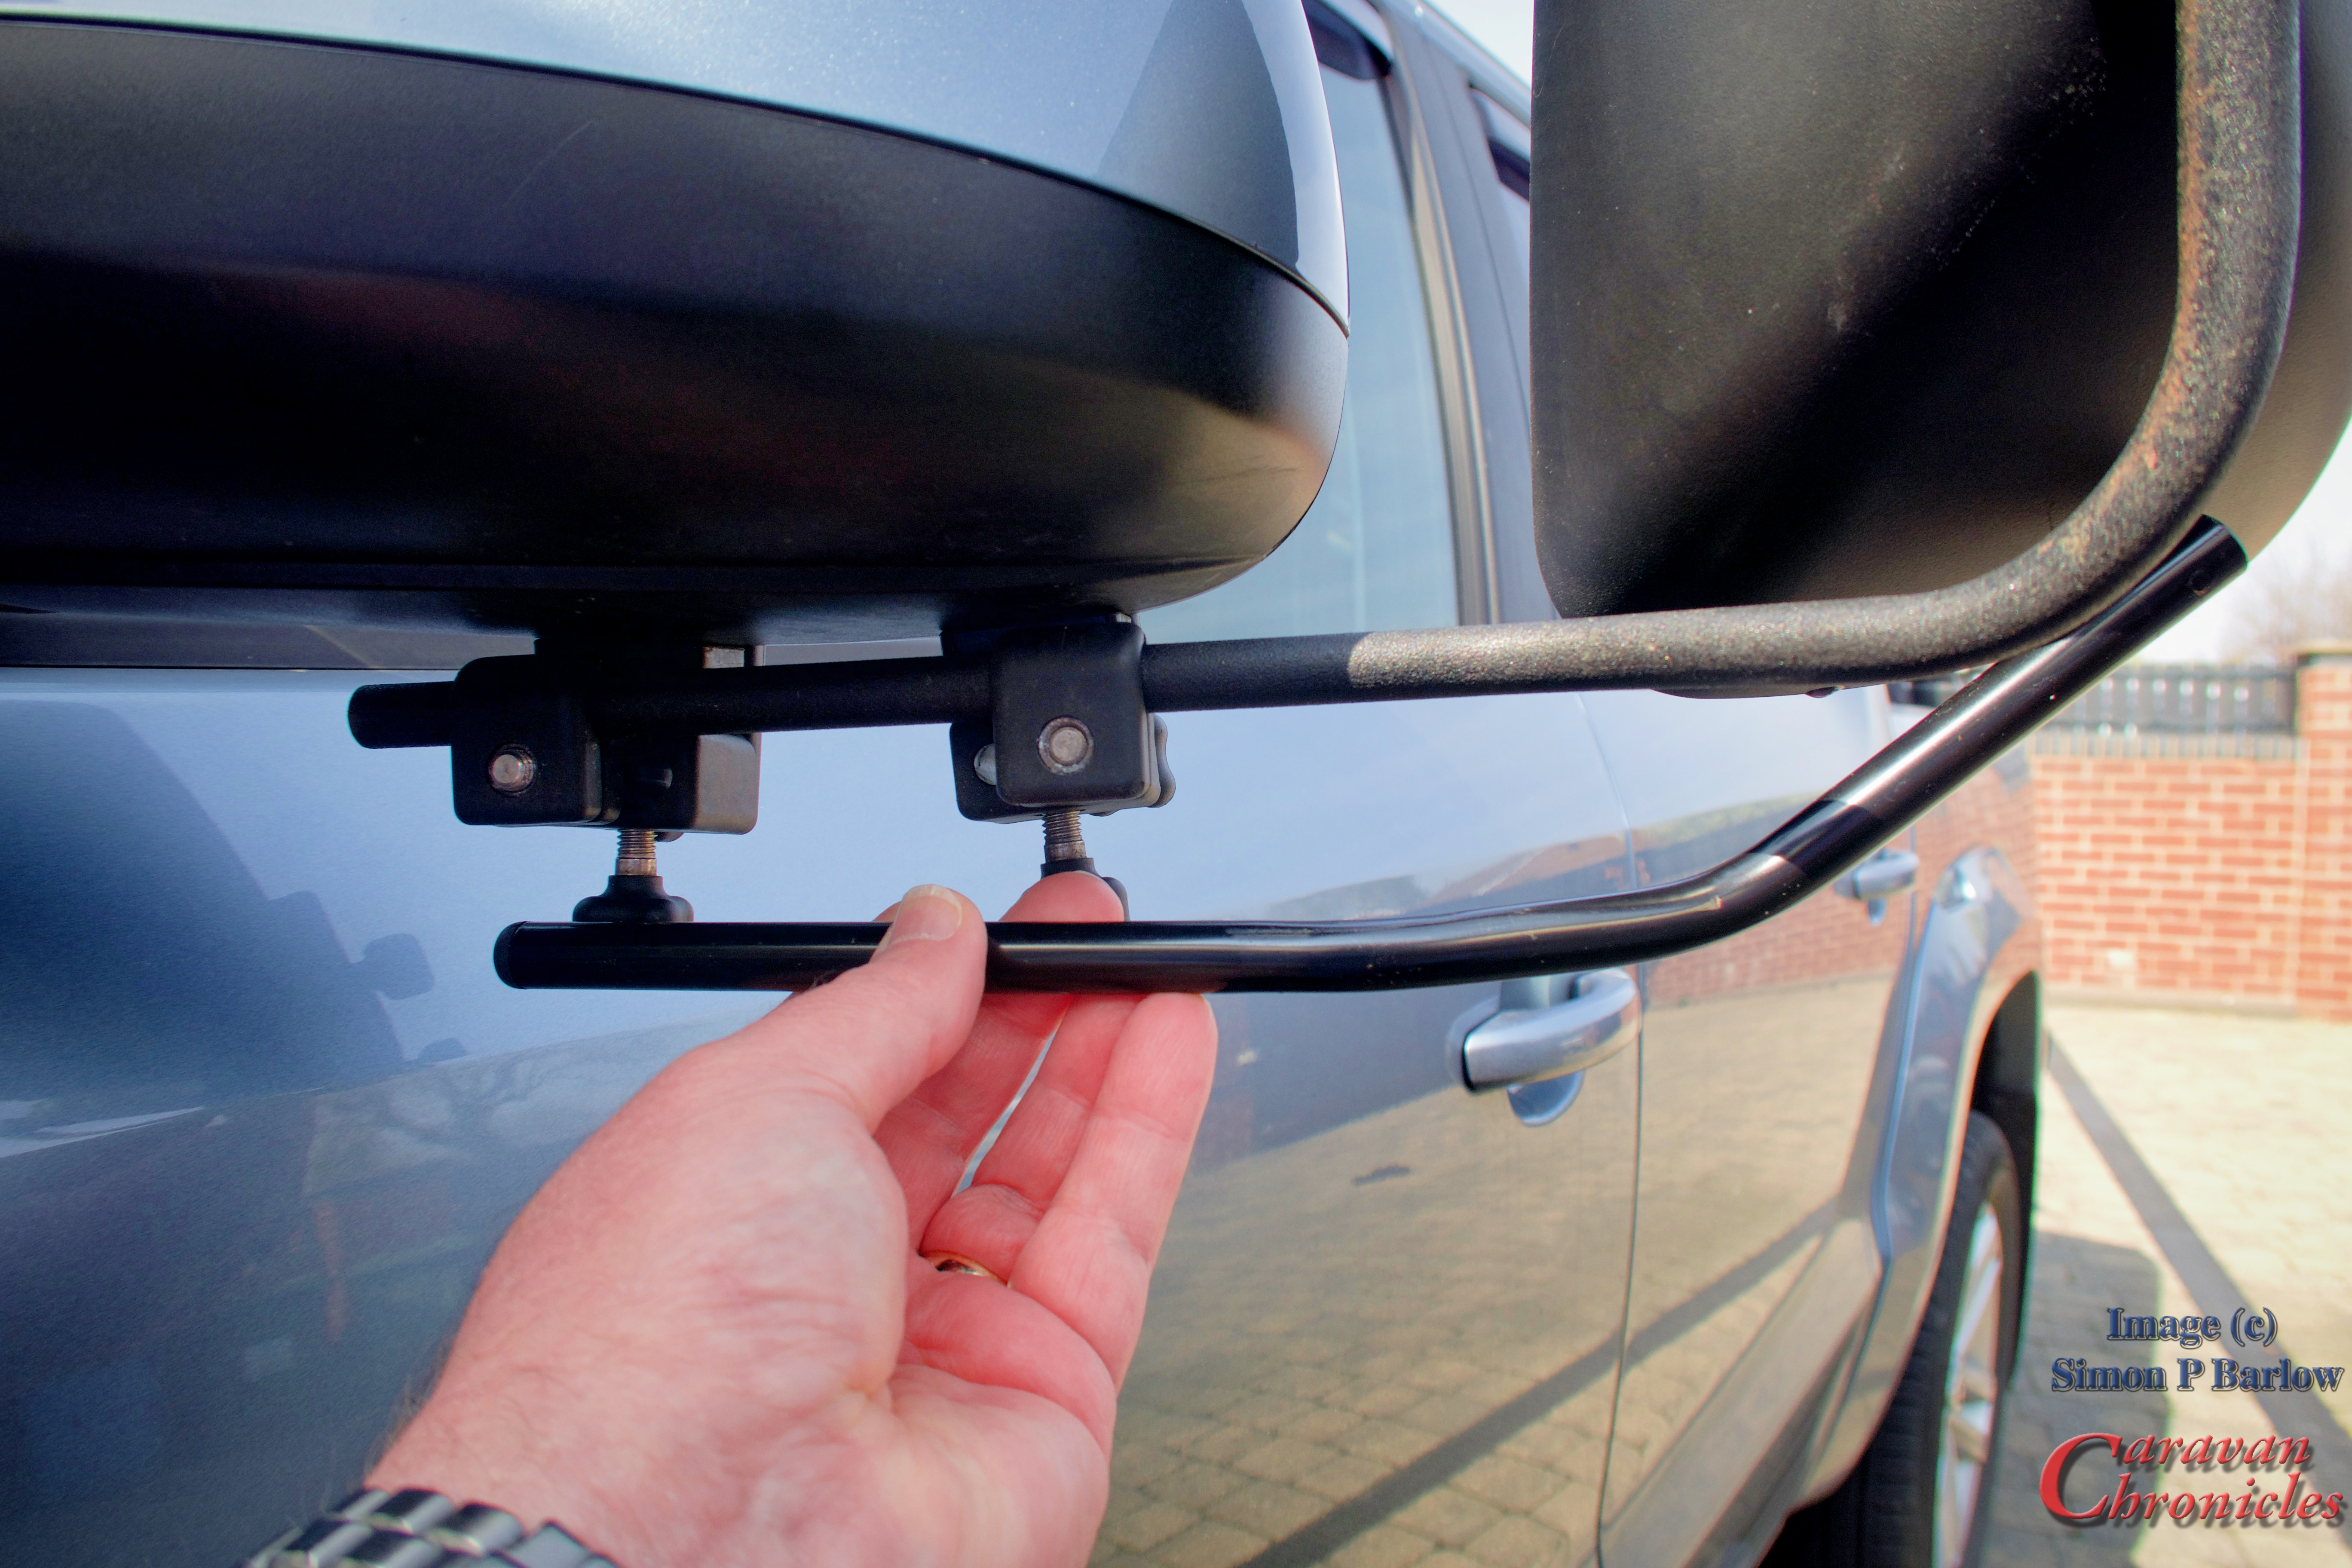
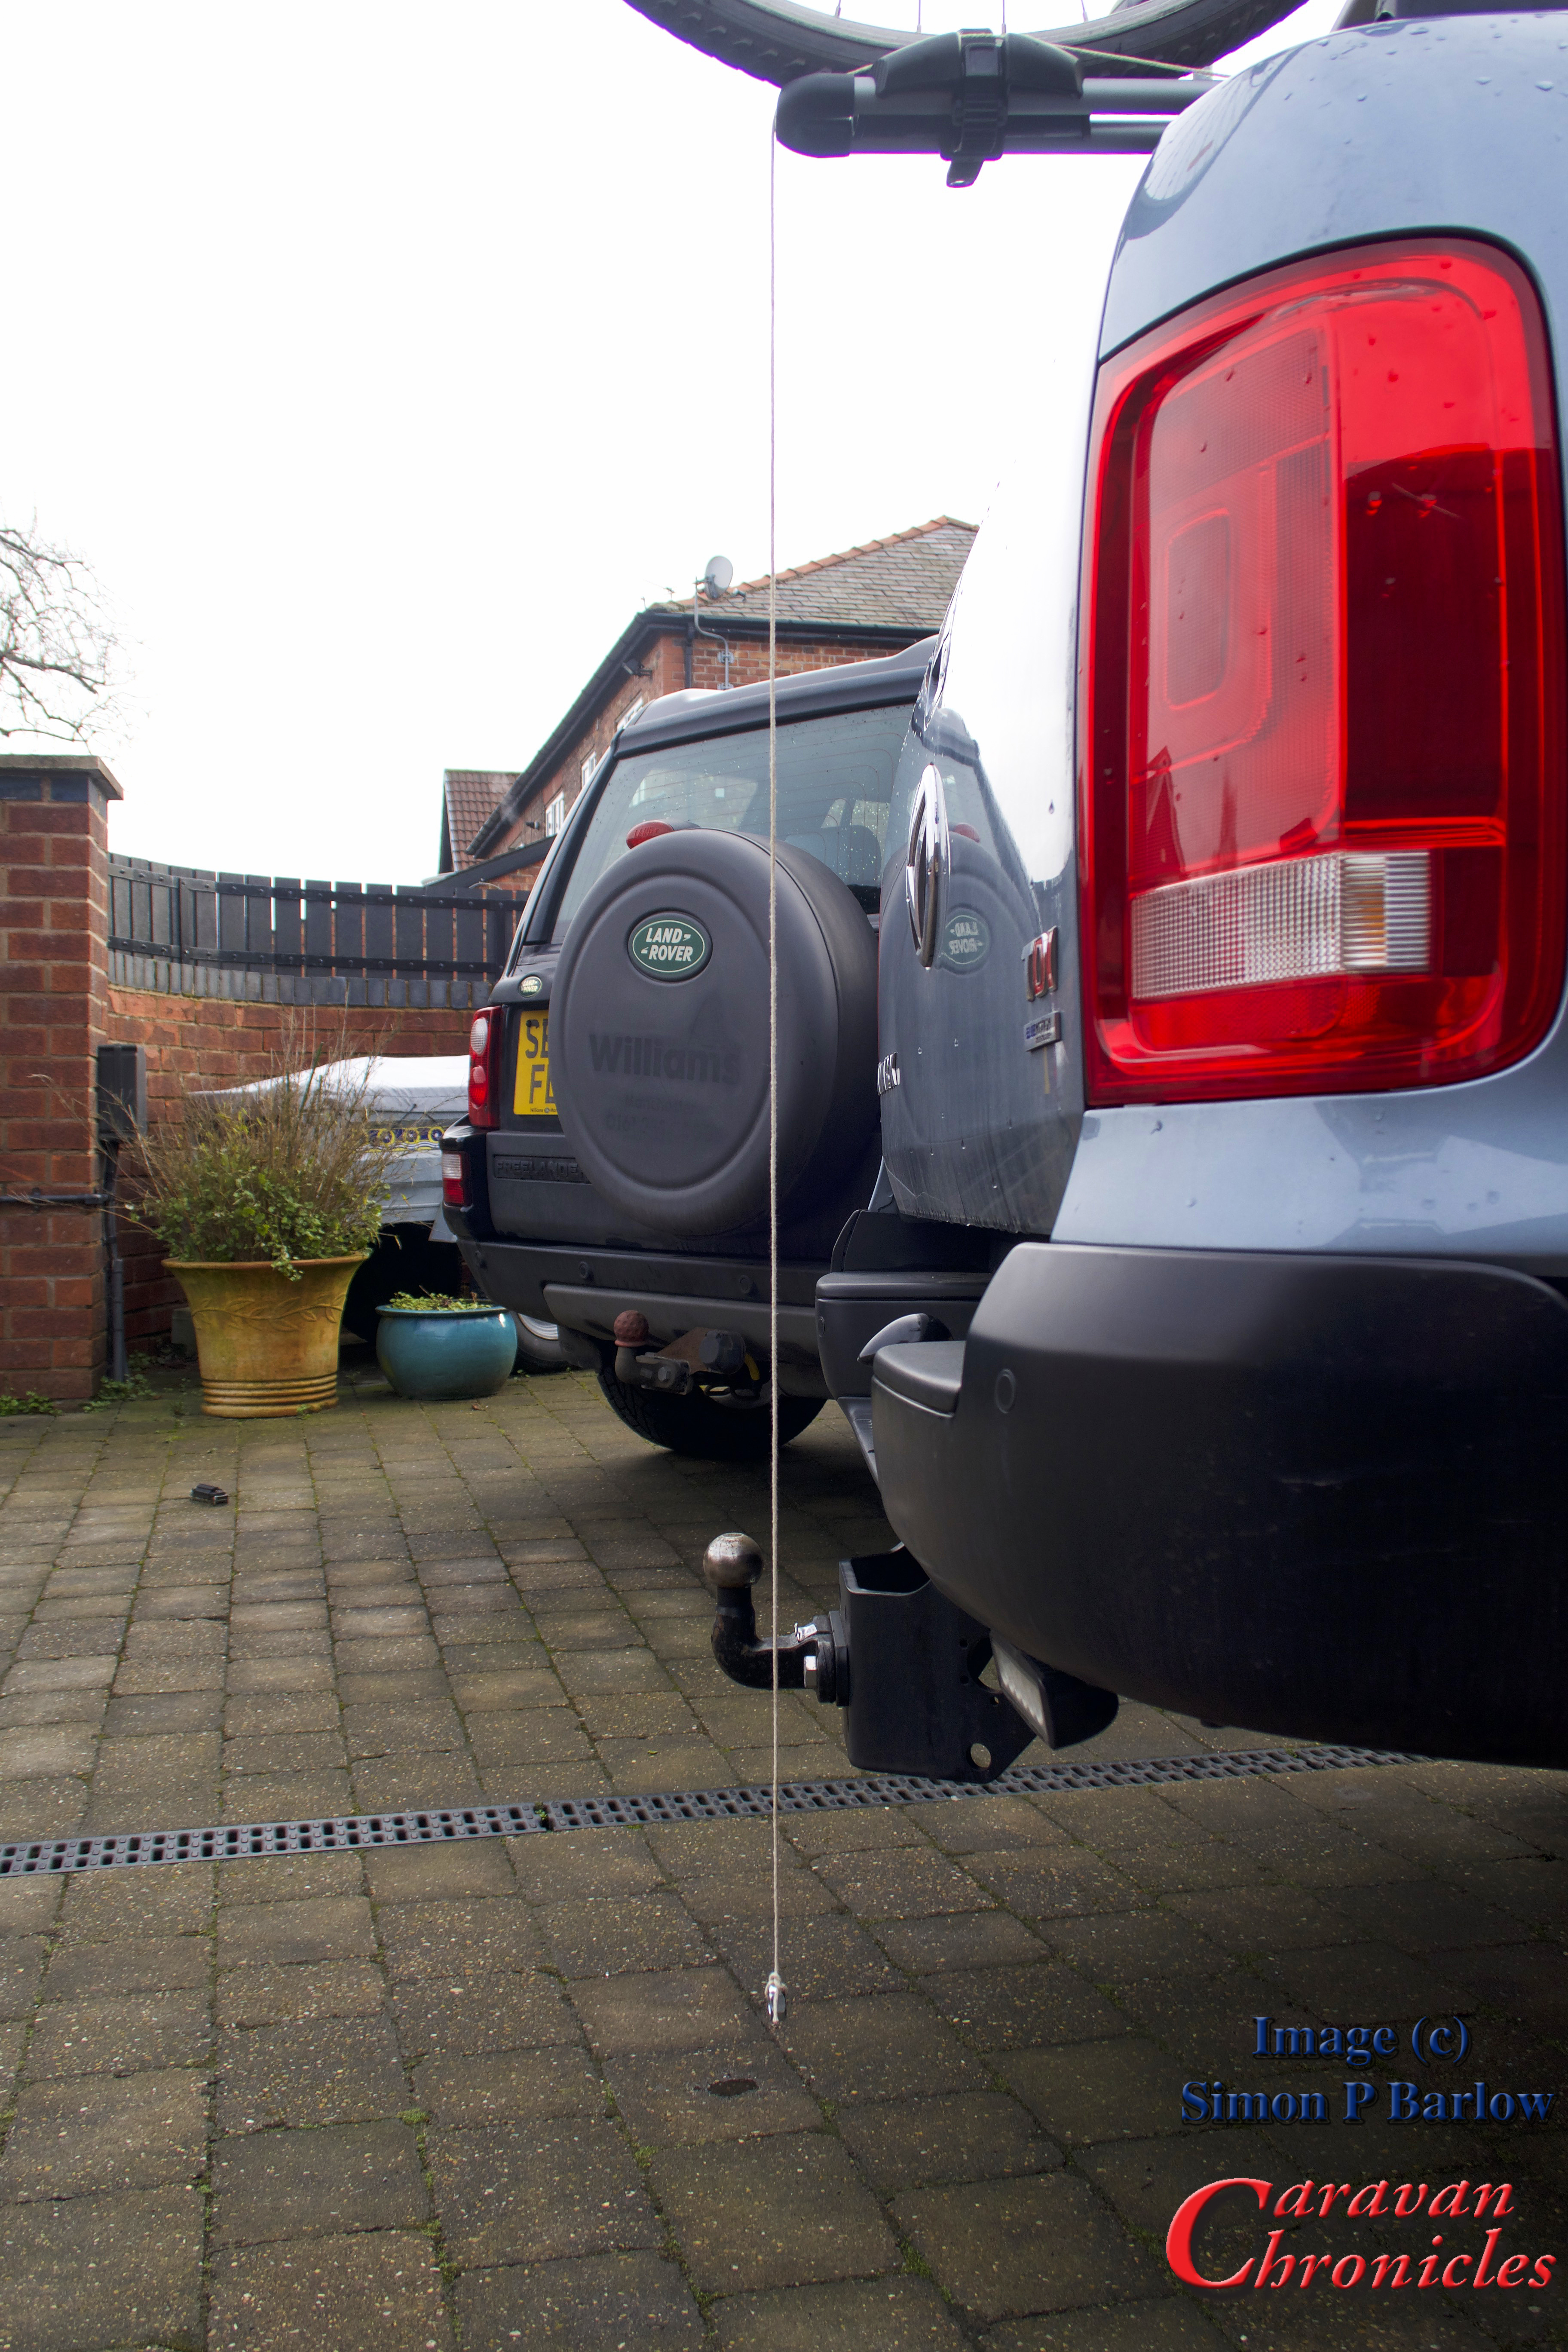
A couple of eagle-eyed mirror aficionados have spotted that we use Milenco Grand Aero 3 towing mirrors… but they also spotted that there was something different about the mounts. OK I’ll have to admit you are an eagle eyed bunch!
On the Amarok, the mirrors are quite big and if I get them adjusted about right I can just see down both sides of the caravan… we’re not 8 foot wide. However, driving without mirrors is more likely to attract attention and it’s easier and safer just to fit a pair. I first went for a brand that I’d used on the Land Rover Freelander, however the Amarok’s mirrors are quite deep and it wasn’t till I tried them that I realised how much of an issue that was….
The other issue I had… I didn’t particularly like the fitting….. it was about on the limits of extension and about 25% of the mirror was obscured by the Amarok’s door mirror… just at the point the would allow you to see the wheels of the caravan. Not ideal.
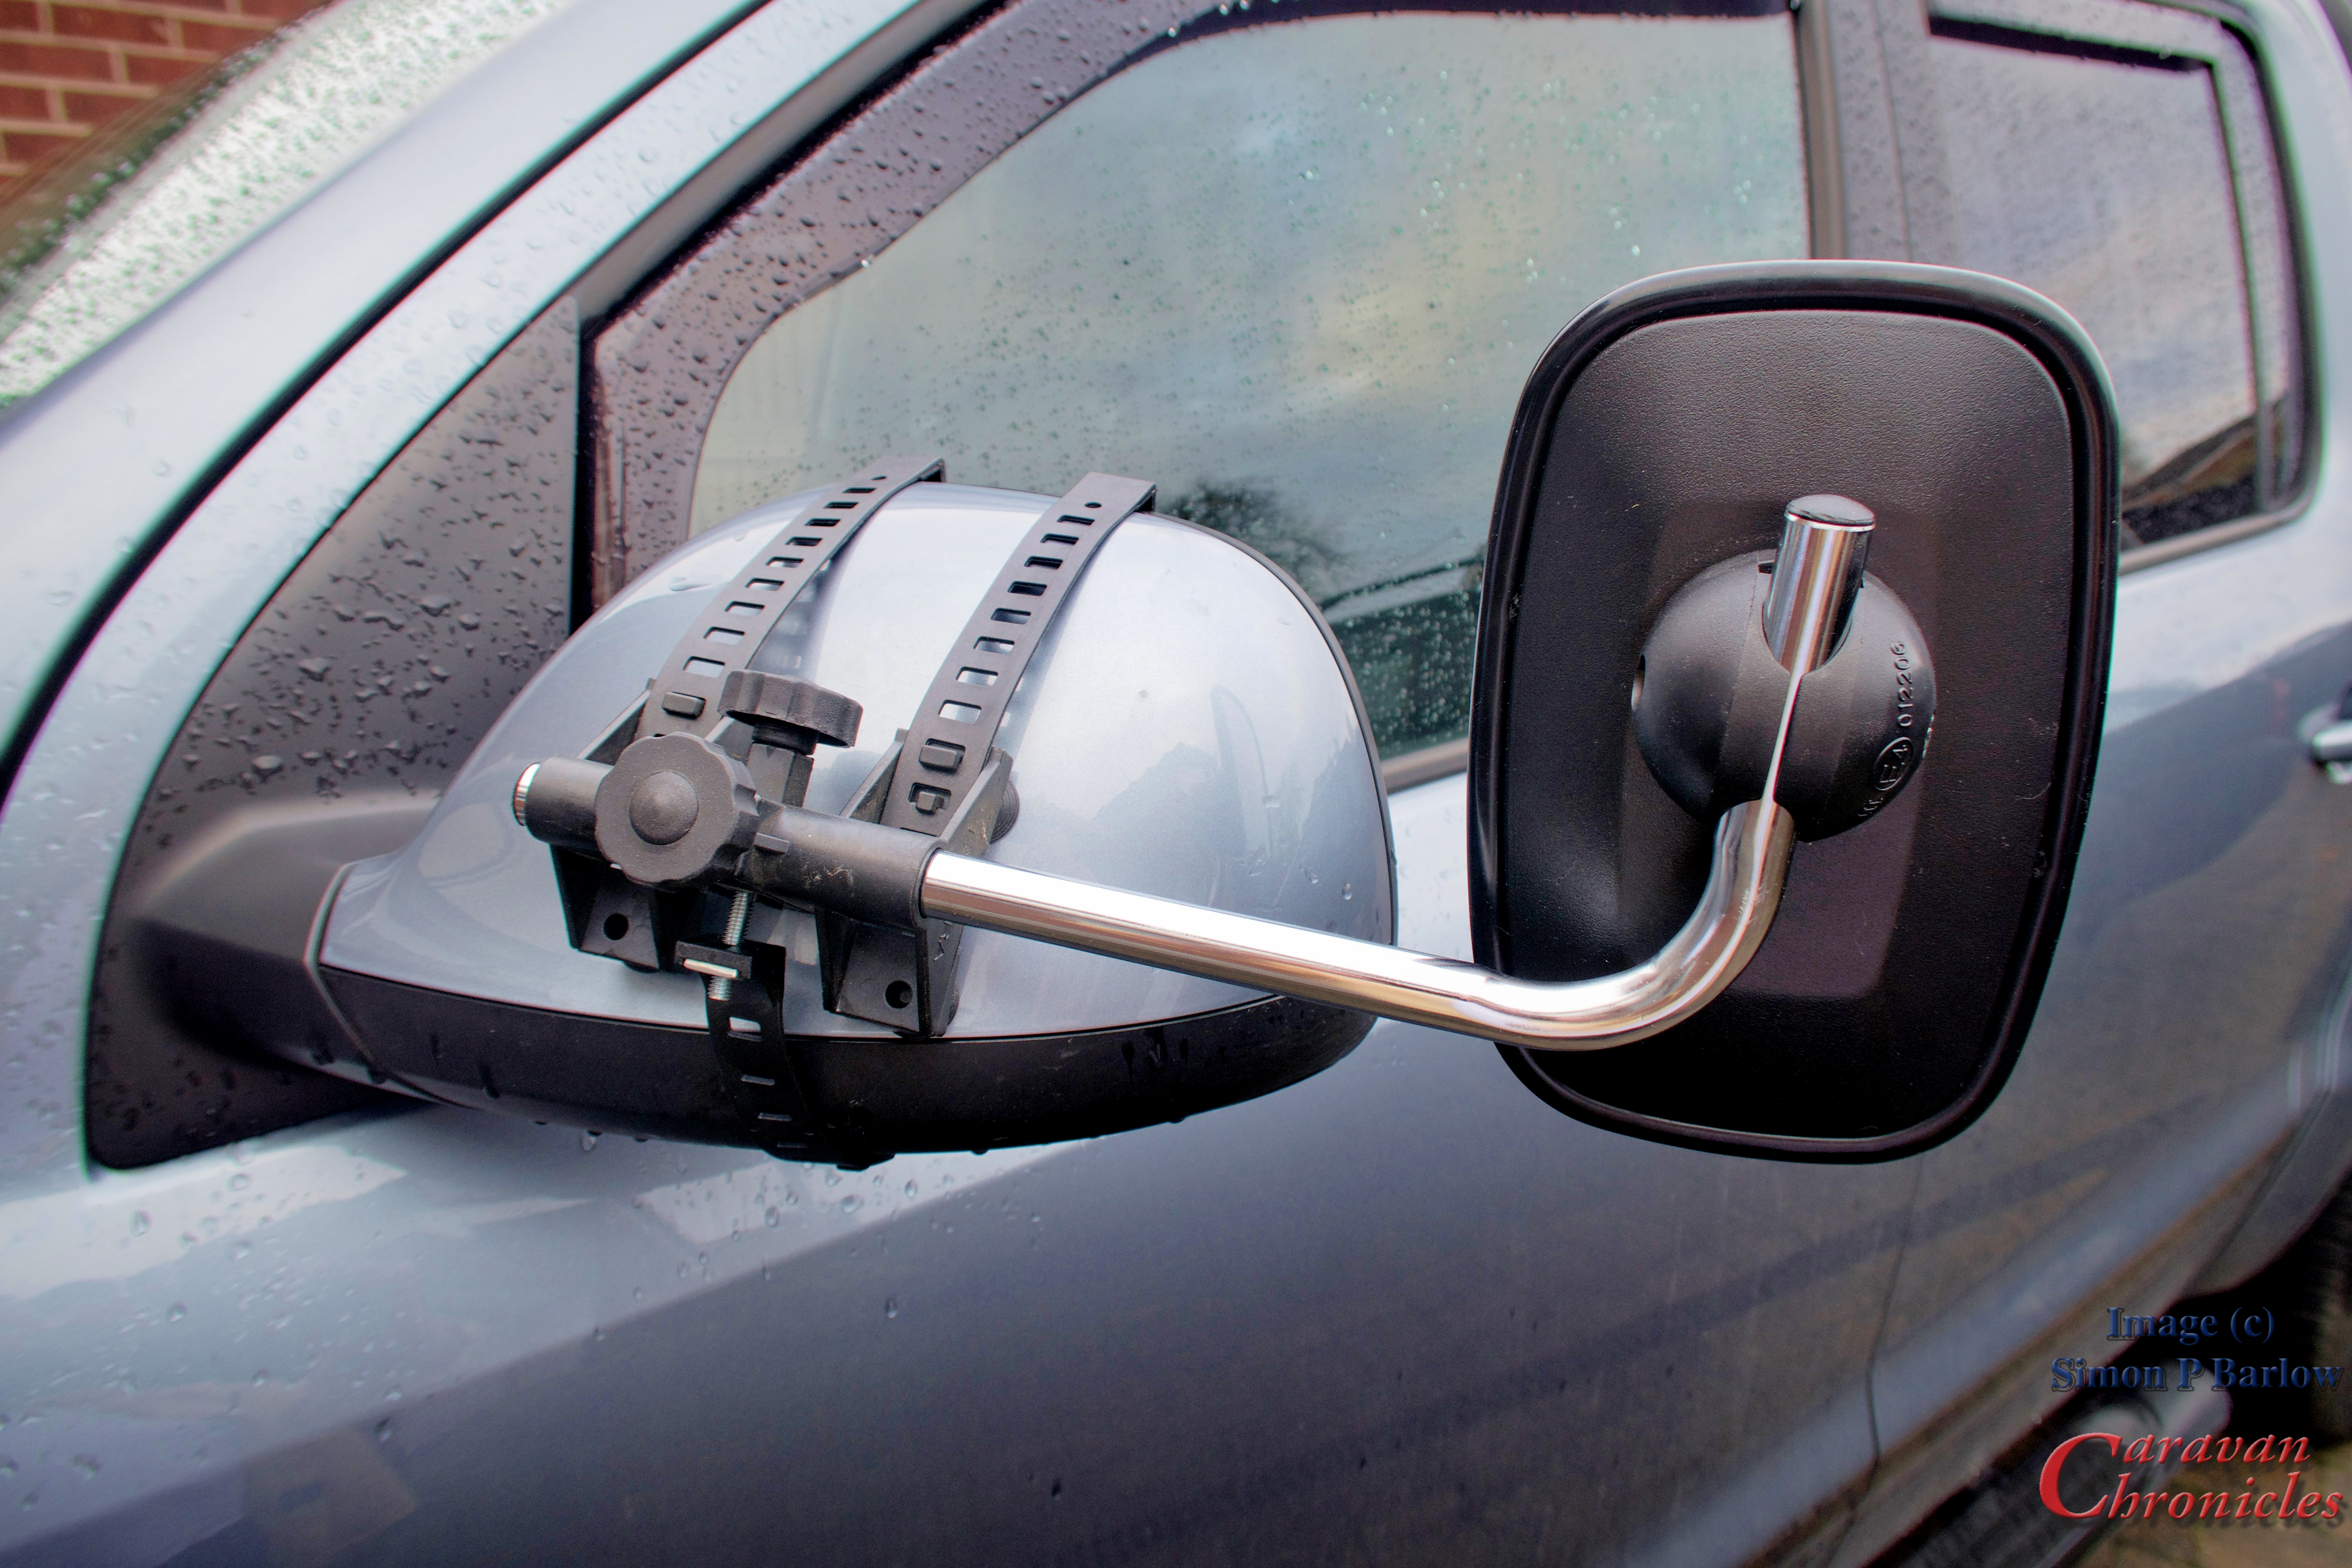
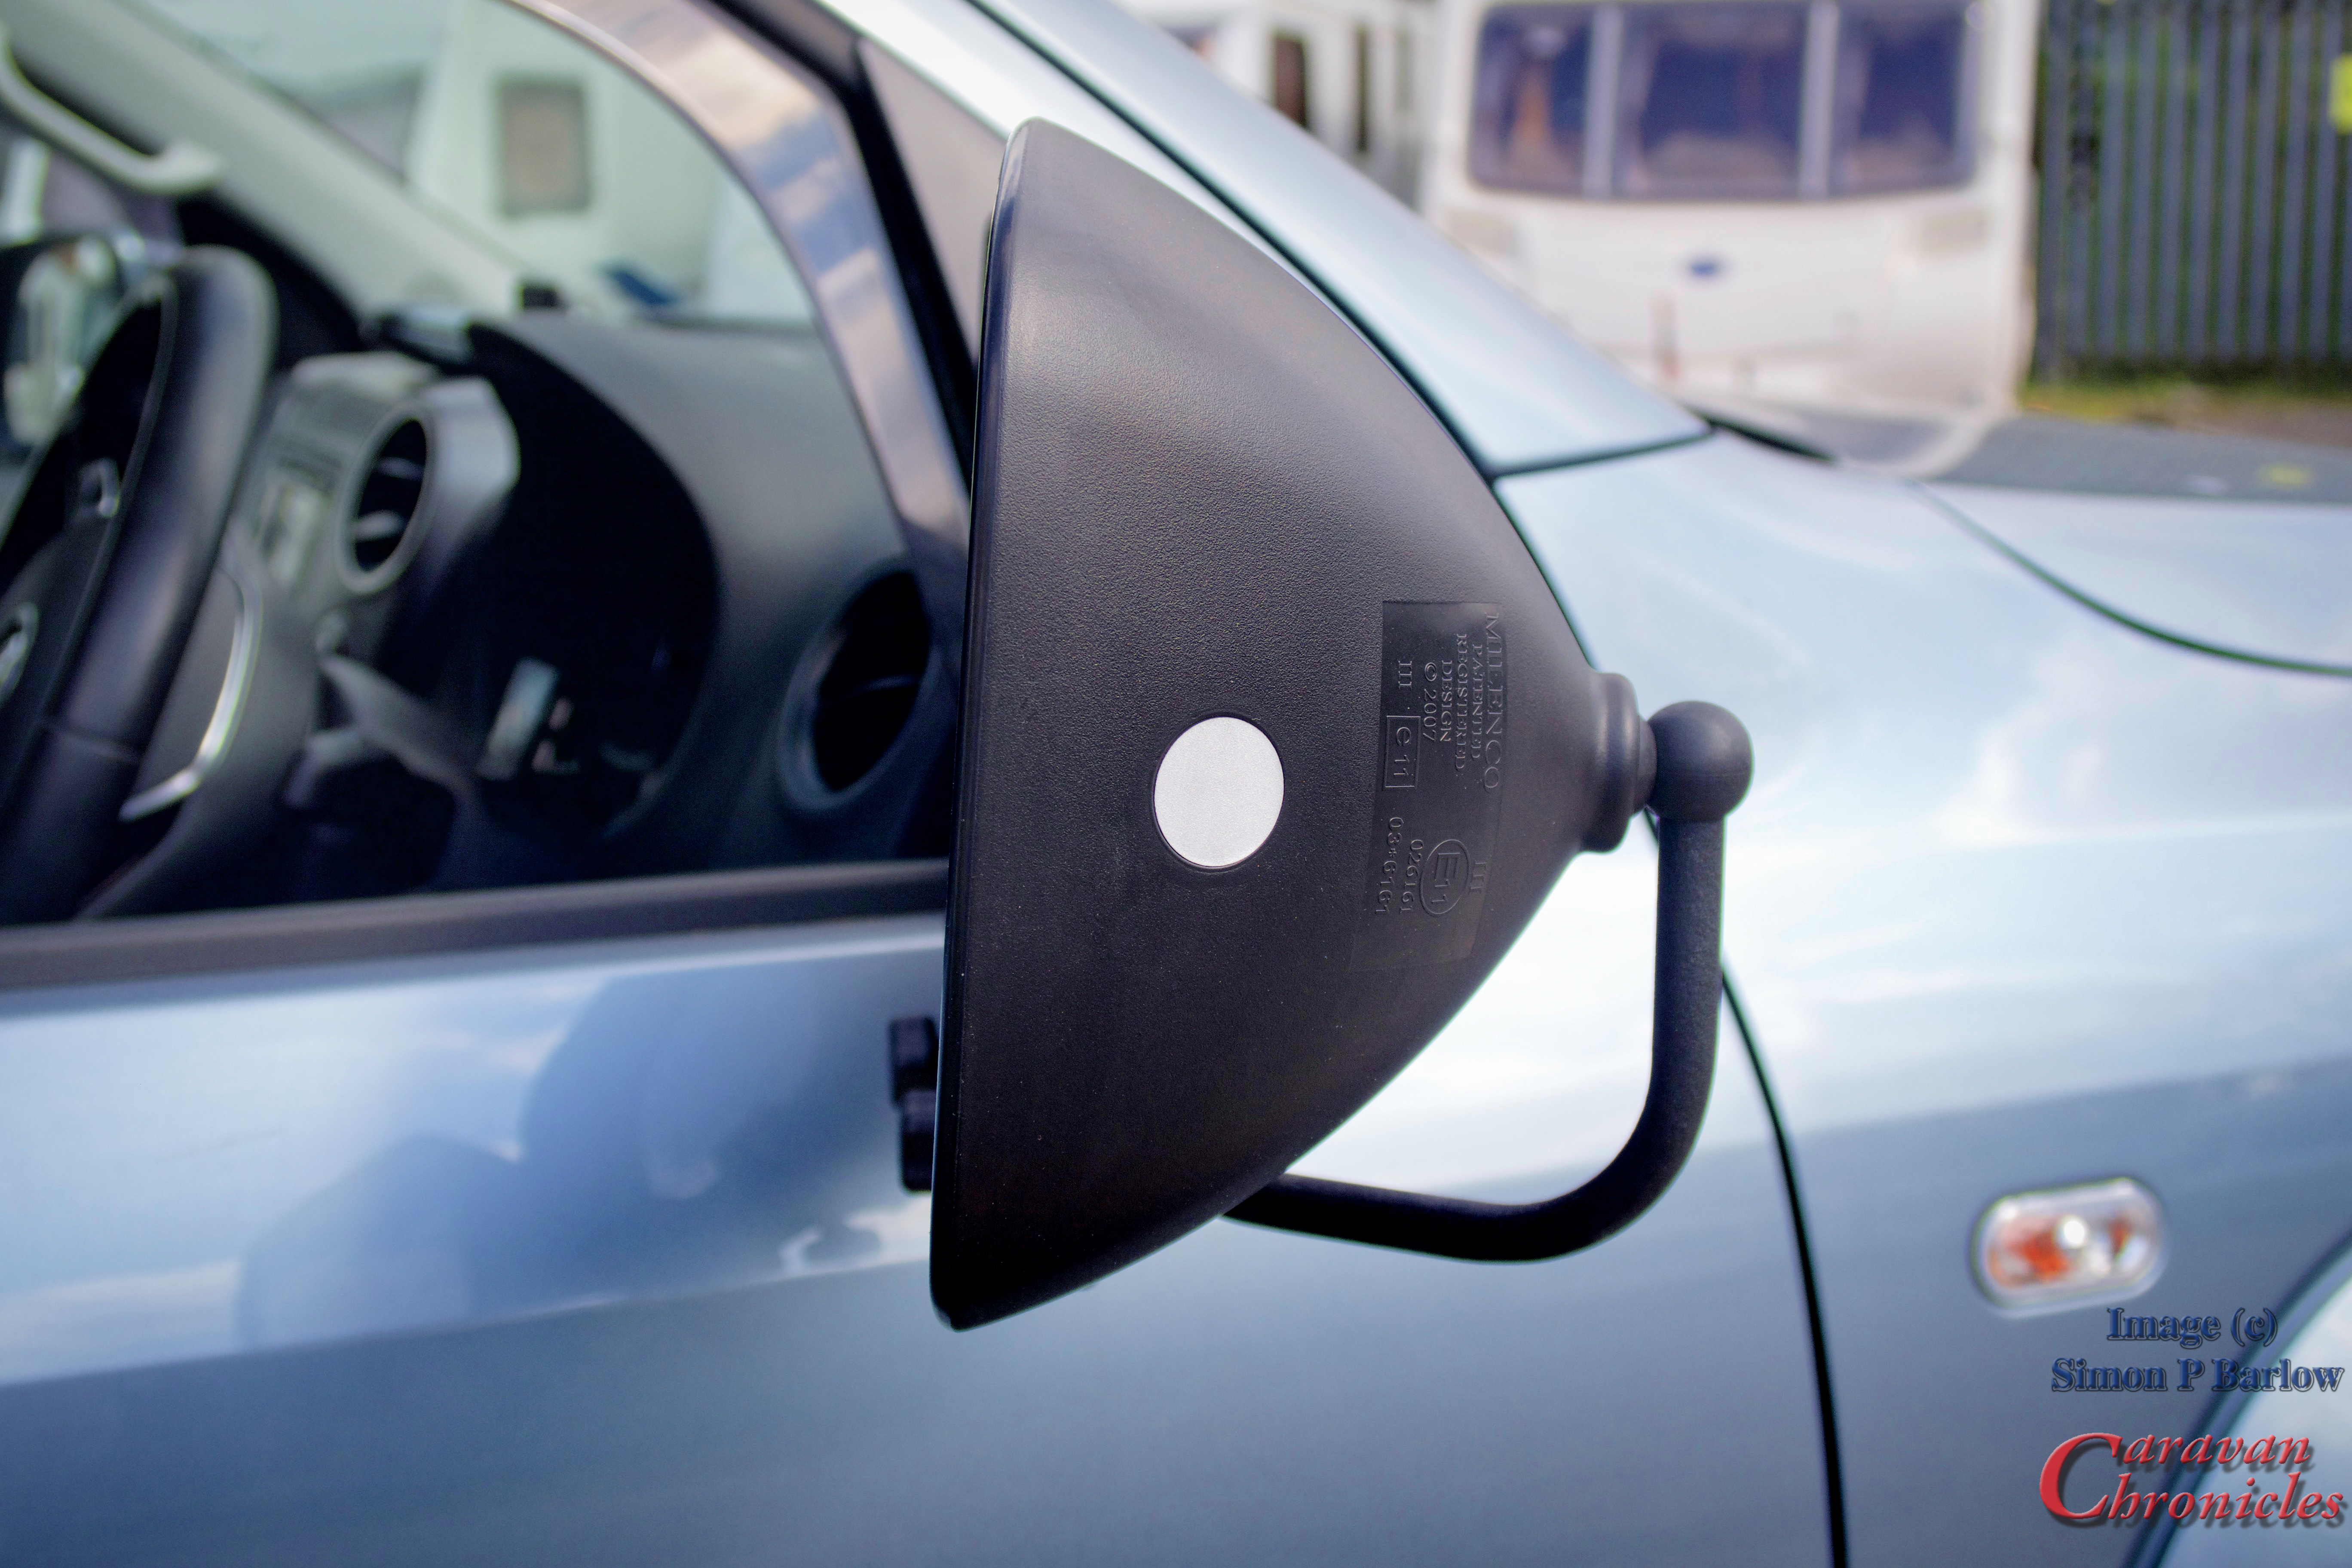
So I looked round for a mirror that would move the face of the mirror rearwards in about the same plane as the normal Amarok mirror. The added depth of the Milenco Grand Aero looked as though it would do the job perfectly.
Actually it was a little too much. As the mounting for the mirror was now on the door mirror plane, not as the previous mirror the back of the mirror housing it shifted the face of the Grand Aero too far rearwards. I liked the vision the Grand Aero gave and the mounting.
To the Bat Cave…
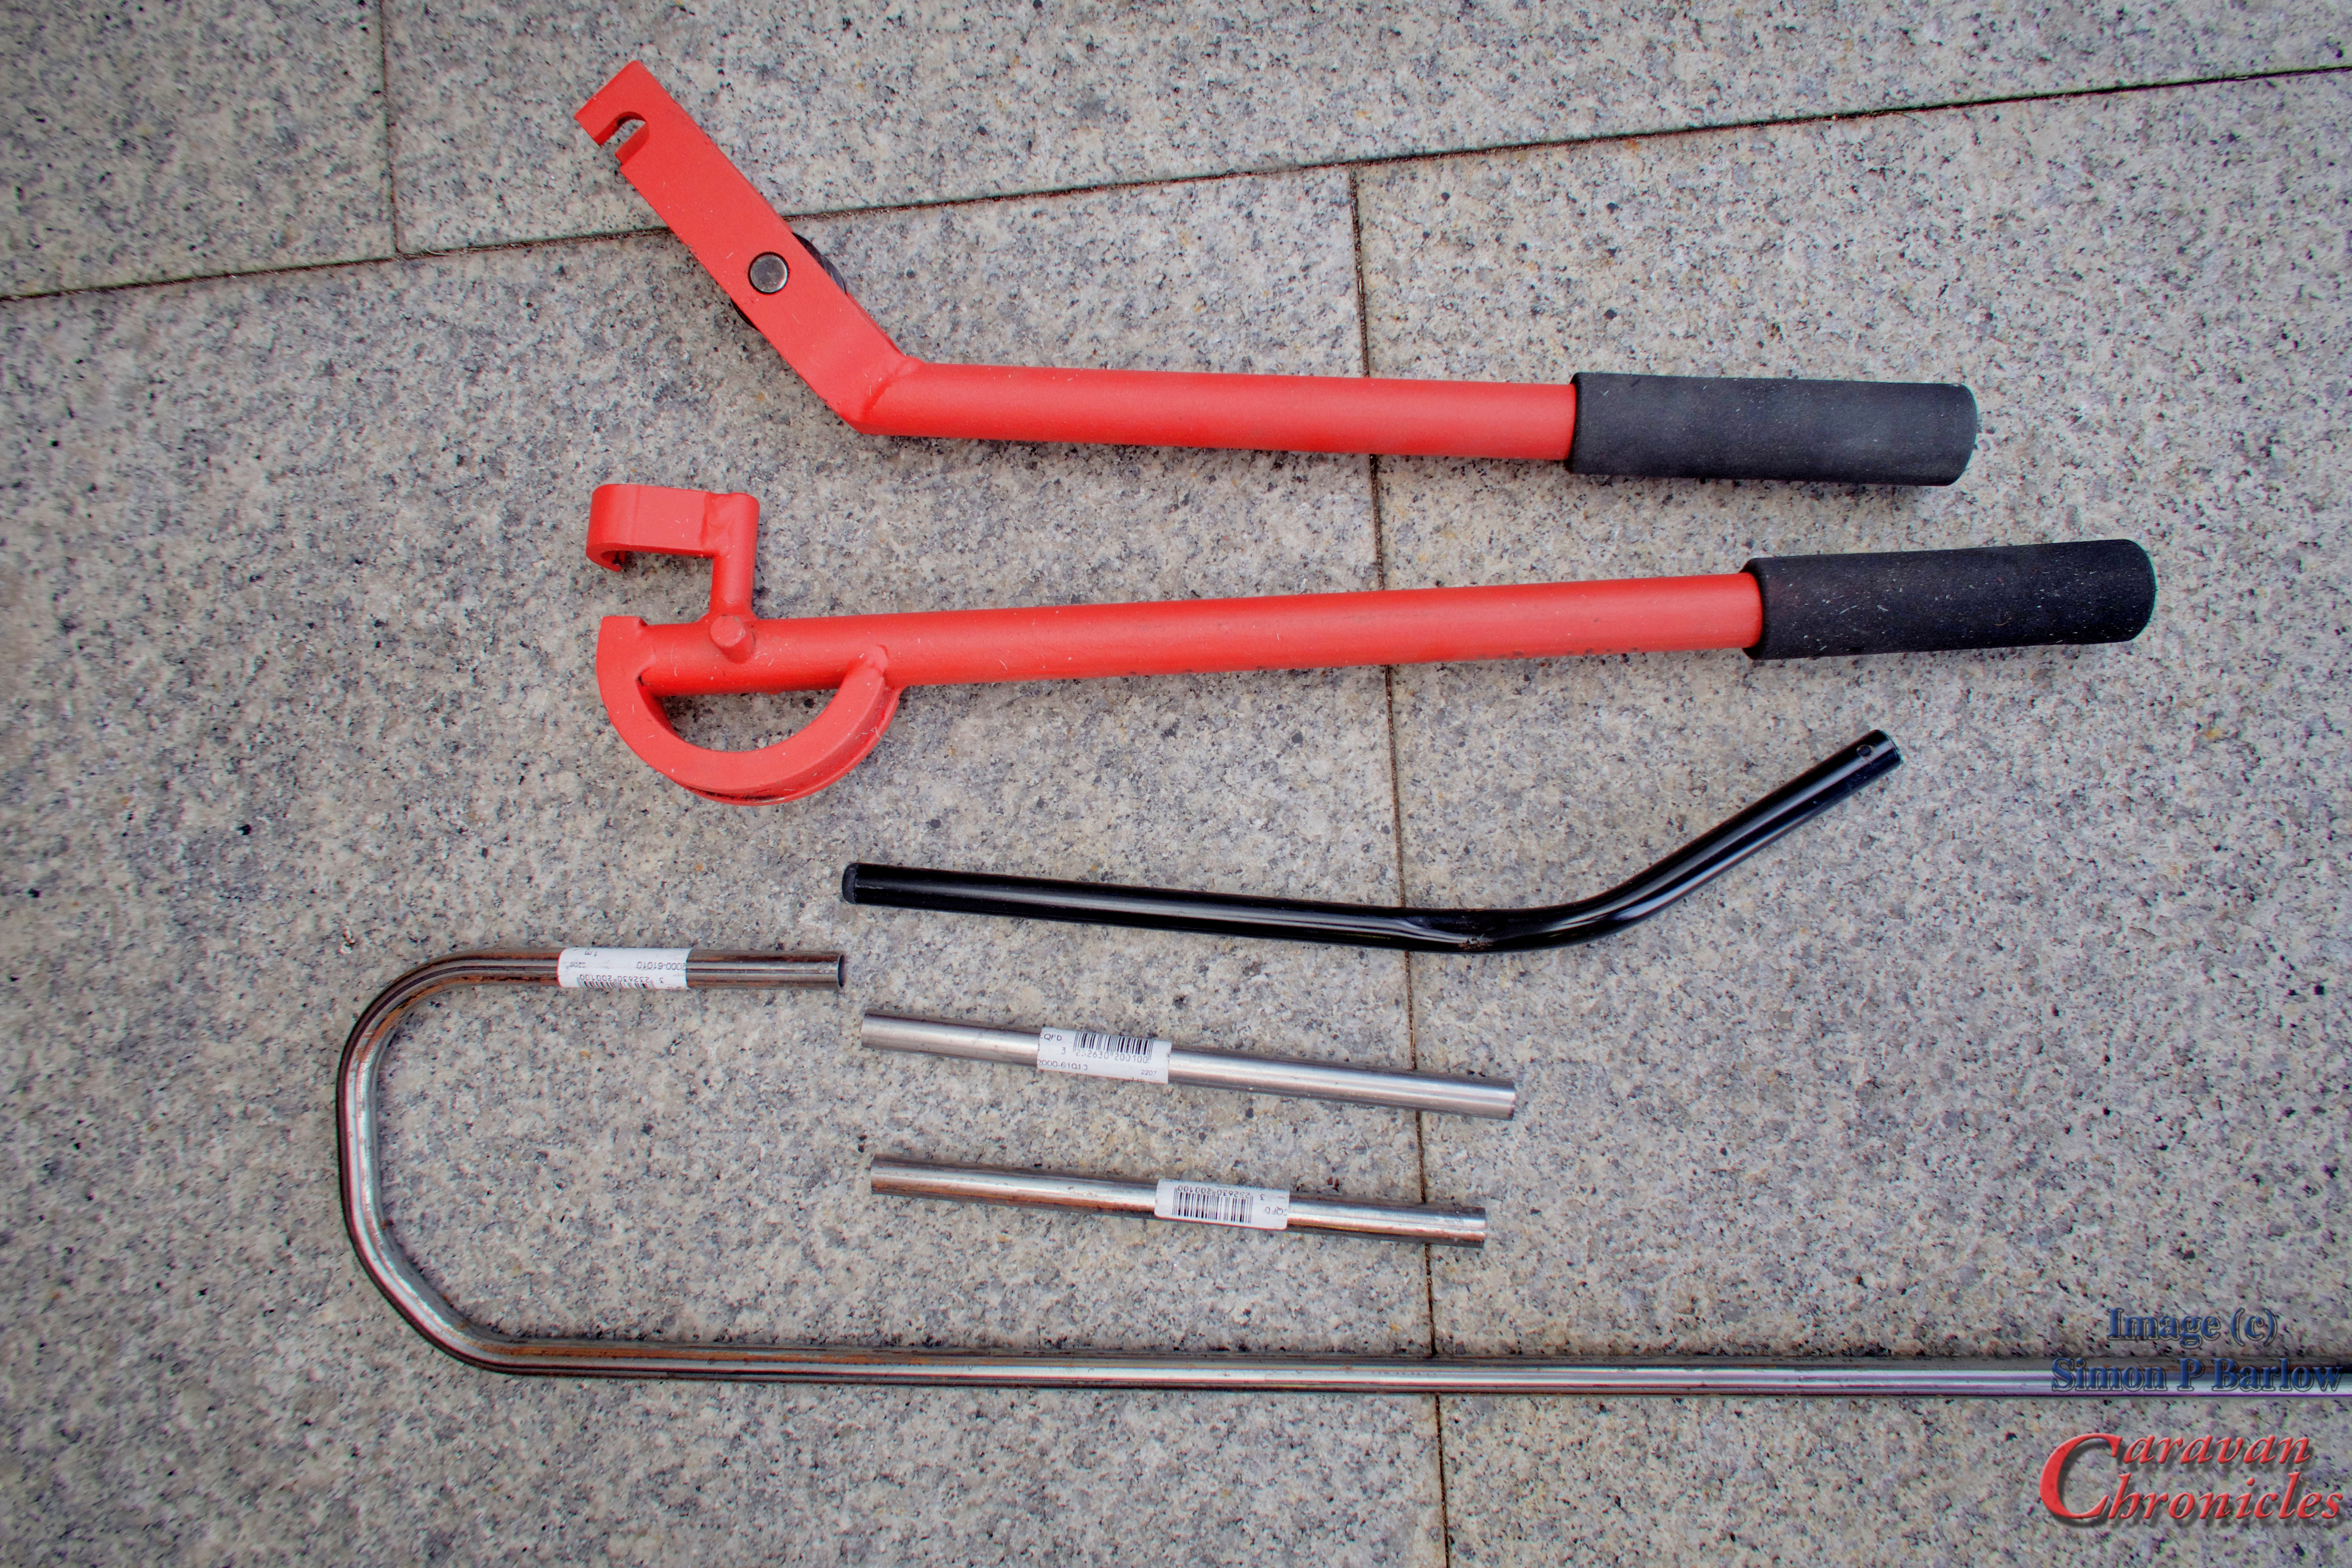
I just happened to have some lengths of 12mm steel tubing and a bending tool. Maybe I could solve the problem without searching round for other products.
I used a welding rod to hand bend a profile that seemed to put the mirror into the right position. I worked out I’d only need two bends to get the mirror in the right position.
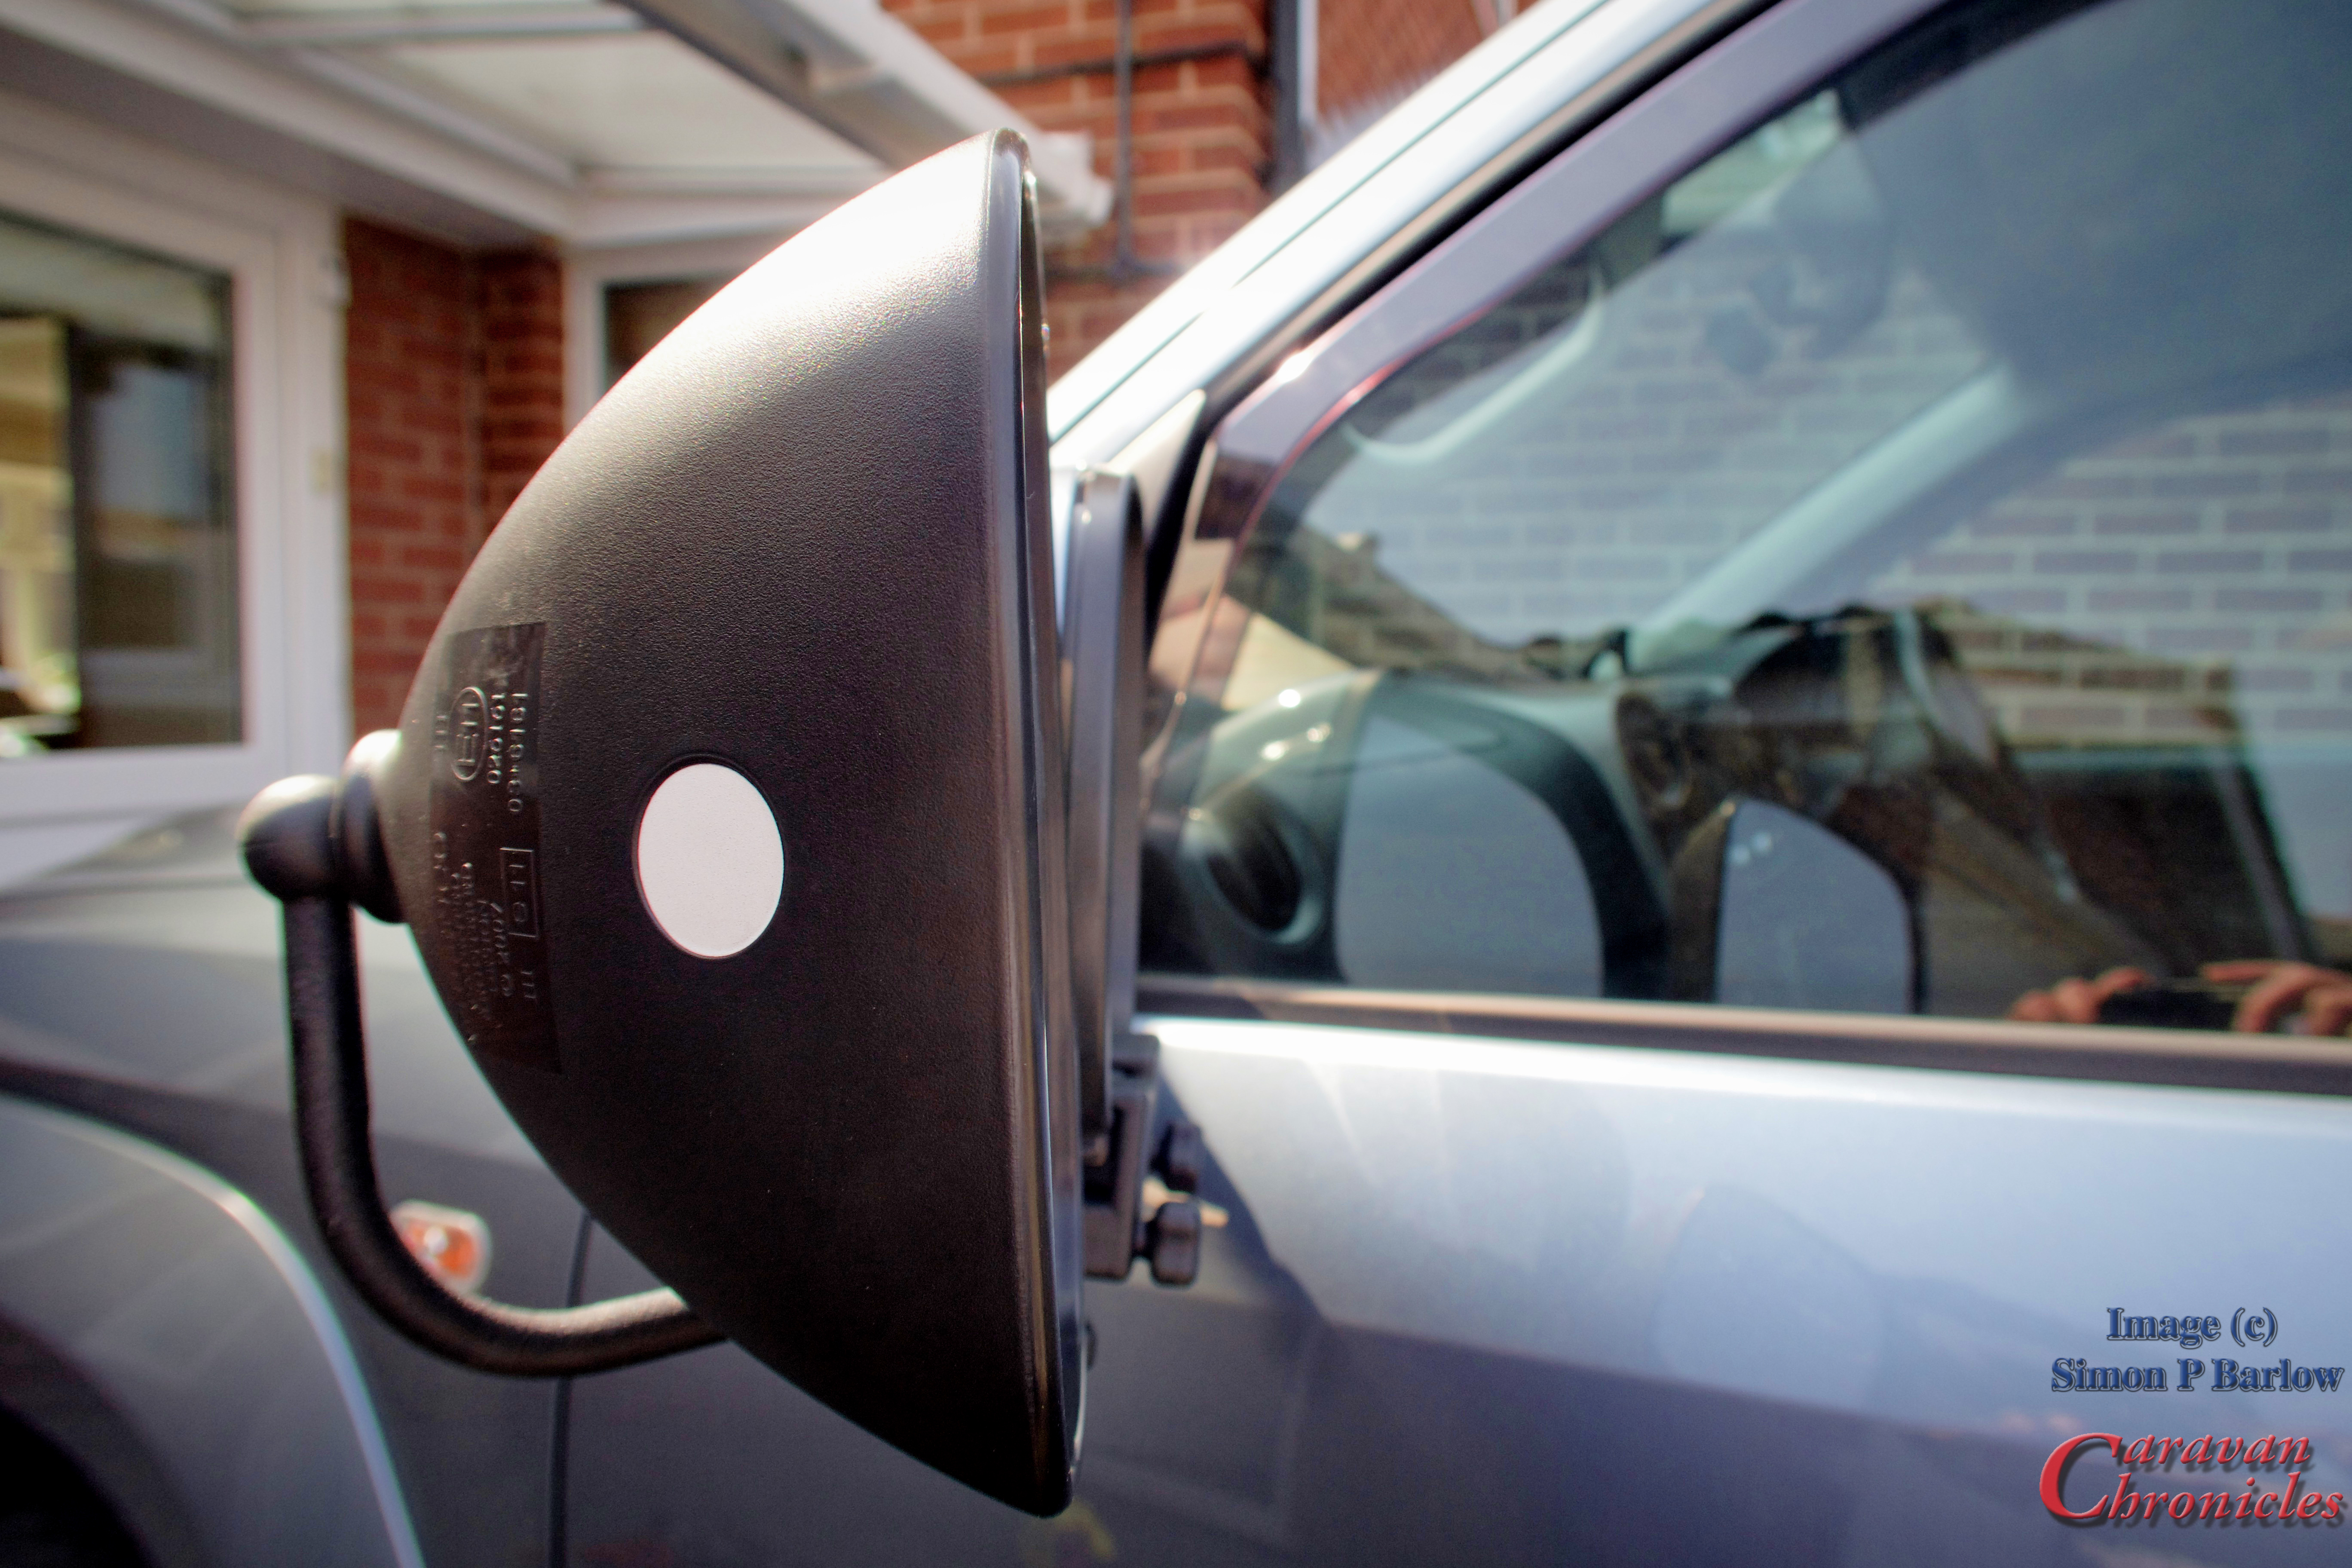
I installed the two mounting brackets on the door mirror in the final position I wanted them and slid a length of tube into them. Marking where I wanted the first bend to be and using an angle finder to approximate the angle that would move the mirror far enough forward so the face was in line with the door mirror face… this then gave me the point to start the bend upwards to get the mirror at the correct height.
Ok before I get a lot of comments asking why installed the mounts on the lower edge of the mirror… two reasons…. if they do move about or squish down on a bit of grit any scratches won’t be seen in the painted area of the door mirrors and from the driving position they don’t obscure my view if I have to look past the top of the door mirrors. I’ve also noticed when its raining I don’t get nearly as much water running down the face of the door mirror. And another reason…. the bottom of the door mirror on the Amarok is not quite as curved and the clamps fitted more securely. I’ve got everything dialed in now to the point where I don’t actually need to adjust the mirrors each time I fit them.
At this point I hadn’t cut the tube to length on the vertical section so I had the chance to adjust the height of the Grand Aero. After a bit of trial and error that involved a clamp and running round to the driver’s seat… and back again to adjust I got what I thought was the right height for me.
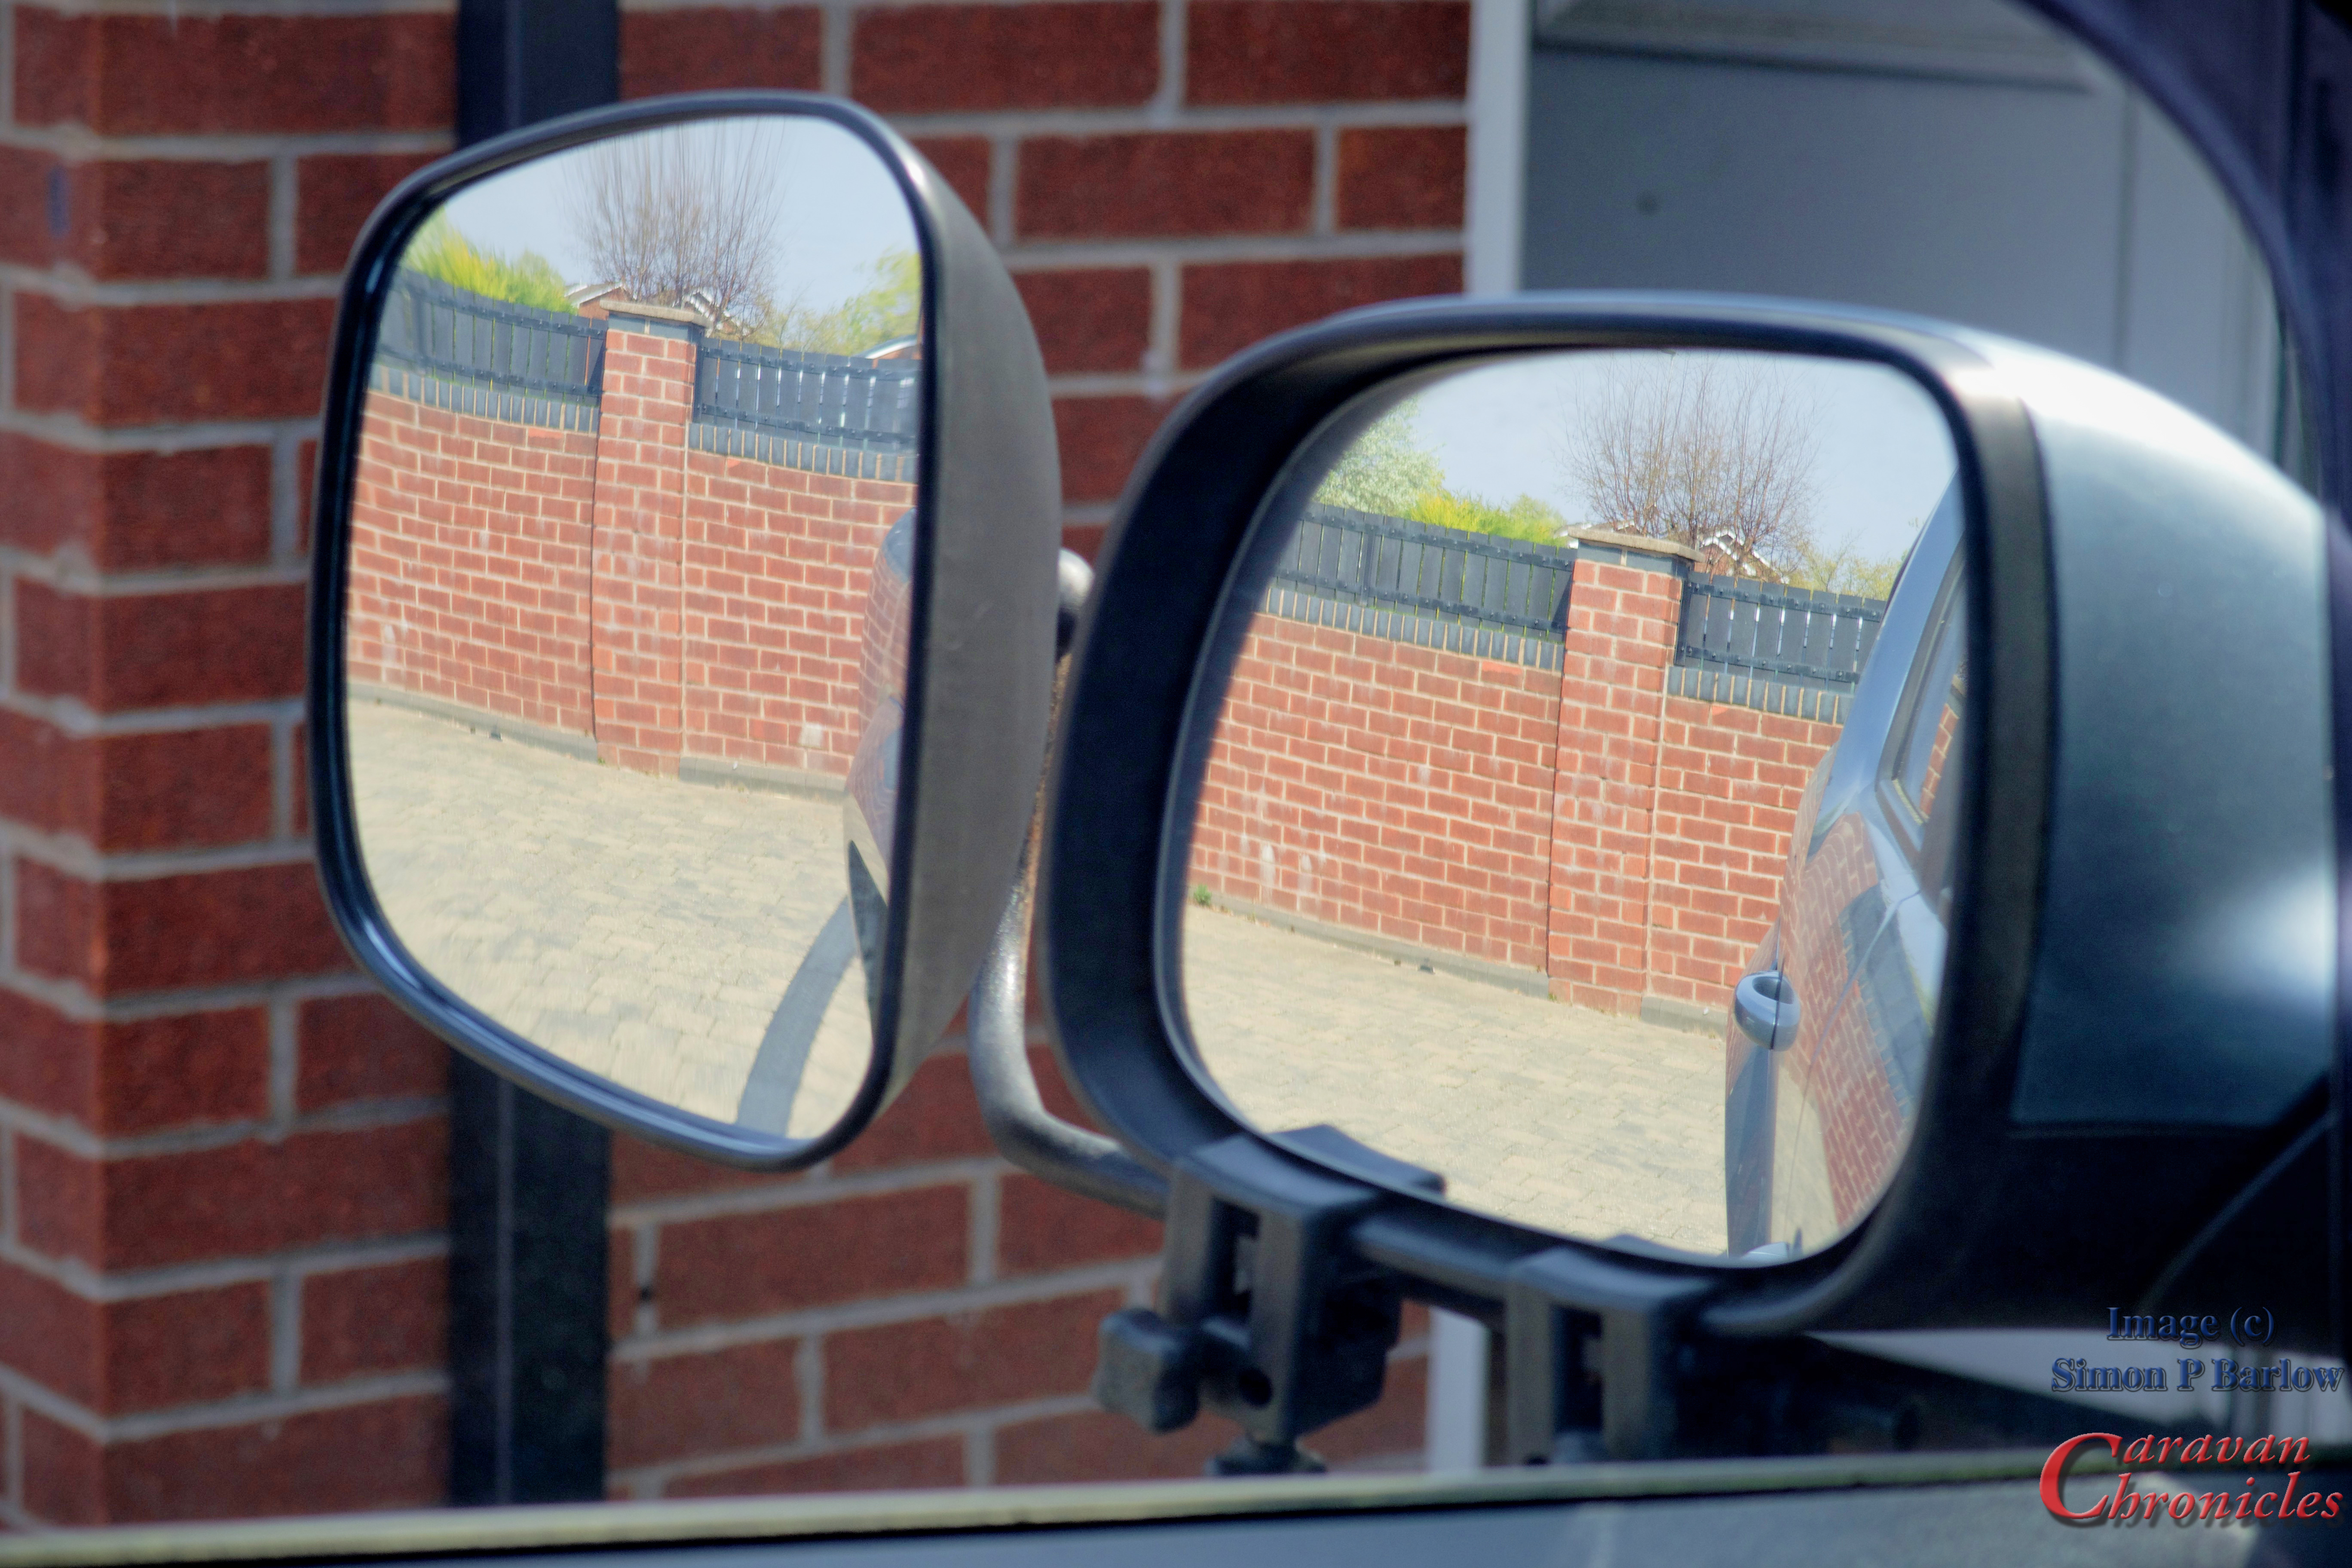
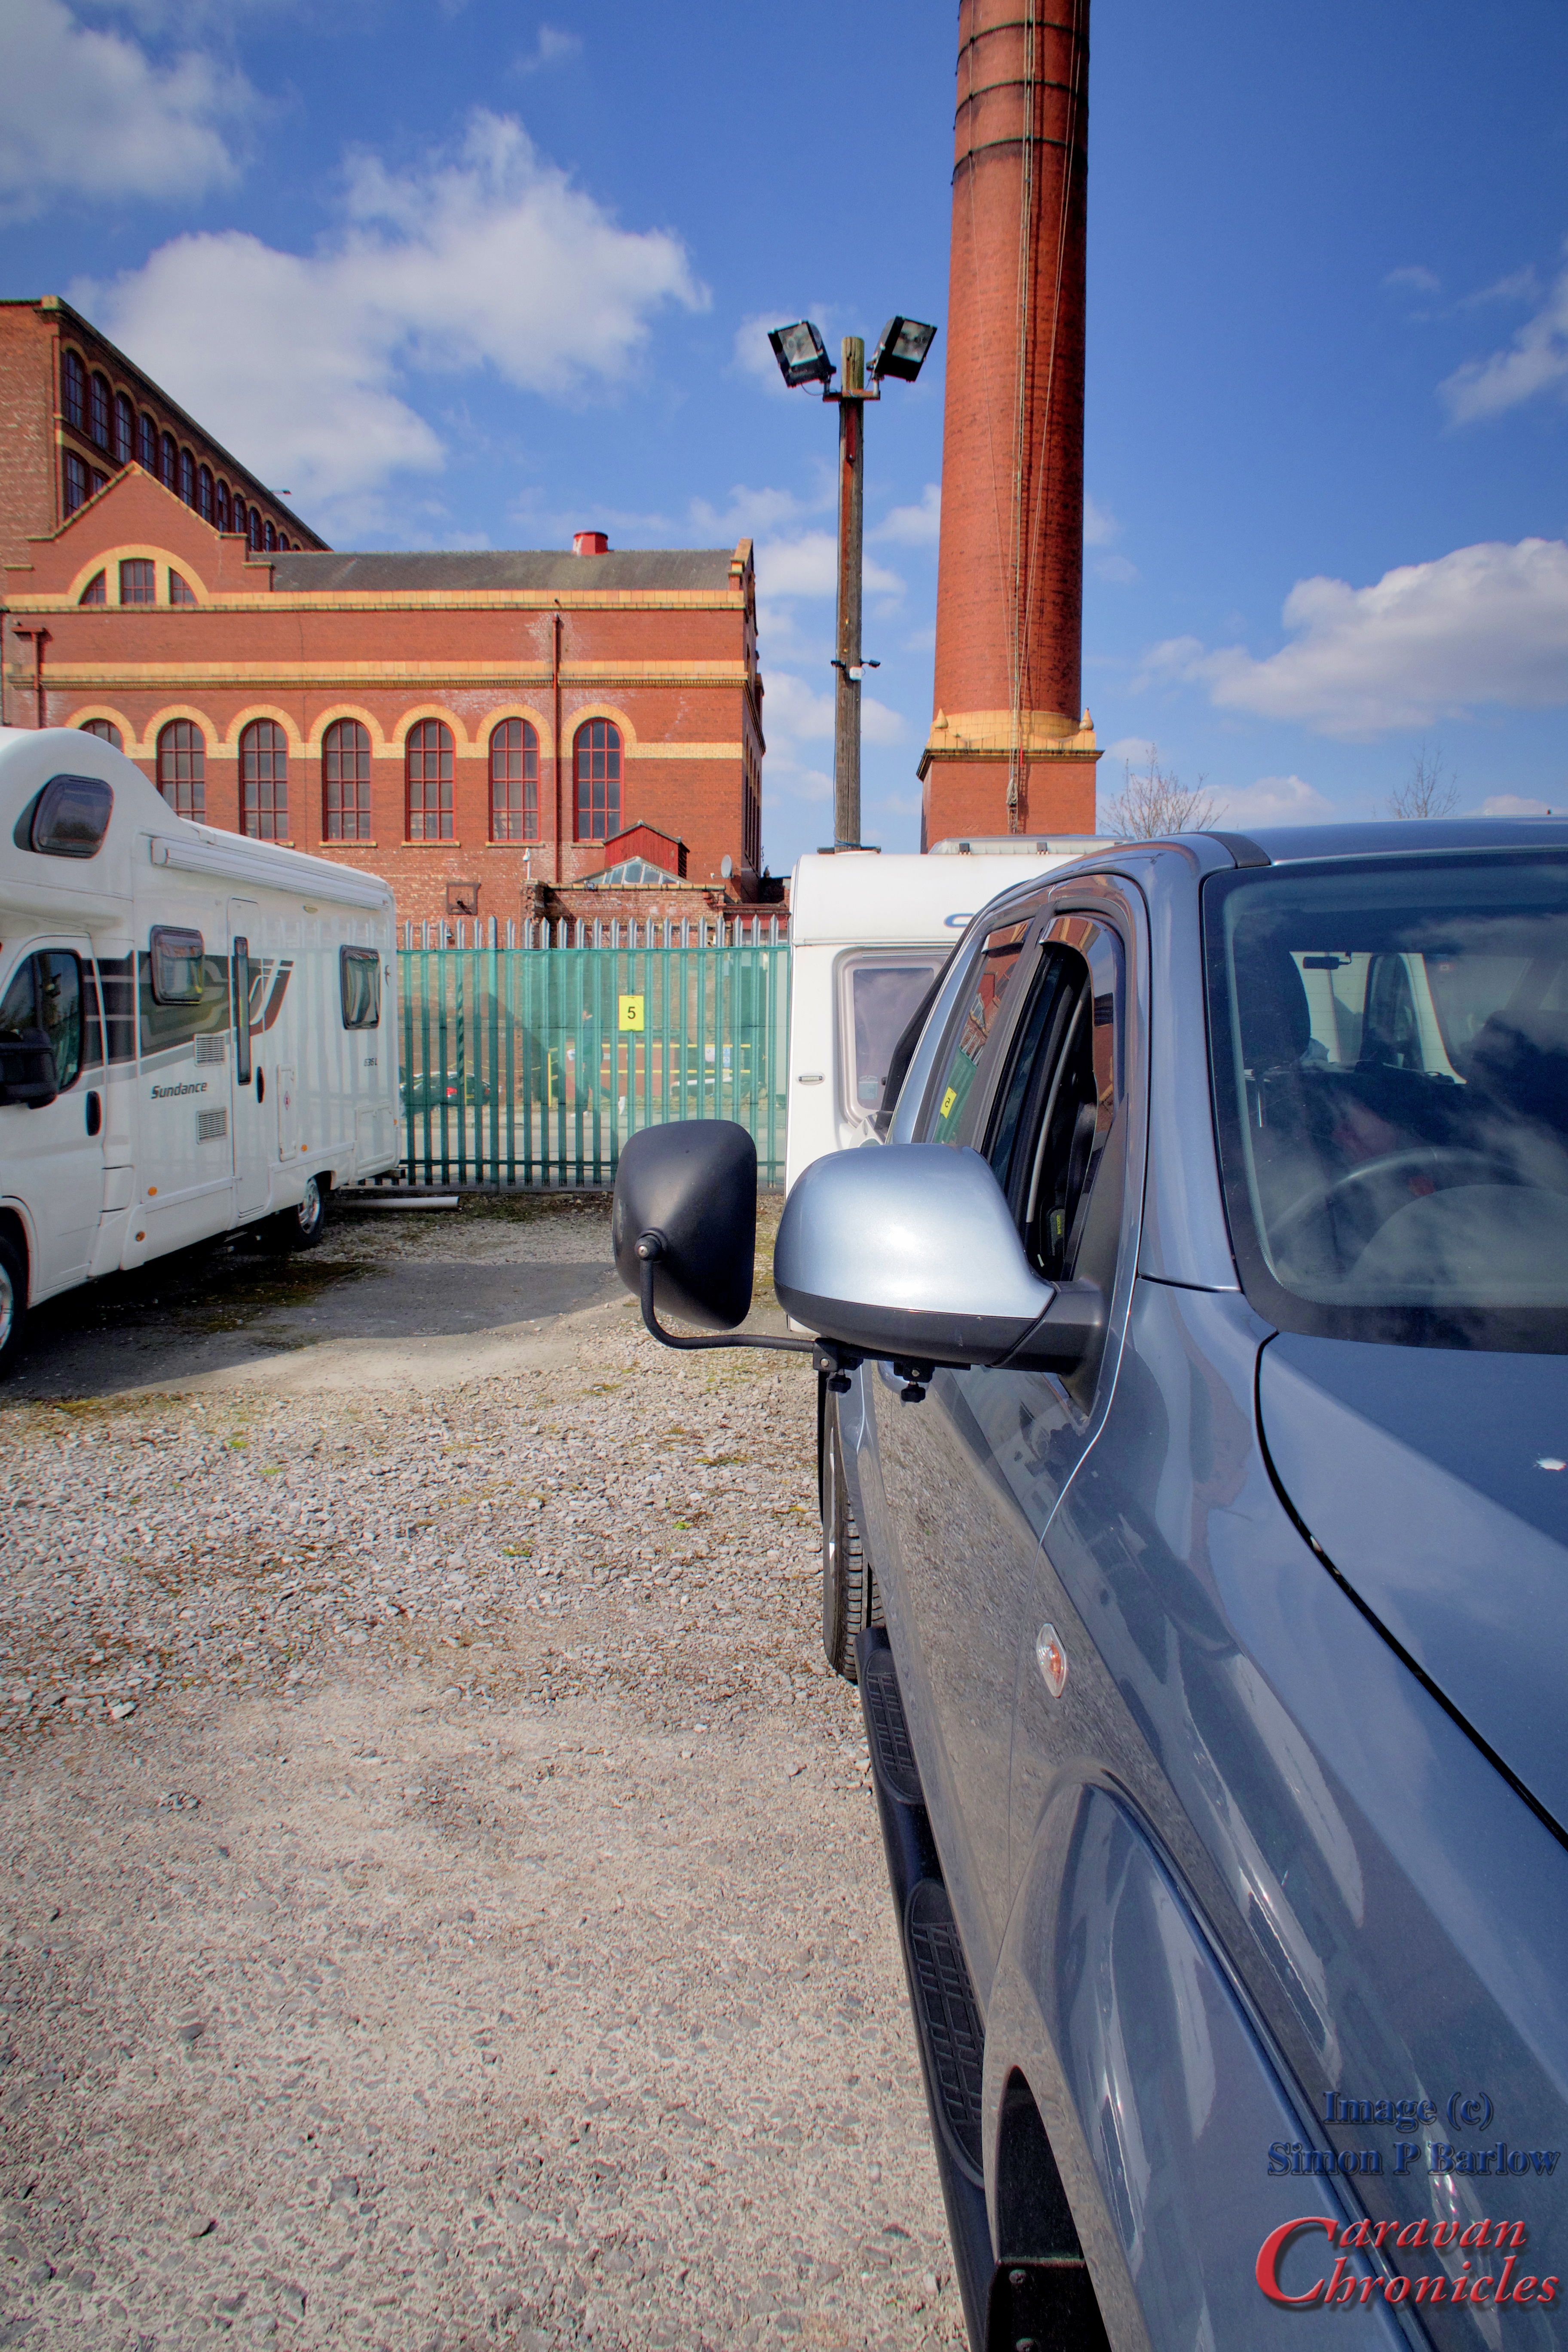
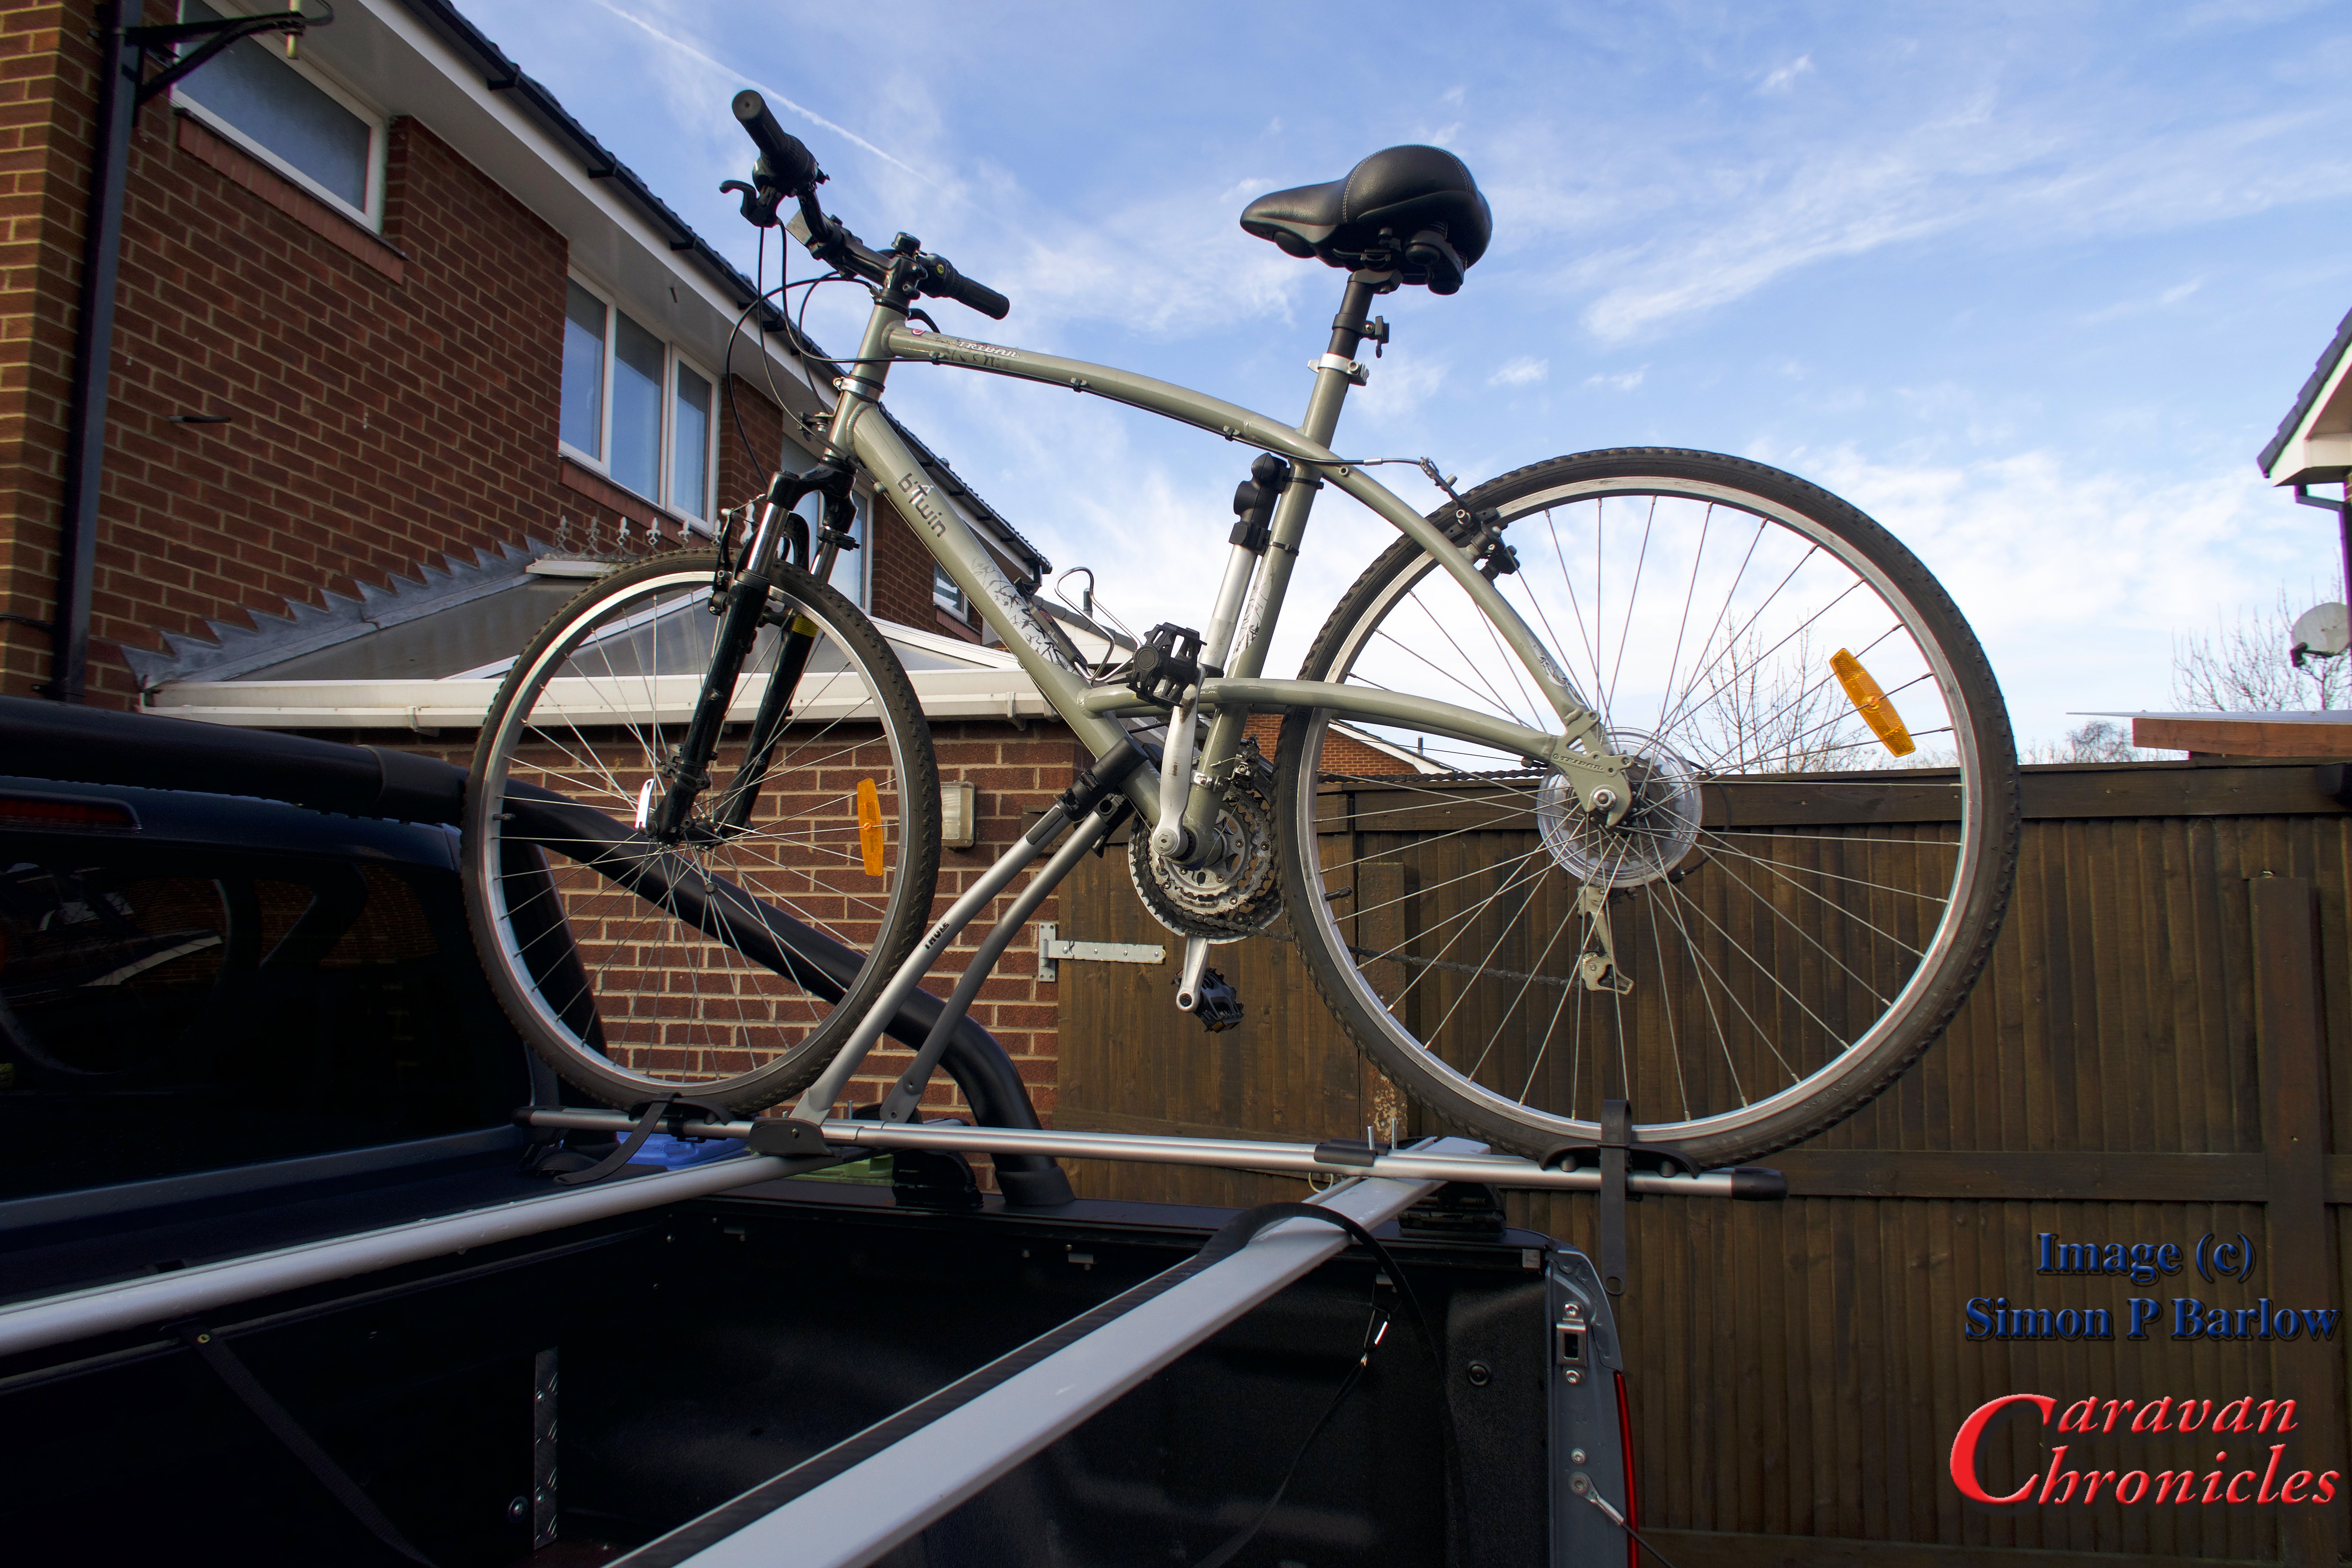
As you can see in the photo above, the reflective face of both mirrors is in near perfect alignment… and for me that makes it easy when driving as I don’t have any perceived shift in focus. The picture below is from the drivers position… I put the camera as close as I could to where my eyes are and I get a great view rearwards. Note that installing the mounting clamps on the bottom edge of the door mirror does not block the forward side view over the door mirror.
The driver’s side was bent the same… just opposite ‘handed’ and the length worked out right for the height too.
When seen from the front… even though I’m not quite ‘square on’ to the caravan, I’m angled slightly to the left when sat in the drivers seat, the mirror is fully outside the extended side line of the caravan giving me a great view.
To finish…
I gave the now bent and drilled tubes a light emery and de-grease followed by couple of coats of grey acid etch primer. This was topped off a few days later with a fine bed liner spray. This game the arms a durable coating plus the bed liner finish is quite ‘grippy’ and allowed the clamps the hold fast without too much yanking on the knobs.
We have been using these now for about two years and for me they work out just fine.
Shopping…
I had all this stuff in the Bat Cave as it was purchased for other projects, so the mirror arms didn’t really cost me anything. Both arms were made out of one 1 metre length of 12mm steel tube.
The tube bender I paid less than £30 for it about 12 months ago from Amazon. The 12mm Steel tube, again from Amazon was around £4 for a 1 metre length and the Truck Bed Liner paint was around £8.
Just for comparison…. the original supplied arm against my contrivance…. and yes… I have now sorted that bit of surface rust out! (I missed a bit when spraying)
We had originally intended to spend a week down at Glastonbury which would have meant the 5 hour drive down would have been an excellent test for the Sterling Power Wildside unit’s first outing. However we had to cancel the trip literally the day before we were due to set off. In the few days between installing the Wildside unit and our planned trip to Glastonbury I had been exchanging emails and phone calls with Charles Sterling talking about some of the aspects of the Wildside unit and the direction that caravan electrics was heading in.
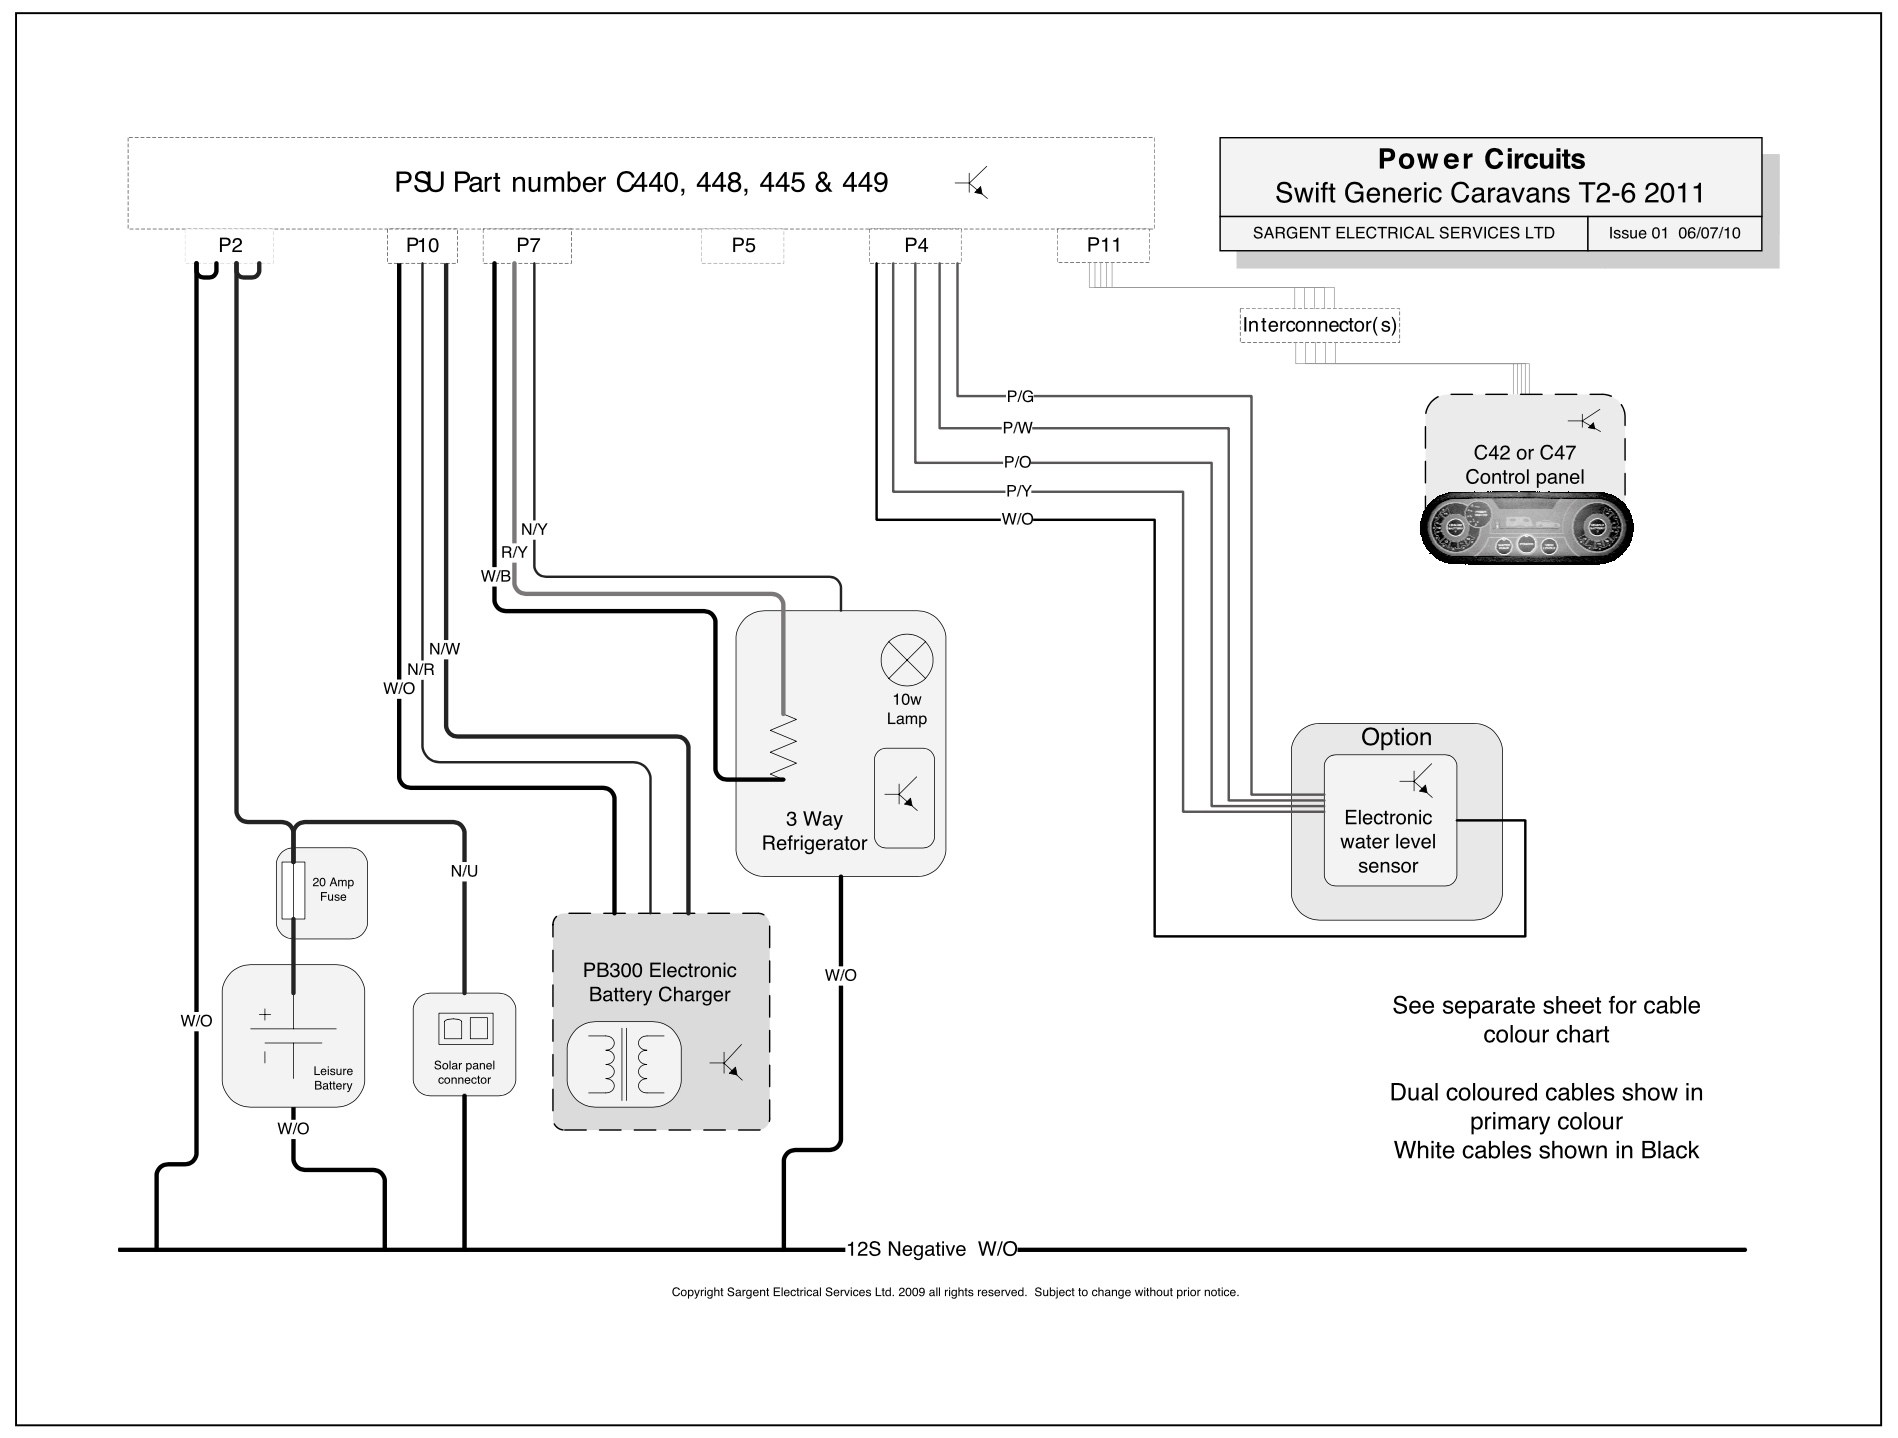
Remember the Six P’s… “Proper Planning Prevents Piddling Poor Performance”… or something along those lines! Before we start hacking away at the multitude of cables (and my email inbox fills up with help requests) we need to pull out the relevant electrical schematics from the handbook. Our caravan is a ‘dealer special’ based on a 2011 Swift Europa 550 fitted with a Sargent PSU.
We can see from the schematic below that the 13 pin plug enters into the caravan and terminates with two connectors – FB6 and FB7 on fuse unit C44 which in our caravan is located just next to the front draws near the water pump. FB6 is all the road lights and we can ignore this.
The cables we are interested in are from pins 9,10,11 & 13 which are coloured Orange, Slate Grey, White/Black and White/Red respectively and terminate in connector FB7. We need to now look for these leaving the Fuse Unit and heading off to the PSU.
The most likely candidate will be connector FB2 with four cables going to connector P1 on the PSU. If they are all 2.5mm² it’s a good clue these are the ones we want. We will need to check these with a multimeter though to be sure. The colours have changed too so we will need to confirm what the new colour is for each circuit.
So that’s the input side of the Wildside potentially sorted out, now we have to find the fridge connections. Looking at the schematic for the Power Circuits we can see that the fridge is connected via four cables. One directly to Neutral and the other three to P7. We can also see from this schematic that the leisure battery is connected to P2 via a 20 Amp fuse. This tells us two things – the wiring is rated for 20 amps and we will have to upgrade the cable size from the Wildside unit to the leisure battery.
For the fridge… We are interested in the two cables that power the heating element and on the drawing they are coloured W/B and R/Y (White/Black and Red/Yellow) and originate from connector P7 on the PSU.
We have now identified on the schematics the cables we need to look for and where they run from and to. Next step is to create a new schematic using the information from these two drawings to show how we are going to connect in the Wildside unit.
To The Bat Cave…. err Drawing Board!
If you are handy at using a drawing package such as Sketch-Up or similar (I use “AUTODESK® Graphic” on my MAC) you can have a go at drawing it out, or simply just use a sheet of paper. The important thing here is you DO draw it out.. this is not an option, its a mandatory task!
TIP: If you are drawing this out by hand on a sheet of paper, it might help to photocopy your caravan schematics and cut out the relevant sections… like the fridge and stick them to your drawing to make it easier.
So here’s my efforts….
If you remember in part 1 I said we will need to make five connections…. not including the neutral. Well we have the five connections. After looking at the layout I decided not to cut the current leisure battery connections to upgrade, but to install a new Positive and Neutral cable alongside the original cables. This will mean however I will need to drill a new hole in the battery box and install a sealed cable gland.
The three cables that we cut on P1 that are now unconnected should, in theory not be part of any circuit. However to be sure I’m going to terminate both the neutral cables (originally connected to Pin 11 and Pin 13 to the neutral point on the Wildside unit.
The cable that was originally connected to Pin 9 I’ll just crimp on a blind connector and secure out of harms way. I am not sure if this might need to be connected to a +ve supply. There are a couple of things that I’ll need to check, for example, the toilet flush always works when the caravan is connected to the tow vehicle – with or without the engine running ( handy if a quick P(it) stop is required!).
Now… To The Bat Cave!
Well it might be a couple of days as I have just ordered a few bits and pieces I don’t have in stock in the workshop… and I’m still procrastinating whether to do the install as a video to accompany my written ramblings.
Coming up in part 3. I attempt not to destroy our caravan, do a lot of crimping, consume a lot of coffee and I may be swearing a lot on camera!
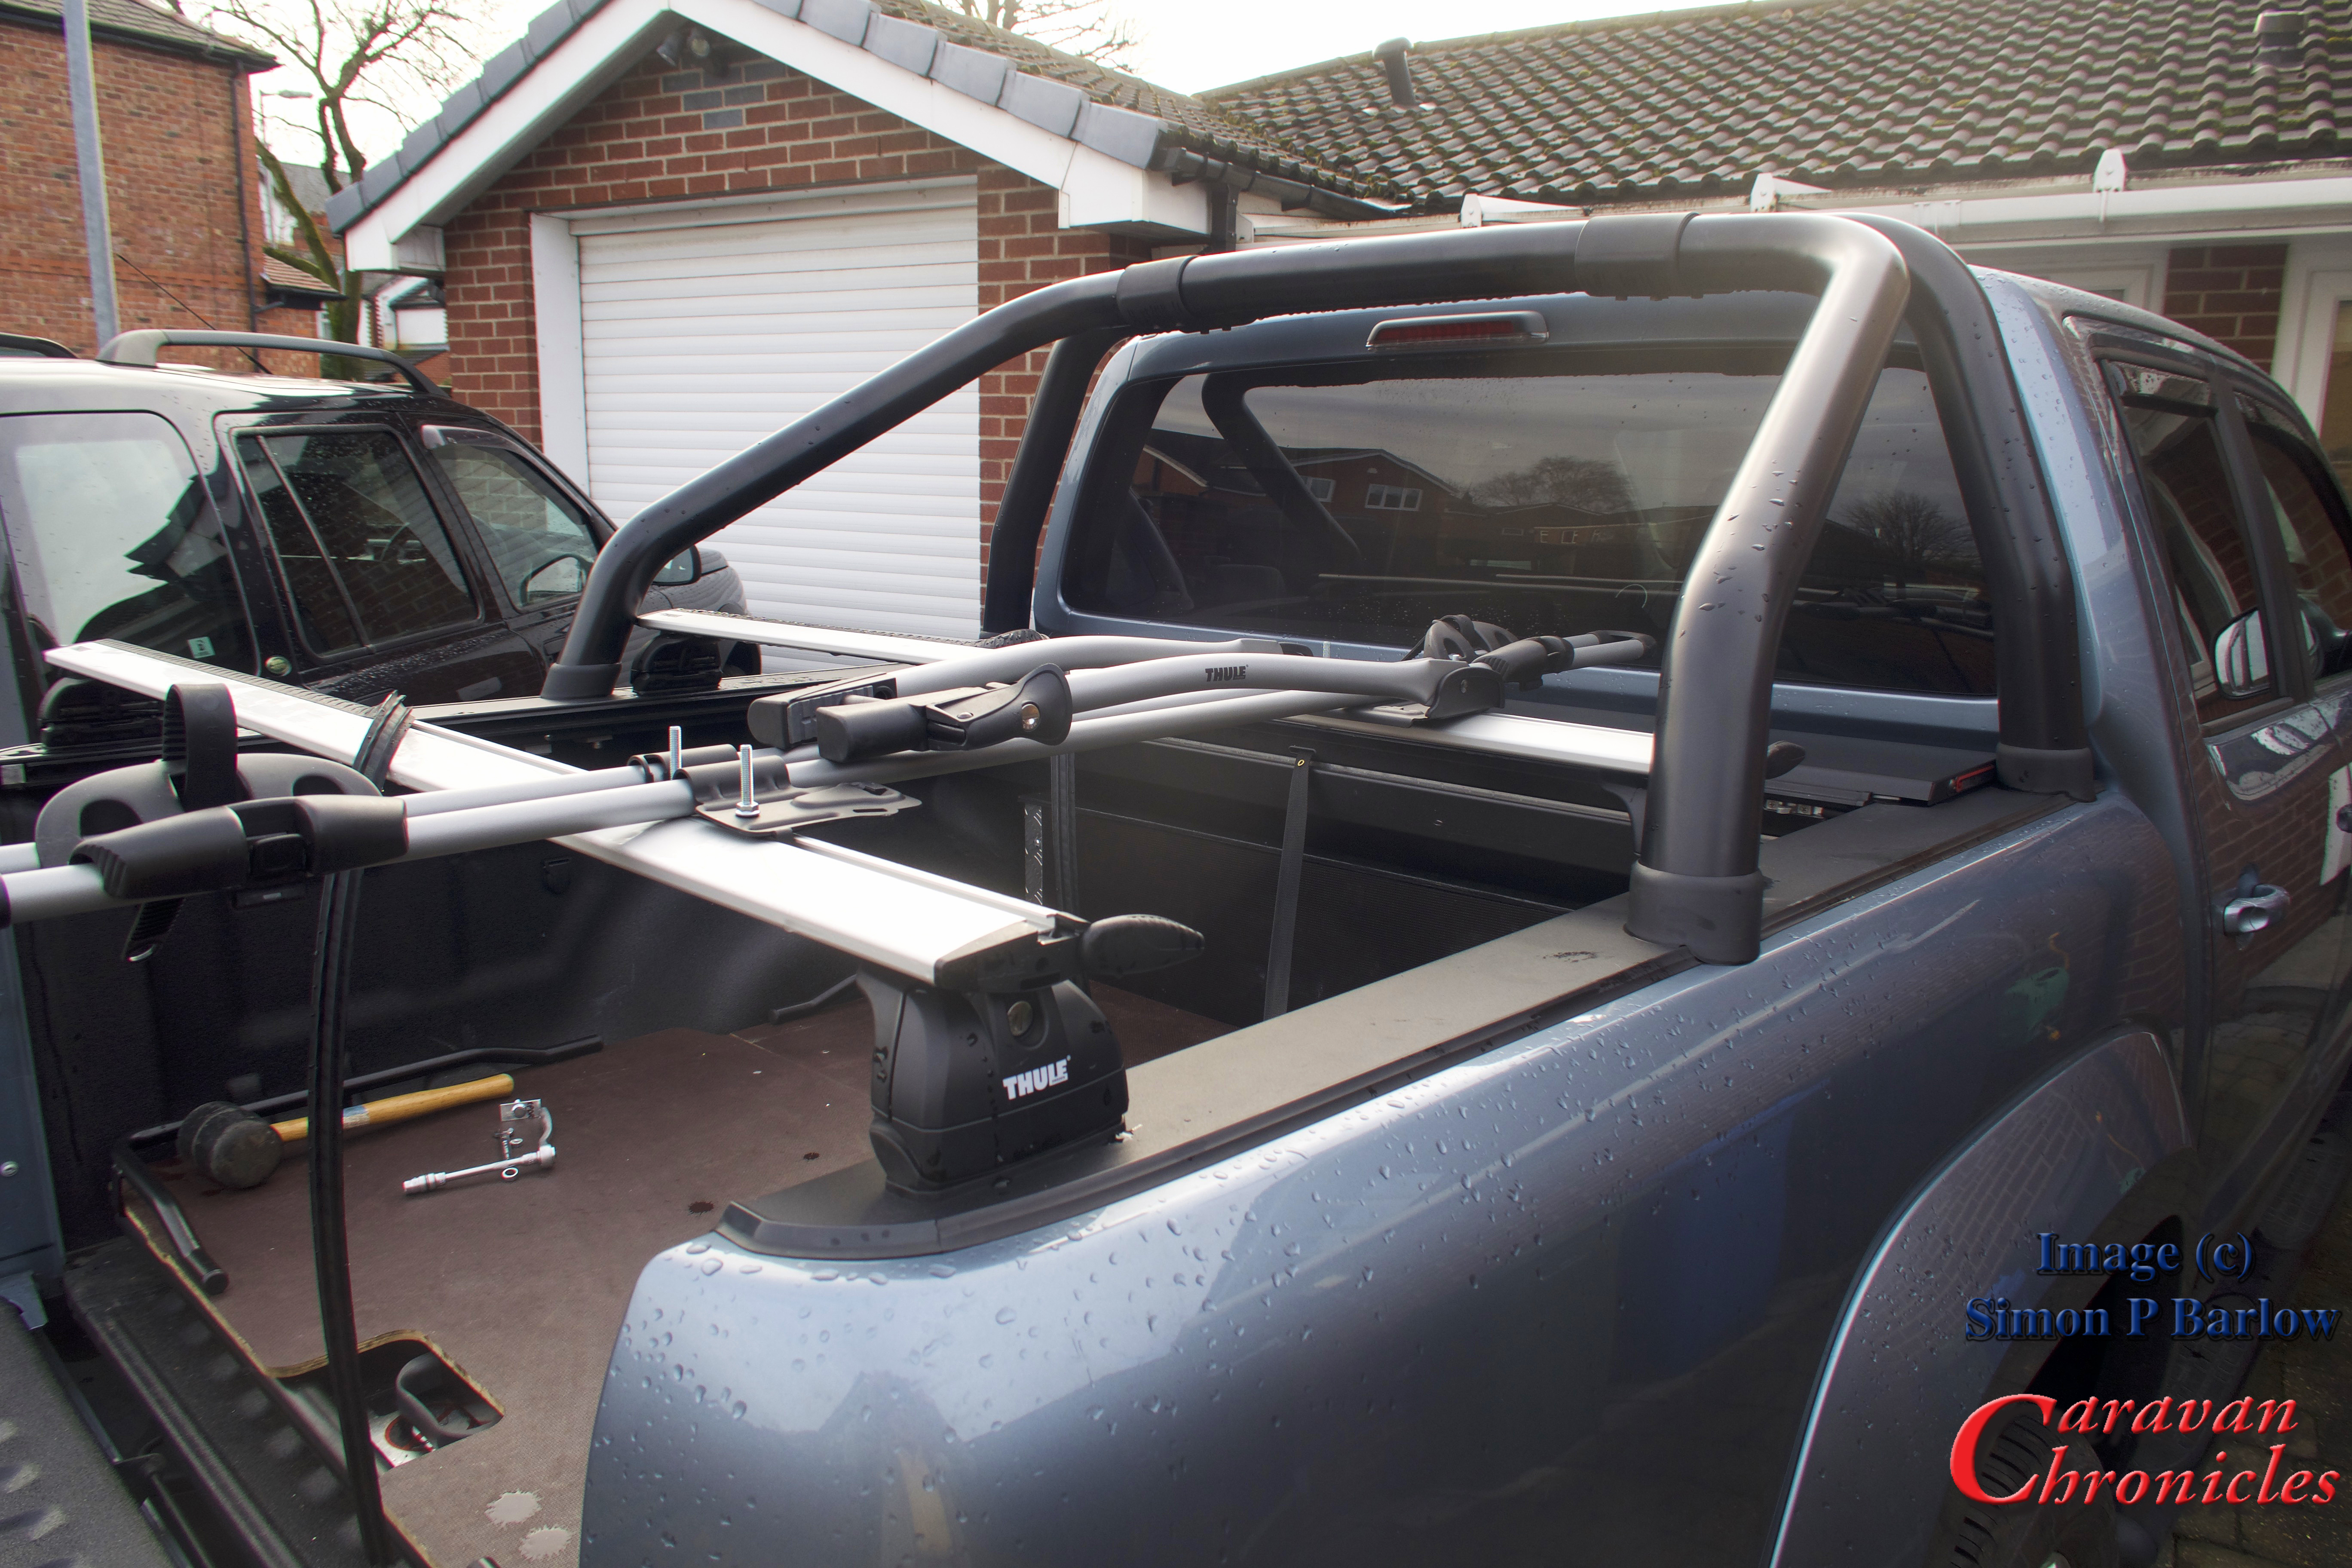
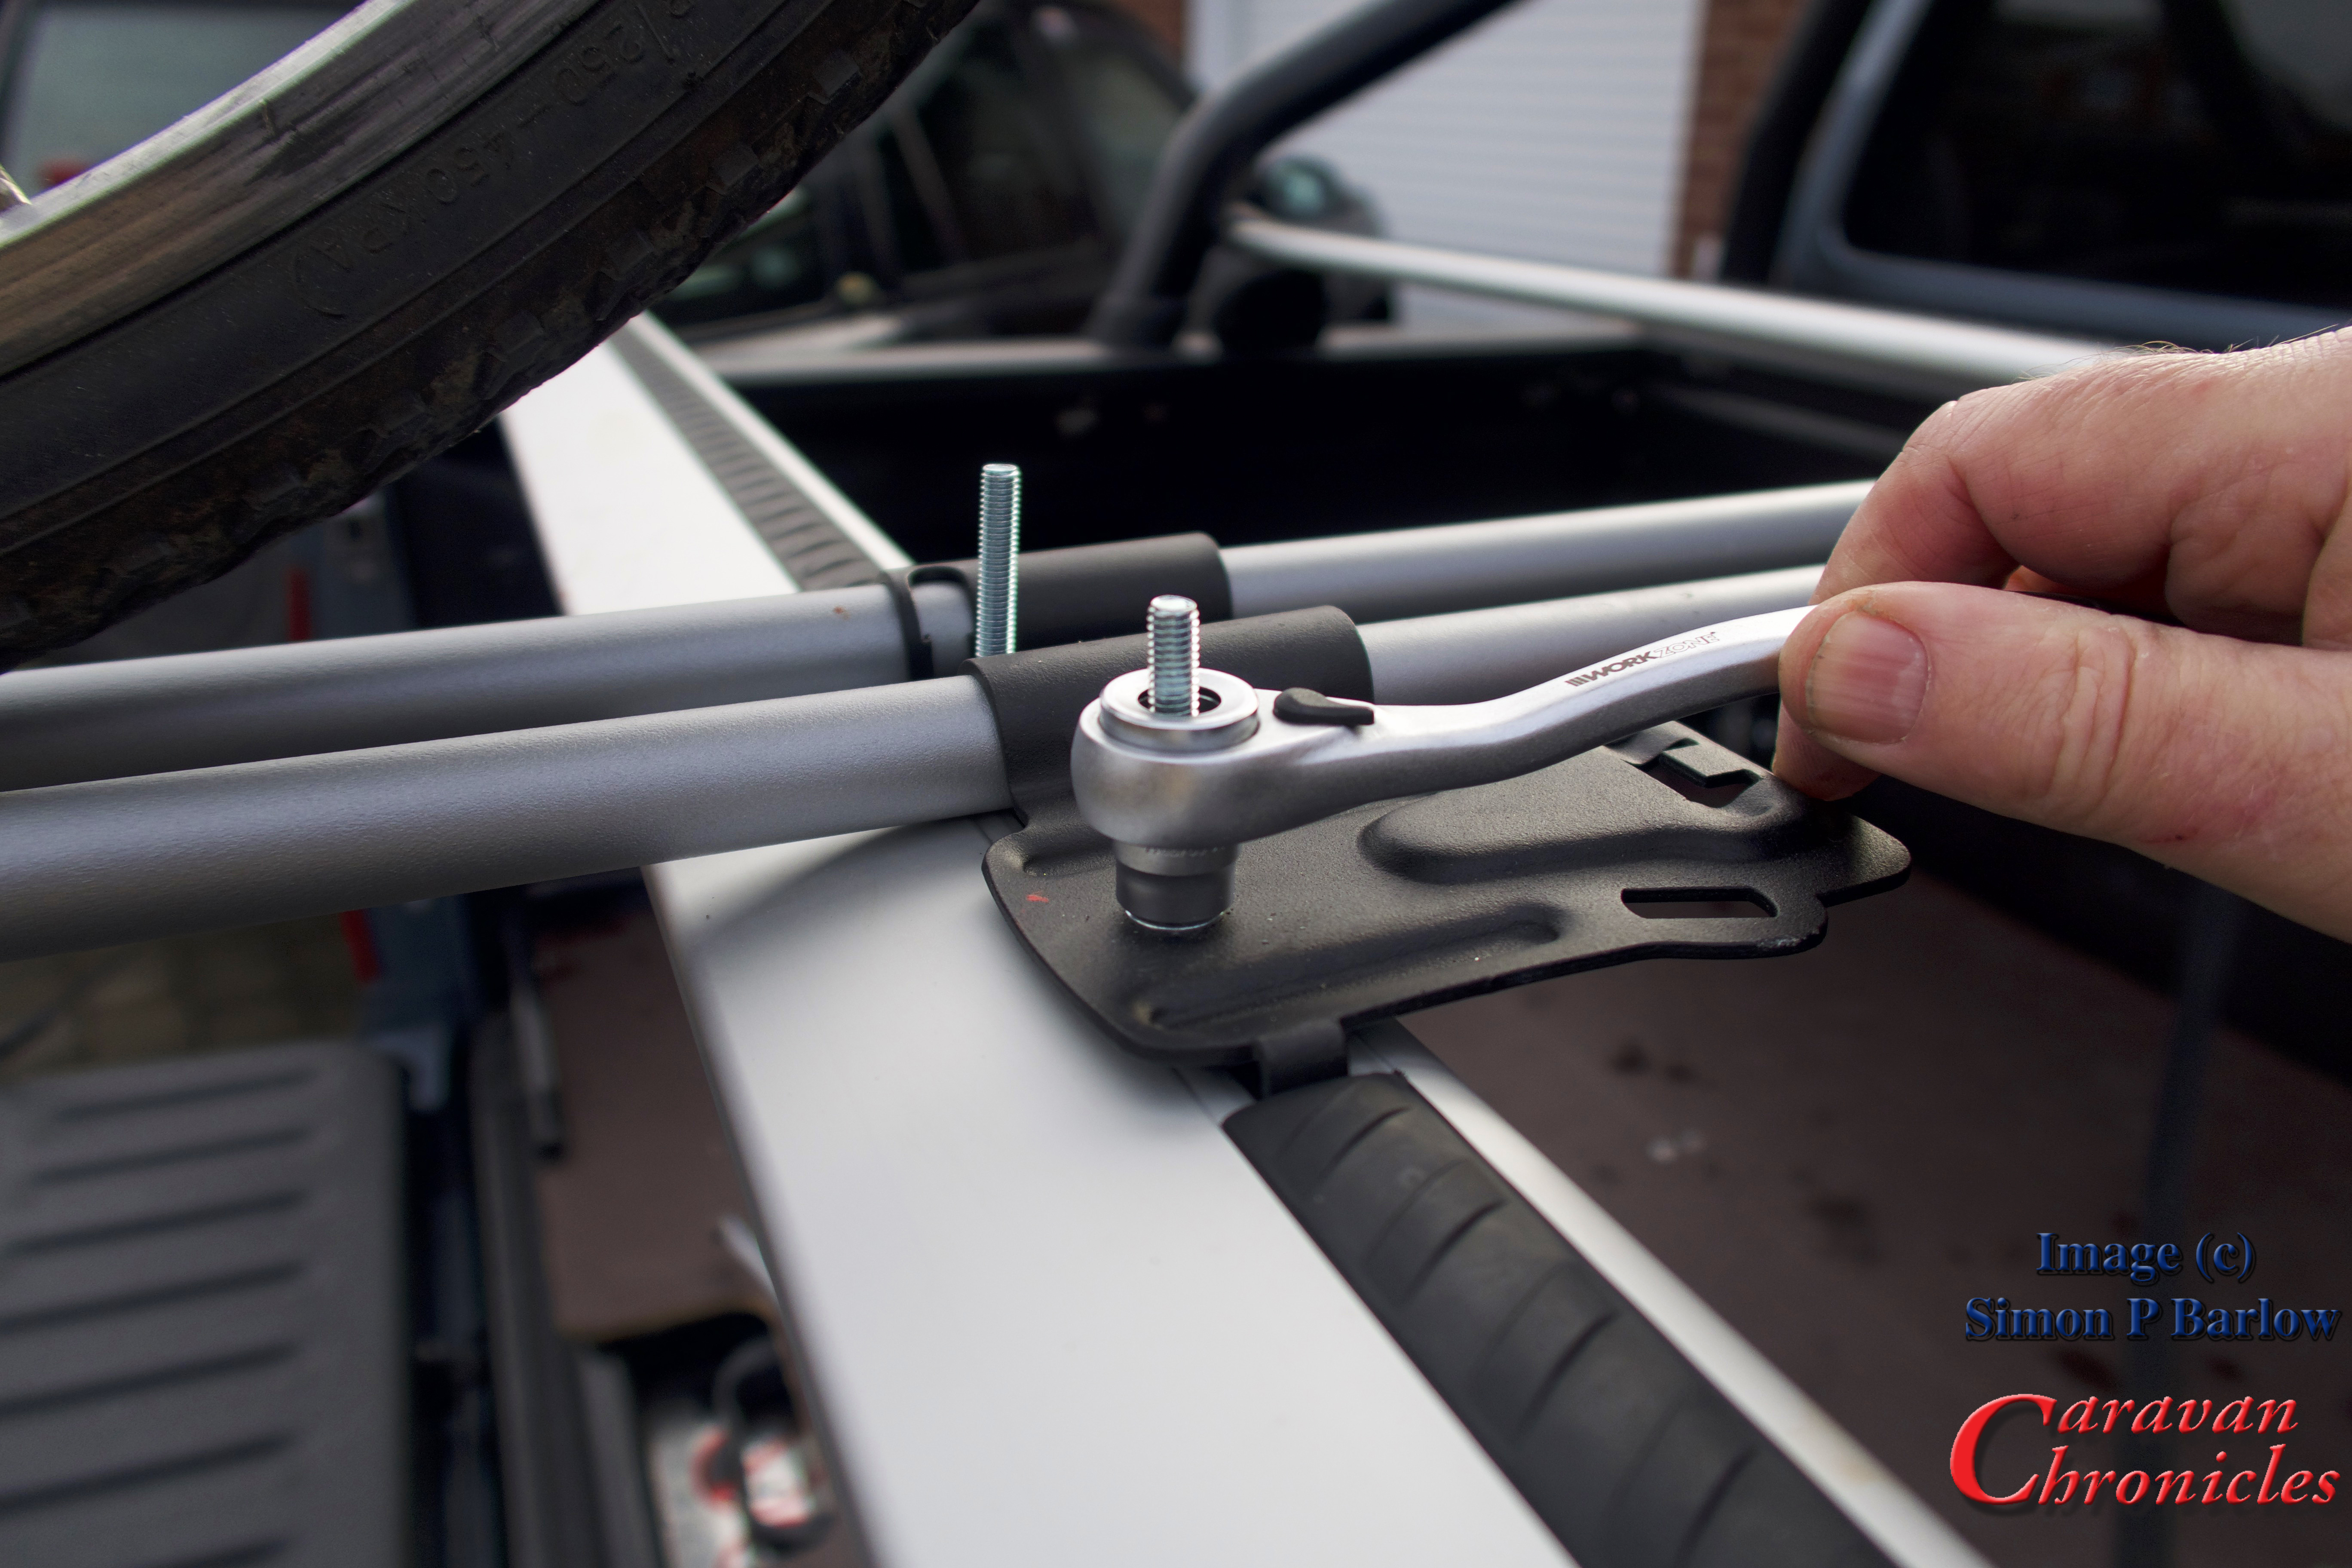
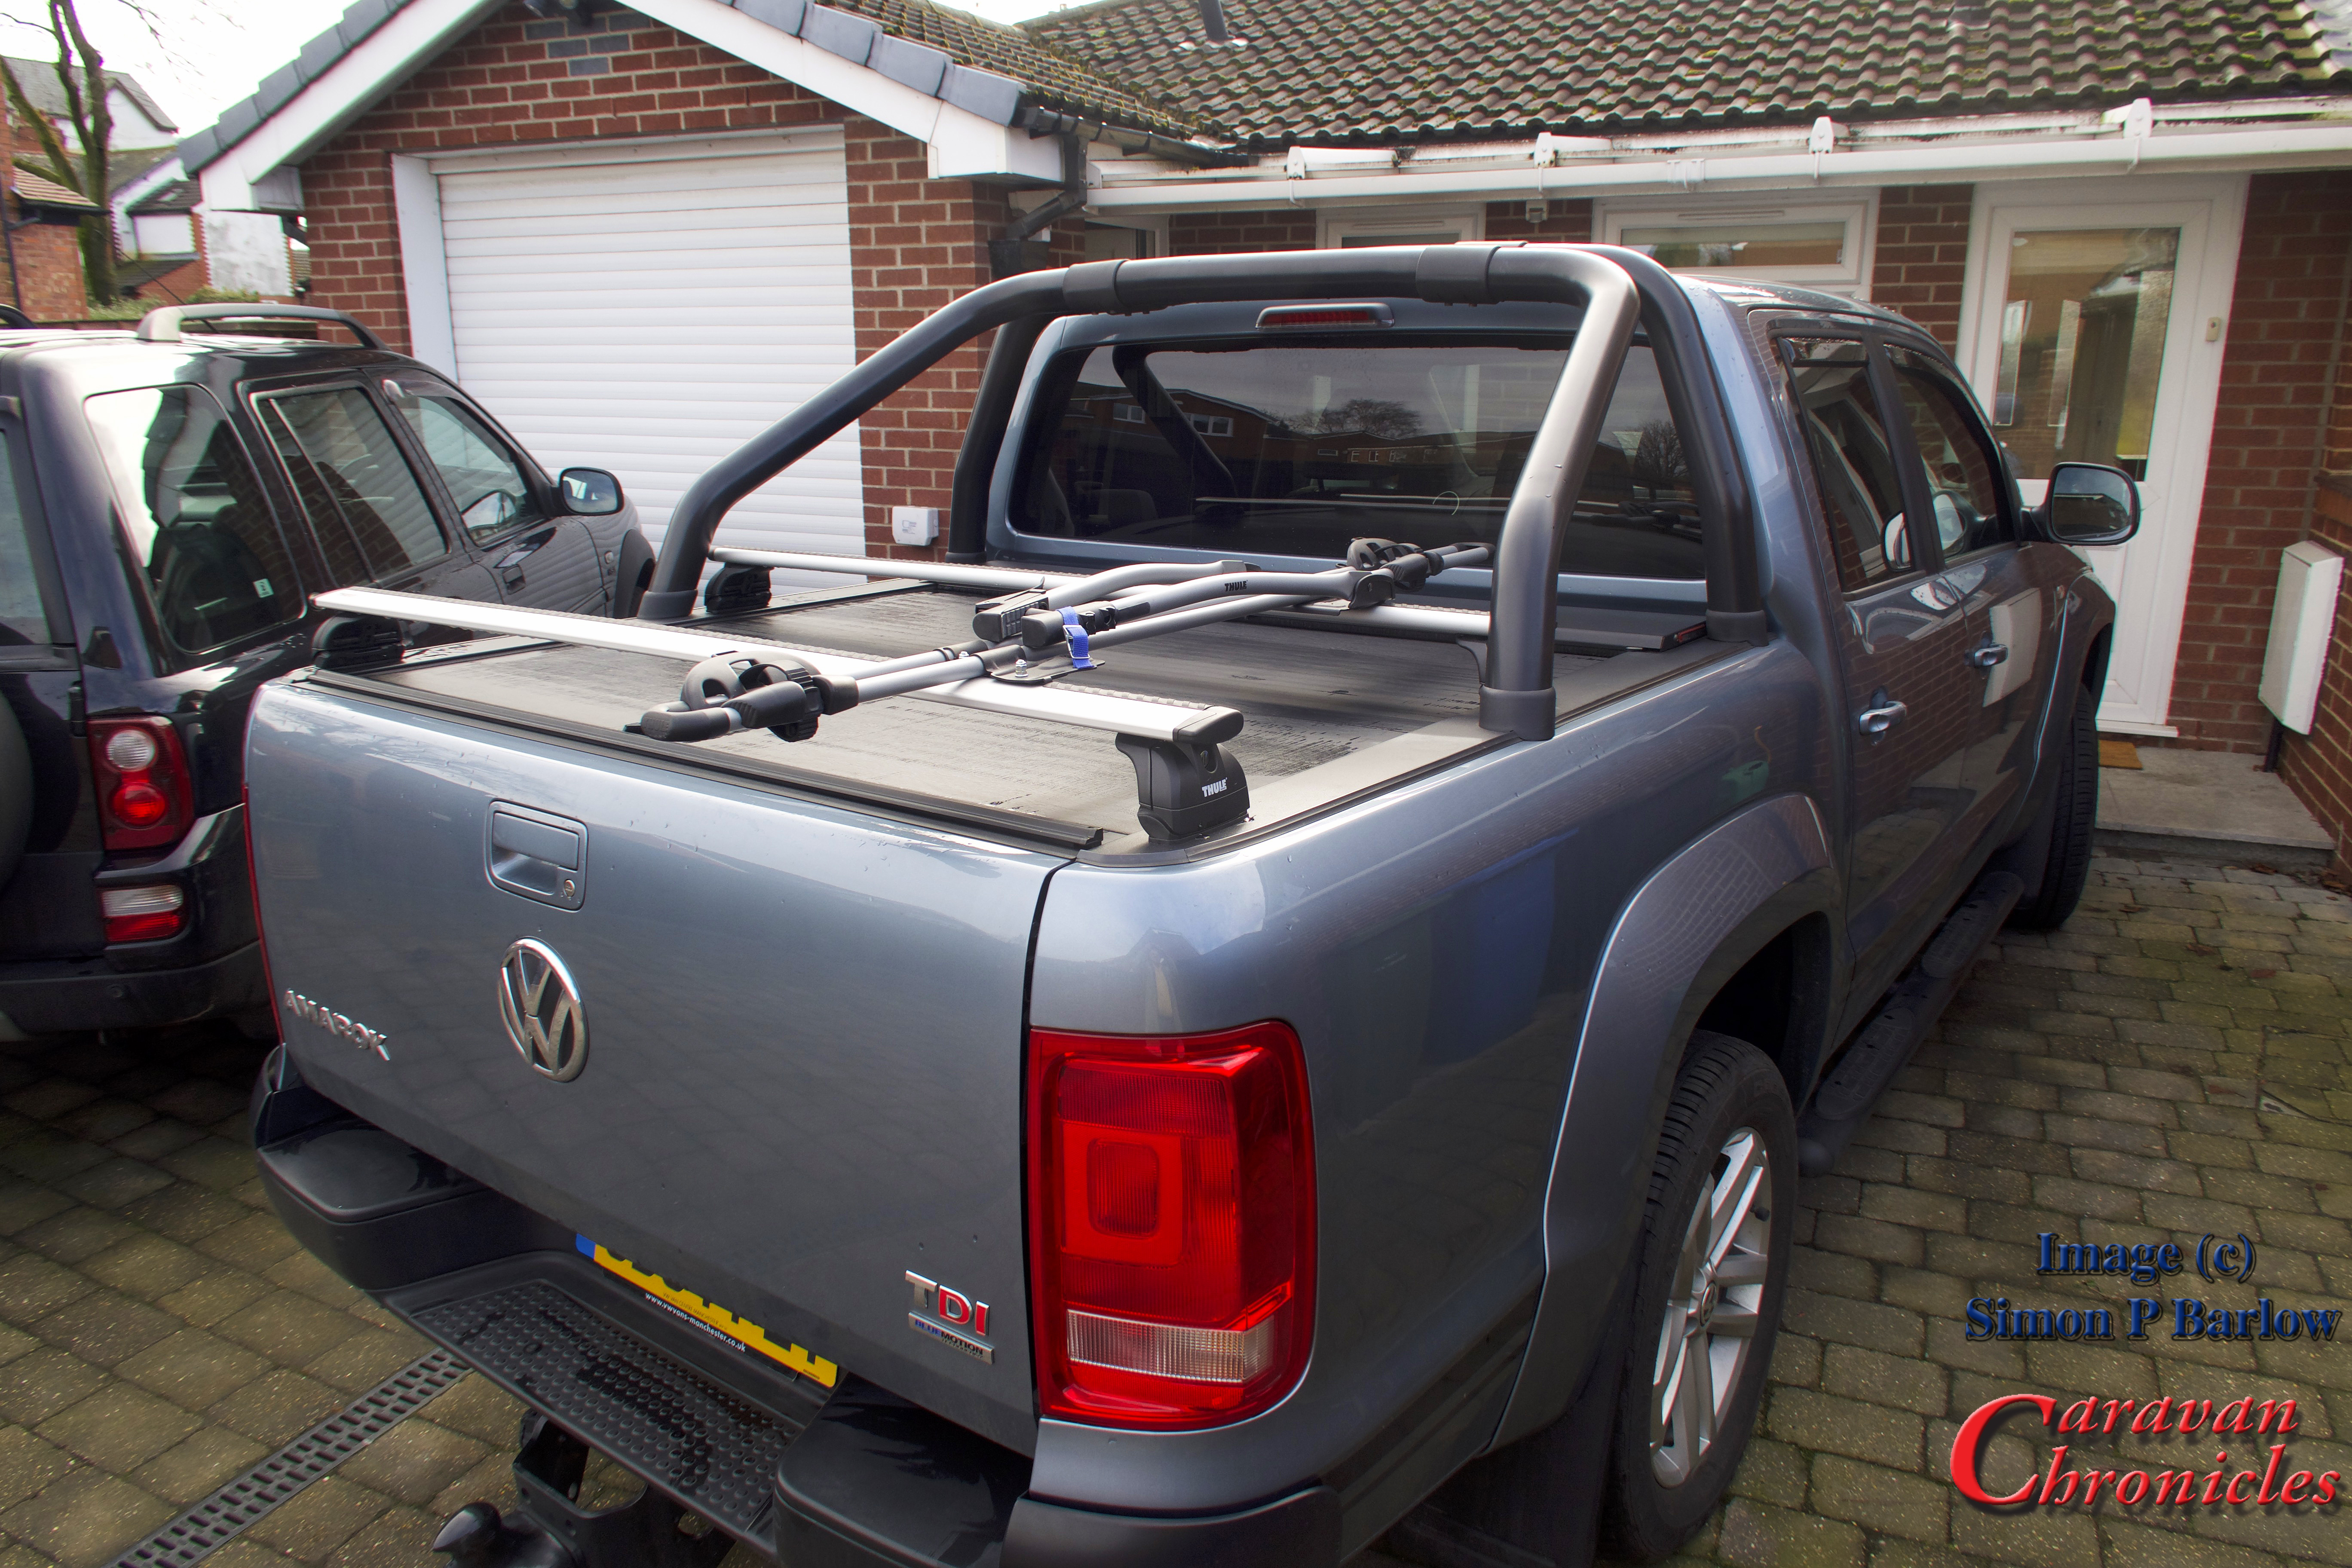
OK, so now to fit the actual bike carriers onto the rack I had previously installed a couple of days ago.
We had opted for the Thule FreeRide 532 over the ProRide version. What put me off the ProRide were a couple of videos on YouTube showing just how easy it was to remove a bike supposedly locked on to the rack. The FreeRide 532 has two arms supporting the bike and offered an option for additional security…. which I’m not going to go into for obvious reasons!
I had ordered a twin pack of the FreeRide 532, unfortunately I only received one. It seems the other was lost in transit somewhere according to my enquiries with the supplier. The other thing I found out was they (or it) didn’t come with the “T” track fixings. OK so a quick trip down to my nearest Thule dealer Northwest Towbars to pick up the elusive fixings. They would remain elusive… Northwest Towbars didn’t have any in stock. Not to be out manoeuvred I’d make my own.
To the bat cave again…
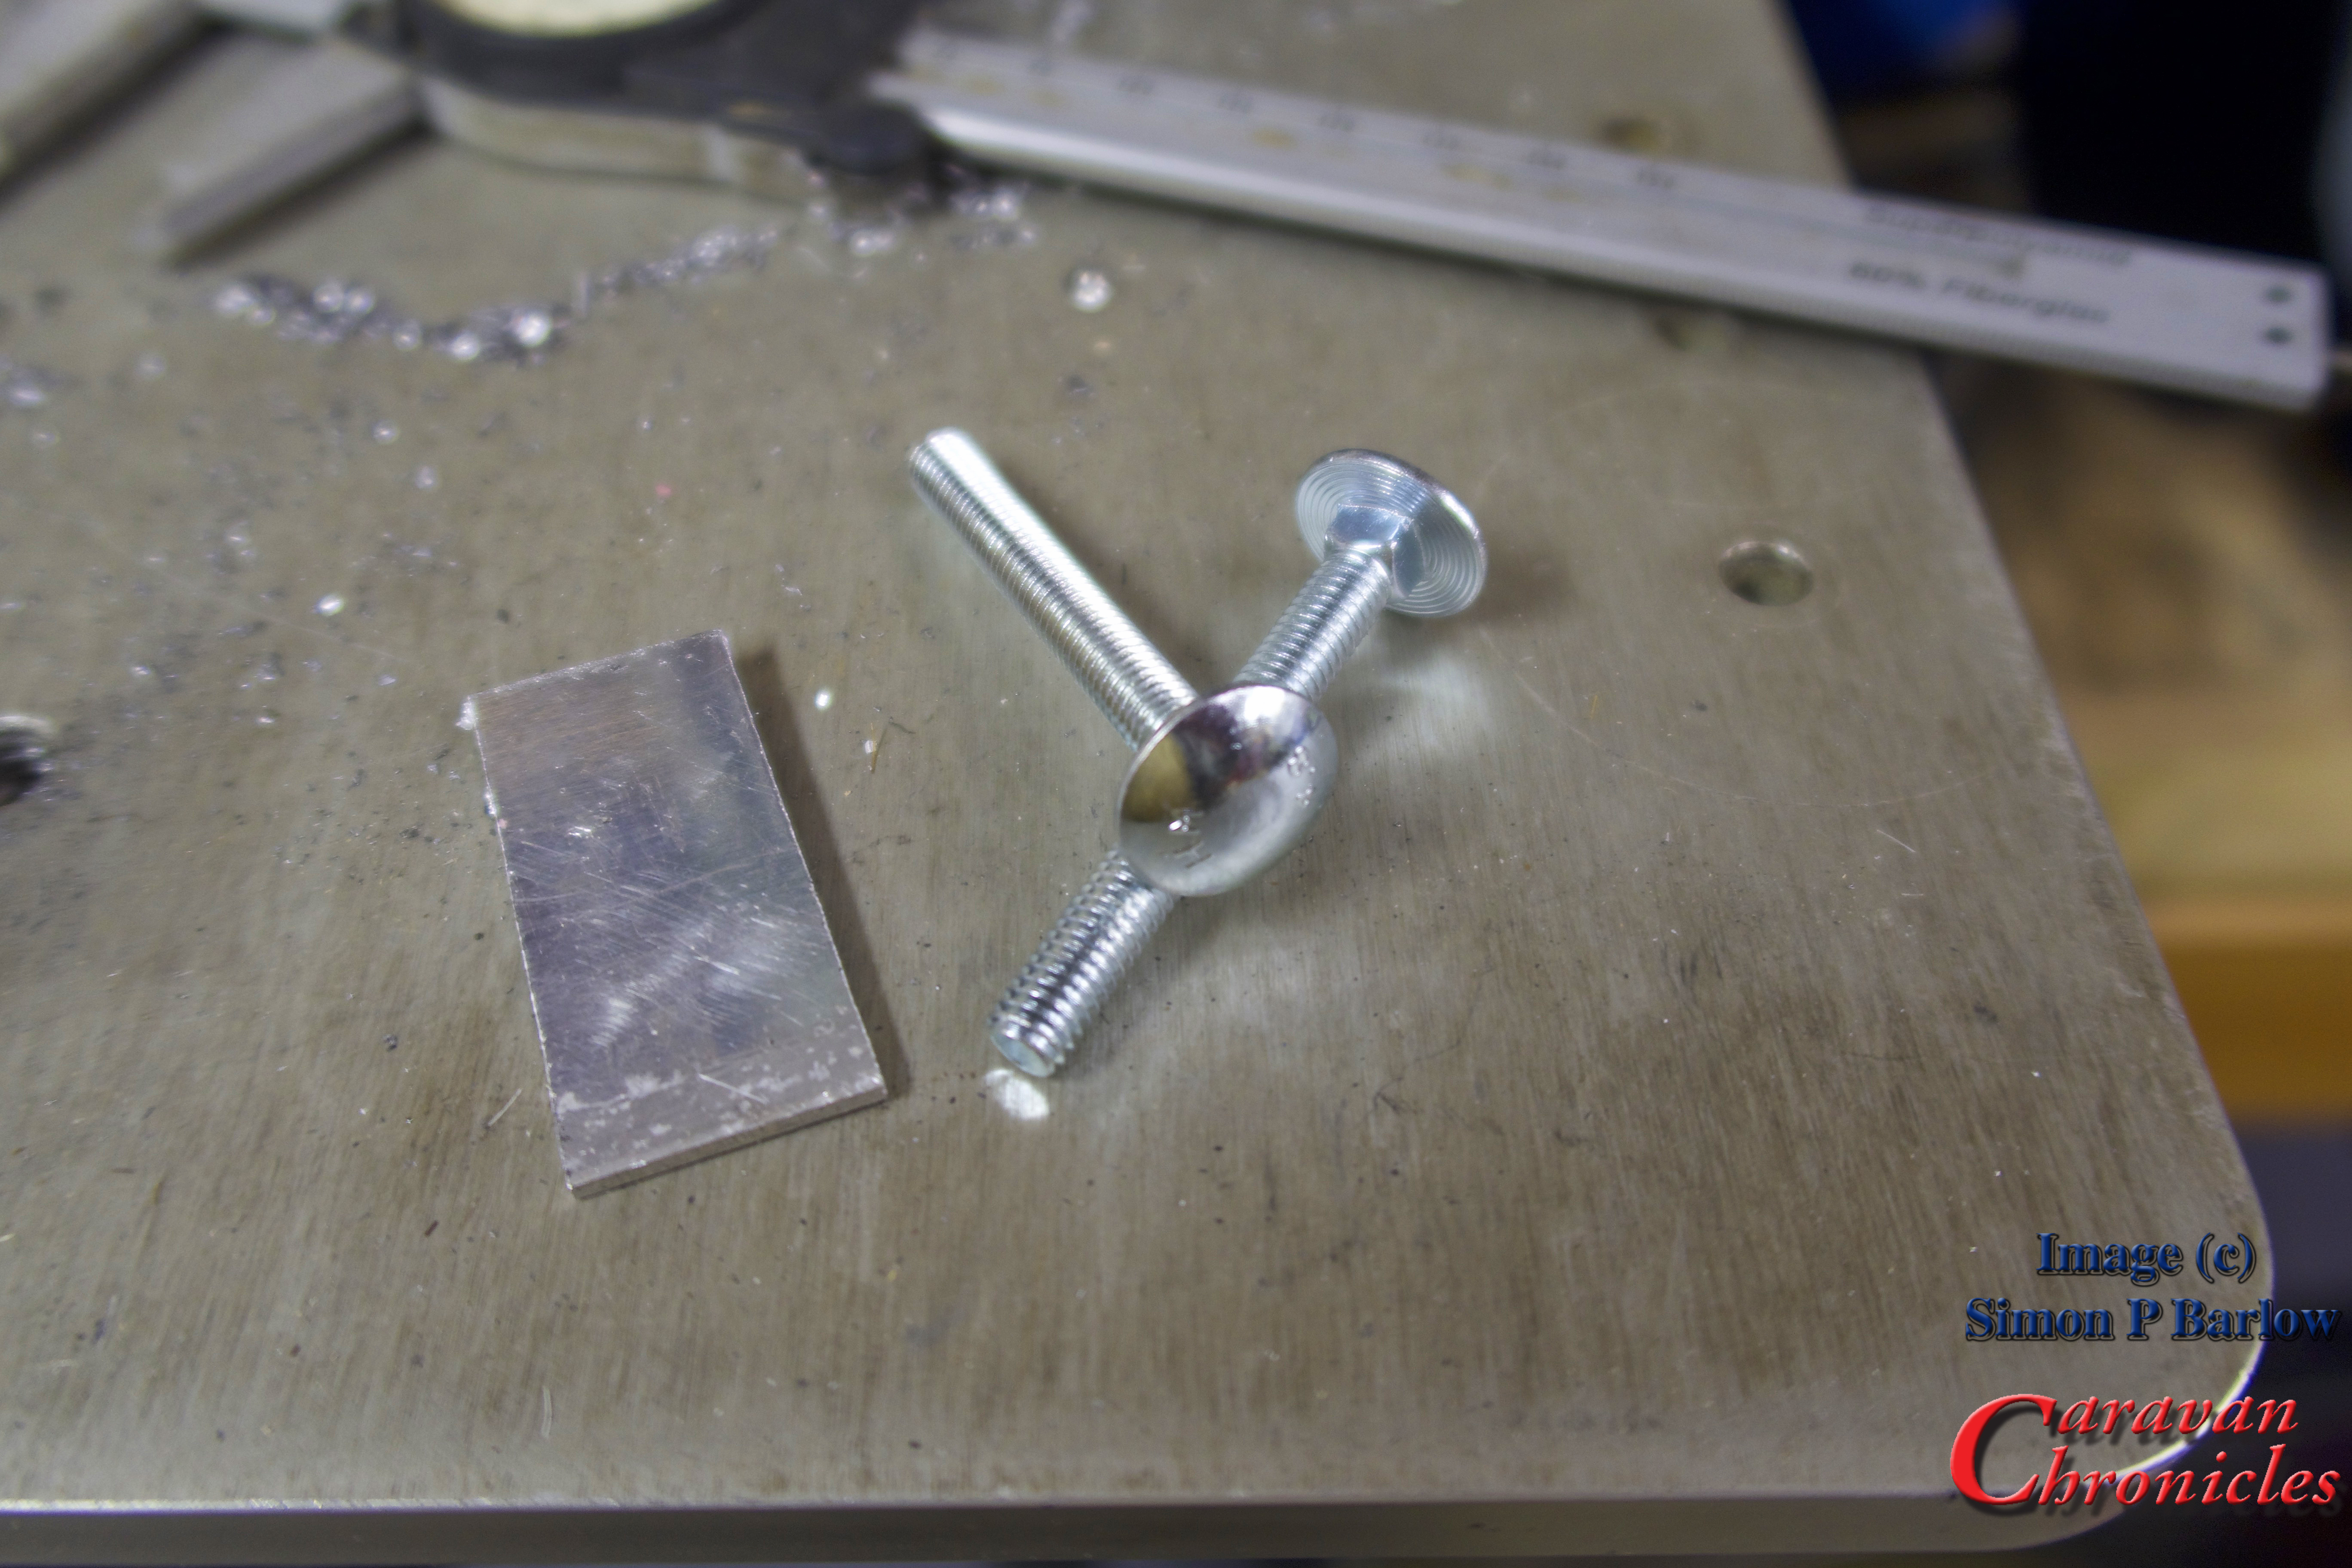
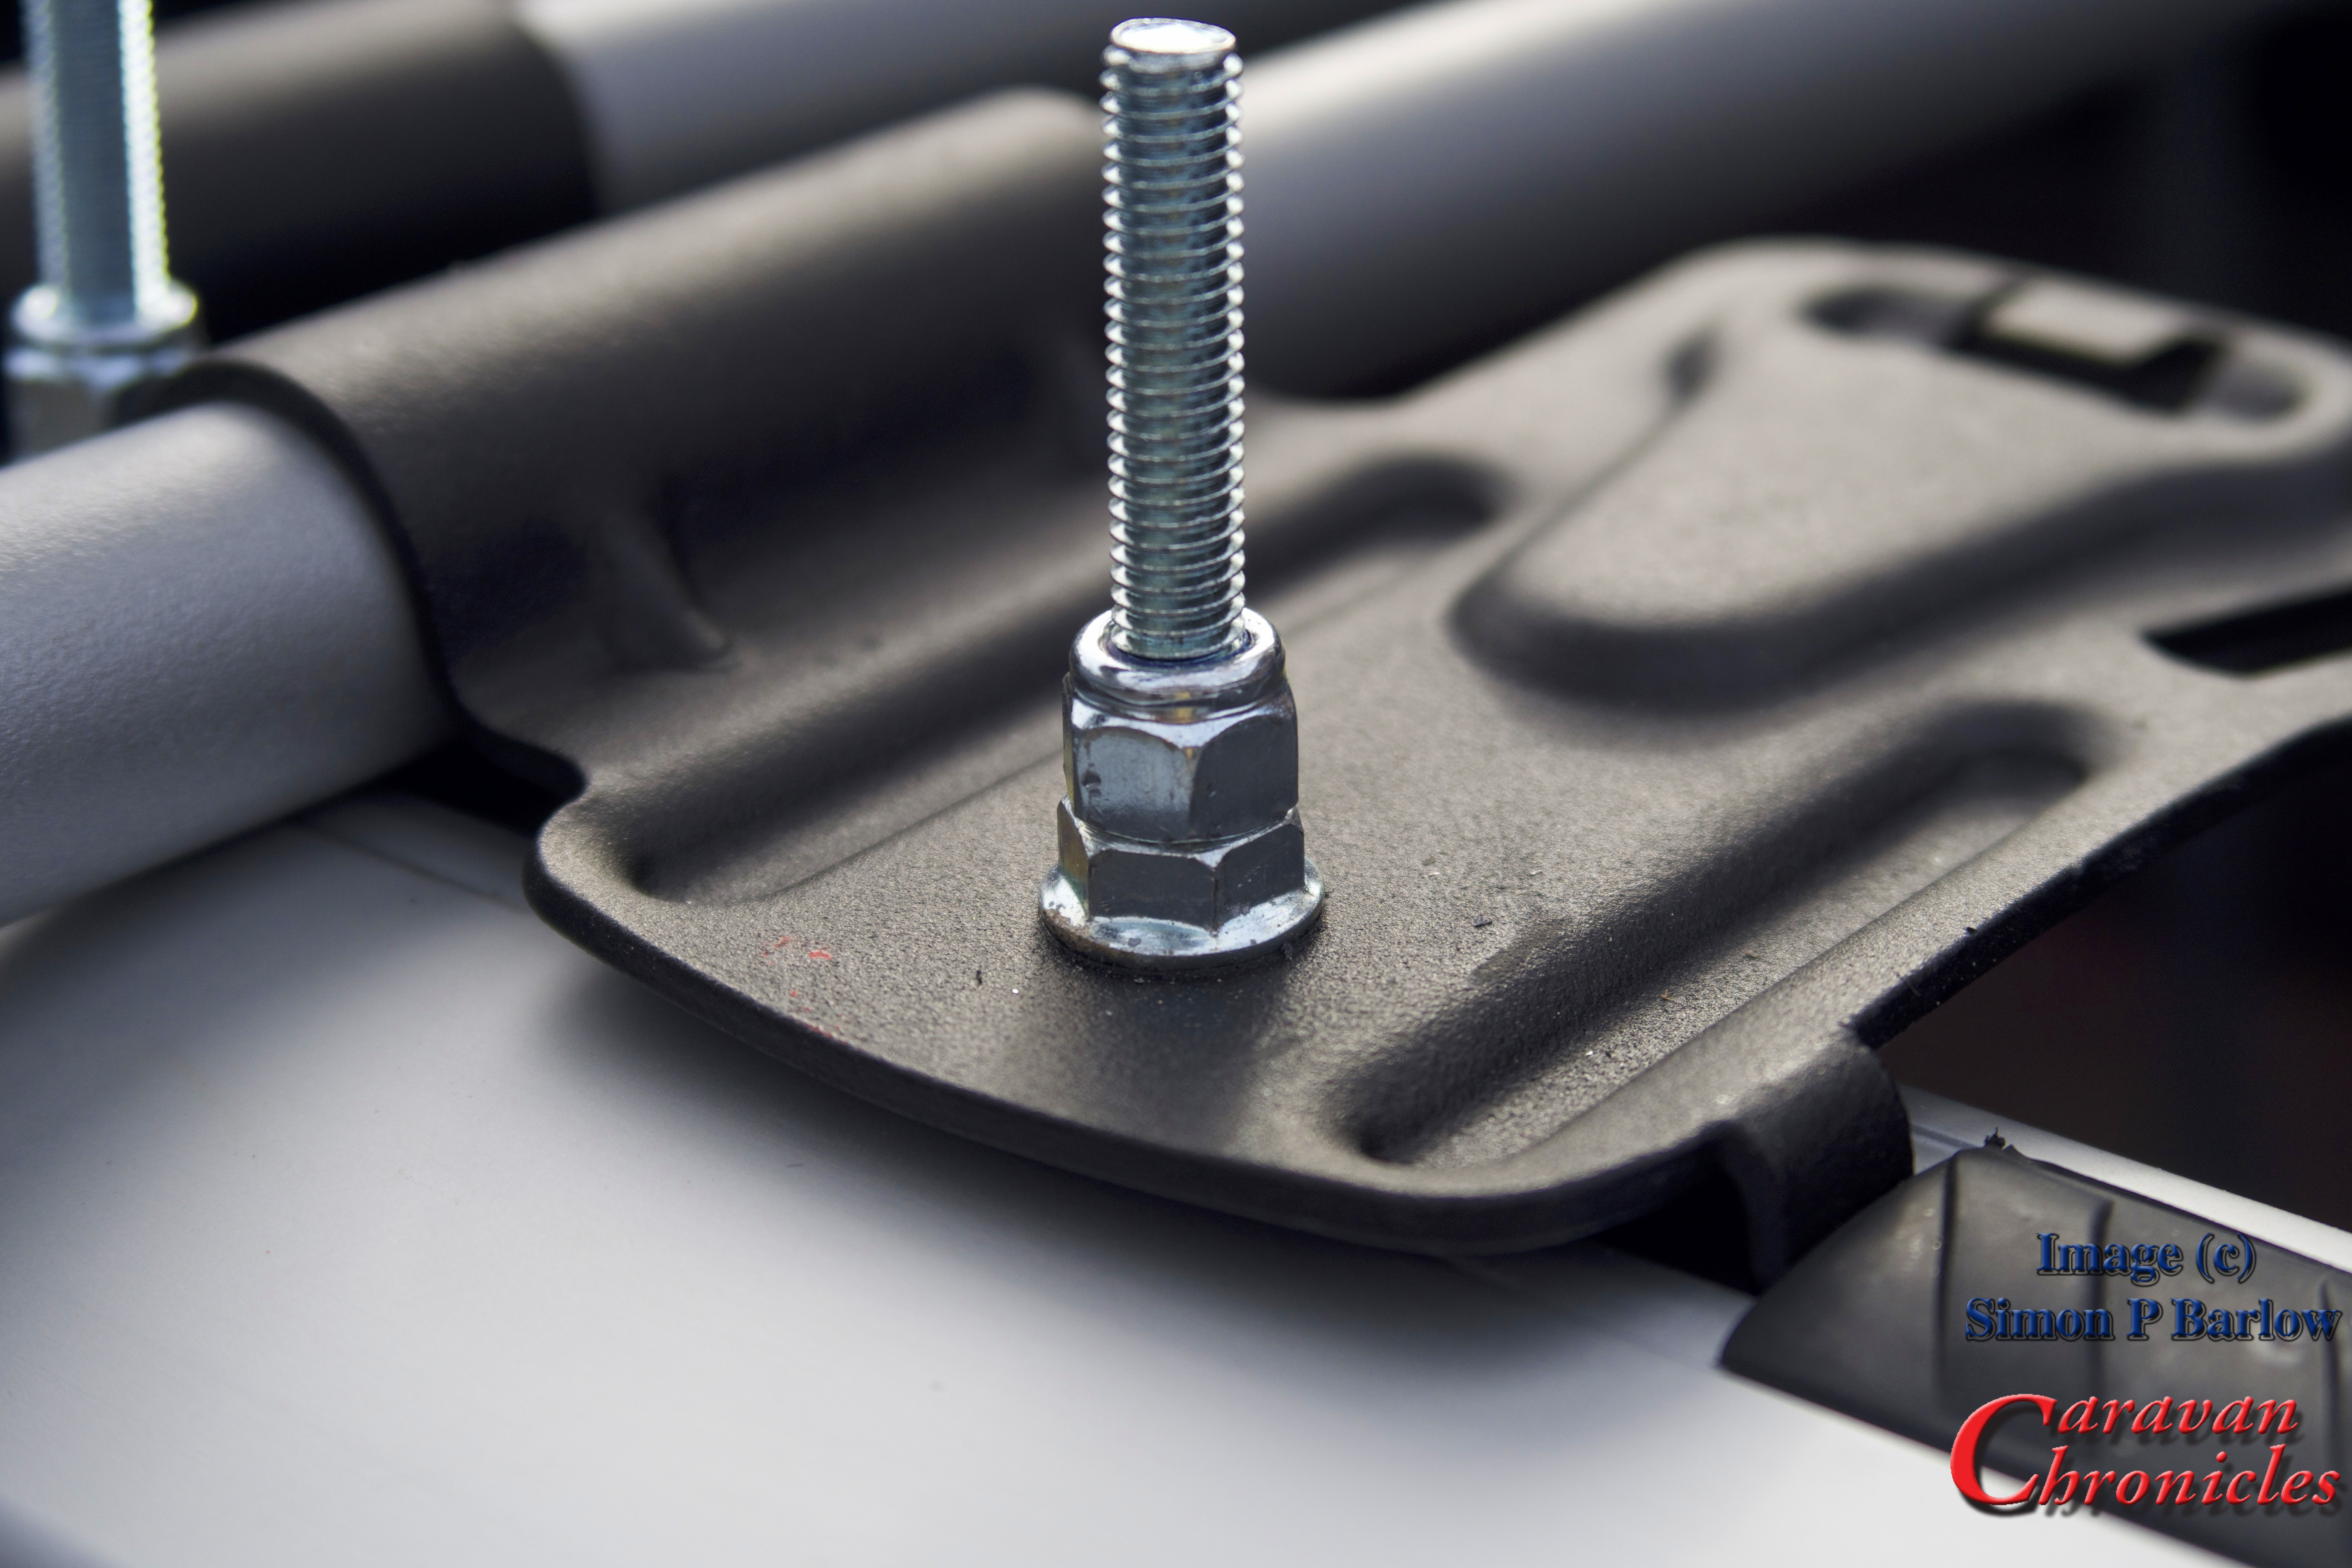
I just happened to have some 2mm aircraft grade aluminium handy and cut eight 21mm x 45mm pieces. The FreeRide 532 normally has three mounting locations, but as there was an additional hole that lined up with the “T” track it would be rude not to use it! So I made four for each rack.
For the threaded bolt I had some dome head bolts handy. The width of the dome head was wide enough so it would not pull through the slot on its own so I was not relying on a 2mm think aluminium plate entirly. To hold the bolts in place I drilled a slightly undersized hole in the aluminium…
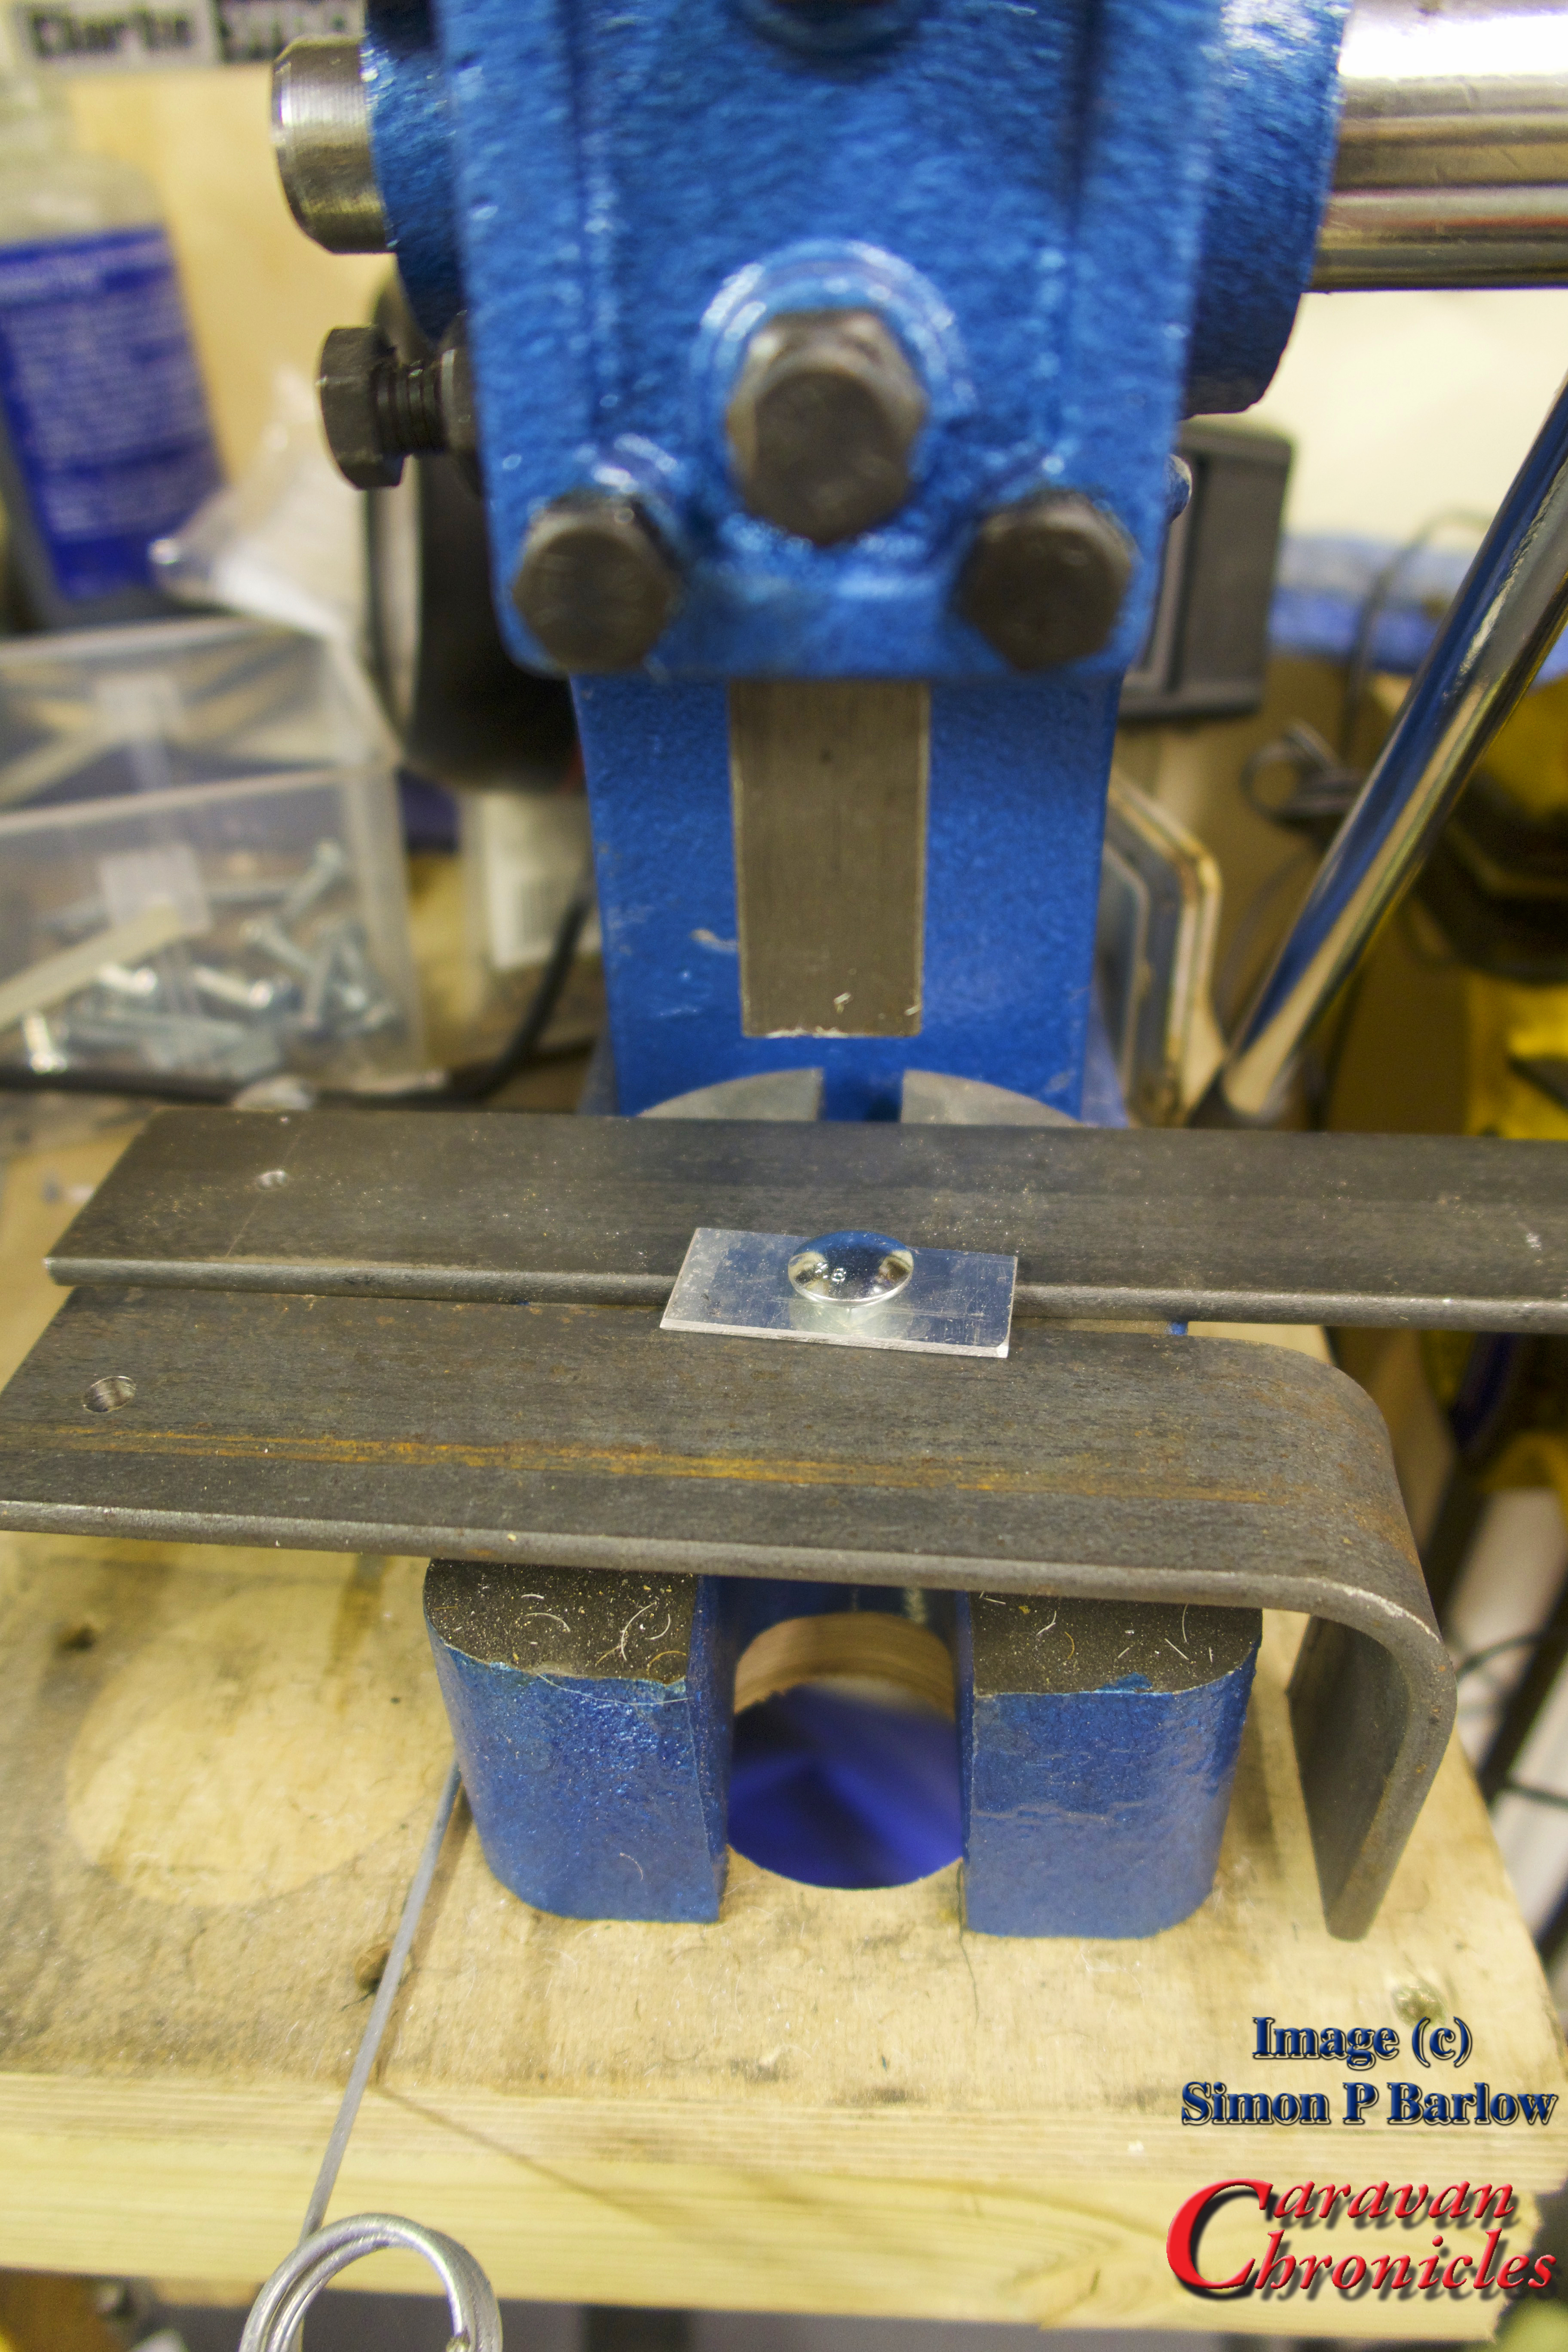
…and used my small press to force the square shoulders of the bolt through the aluminium plate to hold it in place.
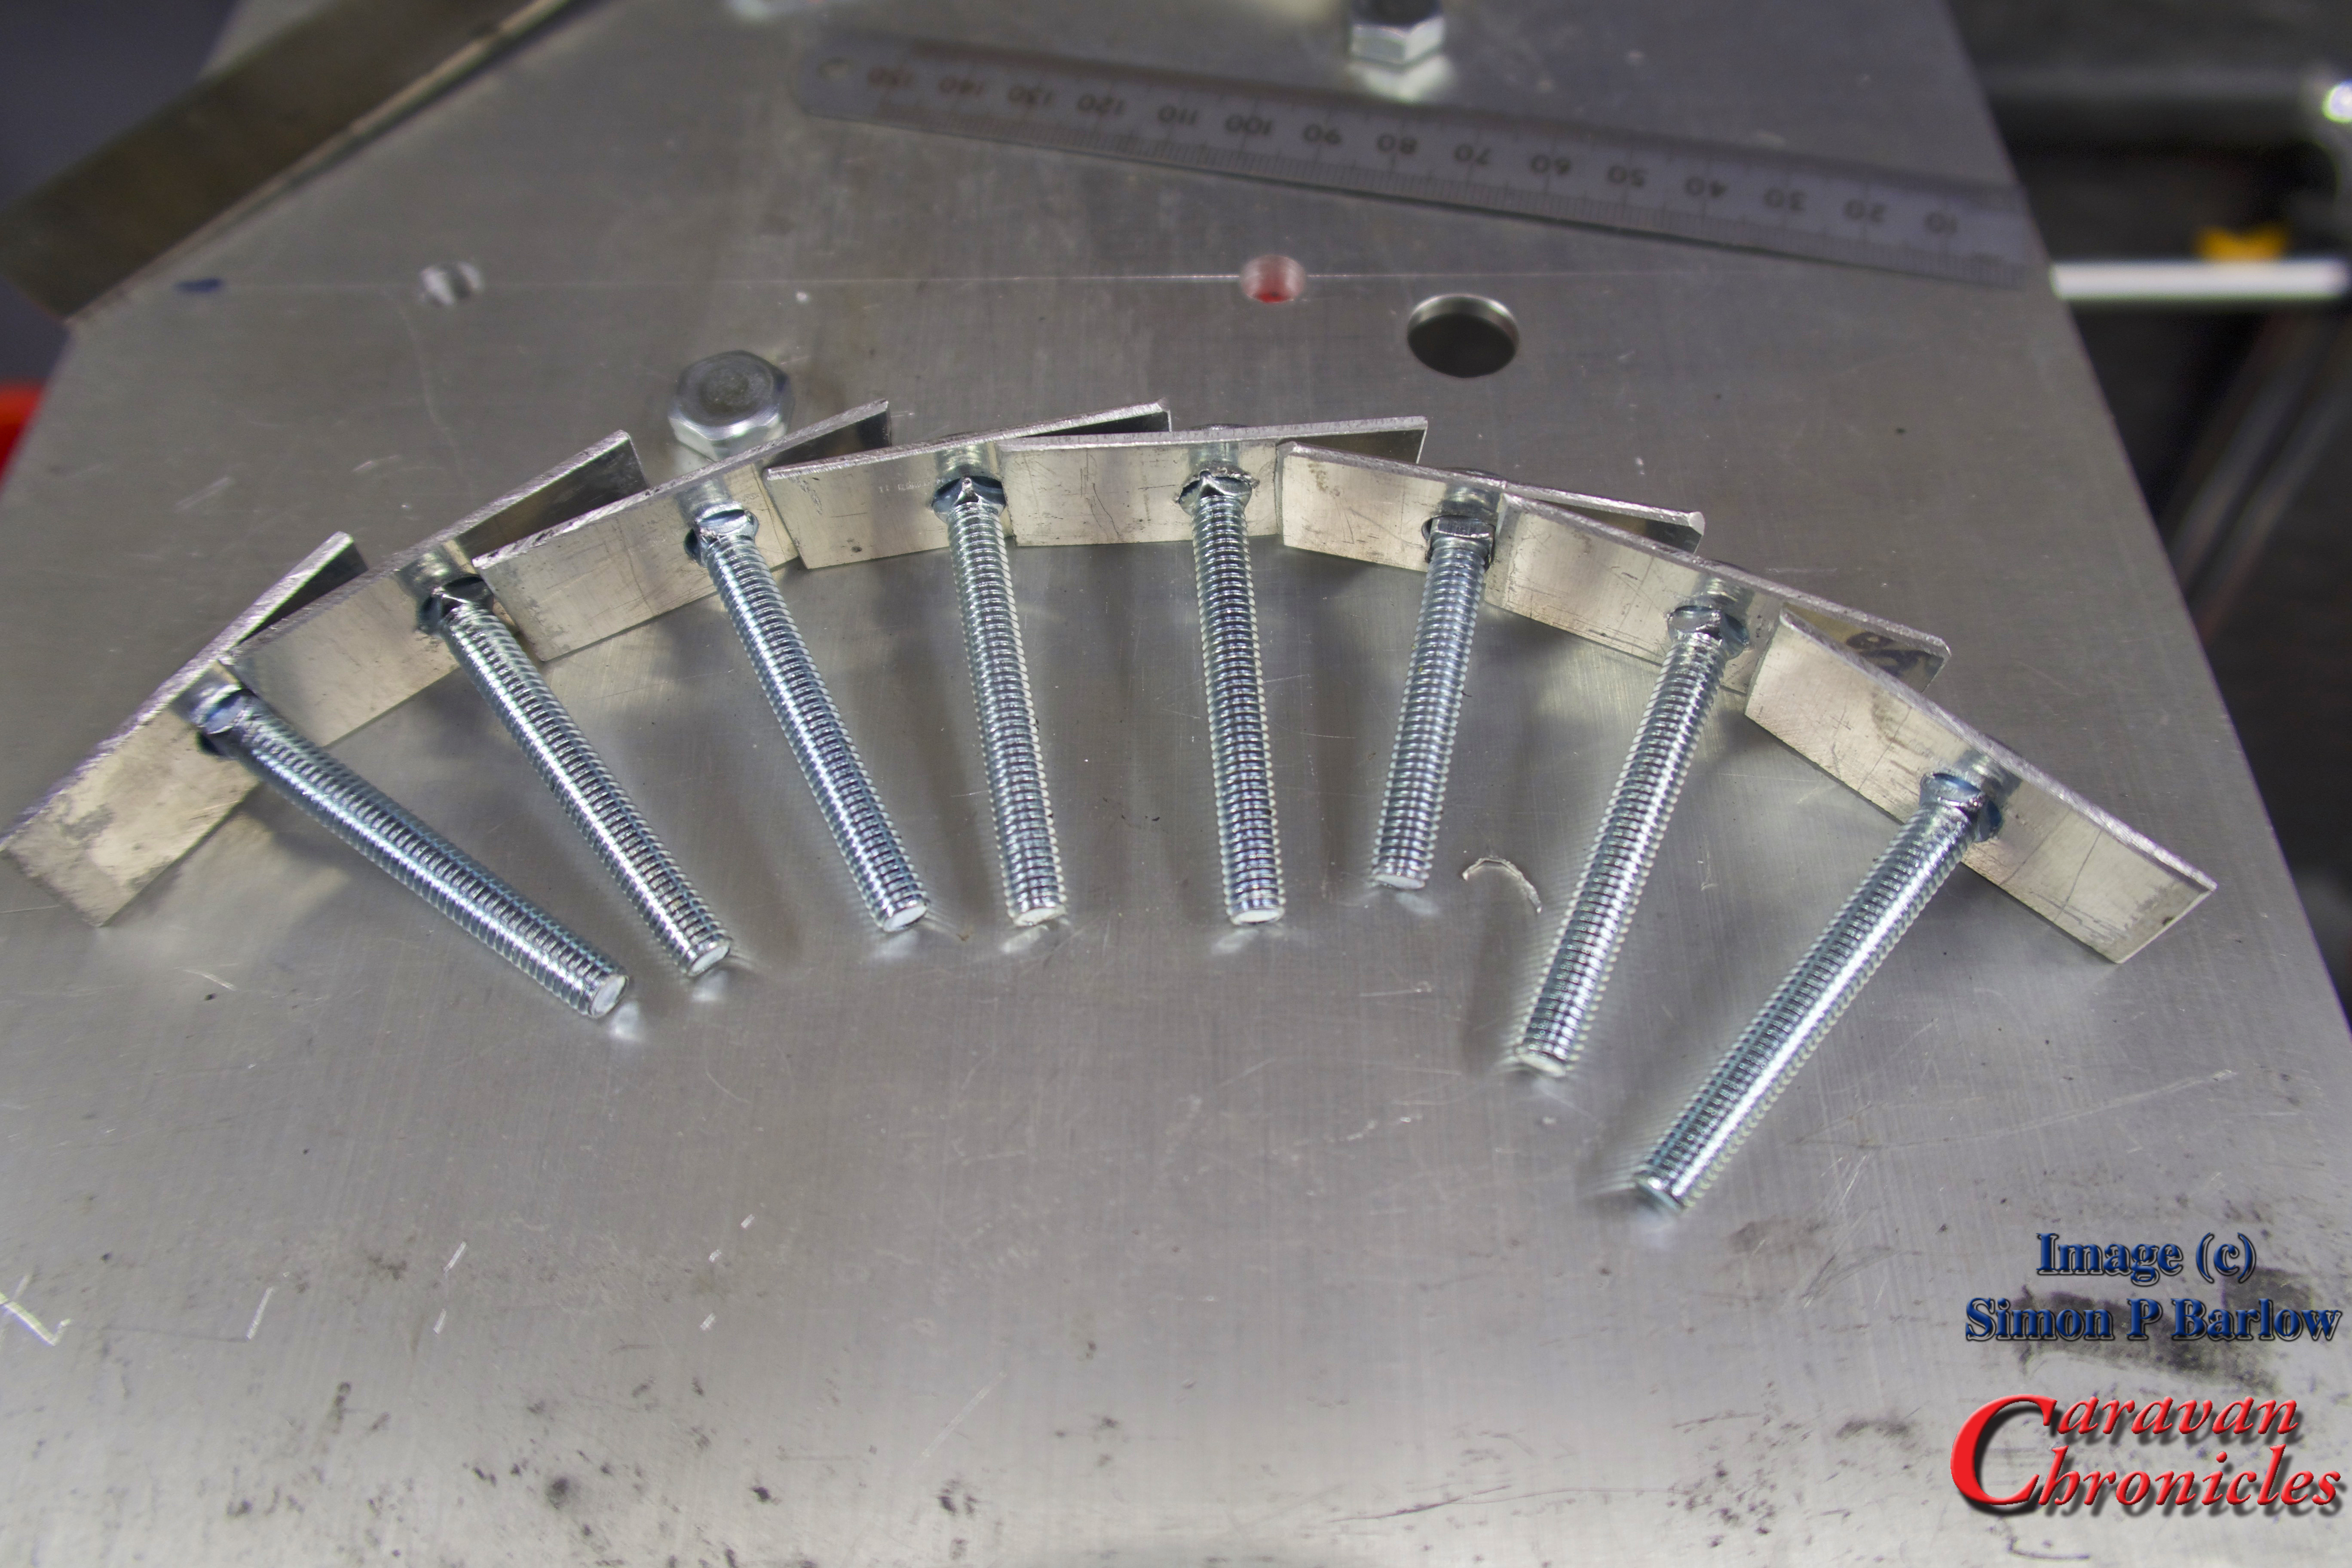
The result was eight “T” track bolts. A quick dressing up on the sanding belt and fine grinding wheel to remove any rough edges finished them off.
The excess length of the bolt would be trimmed later.
Fitting the FreeRide 532 Racks
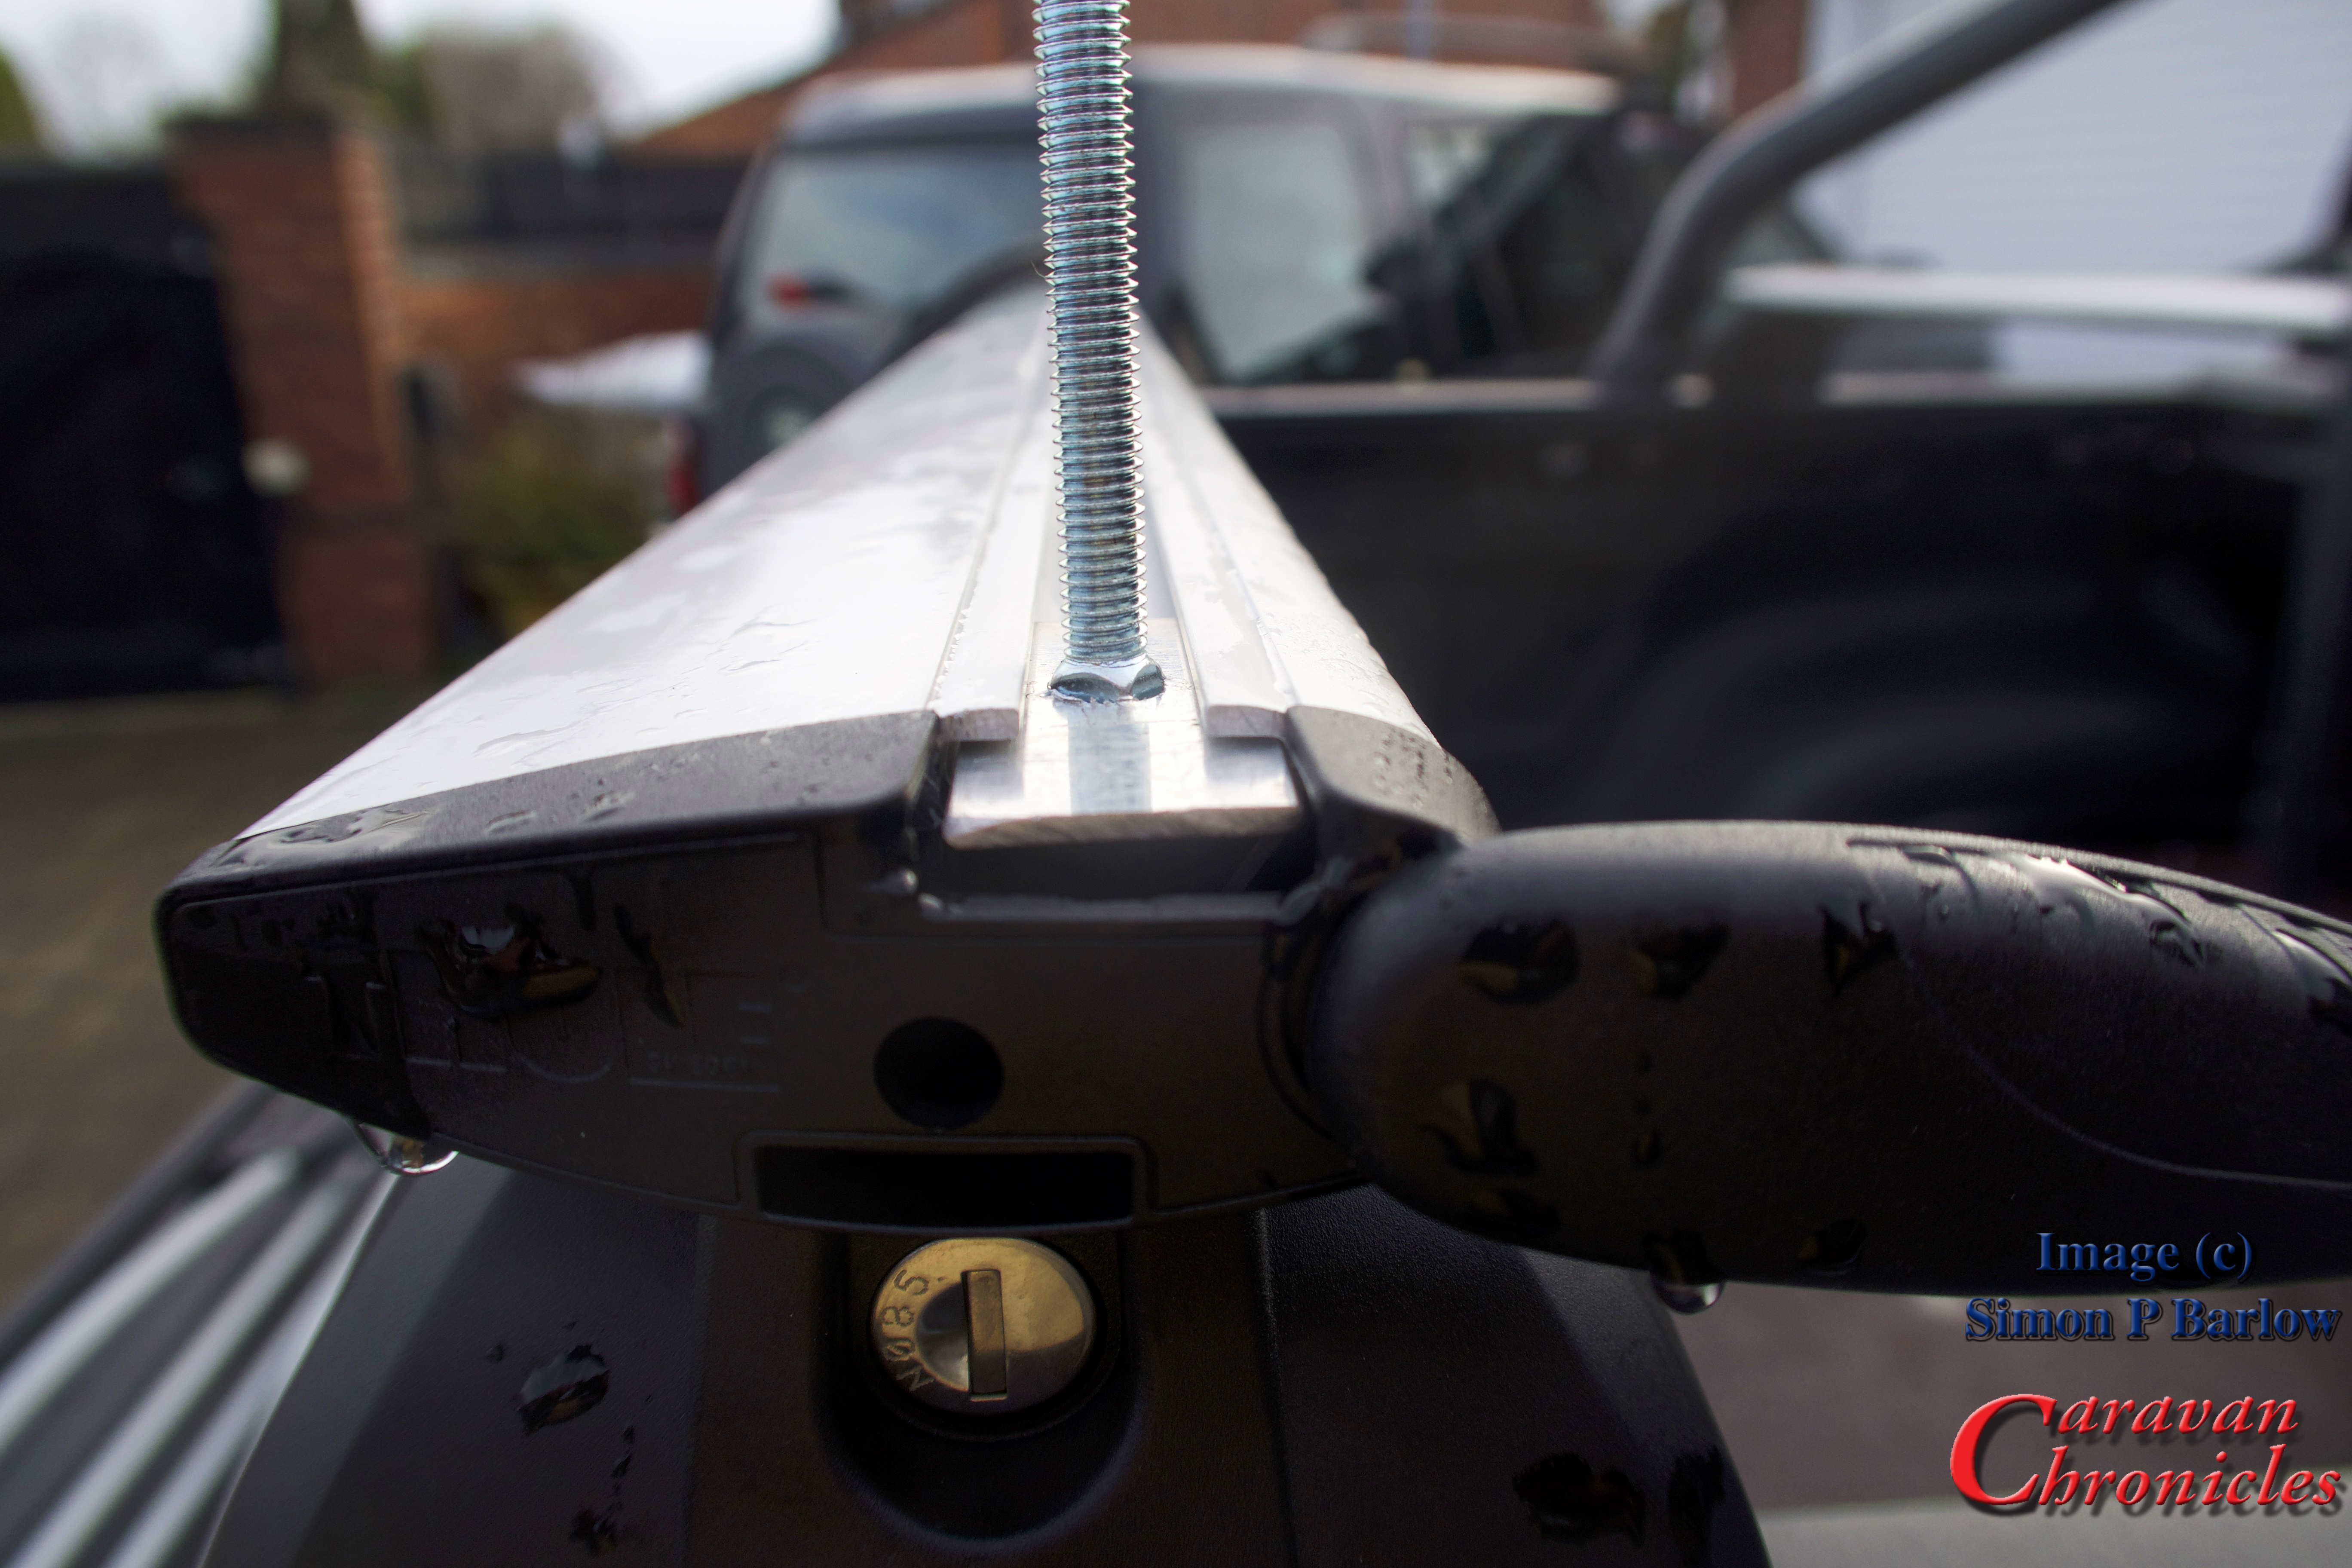
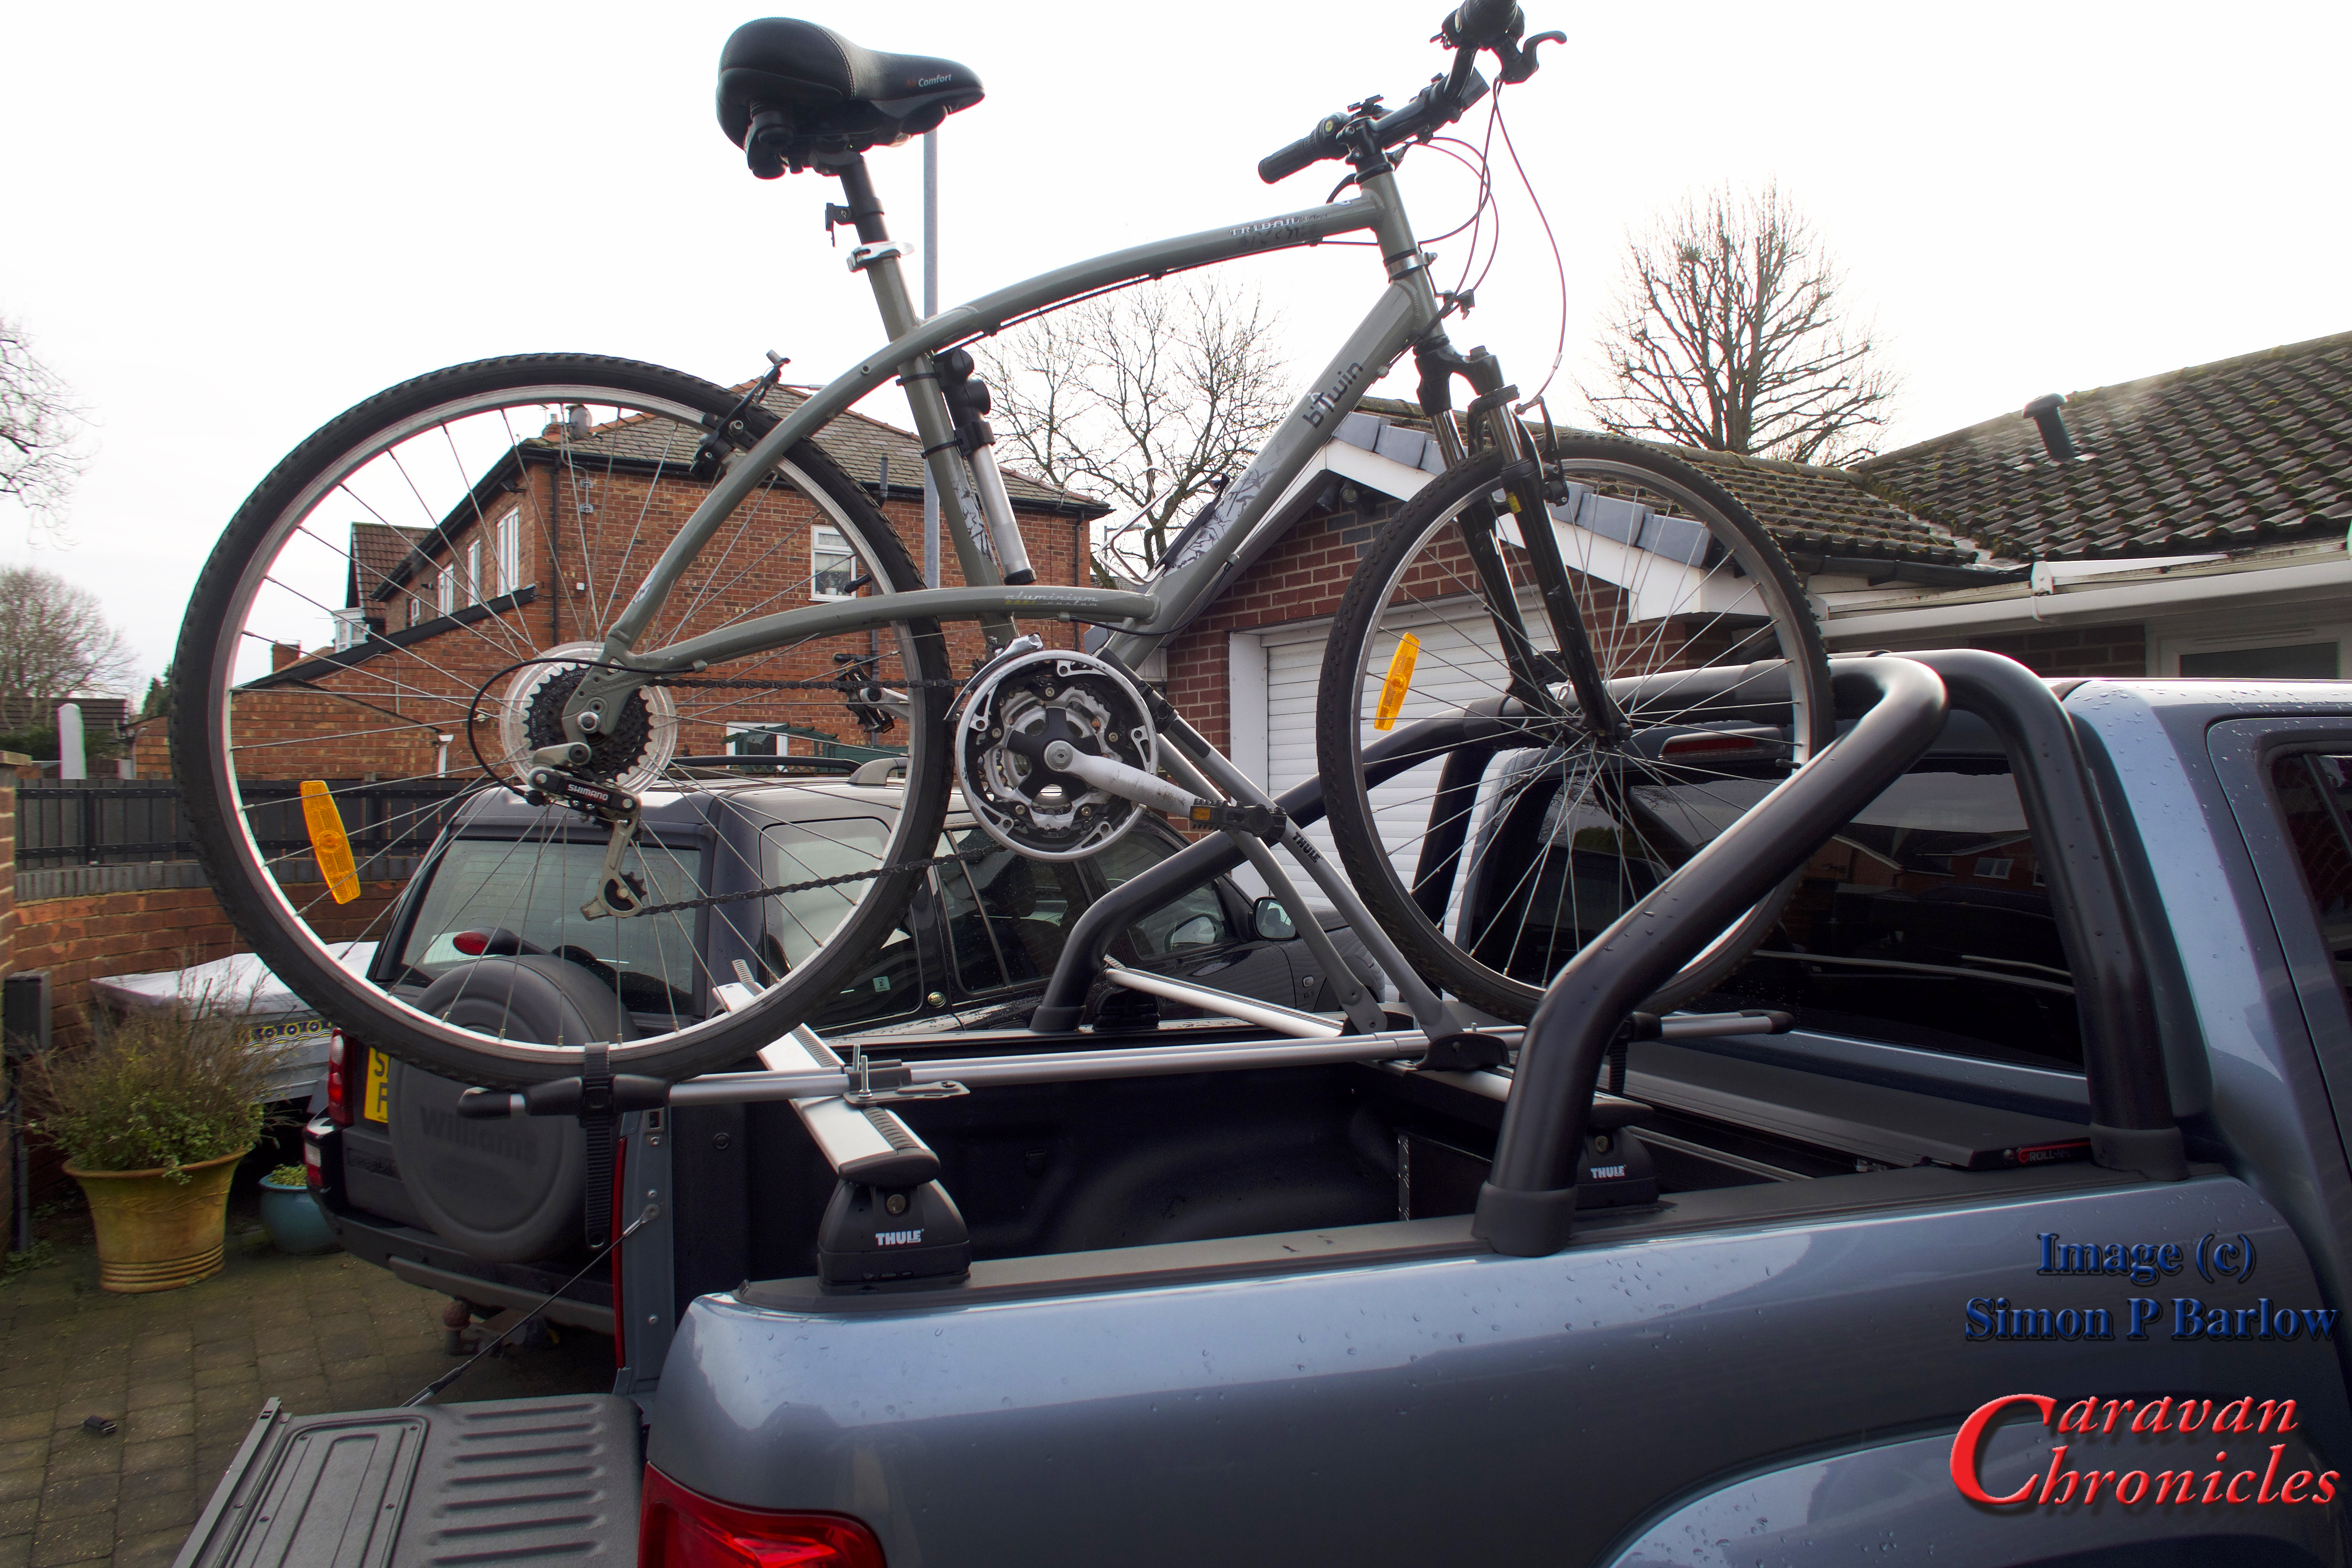
Sliding four of the newly made “T” track bolts in to the WingBars I could place the FreeRide 532 on to the bars.
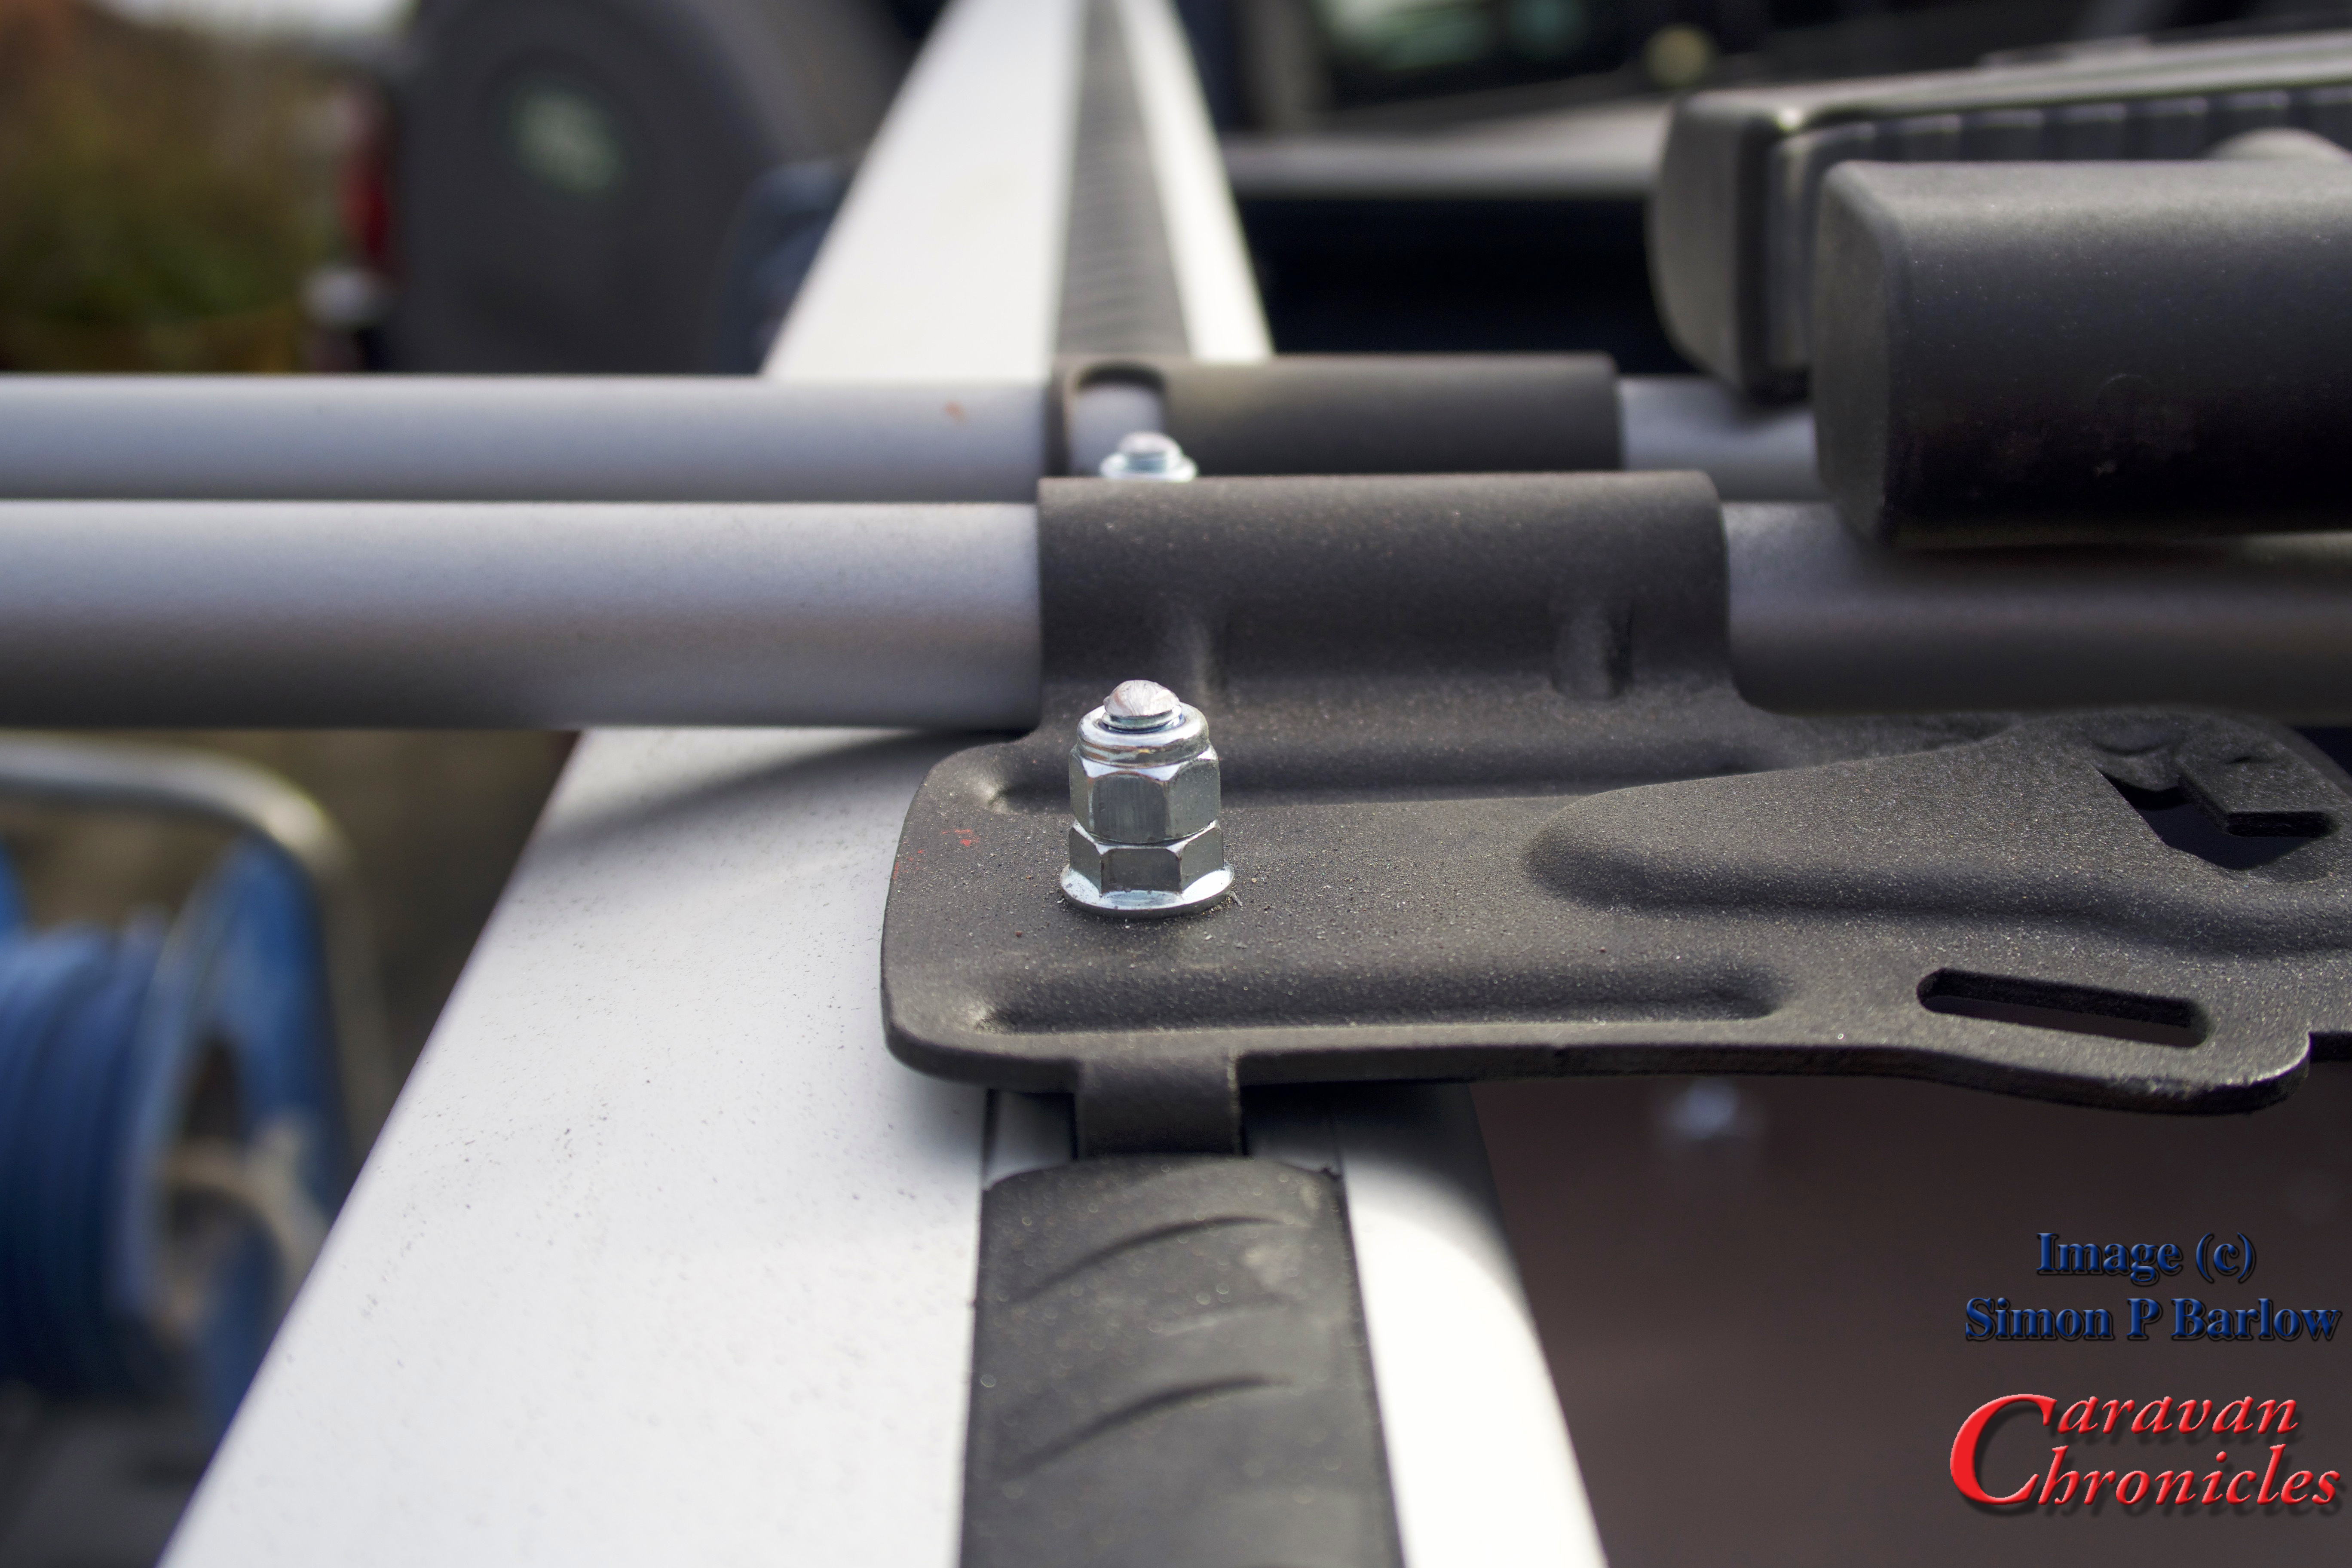
I used a couple of nuts to hold the rack in place while I test fitted one of the bikes. It was a bit too tight. The swing up frame section that clamps on to the bike only partially engaged on the bike frame. The whole rack needed moving rearwards by about 10 to 15 mm.
Not a problem, as the WingBar mounting is off set laterally compared to the “T” track, reversing the bar so it faced the other way would solve this and effectively move the “T” track slot rearwards by about 20mm.
With the WingBar mounted in the other direction the bike was a perfect fit. Also it made it easier opening the end caps of the WingBar as configured the correct way round they were a bit tight against the roll bar.The next thing to address was the overhang. I still had around 50 to 60 mm of adjustment I could make to the rails of the FreeRide rack. Removing everything again and a bit of ‘adjusticating’ with a small rubber mallet soon saw the rails in the correct position. I had not been able to get the rear of the mount flush with the pickup tailgate as was my original hope, but checking with a plumb bob…
… It was still shorter than the tow ball and only about 40mm longer than the rear bumper. So the overhang wasn’t anything to worry about. Even with a bike on the rack it would be clear of the caravan in the tightest of turns. Next it was just a matter of squaring things up and tightening everything down.
I ended up locating the rack more to the side than I first planned. This was for two reasons. Firstly, once the second rack is in place it leaves me with nearly 800 mm between the two racks which will allow for the option in the the future of having the ability to install a mesh tray, ski rack, surfboard rack (we don’t ski or surf… ho hum) or slimline roof box if we ever run out of storage in the Amarok. The second reason is it will give the rear view dash cam a relatively unobscured view rearward even with two bikes on the back.
Everything torqued to the correct settings, I topped off the nuts with an additional nylon lock nut to make sure they could not vibrate loose…
… and using a Dremmel I cut off the excess thread and ground off any sharp edges. I need to find a suitable plastic or rubber push on cover for these then I can give them a quick coat of preserving grease.
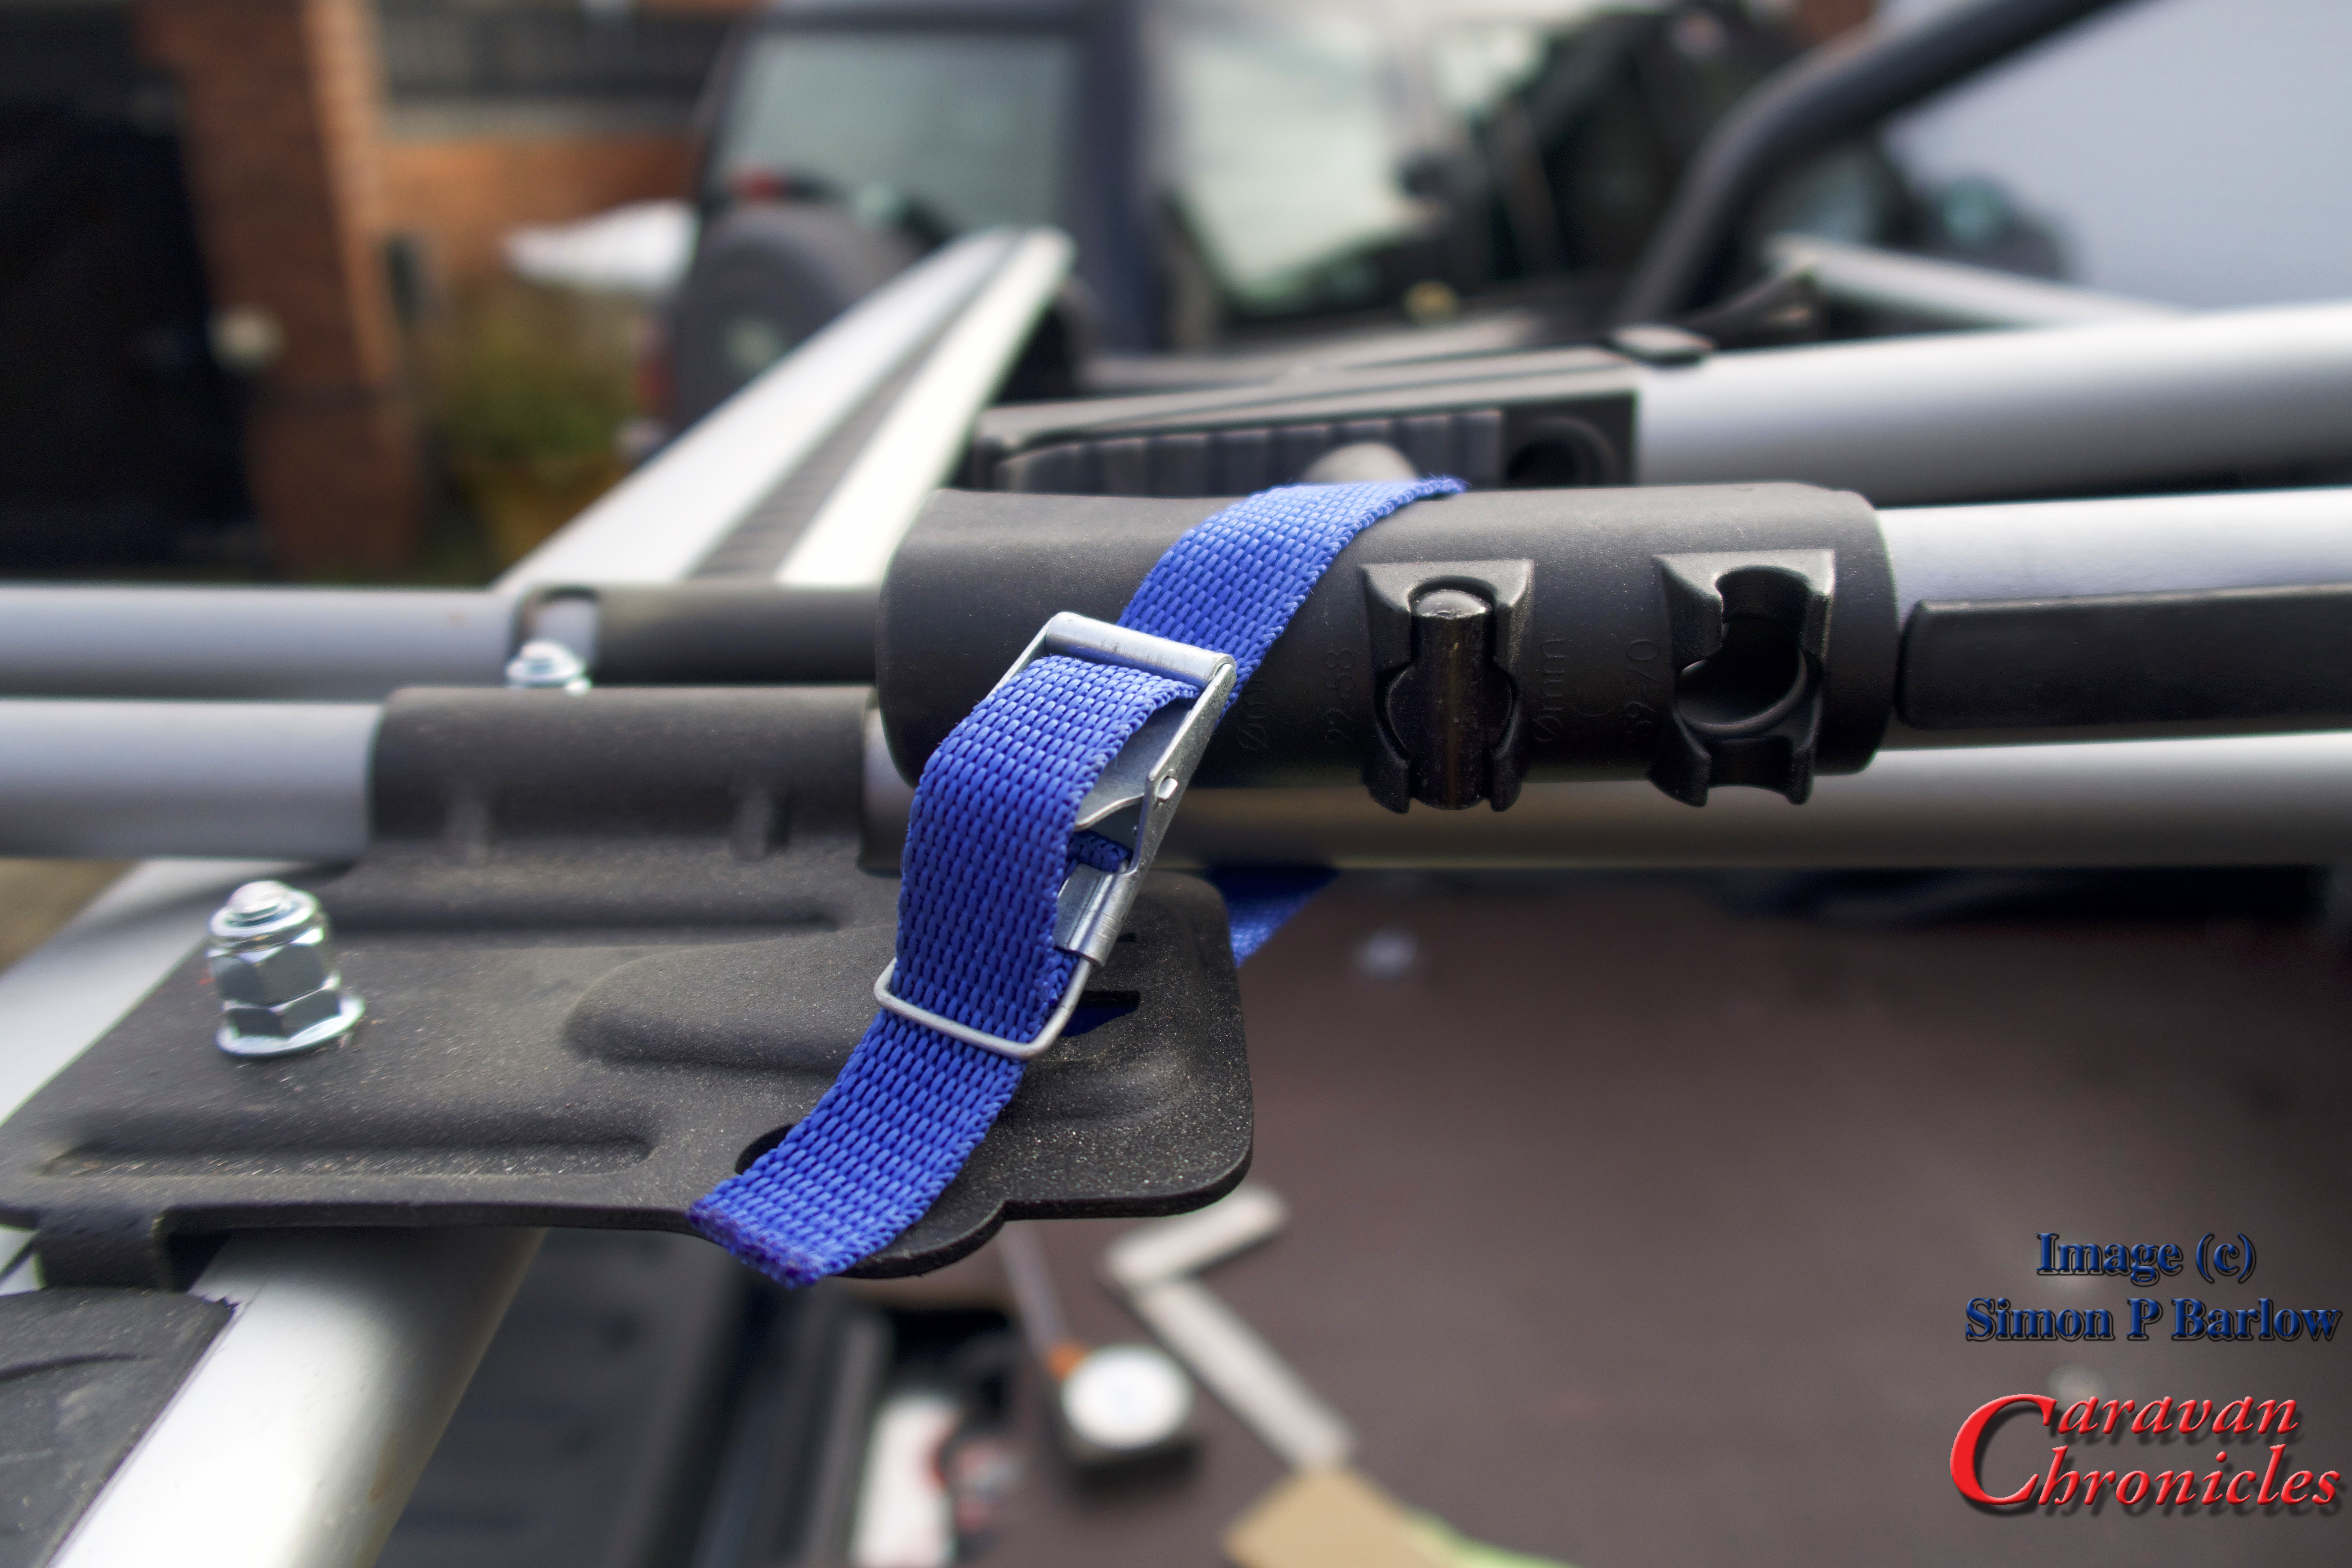
One thing that I did think about was the prospect of the swing arms bouncing up and down when bikes were not on the rack. A quick rummage in my straps box produced a few of these little blue straps and a handy slot on the mounting plate seemed ideal…
… problem solved. A simple solution to something that may or may not be a problem.
So one rack fitted, all that is left is to repeat for the other side, when it arrives!
The additions to the Wolf continue, despite the recent news from Glossop Caravans at our last service, that we have damp in the caravan. Hopefully we will hear soon whether or not its covered by the warranty. So, moving on, a couple of additions to the VW Amarok. After installing the sliding bed, I noticed that there was some space available between the end of the bed and the truck bed at the cab end. It was only 70 mm, but I thought with a bit of creative construction, I could come up with a contrivance to hold some of the stuff and tools that we normally schlep about with us. Using 18mm birch ply phenol finished board I came up with a storage box that is fitted to the bed and projects forward right up to the truck bed front wall… Continue reading →
So after all the spreadsheets, test drives, sorting insurance and towing electrics, emails and telephone calls, the end was in sight. We had a collection date, the 28th July. Apart from our very first brand new car… a racing red MG Metro back in the early 80’s, Sue had always been the one to collect our cars from the showroom, however this time, it was Sue that was working so I was on my own. It took around half an hour to go through all the paperwork and sign on the dotted line several times. Despite the Manchester drizzle the walk round was in-depth and covered all sorts. Inside, Jessica went through all the systems and paired my iPhone to the audio system, even storing some of my most often used radio stations in the memory.
Jessica waiting to give me the grand tour and hand over the keys.
Handover done, everything explained I said goodbye to Jessica who had been so helpful through the whole process, I turned the key, slipped it into drive and pulled out of the forecourt. The odometer showed exactly 48 miles as I turned “Project Wolf” on to Village Way.
My experience with a Commercial Vehicle Dealer
I have mentioned this before, one of the things a few people expressed concern about was actually dealing with a commercial vehicle dealer. Well having dealt with Manchester Van Centre VW I can only comment on my experience. The customer service on first contact was excellent. The whole buying process was handled by one person, Jessica, who did everything. We weren’t passed off from one person to another through different stages of the buying process. I know we are not (well me actually) easy customers… I like to know the in’s-and-out’s of everything and do like getting into the details and asking awkward questions. Through our initial contact with Manchester Van Centre VW to driving out of the forecourt with our new vehicle took a total of 10 days and I either spoke to Jessica or exchanged emails nearly every day over that period and we were kept fully informed throughout the process. My dealings over a few months with VW UK while doing all the research was not as good, emails often going unanswered. Dealing with VW GmbH in Germany was excellent however and they went the extra mile (or kilometre!) to provide information requested.
Are all VW Commercial Dealers the same? I can’t answer that one. Can I recommend Manchester Van Centre VW? Based on my dealings with them, yes. I’ll let you know how it all goes at the first service and if I need to change my views.
On the way back home I had to call in to the North West Towbar Centre in Stockport. When they originally fitted the tow bar, they were two terminals missing and needed to order them from Westfailia. They did contact me directly to let me know before I picked up the Amarok and I arranged to drop in.
While they were fitting the missing terminals, I had another chat with the guys there. I had already had a look underneath at the tow bar and the standard of fitting… you can tell a lot by the way cables are routed and fixed into place, and these guys had done a good job. Everything was routed away from anything that could chafe the loom, the loom was enclosed in a flexible PVC conduit and secured firmly to the vehicle.
While I was there I also checked out the fittings I’d need for the bike racks. They have a full display of Thule products and I was able to check exactly what bits I’d need. Heading home, I called in to fill up with diesel… 52 miles on the clock and 65.74 litres to fill up. I can now start another spread sheet to record mileage and fuel.
… and of course I need to get the thing weighed on a VOSA weigh-bridge.
The figures given on the V5C are a Mass In Service of 2197 Kgs and a Maximum Permissible Mass of 3170 Kgs. On paper, based on a MIS of 2197 Kgs, the 85% ratio is a trailer MTPLM of 1867 Kgs. Our current caravan calculates at 68%. All that is subject to what it weighs on the scales though.
Our first trip towing will be in a few days and I’ll let you know how we get on and my thoughts. I’ll also show you some of the bit’s that we have added.