
Tags
Bike Rack, Maintenance, Modifications, Touring, Towing, VW Amarok
OK, so now to fit the actual bike carriers onto the rack I had previously installed a couple of days ago.
We had opted for the Thule FreeRide 532 over the ProRide version. What put me off the ProRide were a couple of videos on YouTube showing just how easy it was to remove a bike supposedly locked on to the rack. The FreeRide 532 has two arms supporting the bike and offered an option for additional security…. which I’m not going to go into for obvious reasons!
I had ordered a twin pack of the FreeRide 532, unfortunately I only received one. It seems the other was lost in transit somewhere according to my enquiries with the supplier. The other thing I found out was they (or it) didn’t come with the “T” track fixings. OK so a quick trip down to my nearest Thule dealer Northwest Towbars to pick up the elusive fixings. They would remain elusive… Northwest Towbars didn’t have any in stock. Not to be out manoeuvred I’d make my own.
To the bat cave again…
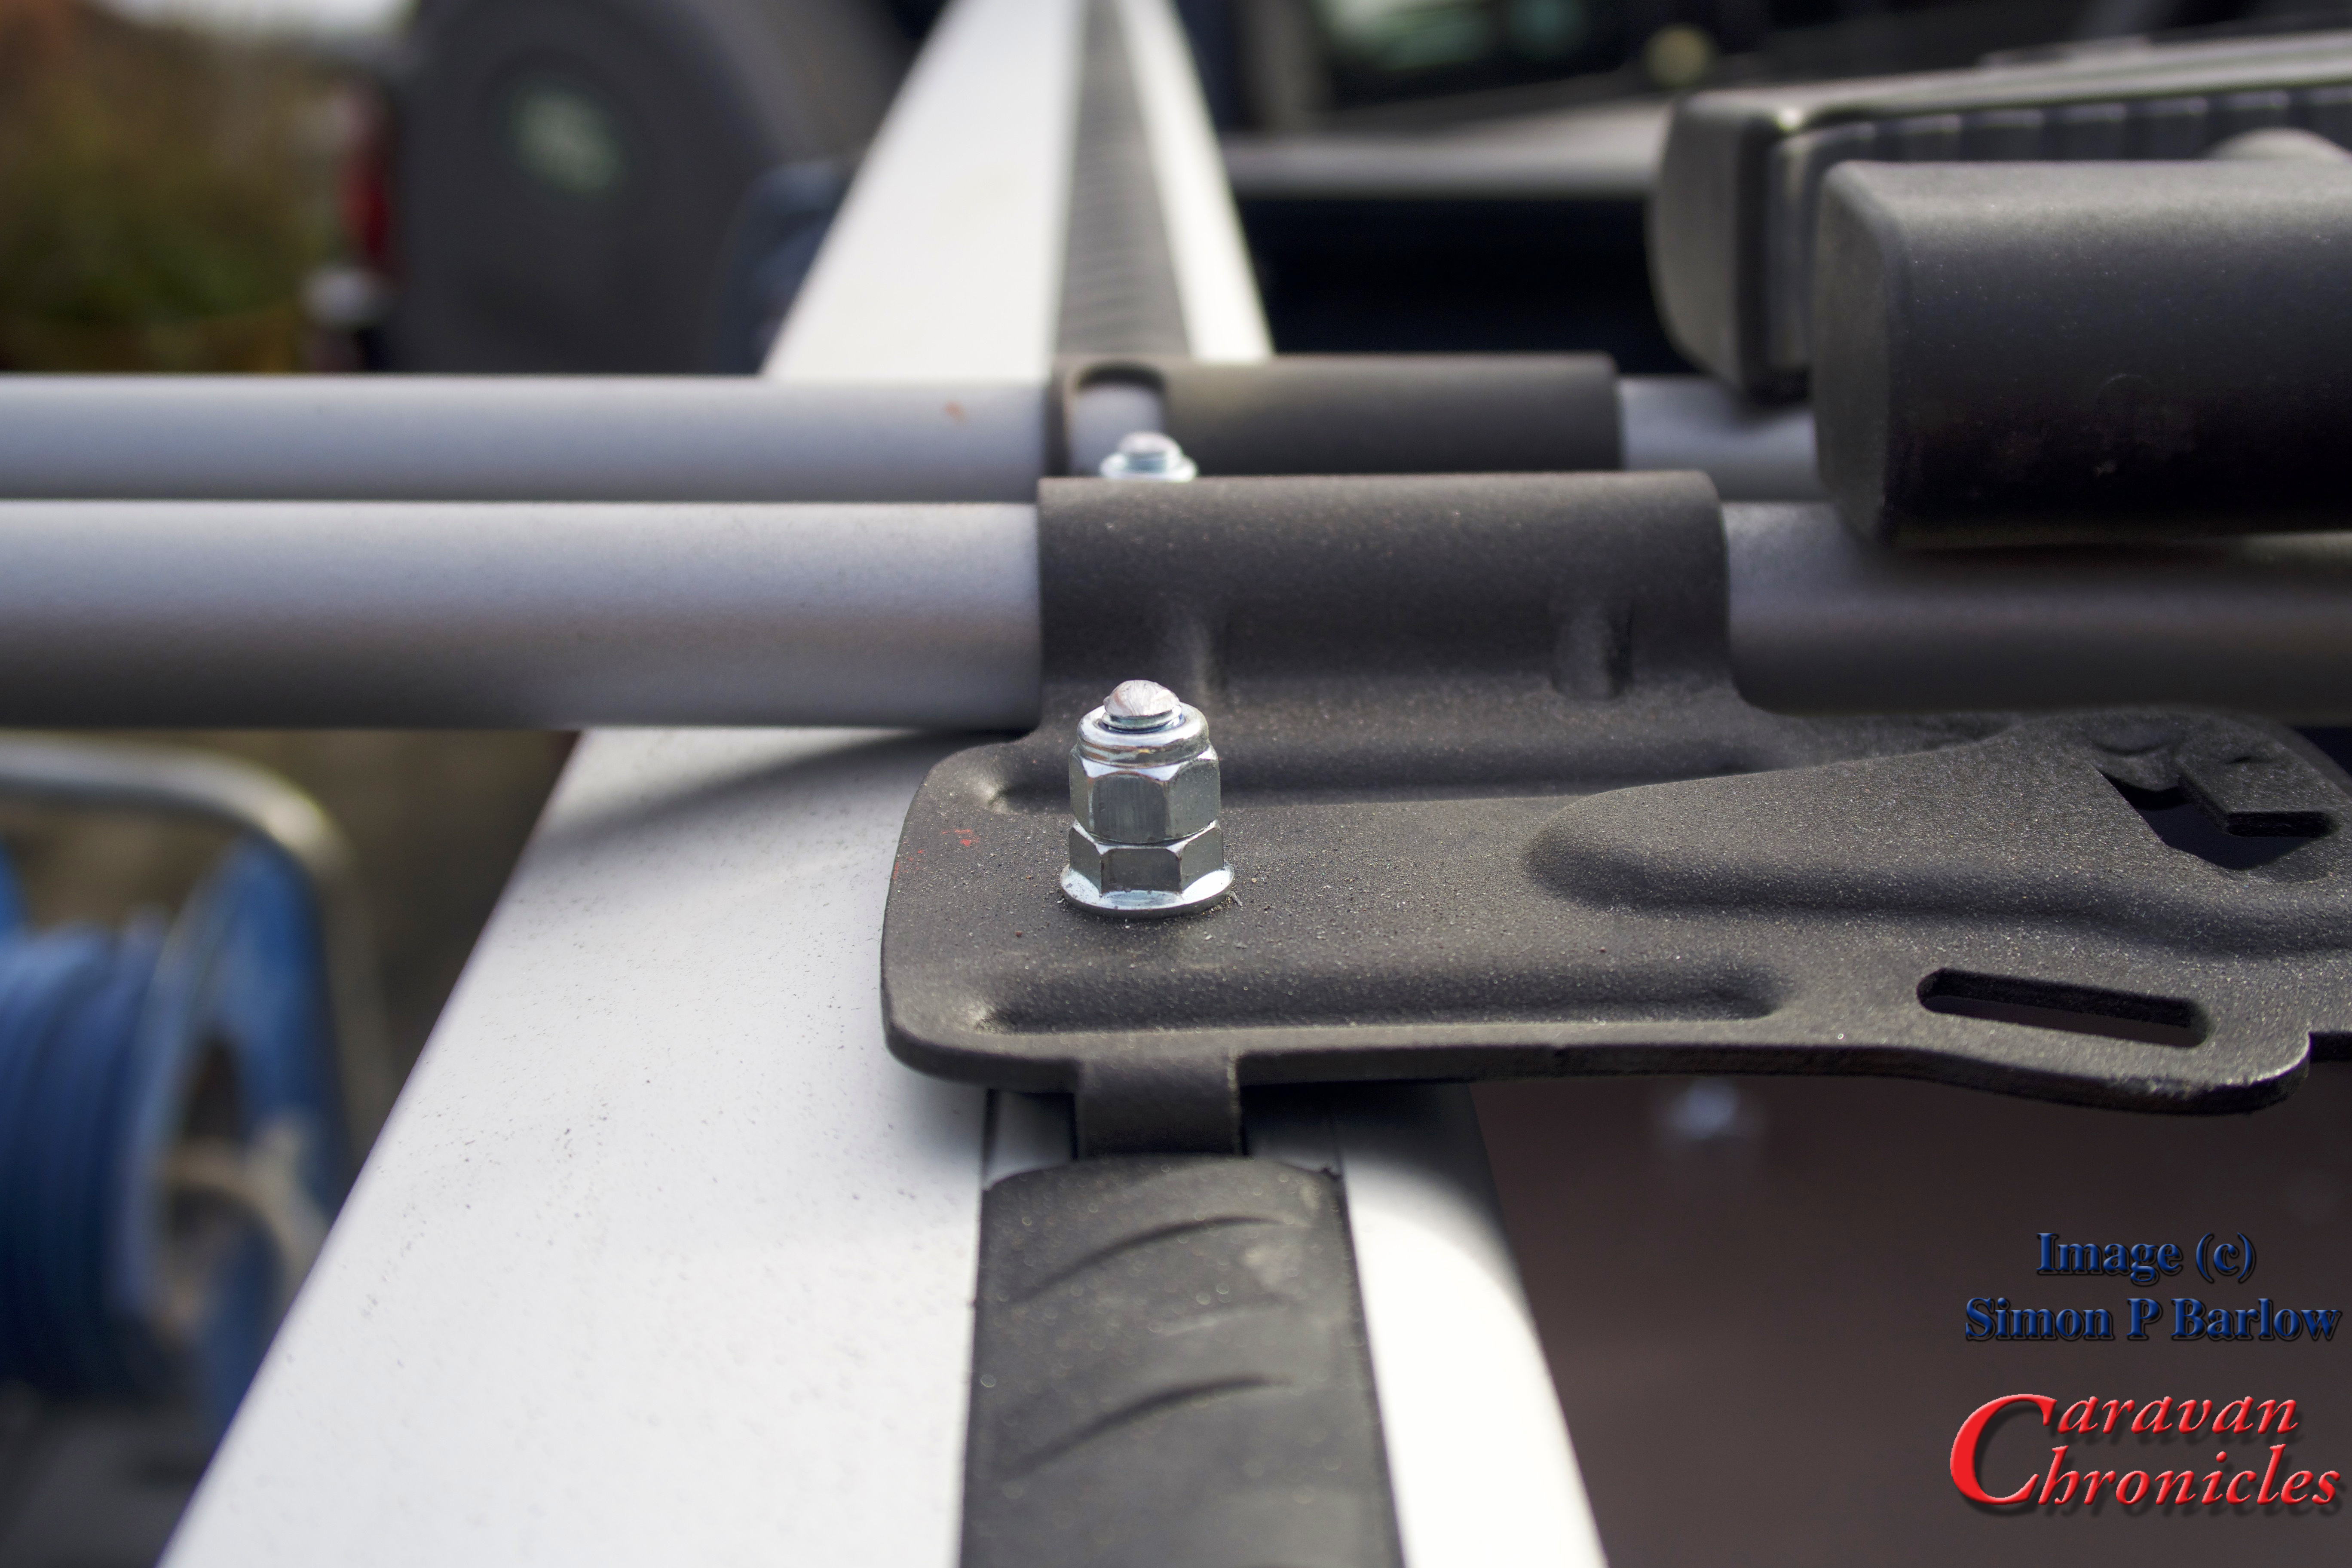
I just happened to have some 2mm aircraft grade aluminium handy and cut eight 21mm x 45mm pieces. The FreeRide 532 normally has three mounting locations, but as there was an additional hole that lined up with the “T” track it would be rude not to use it! So I made four for each rack.
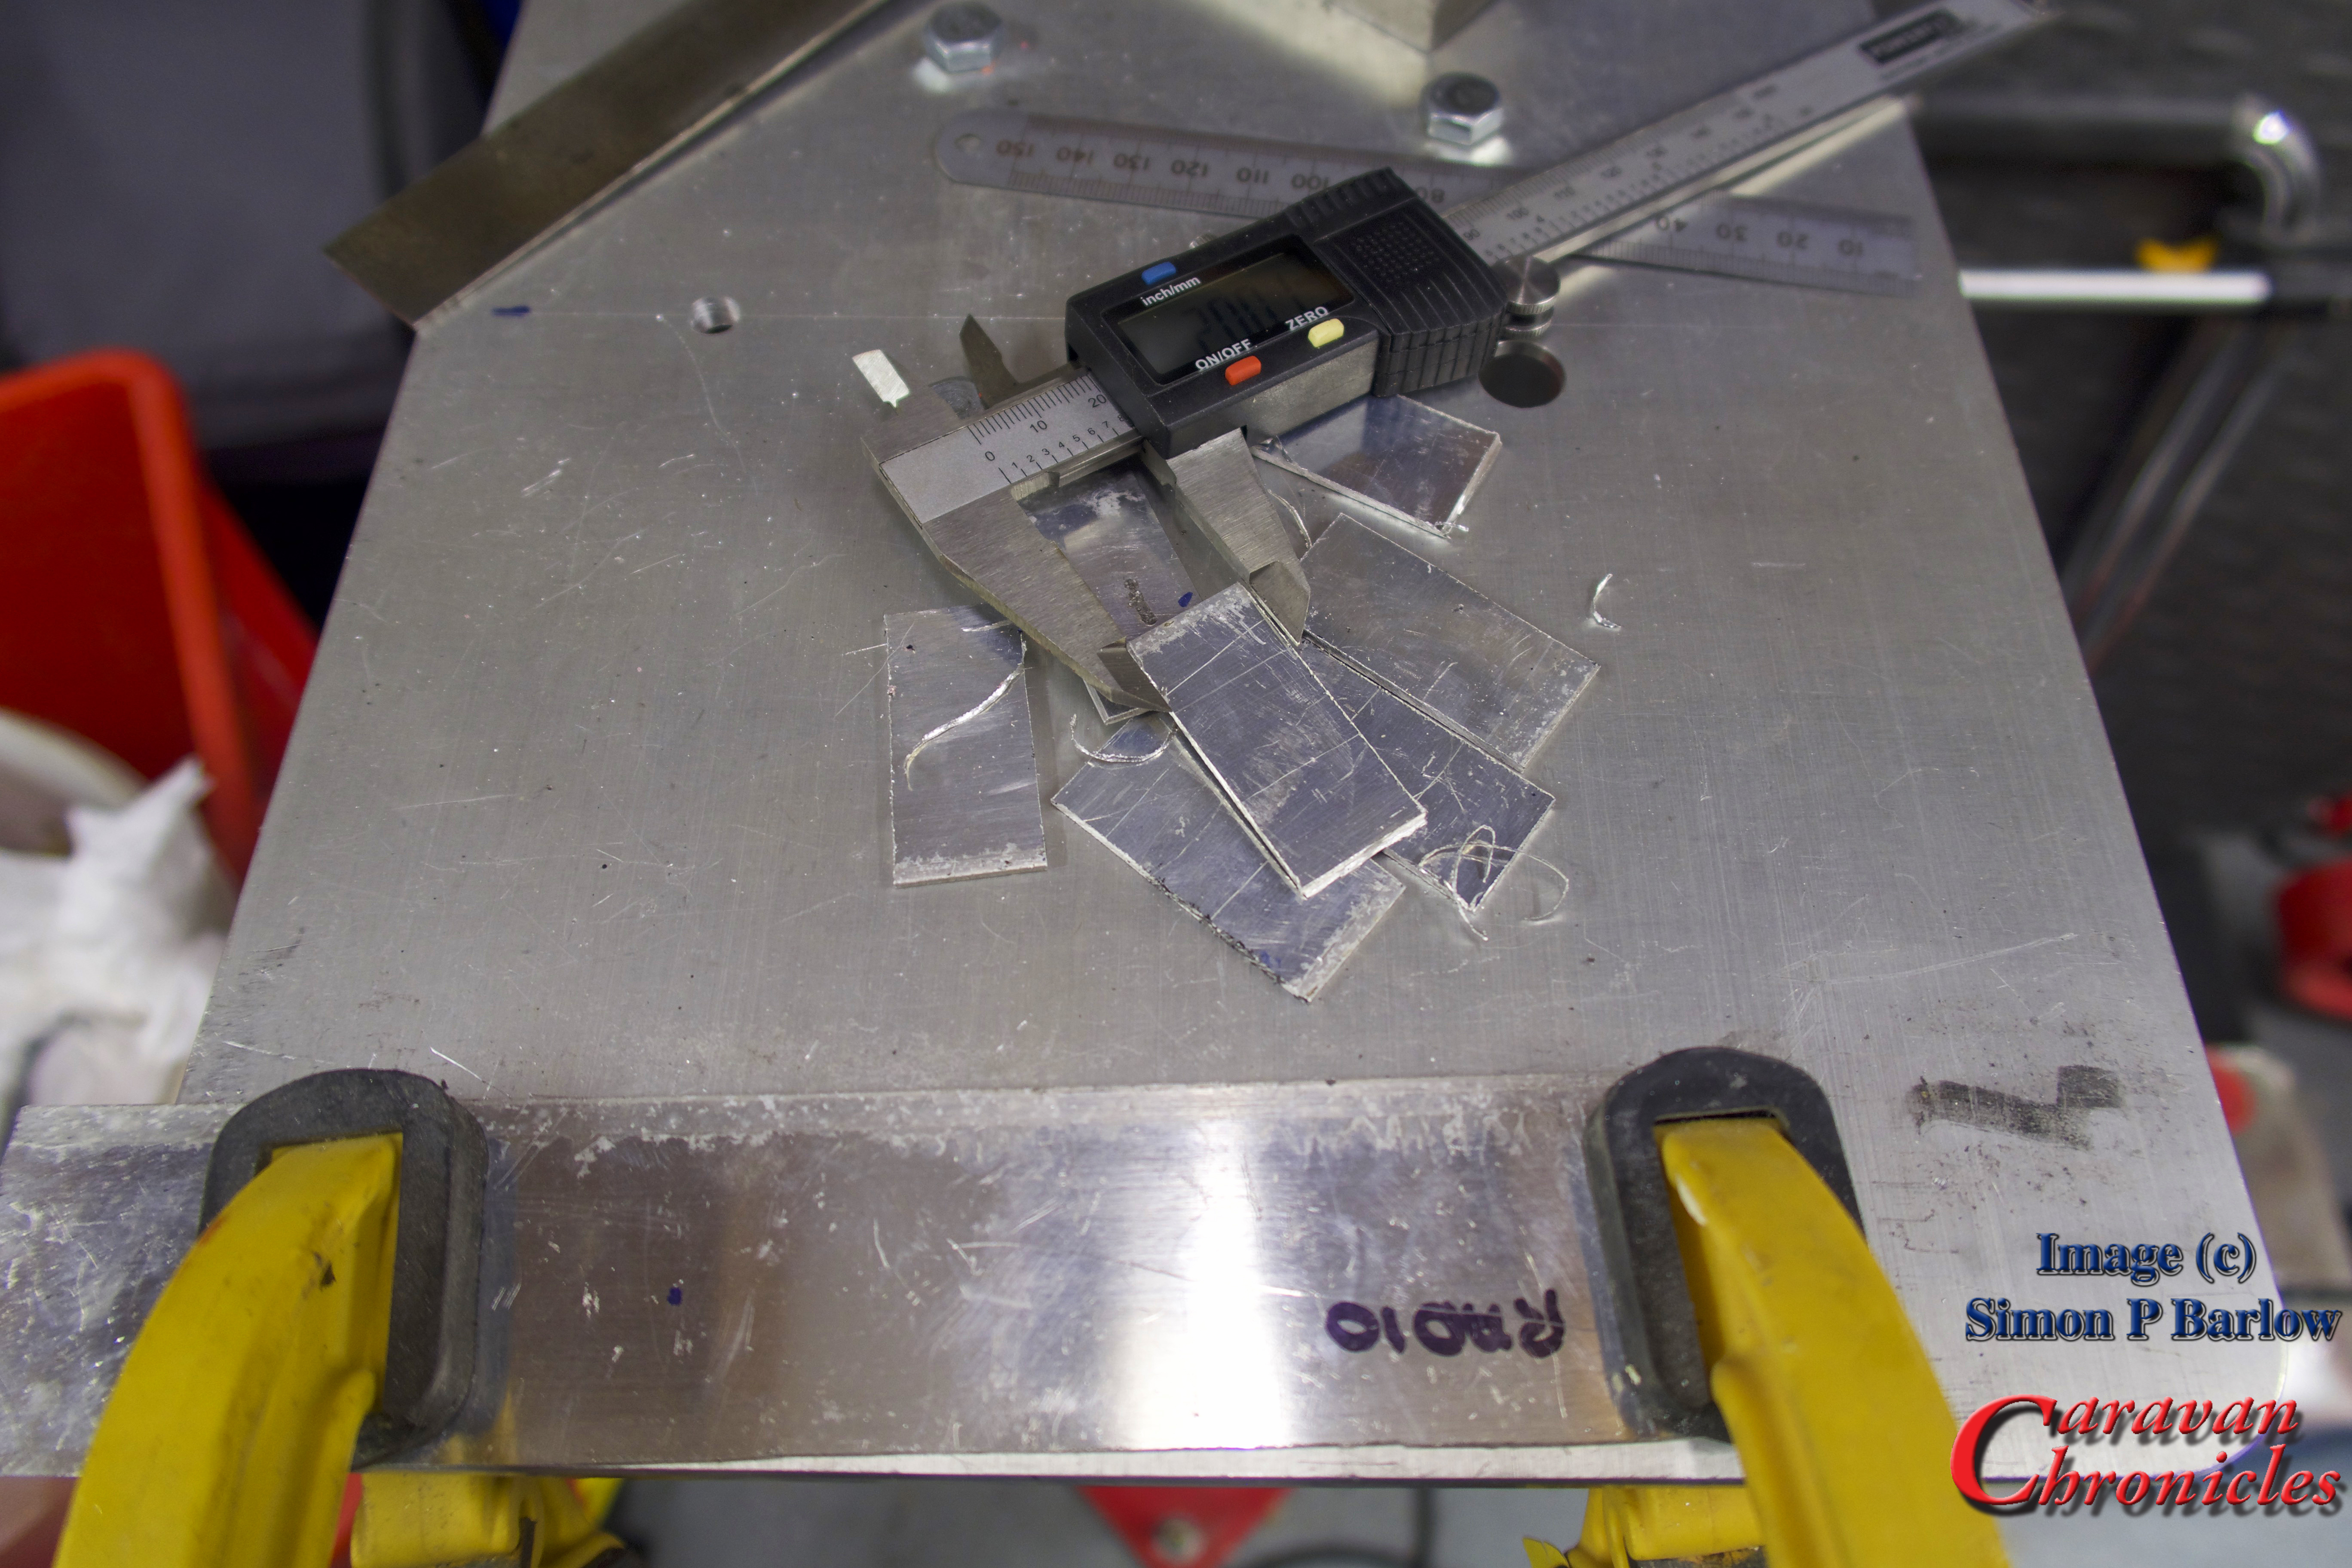 For the threaded bolt I had some dome head bolts handy. The width of the dome head was wide enough so it would not pull through the slot on its own so I was not relying on a 2mm think aluminium plate entirly. To hold the bolts in place I drilled a slightly undersized hole in the aluminium…
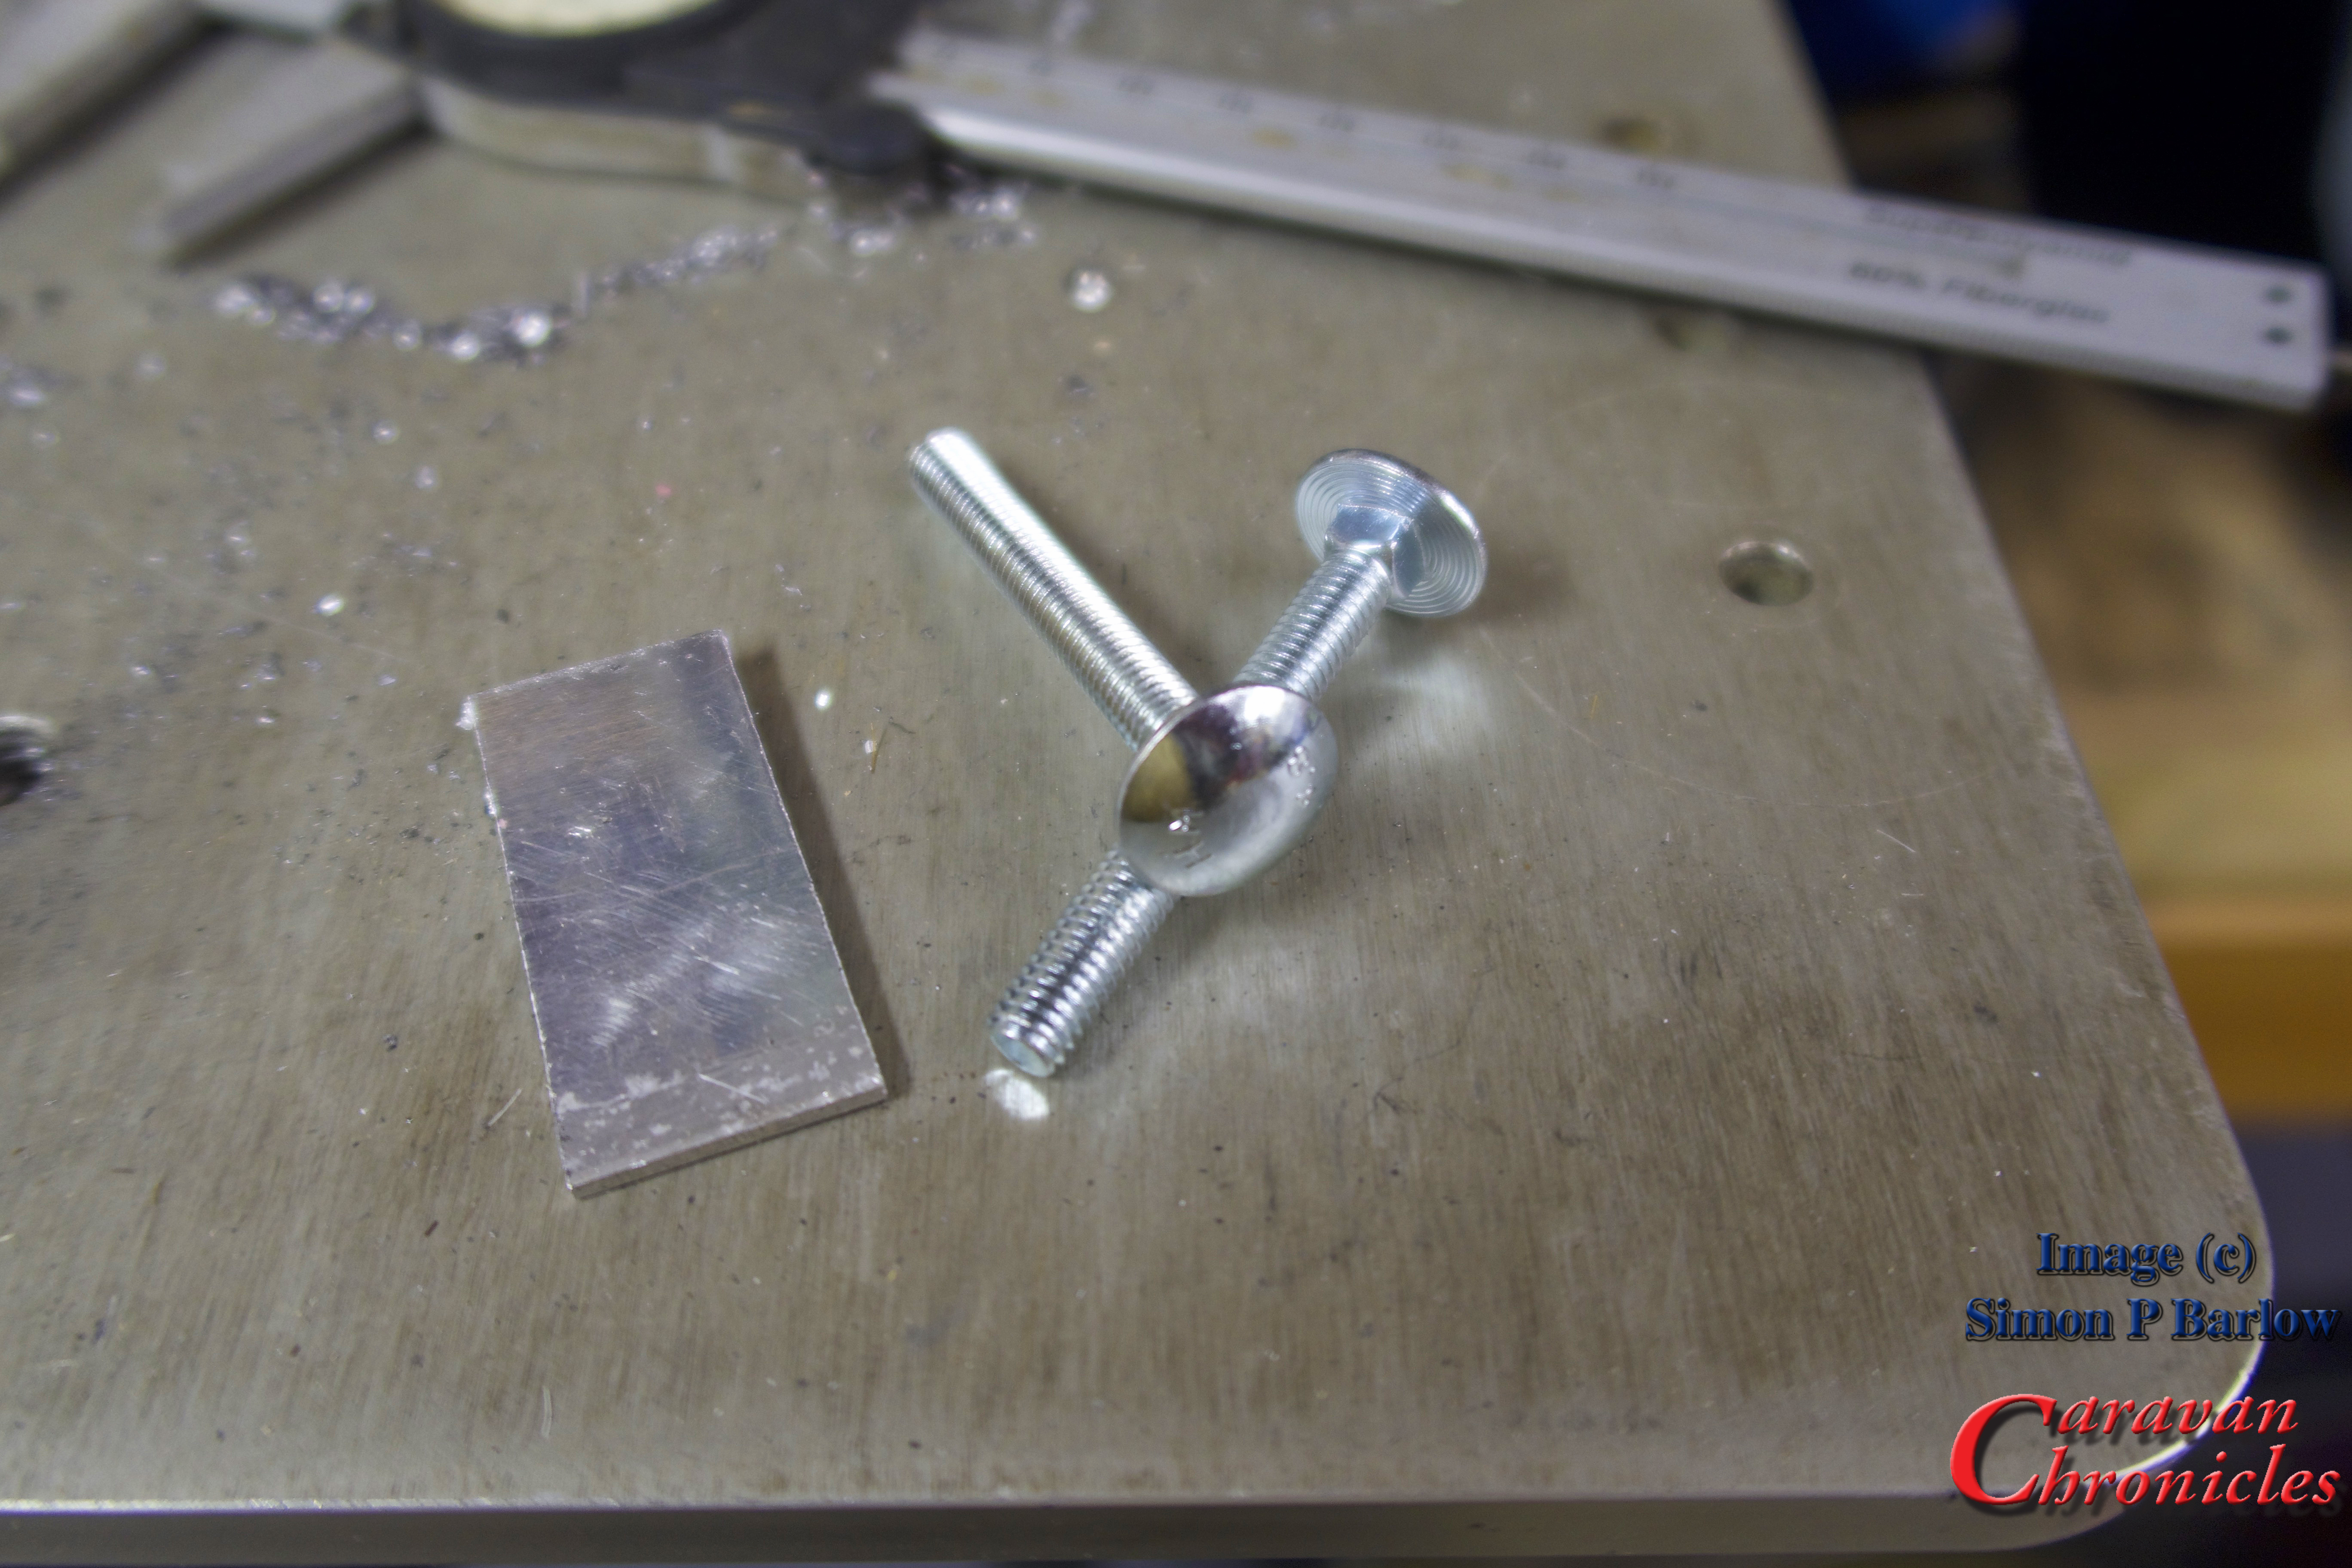
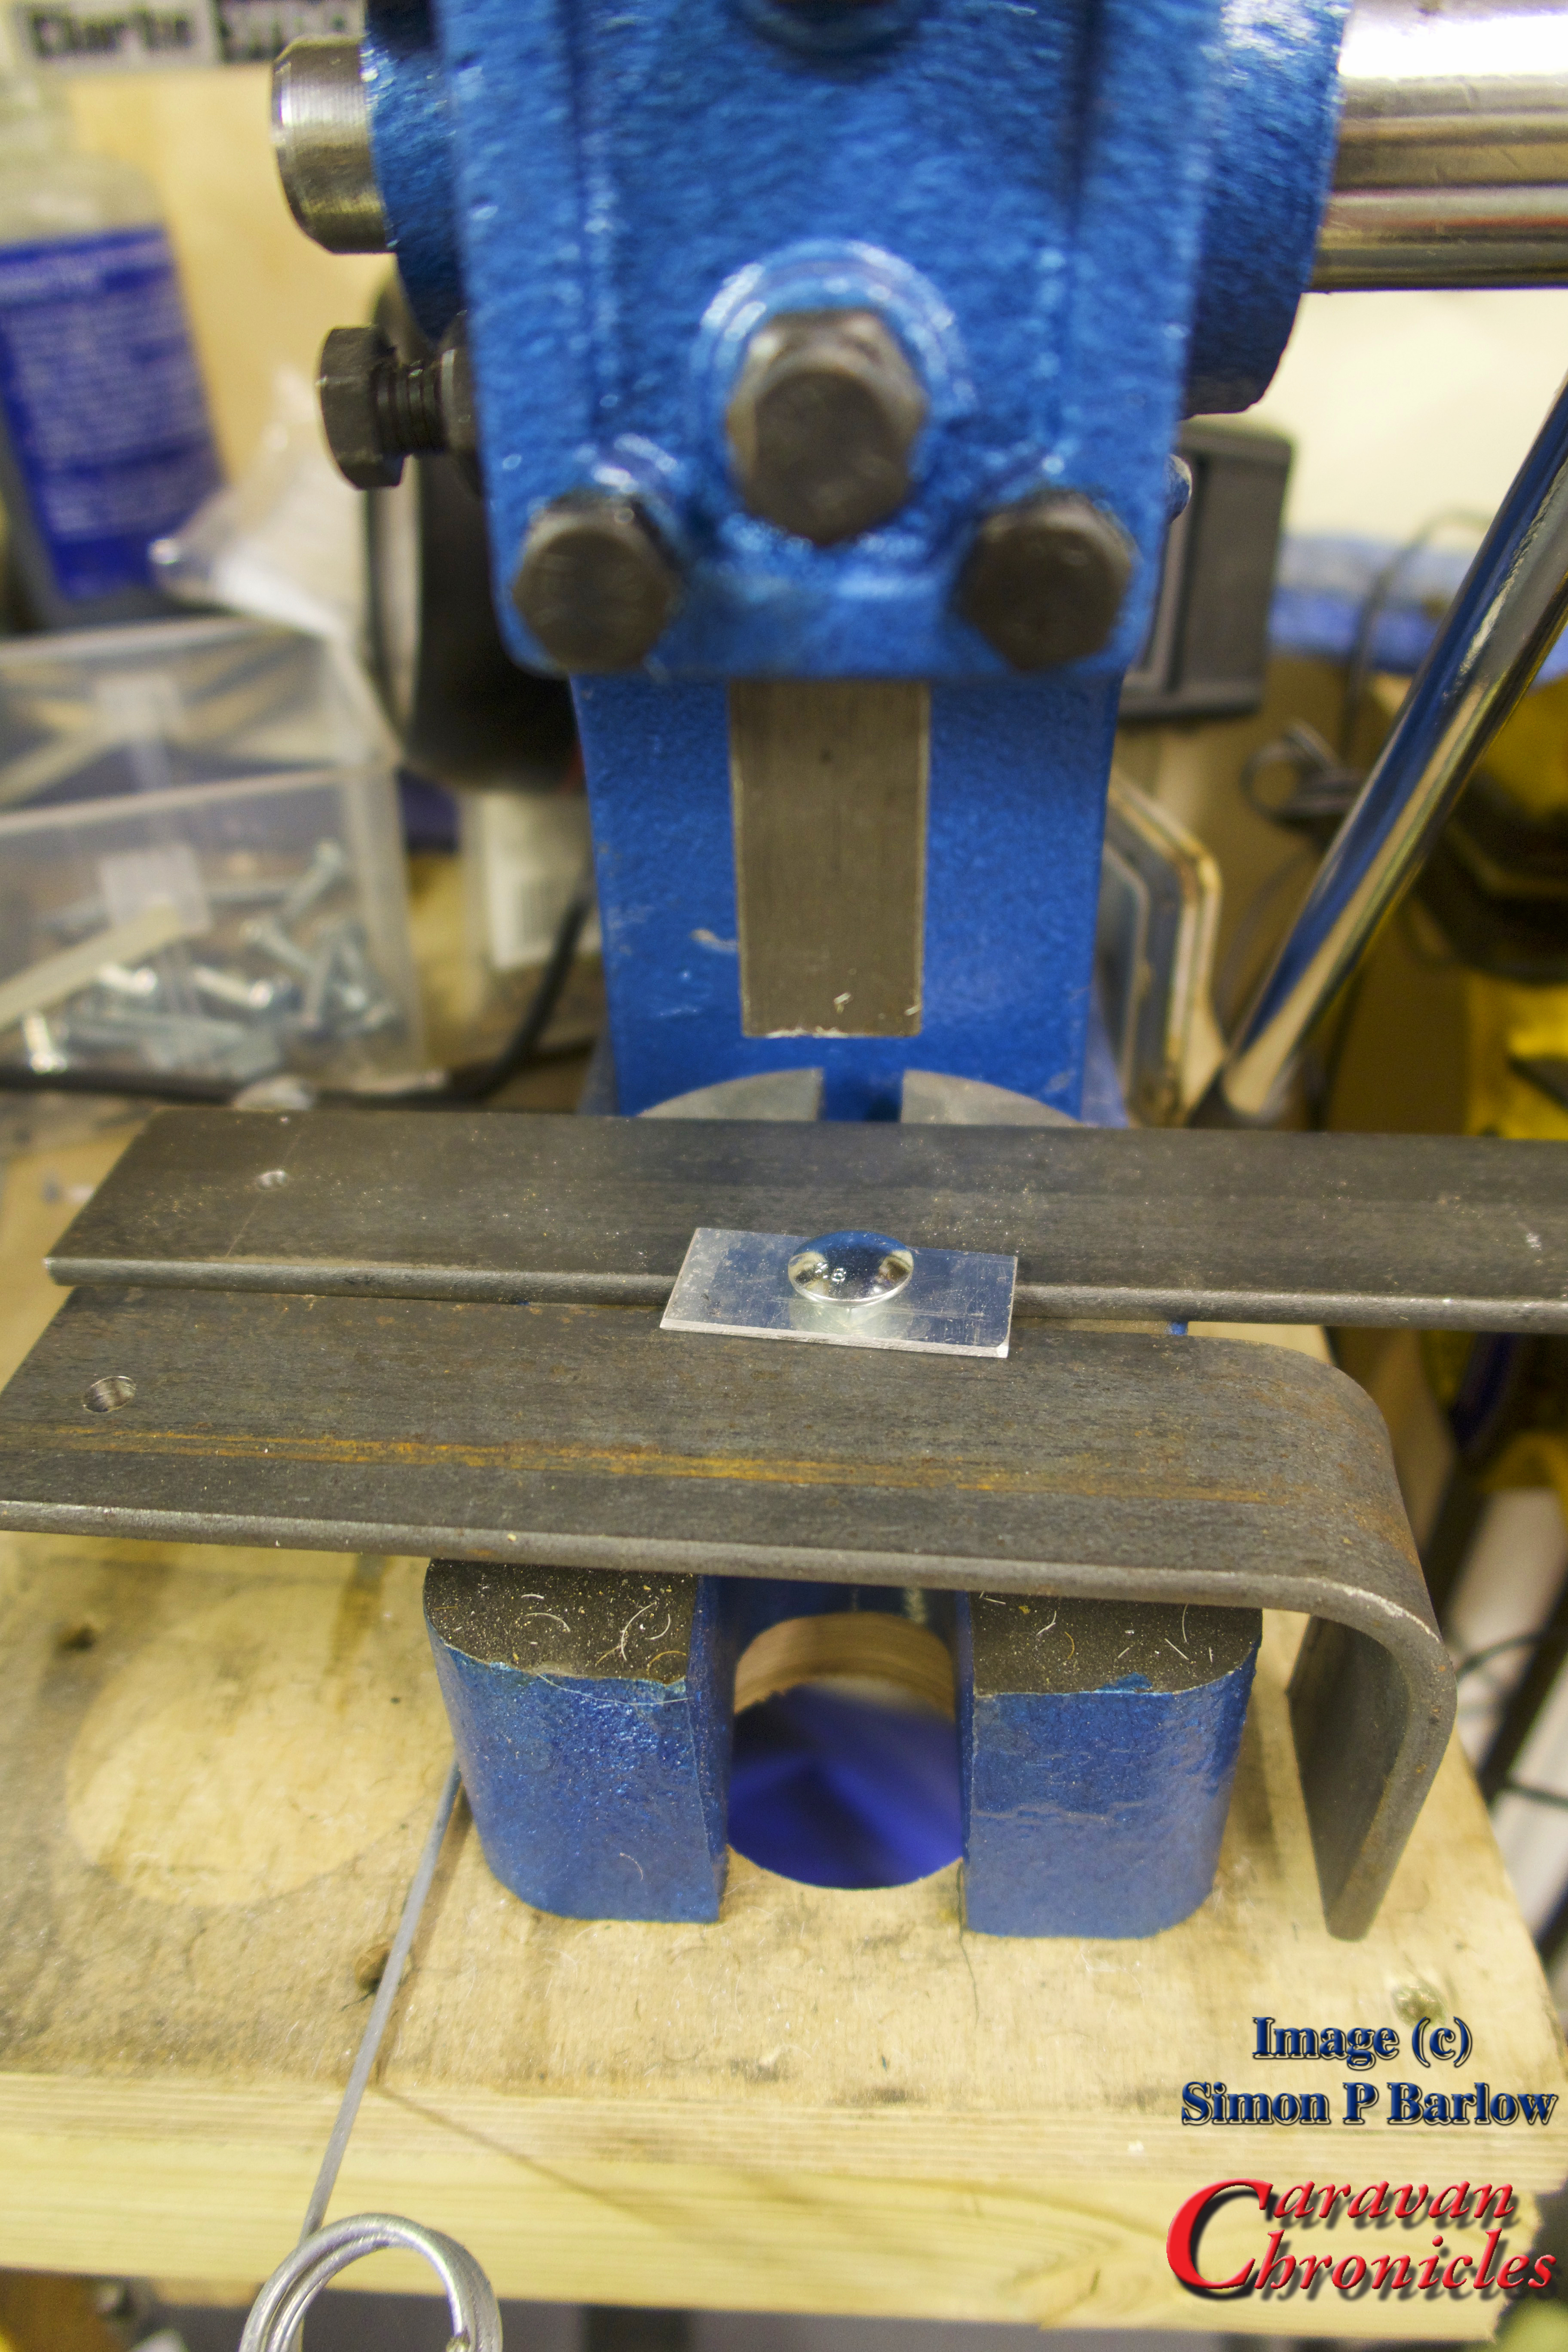
 …and used my small press to force the square shoulders of the bolt through the aluminium plate to hold it in place.
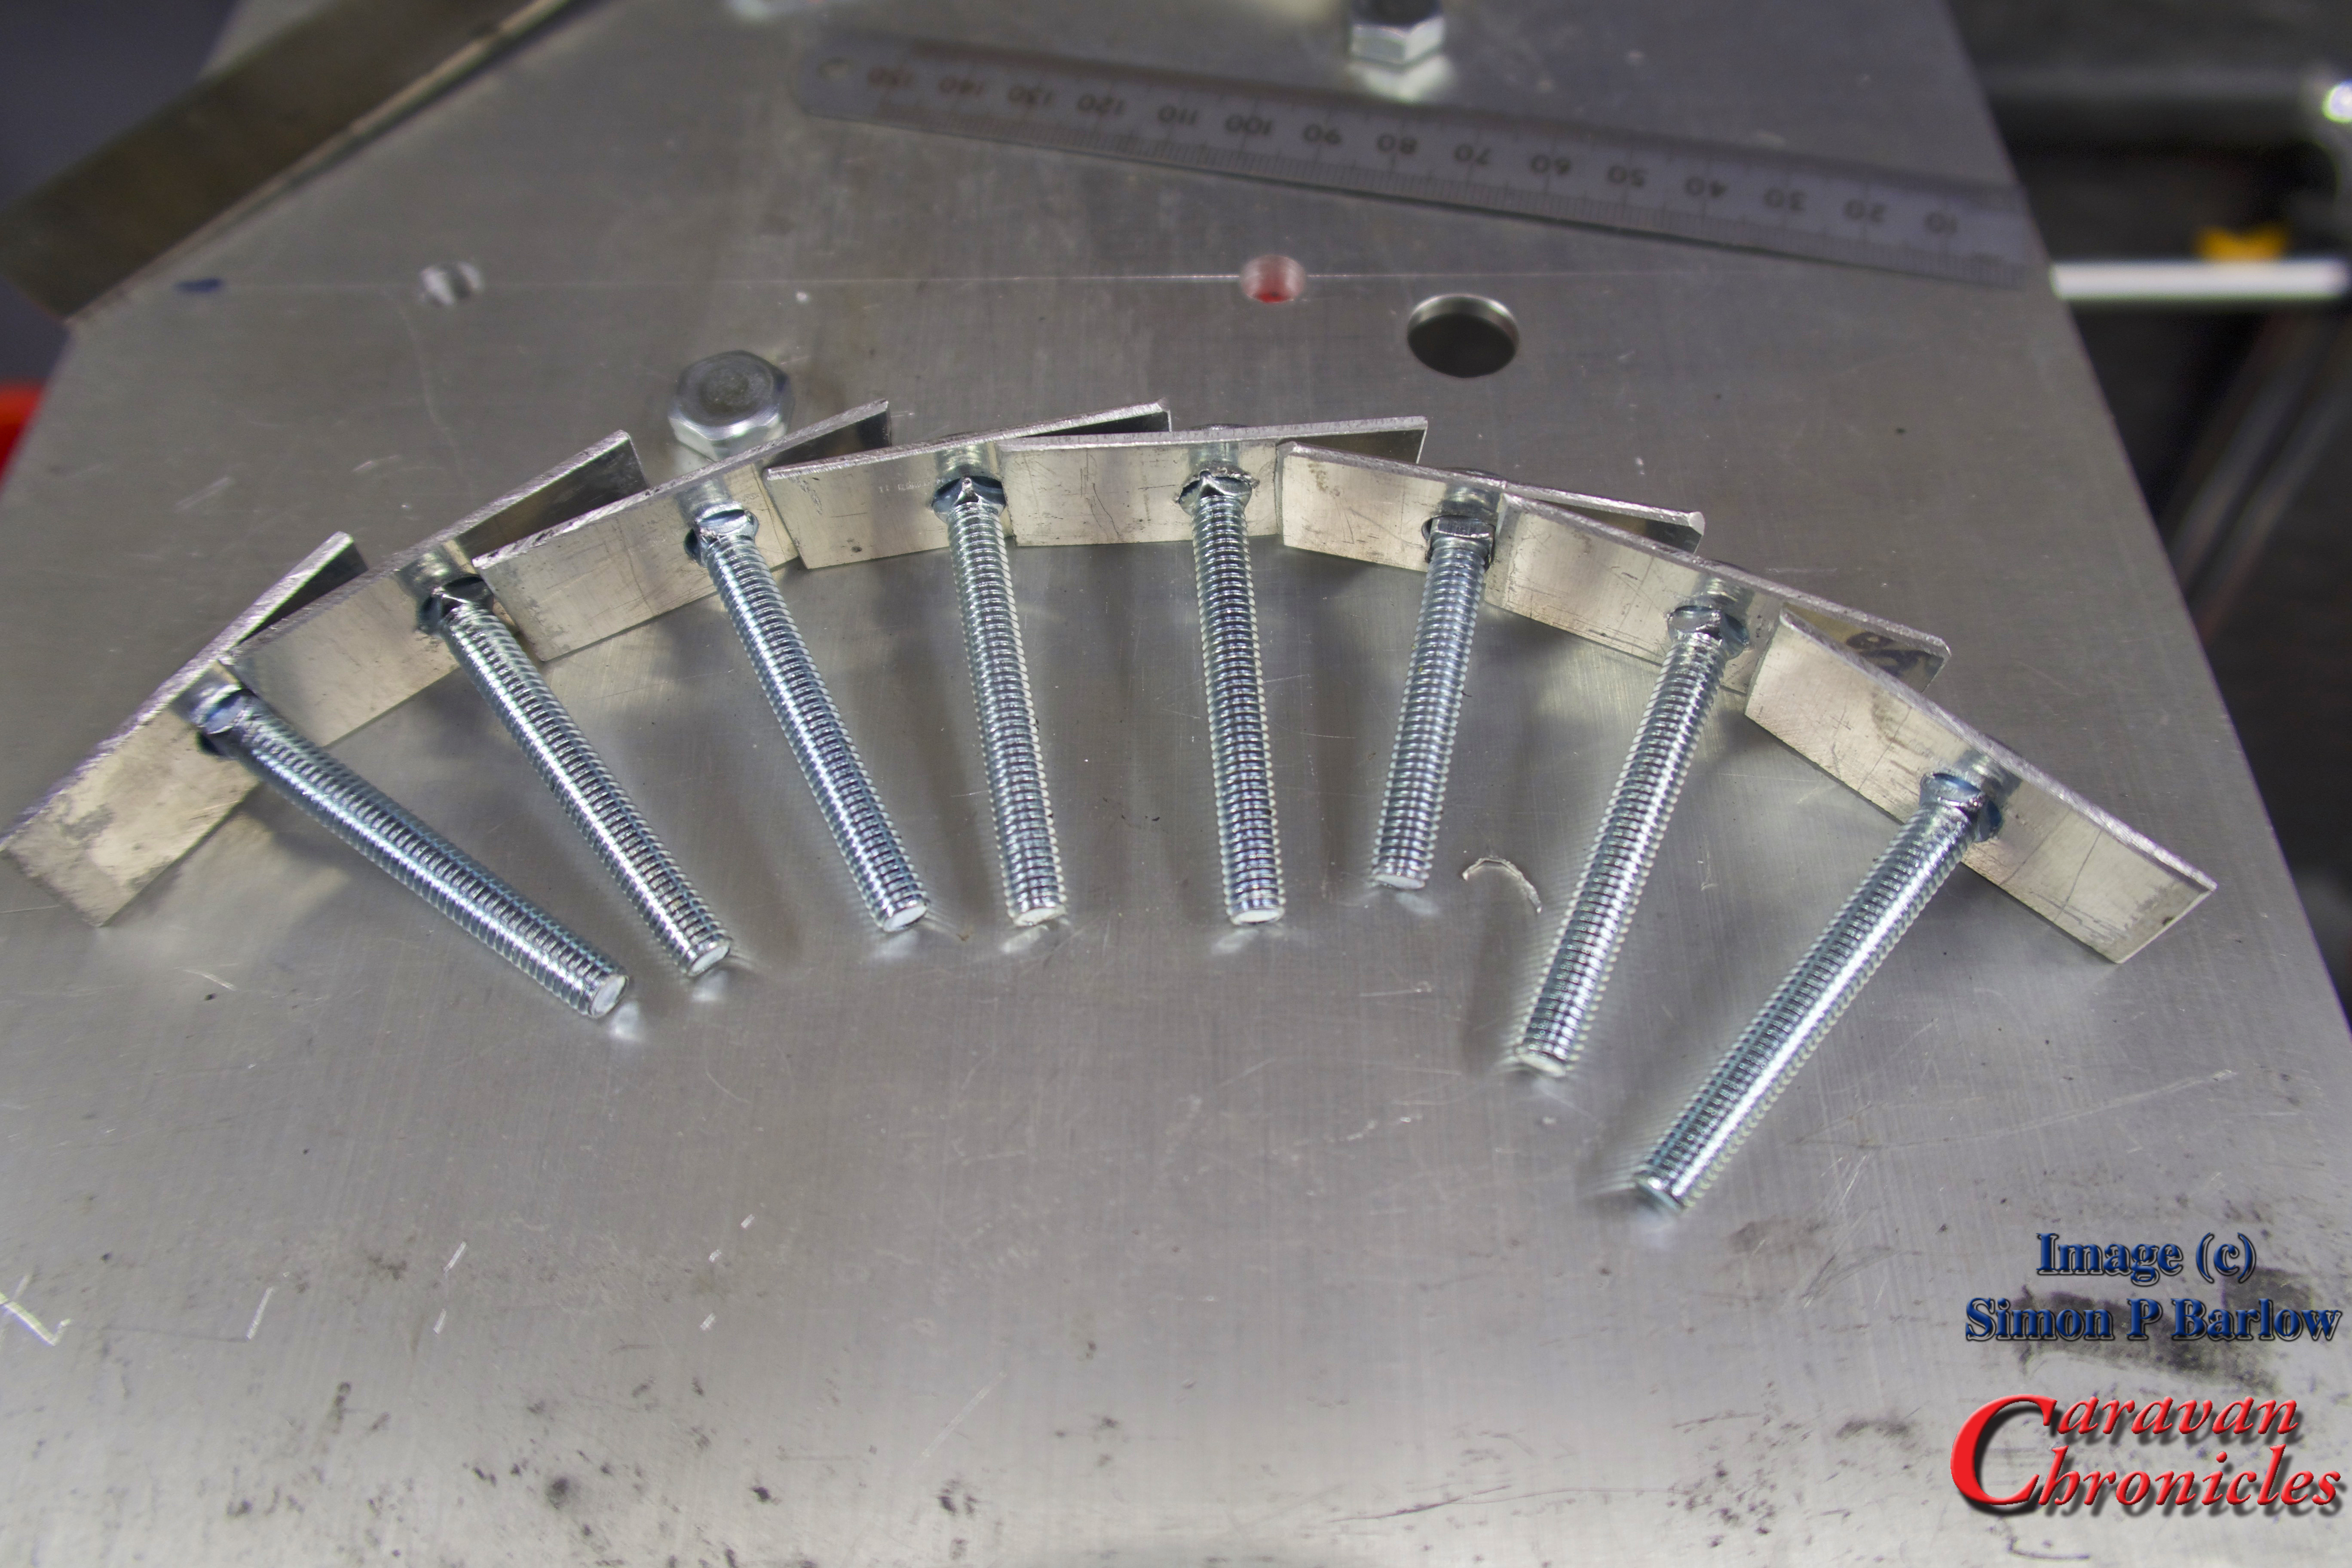 The result was eight “T” track bolts. A quick dressing up on the sanding belt and fine grinding wheel to remove any rough edges finished them off.
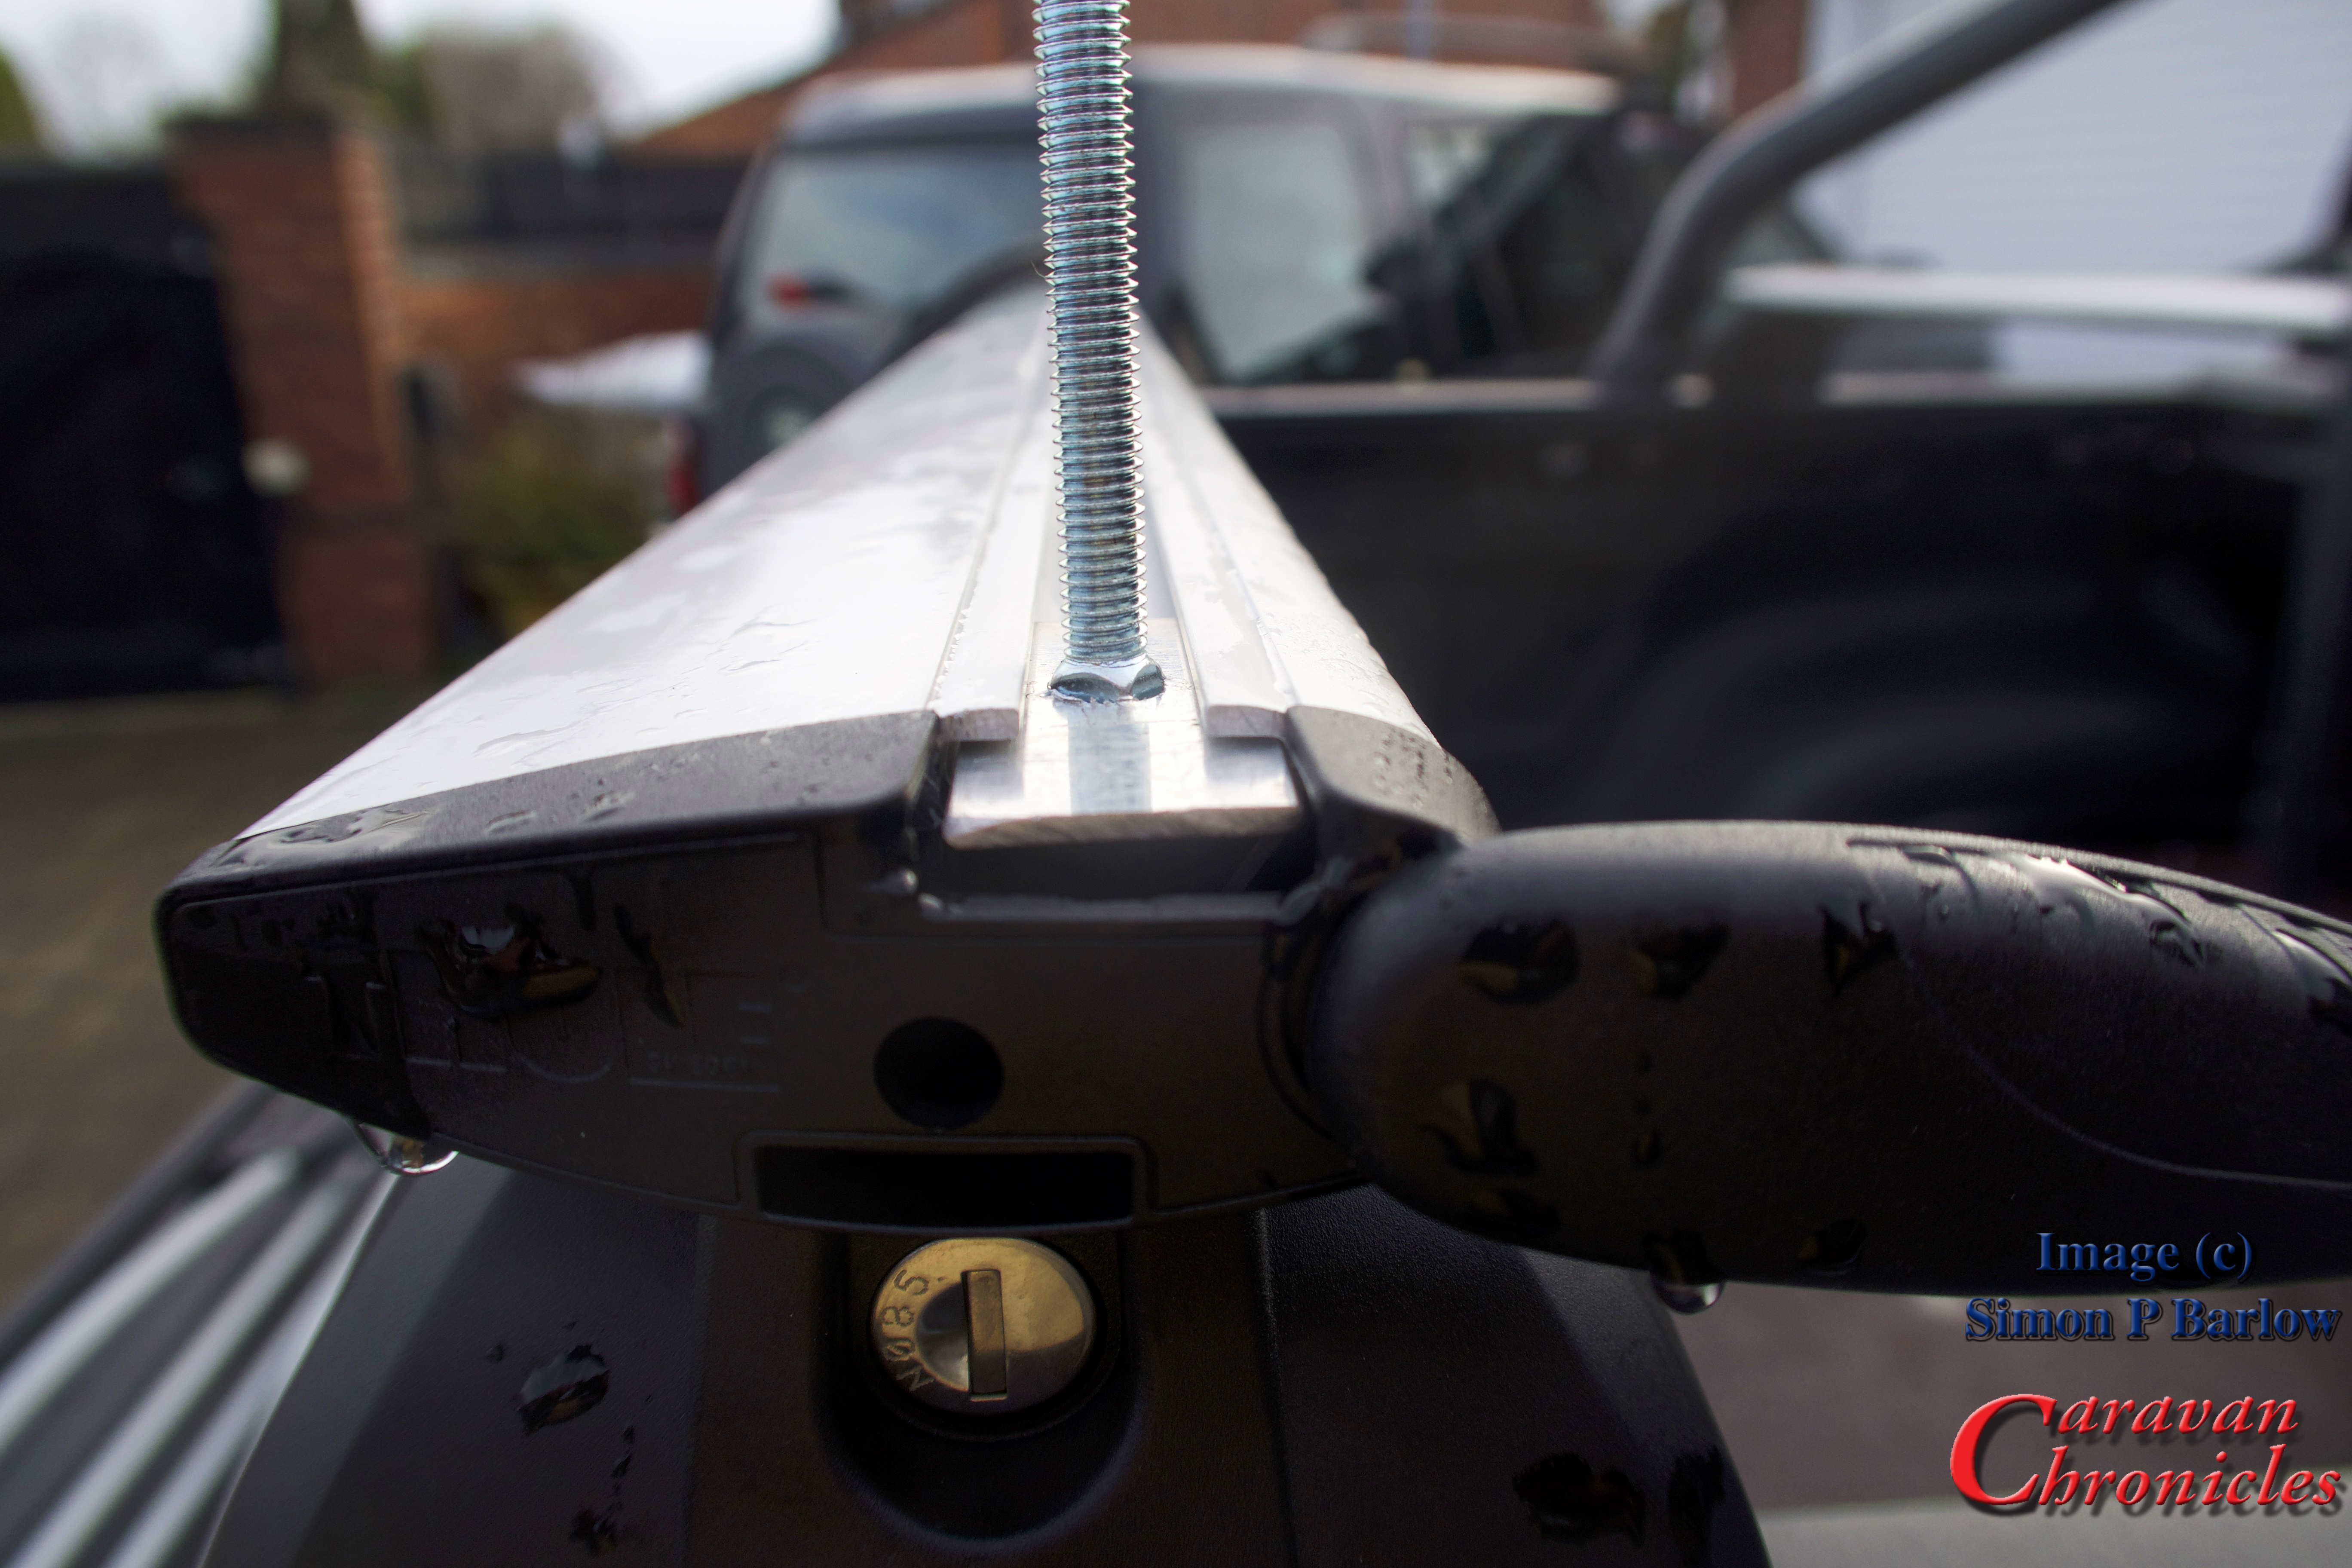 The excess length of the bolt would be trimmed later.
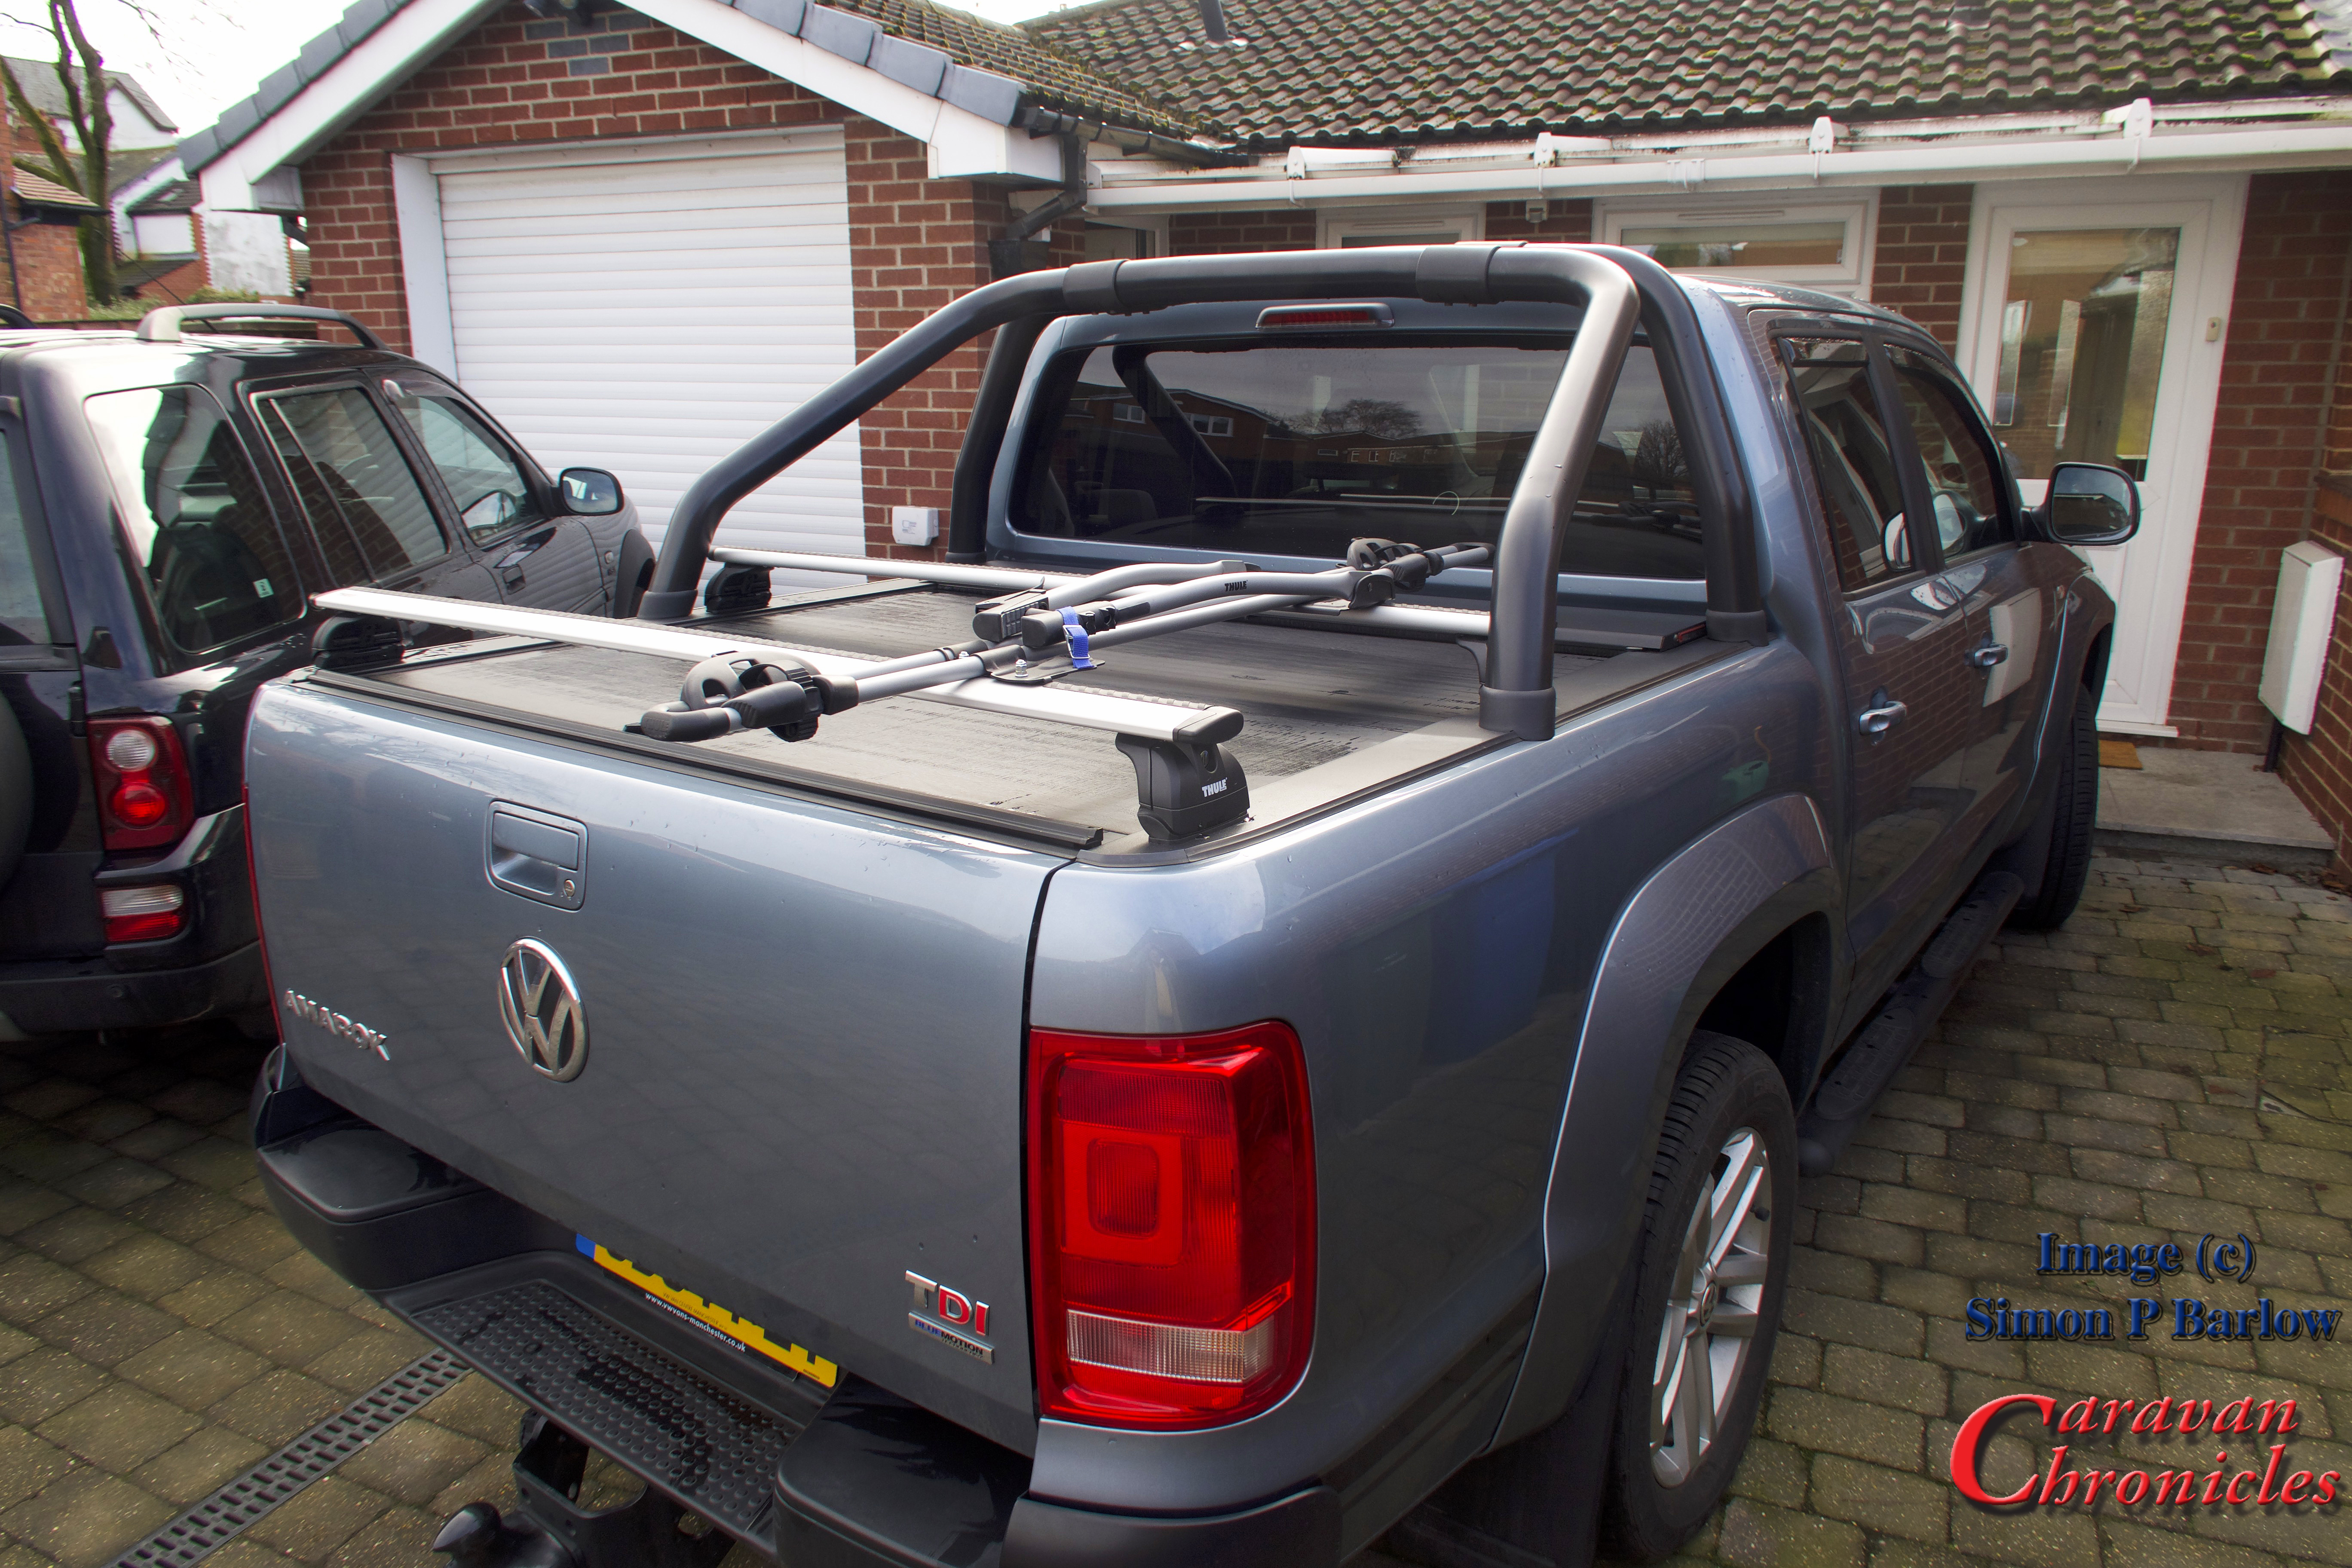
Fitting the FreeRide 532 Racks
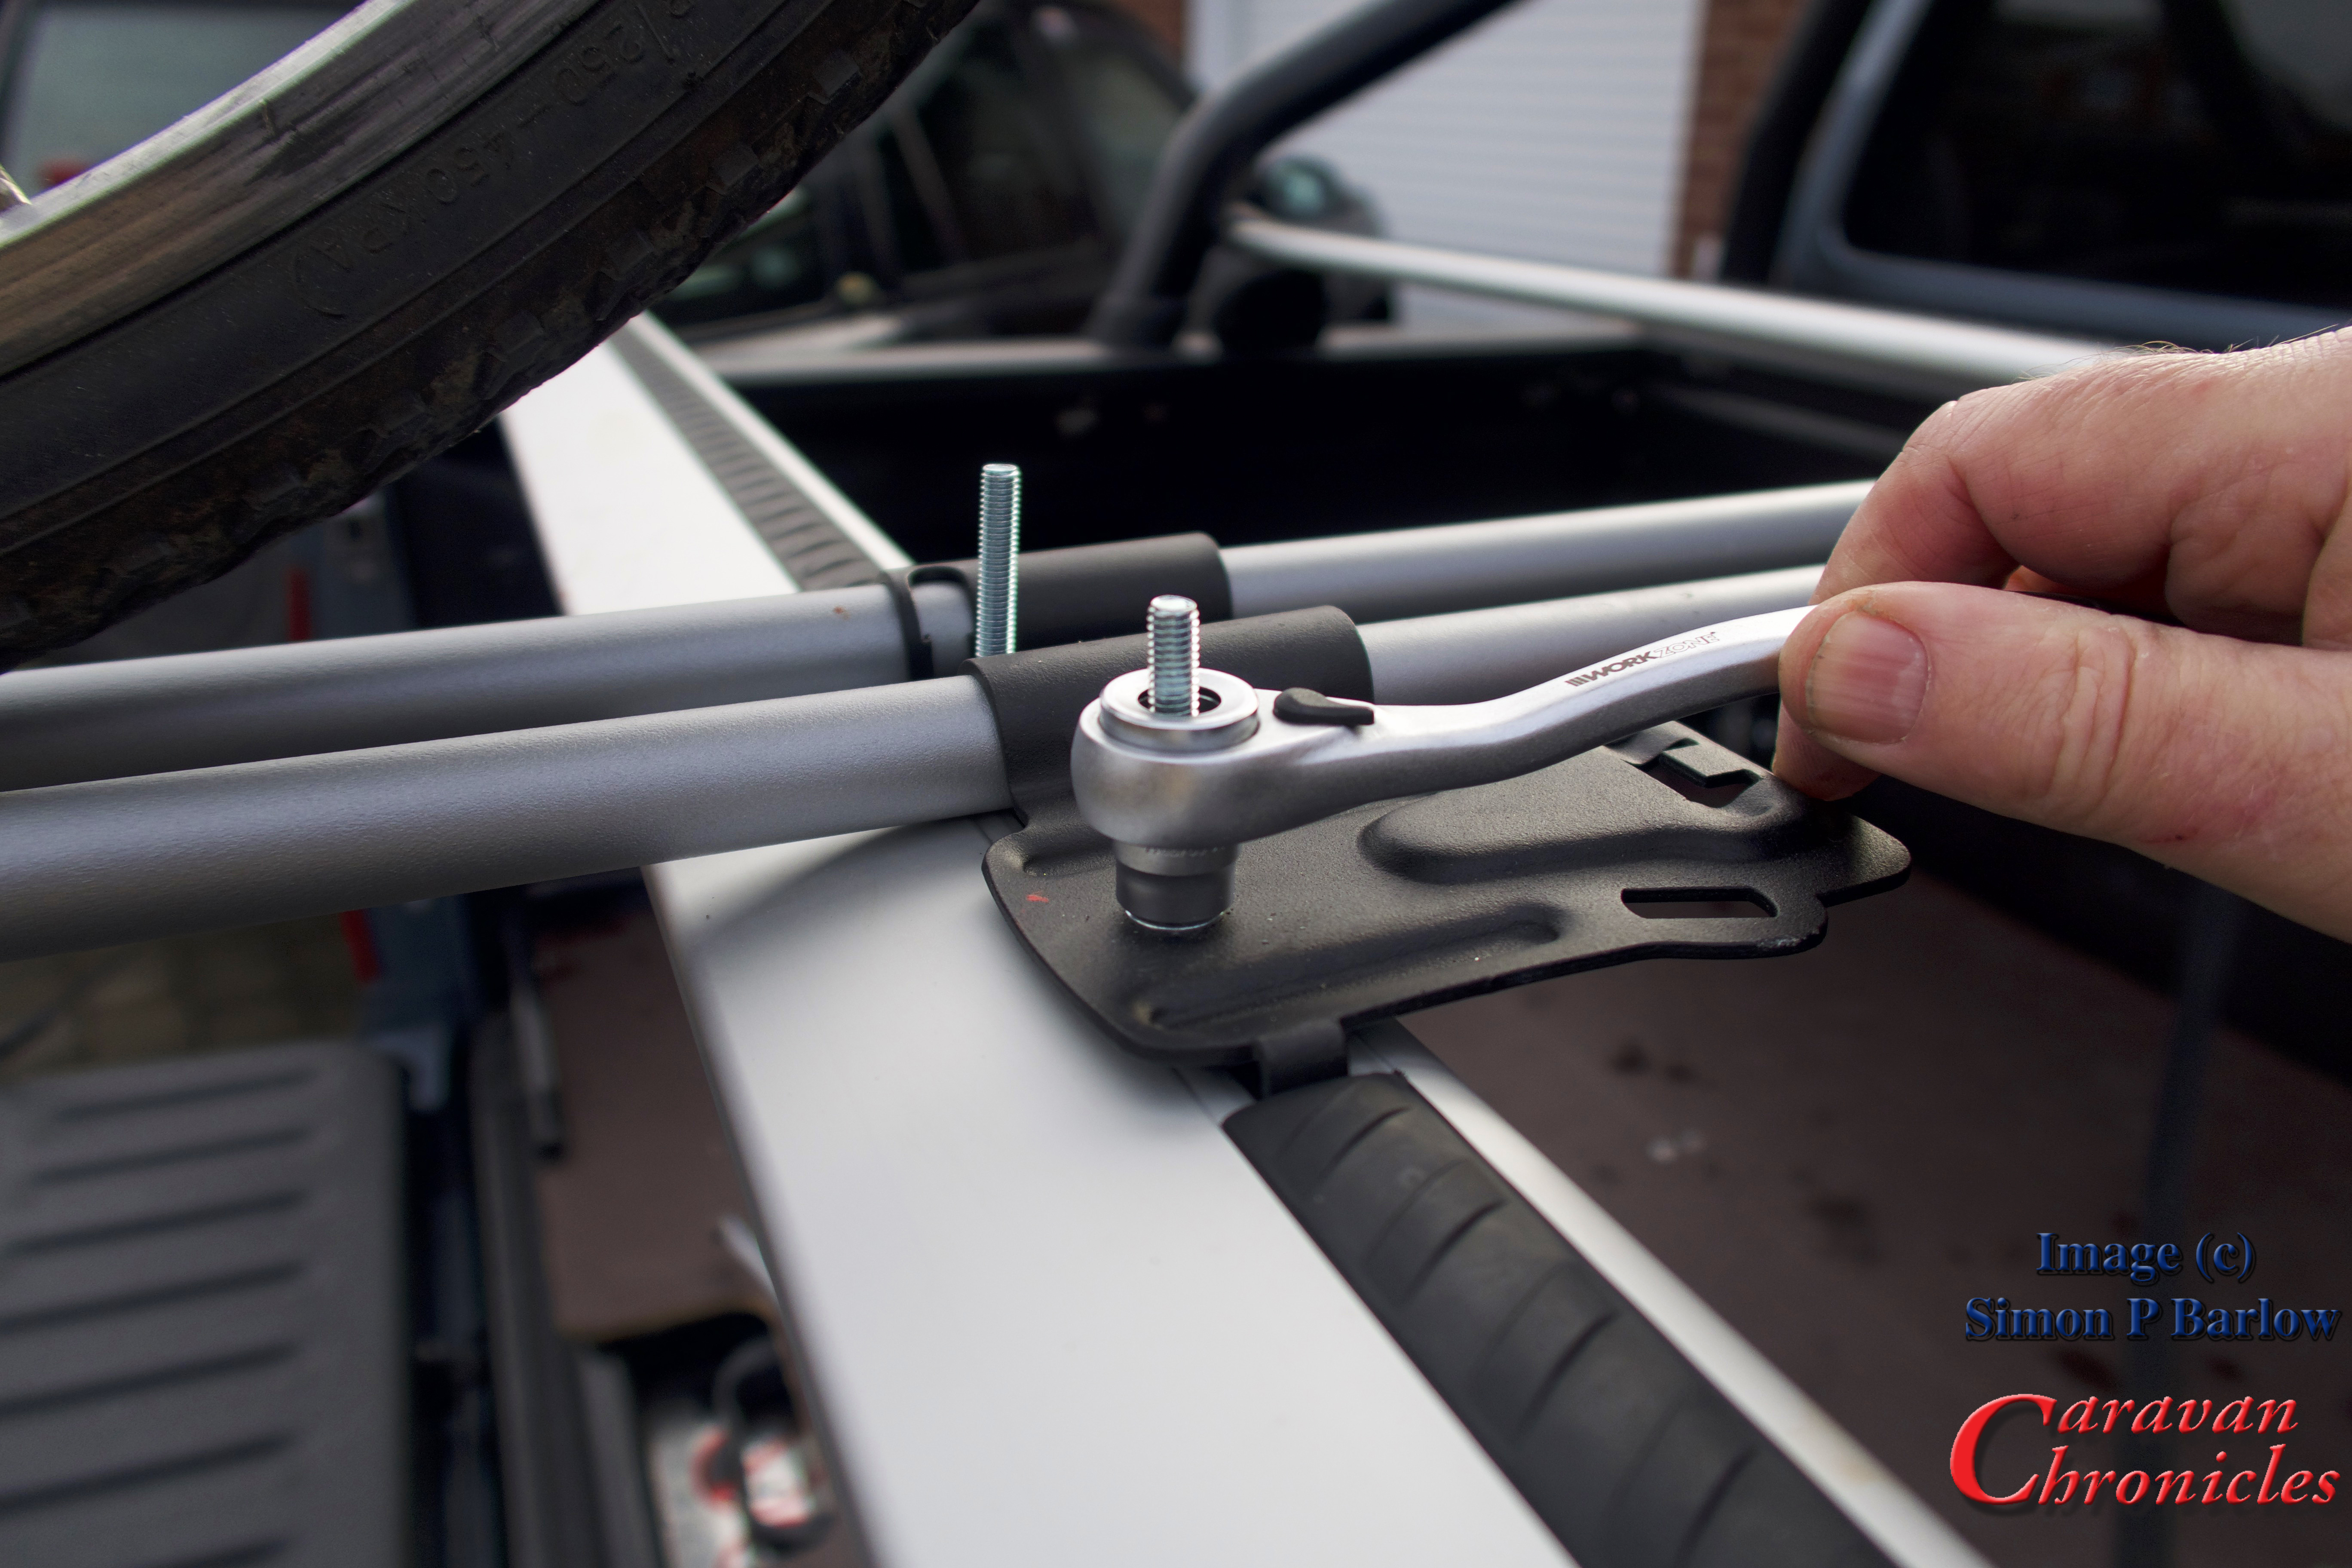
Sliding four of the newly made “T” track bolts in to the WingBars I could place the FreeRide 532 on to the bars.
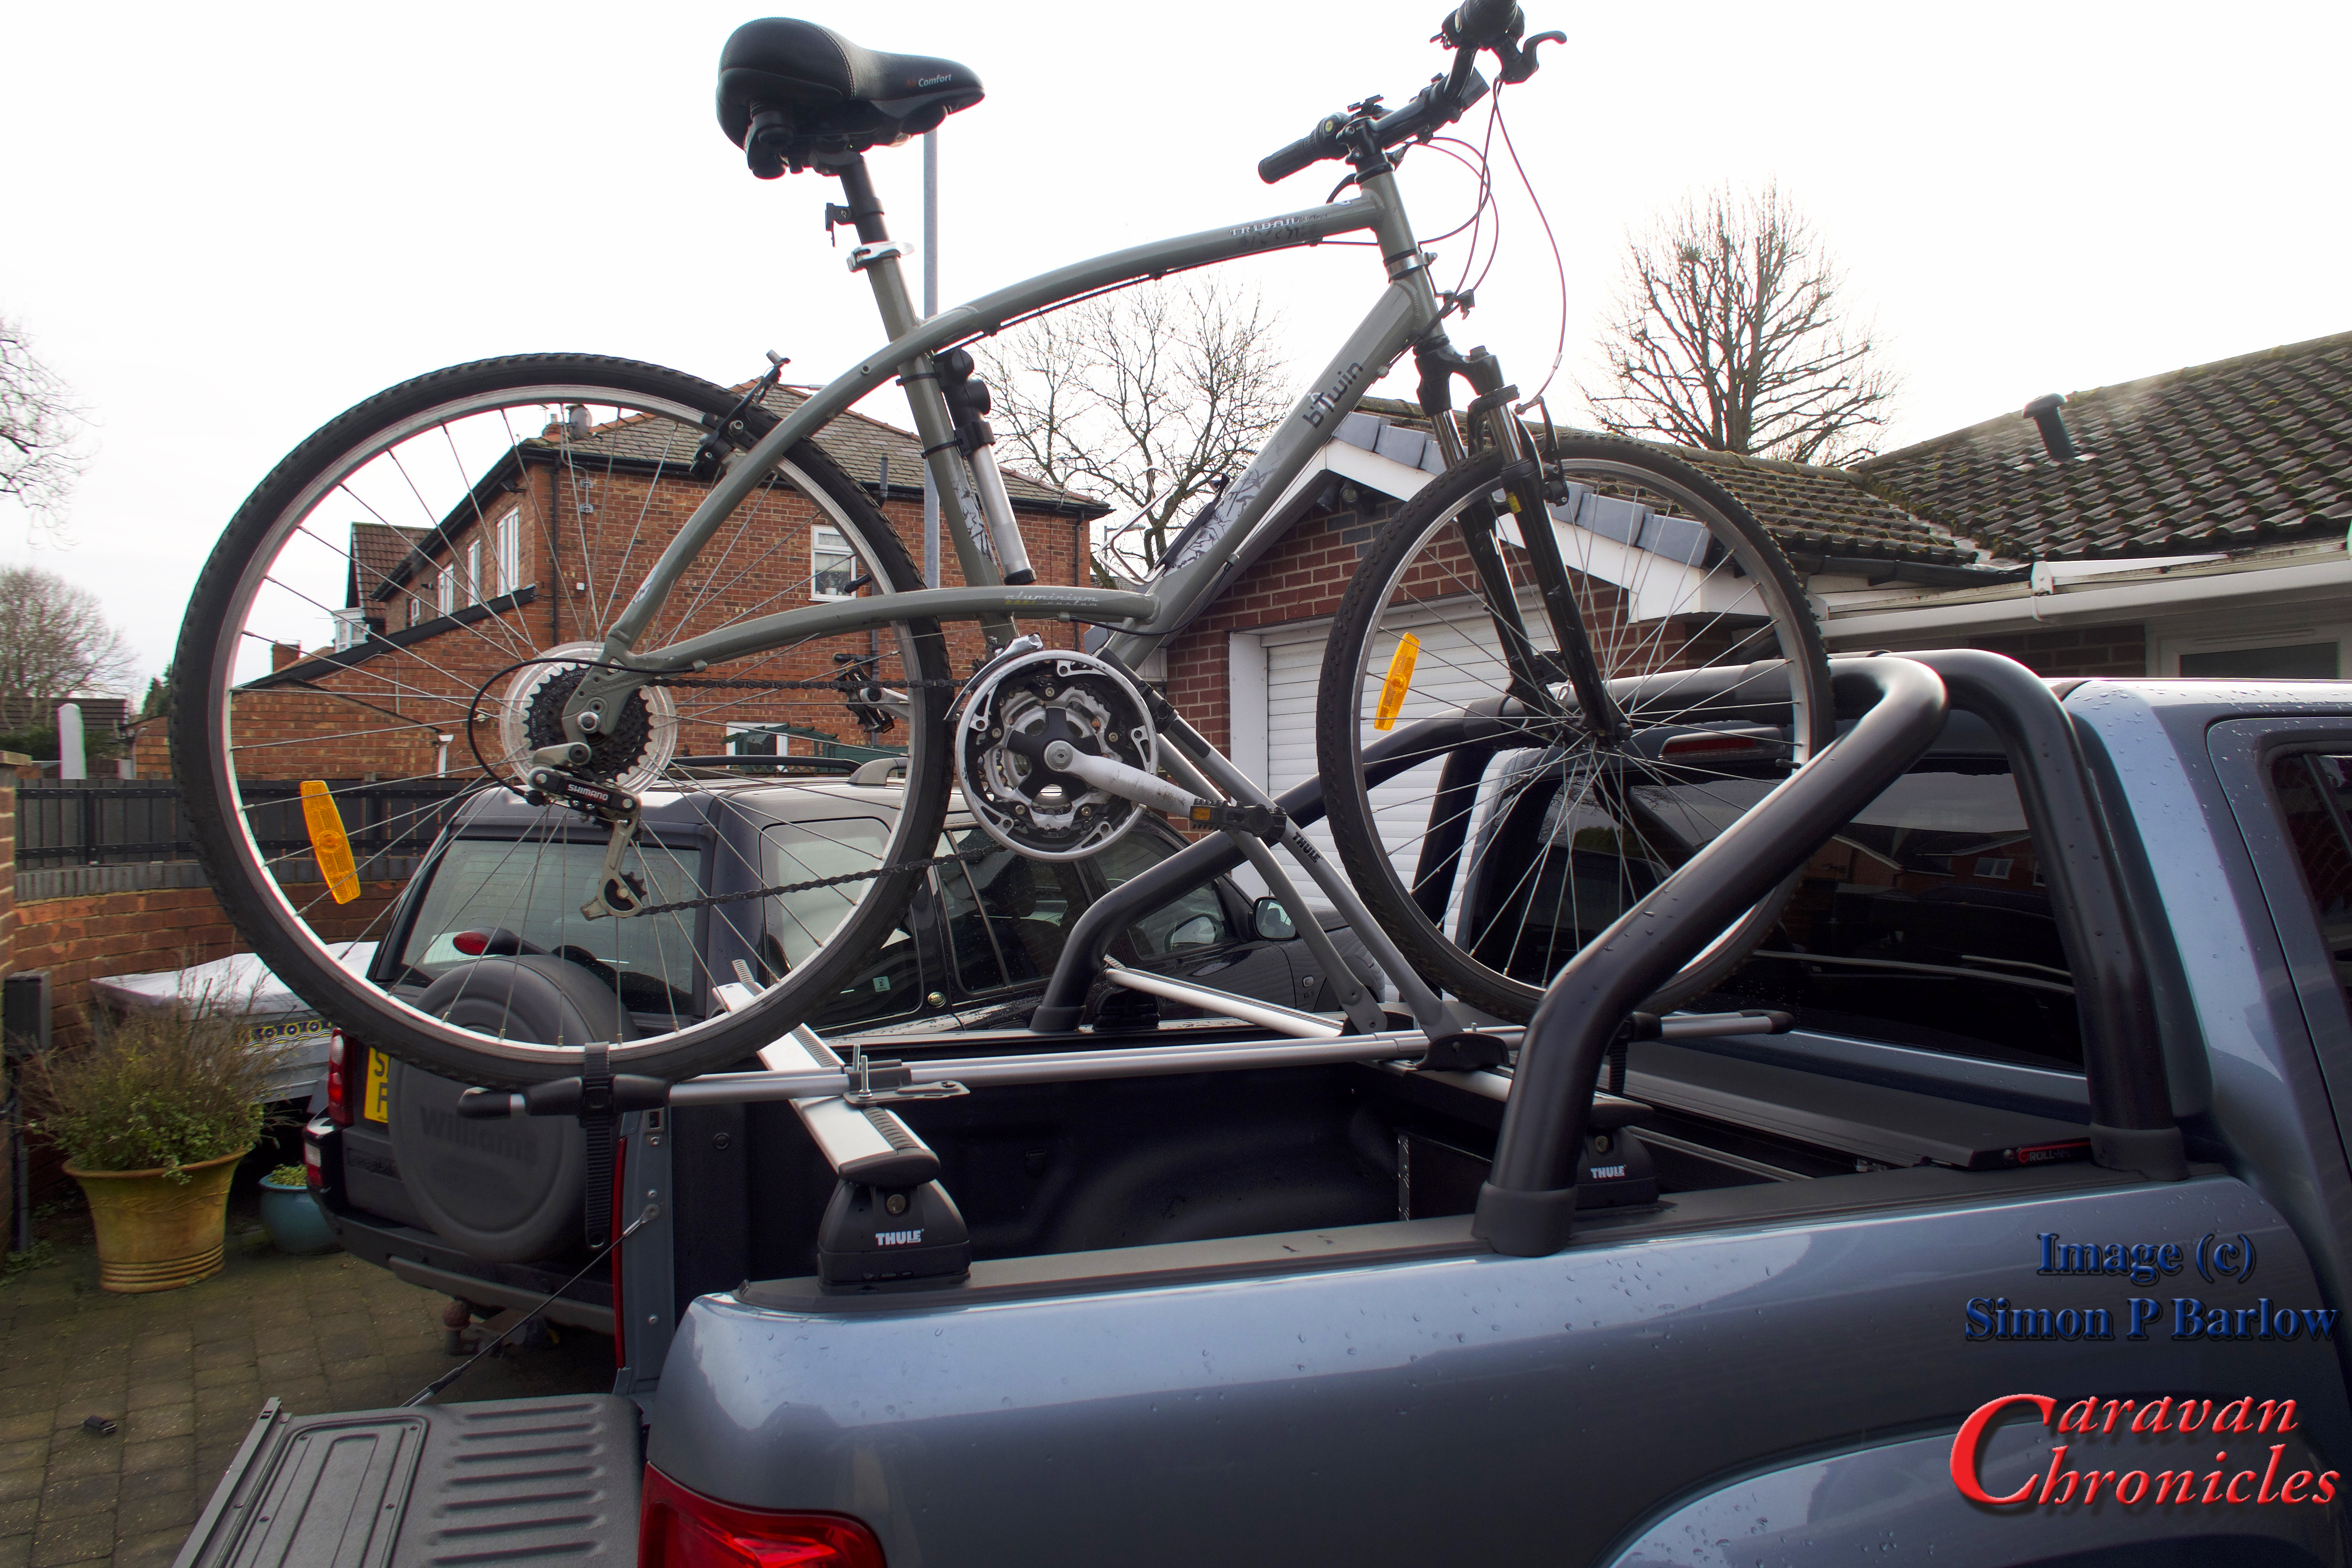
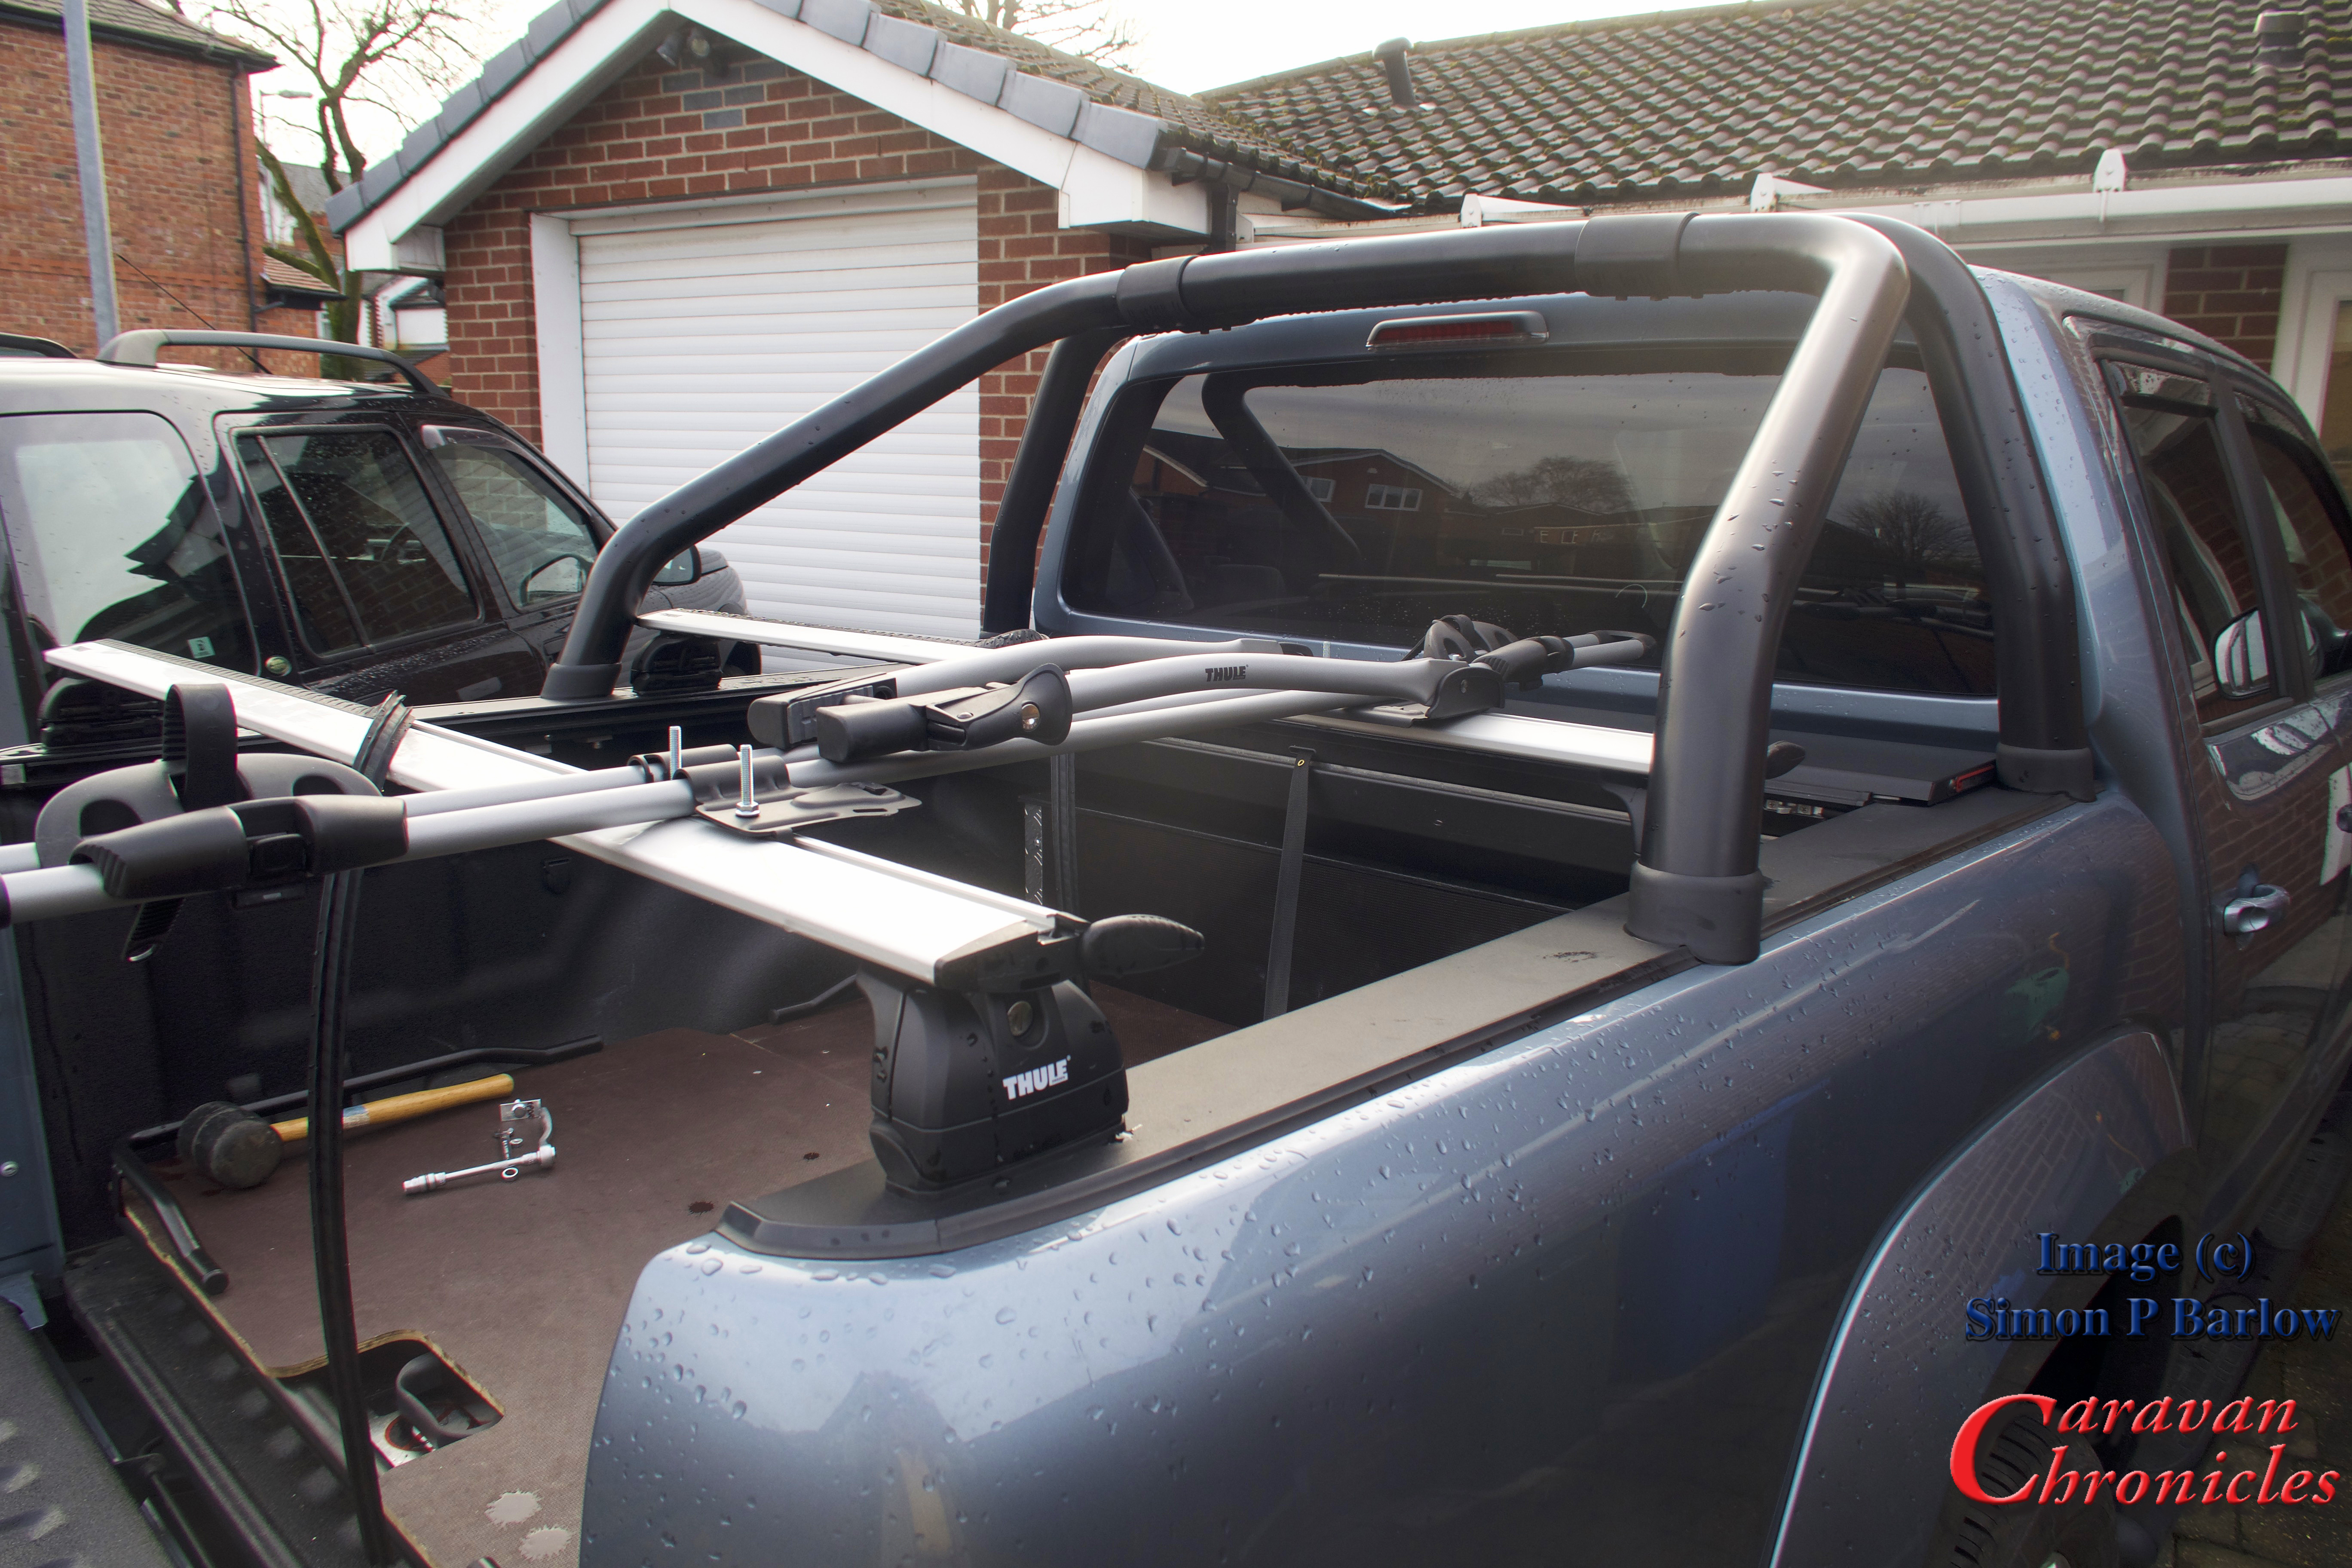 I used a couple of nuts to hold the rack in place while I test fitted one of the bikes. It was a bit too tight. The swing up frame section that clamps on to the bike only partially engaged on the bike frame. The whole rack needed moving rearwards by about 10 to 15 mm.
Not a problem, as the WingBar mounting is off set laterally compared to the “T” track, reversing the bar so it faced the other way would solve this and effectively move the “T” track slot rearwards by about 20mm.
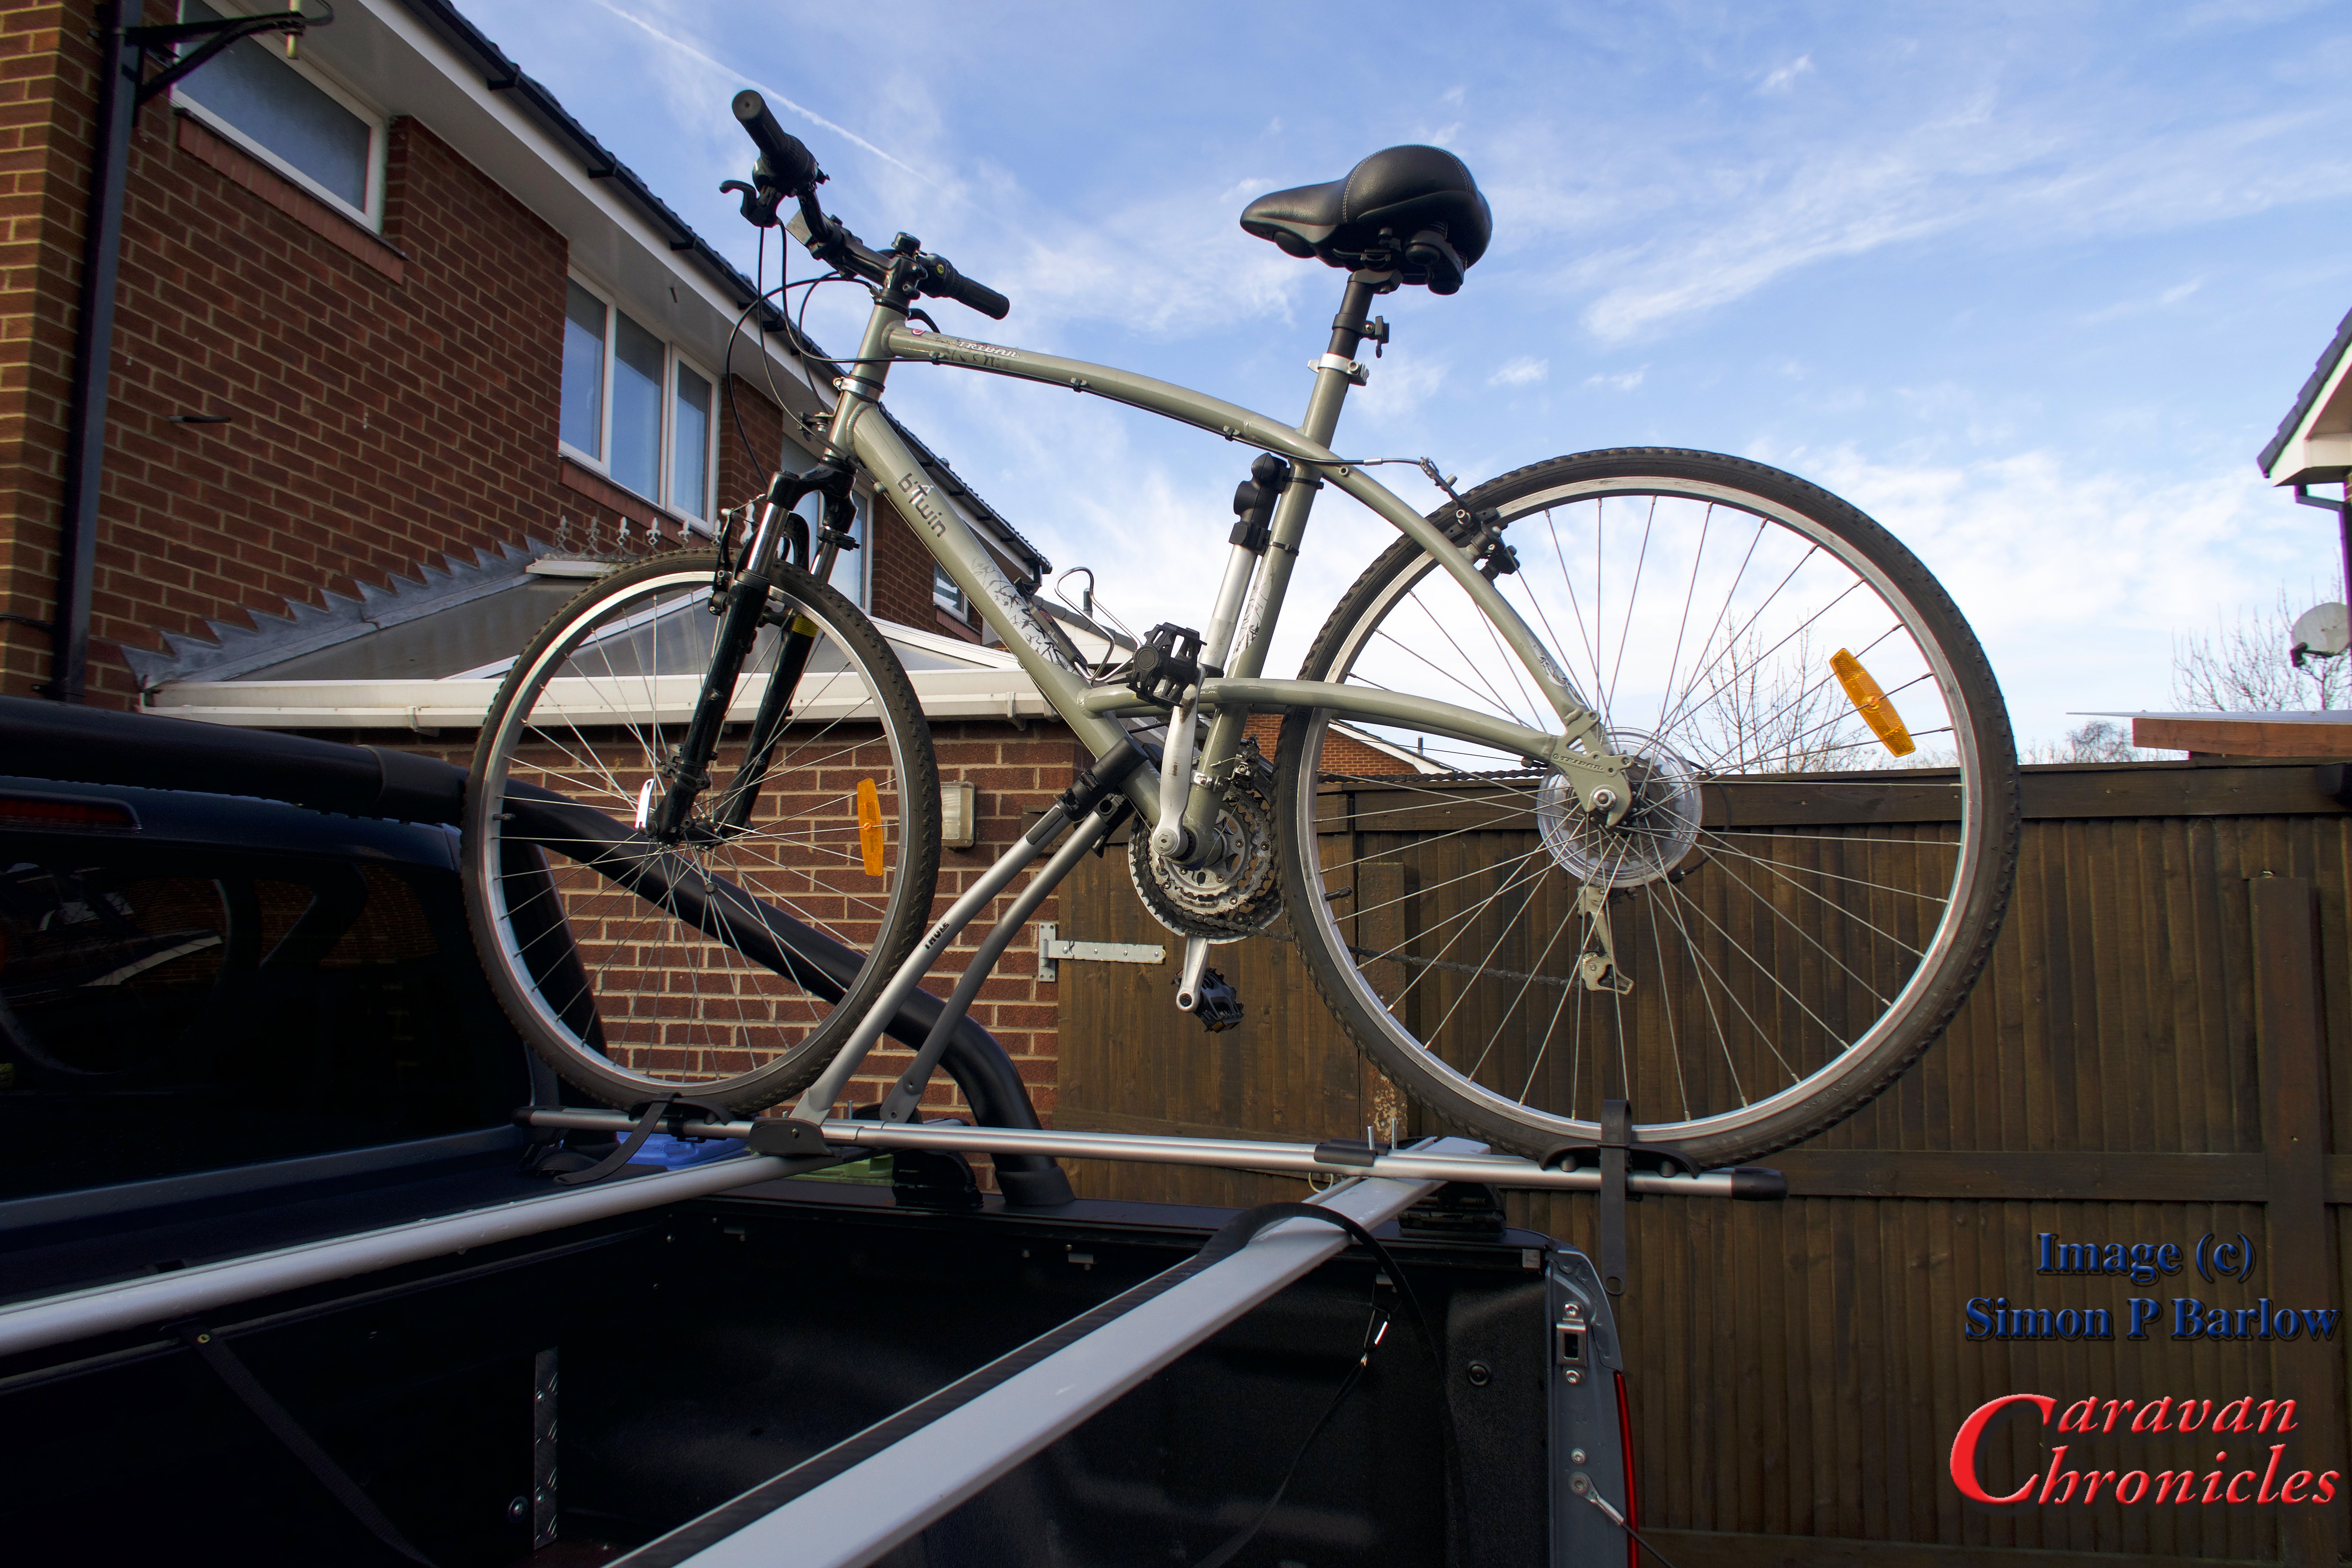
With the WingBar mounted in the other direction the bike was a perfect fit. Also it made it easier opening the end caps of the WingBar as configured the correct way round they were a bit tight against the roll bar.
 The next thing to address was the overhang. I still had around 50 to 60 mm of adjustment I could make to the rails of the FreeRide rack. Removing everything again and a bit of ‘adjusticating’ with a small rubber mallet soon saw the rails in the correct position. I had not been able to get the rear of the mount flush with the pickup tailgate as was my original hope, but checking with a plumb bob…
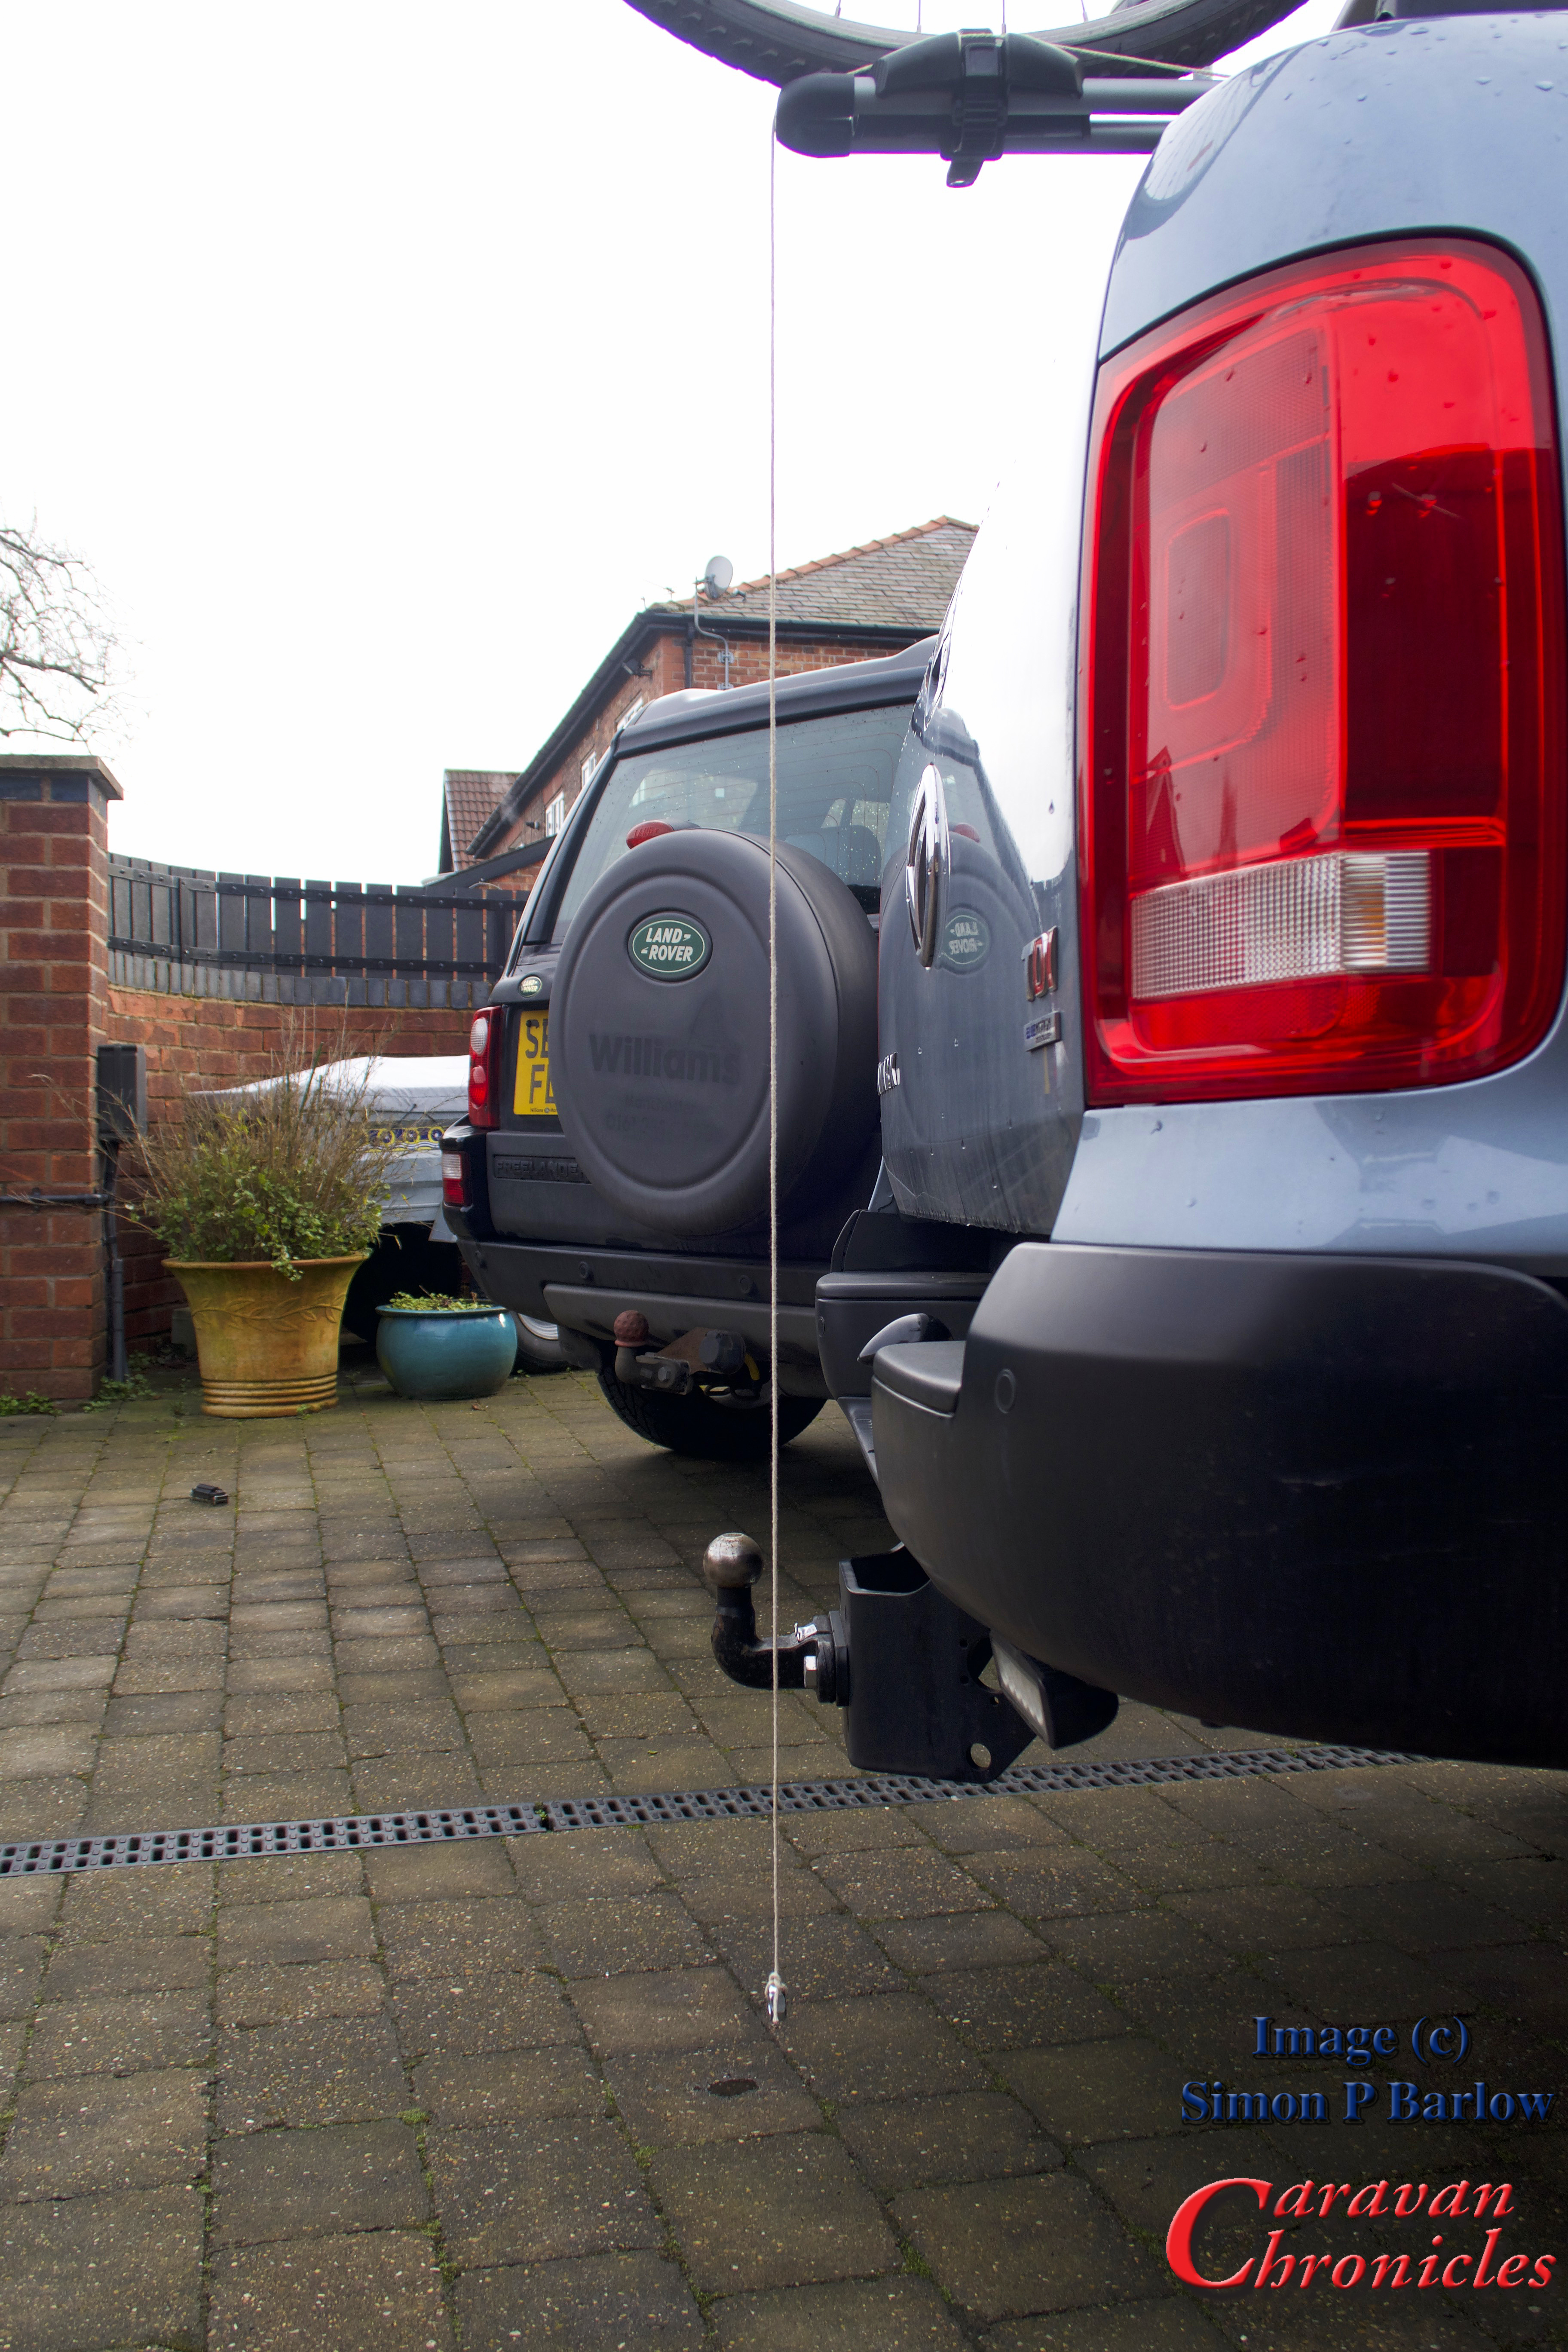
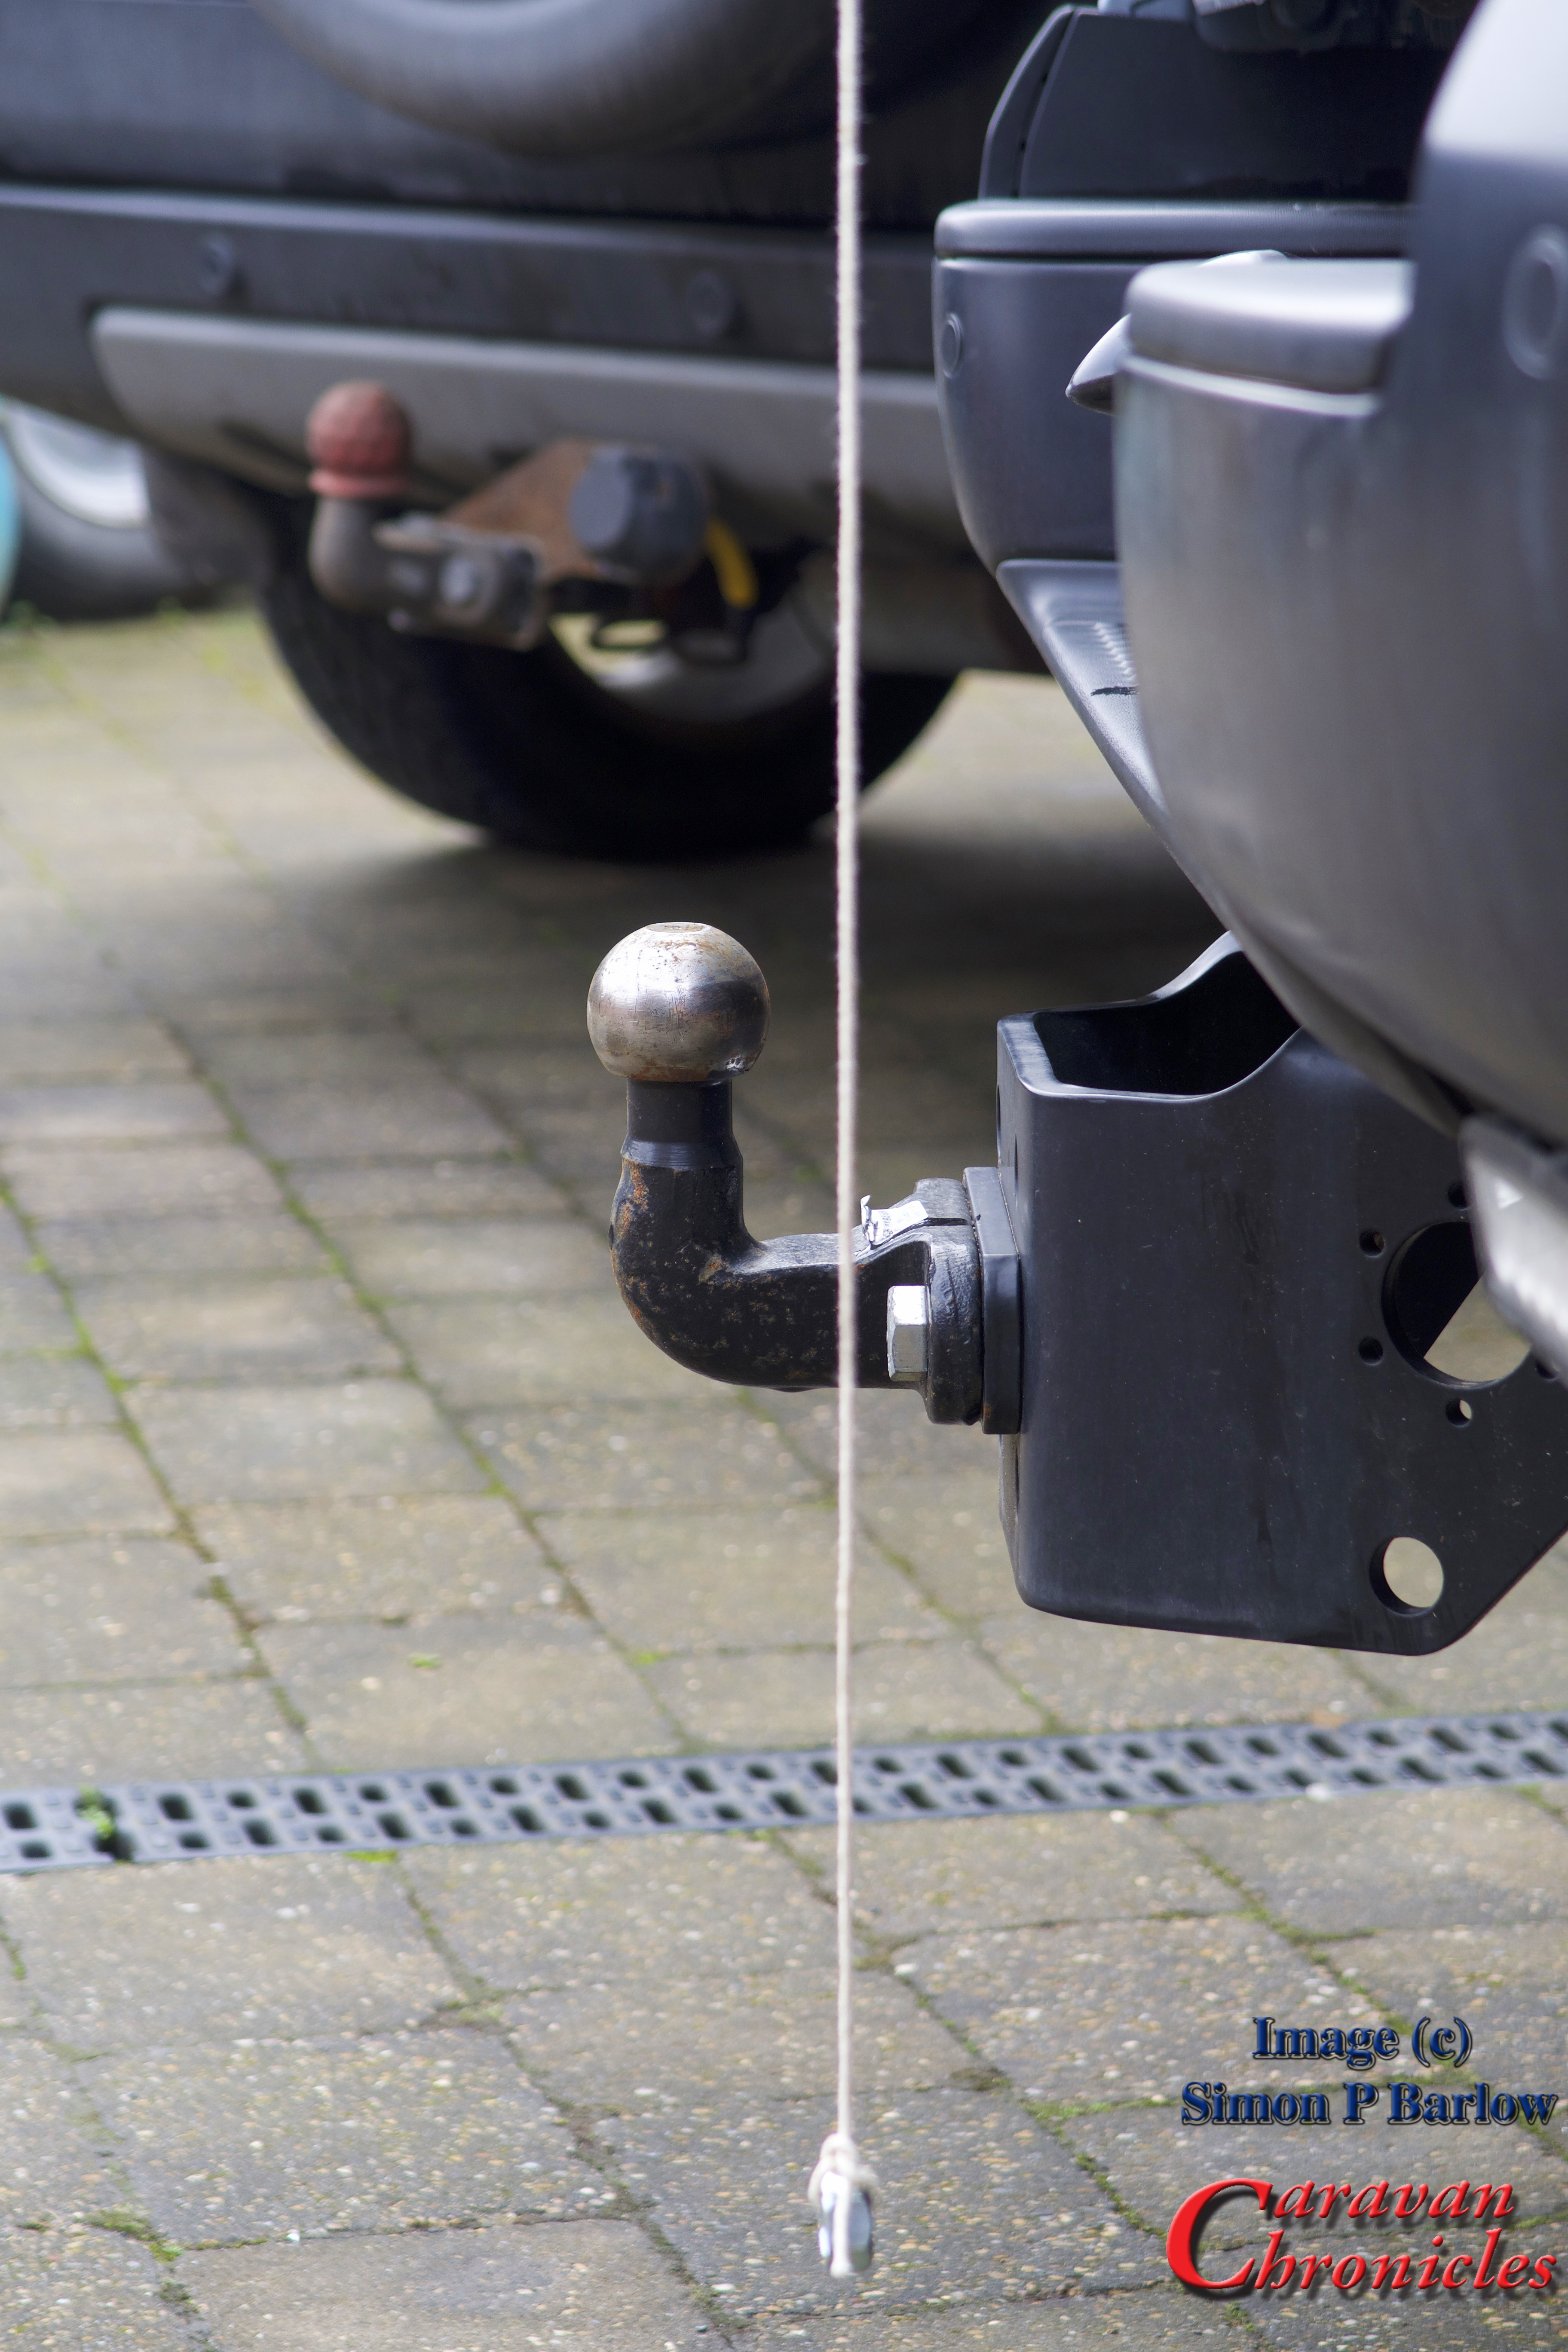 … It was still shorter than the tow ball and only about 40mm longer than the rear bumper. So the overhang wasn’t anything to worry about. Even with a bike on the rack it would be clear of the caravan in the tightest of turns. Next it was just a matter of squaring things up and tightening everything down.
I ended up locating the rack more to the side than I first planned. This was for two reasons. Firstly, once the second rack is in place it leaves me with nearly 800 mm between the two racks which will allow for the option in the the future of having the ability to install a mesh tray, ski rack, surfboard rack (we don’t ski or surf… ho hum) or slimline roof box if we ever run out of storage in the Amarok. The second reason is it will give the rear view dash cam a relatively unobscured view rearward even with two bikes on the back.
Everything torqued to the correct settings, I topped off the nuts with an additional nylon lock nut to make sure they could not vibrate loose…
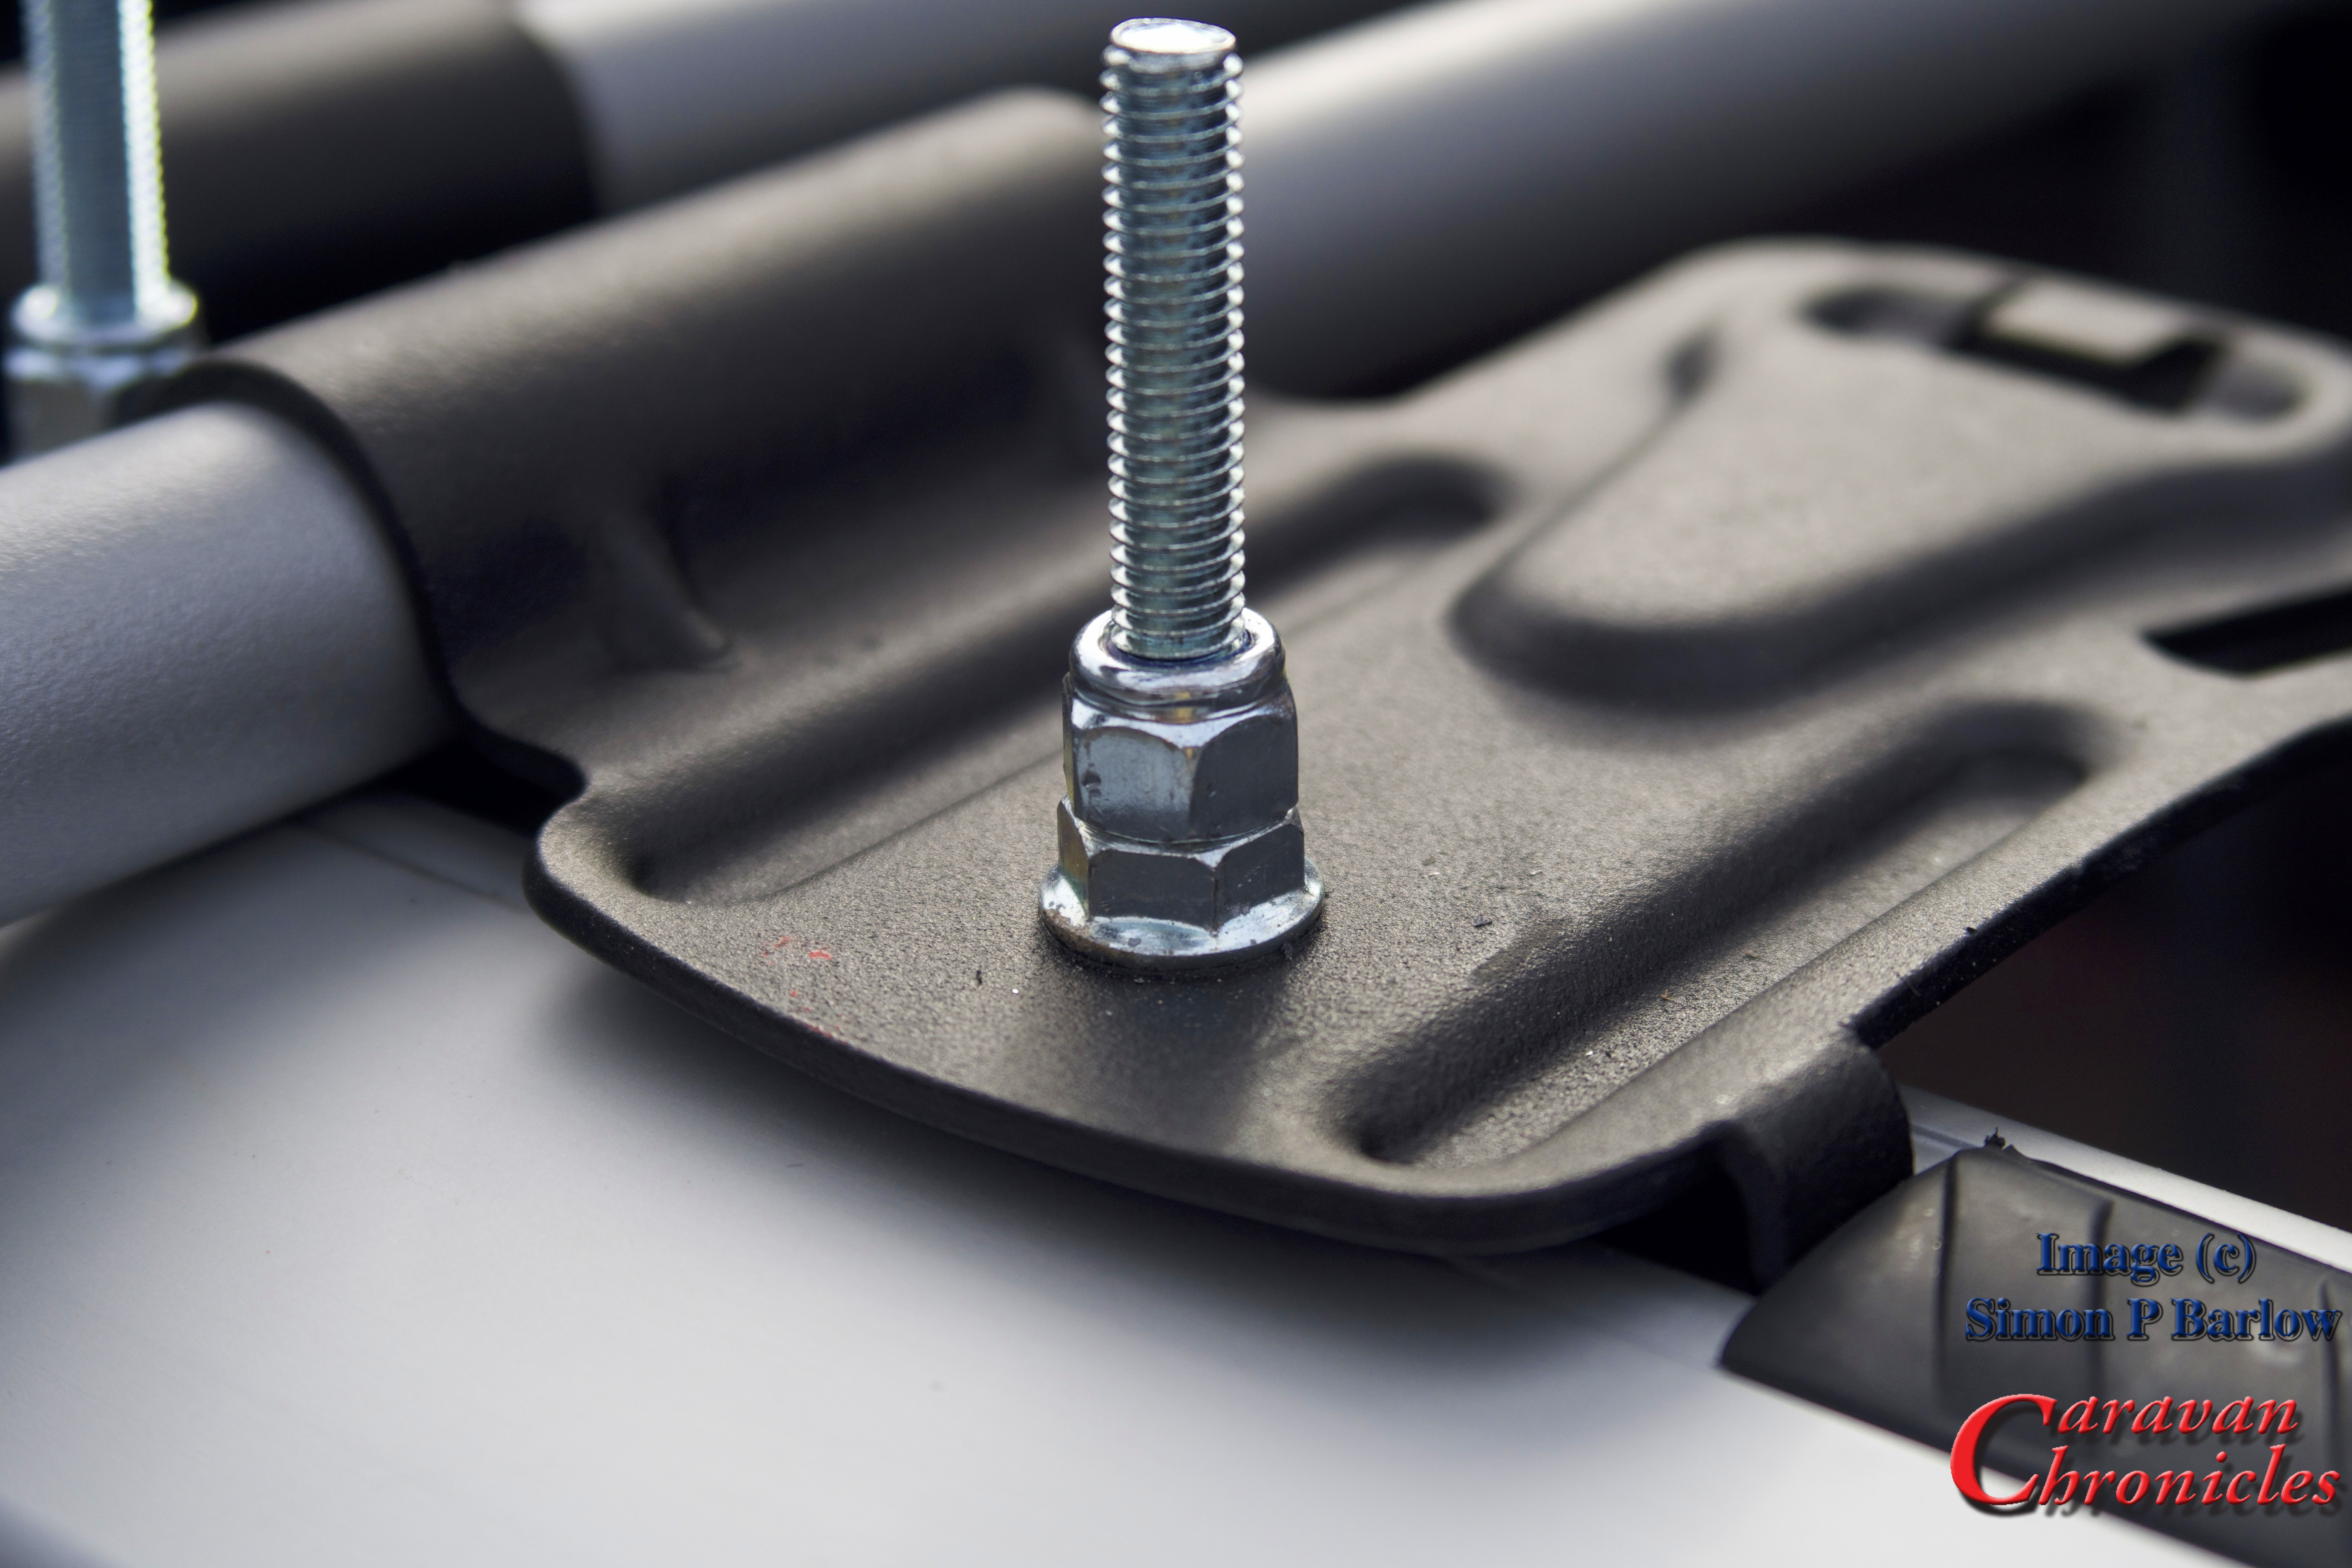
 … and using a Dremmel I cut off the excess thread and ground off any sharp edges. I need to find a suitable plastic or rubber push on cover for these then I can give them a quick coat of preserving grease.
One thing that I did think about was the prospect of the swing arms bouncing up and down when bikes were not on the rack. A quick rummage in my straps box produced a few of these little blue straps and a handy slot on the mounting plate seemed ideal…
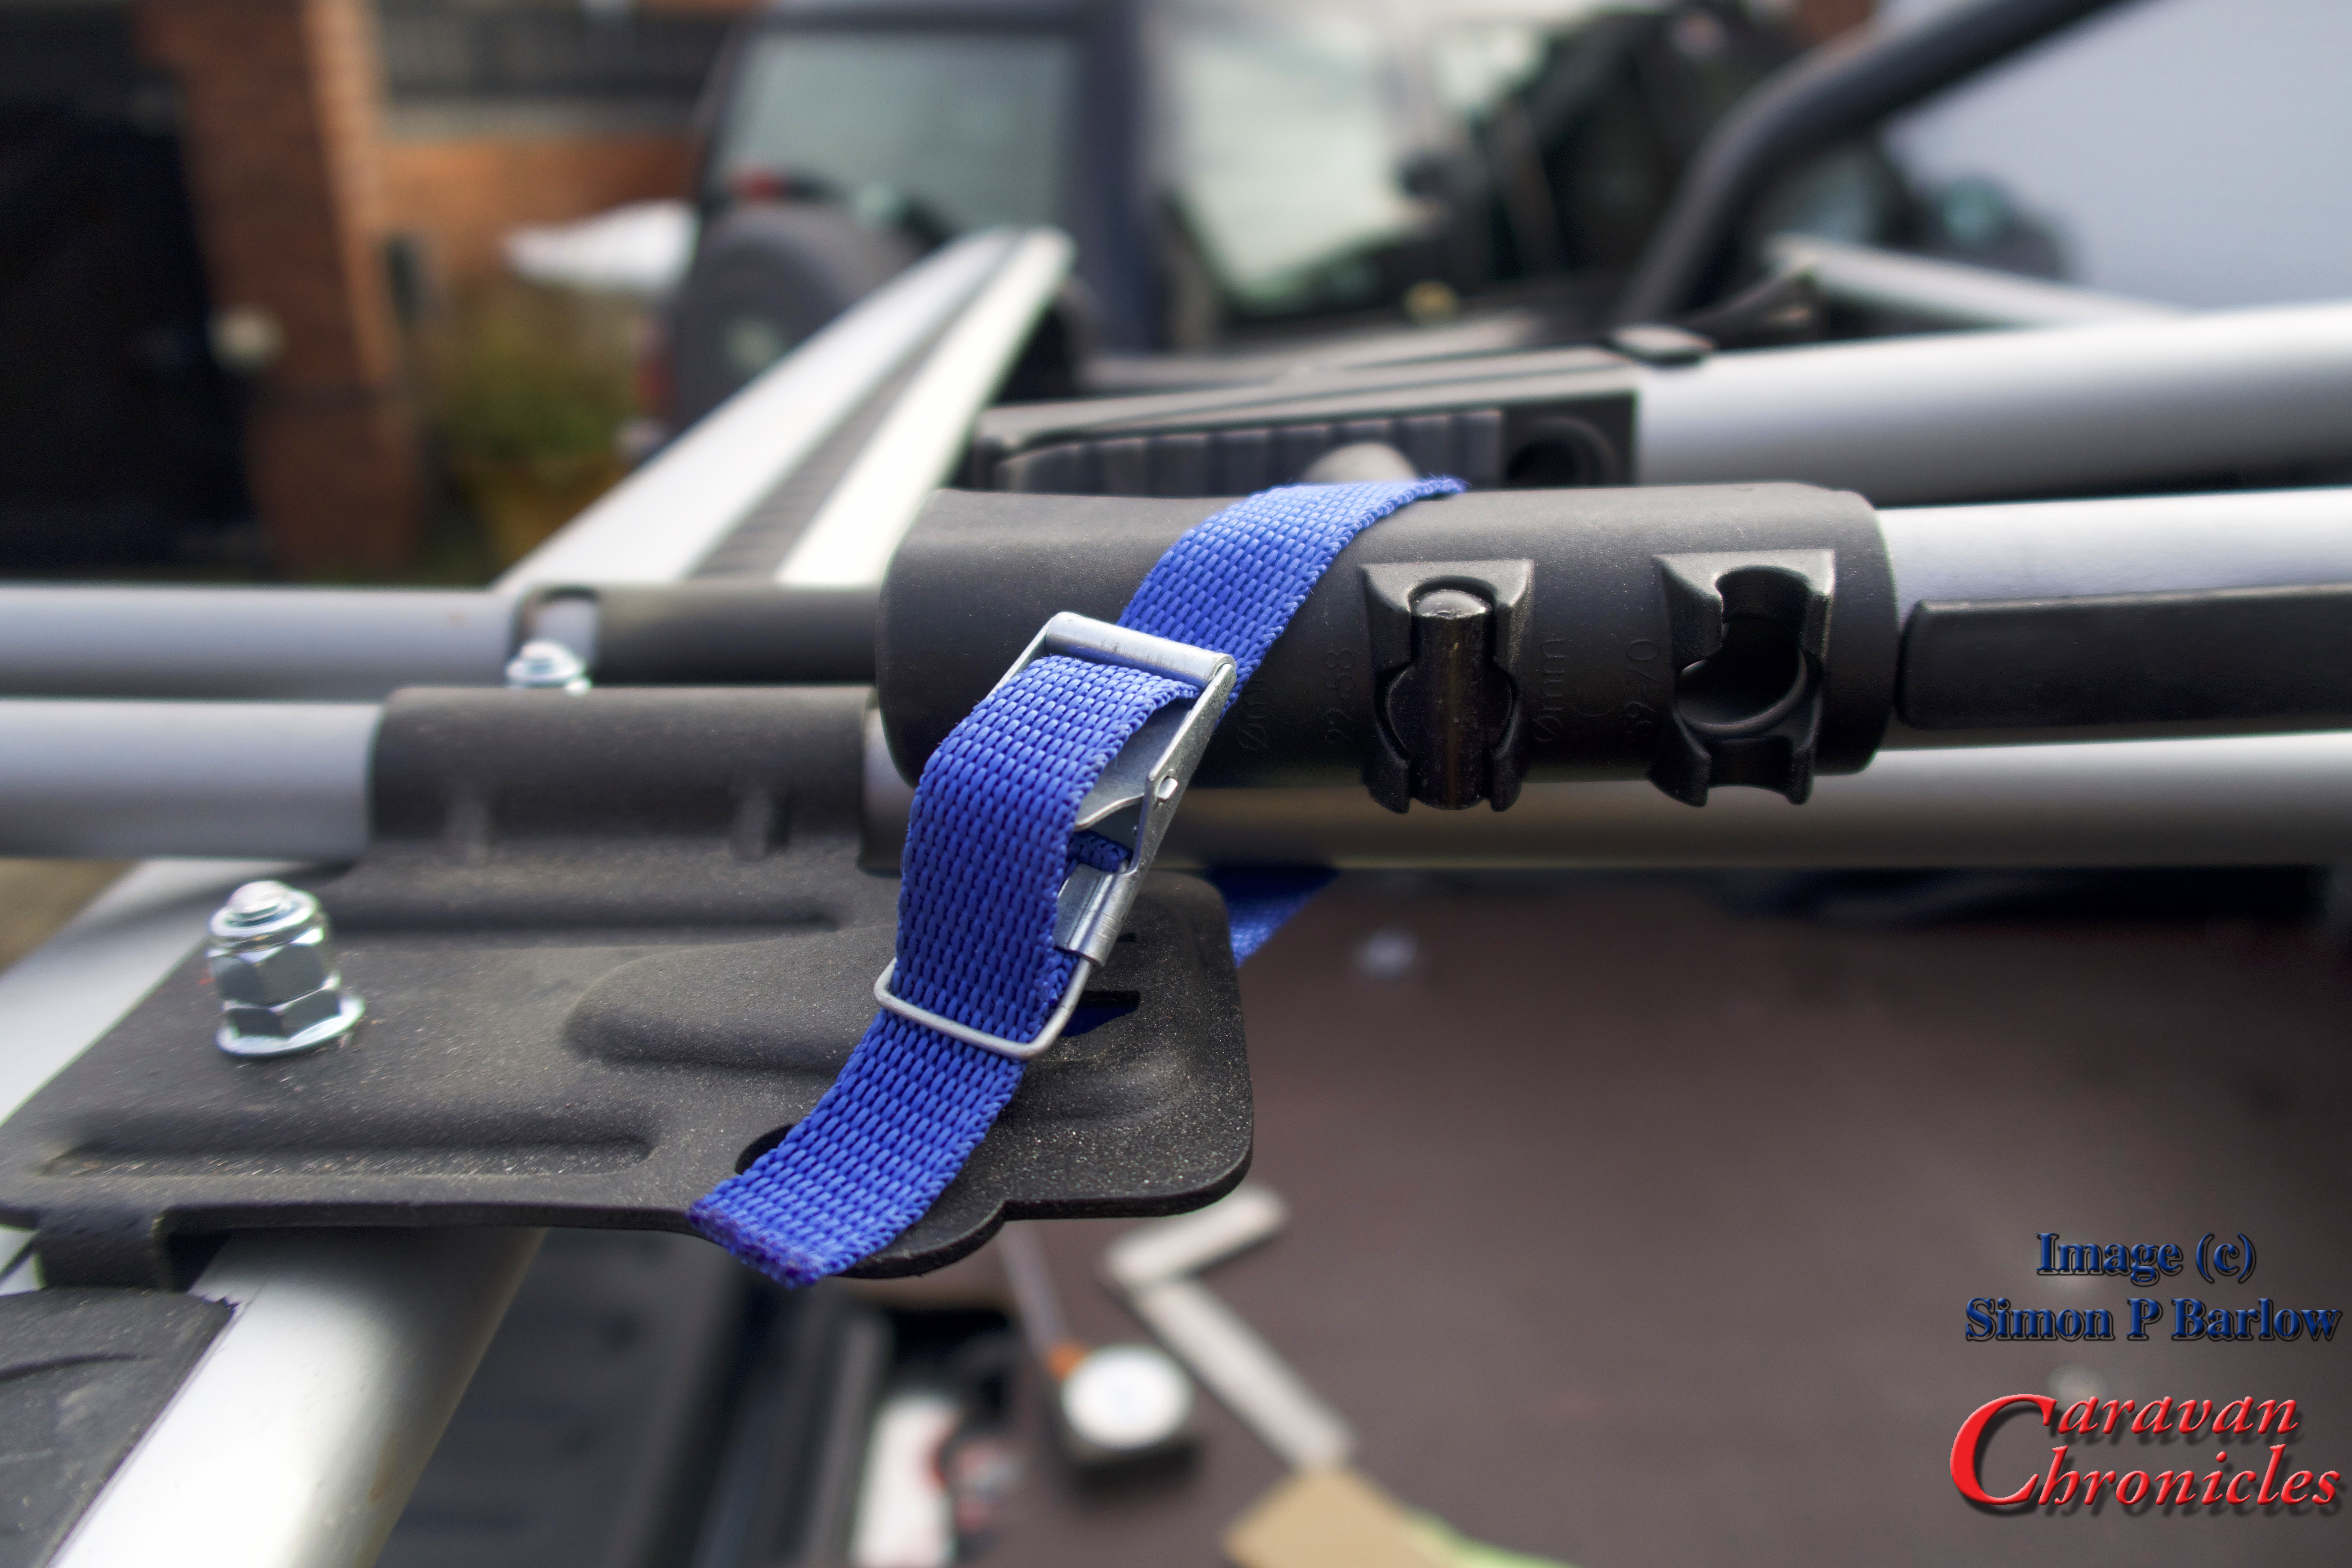 … problem solved. A simple solution to something that may or may not be a problem.
So one rack fitted, all that is left is to repeat for the other side, when it arrives!

Hi again Simon. Well I never. Of all of the years I was seeing a lady friend of mine (Sue Gwynne – now sadly passed on) just up the road in Audenshaw I never knew of this company.
Yes,she was the Auntie Sue to Andrew Gwynne and a sister to John Gwynne the darts/sports commentator.
Hi Simon. An interesting project I’m sure and that is only from where I am looking at it.
Having seen how you have tackled the securing of the rails with the use of the inverted ‘Cup Square-Square’ bolts and the nuts and the additional Nylon Lock-nut.
Having trimmed the bolts to length are you now going to source and fit some black nylon caps over the exposed and cut threads that would perhaps be filled with a heavy grease so as to make life easy should the need arise to dismantle the whole assembly ?
I had a similar need some years ago and ended-up talking to :– https://www.orbitalfasteners.co.uk/en/categories/nut-bolt-cover-caps-1-
After getting them on line I rang their number 01923 777777 to confirm that what I had seen was actually still available.
Keep up the good work.
Regards,
John.
Hi John
Yes, I will be covering the nuts with a cap.
Locally I have a company called Francis Kirk… I have been using them for over 40 years but they have been around since 1868 and its currently the fifth generation of the same family running it.
Nearly all of my nuts, bolts, screws, washers and a whole host of other stuff comes from them.
They still have an old fashioned trade counter that you can take an odd bolt in and say “I need a set of taps for that” and I have never been let down.
Its one of those old fashioned trade counters where you the people. Go in far a washer and spend an hour chatting!
I’ll be hoping in this week to pickup some protector caps.
http://www.franciskirk.com