• Home
  • Help Guides
    • Storage Sites
    • Equipment Reviews
  • Links
  • Document Library
    • Electrical Drawings
  • Photo Gallery
  • Trip Map
    • Caravan Log
    • MPG
  • Shop
  • About
    • Contact

Caravan Chronicles

~ not just another caravan blog

Caravan Chronicles

Tag Archives: Leisure Battery Charging

Euro 6 Engines, Smart Alternators and Your Leisure Battery…

27 Saturday Jul 2019

Posted by Simon Barlow in Caravan Electrics, Electrical, Technical, tow vehicle, Uncategorized

≈ 47 Comments

Tags

Caravan Fridge, Caravan Fridge Problem, Euro6 Engines, Leisure Battery Charging, Smart Alternator

About 12 months ago I wrote a blog post “Is A Euro 6 Engine Killing Your Leisure Battery?” and it got a few comments and generated a number of emails. However 12 months on I’m getting a lot more questions relating to problems around smart alternators and I’ve brought forward this blog post by quite a few months from my planned posting date following a couple of long email exchanges with two readers and a few others.

Right, I think the best way to explain this is to set the stage so to speak.

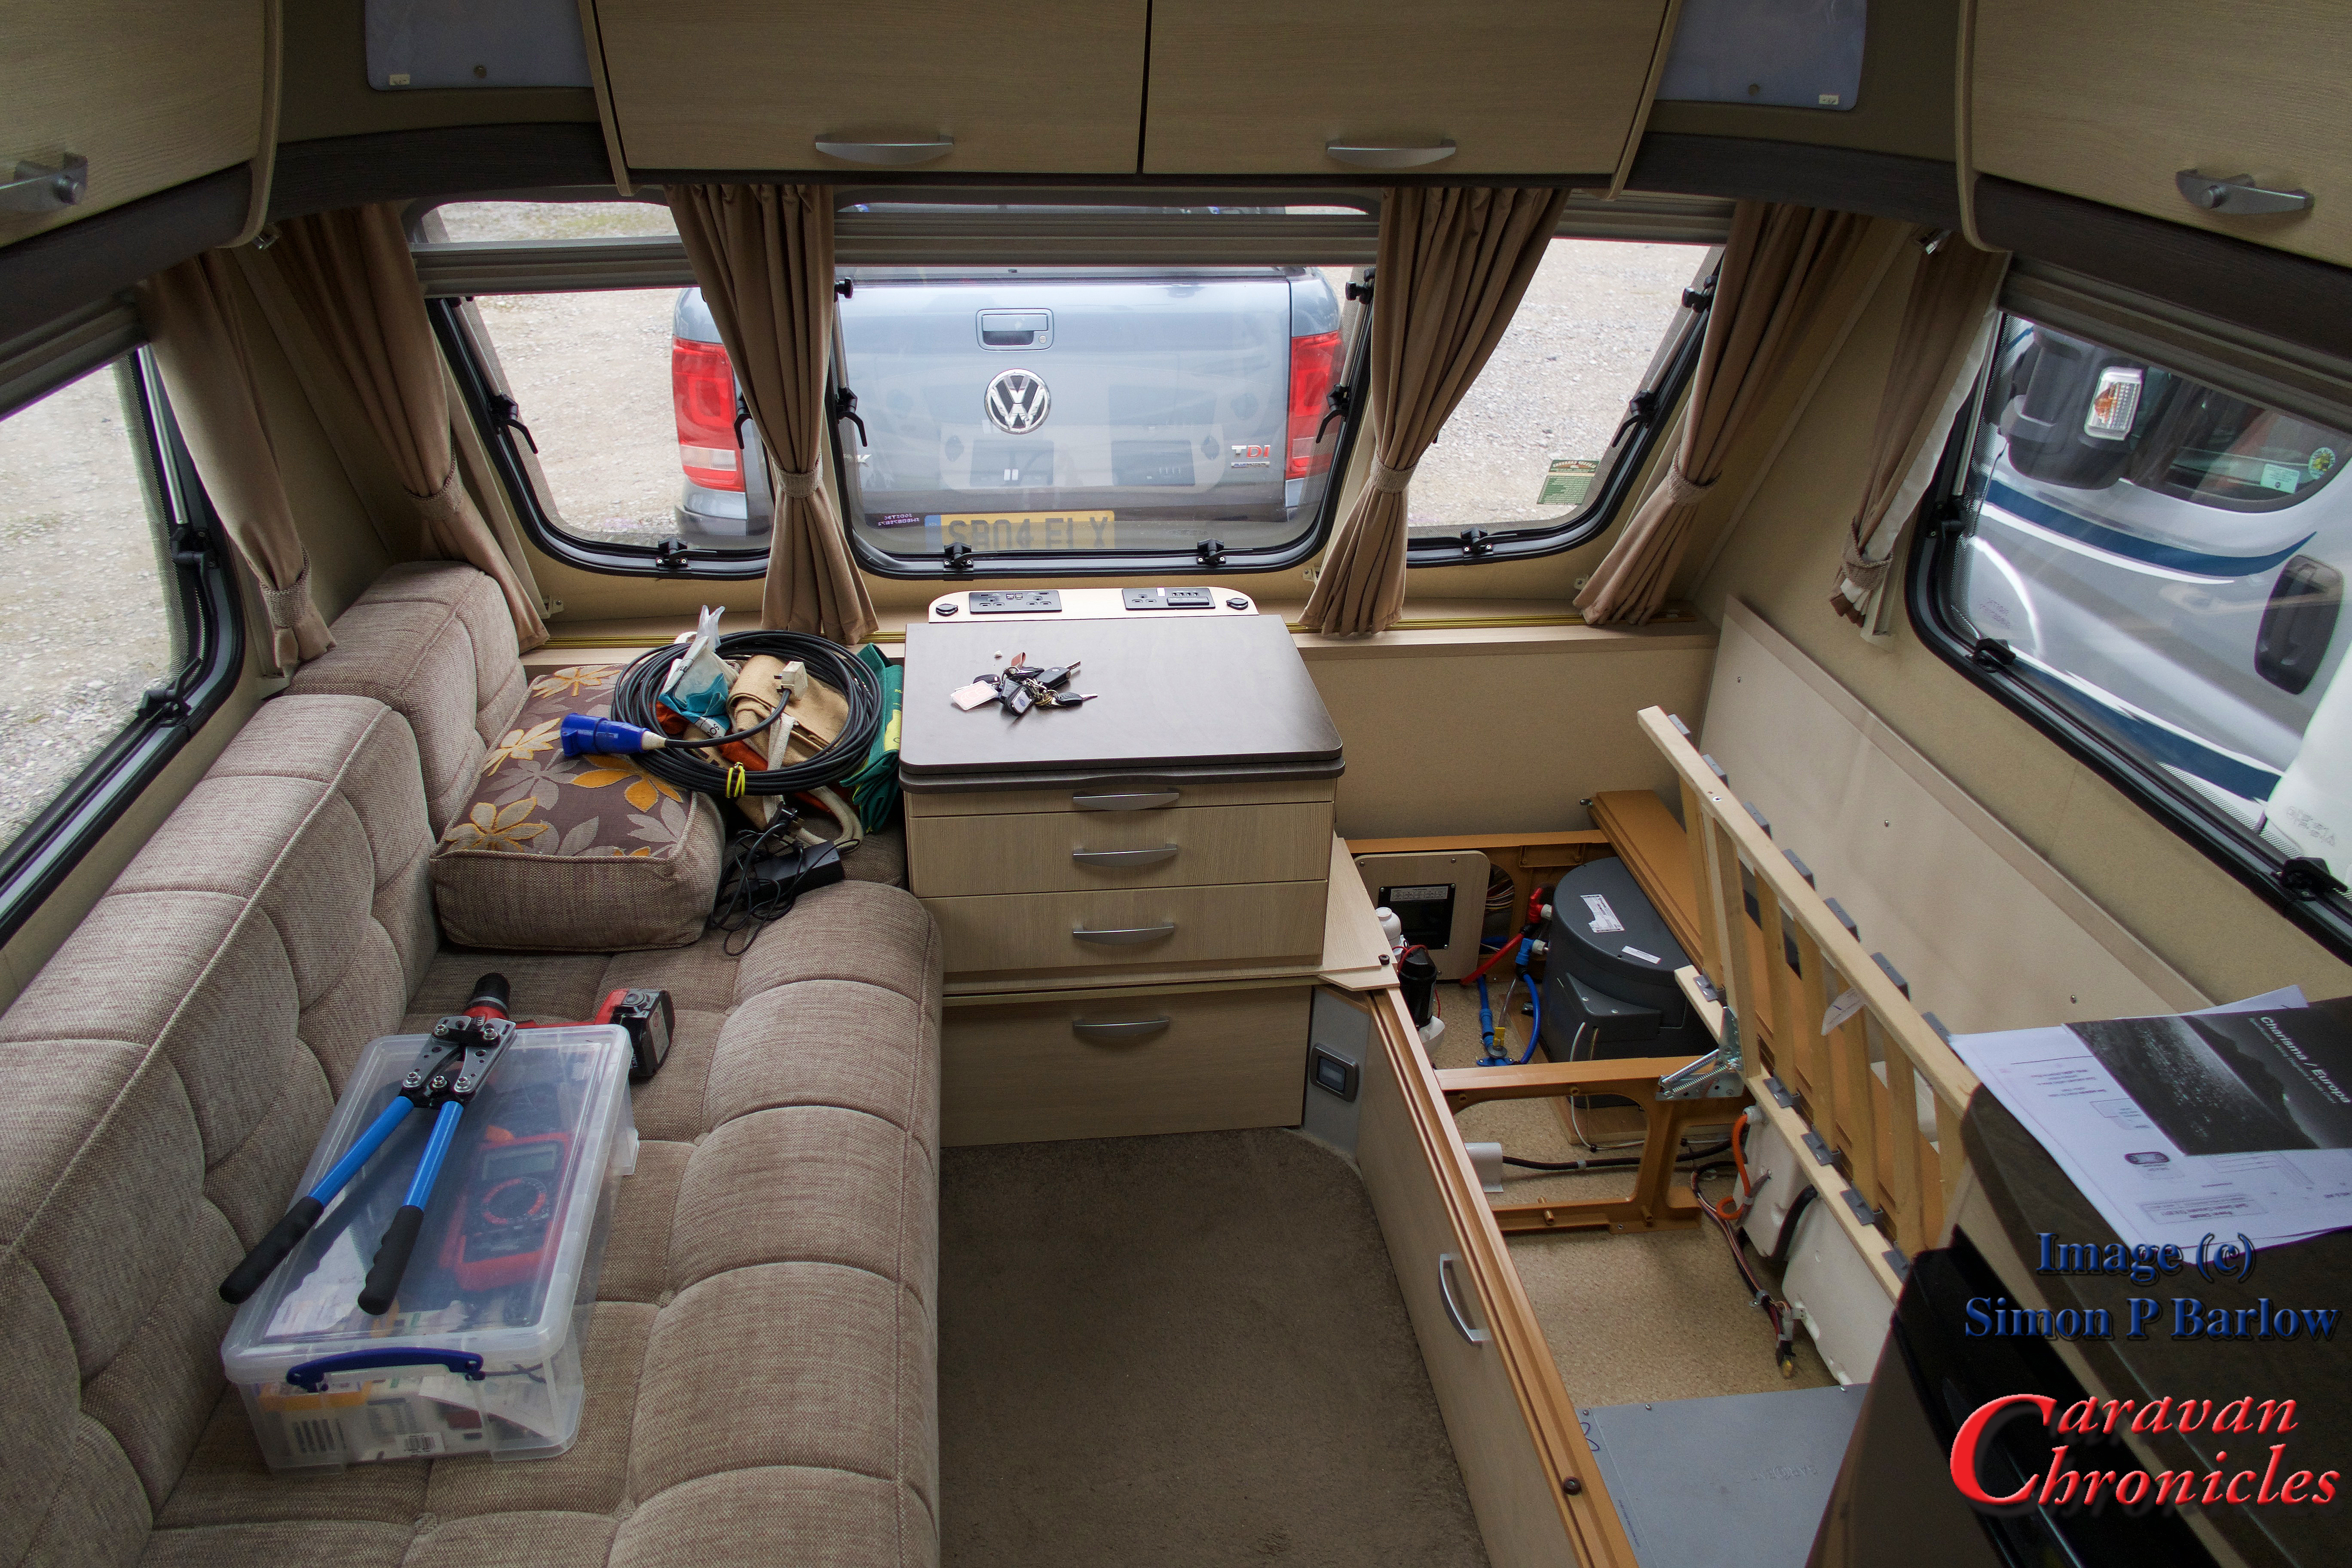
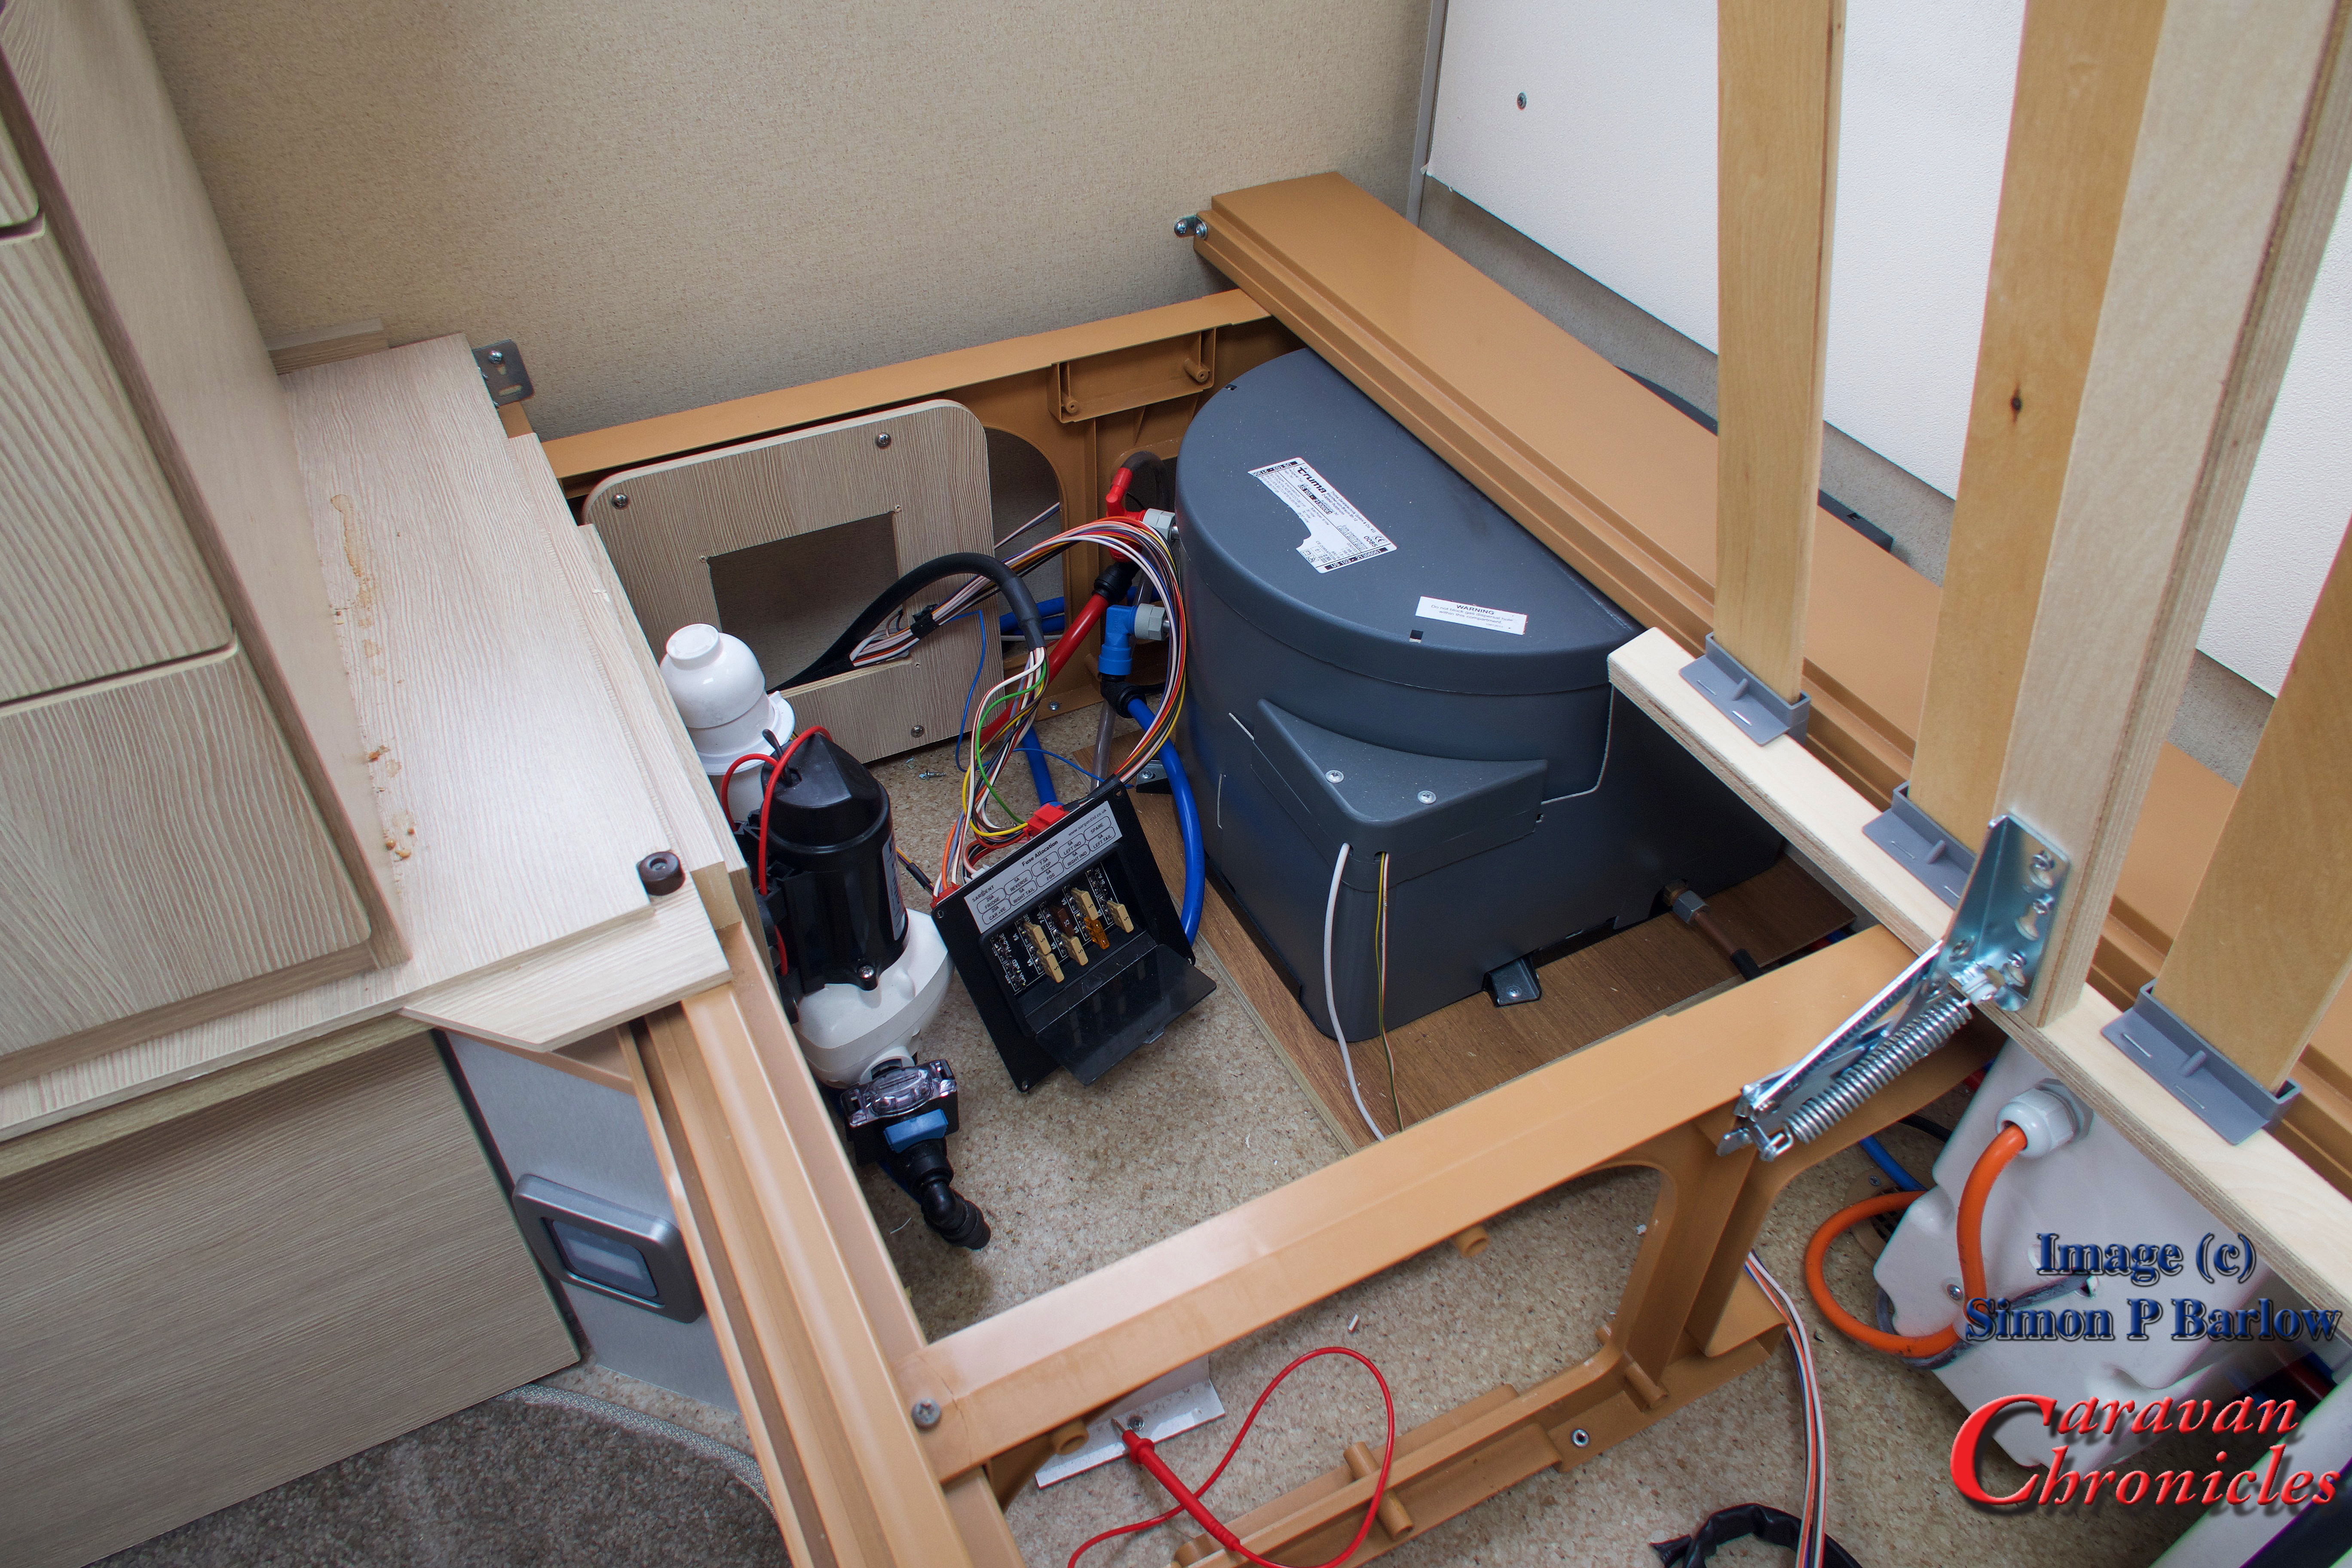
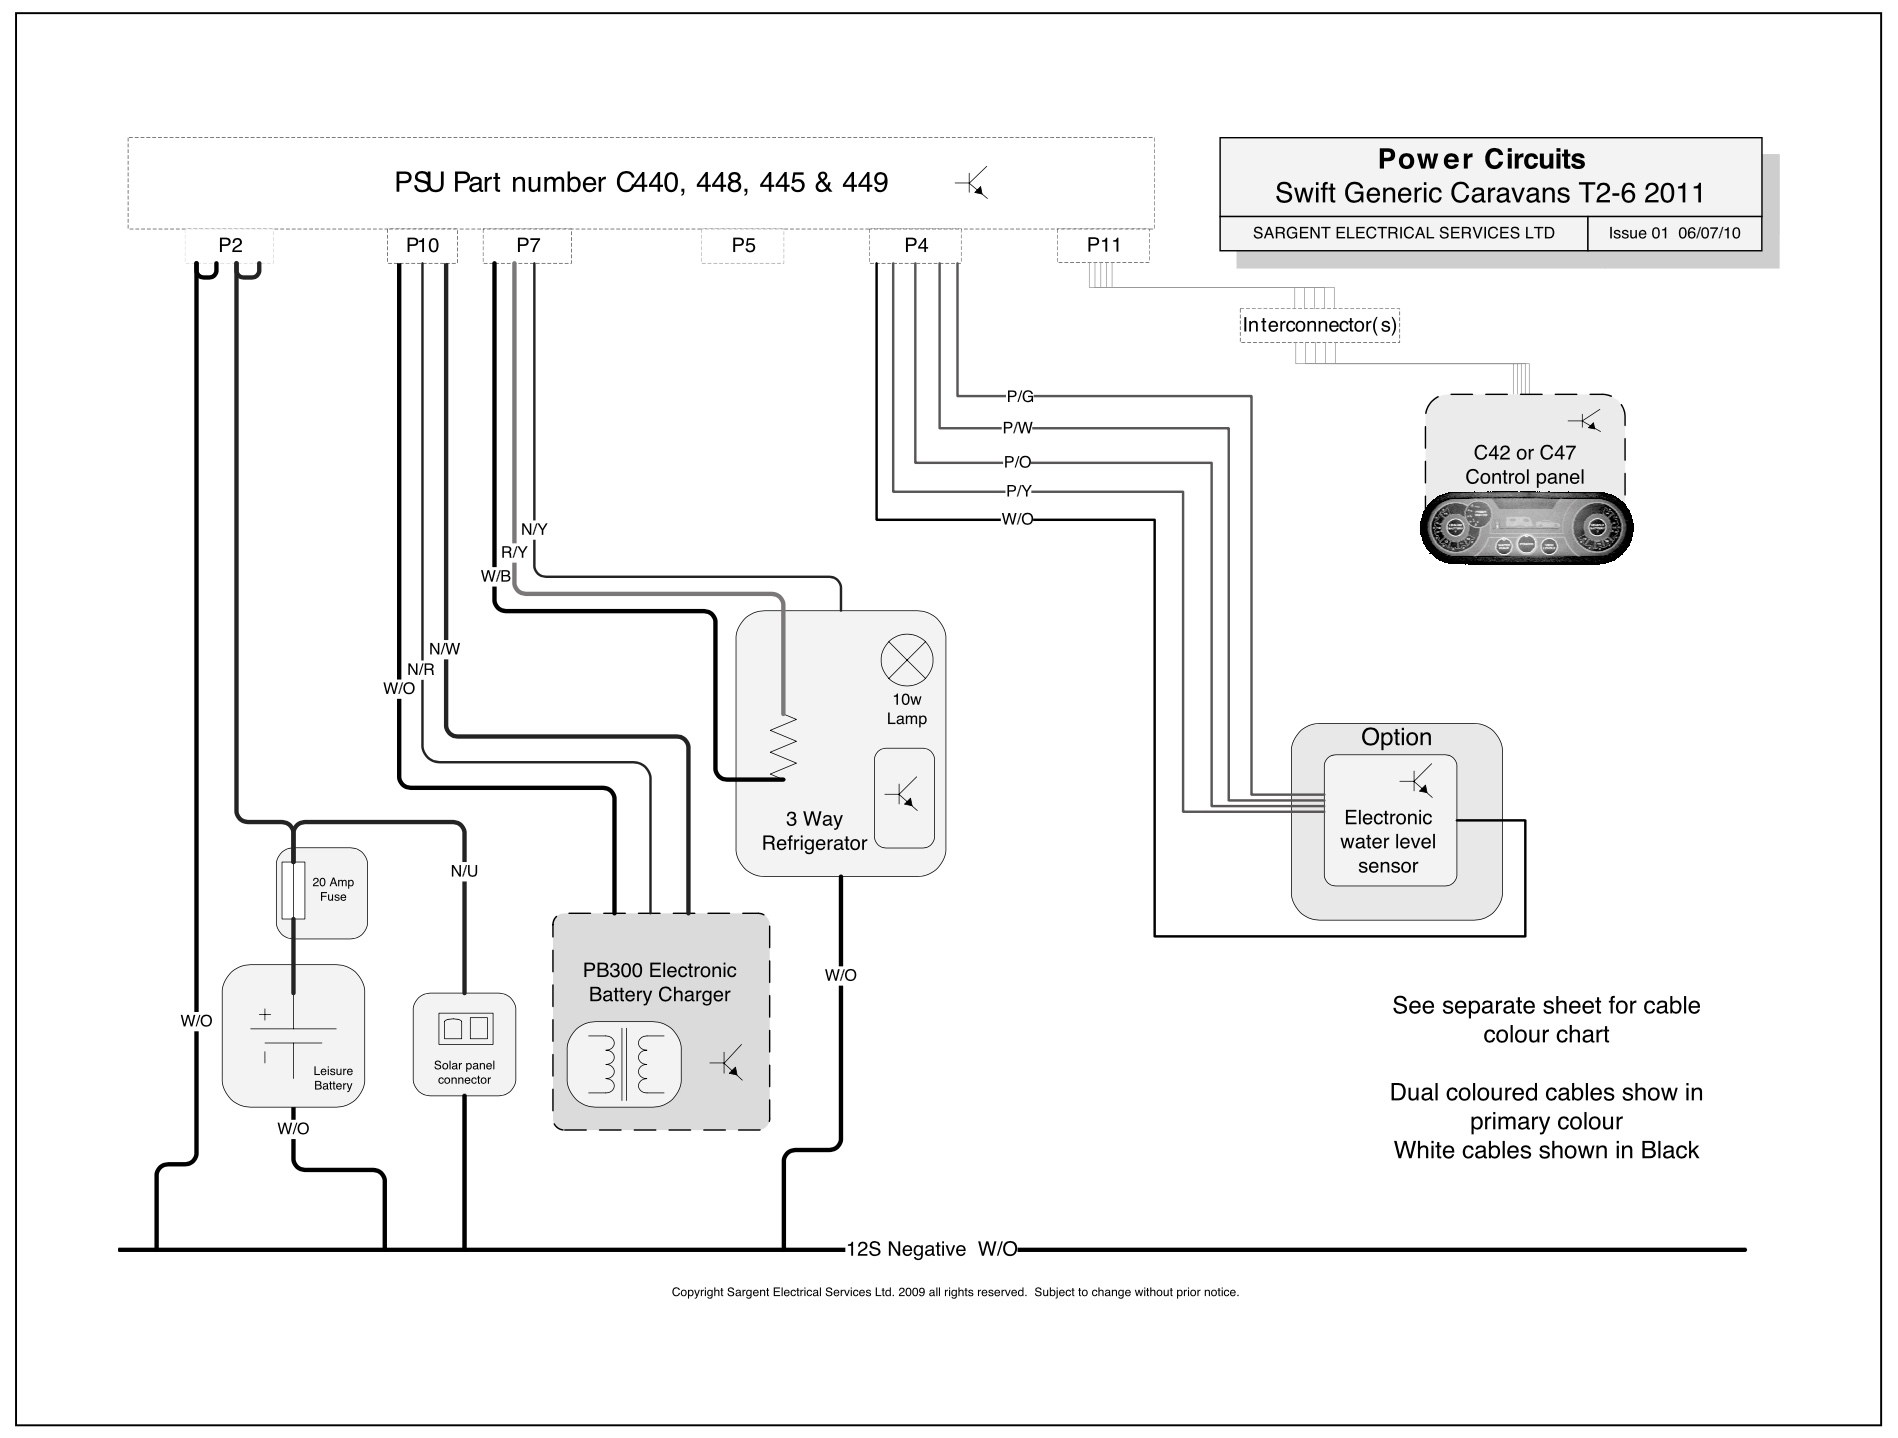
Bob stores his brand new caravan at home and it is regularly plugged in to the house to run the internal battery charger and a dehumidifier. It’s got a new 110Ah AGM leisure battery and a new motor-mover fitted. The caravan is plugged in at least 24 hours before any trip to get the fridge down to temp prior to stocking it up. Bob also has a brand new car, Euro 6 diesel with a smart alternator. The car is a few months younger than the caravan and he’s never towed a caravan with this car. The tow bar and tow electrics were all fitted by the dealer (or dealers agents) prior to it being purchased. He did tow this caravan on 4 trips with his previous car, same make but 6 years older.

The caravan suitably prepped, fridge down to temperature and stocked. An early morning departure and six hour journey with a couple of stops to catch the Euro Shuttle over to France followed by a couple of hours driving in France to their first destination. On arriving, Bob sited the caravan on to the pitch not using the motor-mover and went about setting up. Mrs Bob knowing a request for a cup of tea was imminent went inside to put the kettle on where she discovered everything in the freezer had defrosted. Bob checked the fridge, it was still set for travelling. For what ever reason he also checked the leisure battery on the caravan’s system… 12.1 volts.

Over the next few days there was a couple of phone calls to their caravan dealer along with a number of emails. For the next three weeks and 2 other camp sites the fridge worked perfectly. On the return trip a similar distance and travelling time to the outward journey ended up when Bob returned home he only managed to get the caravan part way up the drive using the motor mover. He had to plug the caravan into his house overnight to charge the leisure battery enough to allow him to use the motor mover to finally put the caravan into its ‘home’ at the rear of the house.

Within a couple of weeks the caravan was returned to the dealer for extensive checking and the dealer could not find any issues with it or the fridge. They put forward the idea it must be an issue with the car. Bob tended to agree with this as he had taken this caravan on four trips towing with is old car and never had any issues. Three relatively short trips, the other a longer two week trip from the North East down to Cornwall, a similar 8 or 9 hour journey and everything seemed fine.

After a conversation with the main dealer who agreed to have the vehicle towing electrics checked over the next couple of days. The verdict from the main dealer was they could find nothing wrong with the vehicle, everything was working as expected.

Now, this is where I got involved. The above is actually an amalgamation of two very similar emails asking for thoughts and advice. The people involved had vehicles from different manufacturers and the caravans were also from different manufacturers. The only common element was the vehicles were new and had Euro 6 engines with smart alternators. I am not going to mention the vehicle or caravan manufacturers for a couple of reasons…. one, I don’t want to end up on the wrong end of a legal letter and two, I don’t actually think the manufacturer of either is relevant.

What’s Going On?

Luckily for me Bob is recently retired but knows his way round an AVO 8 being an apprentice TV repair man for Redifusion back in the day when valves were king. (Just as an aside, I bought my first AVO 8 back in 1976 and paid £8 for it. It was Ex REME in a leather case. I purchased it from MAZEL RADIO on London Rd in Manchester. Anyone from Manchester of a certain age will know Mazel Radio).

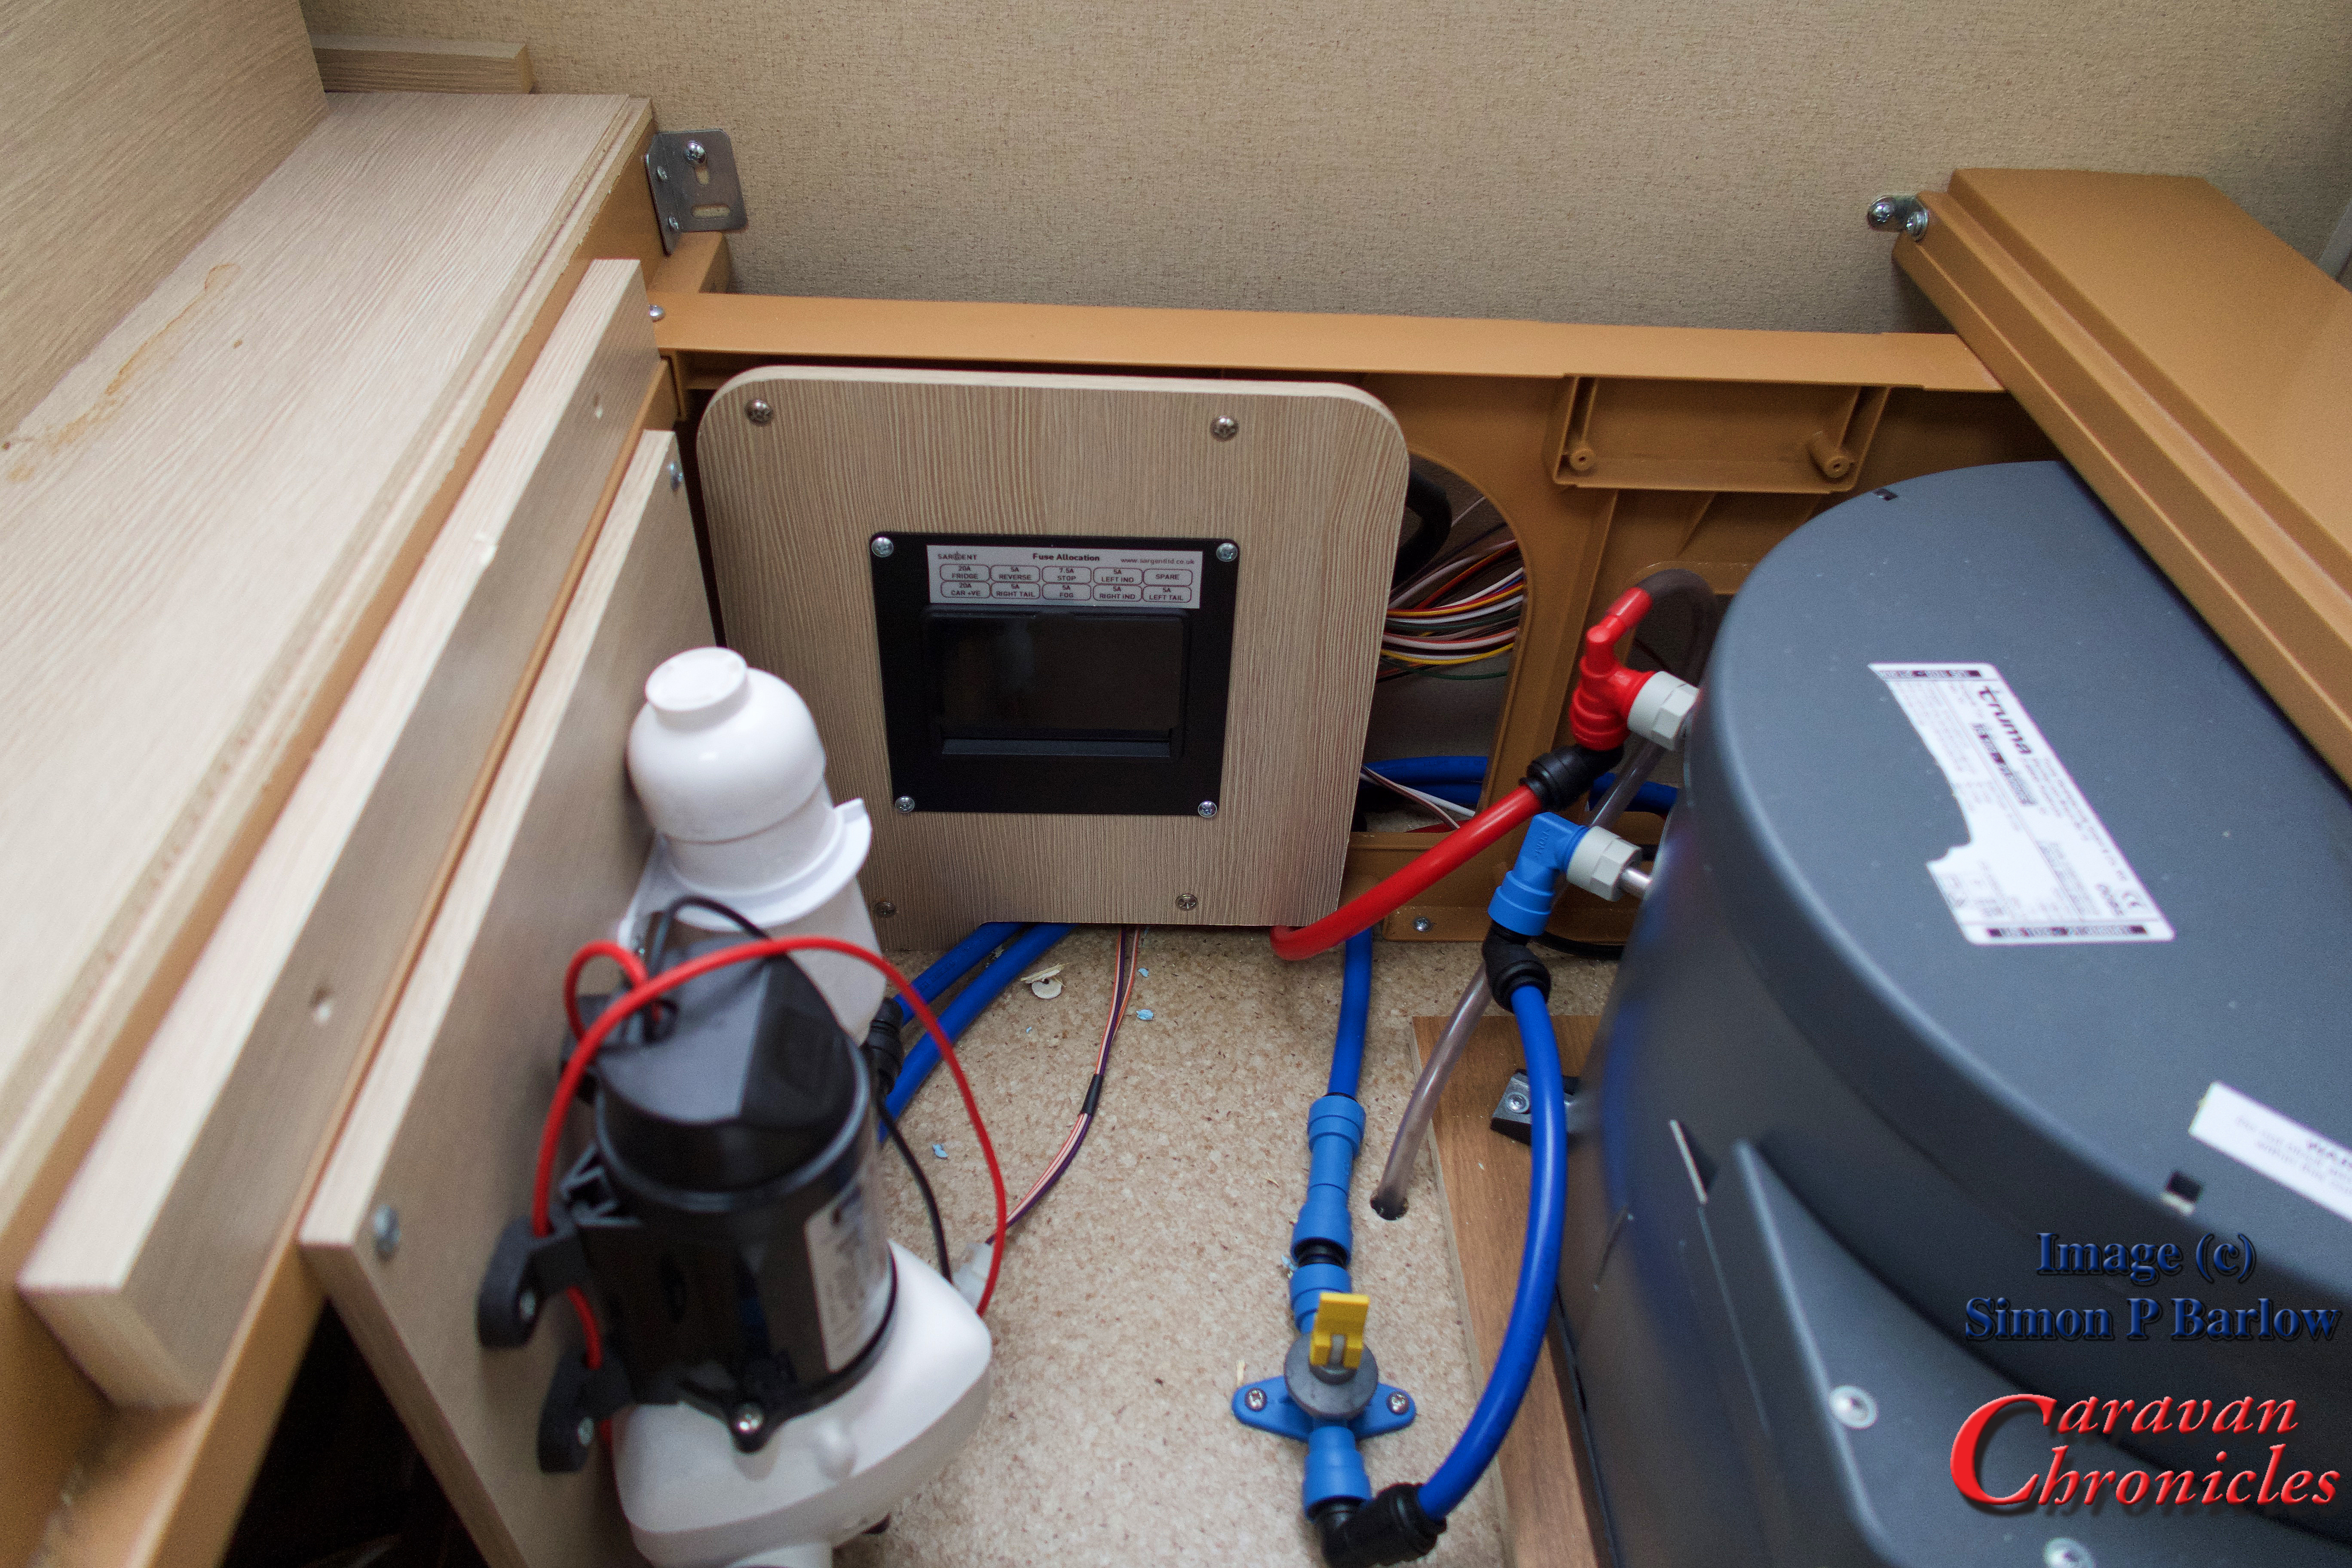
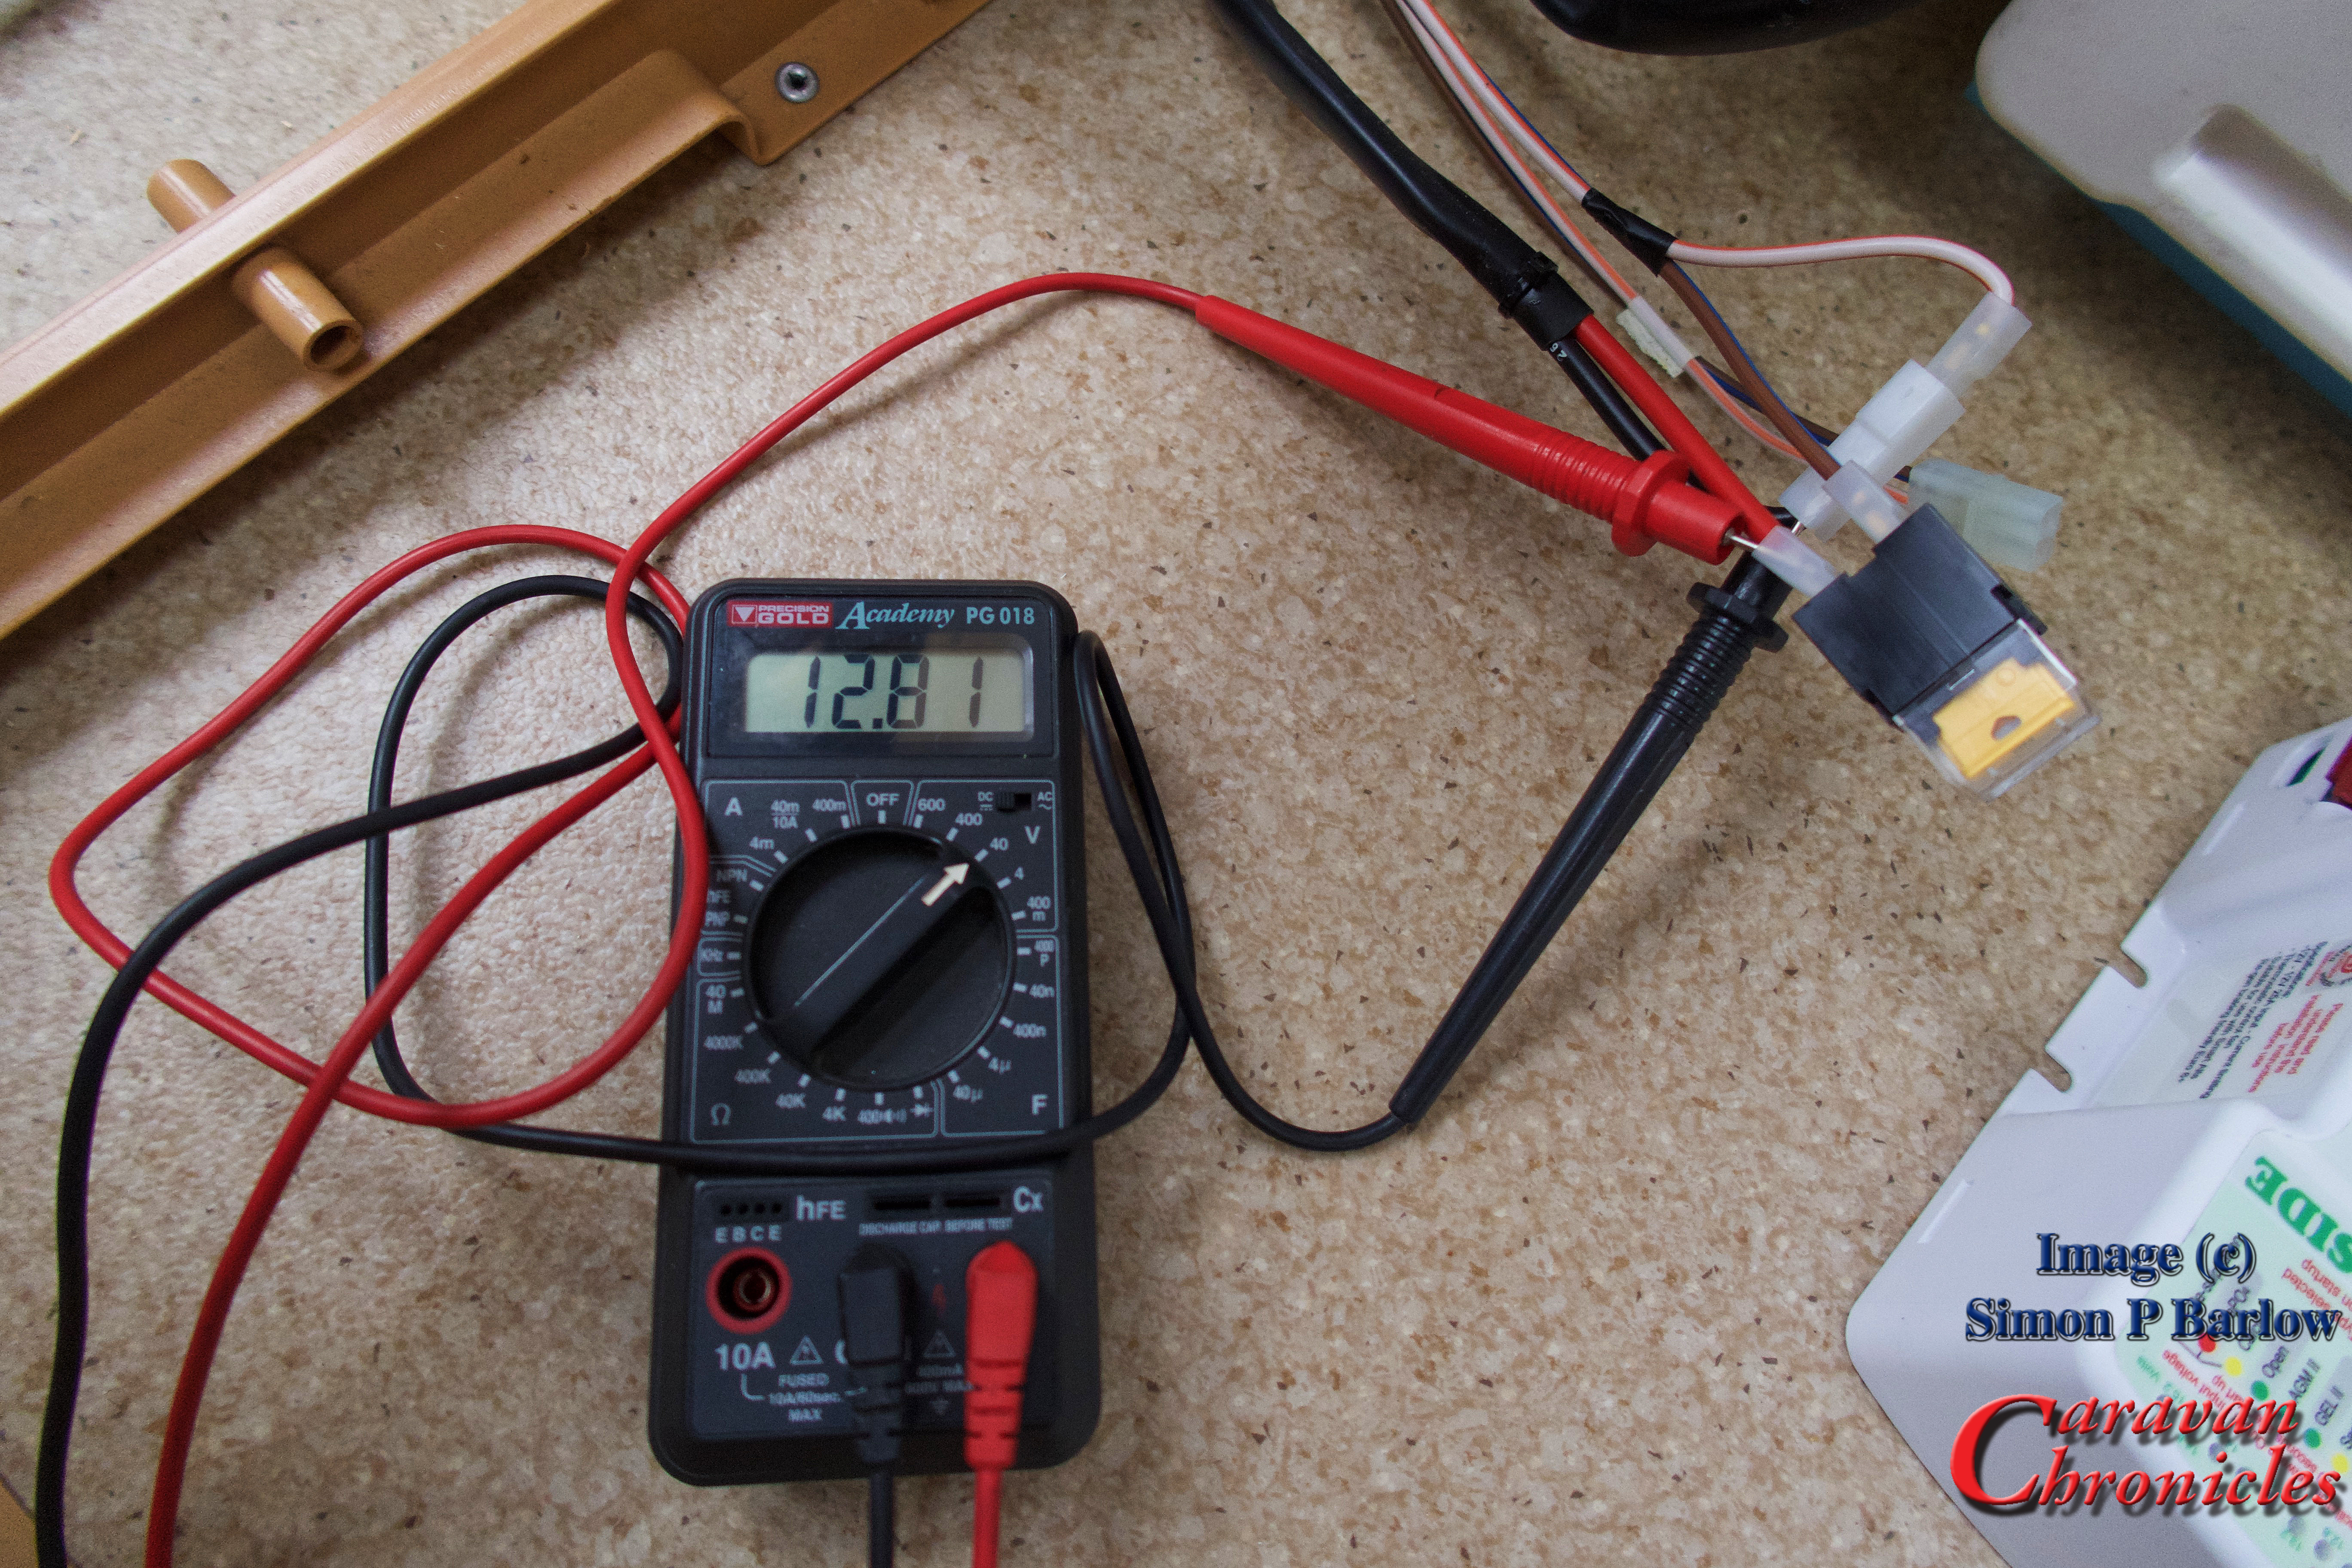
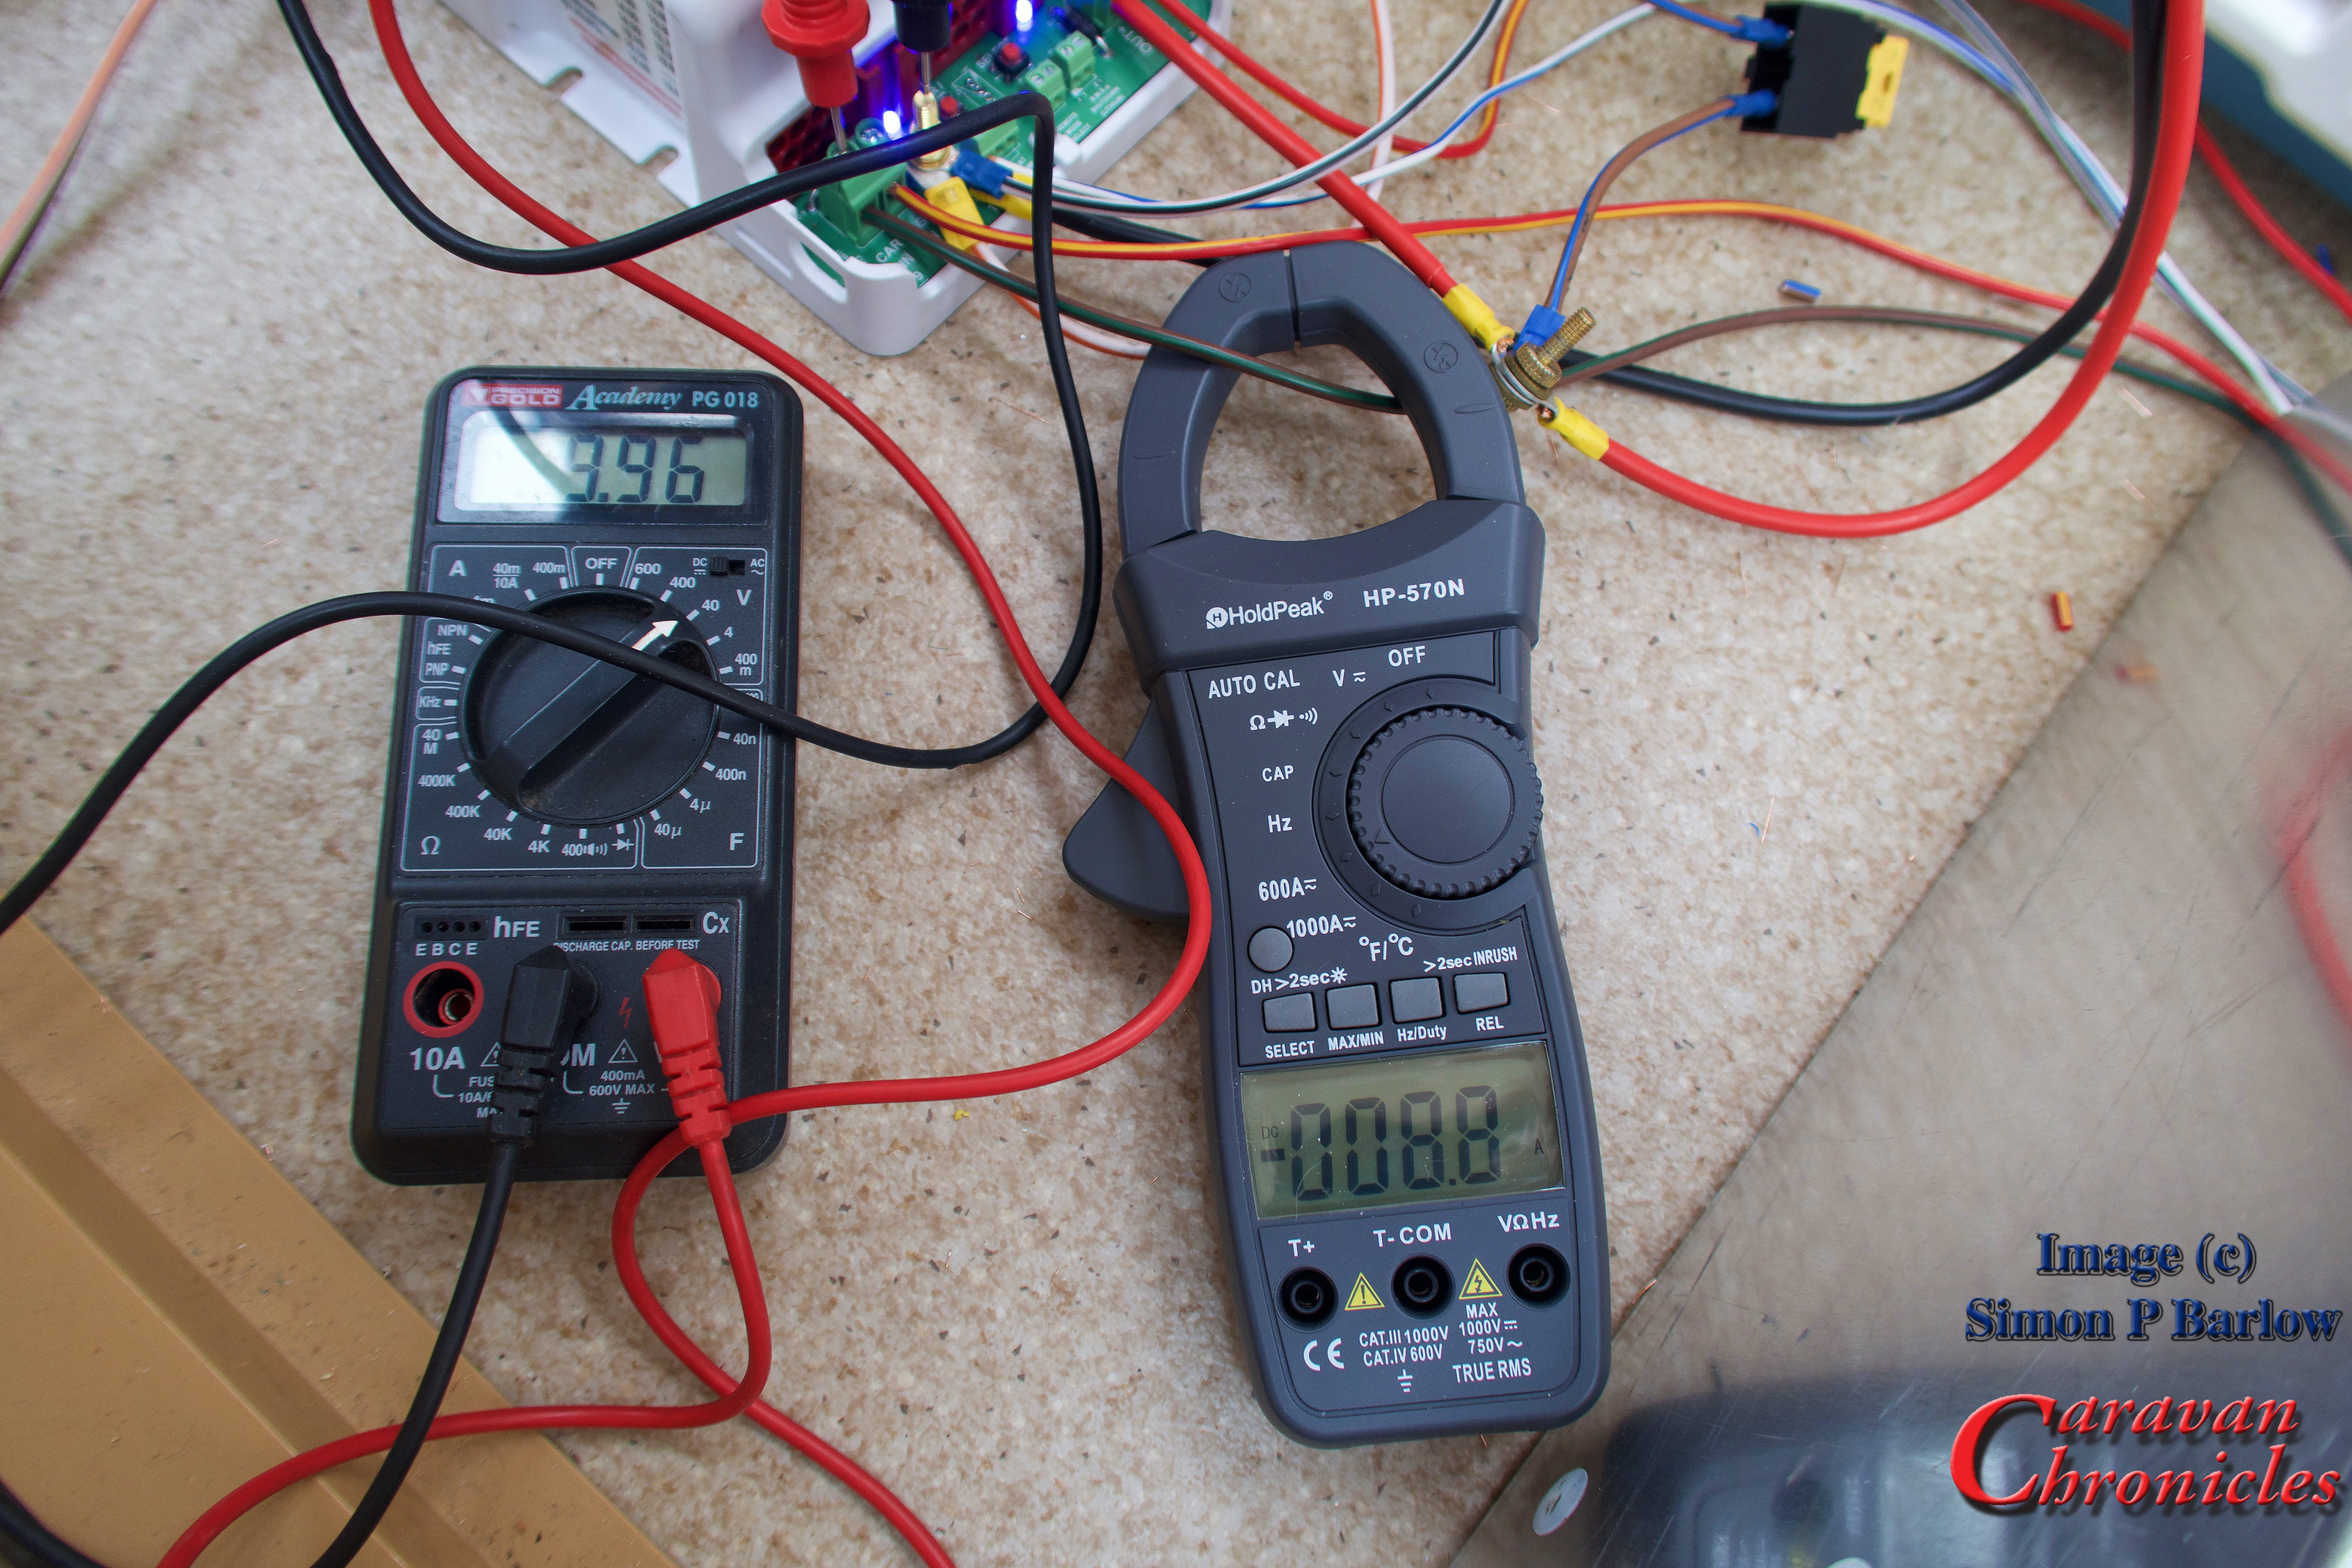
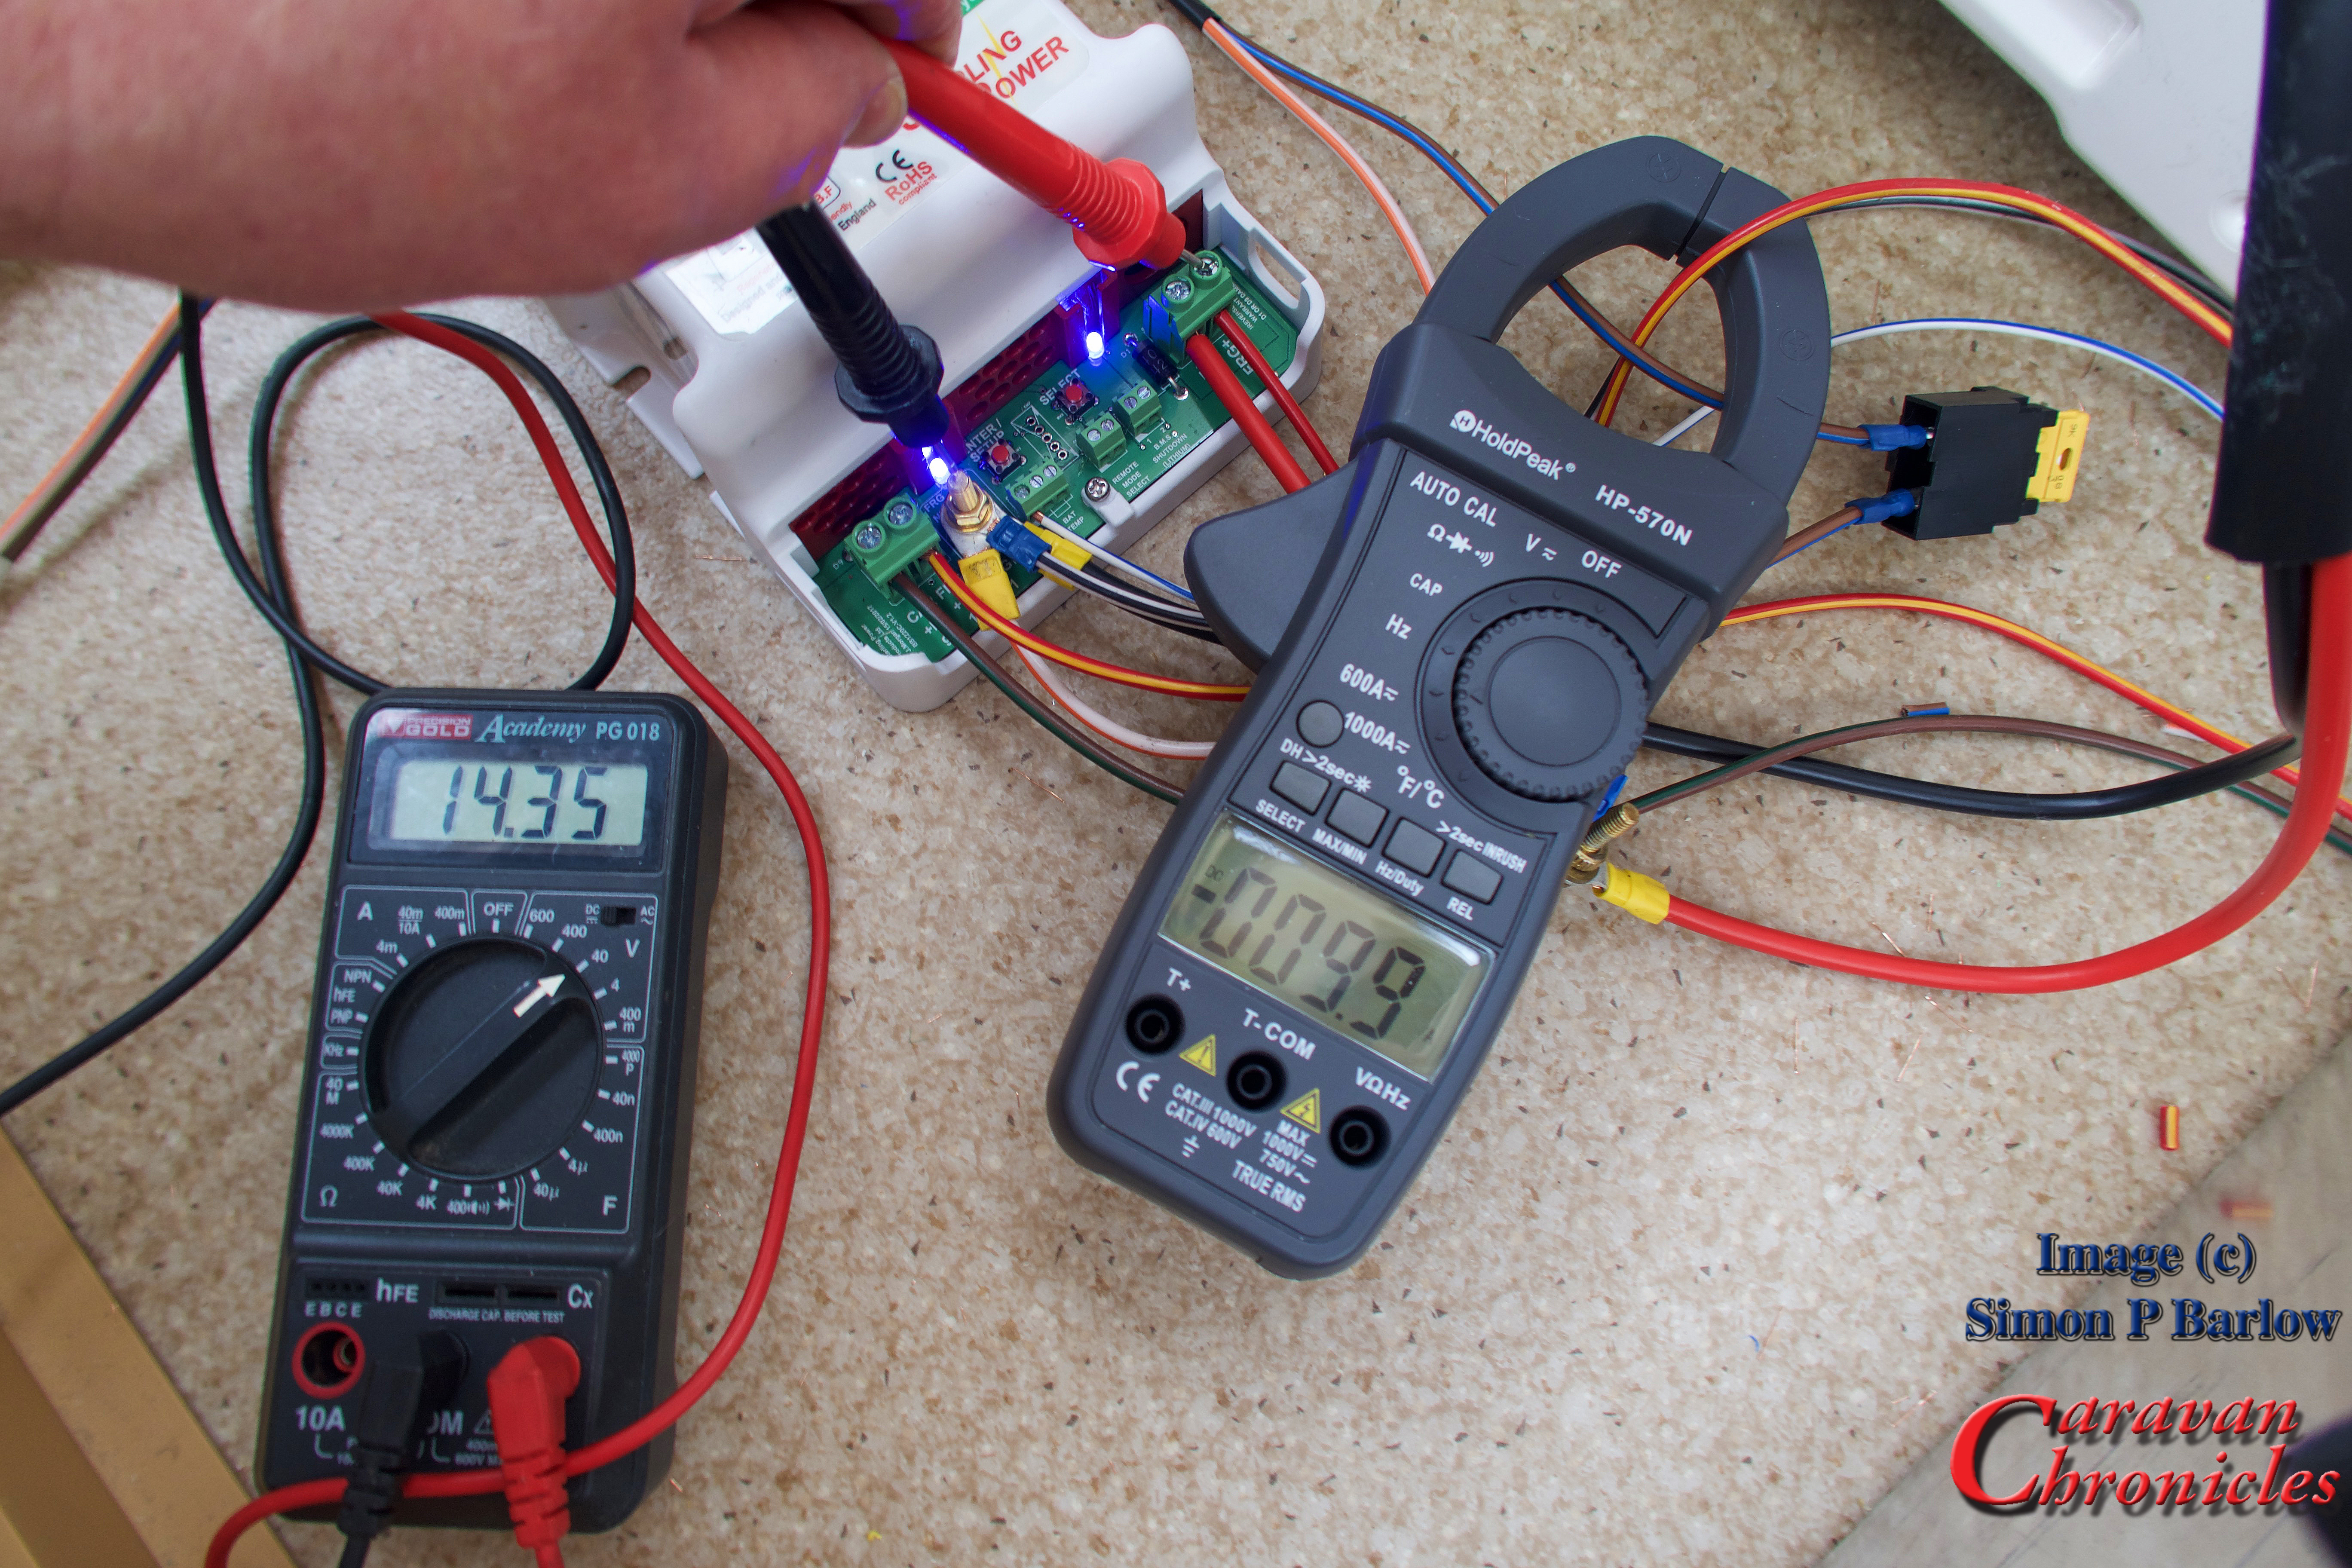
To cut a long story short over a period of a couple of weeks we proved that when hitched up, as soon as the smart alternator went into eco mode, there was a current flow up to about 4.5 to 5 amps FROM the leisure battery TO the car. This only stopped and reversed when the electrical load in the car caused the vehicles ECU to turn on the alternator’s output. Furthermore we determined that with the caravan hitched up, the period the alternator was in eco mode was also longer than when unhitched. Although we could not prove this with definitive evidence, this would also support the reverse current flow from the caravan to the vehicle that we were seeing as the caravan leisure battery was now supporting the vehicle battery.

Now there were a few questions that were buzzing round my brain….

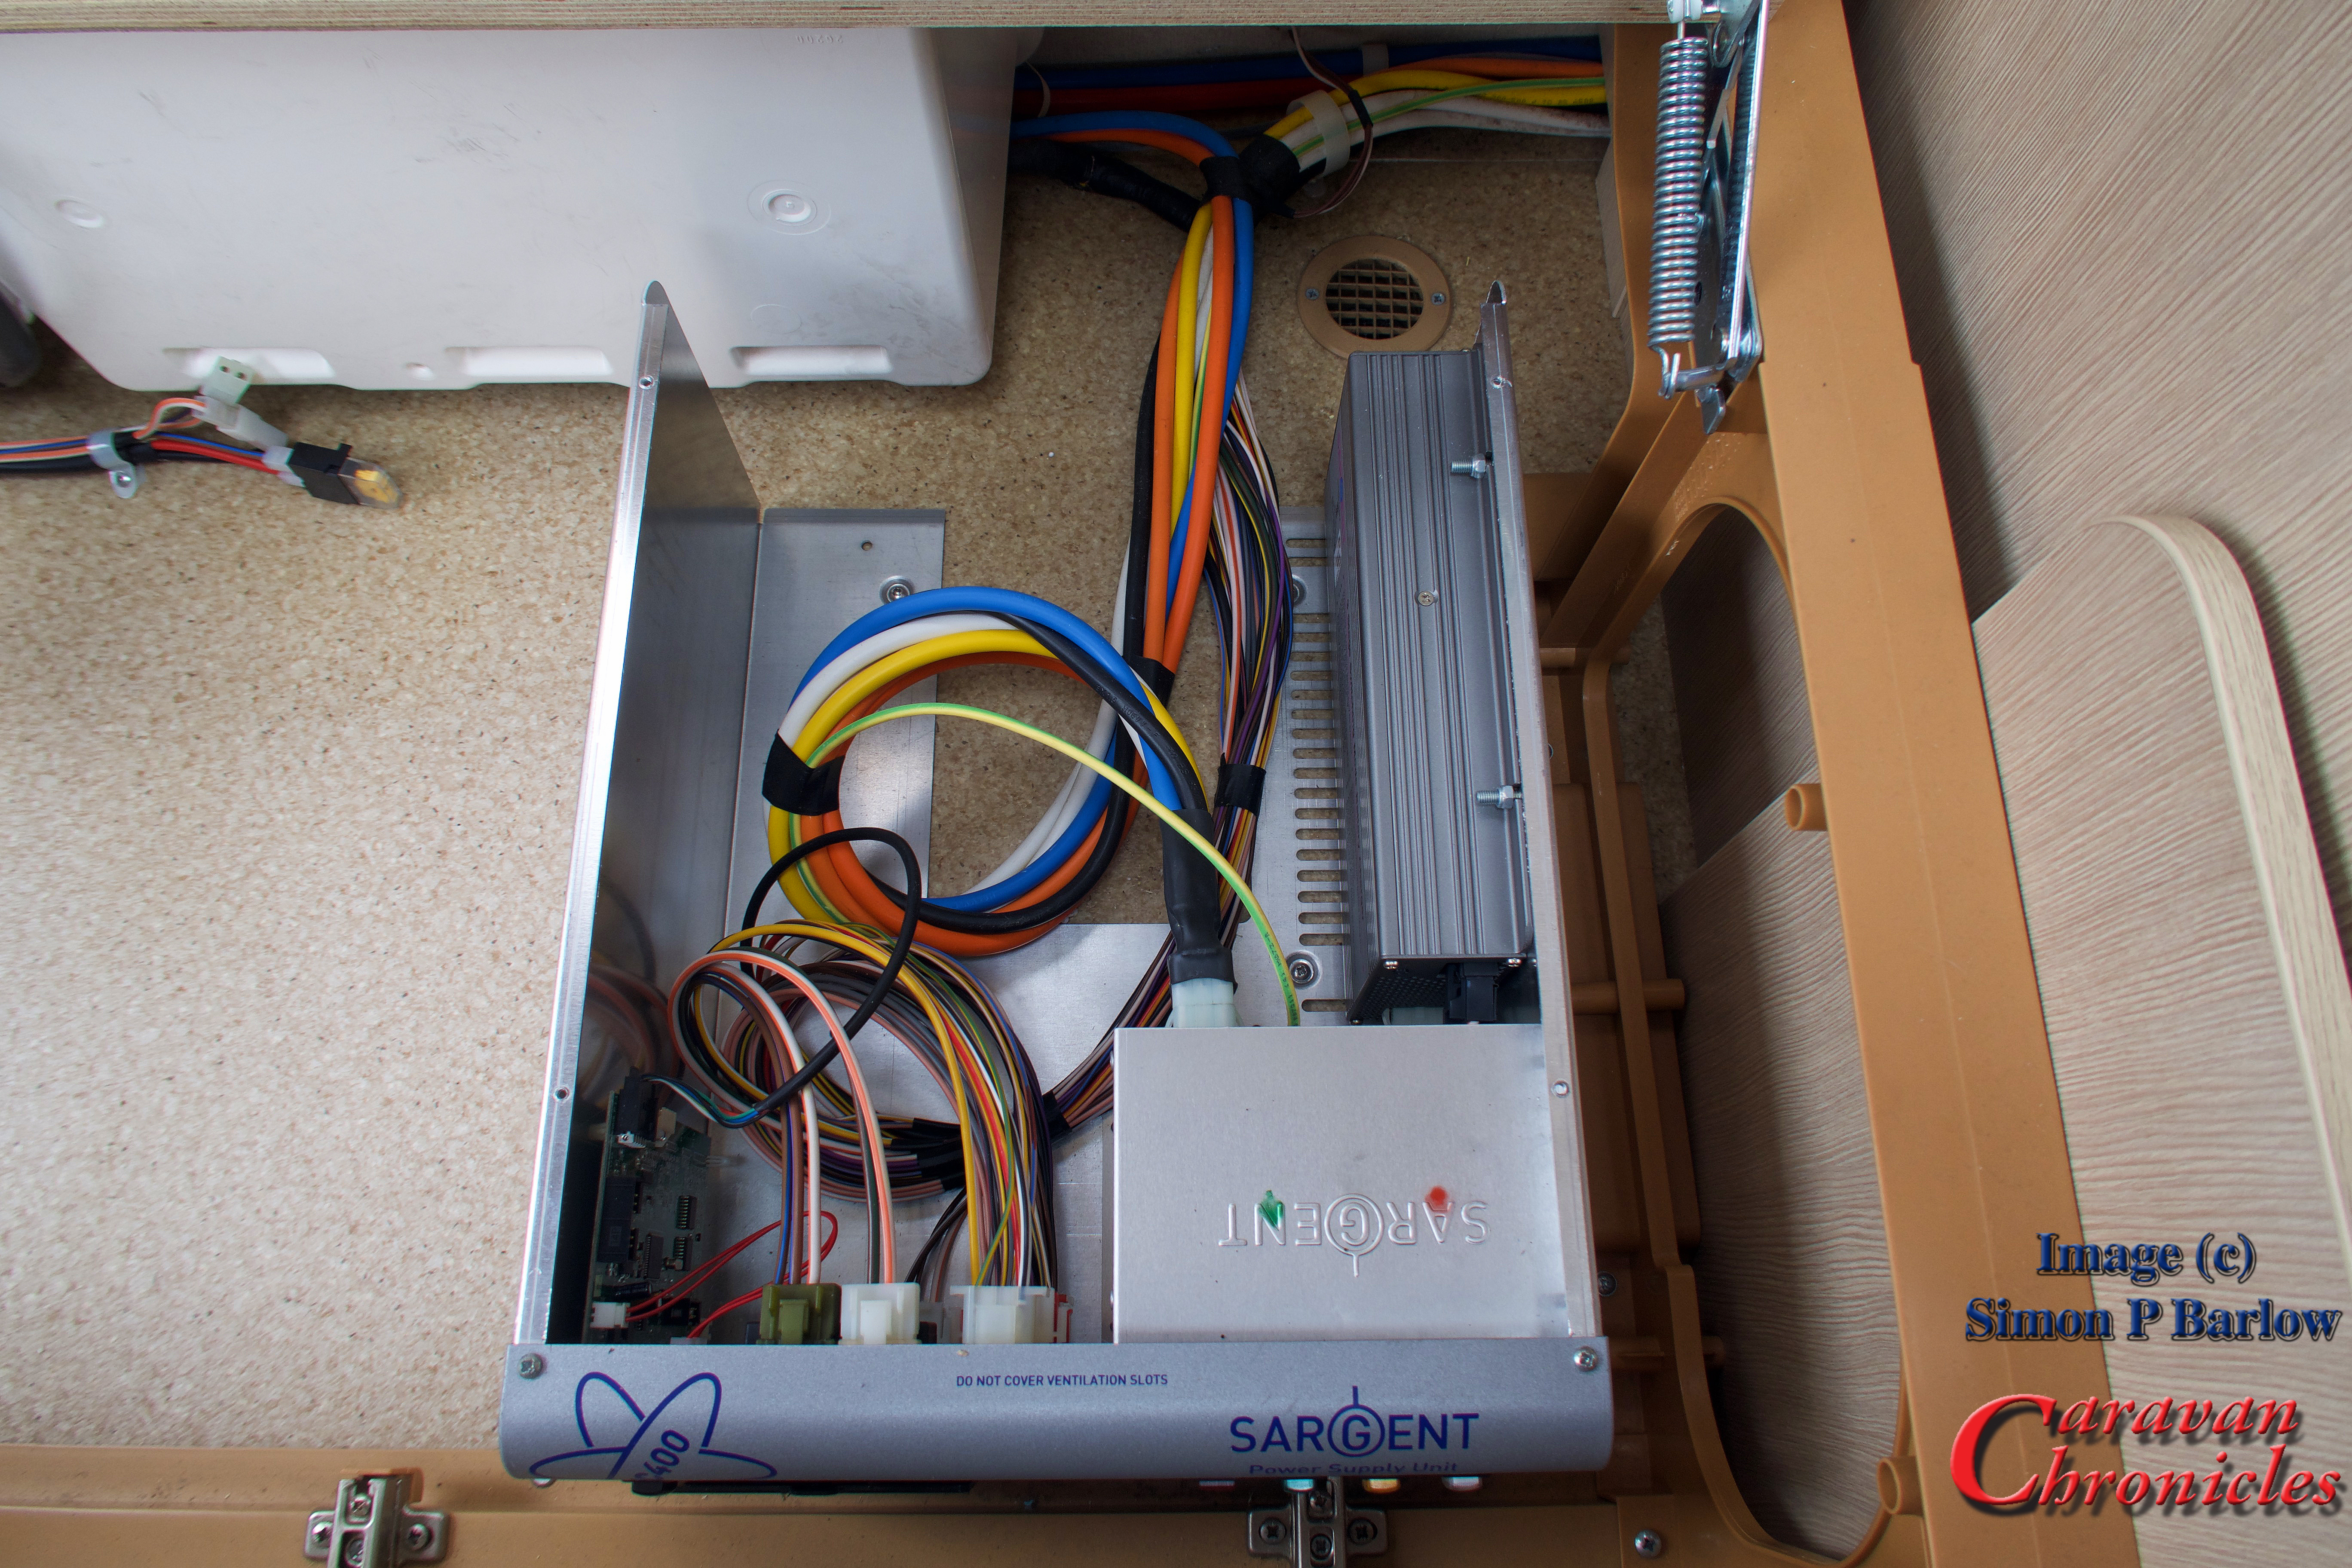
  • Why didn’t the caravan habitation relay drop out when the smart alternator went into eco mode to stop this reverse flow?
  • Why didn’t the dedicated tow electrics strop this reverse flow?
  • Why didn’t the vehicle ECU knowing a trailer was hitched stop the alternator going into ECO mode?
  • If the ECU put the alternator into eco mode why didn’t it drop the fridge supply and by default release the habitation relay?
  • Why did the fridge defrost/not work even though in theory there was a voltage supplied to it?
  • Was this the reason I had seen an increase in emails relating to motor mover issues and batteries not holding their charge?

What Next?

I don’t really know. I don’t know how wide spread an issue it is or its going to become. I also don’t know the details of how specific manufacturers implement eco modes in the ECU programming or how the tow bar electrical interface manufacturers could work round the potential issues while still being able to get their products certified by vehicle manufacturers.

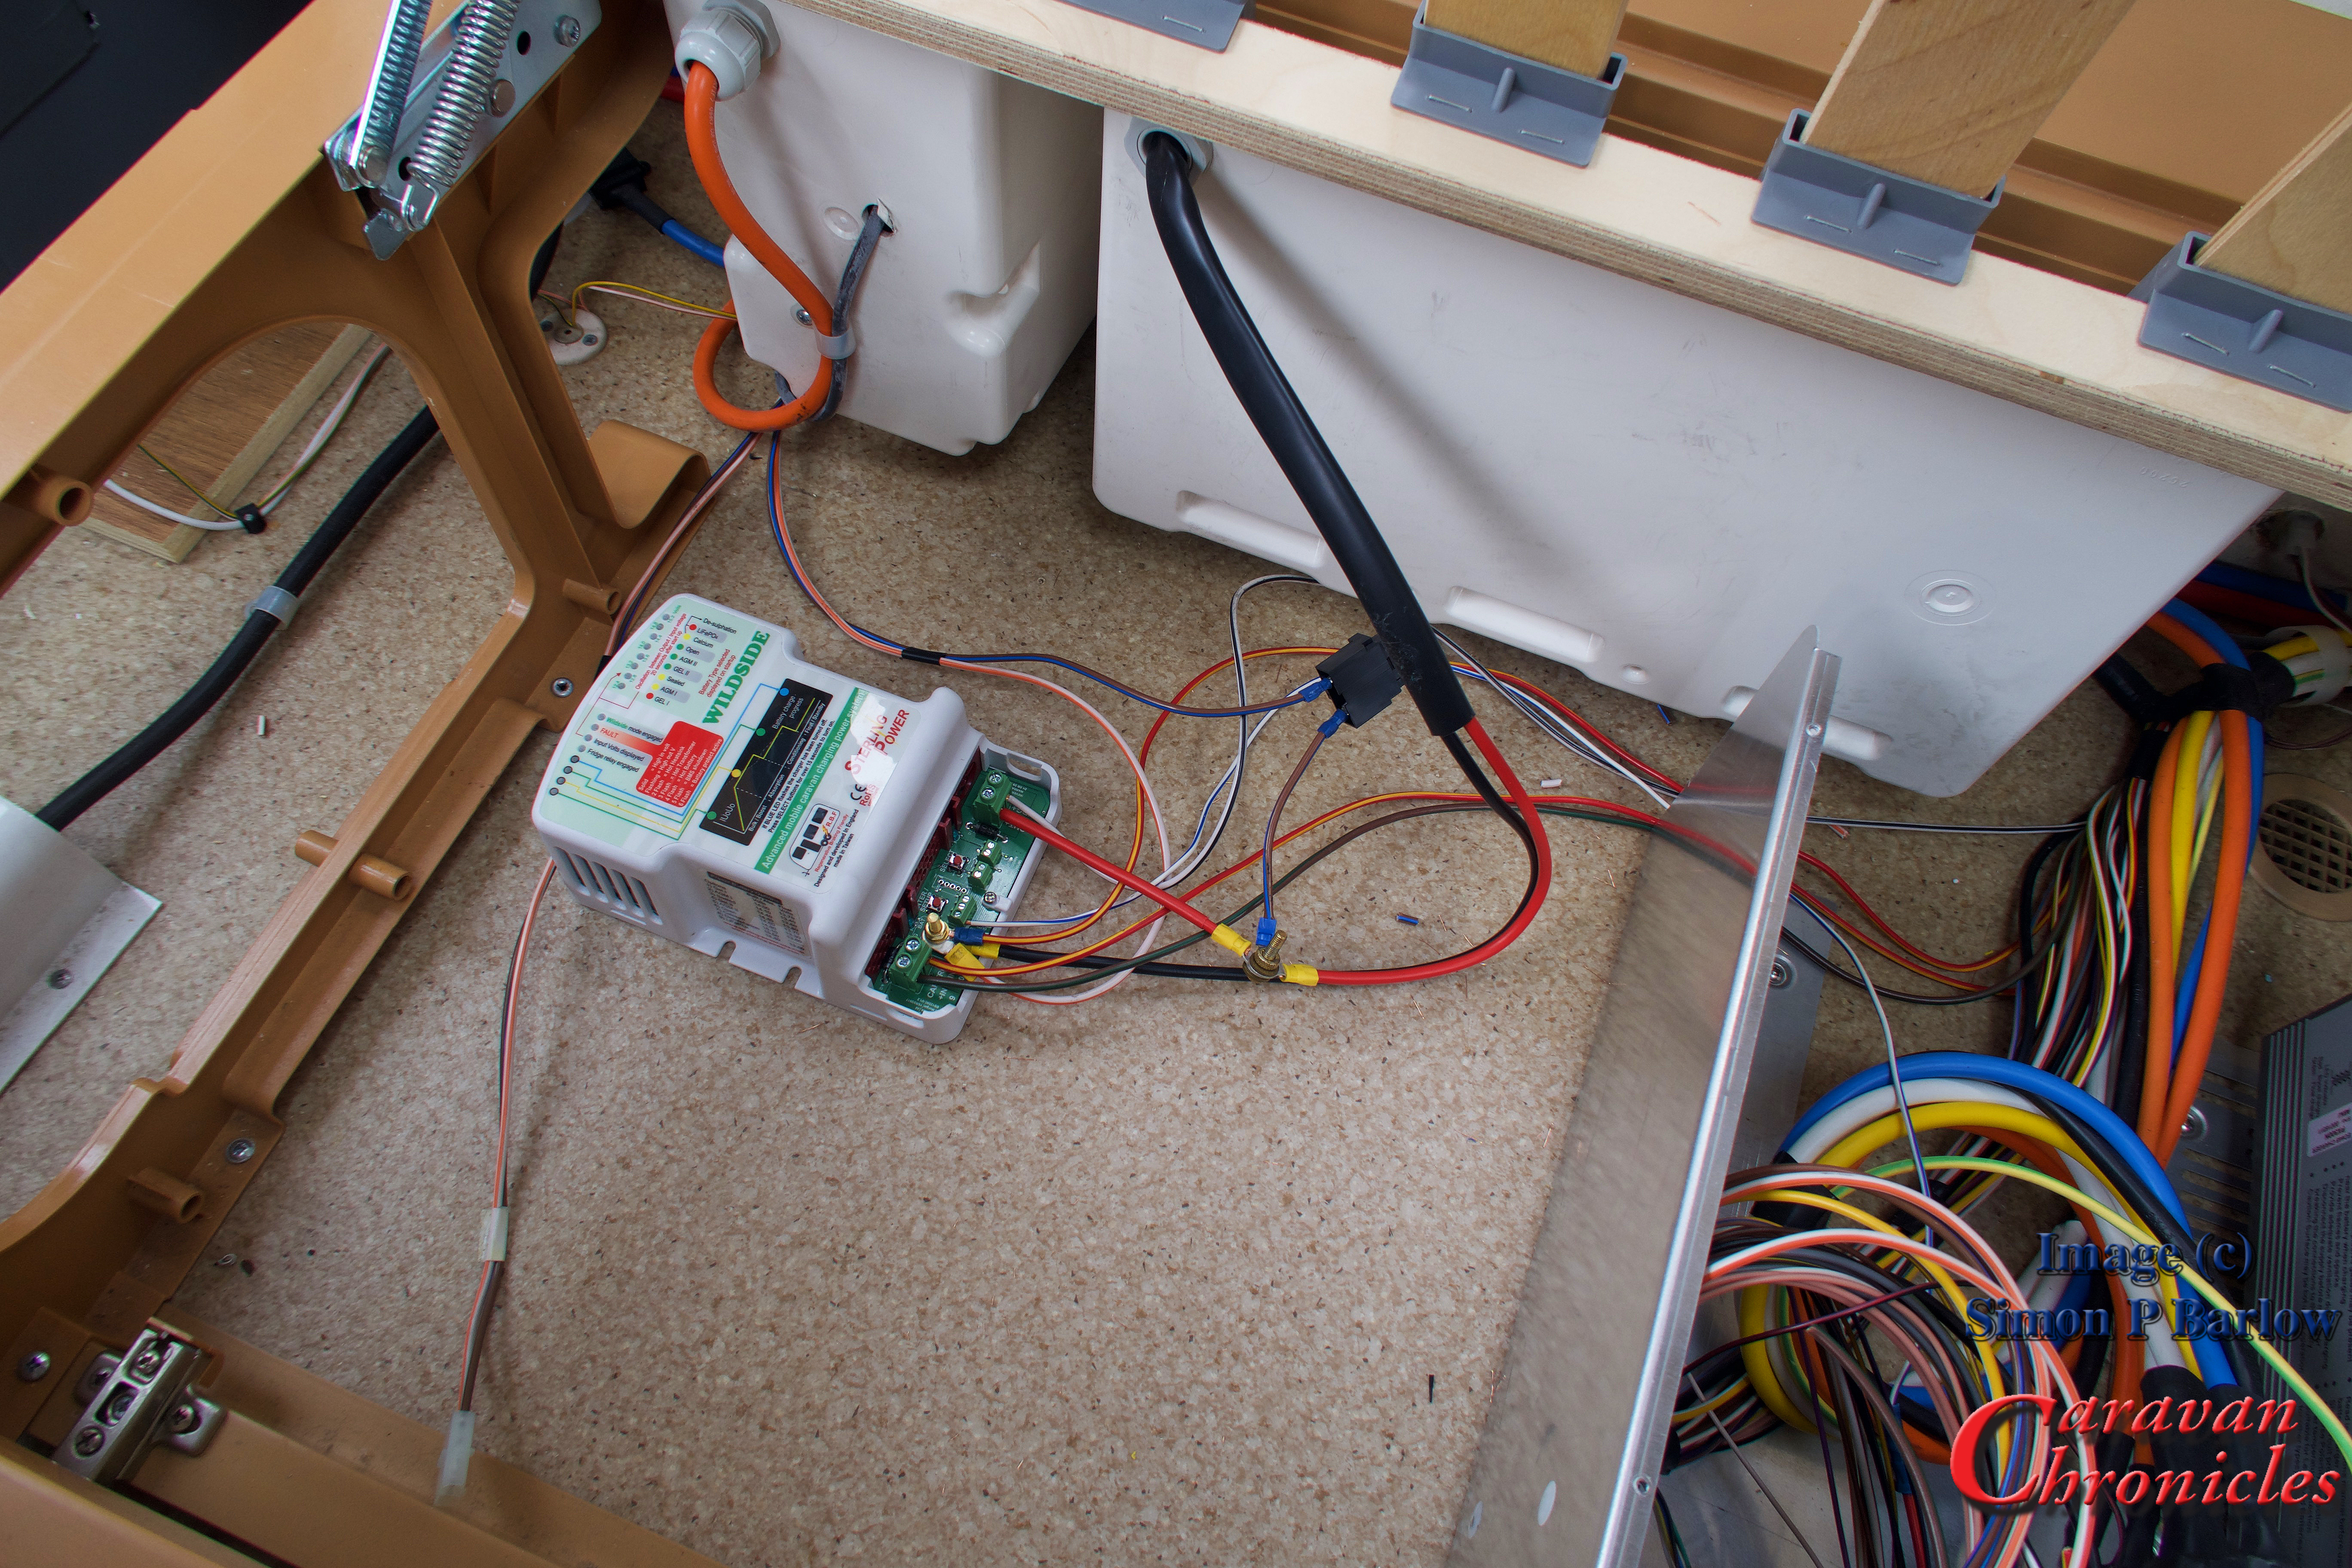
I think it might be down to the caravan manufacturers to come up with a solution. I know that there are a couple of after-market products available that provide a solution – We have one I installed in our caravan and in the short term I think this will be the quickest route. Caravan manufacturers may have a reluctance to respond and they can legitimately say “Well it is designed to work correctly to the relevant standards.” I think that maybe it will require the two main caravan clubs to look further into this and if what I have outlined above is proven by them to be the case, bring pressure to bear on all the parties concerned to come up with a way forward to resolve the issue.

For my part, I have contacted a few manufacturers asking for information and clarification or even acknowledgement of an issue. Unfortunately no one seems to want to talk about it. I do know individuals have emails details of their own problem to manufacturers and have received less than helpful responses.

Let me know in the comments below if you have had anything that might be related to this. I’d like to find out more.

EDIT:…

The thought just crossed my mind…. what affect, if any, will this have on AL-KO ATC (if fitted) when the vehicle is in eco mode and the alternator shut down? Does is mean that there is a possibility that the AK-KO ATC may not work correctly in all circumstances?

  • Related posts you may like…
  • The problem with information from the internet…
  • A Request…
  • For Anyone Restoring A Vintage Caravan…
  • Overland Vehicle Electrics and Other Stuff…
  • A Quick Fault Finding Tip…
  • Something For Your Toolbox…
  • Getting All Charged Up – Update 2…
  • Is A Euro 6 Engine Killing Your Leisure Battery?…
  • Getting All Charged Up – Update
  • Getting All Charged Up – Part 3 “The Install”…
  • Getting All Charged Up – Part 2…
  • Getting All Charged Up – Part 1…
  • Smart Alternators: how they affect Caravans and Motorhomes….

Share this:

  • Twitter
  • Facebook
  • Tumblr
  • Pocket
  • Pinterest
  • Reddit

Like this:

Like Loading...

Getting All Charged Up – Update

02 Sunday Jul 2017

Posted by Simon Barlow in Accessories, Caravan Electrics, Electrical, Off Grid, Product Review, Projects, Reviews, Technical, Towing, VW Amarok

≈ 20 Comments

Tags

Caravan Electrics, Leisure Battery Charging, Modifications, Sterling Power Wildside, VW Amarok

The best laid plans….

We had originally intended to spend a week down at Glastonbury which would have meant the 5 hour drive down would have been an excellent test for the Sterling Power Wildside unit’s first outing. However we had to cancel the trip literally the day before we were due to set off. In the few days between installing the Wildside unit and our planned trip to Glastonbury I had been exchanging emails and phone calls with Charles Sterling talking about some of the aspects of the Wildside unit and the direction that caravan electrics was heading in.

Continue reading →

Share this:

  • Twitter
  • Facebook
  • Tumblr
  • Pocket
  • Pinterest
  • Reddit

Like this:

Like Loading...

Getting All Charged Up – Part 3 “The Install”…

30 Tuesday May 2017

Posted by Simon Barlow in Accessories, Boondocking, Caravan Electrical Fault Finding, Caravan Electrics, Caravan Fault Finding, Electrical, General, Modifications, Off Grid, Technical

≈ 16 Comments

Tags

Caravan Electrics, Leisure Battery, Leisure Battery Charging, Maintenance, Sterling Power, Sterling Power Wildside, Technical

There has been a bit of a delay since Part 1 and Part 2 due to Sue having a fall and breaking her arm in three places. This required over three hours of surgery to install enough metalwork and screws to keep a blacksmith happy followed up by a lot of trips back and forth to the hospital. However, on with the install of the Sterling Power Wildside unit. I think that this will be the first ever install of a unit in a caravan.

I printed out copies of the wiring diagrams and loaded up the Amarok with everything  I’d need and set off for the storage site. Arriving at the caravan everything was cleared out to give me some space to work.

IMG_1134

I’d planned to install the unit somewhere close to the Sargent control box as all the connections I’d need could be found here and it was close to the fuse box that connected the lead from the 13 pin plug to the caravan services.

IMG_1136

The fuse connection point for the lead from the 13 pin plug is in our caravan, located right at the front next to the centre chest of draws against the gas locker wall.

IMG_1135

Before starting, I did a quick voltage check on the leisure battery…. 12.81 volts, which isn’t too shabby as we don’t have a solar panel and it had been February 25th when I left the Caravan show at the NEC and the battery was last charged up. Which was   about 13 weeks earlier.

IMG_1139

To gain access to the wiring going into the Sargent unit, I removed the 4 screws holding the top cover on and the lid simply lifted off revealing all the connections and as a bonus, service loops in the cable. This meant it should be possible to install the wild side unit without having to do any cable splicing. I did debate at this stage if it would be possible to install the Wildside unit inside the Sargent box… but I decided as I didn’t know the heat gain of the Wildside unit, it might be prudent not to attempt it.

IMG_1137

The cables inside the Sargent box are basically separated into two looms. One 12 volt and the other 230 volt which keeps things easy and neat. Also the back of the circuit board within the Sargent unit was printed with each of the plug numbers, so doing all the planning paid off as I could simply find the plug number from my diagram and locate the correct cable easily.

I decided I was going to do a pre-install and connect the Wildside unit up and do a few tests, then once I was happy I’d go ahead and do a full more permanent installation.

It was simply now a matter of finding the plug I needed, unplugging it, locating the correct wire, cutting it and terminating it in the Wildside unit.

IMG_1140

I cut the cables about 4 inches away from the circuit board plug. This would give me plenty of length to crimp on a sleeve connector and heat shrink if I needed to remove the Wildside unit. As a backup I have also ordered some replacement pin inserts for the plugs so I could always re-terminate directly into the plug.

The next connections would be the incoming feed from the vehicle. 4 cables, two neutral and one positive fridge supply from pin 10 and one positive charging supply from pin 9.  These arrive from the 13 pin plug via the fuse box mounted on the front wall through two 20 amp fuses and to the Sergeant unit. I had trouble identifying the cables as the colours were not as indicated in the manufacturers drawings. So to double check I removed the fuse box to gain access to the 13 core cable where it terminates.

IMG_1141

It was easy enough now to trace the correct cables and confirm with my multimeter. So all the connections now made, albeit temporary, I could install the 20 Amp main battery fuse and make sure the Wildside unit powered up OK.

Don’t worry about the brass bolt holding together the three cables, it was so I could easily get a clamp meter on the cables to take current readings.

IMG_1142

It started up without any problems and so I could connect up the 13 pin plug to the Amarok and start the engine and take a few measurements.

I checked the vehicles voltage and it was sat at 14.5 with run/stop disabled and the engine ticking over. OK how come I had a voltage of 14.5 volts in the vehicle with a Euro 6 engine ticking over? Well the Wildside unit basically makes the vehicle’s ECU think that the vehicle battery requires charging (remember an Euro 6 engine cranking battery will only ever be charged to 80% of its capacity so that regen will always work).

The first reading I checked was the leisure battery incoming link. I had a reading of 9.96 volts and a current of 8.8 amps. That was quite a big voltage drop.

IMG_1143

I moved on to test the incoming fridge circuit. This was showing 9.99 volts and a current of 13.3 amps. I had a big voltage drop somewhere. I checked the voltage at the point the 13 core cable terminates and got a reading of 12.75 volts. somewhere between the incoming cable and the termination on the Wildside unit I was getting a  big voltage drop.

IMG_1144

Continuing with taking some readings, I checked the fridge output and it was stable at 14.35 volts, 9.9 amps.

IMG_1145

A problem with the fridge…

On the original caravan wiring diagram it showed the fridge heating element connected with just two wires and on the face of it this looked simple enough. However when I first connected the fridge and powered up, the fridge came up with error code 10 – no power. There was definitely a supply voltage there and it was indicating a current draw of just under 10 amps. I wondered if the voltage detect circuit was polarity sensitive so swiped the connections round and this cleared the error code. So double check the polarity of the connection if you get an error code 10 don’t assume there is a connection fault.

Thinking cap on…

I decided to stop at this point. Unless I could eliminate that volt drop between the incoming cable and the Wildside unit it was pointless taking any further readings.

The next thing to do would be to eliminate the existing wiring for the leisure battery charging circuit and fridge circuit between where the incoming cable from the 13 pin plug terminated and the Wildside unit. I decided to replace the existing caravan wiring with some 2.5mm² cable.

First job was to terminate all the previously terminated cables on the Wildside unit correctly with the correct size ferrule crimped on. When ever you terminate a stranded cable in  a terminal block that compresses the wire, you should first crimp a ferrule on to the cable to ensure a secure connection.

IMG_1148

Next I installed the four new 2.5mm² cables from the 13 core cable to the Wildside unit. I opted to use straight through sleeve crimp connectors to join to the cable coming from the 13 pin plug. I kept the length as short a possible – about 900mm, which resulted in not the best cable route option but I wanted to minimise voltage drop. (remember, the more current you draw through a cable and the longer the cable the bigger the voltage drop!)

All that done, and the correct terminal block installed for the battery positive lead rather than my brass bolt, I powered up everything and hooked up the Amarok and started the engine once again. With the engine running the vehicle was showing 14.7 volts and I was now getting 14.1 volts on the incoming charing circuit with a current draw of 8.2 amps. Note: the clamp meter in the picture is actually showing the charging current for the leisure battery… 5.0 amps.

IMG_1149

Checking the incoming fridge feed I was reading 14.2 volts and a current of 8.6 amps. Which was a vast improvement over my previous readings. (Note: the clamp meter in the picture below is still showing the battery charging current)

IMG_1150

The battery charging voltage was showing 15.01 and 4.8 amps which meant I was at least charing the battery with just the engine on idle.

IMG_1152

Doing a little maths – I was pulling 8.2 Amps via the leisure battery charging circuit and 8.6 Amps via the fridge circuit giving a total of 16.8 Amps. I was supplying 9.9 Amps to the fridge and 5.0 Amps to the battery. A total of 14.9 Amps. The difference would be due to the losses due to stepping up the voltage being supplied by the vehicle to the output voltages of the Wildside unit. In terms of watts – the vehicle was supplying 237.74 watts and the wild side units was outputting 224.49 watts.

This did make me think. As the fridge was now consuming 149.49 watts (its rated at 150 watts) so it in theory should be at it’s max efficiency… did it need to be on all the time? Could the fridge be switched on a duty cycle of say…on for 75% and off for 25%? This would then increase the ability to put more back into the leisure battery, especially useful on short runs.

Speaking to Charles Sterling, I know this unit has been rated on the conservative side and in theory 20 amps can be pulled from each circuit. This would give around 560 watts of power… and in theory about 400 watts available for charging the leisure battery. Will that damage your vehicle? Well as most Euro 6 engines are fitted with 2Kw alternators, there is still plenty of power available.

Finishing up

It was now a matter of tidying up my mess and installing some cable ‘p’ clips to secure everything to the floor. The two sleeves on the cables that come from the 13 core cable are there so I can identify each circuit. Red for leisure battery charging and blue for fridge circuit.

IMG_1157

The yellow fuse you can see is the leisure battery fuse. It’s rated at 20 amps and is in circuit between the leisure battery and the caravan services, so pull that fuse and the caravan will be isolated from the 12 volt system. I’ll probably replace that with a circuit breaker in the near future.

IMG_1156

IMG_1161

A couple of things I thought about while doing this install.

The Sargent control box is a lot of wasted space. I recon that it should have been shrunk down to ¼ of it’s current size and probably relocated to somewhere else… maybe under the draw unit at the front of the caravan.

The incoming fuse connection panel too seemed a little flimsy. All it consisted of was a circuit board with multi plug connectors on one side and spade connection soldered on the other for the blades of the fuses to slide into. Some of the soldering looked ‘dry’ and I wondered if this was causing some of the volt drop I was experiencing… that coupled with the multi-plug connections in the loom. I know it makes the build of the caravan easier on a production line and you only need semi skilled labour to install but hey sometimes things like this matter.

Its obvious that caravan wiring is done down to a cost and the minimum standard required. I would have liked to seen some slightly heavier gauge cable for some of the connections. It amazed me that the leads that connect to the battery are 6mm² but drop down to 2.5mm² once outside the battery box and the connection between the two is just a simple male/female spade connection.

The other thing that struck me was how inefficiently the plumbing was done. I’d never really looked at it before, but casting my eye over it I think I could have laid it out a bit better and saved three push-fit connectors.

Who’s this unit designed for?

Well anyone really that has a Euro 6 engine in their tow vehicle or motorhome (if you have a motorhome you need to look at the BB1230 which is a step up again from this) and cares about maintaining their leisure battery.

If you have a motor mover fitted and use it to get your caravan out from its parking spot before you set off and then find sometimes you don’t have quite enough power to position your caravan on your pitch when you arrive or the reverse… your motor mover always seems to run out of steam trying to put your caravan back in its storage area when you return home, the Wildside unit should make sure you always have a fully charged battery and I’m my opinion is something that should be classed as an essential item.

From a lot of emails I have received it would seem that generally people with motor movers seem to be changing their batteries more frequently. A lot of the time when the motor mover stope working or works erratically the advice from the motor mover manufacturer is “you need a new battery” or” its a problem with your battery”. I”m going to throw this out there… I think it may be down to the batteries never really getting a proper charge and sulphating, radically shortening their life.

Alternatively if you do a lot of “Off Grid” (Boon-docking) camping, this will make sure you maximise the charge in your leisure battery to allow you to get the most from it. Especially if you have a Euro 6 engine.

How easy is it to install?

Planning is the key and a modicum of skill in being able to trace cables and terminate correctly. However a lot is going to depend on your caravan, how it is connected and the quality of the original installation. For me it was quite straight forward but the location of the existing components made it easy. Depending on your particular caravan you may end up having to run some additional cabling. Whatever you do, do not cheap-out on cable termination! Buy the right terminals and a good ratchet style crimp tool and make sure any cable you install is a good quality brand of the correct gauge.

Were there any issues?

Nope, it worked straight out of the box.

What next?

Road test! In a few weeks we are travelling down to Glastonbury which is between a 5 and 6 hour tow and I’ll be taking readings during the trip to see how the battery is being charged and the fridge temp. Just for the pure fun of it….. I’m going to try to make ice cubes in the freezer so we have ice for our drinks when we arrive! I’ll let you know how I get on.

Looking forward.

The biggest problem really is the fridge. A three way absorption fridge is probably the single most inefficient way of chilling anything. Whether its powered from 12 volts, 230 volts or gas. Its far more efficient to use a compressor fridge.

Now a 230 volt compressor fridge is relatively cheap when compared to a three way absorption fridge, great for when you are on hook up, but now imagine being able to run it via an inverter while you are driving or off grid from your battery. As they only run short periods and take less power to run. Coupled with the fact they don’t run continuously like an absorption fridge. It would be possible to do away with a 3 way absorption fridge completely.  As we now have a sensible way of charging batteries, and given the fact the price of modern lithium battery technology is dropping all the time I don’t think technically we are far off making the transition. Its just down to the caravan manufactures…. so don’t hold your breath.

Contact:

Sterling Power

Stuff I used:

You can find links to all the crimp terminations and tools that I used in the Caravan Chronicles Shop


Share this:

  • Twitter
  • Facebook
  • Tumblr
  • Pocket
  • Pinterest
  • Reddit

Like this:

Like Loading...

Getting All Charged Up – Part 2…

26 Wednesday Apr 2017

Posted by Simon Barlow in Caravan Electrics, Caravan Servicing, Electrical, General, Maintenance, Modifications, Projects, Technical, Uncategorized

≈ 10 Comments

Tags

Battery Charging, Leisure Battery Charging, Maintenance, Project, Sterling Power, Sterling Power Wildside, Technical

Planning the Install

Remember the Six P’s… “Proper Planning Prevents Piddling Poor Performance”… or something along those lines! Before we start hacking away at the multitude of cables (and my email inbox fills up with help requests) we need to pull out the relevant electrical schematics from the handbook. Our caravan is a ‘dealer special’ based on a 2011 Swift Europa 550 fitted with a Sargent PSU.

We can see from the schematic below that the 13 pin plug enters into the caravan and terminates with two connectors – FB6 and FB7 on fuse unit C44 which in our caravan is located just next to the front draws near the water pump. FB6 is all the road lights and we can ignore this.

Socket Connections

The cables we are interested in are from pins 9,10,11 & 13 which are coloured Orange, Slate Grey, White/Black and White/Red respectively and terminate in connector FB7. We need to now look for these leaving the Fuse Unit and heading off to the PSU.

The most likely candidate will be connector FB2 with four cables going to connector P1 on the PSU. If they are all 2.5mm²  it’s a good clue these are the ones we want. We will need to check these with a multimeter though to be sure. The colours have changed too so we will need to confirm what the new colour is for each circuit.

Socket Connections 2

So that’s the input side of the Wildside potentially sorted out, now we have to find the fridge connections. Looking at the schematic for the Power Circuits we can see that the fridge is connected via four cables. One directly to Neutral and the other three to P7. We can also see from this schematic that the leisure battery is connected to P2 via a 20 Amp fuse. This tells us two things – the wiring is rated for 20 amps and we will have to upgrade the cable size from the Wildside unit to the leisure battery.

Fridge Circuit

For the fridge… We are interested in the two cables that power the heating element and on the drawing they are coloured W/B and R/Y (White/Black and Red/Yellow) and originate from connector P7 on the PSU.

Fridge Circuit 2

We have now identified on the schematics the cables we need to look for and where they run from and to. Next step is to create a new schematic using the information from these two drawings to show how we are going to connect in the Wildside unit.

To The Bat Cave…. err Drawing Board!

If you are handy at using a drawing package such as Sketch-Up or similar (I use “AUTODESK® Graphic” on my MAC) you can have a go at drawing it out, or simply just use a sheet of paper. The important thing here is you DO draw it out.. this is not an option, its a mandatory task!

TIP: If you are drawing this out by hand on a sheet of paper, it might help to photocopy your caravan schematics and cut out the relevant sections… like the fridge and stick them to your drawing to make it easier.

So here’s my efforts….

Wildside Wiring 01

If you remember in part 1 I said we will need to make five connections…. not including the neutral. Well we have the five connections. After looking at the layout I decided not to cut the current leisure battery connections to upgrade, but to install a new Positive and Neutral cable alongside the original cables. This will mean however I will need to drill a new hole in the battery box and install a sealed cable gland.

The three cables that we cut on P1 that are now unconnected should, in theory not be part of any circuit. However to be sure I’m going to terminate both the neutral cables (originally connected to Pin 11 and Pin 13 to the neutral point on the Wildside unit.

The cable that was originally connected to Pin 9 I’ll just crimp on a blind connector and secure out of harms way. I am not sure if this might need to be connected to a +ve supply. There are a couple of things that I’ll need to check, for example, the toilet flush always works when the caravan is connected to the tow vehicle – with or without the engine running ( handy if a quick P(it) stop is required!).

Now… To The Bat Cave!

Well it might be a couple of days as I have just ordered a few bits and pieces I don’t have in stock in the workshop… and I’m still procrastinating whether to do the install as a video to accompany my written ramblings.

Coming up in part 3. I attempt not to destroy our caravan, do a lot of crimping, consume a lot of coffee and I may be swearing a lot on camera!

Share this:

  • Twitter
  • Facebook
  • Tumblr
  • Pocket
  • Pinterest
  • Reddit

Like this:

Like Loading...

Getting All Charged Up – Part 1…

25 Tuesday Apr 2017

Posted by Simon Barlow in Boondocking, Caravan Electrics, Caravan Servicing, Electrical, Gadgets, General, Maintenance, Modifications, Off Grid, Product Review, Reviews, Technical, tow vehicle, Uncategorized, VW Amarok

≈ 6 Comments

Tags

Euro6 Engines, Leisure Battery Charging, Maintenance, Project, Regen Braking, Sterling Power Wildside

If you are a regular reader you may remember a couple of posts I wrote about leisure battery charging in caravans and motorhomes (Smart Alternators: how they affect Caravans and Motorhomes…. and NEC Show Roundup – it’s all technical…) and I linked to a few videos that Charles Sterling from Sterling Power has produced covering charging topics and Euro6 engines. At the recent NEC show Sterling Power were featuring a new product that would soon be available that would solve all the issues for caravan owners that were experiancing towing with vehicles that had “smart alternators” which were are standard on Euro5 and Euro6 engines and the issues around regenerative braking on Euro6 engines. Charles promised to send me one of the first pre-production “Wildside” Battery to Battery chargers specifically designed for caravans.

IMG_1127
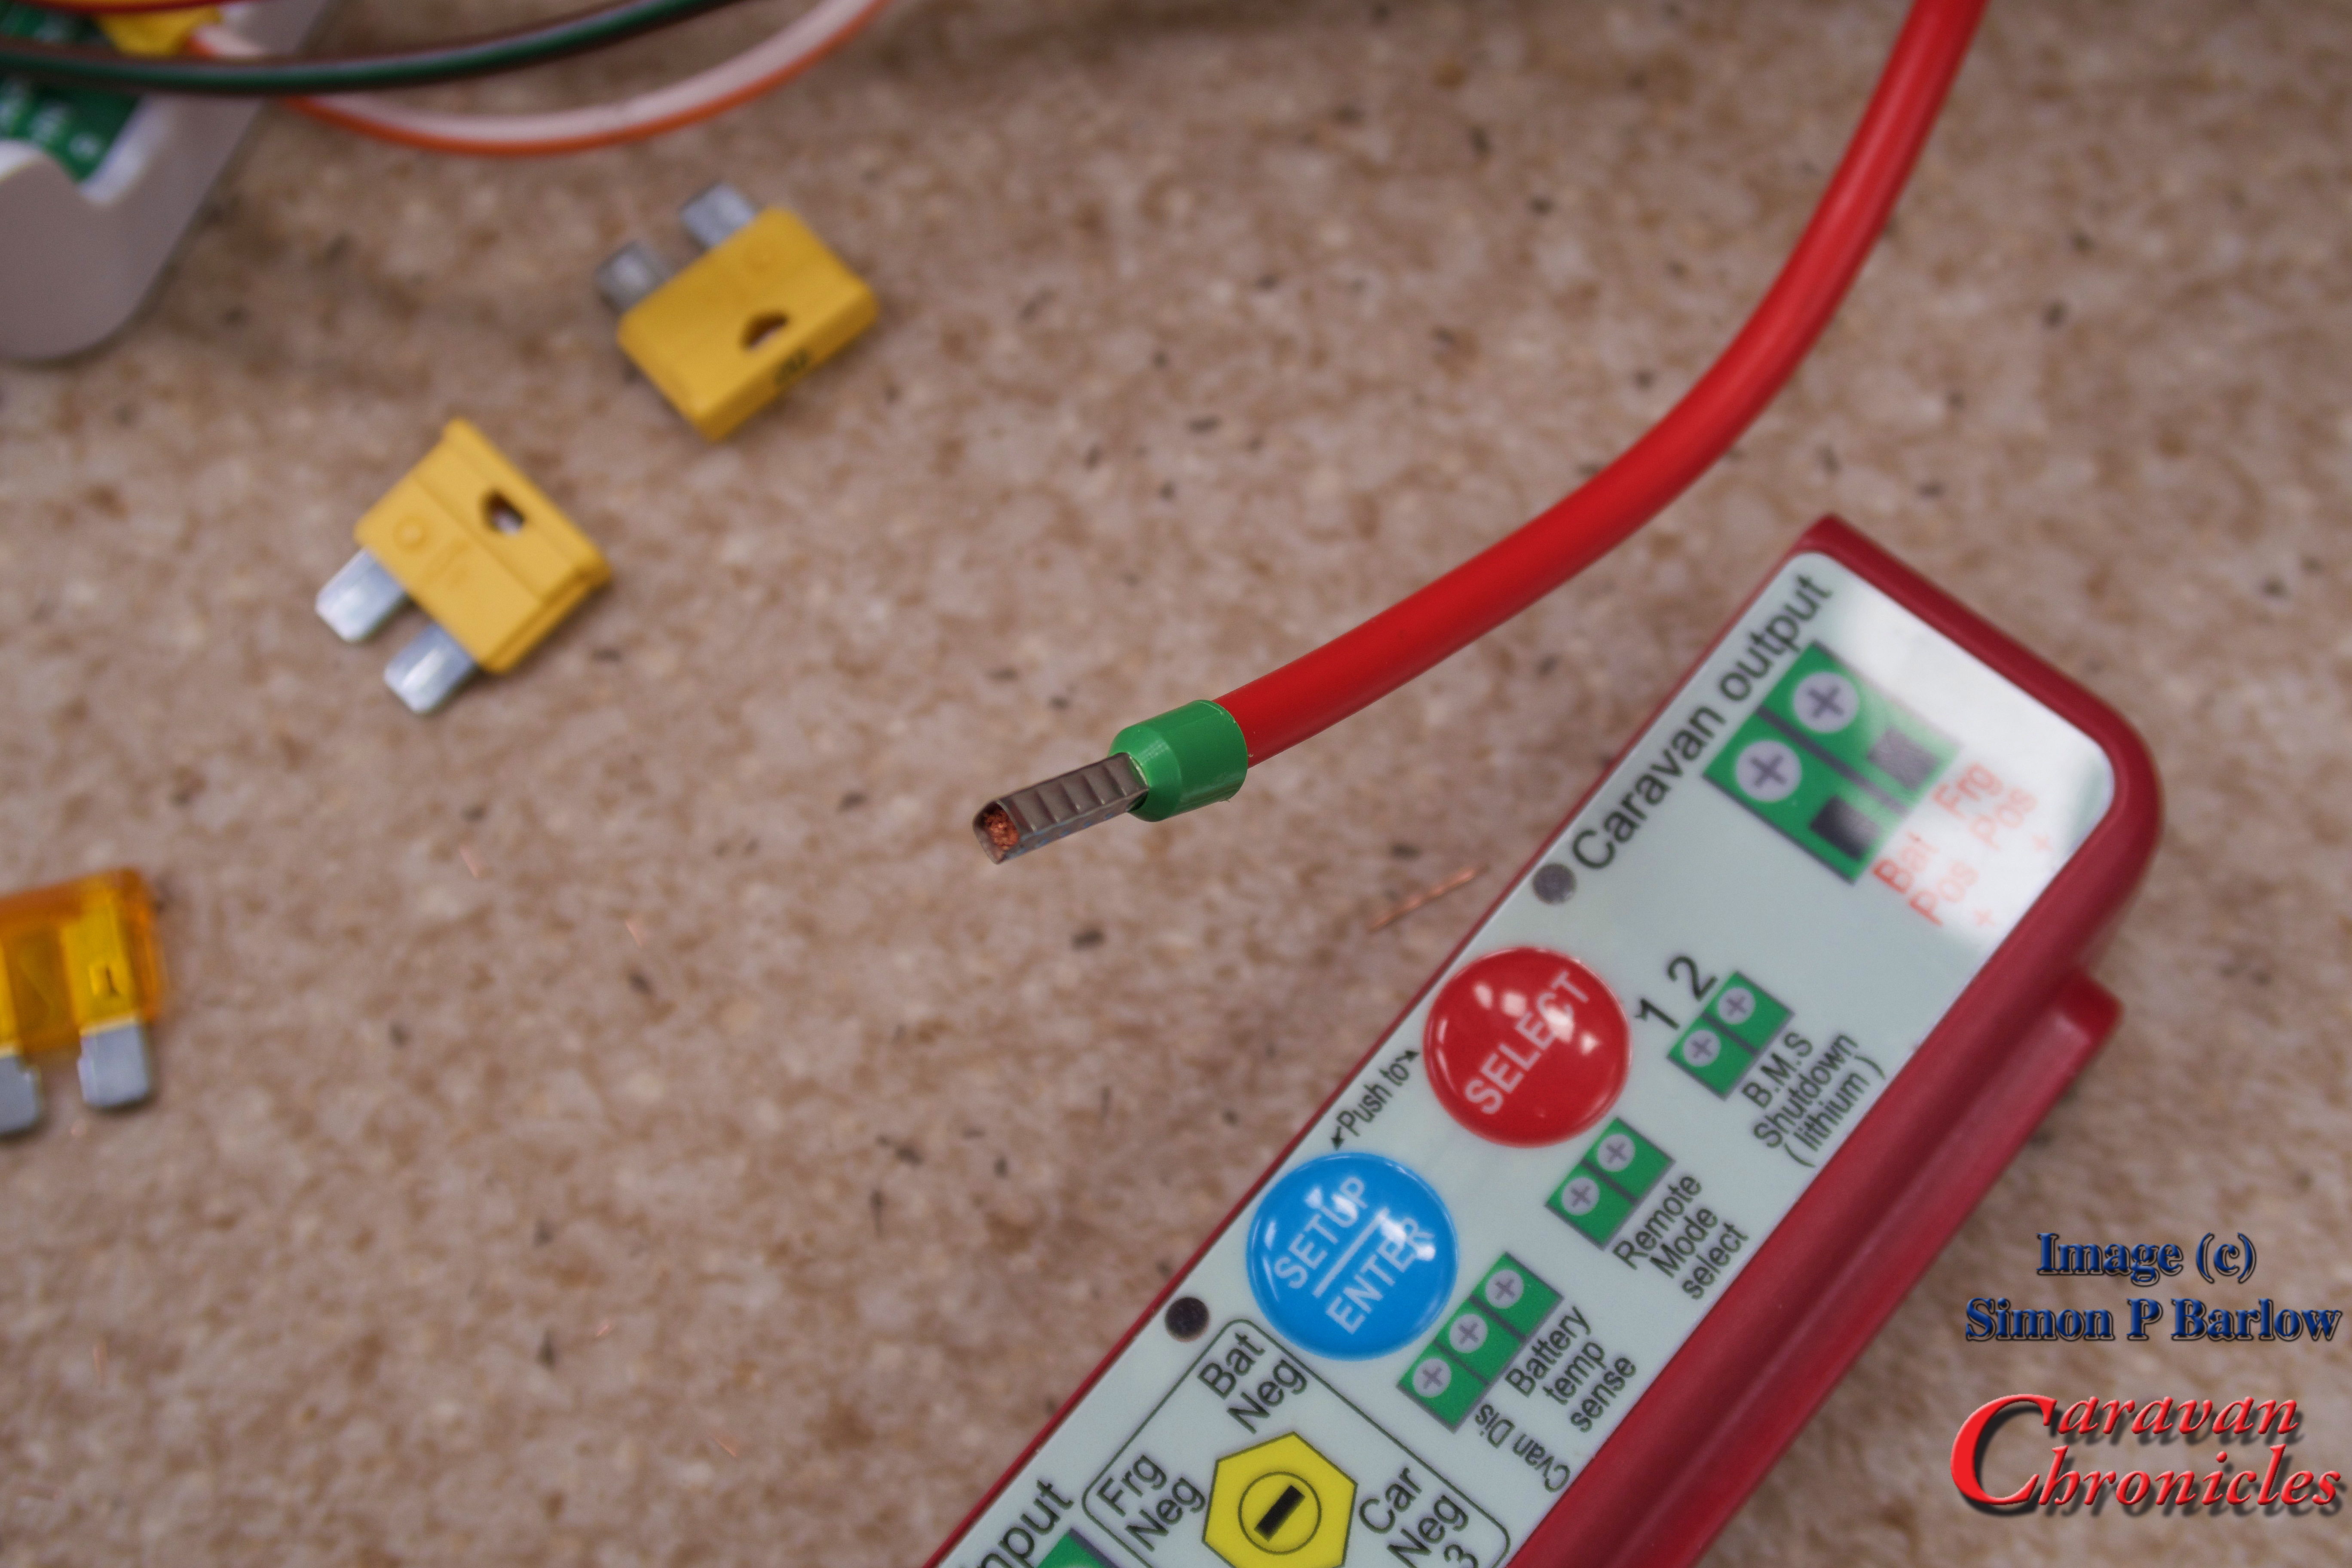
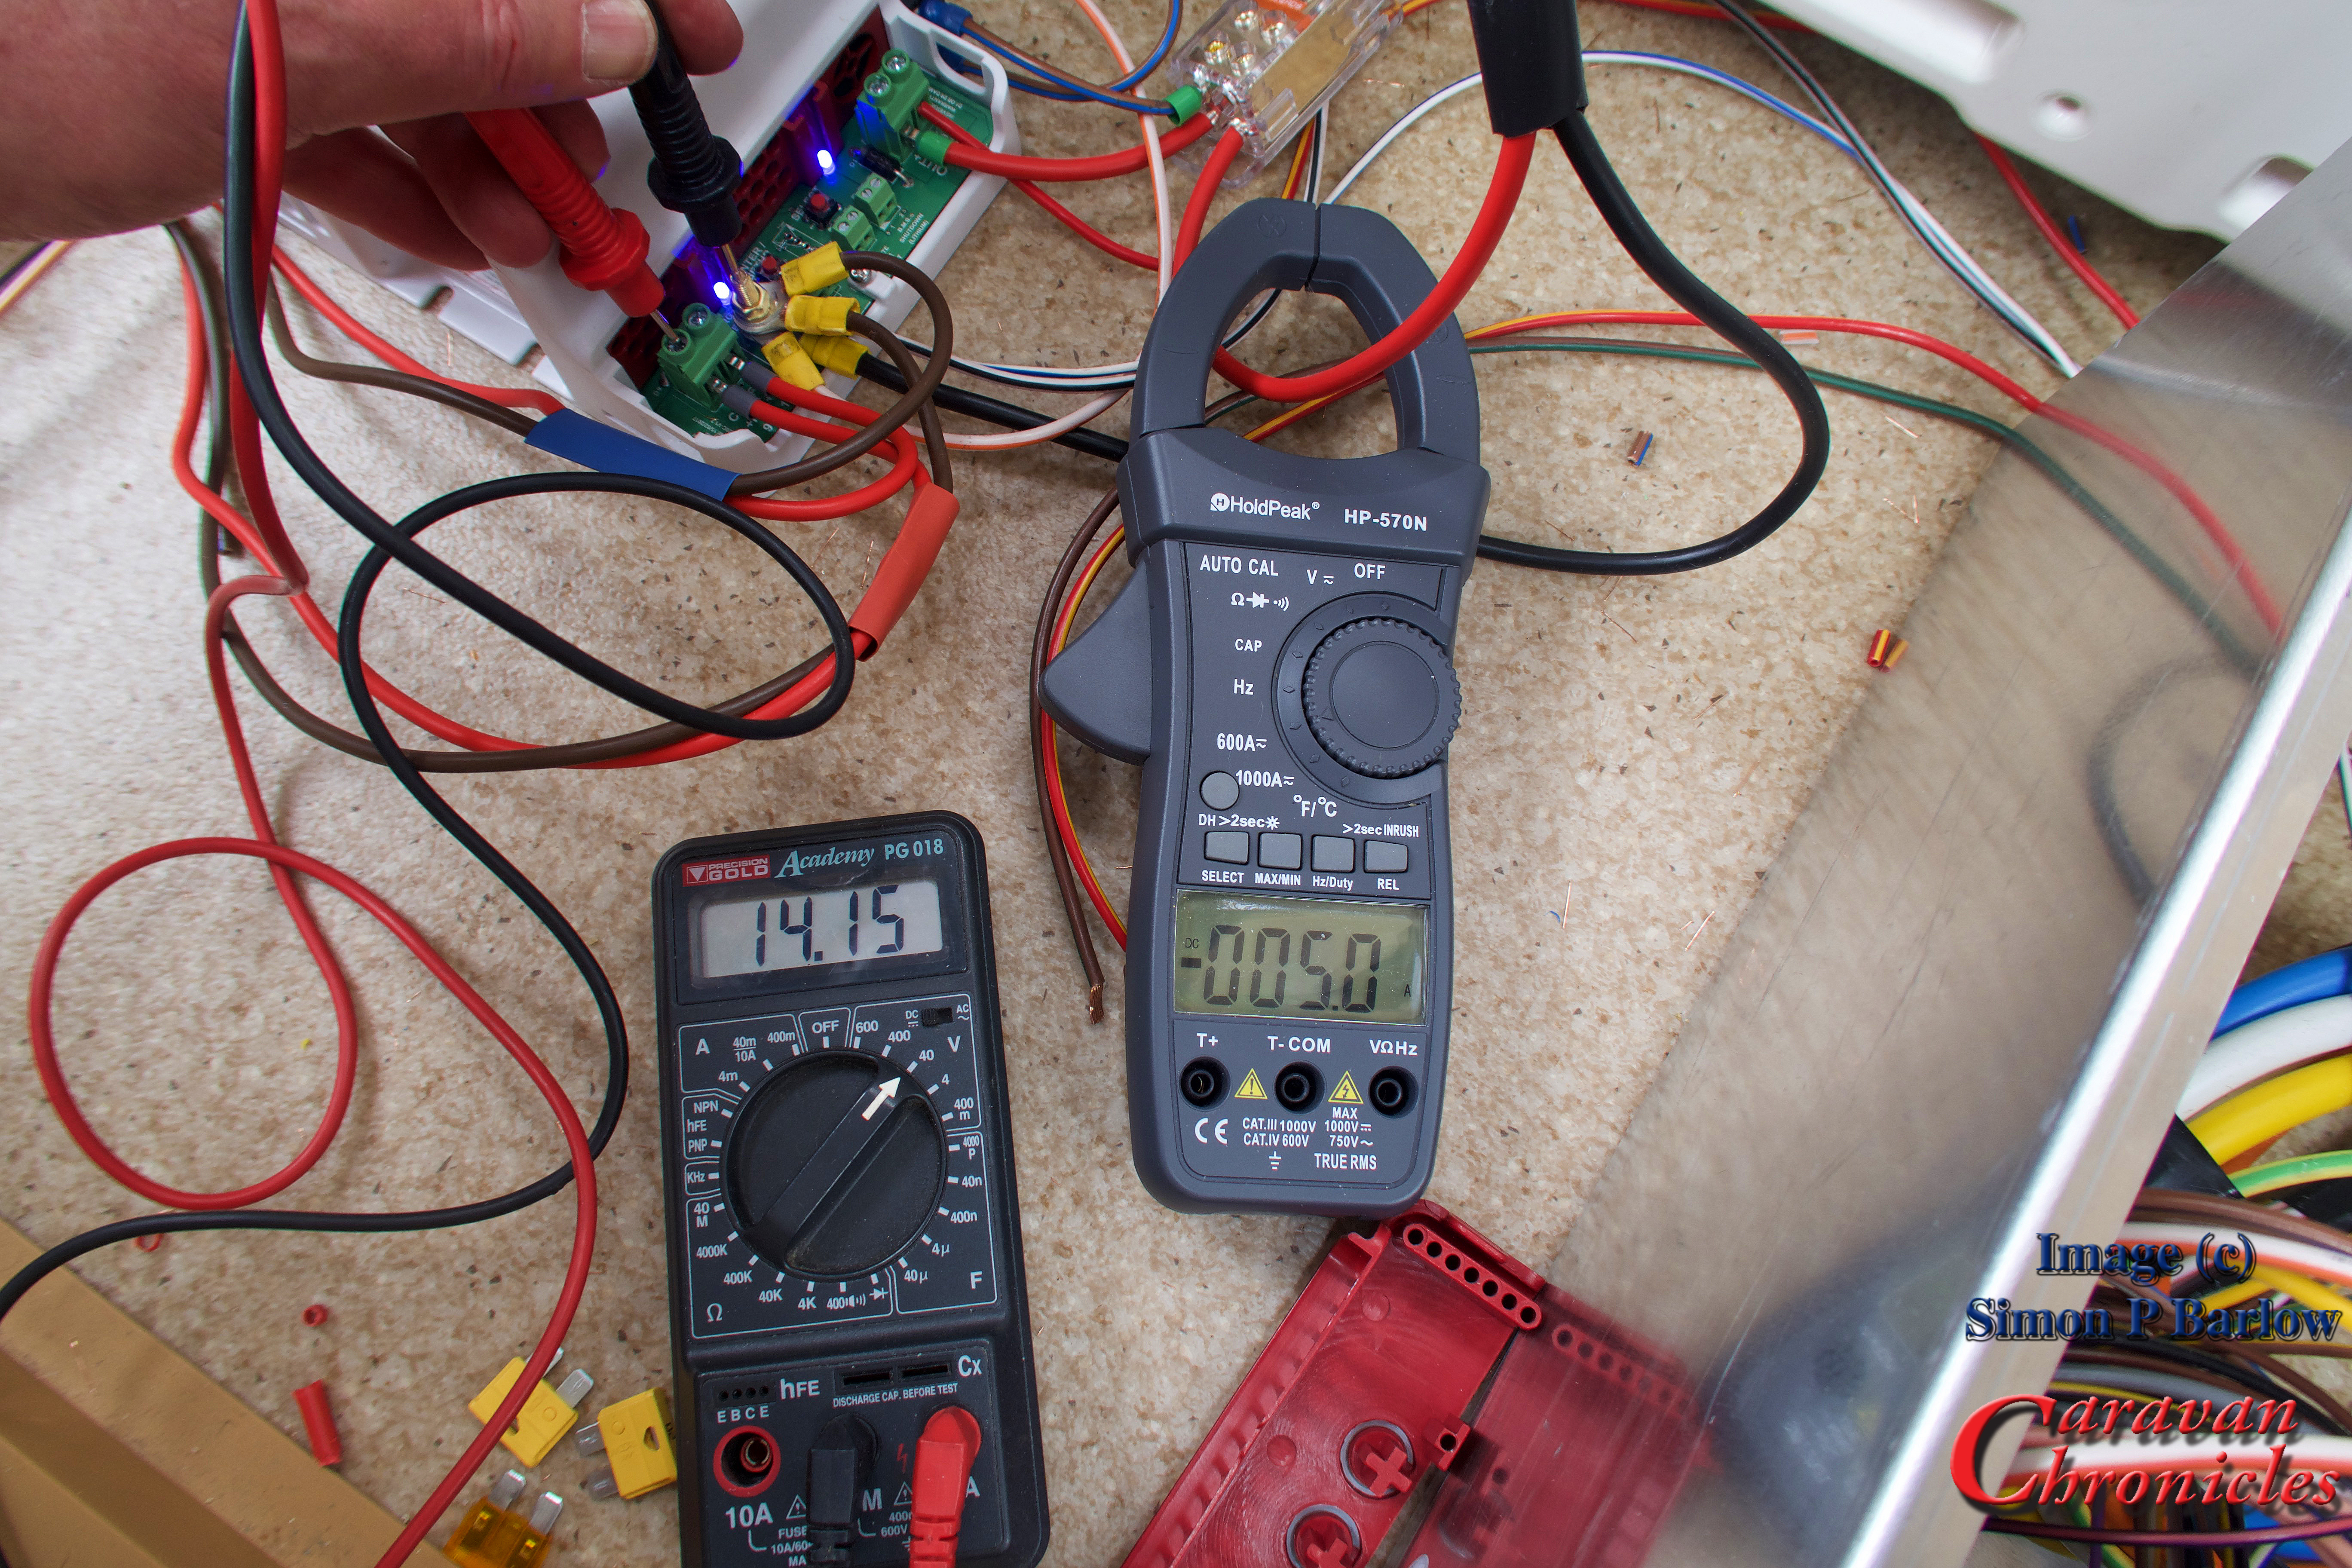
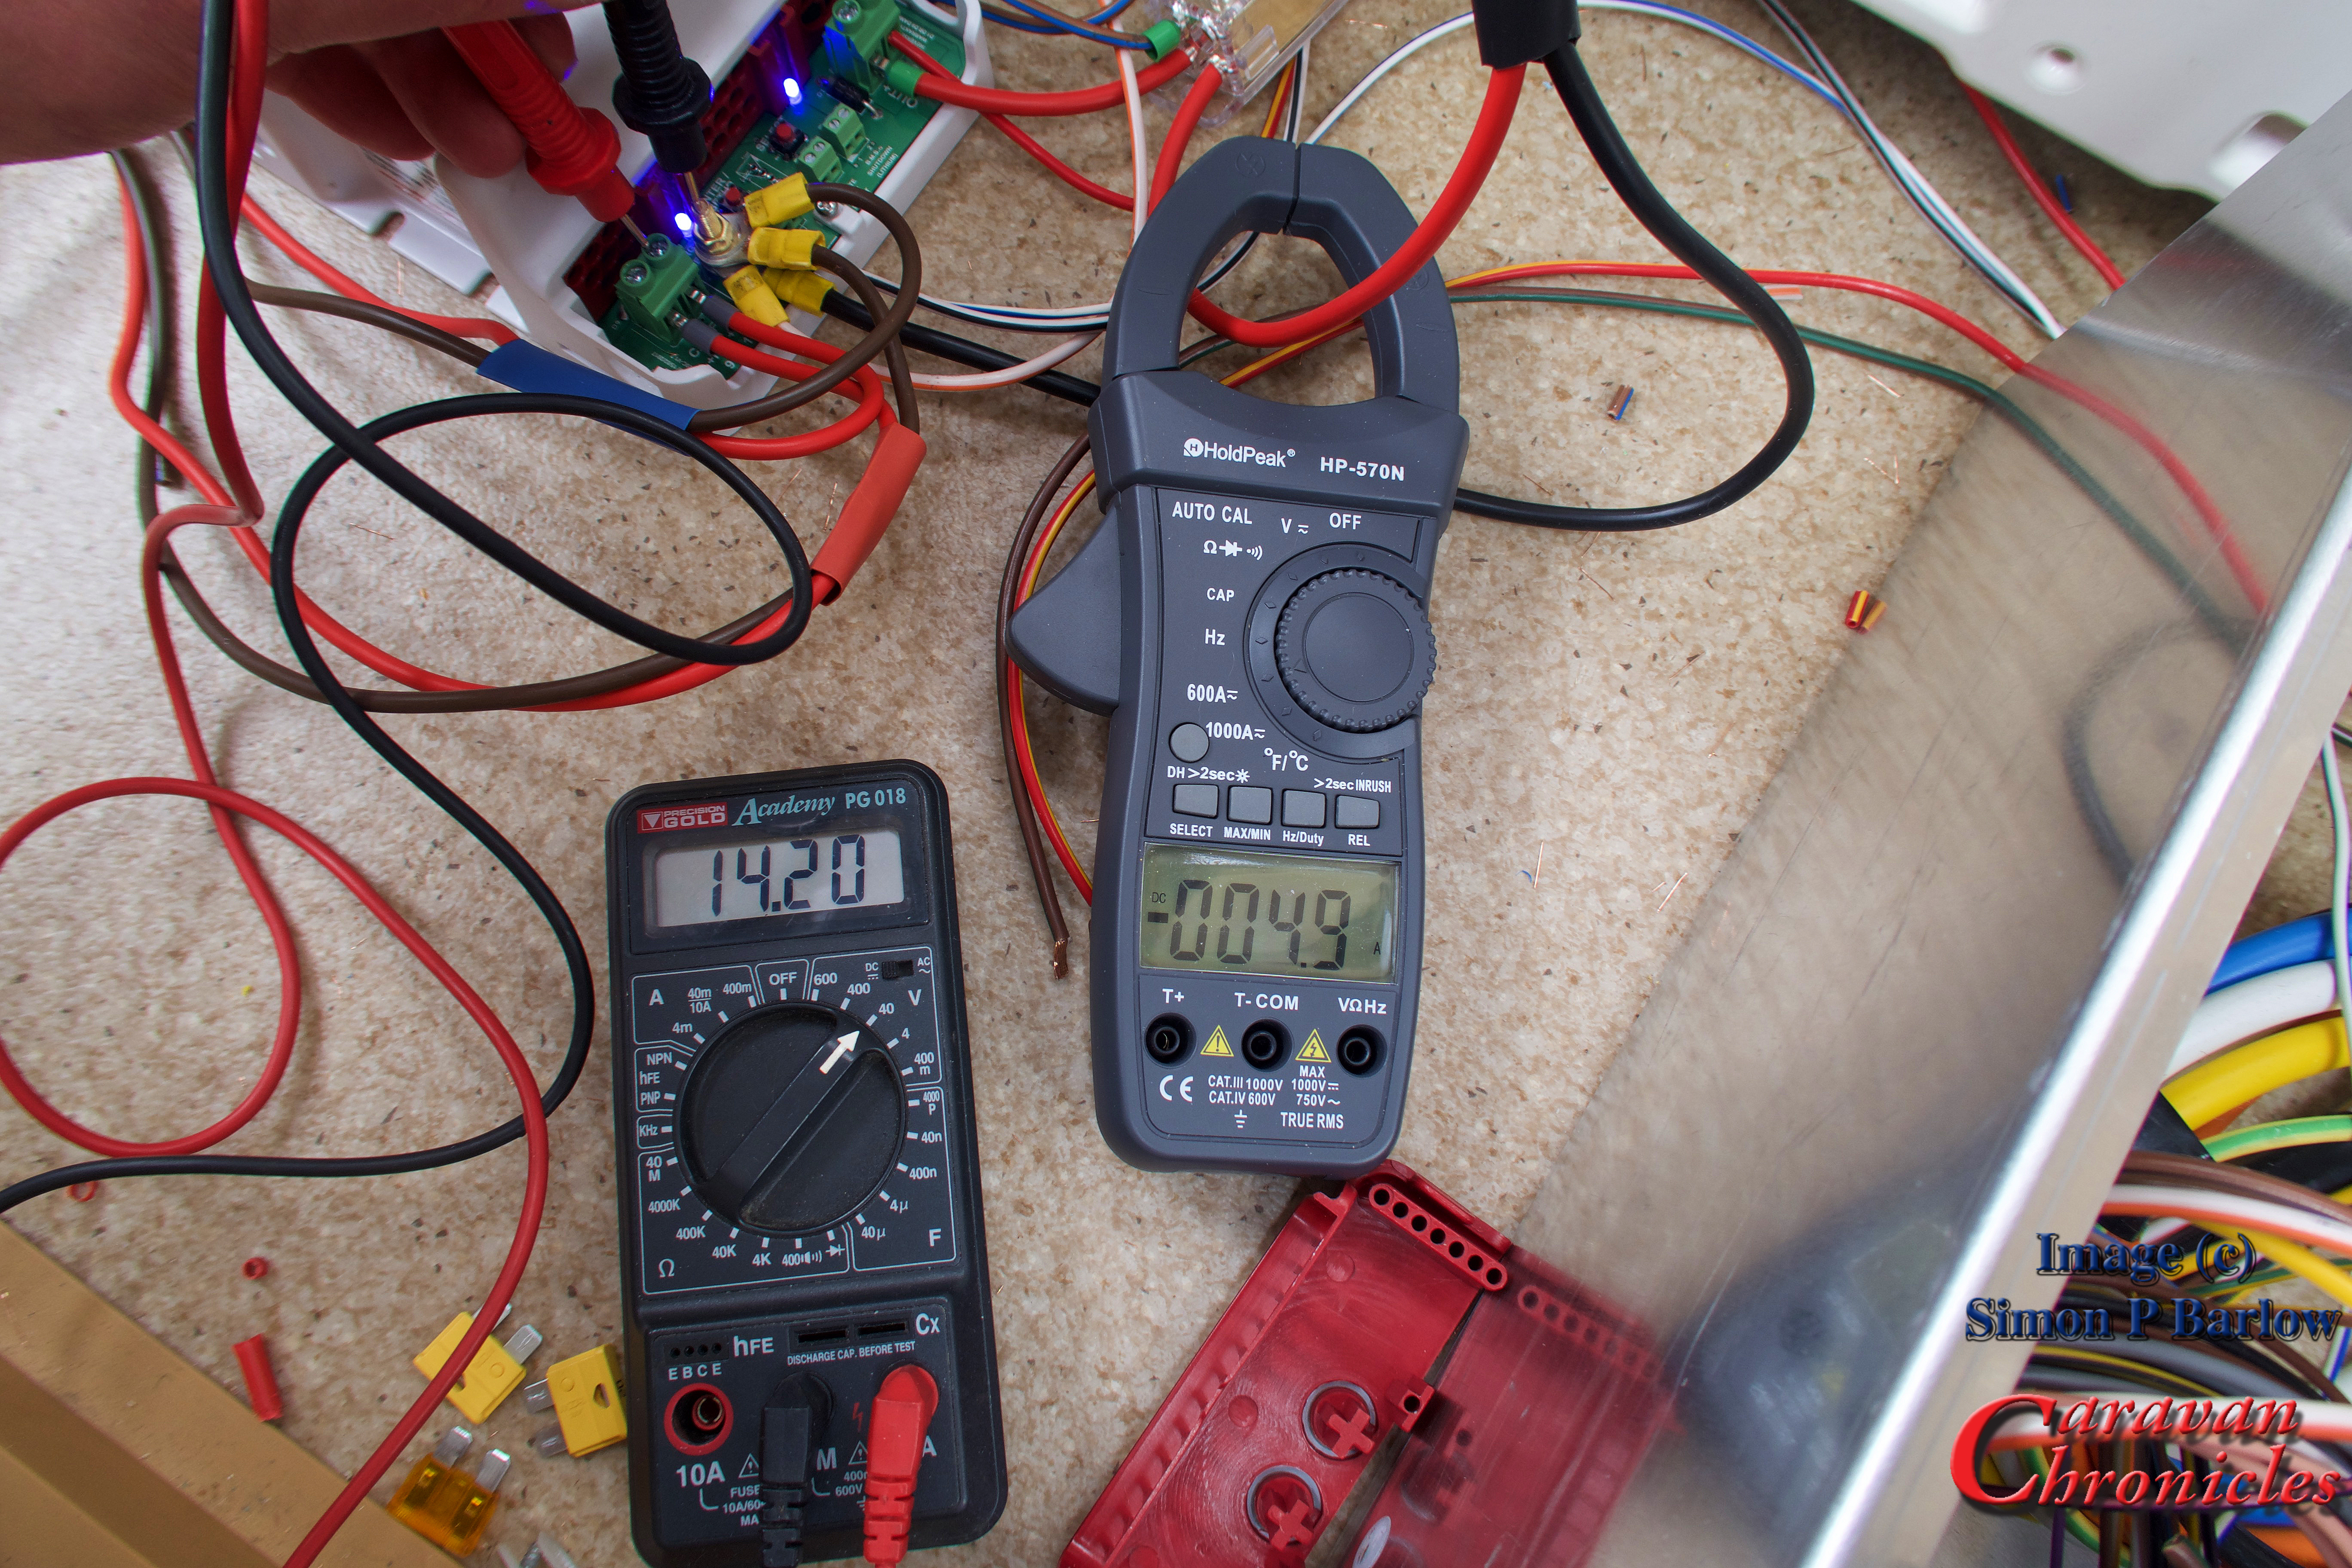
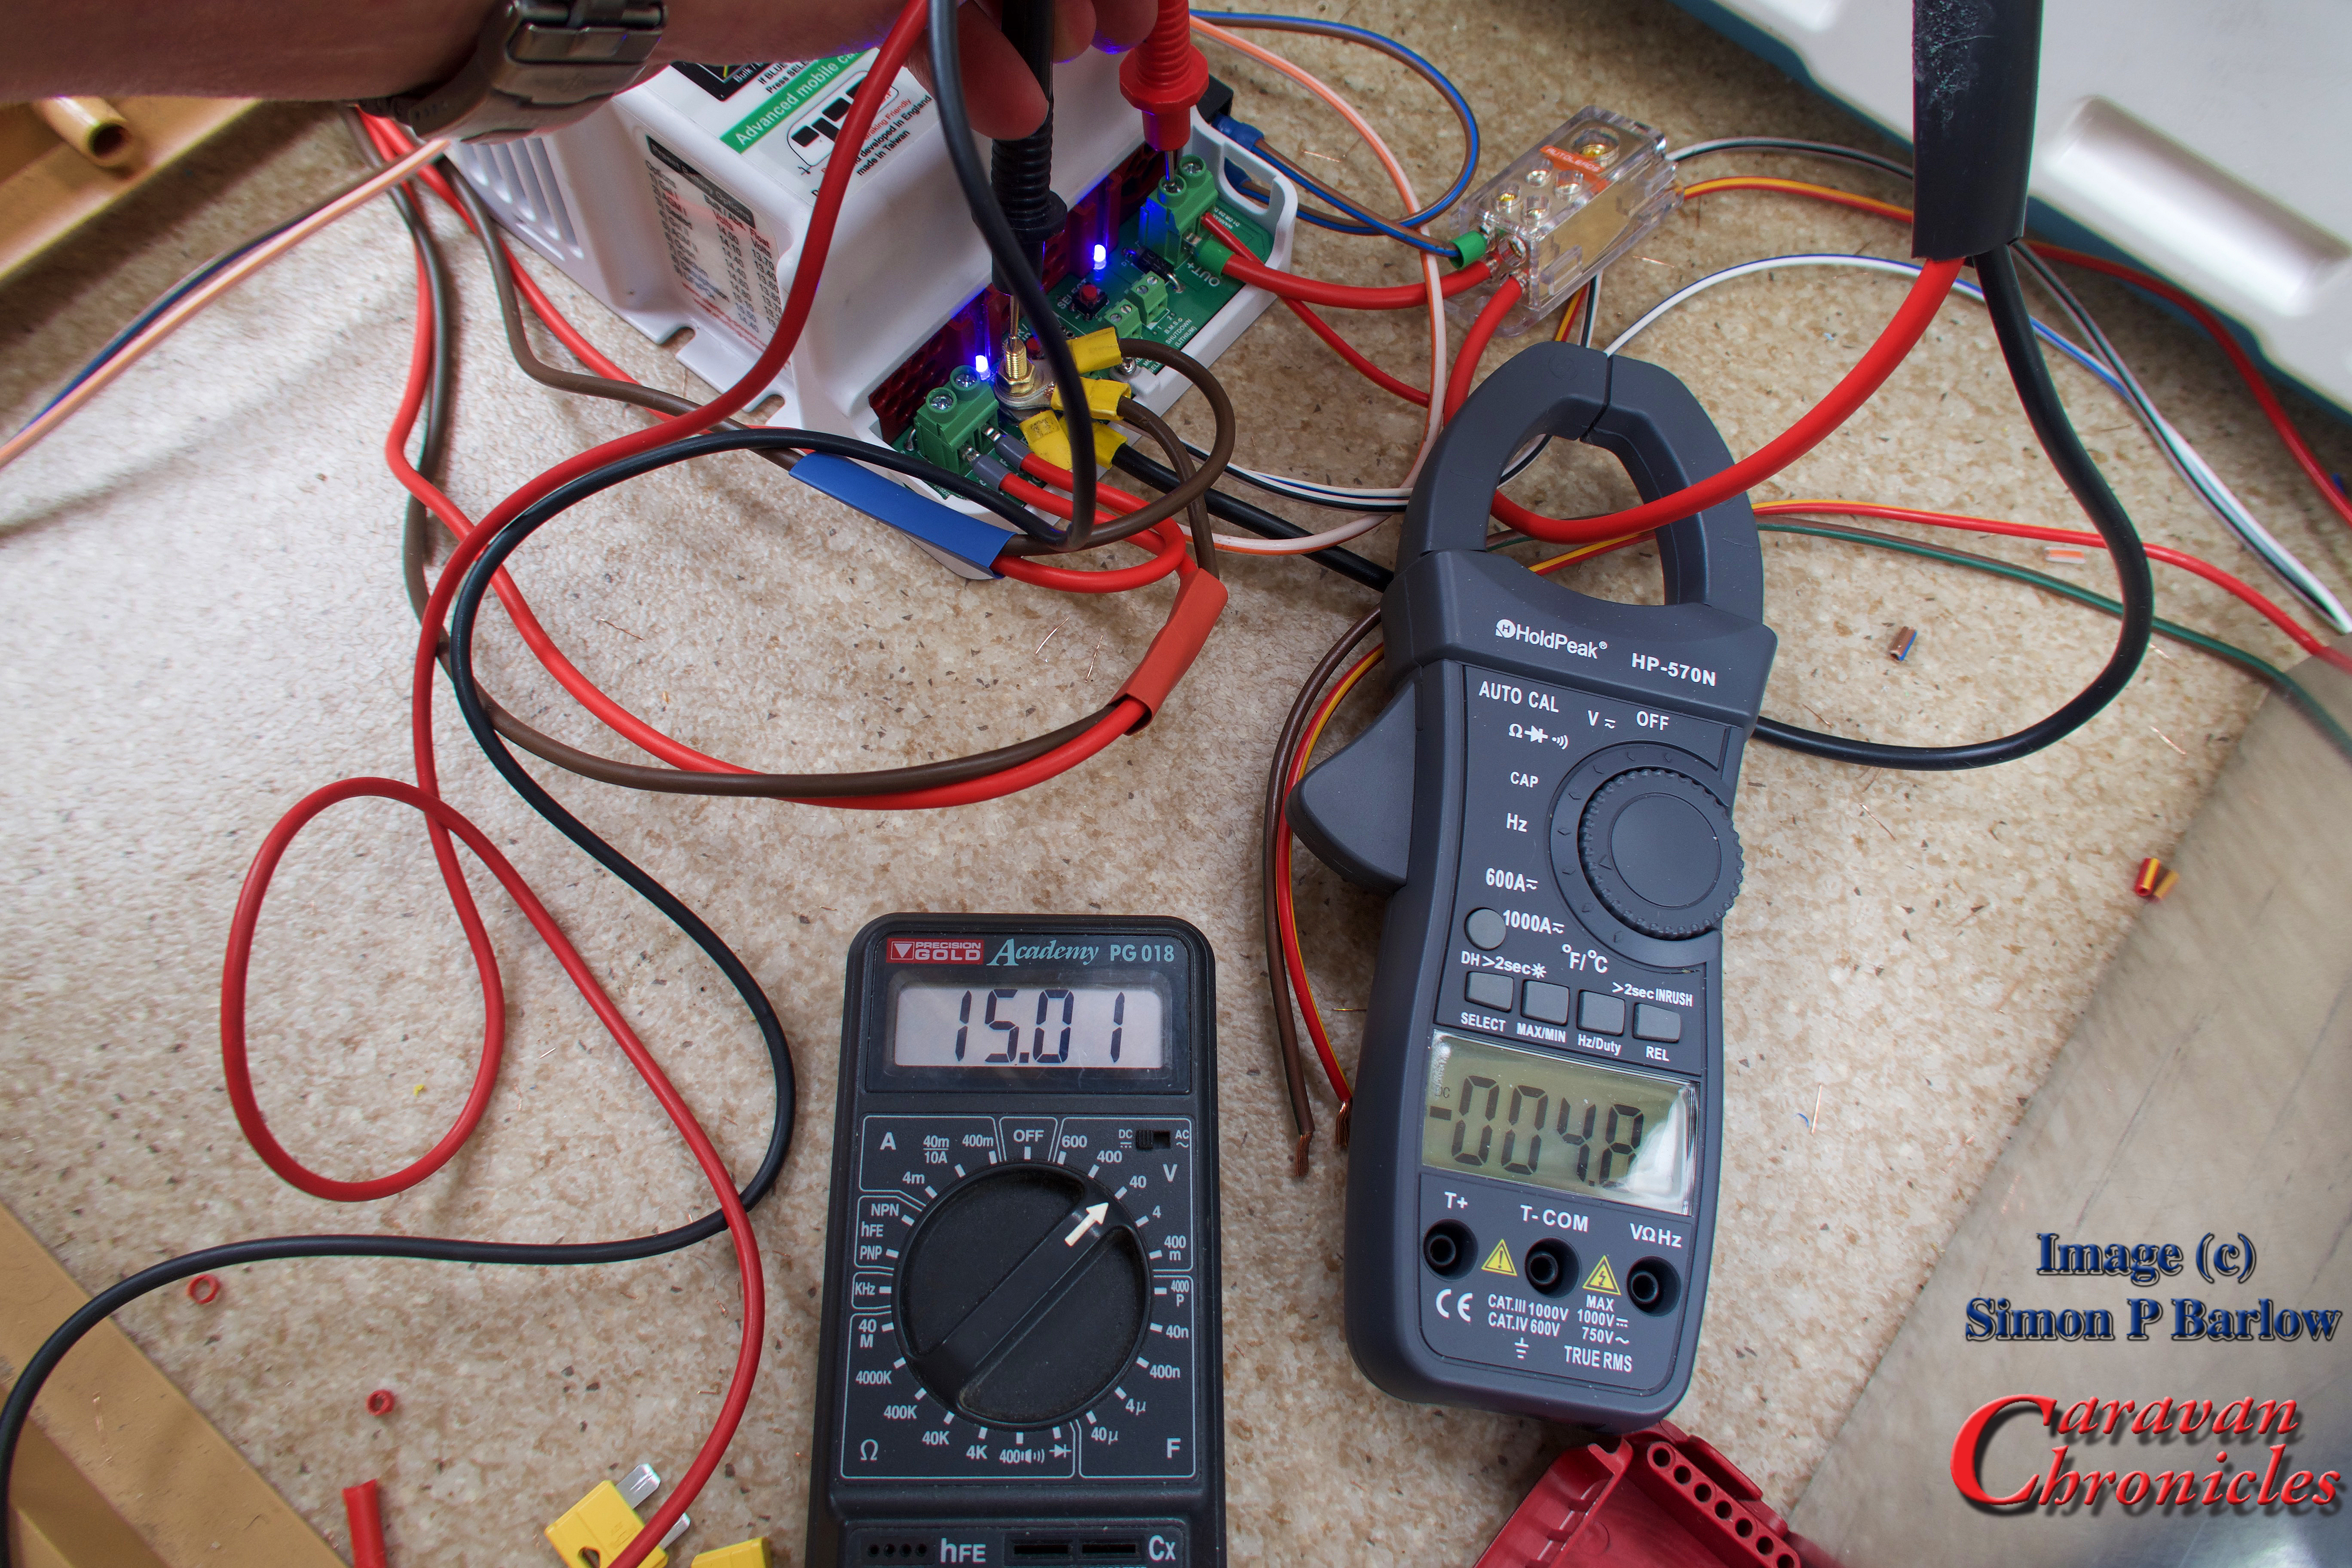
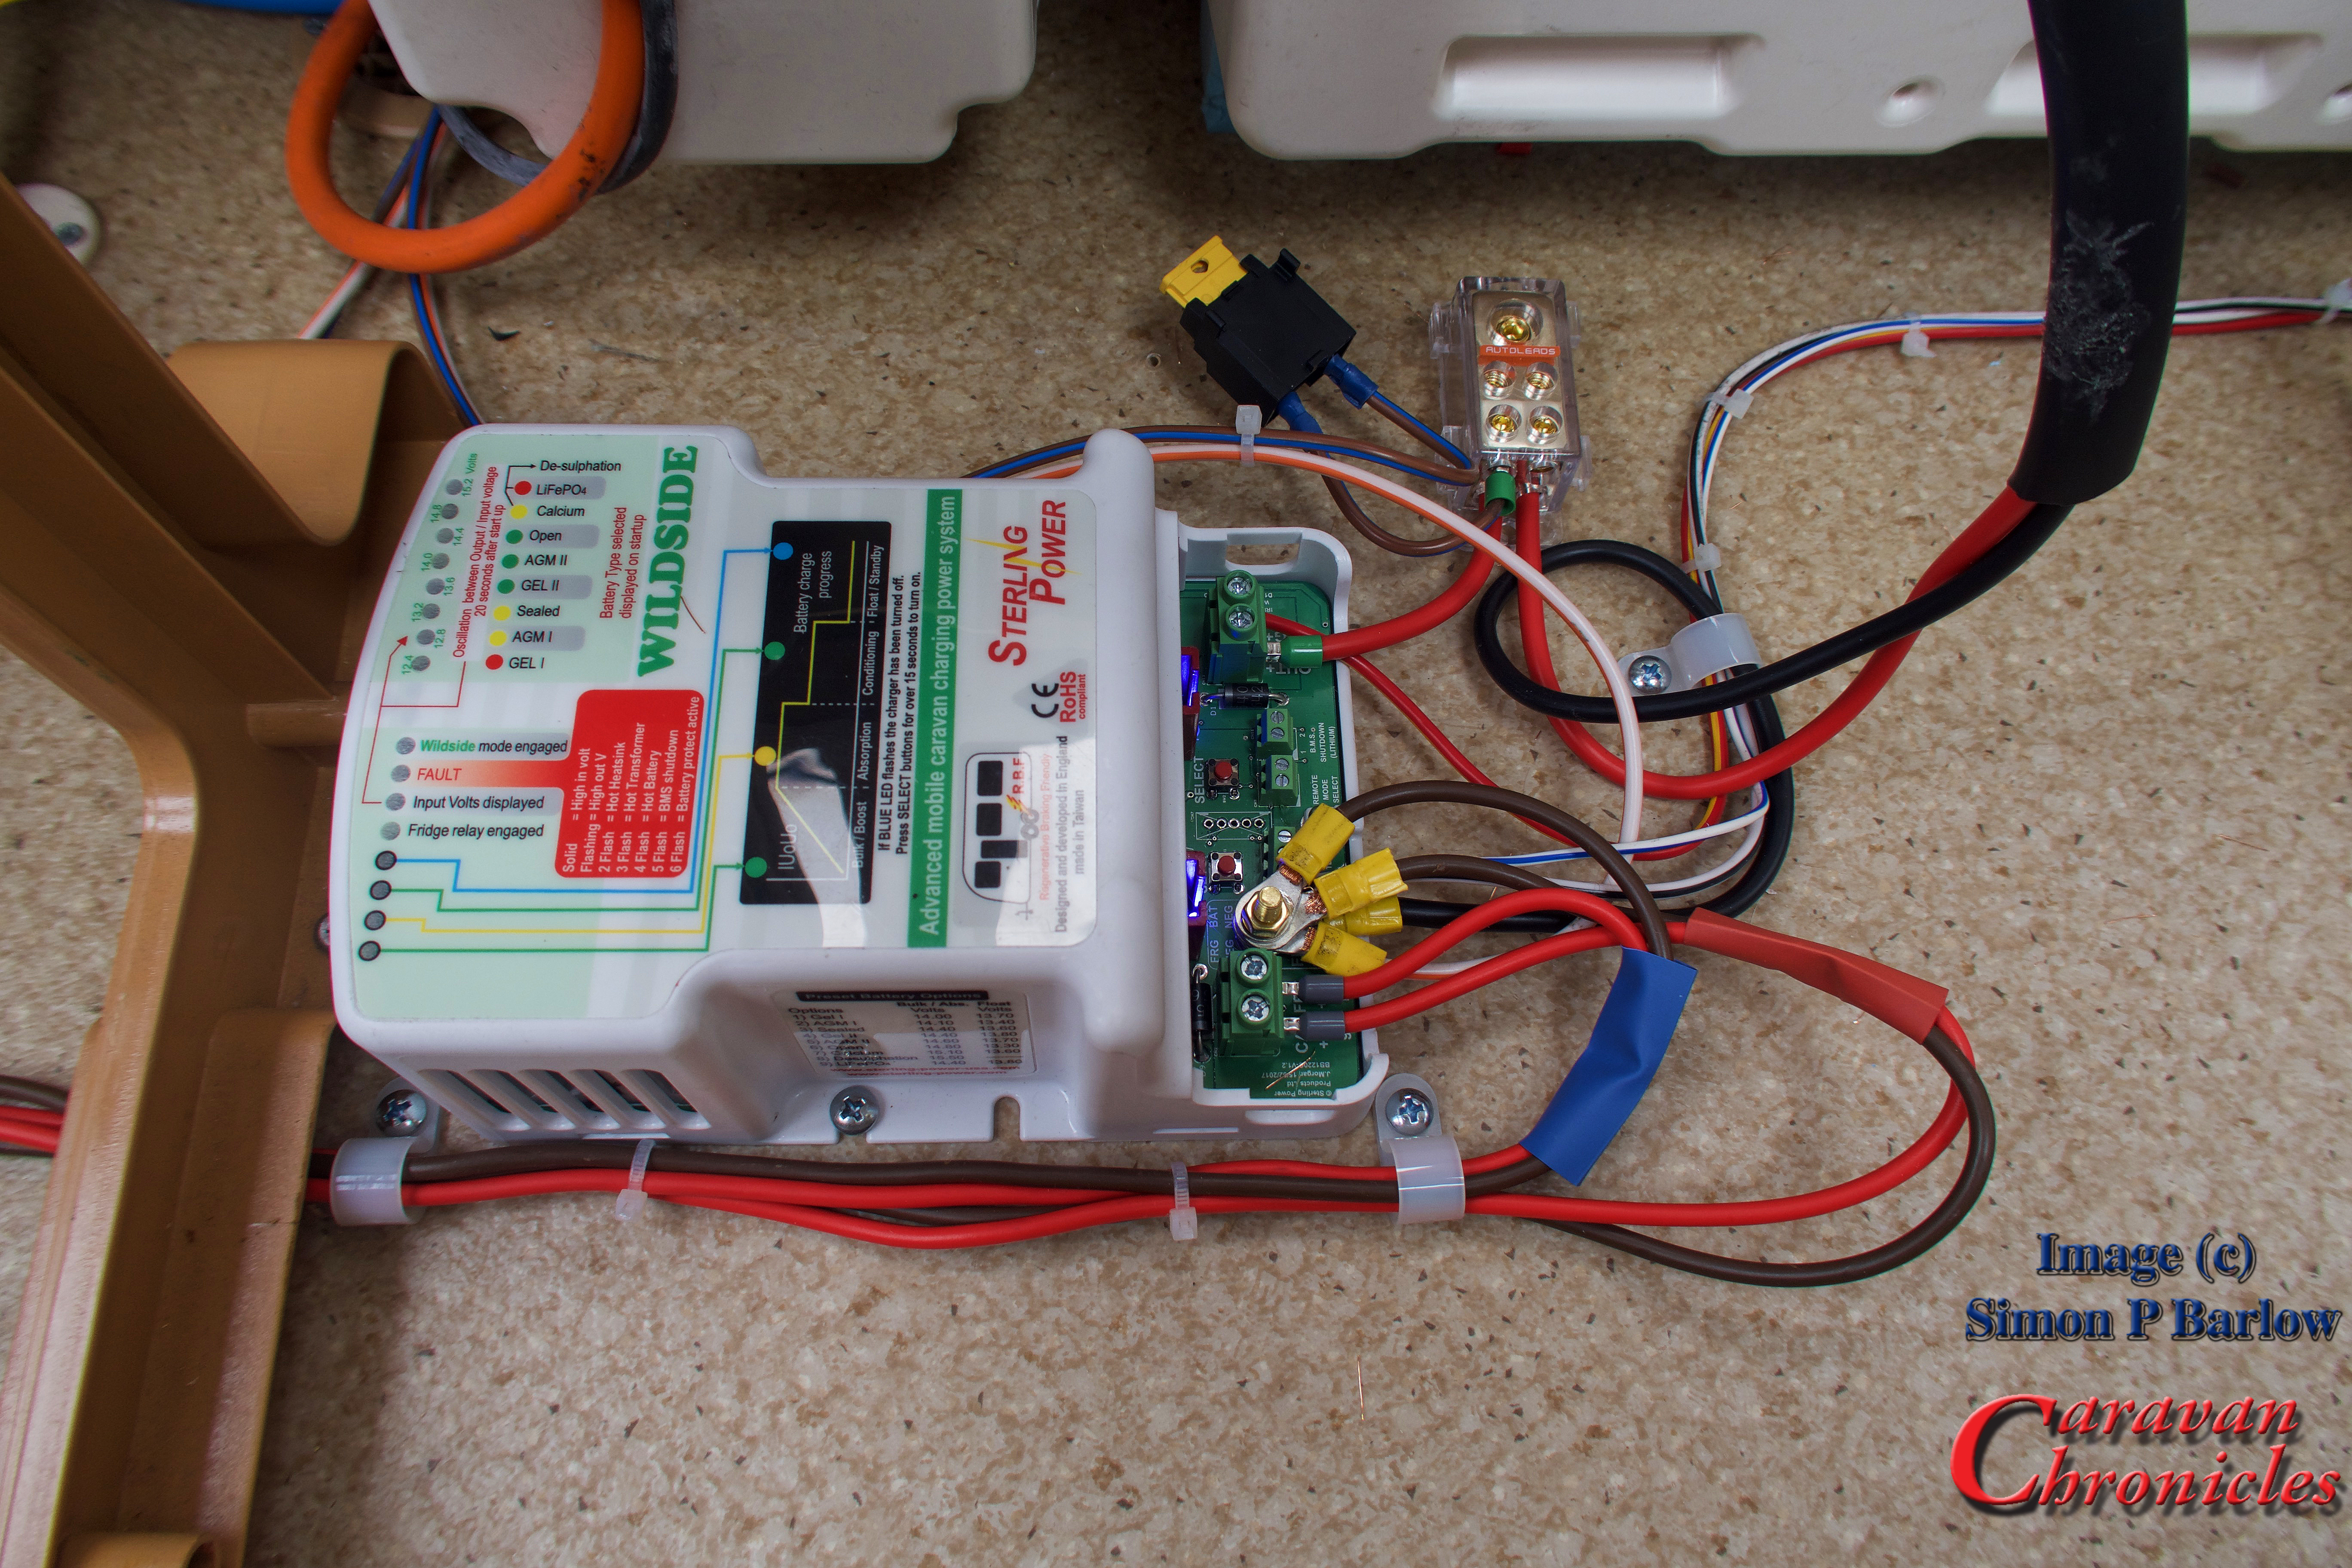
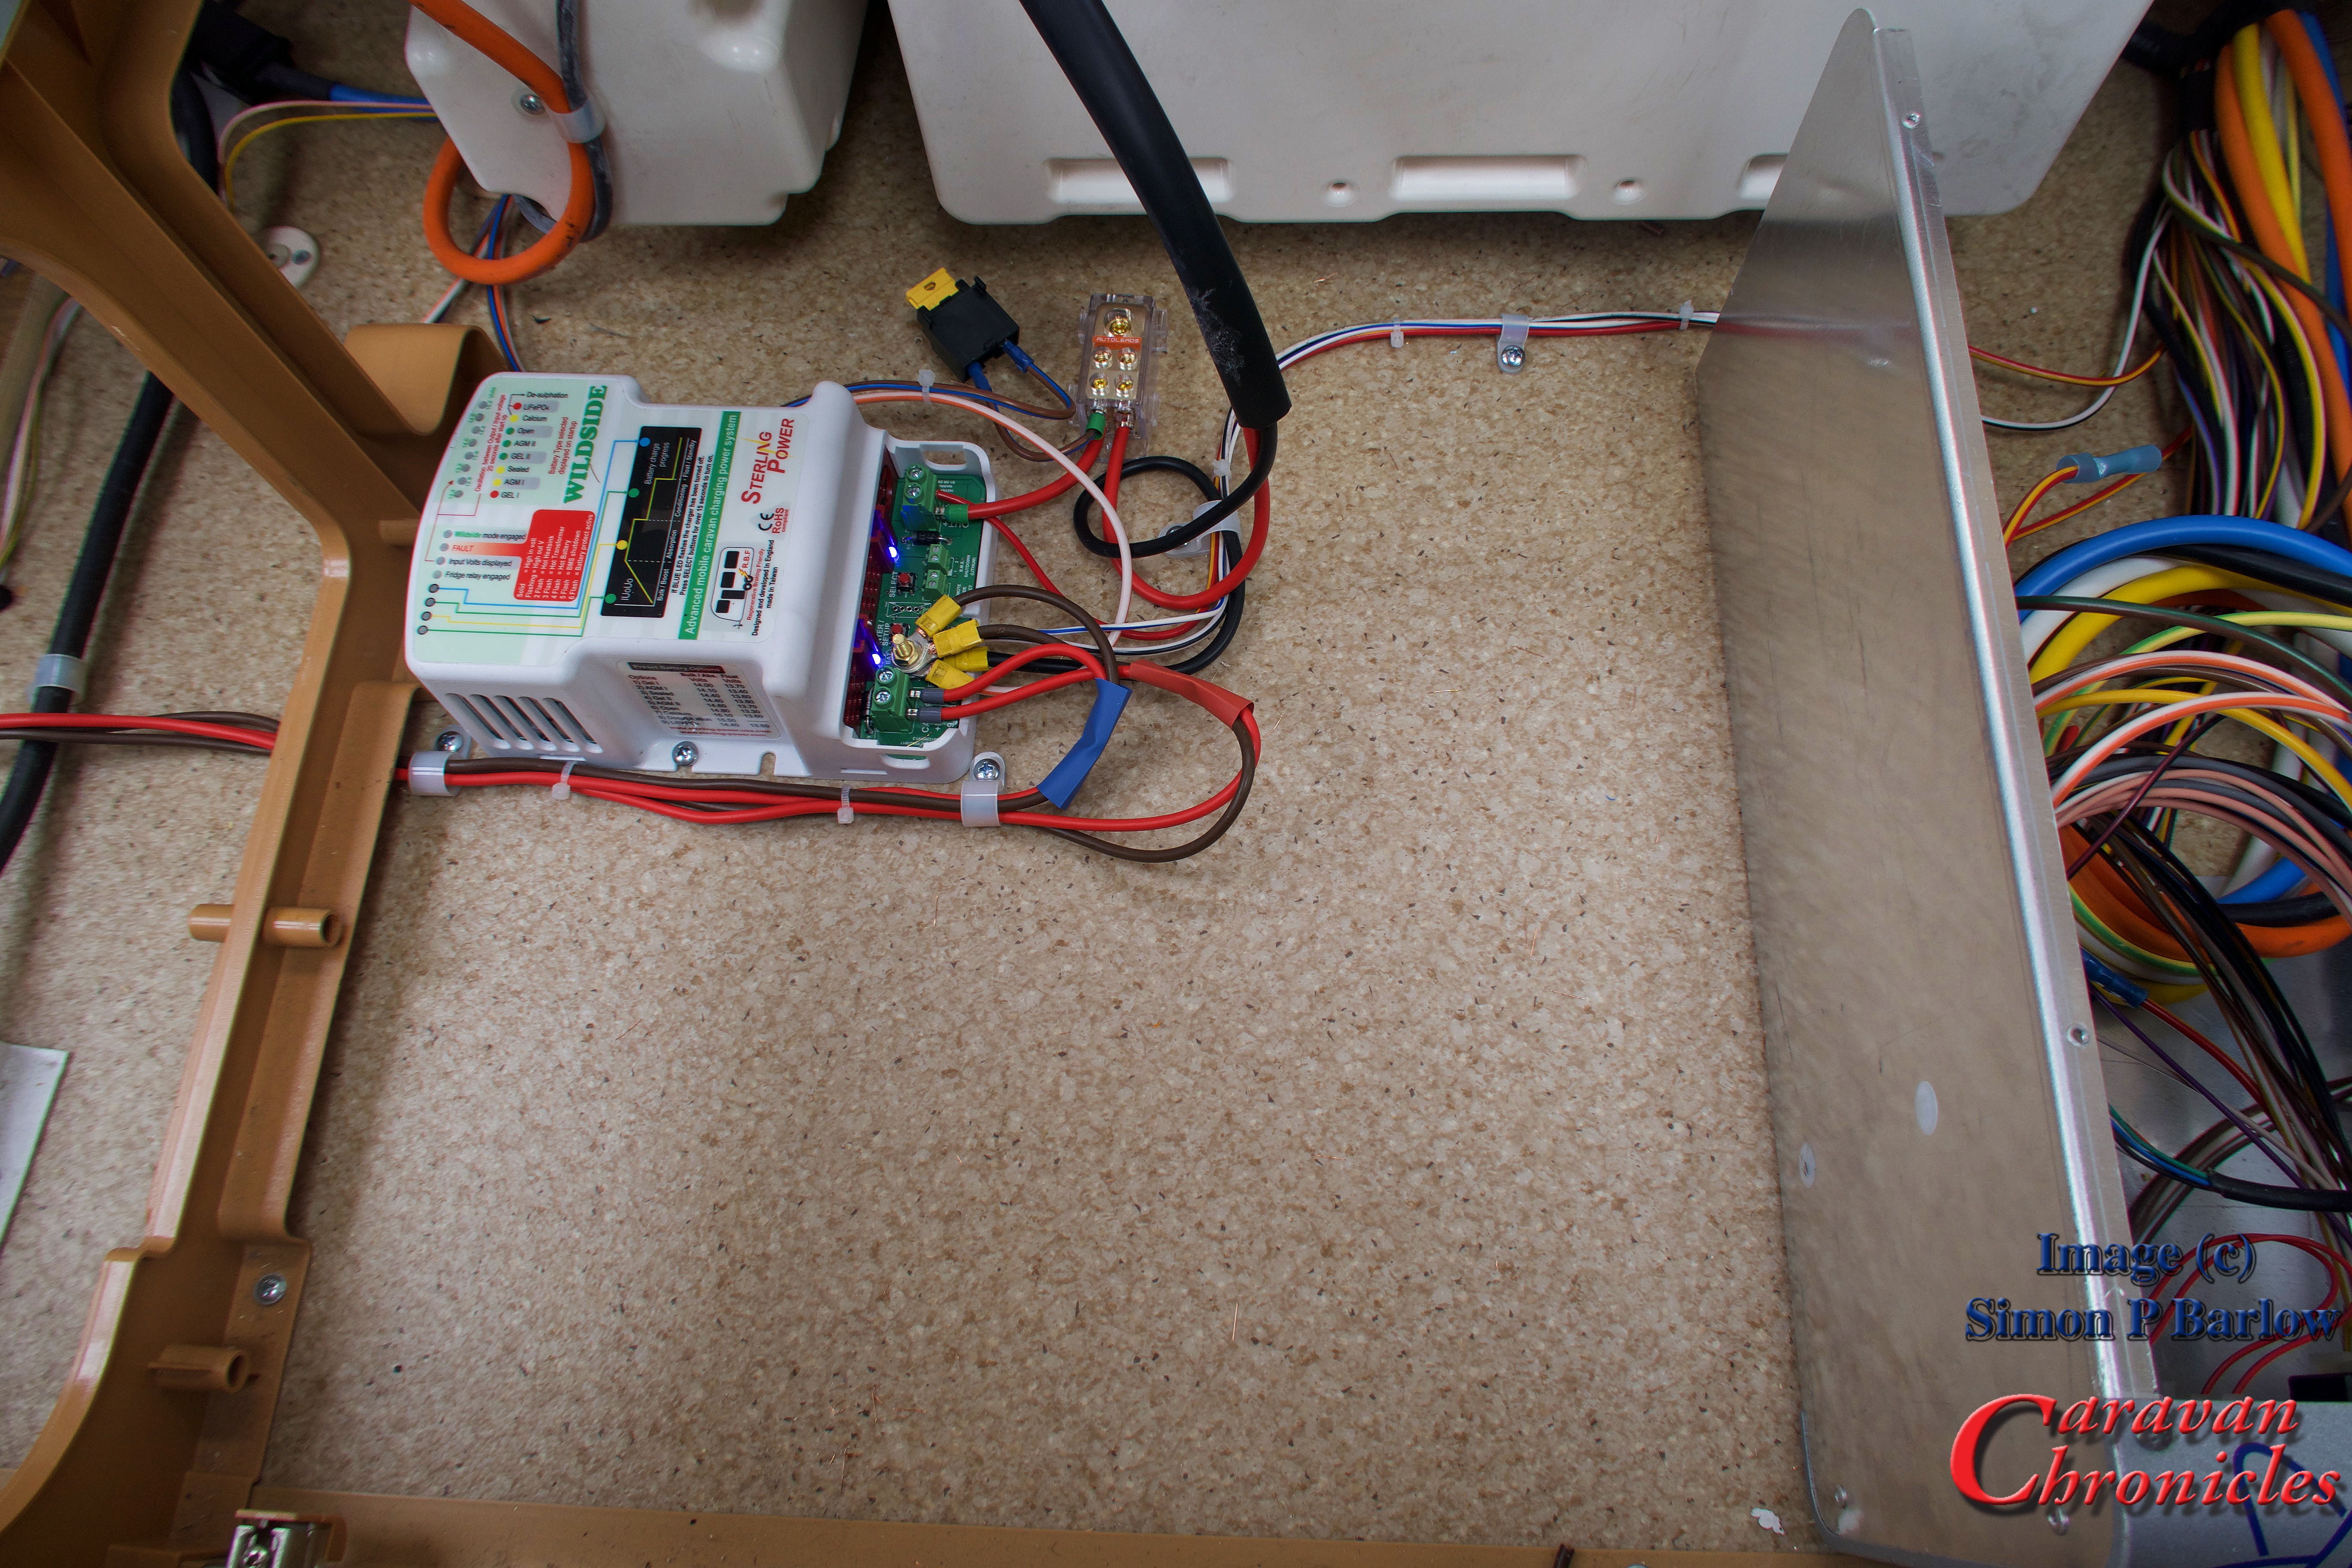
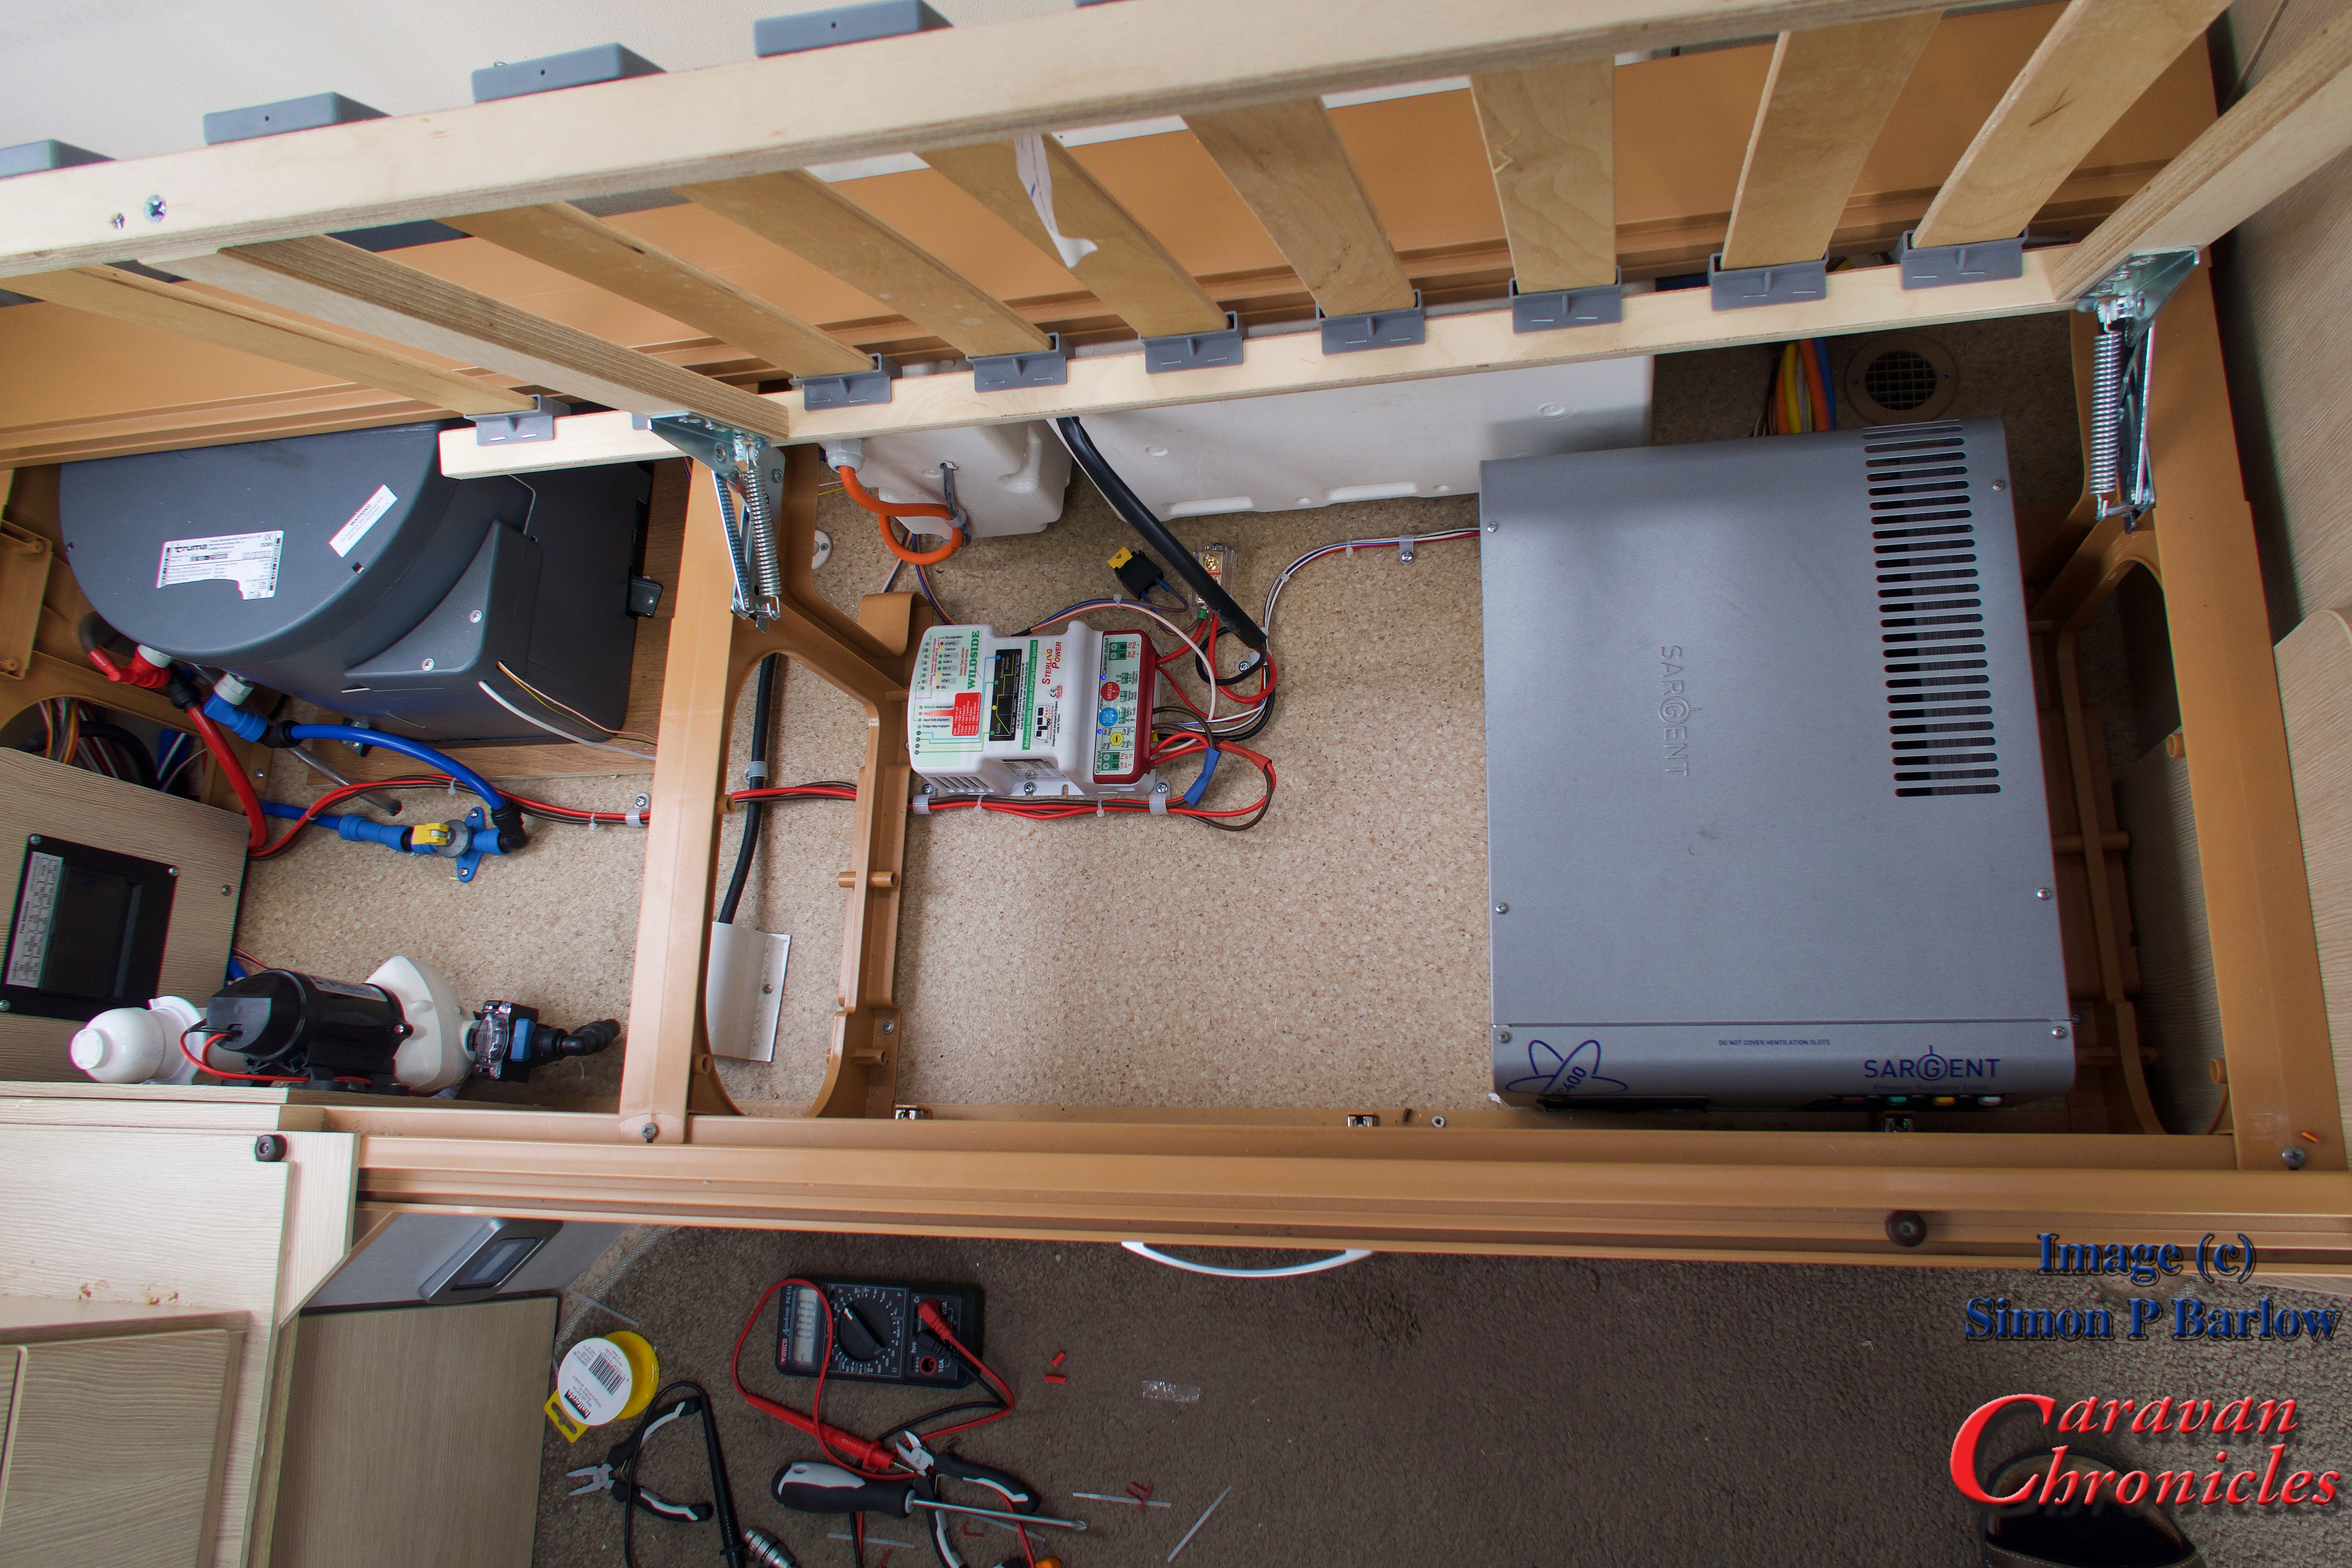
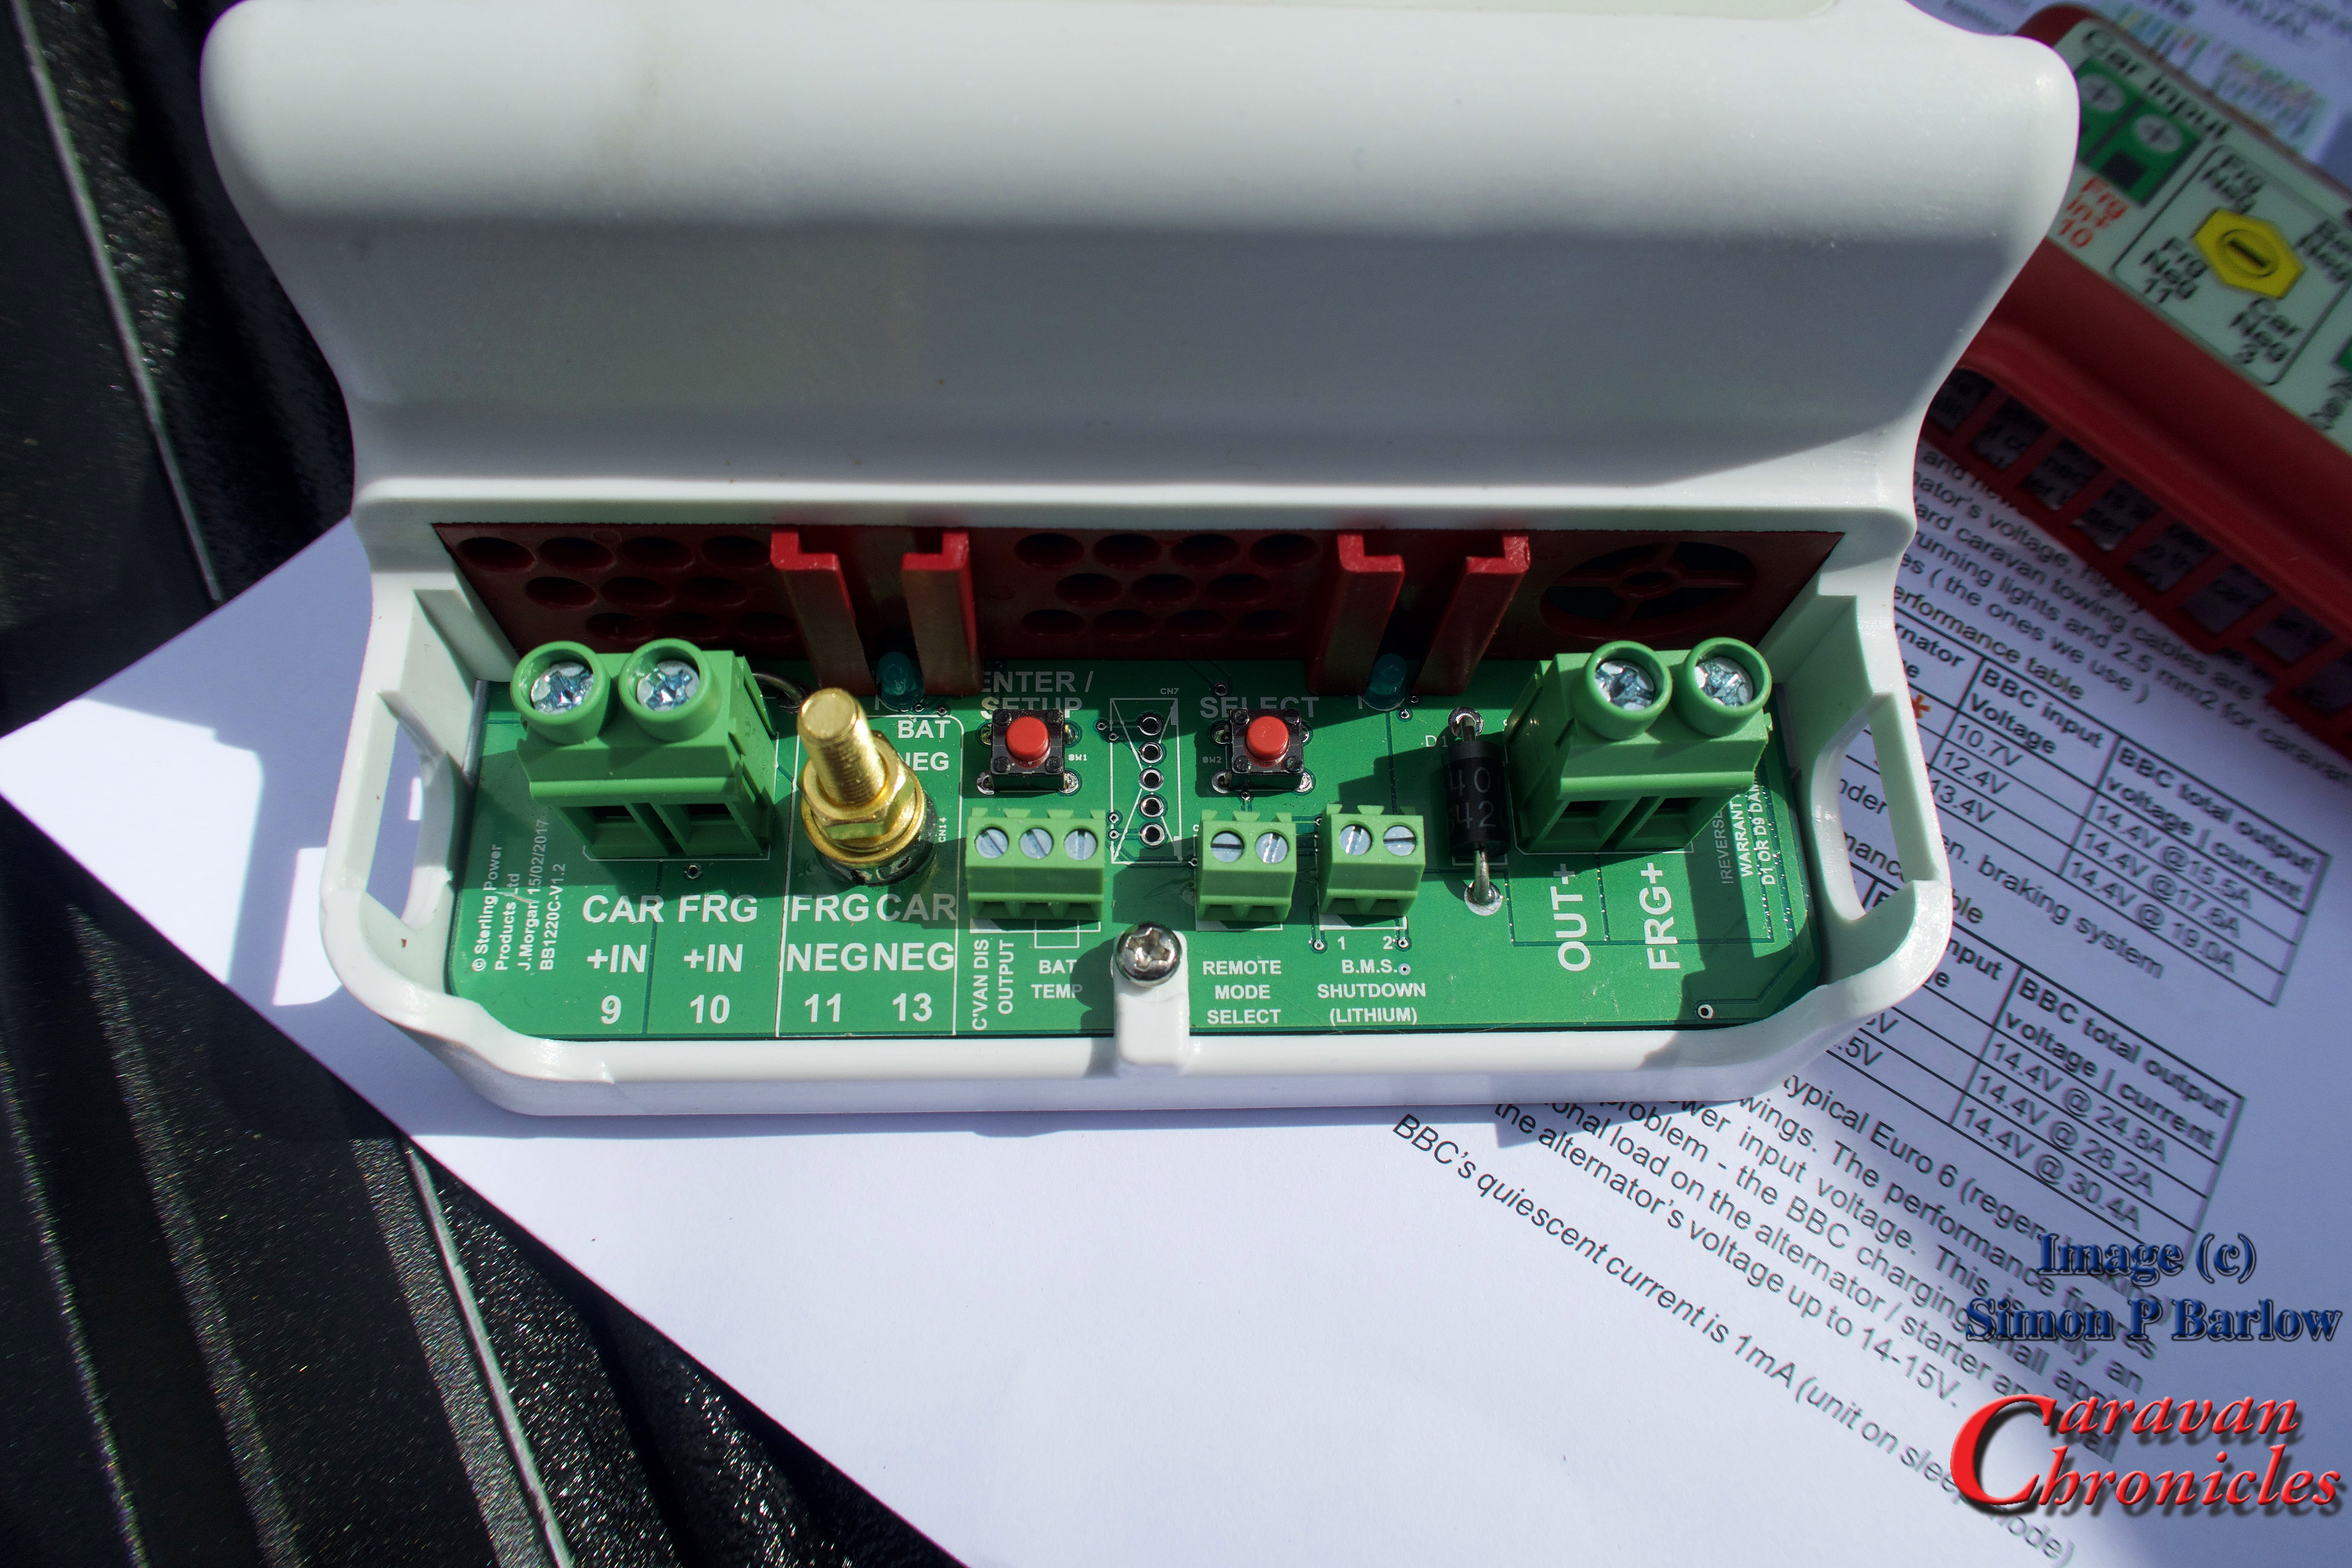
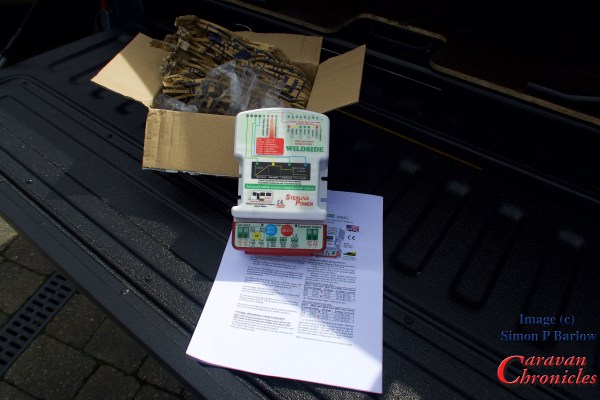
A couple of days ago I was excited to receive   a package from Sterling Power containing one of the pre-production new “Wildside” units. The unit itself is robustly constructed and weighs in at about the same as a bag of sugar – 1Kg.
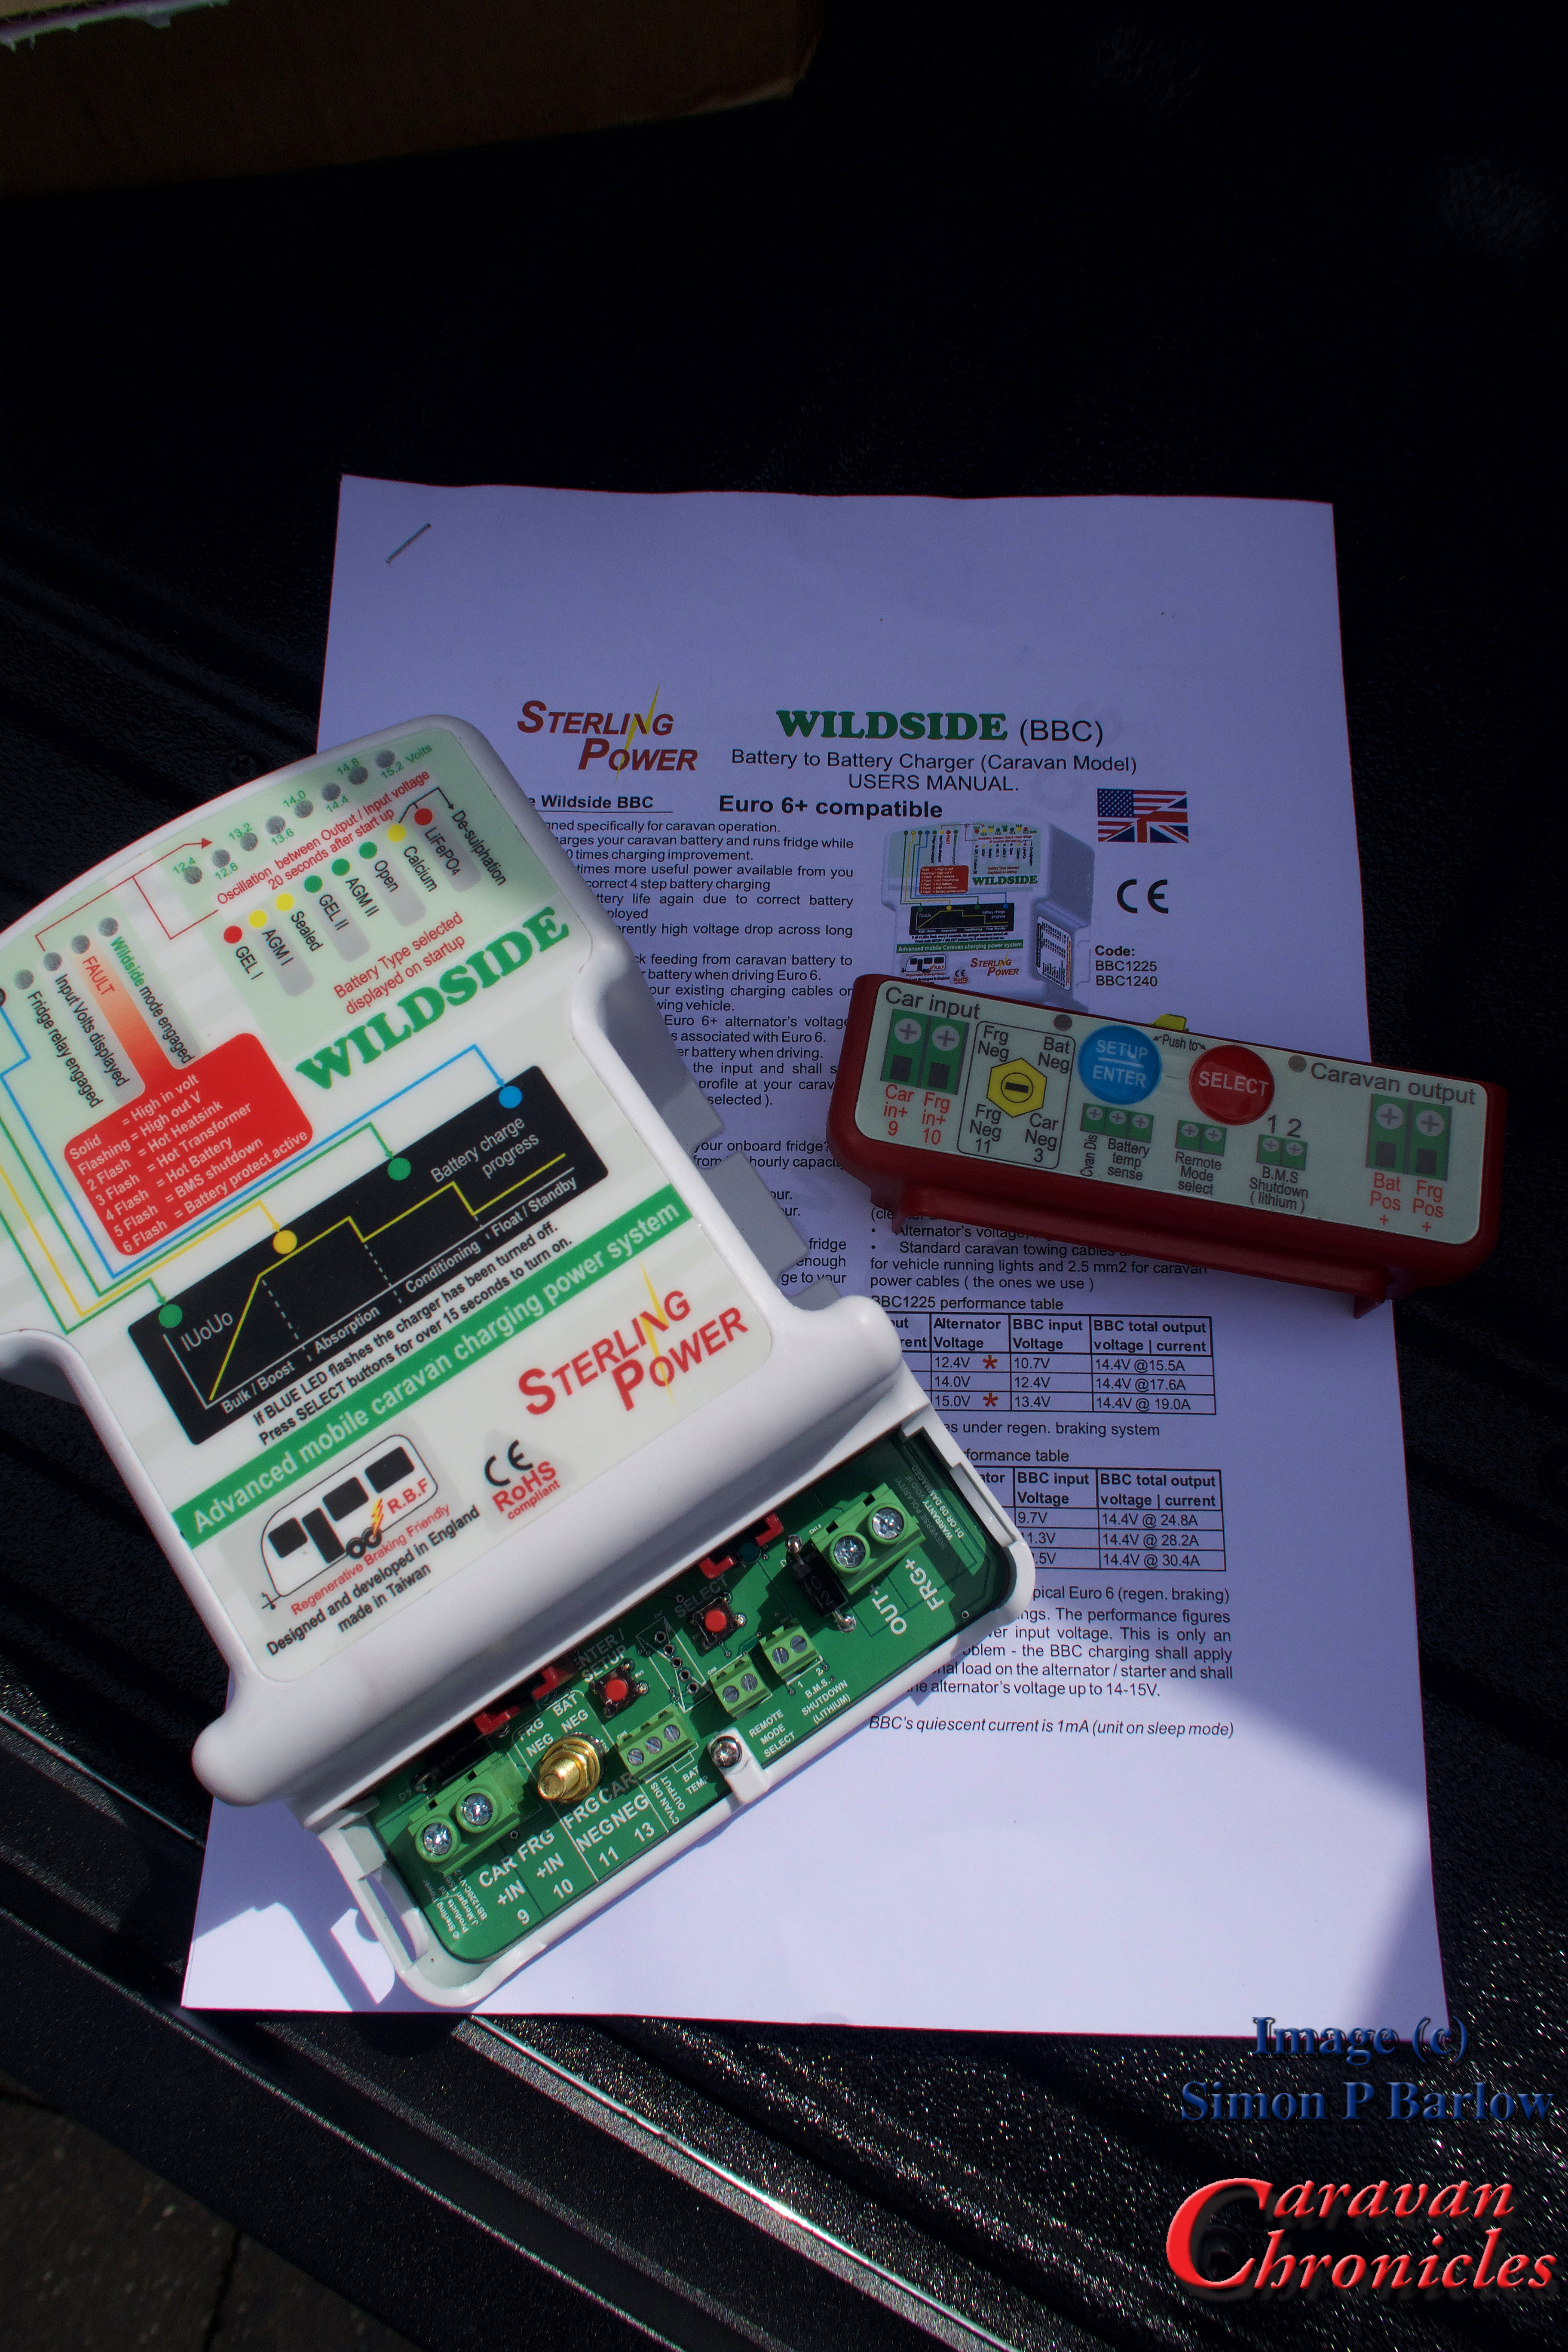
It comes with a comprehensive 11 page instruction/installation manual that goes through all the steps that you need to install the units and what all the various lights and connections are on the unit itself. For anyone that is familiar with my electrical drawings, Sterling have based their installation drawings on my format so are easy to understand (in my opinion!).

I’ll state now for the record, Sterling Power have sent me this free of charge to install and evaluate and that is what I’m going to do, but I will be honest and tell you if I think there are any issues with the installation or the unit in the way that it operates.

IMG_1131

Looking at the connections for the unit it all looks straight forward. The circuit board is labelled  exactly as the drawings in the installation manual which is reassuring and the manual goes into the various functions of each connection and the programming of the unit.

Why this unit?

Since we had changed from using our 2006 Land Rover Freelander HSE as our primary tow vehicle to our 2016 VW Amarok Atacama I had noticed that our leisure battery was not getting close to a full charge even after towing for a couple of hours. We don’t have a solar charging system installed and relied on the tow vehicle and EHU when on site to keep our leisure battery topped up. I knew about the limitations of smart alternators and have written about them before and answered lots of emails about problems readers were now experiancing. Up to this point I really didn’t have an answer to most of the problems and I was considering going down the same route as our Australian cousins and installing some hefty cables between the tow vehicle and caravan, connected together with Anderson connectors. Works fine down under and would do here, especially coupled with one of Sterling Power’s B2B units which I had been looking at.

Now this would be ideal for us, but anyone who tows using a company car, a lease vehicle or a vehicle on a LP scheme can’t just go ahead and install stuff willy nilly. Unless it is done right, it has the potential to be a bit of a ticking bomb as well and  if I was going to recommend it as a solution there are very few people with experience to do an installation of this type. I have seen some right botch jobs on heavy-duty cabling by so-called “professionals” when installing simple winches and dual battery systems on 4 x 4 off road vehicles. Using a lump hammer, cold chisel and block of metal is NOT the professional way to crimp battery cables!

I was looking round to see if there were other options and talking to the chaps on the Sterling Power stand at the show told me they had a product in development that might just be the solution…. and here we are!

How does it work?

I’m not going to give you chapter and verse on the internals (some of that would be guessing on my part and some is propriety information anyway) so I’ll simplify it as much as I can.

In current tow vehicles you have two connections that supply power to the caravan – one for the fridge which is only live when the engine runs and one for charging the leisure battery which is usually live all the time.  Now the problem is that as it’s quite a distance from the front of the vehicle where the battery and alternator are to where  the leisure battery and fridge are located in the caravan. The size of the cables providing the connections are key to how efficient it all works.

Nearly all good quality tow bar wiring uses 2.5 mm square (2.5mm²) cable for these circuits and they connect between the tow vehicle and caravan through a 13 pin plug and socket (or 12N & 12S in older vehicles). The problem with all this is down to good electrical ‘laws’. In essence the more current you draw through a length of cable the greater the voltage drop ( I go into a bit of techie detail about it here… Understanding Cable and Cable Sizes ) Some people go to the lengths of re-wiring the circuits in 4mm² or even 6mm² cable, which was OK up to a point… usually the point which is the connection between the vehicle and caravan. With the traditional installation what you end up with is two circuits that the voltage is usually too low to provide a good charging capability for the leisure battery and the fridge circuit that might or might not, depending on voltage drop, have some spare capacity but you can’t use it to charge the leisure battery.

Back to the Wildside unit…

What the Wildside unit does and this is really clever, is it takes over the two power circuits, aggregates them and manages the output. It draws the maximum current available through each of the two circuits and provides an output for the fridge always at the correct voltage to maximise the efficiency of your fridge and protect it from the voltage fluctuations inherent with Euro6 and Regen engines and any spare capacity on this circuit it added to the leisure battery charging circuit, steps up the voltage and provides a separate output via a four stage intelligent battery charger to maximise the charging capability to your leisure battery.

This is a very very simple one paragraph explanation, it does have a few other tricks up its sleeve though.

One feature is the “Remote Mode Select” switch option. This allows you to install a switch that will allow you to turn the unit to “Wildside”, “Boondocking” or “Off Grid” mode and run the fridge as though it was being powered from the vehicle. It is actually being powered from the leisure battery.

Take note though… Most caravans and motorhomes are fitted with absorption fridges which use a heated element that is constantly on to make the fridge work. However some motorhomes ( I don’t know of any caravans) are fitted with the more expensive and vastly more efficient compressor fridges which work exactly like your fridge at home but can’t run on gas. If you are camping off grid for a few days with an absorption fridge, then run it on gas. However if you are worried about your fridge not maintaining temperature on an hours ferry crossing or on a euro tunnel crossing then you can use the switch to keep the fridge running. The period you can power it will depend on the capacity of your battery(s)… I would not advise using it with and absorption fridge on a battery bank with anything less than 110Ah capacity.

If you do use this feature on the Wildside unit, it will protect your battery bank from discharging past the safe point by turning off the fridge when the voltage reduces and reaches a critical point that would damage your battries.

You also have the ability to specifically select the type of leisure battries you have installed – GEL I, GEL II, AGM I, AGM II, Sealed, Open, Calcium, LiFePO4 to get the correct tailored charging and maintenance program for your battery bank.

If you are fortunate to have lithium leisure batteries there are a couple of other connections you will need to check out too.

Installation Considerations…

We know what it does so how do we connect it. Well this is where it could get messy unless we have a plan.

IMG_1132

In essence, what do we need to do? Well we have to cut and divert the incoming pin 9 and pin 10 into the Wildside unit and connect one output to the leisure battery. We also need to disconnect the fridge from the caravan’s original control box and reconnect it to the Wildside unit. As the habitation relay is usually buried inside the original control box we need to be able to control this from the Wildside unit. There is a terminal for this (“CVan Dis Output”) but what do we connect to this to make the habitation relay operate correctly?

The original Pin 10 lead that we cut and diverted into the Wildside unit, the other end of this still goes into the installed control box and this will operate the habitation relay. Remember we disconnected the fridge power lead from the installed control box and reconnected it directly to the FRG+ output on the Wildside unit so all it does now is operate the habitation relay.

So summing up, we have to cut 3 cables and re-terminate 5 ends into the Wildside unit. This of course does not include the neutral connections which will be easy and straight forward.

Other Considerations…

The installation of the Wildside unit must be easily reversible so it can be moved to another caravan at some point in the future.

We must also use the correct size cables to connect to the leisure battery as we will now be charging at higher currents than was possible before, the original cable that was installed in the caravan to connect to the leisure battery may not be of a sufficient rating.

We must document the changes properly so that at some point in the future someone can follow what we have done incase they have to fault find.

We must make sure all the connections and general installation are done to a high standard to ensure the installation is safe.

Finally we must be able to do the install without invalidating any warranty on the original installed control unit (i.e. not opening it up) and retain functionality of all the elements of the caravans electrical system. It’s no use installing the Wildside unit if half the electrical features of you caravan don’t work afterwards!

IMG_1130In Part 2…

In the next part I’ll go through the manufacturers electrical schematics of the caravan and show how to find and trace  which cables we are going to look for when we do the install and how we produce a simple drawing showing the changes.

I’ll also come up with a quick check list for all the additional bits (cable, terminals etc) that we will need for the install.

Share this:

  • Twitter
  • Facebook
  • Tumblr
  • Pocket
  • Pinterest
  • Reddit

Like this:

Like Loading...
Buy Me A Coffee

Caravan Chronicle Stats

  • 44,391,225 Views
Follow Caravan Chronicles on WordPress.com

Follow Caravan Chronicles and receive notifications of new posts by email.

Follow on Facebook

Recent Posts

  • Is This A Growing Trend..?
  • Adapting Our Bike Rack for e-Bikes
  • Has Bailey Built Our Perfect Caravan?…
  • Just a quick one…
  • A Few Mods and Updates…
  • A Bit of a Milestone…
  • Finishing Off A Few Jobs…
  • “Put your lights on mate…..”
  • Well that took some cleaning…
  • How have you all been doing?
  • Copying Content… Again!
  • Here’s Something I Think You Want To Take a Look At…
  • Ticking All The Boxes…
  • Vehicle Wiring Projects… Some Thoughts.
  • A Bit of Unashamed Promotion…
  • Season’s Greetings…
  • The problem with information from the internet…
  • I can’t think of a snappy title…
  • Euro 6 Engines, Smart Alternators and Your Leisure Battery…
  • For Anyone Restoring A Vintage Caravan…

Archives

Categories

RSS Links

RSS Feed RSS - Posts

RSS Feed RSS - Comments

CaravanChronicles.com Tag’s…

13 Pin Plug Accessories AL-KO Avtex Bear Extender Bike Rack Blackpool Blackpool Illuminations blogging Cadac Camping & Caravanning Club Canterbury Caravan Caravan Blog Caravan Club Caravan Electrical Caravan Electrics Caravanning Caravans Caravan Show Caravan Talk Caravan Tyres Cheltenham Chirk Christmas Market Christmas markets Cleaning design Event City Factory Visit Fiamma France Freelander Glastonbury Glossop Caravans Humor Insync Jonic Bedding Lady Heyes La Tournerie Ferme Leisure Battery Leisure Battery Charging LPG Refilling Maintenance Manchester Caravan & Motorhome Modifications NEC North Western Caravans Ltd OLPRO One Hairy Caravanner Oswestry Oxford Product Review Project Safefill Sat Nav Sterling Caravans Sterling Power Wildside Swift Factory Swift Group Swift Talk Technical The Old Oaks Touring Towing tow vehicle TPMS Trafford Centre travel Travel Trailer Travel Trailers vacation VW Amarok Warwick Racecourse WiFI

Create a website or blog at WordPress.com

  • Follow Following
    • Caravan Chronicles
    • Join 670 other followers
    • Already have a WordPress.com account? Log in now.
    • Caravan Chronicles
    • Customize
    • Follow Following
    • Sign up
    • Log in
    • Report this content
    • View site in Reader
    • Manage subscriptions
    • Collapse this bar
 

Loading Comments...
 

    %d bloggers like this: