Many thanks to all my friends. As I write this I’m in the Christi hospital hoping to go home in a few days. I was told about a week ago that I had about 3 months to live and should start preparing my affairs. Which Sue and I are trying to do. I have some very dear and close friends that are helping us in this task.
I’m not sure what is going to happen to this blog. It is funded for a further 12 months so should be available on line until then. Sue as editor- in-chief does not want to continue.
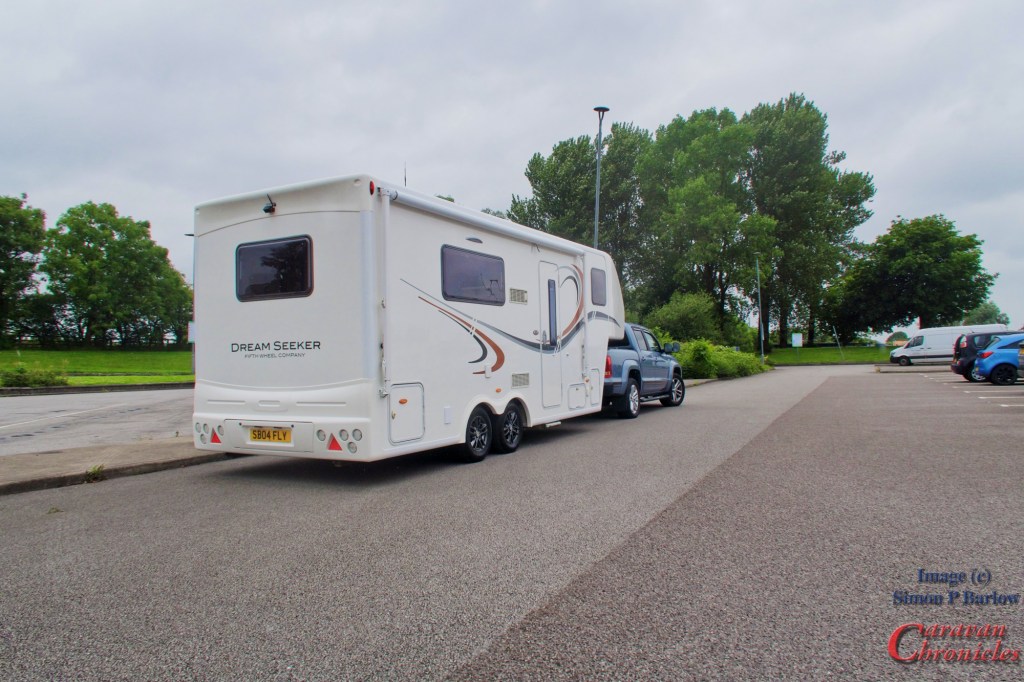
Our beloved outfit is now for sale, including two MiRider electric bikes, a good selection of spares and I had just fitted new bathroom and kitchen taps along with a top of the range filter tap.
The setup will include the VW Amarok which has been updated. The brake system is electric over hydraulic meaning no air tanks and air pump on the vehicle.
I’m sure Sue will be able to have a detailed sheet with more info available shortly.
As For me……
Once this is over I am looking to joining many of our fur children that have passed over the rainbow bridge. I am sure there is a bench that I can sit on and see Tilley, Kipper, Sam, Bailey, Lilly, Polo, and my beloved Oscar again.
Henry has an important job to do and that is to get Susan through all this.
To my wonderful wife, life long companion, navigator, voice of reason, soul mate, I will miss you so much I have not even gone yet and it hurts. I love you so much.
Sue may post up dates, but I am unlikely to write any more. Goodbye dear friends.
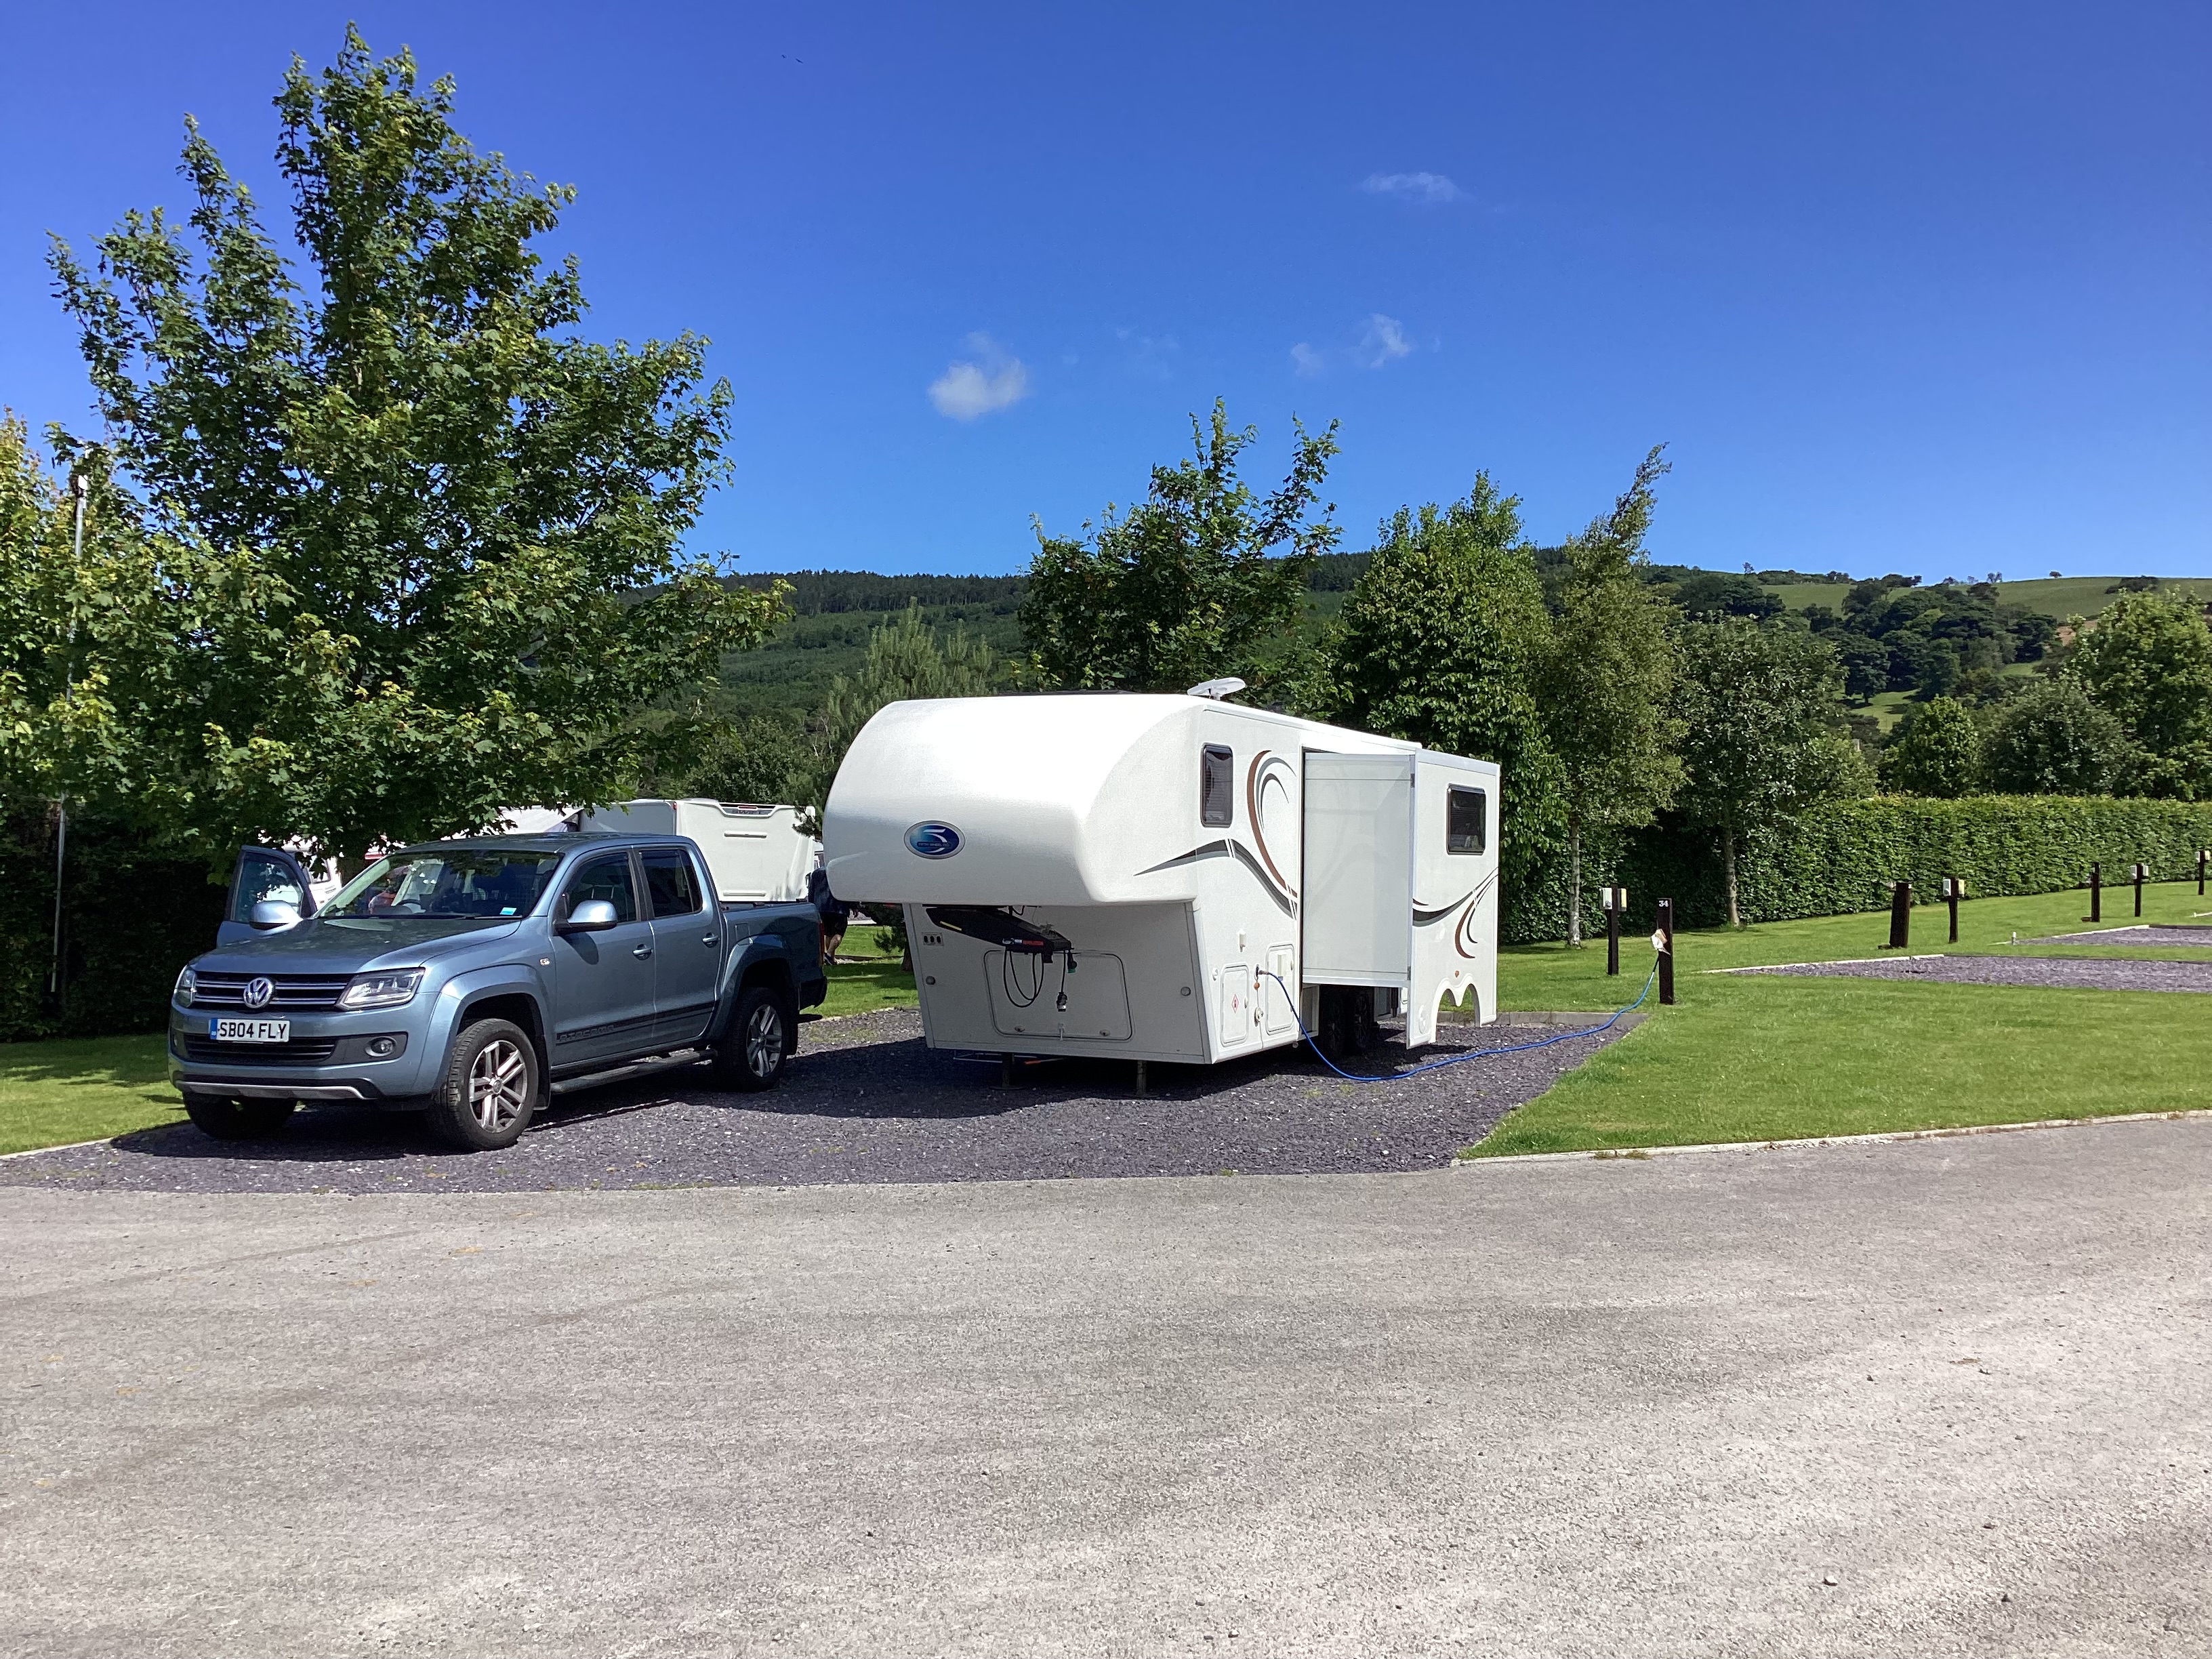
Well not really a tour, only two locations. The first leg was down from Manchester to Glastonbury and a stay at The Old Oaks. We first went there in 2012 and had five or six more visits in the next four years. So it had been quite a while really.
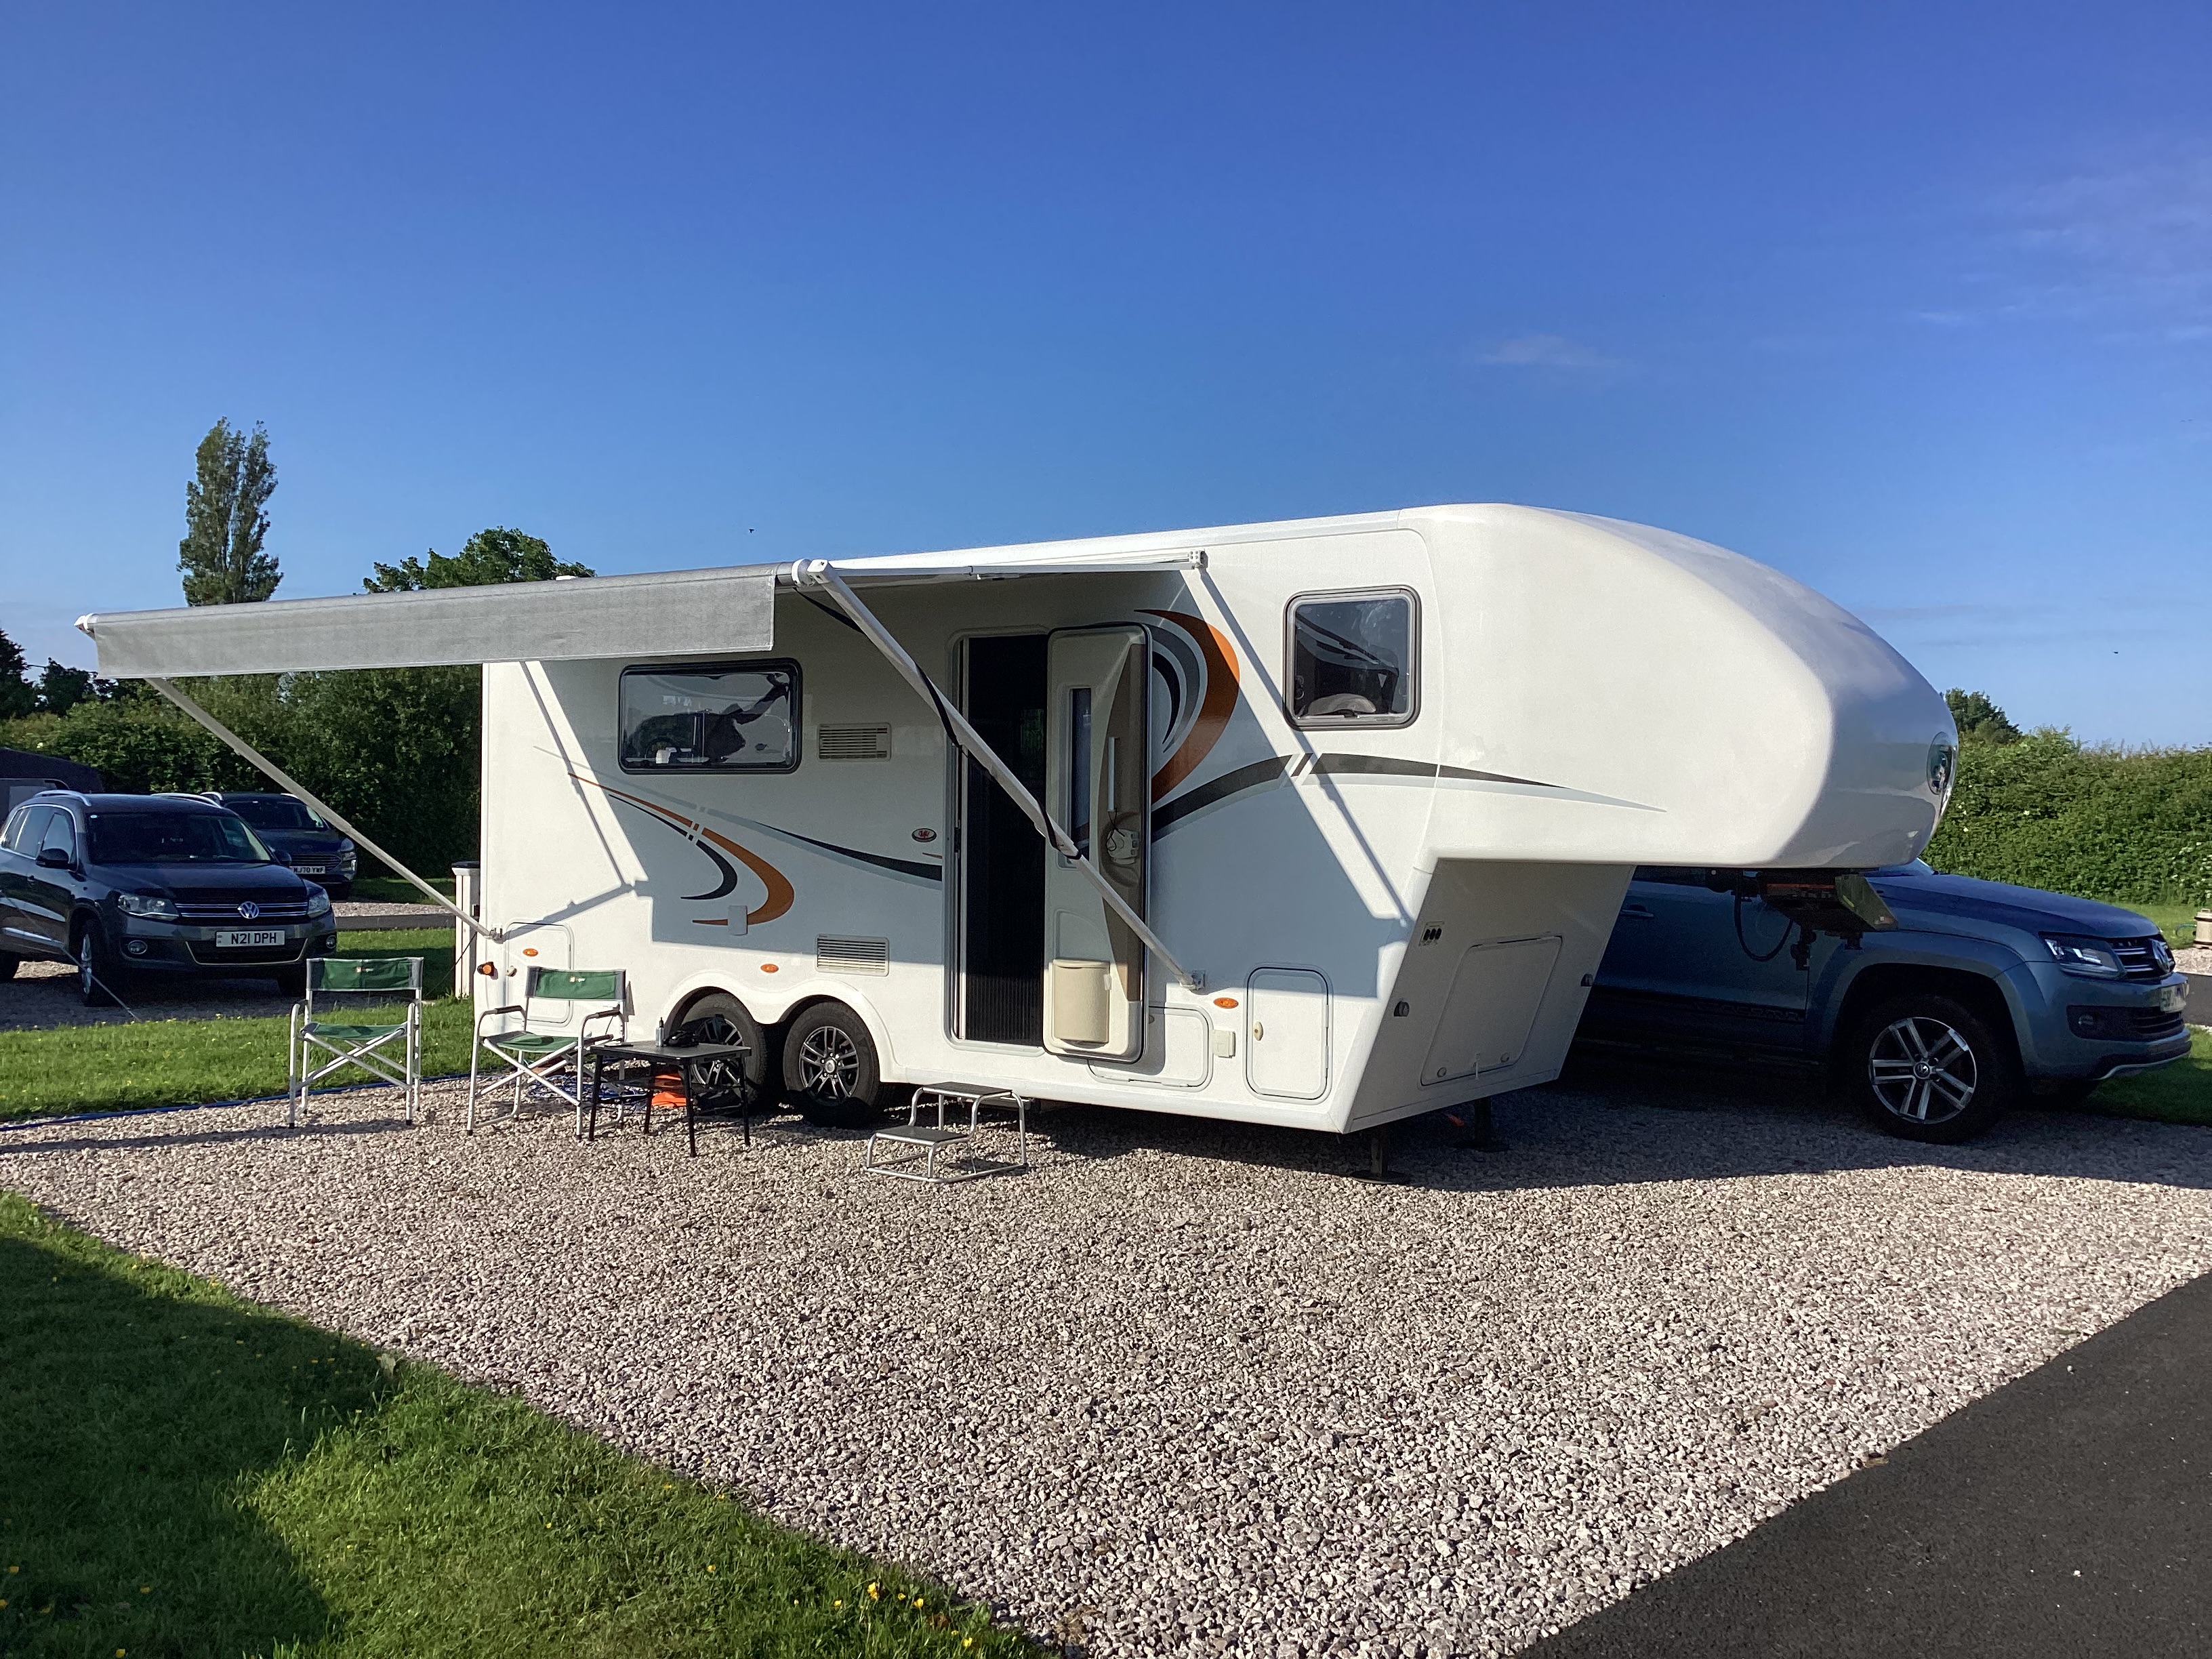
We were located in the Upper Oaks area on a premium pitch which was easily big enough for our 5th Wheel. The site was as pristine as you can get really and I was particualarly interested to see that the lawns were now cut with an electric rechargeable mower working 24 x 7. We kind of got attached to the one trimming the central area and I named him “Earl”. It became a bit mesmerising watching Earl trim the grass and we felt sorry for him when he was out there in the pouring rain working trimming away while everyone else was huddled in their caravan or awning. I really think he needed a cat companion sat on him keeping him company.
While we were there we had a few jobs to do in the caravan. We replaced the bathroom taps, kitchen taps and water filter tap. I’ve still got to install the new drinking water filter and connect the filter tap. We also cleaned the awning rails, which still need a bit of work on them with a tooth brush in the rails. Sue valiantly attacked the locker handles with something called “The Pink Stuff” which was recommended to us by The Caravan Nut…. and fine stuff it is too. It has almost brought the handles up to new condition. Another session and we should almost be there with them.
This is my spot…. find your own doughnut!
The big one was replacing the runners on the shower doors. I’d ordered a set from Amazon and they needed fitting. I never knew that shower doors were going to be so heavy! We removed the bi-fold doors and got the bottom runners replaced then came the task of re-installing the doors… you have to lift the things into the correct position then install the top runners… between the two of us we seemed to make it hard work, but got there in the end. The original runners had cracked as there didn’t seem to be a way of securing the doors while in transit. The method was to secure the doors in an open position… and now knowing the weight of the doors came to the conclusion that this was not going to work. The doors needed to be secured in the closed position so the weight was evenly distributed and the doors were held securely by the frame of the shower. A simple solution was to use a child proof door securing strap. These came with two buttons you secure with 3M VHB pads and one step secures the door in the closed position easily…. even with my weight pushing on it.
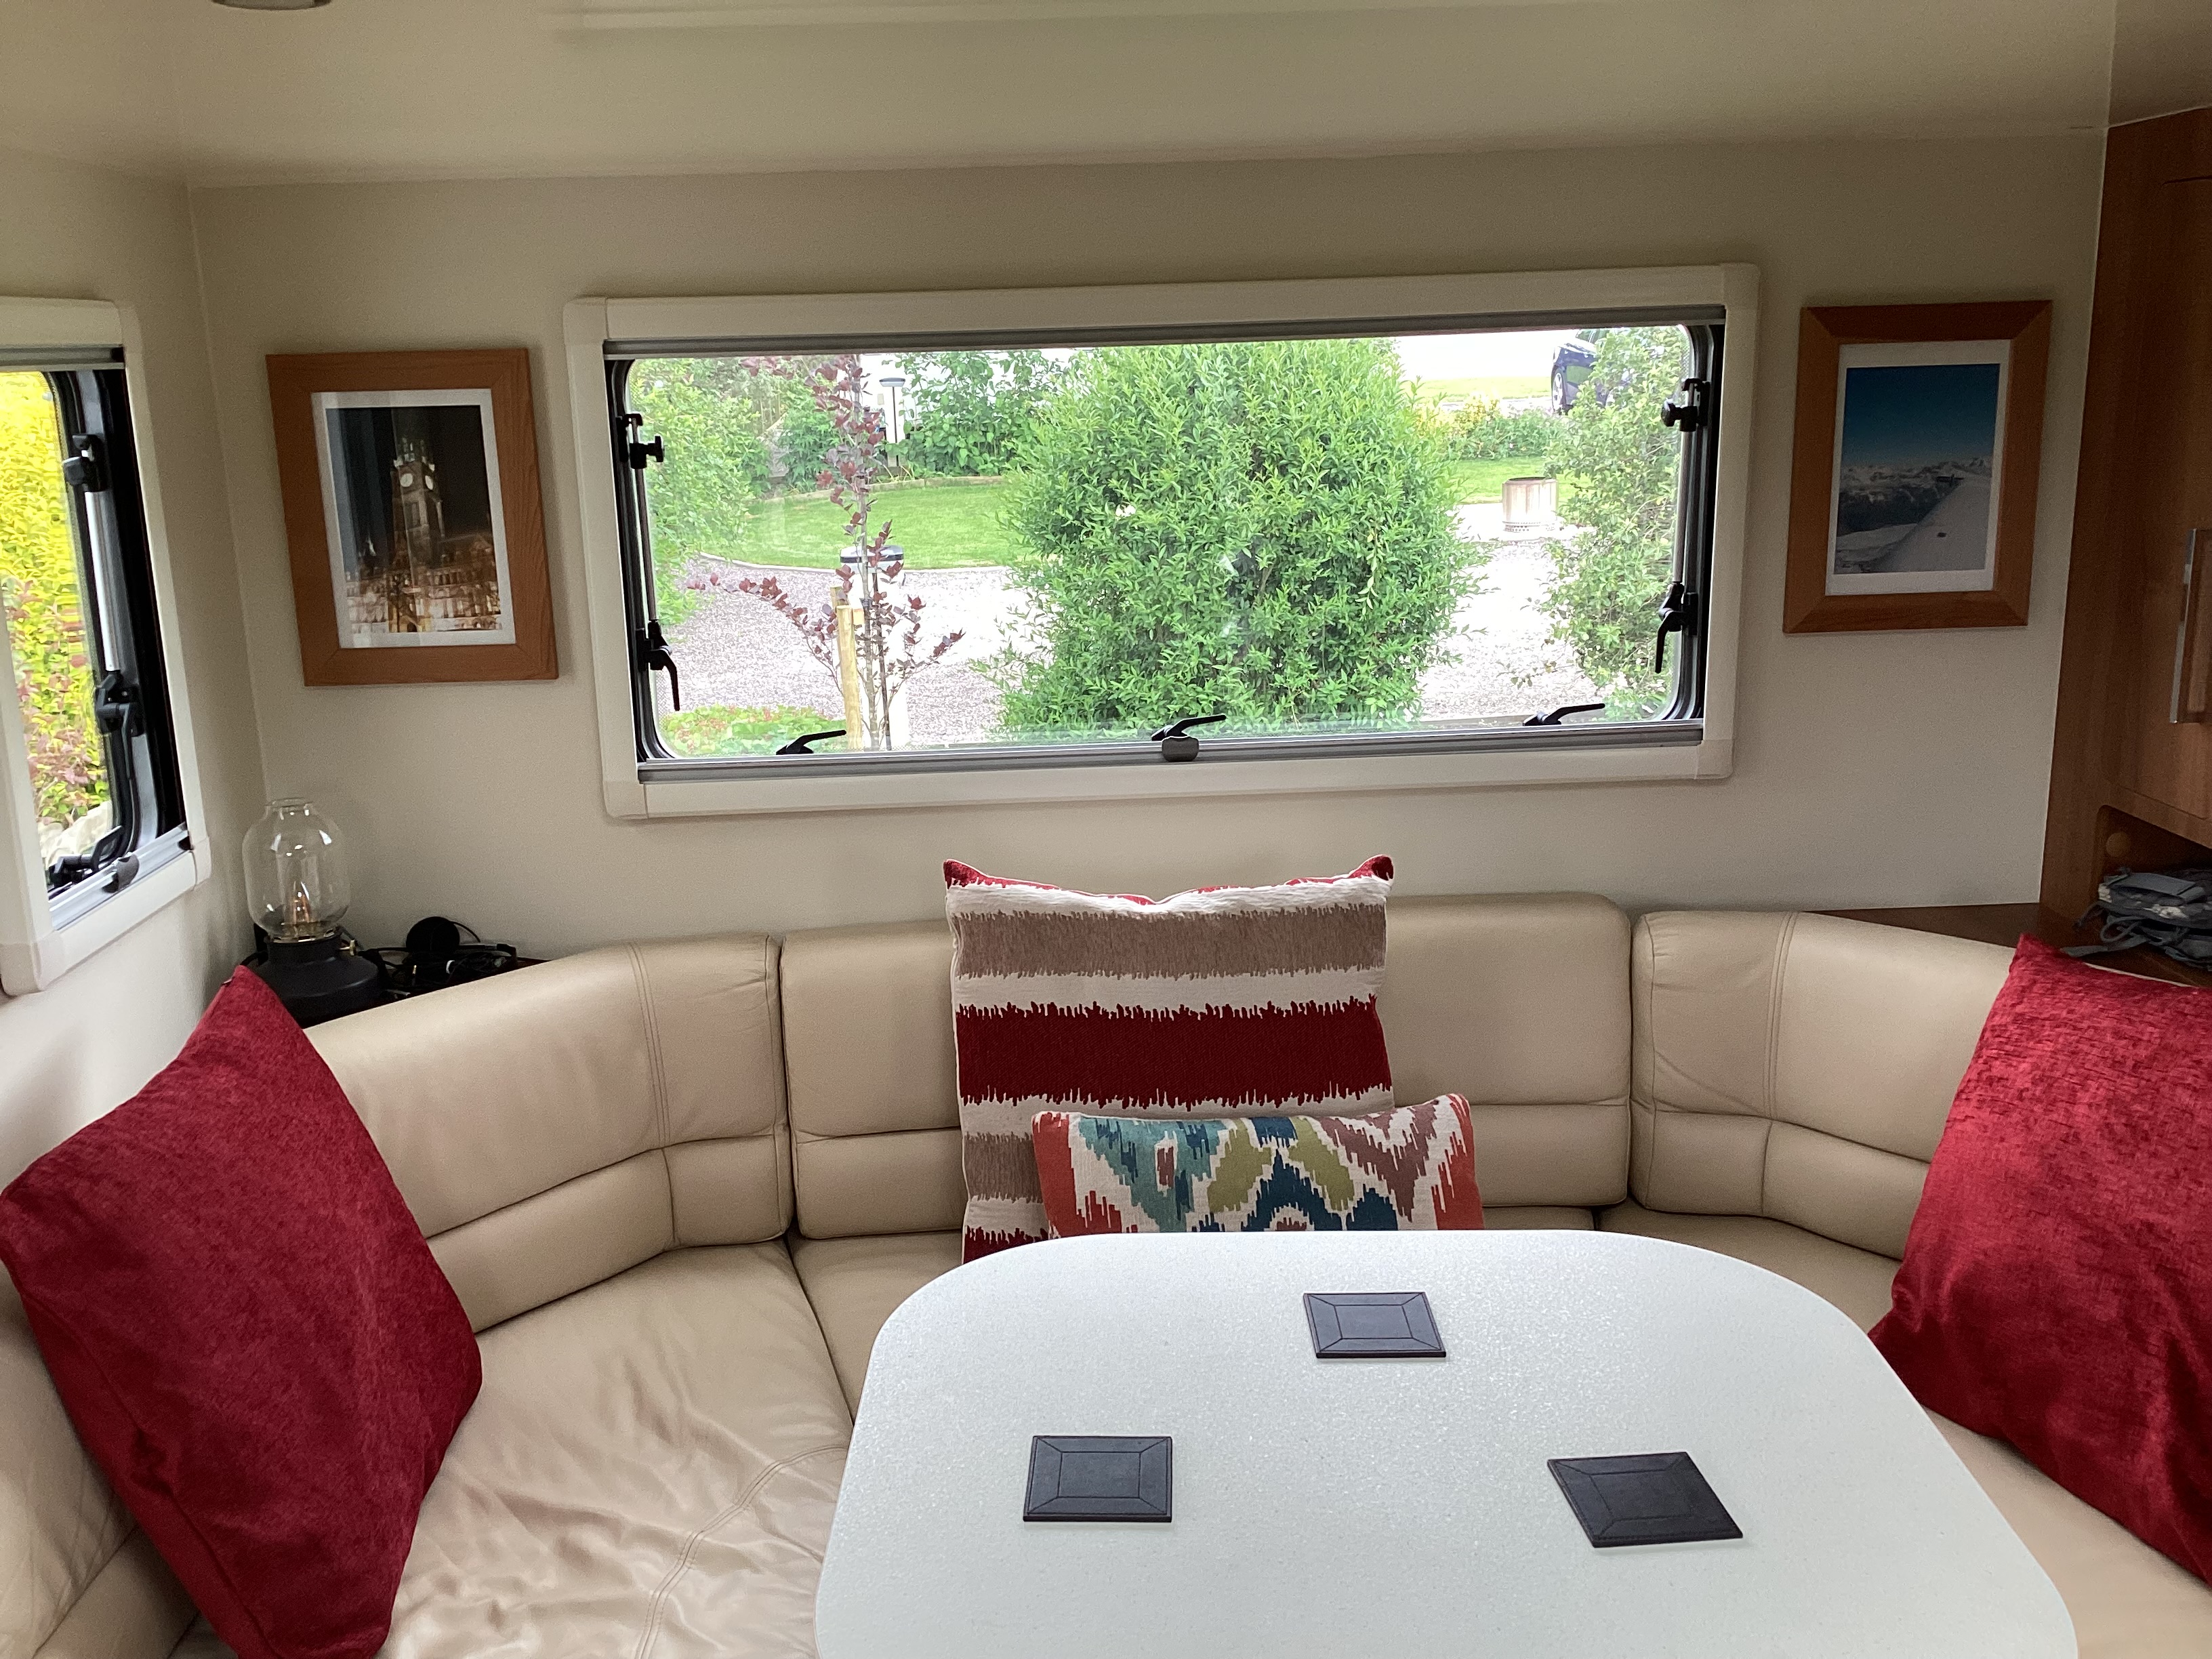
In the mean time we have been making the inside ‘ours’ if you know what I mean. The installation of some pictures and side lights makes it more like home.
The side lights are ones we found at IKEA. I shortened the mains leads to about 8 inches to reduce the amount of spaghetti cabling and used command strips to hold each light firmly in place. Each light has a dimmer and I selected warm tungsten effect LED bulbs to give that cosy feeling when watching TV and the rain hammering down outside.
We also supplemented the coat rail with a hat rack (again using command strips) to house my mahoosive collection of 6 baseball caps. This was finished off with a wall clock almost matching the wall colour with a style that we were looking for. The clock was a B & M special I think. Again held up with command strips. So far we have not had anything fall off using these strips.
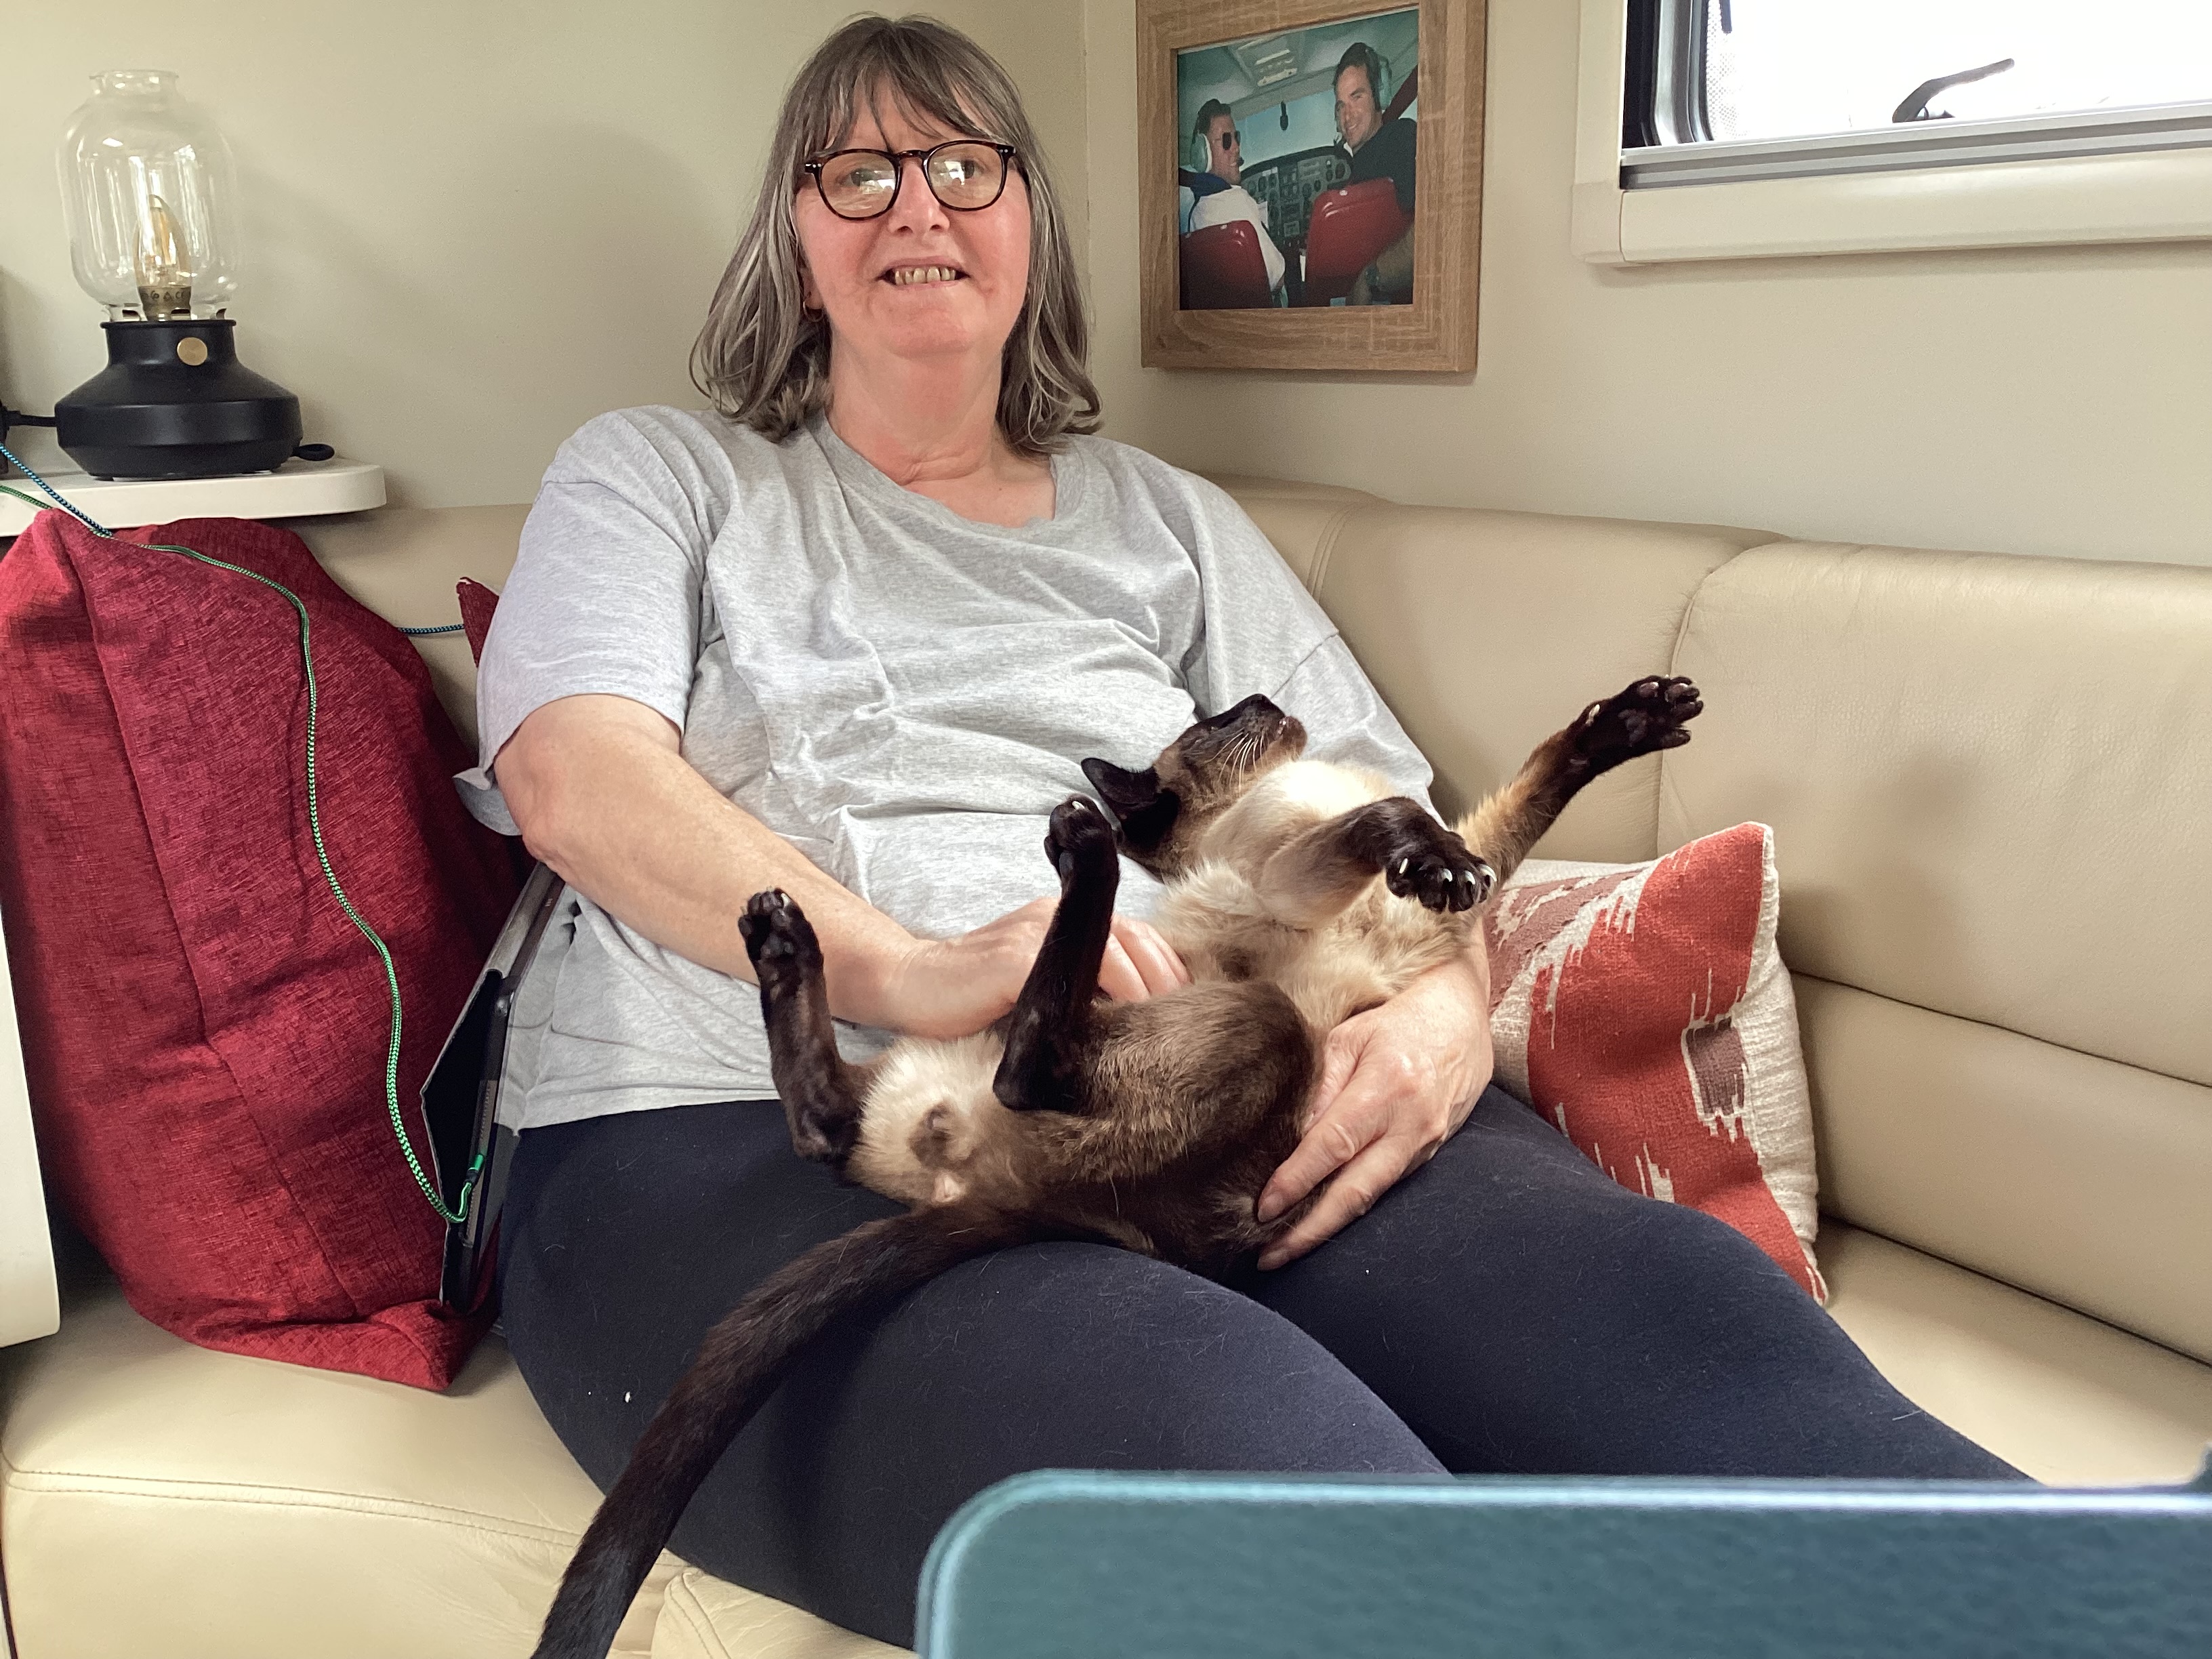
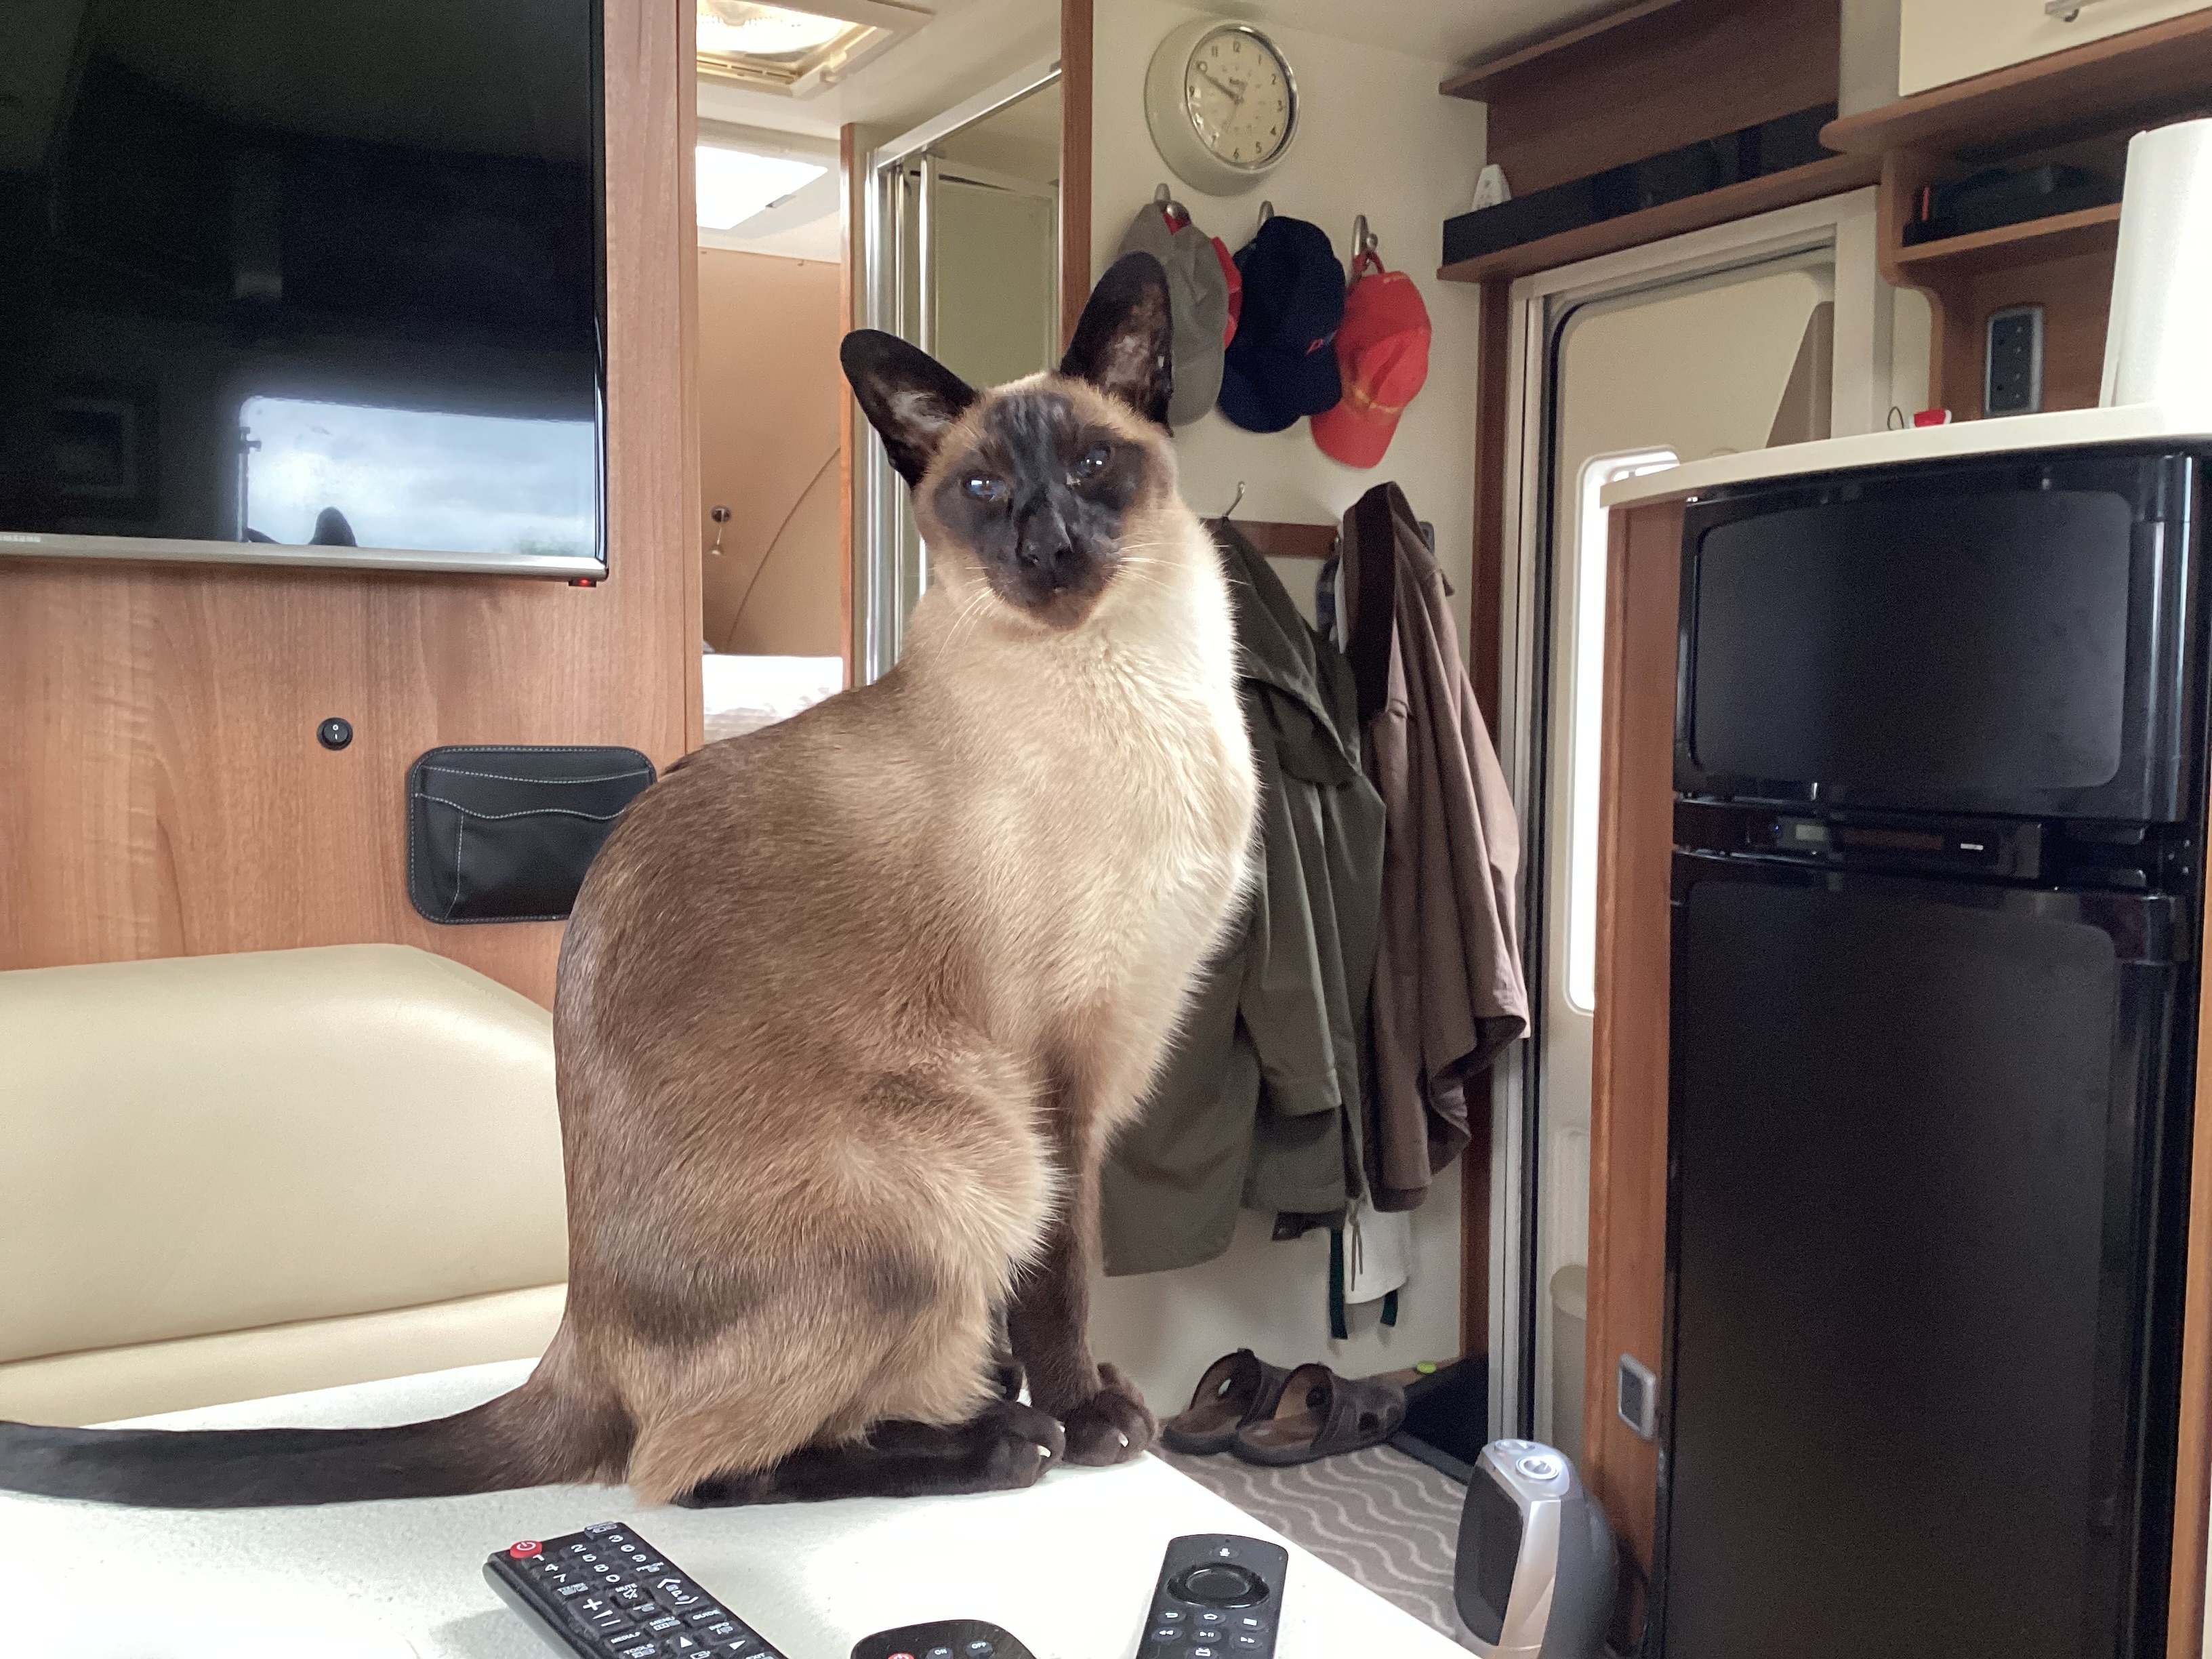
Henry Fluffybutt III enjoying a belly rub
Sitting back enjoying the few days work it took…. and a big belly rub for Henry for putting up with all the too and fro while we did the work. You can see one of the side lamps next to Sue… turned up to full, this provide an excellent reading light as well and generating mood lighting at a lower level at night. All the sockets I installed have twin USB charging ports and I installed a 4 port charging station near the TV… just in case!
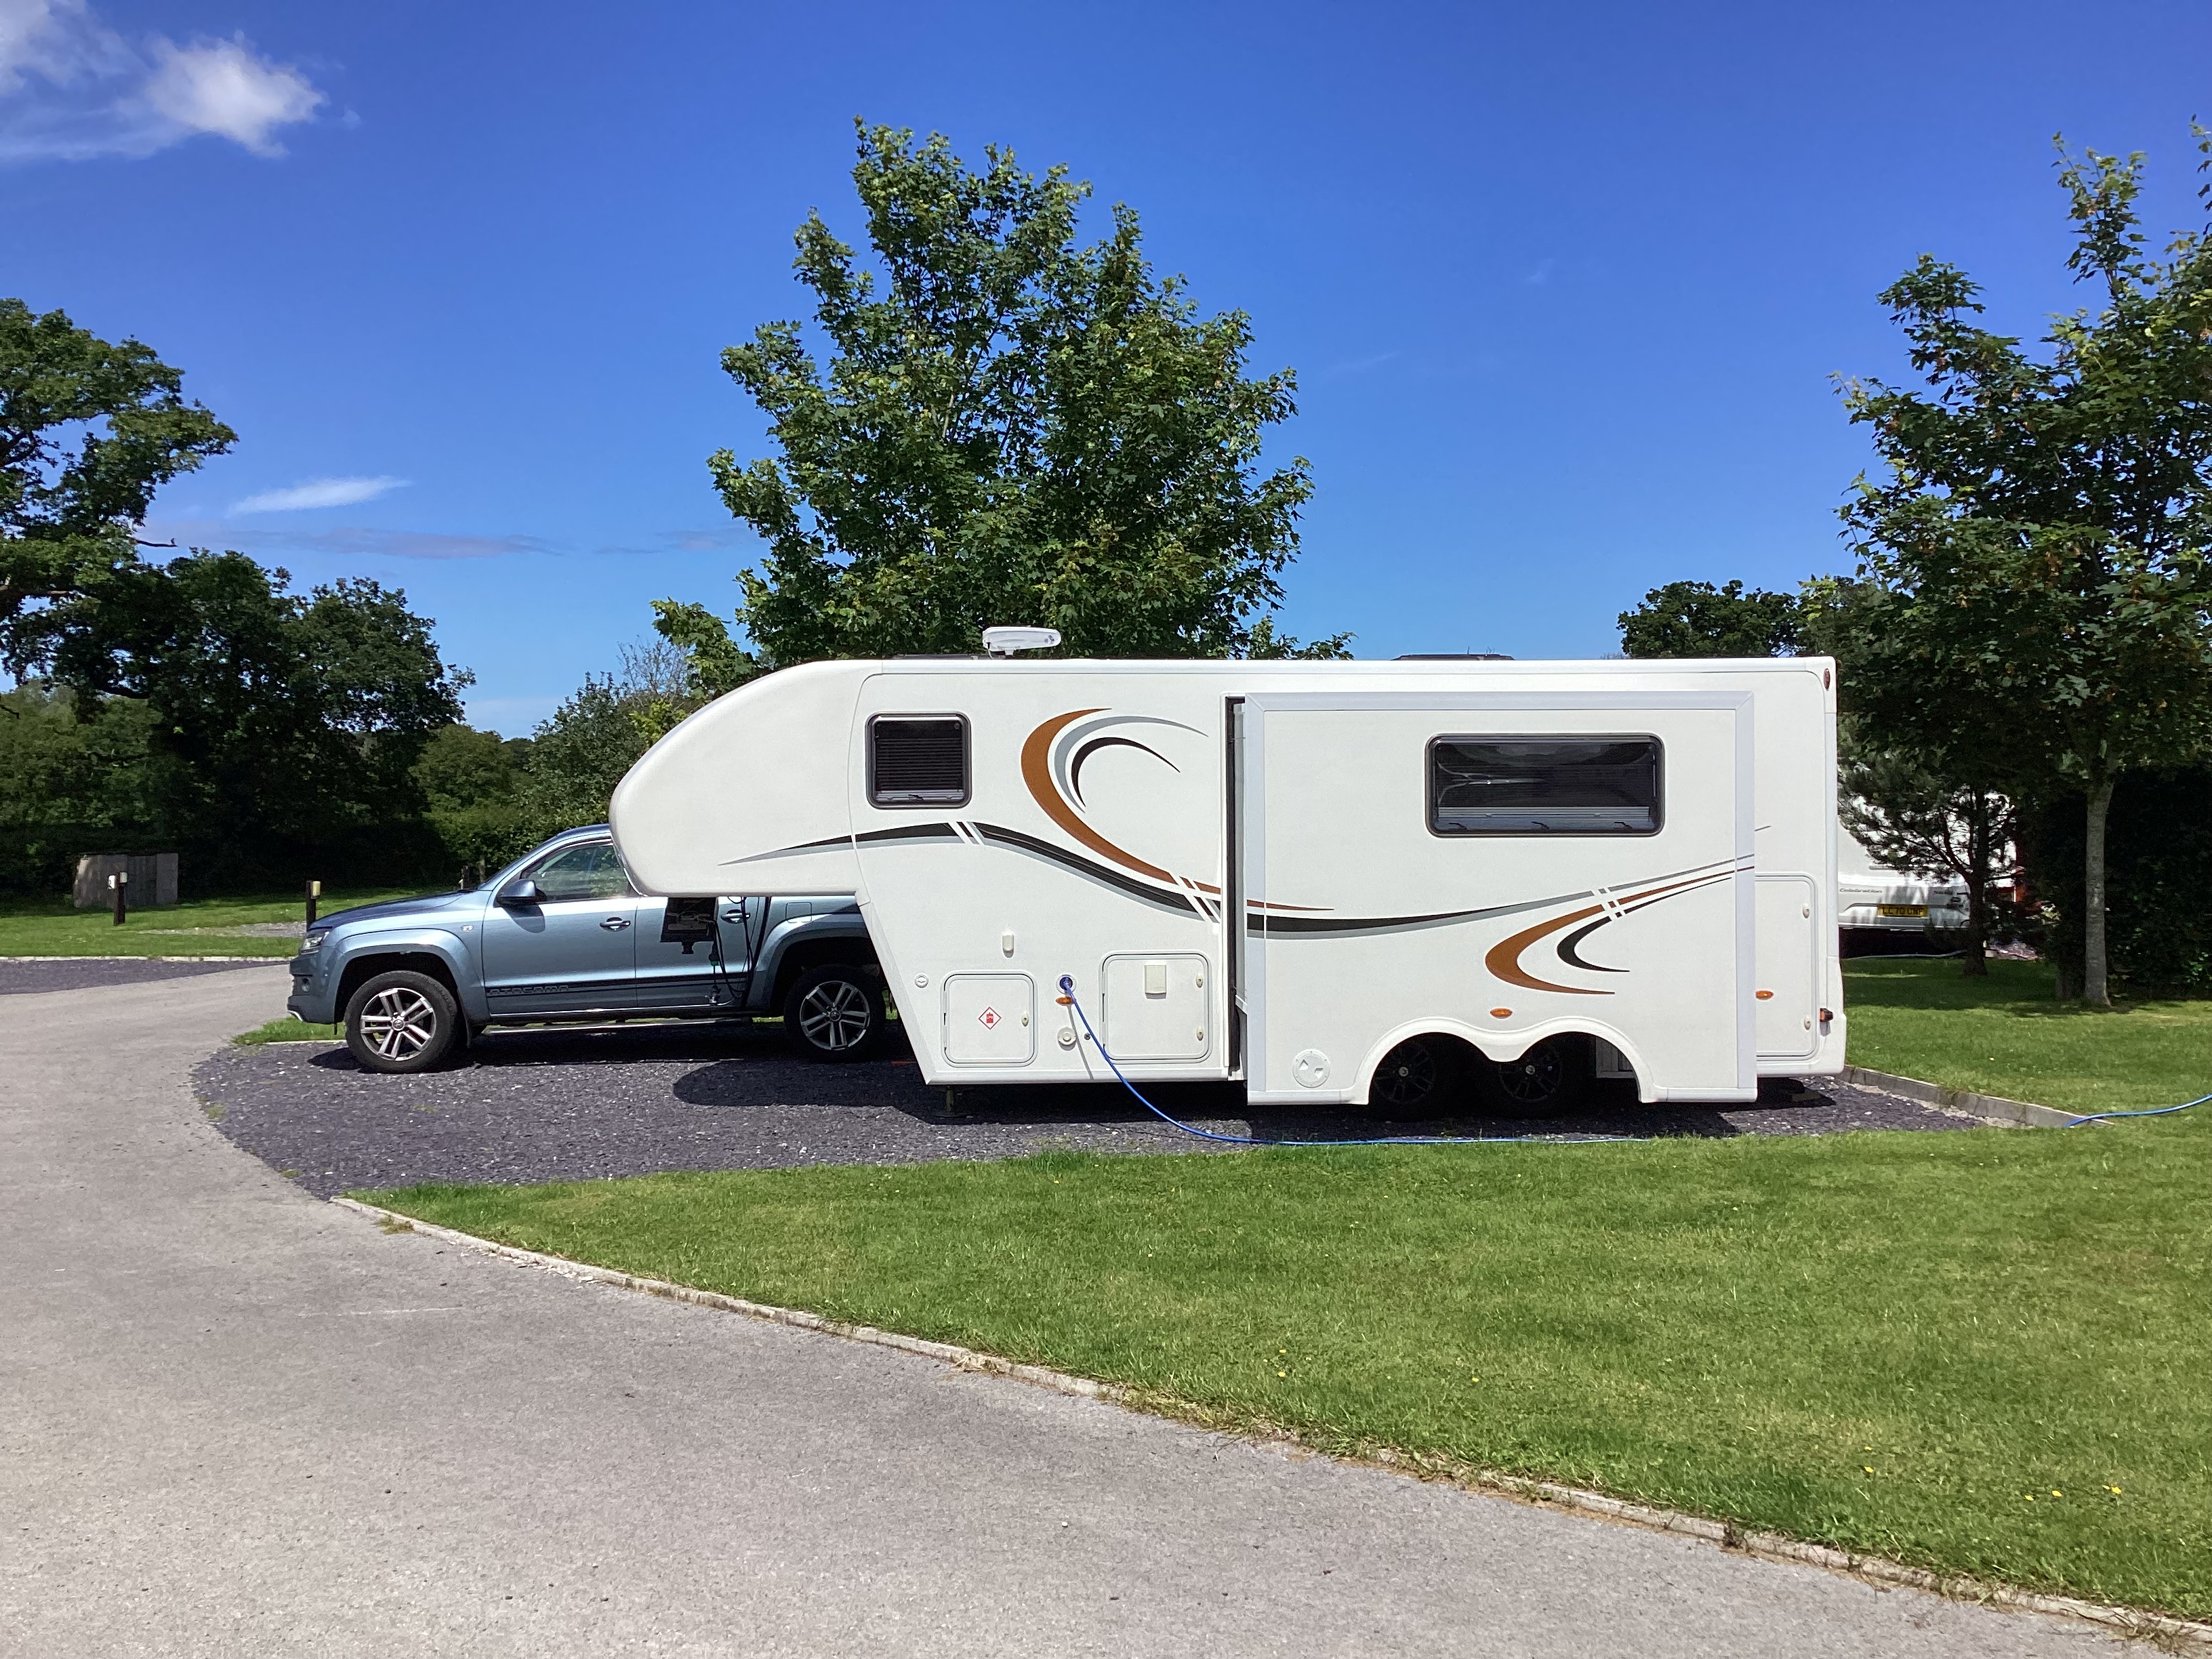
Stop No. 2…
From Glastonbury we headed back north, this time to Rhuallt in North Wales. Home of The 5th Wheel Company. When we bought our 5th Wheel they replaced the water heater/warm air boiler and the Thetford fridge. We had been developing a problem with the fridge door….. to the point when we closed the door you had to give it a gentle kick at the bottom to make sure the door closed properly. I sent some photos of the corners of the door as it looked as though it was racking and the corner joints were pulling apart. Simon at the 5th Wheel Company sent the photos off to Thetford and they agreed to replace the door without any hesitation. So we had scheduled a day to visit to get the door replaced… as we also had a few days to spare we turned it into a three day stopover. I do have to say the service from everyone at The 5th Wheel Company always exceeds expectations.
On Saturday, the trip from Glastonbury to North Wales was sunshine one minute and torrential can’t see a thing in front OMG it cannot rain any heavier nightmare. It didn’t help that a large proportion of the drivers on the motorway required driving lessons… the well known makes were doing their own thing as usual.
All set up at Rhuallt
As we passed Chester it was nothing but clear blue sky, a welcome change from the grey on and off again drizzle at Glastonbury.
The sunshine also gave us a chance to go over the 5th Wheel with an combined exterior cleaner and silicon polish… which really only took us a couple of hours. A few weeks ago we did a deep clean on the exterior that took us nearly two days. Mind you it was down to scrubbing all the locker frames with a tooth brush and most of the running rails. We gave it the first silicone polish back then and that causes the water to bead off really easy and also helps prevent black streaks which are caused by dirty water running off the roof. Yep, we still have to tackle the roof…. it’s a bit of a large task though.
Homeward Bound…
We left Rhuallt a bit later than we expected and headed home. The following day I had an appointment at The Christie for bloods and ti see my oncologist. Heading out of North Wales we decided to call into Chester Services… Flippin huge mistake. Chester Services has to be one of the worst services in the UK. Considering three days before we called into Gloucester Services on the M5 which is probably the best services in the whole of the UK…. maybe Tebay is close but as they are both owned by the same group… I’ll say Gloucester tops the list.
We entered Chester Services and missed the small “Caravans” sign and ended up back on the roundabout for a second attempt (things you do for a Costa Coffee) taking a bit slower and being a bit more vigilant we noticed the red – white text, the sign that said ‘HGV Caravans” So we followed it. It took us straight to the lorry park. I pulled in behind a refrigerated trailer and turned off the engine. We sat there for a minute or two trying to see how the heck you get to the main building as most of the perimeter was thick bushes you could not see through or over and no signs. I opened the door… and shut it again.It wasn’t a particularly warm day but the smell of emptied stale urine bottles and dumped poo bags was overpowering. The only thing that would cure this would be the purchase of a good jet steam cleaner and steam cleaning all the concrete and surrounding areas.
I did have a look on google earth to see if I had missed the caravan parking area… but alas there isn’t one. The best bet I think would be to pull into the coach parking area as this did not seem to have any coaches…. why would it with the smell wafting over from the lorry park.
Photo: Google Maps
I could not even see a way to squeeze in the main carpark…. the lanes between rows of parked cars was ridiculously tight. 4 minutes after we pulled in and turned the engine off, I was reversing out of the lorry parking lane and we were back on our way. Even the pull in behind the Drive Through Costa Coffee was too short… it had a mini in it and was full. We could not even use the Costa Drive through… although the building didn’t have an overhang…. it did have a steel height barrier. Another thing I noticed were the bushes at every road junction. They all needed a good trim as the sight lines were very restricted… at one point I had to get the Amarok half way across the road just to see if there was any traffic approaching the junction from the right. The shrubbery has encroached to the road edges since the satellite photo above was taken.
I understand that the Tebay group has gained planning permission to build a new service station serving the M62 / M56 at Tatton… which is now it would seem being held up by a central government planning enquiry. Why am I not supprised. https://www.tattonservices.com
So, we are now back at home, I had my bloods and checkup yesterday and all going well. I have a CT scan next week so we will know more after the results of that. It’s back to planning our next adventure hopefully another two or three stopper. Sue has been binge watching “Vera” on TV…. so I can feel a trip to the north east on the cards.
Tricky one… I don’t have a tool box anymore. I recently started mooching around the internet for a smaller tool box… or rather a tool bag. I used to use up until a few months ago a Stanley Tool Bag. It was lighter than a tool box, I could get more in it… and I could loose more in it too. I had tools at the bottom of that bag I thought I’d lost years ago.
The price of some of the ABS tool boxes, even the small ones took me back a bit. Which prompted the search for alternatives.
As most of my tinkering when out and about seems to be based on electrical, I ditched some of the other stuff…. well really returned a lot back to my workshop. That left me with a selection of tools that I wanted to take. In the workshop most of my tools are Wera, Snap-On, Klein, Knipex, Wiha and Channellock. Not the cheapest brands, but as a lot of my time was spent tinkering with aircraft back in the day, then you soon realise why some tools command a premium price. I still wince at the cost of a set of stainless steel wire wrapping tools for securing aircraft fixings.
So sorting out my ‘portable’ tools I tend to use semi-named brands. Mac do a half decent range of screwdrivers and a small plier and cutter selection. Cheap enough from B & Q (Home Depot) not to have nightmares when finishing something making sure you have picked up all your tools.
The next thing I needed was a bag to store them in. I had a specific size in mind to allow them to fit in one of the lockers of the 5th Wheel… this was to become my “mini- workshop” locker that also housed a box of specific spares for the 5th Wheel.
I do have a separate little bag containing tools for the e-bikes that is small enough to drop into one of the bike bags, but that is a bit specific to the MiRider bikes.
Buckets, Bags, Boxes…
I started looking at tool bags, One company bought my eye in the USA… they made tool bags and tool rolls out of old canvas fire hoses. I soon stopped looking when I saw the price… for what they were asking I wanted the fire engine the hose came from as well.
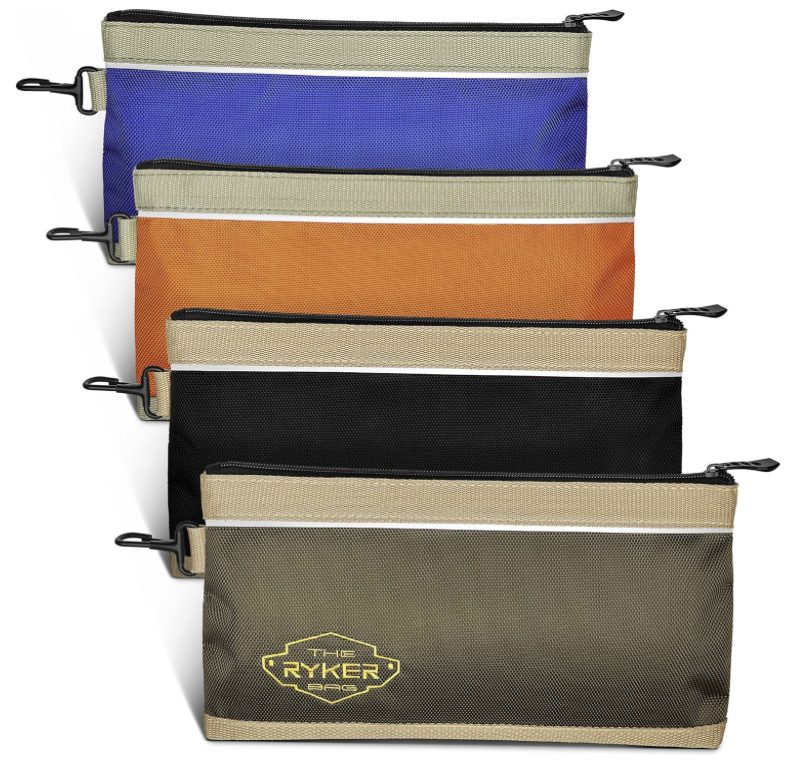
I spotted at the bottom of the Amazon page a company called Ryker. They seemed to offer a bag that was just at the right size and they also had tool rolls and tool pouches. I procrastinated for a few days trawling the web for something that might be better… In the end I didn’t find anything for the same price. Not the cheapest I found but had lots of good reviews.
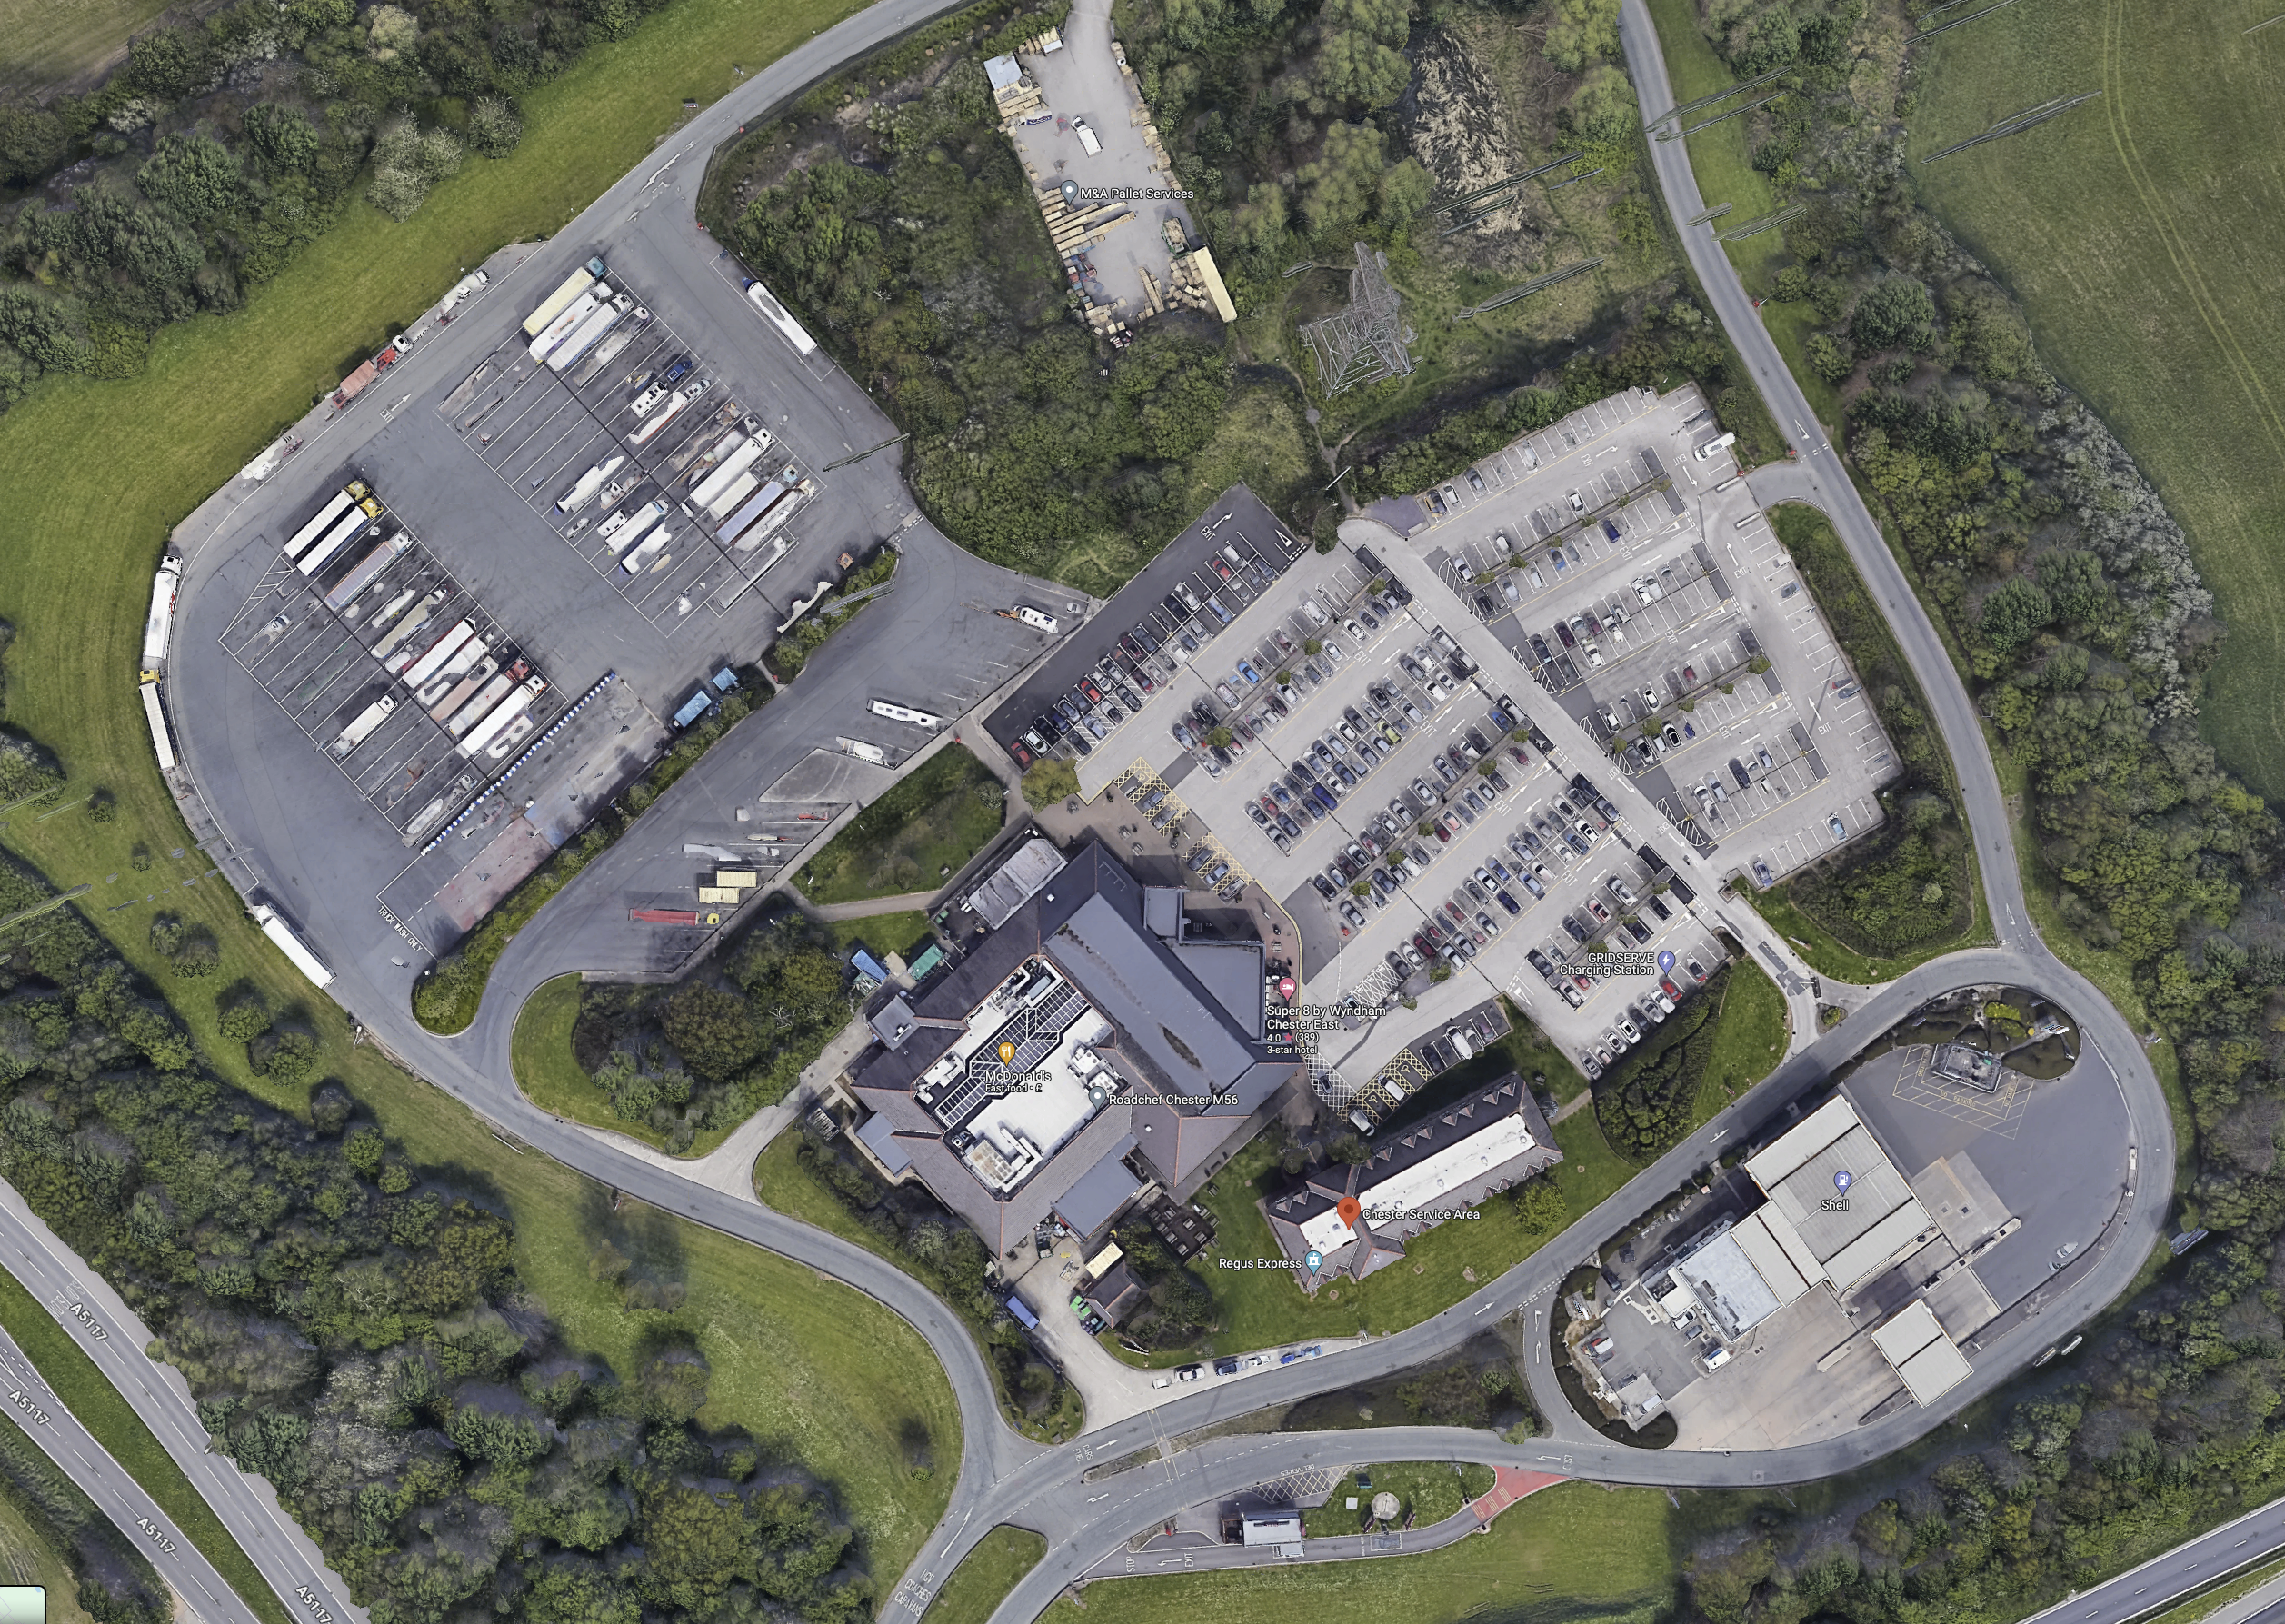
So my portable tool collection is now housed in a small tool bag, small tool roll and two tool zip bags. It all fits in the storage locker on the 5th Wheel or in the tool compartment of the Amarok. It’s all light enough for me to carry it in one hand as well.
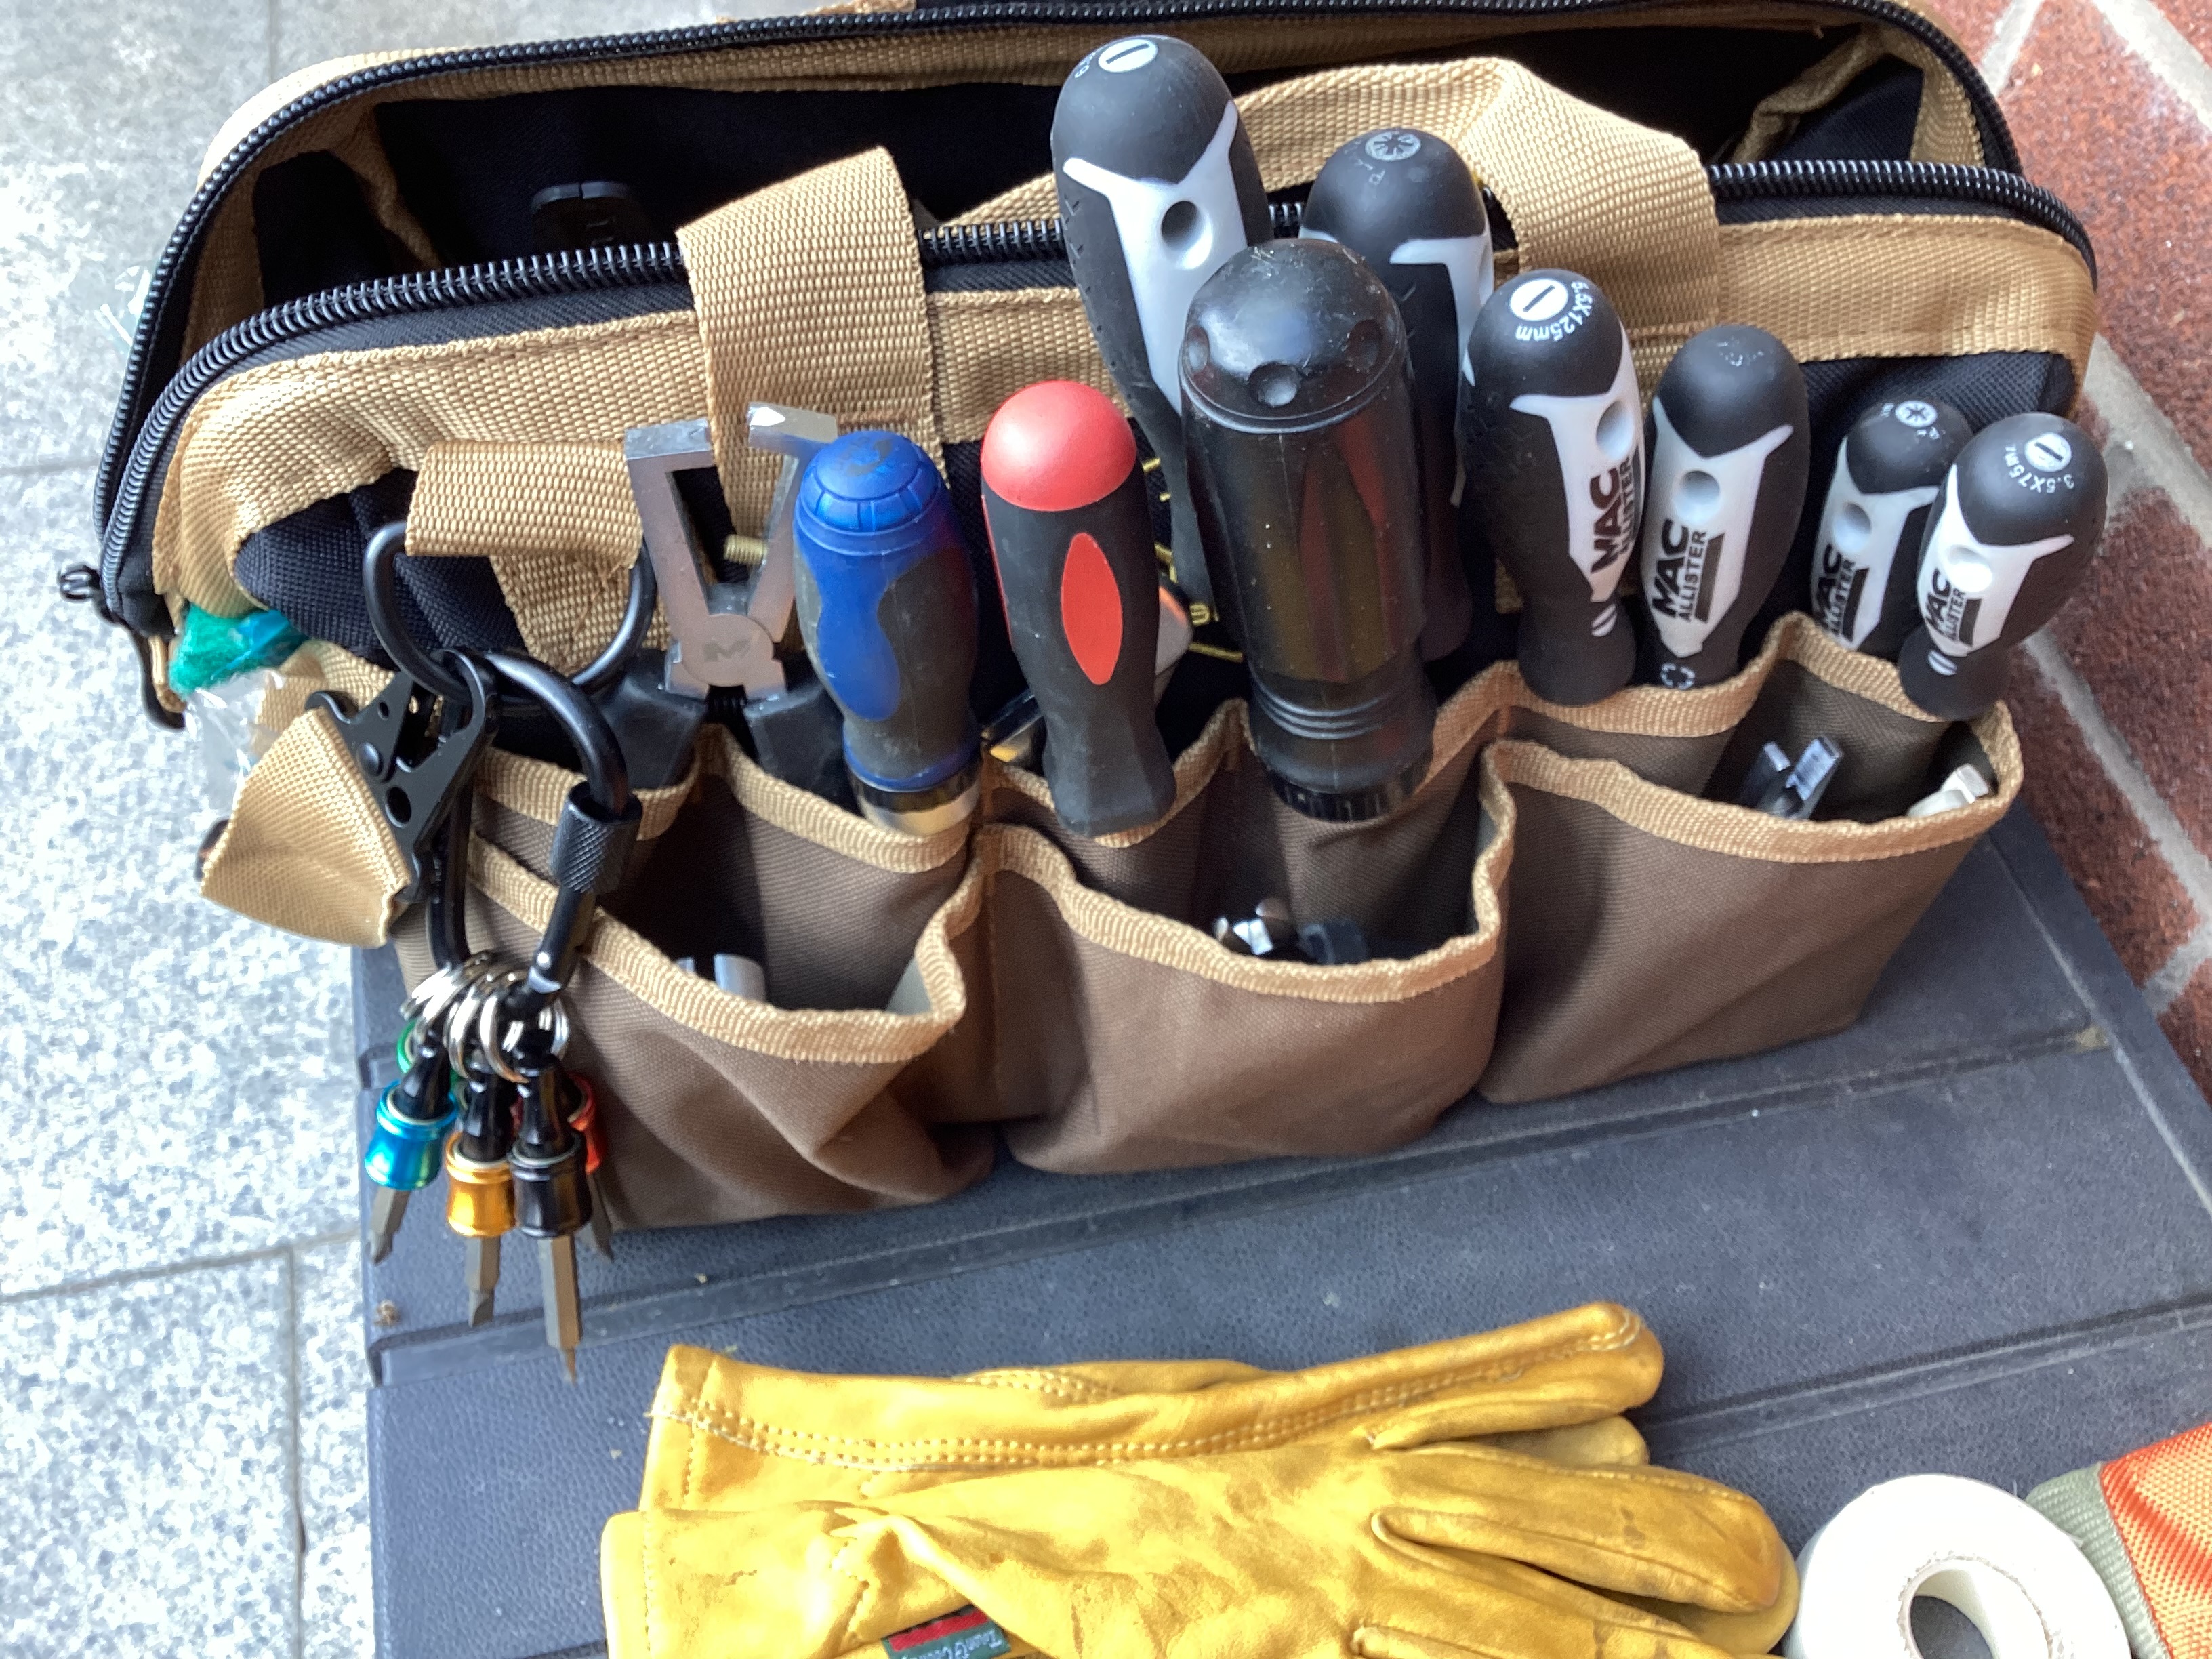
Take a Closer Look….
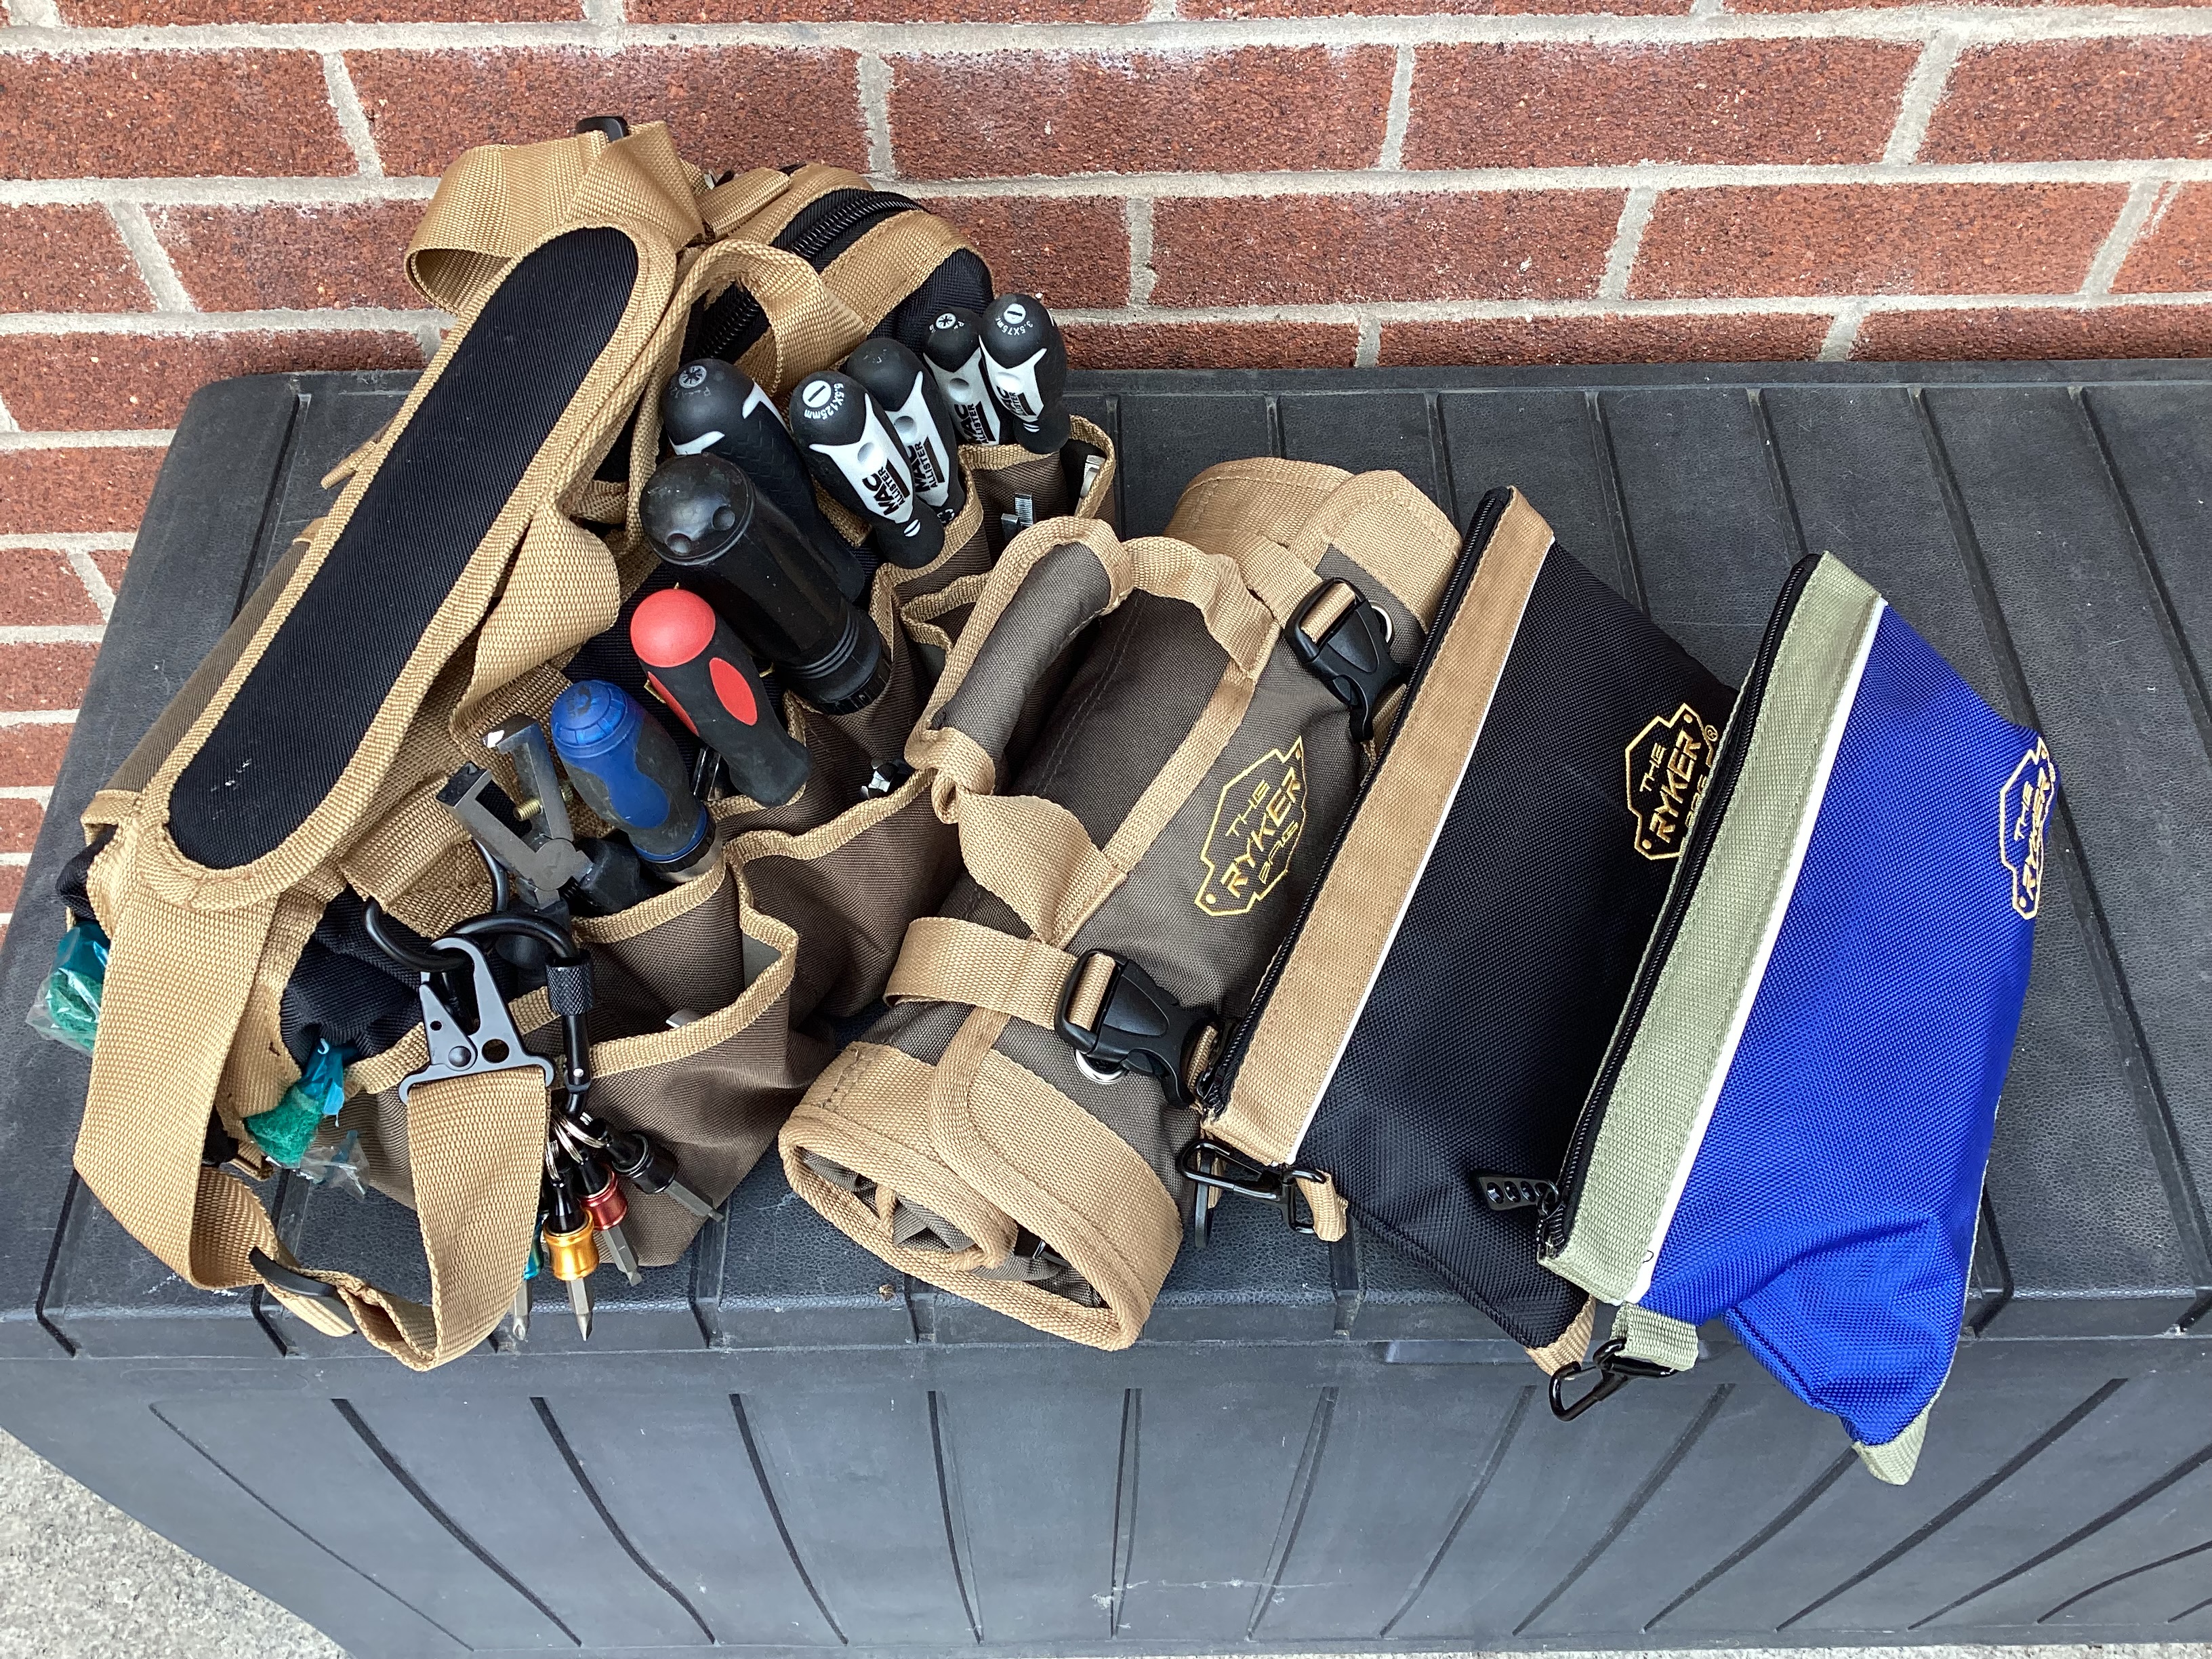
Yep crimp tools are the main thing in my bag… and a couple of types of wire strippers for different cable structures. For automotive use everything should be crimped, never soldered and heat shrunk. I’m still looking for a small portable heat gun (not a gas powered flame type) that can run on rechargeable or 12 volts. I know they are out there somewhere!
A selection of common screwdrivers along with a torque screwdriver so that terminal screws can be tightened to the required torque and not overdone. (If you have any dealings with Victron equipment, you will know they spec a torque for every connector!)
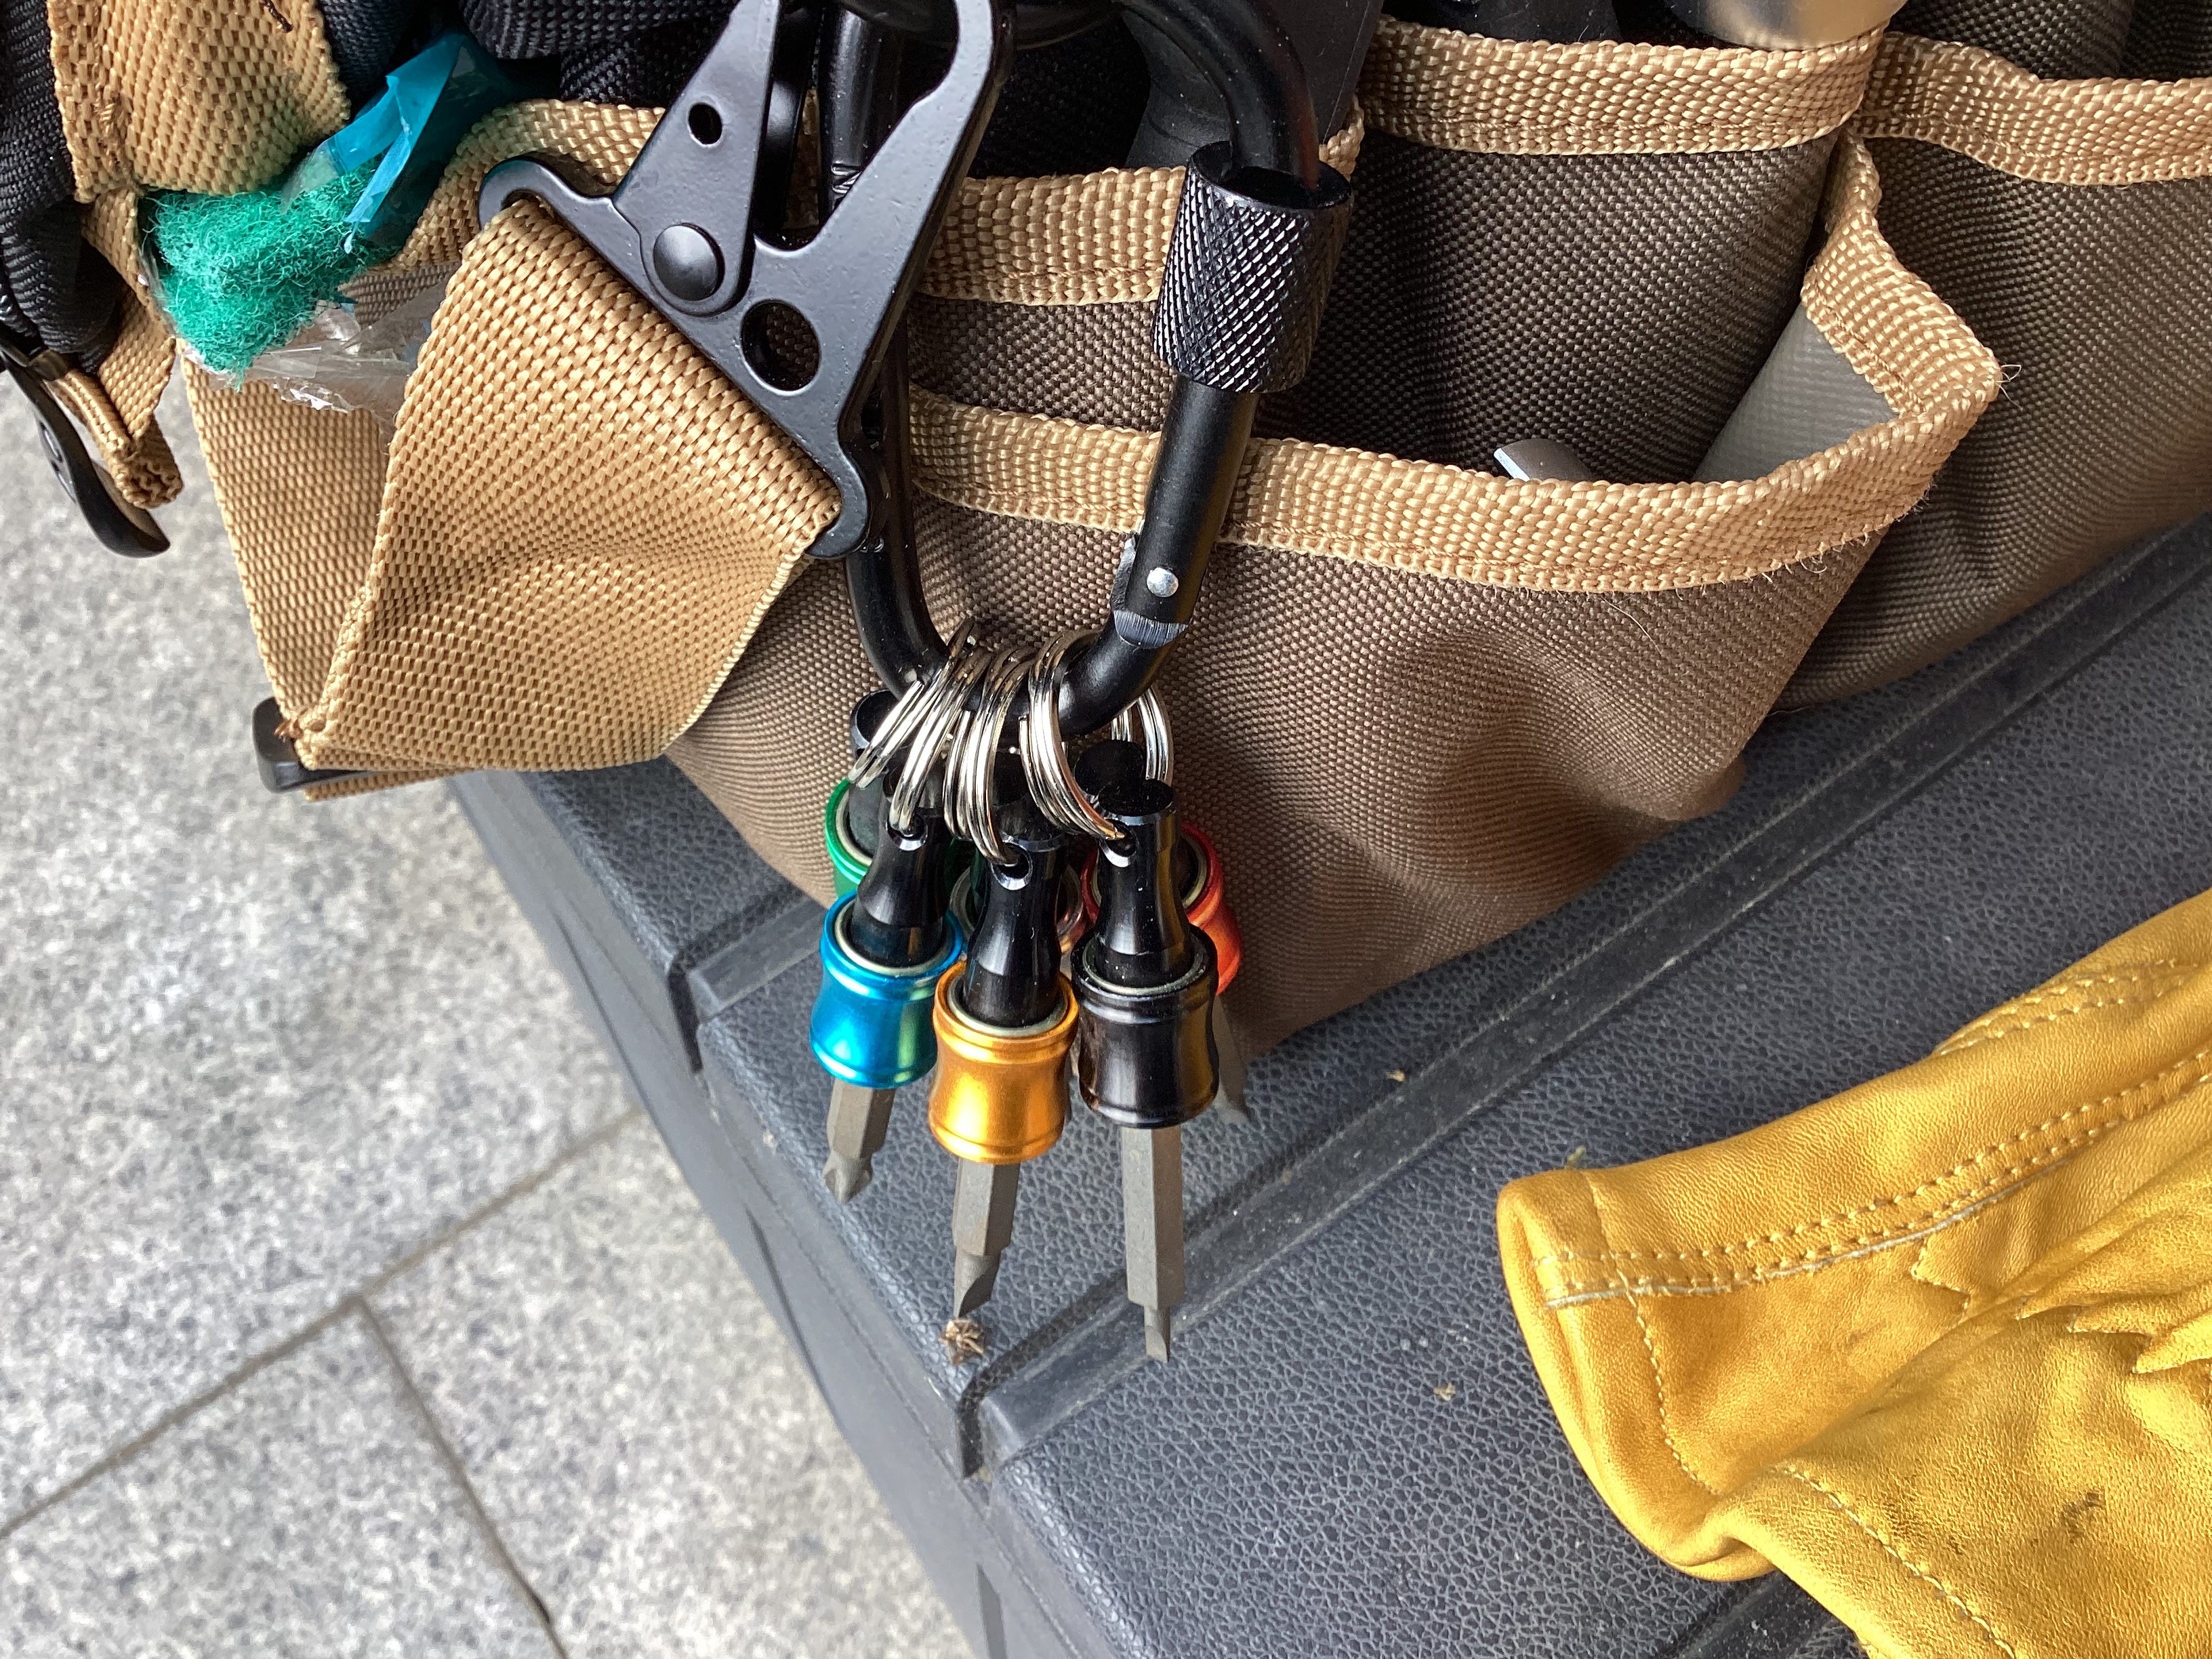
Above: A neat carabina clip containing 7 holders that allow you to easily store the most used hex bits. You can pop them out single hand and return the bit easily after using it. Saves routing round for the correct bit.
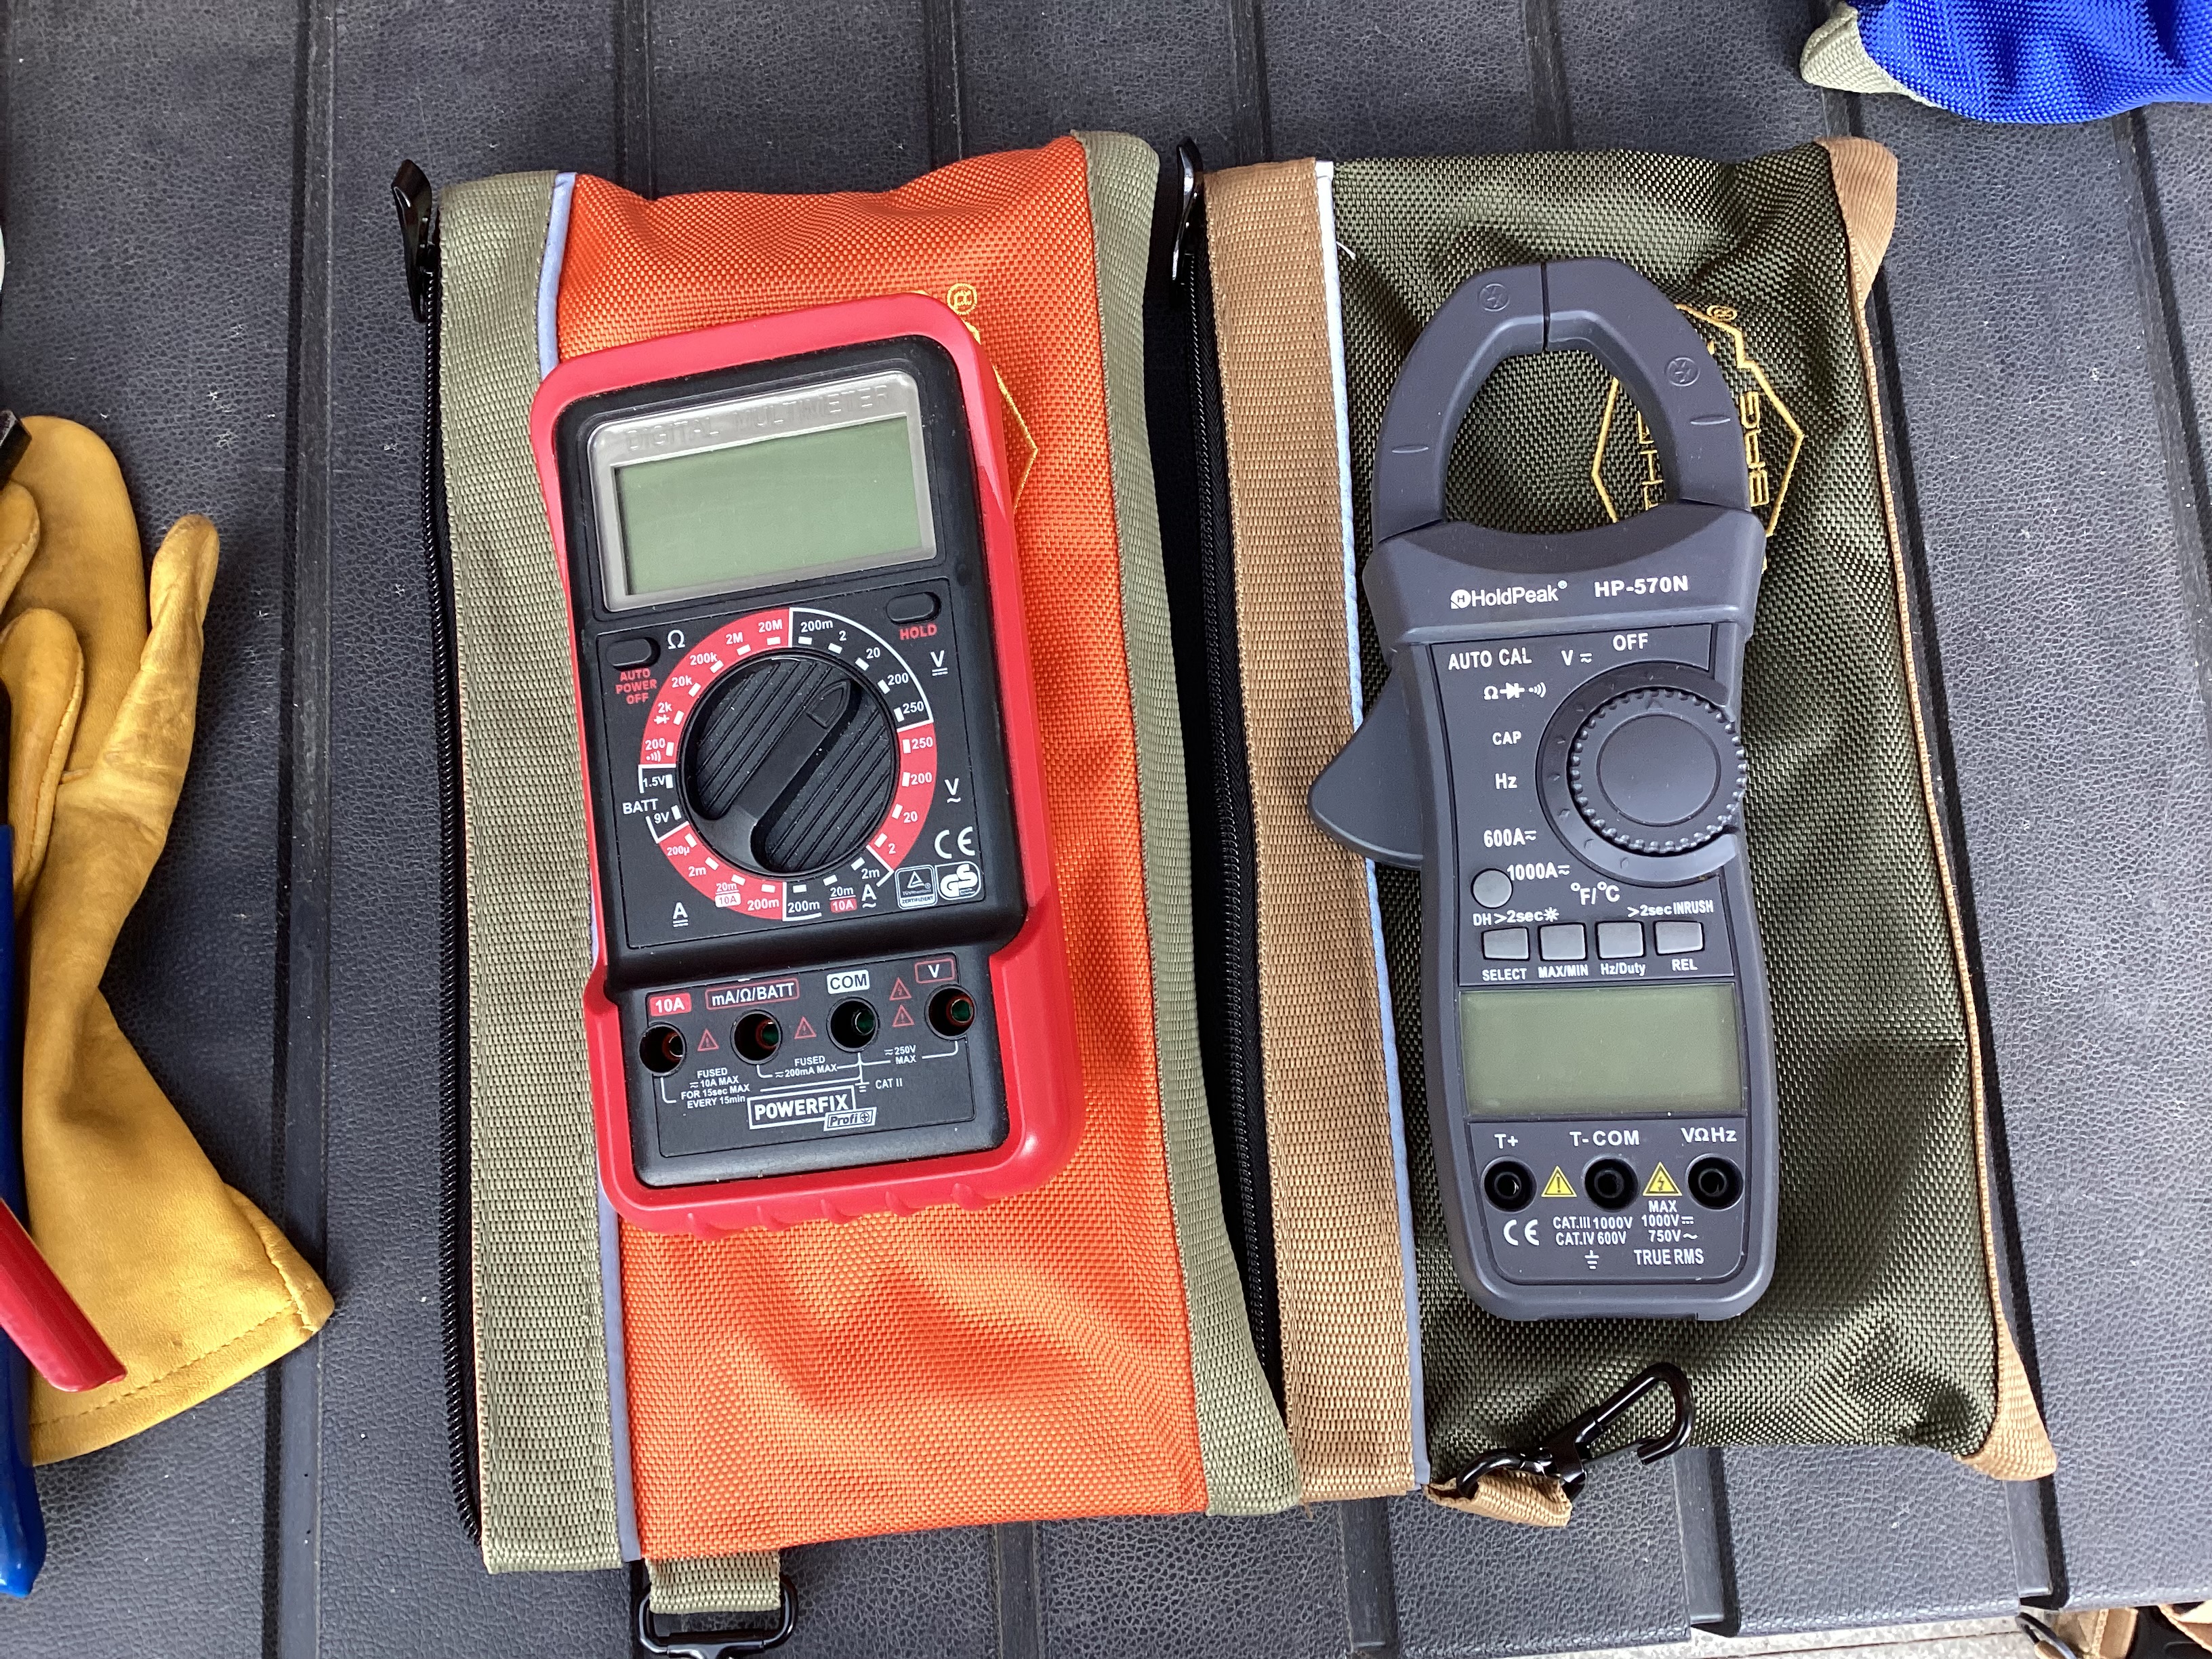
I carry two multimeters, now in their own cases inside the bag. One is a standard fairly cheap all round meter (left) and the other an AC /DC clamp meter that also can double as a general multimeter. Sometime having just one won’t cut it when fault finding. I’m undecided if I should switch out my general multimeter for one of my oscilloscope meters… so I can see CANBUS signals when fault finding. Same size so no storage issues.
If you think I missed out on hex bits…. well there is a full set in one of the tool bag pockets.
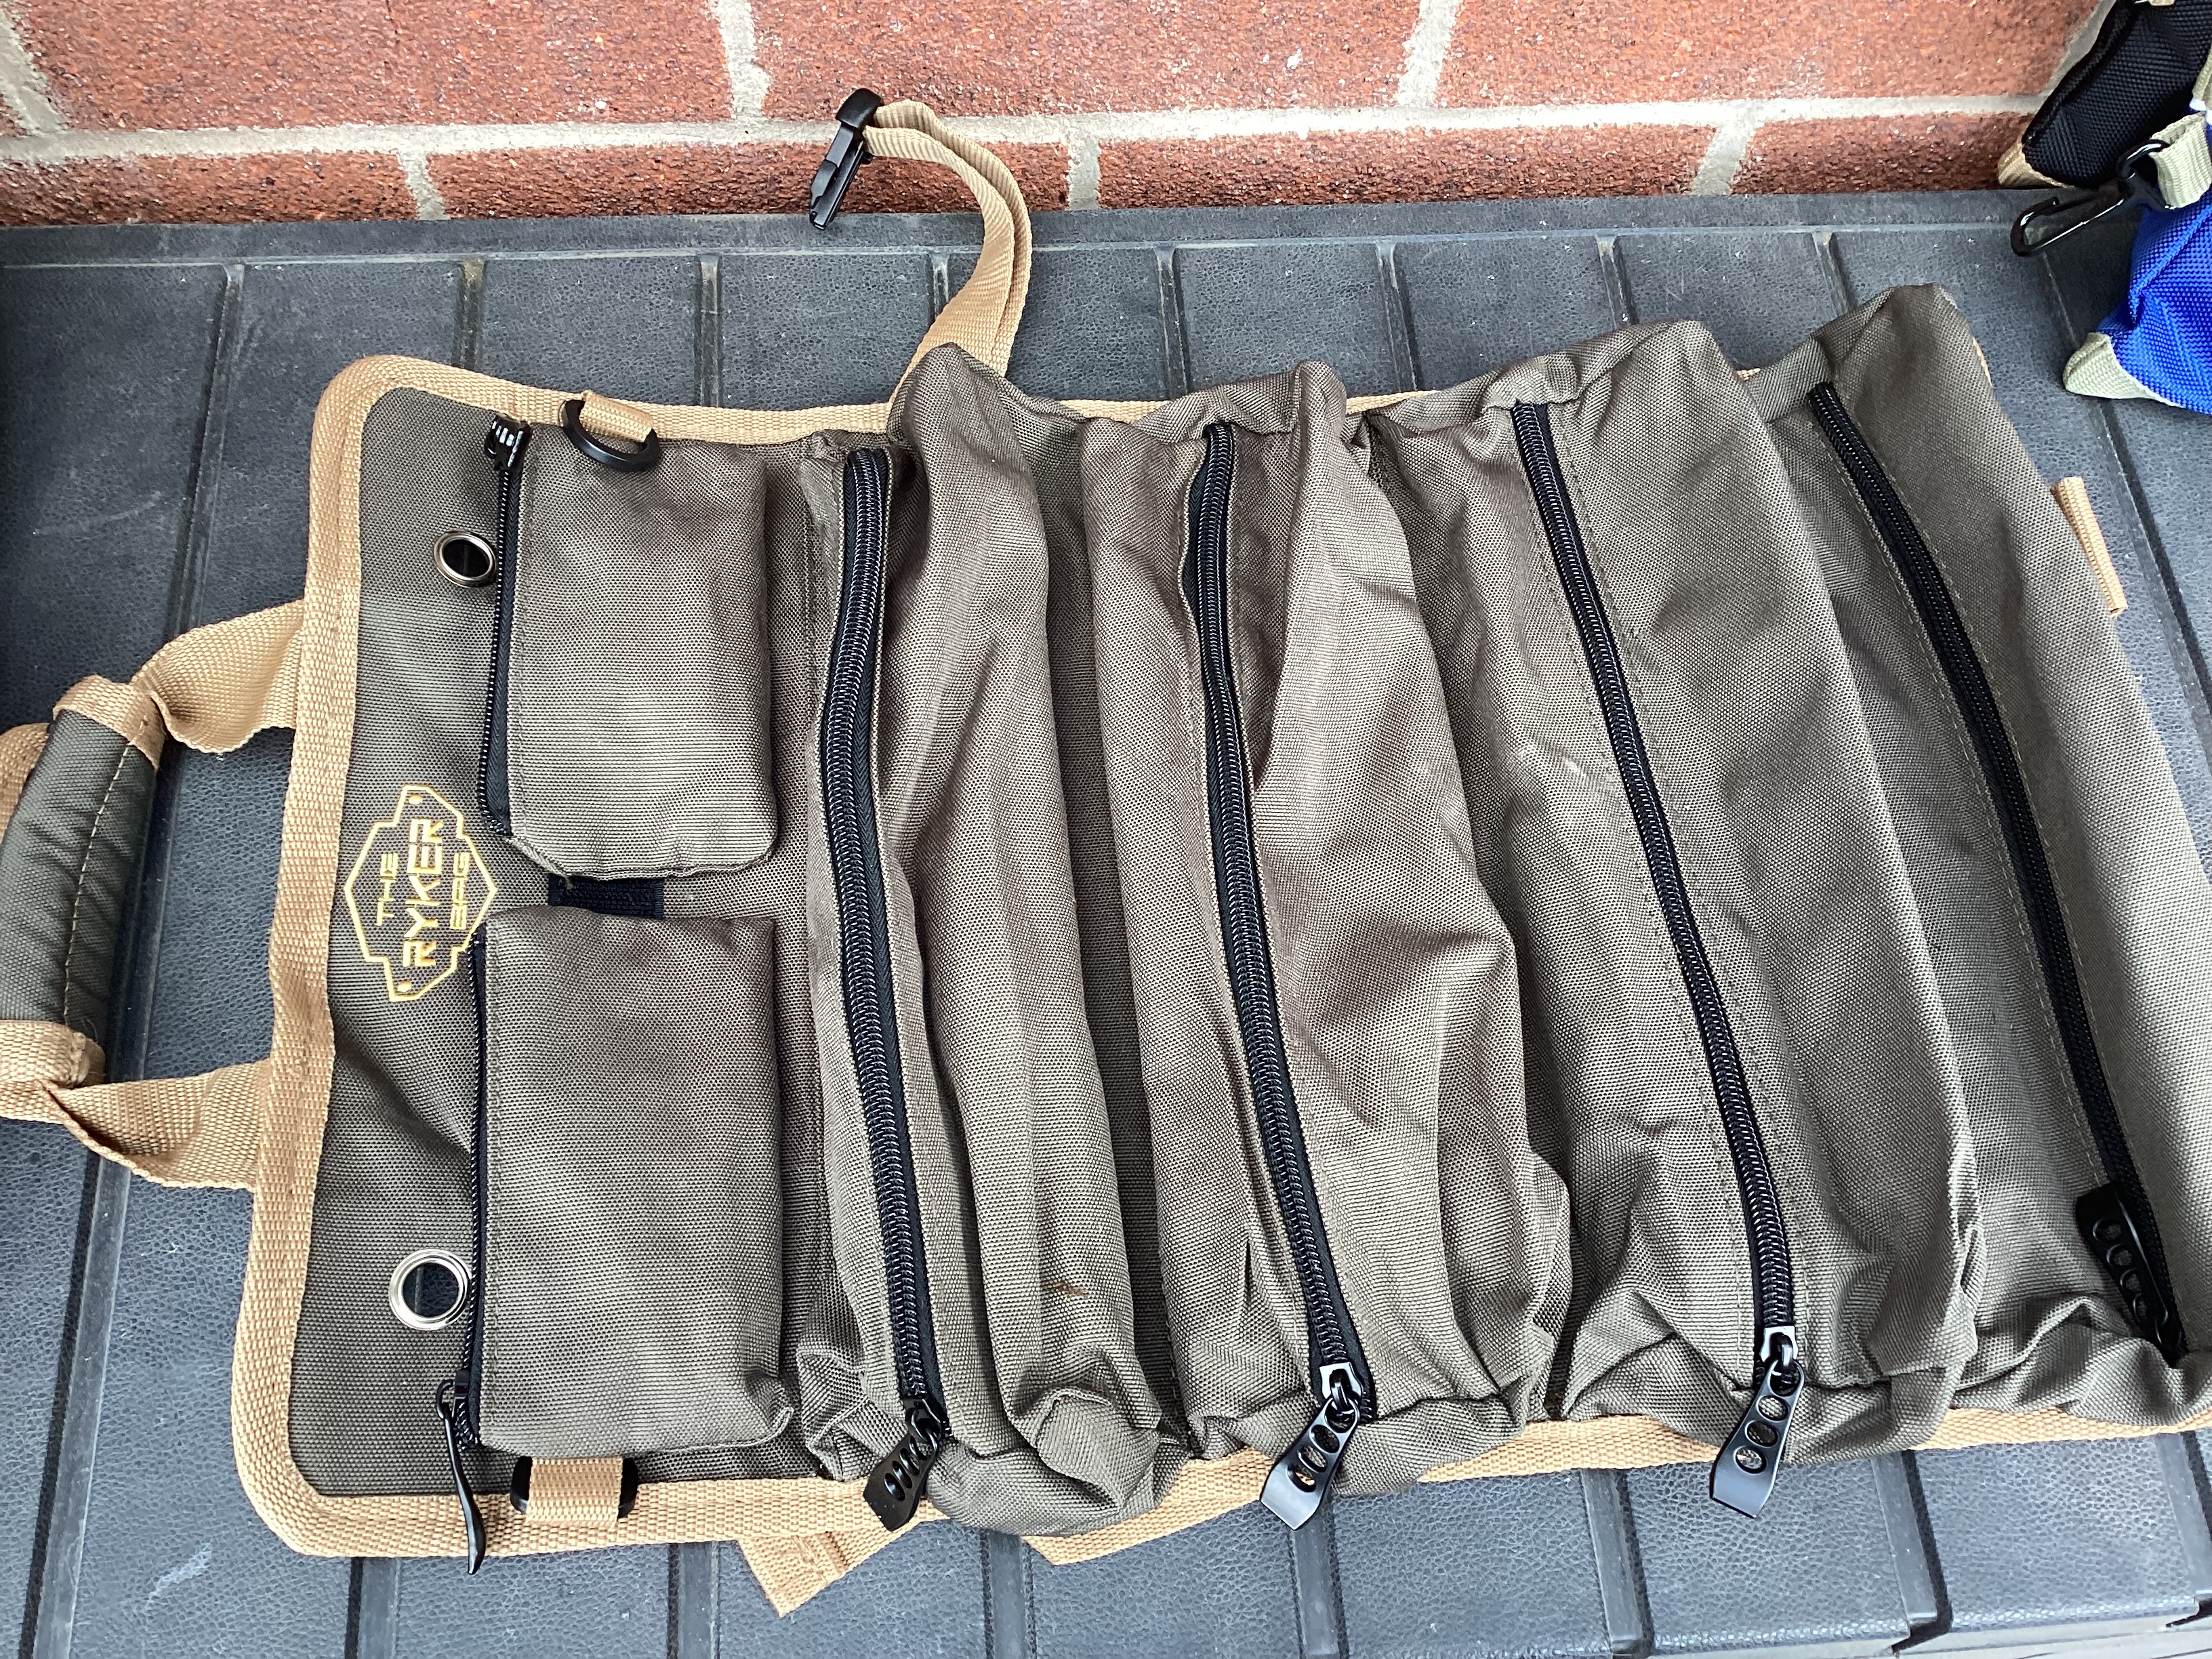
Let’s Roll With It…
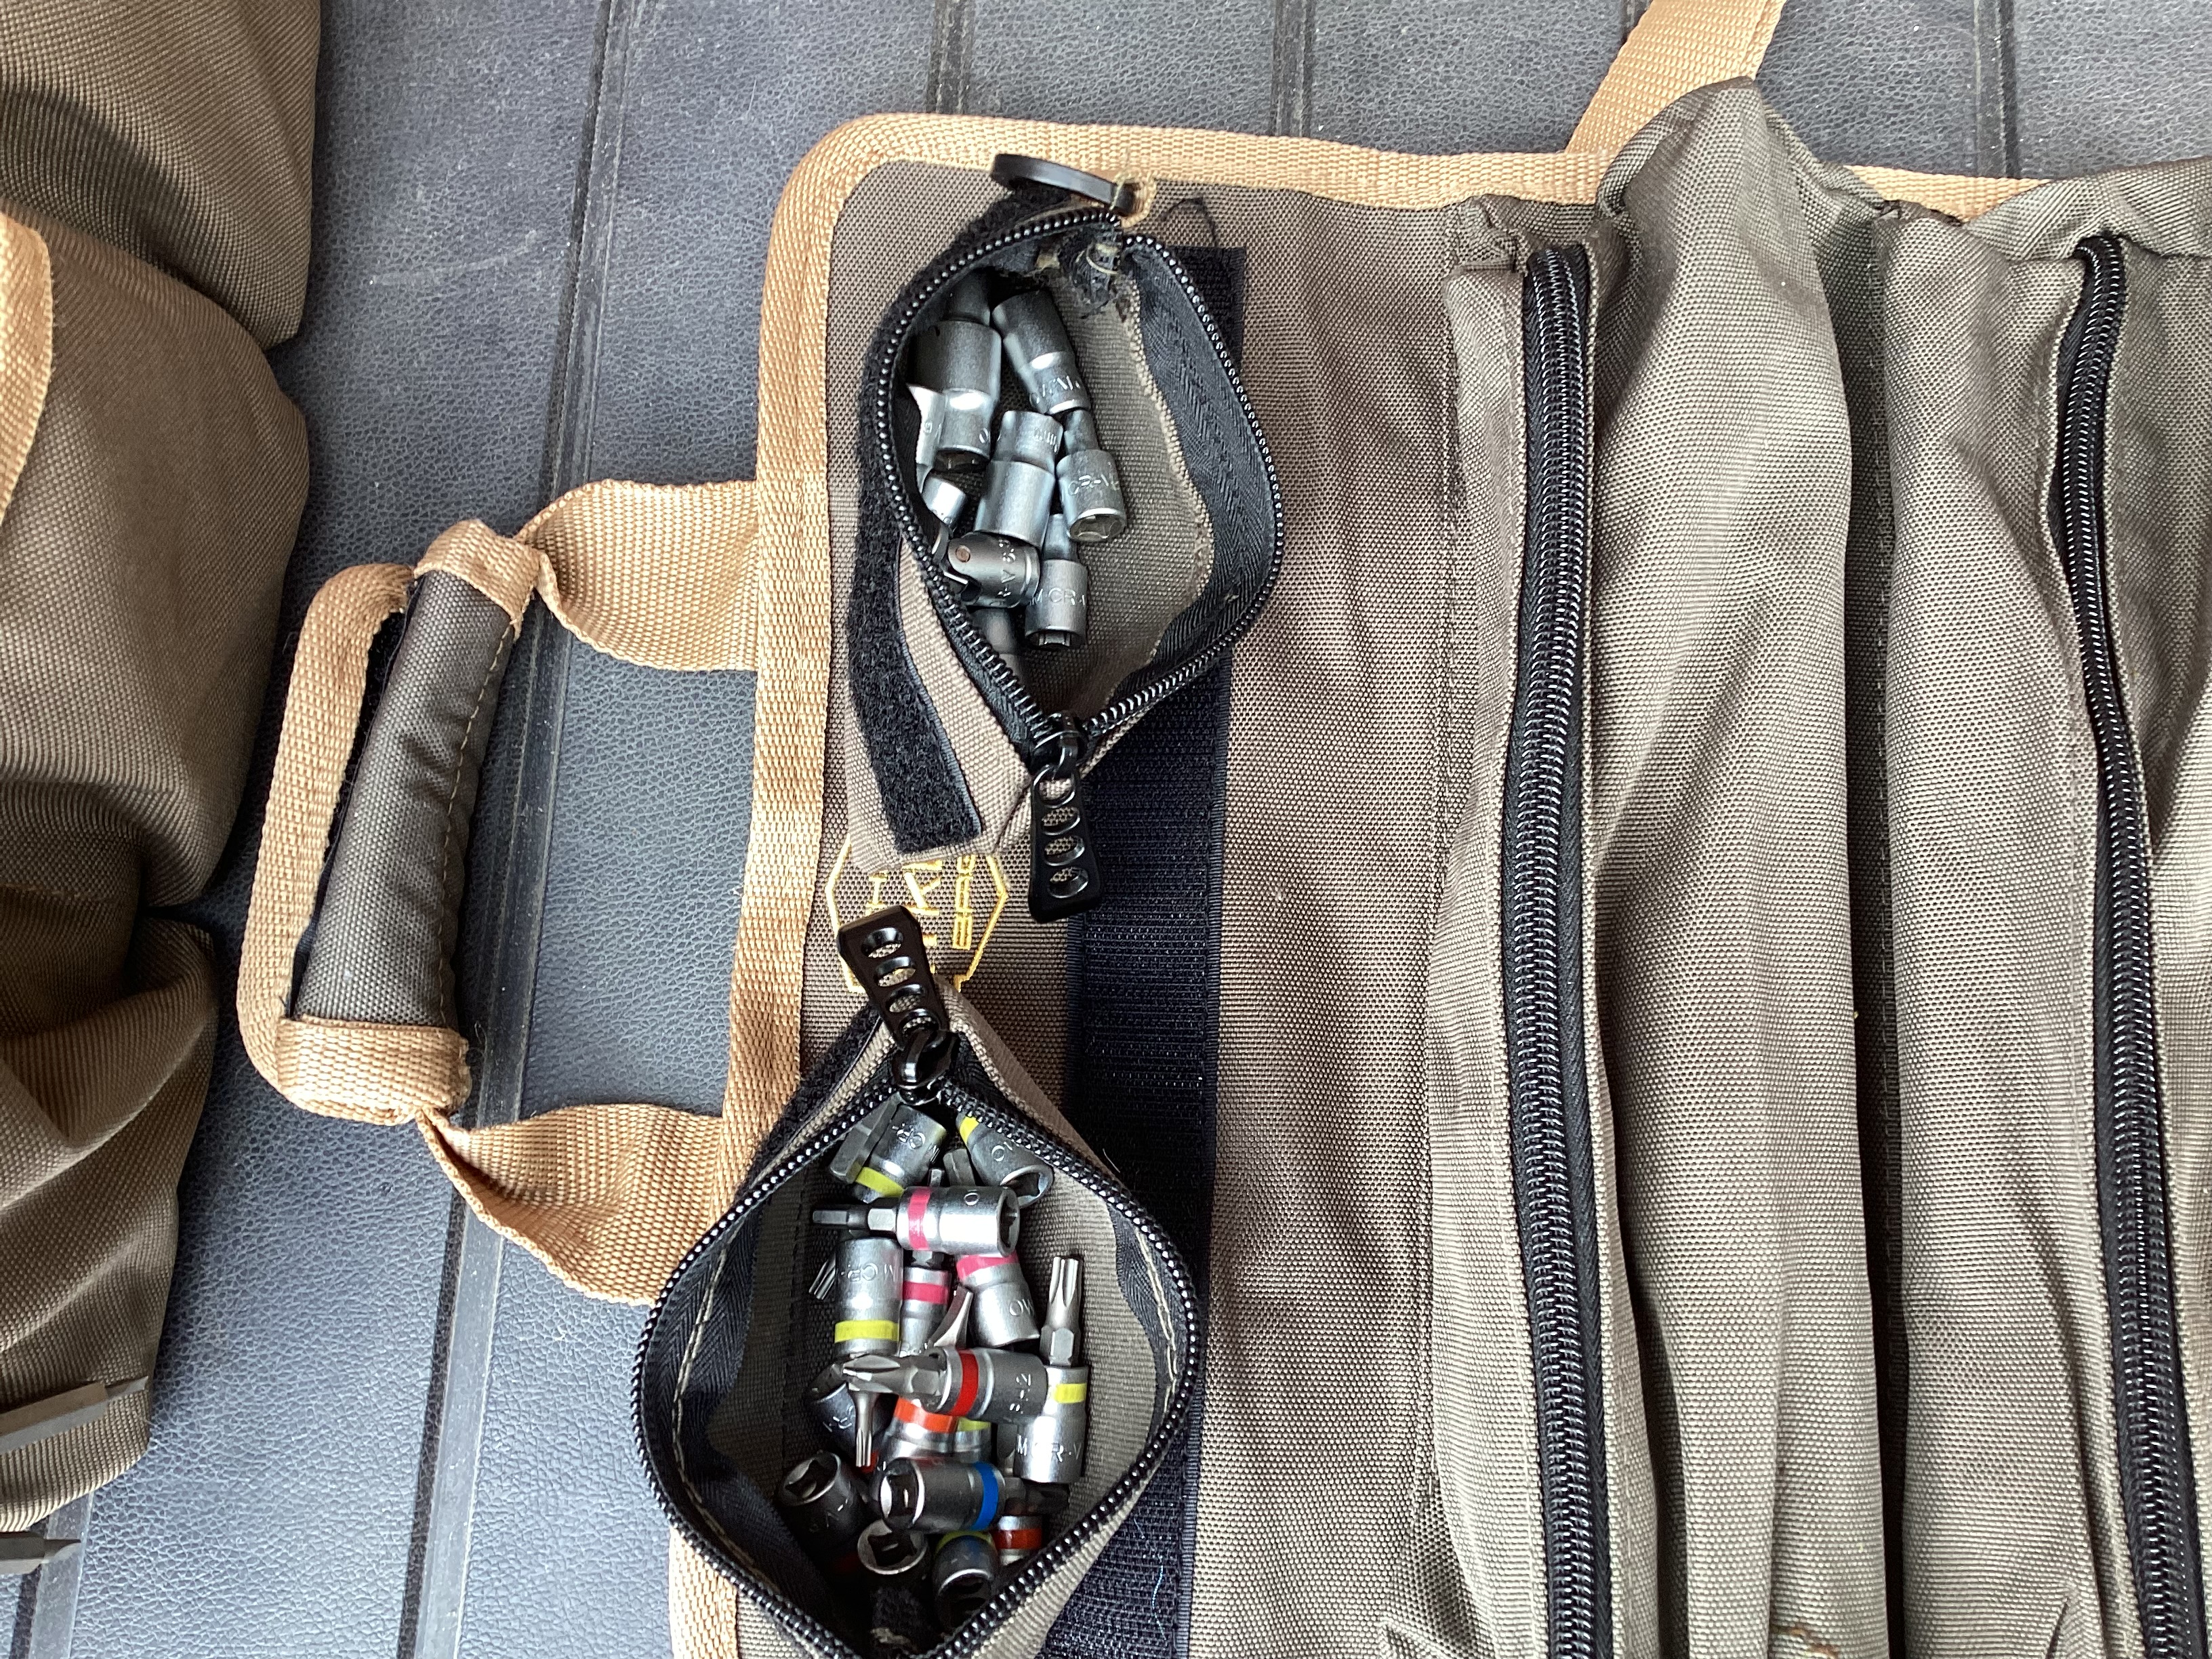
OK this is still a work in progress… The Tool Roll.
Handy little roll actually. You can hang it up on the wall, it has a couple of removable pouches held in by velcro and a few clips to allow additional tool pouches to be added.
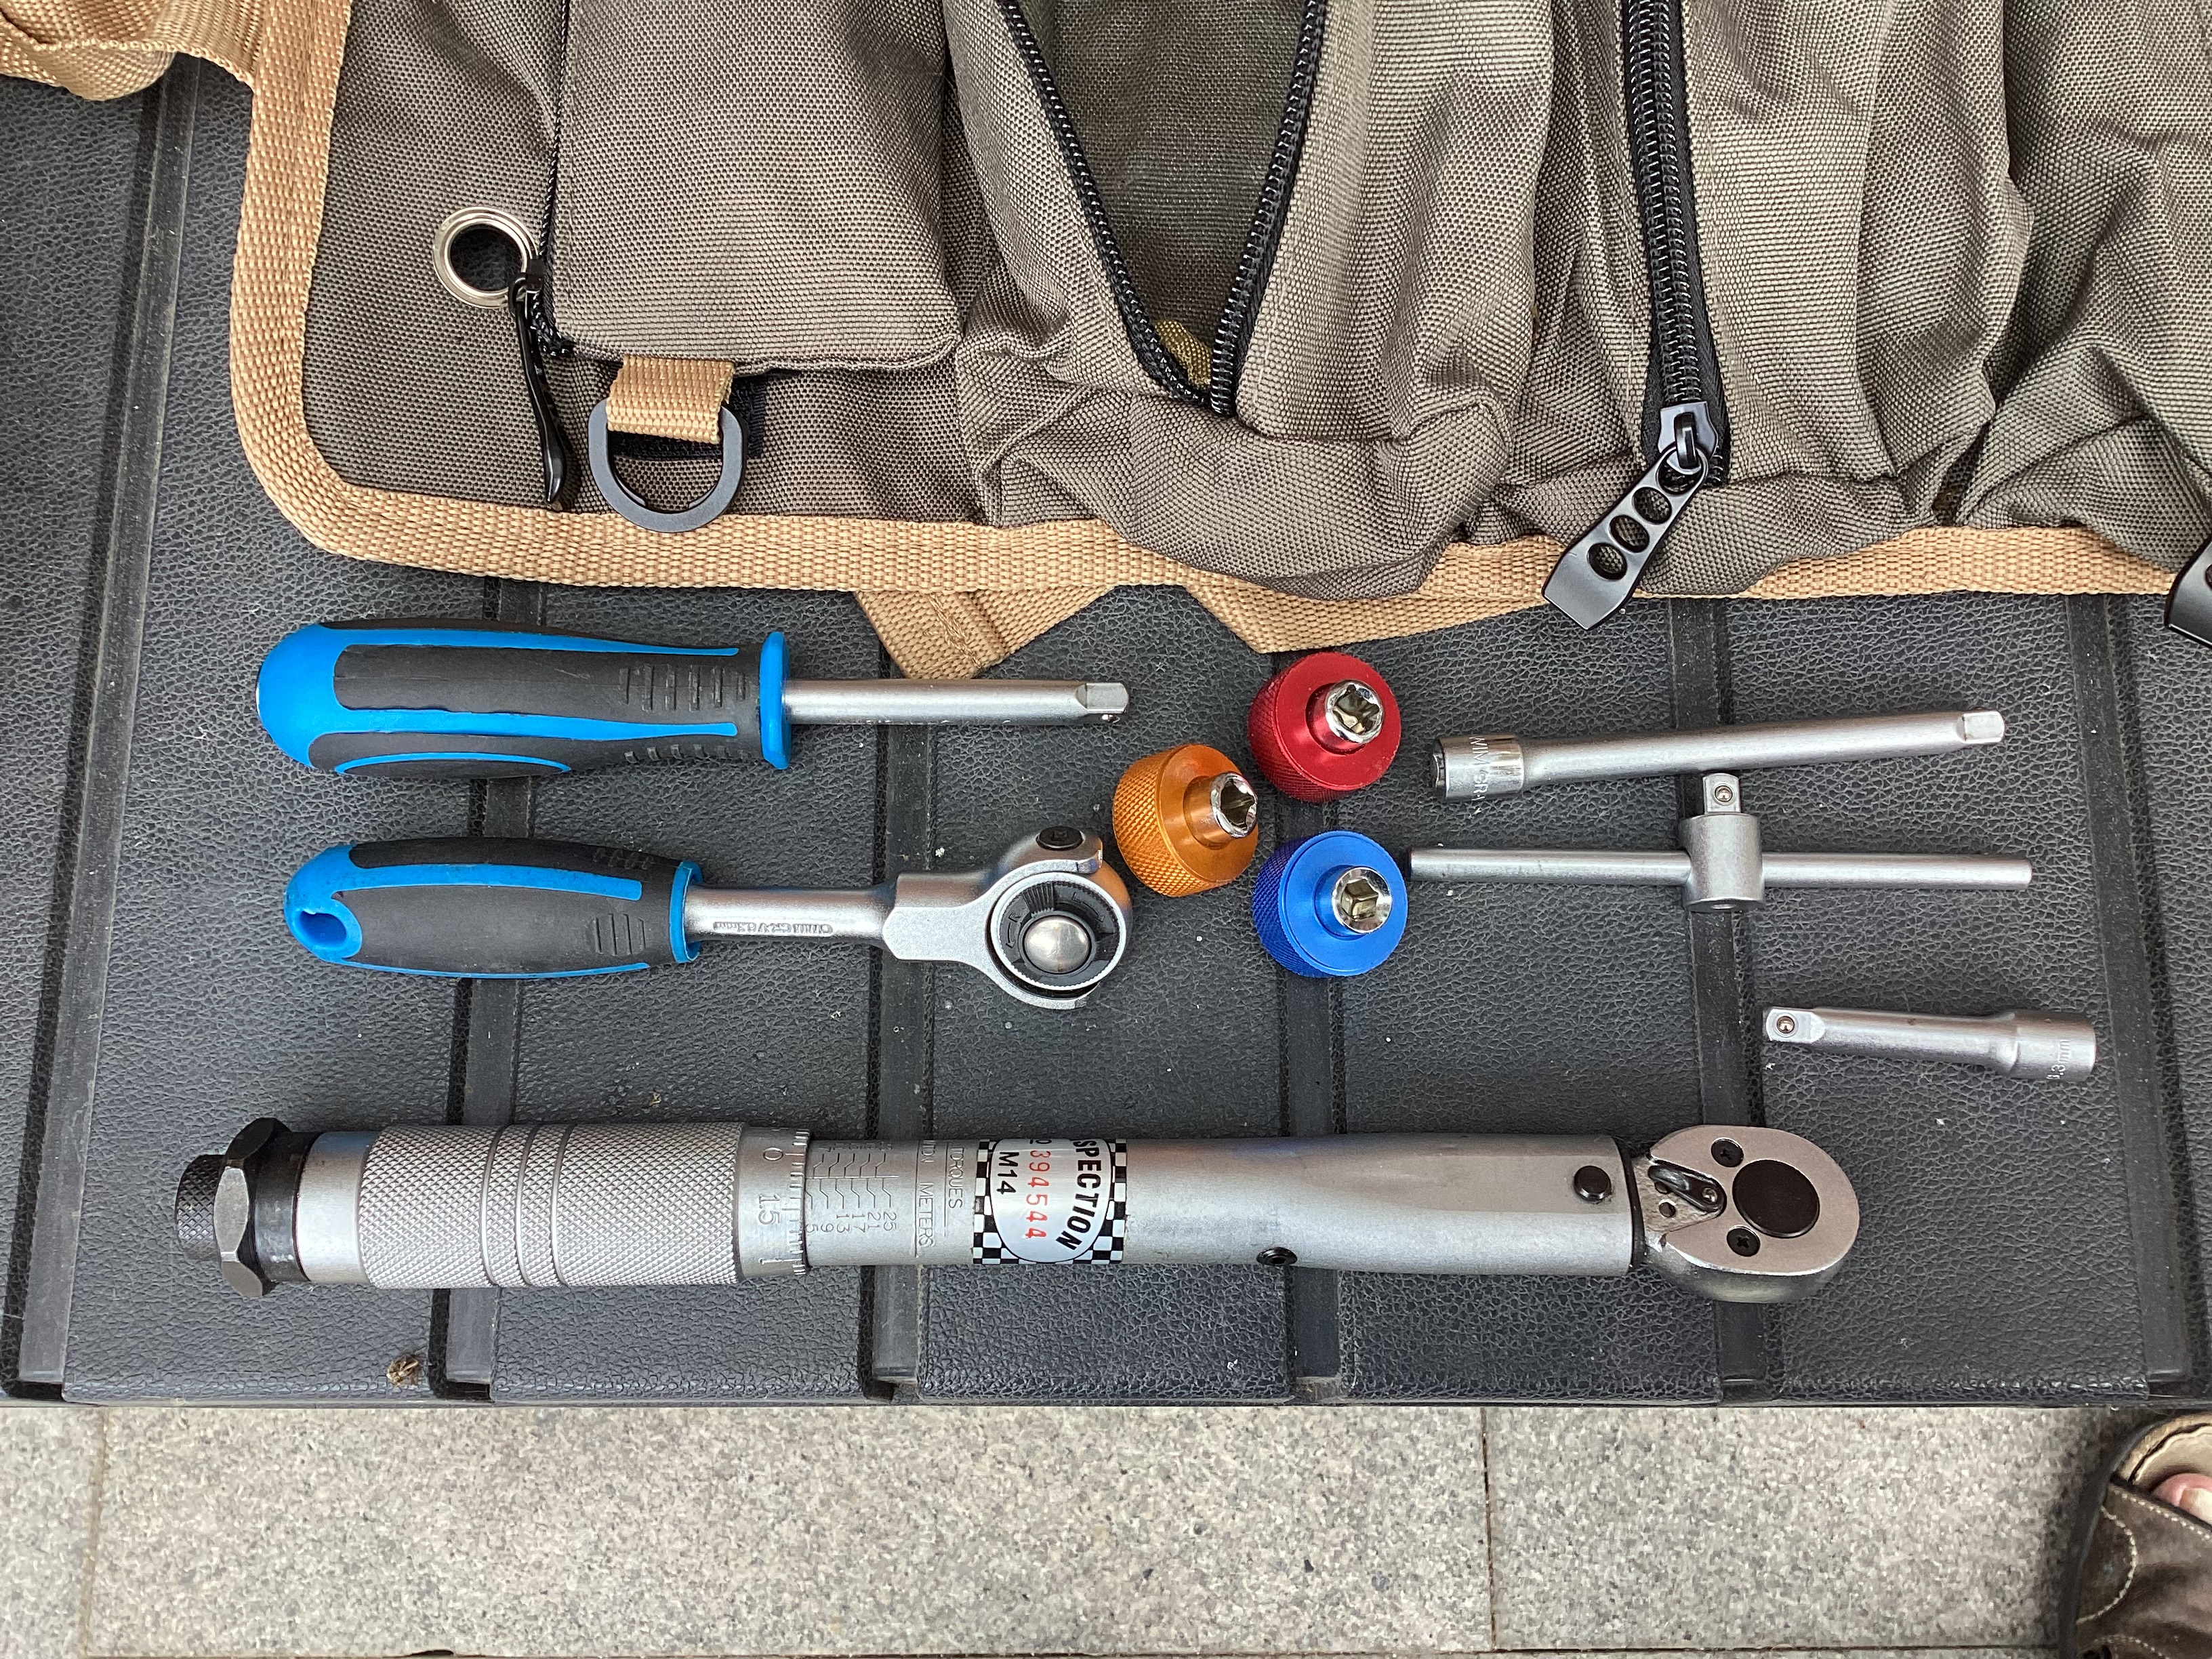
I used them to store 1/4 inch drive sockets and bits. The handles are stored in the first and second main pouches. Along with a 1/4 inch drive torque wrench that allows me to correctly tighten up larger terminals, including lithium battery terminals. My torque screwdriver is only rated up to 12Nm. I also have three 1/4 inch thumb wheels for hex bits for those hard to reach little places.
Next compartment is the long reach sockets. These allow you to slip on a socket and ratchet onto a long thread terminal or threaded rod. If you recognise the two sets…. the one above with blue handles and the long reach sockets……. they are Aldi / Lidl specials… each set was cheap as chips and if you look closely they are made by the same company that makes specialist tools for one of the major German tool companies. I recon buying these saved me about £120 over the named brand.
Finally some instrument screwdrivers… and a spirit level (Why?)
Last compartment… still working on it…. I did find my other pair of plumbers pliers though!
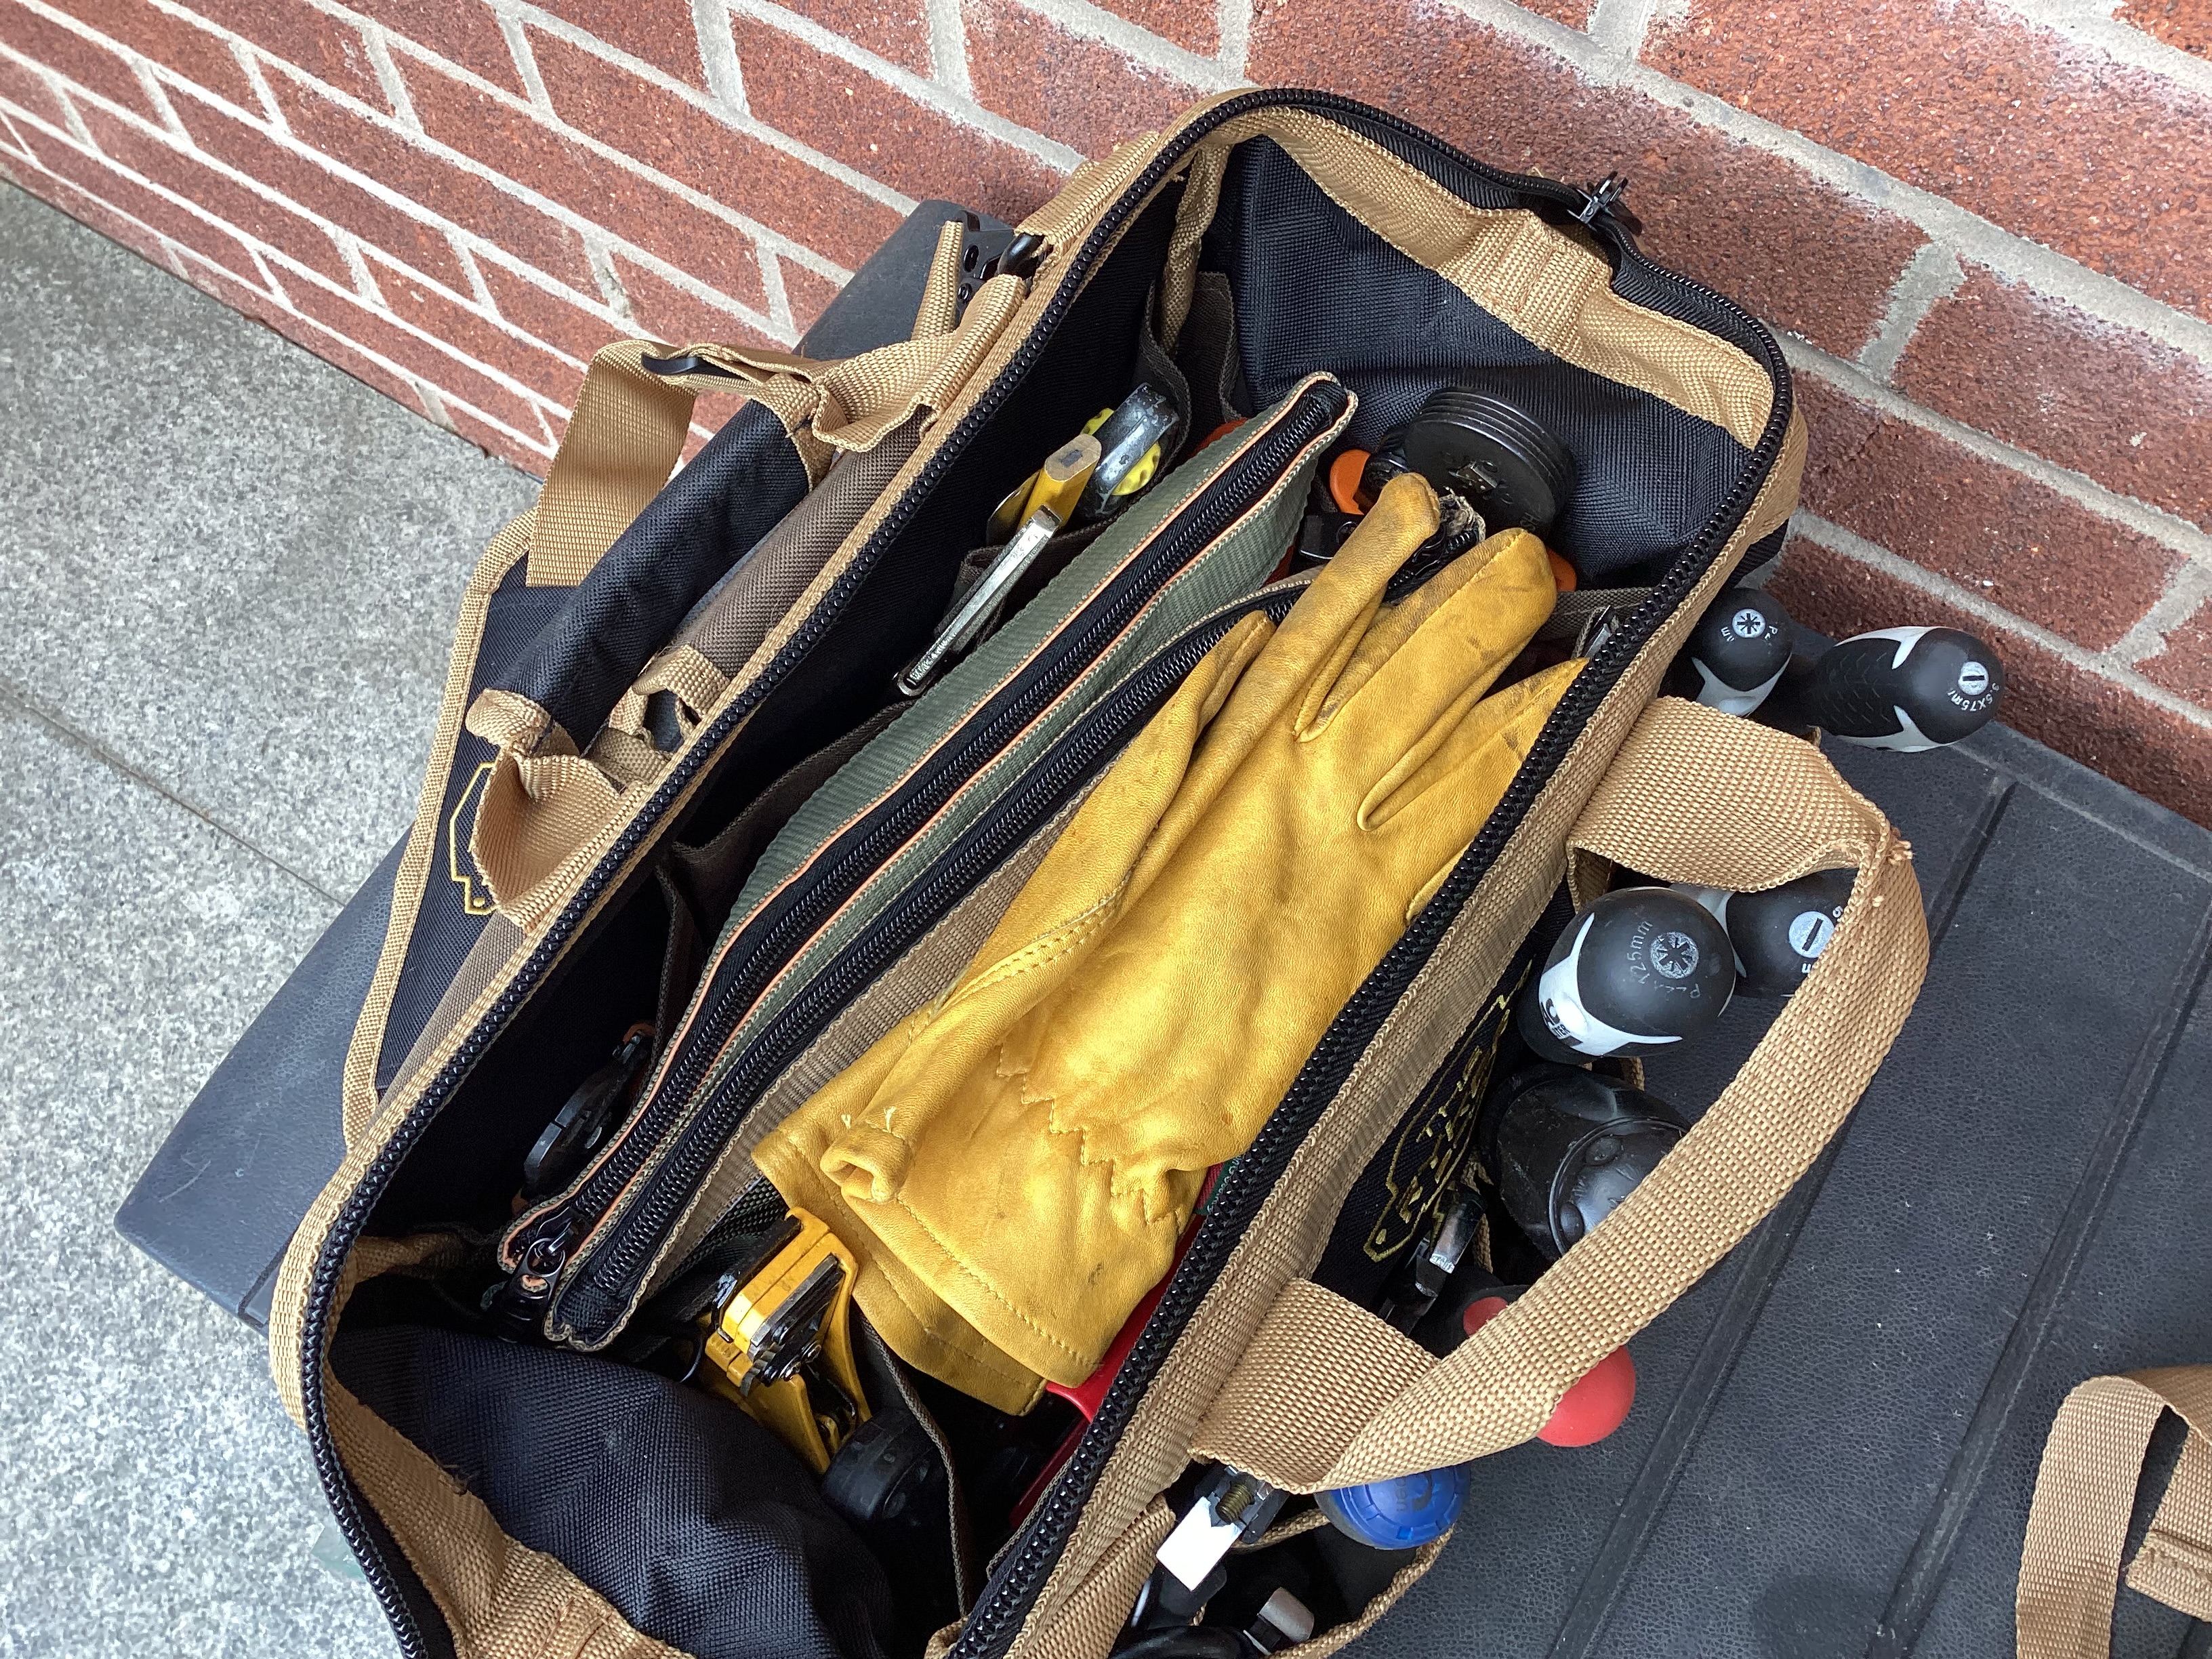
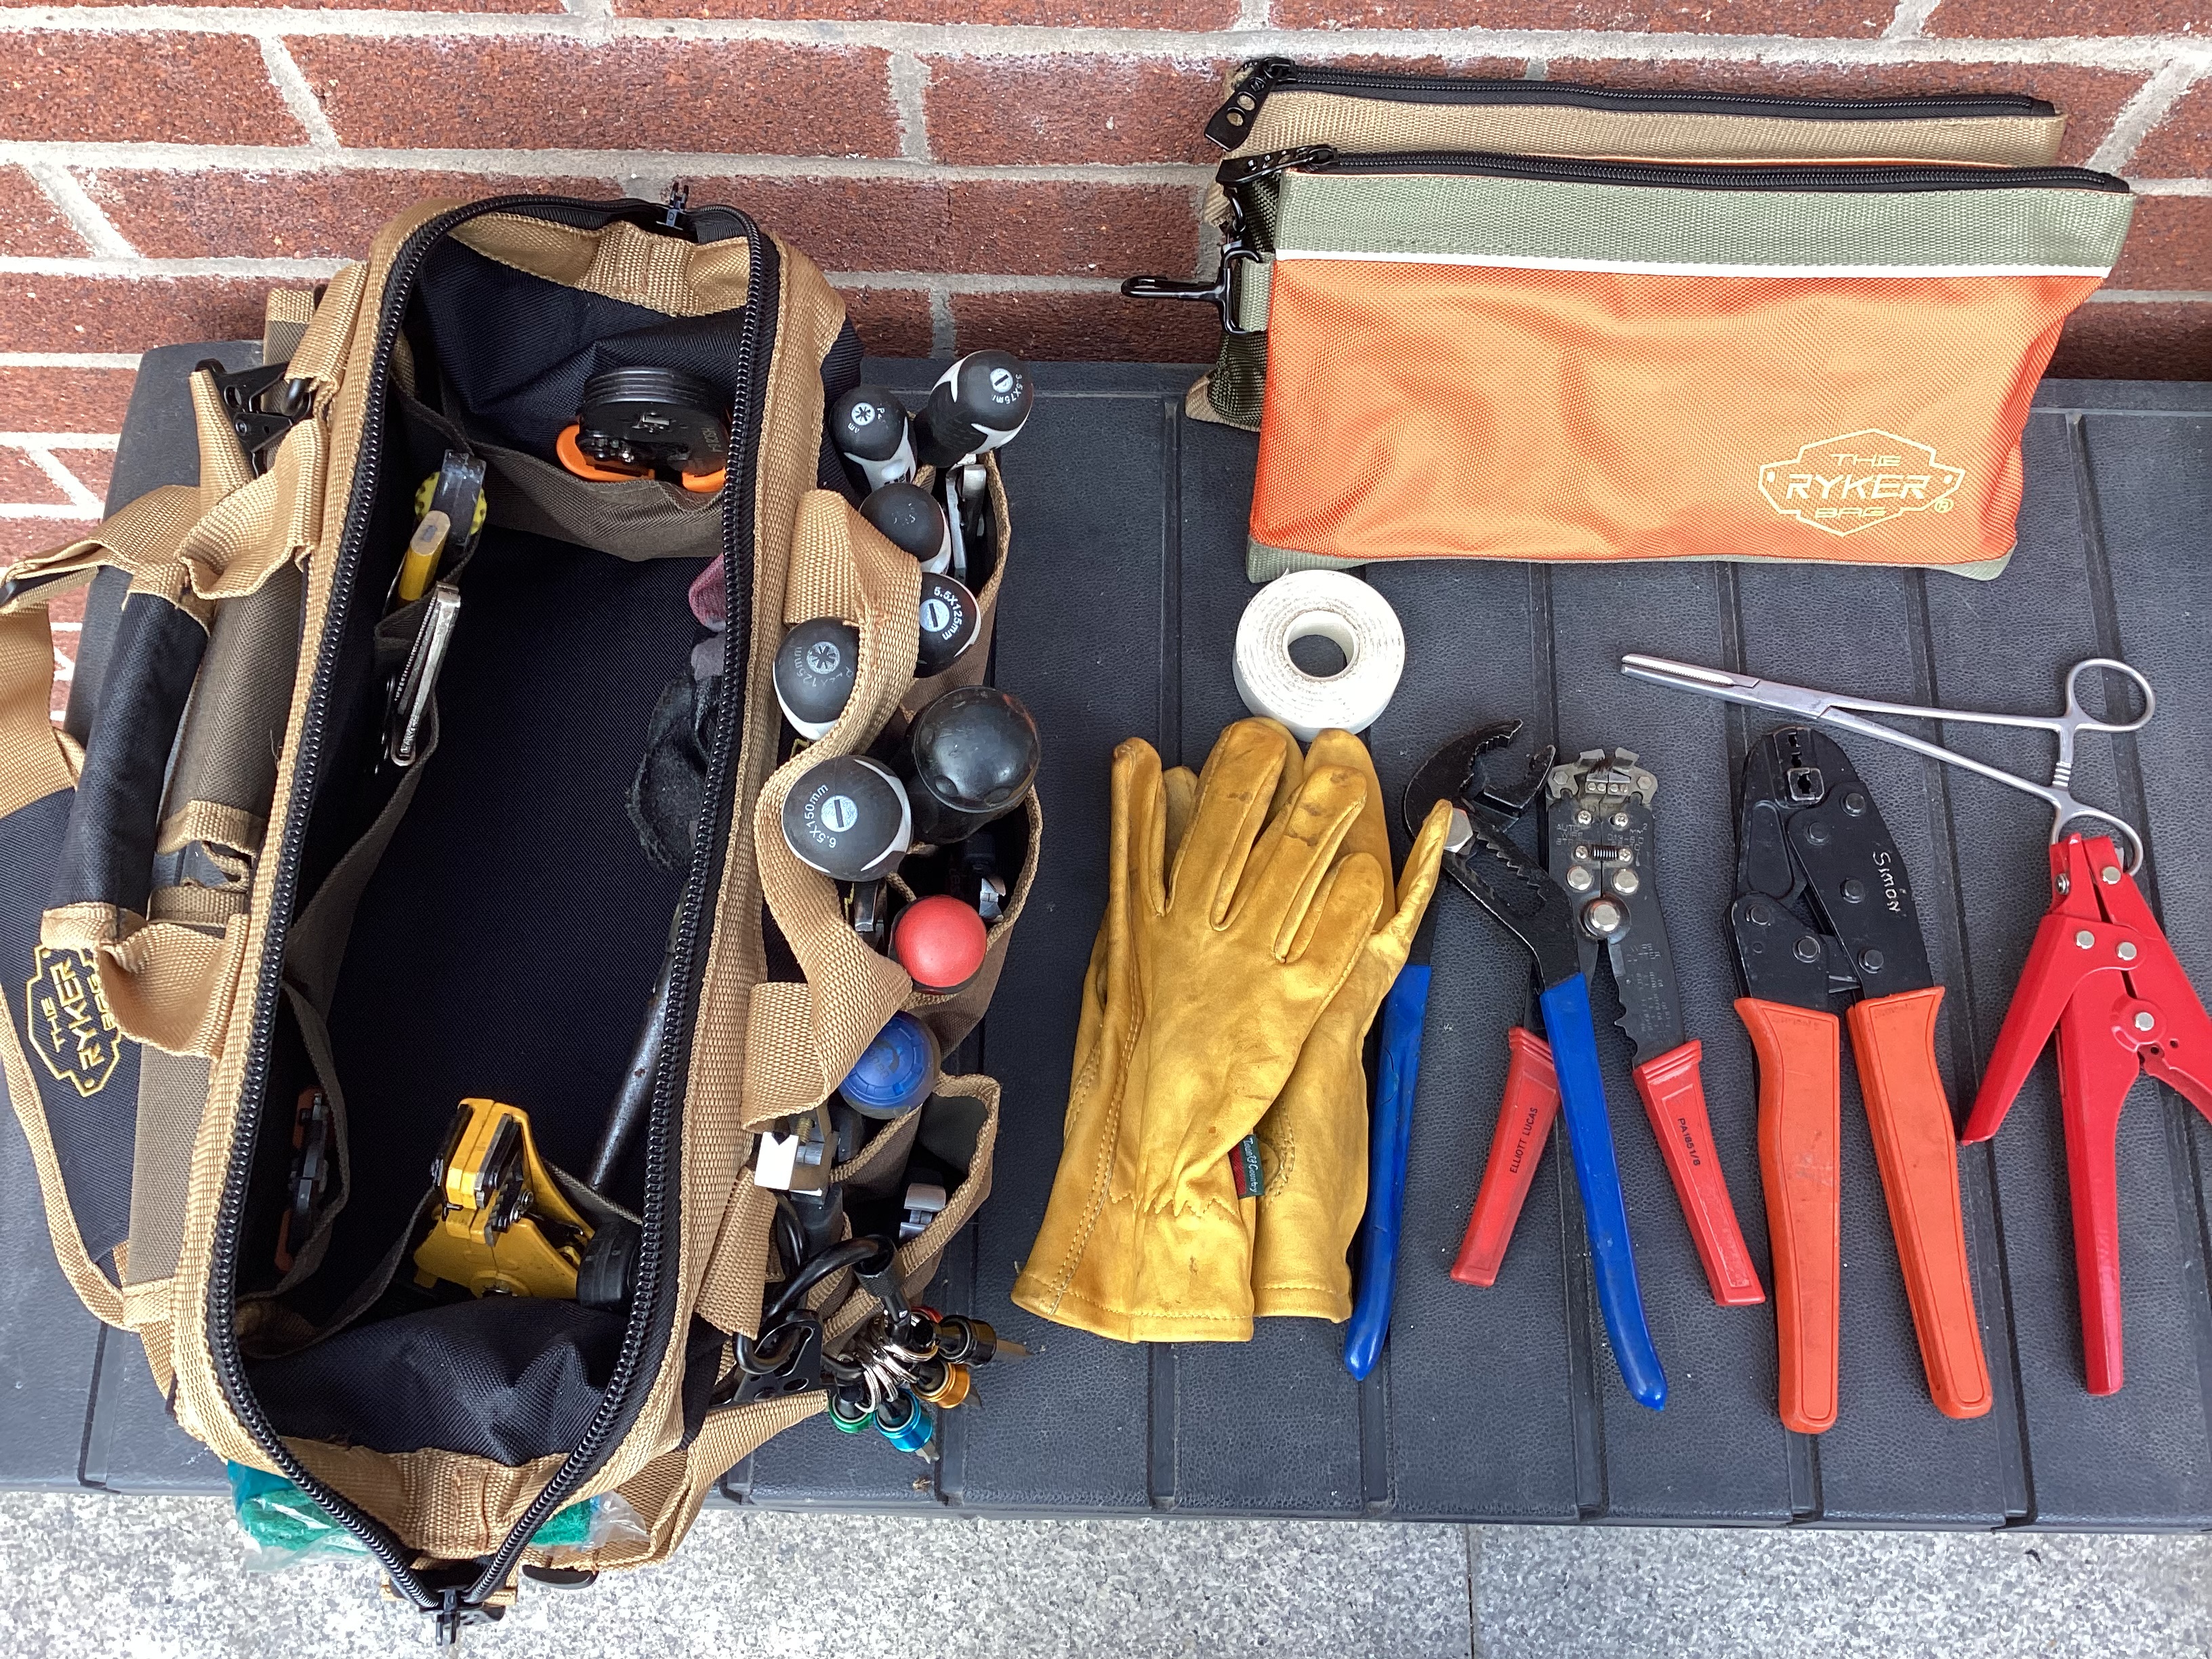
Finally…
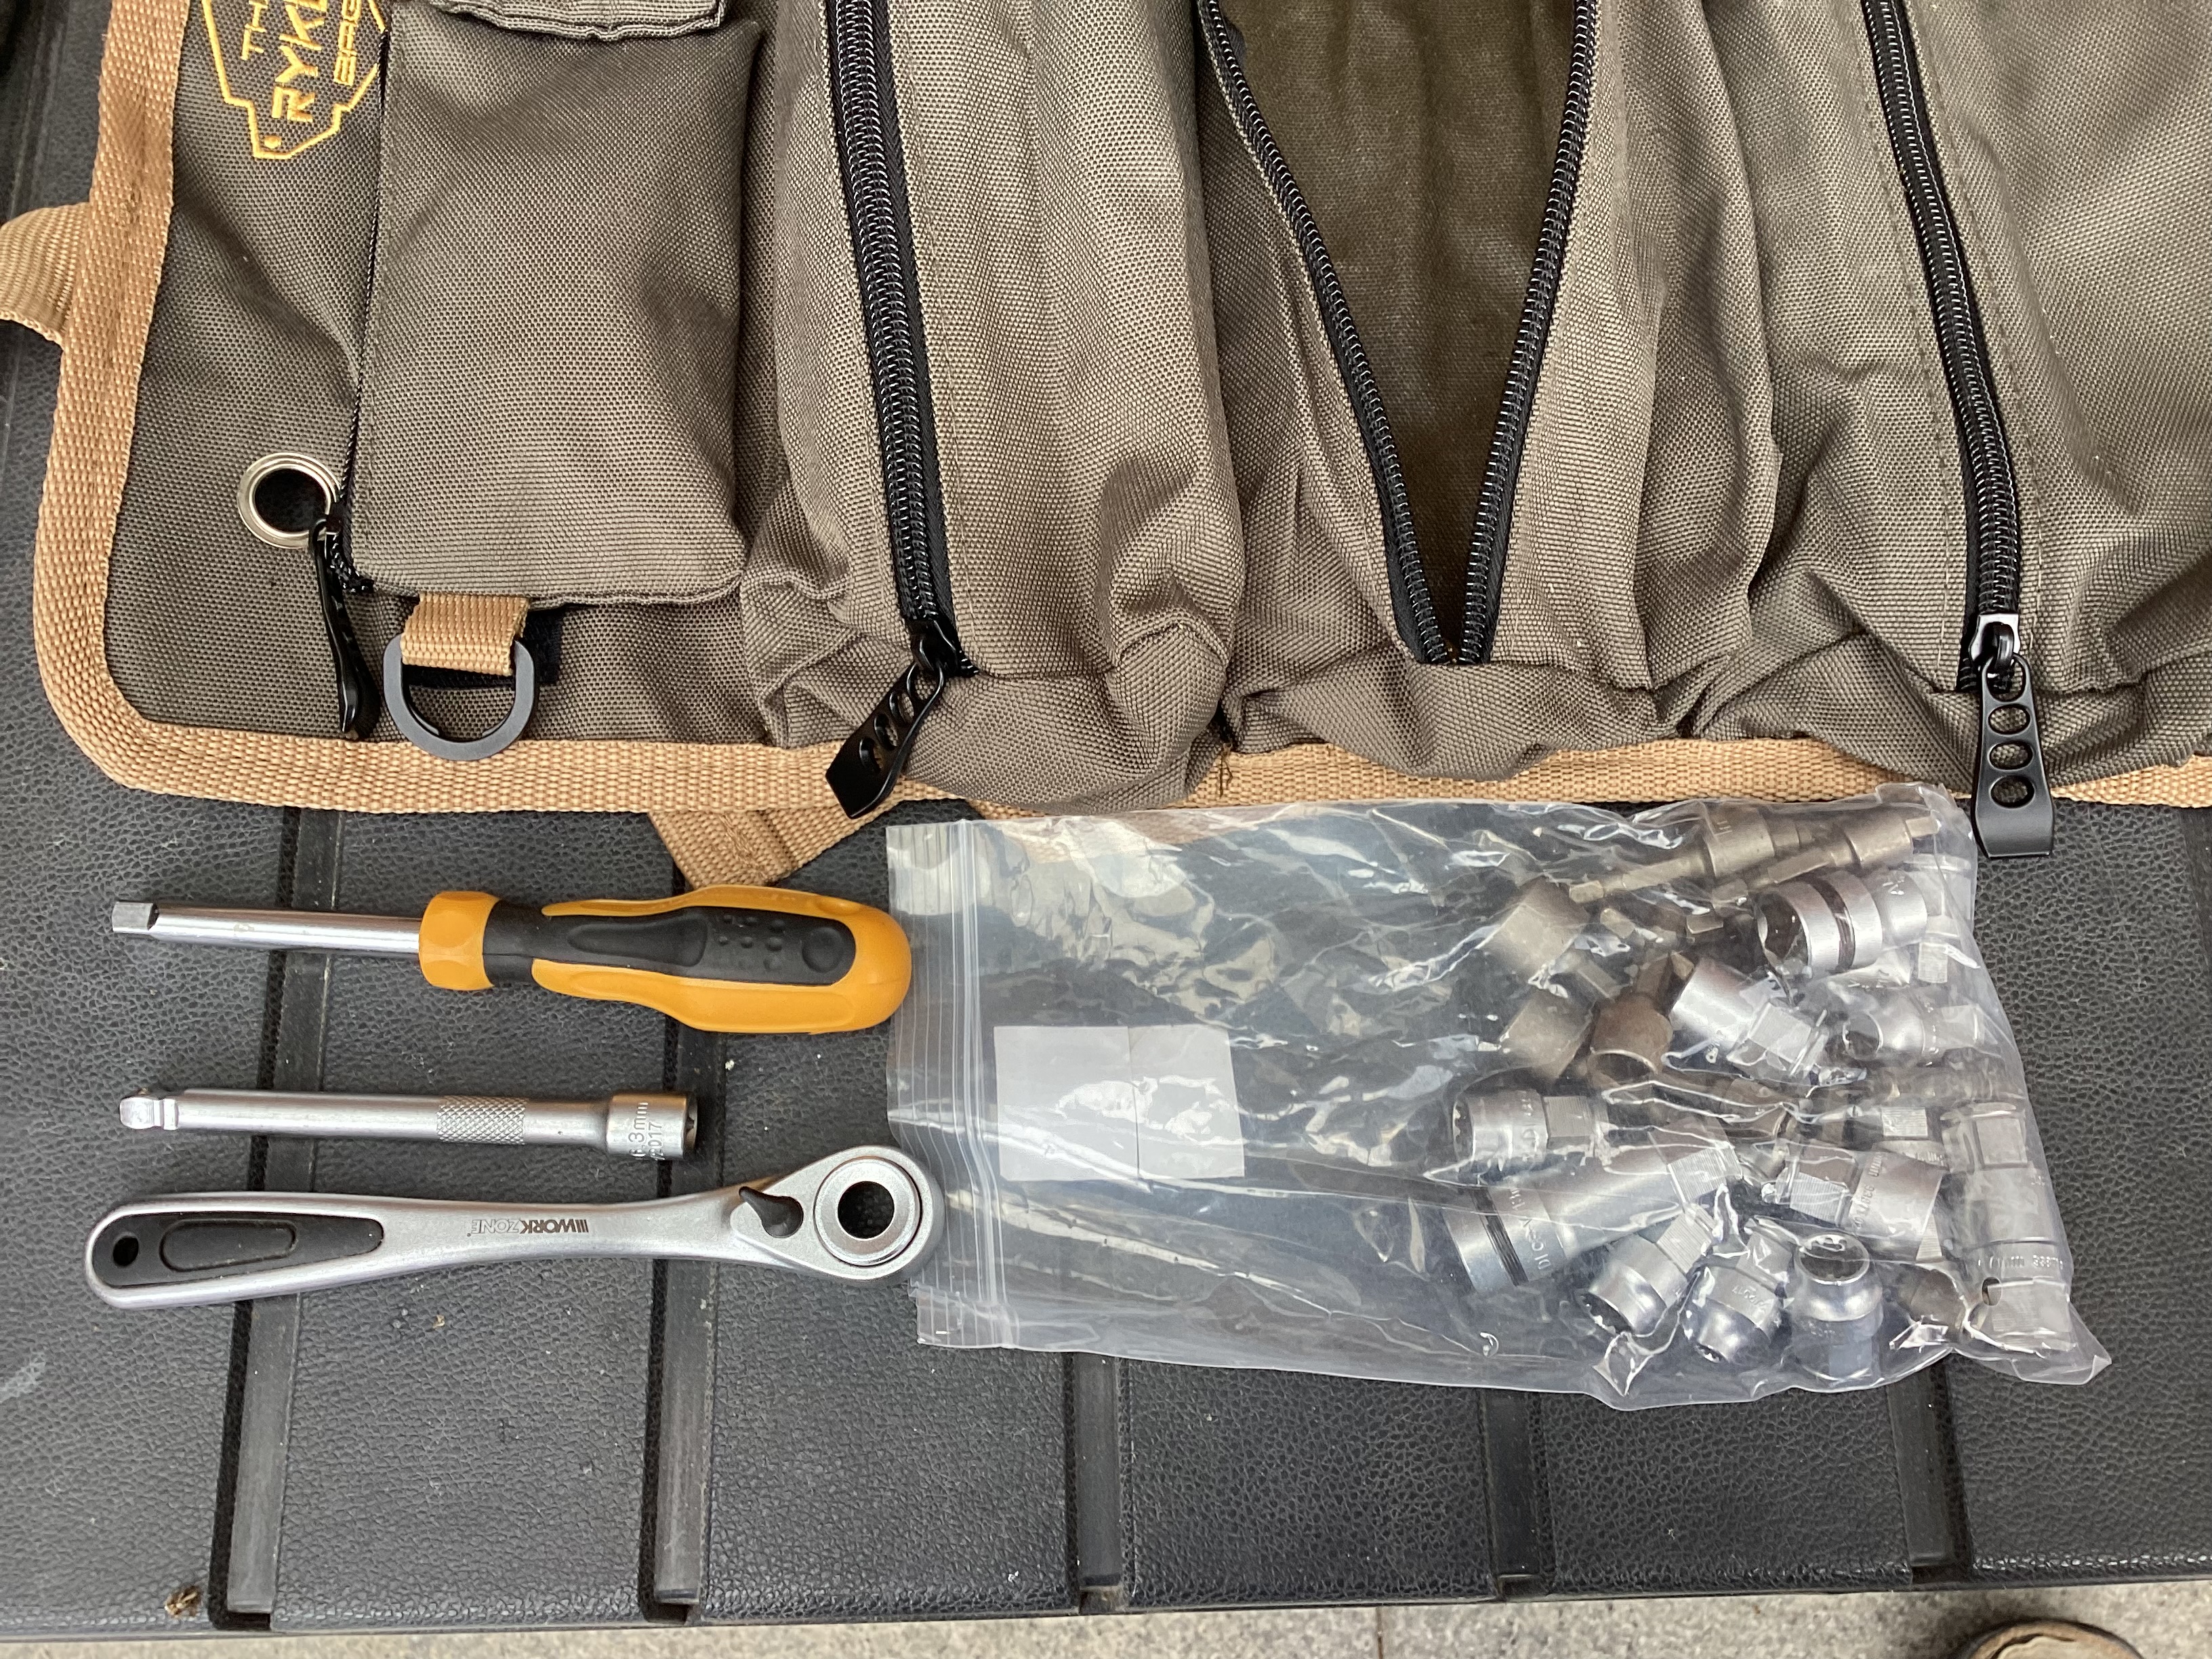
Last two tool bags…
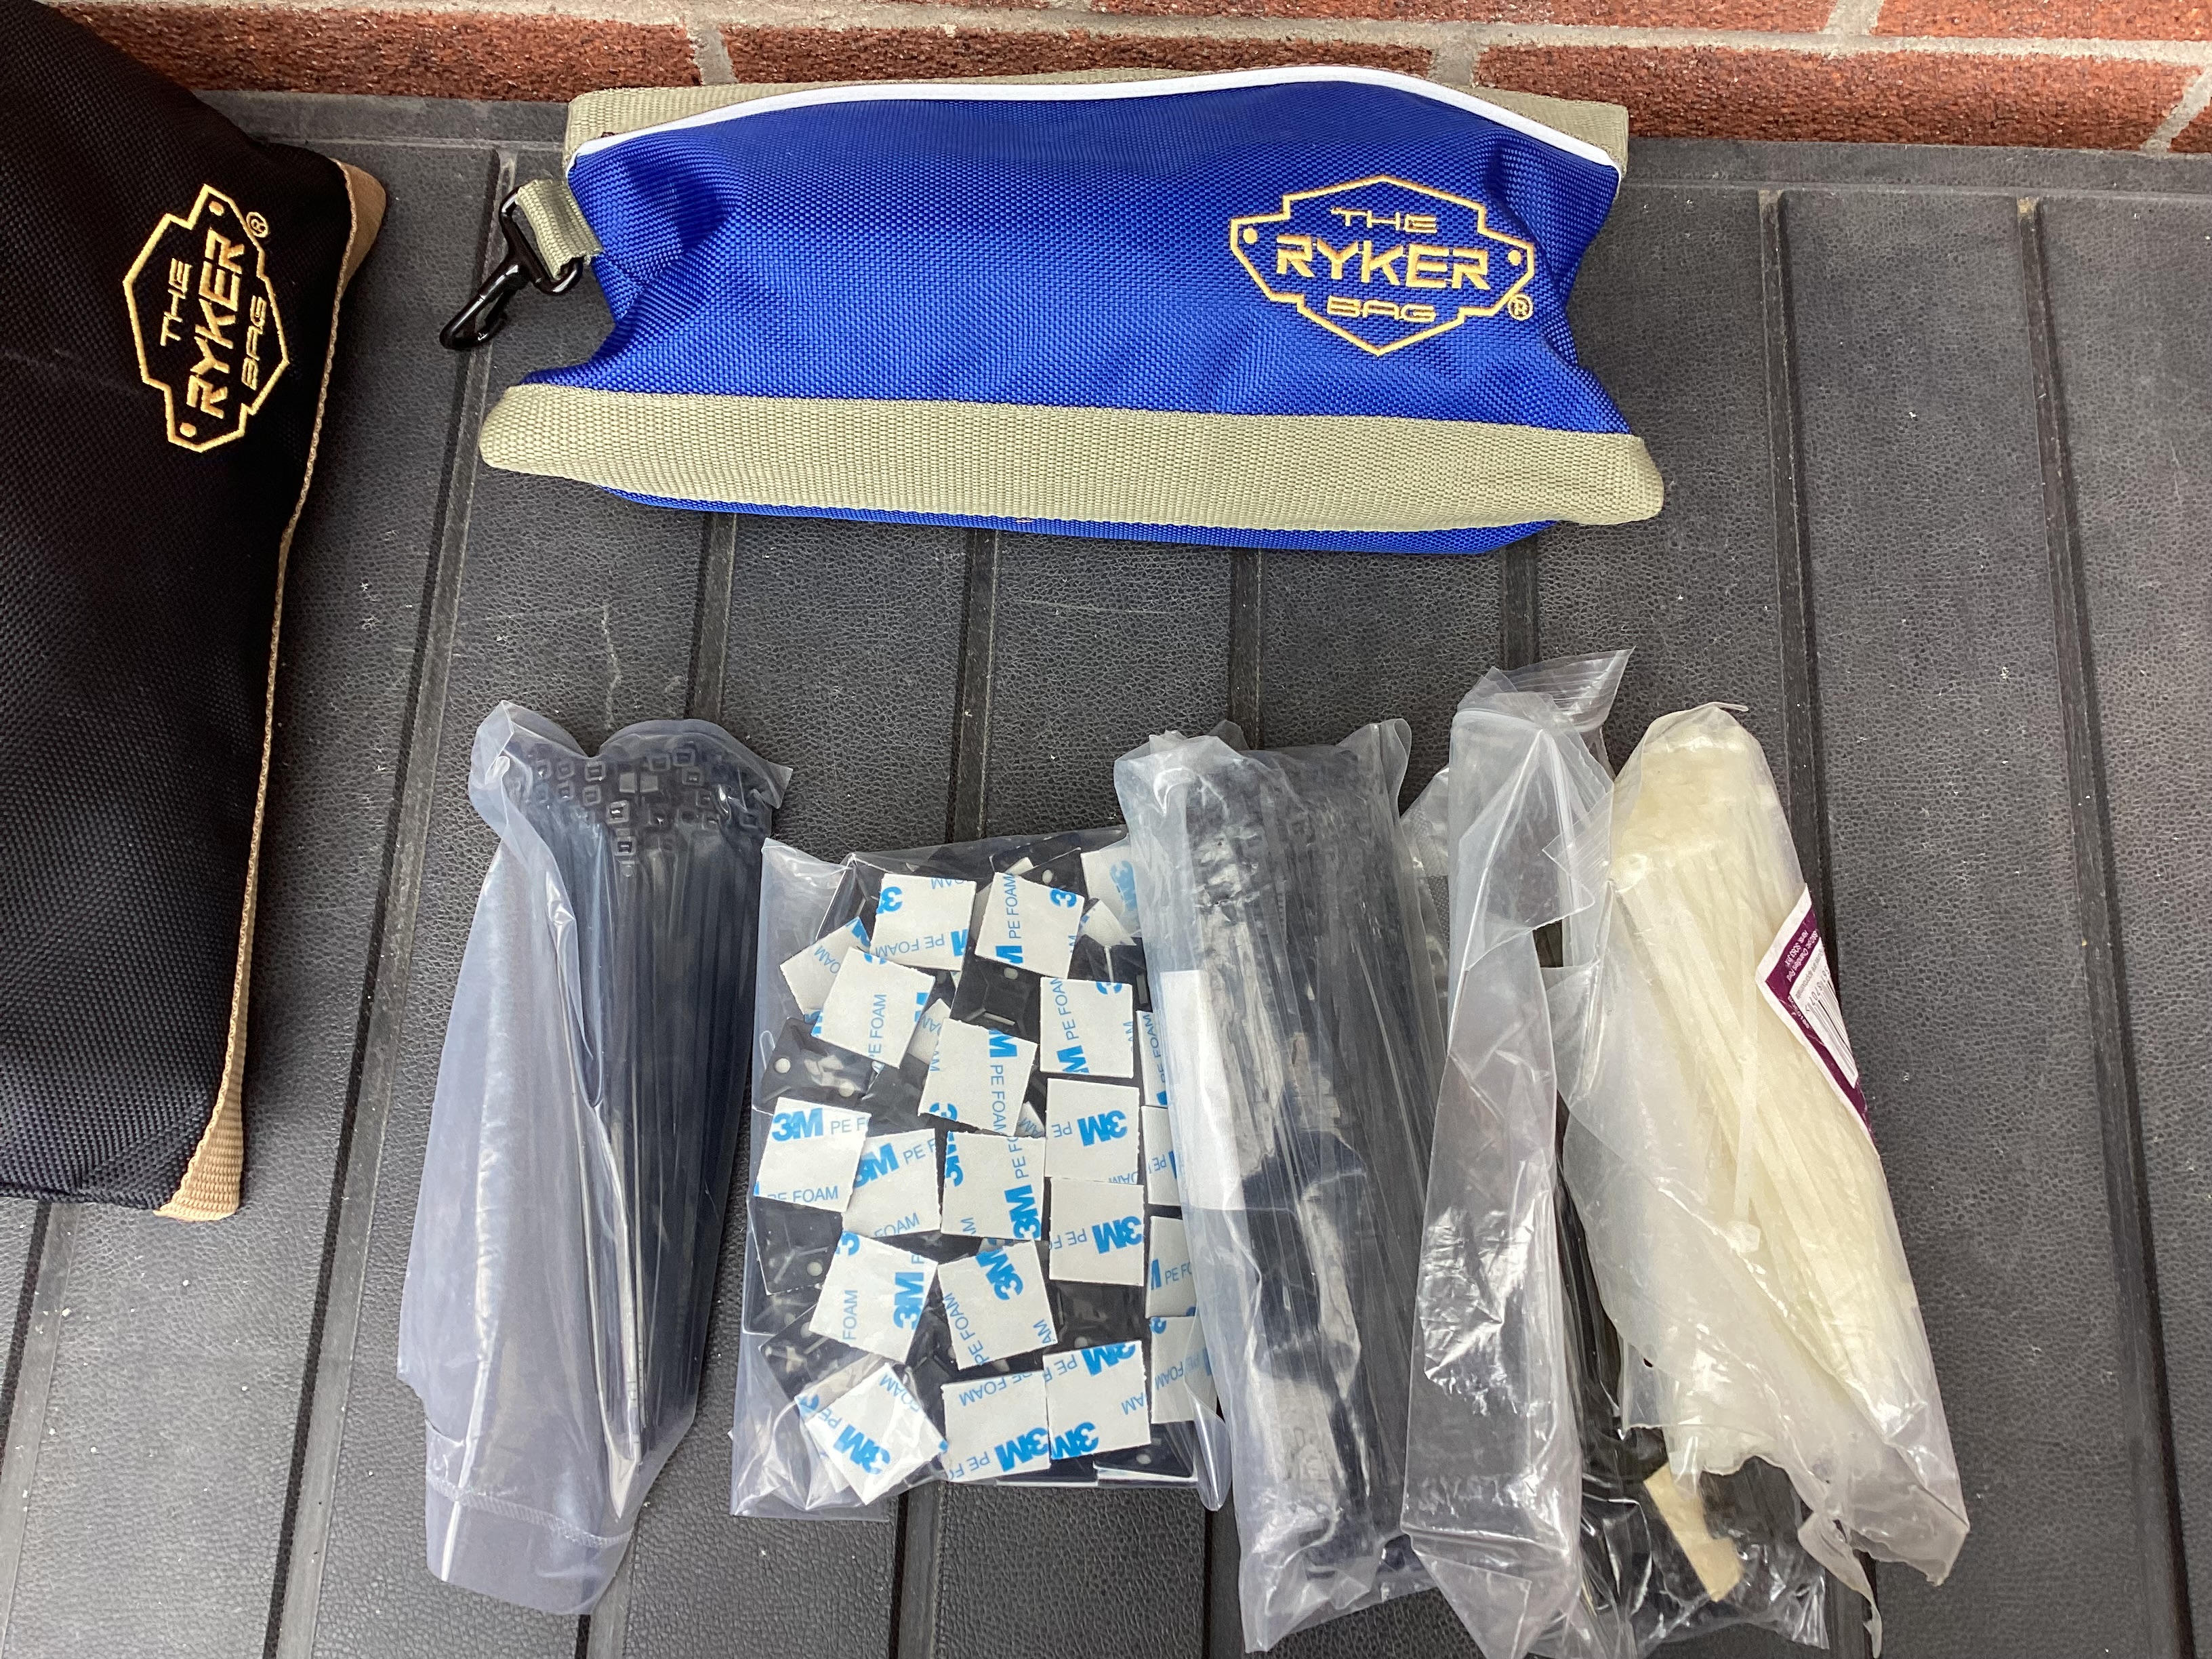
Odd collection of crimps and a full set of cable ferrules…. The spares box in the 5th Wheel has a full set of crimps… spare 13 pin plug, MelTruck EBS 24v 7 pin plug for the brake system, Fuses, Heat shrink, stainless fittings for the sun canopy, sets of stainless screws, cap head bolts, nuts, washers etc. If there is enough interest I’ll go through my spares box in a future article.
The business card style box (photo below) was a bit of a find. I was looking for removable draw organisers fr the workshop and after a lot of searching came up empty. However changing my search to ‘business card boxes’ found these… a box of 100 only cost me about £20 delivered. removing the lids and using them as trays as well gave me 200 storage compartments. I’m now on my second box of 100.
…. and you can never ever have enough tip ties…..
So that is a quick roundup of “What’s in my tool bag” thingy posts on you-tube. Not very interesting for 99% of people out there, but everyone seems to do it now and again.
So, I’ll bet the next question is…. “OMG love the bags where can I get them from?”
All available from Amazon…. I’m not affiliated with Ryker or sponsored by them, but I will get a few pennies if you absolutely can’t live without these and buy them through the links below. In the couple of months I have been using them I find that they are good quality, stitching and zips are up to mustard and the material seems to be hard wearing.
There are other similar products available if you follow the links on to Amazon, some cheaper too. You might find something that is more suited to your needs and price range, but have a look at tool bags instead of tool boxes. For me it was a bit of a game changer and space saver…. no to mention the weight and the fact I don’t need to get a big tool bucket or box out that contains everything.
Tourfest North west was our first time attending anything like a gathering of bloggers, vloggers and the generally like minded. It was organised by The Caravan Addys with a little help from others I’m sure as it must be a time consuming task and hard work to bring everything together.
We opted to arrive at the wonderful Donkey Creek Farm a day early. We had planned to set off from our compound at around 12pm…. and part way round the M60 on the other side of Manchester Sue realised we had forgotten my Chemotherapy Tablets…. so we turned round and diverted back home.
Some where along the M61 we realised we had forgotten all the contents of the bread bin…. bagels, wraps, hoagies and sliced bread for the morning toast. Not that we would have had any jam… or honey as we had forgotten that too!
The next little disaster, notice I didn’t title this post as “Disaster at Tourfest”…. as some people do like a bit of click bate goings on. Turning onto Naze Lane less the half a mile from Donkey Creek Farm we picked up a chunk… well more of a small piece of steel in one of the rear tyres of the 5th wheel. Sue noticed it as soon as we stopped at Donkey Creek reception and it was defiantly flatter when we came out of reception than when we went in!
It doesn’t stop there…
On setting up we discovered we had also left my trousers at home too….
The first order of business was to sort out the puncture. I carry a 12 volt compressor and tried re inflating the tyre. I got it up to 50psi but I could hear a hiss, so I’d not just popped it off the rim. I didn’t really think I had but you have to try. I managed to find the offending bit of steel and wheedle it out of the tyre with my leatherman.
Looking at where it had entered the tyre I didn’t really fancy a repair as it was right between two tread blocks. So a replacement was needed. In the past I’d have jacked the caravan up, removed the wheel and set off to find a tyre shop. However I’m a bit hampered nowadays so we needed someone to come out to us. I asked at Reception and they recommended a local garage… J Townsend & Sons (01772632238). I recognised the name as sometime back in 1998/99 they had done a full service and brake replacement on my old Land Rover Discovery 1 when I worked at Warton. Small world.
I gave them a ring and they said they would be out to me in about 20 minutes, and they were spot on time. They jacked the 5th wheel up in the correct place and removed the wheel. We were asked if we were staying in the 5th wheel overnight and as we were, he left the jack and stand in place to ensure there was support for that axle. Not a lot of people would have left a 5T workshop trolly jack overnight!
I had a wander down a few pitches for a quick chat with Martin – The Caravan Nut and Mrs TCN… which was really useful as Martin is the fountain of knowledge when it comes to cleaning products. He confirmed the “The Pink Stuff” would be a great product to use to clean up and re-whiten all the locker handles on the 5th Wheel. That was really helpful as I’d been reading about all sorts of self made concoctions on the internet for cleaning yellowed plastic and non of them sat comfortably with me because of what they contained. I left Martin and Mrs TCN putting the final touches to the show room shine on their caravan.
The following morning Townsends gave me a ring, new tyre all done at a total cost of £108, which for two visits didn’t seem out of order for me. Graham – Caravan Vlogger will be pleased to note I did manage to torque my own nuts before setting off for home.
So the current situation is…
I have my chemo tablets, no bread, no trousers and a new tyre on the rig. What else could go wrong?
It was now Friday and the day of the great arrival . Even though it was slightly inclement weather wise we set up shop ready to mark the arrivals out of ten based on reversing skill, use or not of a motor mover, amount of gesticulating of the reversing assistant and repositioning as the significant other was not quite happy with the exact location on the pitch and finally speed of erection…. of the awning!
No we didn’t….. HONESTLY ! We didn’t.
While we were sat out Hey Ho Let’s Tow stopped by for a chat and I can honestly say they are a great genuine family, it was a pleasure chatting to them and generally talking about all sorts. Sorry no pics but I feel at some of these events the stop and chat should be just that and not seen as a photo opportunity… if someone asks then that’s OK.
Friday night we were all due to go to a local social club organised by Tony & Deb…. I suspect more by Deb from the The Caravan Addys. However overnight I had started bleeding from my stoma. By late afternoon it was rather bad….. in fact blue light to the nearest hospital bad…. we hung on a bit and it subsided somewhat but it nixed on me going out to the Big Meet Up, buffet, disco and dancing that evening. Overnight it stopped and I started to feel a bit better. We narrowed it down to my trousers of all things…. yep bloody trousers featuring in the blog again!. The belt line on my trousers had been rubbing on my stoma and actually started a small bleed that actually seemed a LOT worse than it was. Phew….. I have never seen Sue actually worried before about a medical issue despite her 35+ years in medicine.
Saturday the weather was finally playing along.
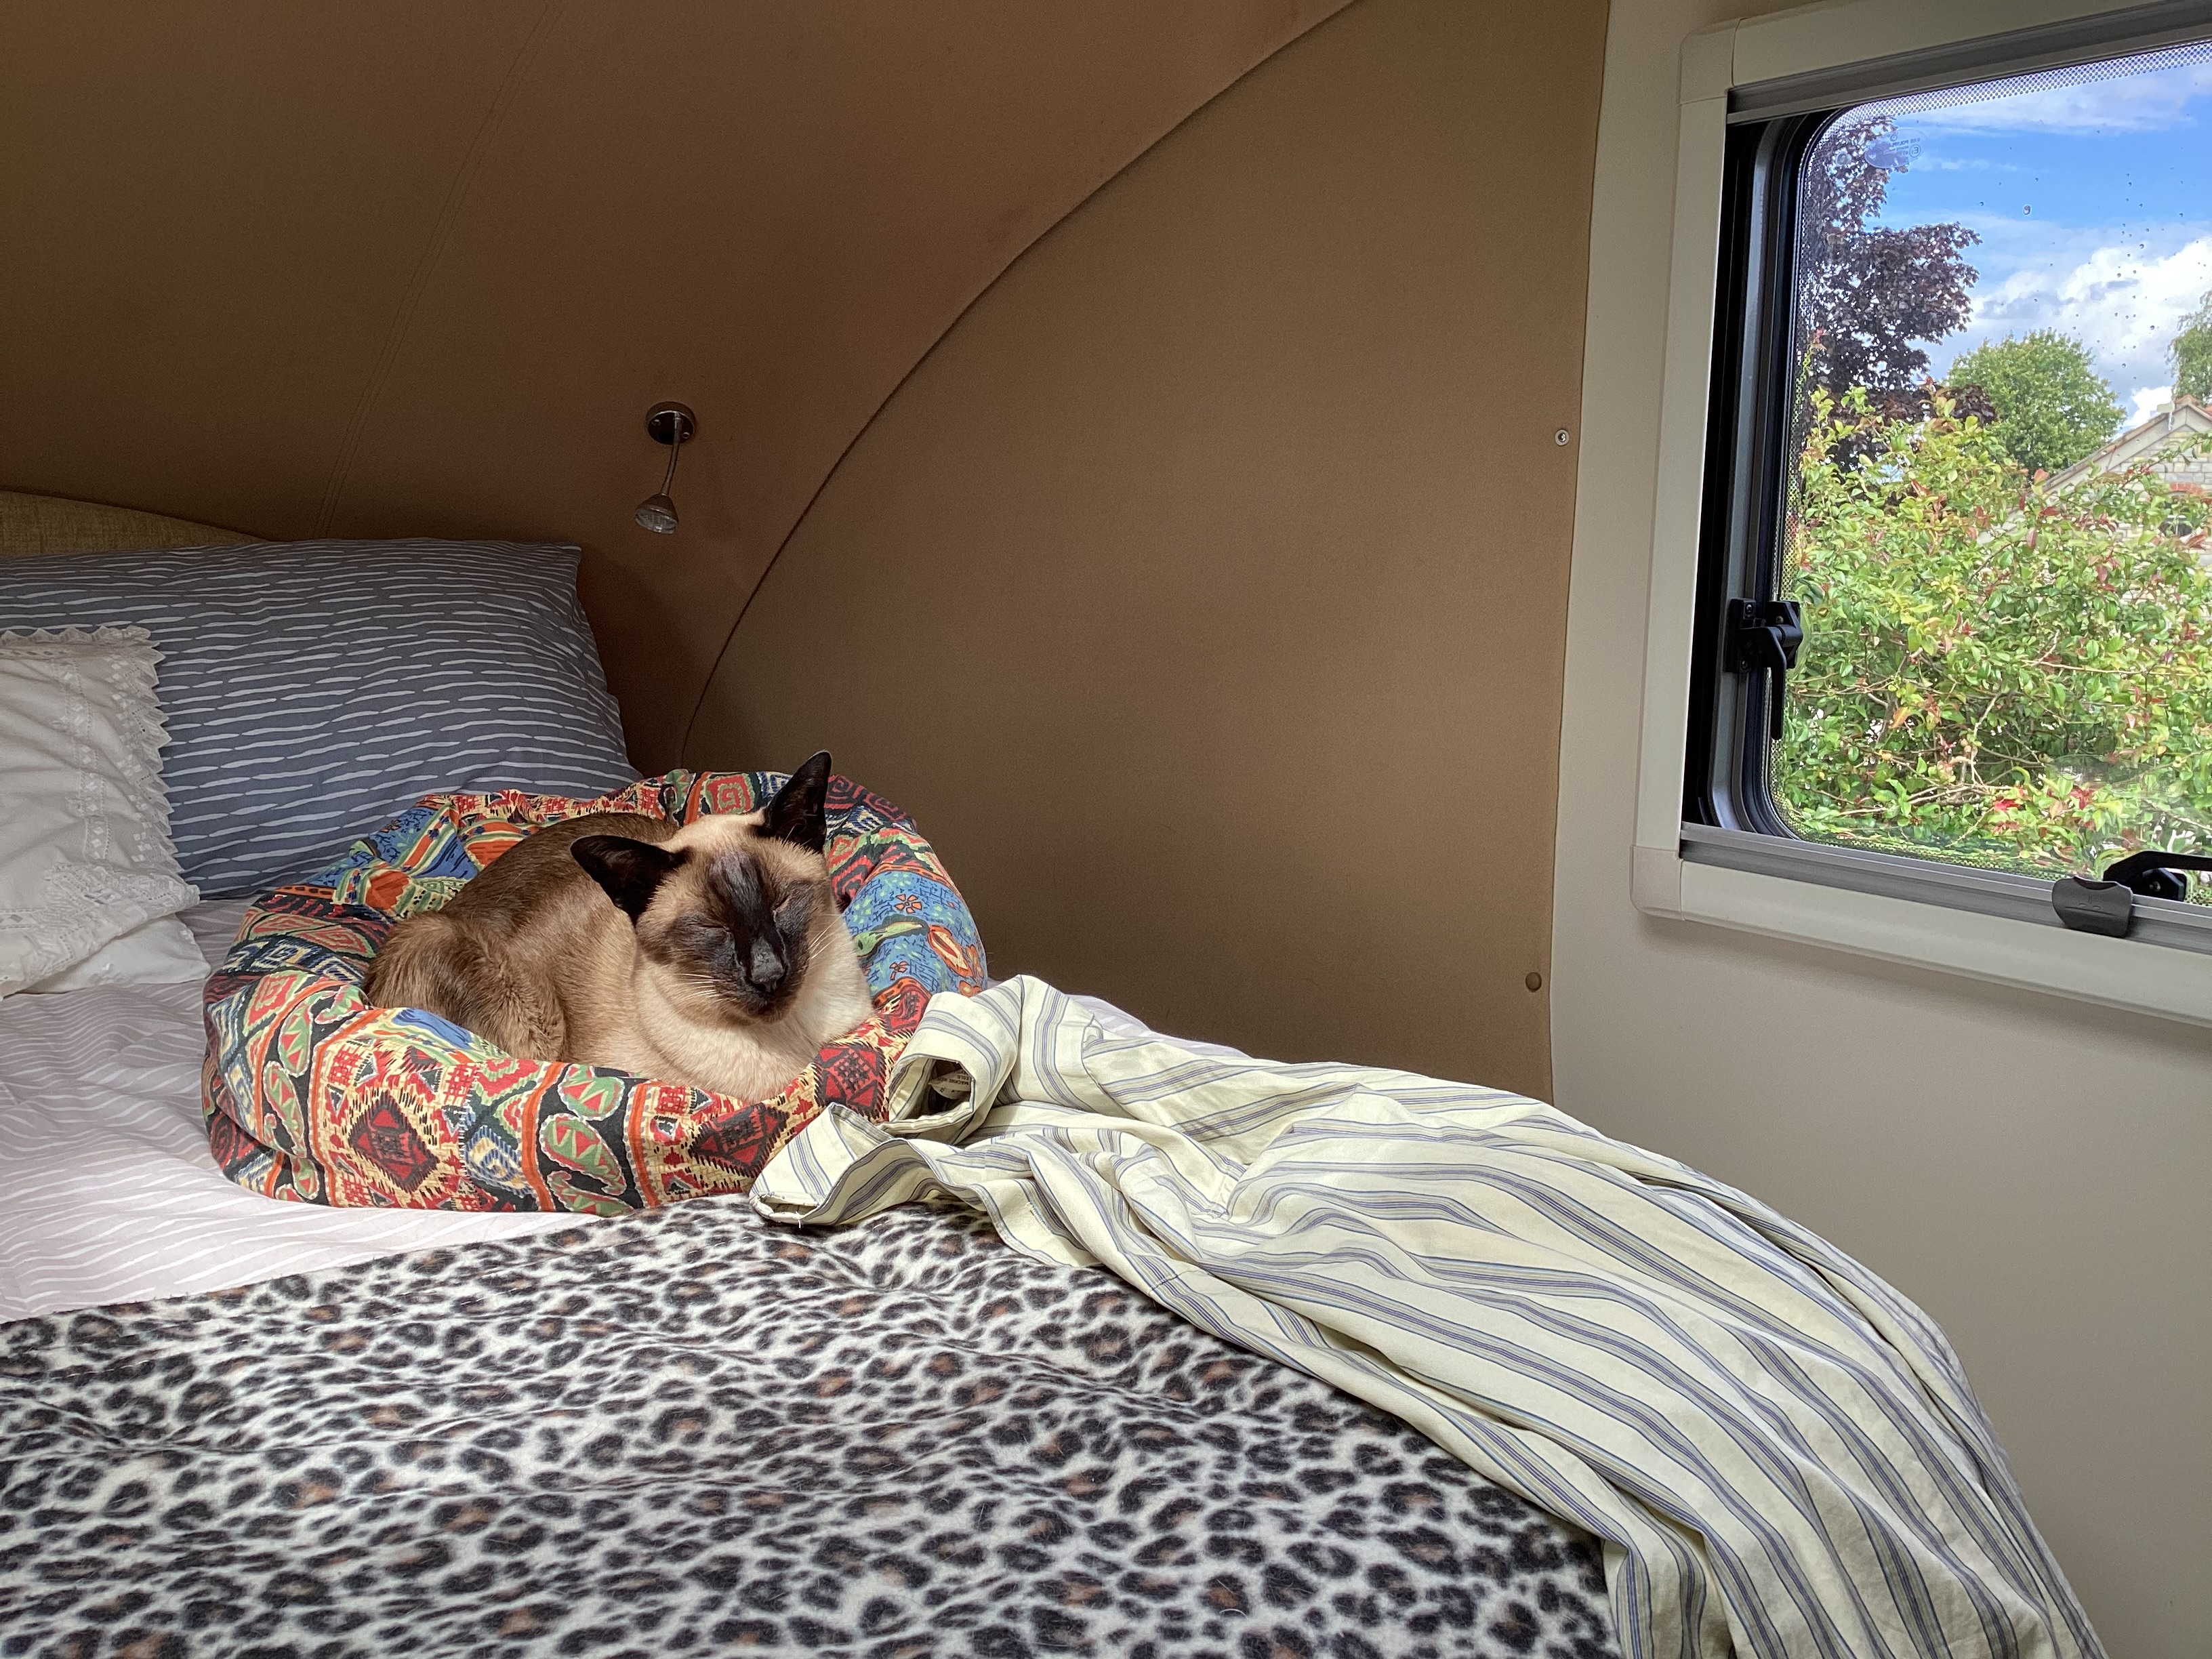
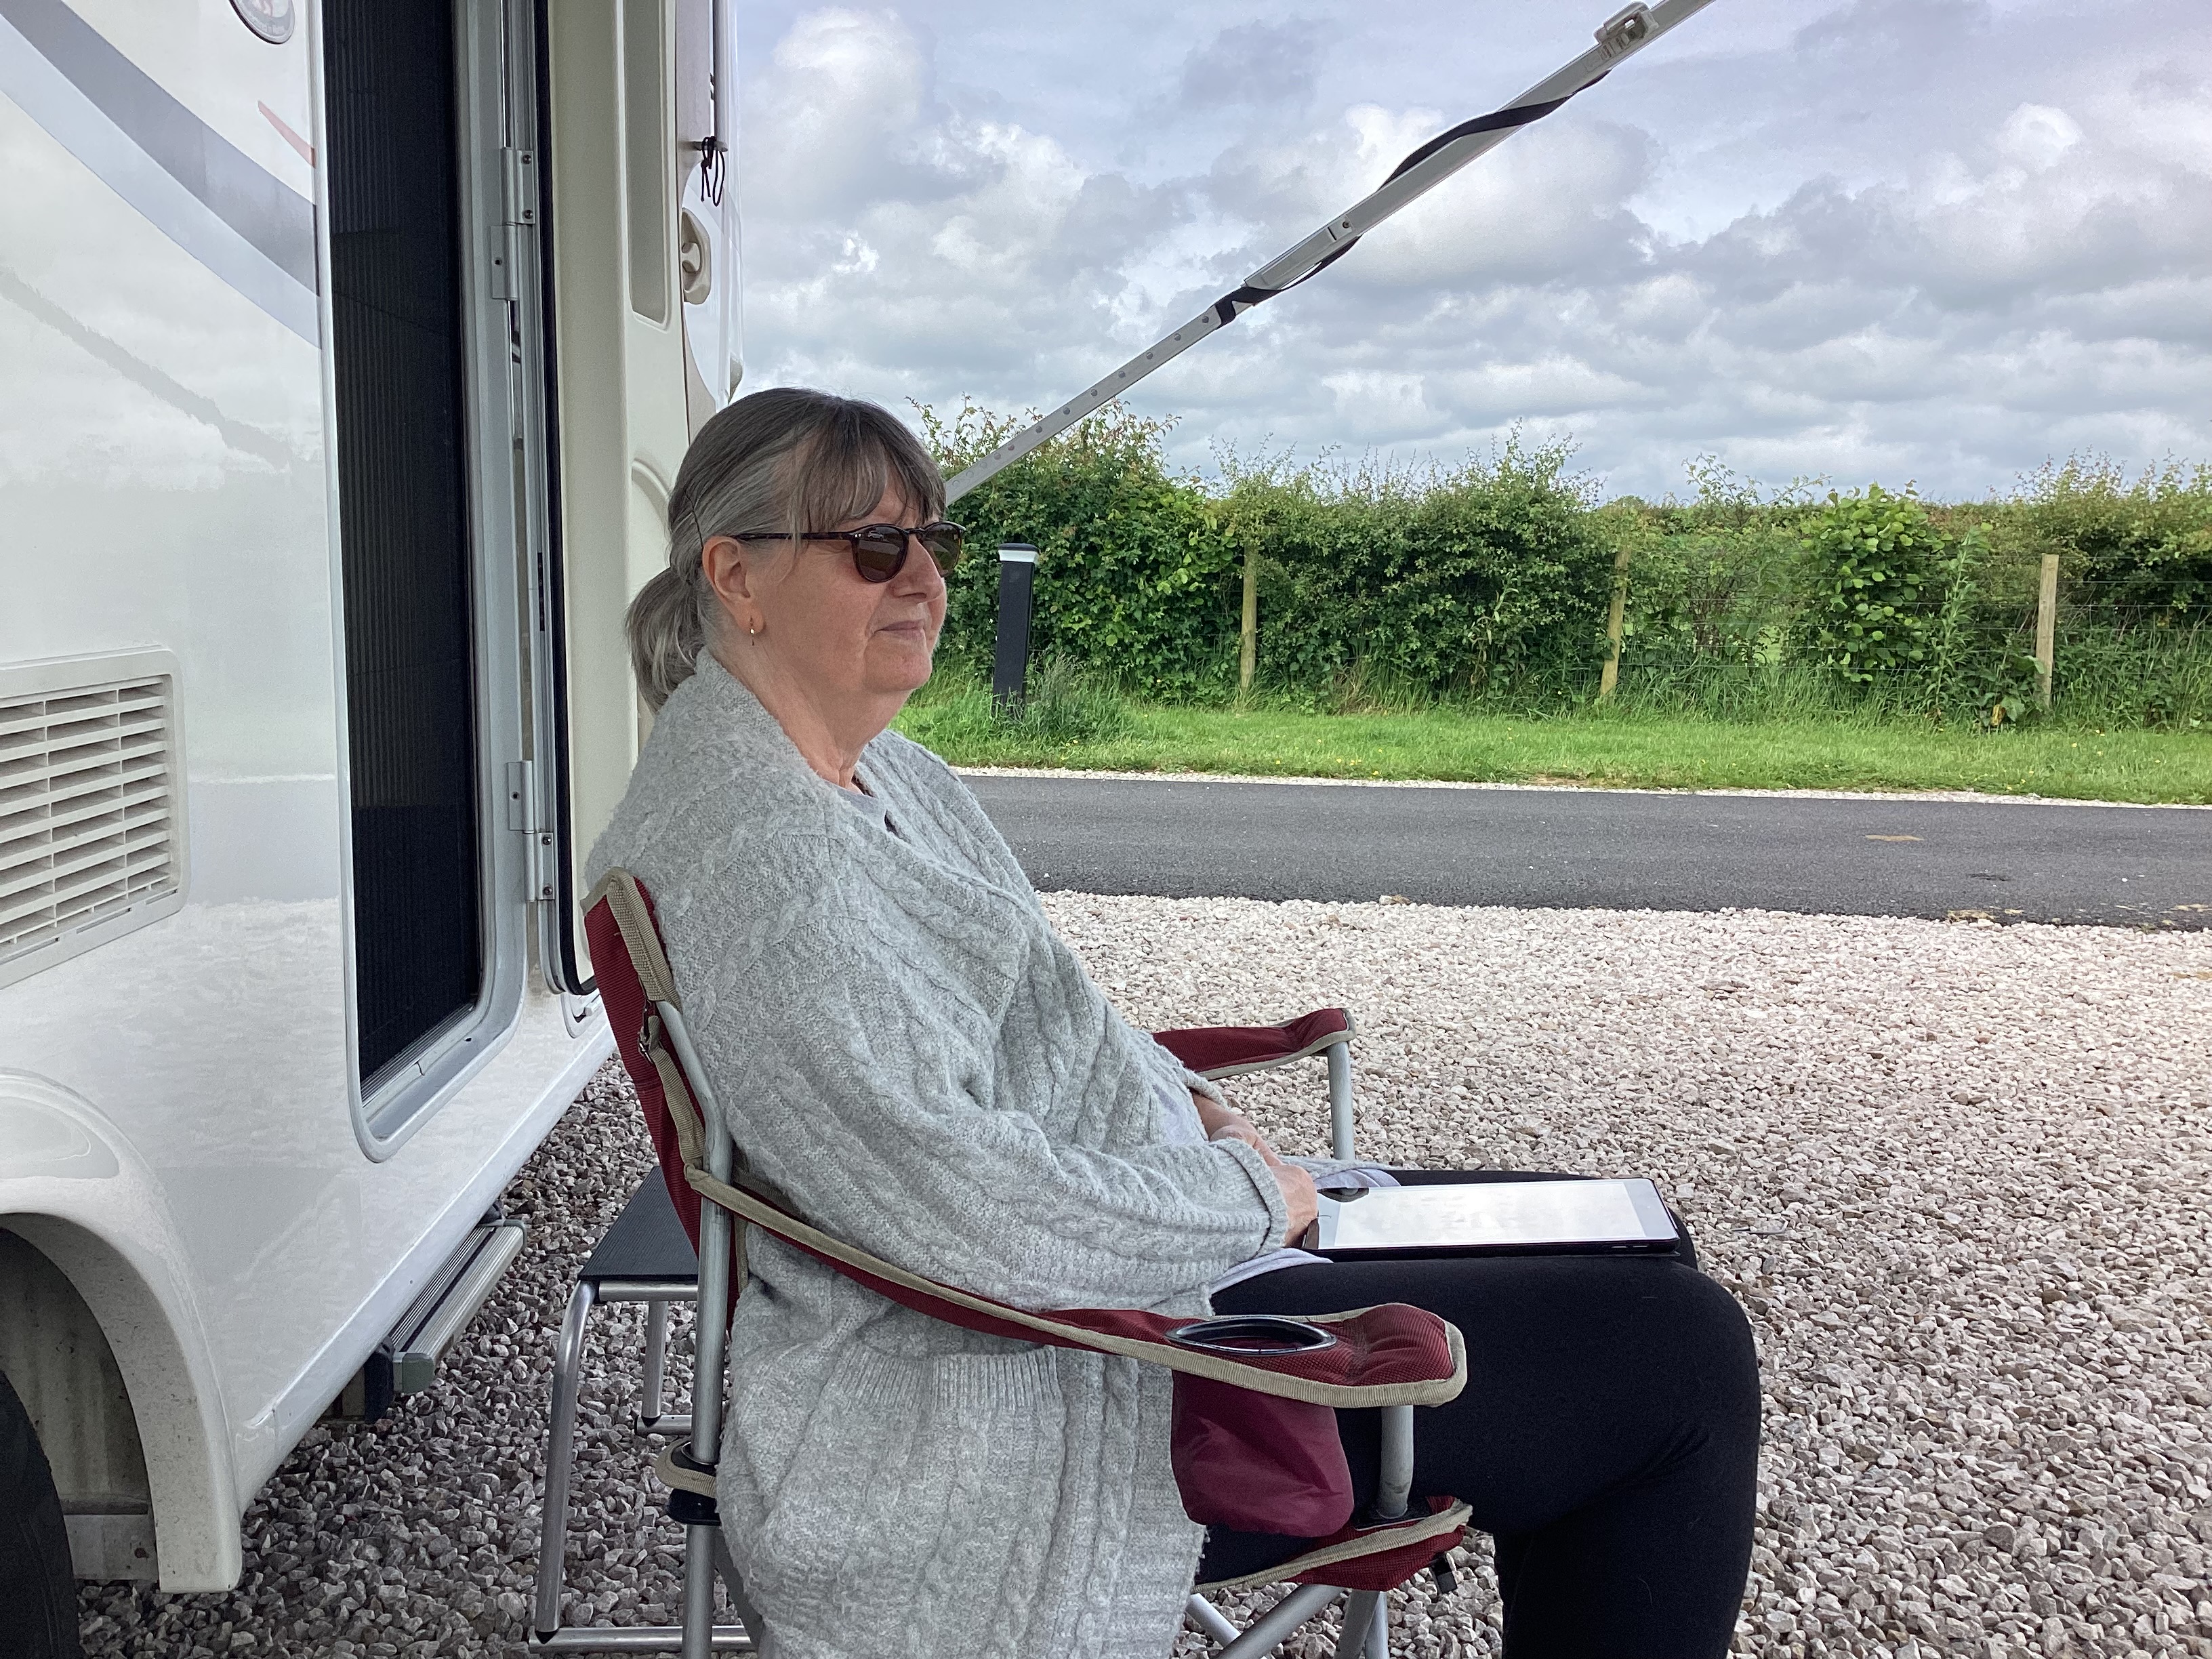
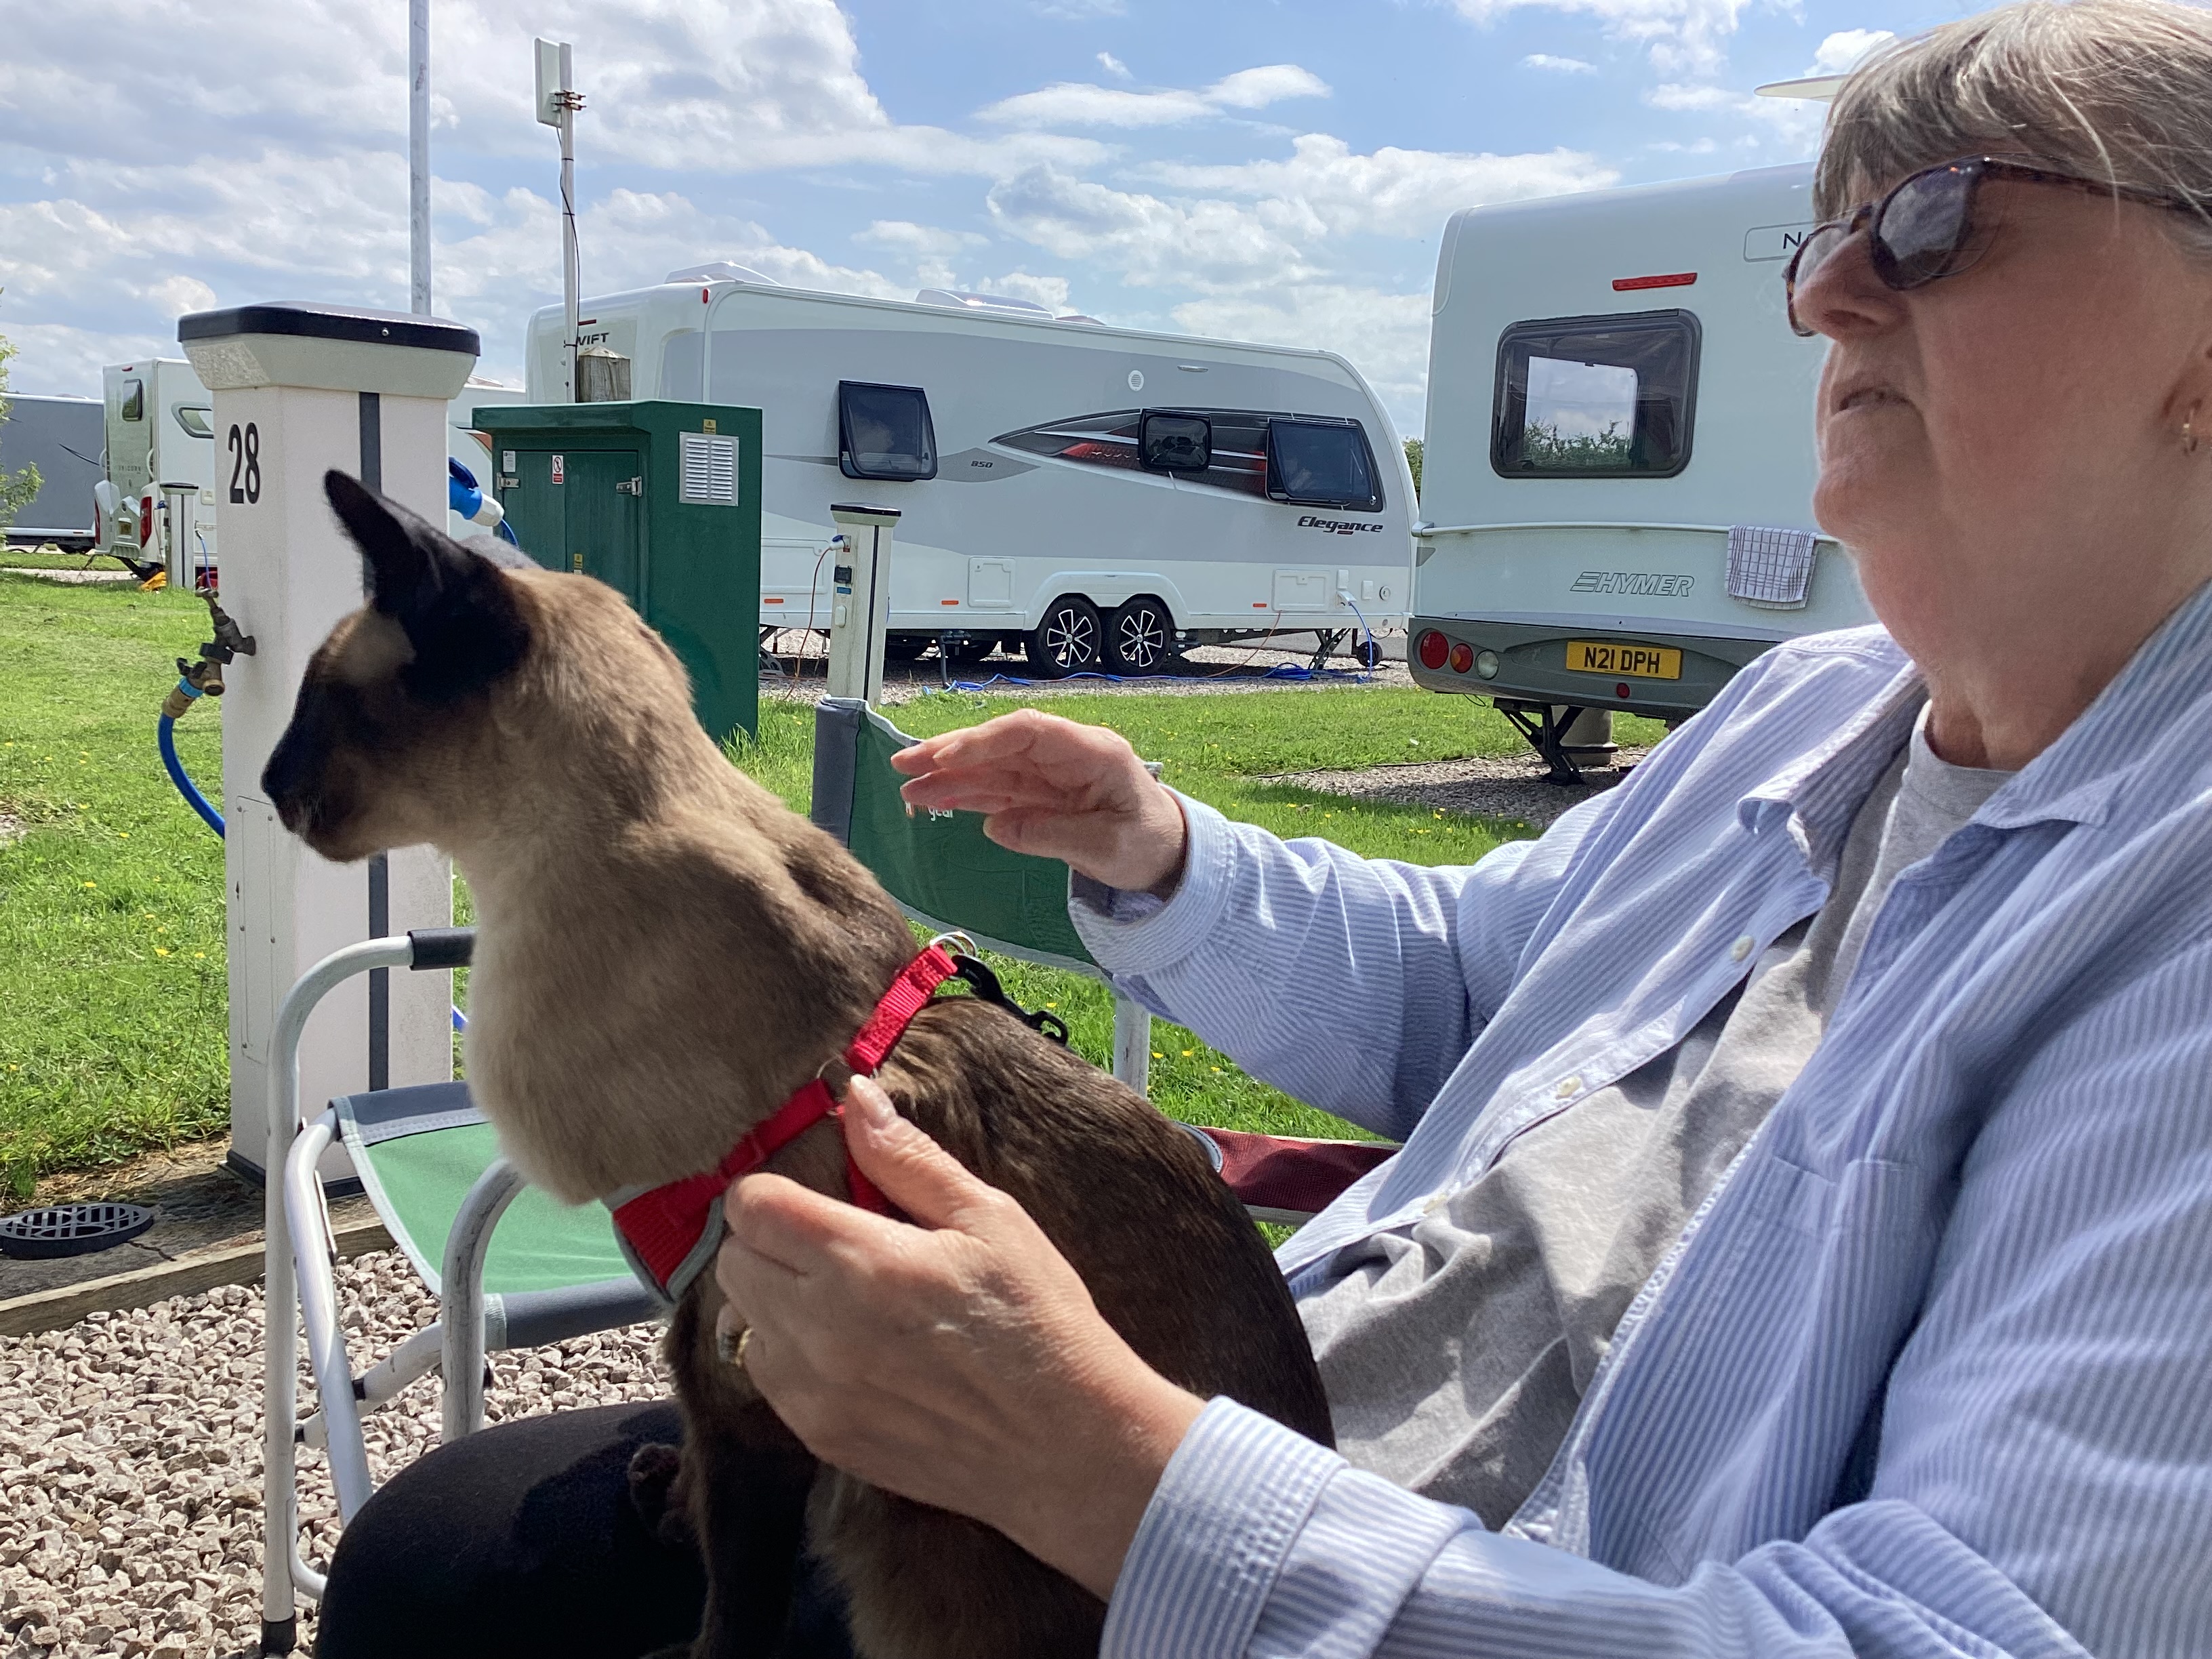
Sun and blue skies. Himself decided that maybe a bit of fresh sea air up the nostrils was required… before his next scheduled nap.
You can never have enough Siamese on the internet….. well that is what Henry says.
Graham – Caravan Vlogger and Mrs CV stopped by for a chat and a quick nosy round the 5th wheel. It was really nice chatting to Graham after a couple of years of ‘chatting’ on line. Again Graham is genuinely as he appears on his channel…. a really nice chap.
Saturday evening was a bit of an informal do with various caravaners gathering, I was still cautious as I didn’t want to restart the previous days medical event so we ducked out of that but plenty of people stopped by for a natter including a chap that had hot rods and currently had a hot rod truck…. I never got his name but was great to talk to about everything from tyres to engine oil.
Sunday there were. couple of departures the main core however departing on the Bank Holiday Monday. We had booked through to Tuesday as we thought it might be quite on the roads… which it was.
So that was our Tourfest North West 2024.
Would we go again… heck yes hopefully with Tablets, Bread and Trousers!
Are you sure you remembered to pack my nom noms… this is serious dude!
In a few days we are off again this time to Glastonbury for a week staying in at The Old Oaks…. Gives us chance to call in to Clark’s Shopping Village and get a new pair of casual shoes! Then on the way home we are stopping in North Wales at the 5th Wheel Company while they do a couple of jobs and extending the stay for a few days…. and just maybe I’ll be back on the bike for short little trips for morning coffee.
Isn’t technology wonderful. I’m sat here at the Christie Hospital undergoing 5 hours of chemo via a drip and infusion pump and editing this post on my iPad which I originally started writing on my iMac back at home after drafting it on my Mac while at Donkey Creek.
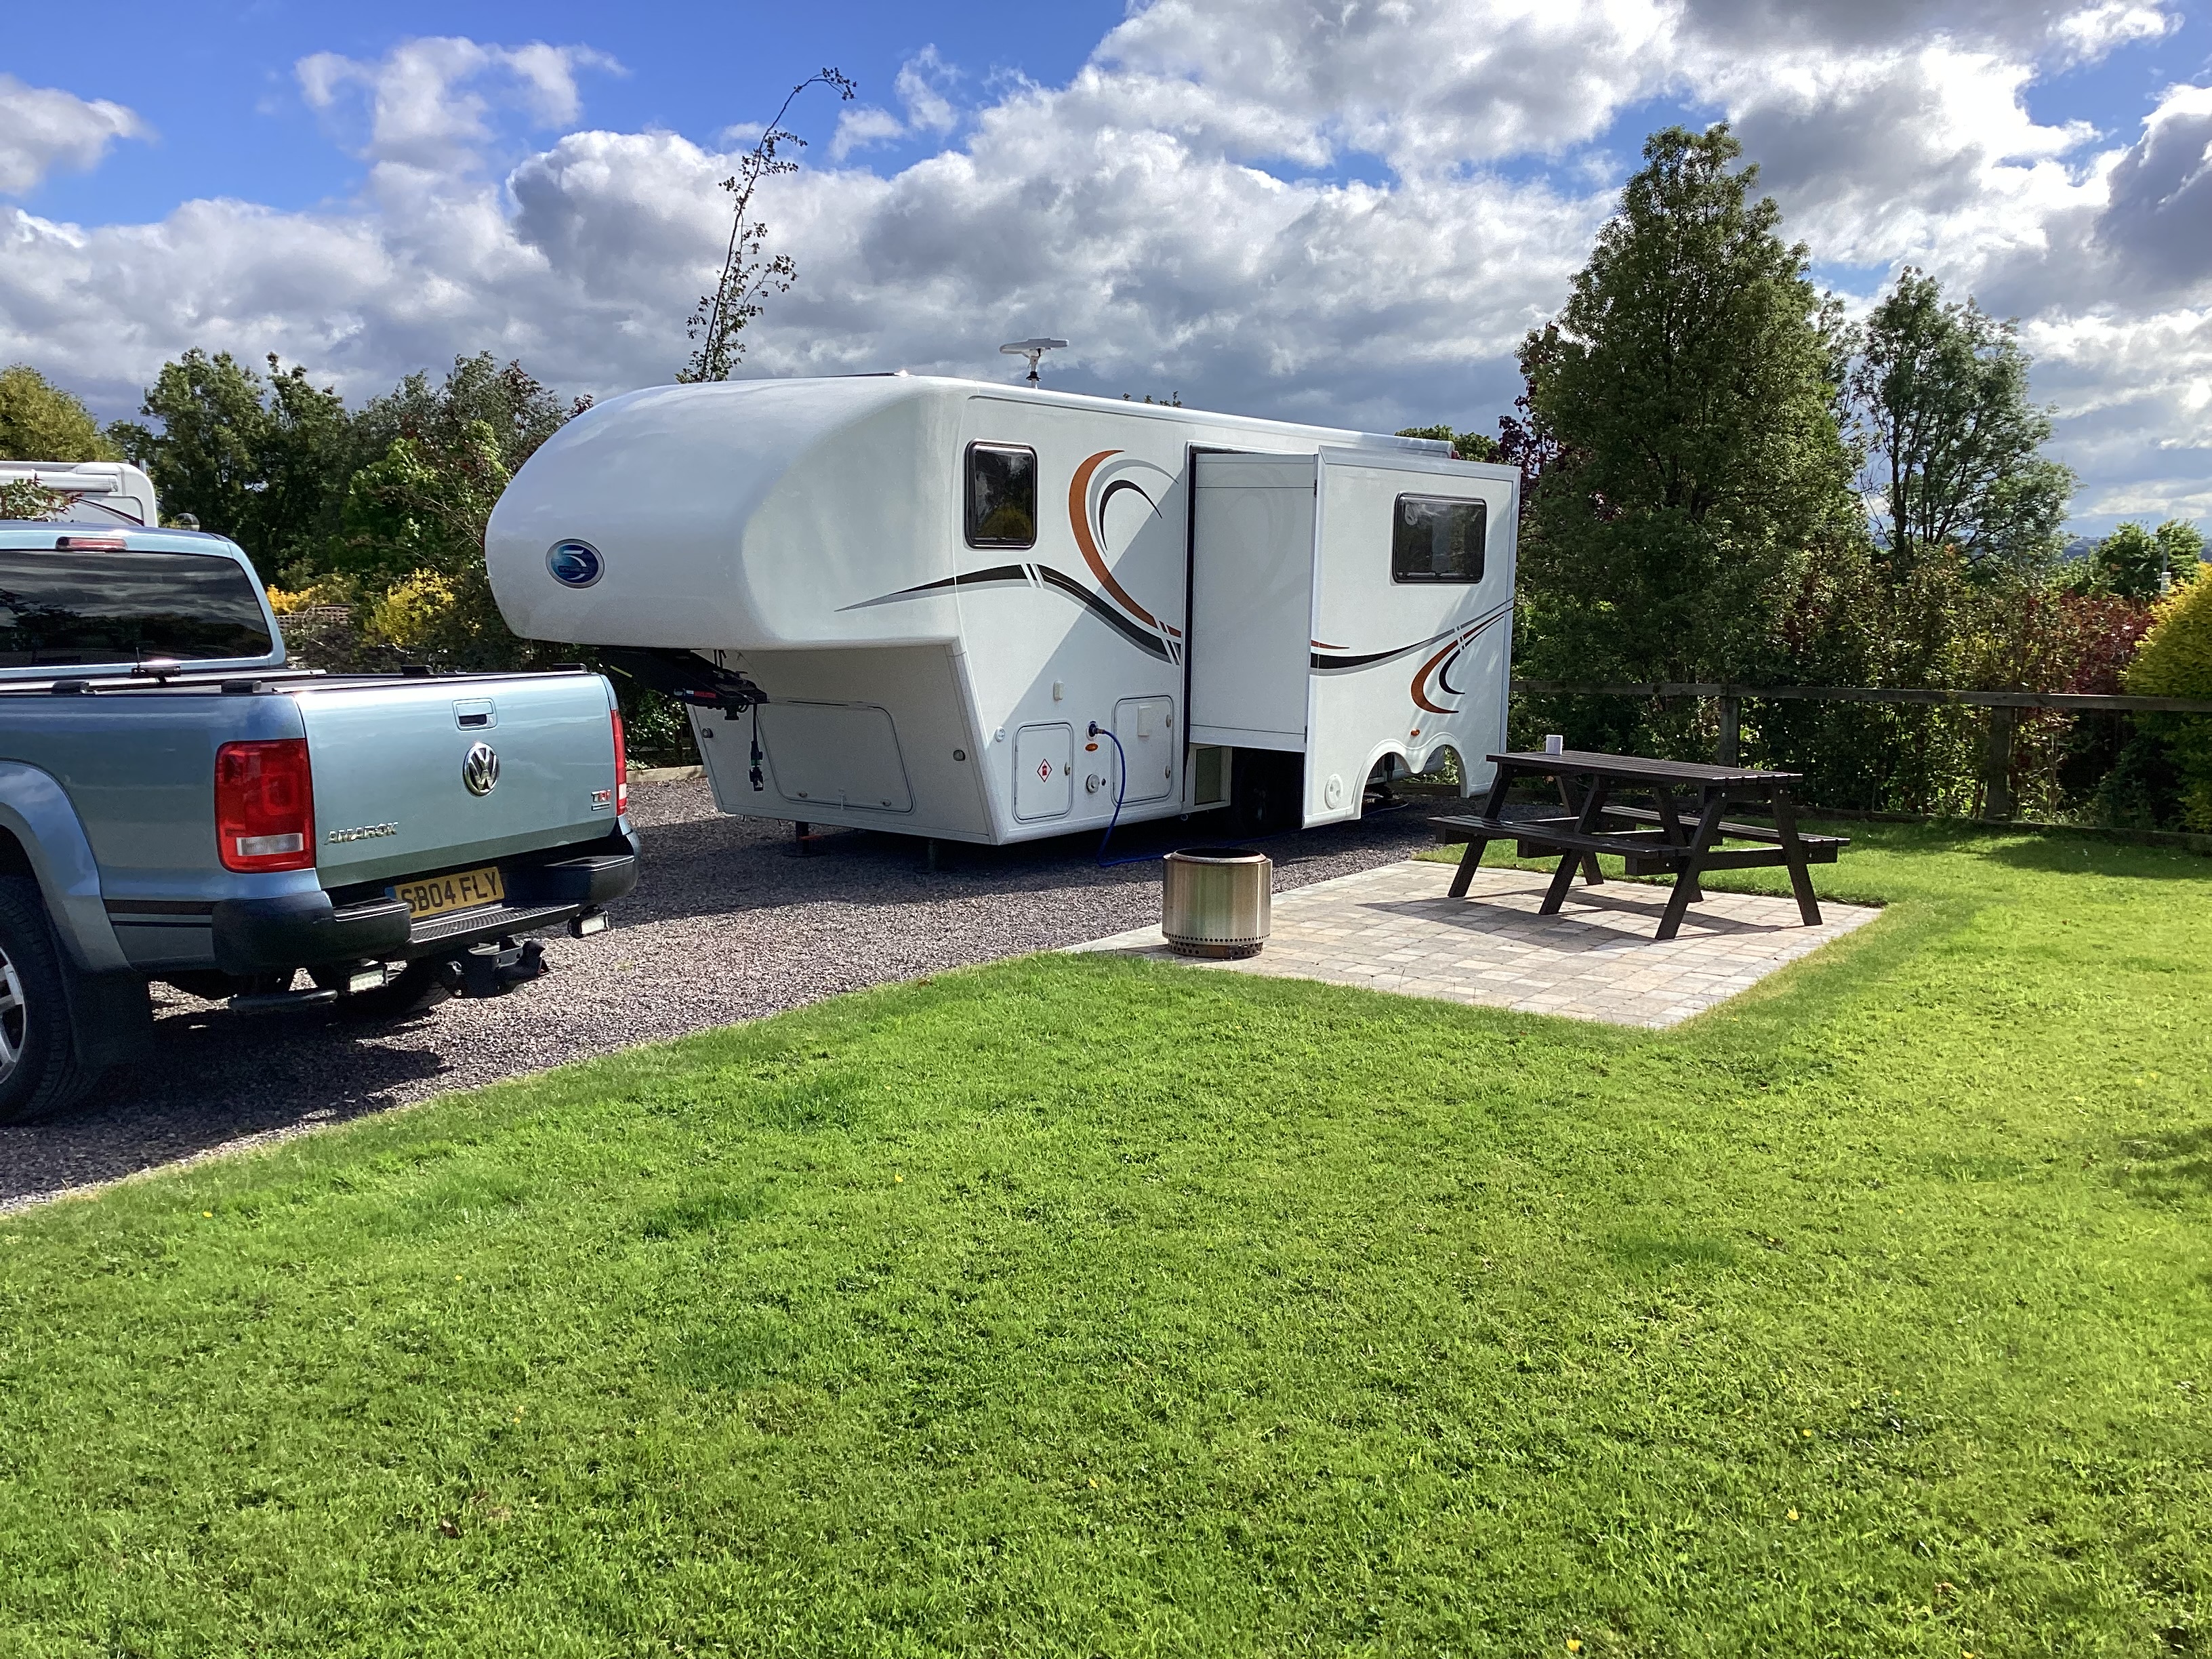
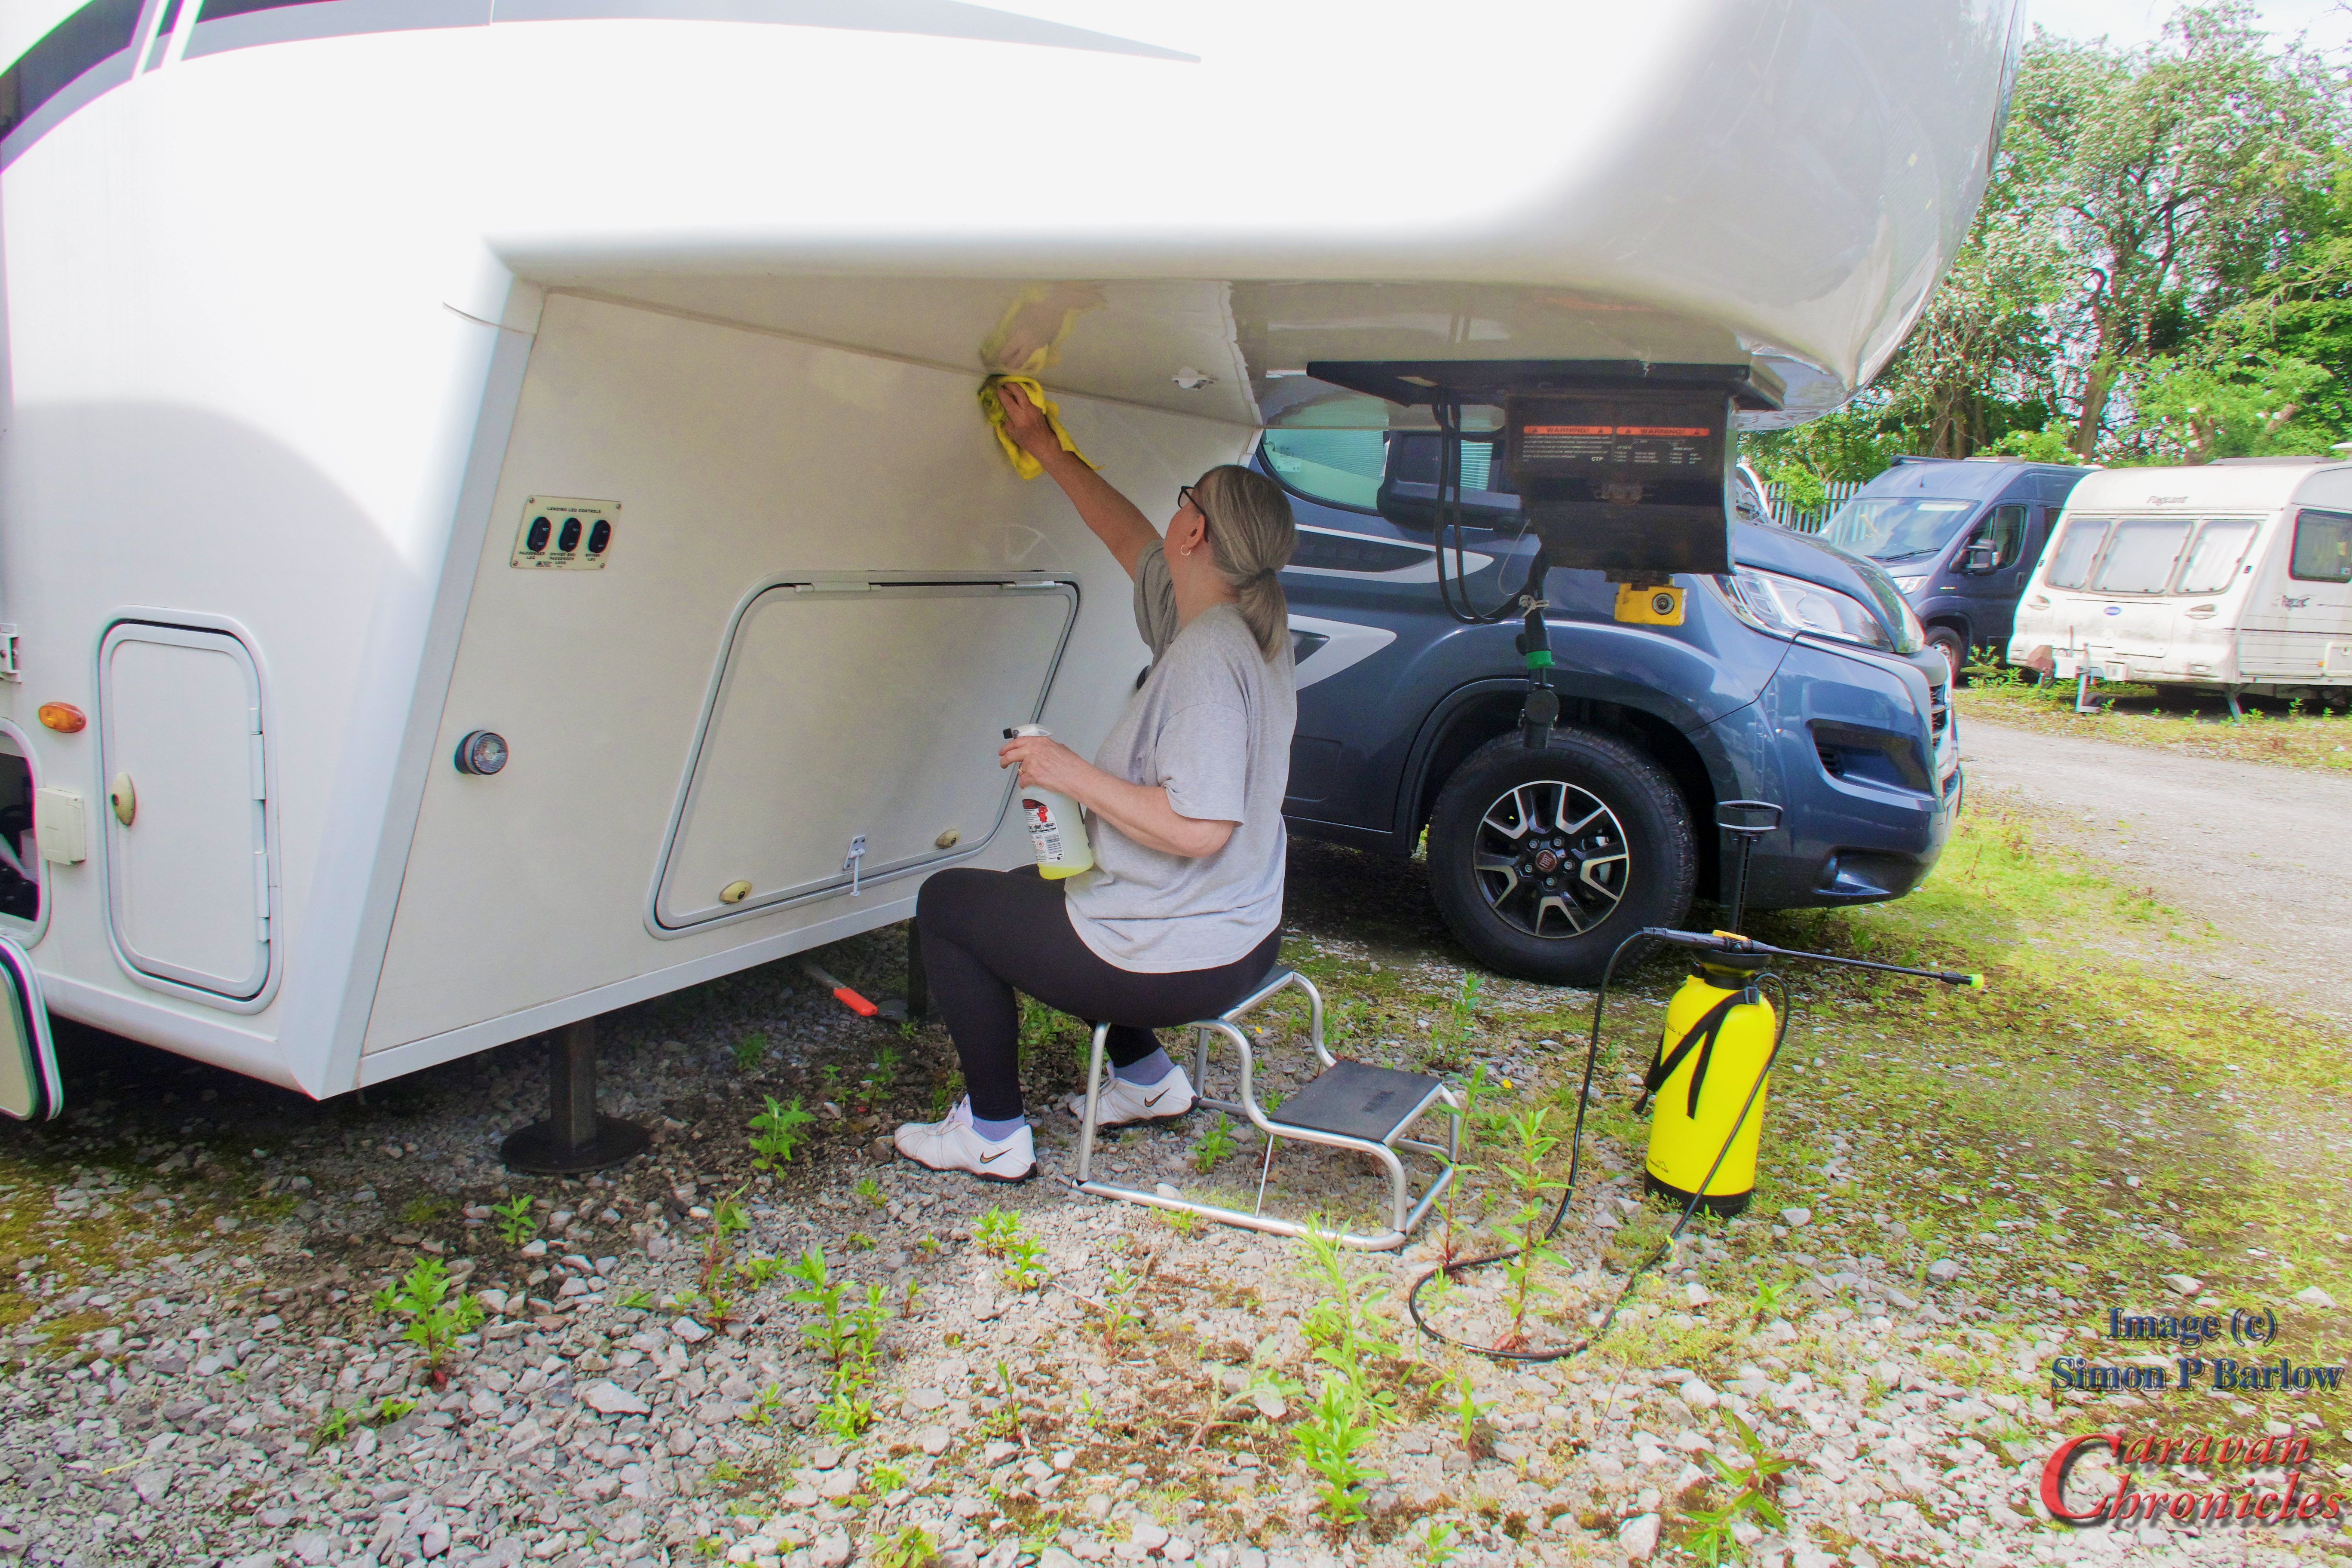
OK we are still working on a few bits and pieces but the weather on Friday and Saturday was ideal for cleaning the outside of the 5th Wheel. So while Sue made a start on the cleaning of the nose cap, I finished the first stage of the water pump relocation project and upgraded the wiring.
At some point the original wiring had been modified to include a 10 Amp socket in the wet bay to allow the use of an external pump to fill the fresh water tank. We still wanted to use this as the original external electrical connector was missing the original plug and it was just easier to sort out the wiring. It had been modified using 6 amp rated cable to both eh internal water pump AND the 10 socket. All fused on a single 10 Amp fuse. The wiring I upgraded to 16 amp rated cable but retained the 10 Amp fuse. So there should be no issues with cable rating in the future.
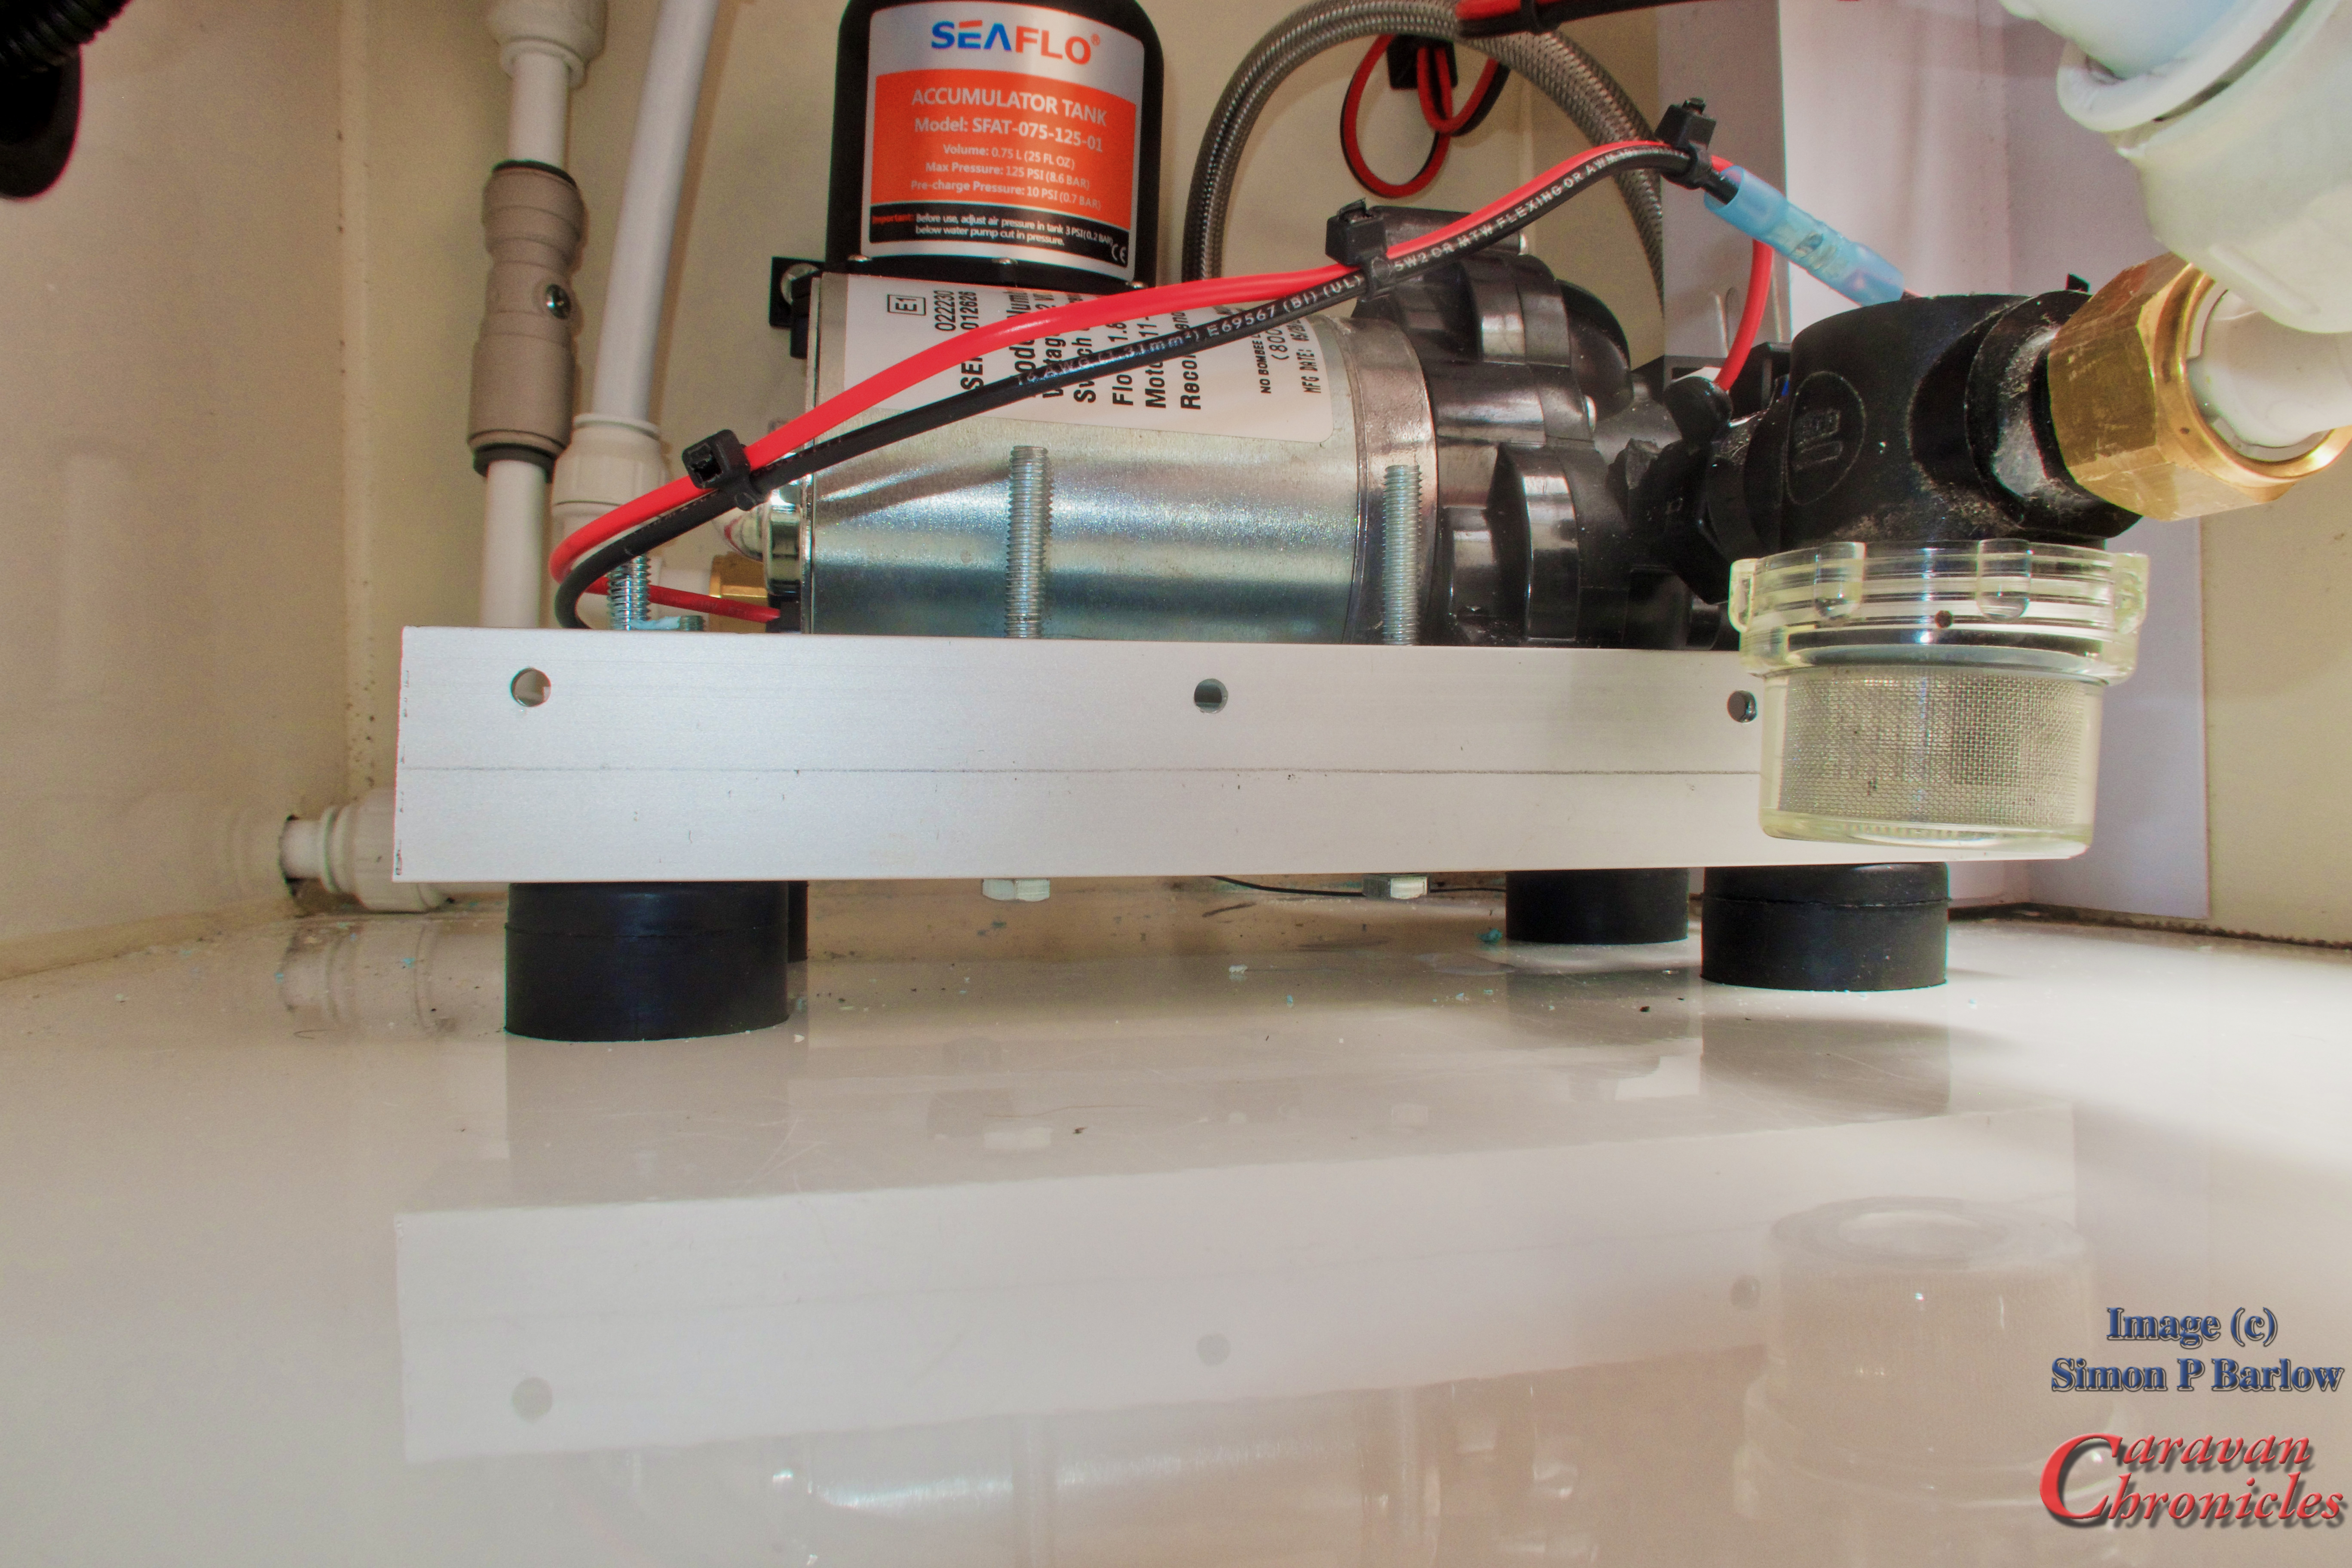
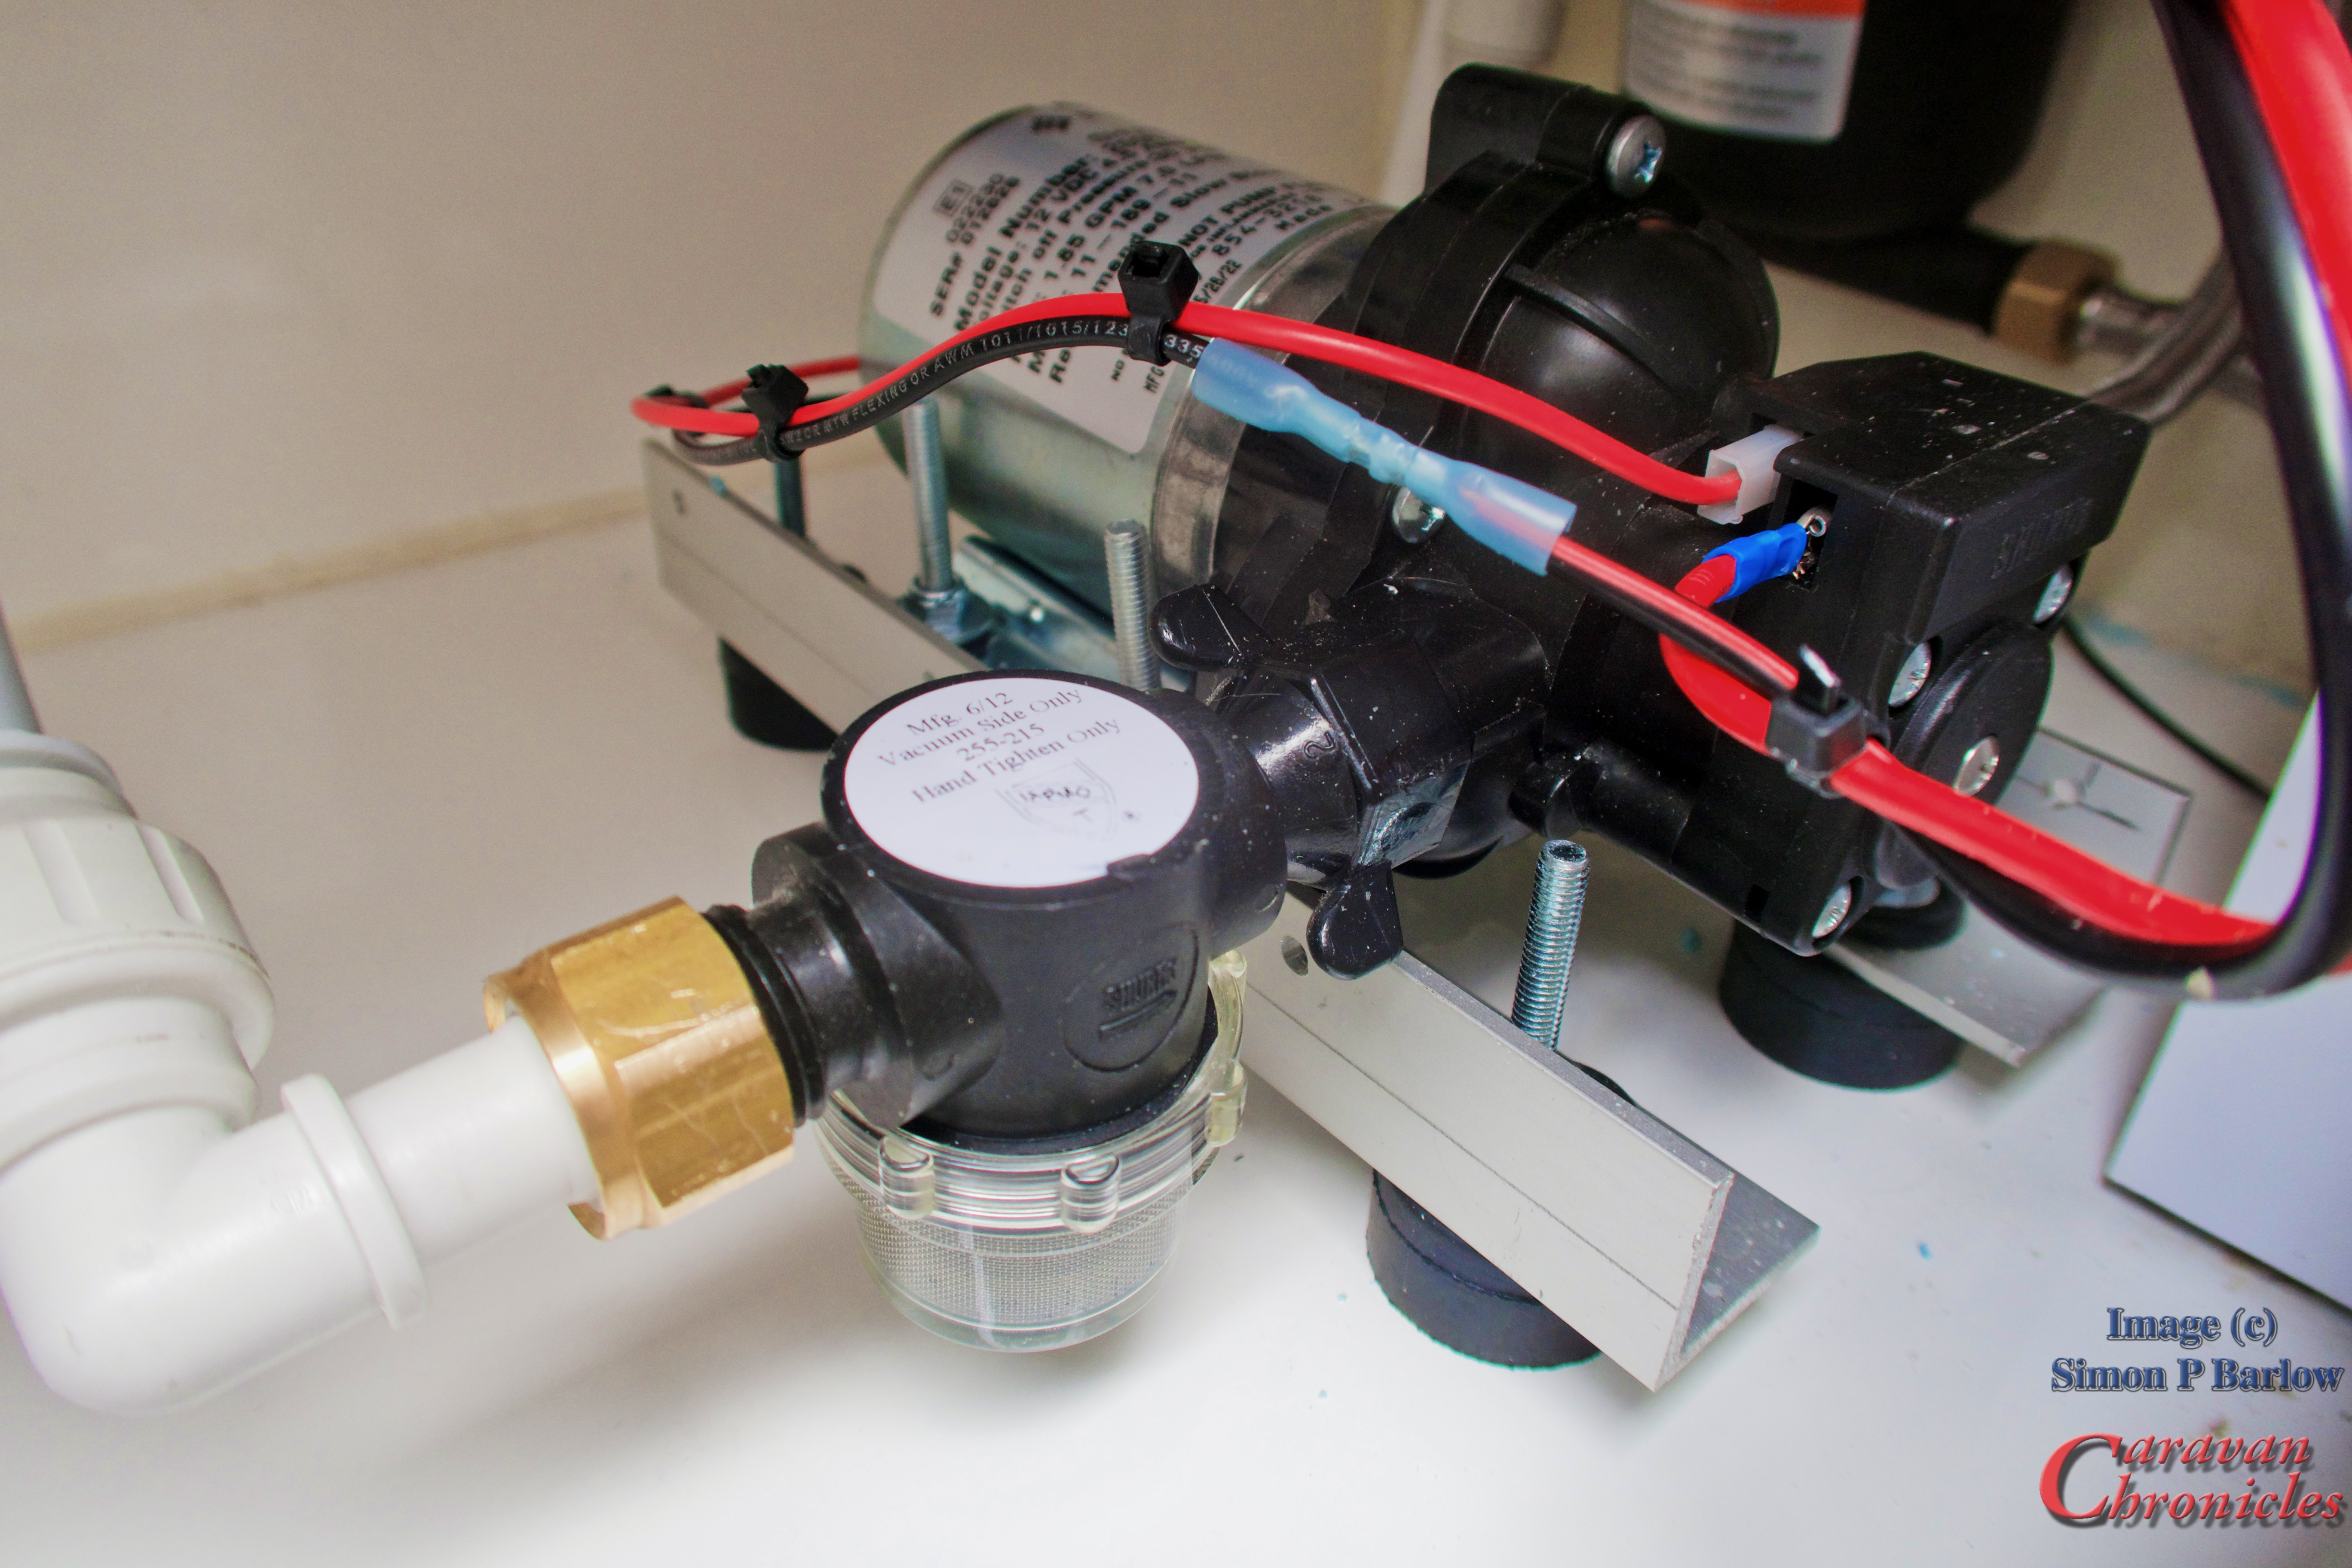
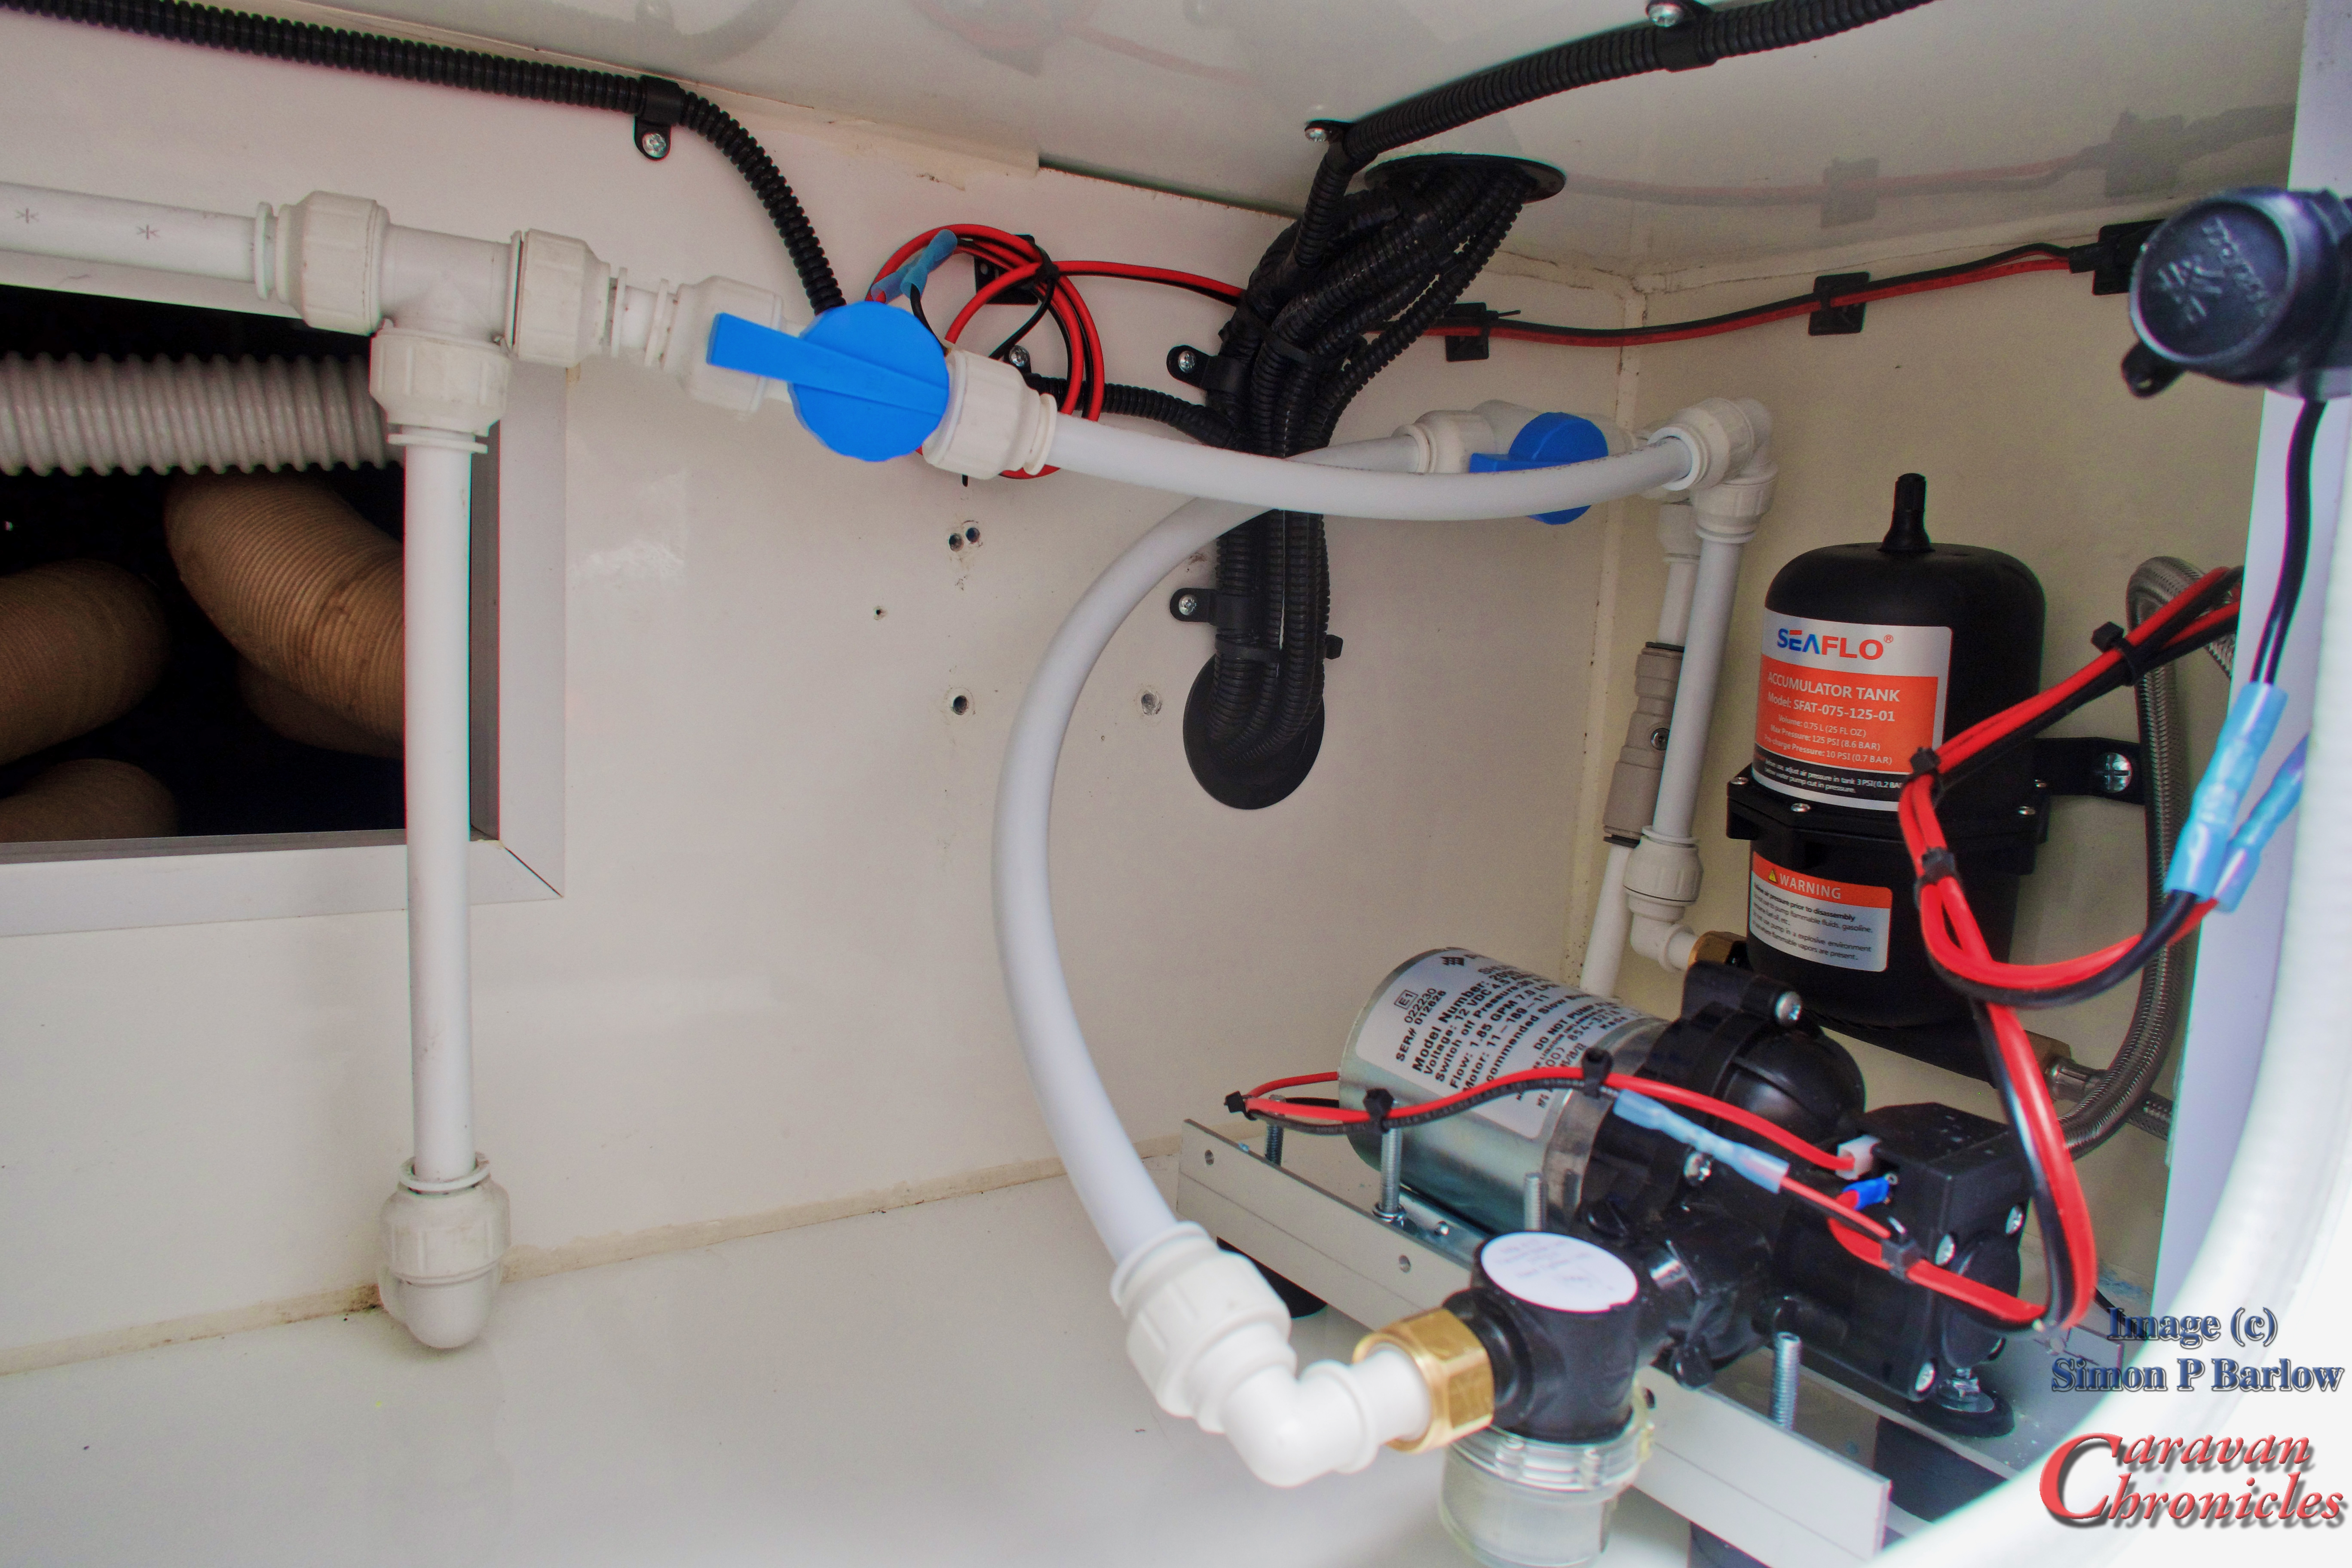
You can see from the photo above some of the work involved in moving the water pump. It was originally mounted where the holes are on the vertical wall. This resonated quite badly as it is located just under the bathroom and was particularly loud at night if the loo was flushed.
So to reduce the vibration from the pump before mounting it in a different location I made a aluminium cradle to mount the pump to and sat this on rubber isolation mounts before mounting it to the floor using stainless steel bolts, washes and lock nuts….. in fact I used stainless hardware for all the mods.
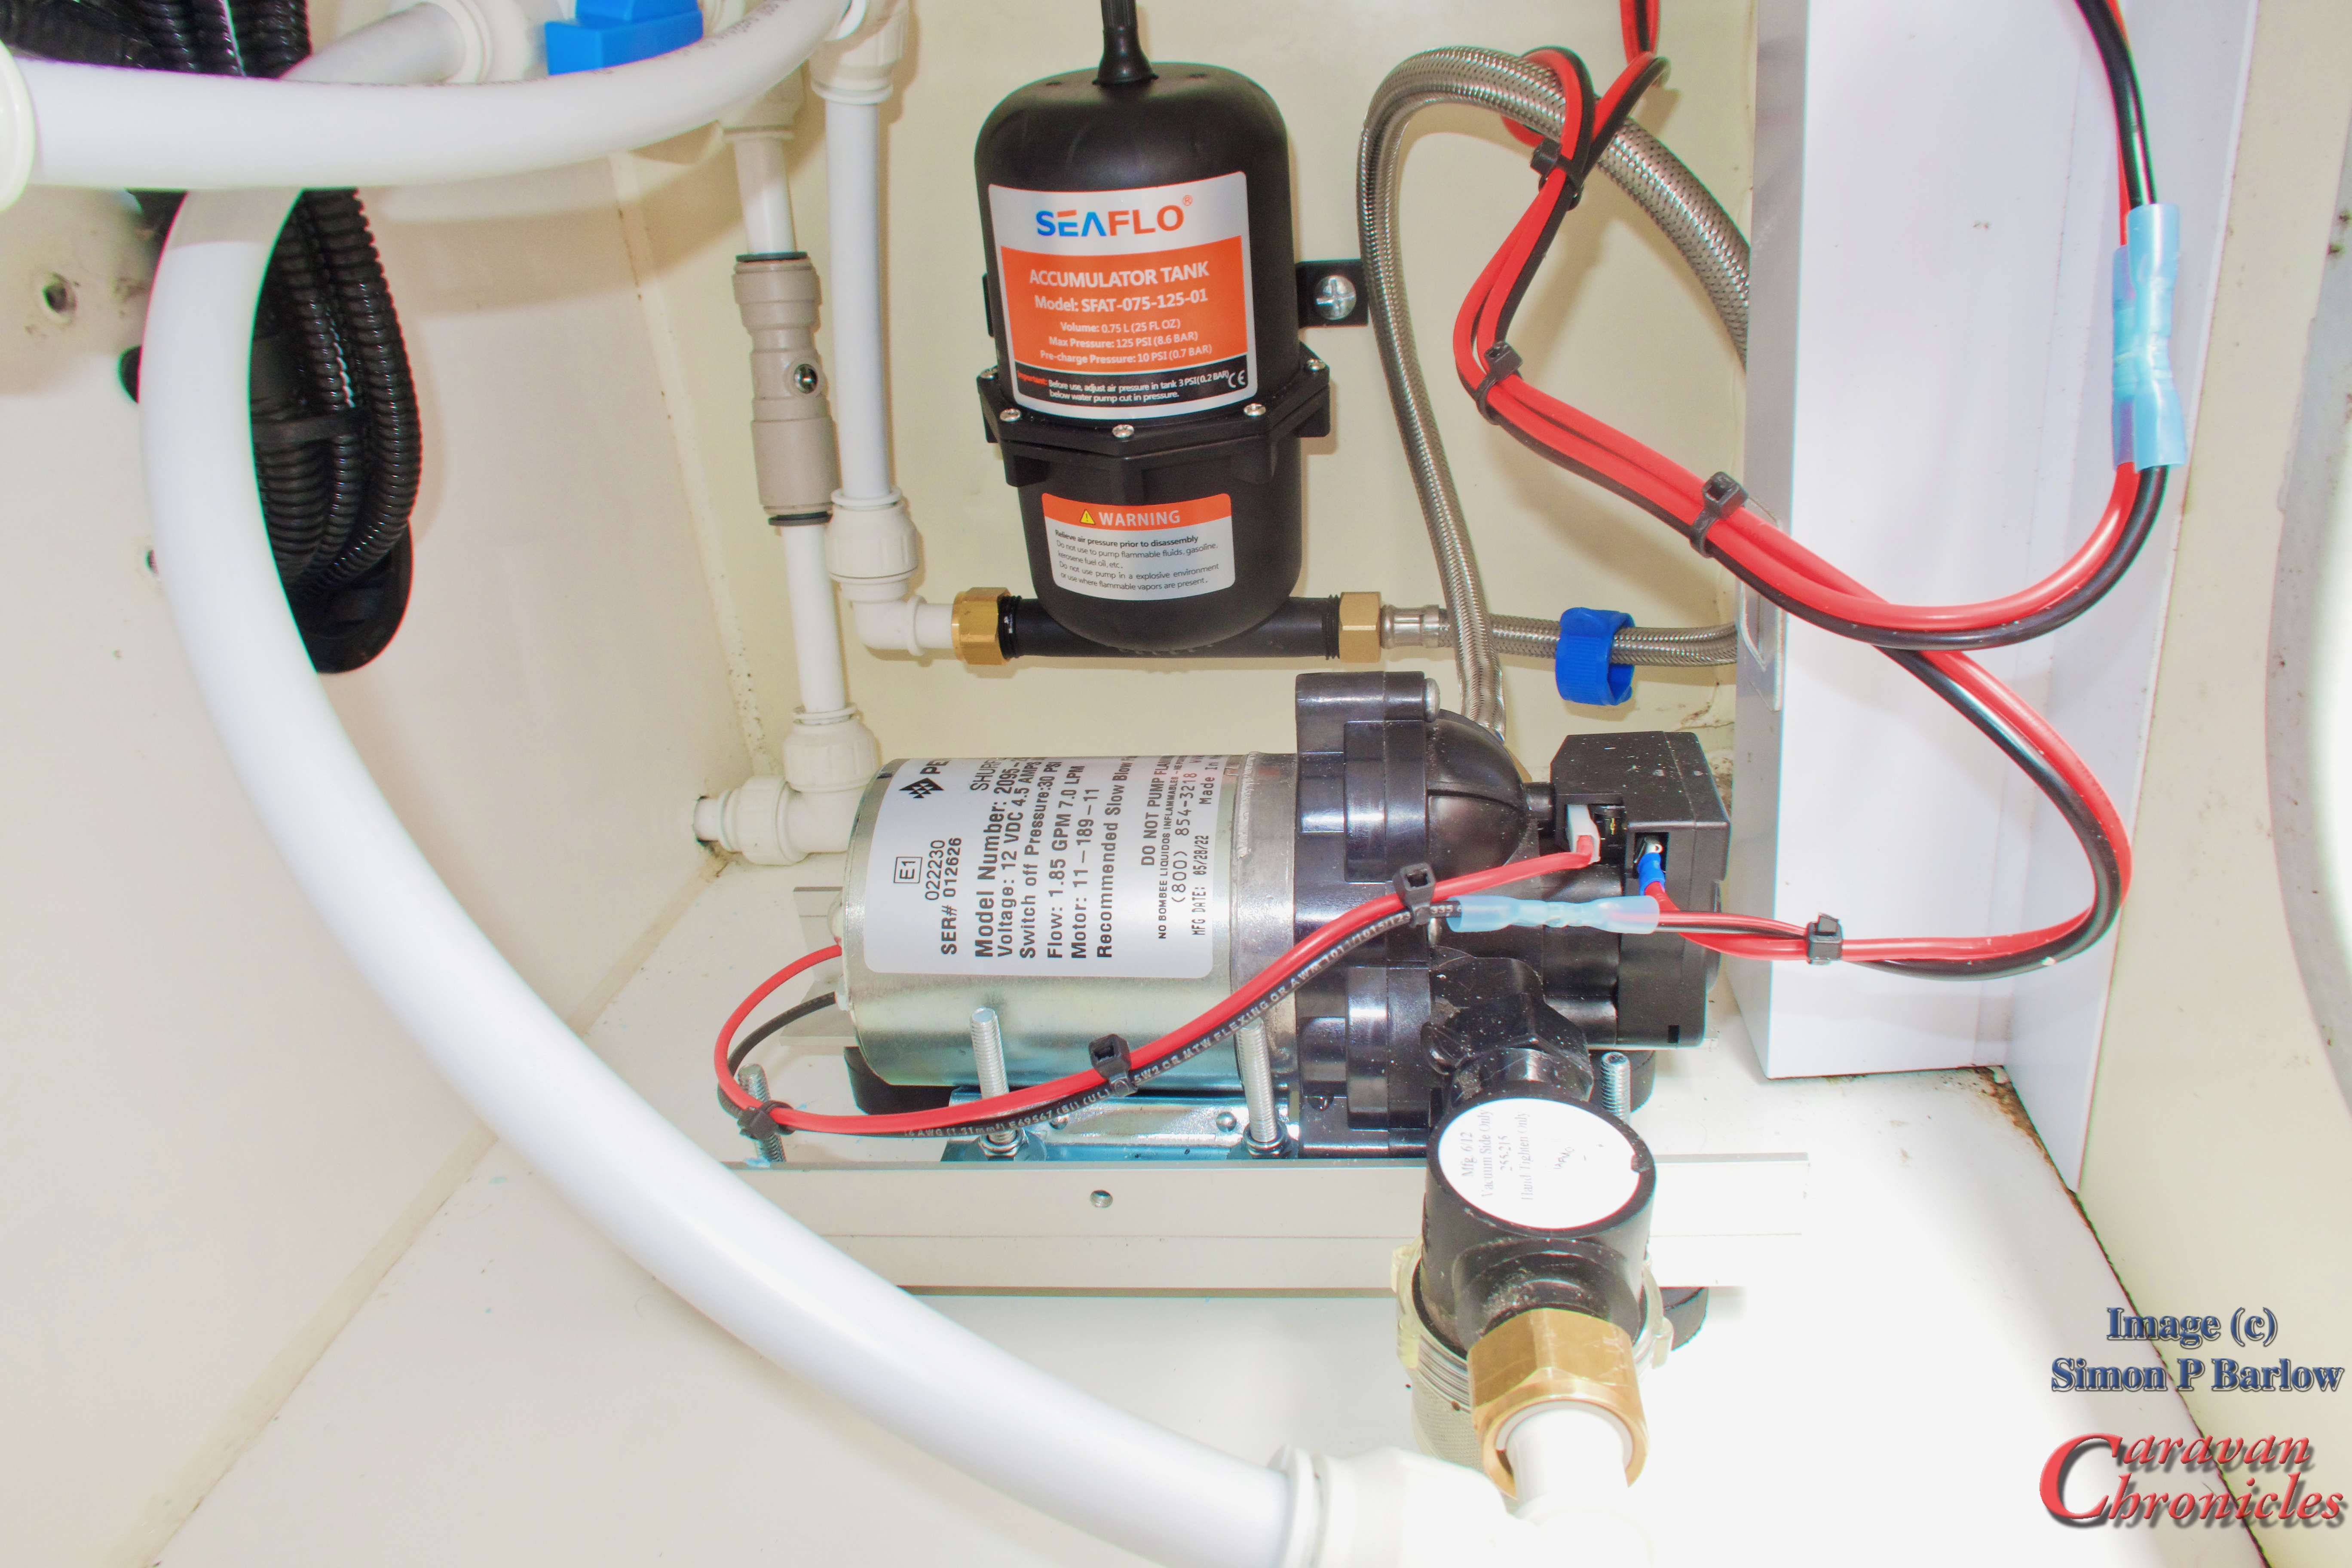
The next job was to install a 0.75 L SeaFlo accumulator with the bag set to 15psi and isolate this from water knock caused by the pump using a stainless jacket flexible hose in a loop. I have another stainless hose that will be used in a future upgrade that will allow this pump to be used to draw water from a 120 litre bladder in the back of the pickup truck….. but for now that’s going to be a end of season upgrade.
The two valves [in blue] are used to isolate the feed from the water tank and the output from the pump and are a bit untidy…. these will be repositioned shortly as I’m going to add an outlet to allow me to connect a hose so I can wash off the bikes and flush the grey water drain pipe when I disconnect after dumping on a serviced pitch. I’ll also swing the pump filter 90 degrees for a bit of space saving and I’m thing about a water treatment pre filter between the tank and pump. We have a filter on a separate clear water dispensing tap the we use for the kettle or food prep…. but this would allow all the taps to be protected.
The result of moving the pump, anti knock loop and accumulator is that now we cannot hear the water pump running in the caravan. Result!
Sue working hard cleaning the front locker wall after going a grand job on the front cap above. The task of cleaning…. including the use of a tooth brush around all the door seals eventually took two whole days.
If anyone has tips about restoring the plastic handles on the lockers I’d be grateful if you could leave a comment. I’ve been steered to something called “The Pink Stuff” miracle cleaning paste by a couple of other 5th wheel owners
Let there be light…. more light in fact!
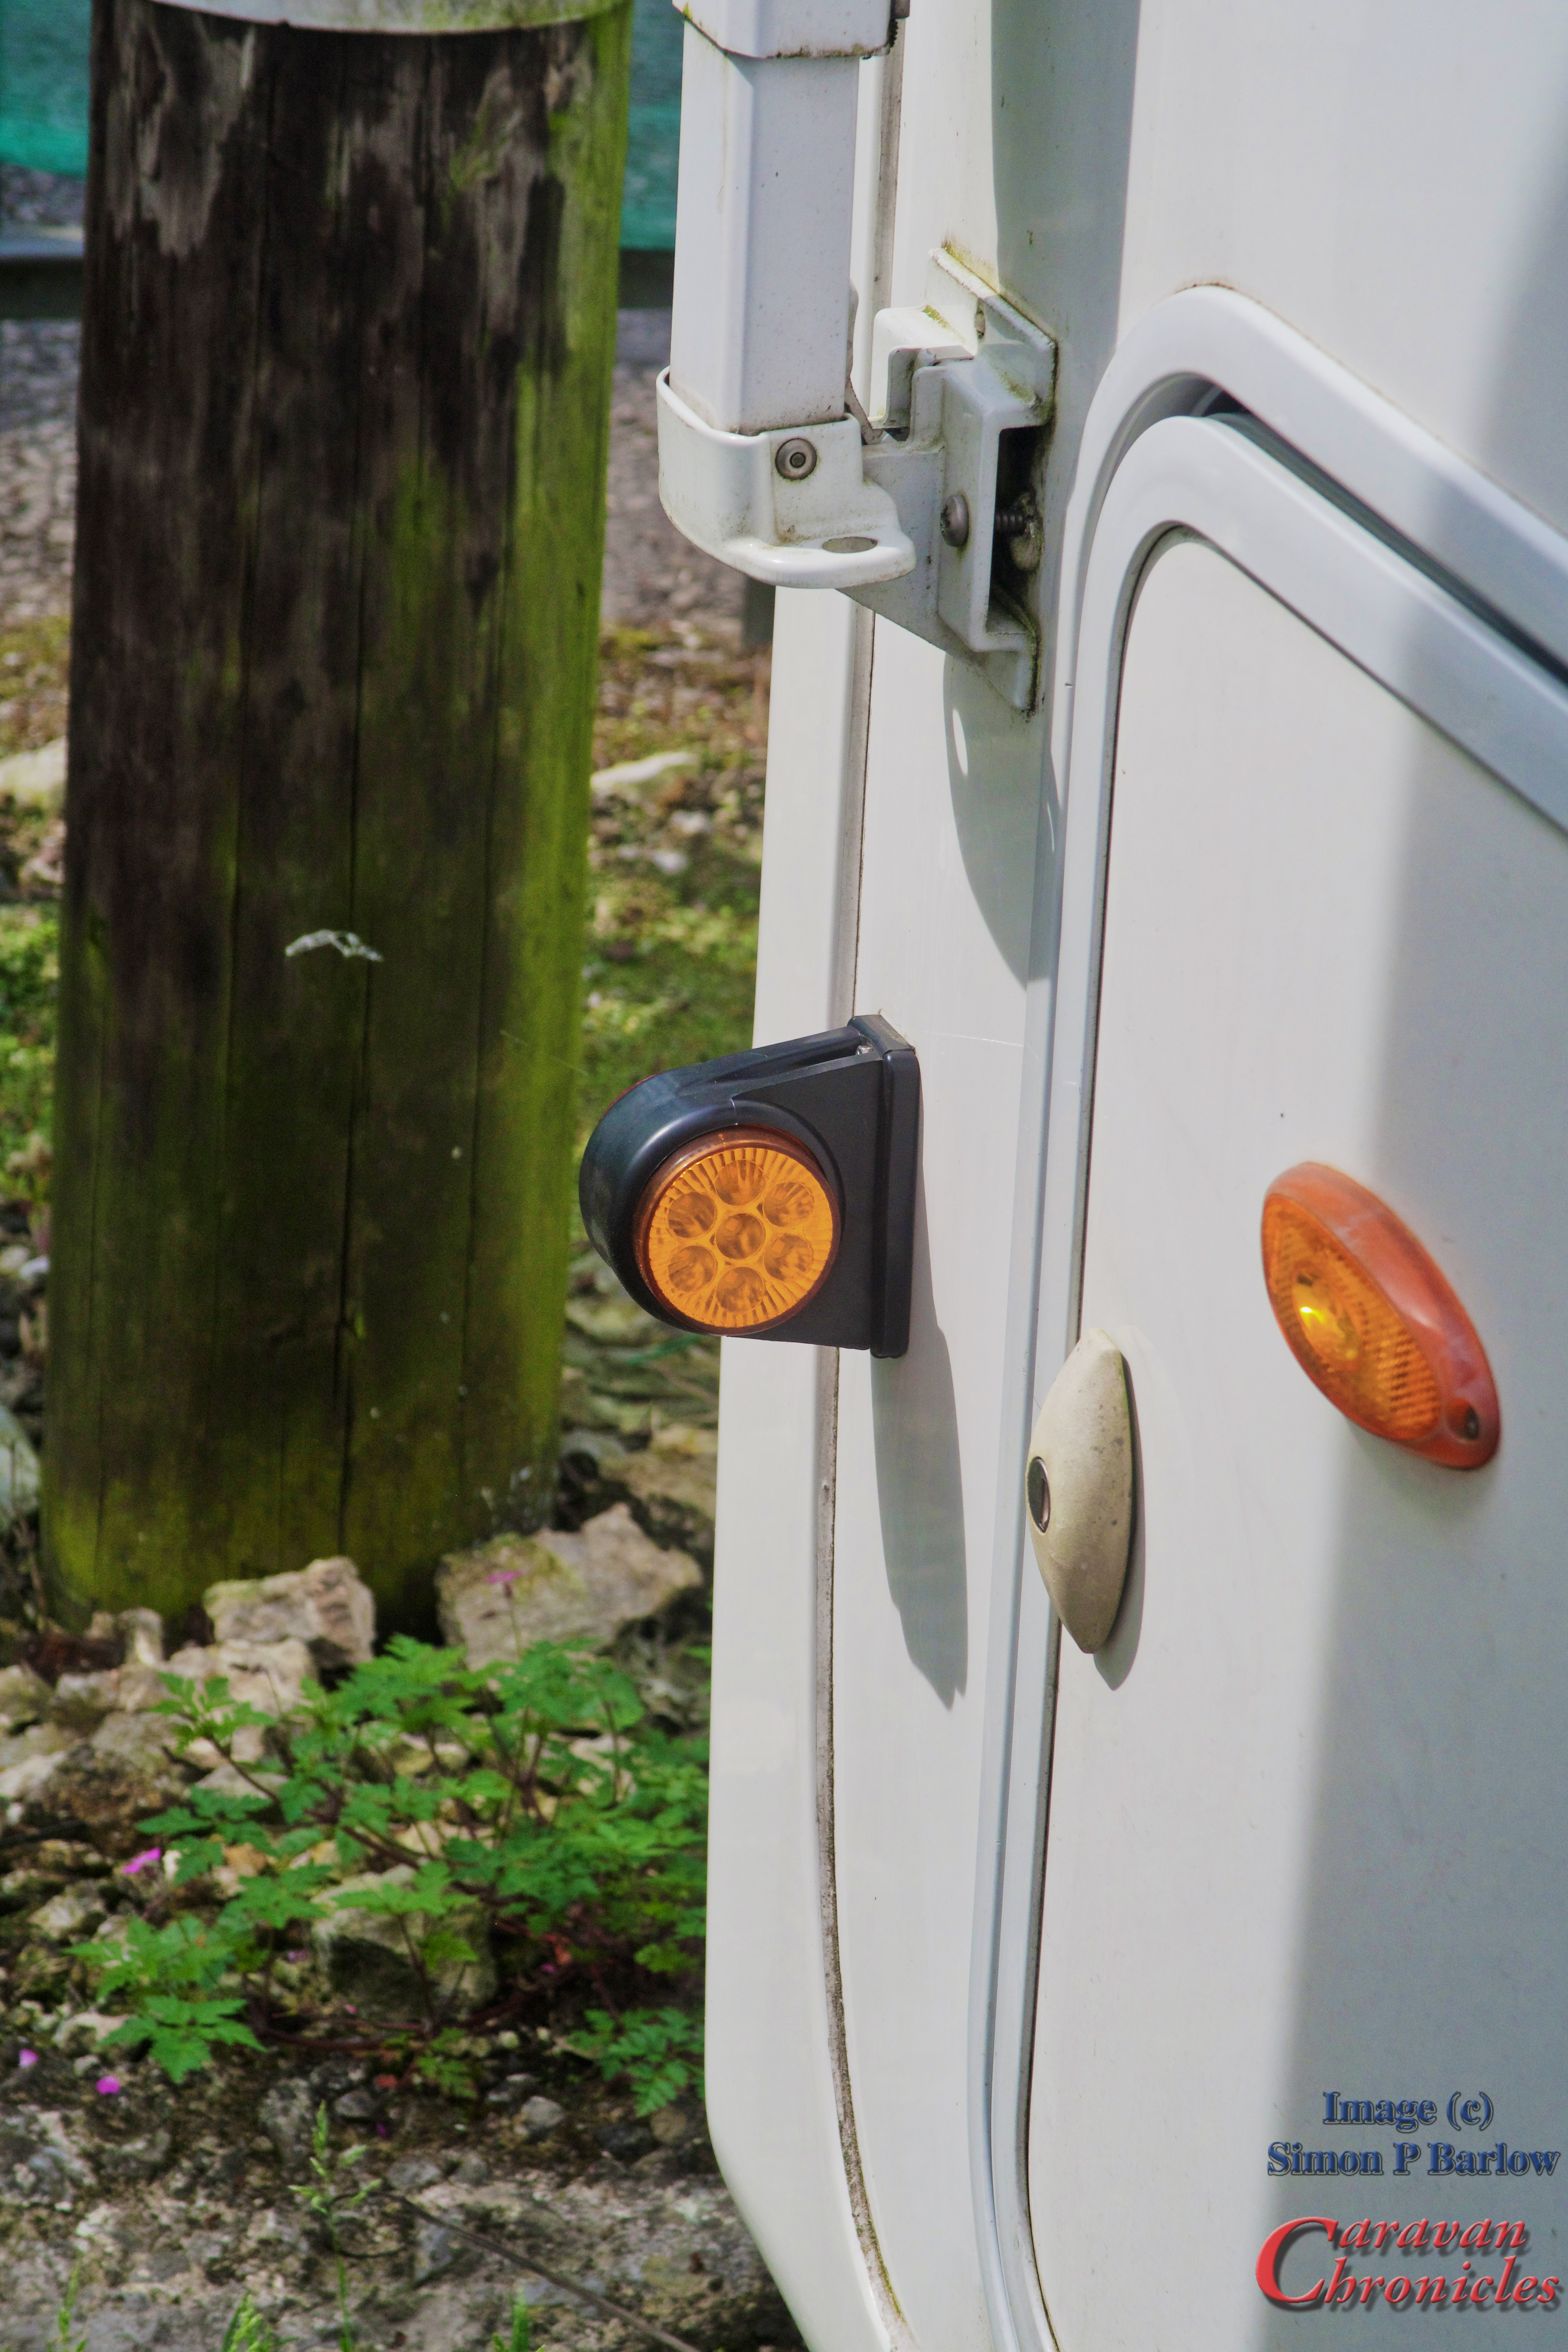
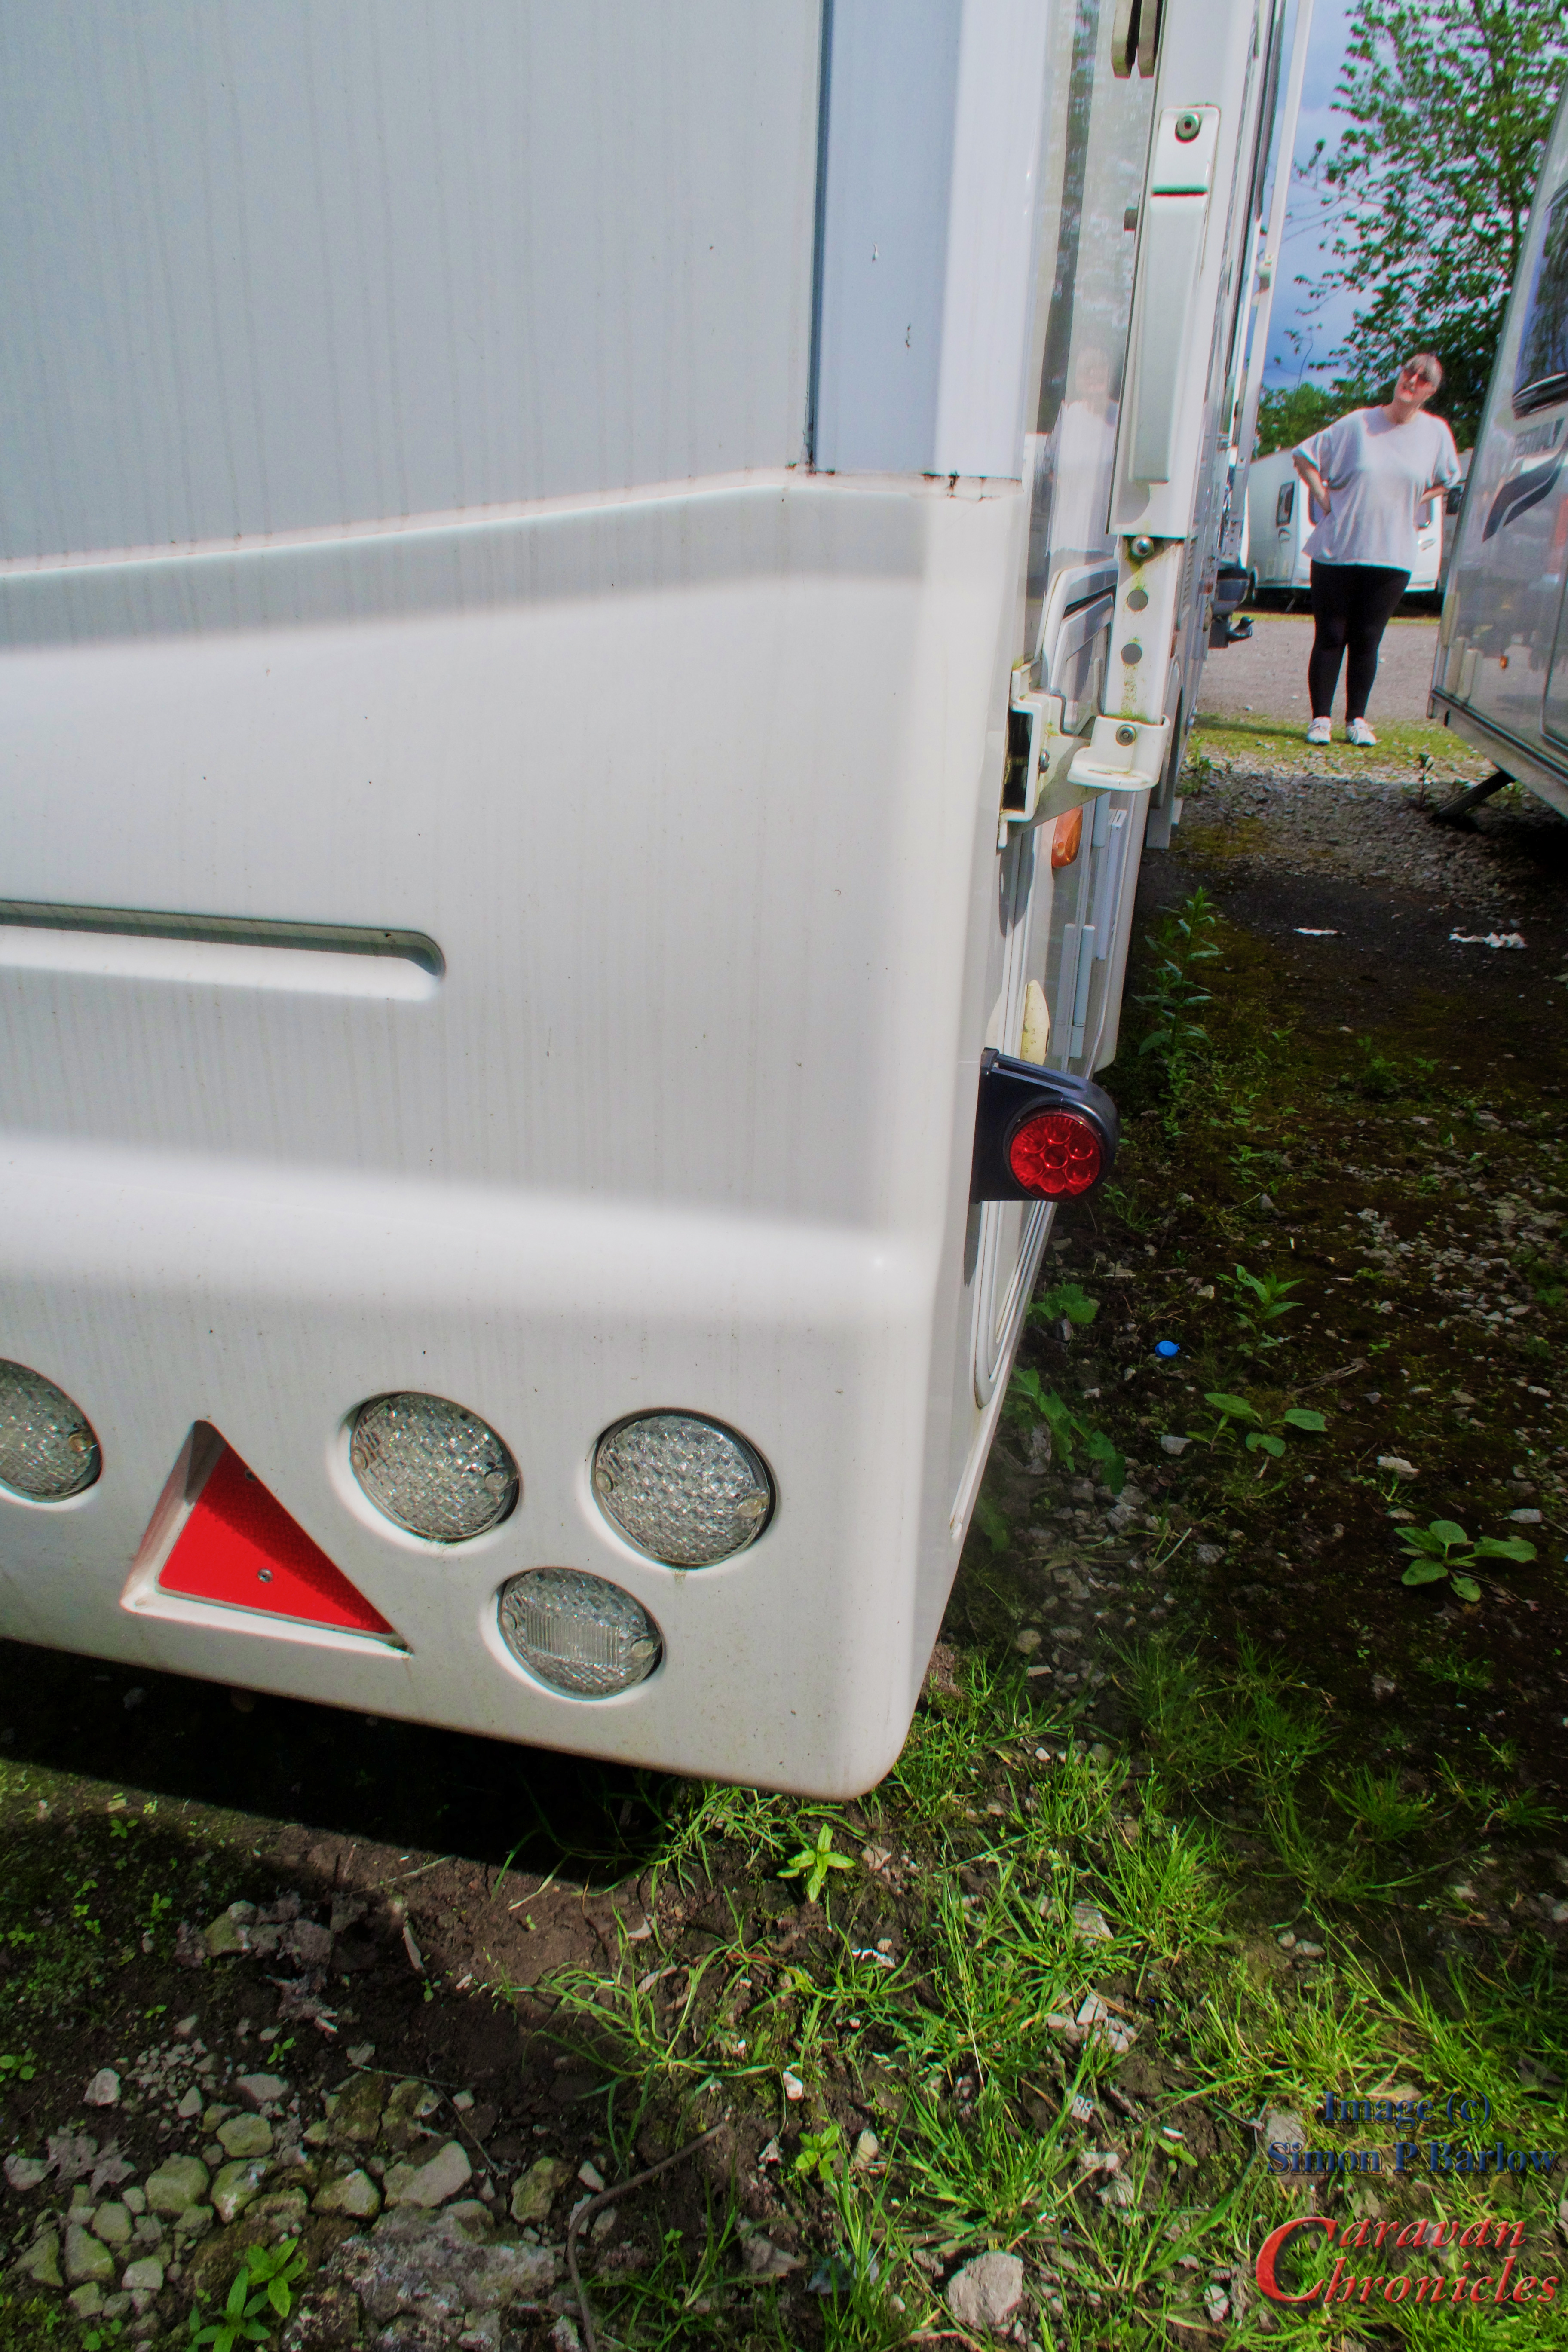
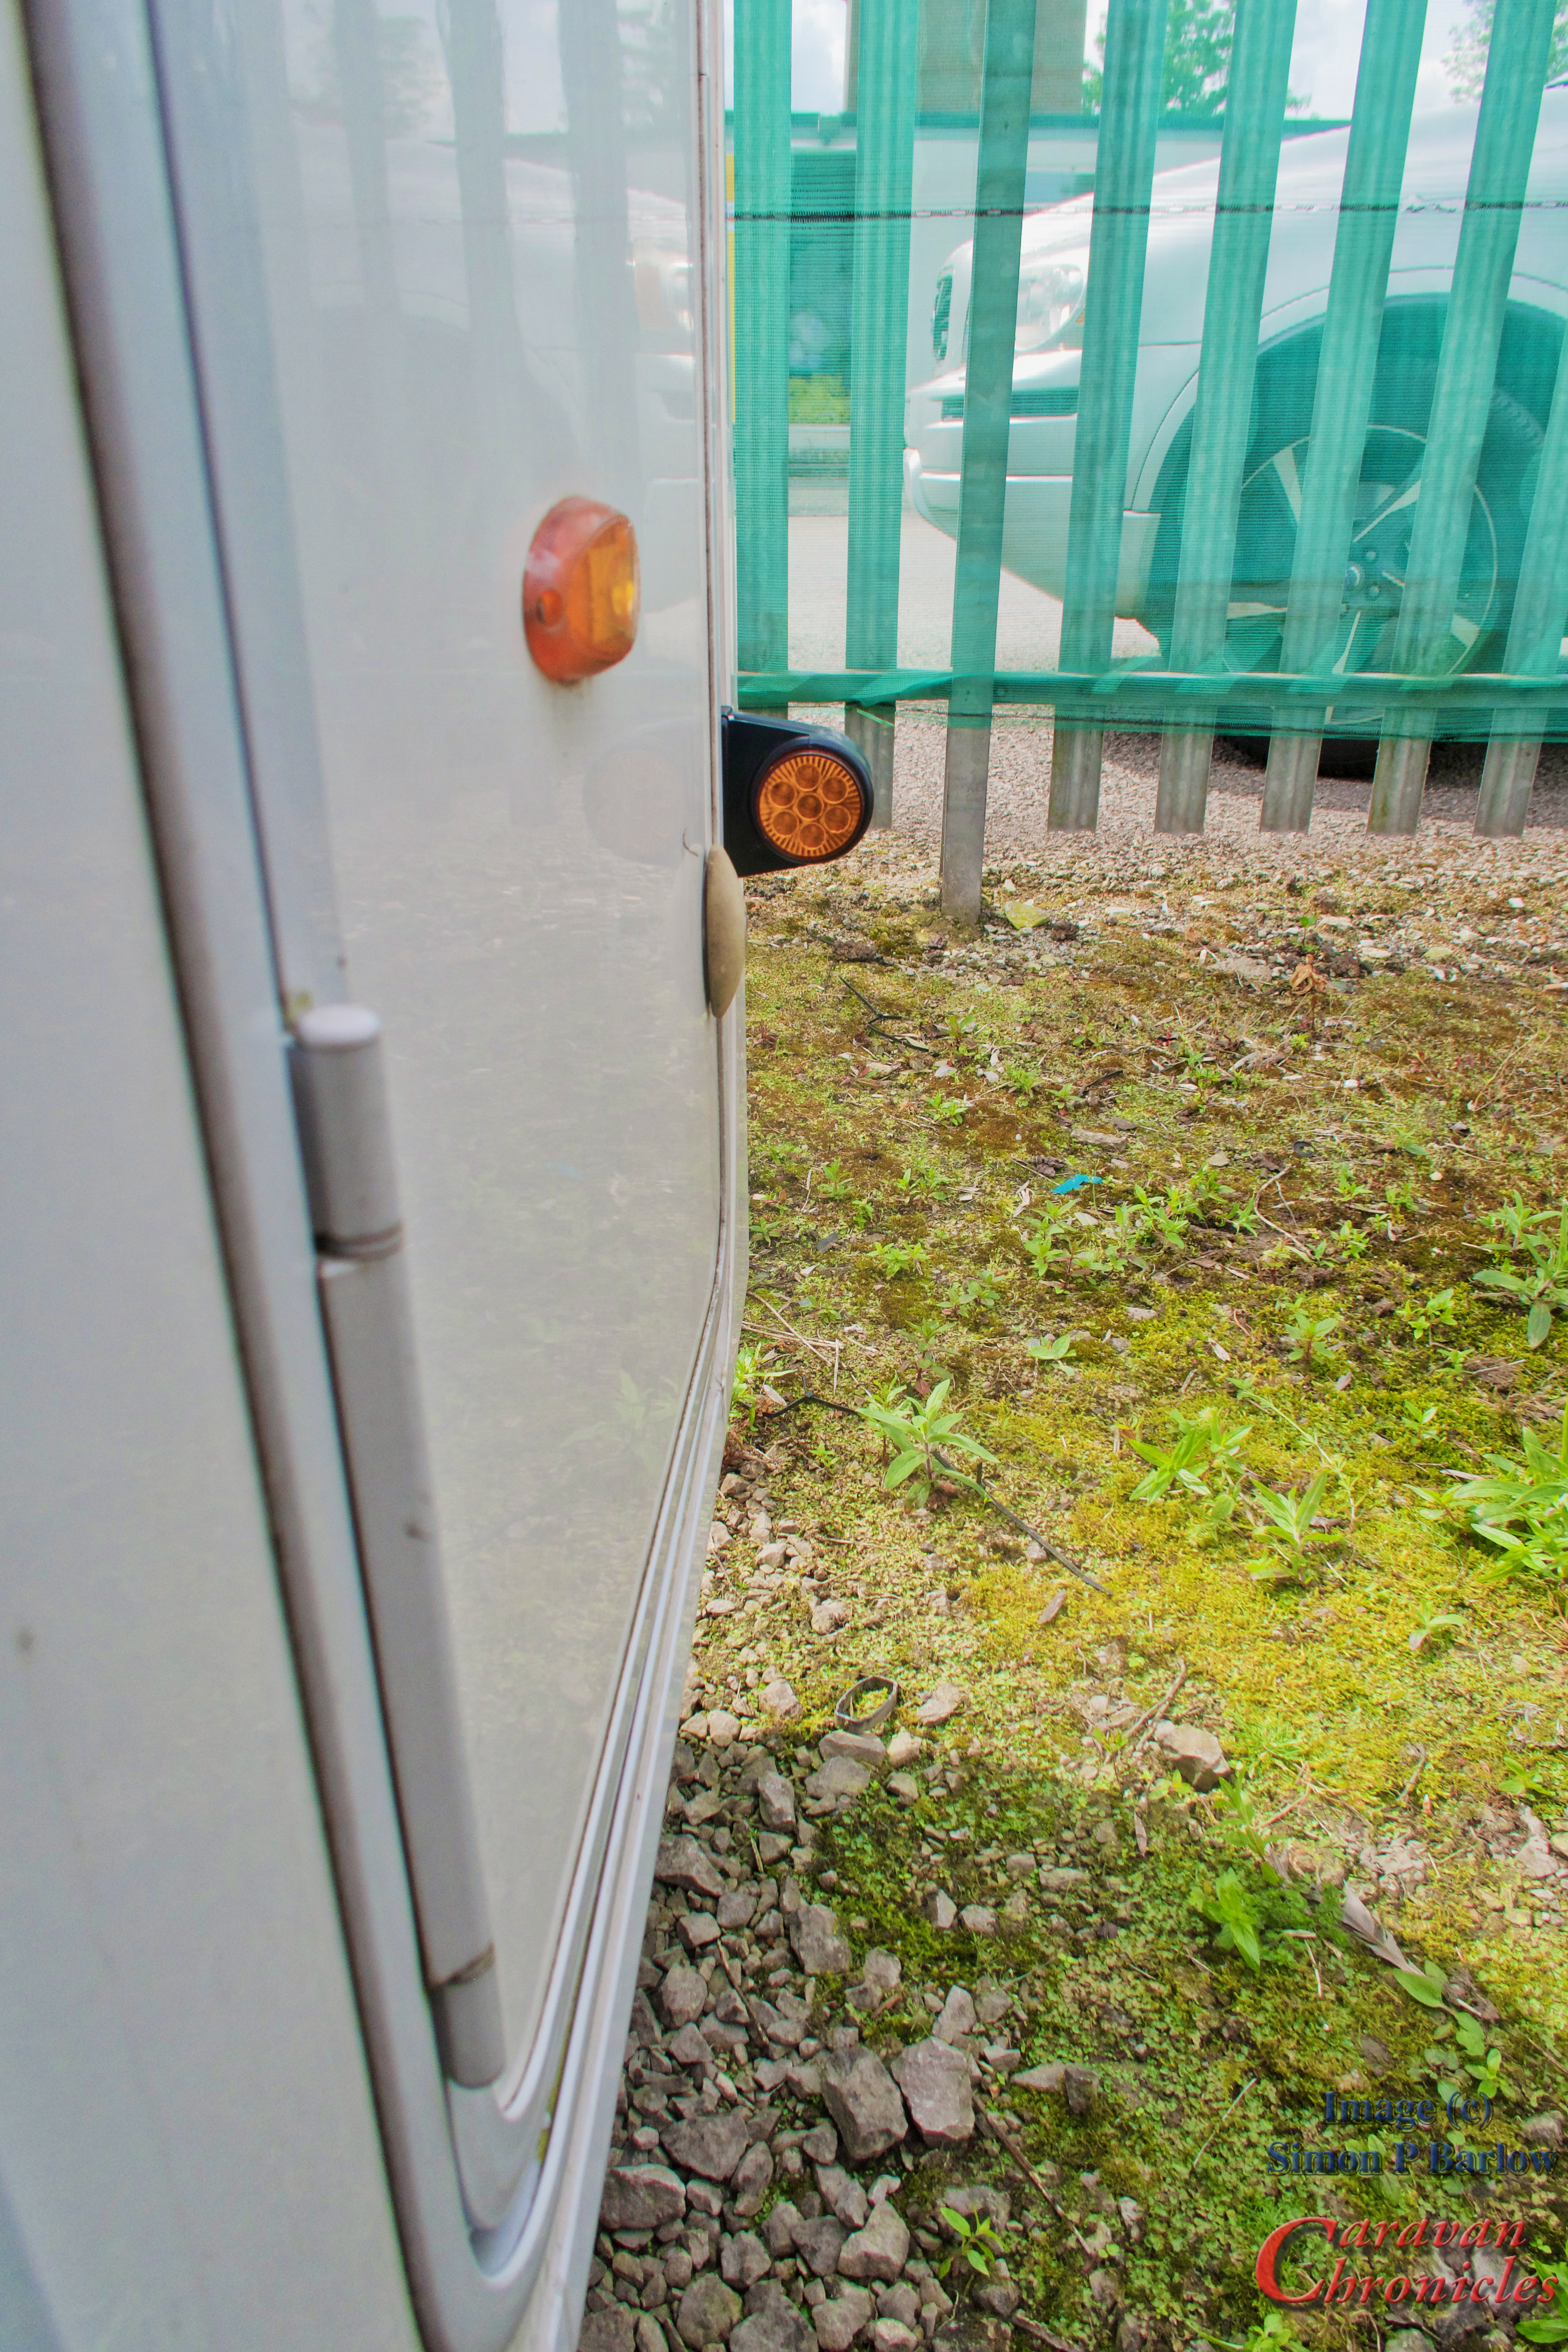
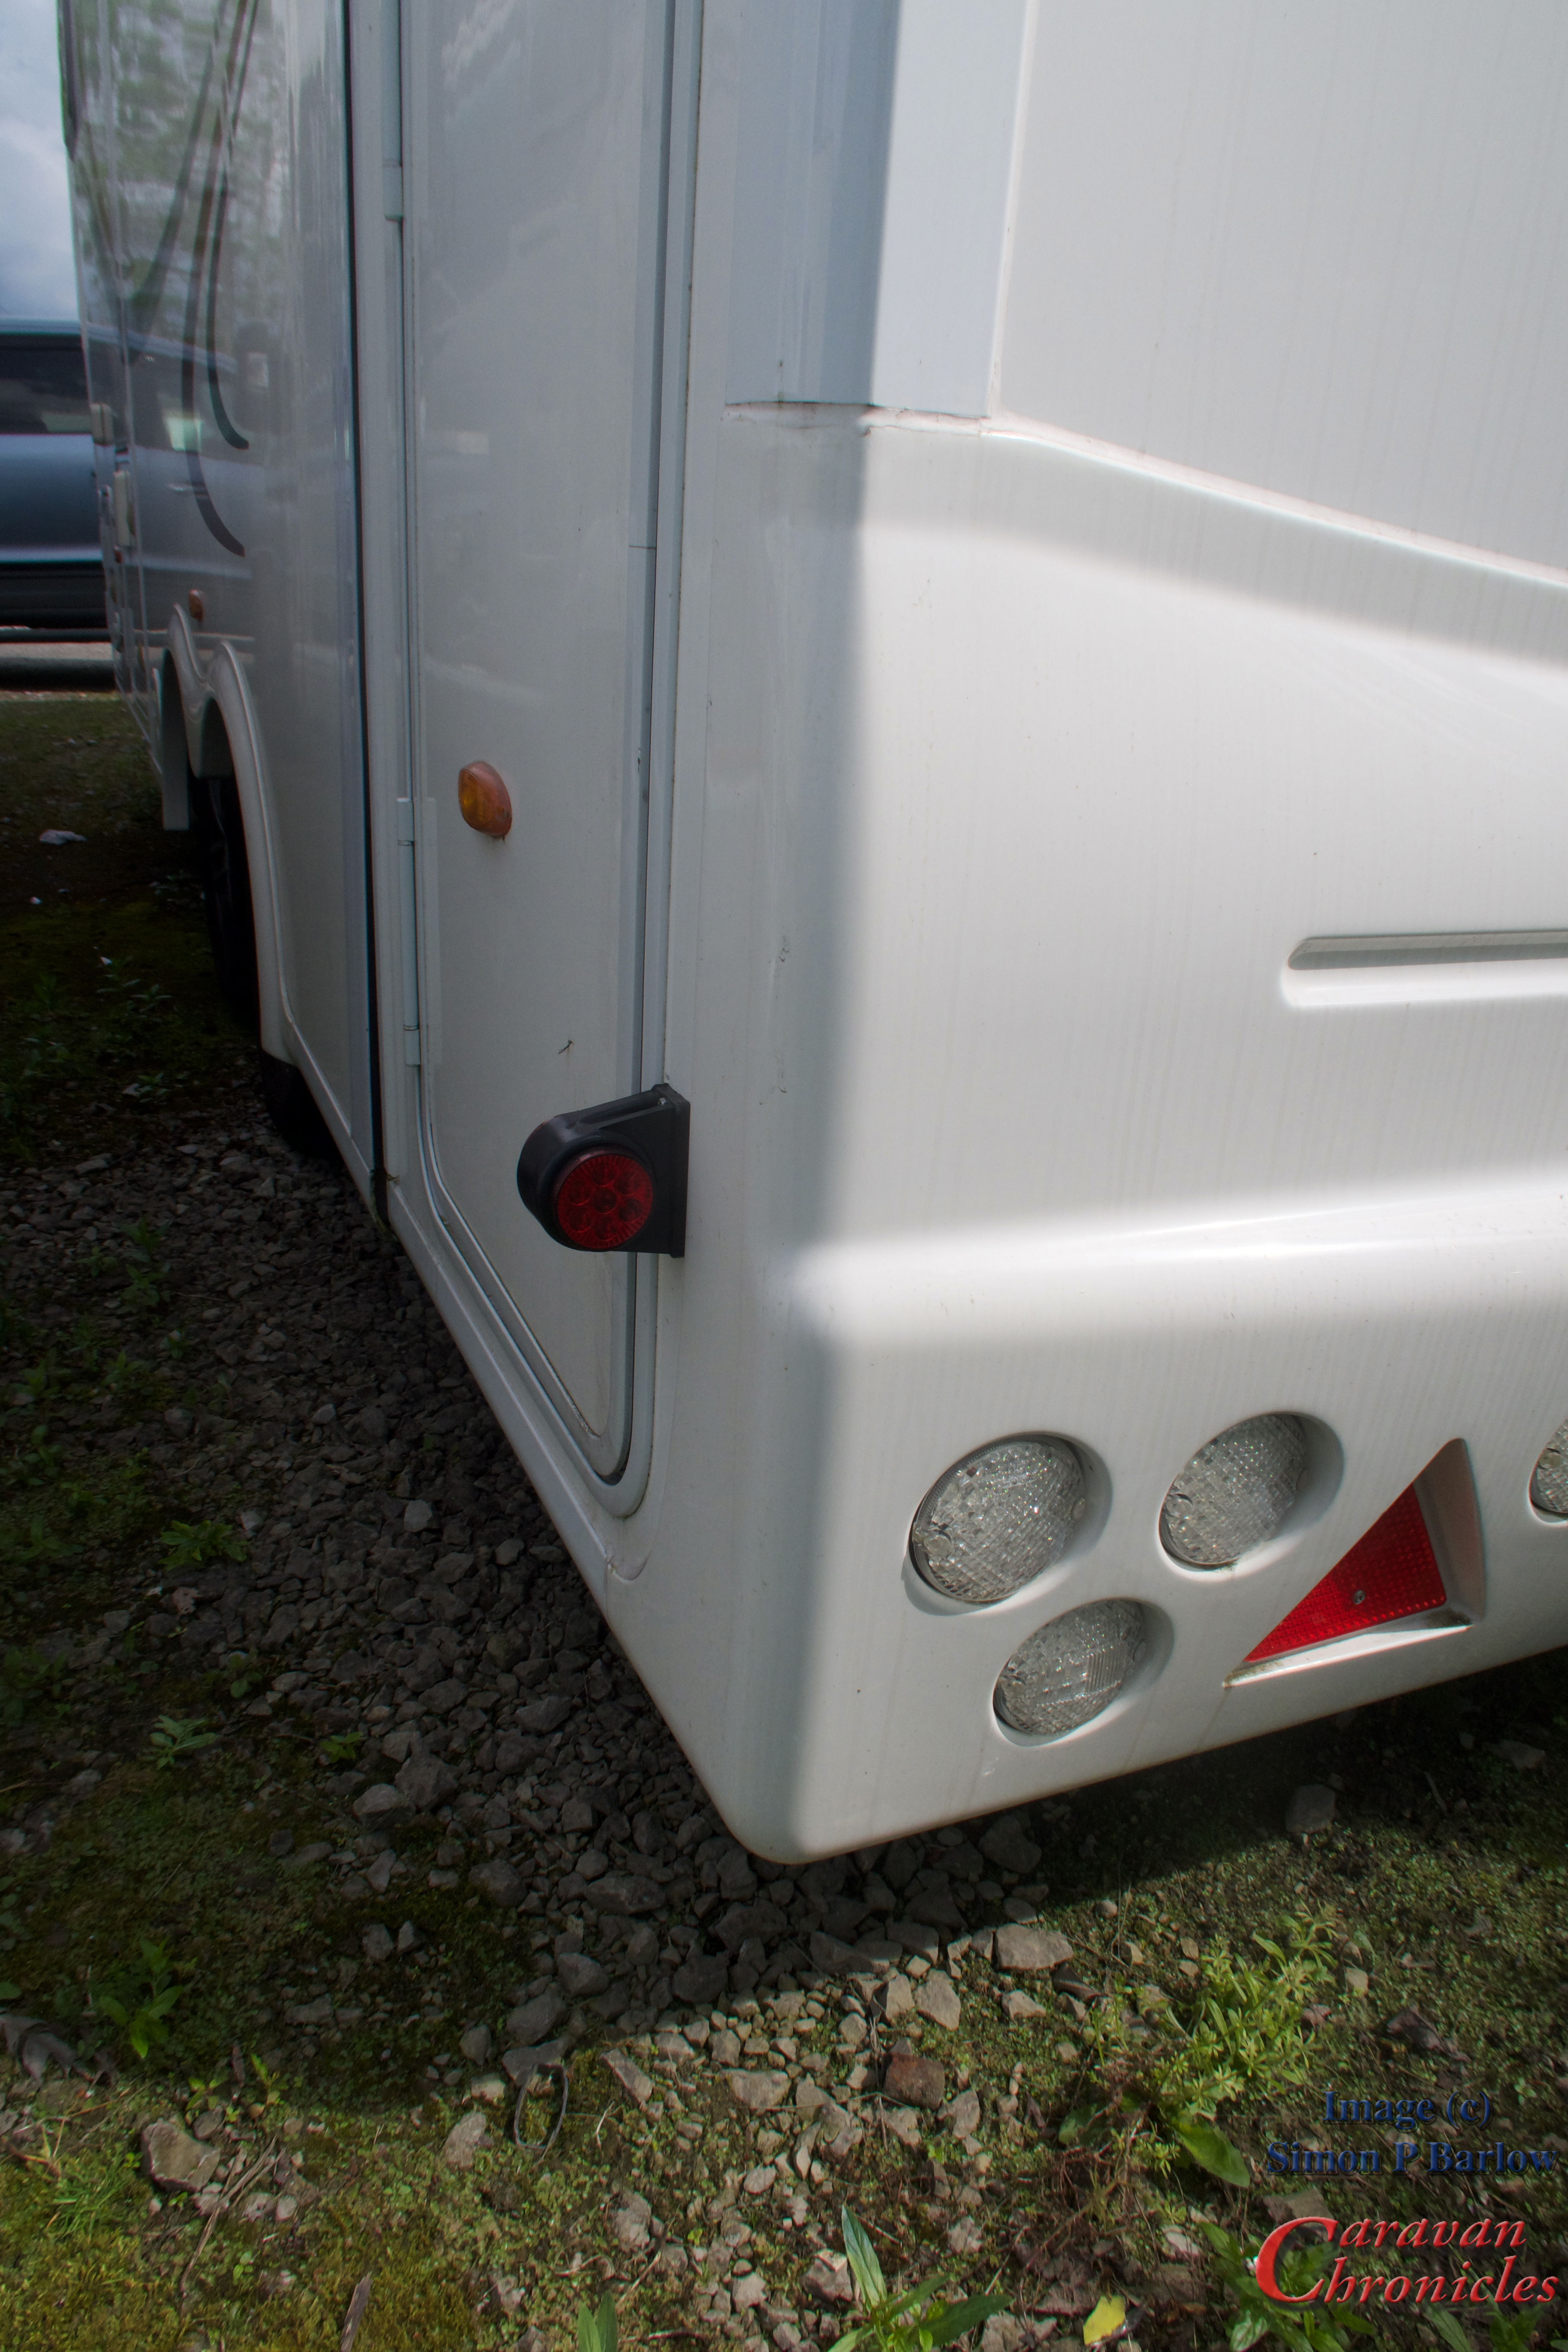
The other title upgrade was to the rear of the 5th Wheel. I have been reading up on some proposed lighting changes for articulated trailers in some countries. What used to be called front and rear marker lights seem to have gone through a name change….. these are now called “edge out lights”.
If you are parked in a straight line they are not required to be seen, but if you park at an angle exposing the edge of the trailer, the edge is required to be seen by either on coming traffic or following traffic… depending on the angle you are parked at. I’m not exactly sure how this affects things in general in the UK, but it was interesting that I picked up on the watching a couple of training videos about hitching and unhitching a articulated trailer in preparation for your HGV test.
As I understand it, if you are stopped and an edge of the trailer is exposed past the normal line of the prime mover unit and trailer straight line width then this edge must be marked with lights.
From the front our ‘marker lights’ seemed to be located in the correct position…. but I could not find out about the rear in much detail, so a quick chat with a man that knows all about this he pointed me in the right direction. Although that said he was also unclear as how this would affect 5th wheel caravans as he thought it might only apply to commercial vehicles. I did mention that the VW Amarok as most of the heavier pickups are actually listed and taxed as commercial vehicles. That brought some “Hmmm’s and Ahhh’s” into the conversation….. including “in that case you will need the ‘angles of death’ stickers in Europe….. Angles Morts”
These lights show red to the rear and orange to the front. As they are located at the widest part of the trailer…. on this side that has to include the awning frame they indicate the edge of the trailer to the rear…. and from the front the amber side also indicated the edge of the trailer to oncoming traffic.
A really handy thing for me is when driving even during the day I have my side lights on. The amber light I can see in my side mirrors and it clearly marks the end of the trailer…. in inclement weather this has become a bit of a game changer as I now can clearly see even in a lot of road spray where the back of the trailer is.
when following lorries I always notice how bright these tiny LED rear lights on rubber stalks are that stick out from the side of the trailer…. I tend to notice these before I sometimes see the rear light cluster….. these are the same… they are CE marked along with the UK / Euro markings so must be compliant with regs but they are brighter that the 5th wheels rear red side lights….. and the more rear lights I have hopefully will reduce the chance of someone getting to intimate with the rear of the trailer!
Personal note….
Thanks to everyone asking how I’m progressing….. the chemo is going well and I seem to be quite lucky as I have very few side effects to the point that really the couple I have is a mild inconvenience.
I have settled down in to a routine of having a stoma and bag…. bit of a shock to me when I had it done as it wasn’t mentioned in the pre-op that this might be an outcome….. but there again it might have been…. I was on that much medication I was convinced that I’d had a conversation for about an hour with a man stood at the end of my bed dressed in 1040’s clothes complete with trilby hat and chain smoking staring up the ward never taking his eyes of someone I could not see because of the curtains around my bed. He told me he was tasked with keeping an eye on this person as he was suspected as being a spy for the Germans.
What the hell were they medicating me with!!
Only a few days away from the big TourFest North West at Donkey Creek Farm… if you are going please drop by and say high. Sue and I would love to see you. Henry might be a bit noisy though!
Like any project, ticking the small stuff off a list is the way to move forward even if it seems like sometimes you have ground to a halt. A bit lacking on photos…. I’m temporarily unsure of their location… pilot speak for I’ve lost them! I’ll correct that in due course.
I built a new aluminium frame for the water pump and moved the pump from the original mounting position which caused a lot of noise when running, especially in the bathroom…. as we have a direct tank flush not a holding tank, this was particularly annoying if the loo was flushed at night. So now the water pump is mounted on its isolation feet on an isolated aluminium frame bolted directly to the sub-floor in one of the lockers. I also changed the piping from the pump from solid to flexible connections further reducing noise transmission through the pipes. My next step… some time this week is to install a larger one litre accumulator tank between the pump and plumbing to reduce the cycle times of the pump. Thankfully the plumbing system installed in the 5th wheel is rated for a greater pressure than most caravans and motorhomes… that’s what gives us a great shower!! so I’ll be able to match the accumulator pressure with the pump pressure to get the best out of them.
The other little upgrade was to move the grey water and fresh water dump outlets closer to the side of the caravan. They used to be set back about eight inches and required a kneeling mat and one arm dexterity to plug in the flexible waste pipes when on a fully serviced pitch. Now it’s a simple matter of bending over and I can easily access both outlets for connecting pipes…. saving the knees a bit of hard labour at my age is key. Also if dumping at a motorhome service point I can easily see if I’m in the correct position for a clean dump and not going to splash all over the place. As the Hanks say… “Let ‘er rip”
Thanks to my local nut and bolt supplier… Francis Kirk and Sons I’ve been going there for bits and pieces since 1976… I have now got a full set of stainless steel fittings… an odd collection of UNF and UNC sizes…. ready to replace all the nuts and bolts on the pull out sun canopy, replacing the original components that were showing signs of rust and starting to bind up. I also managed to get a set of tap and dies to run through all the threads before changing everything over.
We managed to get some of the picture frames mounted inside the caravan and that makes a huge difference…. along with upgrading the occasional side lights to LED dimmable units…. feels more like home with each little improvement.
Not long to wait now….
Looking forward to Tourfest North West in a three weeks time, 24th May – 27th May at Donkey Creek Farm and meeting up with some of the bloggers and vloggers I’ve followed over the years. Thankfully no one will recognise Sue and I so we can sneak off if it gets too rowdy . I believe it is now fully booked so if you wanted to go you will just have to wait until the next one.
A few days after that we are off to The Old Oaks at Glastonbury…. it’s been a few years since we were there so it will be nice to go back and see all the changes and improvements they have made. Hopefully we can get back out on our bikes again as well.
It seems such a long time since I posted anything.
Last time out with the Dreamseeker I noticed that the charging voltage when we were hooked up to the truck was only about 12.1 to 12.3 volts as measured in the Dreamseeker battery box.
I know that the VW Amarok puts out 14.6 to 14.8 volts, measured at the 13 pin socket AND indicated on the digital voltmeter I installed in the dash. So it was time to do a bit of investigating.
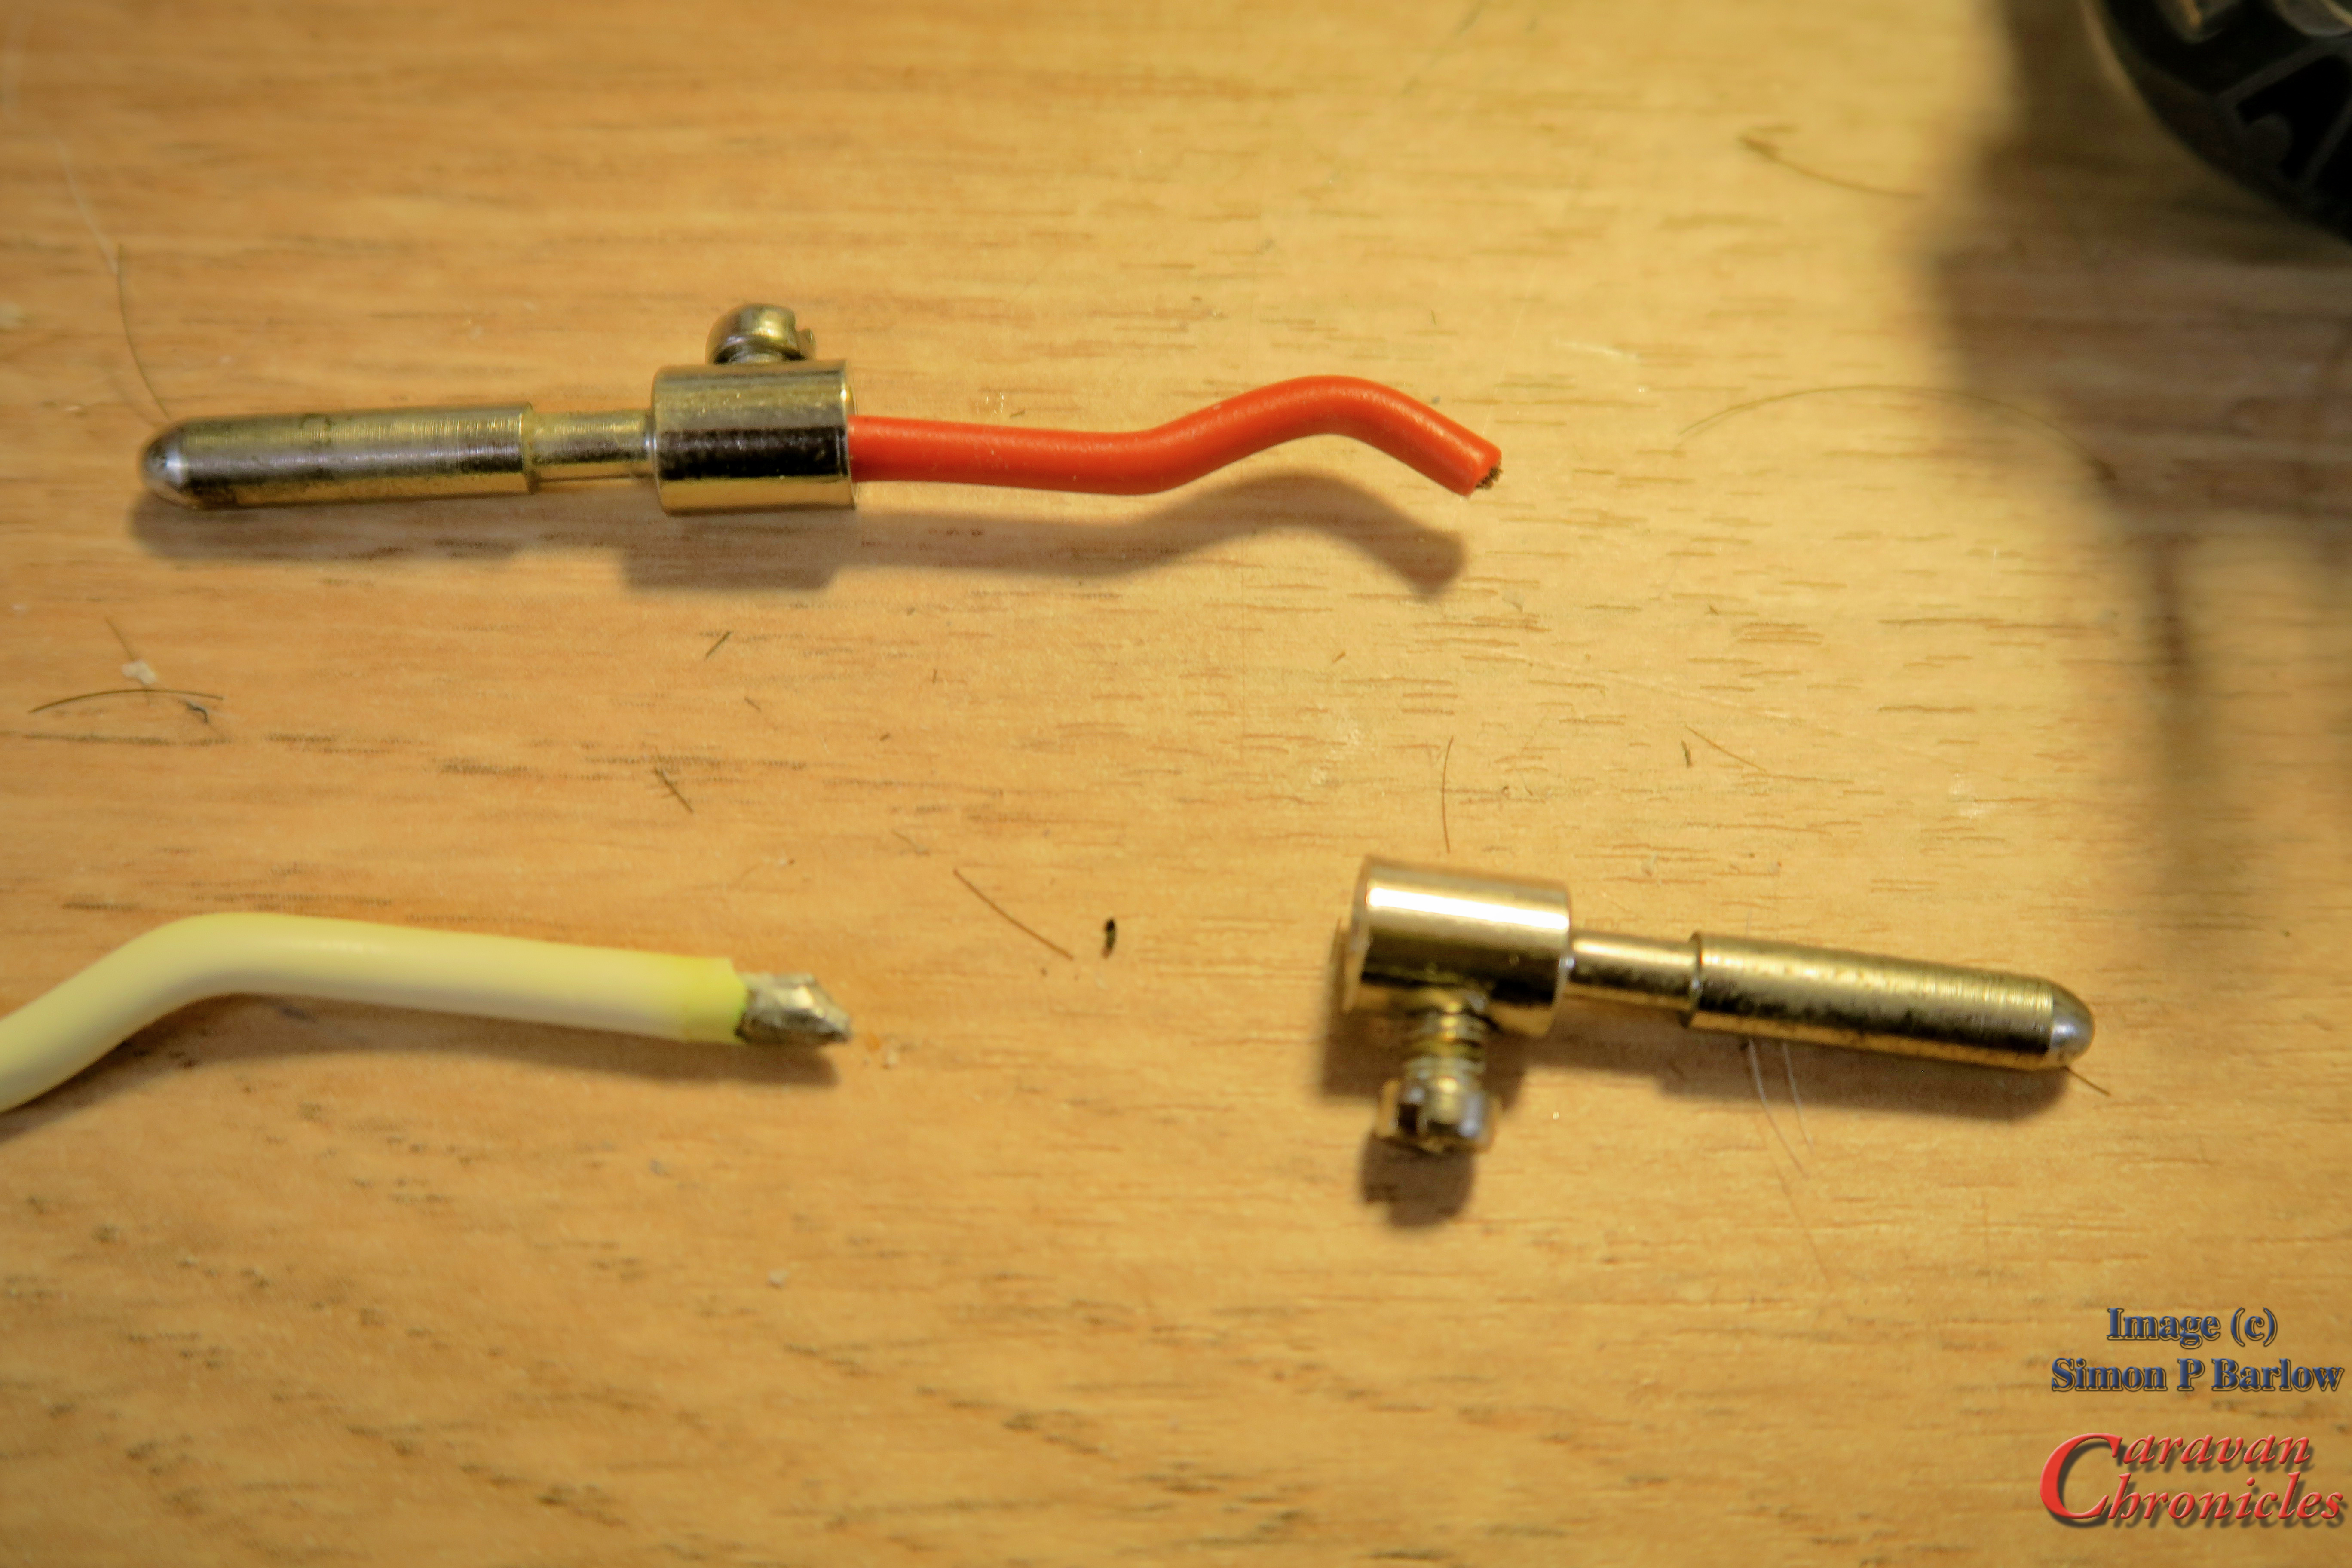
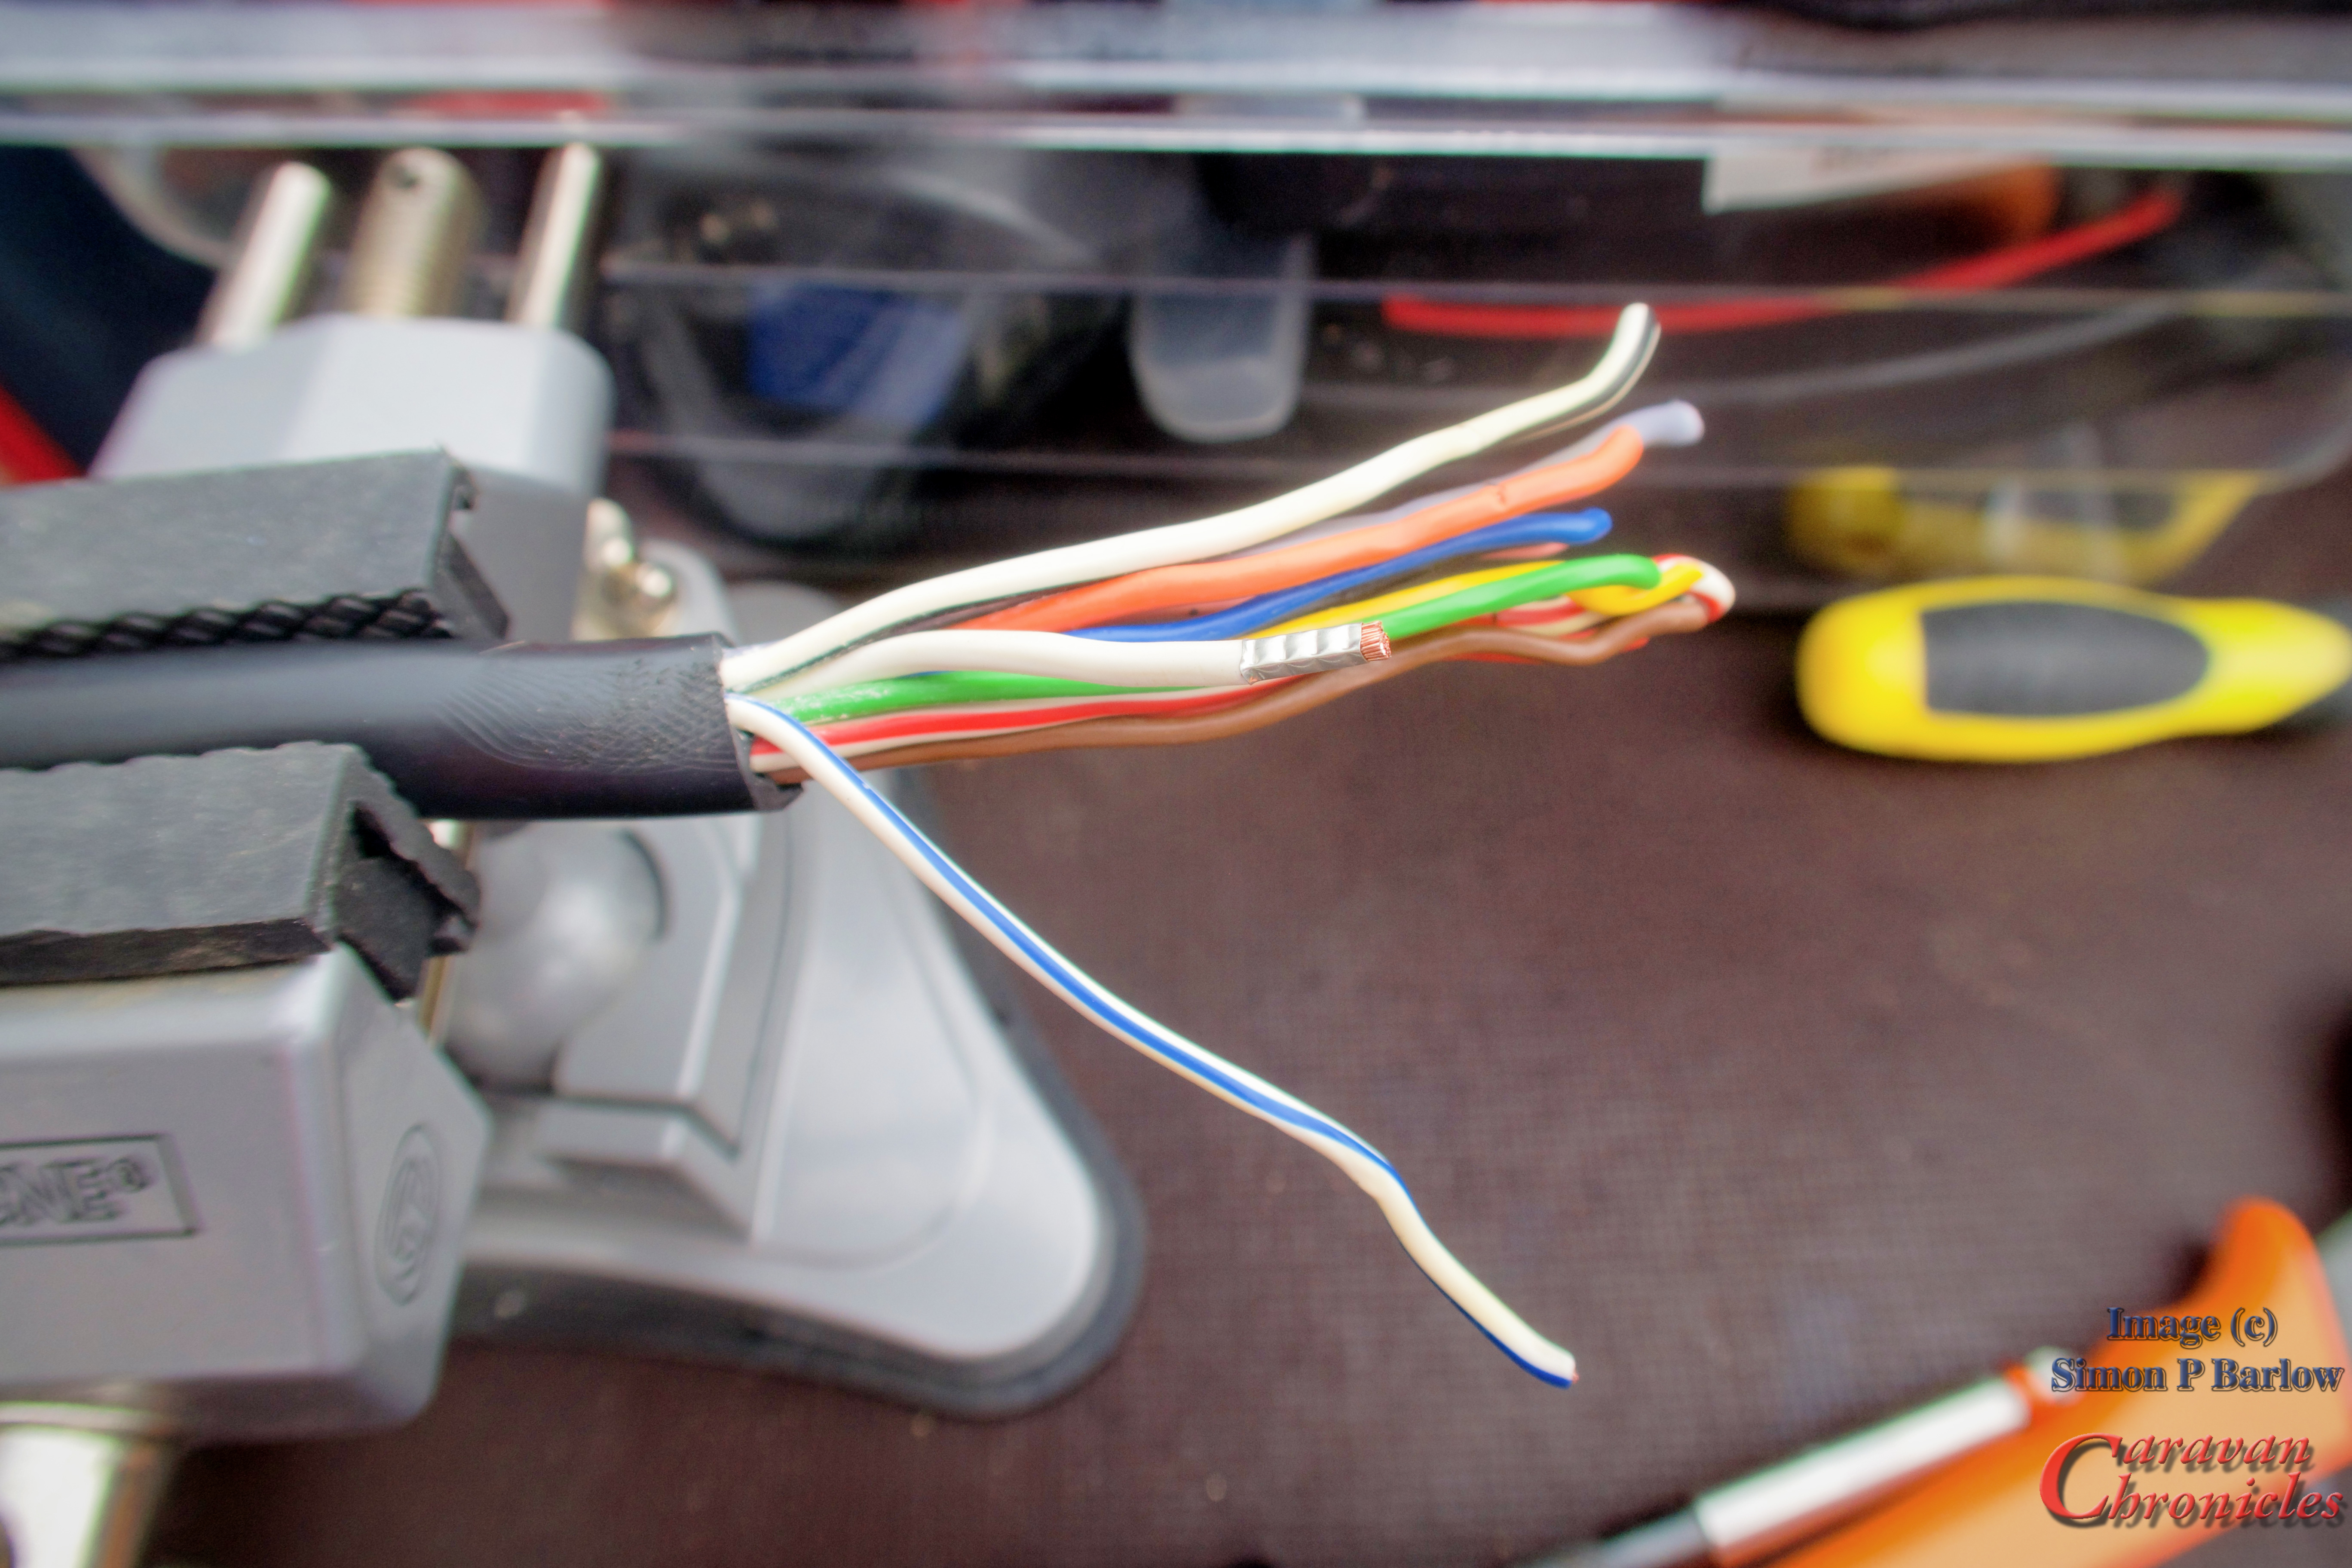
After measuring the resistance of the charging circuit and fridge circuit it was clear there was a bit of an issue. First stop was to disassemble the Dreamseeker’s 13 pin plug. All became clear…. The cable had been terminated in the socket with soldered ends and were suffering corrosion (solder very dull) and cable degradation….. the copper conductors when stripped of their insulation were black. All in all not good.
I wanted to replace the whole 12 core cable with a replacement but unfortunately I didn’t have a length in stock long enough. I usually keep a length suitable for replacing the cable and plug on a normal bumper tow caravan.
The simple solution for the time being would be to cut back as much as I could and install a new 13 pin plug with correctly crimped ferrules on the cable.
I cut off the old plug and stripped back the protective cover from the cable allowing enough to shorten the individual conductors to the correct length and inspect them for internal corrosion before crimping on the ferrules ready for termination.
The torque setting for these terminations are listed as a minimum of 5Nm to a max of 8Nm so I set my torque screwdriver to 6.5Nm. A happy medium I think.
The new plug was reassembled and I could get on with testing it. At the Amarok I measured 14.7 volts on the leisure battery circuit (same on the fridge circuit) and at the leisure battery I measured 13.9 volts and 9 amps charge, which considering the two 110Ah AGM leisure batteries are at the rear of the Dreamseeker I was happy with the loss.
Something I’m going to try…
While I was doing all this I started thinking (I’d also just seen the price of 13 core trailer cable per metre!) Why are we using this cable?
I have a length of woven kevlar cable sleeve (used in the aviation world) and I could thread my own cable…. upgrading the 1.5mm2 to 2.5 and the 2.5mm2 to 4mm and the “cable” would… (actually is…. as I have made one up now)… a lot more flexible than the existing product as it allowed the individual cables to move and slide past each other. I also used marine grade coated copper cable, so no corrosion of the strands.
4mm2 cable was a bit of a faff to terminate in the commonly available 13 pin plugs, but I believe the genuine ” German Jager manufactured plugs are acceptable for 4mm cable and they even have a crimp terminal version. So I’m going to do a bit more investigating as if I can get 4mm2 leisure battery and fridge circuits from end to end, that will reduce the voltage drop… which is always a step forward.
I’m also looking again at a high current circuit using Anderson connectors between the Truck and 5th Wheel. Currently I’m thinking of a 50 amp circuit with a 30 Amp DC to DC charger installed in the Dreamseeker…. ready for the battery upgrade. (along with a solar install, when I can find a suitable company to work with on that project)
Tourfest Northwest… as arranged by “The Caravan Addys”
Sue and I will be at Tourfest Northwest hosted at Donkey Creek Farm near Warton in May (24th to 28th) drop in and say “Hi”……” see you in a bit“
Happy New Year to everyone, I hope you have a great touring year ahead.
I’d like to take this opportunity to give you a bit of an update on my personal circumstances and a look forward to a couple of projects I’m planning to kick off our year.
First…
… A HUGE thank-you yo everyone that messaged, email and posted about my cancer diagnosis. Things started off OK and I had a stent installed in my colon to stop it blocking and started chemotherapy. Before I got two cycles of chemo completed my body decided it didn’t like the stent and for what ever reason decided to try and pass the stent to the nearest exit. This resulted me being blue lighted in to Manchester Royal Infirmary on a Saturday afternoon. 24 hours later I underwent an emergency Laparotomy to remove the stent now firmly stuck where it shouldn’t be and part of my transverse colon was removed at the same time. Basically the section where the tumour was. A further five days on the High Dependancy Unit followed and another 13 days on a surgical ward. I remember very little of any of this…. basically I was on another planet drug wise. Apparently it was touch and go a couple of times as my colon was leaking into my body.
Part of the surgery included a colostomy, so now I’m learning to live with that. I was released home late on Christmas Eve so got to spend Christmas with Sue at home.
So far I’m recovering as planned. My body strength is slowly returning… I lost a lot of muscle mass bing in bed for nearly a month. My weight has dropped by around 31kg… so if you see someone dressed in 1980’s gear… it could well be me wearing some of my old stuff. I decided against the platform shoes and petrol blue patch pocket pants though!
I go back on the 10th Jan to The Christie Hospital for checkups and to see when I can resume my chemo treatment.
ONWARDS!
So we are still planning to attend Tourfest North West in May at Donkey Creek Farm and I’m looking towards our first trip away sometime towards the end of this month hopefully. It will only be local and for a couple of days initially.
Future Projects…
The first big one is a bit unusual. I want to add electronic side view mirrors to the Amarok. These are two screens that mount vertically on each of the A posts and link to cameras where your rear view mirrors are. However I’m adding a twist. I want to mount the rear view cameras on each side of the 5th wheel. This would mean that when looking to the rear view mirror on the passenger door of the amaro I not only see the rear view from the Amarok door mirror but also the rear view from the camera mounted on the side of the trailer. Not a big gain driving down the road you might say, but there are two huge advantages. The first is I will not need to fit extension mirrors to the Amarok when towing as the installed cameras and internal A post mounted screen combo will give me the required view coverage required by law. This has already been accepted and approved for commercial vehicles and coaches and is in use on the road already. To comply with regs though these will have to be connected via a Suzi between the trailer and truck. You cannot have wireless devices.
The second is when reversing I will always have a view down each side of the trailer no matter what angle the Amarok is the the trailer. This has huge advantages when reversing into pitches as effectively there will be no blind side reversing as the combination of rear and side view cameras will always allow me to see the three sides of the trailer.
The next project really is one I came up with while in hospital. My last ‘job’ was ground op’s supervisor at Manchester Airport, a job which occasionally meant I had to oversee the ground start of engines, push backs etc. To do this we used a head set plugged into the aircraft so we could talk to the flight deck. This got me thinking…. I have several Dave Clark headsets from my flying days and thought about adapting these for ground comms between someone directing reversing and the driver.
We have tried mobile phones, cheap hand held radios working on DMR Chanels and a couple of HAM handhelds programmed to an obscure frequency that hopefully won’t get me into trouble with the authorities , as my radio licence is for aviation operation, I gave up my ham licence in the late 70’s.
It’s just an idea that may or may not work out… I have the kit and all it will take is a bit of soldering and making up a small circuit board to get everything working. As I am on restricted duties ( can’t lift anything heavier than a cup of coffee or a ham sammich) for at least ten weeks, sitting at my bench in the workshop is not an issue and it gives me something to tinker about with for a while.
The third project is to get a 12 volt 50 Amp service from the Amarok into the 5th wheel. This is in preparation for installing a dc to dc charger if we decide to move over to lithium. If not we can still install a DC to DC charger for the current AGM battery bank we have. The move to lithium is not yet a proven case for us as we currently don’t do much off grid.
Lastly is installing a couple of big solar panels. Initially this will be to keep our current AGM batteries charged, so thinking about 800 watts should do it and this could be increased in the future. One thing we do have on the 5th wheel is plenty of flat open roof space. At this stage I’m thinking of flexible panels bonded to the roof rather than ridged panels as they weigh a lot less.
Unusually for me… and the blog, I might have to partner up with companies to get a couple of these projects completed as at the moment I’m not in any shape to go crawling round the truck or the 5th wheel. We will see how that progresses though.
Thanks again..
So again a HUGE thank you for all the emails, messages and comments. I apologise if you emailed or posted comments with technical questions and I haven’t replied, but I have been out of it for a while. A huge than-you too to the people that have bought me a cup of coffee via the link. I’m well on the way to covering the cost of paying for the hosting of the blog and domain name for another year.
Both Sue and I hope you all have a fantastic New Year and have a fantastic touring season. Stay safe and hopefully we will see you soon on a site somewhere.
Just like to say a huge thank you to so many people that have commented or emailed me over my last post. It has cheered me up no end…. it really has.Enough to rattle this post off!
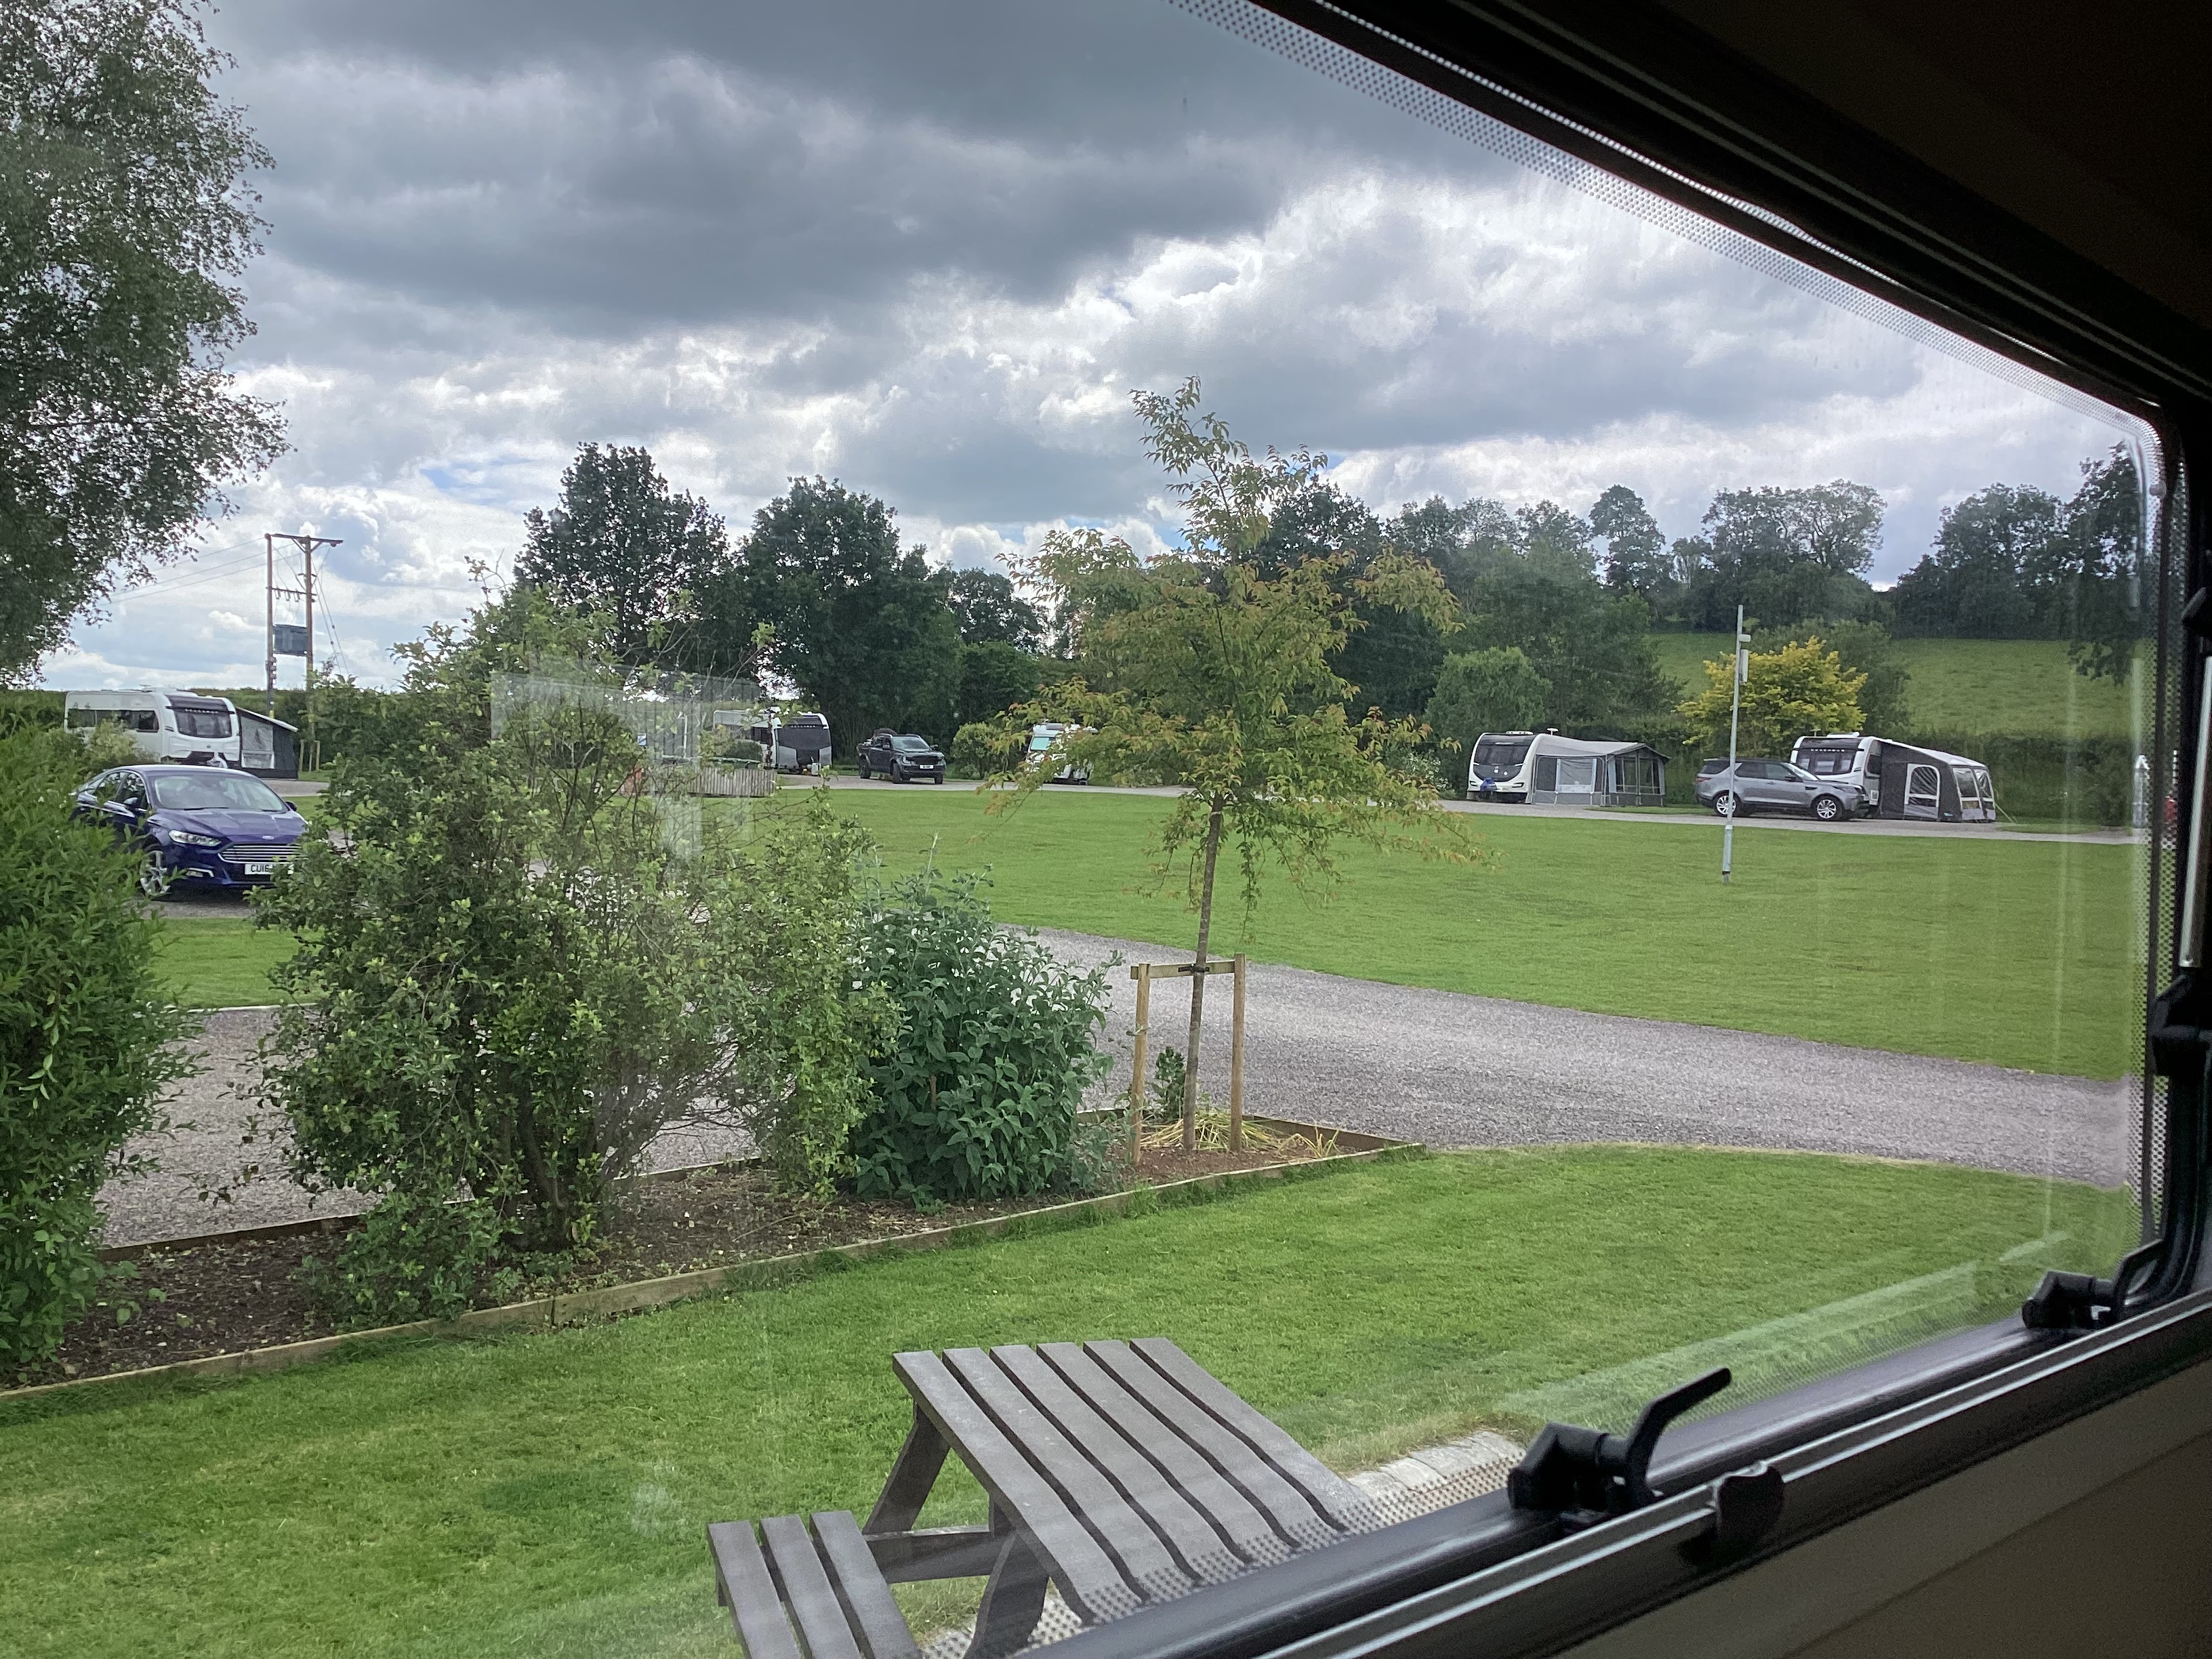
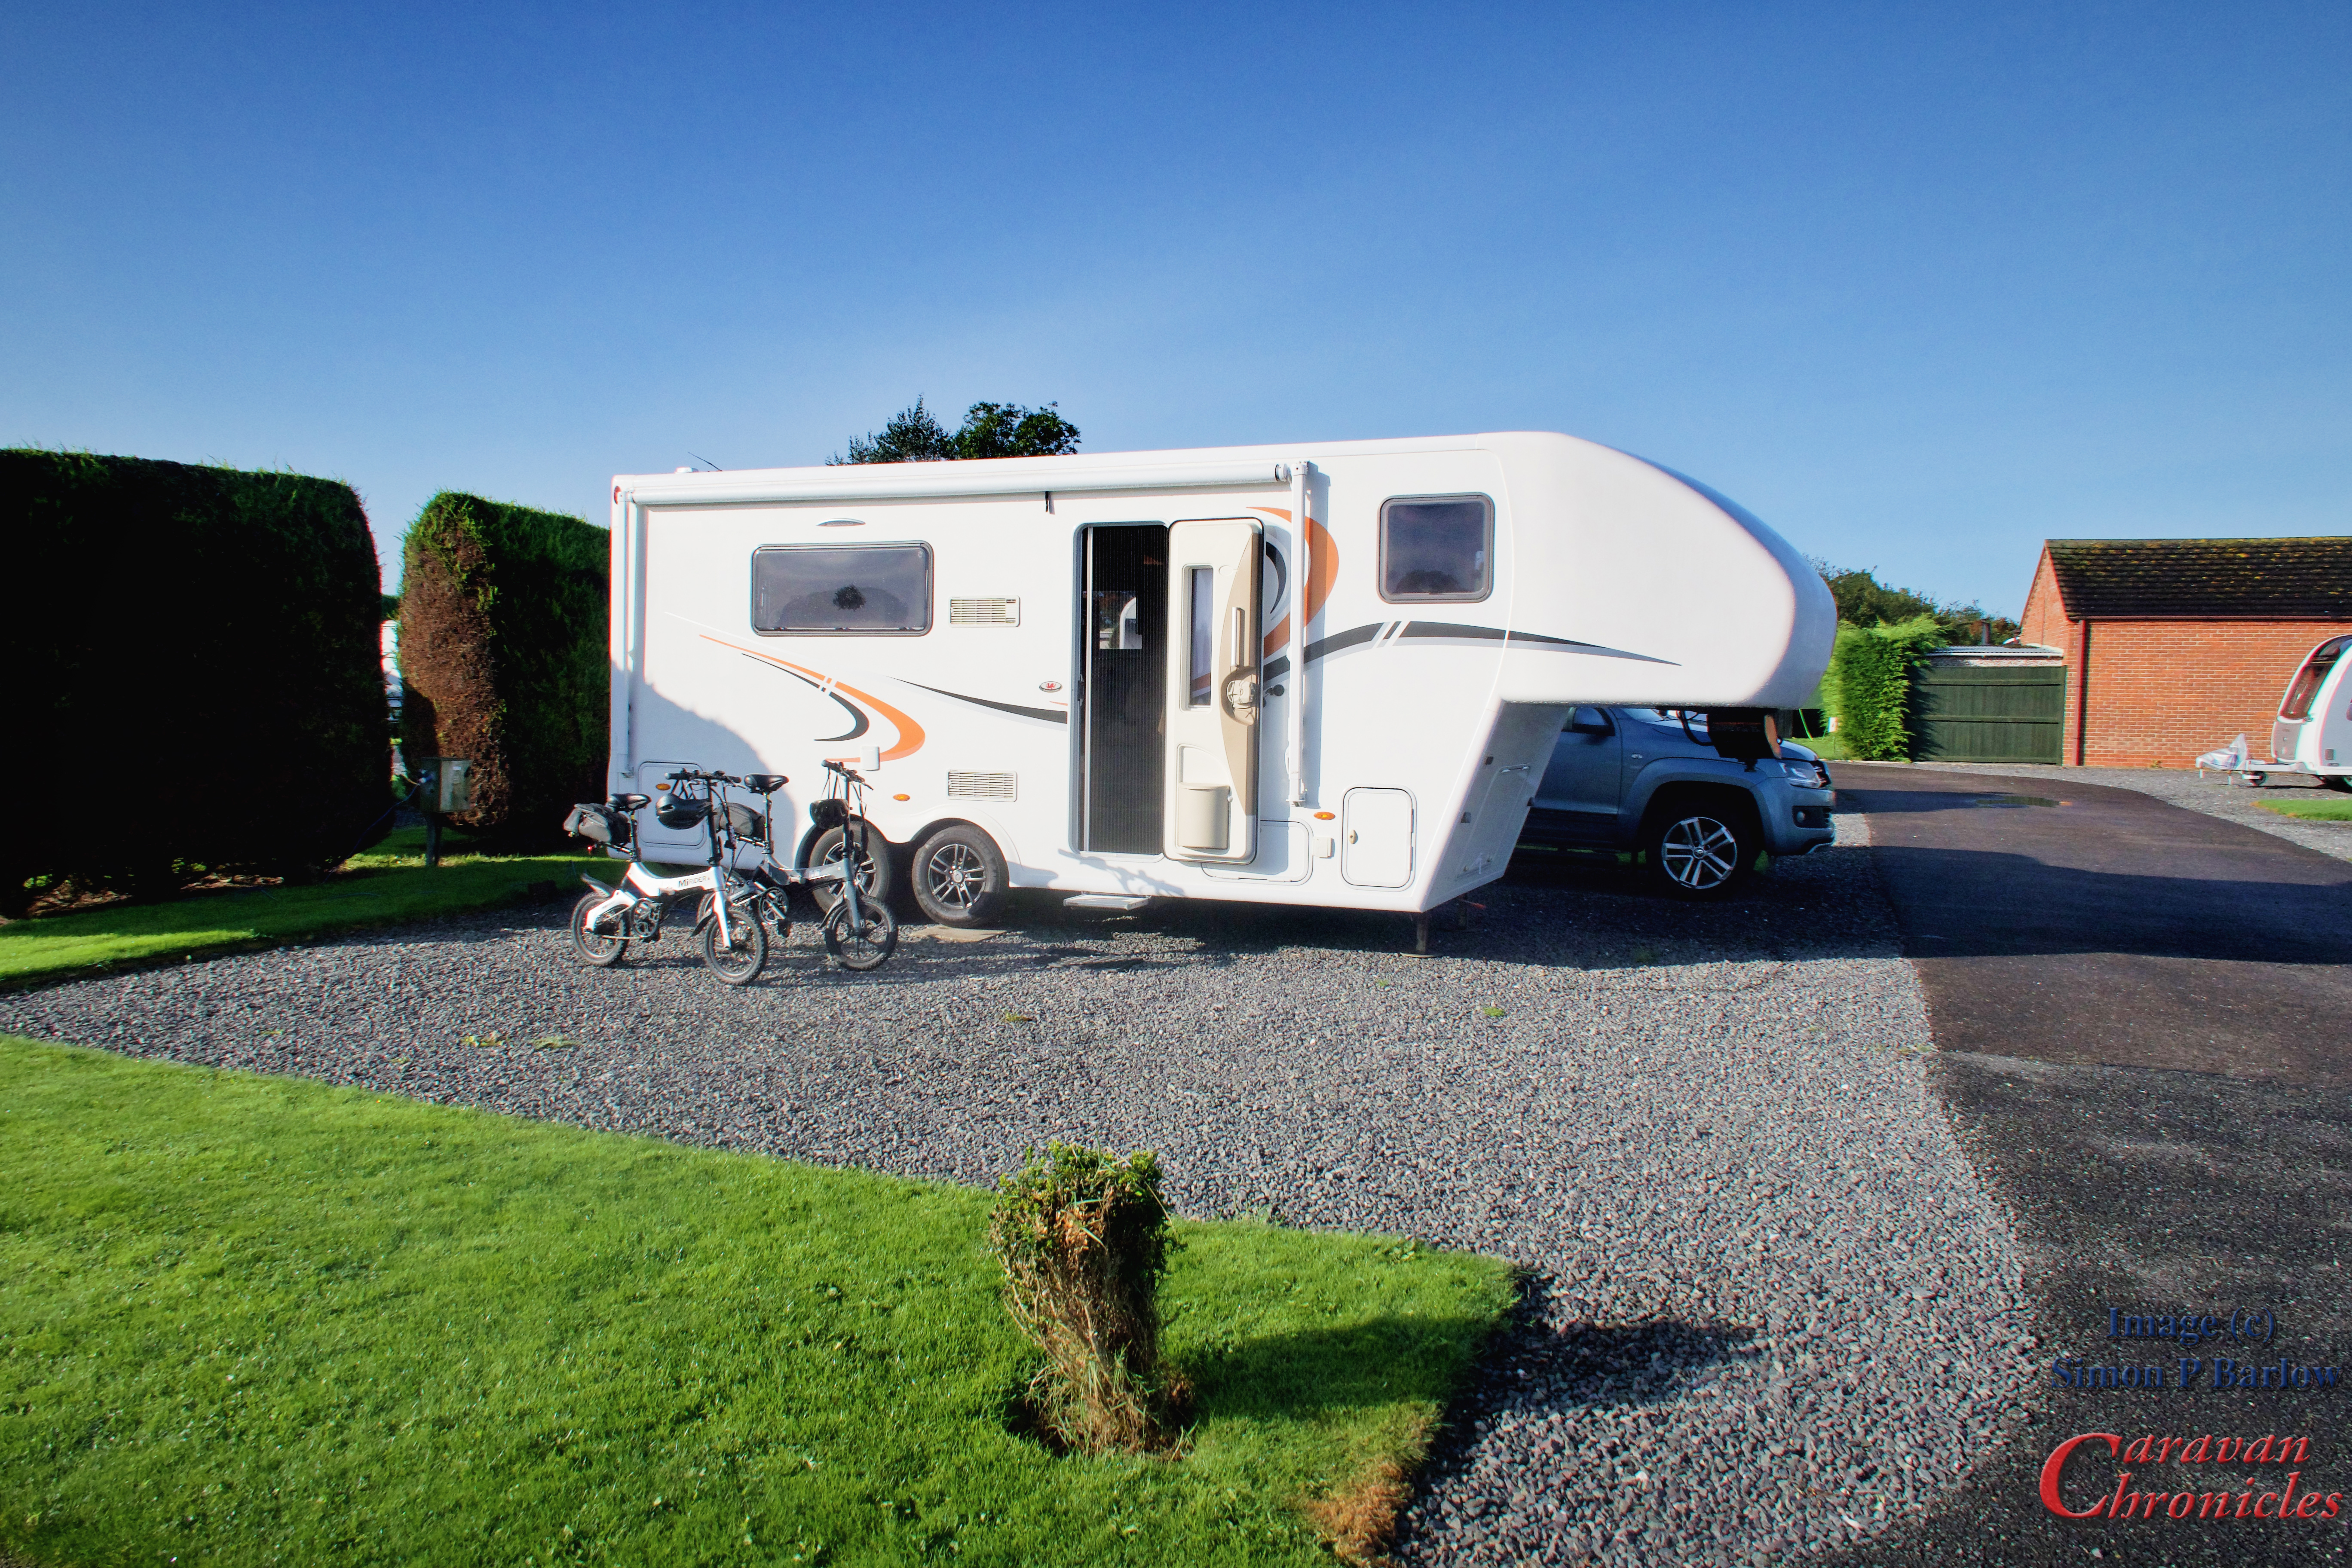
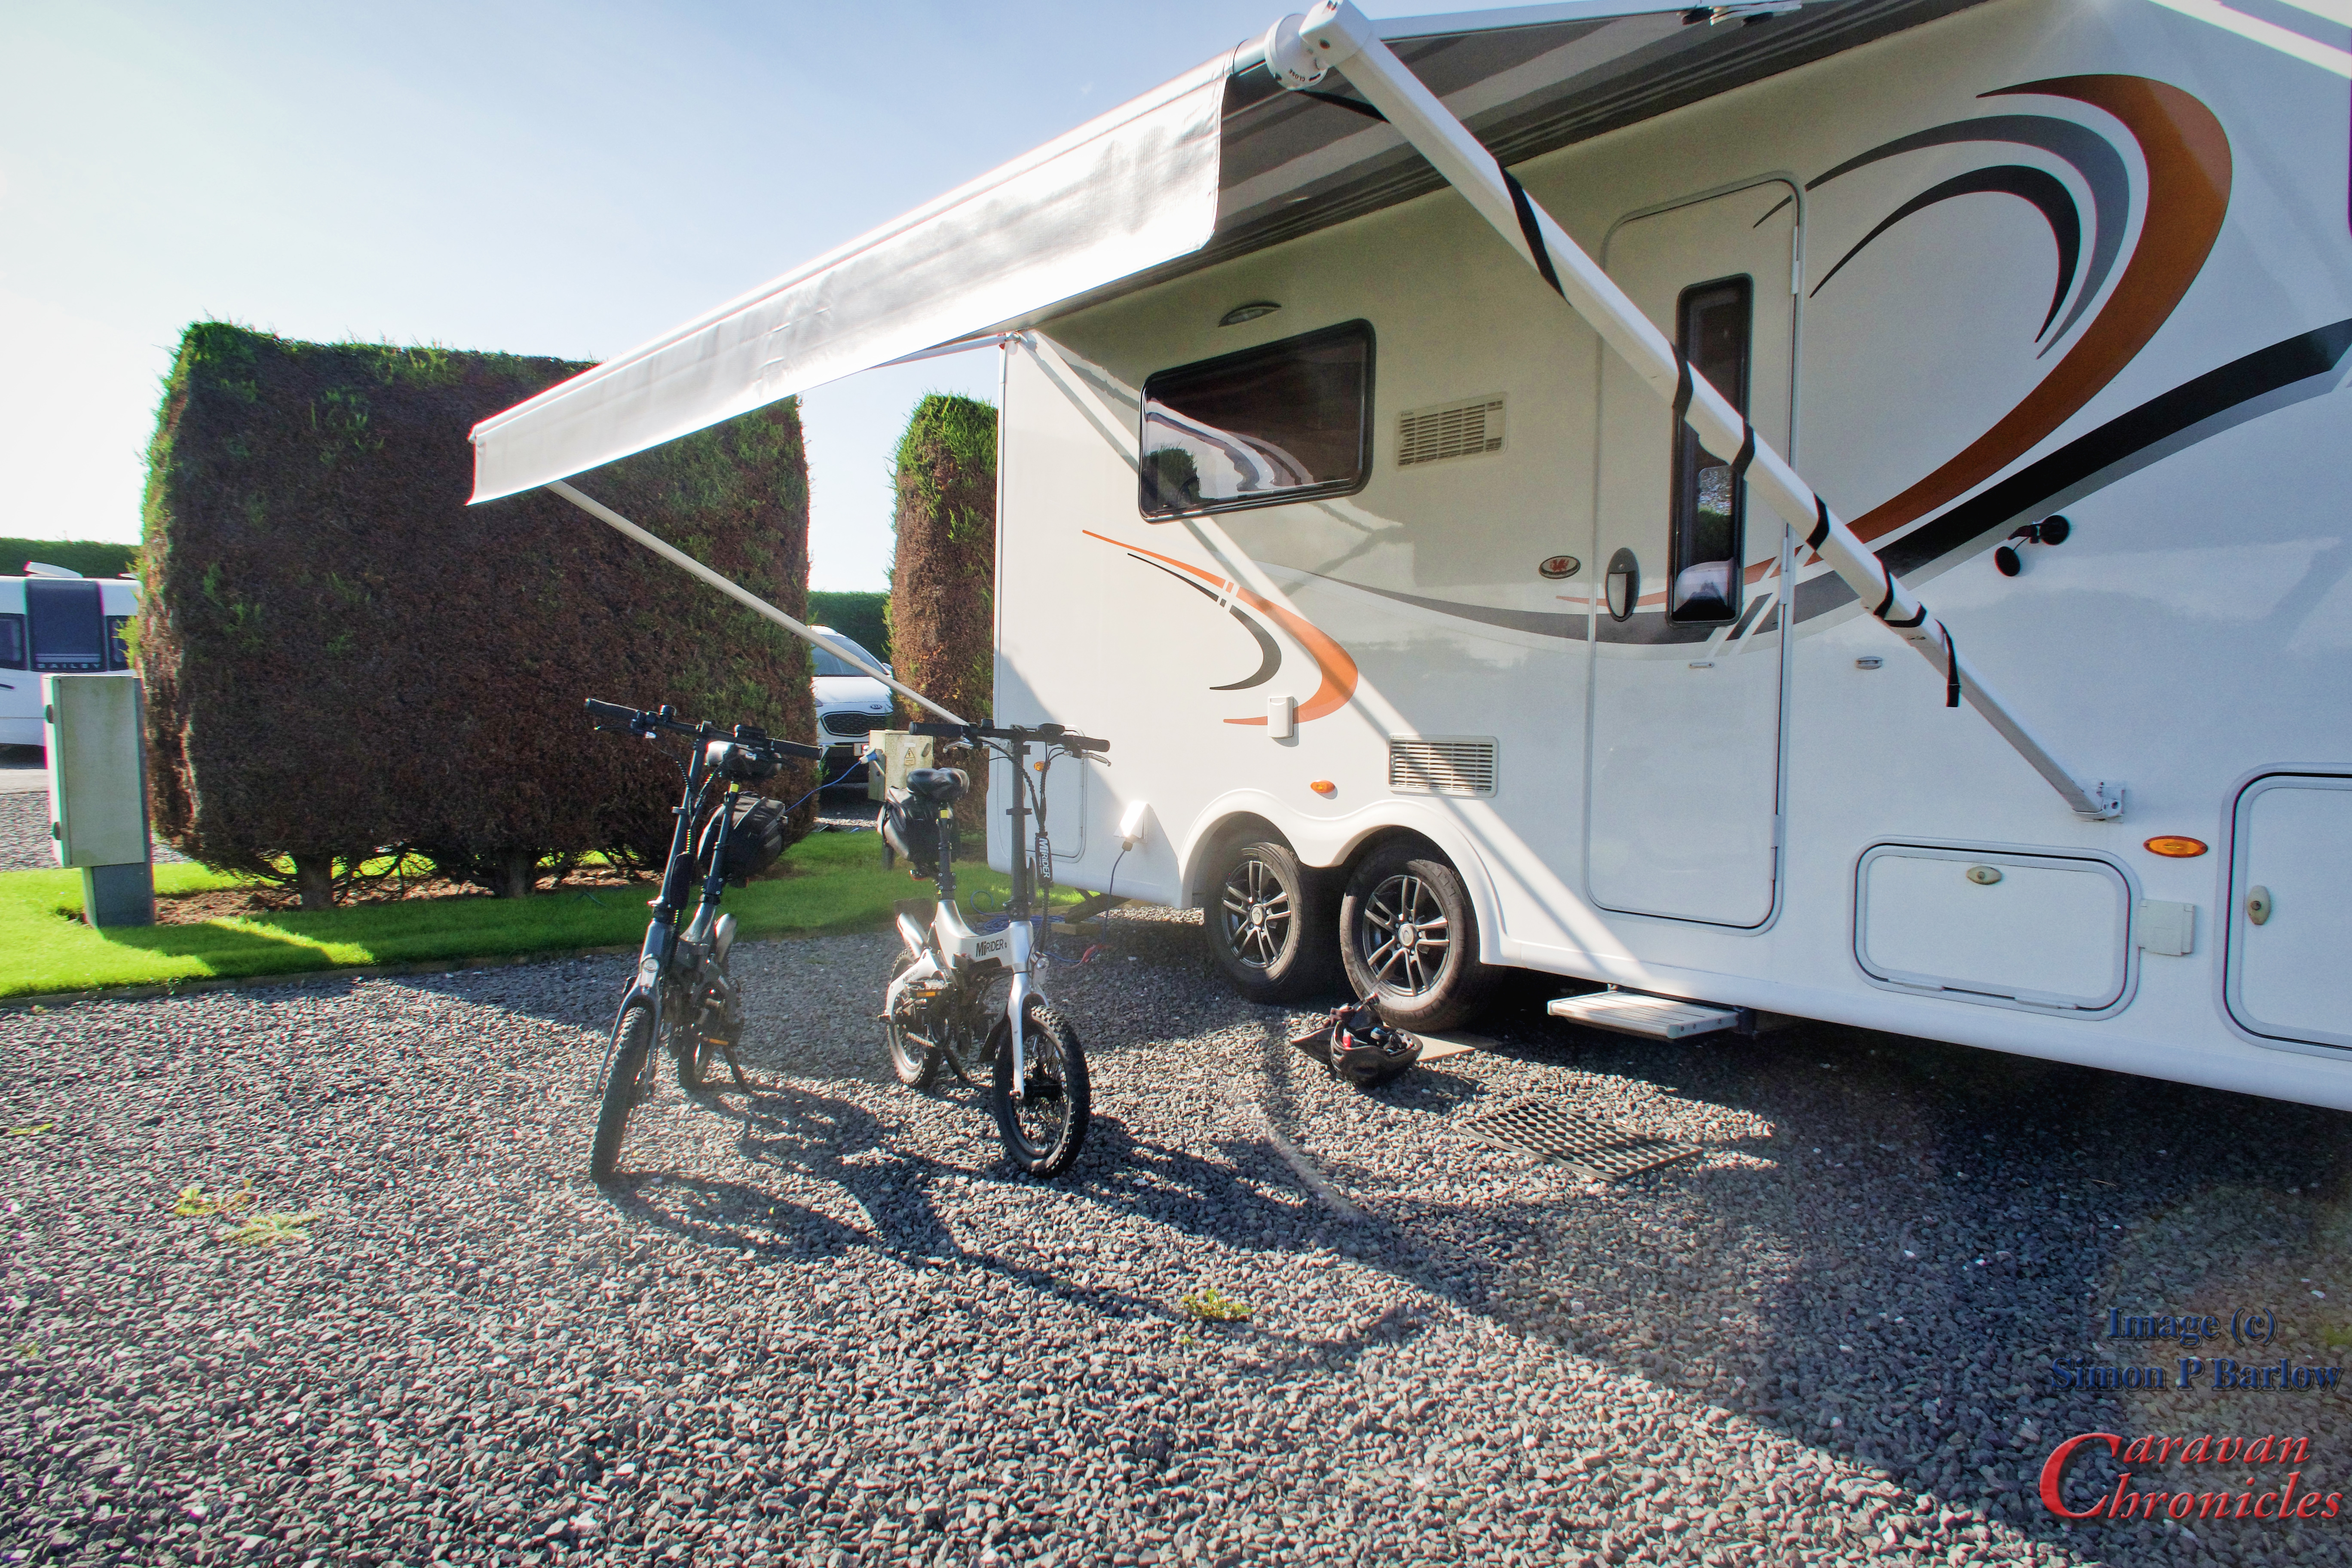
We recently went back to Cherry Tree Springs at Sutton on Sea for an 7 day break. We had been there earlier in the year and really liked the atmosphere and the people there. As we have been trying independent sites this season over Caravan & Motorhome Club sites, I did a comparison. To stay at the C & M Club site for the same dates would have cost £280.00. We paid £178.50 at Cherry Tree so a saving of £101.50…. in fact we stayed an extra night making 8 in total so saved even more!!!
The facilities block is as you would expect… really clean, plenty of hot water and warm. The rest of the site is really well maintained and the pitches are level with plenty of space for parking and room for a large awning.
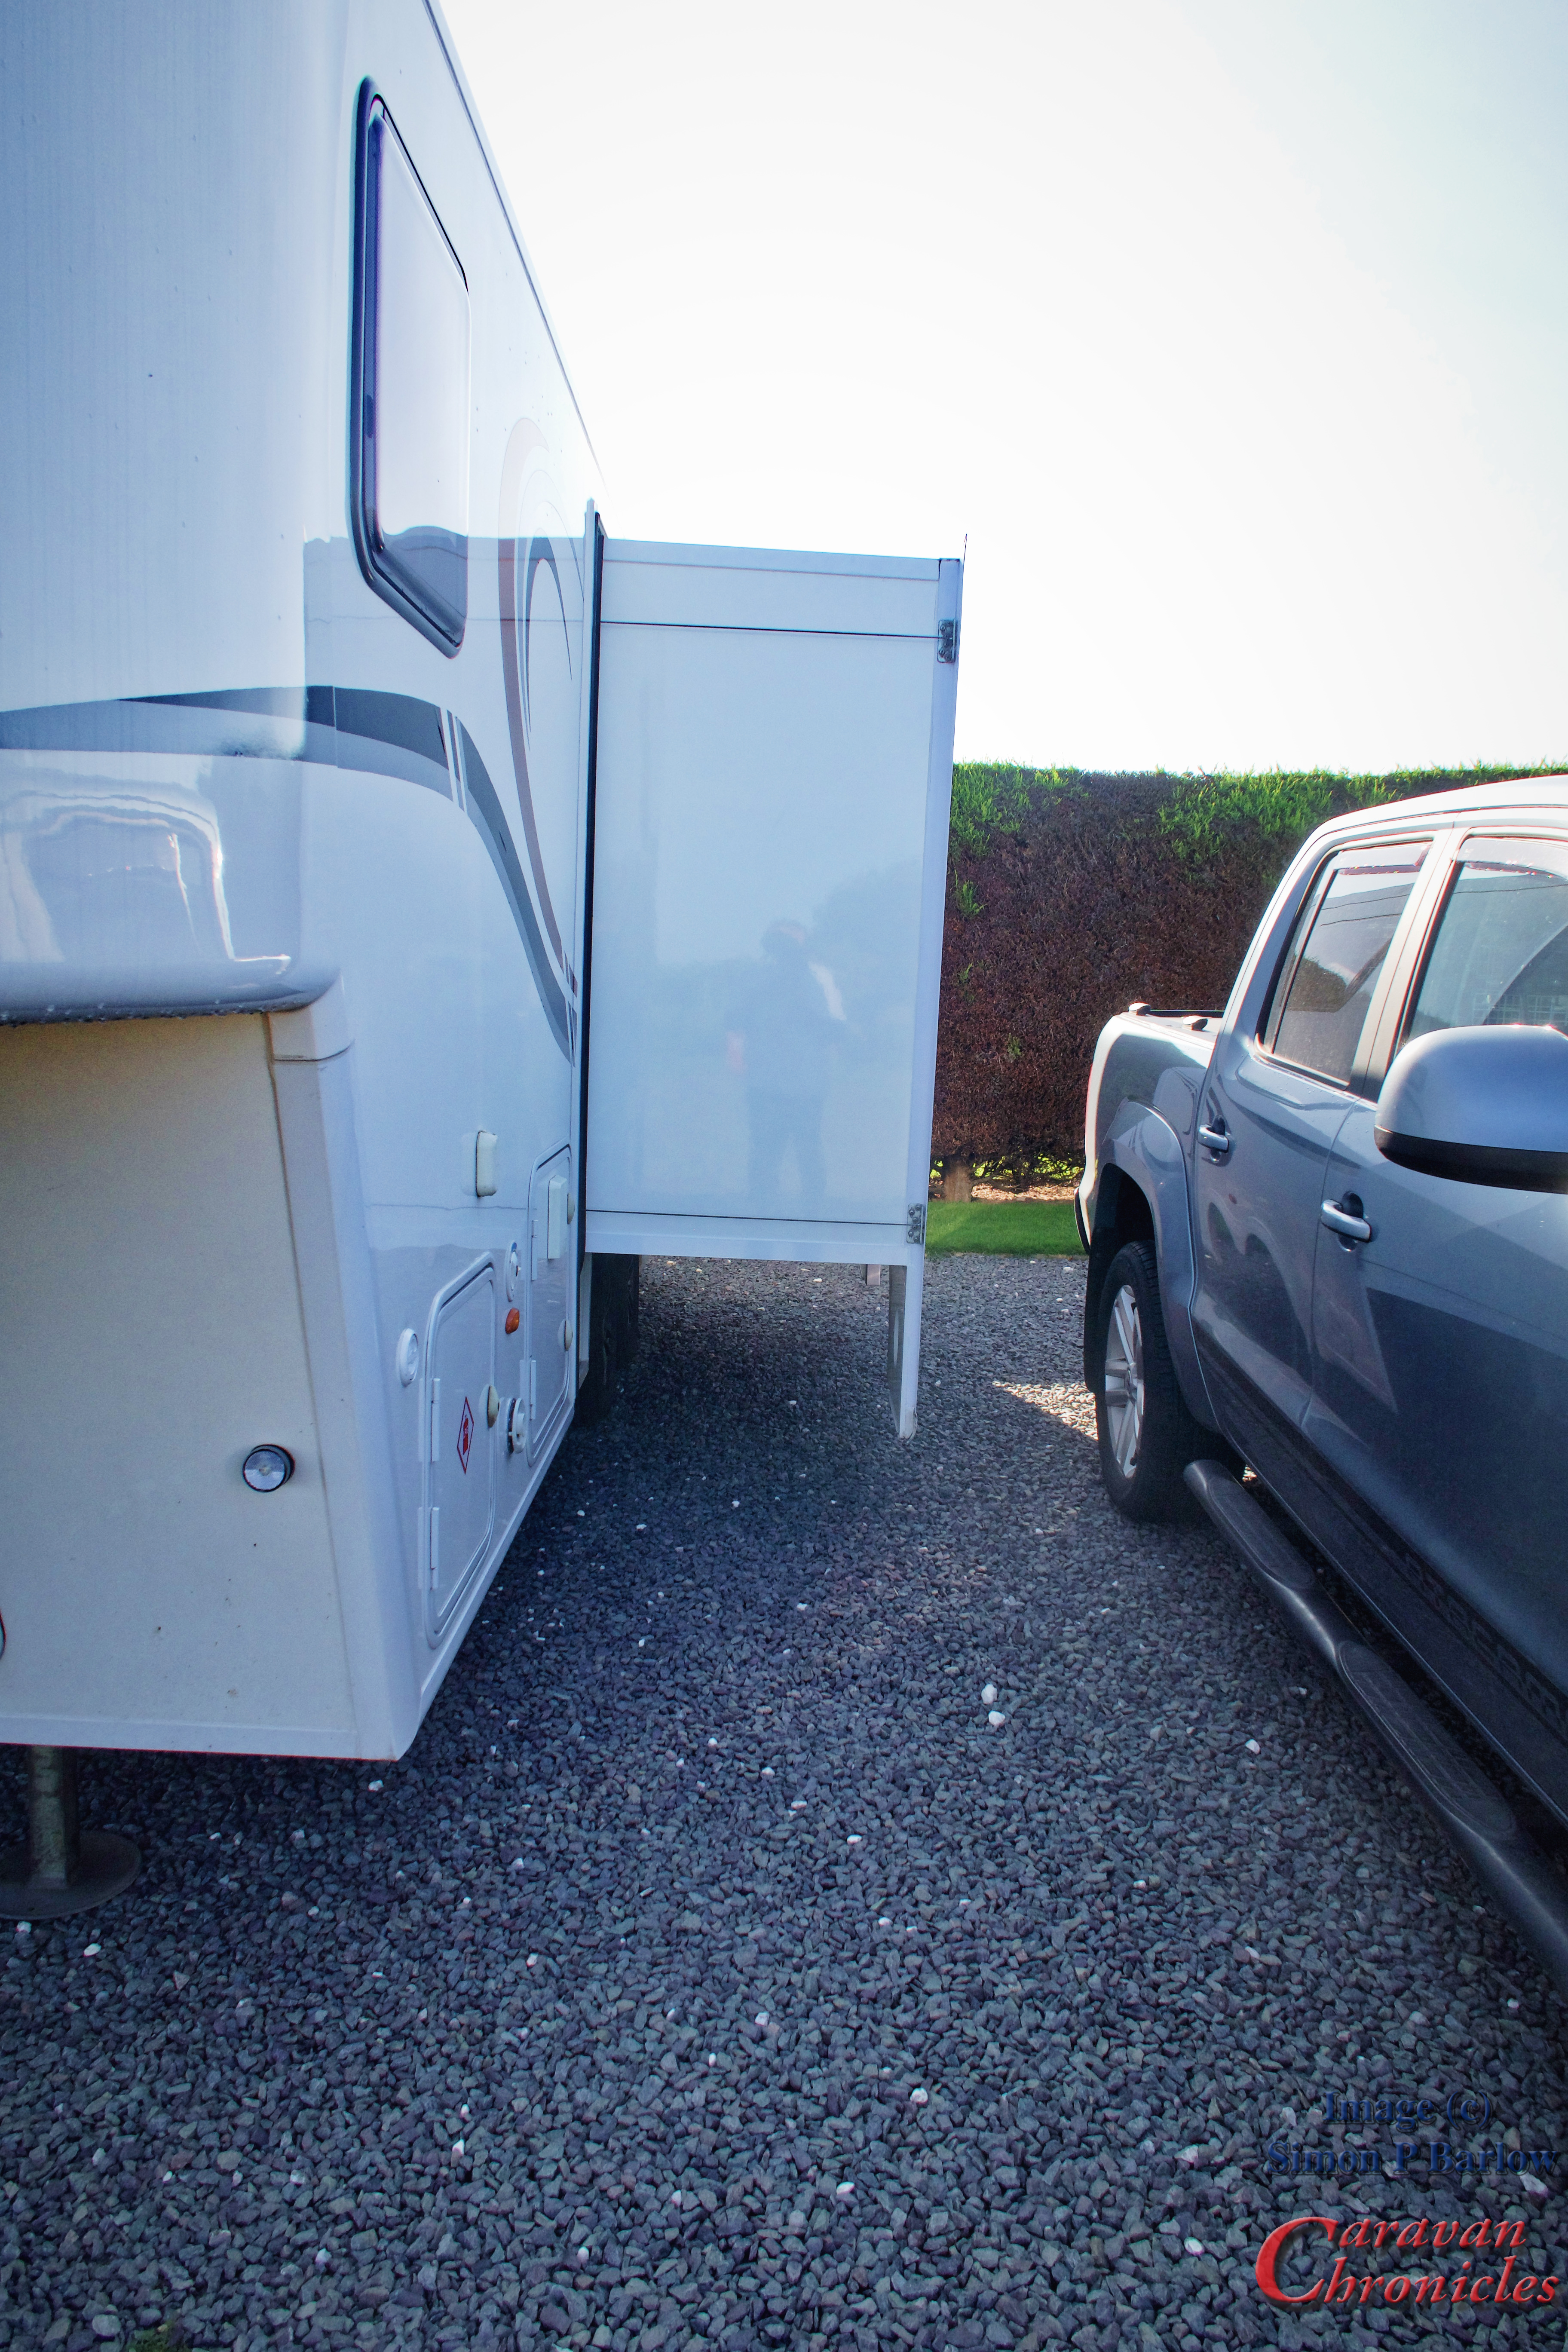
Even with our slide out… out, I still had room for the VW Amarok and plenty of room on the other side for our huge roll out canopy.
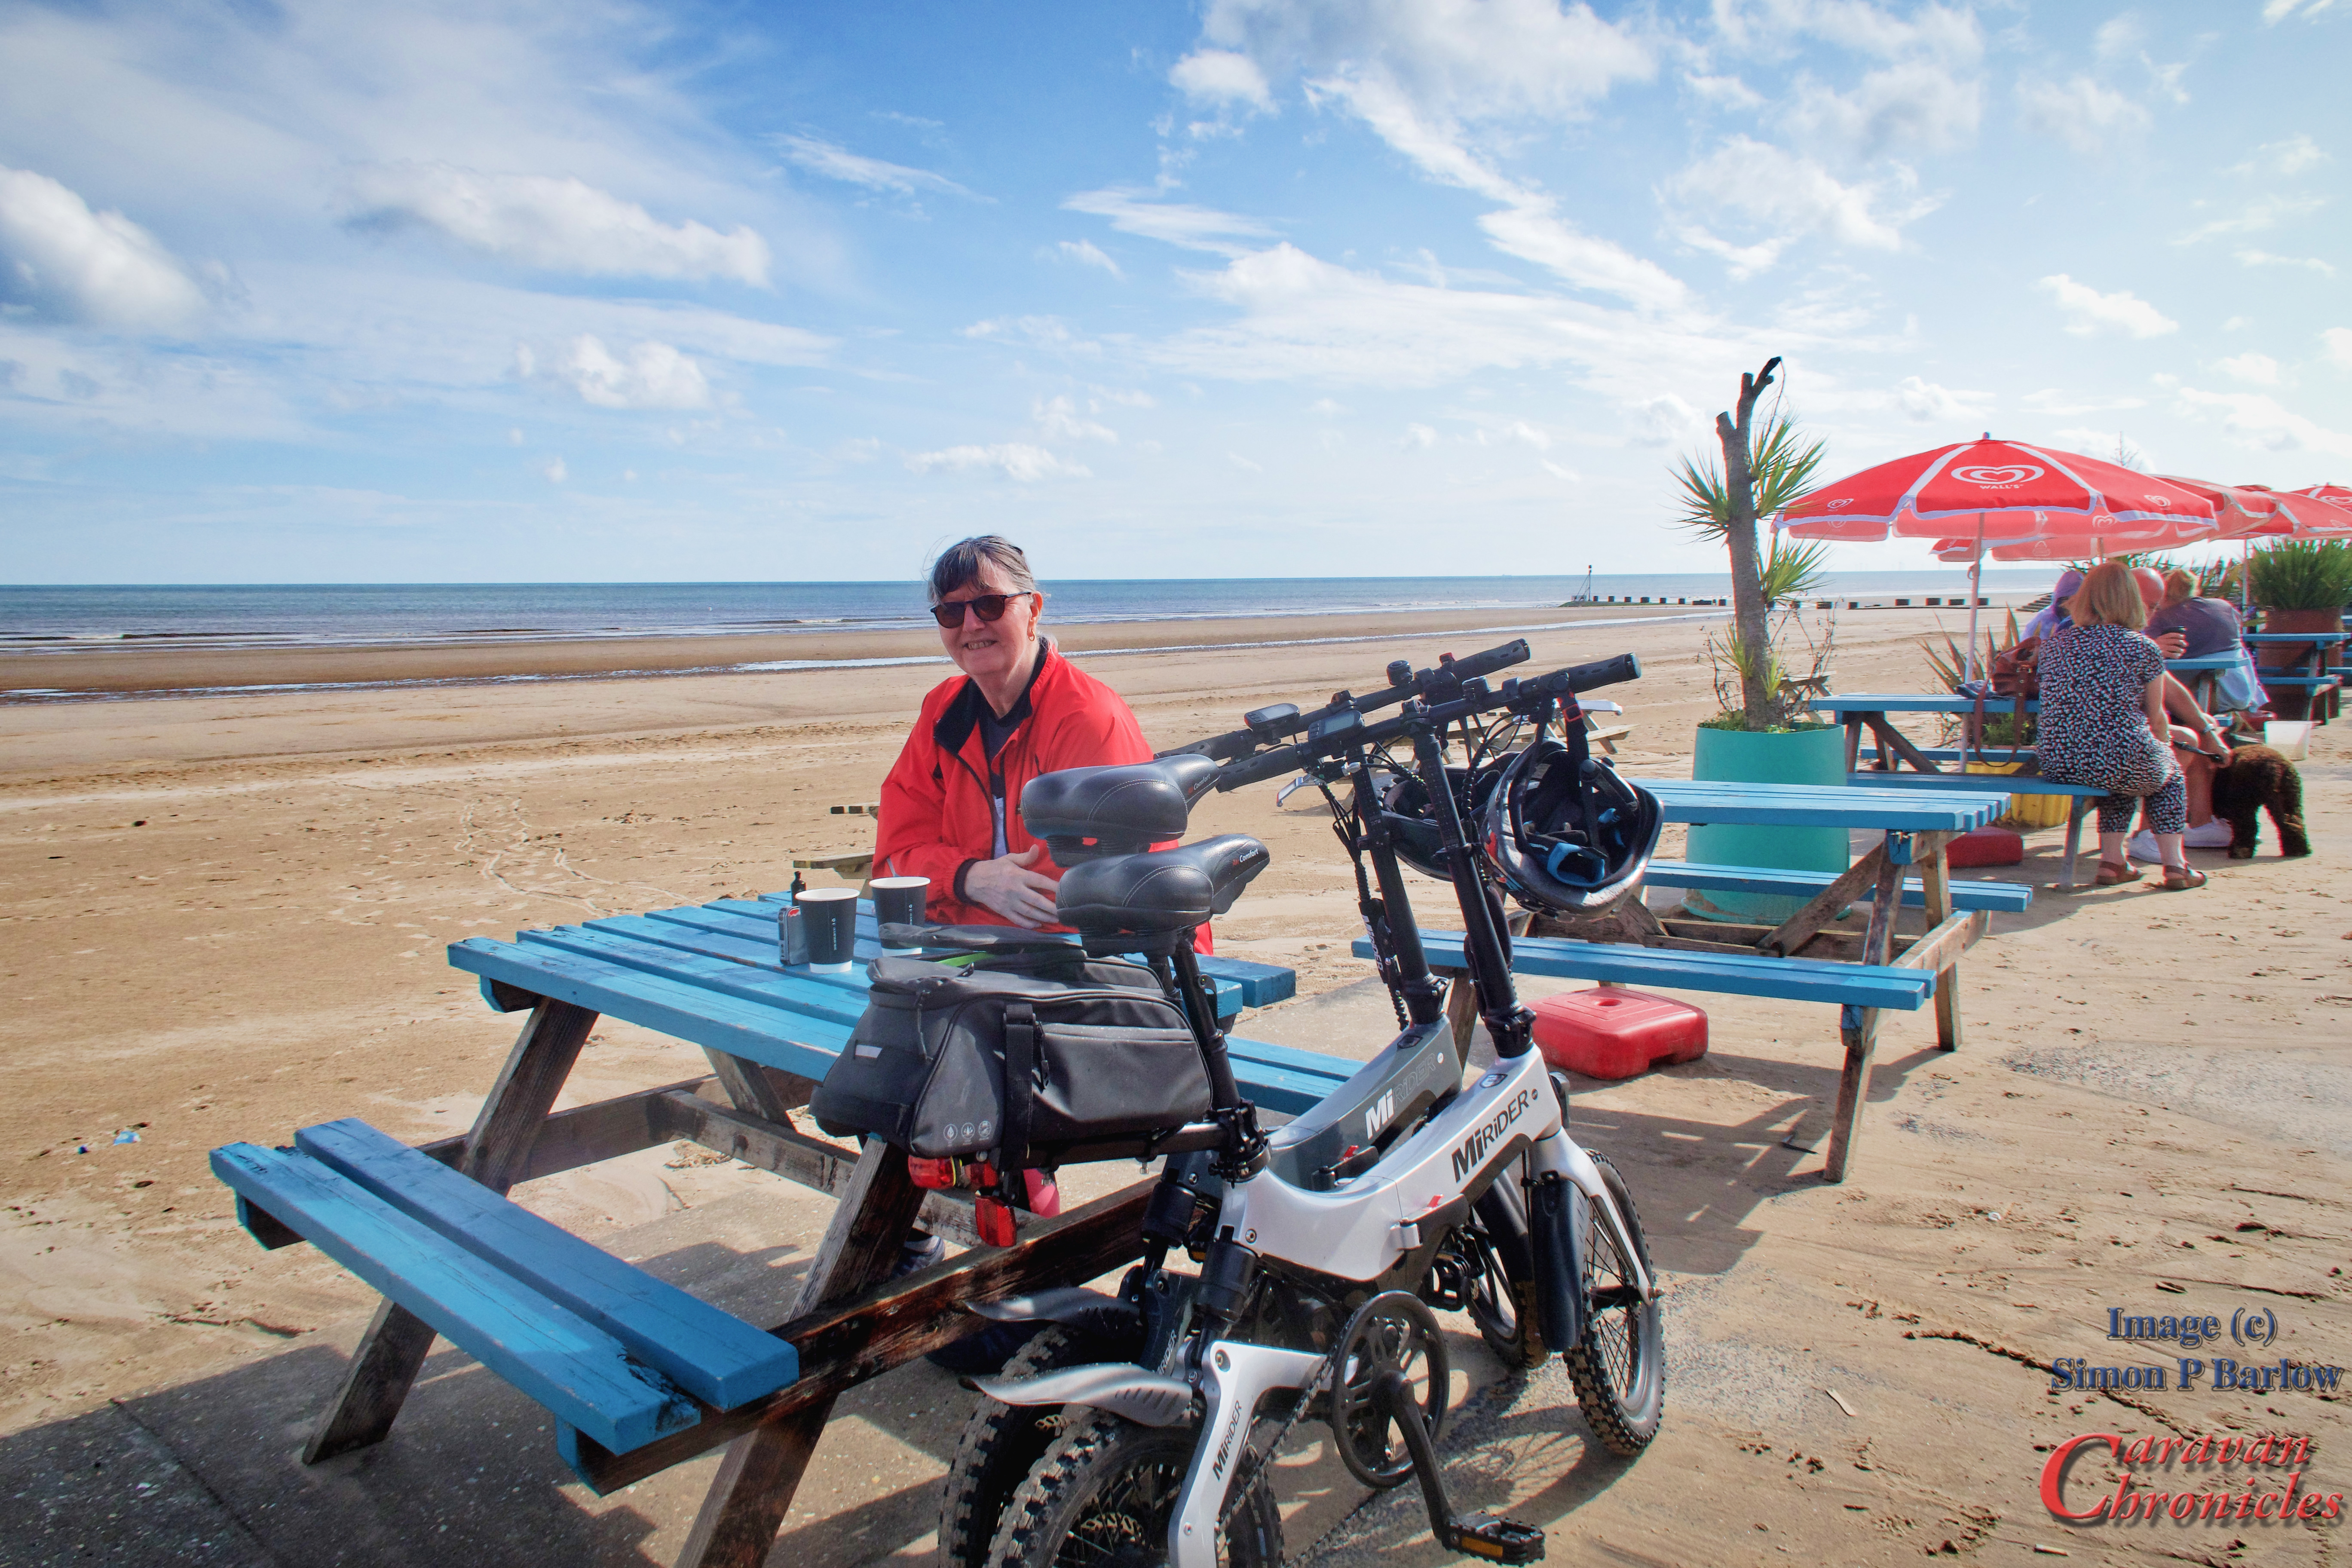
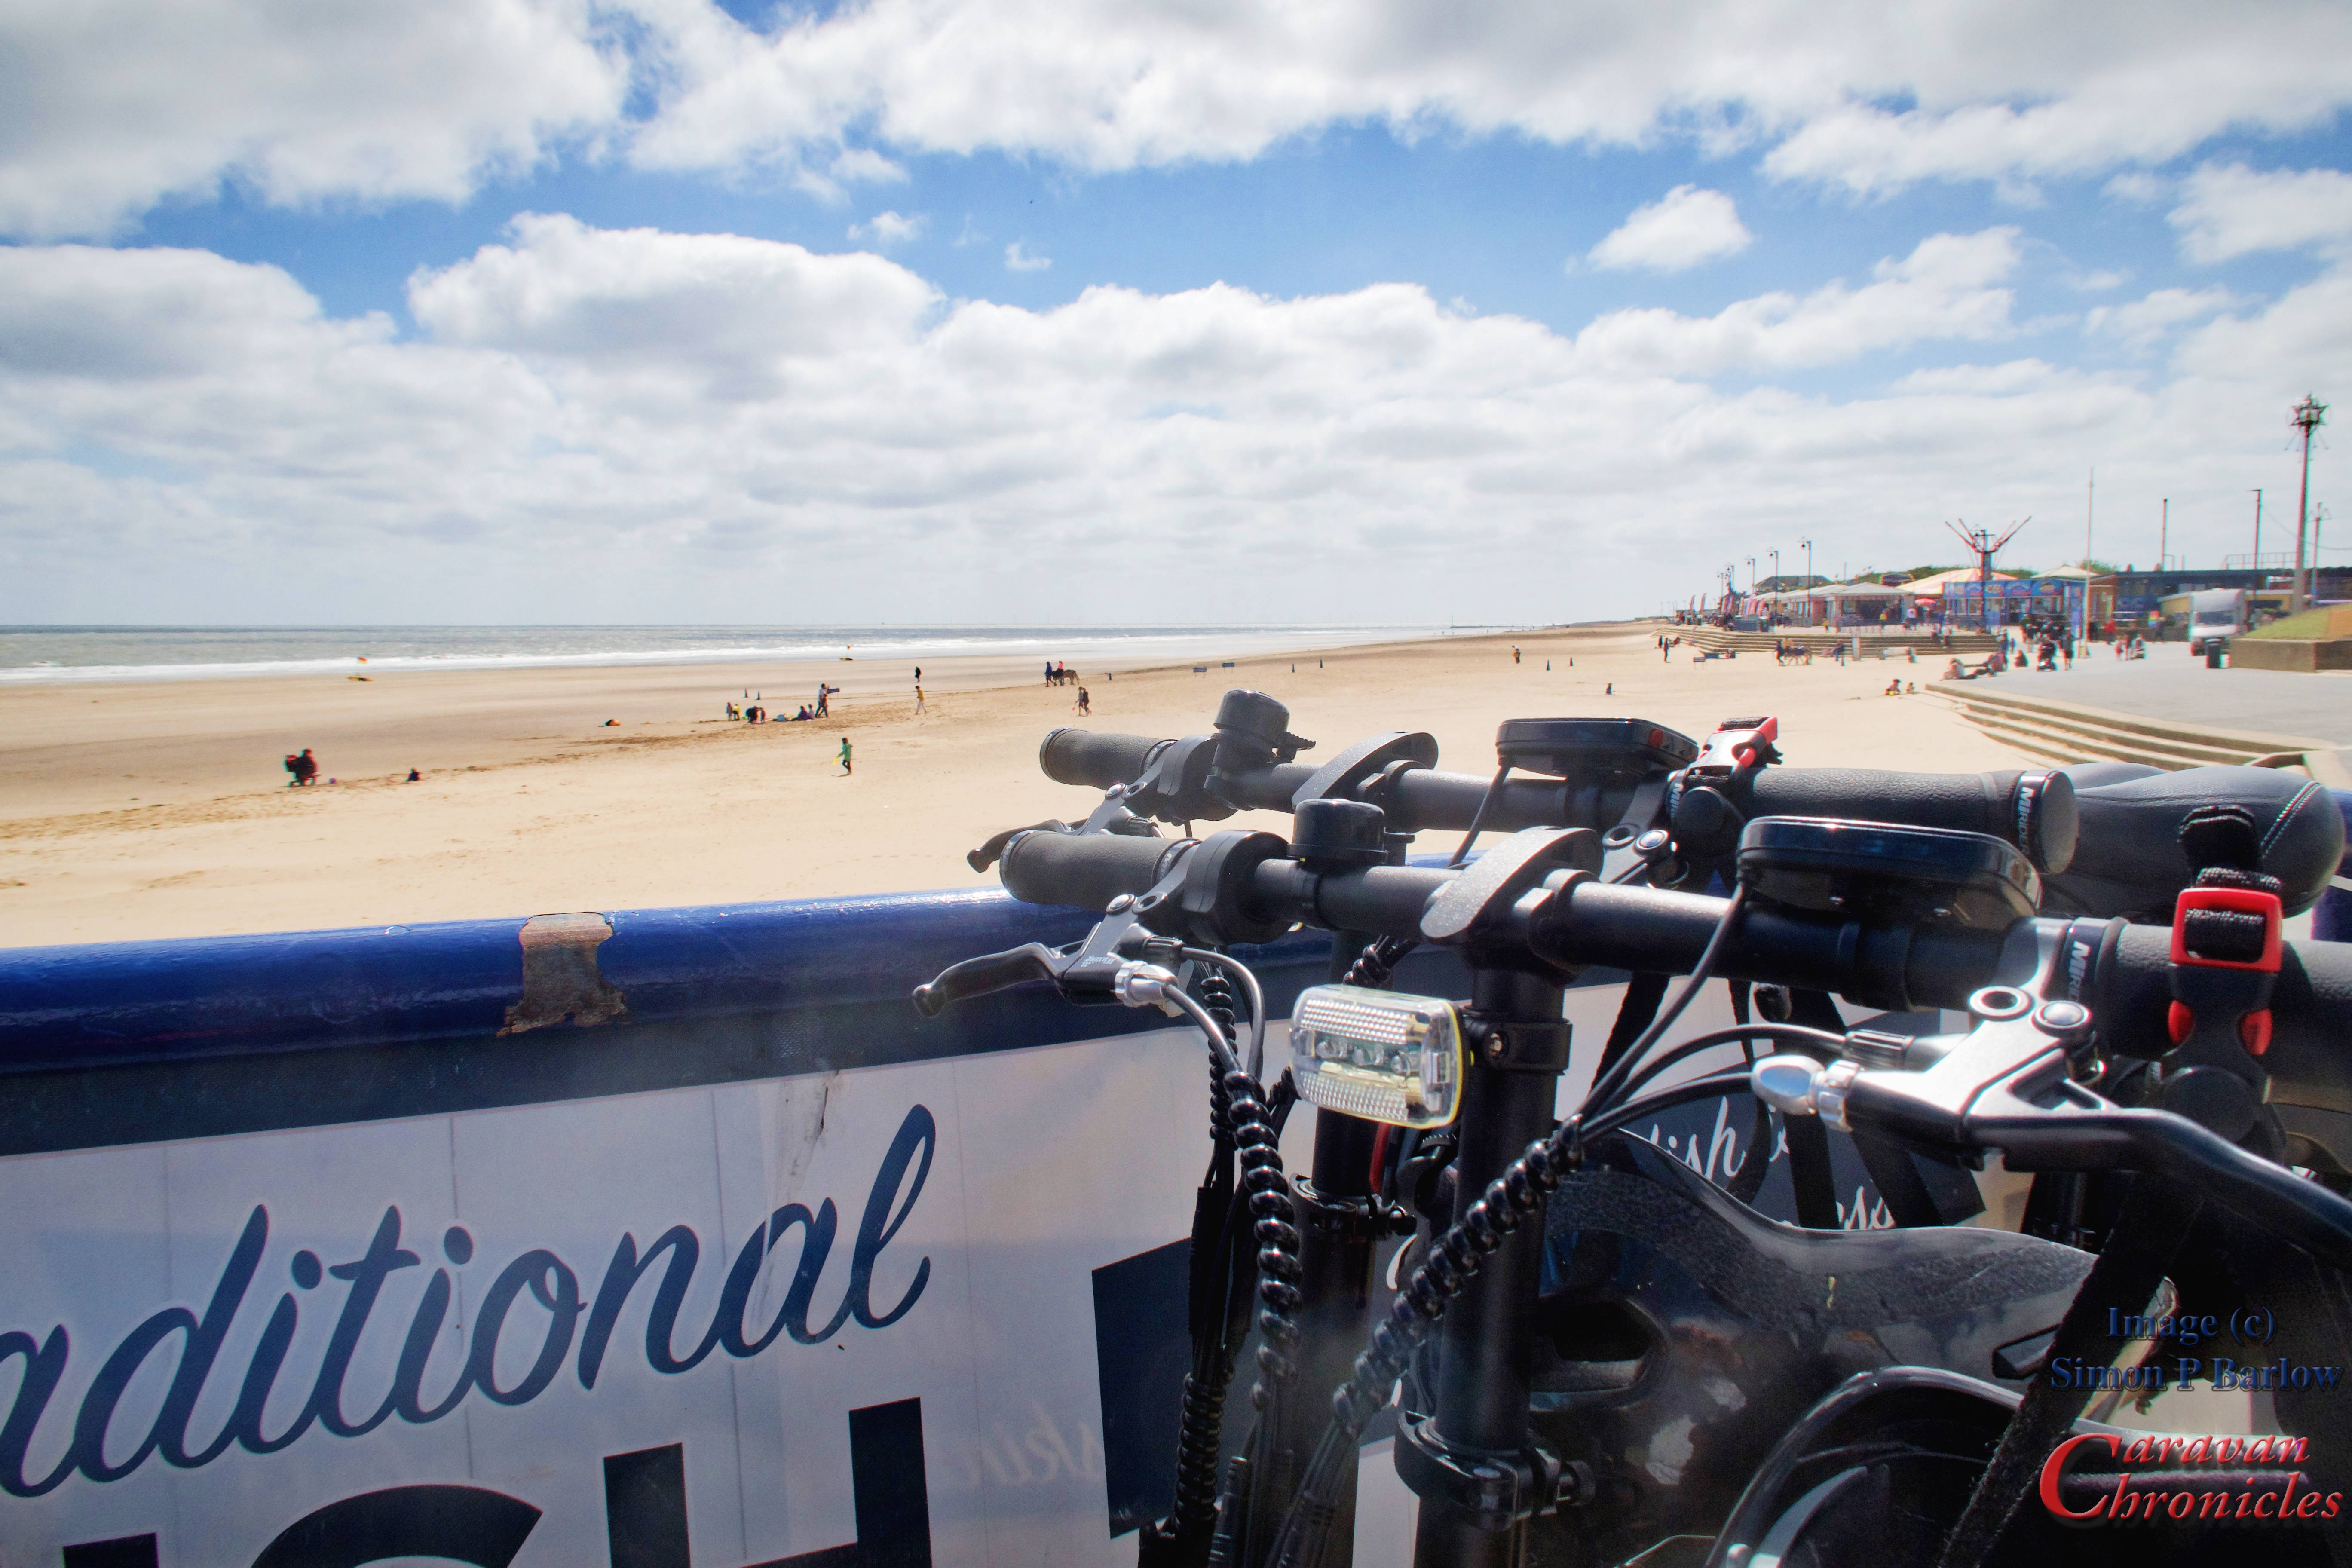
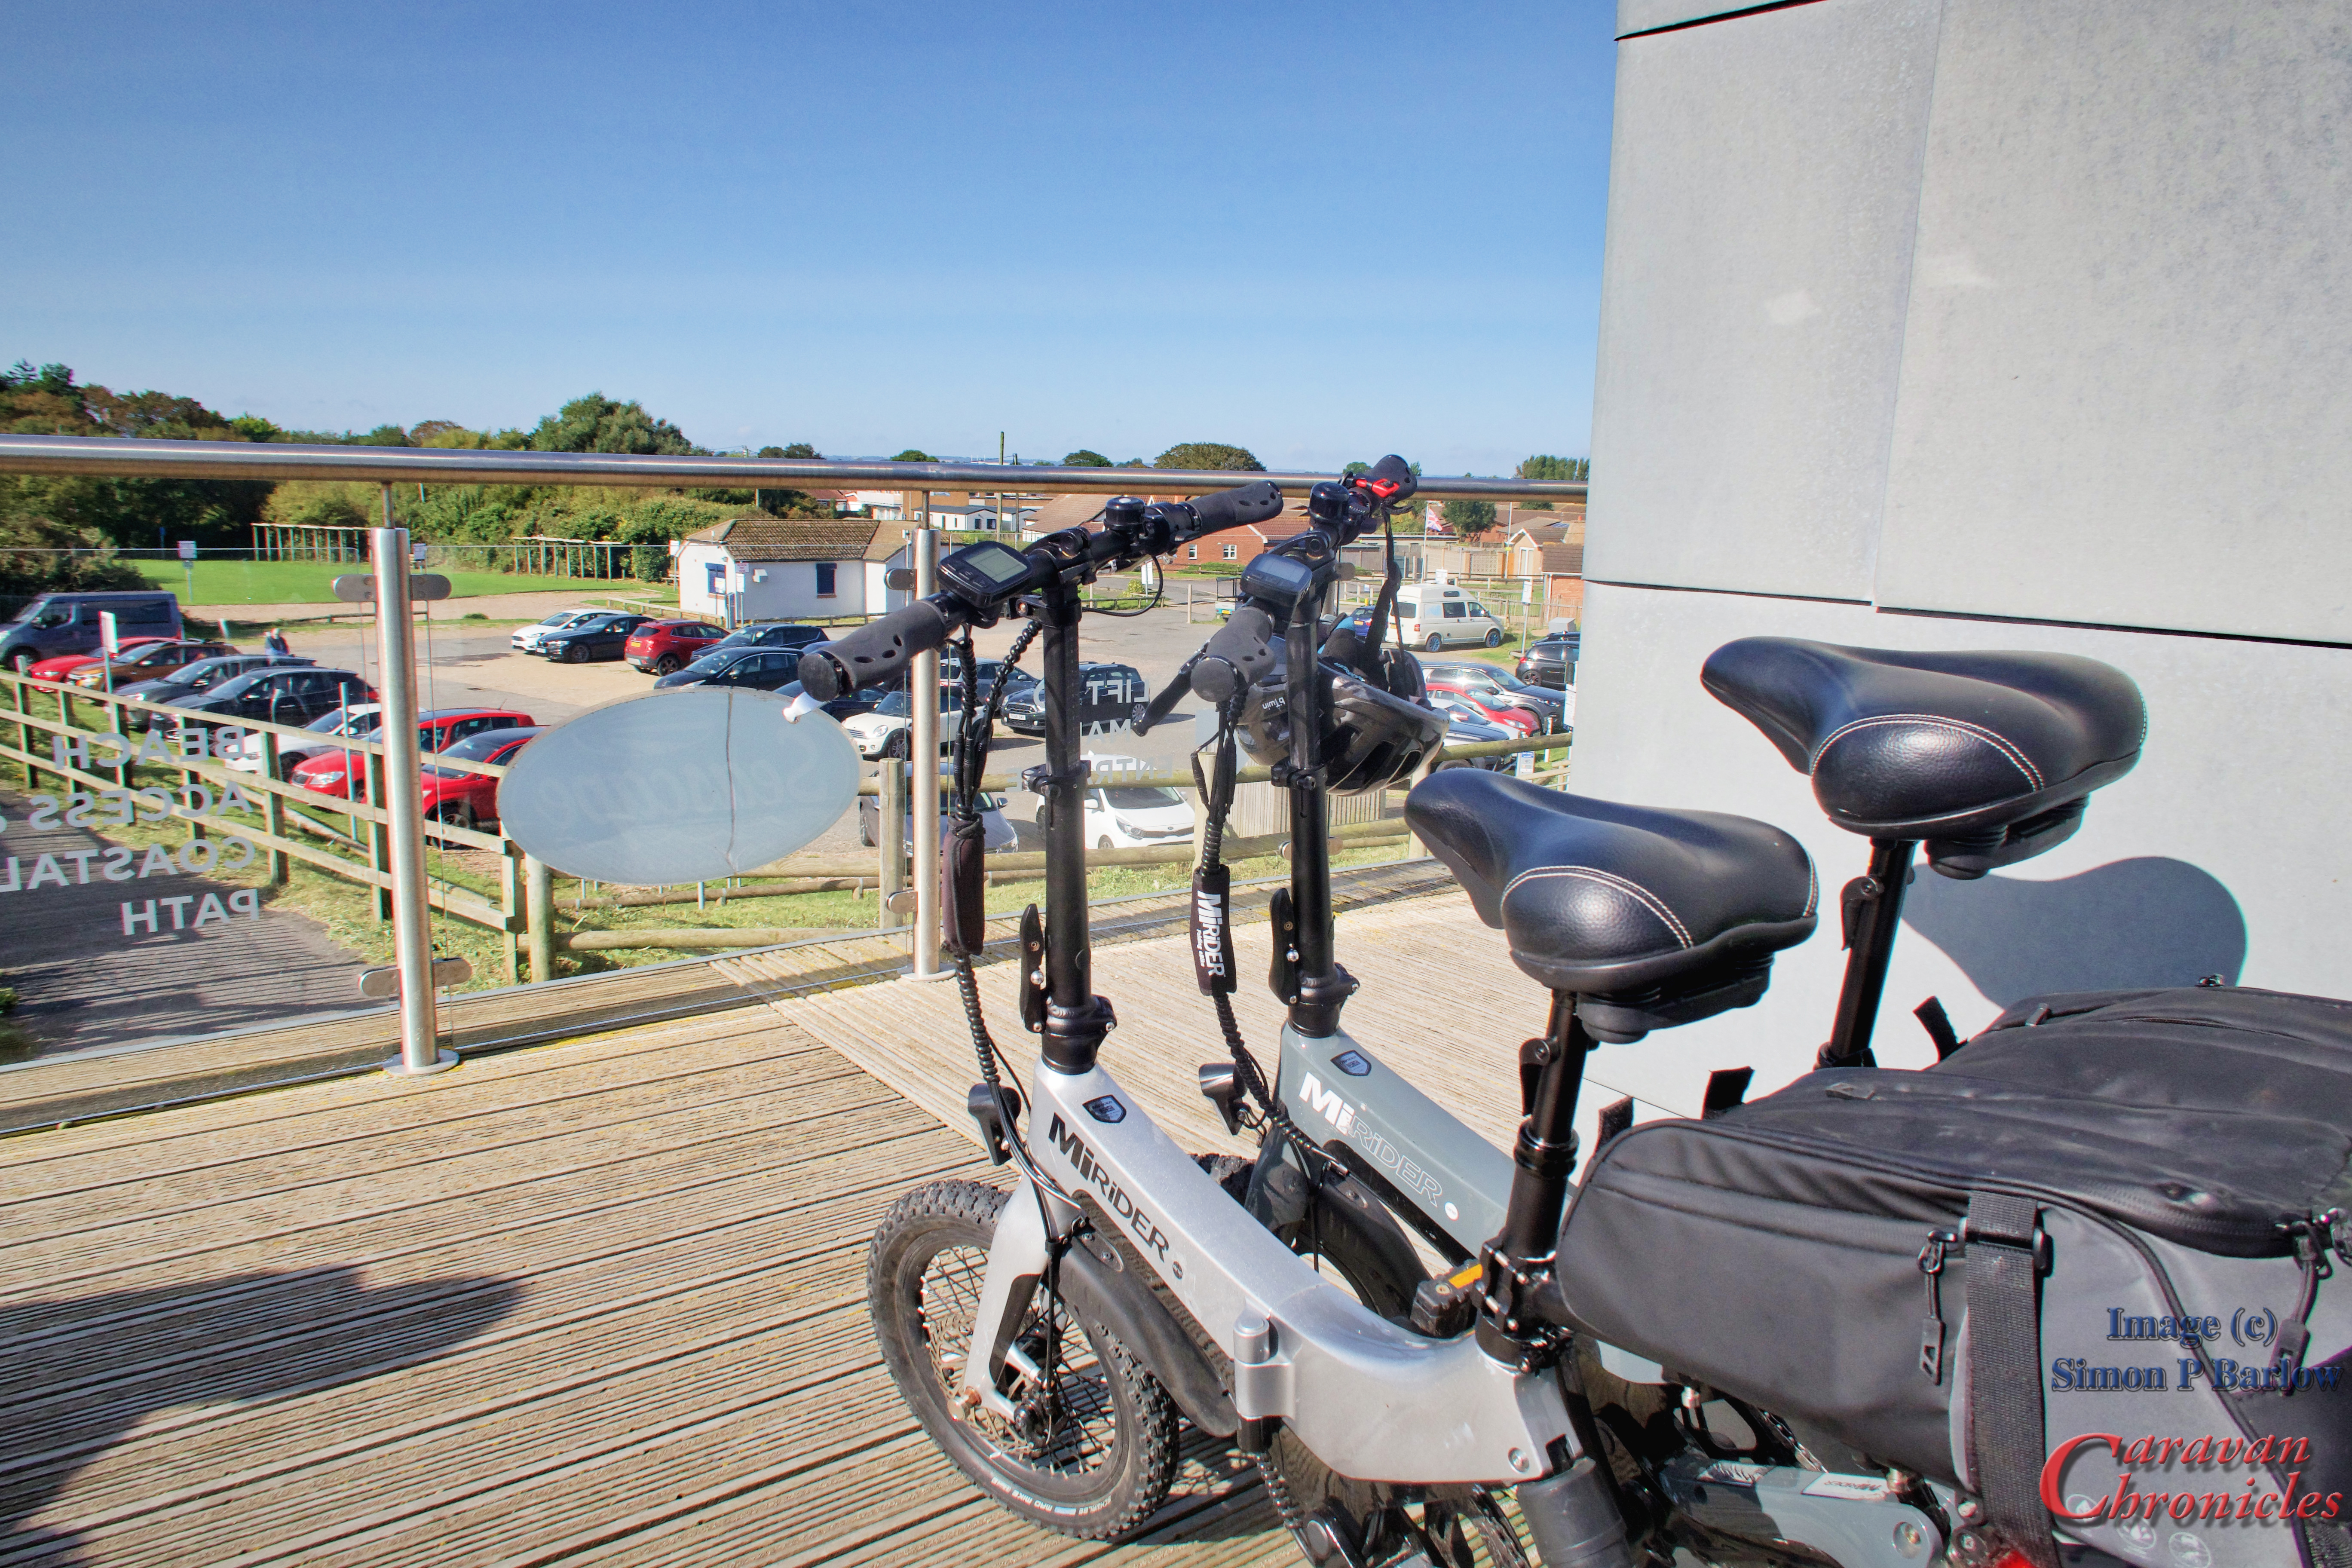
Apart from a couple of days the weather was blueish skies and warm for September which allowed up to get a bit of cycling in. Having the MiRider bikes stored in the garage in the frame I made (read “Rack’em Up“) makes it easy to get them out ready for a quick ride out. Mornings were usually a cycle, north up the coast to Mablethorpe for morning coffee, either sat next to the beach…
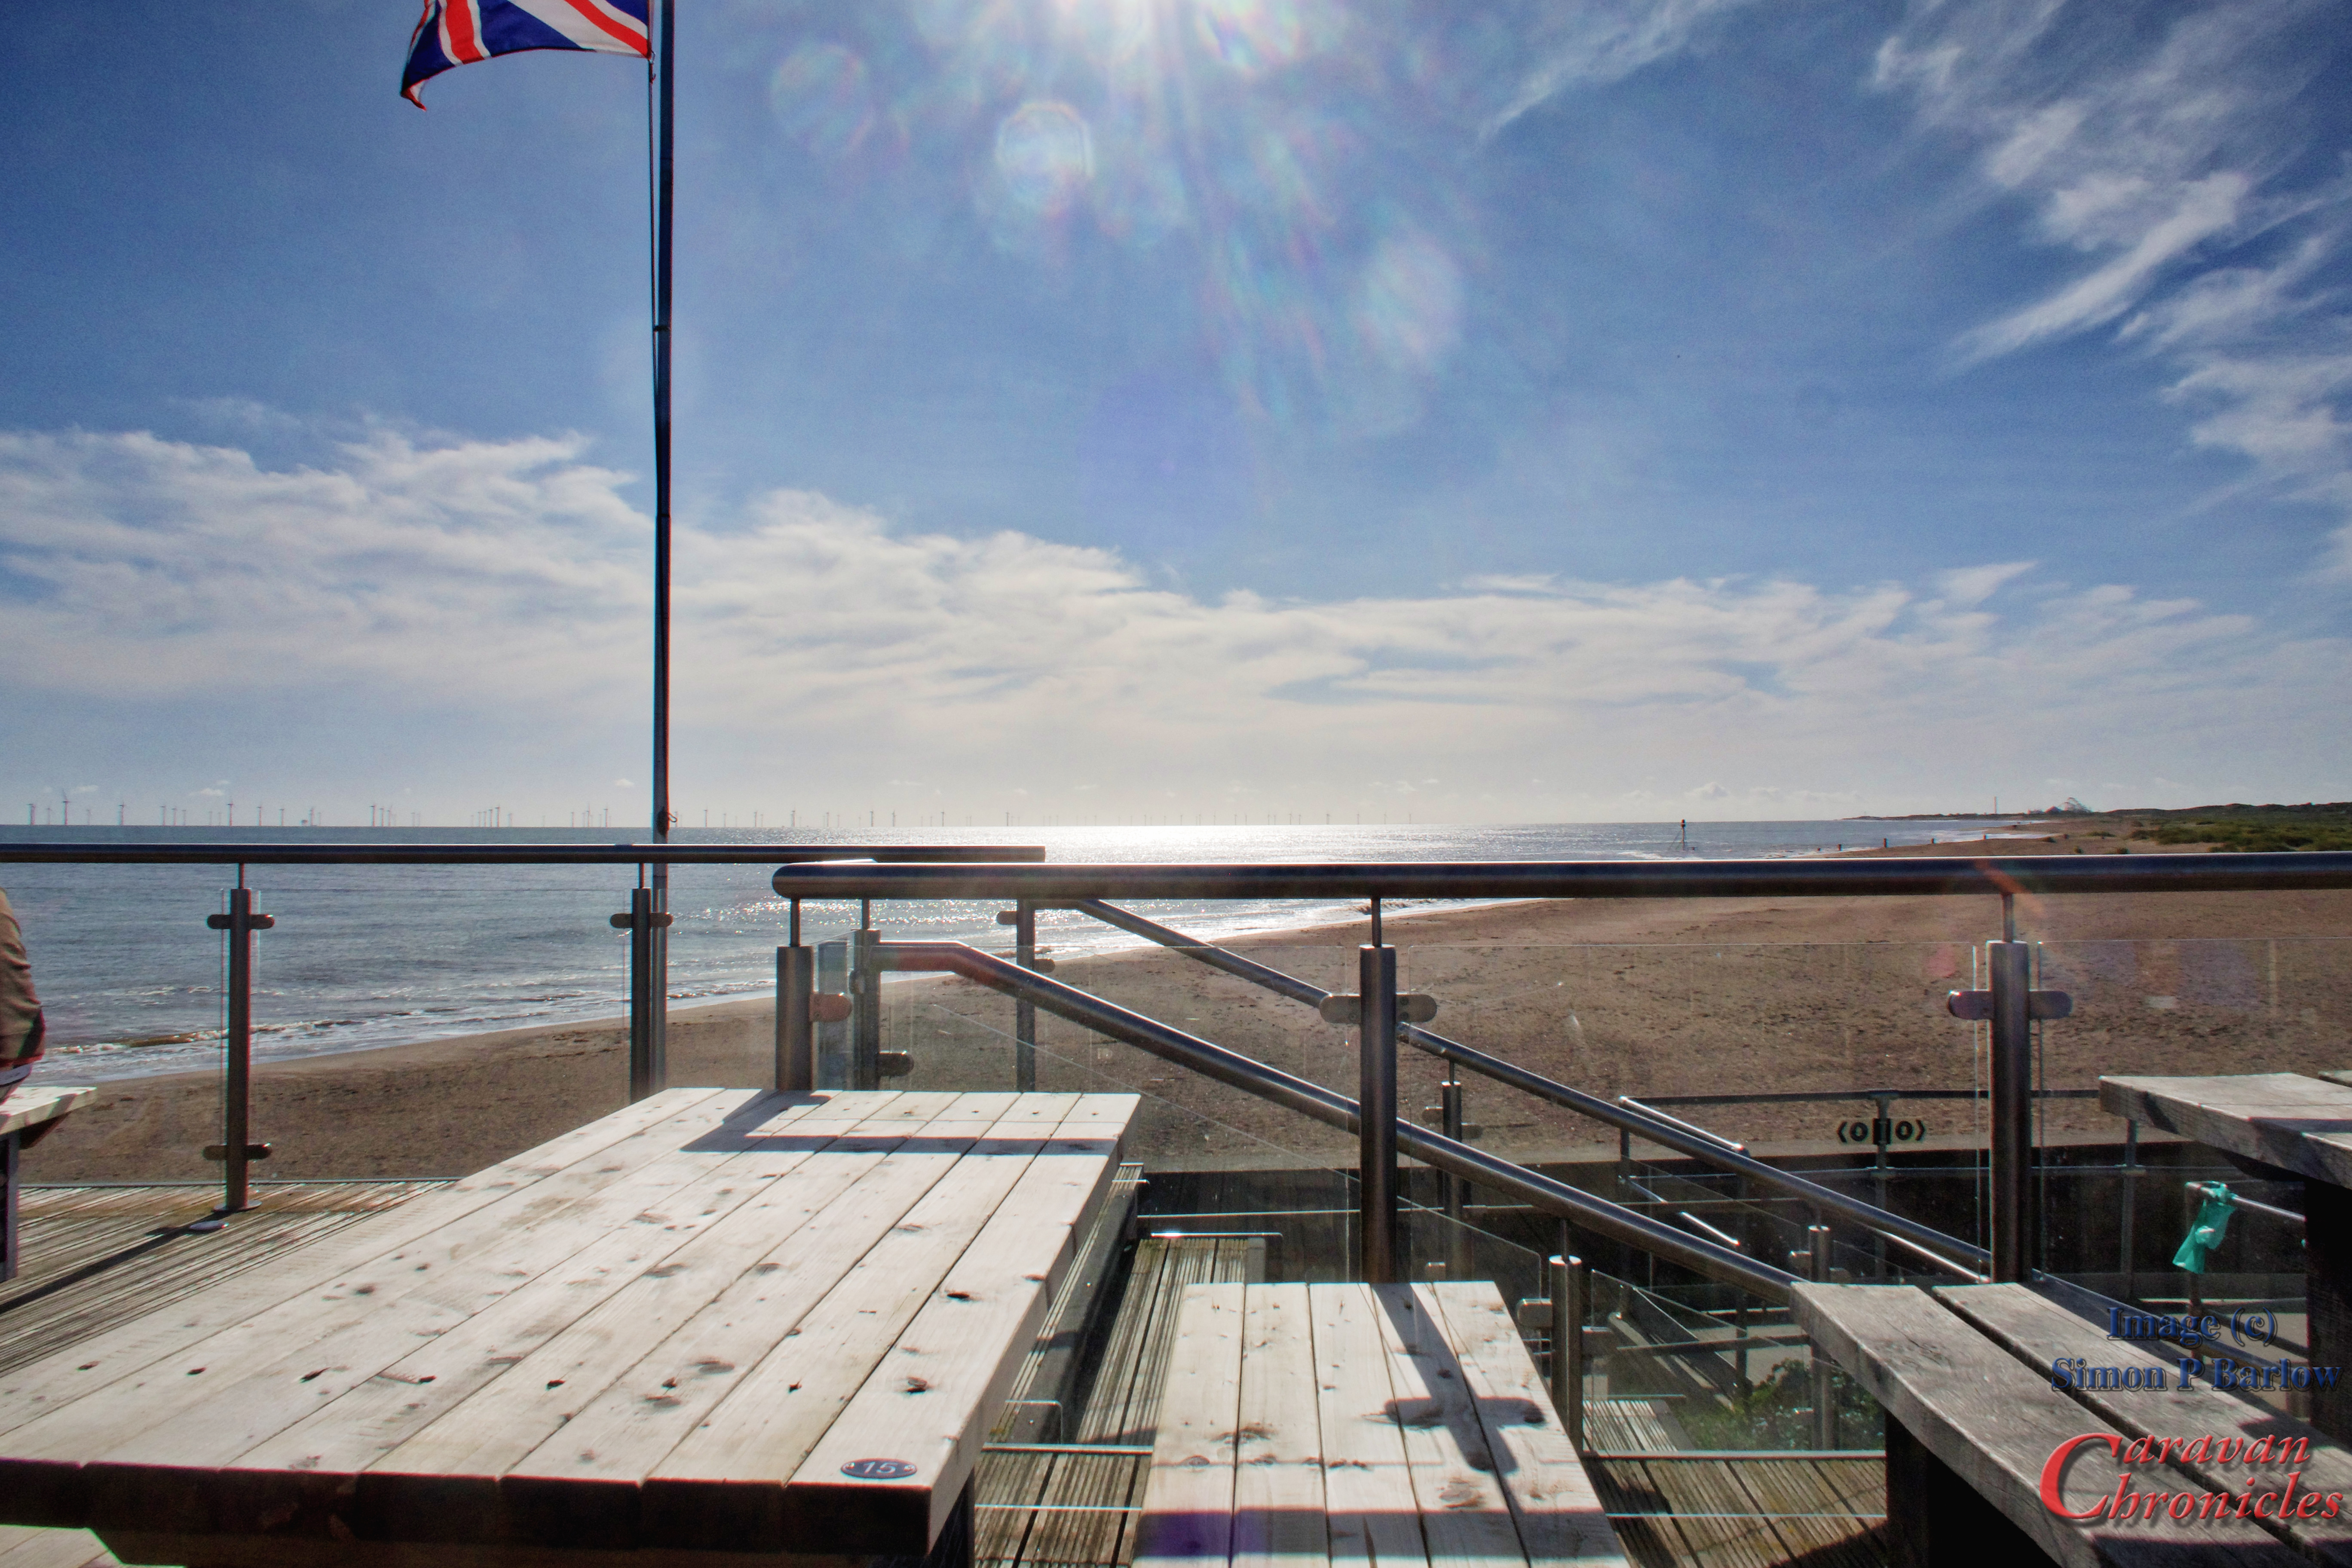
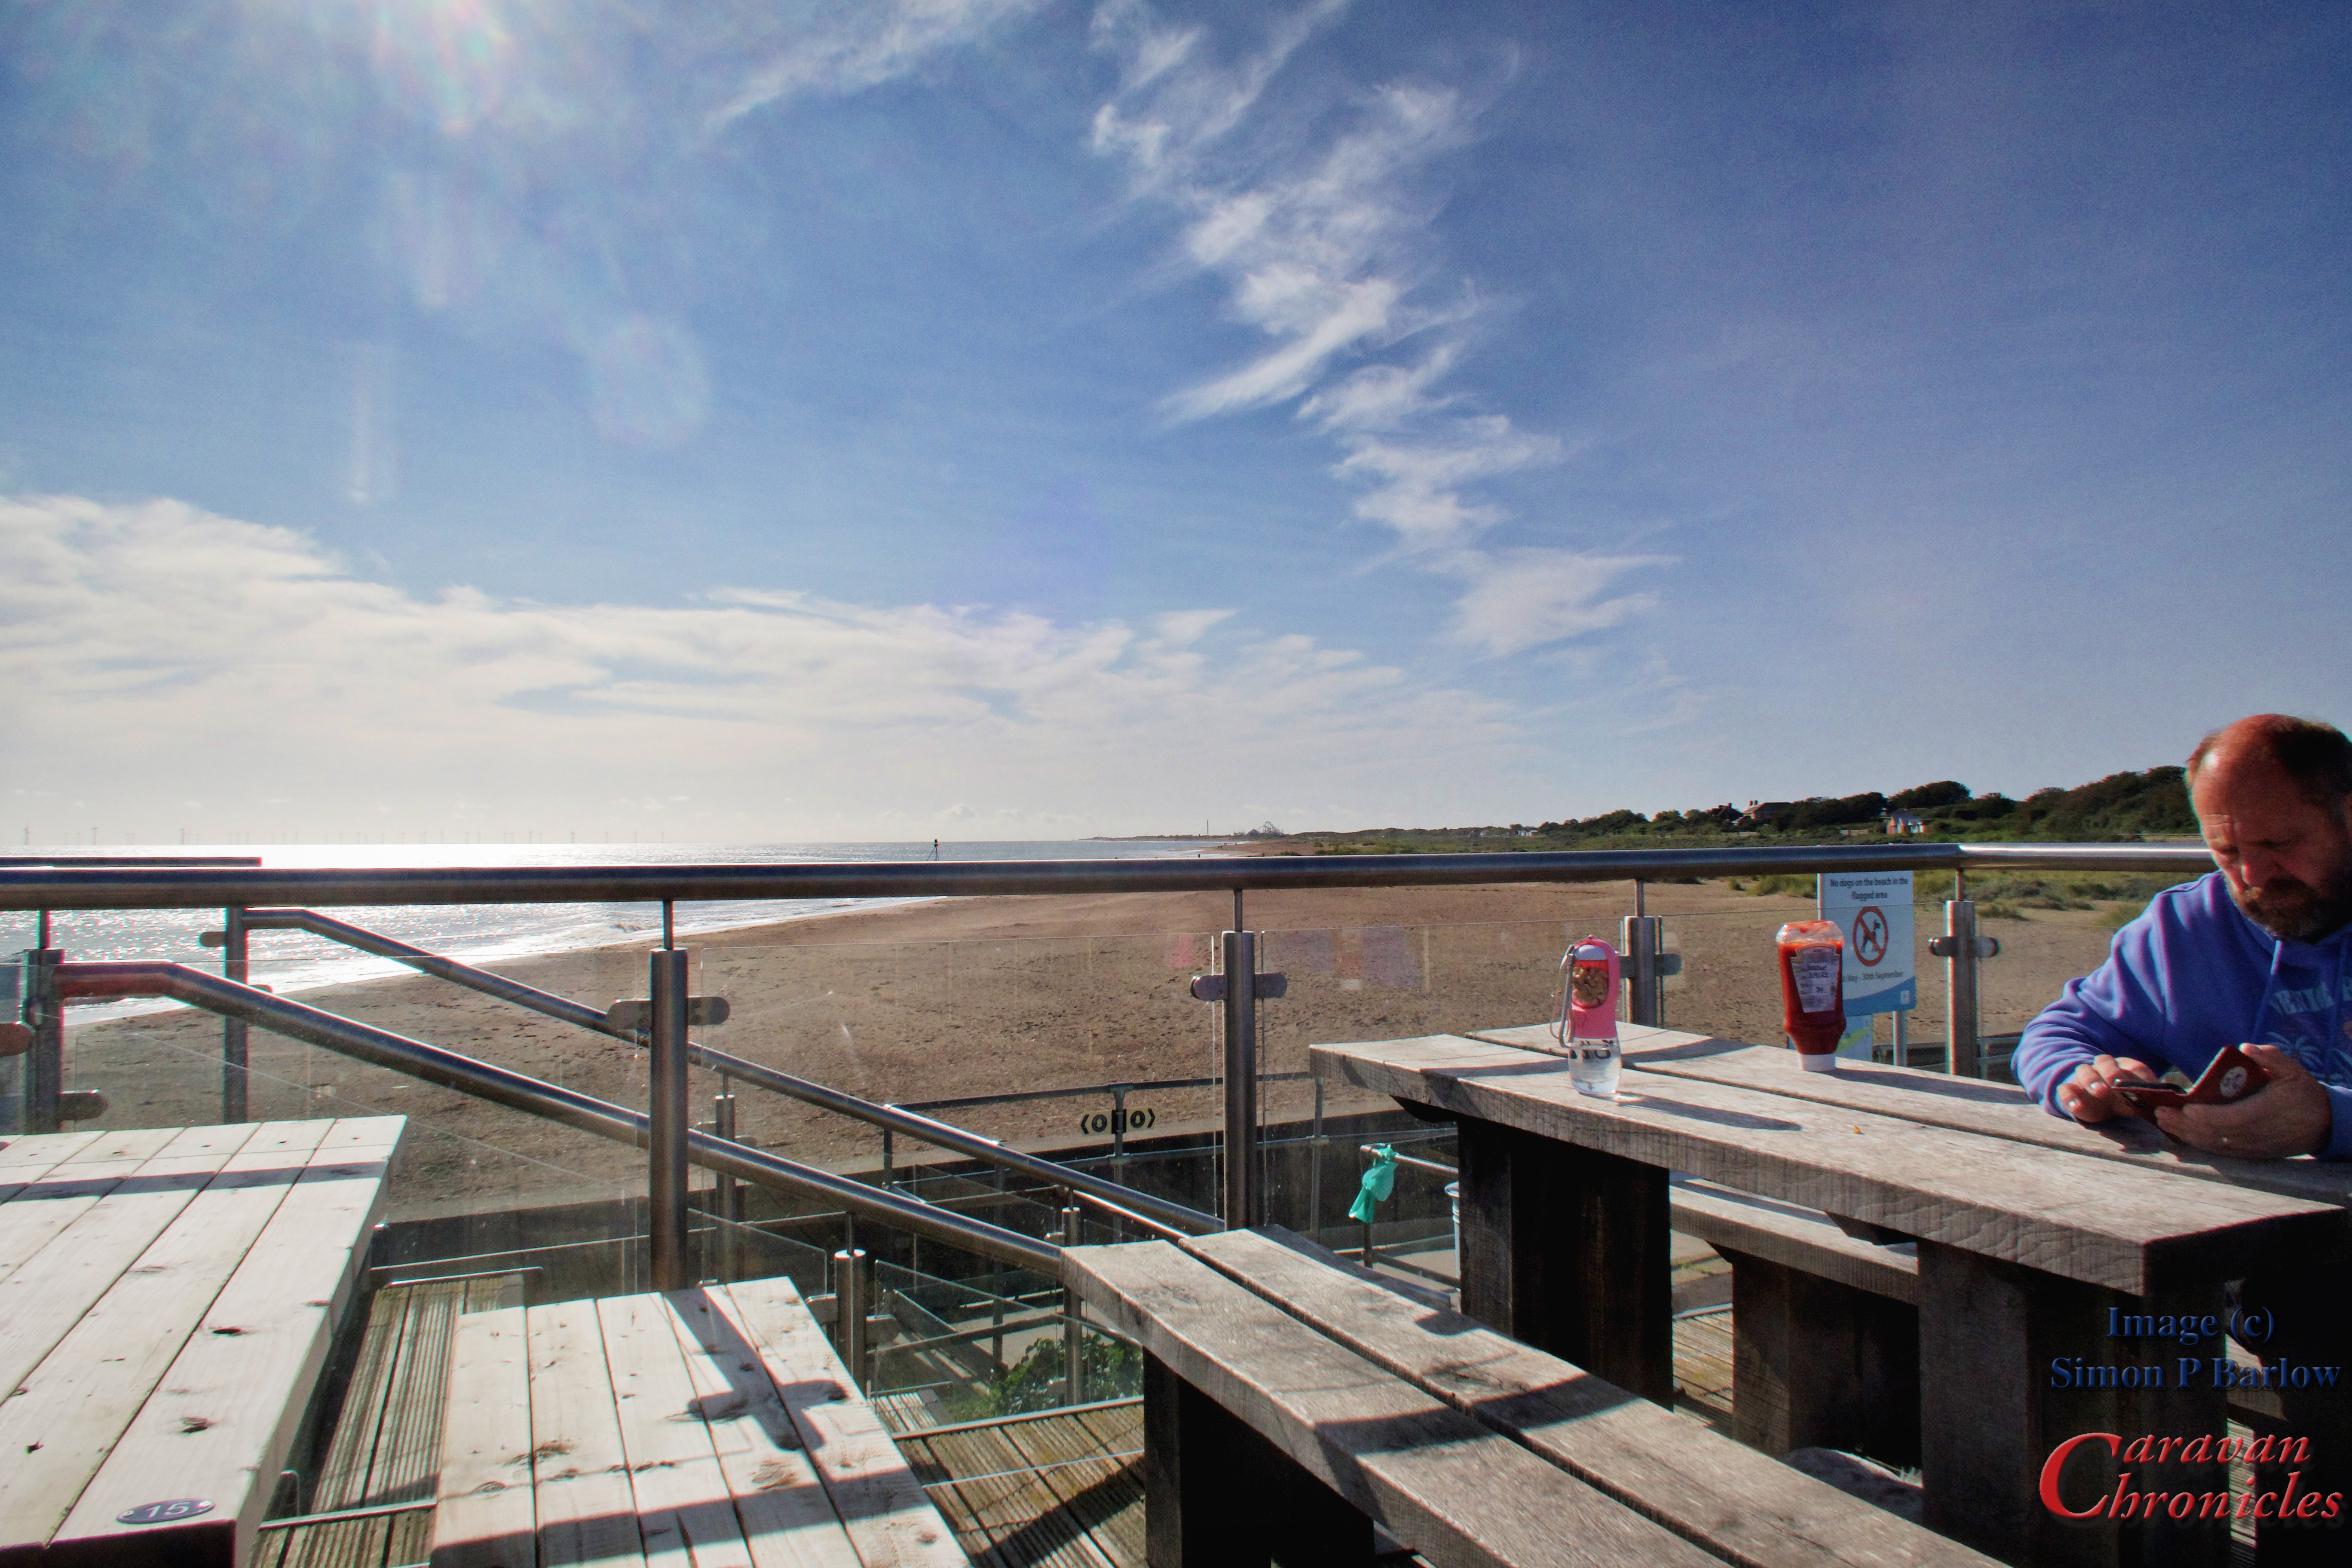
… or sat up on the elevated section in front of the cafe next to the life guard station. The coffee there is much better we think.
Top Tip
A great little shortcut on the bike to get to the front…
If you turn right out of Cherry Tree Springs enter Huttoft Road and follow this for about 300 metres… the first turning on your right is Bluestone Road. Turn right and cycle 70 metres up Bluestone Road. At the end is a T-junction, turn right and 8 metres on your left is a walkway between the houses. Take the walkway and at the end is Walkington Way. Cycle along walking ton Way to the end to another T-Junction. Turn left and ride for 100 metres and on your right a steep ramp up to the top of the Roman Bank… this will get you on the prom and you can cycle all the way to Mablethorpe on it. If you turn right at the end of Walkington Way you can fool Huttoft Bank all the way to Chapel St Leonards.
Its a quick little cut through and allowed us to get to the sea front in about 6 or 7 minutes
Another nice cycle ride is to follow Huttoft Bank south to Chapel St Leonards… it’s a bit further but easy cycling and stop off at North Sea Observatory, Chapel Point for a coffee….
We can both recommend you try out their toasted tea cakes…. The coffee is rather good too! looking at some of the plates being brought out to other customers, the English breakfast looks rather good as well. Unfortunately cycling with a full English onboard is not something to be undertaken lightly.
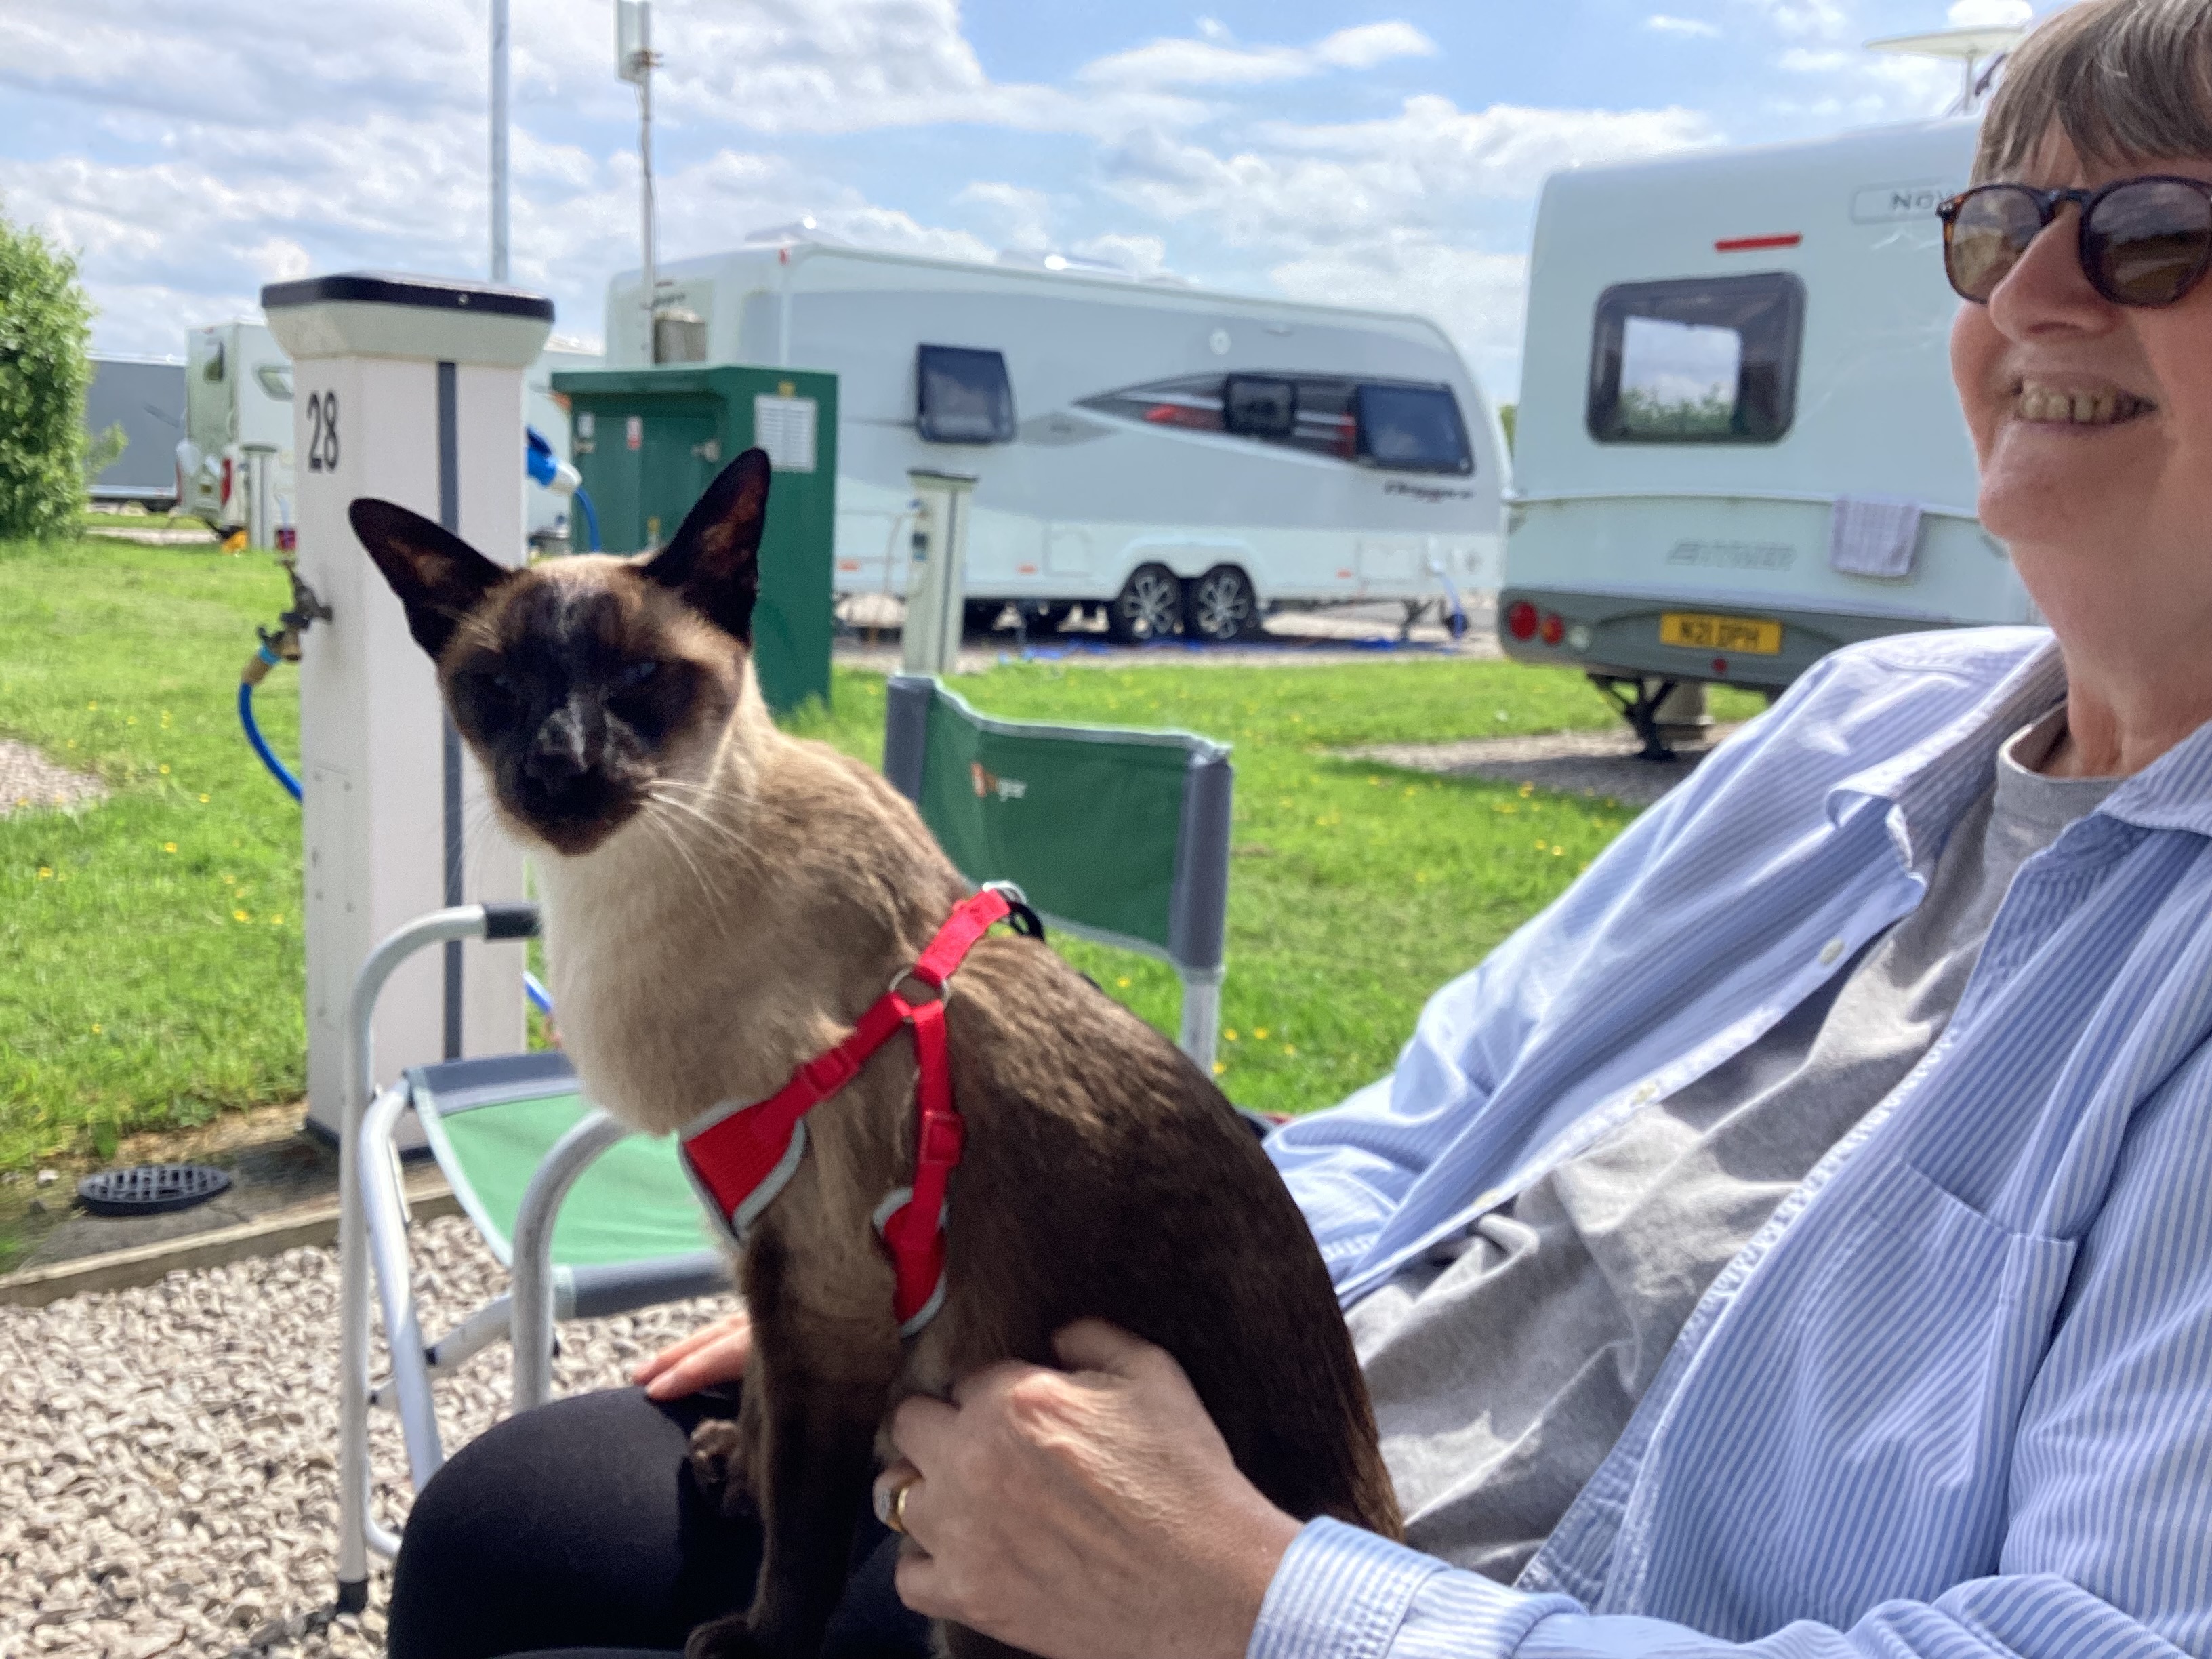
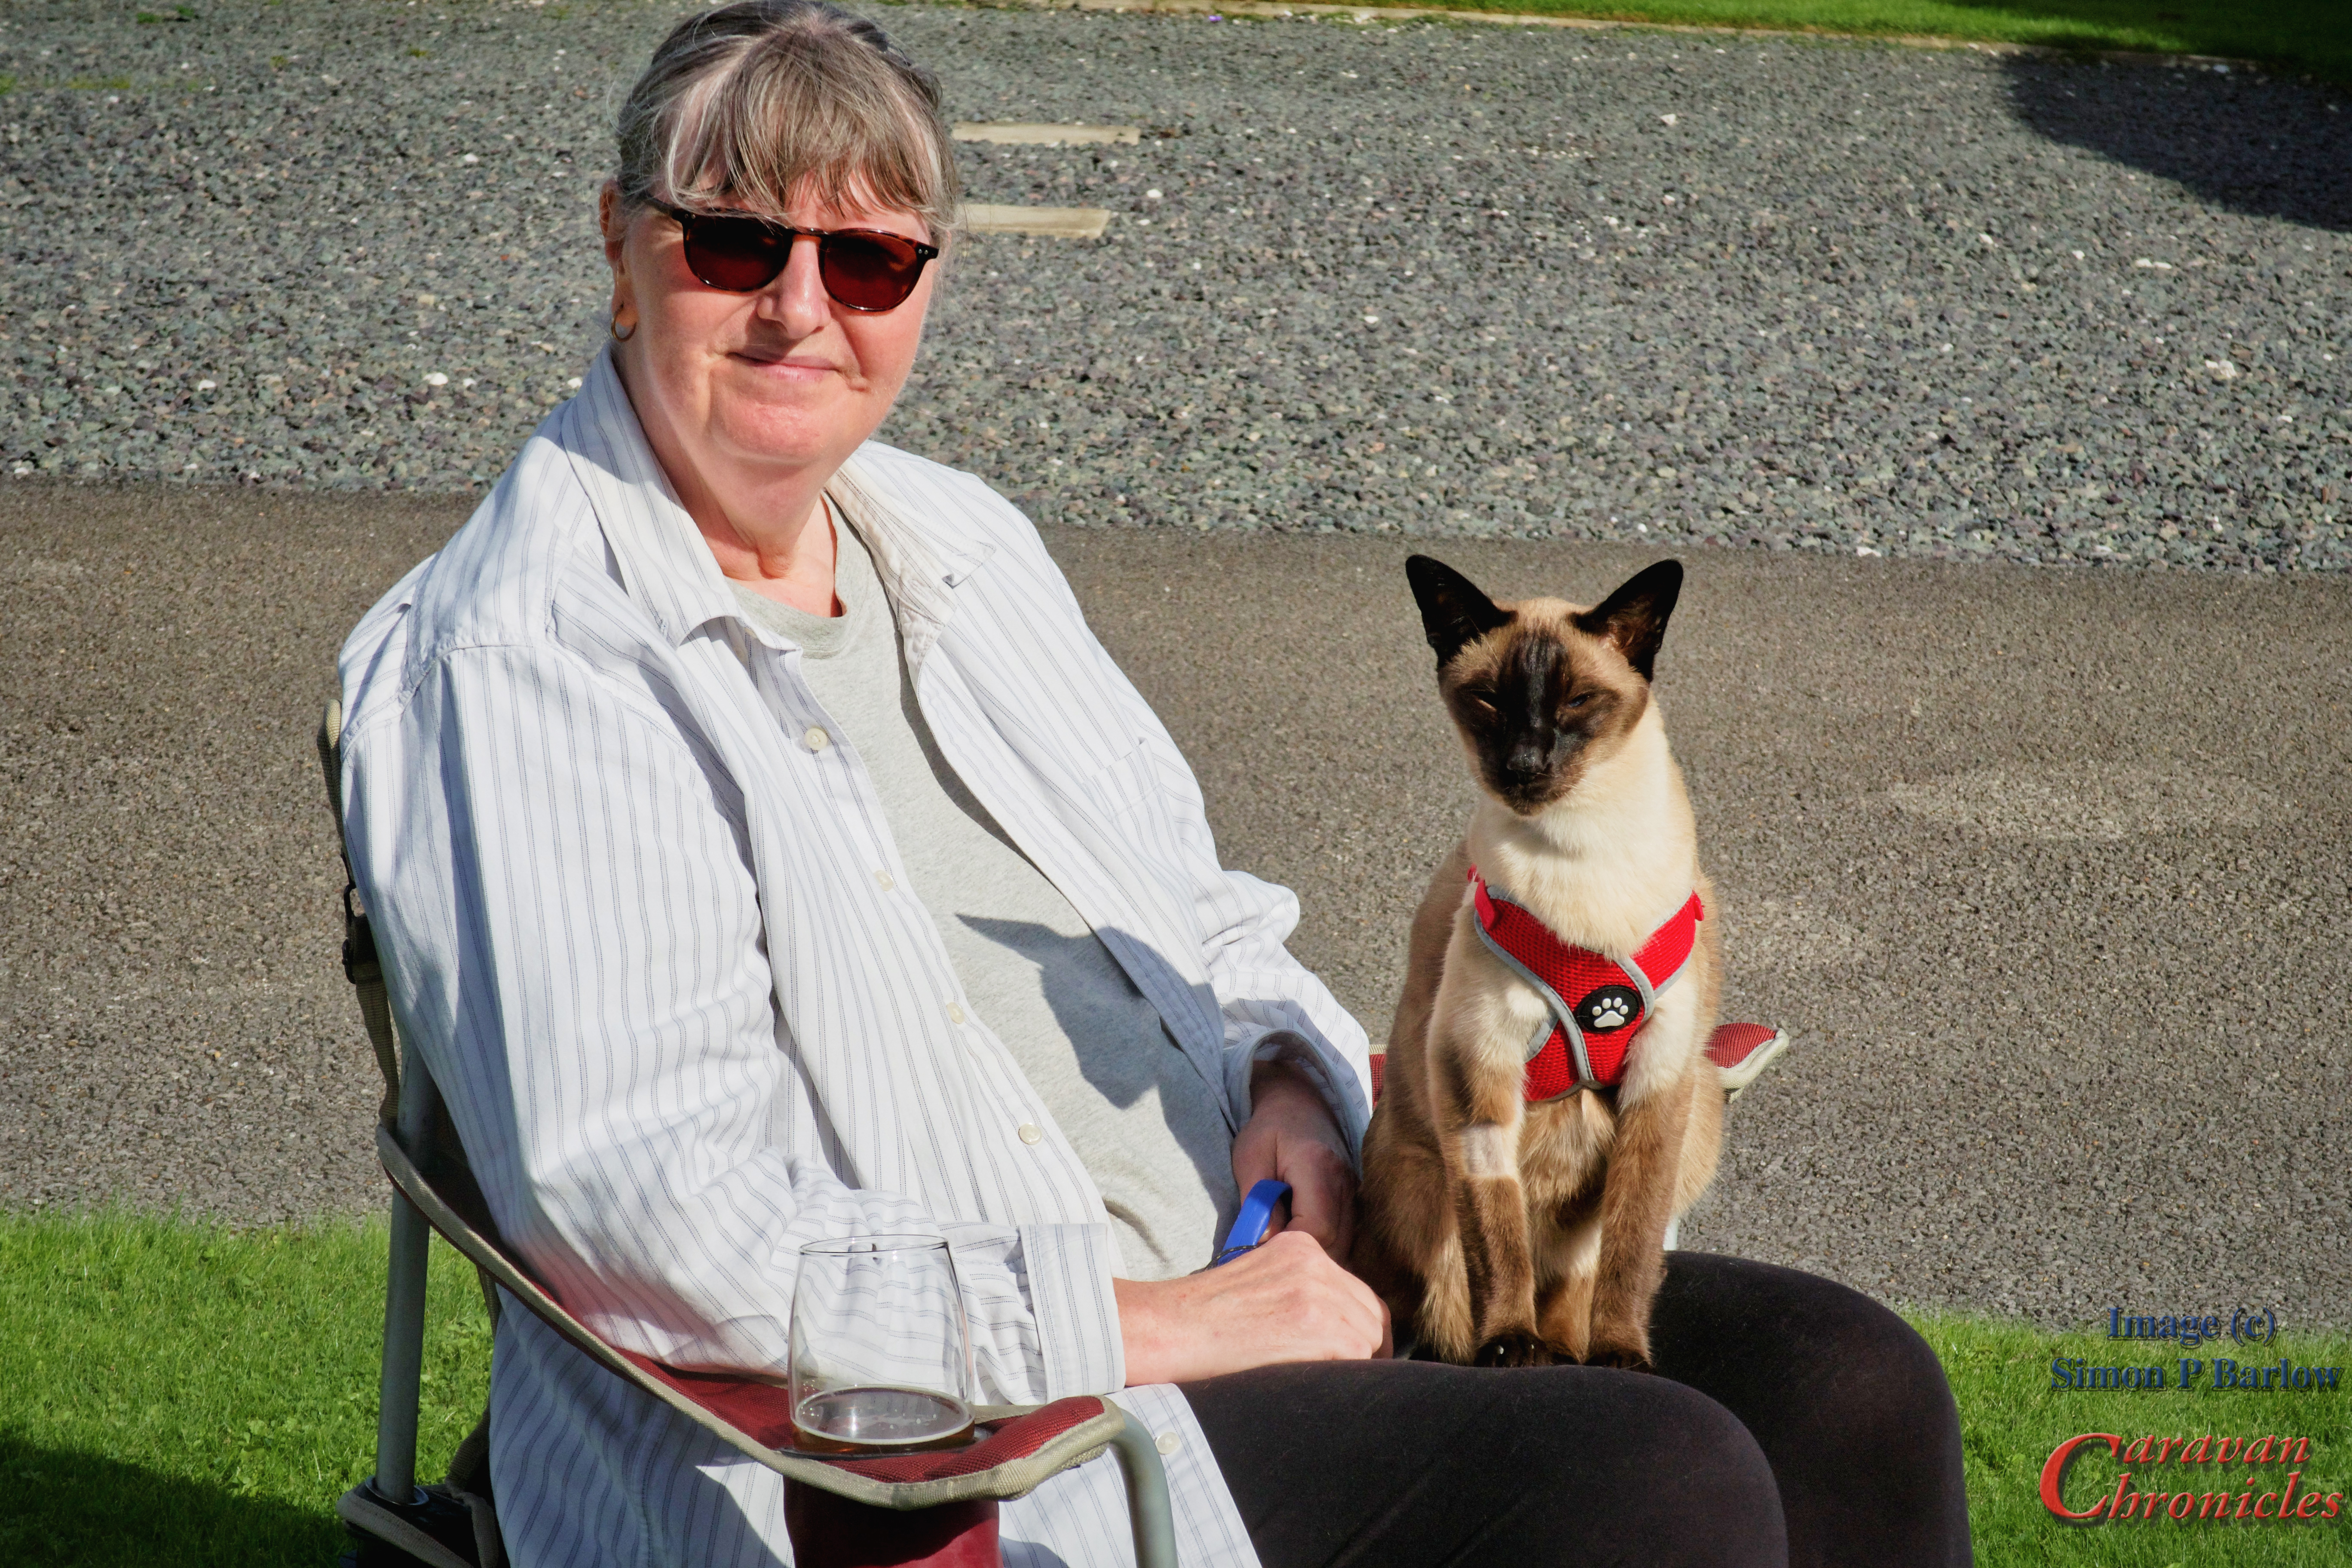
The nice thing about Cherry Tree Springs is there always seems to be someone to have a chat with… not in an intrusive way but sat out with Henry – yep he’s getting better at this now with his little harness on and rather like the attention he gets.
The 5th wheel aways attracts attention and we had a few people stop and talk to us about it. We have done a couple of walk throughs and I’m now getting dab hand at going through the usual questions about what its like to tow (easy peasy, much easier than a bumper pull) and what needs to be done to a pickup to convert it and the weights. Everyone still has a jaw dropping moment when I tell them our user payload is 960Kg… which is slightly more than half of the total weight of our old caravan fully loaded! (PS 5th Wheel Company…. I think we deserve some tee shirts!)
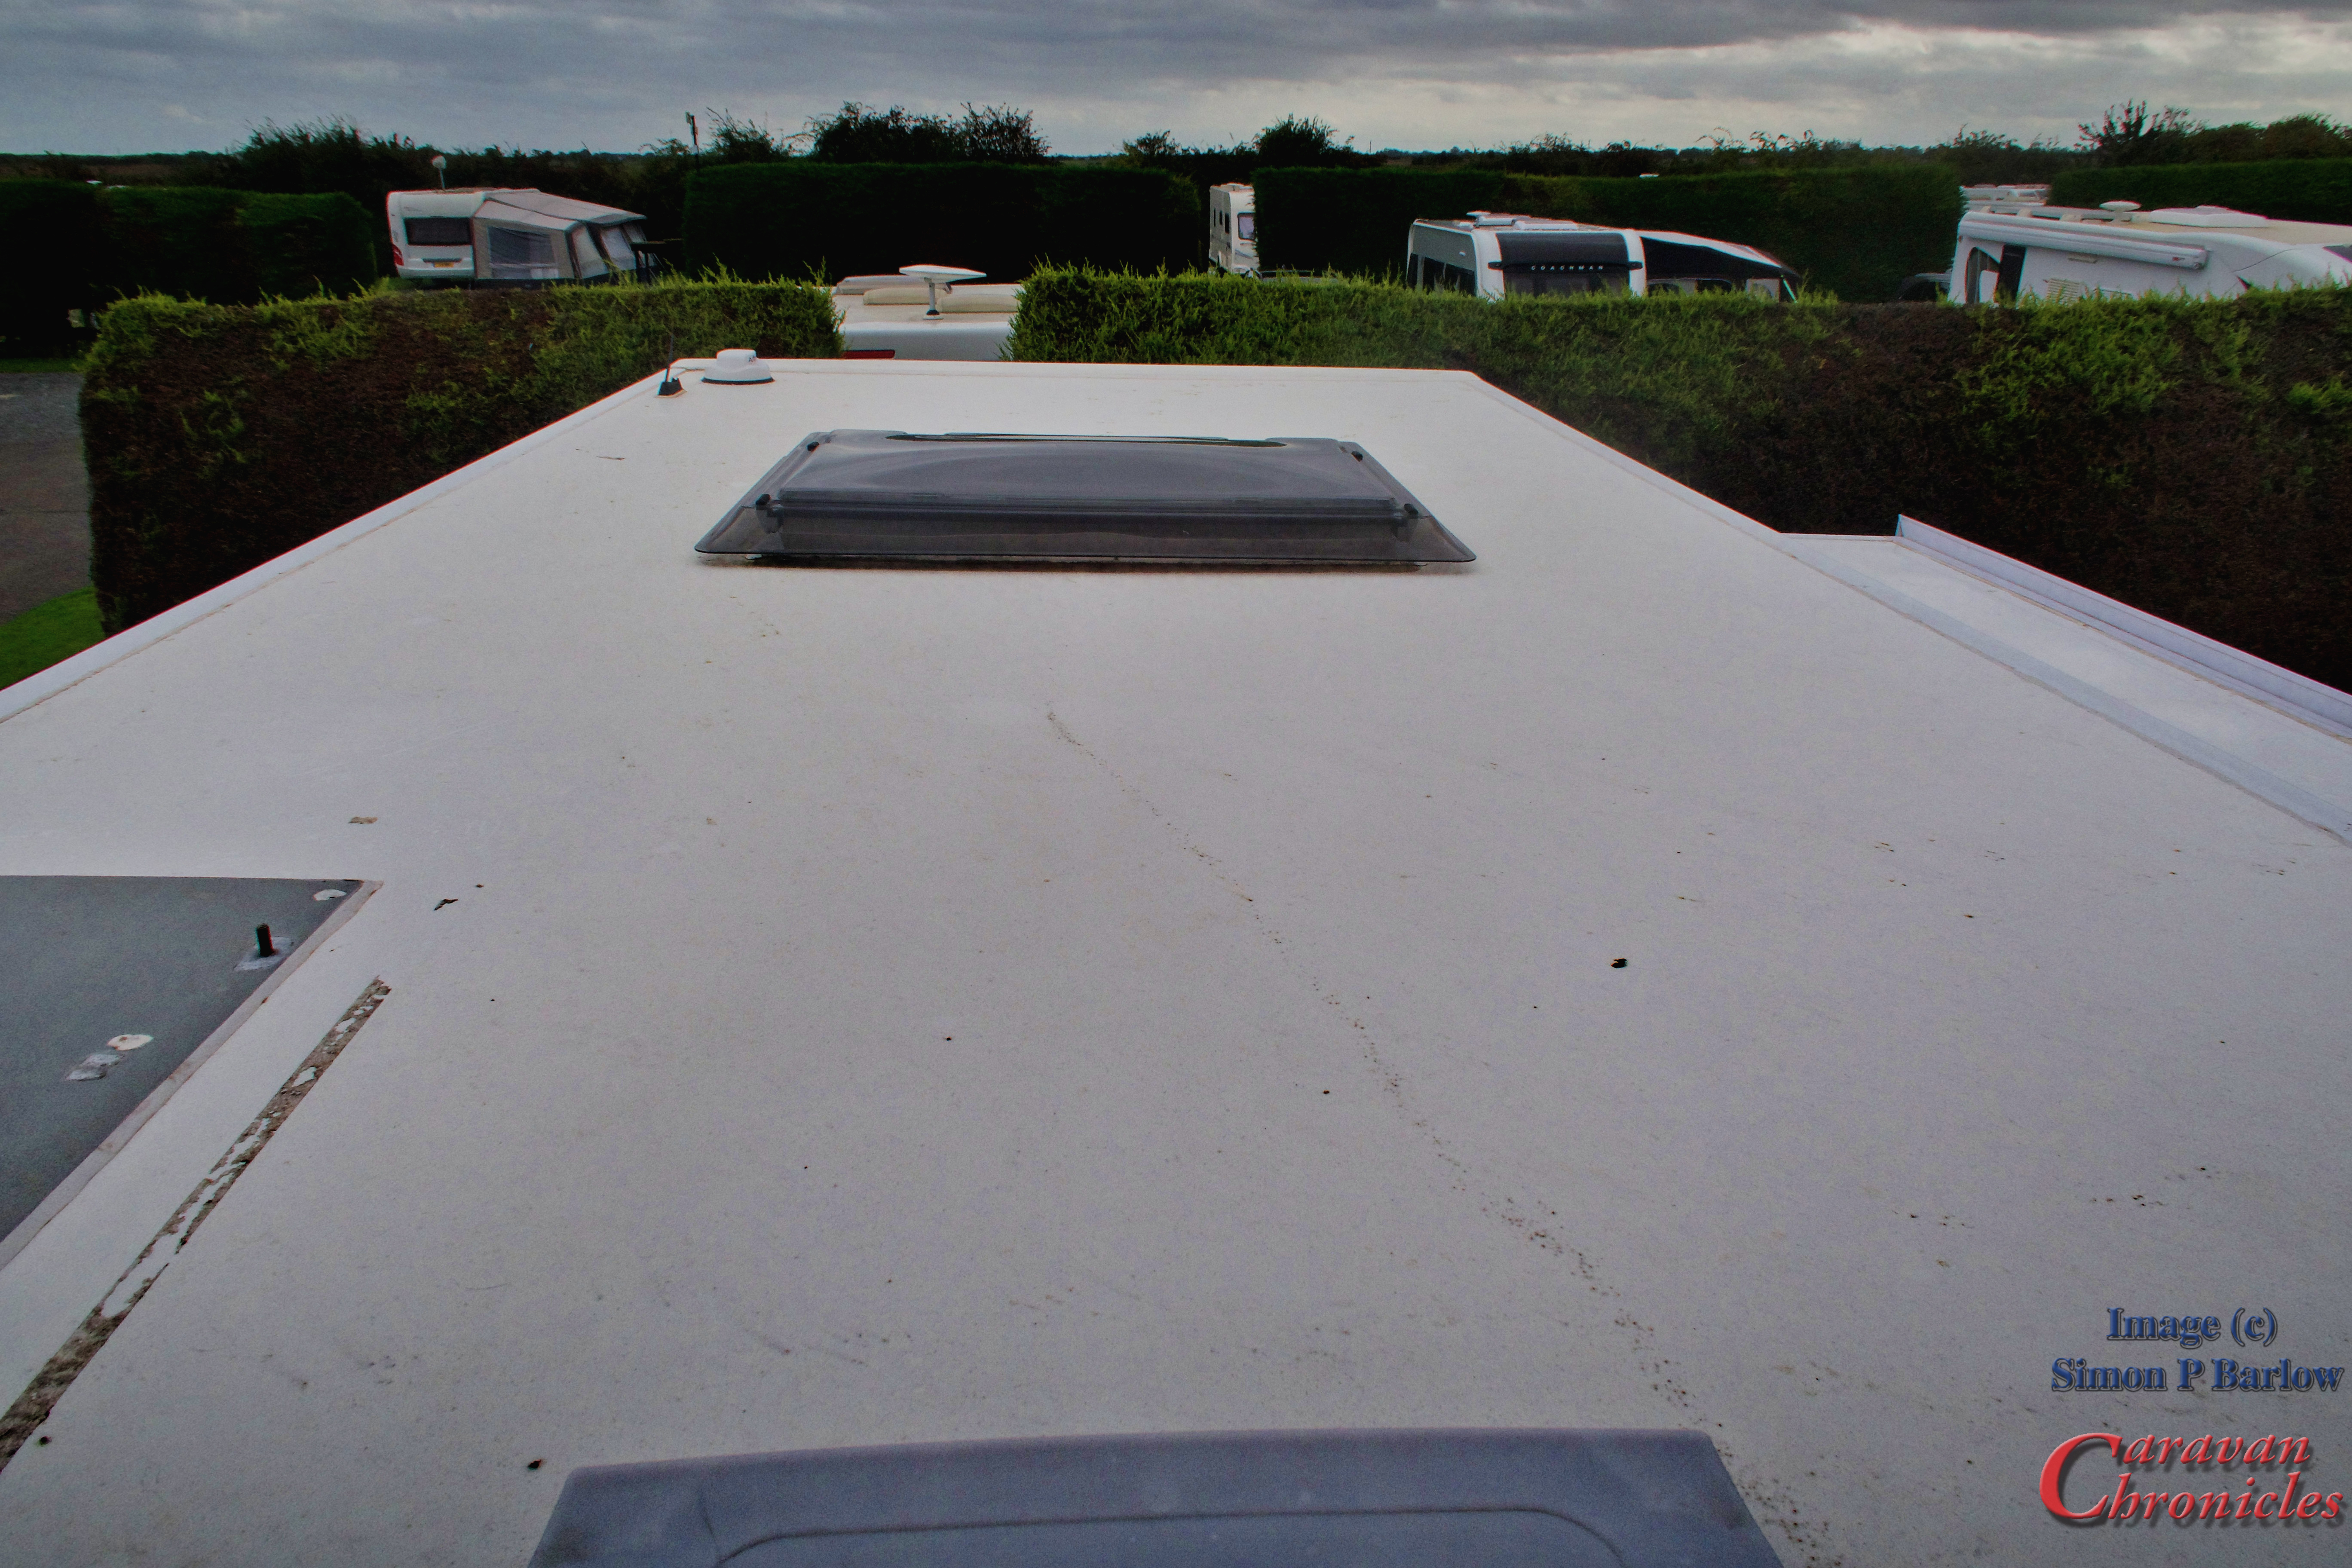
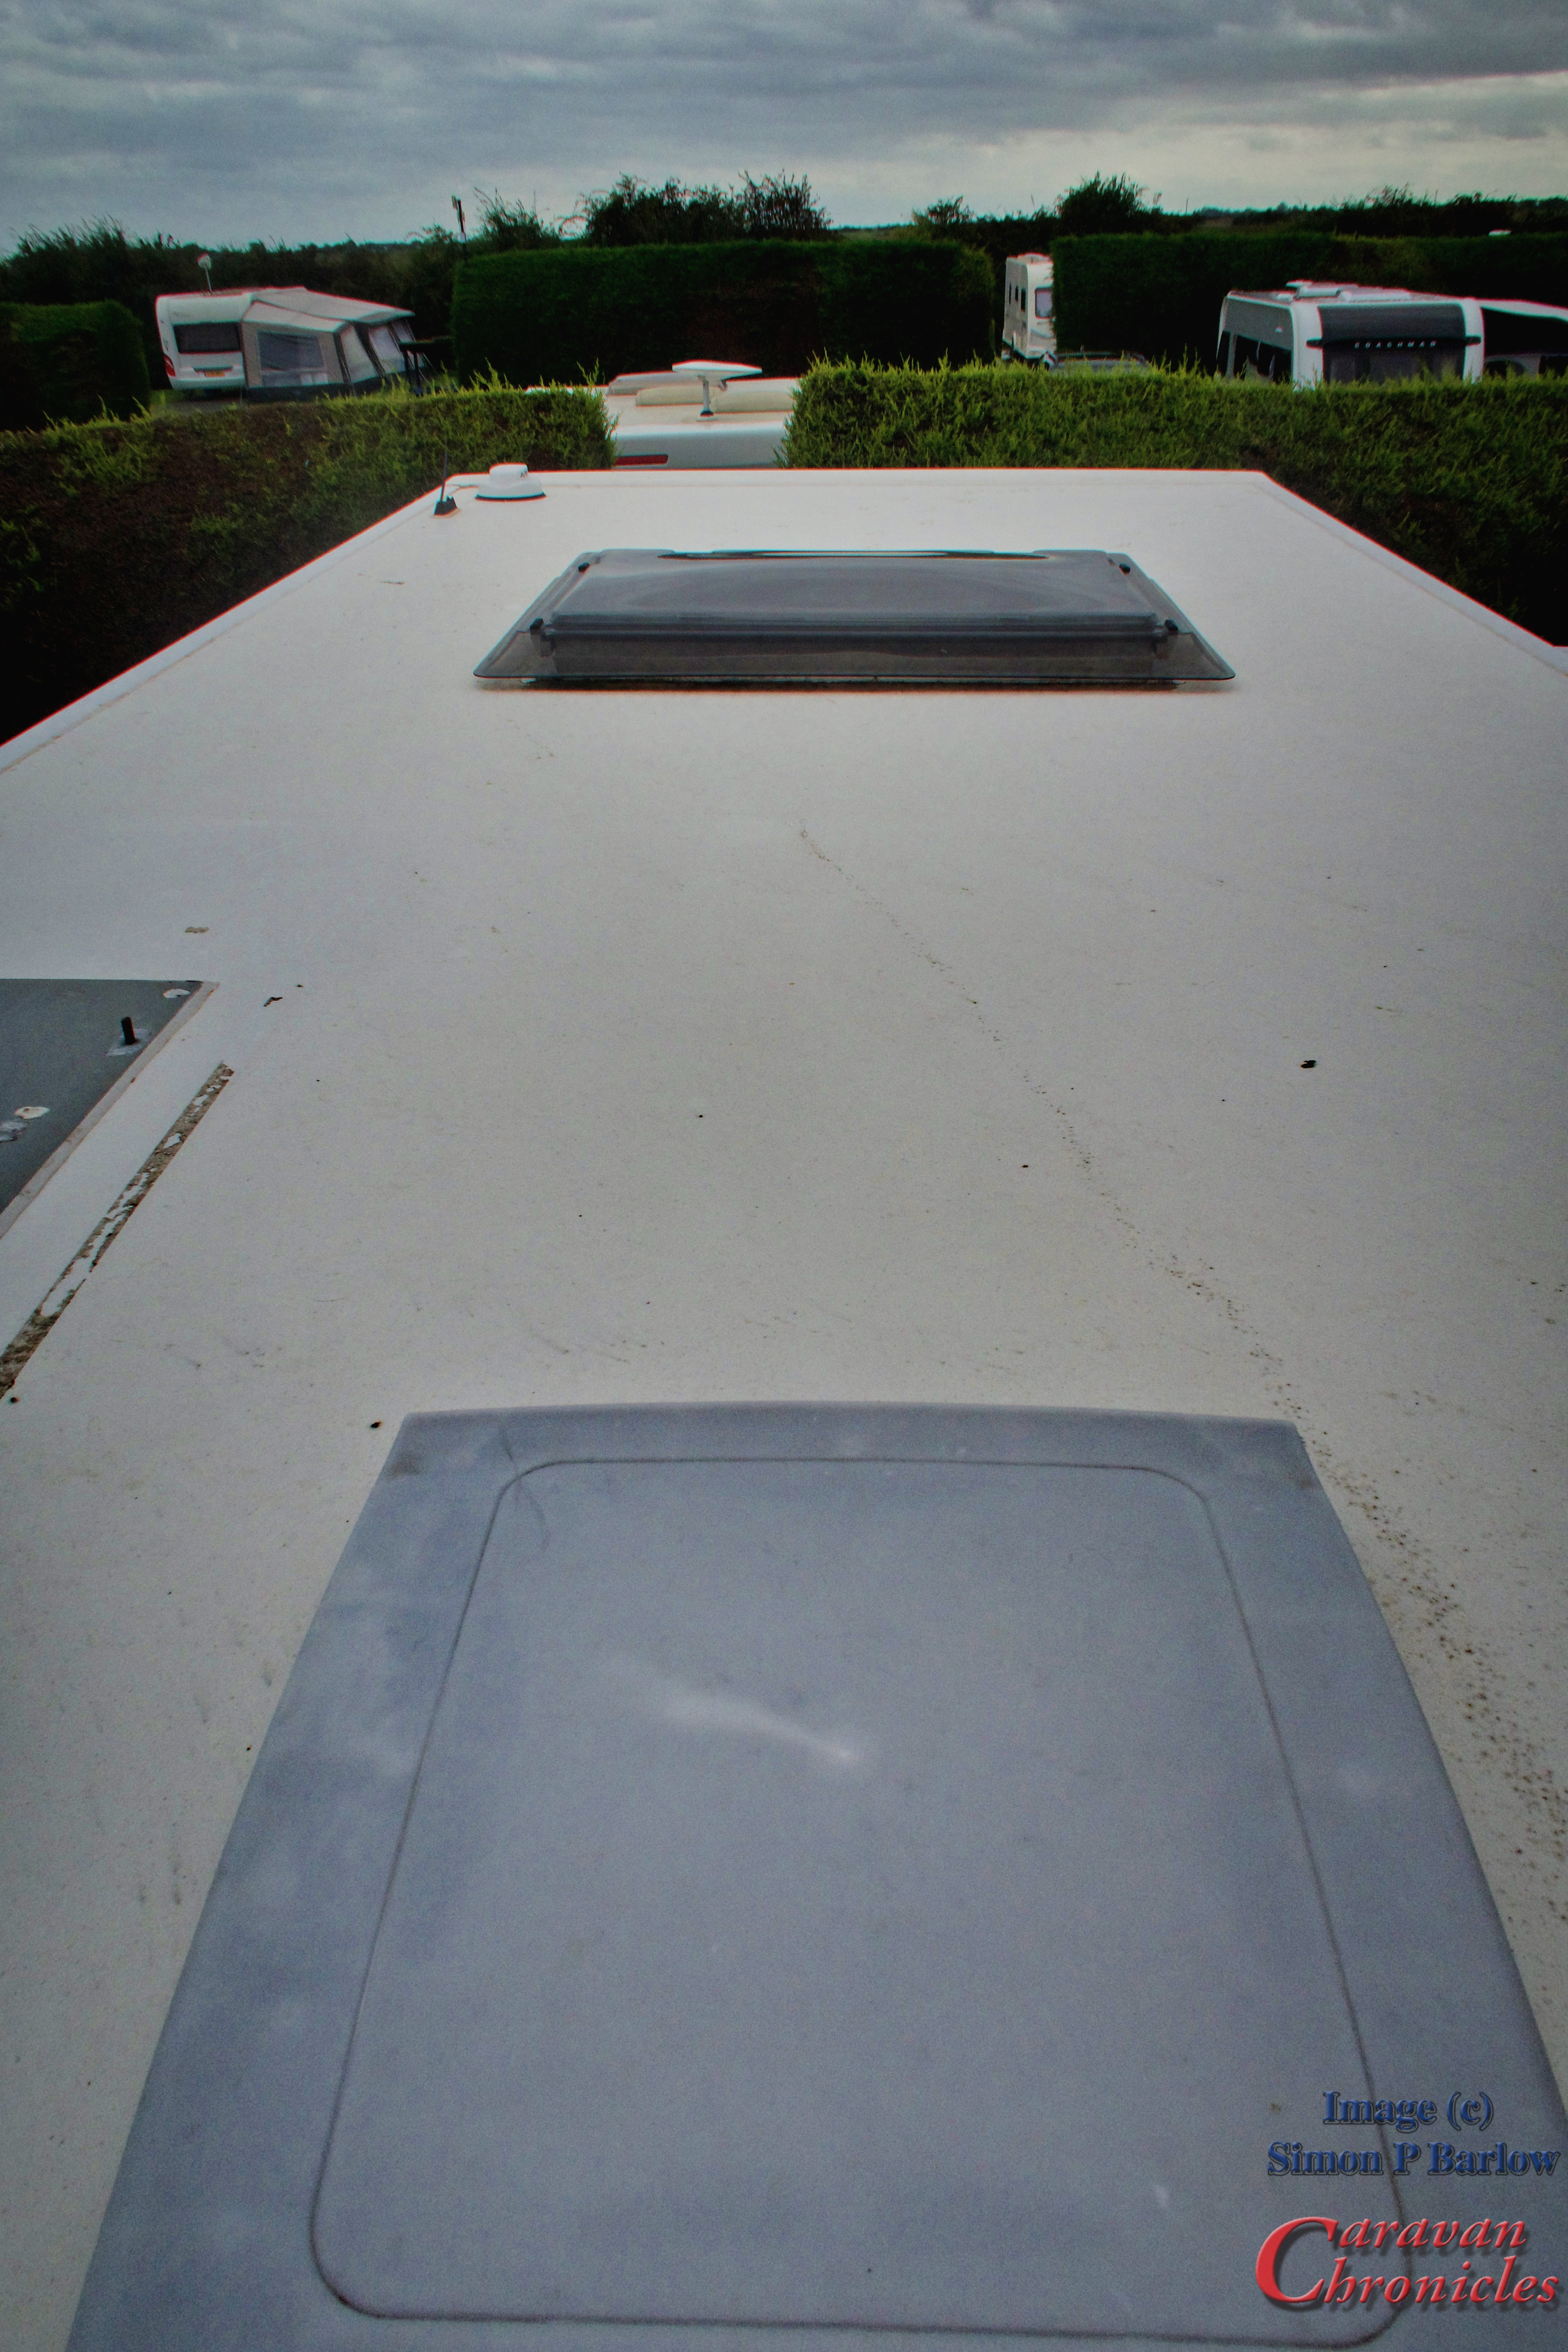
The next step I think will be to install some solar…. and we have a nice flat roof as I found out when I stood on the bed and poked my head out of the front skylight… I think it will be easy to get 800 or 1000 watts of panels on there!
Currently I’m leaning towards Renogy’s kit as the big blue seems to be getting very overpriced and you need so much of it box wise to make a system. But that’s for the future… and maybe if I can get them to work with me on it.
PS If you do stay at Cherry Tree Spring….. give Square Pizza in Sutton a go…. the details are in reception…. not found anything that beat’s them outside of the USA (so far!)