• Home
  • Help Guides
    • Storage Sites
    • Equipment Reviews
  • Links
  • Document Library
    • Electrical Drawings
  • Photo Gallery
  • Trip Map
    • Caravan Log
    • MPG
  • Shop
  • About
    • Contact

Caravan Chronicles

~ not just another caravan blog

Caravan Chronicles

Tag Archives: VW Amarok

How’ve We Been Getting On With Our Catch Can?

09 Thursday May 2019

Posted by Simon Barlow in Amarok, General, Maintenance, Modifications, tow vehicle, VW Amarok

≈ 5 Comments

Tags

Catch Can, Diesel Engine, Mann-Hummel, Pro Vent, VW Amarok

Back in June 2018 I fitted a Man Hummel ProVent oil catch can to our Amarok. Since then I’ve had a few people asking me how we have been getting on with it and has it actually ‘caught’ anything.

If you haven’t a clue what I’m on about here’s a link to the original two posts…. Catch Me If You Can… and Catch Me If You Can Pt 2

shopping

I fitted the ProVent to our VW Amarok when it had done about 8000 miles (12,800Km) and we have now done just over 13,000 miles (21,000Km) a great deal of it towing. I opted initially to drain the ProVent every 600 Miles (1000Km) and the first three each time I got about half a cup of slightly oily water. It was clear like water but when rubbed between your fingers it felt ‘slippy’ a bit like baby oil. I did notice that one    draining that covered two long tows up to the Lake District what came out was slightly darker, still about the same quantity though. However I did notice on the last draining I had more of a dark oil content as a separate layer in the lighter clear ‘oily water’. Watching the video below I did find out that this is normal. The filter that is in the ProVent takes a few hundred Km to start working properly, first catching the condensate and then once the filter is saturated does it start to catch and drain the heavy oil.

I did recently remove the hoses on the intercooler (inlet and outlet) just out of curiosity and the interior from what I could see was still clean, with only a light covering deposited from the first 8000 miles (13,000Km) of running without a catch can fitted.

So how much have I got out?

Well in the first 5000 miles (8000Km) I have now filled an old 500ml  2 stroke oil container and just started on my second. I’ll continue to drain at the 600 mile mark. Although I must admit I now drain it before a long towing trip and again when I return home. It only takes about a minute and doesn’t require any tools so really is one of those tasks that is easily accomplished with the minimal of effort. Hopefully this will keep our engine in tip-top condition and not start to suffer from the oily carbon build up that saps power and is prevalent in all diesel engines.

4WDaction-logo-1

Here’s an excellent video from the guy’s at 4WD Action with probably the best explanation I’ve seen so far on the net… (Video (c) 4WDAction.AU)

Share this:

  • Twitter
  • Facebook
  • Tumblr
  • Pocket
  • Pinterest
  • Reddit

Like this:

Like Loading...

Catch Me If You Can… Part 2

28 Thursday Jun 2018

Posted by Simon Barlow in Accessories, Amarok, General, Help Guides, Maintenance, Modifications, Technical, Uncategorized, VW Amarok

≈ 6 Comments

Tags

Accessories, Catch Can, Diesel Engine, Maintenance, Provent, Technical, VW Amarok

You might want to read Catch Me If You Can… (pt 1) first

After a quick four-day break at the Caravan & Motorhome Club’s site at Wirral Country Park (excellent by the way… already trying to work out when we can go back!!) and a bit of work getting in the way it was time to get going again not he catch can… really it should be called the “Air Oil Separator” Install.

Last time, I’d decided if IKB would have been shaking his head… then it wasn’t right. I decided to make a new bracket out of 1.8mm aluminium sheet and go into full on origami mode. (ps.. after the last post someone emailed me asking what IKB was…. Mr Brunel  was not pleased).

I wanted to make a bracket that passed under the air con pipe and bonnet cable release fitting so that it cleared everything and gave good access at the same time. As a test I did a trial bend if some 1mm thick steel I had just to get the shape…

IMG_1441

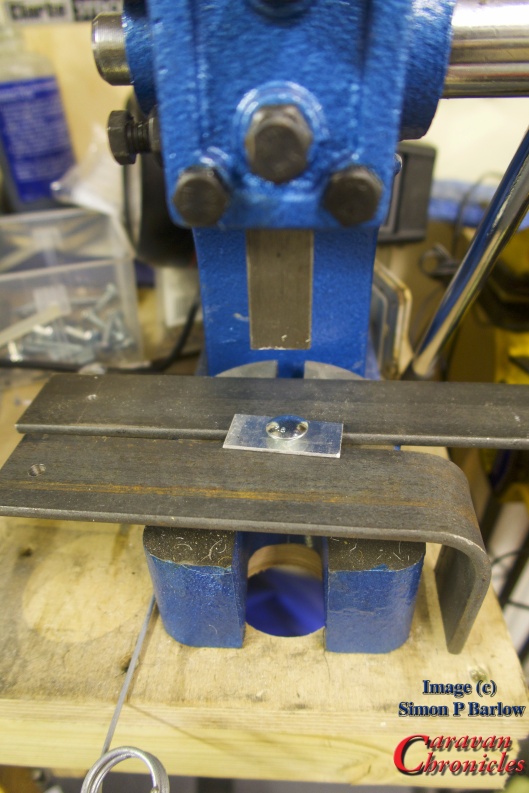
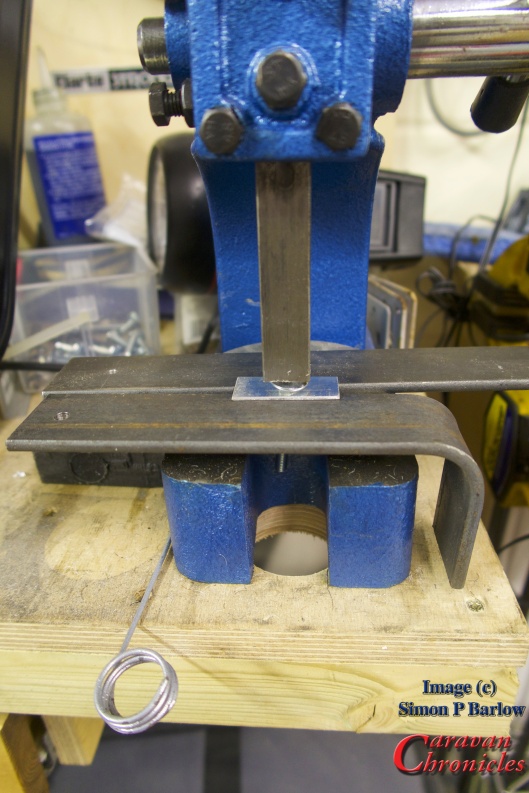
Once I’d got the angles and size sorted it was time to move on to the aluminium sheet. My press brake… well I call it a press brake, in reality its a cheap basic hand folding machine but it works very well as long as you know its limits and don’t get daft trying to fold big stuff. It was all about the angles…

IMG_1451

The first two were easy and I could form the lip with two folds, the second was less than 90 degrees so I just about got away with enough clearance. However folding the return that would lip over the front cross brace which was also less than 90 degrees also meant that I’d have a problem fitting it in the folder.

IMG_1453However, a little lateral thinking and taking the blade off the folding machine, inserting my workpiece and re-installing the blade meant I could fold in the opposite direction (downward)… result!
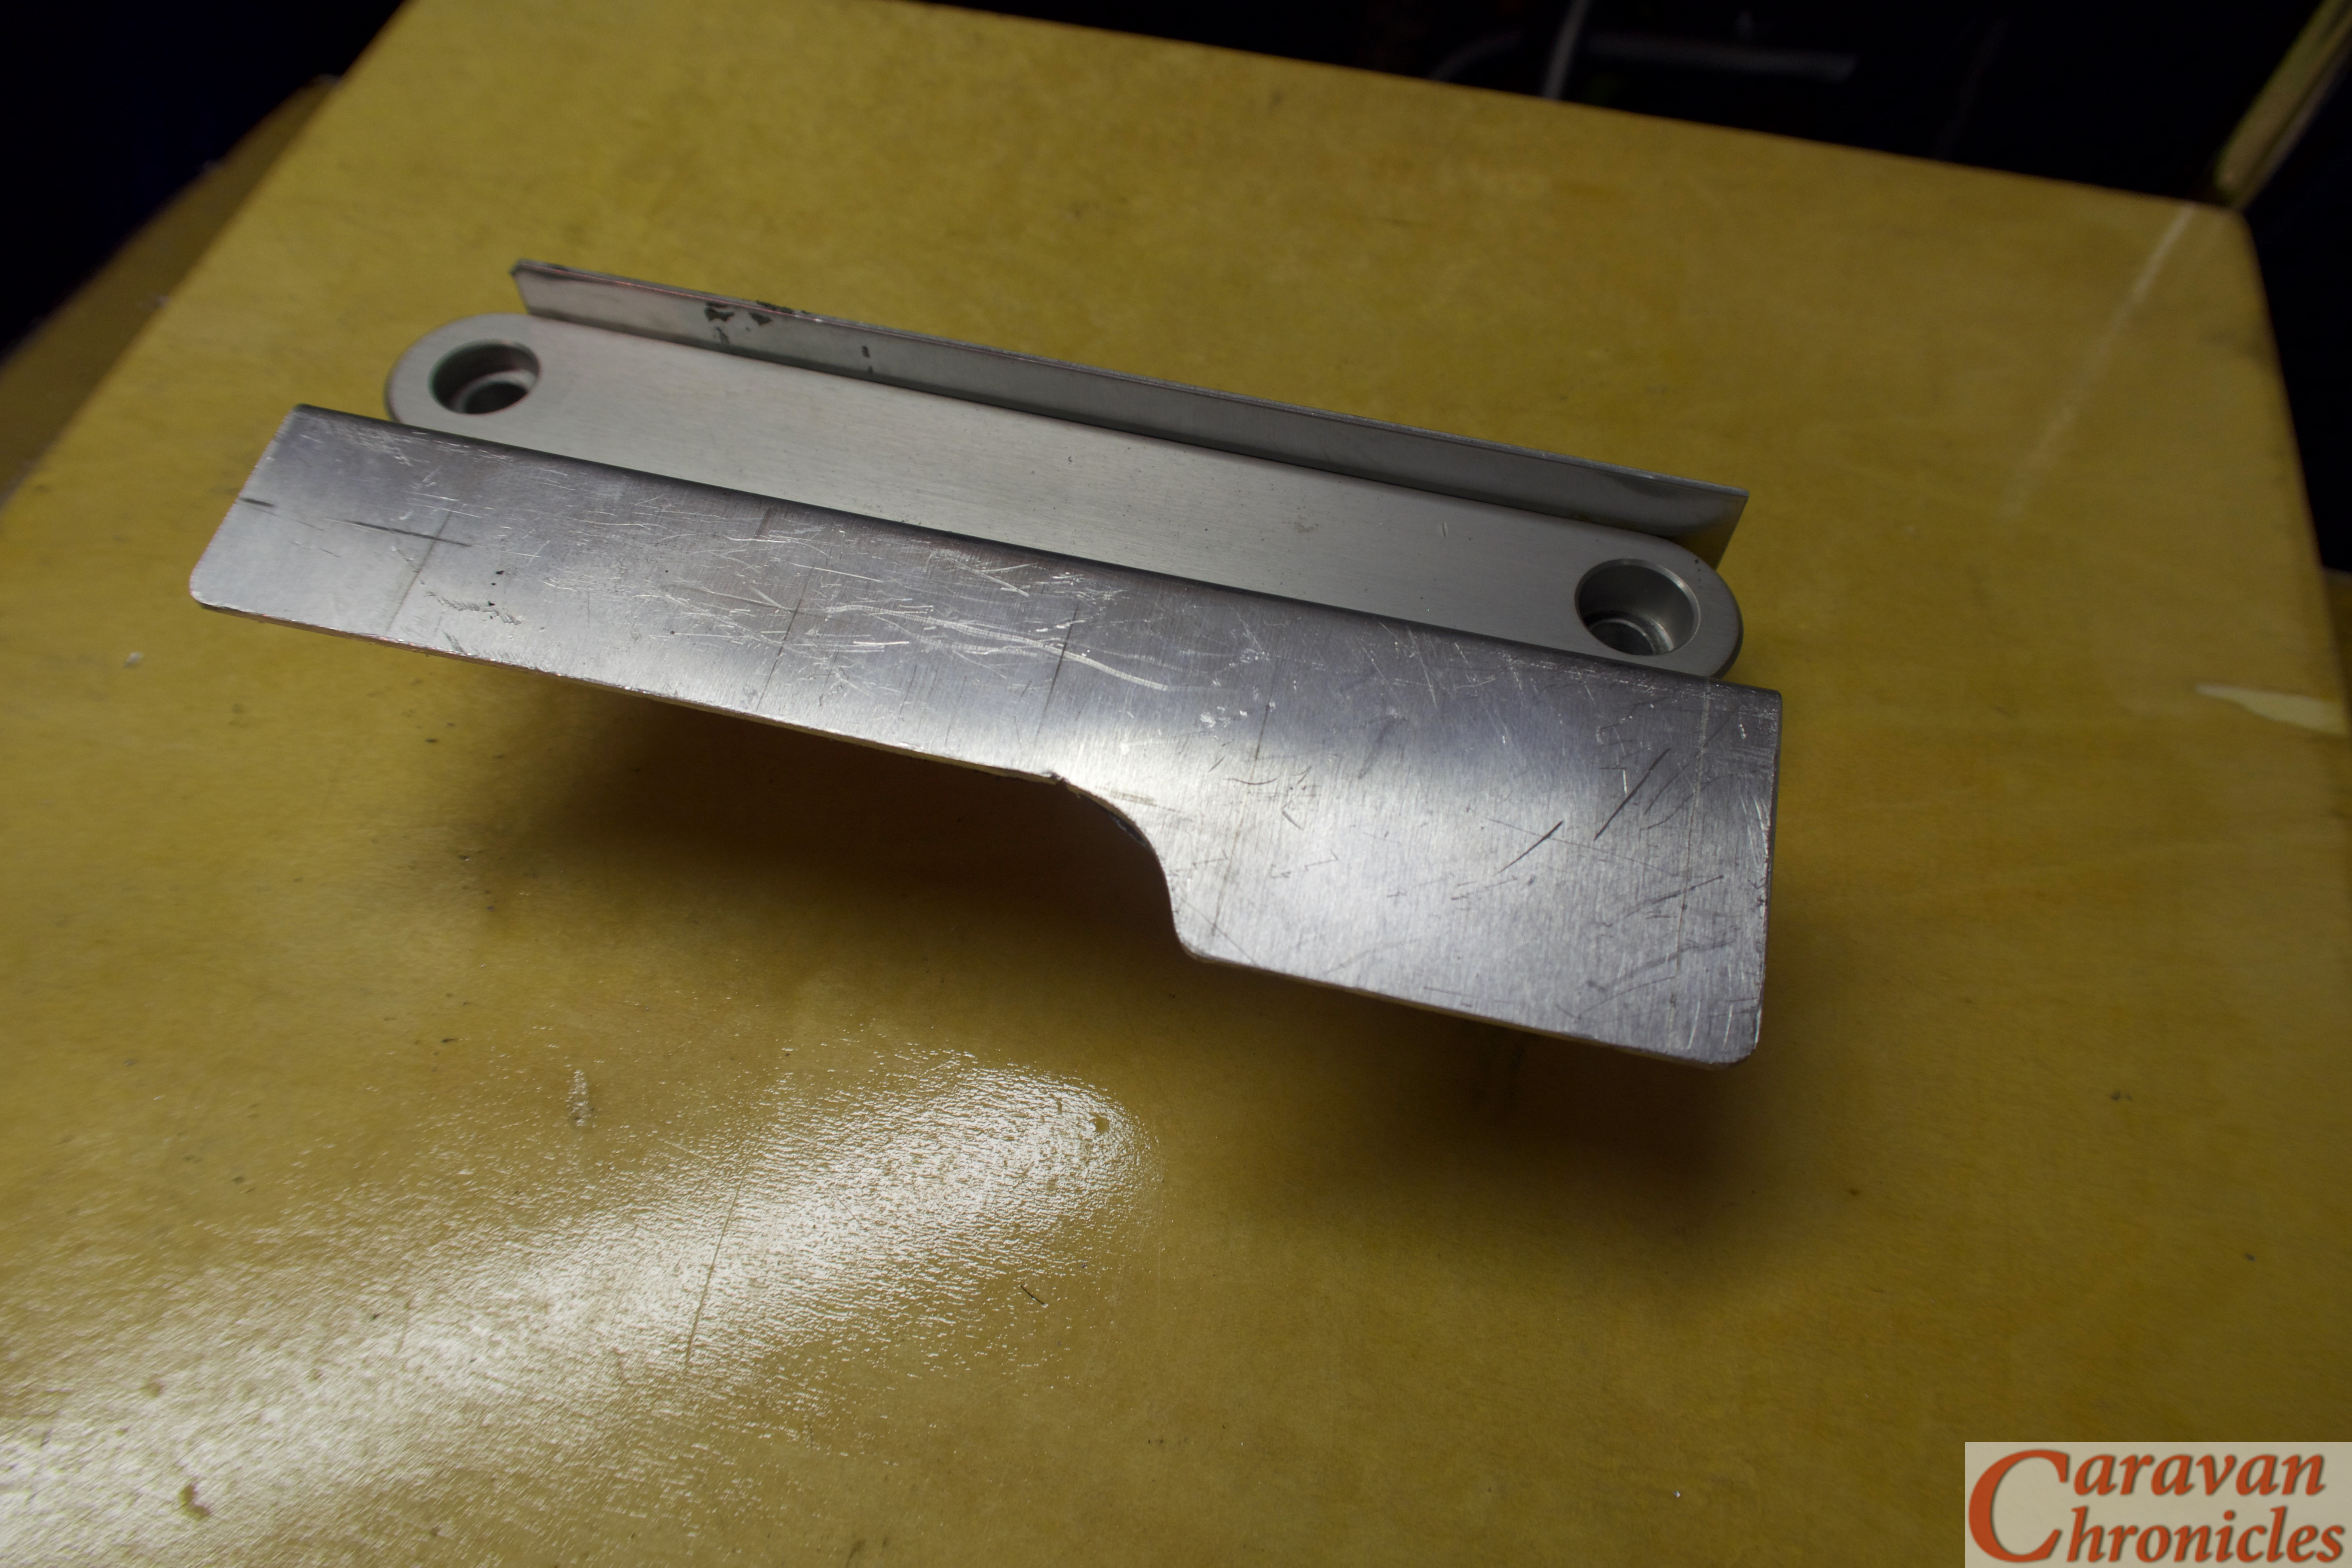
IMG_1454A quick trim and rounding off the edges gave me a rough folded bracket. A quick file of the edges and work-over with some fine emery removed all the tool marks… quickly followed up with a coat of etch prime to protect it.

IMG_1455

I now had to work out how to mount the plastic housing the bonnet release cables were located in. On the rear of the fitting were two plastic tabs that locked into two square holes punched into the vehicles cross member.

IMG_1458

So a few minutes spent with a dremmel and a couple of suitable sized swiss files later…

IMG_1457… and the piece was ready for a final rub over with scotch bright a second coat of etch primer and two coats of black.

The Installation…

IMG_1462

All went a bit easy actually… which is flipping’ unusual for me. I released the bonnet (or ‘hood’ for my American friends) cable fitting and simply clipped it back in to the two new holes I’d made.

IMG_1463

The Provent was installed next…

IMG_1464

IMG_1465

… again without any issues. Next was to sort out the plumbing.

I’d done a bit of research and asking around and the guys at ASH… AutoSiliconHose.com had come highly recommended. So a road trip over the Pennines to Mirfield (just east of Brighouse in West Yorkshire) was scheduled.

I had a basic list of what I thought I’d need and the chap behind the counter hooked me up with everything… including the alloy couplers he cut to size while I waited. Great service from ASH and I can definitely recommend them.

Back home with my shopping, it was time to start on the plumbing.

IMG_1469

For securing pipes, I personally prefer spring clips… the type you install with special pillars, however the silicon hose OD was slightly too large for may normal stock of clamps so I had to opt for using the wire type. I’ll order some of the correct size and replace the wire clamps as soon as they arrive.

IMG_1471

IMG_1472

IMG_1473

IMG_1474

It was really simple now to just assemble the bits, cutting the silicon pipe to length as required. I used a pair of plastic conduit cutters to easily slice through the pipe.

Before I made the final connections to the crank case breather port or the turbo inlet port I blew the pipes clear using a high pressure air line.

All that was left to do was install the drain hose, one way valve and drain tap. I used normal 20mm oil line for the drain, inserting the one way valve about three inches below the outlet of the Provent catch can. The remainder of the hose was dropped down to chassis level and the drain tap added and secured with a couple of zip ties.

IMG_1475

The Finale…

IMG_1479

IMG_1477

I secured the pipes in a couple of places with zip ties, now I know the route I can make a small stand-off bracket with two rubber lines “P” clips to mount on the engine to hold the pipes, although they are self-supporting because of the short length.

In the photographs above it looks like the piping is tight across the engine, I did do a pull and push test and there is plenty of movement at the 90 degree bends to allow the torque twist of the engine without pulling or pushing on the pipes at the catch can end.

The current mileage is 11,750 or there abouts, so I’ll check the drain and filter in 100 miles and each 100 miles after that so I can get an idea of how the setup is going. I’m not sure how long the filter is designed to last, but Ill put it on the schedule to replace ever main service. The other thing that is an unknown is how much oil I’ll get. I have been watching some YouTube videos made by Berrima Diesel in Australia (if you watch any of the Australian 4 x 4 or off-road channels you will recognise the name). I only found out about their catch can experience when one of the guys from one of the 4 x 4 adventure channels got in touch… even if you don’t think you need a catch can but drive a big diesel their videos are well worth watching.

Ok… I was saying I don’t know how much oil to expect… but it did surprise me that Berrima Diesels posted a video showing a new 4 x 4 with about 6000Km on the clock had produced about 300ml’s of oil using the same Provent catch can. It’s also worth taking look at what the have to say about the current oil specified in diesel engines.

The other thing I noticed was when I left the engine ticking over for about ten minutes. Bearing in mind I had just come back from West Yorkshire via the M62 and M60 and started the pipe install as soon as I got back so the engine was still hot, the difference in temperature between the short length of pipe exiting the crankcase vent and the inlet pipe of the turbo. The pipe exiting the crankcase vent port was almost at the temperature I could not keep my fingers on it, while the inlet pipe I’d connected too was still cool. I’ll have to get my thermomiterbob laser do-hicky out and get some readings… but anything that helps cool gasses going into the turbo has to be of benefit right?

That’s it for now, I know it’s not caravanning related that much… unless you want to get the best out of your diesel while towing. I promise the next one will be caravan related, honest!

As in part one I’d also like to give a shout out to Charles at HumbleMechanic.com for all the information and videos he produces about VW vehicles. Charles has been an absolute gold mine of information for all things VW and if you drive any of VW’s vehicles please be sure to drop in on his YouTube channel and take a look. 

Share this:

  • Twitter
  • Facebook
  • Tumblr
  • Pocket
  • Pinterest
  • Reddit

Like this:

Like Loading...

Getting All Charged Up – Update

02 Sunday Jul 2017

Posted by Simon Barlow in Accessories, Caravan Electrics, Electrical, Off Grid, Product Review, Projects, Reviews, Technical, Towing, VW Amarok

≈ 20 Comments

Tags

Caravan Electrics, Leisure Battery Charging, Modifications, Sterling Power Wildside, VW Amarok

The best laid plans….

We had originally intended to spend a week down at Glastonbury which would have meant the 5 hour drive down would have been an excellent test for the Sterling Power Wildside unit’s first outing. However we had to cancel the trip literally the day before we were due to set off. In the few days between installing the Wildside unit and our planned trip to Glastonbury I had been exchanging emails and phone calls with Charles Sterling talking about some of the aspects of the Wildside unit and the direction that caravan electrics was heading in.

Continue reading →

Share this:

  • Twitter
  • Facebook
  • Tumblr
  • Pocket
  • Pinterest
  • Reddit

Like this:

Like Loading...

Fitting A Bike Rack to the VW Amarok – Finale…

12 Sunday Mar 2017

Posted by Simon Barlow in Accessories, Amarok, Bike Carrier, Bike Rack, General, Modifications, tow vehicle, VW Amarok

≈ 5 Comments

Tags

Bike Rack, Modifications, Touring, Towing, VW Amarok

It’s time to wrap up the bike rack install. I had to wait a few days for the final rack to arrive. Although I had ordered a twin pack of the Thule FreeRide 532 from Holdcrofts via Amazon and they had shipped out a twin pack, it would seem that their courier had ‘lost’ one and to Holdcrofts credit as soon as I emailed them they dispatched another… which the courier took four days to deliver.

IMG_1098 Continue reading →

Share this:

  • Twitter
  • Facebook
  • Tumblr
  • Pocket
  • Pinterest
  • Reddit

Like this:

Like Loading...

Fitting A Bike Rack to the VW Amarok – Part 2…

04 Saturday Mar 2017

Posted by Simon Barlow in Accessories, Amarok, Bike Carrier, Bike Rack, General, Modifications, Projects, VW Amarok

≈ 3 Comments

Tags

Bike Rack, Maintenance, Modifications, Touring, Towing, VW Amarok

OK, so now to fit the actual bike carriers onto the rack I had previously installed a couple of days ago.

We had opted for the Thule FreeRide 532 over the ProRide version. What put me off the ProRide were a couple of videos on YouTube showing just how easy it was to remove a bike supposedly locked on to the rack. The FreeRide 532 has two arms supporting the bike and offered an option for additional security…. which I’m not going to go into for obvious reasons!

I had ordered a twin pack of the FreeRide 532, unfortunately I only received one. It seems the other was lost in transit somewhere according to my enquiries with the supplier. The other thing I found out was they (or it) didn’t come with the “T” track fixings. OK so a quick trip down to my nearest Thule dealer Northwest Towbars to pick up the elusive fixings. They would remain elusive… Northwest Towbars didn’t have any in stock. Not to be out manoeuvred I’d make my own.

To the bat cave again…

I just happened to have some 2mm aircraft grade aluminium handy and cut eight 21mm x 45mm pieces. The FreeRide 532 normally has three mounting locations, but as there was an additional hole that lined up with the “T” track it would be rude not to use it! So I made four for each rack.

img_1069For the threaded bolt I had some dome head bolts handy. The width of the dome head was wide enough so it would not pull through the slot on its own so I was not relying on a 2mm think aluminium plate entirly. To hold the bolts in place I drilled a slightly undersized hole in the aluminium…

img_1074

img_1075img_1077…and used my small press to force the square shoulders of the bolt through the aluminium plate to hold it in place.

img_1078The result was eight “T” track bolts. A quick dressing up on the sanding belt and fine grinding wheel to remove any rough edges finished them off.

img_1079 The excess length of the bolt would be trimmed later.

Fitting the FreeRide 532 Racks

Sliding four of the newly made “T” track bolts in to the WingBars I could place the FreeRide 532 on to the bars.

img_1080I used a couple of nuts to hold the rack in place while I test fitted one of the bikes. It was a bit too tight. The swing up frame section that clamps on to the bike only partially engaged on the bike frame. The whole rack needed moving rearwards by about 10 to 15 mm.

Not a problem, as the WingBar mounting is off set laterally compared to the “T” track, reversing the bar so it faced the other way would solve this and effectively move the “T” track slot rearwards by about 20mm.img_1081

With the WingBar mounted in the other direction the bike was a perfect fit. Also it made it easier opening the end caps of the WingBar as configured the correct way round they were a bit tight against the roll bar.img_1083img_1084img_1082The next thing to address was the overhang. I still had around 50 to 60 mm of adjustment I could make to the rails of the FreeRide rack. Removing everything again and a bit of ‘adjusticating’ with a small rubber mallet soon saw the rails in the correct position. I had not been able to get the rear of the mount flush with the pickup tailgate as was my original hope, but checking with a plumb bob…

img_1090img_1091… It was still shorter than the tow ball and only about 40mm longer than the rear bumper. So the overhang wasn’t anything to worry about.  Even with a bike on the rack it would be clear of the caravan in the tightest of turns. Next it was just a matter of squaring things up and tightening everything down.

img_1092

I ended up locating the rack more to the side than I first planned. This was for two reasons. Firstly, once the second rack is in place it leaves me with nearly 800 mm between the two racks which will allow for the option in the the future of having the ability to install a mesh tray, ski rack, surfboard rack (we don’t ski or surf… ho hum) or slimline roof box if we ever run out of storage in the Amarok. The second reason is it will give the rear view dash cam a relatively unobscured view rearward even with two bikes on the back.

Everything torqued to the correct settings, I topped off the nuts with an additional nylon lock nut to make sure they could not vibrate loose…

img_1093img_1094… and using a Dremmel I cut off the excess thread and ground off any sharp edges.  I need to find a suitable plastic or rubber push on cover for these then I can give them a quick coat of preserving grease.

One thing that I did think about was the prospect of the swing arms bouncing up and down when bikes were not on the rack. A quick rummage in my straps box produced a few of these little blue straps and a handy slot on the mounting plate seemed ideal…

img_1096… problem solved. A simple solution to something that may or may not be a problem.

So one rack fitted, all that is left is to repeat for the other side, when it arrives!

img_1097

Share this:

  • Twitter
  • Facebook
  • Tumblr
  • Pocket
  • Pinterest
  • Reddit

Like this:

Like Loading...

Fitting A Bike Rack to the VW Amarok – Part 1…

03 Friday Mar 2017

Posted by Simon Barlow in Amarok, Bike Carrier, Bike Rack, Modifications, Uncategorized, VW Amarok

≈ 8 Comments

Tags

Bike Rack, Modifications, Touring, Towing, VW Amarok

It’s been a few months since we bought our VW Amarok and I hadn’t originally intended it to take this long to install a bike rack or carrier. What slowed us down was sorting out the bits needed for mounting a bike carrier above the bed of the Amarok. In the USA, pickups are plentiful and there are various companies that make carrier systems and mounts for pickups. My initial thoughts it would be fairly easy and started perusing the Thule website. Unfortunately they did not sell the correct mounting hardware for where I wanted to mount the rack.. on the side rails for the Roll-N-Lock cover.

Searching the internet found plenty of results for the type of mounting I wanted… all in America and the most promising system was produced by Yakimar.

However, trying to find a retailer that would ship to the UK was a bit of a problem as most would only ship to the US and Canada. I did eventually find a company in California that would. The next hurdle was the cost. To buy everything and get it shipped over here would ring up a massive £2180 bill at the checkout. This was not worth it. I out the bike rack on the back burner for a while… and the pound against the dollar slipped in the meantime.

Getting ready for installing the bike rack

I started looking around again at the start of this year and returned to Thule and Fiamma. Could I make up my own “kit of parts” to do the job? Fiamma while having a great selection of racks and bits didn’t provide anything in the way of a roof bar so back to Thule again. While mooching about their website I accidentally got on to the American  area of their site and while looking for mounting feet came across one specifically designed for mounting on to flat roofs. The part was intended for a Fibreglass canopy on a Jeep Wrangler but pictures showed them being used on a number of vehicles and camping trailers. This was exactly the part I needed.

I checked with a number of Thule retailers to see if they had Kit 3113 which was used to mount Rapid Podium Foot Pack 460R on flat surfaces. No one had it, so a quick email to Thule asking if it was obtainable in the UK or Europe was fired off. The answer was a bit surprising. It was an American part produced by the American Division and was not obtainable in Europe.

OK, back to my contact at Worldwide Cyclery in California… did they stock it and could they ship it? It arrived within six days. I also ordered the Foot Pack 460R as it was over £60 cheaper even after paying import duty than buying it in the UK on-line. I now had the means to mount the WingBars(Aeroblade). I just needed to check the size and order these and two FreeRide 232 bike mounts. Before I ordered, I checked the width I’d need. Next problem, The WingBars in the UK were 1500mm wide and in the US being manufactured in English sizes were slightly wider by about an inch. They arrived a few days later from the US!

OK, so now I had all the parts… to the bat cave!

Assembling the 3113 mounting plates

Assembling the 3113 mounting plates

The first task was to assemble everything so I could to a test fit of the whole caboodle on the back of the Amarok before drilling anything… always a good idea! The four Kit 3113’s were assembled first and the four 406R feet were mounted on to them.

img_1048

Assembling the 460R on to one of the 3113 mounting plates.

img_1045

 Once this was done, the sub assemblies were slid on to the ends of the WingBars.

img_1050

Once this was done, I could roughly position the two partially completed WingBars across the bed of the Amarok.

img_1051

I now needed to check the position of the bike on the FreeRide 532 so that would in turn give me the position I needed to mount the WingBars. From the centre line of the mounting plate the front edge of the front wheel is about 550 mm, so the front WingBar needs to be at least 550mm back from the rear of the cab.

img_1044

However, the Amarok’s sport bars have to be taken into consideration as these stop the front wheel of the bike going too far forward and will help protect the cab.

img_1067

This presented a problem. The rear of the FreeRide232 protruded back and hung over the rear tailgate by about 350mm and if possible I wanted everything flush. Not a problem, the two bike wheel mounts can be slid forward and backwards to accommodate various size bike frames and the main mounting point… with a little assistance from a rubber mallet and be slid backwards. So in effect I nudged the two main bars forward so they didn’t protrude over the tailgate and the bike still fitted. You can see my mark as I started to move the main mounting plate on the picture below:

img_1053

While doing the test fitting and adjusting the position of the mountings, I discovered I had a bit of luck. On the Amarok sport bar there are two ABS plastic mouldings that fit round the bars that are designed for mounting spot lights or work lights that just happen to line up and can be used as ‘rub strips’ to stop the front wheels contacting the coated stainless steel sports bars.

img_1065

I could now measure where I wanted the WingBars to be located and marked out the positions. I wanted the rear cross-bar to be as far to the rear as possible (something planned for the future) and worked out the distance from the front bar which had to be located so the bike rack fitted with the front wheel tucked against the roll bar.

img_1054

As the sides of the Roll-N-Lock cover had a slot underneath, I’d previously machined 4 pieces of steel to fit in them and pre drilled and tapped the holes. All I needed to do was drill the sides of the Roll-N-Lock cover.

img_1057

The (supplied) hex bolts passed through and screwed into the steel plates I’d machined. I also added a spreader nut and lock nut underneath… just to be sure! The lock nut wasn’t tightened up to the spreader nut, so if someone tries to undo the hex bolts, they will simply back off a little then spin round.

OK, first one done time to do the other side…

img_1056

Other side complete a quick test fit of the WingBar…

img_1059

While pre-positioning the front bar ready for marking out, I was interrupted by Sue… a welcome coffee and hot pie break!

img_1062

Both rails fitted, it was time to add the covers and rubber strips…

img_1051

A final position check of one of the racks and time to call it a day as the rain set in again.

img_1063

The spacing of the bars will give us lots of options for the future to add a top box, ski mounts – these will allow ski’s to be carried angled upwards over the cab (have to learn to ski first though!) or a mesh tray.

I’ll post part two soon showing the bike carrier mounting and go into some of the little pitfalls I have come across.

Share this:

  • Twitter
  • Facebook
  • Tumblr
  • Pocket
  • Pinterest
  • Reddit

Like this:

Like Loading...

A Few Questions Answered About the Amarok…

13 Tuesday Sep 2016

Posted by Simon Barlow in Amarok, tow vehicle, Towing

≈ 8 Comments

Tags

off road, tow vehicle, Towing, VW Amarok

I’ve been known as a Land Rover supporter for quite a while now, in fact I started driving Land Rovers 38 years ago back in 1978 and passed my test in one. A lot of people were surprised when I decided to look at something for towing other than a green oval and I have received lots of questions (I mean lots!) about the Amarok.

So far we have done about 1100 miles in ours and I’m still learning about some of its capabilities. One thing that has really impressed me is the awesome eight speed gearbox. One thing that taking any vehicle off-road and sometimes towing on loose or slick surfaces requires is to hold a set RPM while the tyres find traction. With Auto gearboxes normally the gearbox doesn’t like this and shifts up a gear to reduce RPM taking you out of the power band. However, flick the gearbox into manual tiptronic mode and the gearbox will just simply sit in the gear selected until you change. The other thing I found out too was that on slick or icy surfaces, you can select second gear and pull away from stationary to reduce any chance of wheel spin. Do you really need a vehicle that can go off roading with the best… well lets just say you will never have any issues on that sloping grassy CL/CS site!

It would take me far too long to answer all the questions I have been asked and quite frankly it would be flipping boring… akin to reading pi to 20,000 decimal places, so I’ve put together a small collection of YouTube video’s that hope fully will answer a lot of the questions. The first four are courtesy of Miles Continental VW dealers in New Zealand and the first features well-known 4WD professional Pete Ritchie. The fifth video is the inimitable Andrew St.Pierre White of 4xOverland.com (and yes Andrew, they have sorted bluetooth connectivity out) and finally, if nothing else watch the last video… can a two litre engine and auto gearbox pull a road train?


And finally….. if there was any doubt about pulling power……

Share this:

  • Twitter
  • Facebook
  • Tumblr
  • Pocket
  • Pinterest
  • Reddit

Like this:

Like Loading...

A Place for Everything…

29 Monday Aug 2016

Posted by Simon Barlow in General, Modifications, Projects, tow vehicle, VW Amarok

≈ 3 Comments

Tags

Modifications, Towing, VW Amarok

The additions to the Wolf continue, despite the recent news from Glossop Caravans at our last service, that we have damp in the caravan. Hopefully we will hear soon whether or not its covered by the warranty. So, moving on, a couple of additions to the  VW Amarok. After installing the sliding bed, I noticed that there was some space available between the end of the bed and the truck bed at the cab end. It was only 70 mm, but I thought with a bit of creative construction, I could come up with a contrivance to hold some of the stuff and tools that we normally schlep about with us. Using 18mm birch ply phenol finished board I came up with a storage box that is fitted to the bed and projects forward right up to the truck bed front wall… Continue reading →

Share this:

  • Twitter
  • Facebook
  • Tumblr
  • Pocket
  • Pinterest
  • Reddit

Like this:

Like Loading...
Buy Me A Coffee

Caravan Chronicle Stats

  • 44,711,105 Views
Follow Caravan Chronicles on WordPress.com

Follow Caravan Chronicles and receive notifications of new posts by email.

Follow on Facebook

Recent Posts

  • Lighting Up The Scene…
  • Keeping Electrons Contained…
  • Something for BMW X3 owners…
  • Is This A Growing Trend..?
  • Adapting Our Bike Rack for e-Bikes
  • Has Bailey Built Our Perfect Caravan?…
  • Just a quick one…
  • A Few Mods and Updates…
  • A Bit of a Milestone…
  • Finishing Off A Few Jobs…
  • “Put your lights on mate…..”
  • Well that took some cleaning…
  • How have you all been doing?
  • Copying Content… Again!
  • Here’s Something I Think You Want To Take a Look At…
  • Ticking All The Boxes…
  • Vehicle Wiring Projects… Some Thoughts.
  • A Bit of Unashamed Promotion…
  • Season’s Greetings…
  • The problem with information from the internet…

Archives

Categories

RSS Links

RSS Feed RSS - Posts

RSS Feed RSS - Comments

CaravanChronicles.com Tag’s…

13 Pin Plug Accessories AL-KO Avtex Bear Extender Bike Rack Blackpool Blackpool Illuminations blogging Cadac Camping & Caravanning Club Canterbury Caravan Caravan Blog Caravan Club Caravan Electrical Caravan Electrics Caravanning Caravans Caravan Show Caravan Talk Caravan Tyres Cheltenham Chirk Christmas Market Christmas markets Cleaning design Event City Factory Visit Fiamma France Freelander Glastonbury Glossop Caravans Humor Insync Jonic Bedding Lady Heyes La Tournerie Ferme Leisure Battery Leisure Battery Charging LPG Refilling Maintenance Manchester Caravan & Motorhome Modifications NEC North Western Caravans Ltd OLPRO One Hairy Caravanner Oswestry Oxford Product Review Project Safefill Sat Nav Sterling Caravans Sterling Power Wildside Swift Factory Swift Group Swift Talk Technical The Old Oaks Touring Towing tow vehicle TPMS Trafford Centre travel Travel Trailer Travel Trailers vacation VW Amarok Warwick Racecourse WiFI

Create a website or blog at WordPress.com

  • Follow Following
    • Caravan Chronicles
    • Join 669 other followers
    • Already have a WordPress.com account? Log in now.
    • Caravan Chronicles
    • Customize
    • Follow Following
    • Sign up
    • Log in
    • Report this content
    • View site in Reader
    • Manage subscriptions
    • Collapse this bar
 

Loading Comments...
 

    %d bloggers like this: