
I’m installing a “Catch Can” can on our VW Amarok and this little posting is all about it, but first a bit of history on why I’m installing one.
If you look at modern high performance diesel engines one of the things that they do to reduce emissions is have a number of systems to reduce the harmful emissions. EGR or Exhaust Gas Re-circulation wich is feeding part of the engines exhaust back into the intake but probably the most widely known is the DPF… or Diesel Particulate Filter which captures fine soot particles from exiting the exhaust. The DPF needs to be cleaned regularly, through a process called regeneration. Either active, passive or forced, the accumulated soot is burnt off at high temperature (around 600°c) to leave only a residue of ash, effectively renewing or regenerating the filter, ready to take on more pollution from the engine. To regenerate, the vehicle electronics adjust the timing of the engine to increase the exhaust gas temperatures or commonly it can be achieved by passive regeneration usually on the motorway when exhaust gasses are generally hotter.
In city driving or short trips the regeneration my not take place fully, leading to blocking of the filter. This can lead to higher fuel consumption and a visit to the mechanic for cleaning or replacement.
Forced Regeneration
If the DPF become blocked you will get an engine warning light and/or a DPF warning light to let you know that a regeneration or cleaning is required. If the vehicle continues to be driven and the engine load is not enough for the automatic process to be initiated you will get a second stage DPF warning. When your vehicle displays second stage DPF warning lights it will usually go in to ‘limp mode’ and should be taken to the dealer to ascertain the extent of the problem.
A forced regeneration involves the garage using a computer program to run the car, initiating a regeneration of the DPF. This will also usually require changing the engine oil & oil filter.
Why does my Diesel Particulate Filter (DPF) block
Problems arise around town with stop start driving where the regeneration process might not complete or the engine never get hot enough for a long period. A warning light will illuminate or a message indicating the DPF is full displays on the dash. If you continue to drive in the same manner, the soot build up will increase until other warning lights illuminate and the vehicle will go into ‘limp’ mode, where driving speed is restricted.
Crankcase Ventilation
In all piston engines a certain amount of ‘blow by’ happens, this is some of the hot gasses treated in the cylinder combustion leaking past the piston rings.. or ‘blowing by’ and entering the crank case in the sump area. This pressure needs to be released and twenty years ago the engine oil filler cap used to have e vent in it. However in modern emission controlled vehicles this is not acceptable and the excess pressure is vented into the air intake of the engine where it passes through the engine cycle and exits through the exhaust. These hot gasses passing through the sump on their way out pickup fine mist of oil from the sump which is carried through to the intake of the engine and this creates three problems. The first is a sticky residue build up on the intake valves that hardens with temperature – especially on direct injected engines. Secondly the intake pathway gets coated in oil from the engine. If you have a turbo charged engine with an intercooler, this can become an issue as it reduces the heat exchanging effects of the intercooler. Thirdly, when the oil is burnt in the engine it creates a heavy soot that increases the build up in the DPF.
When towing, you generally use more power for accelerating and maintaining speed which is great in one respect for the DPF. The downside though is the piston blow by is more and therefore the crank case pressure is increased.. picking up more of that fine oil mist from the sump.
Now the diesel engine tuning guys and the 4 x 4 guys in Australia have known about this for a number of years and they have a solution to the problem.
Cleaning up the crank cases gasses – “Catch Can’ or Air Oil Separator?
There is a difference. a ‘Catch Can’ is usually just that. A can that the gasses are fed into with an outlet that is fed back into the turbo inlet. Some do have some form of baffle but a lot don’t. More expensive ones may have a gauze wad inside for the oil droplets to form on. A lot don’t have a drain, you have to remove the bottom of the can to empty it. If you look on auction sites you can find nice looking anodised aluminium ones for £20 or £30 but for that sort of money all you are really paying for is the nice looking anodised aluminium. Not for an efficient effective unit.

On the other hand, a true Air Oil separator will have multiple traps in the form of differing size materials making up membranes for droplets to form on. A number of them are designed to swirl the gasses around first before exiting through the centre after passing through the filter membranes.
I wanted to get as much oil out of the gasses before they enter the engine inlet. So I opted for an Air Oil separator with replaceable membrane filter rather than a cheap ‘catch can’. Seems like a simple device really, but there are a few more things to take into consideration…
I’ve opted to use the Mann-Hummel ProVent 200 on our VW Amarok. It’s been used all over the world with hundreds of installations on Toyota’s, VW’s, Mitsubishi’s, Land Rover’s and not just on 4 x 4’s.
My hope is that I’ll reduce the emissions through the engine while prolonging the life of the DPF, keeping the inlet clean and oil free and importantly preventing that soot and carbon buildup in the inlet ports and valves while maintaining the efficiency of the intercooler.
Getting Started
I did look at the kits available for the VW Amarok and all were sourced in Australia. However I could buy all the individual components in the UK a lot cheaper than importing a kit. Bit’s ordered, the first decision was where to locate the unit…
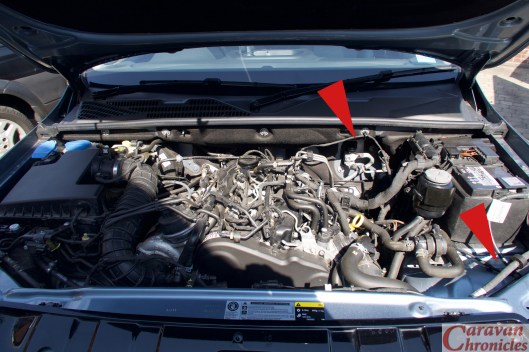
In the Amarok’s engine bay there is only two real places viable for the location of the ProVent. The first is on the back wall next to the engine ECU which seems to be the place of choice for most of the kits I’d found, and the second is in the front right hand corner in front of the battery.
Installing it on the rear firewall next to the ECU would mean partially covering up the Air Con gassing ports and I just knew that would be asking for trouble in the future…

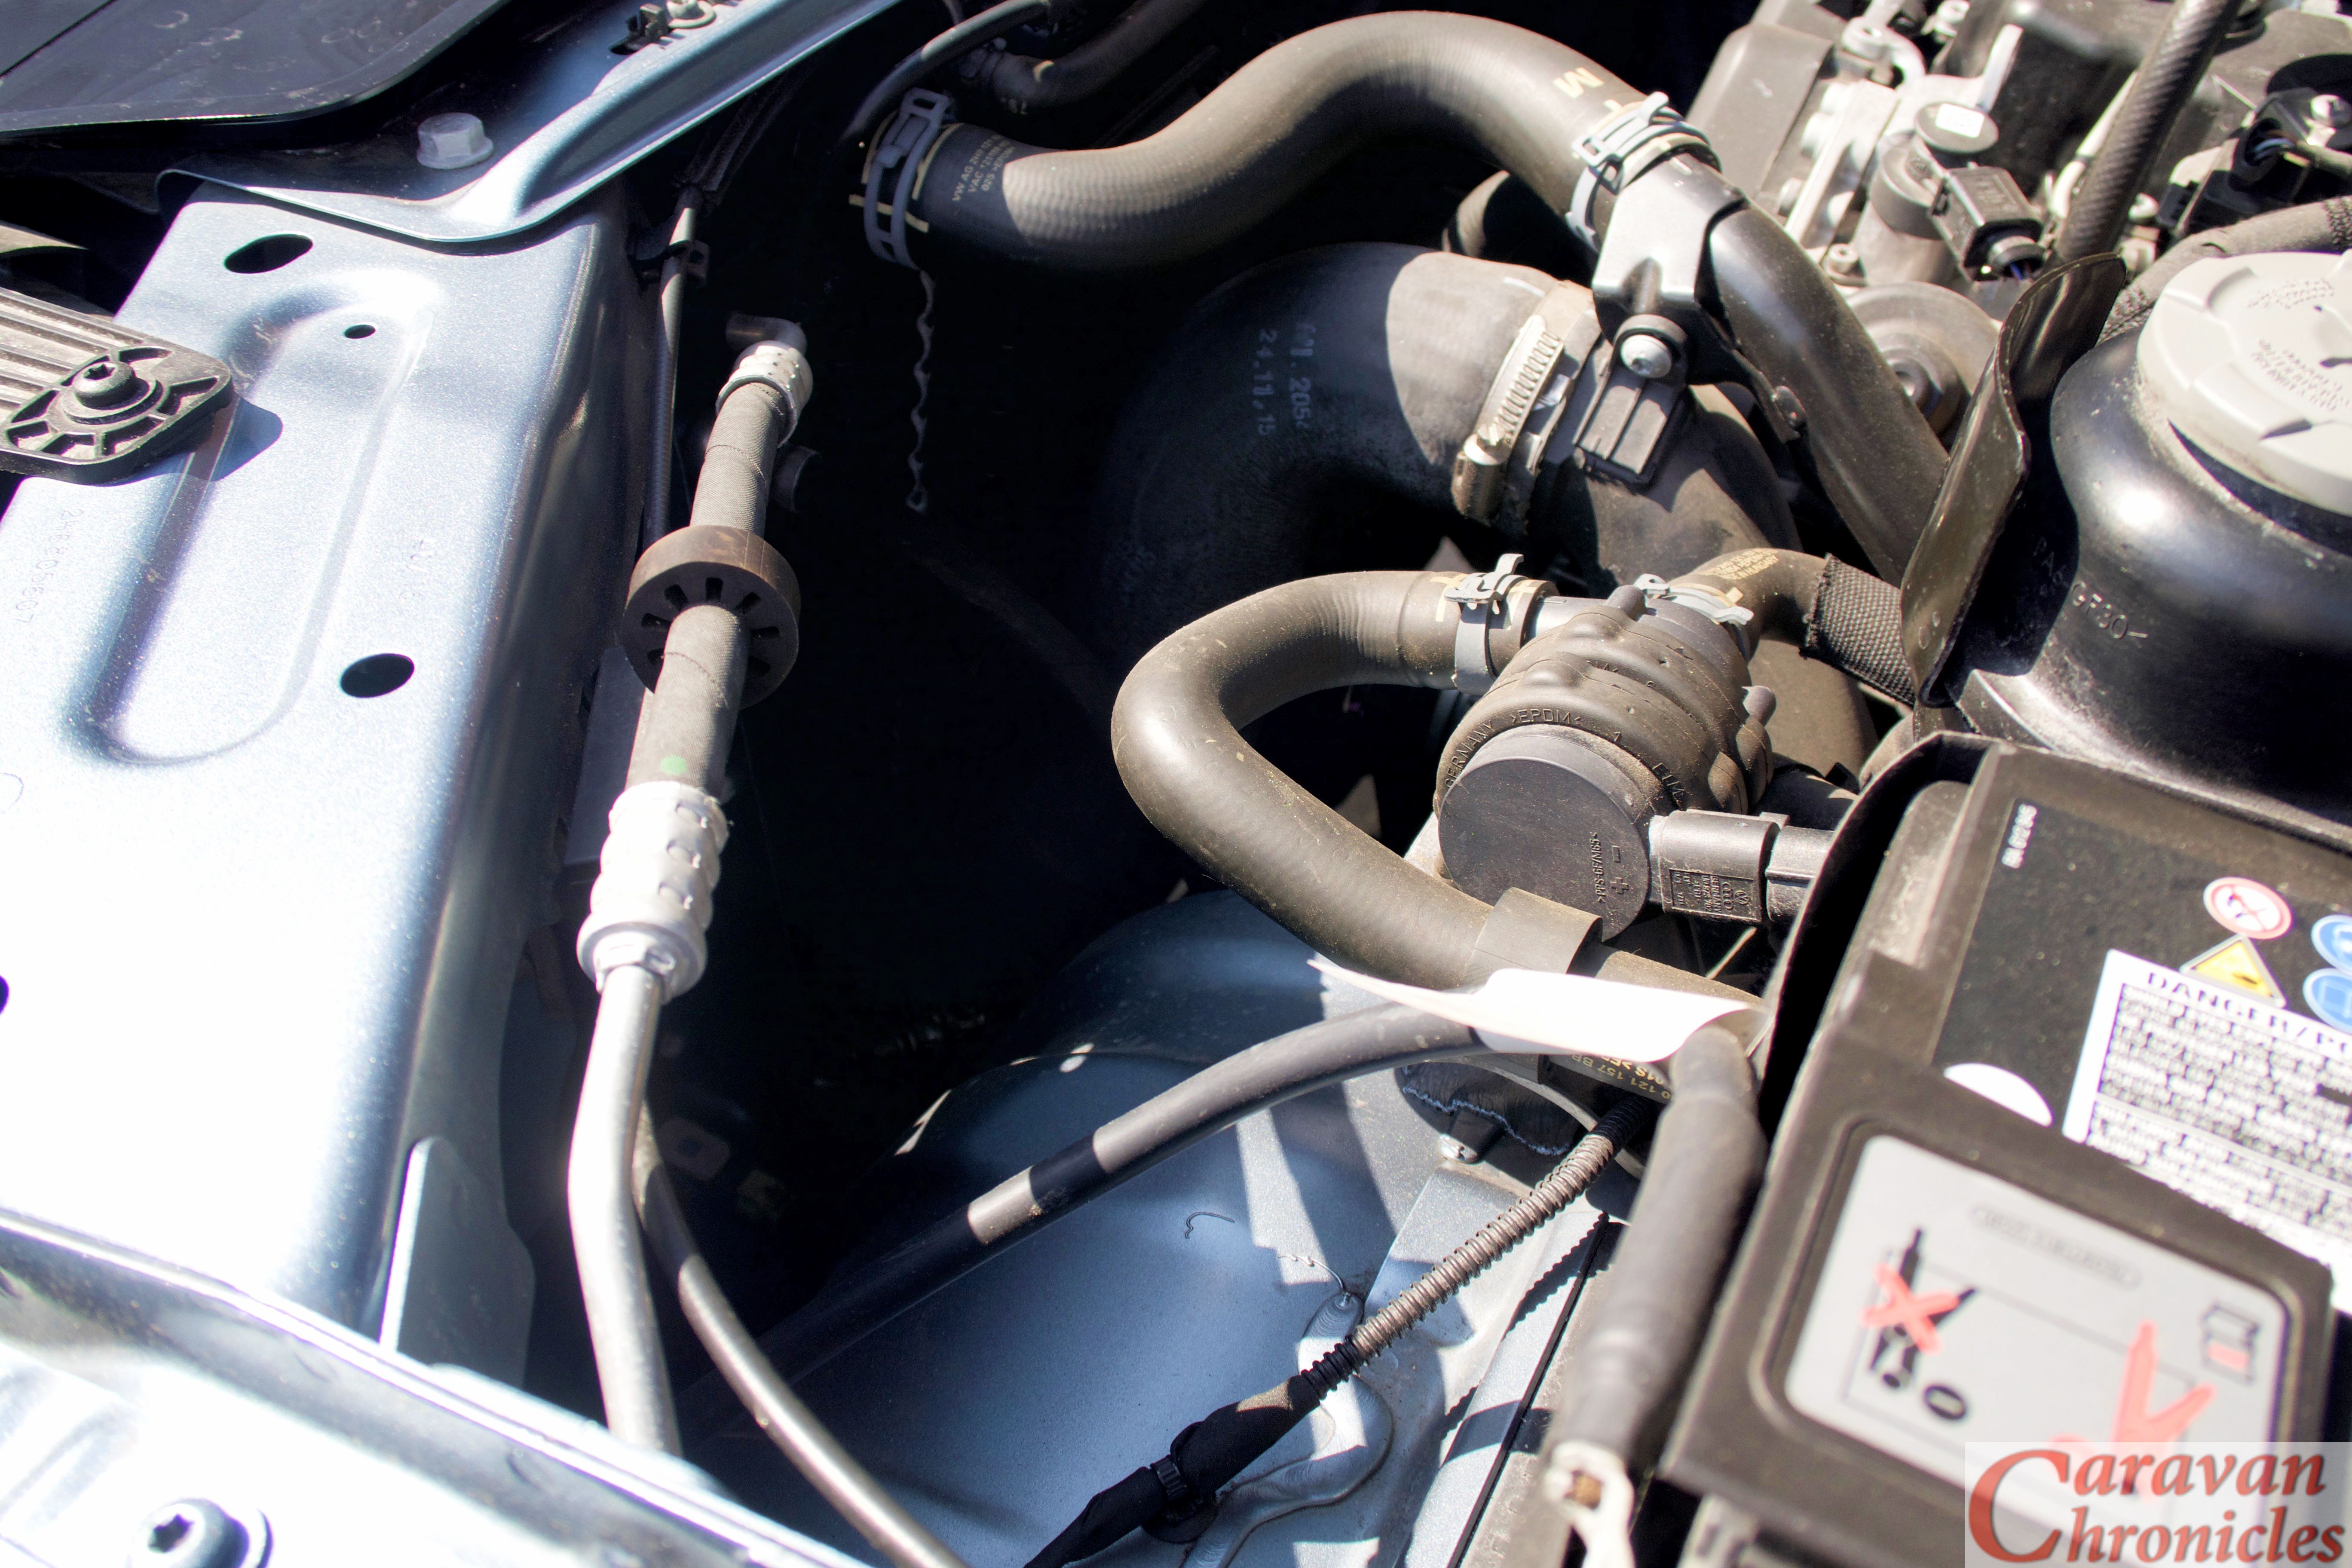
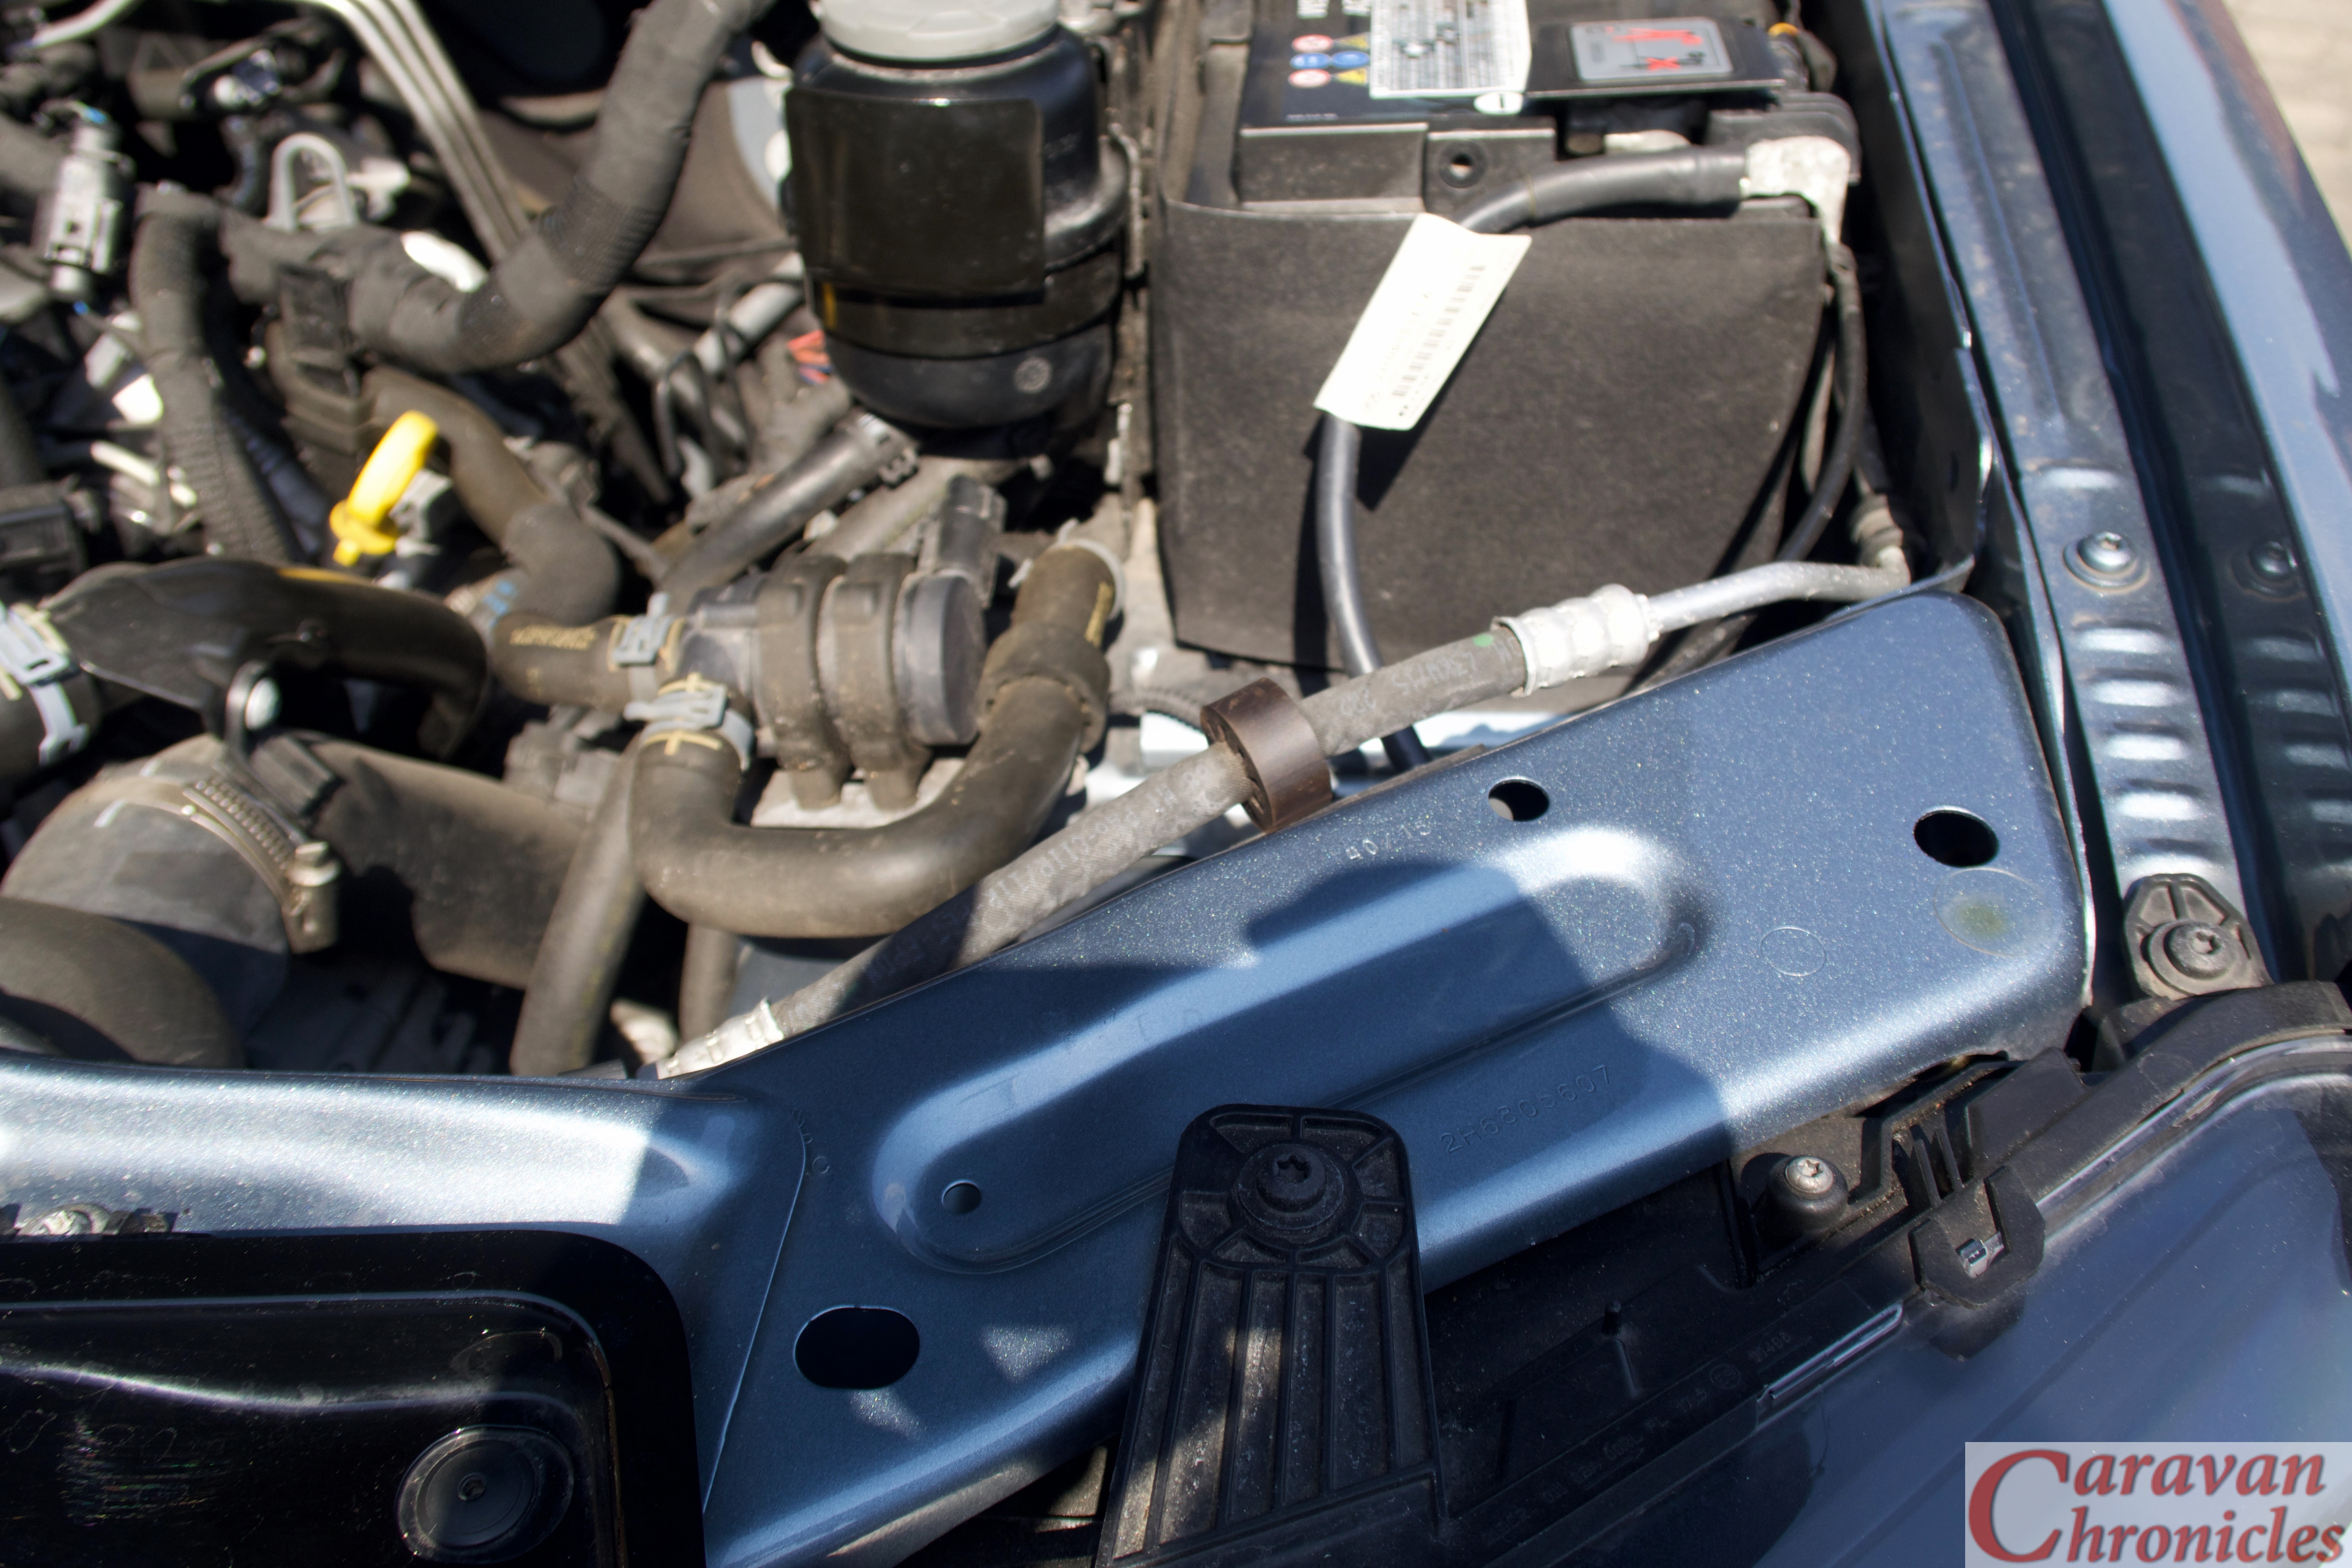
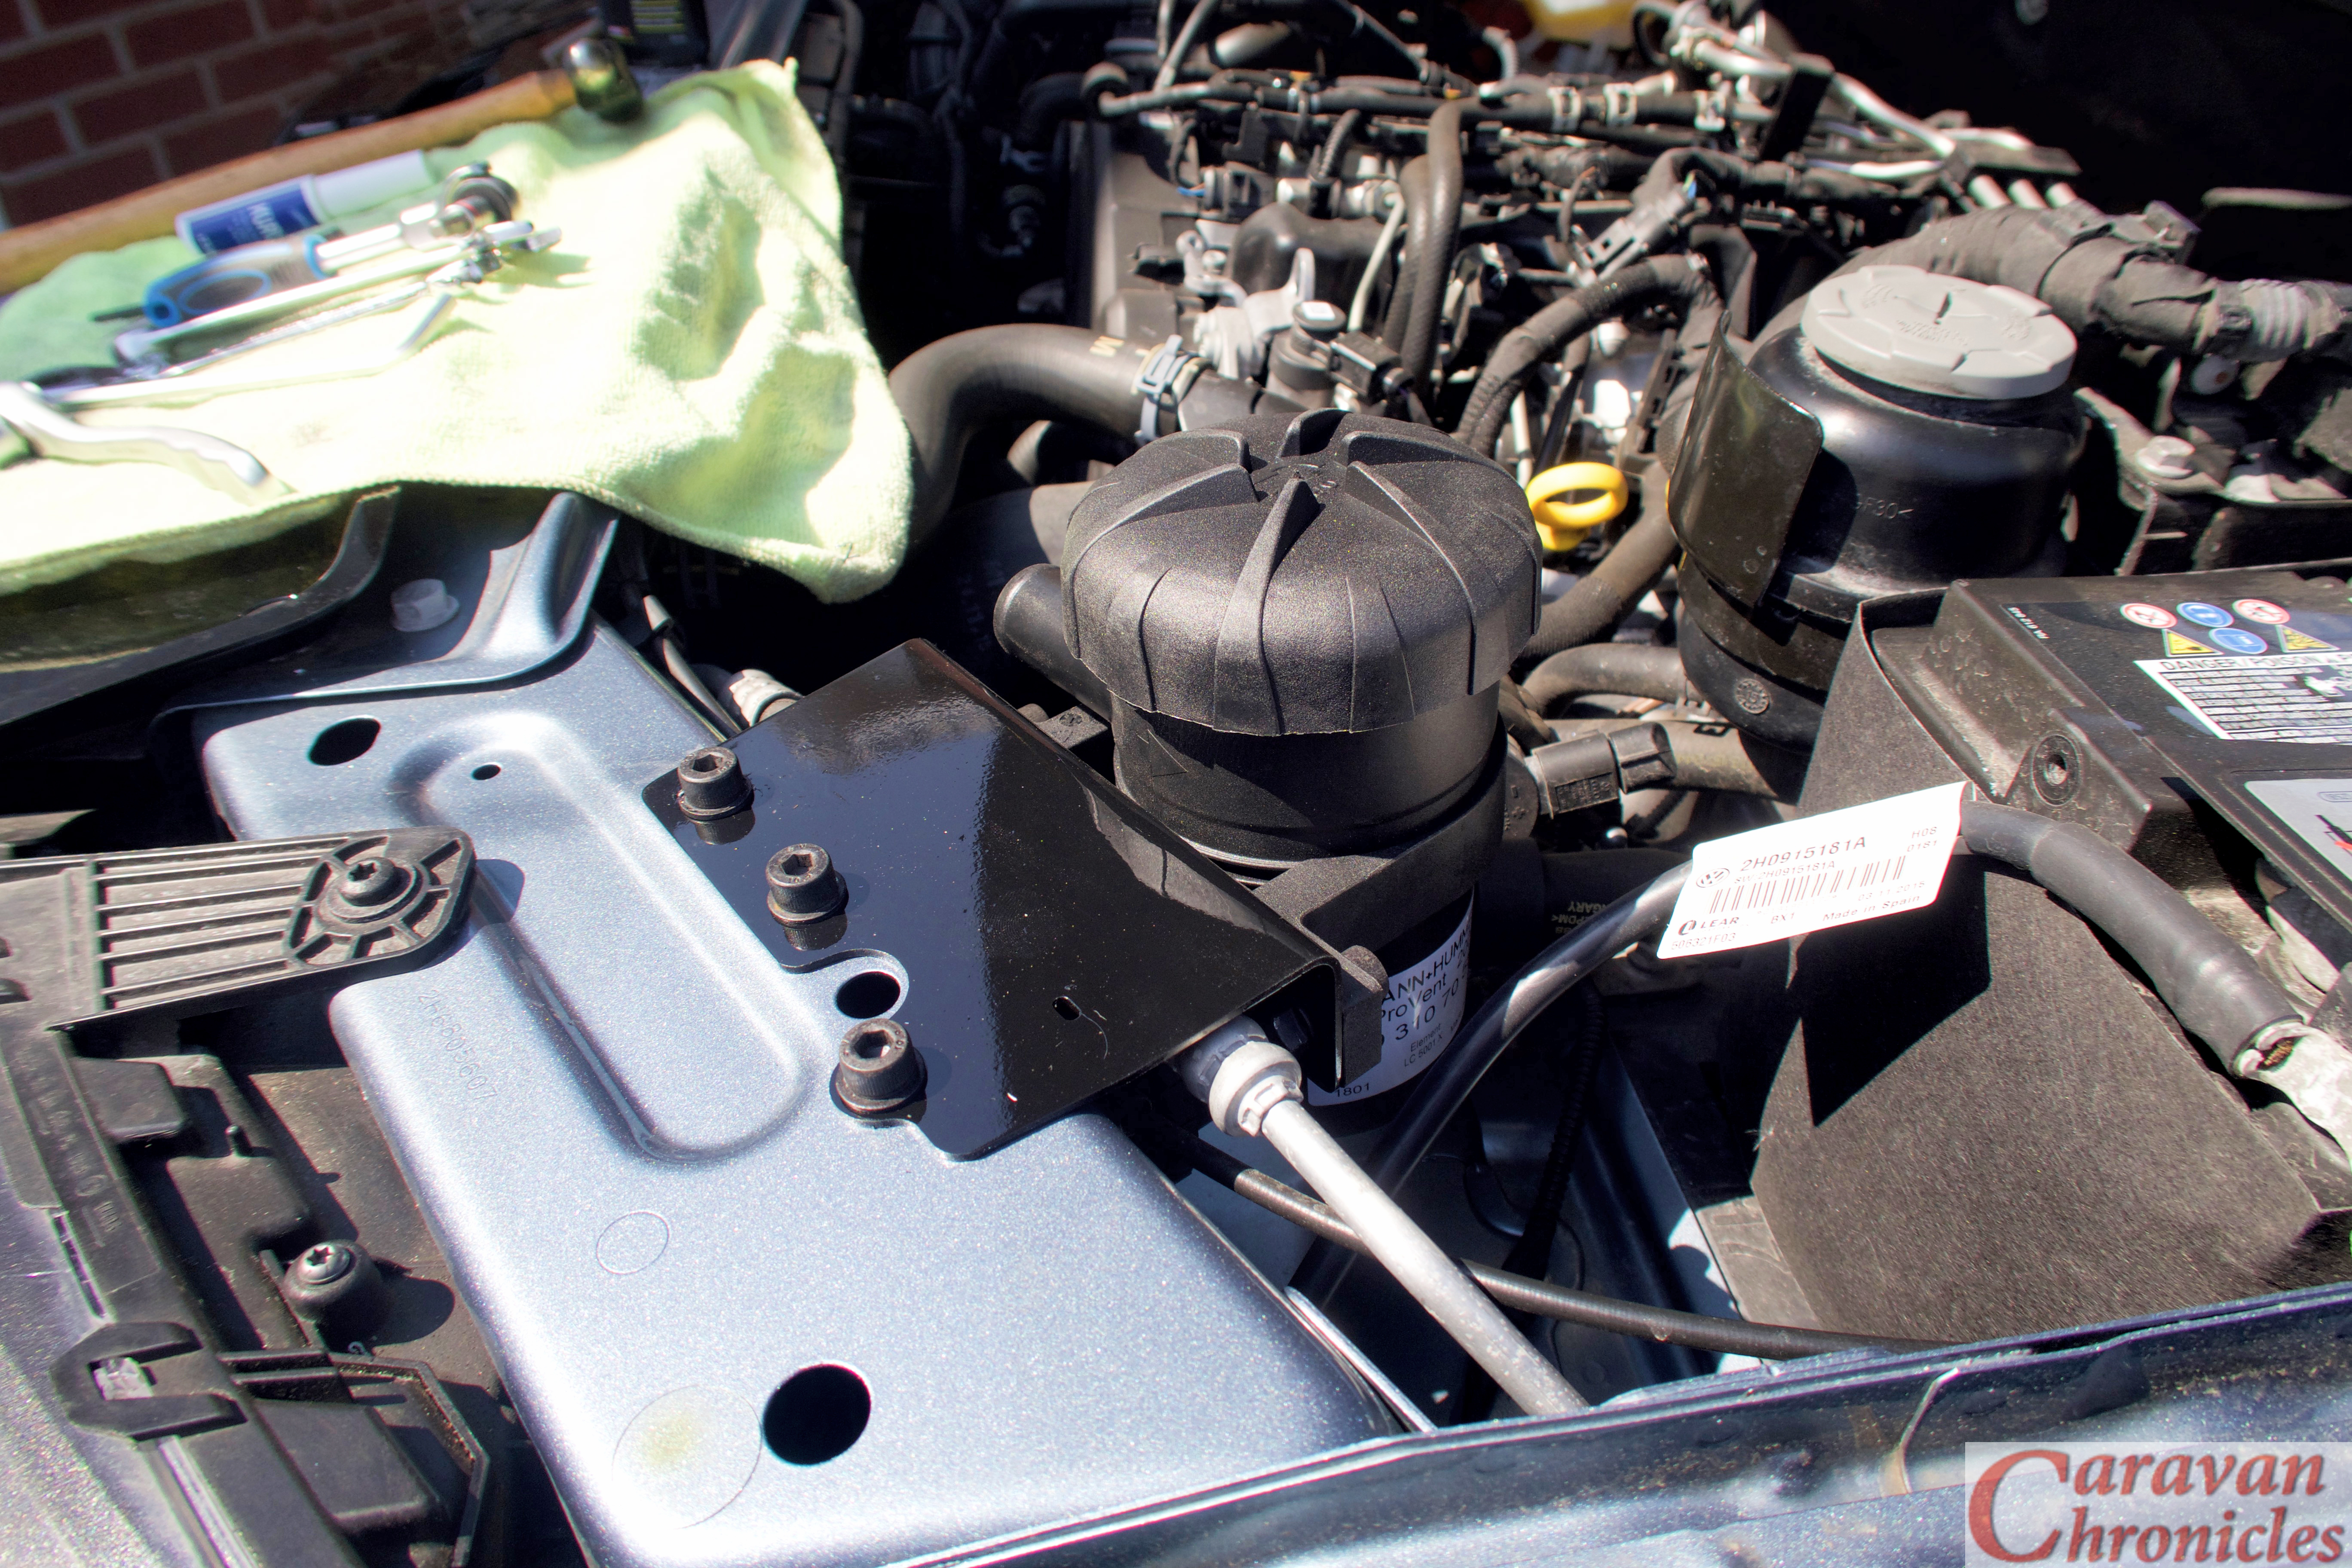
So the location that in my mind seemed the most logical would be to mount it in front of the battery, manufacturing a suitable bracket to hang it off the front top cross-piece where there seemed plenty of room and easy access.
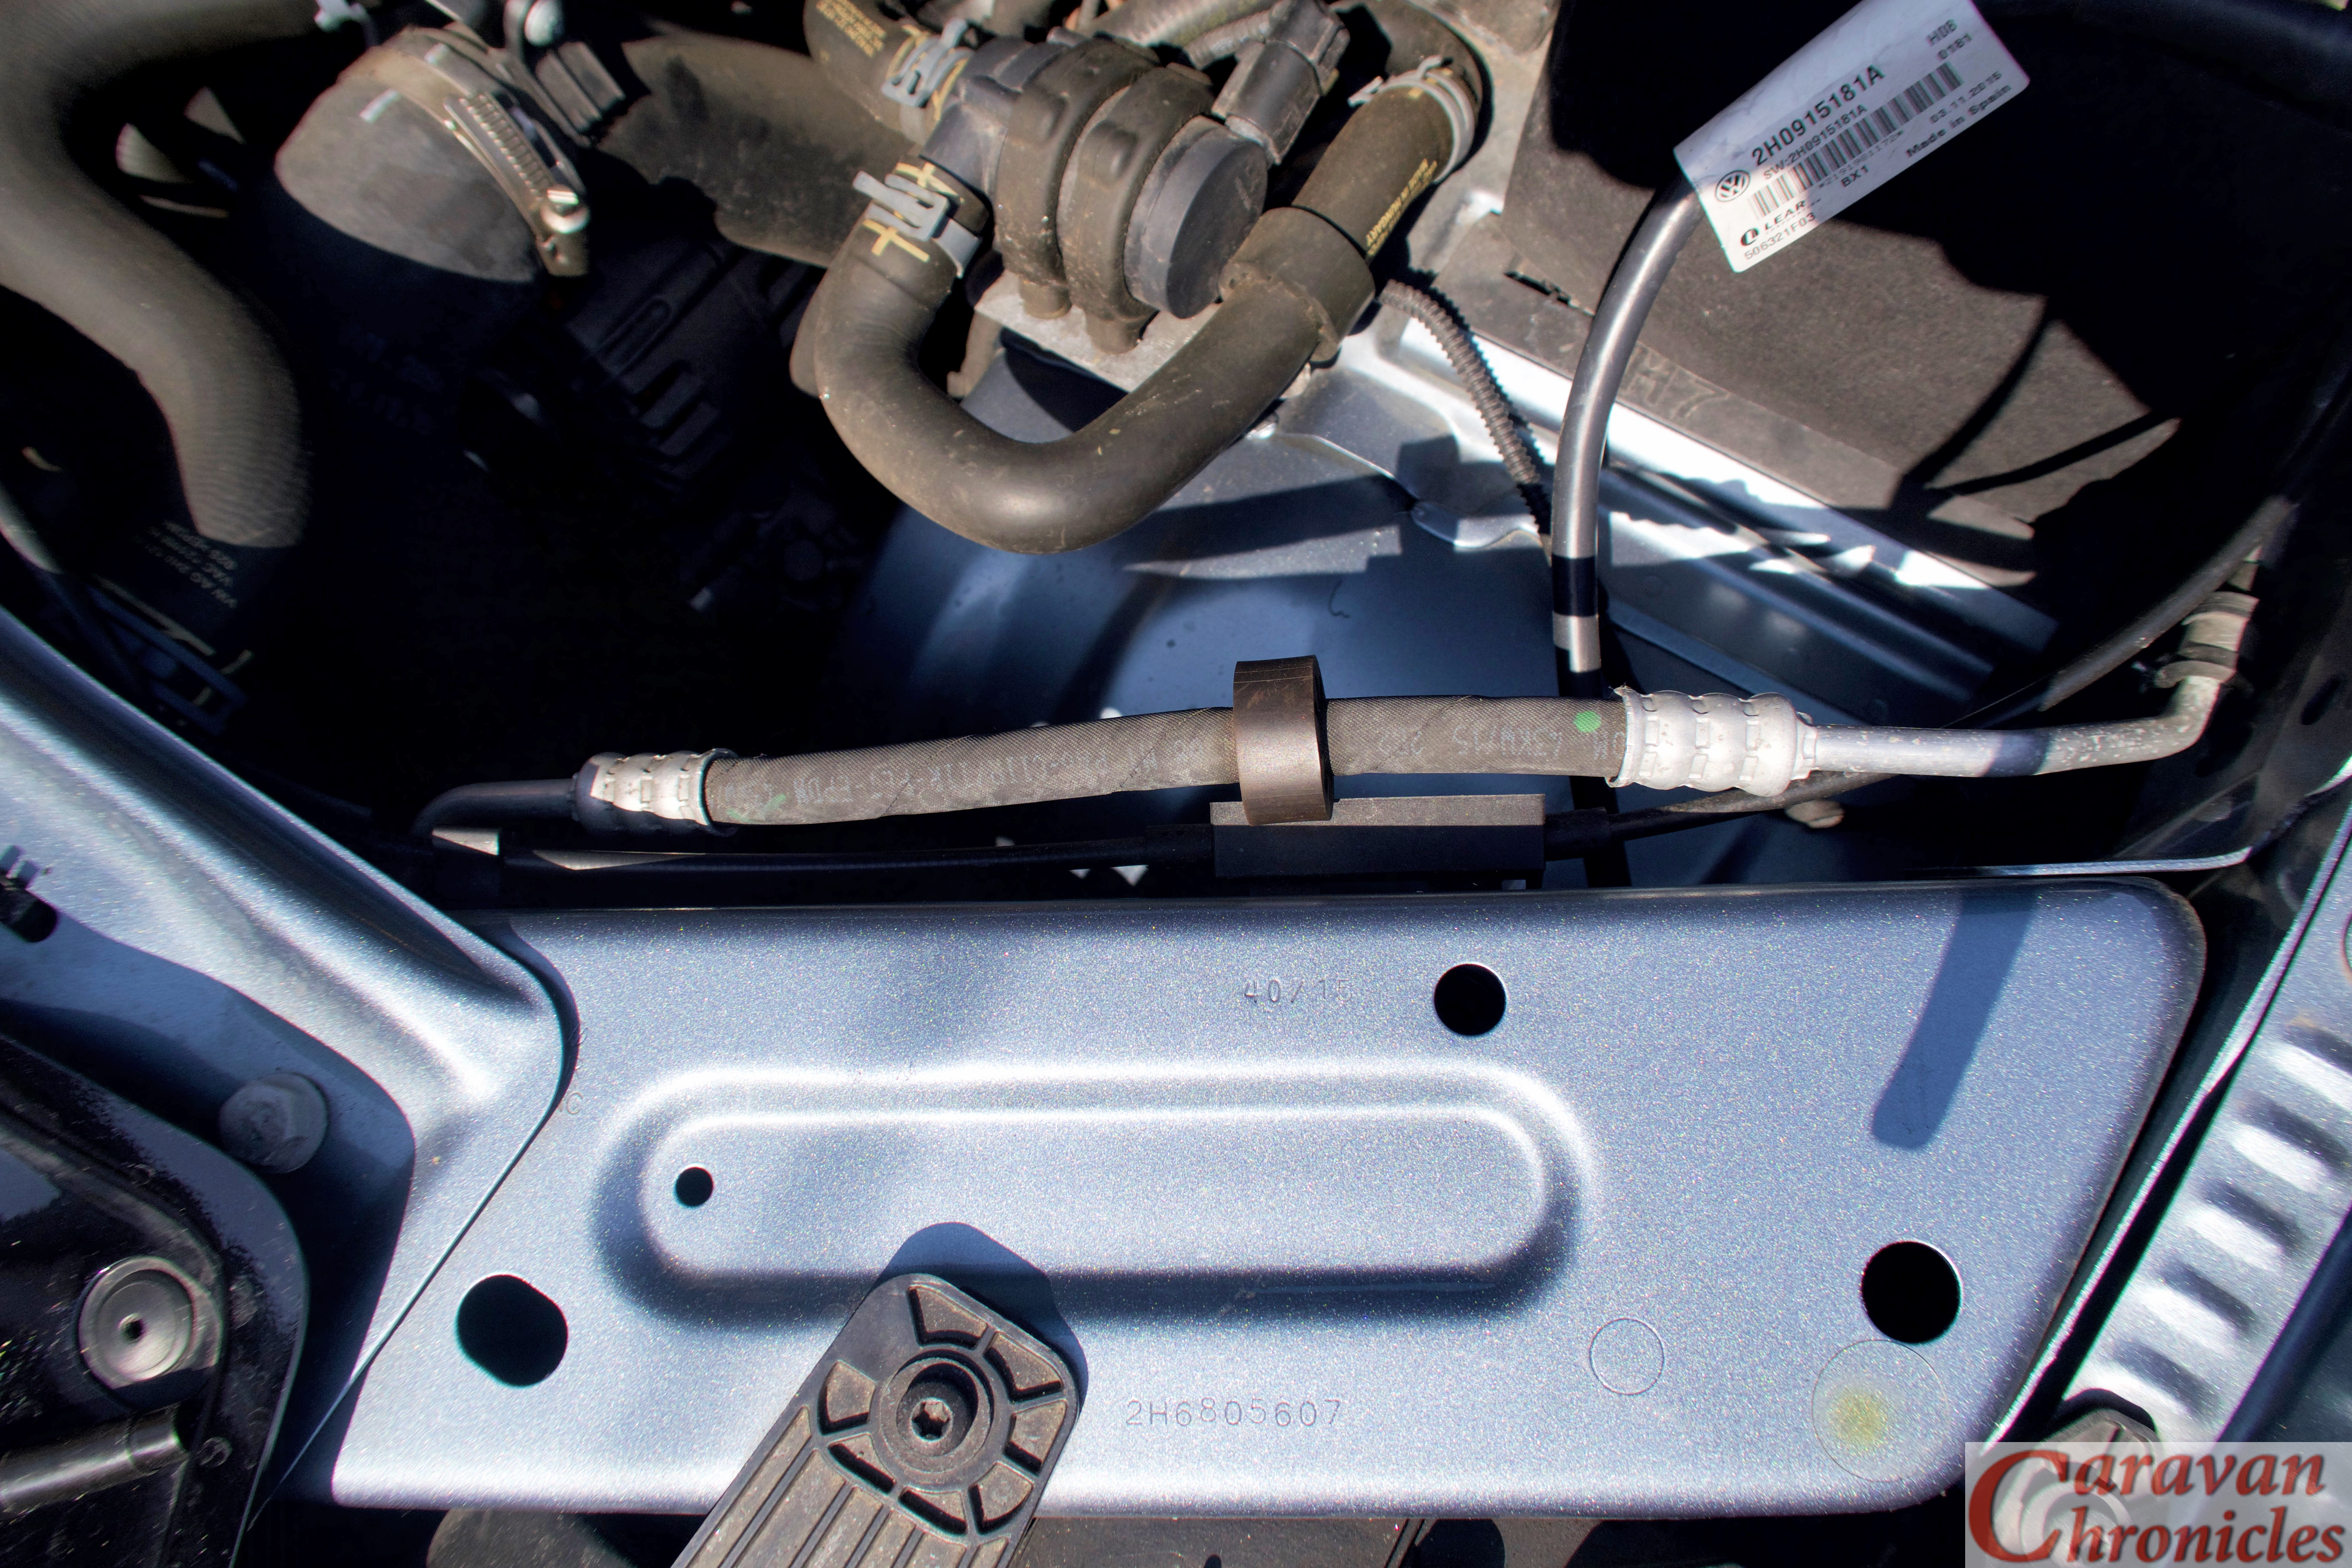
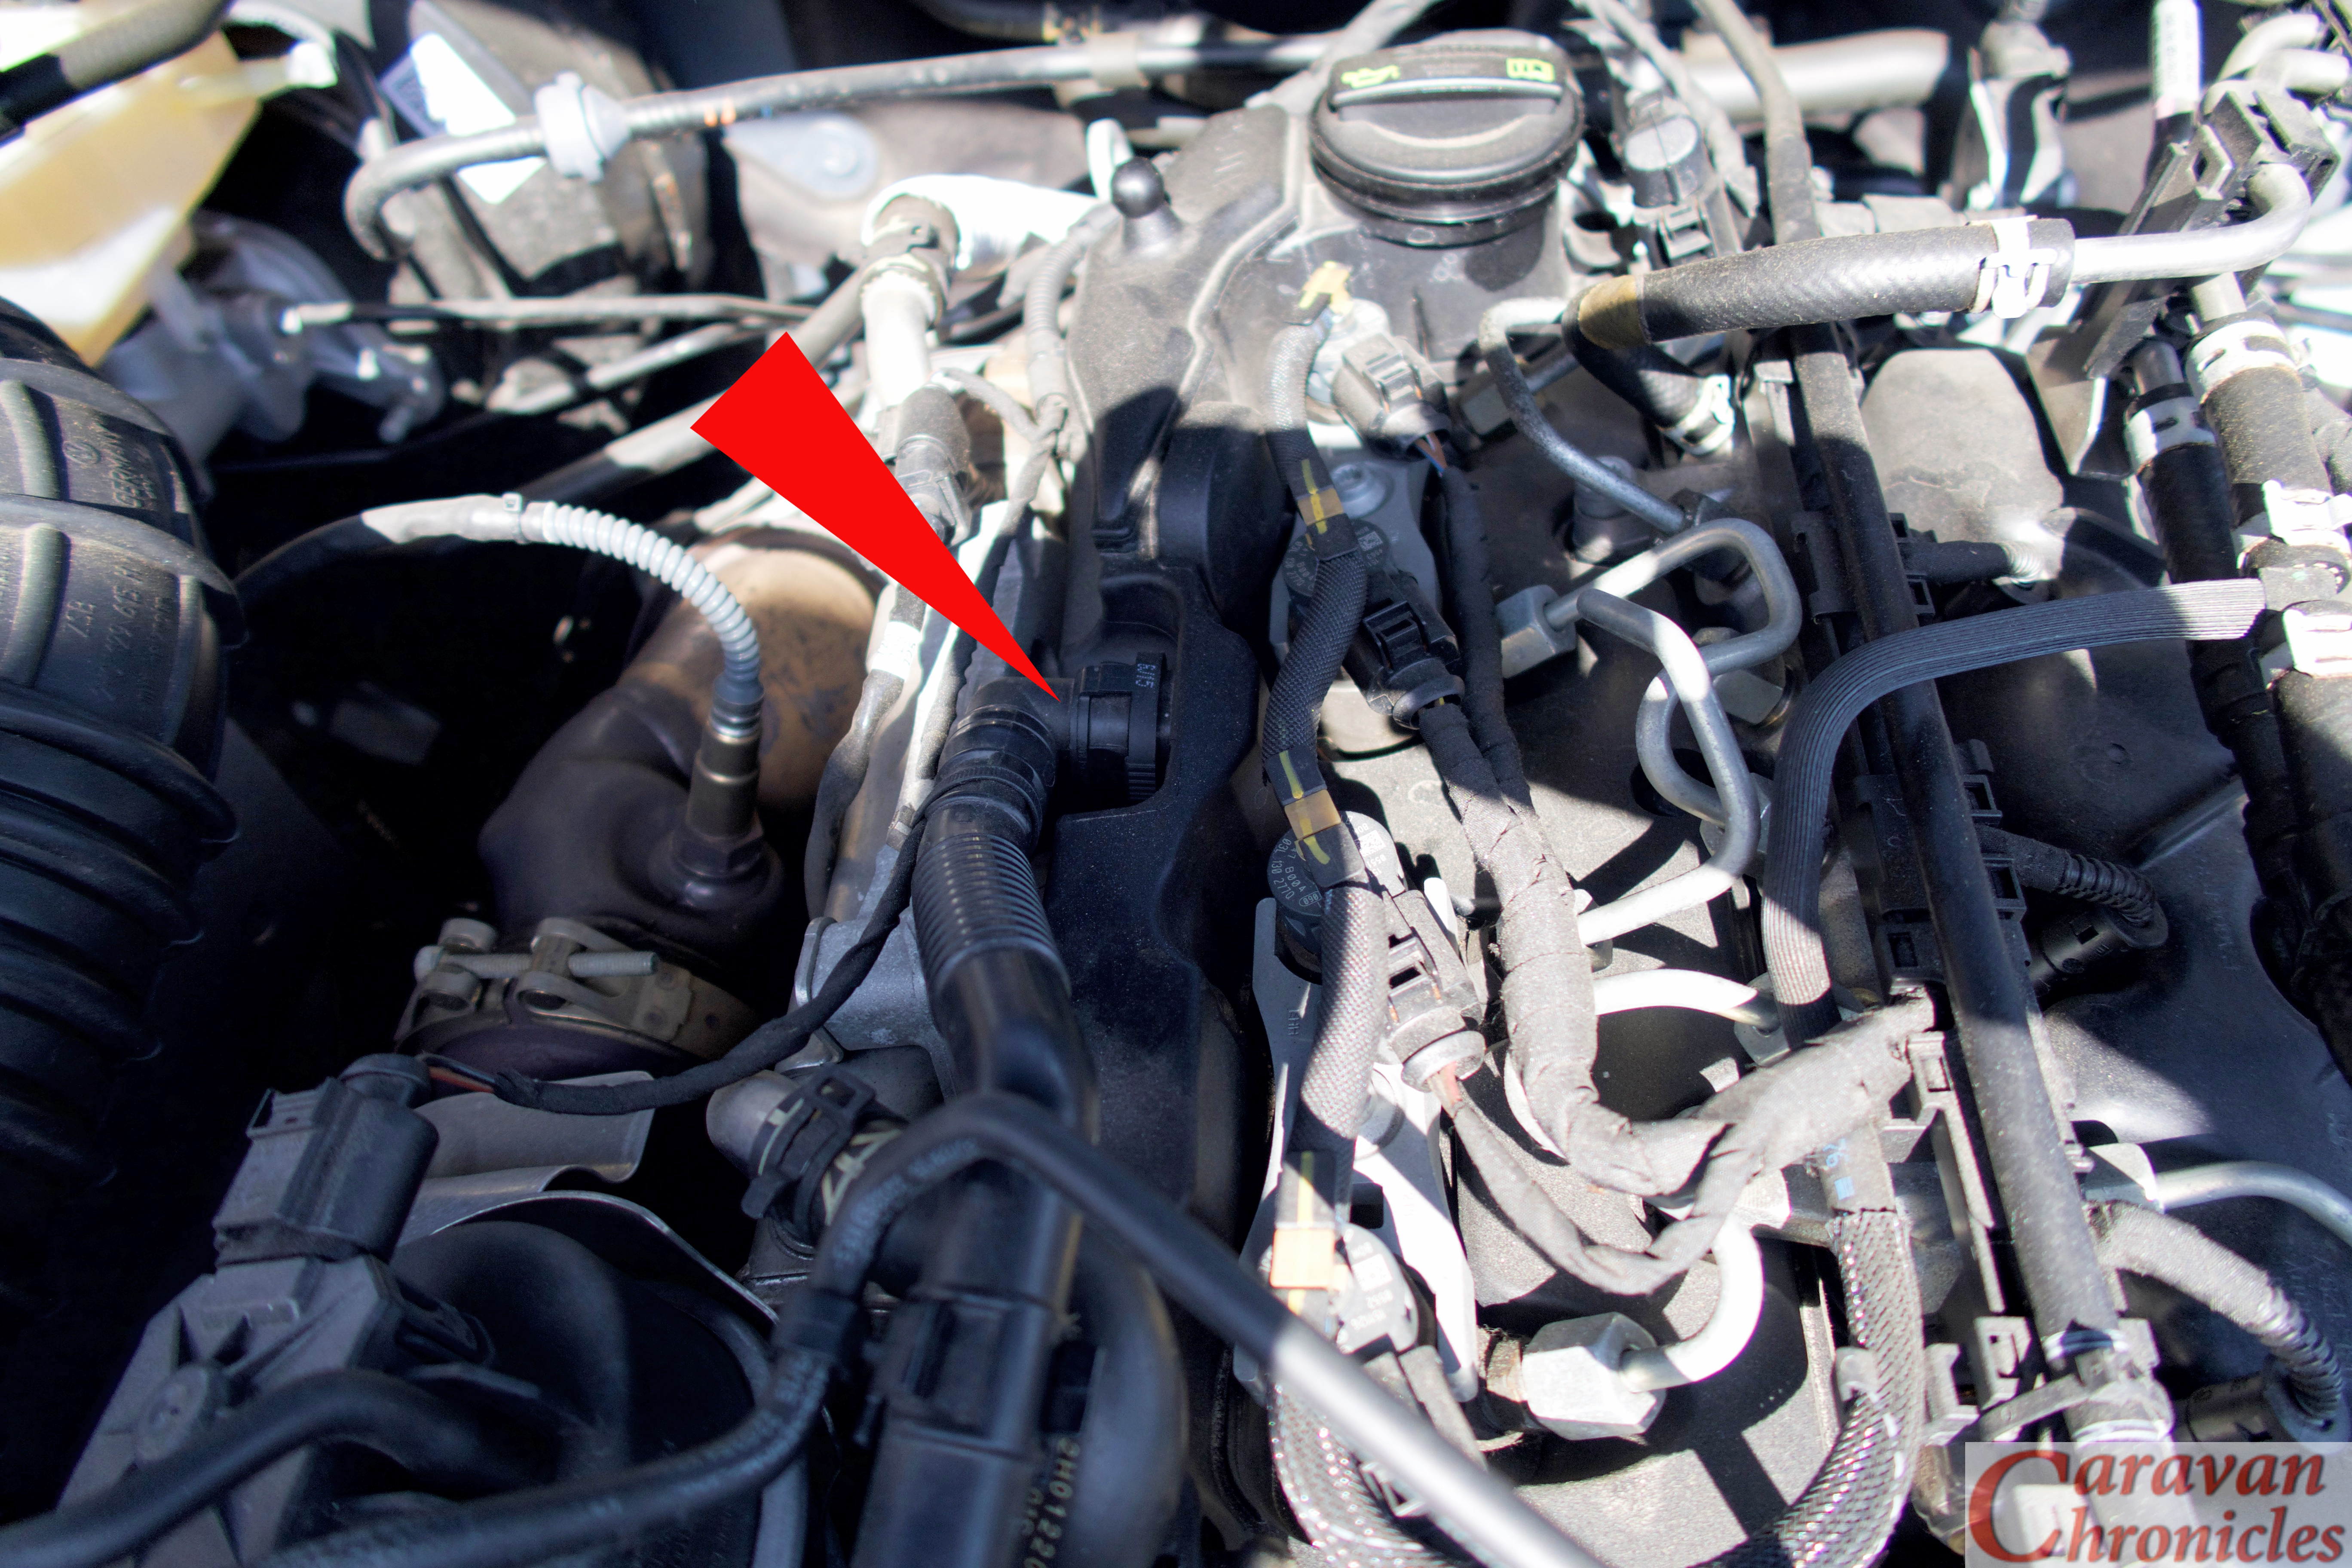
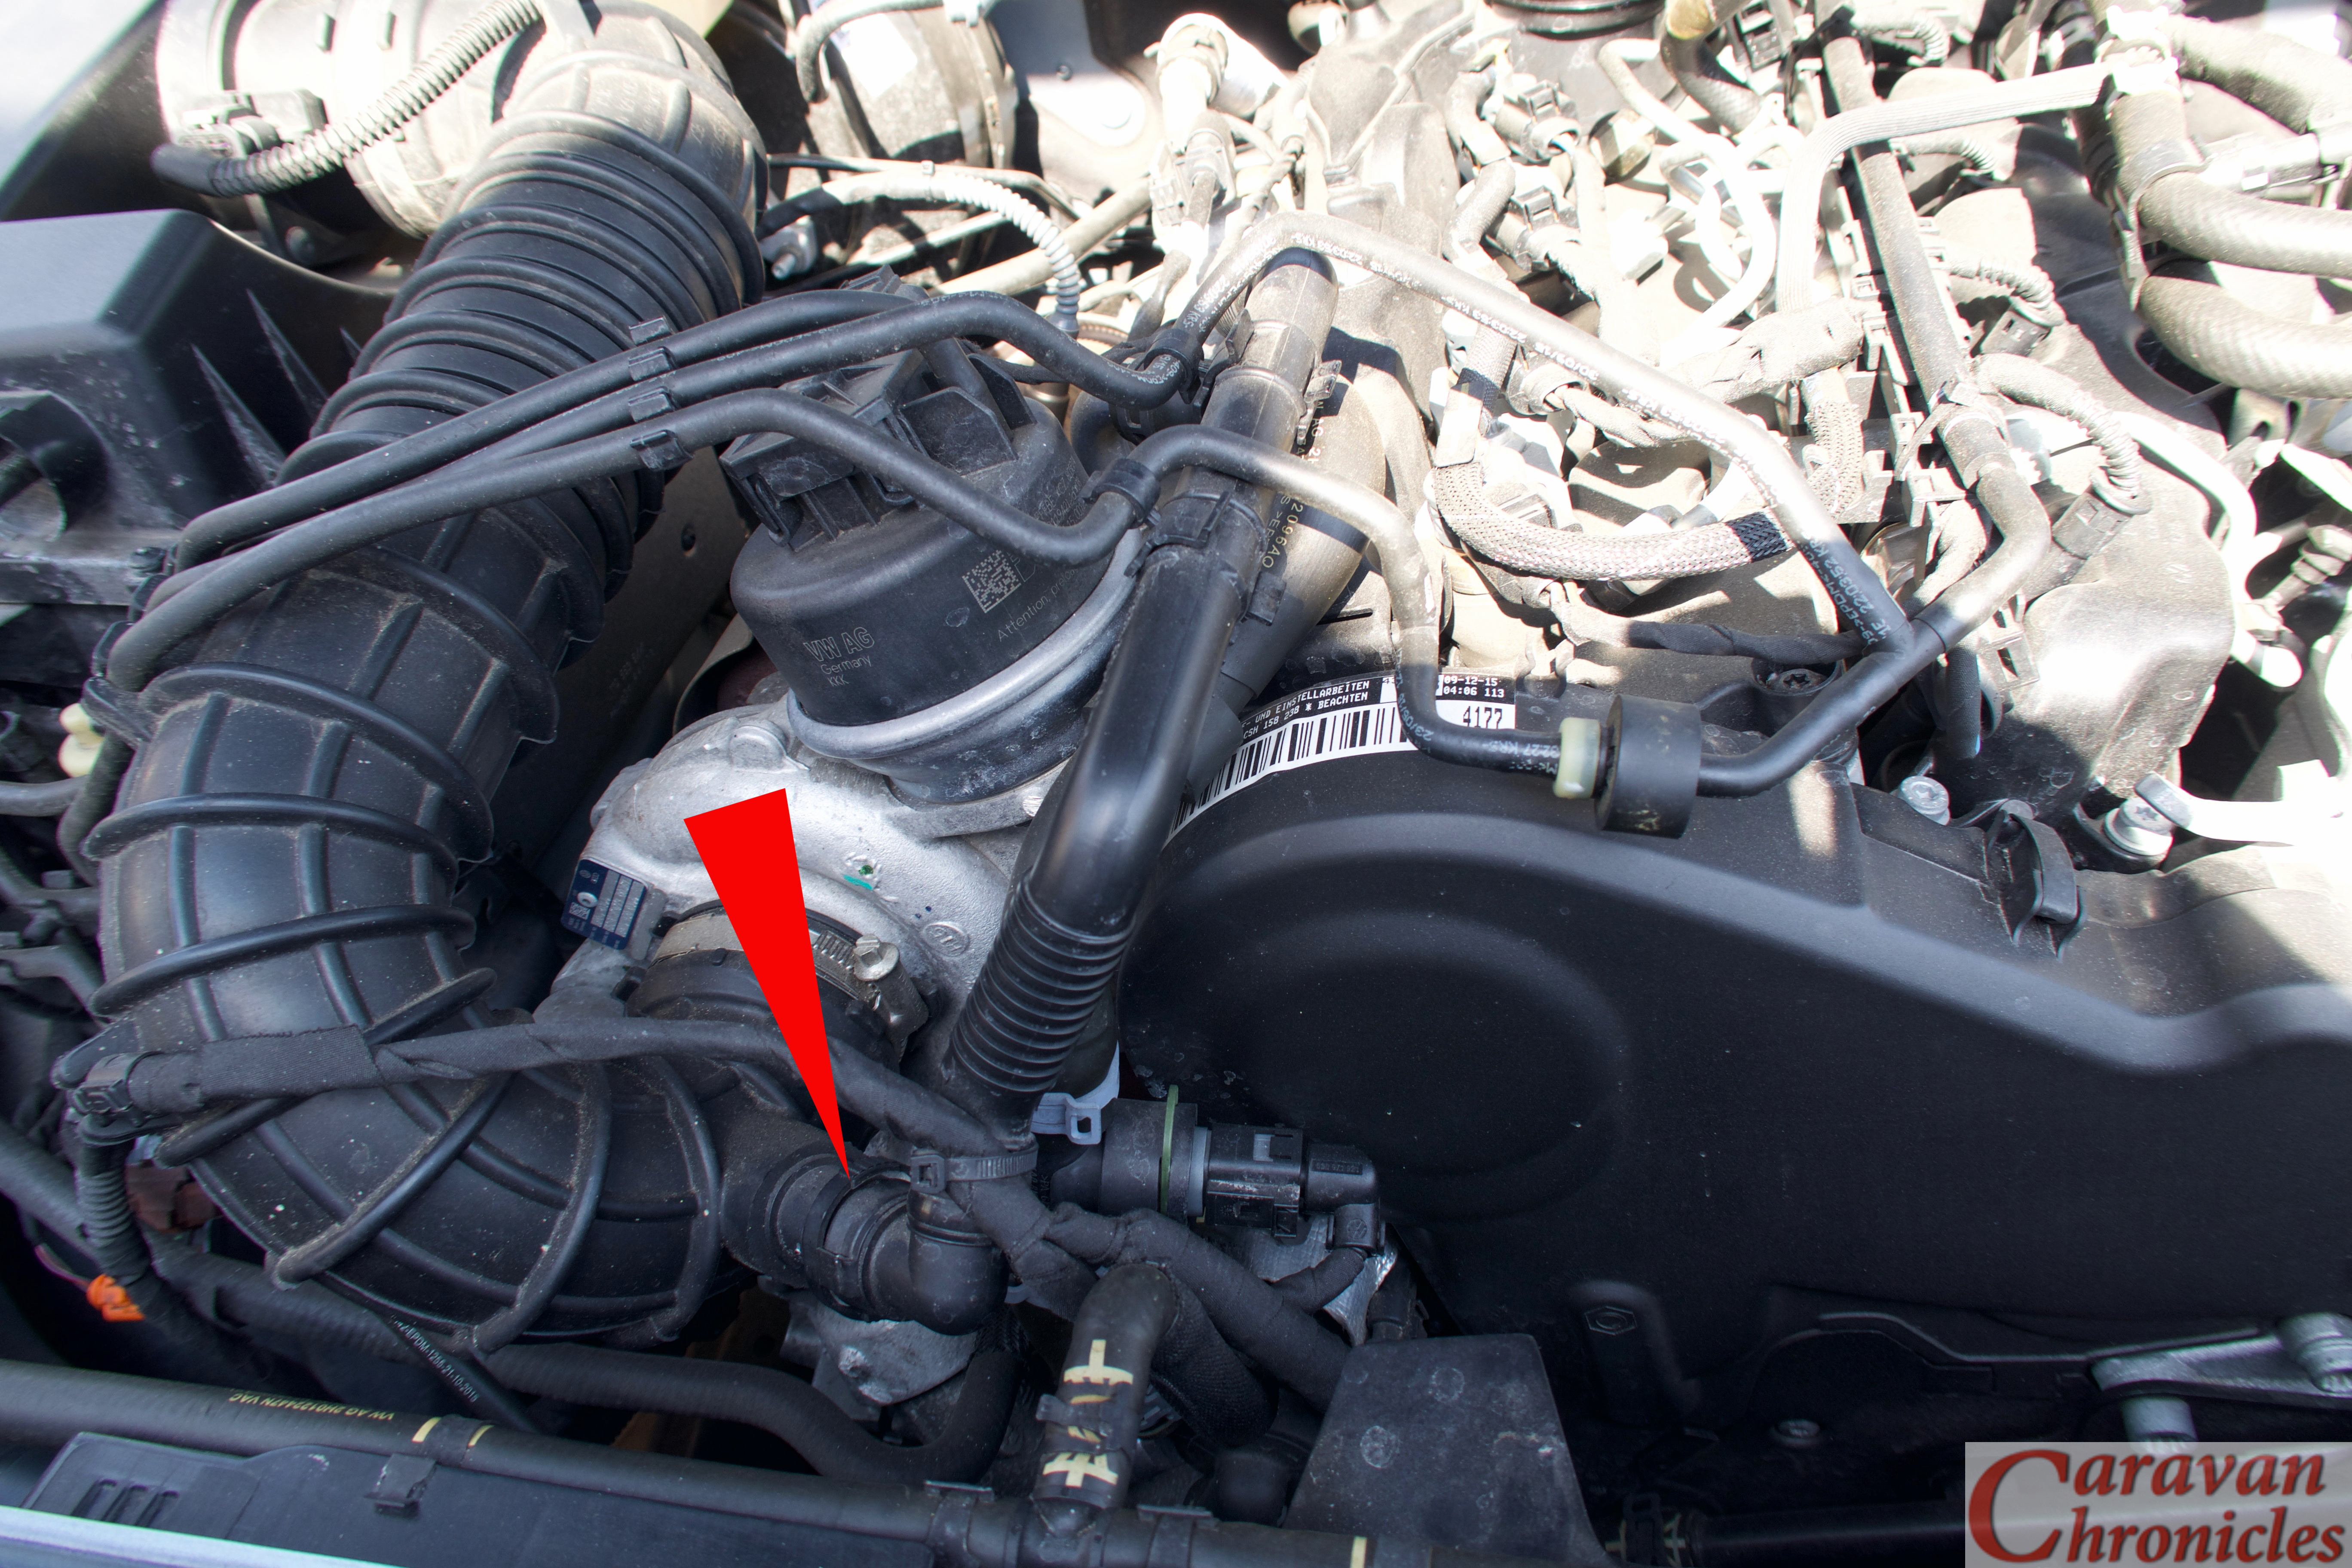
This would also allow the two pipes… one from the crank case pressure release port (left below) and the return to one of the turbo inlet ports (right below) could take a short route from the ProVent across the front of the engine and would give me a couple of suitable points to mount supports for the pipes.
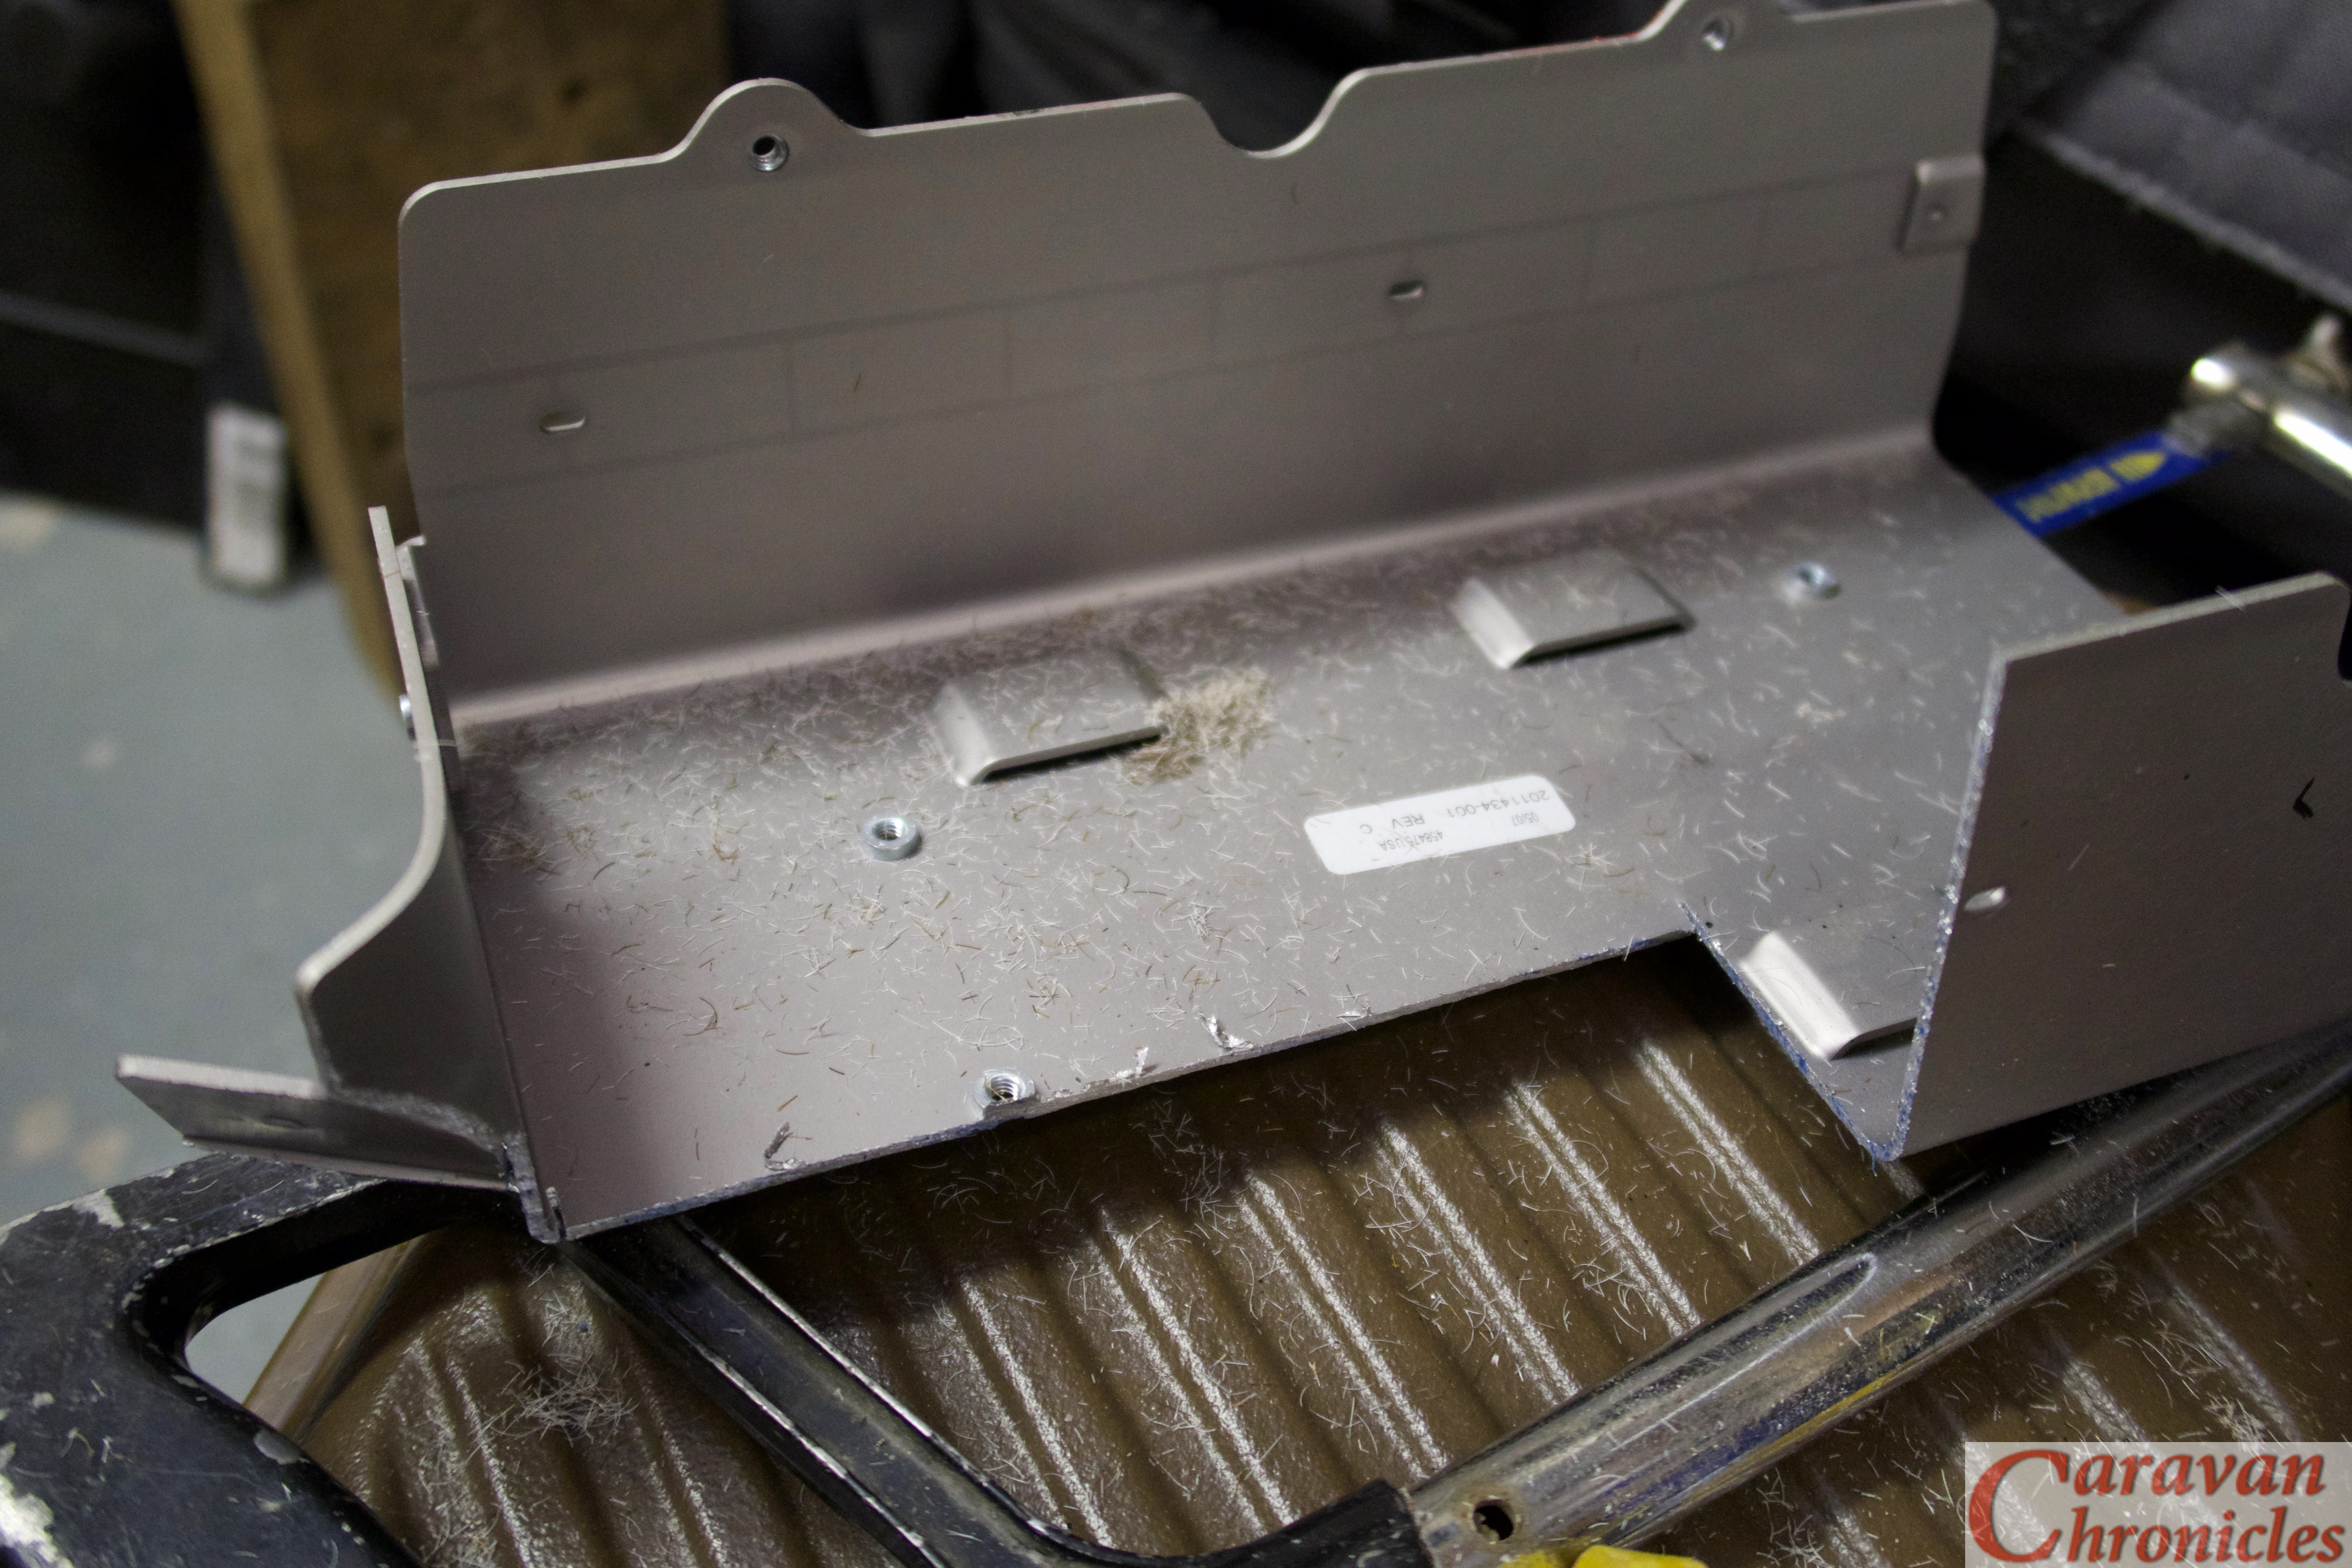
I needed to manufacture a bracket that mounted to the top cross rail and went over the air-con hose and bonnet release cable just below it. As luck would have it in my scrap metal bin I had the chassis from on old bit of electrical kit that was made out of aluminium and looked like it would do the job.
Cutting a section off, filing down the edges and drilling mounting holes didn’t take too long and that was followed up by a coat of etch primer and a couple of coats of high temperature gloss black (I only used that as I had a spare can from a previous job!)
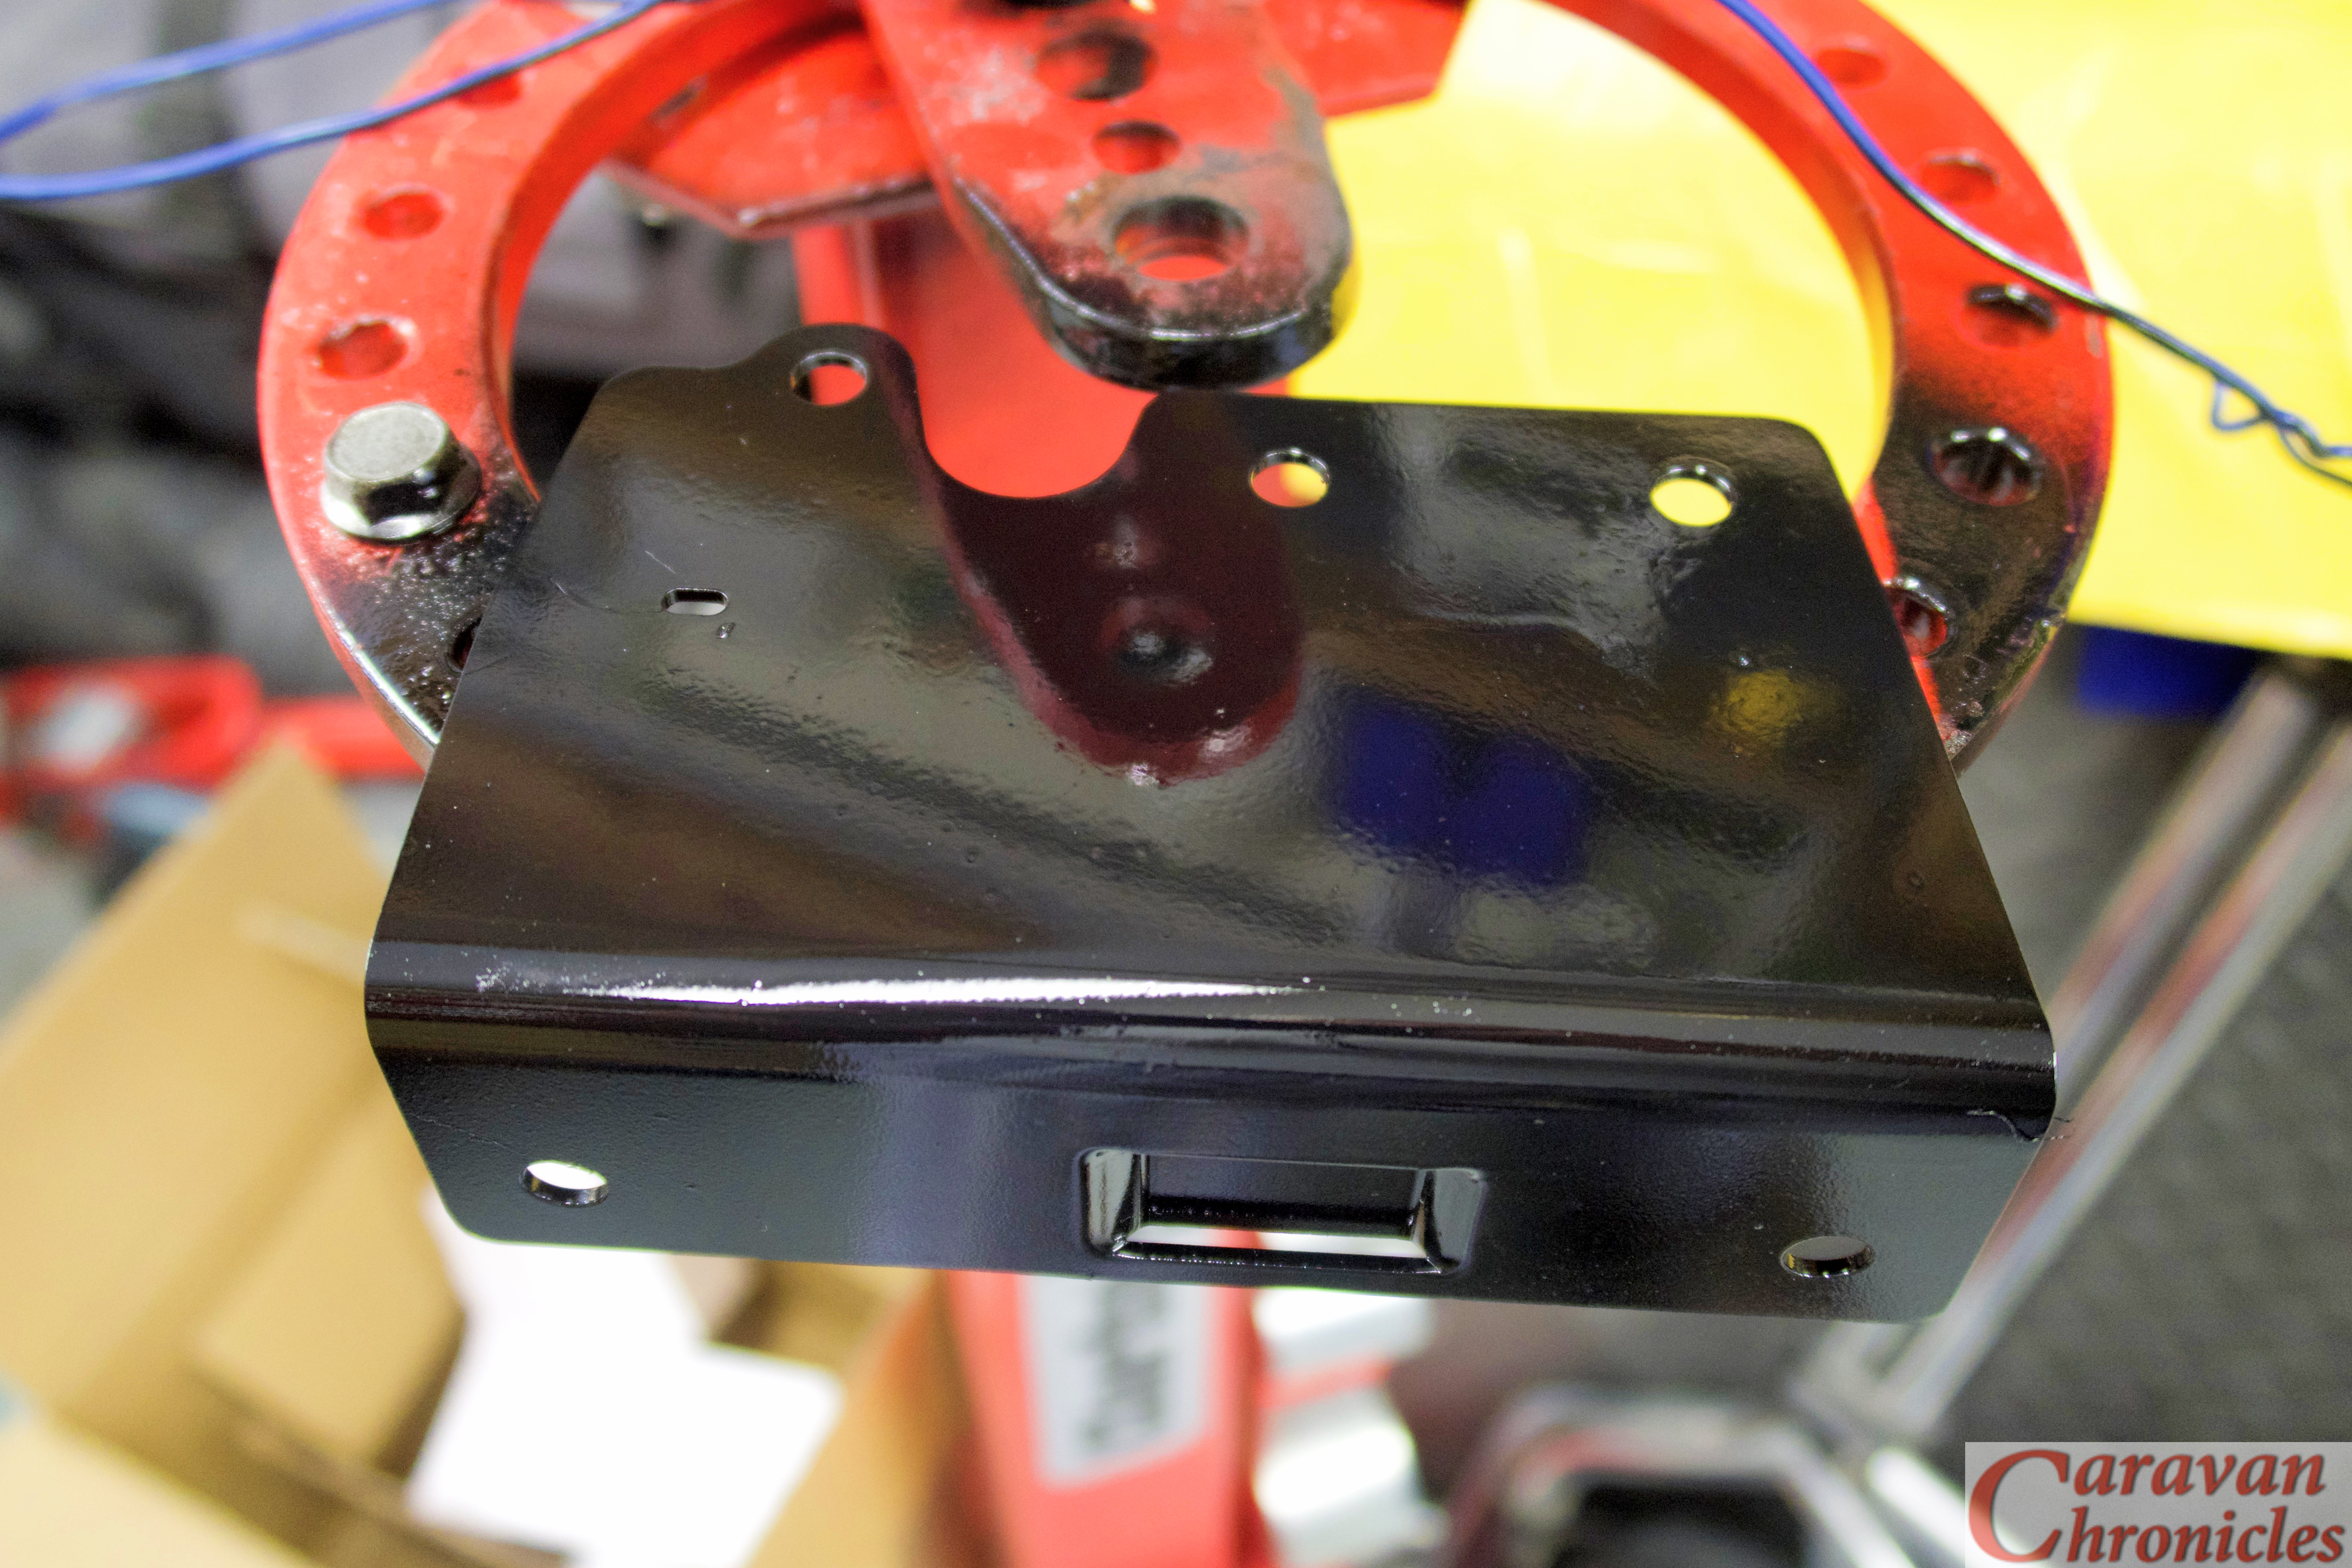
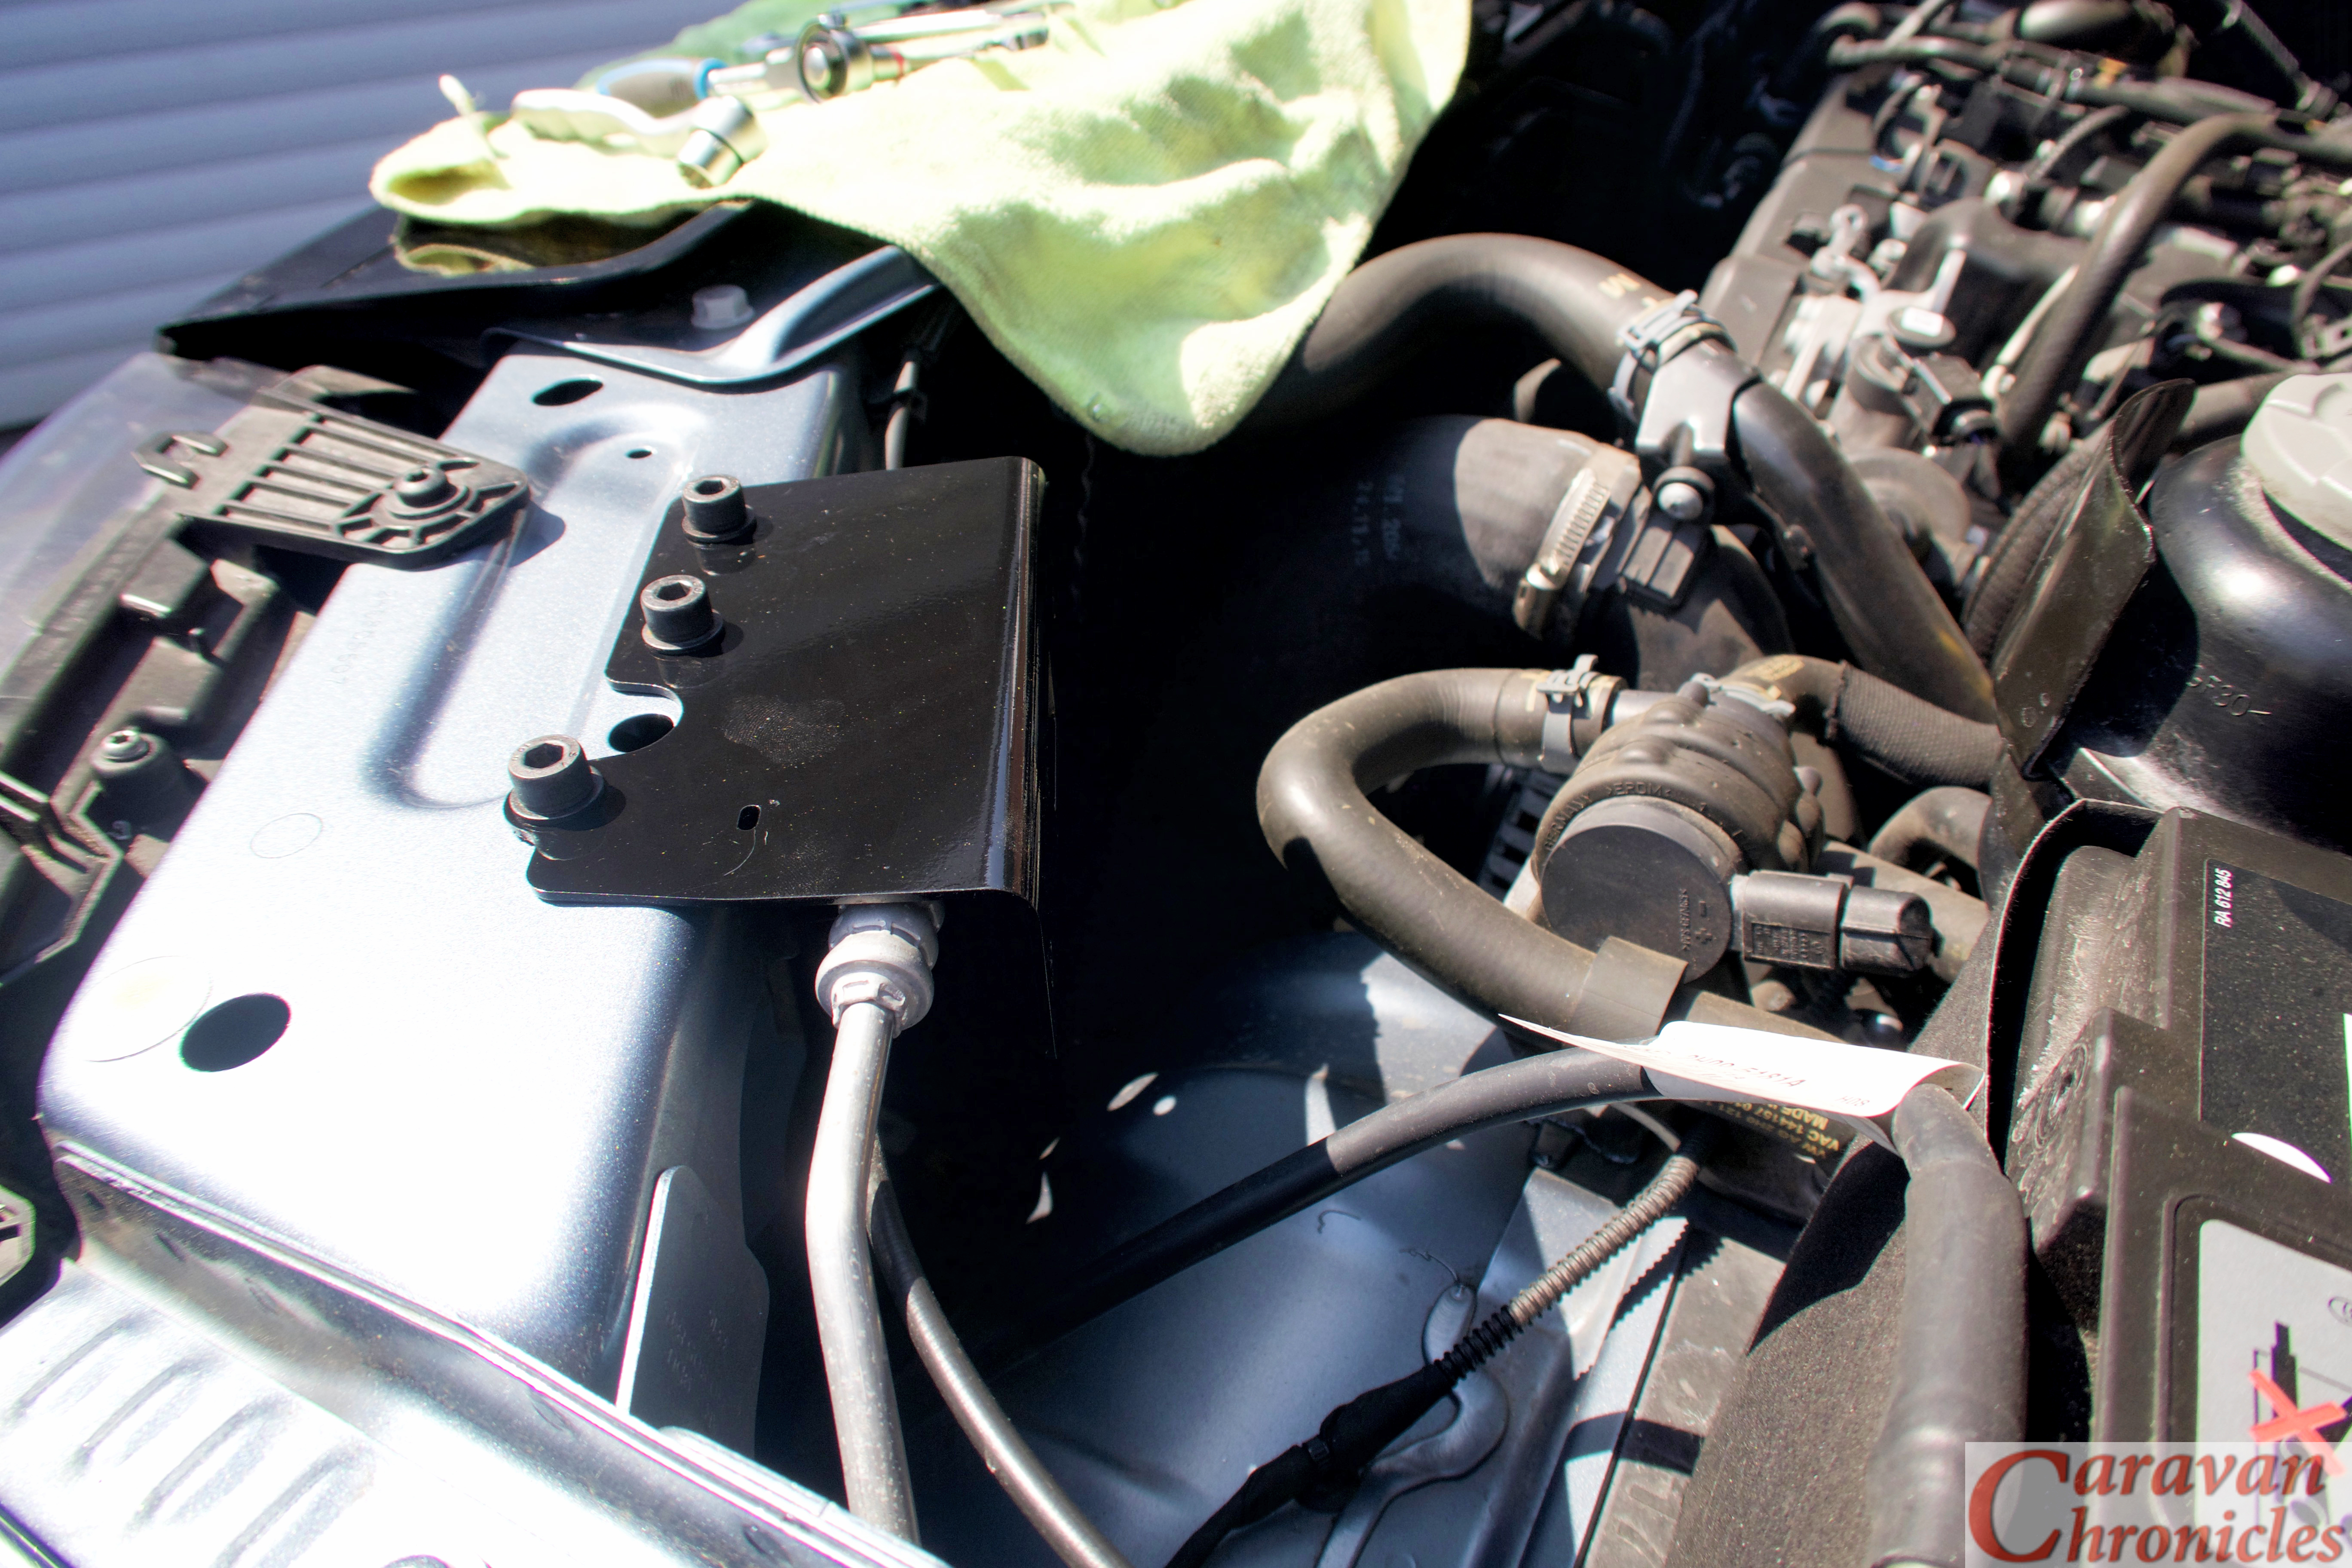
Fitting was fairly easy…. and no, they will not be the final bolts!
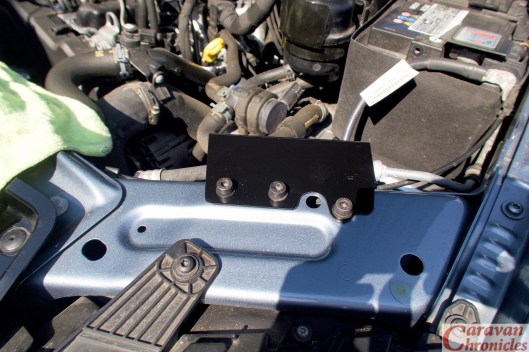
Marking and drilling three holes, followed by a couple of coats of metal protector to stop the edges of the holes rusting soon had the bracket in place. If you are wondering why the shape… well it came like that when I cut it off the scrap chassis, but quite by chance it allowed access to the hole which is access to the headlight adjuster screw.
Mounting the ProVent was now simple enough…

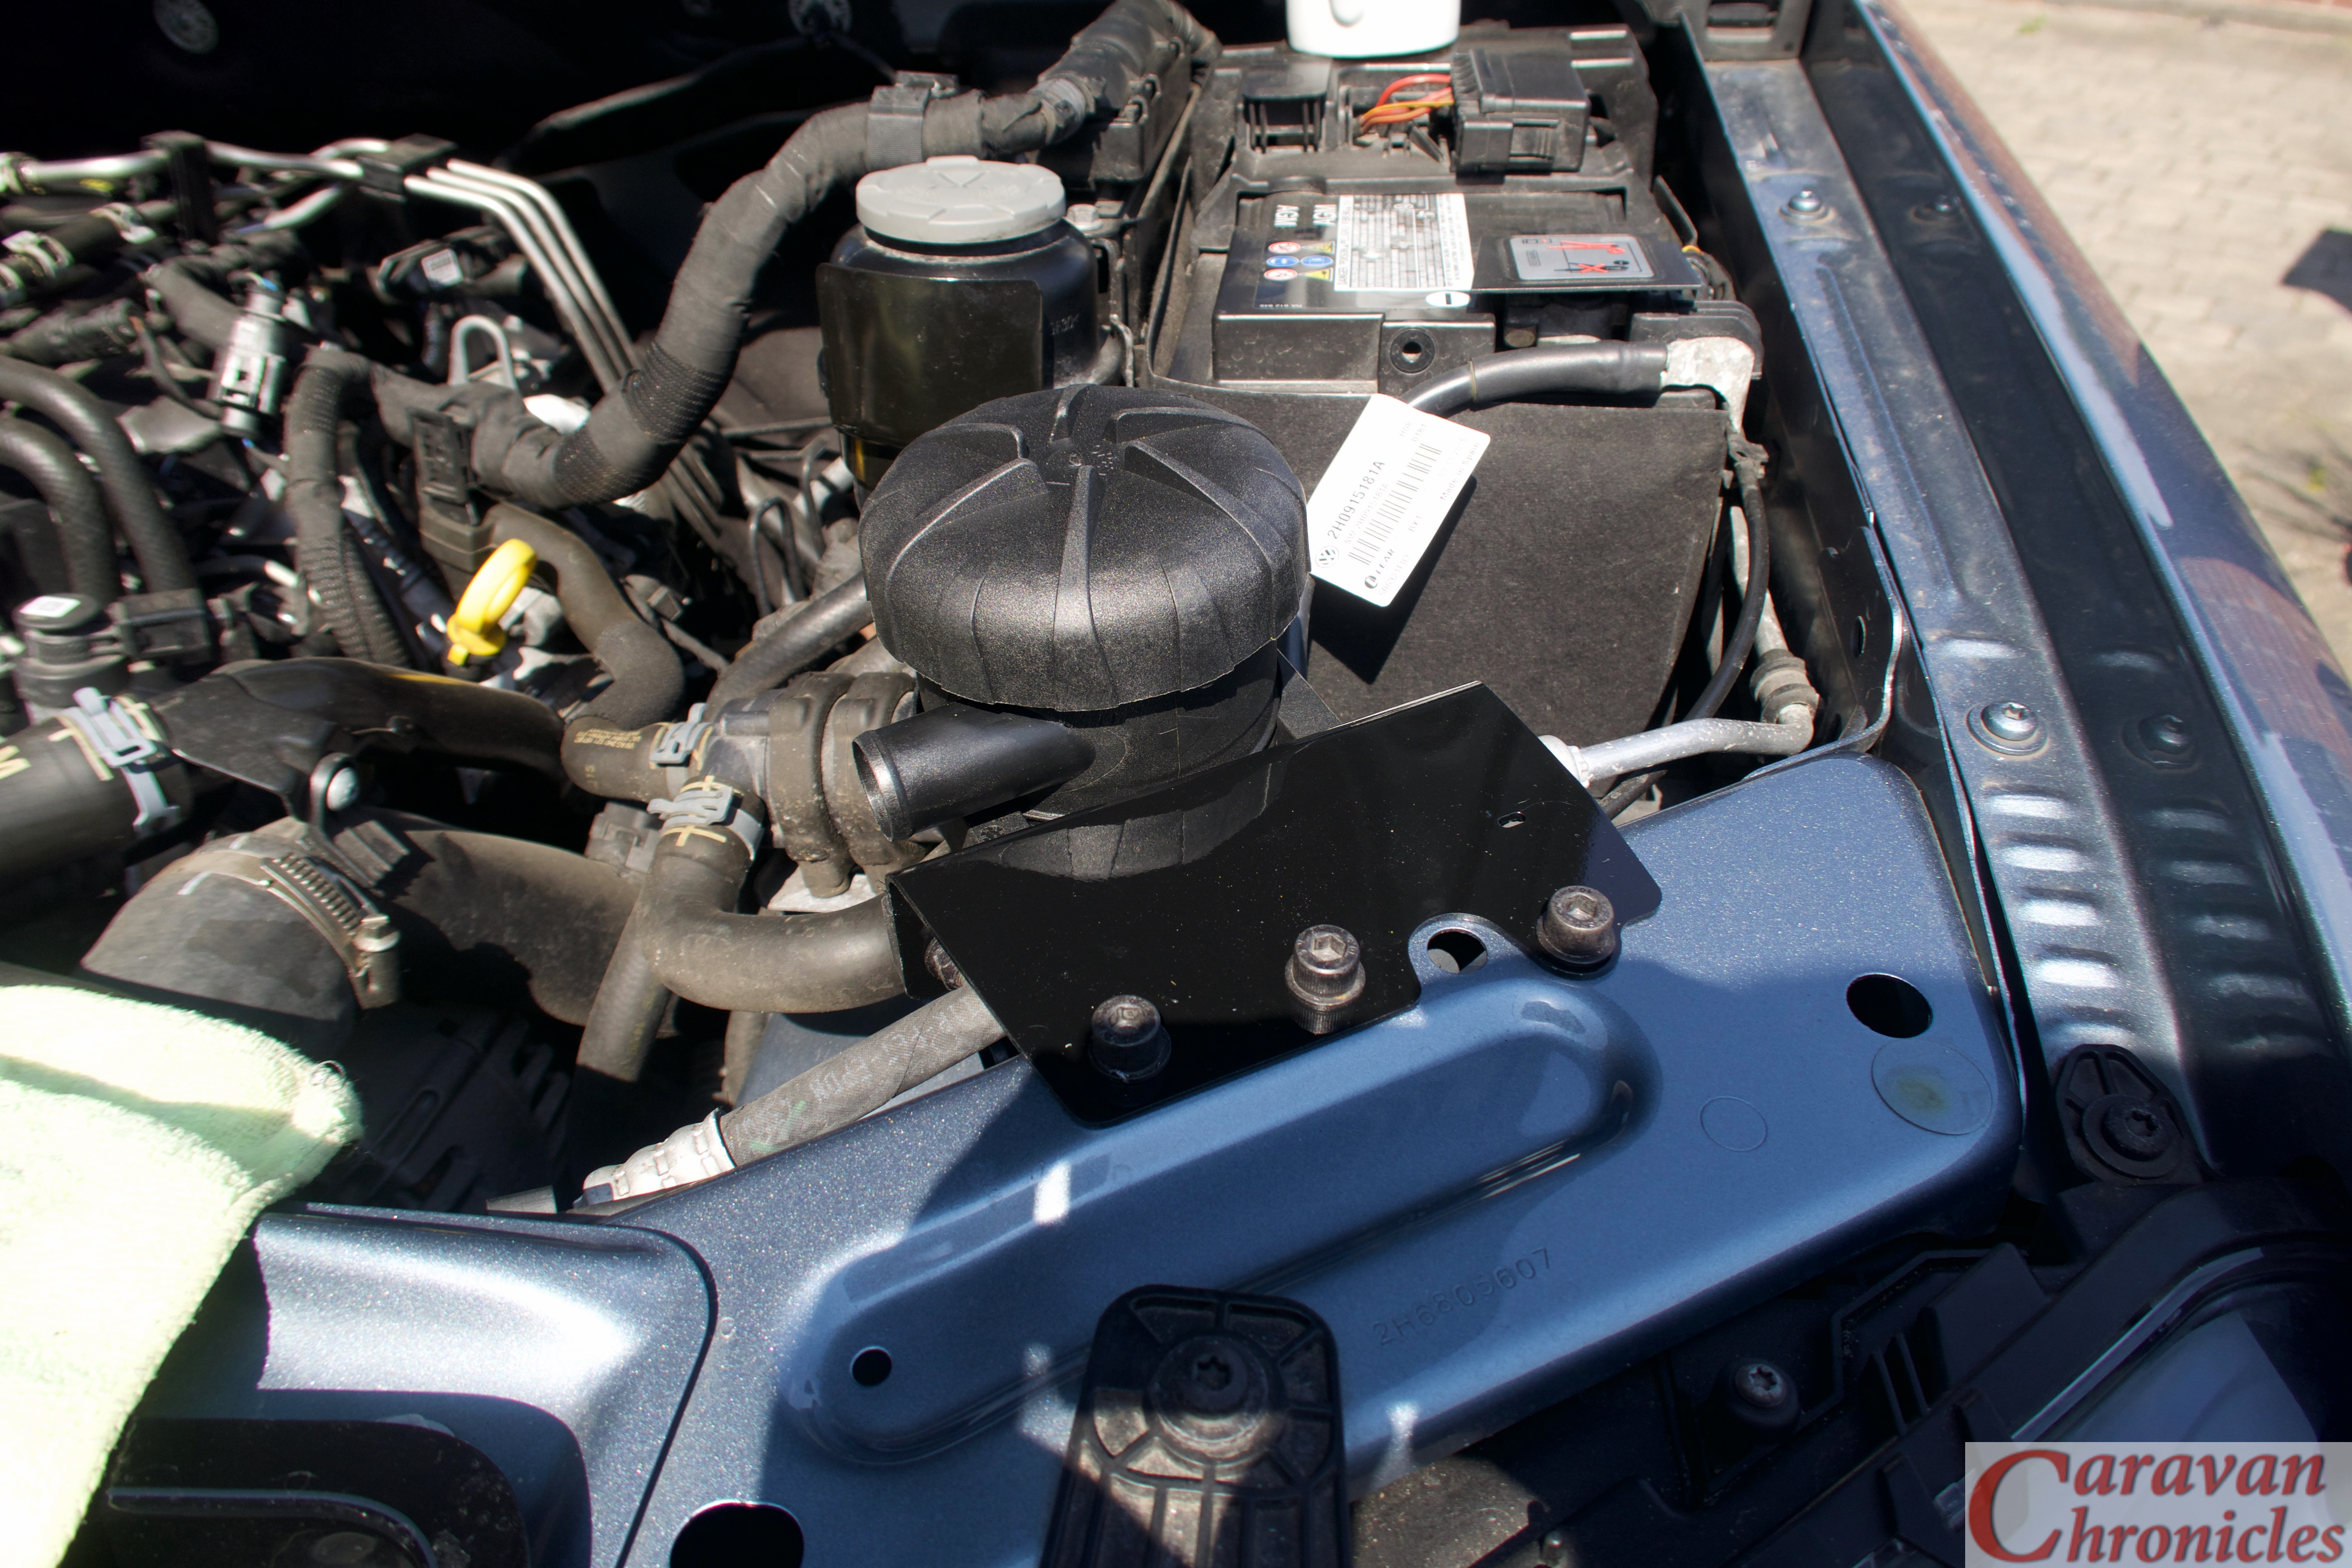
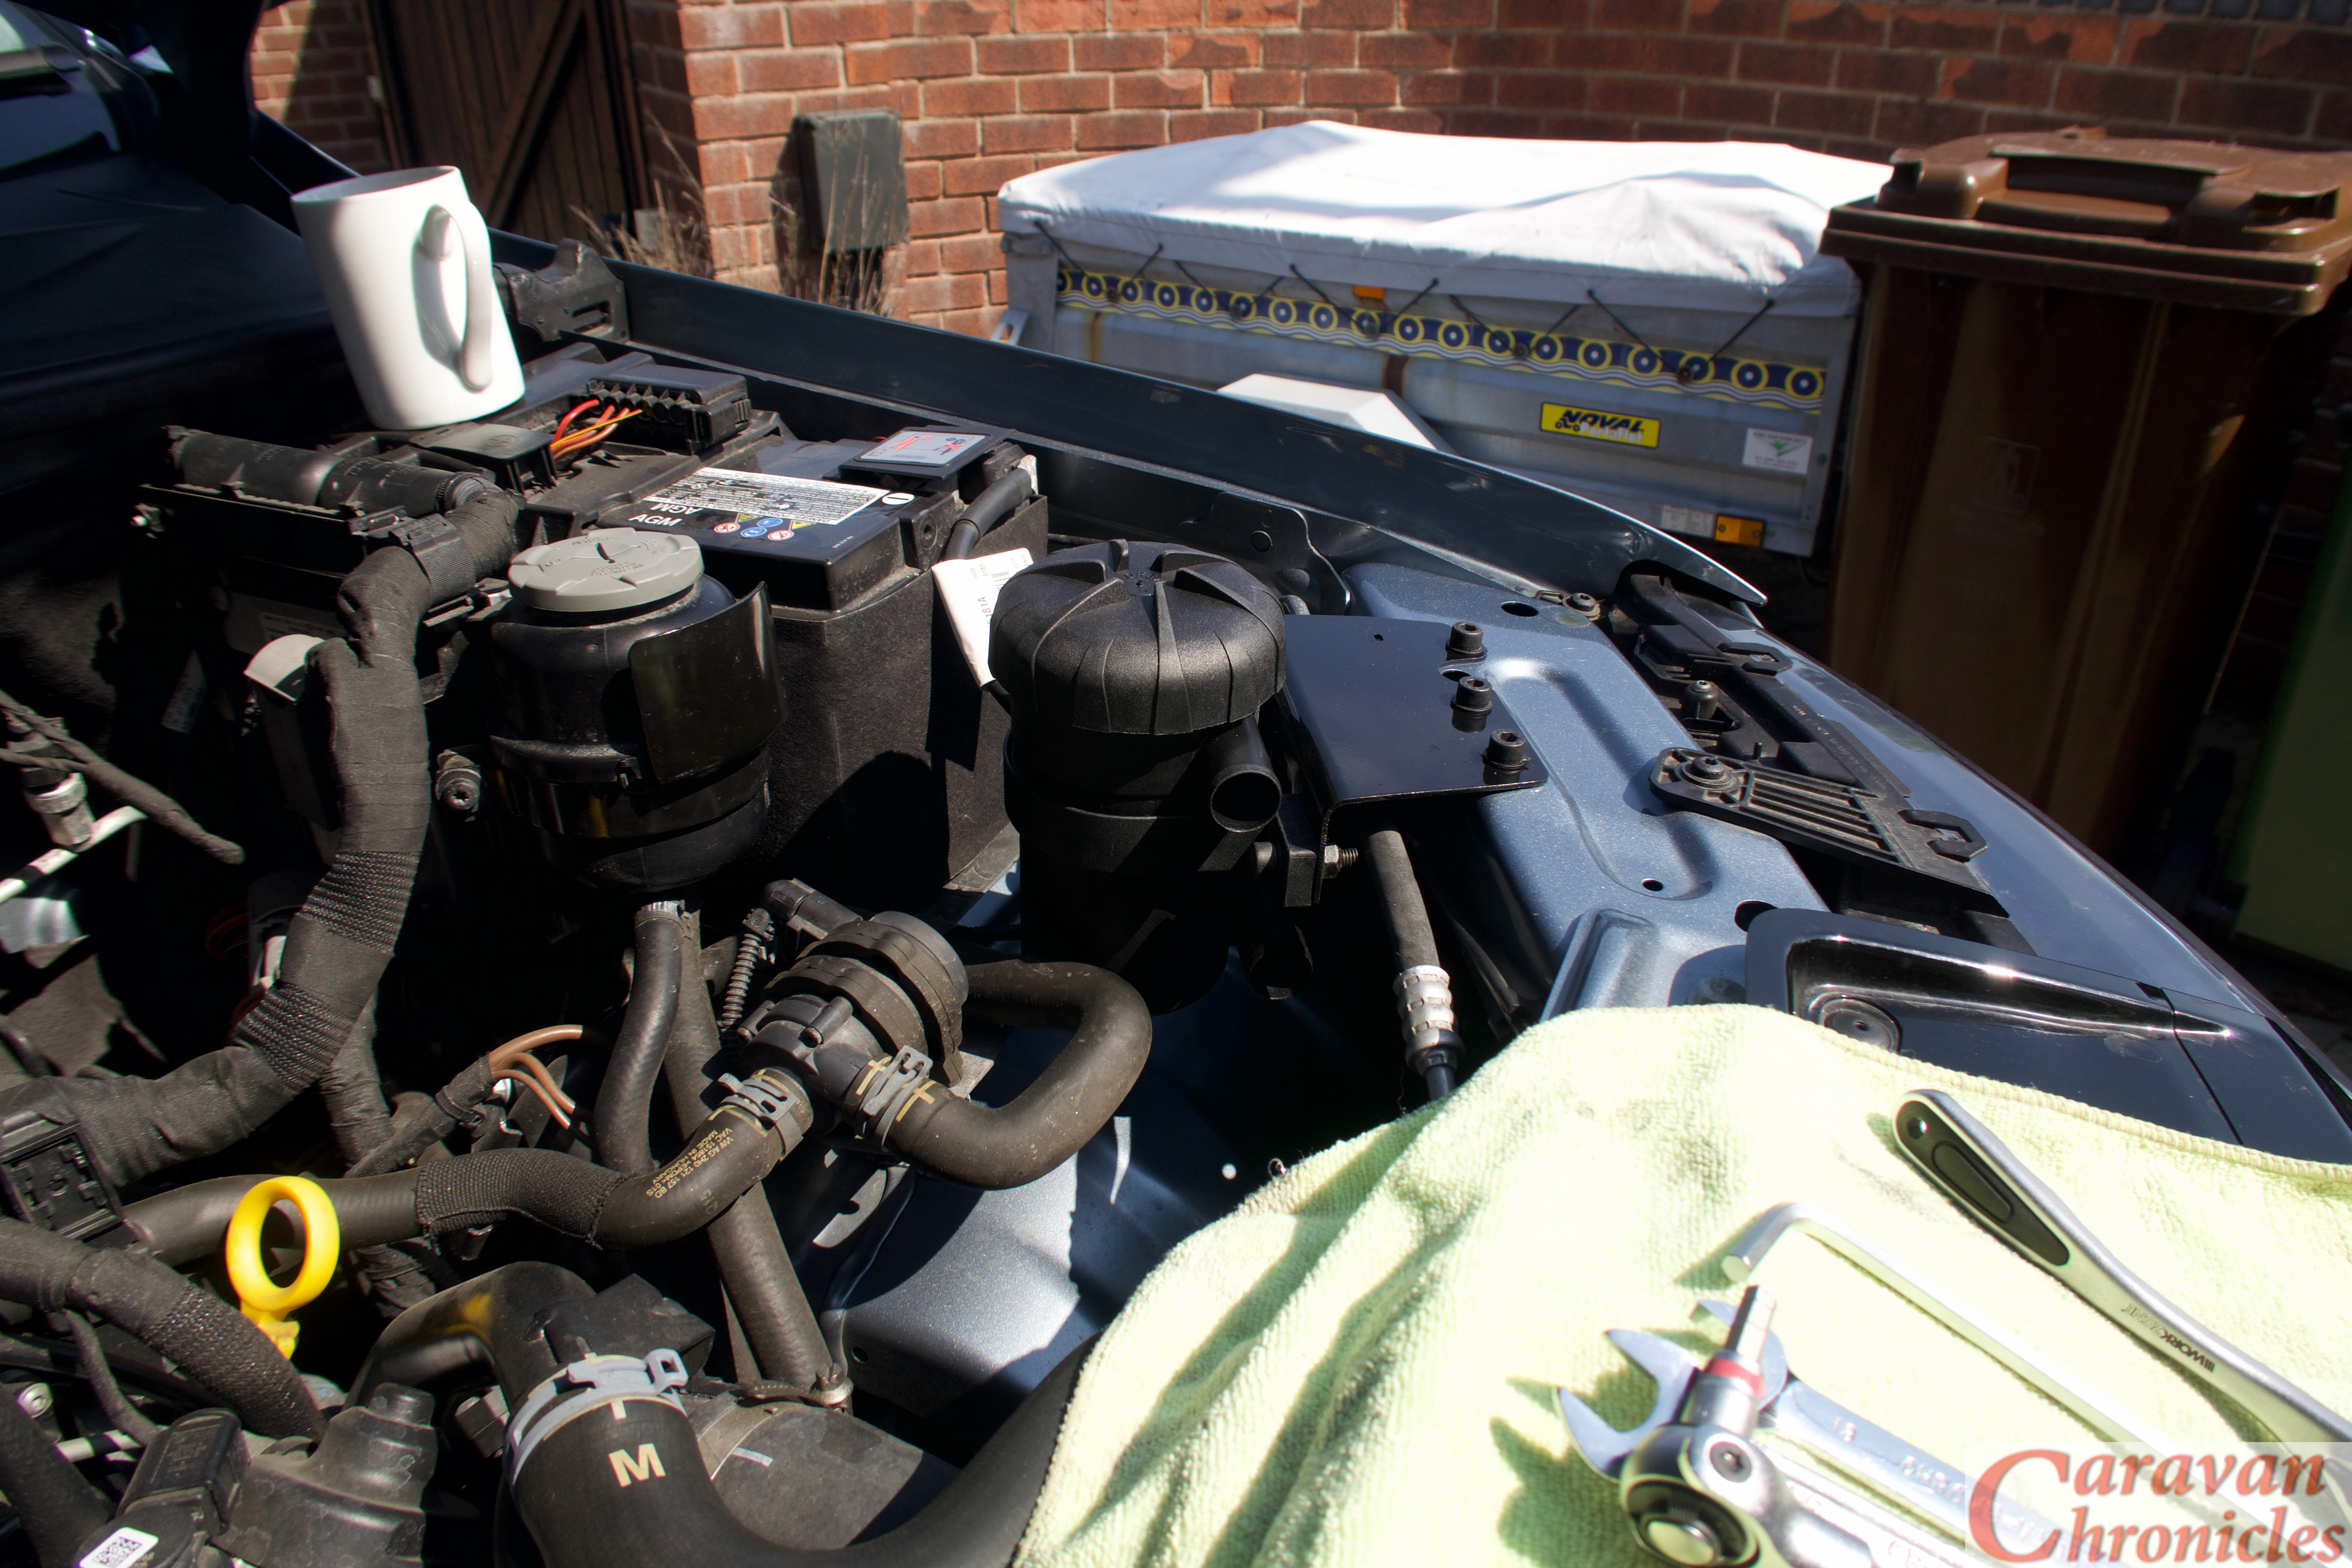
It was at this point I stopped. I didn’t like the way it covered the air-con pipe. There was little chance of it rubbing, the pipe already had a big rubber ring on it to stop chafing against the front cross beam or the bonnet release cable. I also now could not get to the bonnet release cable. The mount covered the point where there was a lubrication and connection block for it. It just wasn’t good engineering design. IKB would be shaking his head and wafting his cigar around in dissatisfaction..
Back to the bat cave. Time for a rethink and to hone my skills in sheet metal origami.
I would like to thank Charles at HumbleMechanic.com for all the information and videos he produces about VW vehicles. Charles has been an absolute gold mine of information for all things VW and if you drive any of VW’s vehicles please be sure to drop in on his YouTube channel and take a look.
That’s it for the moment… off to Wirral Country Park Caravan & Motorhome Club site for 4 days R & R.
Be right back after the break…..

Pingback: How’ve We Been Getting On With Our Catch Can? | Caravan Chronicles
I want to say that about this blog it’s a very amazing blog . It,s so useful to us. Thanks for such a great information provided to us.
Pingback: Catch Me If You Can… Part 2 | Caravan Chronicles
Seems a good idea however I wonder if it would on a vehicle and does not have a DPF fitted and reduce emissions? Apparently there has been a breakthrough on tis . See https://www.express.co.uk/life-style/cars/935485/diesel-cars-UK-technology-remove-emissions-pollutants
Hi Ian
Maybe a solution… but how long before it becomes a option or standard on vehicles?
Being selfish, I wanted something that would help maintain the longevity of my engine and eliminate or at least reduce unforeseen future expenditure related to service costs associated with recirculating crank cases gasses…. in the expectation I will run the engine to about 100,000 miles (same as our 12 year old Freelander currently) and help make a difference at the same time.
“Catch Cans” have been used ‘down under’ for a lot of years now and looking at some of the YouTube posts (ok I know that it can’t be taken as empirical evidence) about how much oil has been collected from as little as 6000Kms of driving… at least it is in a container not the atmosphere.
Thanks Simon. Not being mechanically minded I am not sure if it can be fitted to my Jeep as cannot afford at this time to change vehicles and it seems to be a good idea
.
If you have a Grand Cherokee… https://www.youtube.com/watch?v=UPBPNN5RGlU