Like any project, ticking the small stuff off a list is the way to move forward even if it seems like sometimes you have ground to a halt. A bit lacking on photos…. I’m temporarily unsure of their location… pilot speak for I’ve lost them! I’ll correct that in due course.
I built a new aluminium frame for the water pump and moved the pump from the original mounting position which caused a lot of noise when running, especially in the bathroom…. as we have a direct tank flush not a holding tank, this was particularly annoying if the loo was flushed at night. So now the water pump is mounted on its isolation feet on an isolated aluminium frame bolted directly to the sub-floor in one of the lockers. I also changed the piping from the pump from solid to flexible connections further reducing noise transmission through the pipes. My next step… some time this week is to install a larger one litre accumulator tank between the pump and plumbing to reduce the cycle times of the pump. Thankfully the plumbing system installed in the 5th wheel is rated for a greater pressure than most caravans and motorhomes… that’s what gives us a great shower!! so I’ll be able to match the accumulator pressure with the pump pressure to get the best out of them.
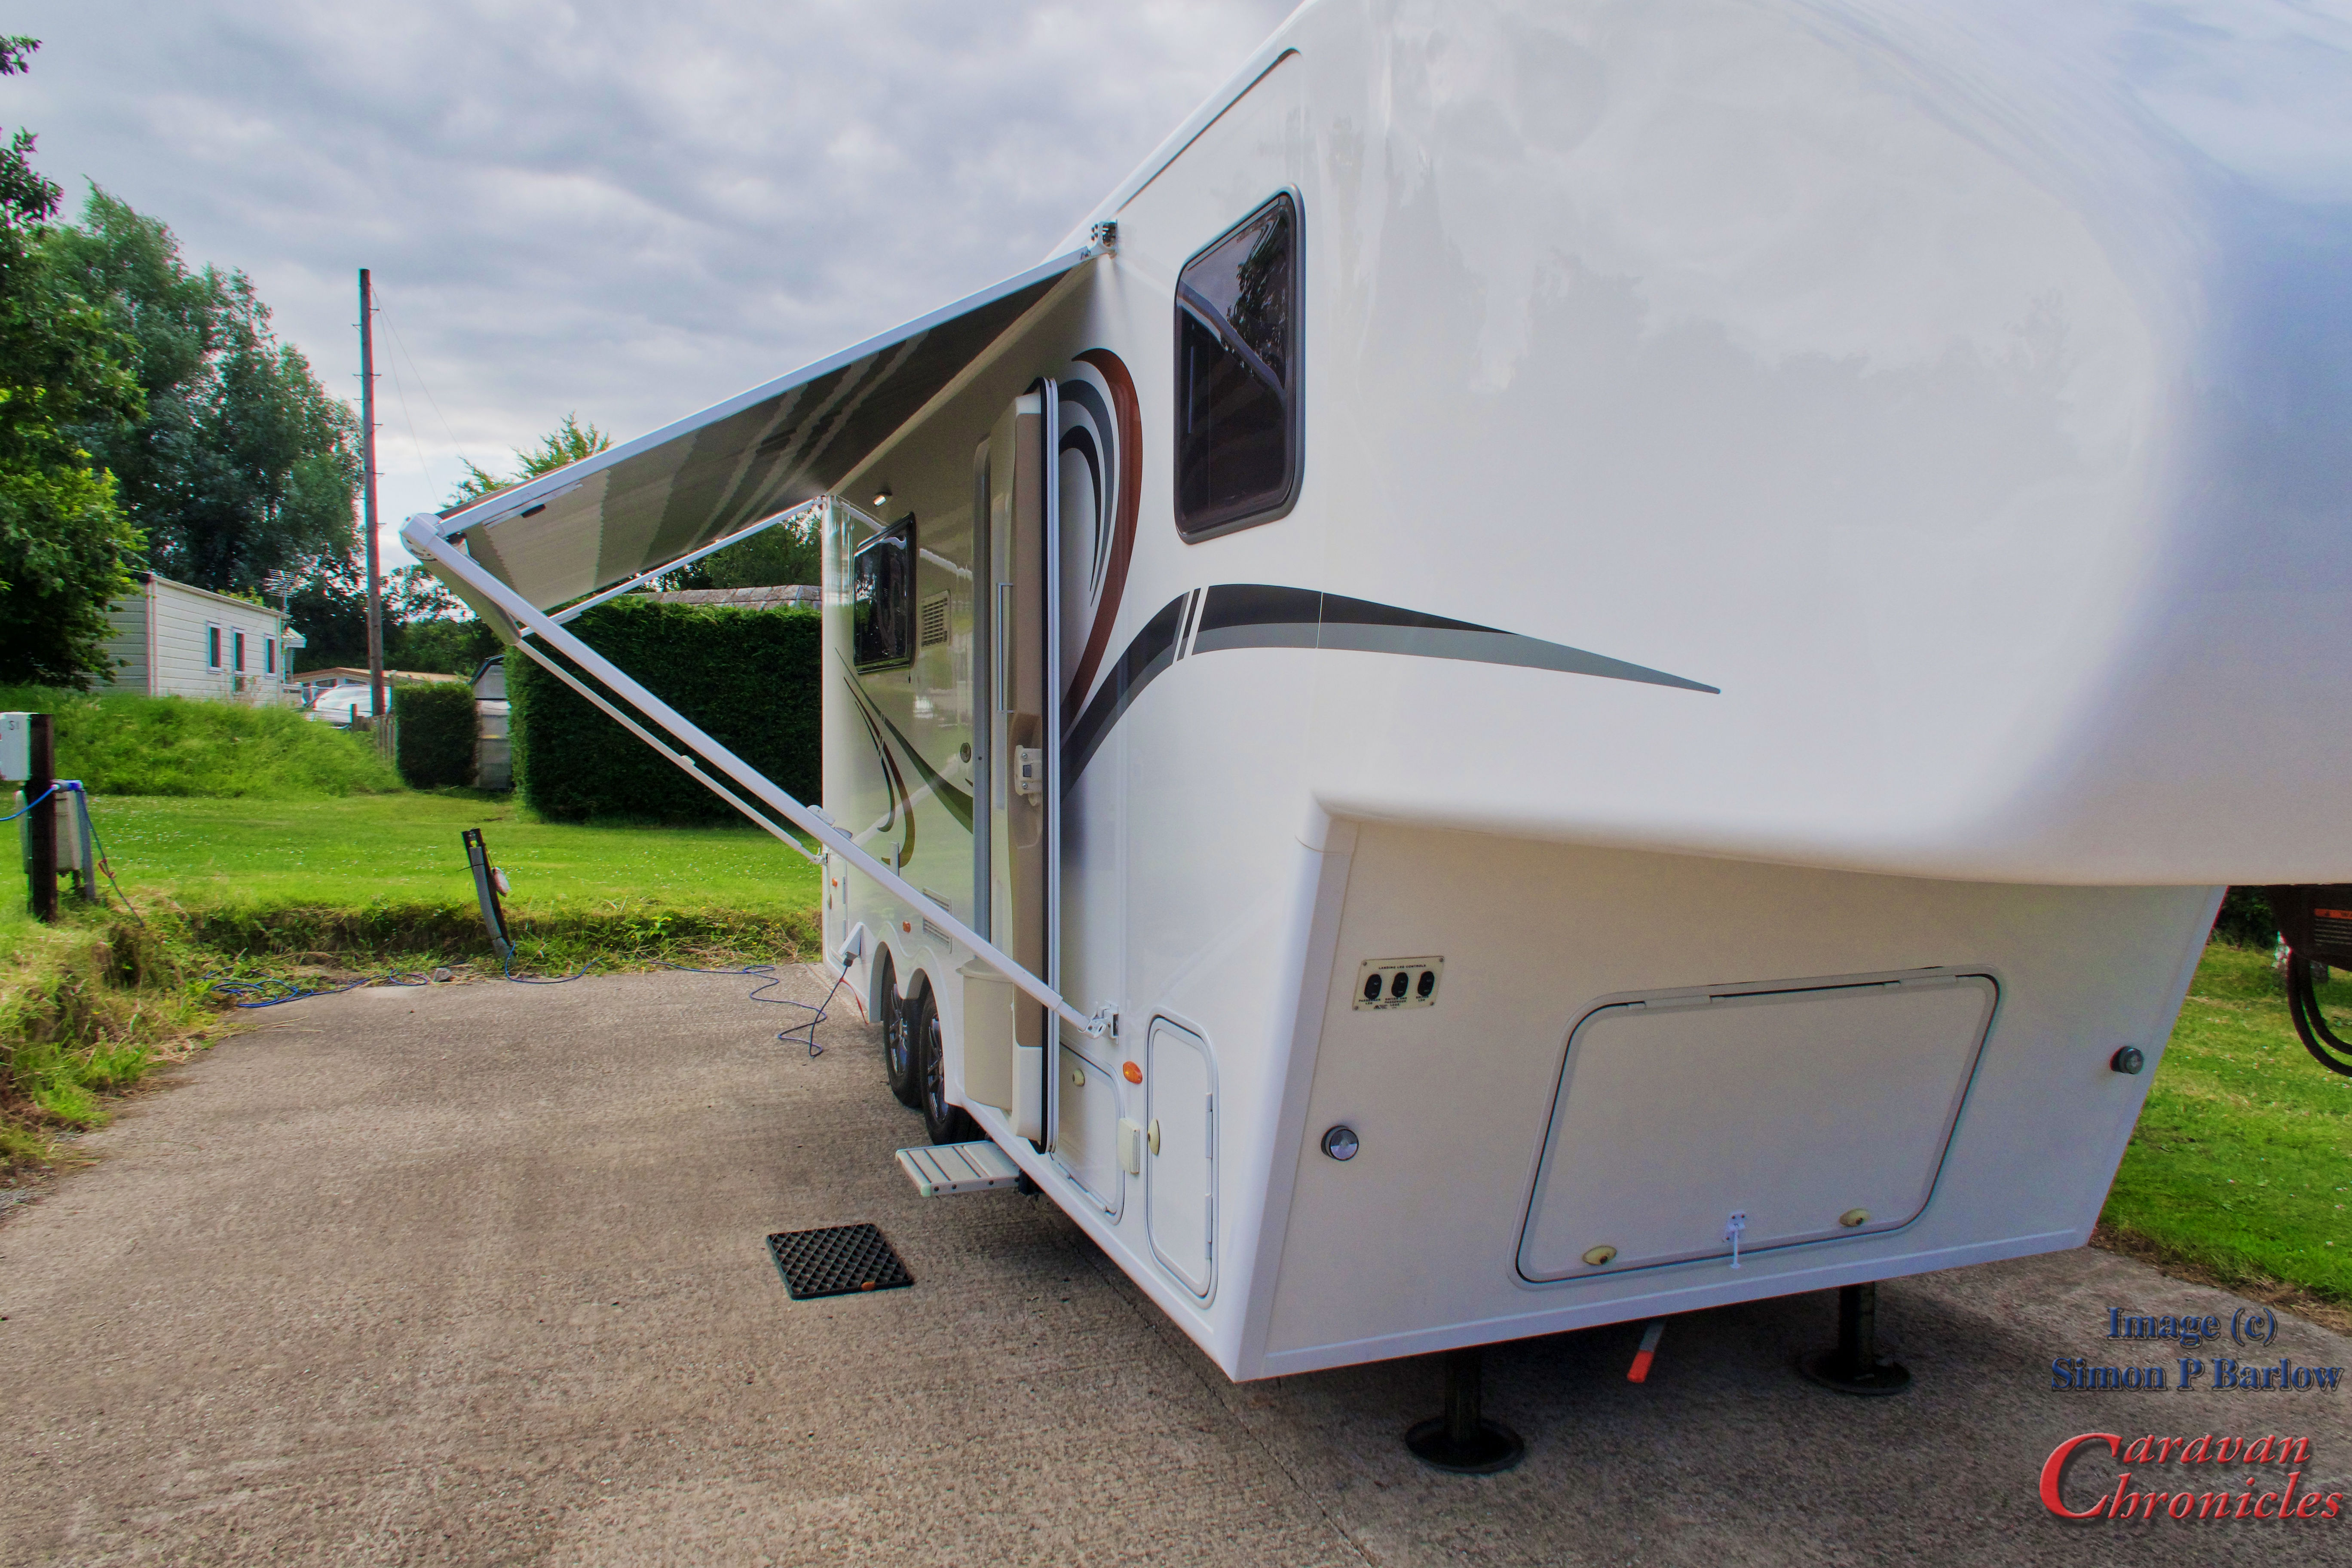
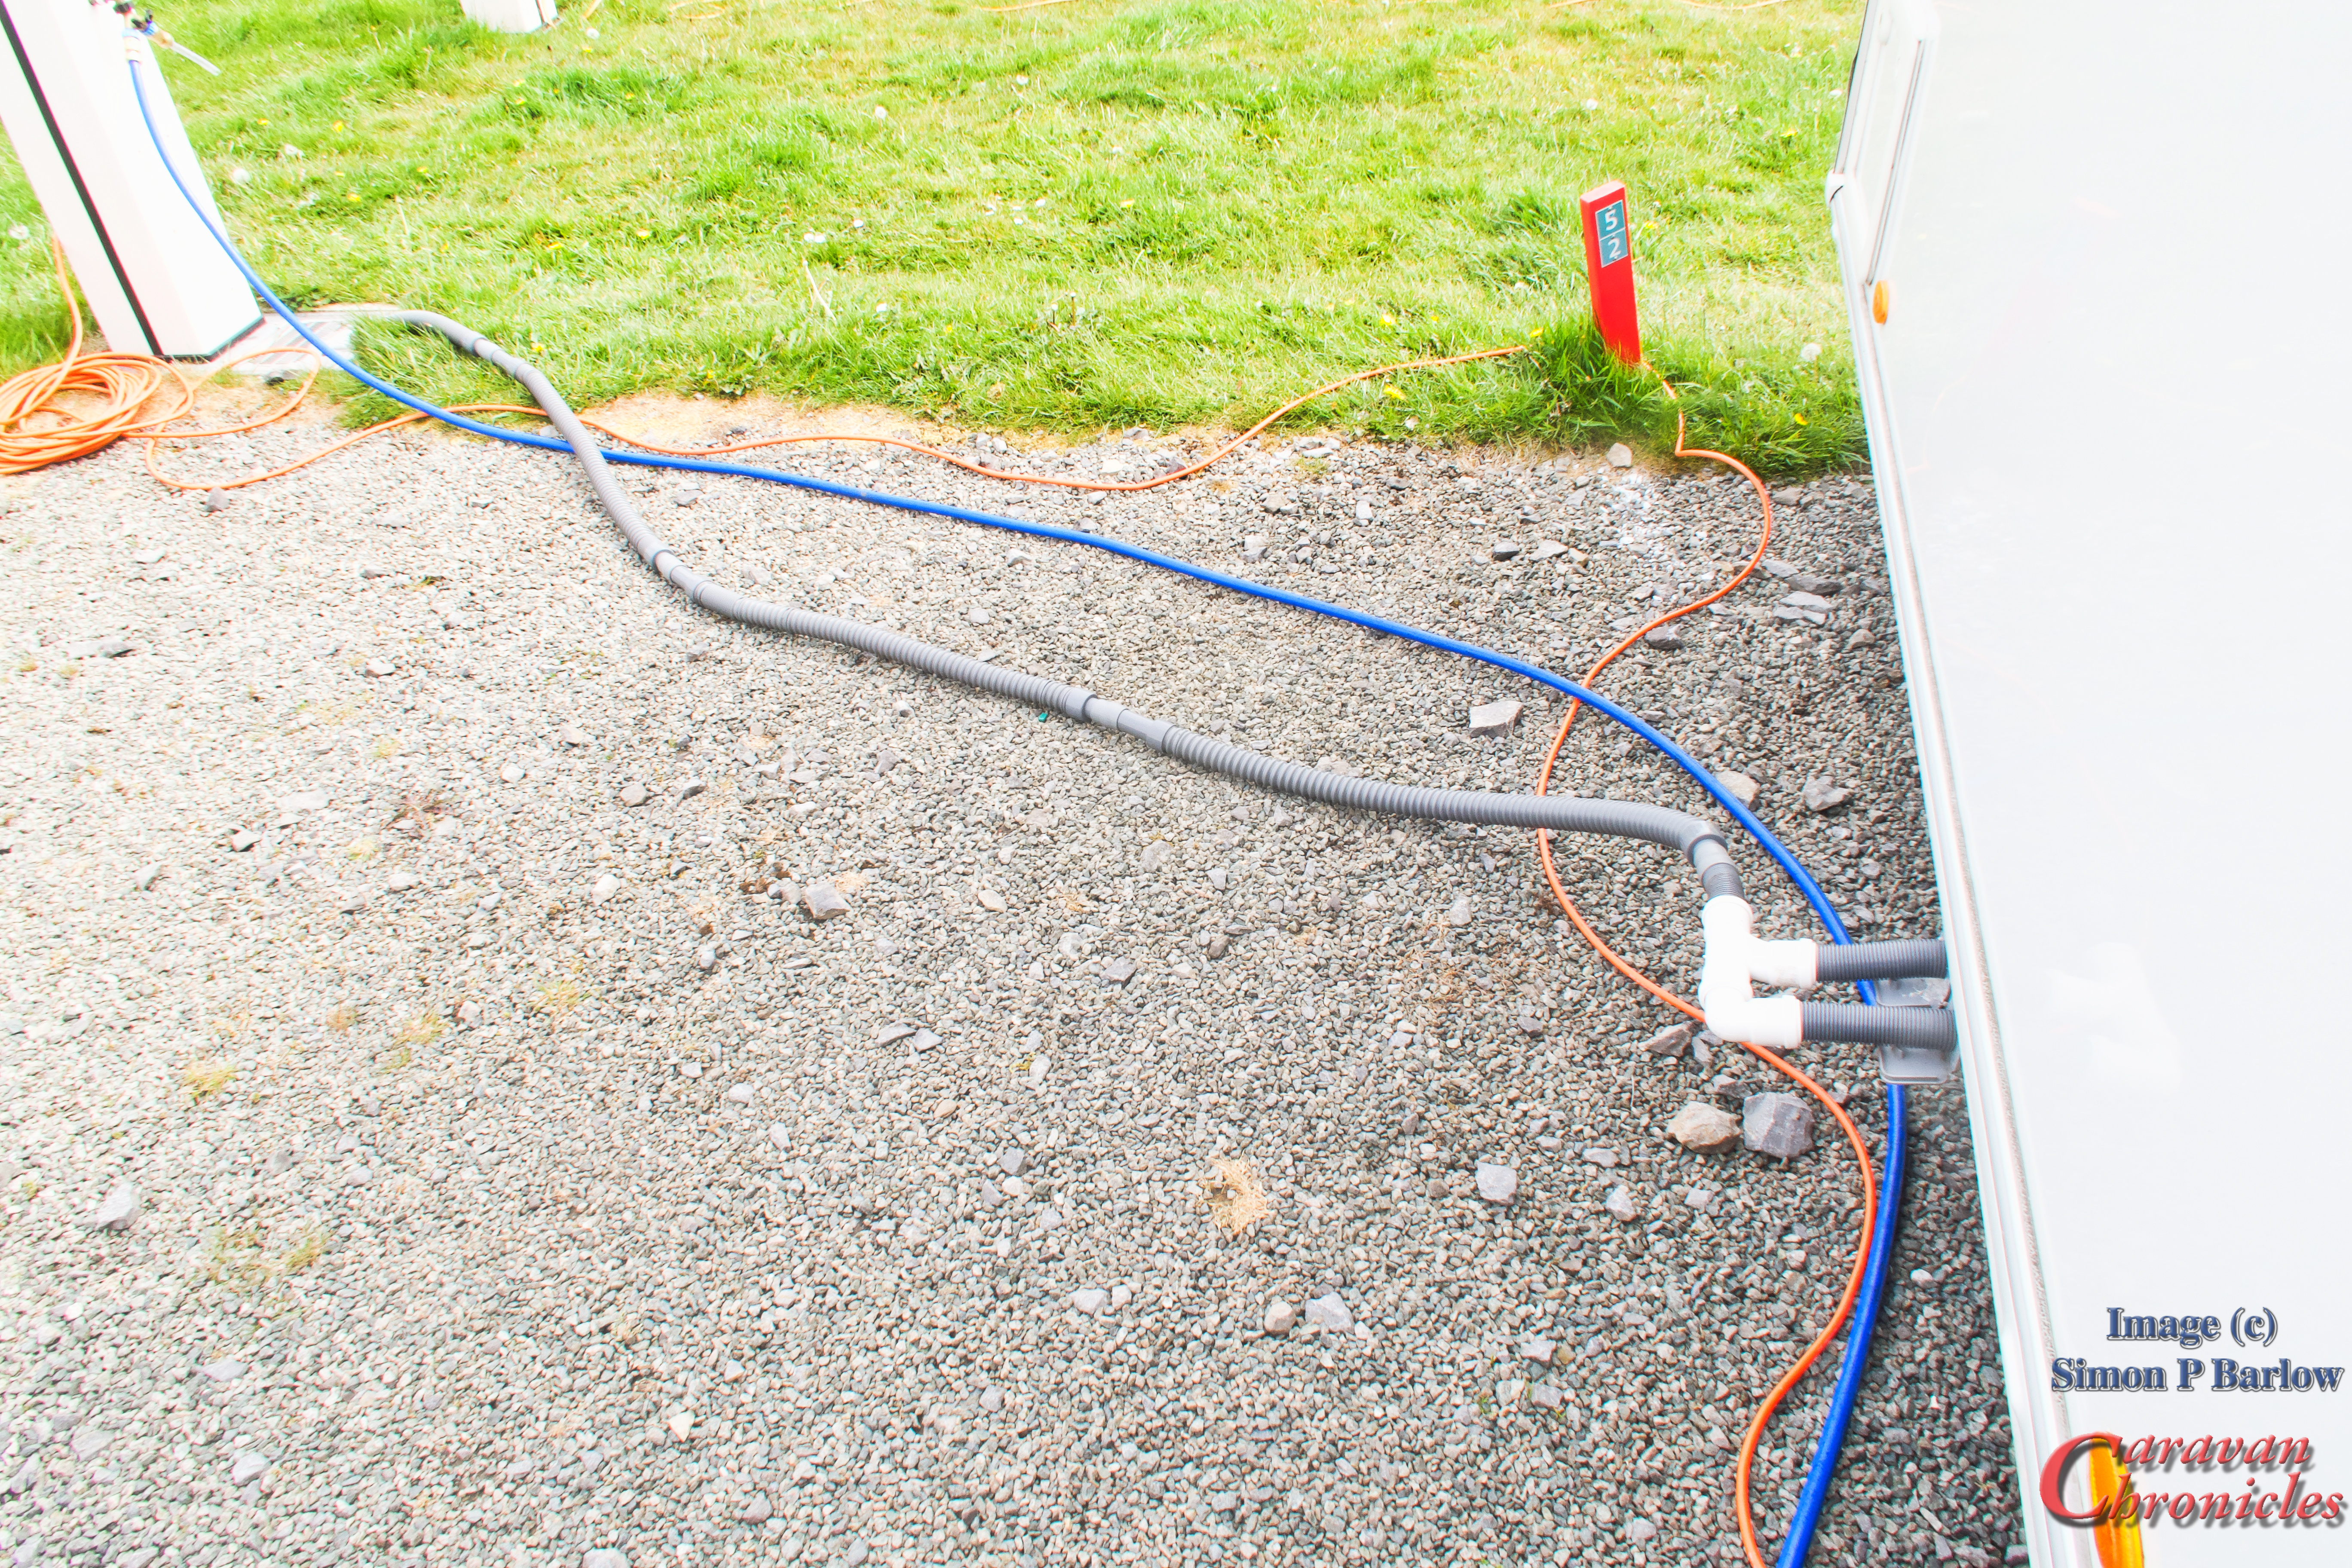
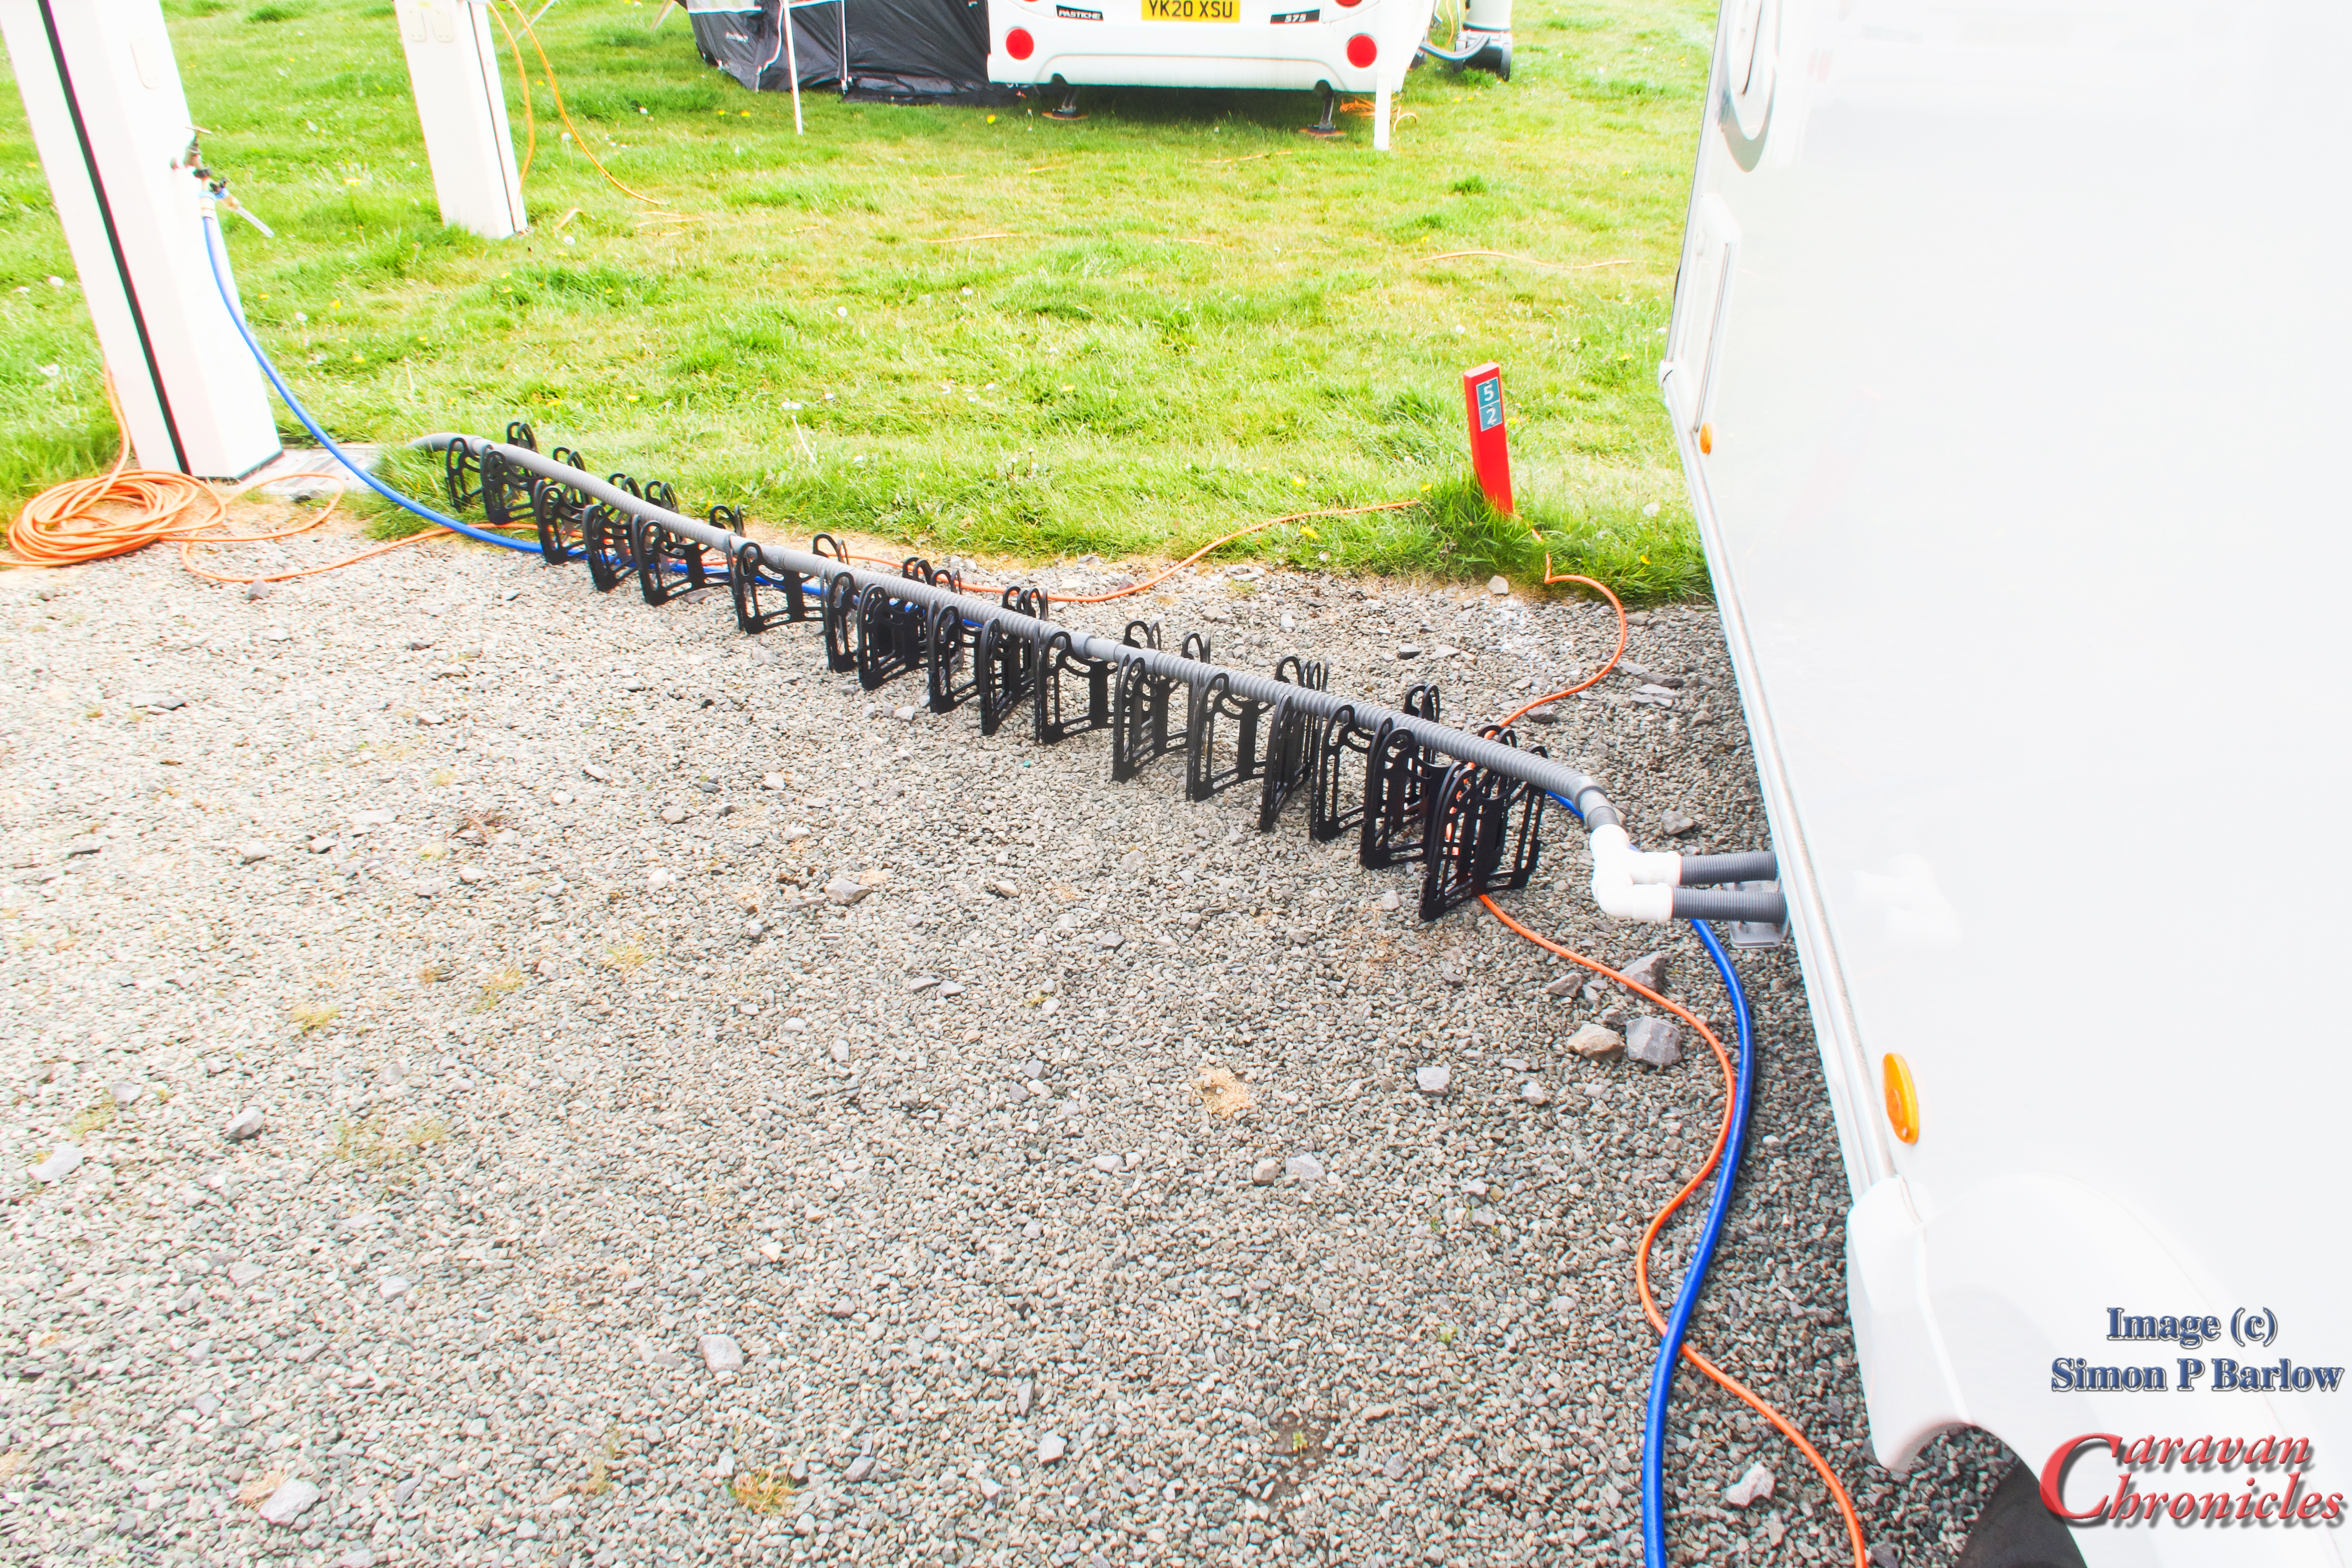
The other little upgrade was to move the grey water and fresh water dump outlets closer to the side of the caravan. They used to be set back about eight inches and required a kneeling mat and one arm dexterity to plug in the flexible waste pipes when on a fully serviced pitch. Now it’s a simple matter of bending over and I can easily access both outlets for connecting pipes…. saving the knees a bit of hard labour at my age is key. Also if dumping at a motorhome service point I can easily see if I’m in the correct position for a clean dump and not going to splash all over the place. As the Hanks say… “Let ‘er rip”
Thanks to my local nut and bolt supplier… Francis Kirk and Sons I’ve been going there for bits and pieces since 1976… I have now got a full set of stainless steel fittings… an odd collection of UNF and UNC sizes…. ready to replace all the nuts and bolts on the pull out sun canopy, replacing the original components that were showing signs of rust and starting to bind up. I also managed to get a set of tap and dies to run through all the threads before changing everything over.
We managed to get some of the picture frames mounted inside the caravan and that makes a huge difference…. along with upgrading the occasional side lights to LED dimmable units…. feels more like home with each little improvement.
Not long to wait now….
Looking forward to Tourfest North West in a three weeks time, 24th May – 27th May at Donkey Creek Farm and meeting up with some of the bloggers and vloggers I’ve followed over the years. Thankfully no one will recognise Sue and I so we can sneak off if it gets too rowdy . I believe it is now fully booked so if you wanted to go you will just have to wait until the next one.
A few days after that we are off to The Old Oaks at Glastonbury…. it’s been a few years since we were there so it will be nice to go back and see all the changes and improvements they have made. Hopefully we can get back out on our bikes again as well.
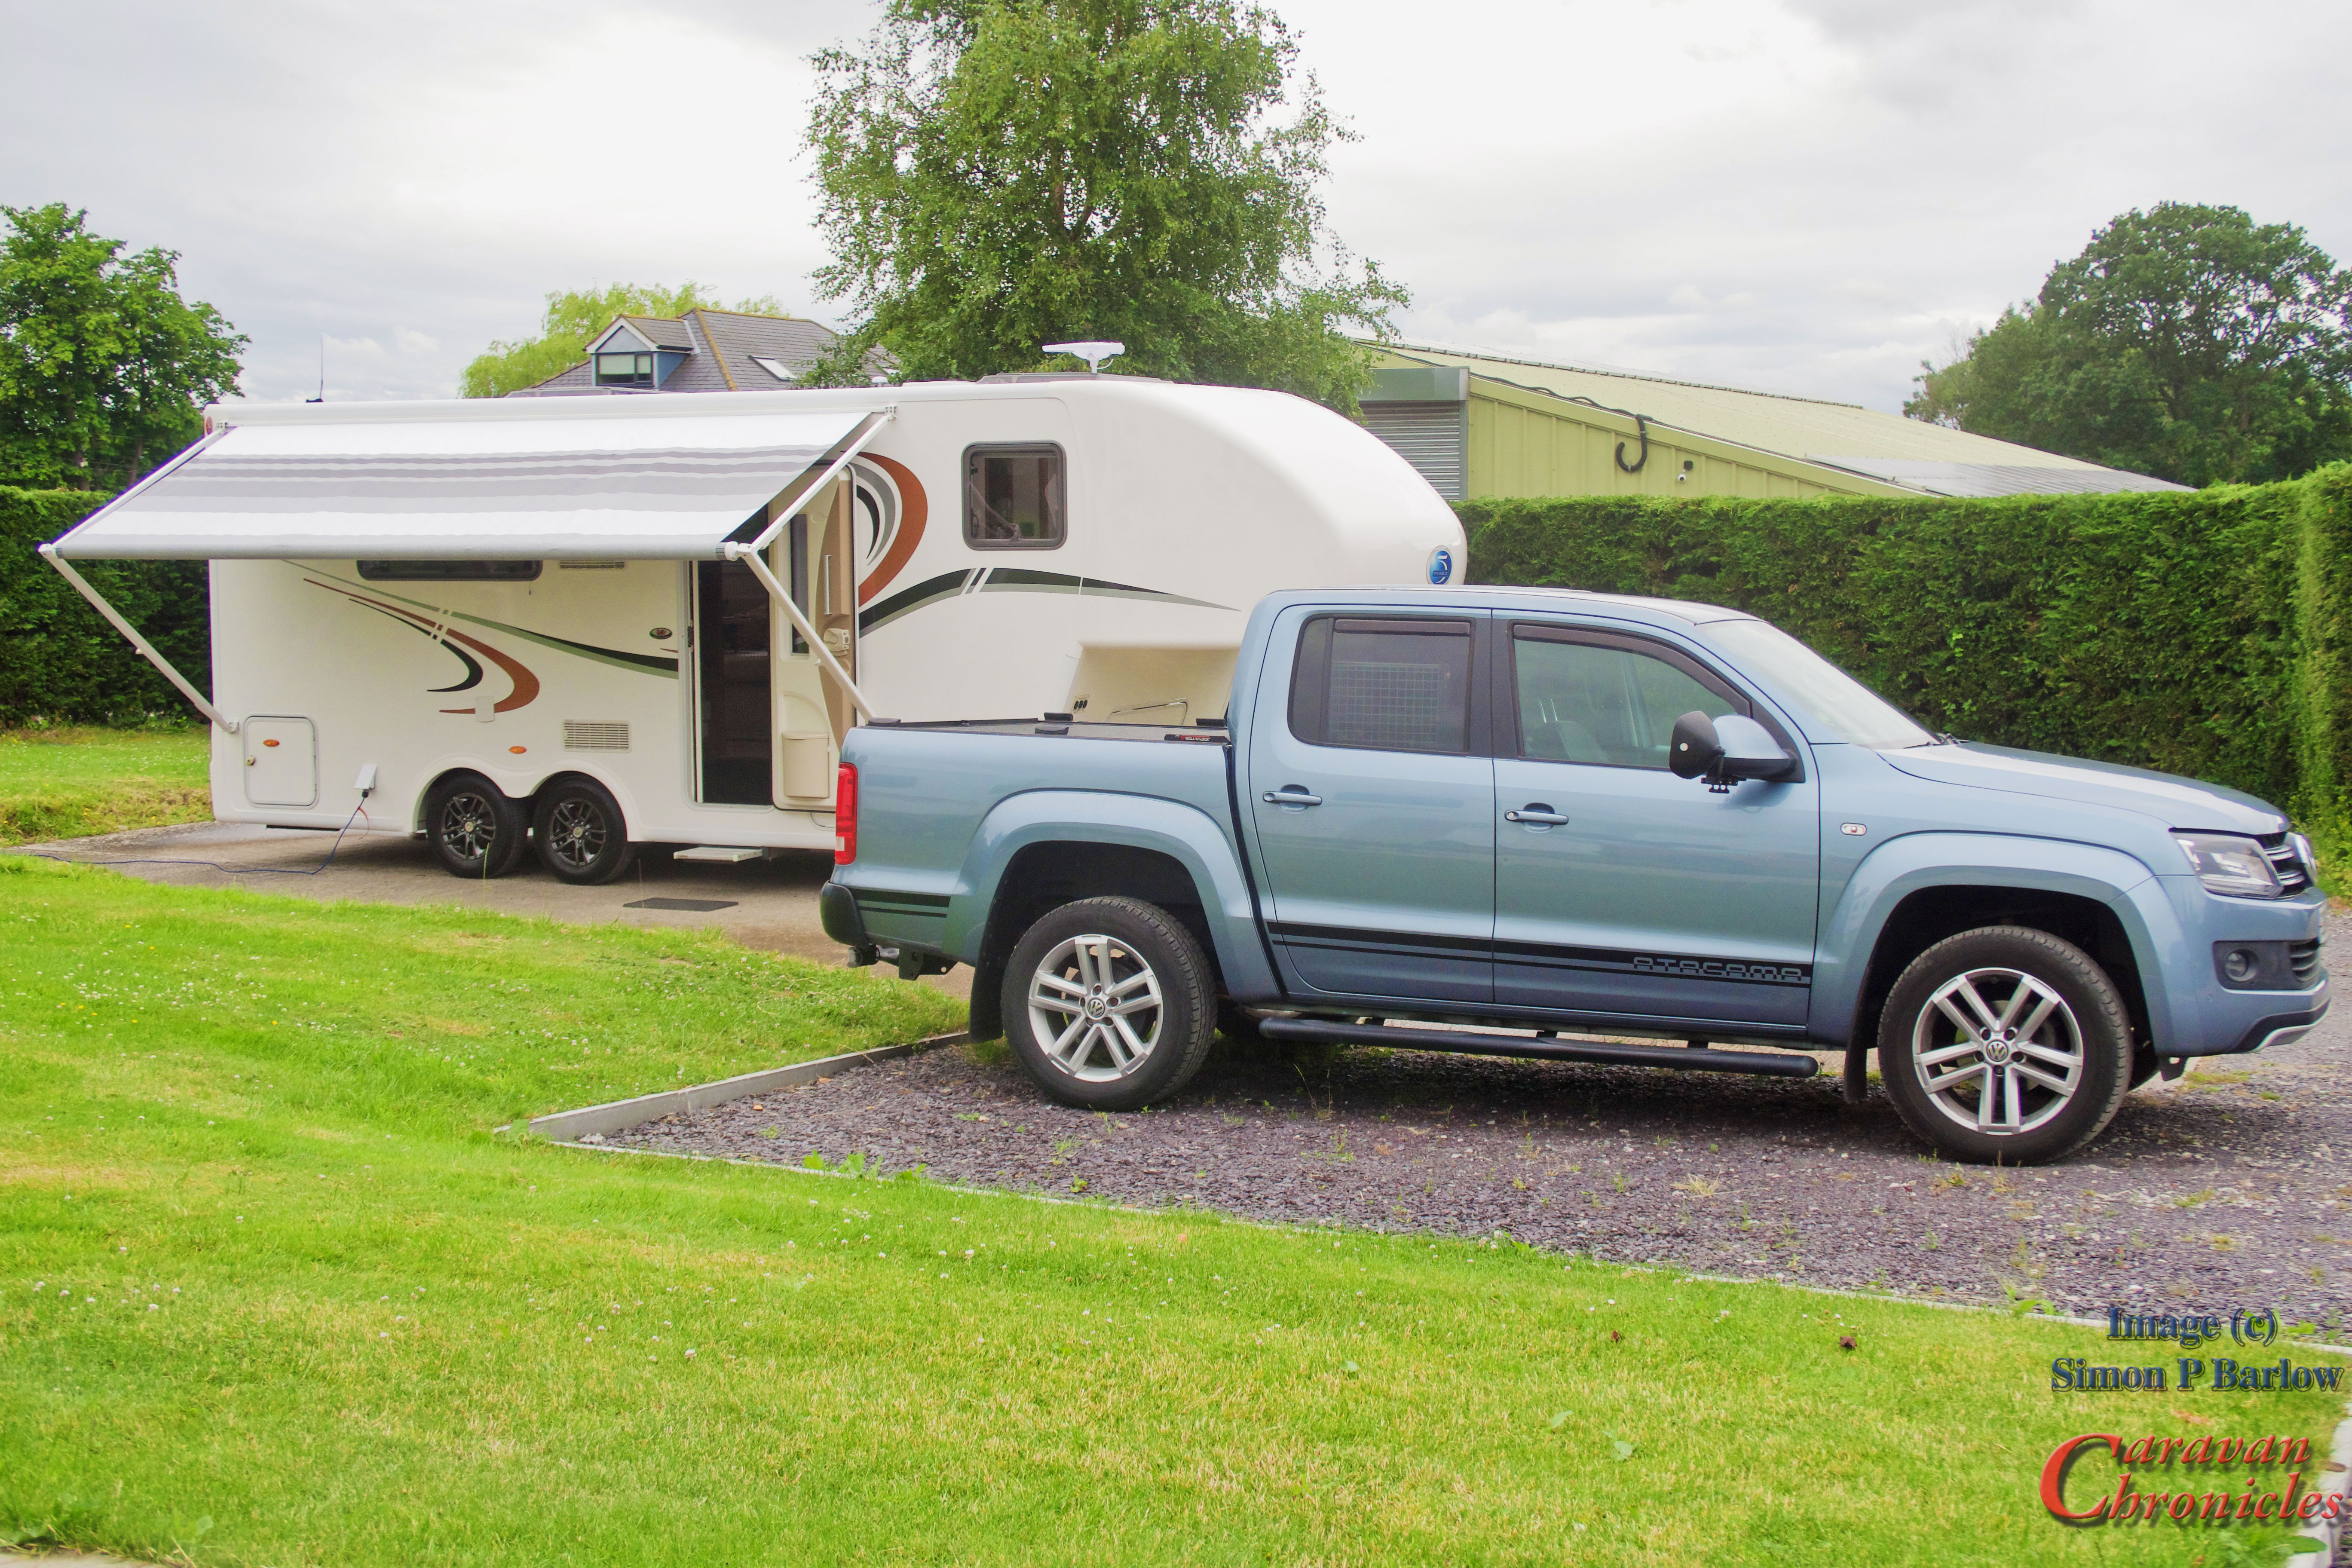
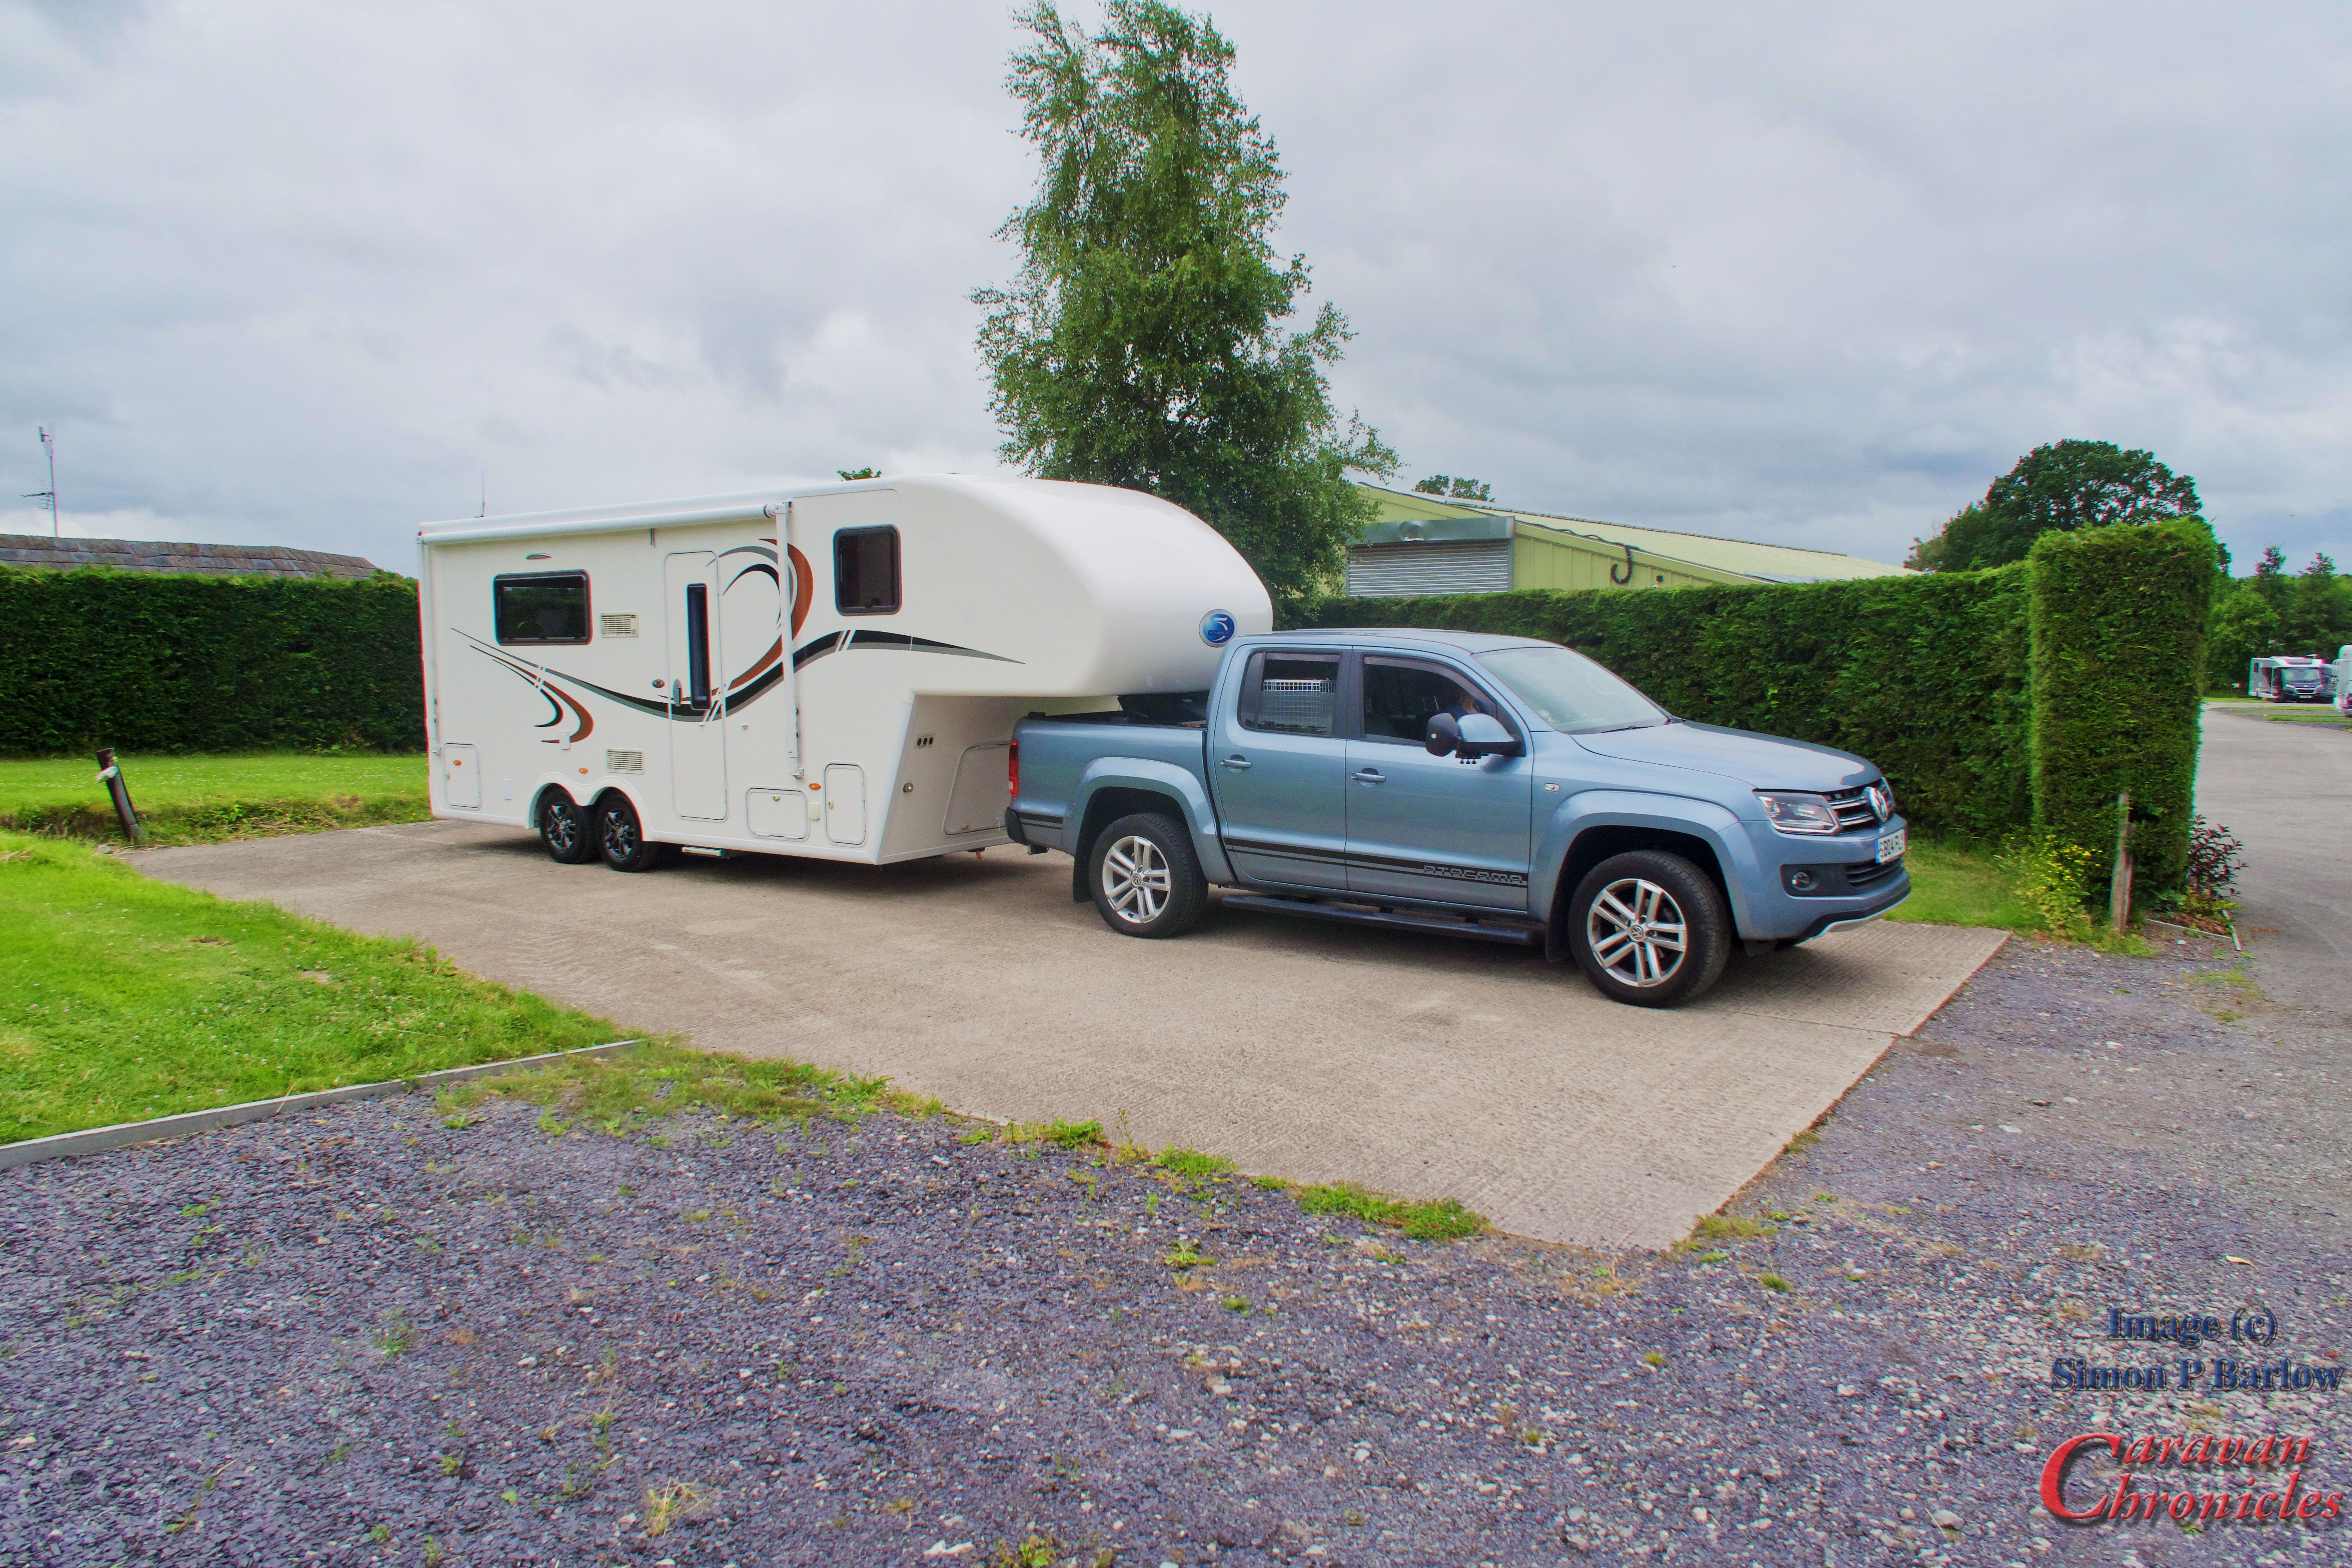
It’s Wednesday 28th June, and we have an appointment in Rhuallt… we are going to the Fifth Wheel Company for the big handover when we collect our 5th wheel caravan. This not just a handover, it’s a Fifth Wheel Company handover. Which means 3 days of training, acclimatisation and adjustment to a 5th wheel caravan and the all important hitch installation in the VW Amarok which will be completed by the technical guys at the Fifth Wheel Company.
The previous week…
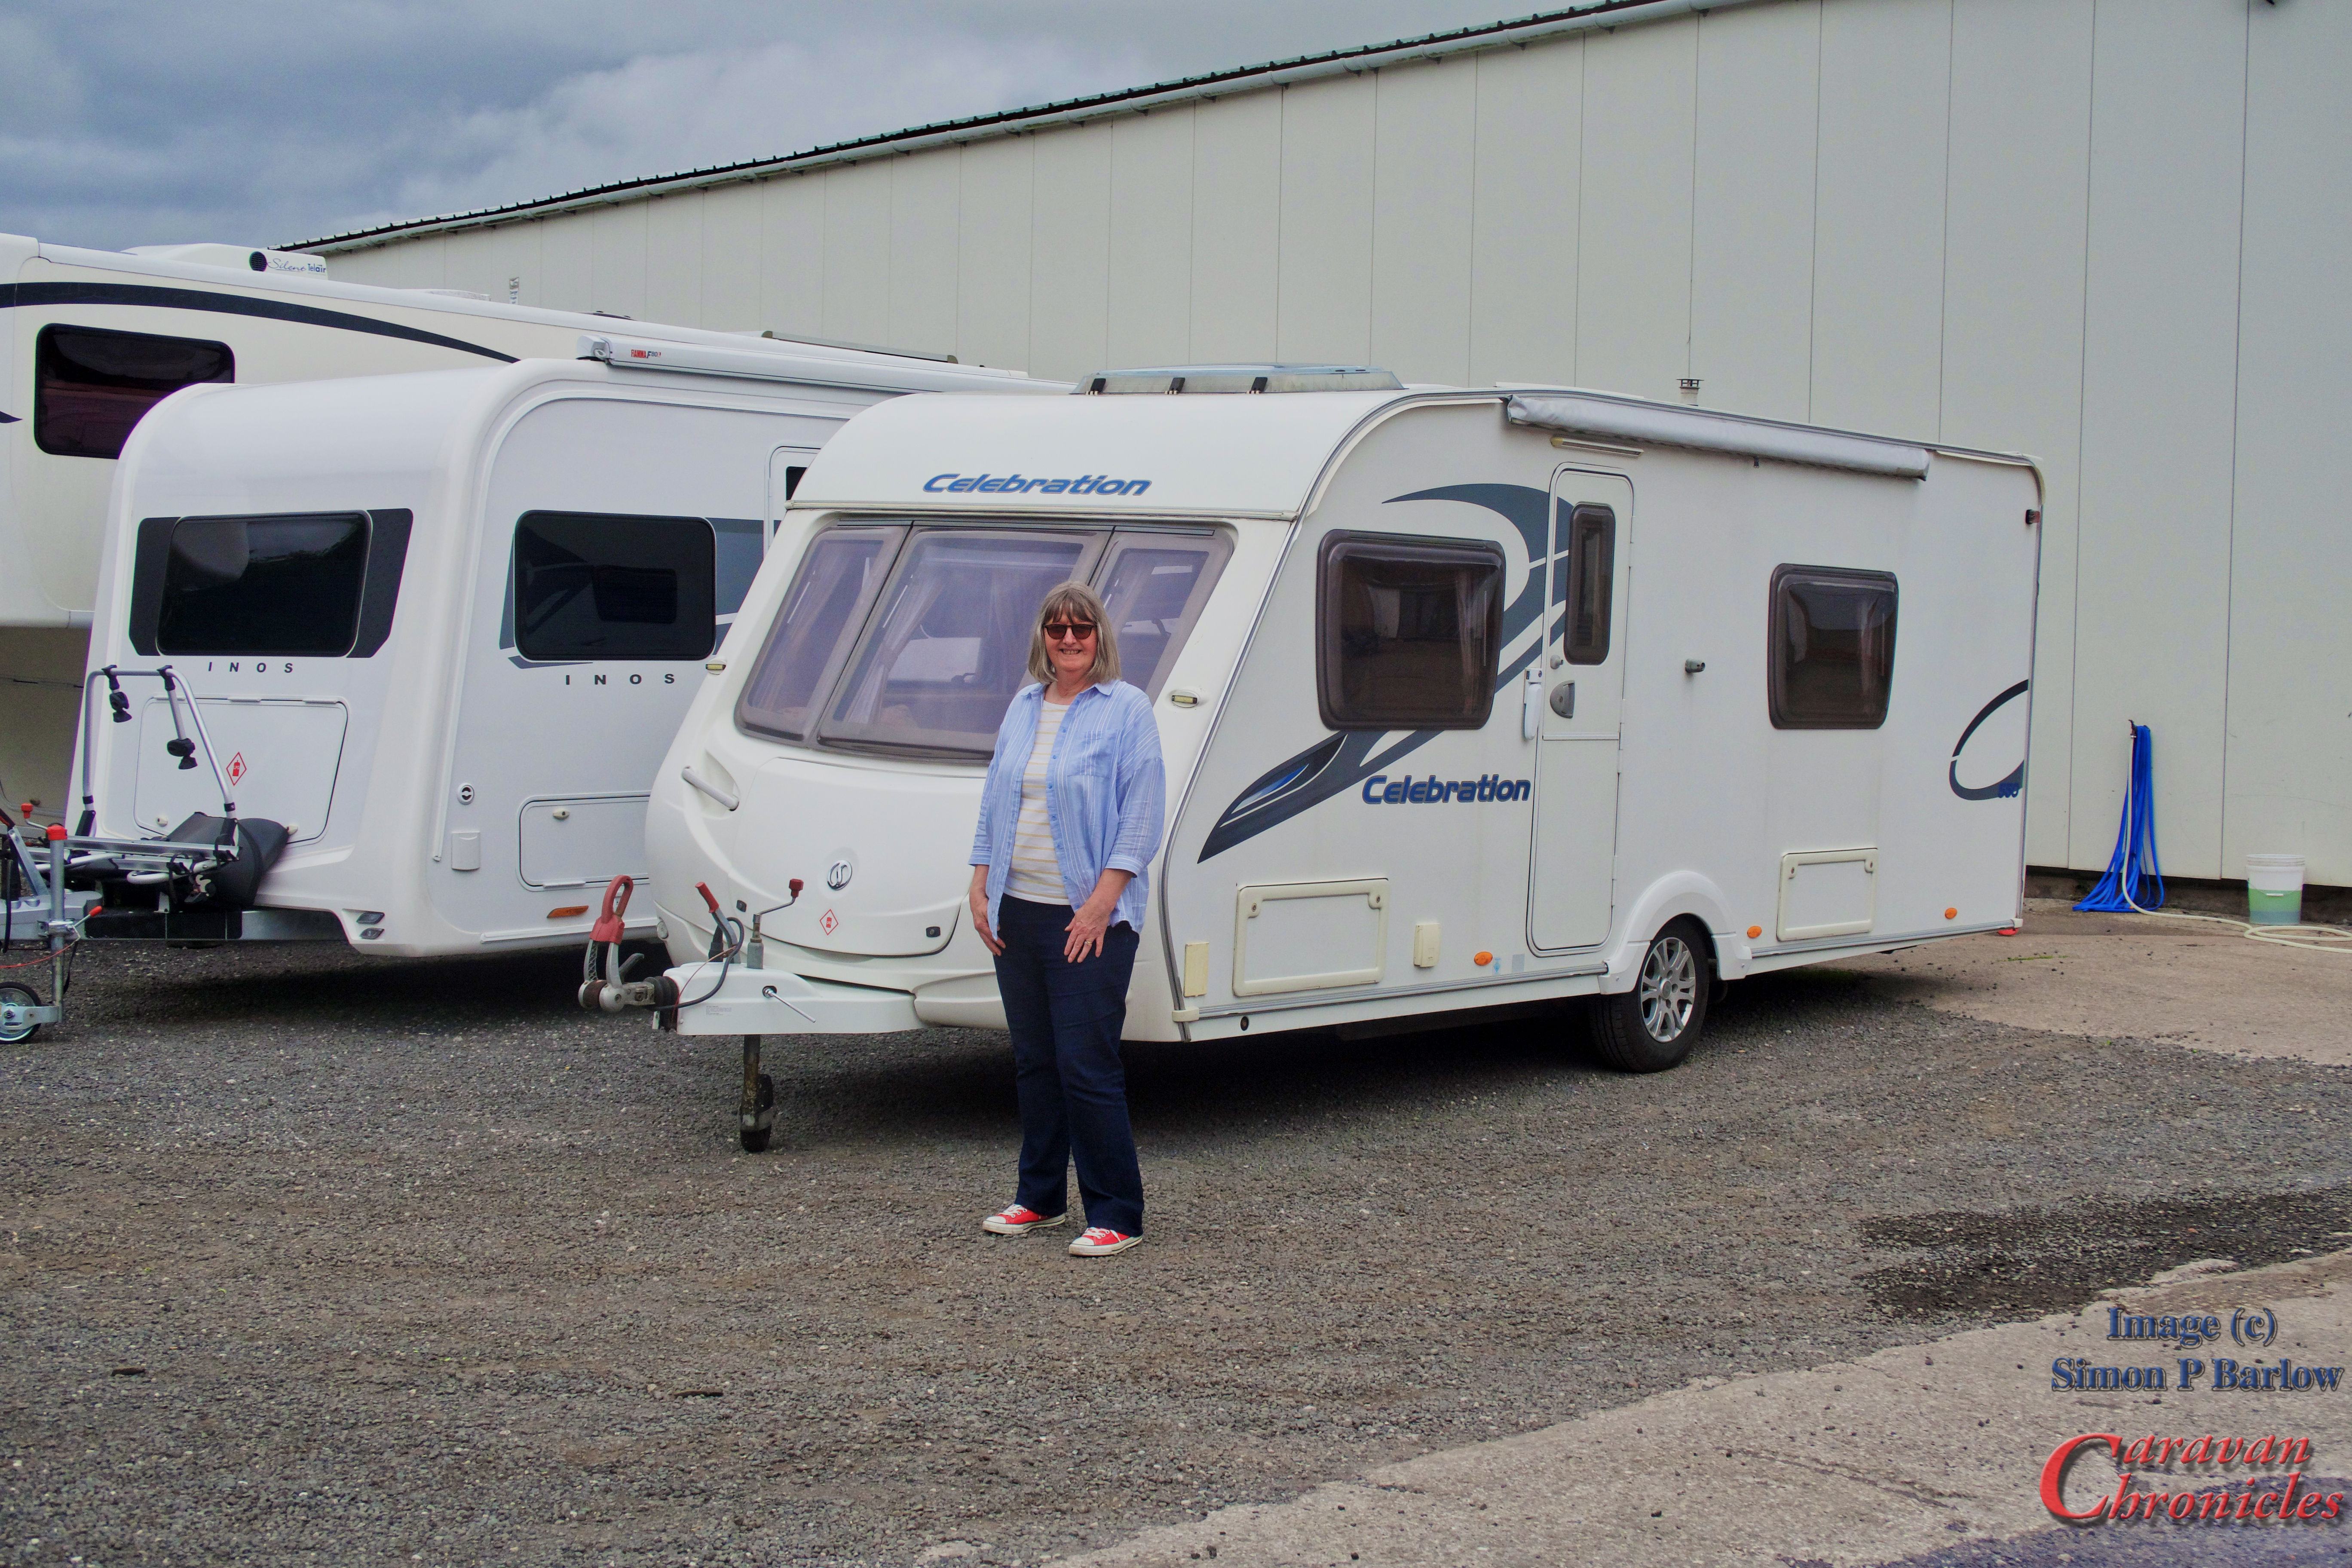
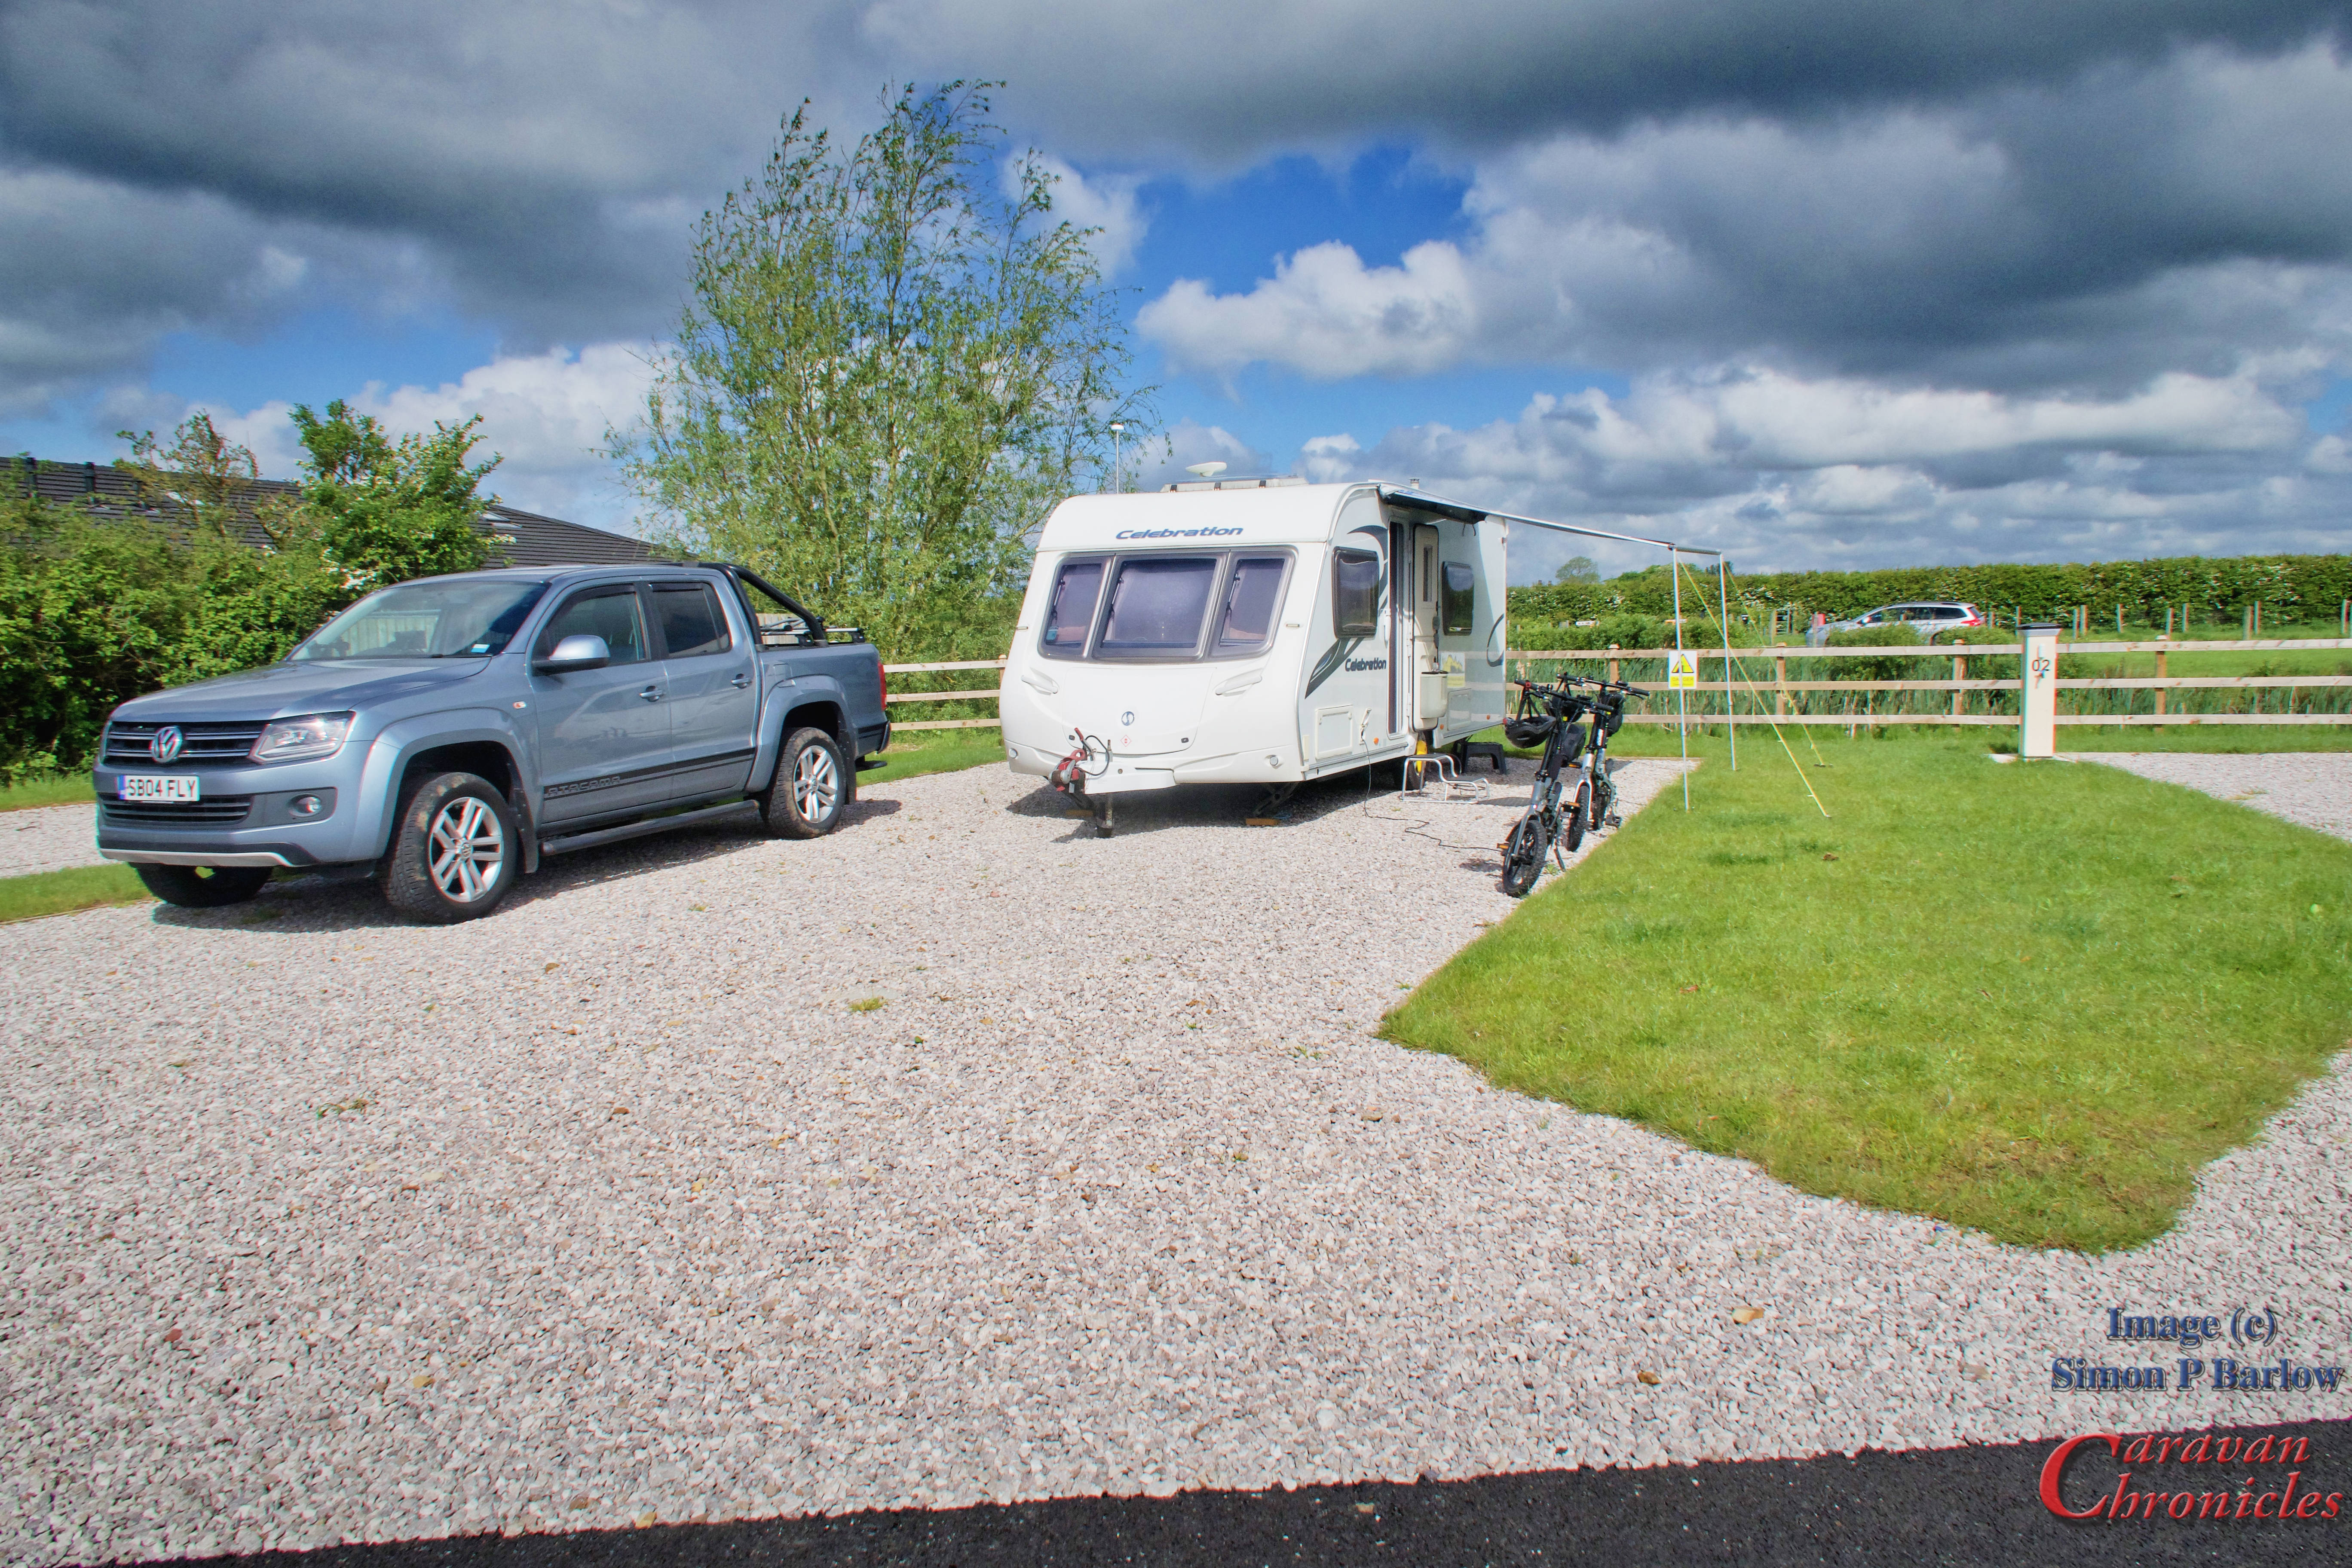
We had spent the previous week unloading our Swift Celebration 550 of its contents…. 12 years worth of touring “stuff” which initially didn’t seem like much, but stacked up it filled my workshop, I mean really filled my workshop. I had also tackled removing the sports bars from the Amarok, along with the bike carrier as well as the sliding bed and inbuilt tool box. I was now out of space in the workshop.
What followed was a cleaning frenzy.. Sue tackled every surface of the caravan, the loo, shower and sinks were cleaned and polished. The carpets were brought home cleaned and vacuumed to within an inch of their lives and returned to the caravan. We removed the Safefill gas cylinder and I started collecting all the original accessories for the caravan…. Alko Hitch Lock, Alko Wheel Lock, Alko Jack (still in its original protective wrapping) and I even had the original braided gas hoses along with the steady winder. As we were leaving the Fiamma sun canopy on it I found all the original bits to go with it. All the original paperwork from Glossop Caravans along with the Folder from Swift that came with the caravan contains all the manuals for the installed equipment was put in the front draws.
The big day…
Even though the pickup bed was completely empty we could not get everything in the truck that we needed to take over so we boxed up everything we thought we would need and loaded the boxes on the floor of the caravan. It was a lot of stuff. It filled the caravan floor forward of the axle and the truck bed.
Henry was put in his carrier and secured in the Amarok. He seems to have got quite used to the journeys now spending his time either looking out the window at passing cars or sleeping. The run over to Rhuallt from our storage site was a little over an hour as the traffic was light especially along the North Wales Expressway.
We pulled into the carpark and leaving Henry in his carrier… with both back windows three quarters down so he could see out and had a bit of a cross breeze went in to meet Simon again. In the reception area was a sign welcoming us by name to the Fifth Wheel Company (We didn’t get that when we picked up our other caravan) Simon showed us into the showroom where our caravan was parked up all shining and the lights on inside. Time for some paperwork to be exchanged along with the required number of beer tokens.
All change…
I pulled our old caravan… that technically was now not ours, up to the showroom roller door and we started the process of transferring all the boxes from our ‘technically not ours” old caravan to the 5th wheel caravan. The plan was to get everything out of one caravan into another then Simon would tow the 5th wheel caravan a couple of hundred metres along the road to Rhuallt Campsite which adjoins The White House Restaurant and Hotel where we could spend the rest of the day transferring everything over from the Amarok and putting everything away.
We parked up our old caravan next to a rather splendid Ineos caravan next to the factory and said our farewell’s to it. Even Henry watched it through the back window as I unhitched and pulled away. I think really he was thinking it was snack time and that is where his snacks usually materialised. 12 years of caravanning, and the reason this blog came into existence was ending but a new chapter was starting. One that had more wheels in it than you could shake a stick at!
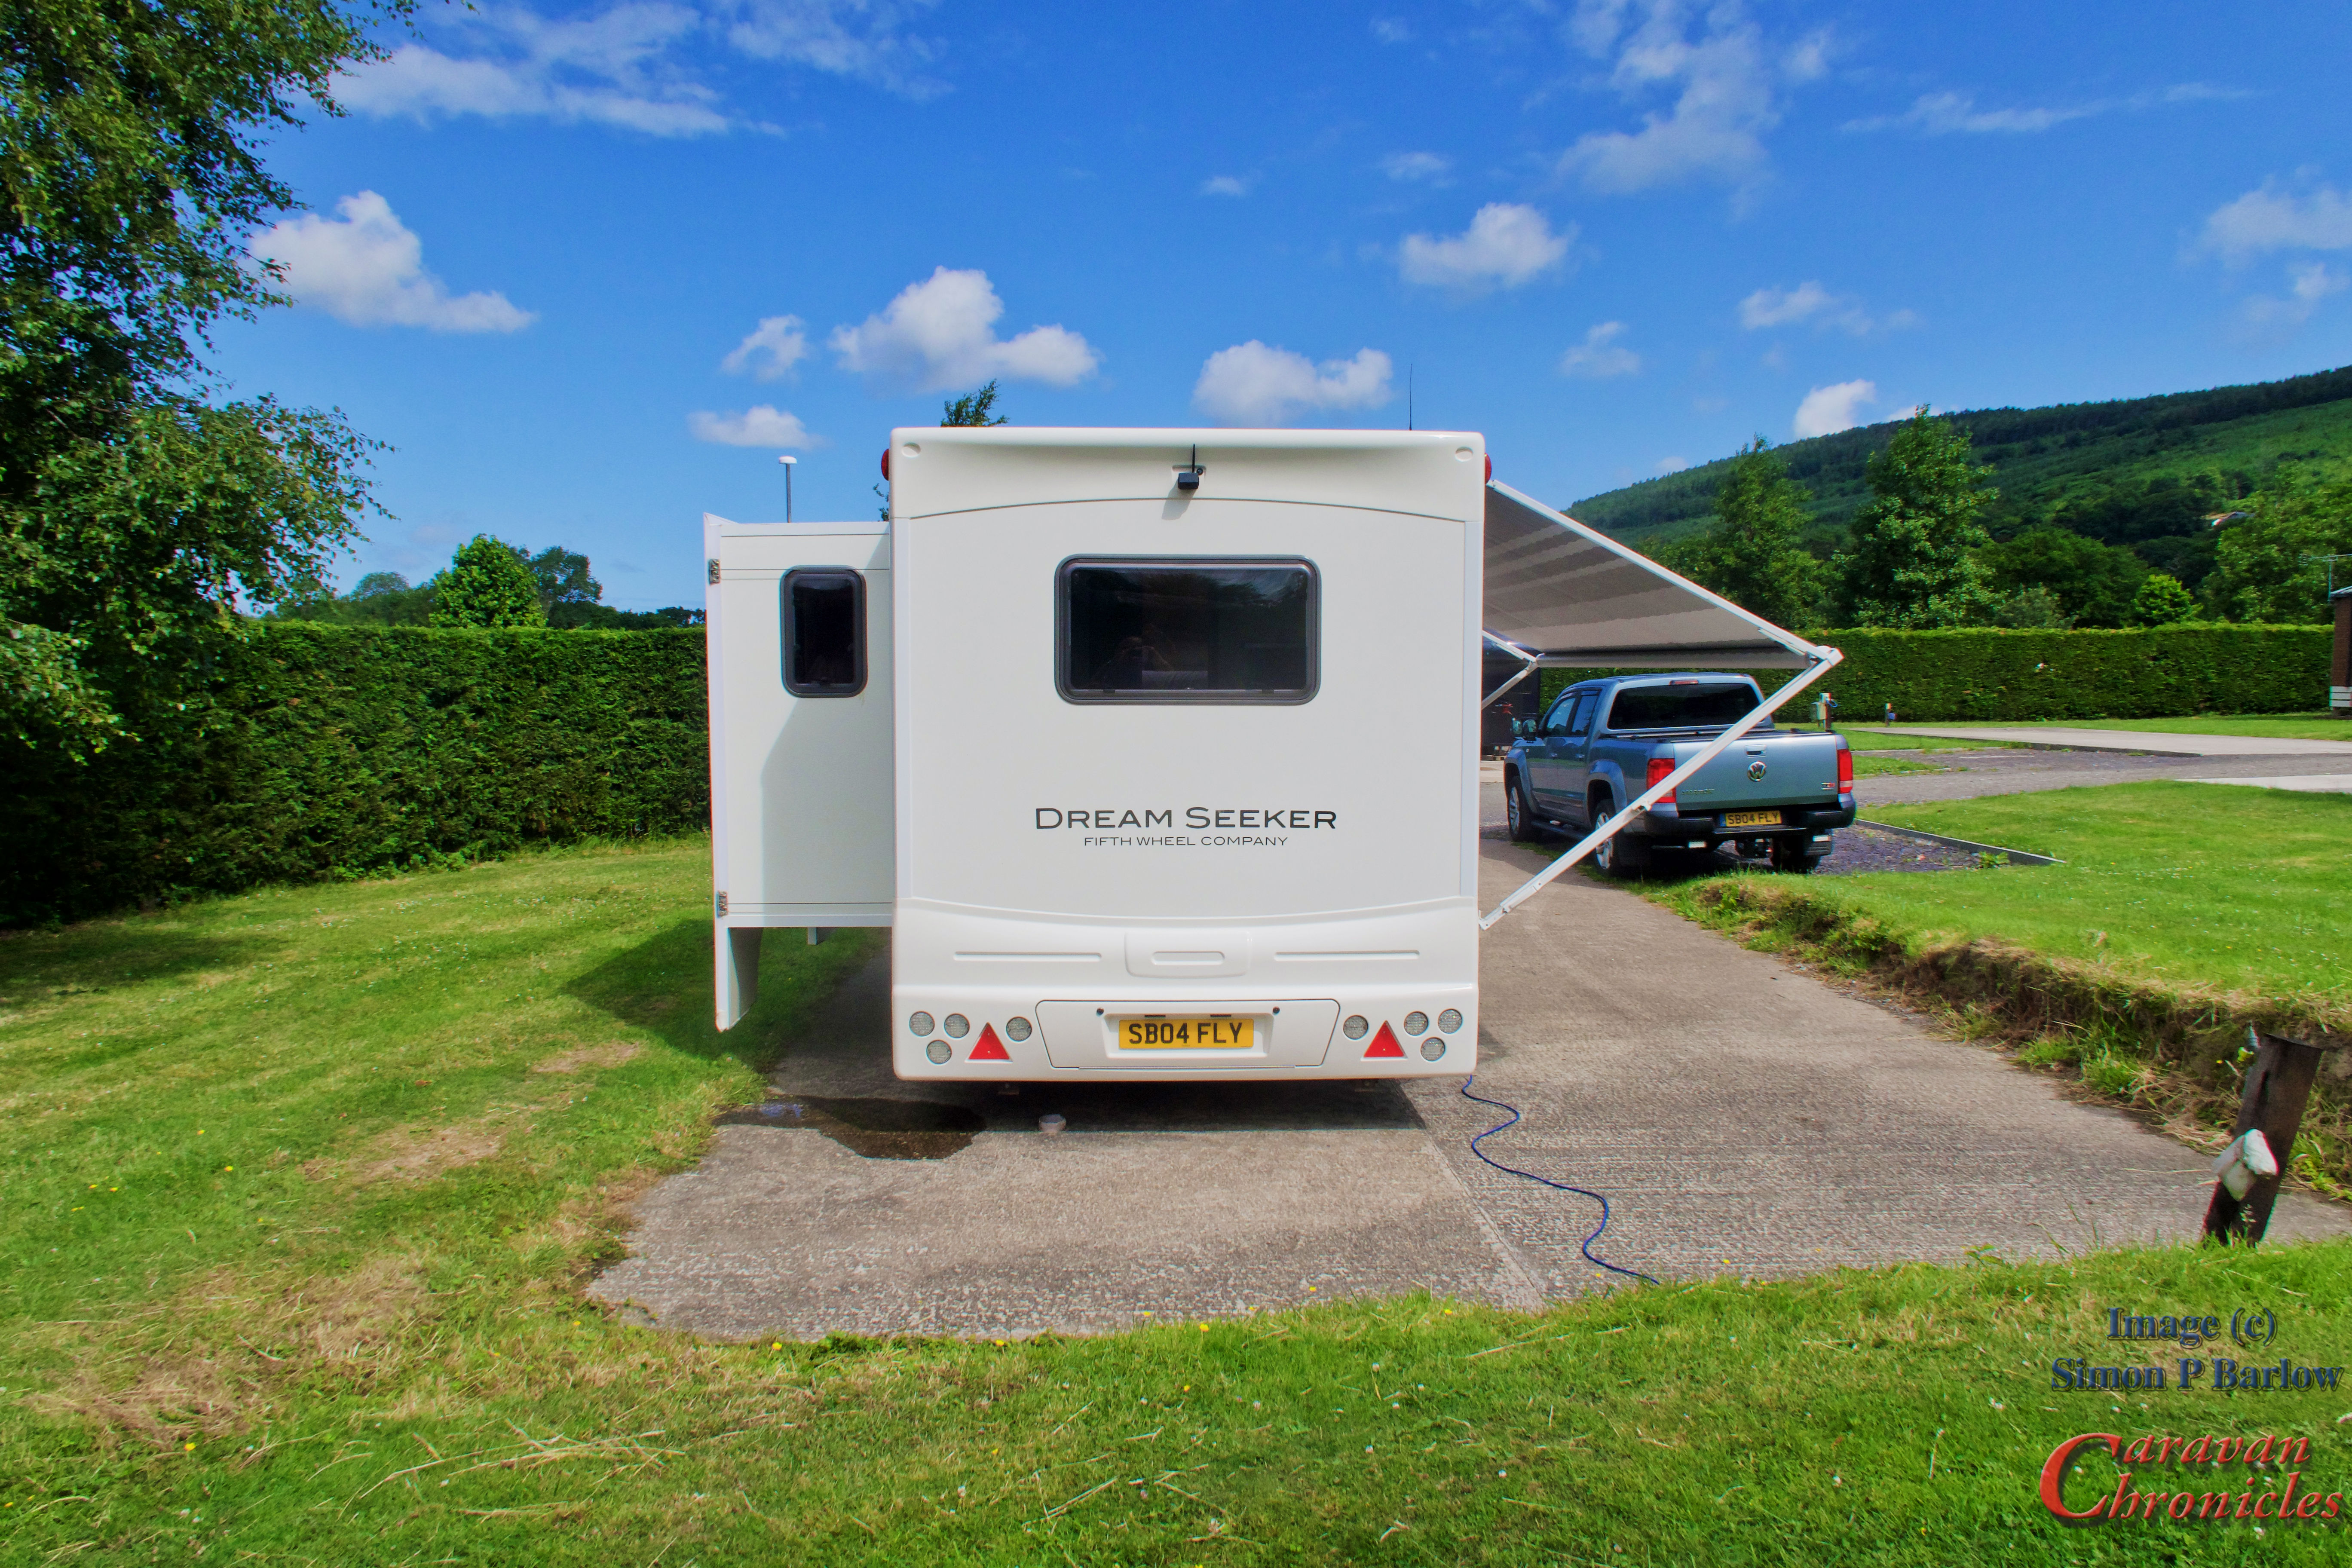
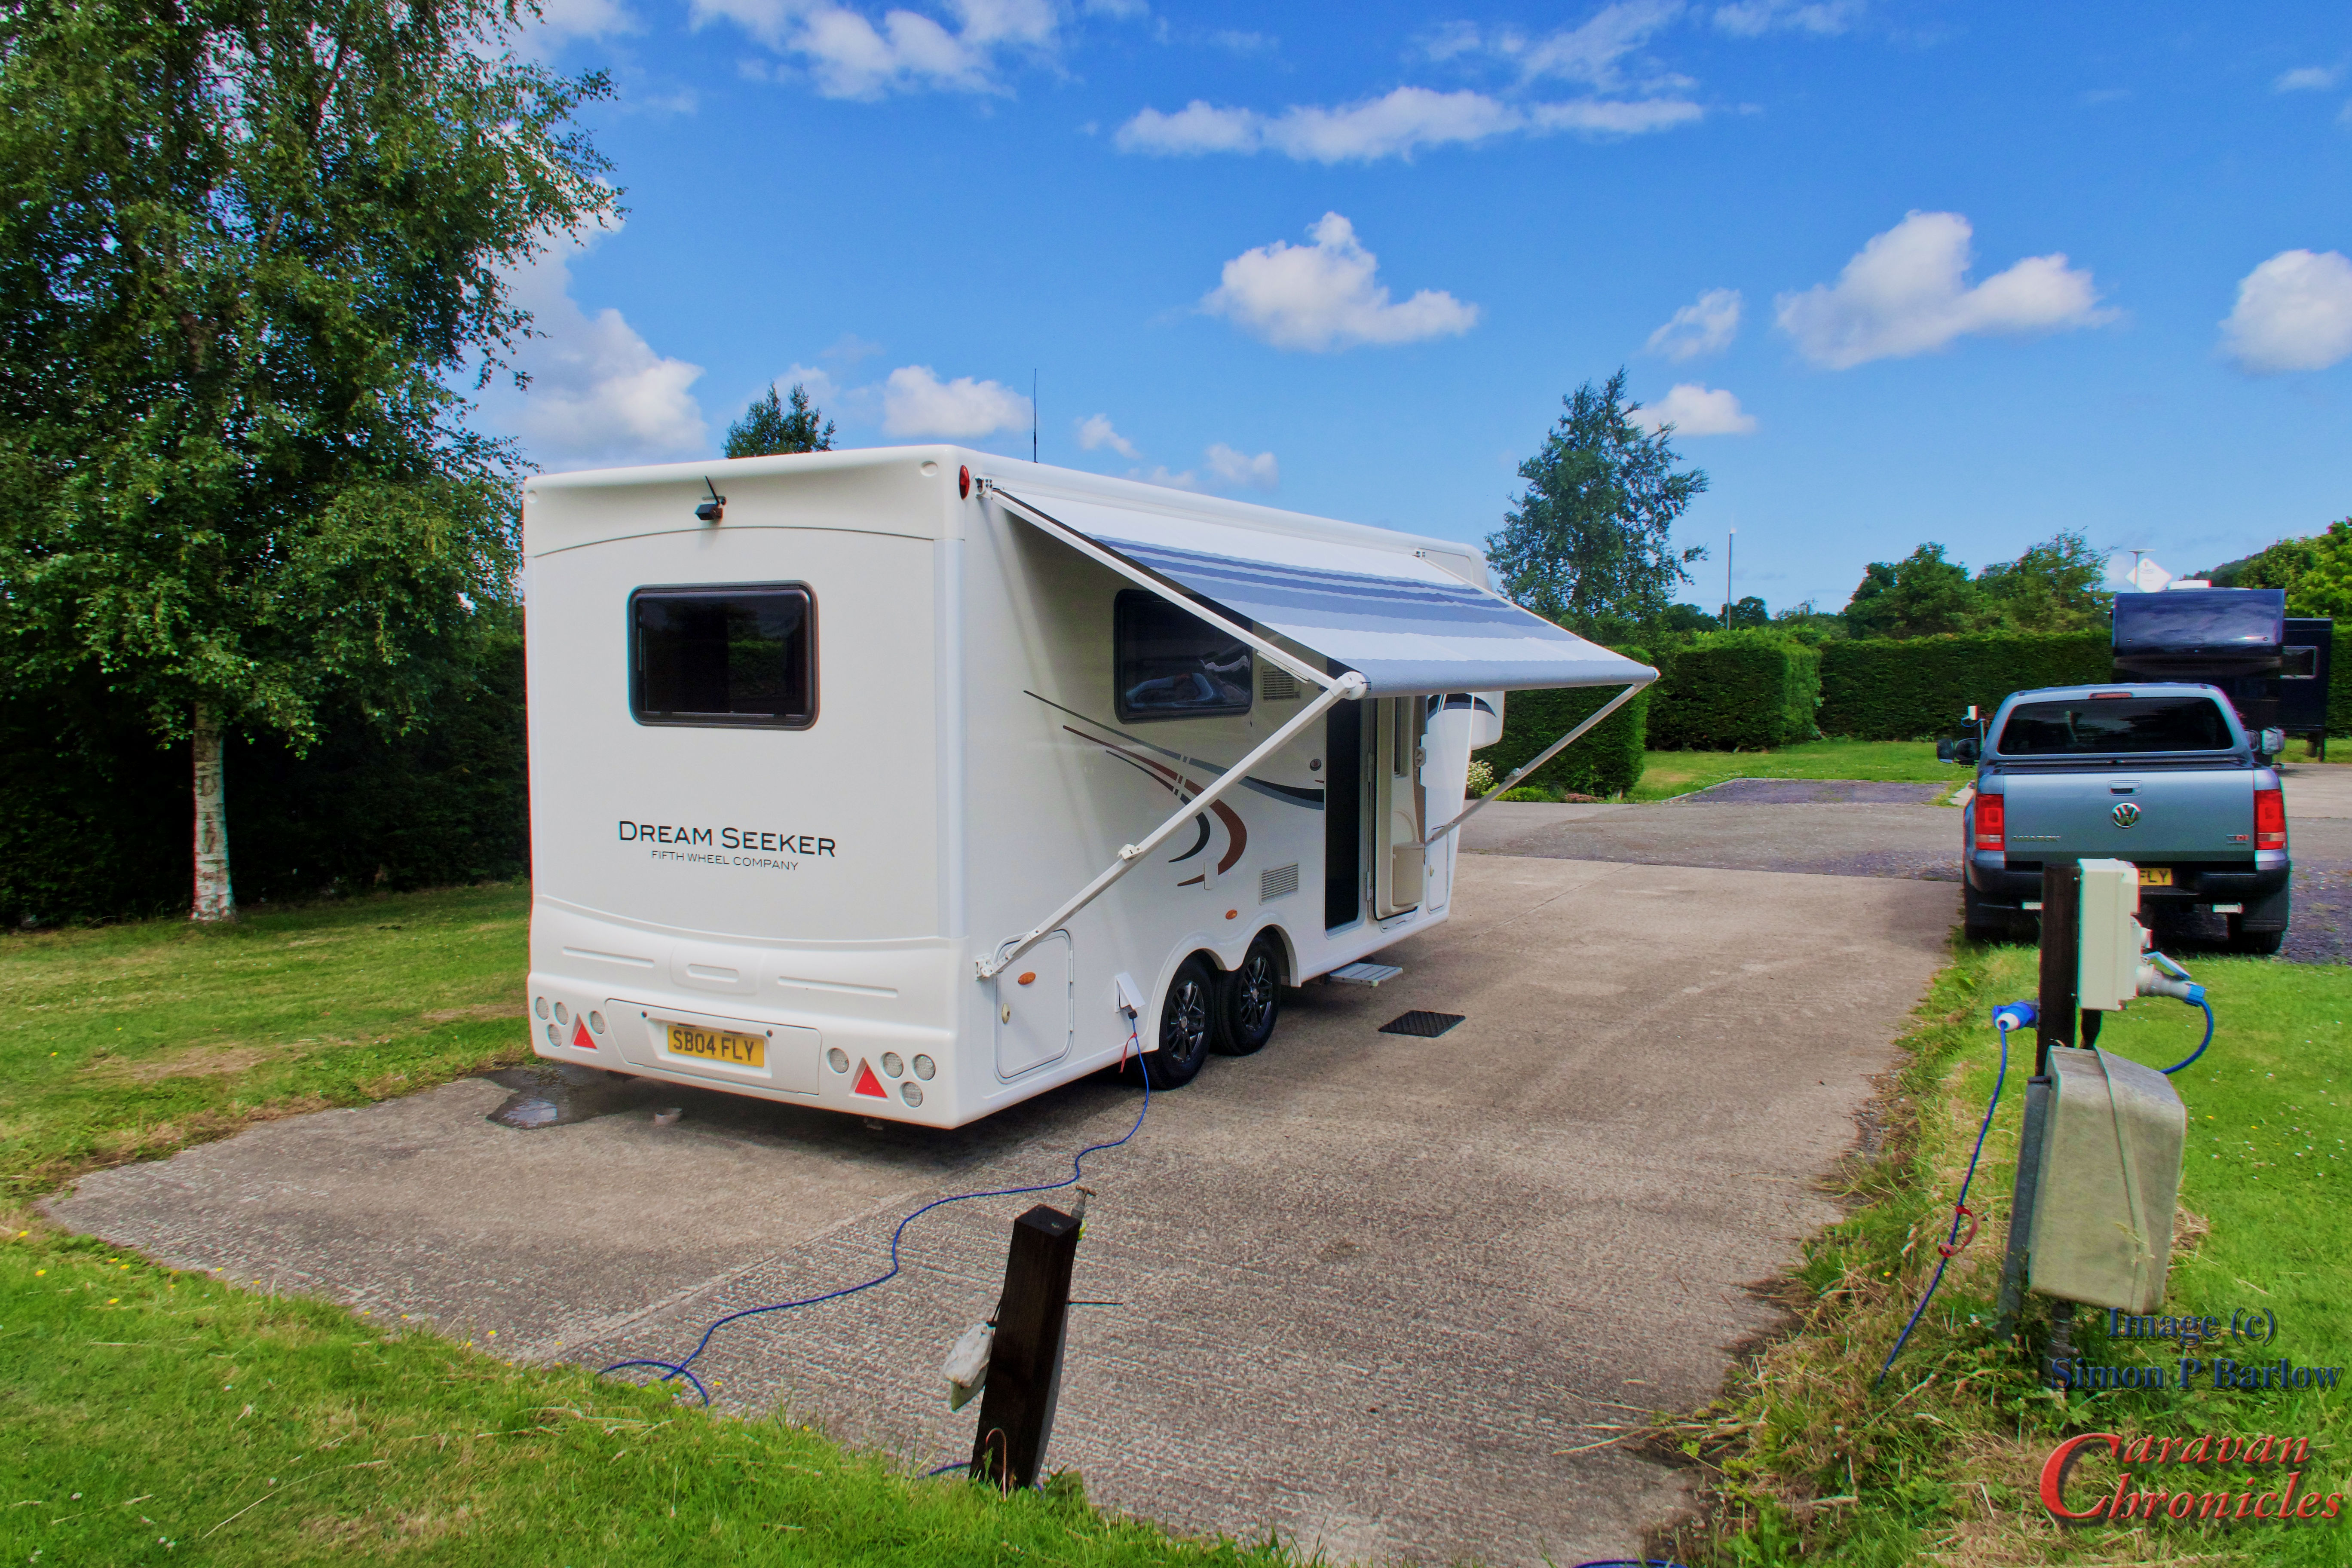
We followed Simon the short distance up the road and pulled into the carpark of the White House which leads through to the camp site. First snag… there was a conference on in the hotel and the car park was packed and Simon could not make it round the 90 degree bend due to two vehicles parked in areas that were not marked parking bays. A short delay, cars were moved and Simon finally got it on to the pitch. There are a number of pitches reserved for 5th Wheel caravan as this is where you can overnight when you bring your caravan for servicing. We went briefly through the unhitching process and then in a little more detail the actual setting up, connection and operating the slide out and a run through of powering up everything. He then left up to start putting everything away and said he would come back in a couple of hours to answer any questions we had and run through anything we were unsure of.
The pitches were obviously designed for 5th wheel units. With power, water and drains set up for dumping grey water tanks. We filled up the 230 litre fresh water tank and turned on the water heater. Our unit is not a new caravan, but it has gone through a full factory refurbishment that included a brand new Truma Combi 4E with iNet controller, brand new Thetford N4000 fridge, new twin 11 litre GasLow refillable bottles and a full reseal as well as lots of other details. It was also fitted with a SOG fan system on the Thetford toilet. It came with a Samsung TV and LG Sound bar installed. The brake system is electric over hydraulic and I was later to find out just how good this was.
Storage… OMG the storage!
We eventually got everything stowed away… everything we had brought with us… and we had not really filled any storage compartment or cupboard. In fact we has storage cupboards and compartments that were still empty. Then we found more storage under the seats in the slide out… and even more behind the wardrobe. It also has a huge under floor locker (As we are now currently set up our available user payload is around 960kg.
Simon called back to see how we were getting on and if we had any questions. I’d noticed a couple of things and he headed off to the factory and returned within 20 minutes with replacements. I will probably repeat this several times but I can’t get over just how good the service and all our dealings have been with everyone from the Fifth Wheel Company. It is exceptional to say the least.
Simon left us to enjoy the rest of the day in our caravan. Tomorrow (Thursday) we have the day to ourselves… which would include a run out to to do a bit of shopping. Friday Simon was going to collect the Amarok and take it down to the factory to have the Reese hitch installed, the electrical conversion and additional systems installed for the electric over hydraulic brake system and air assist bags installed on the suspension which would allow the Amarok to be plated to a GTM of 6400kg.
Henry just checking in with Sue and making sure She knew where the cat biscuits were stored.
During the course of Thursday we had new neighbours arrive in their Celtic Rambler… Gary and Helen, who were also newish to Fifth Wheel life having taken delivery of their unit last November but it was really great to chat to them as they had some really helpful tips about things they discovered since starting out with a 5th wheel. It was also great that Gary spent a little time going through some of the things he had come across hitching and unhitching…. useful information if we ever come up against similar situations.
Friday morning and Simon appeared early to collect our Amarok. As it drove off we set about re-organising stuff we had previously put away as talking the evening before we realised the whole way we had caravanned before would change. I took the opportunity to do a test dump of the grey tank using our colapz waste pipes from the previous caravan and swopped fittings on our blue water hose so I could connect to the tank filler.
That afternoon Simon returned with one of the company vehicles and we went through hitching up and unhitching a couple of times until we had… saying mastered it would be wrong…. become familiar with the sequence might be a better way of putting it. I think we will be using the checklist for a while longer! There are quite a few more steps to hitching, but I’ll swear it is easier than hooking up a caravan on a tow ball. Sue called the list out as I went round going through the process. I guess if I can remember the Emergency checklists for aircraft I’ve flown then this will become as easy as that.
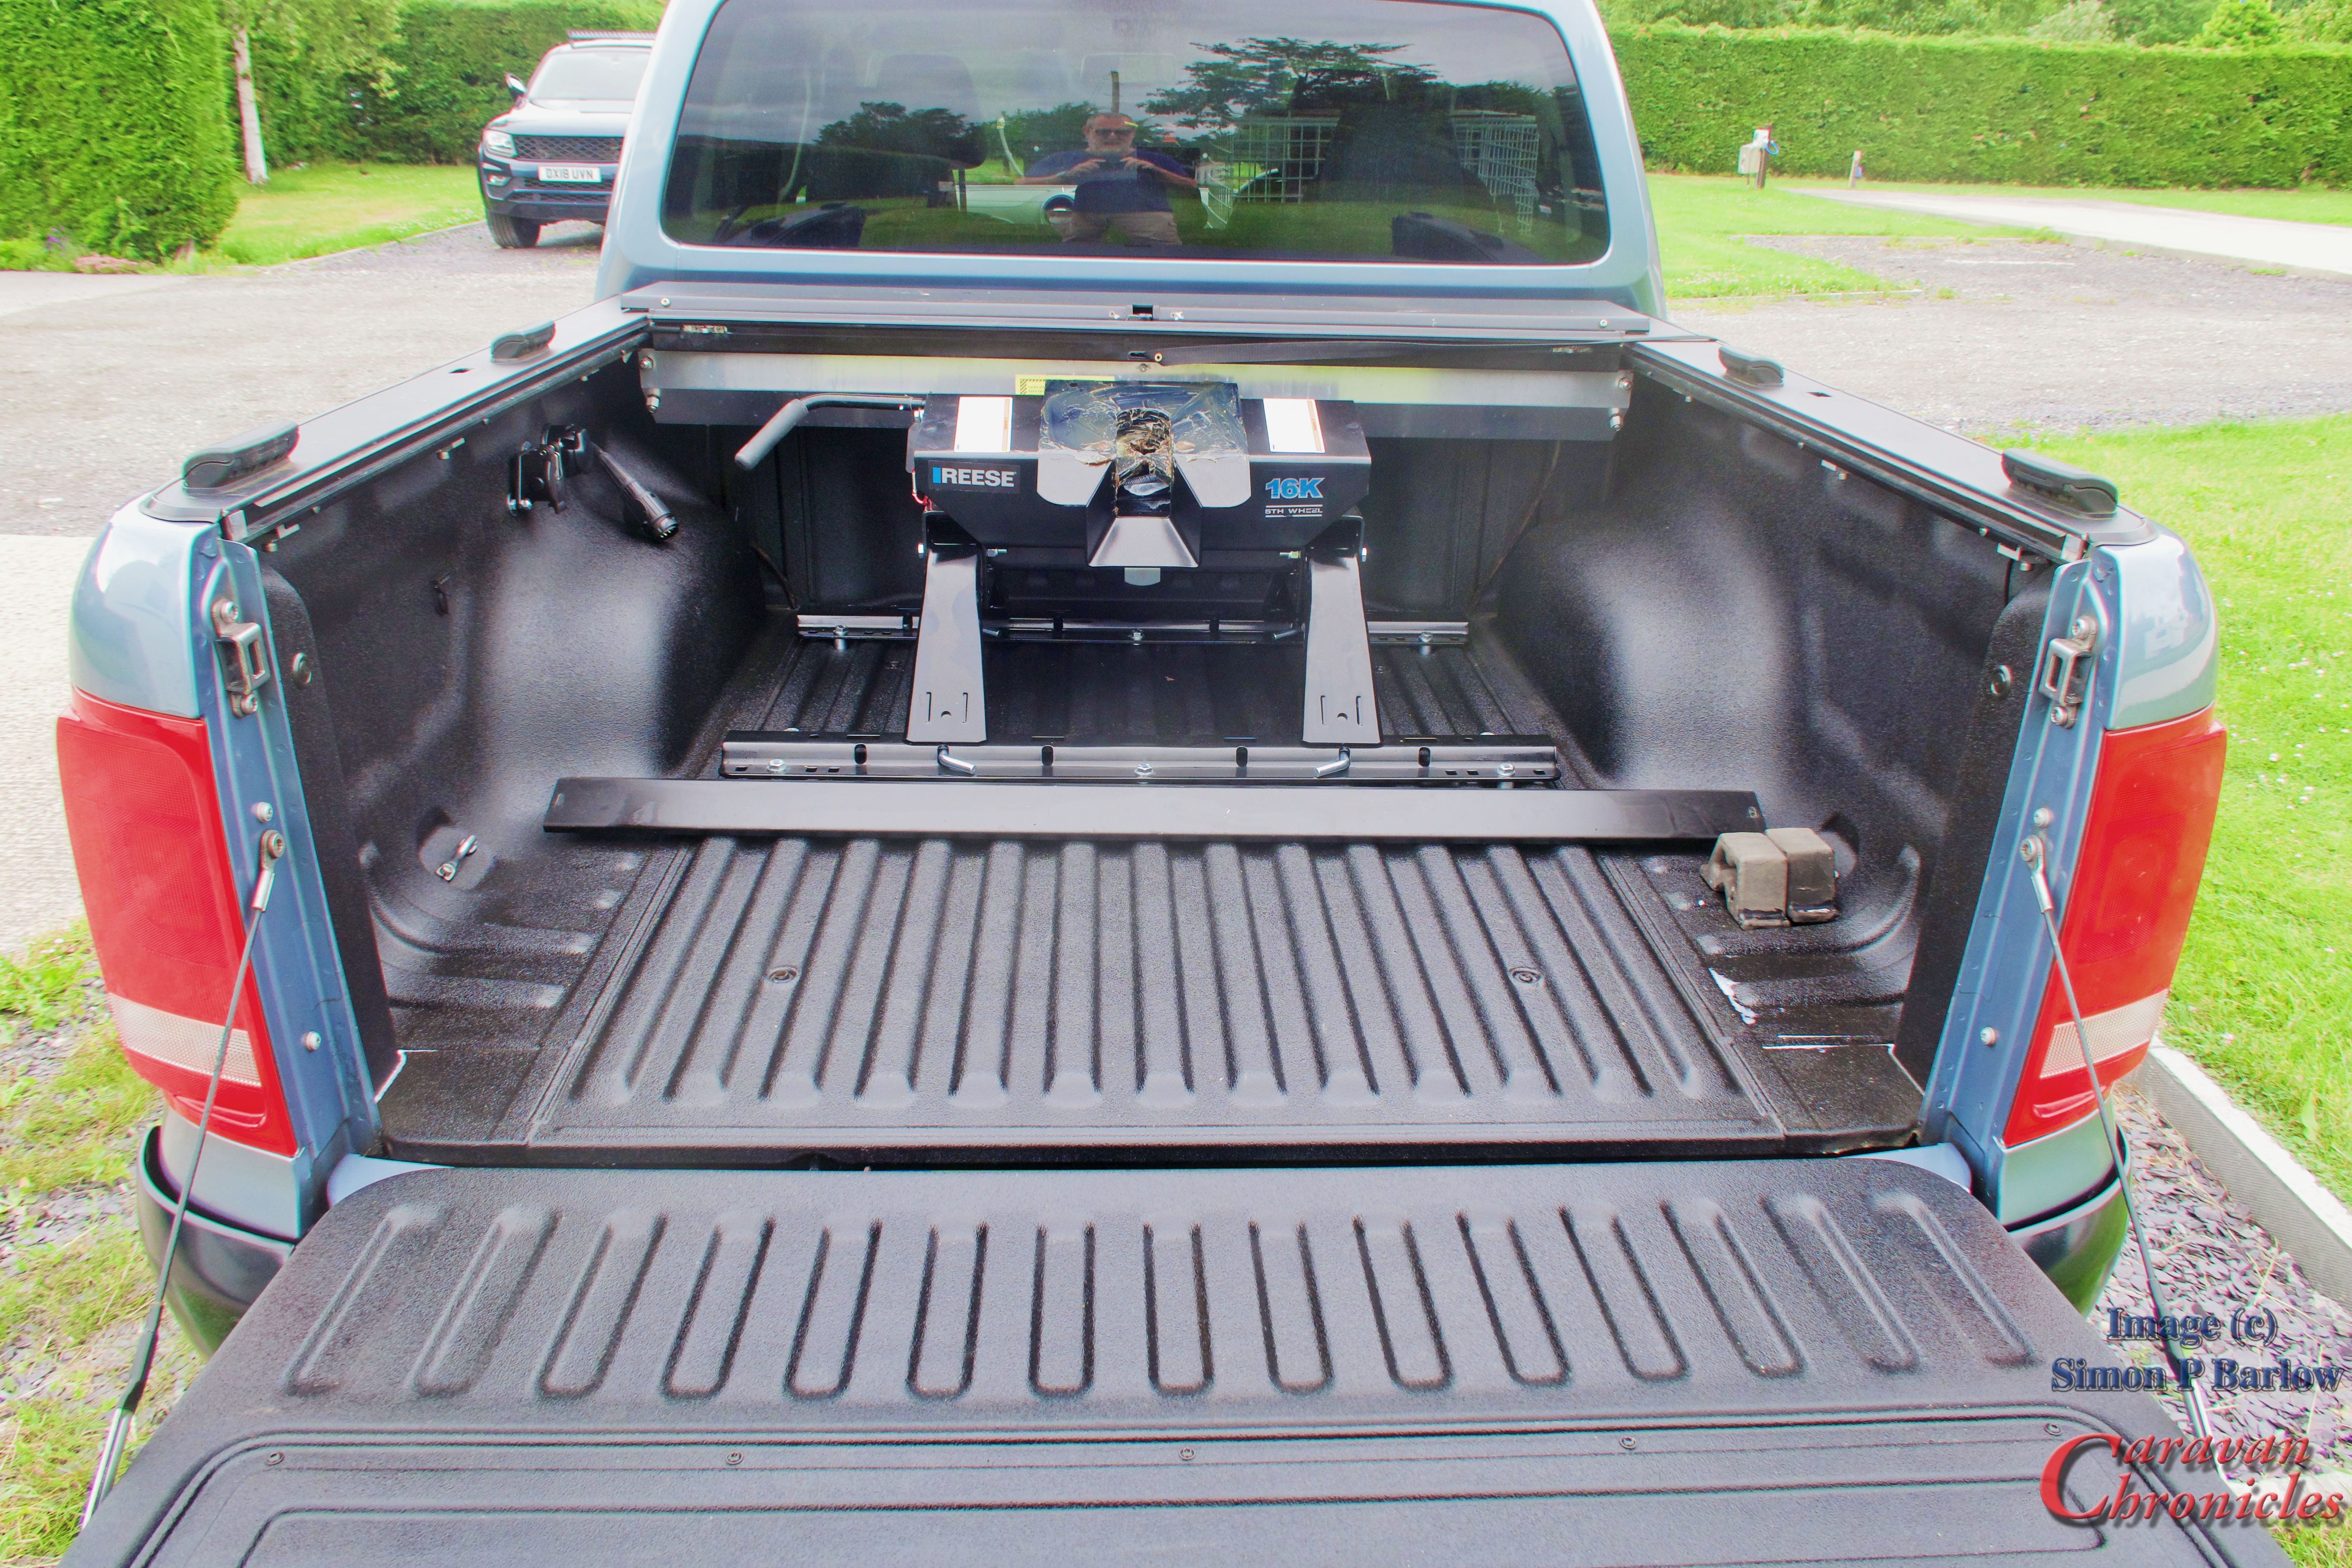
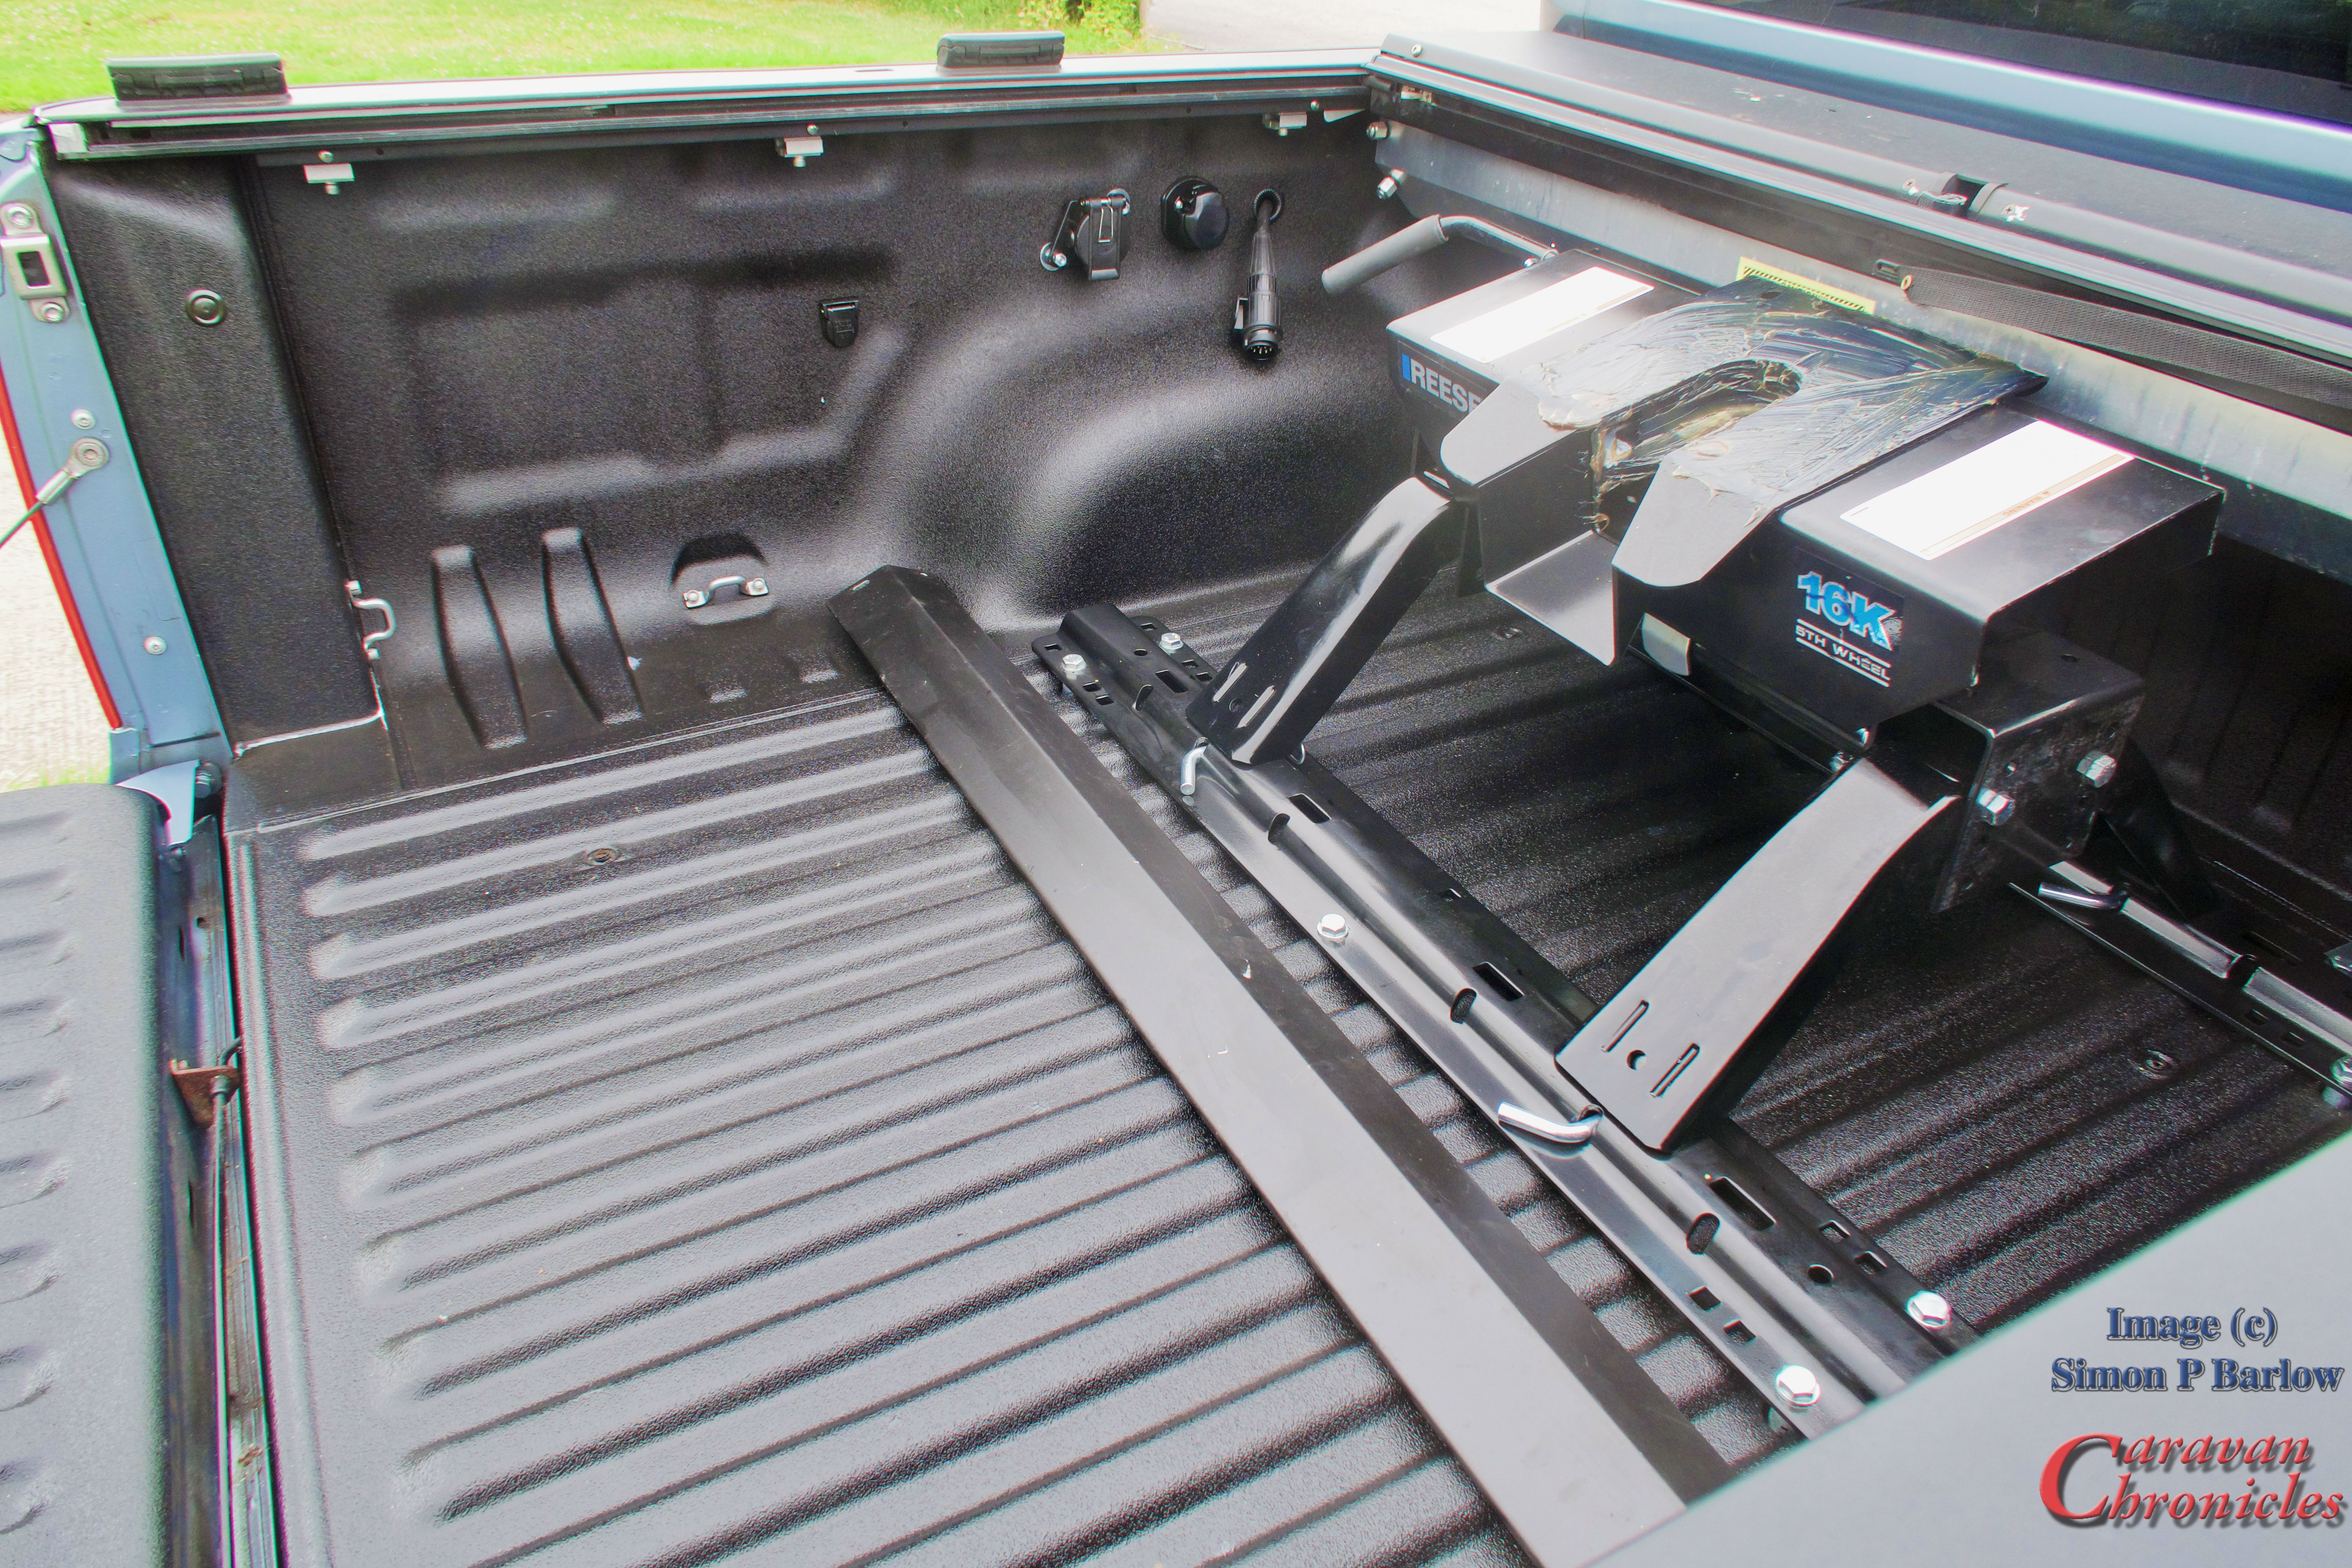
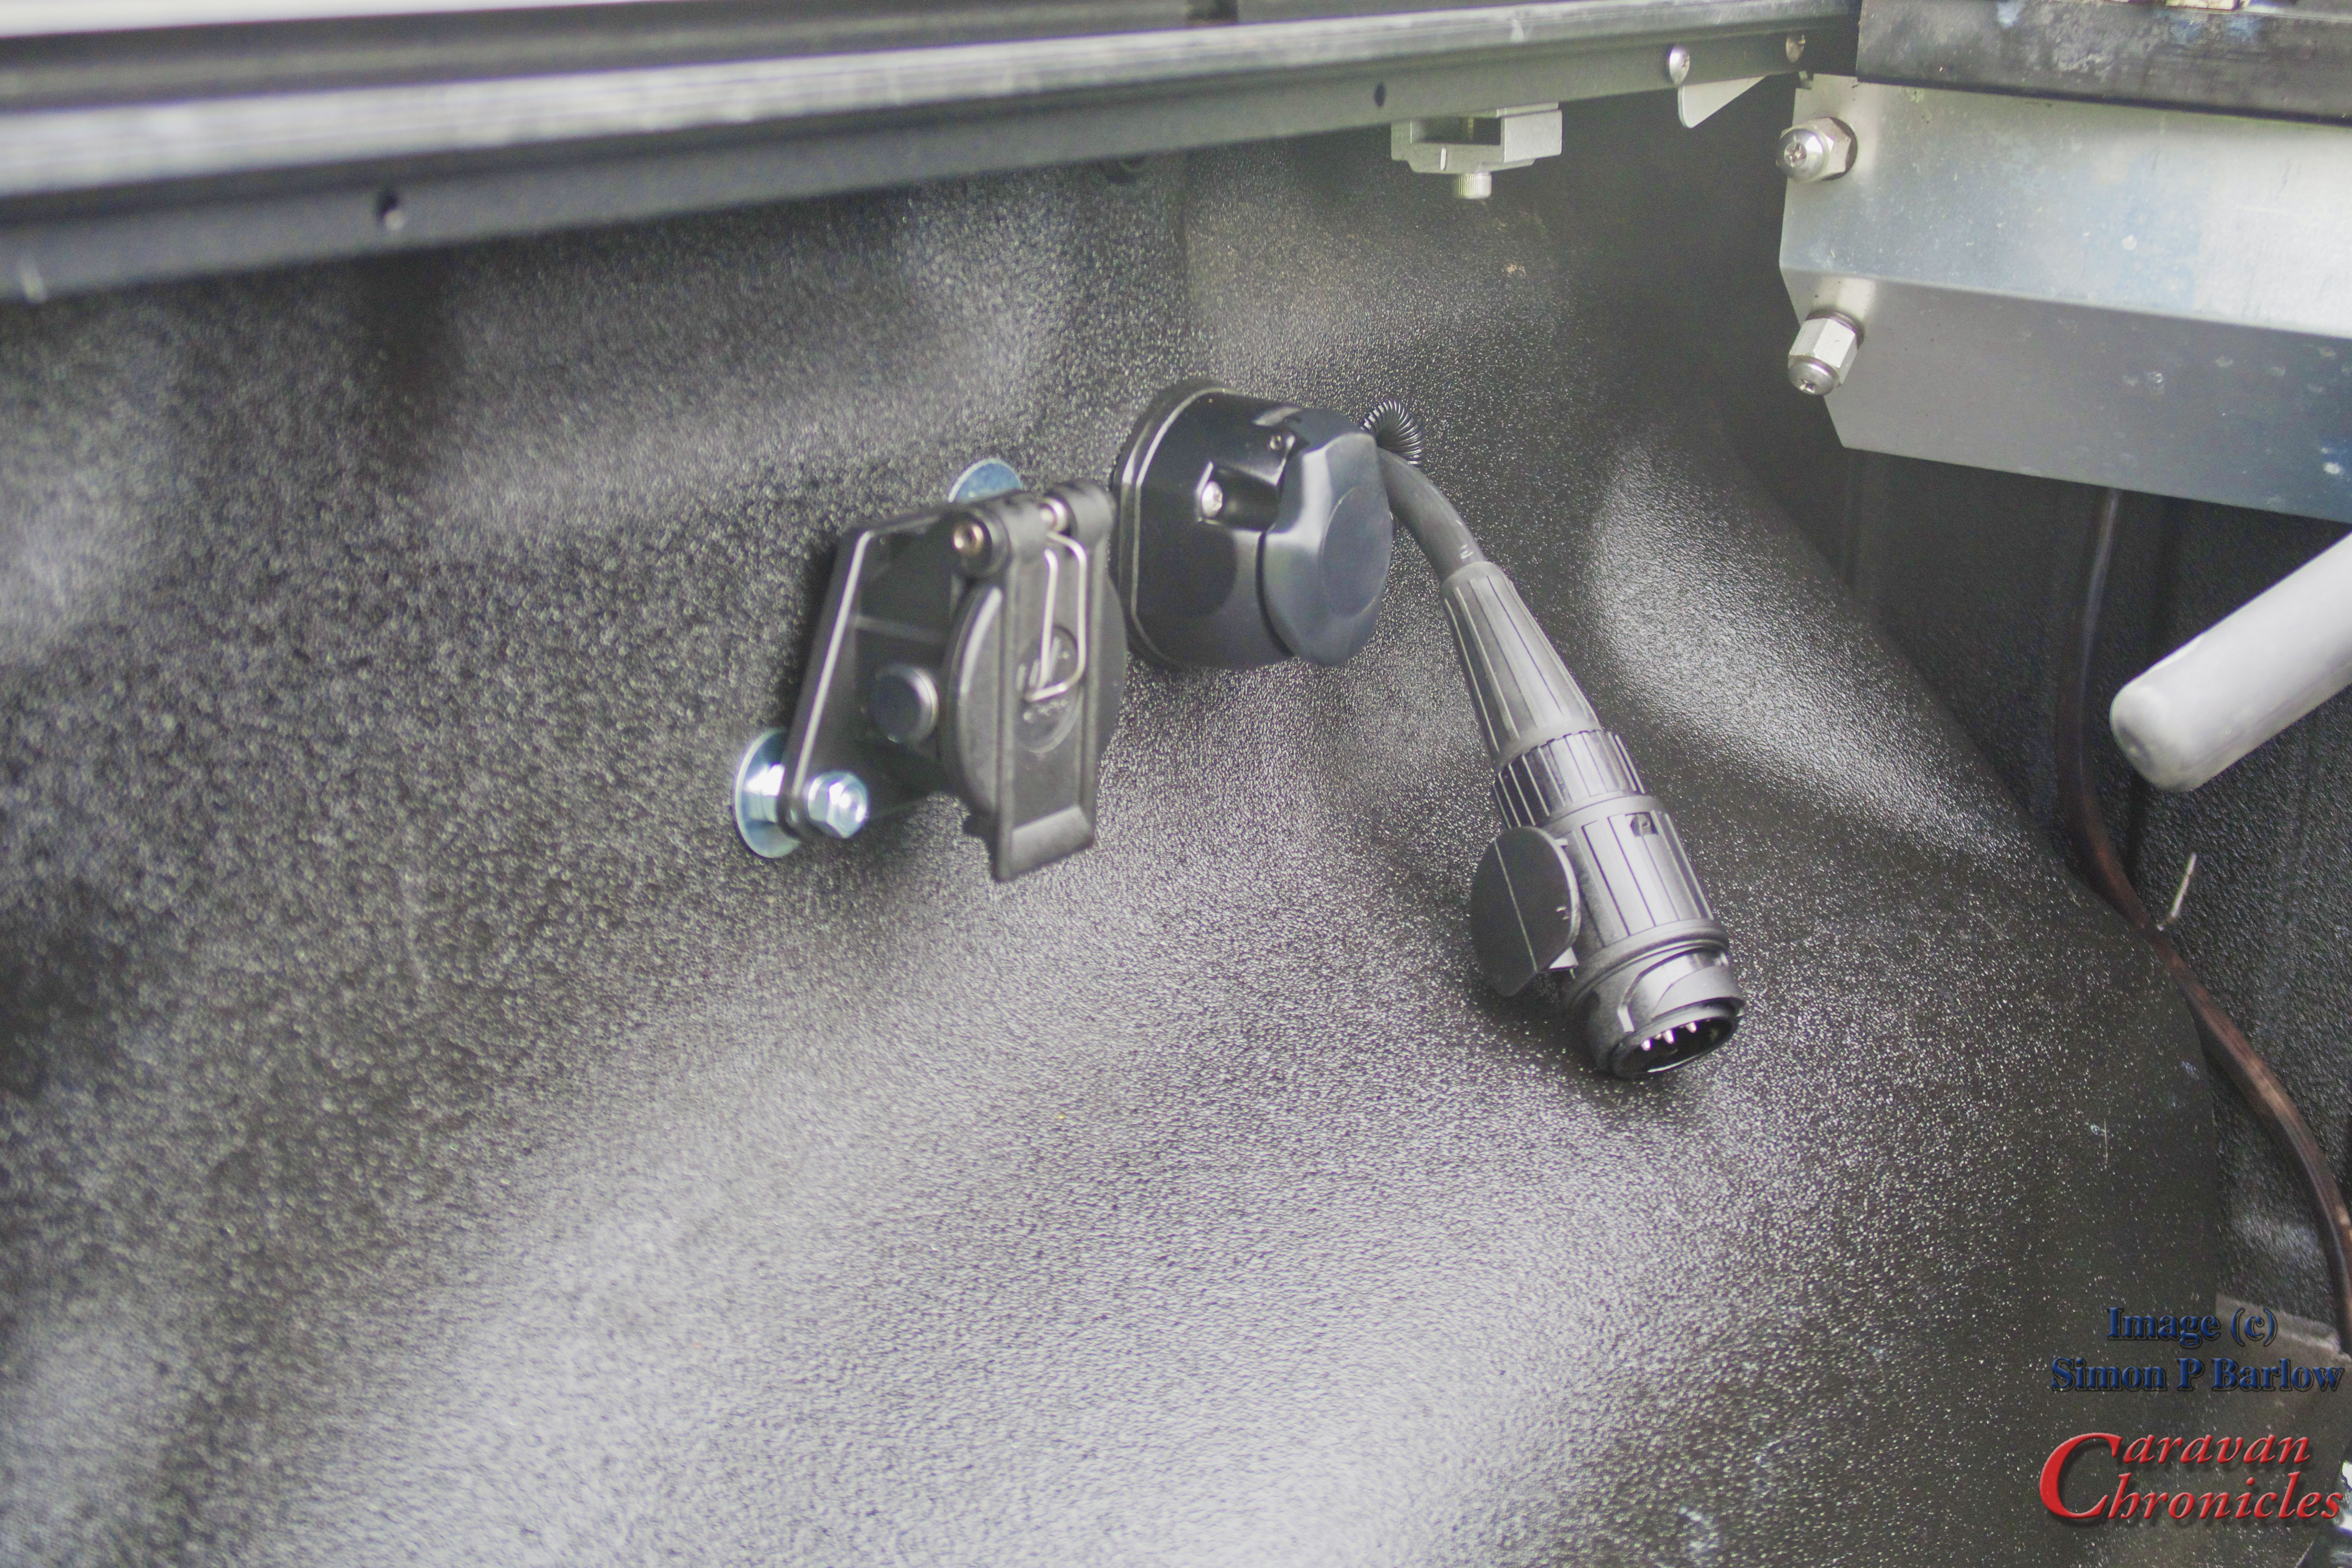
Simon returned late in the afternoon with our Amarok…. all converted, new weight plate fitted and the truck bed was looking really clean. They had managed to install all the connectors in the side of the bed rather than in a box ad it looked really neat.
We still had lots of room in the bed of the truck and one of my future projects is to re-install the slide out tray back in. It will need shortening but I think it will be achievable.
OK, I know you are going to ask….. why is there a 13 pin plug hanging out next to the two sockets? Well part of the installation was to move the connections for the tow bar mounted socket over to the pickup bed so that is the primary connection for the 5th Wheel. The 13 pin plug is effectively a short extension down to the tow bar so I retain all the functions at the ball hitch for towing our trailer. All I have to do is plug it in to the thirteen pin socket in the pickup bed. I have now put a green cap on it and it is secured in a clip.
The installation has also allowed me to continue using our Roll-N-Lock bed cover and as an added bonus, If I want to fit the bike rack on then I can do easily within a few minutes. Obviously we can’t tow the 5th wheel with the bike rack on.
Wagons roll…
Saturday morning arrived…. put the awning away (something that took about 1 minute seriously!) dump the grey and fresh water, turn the gas off. Sue stowed all loose items, bought the slide in, stowed the waste pipe, and dropped the tailgate.
Reversed and aligned up on the hitch adjusted the hitch height using the electrical landing legs, reversed on with a small ‘clunk’ as the jaws closed going the pin. Quick pull test, and as I hooked up the 13 pin plug and the break services plug Sue raised the landing legs. Henry stowed in his carrier… looking quite satisfied with the trip in general as he seems to have found a few new spots to snooze in we were ready to pull out. From the point of us saying “Right shall we make a move” I guess it took less than 30 minutes before we were ready to pull out. It really was easy to break camp.
Final walk round and photo
Pulling out of the site onto the road wasn’t difficult. I need to adjust my mirrors slightly as I’d like to see a bit more of the 5th wheels tyres on the road, especially for cornering. The first real test was approaching a small roundabout a few hundred metres up the road…. I didn’t think we were slowing enough and I was going to overshoot onto the roundabout, so I pressed the brake peele a bit harder… then the trailer decided that meant it must be a sign more brakes were required and it obliged… wow those brakes do work well. I don’t think there is a delay as such, you just have to give them a clear sign of what you want them to do. So a little feathering of the foot brake to shed a few miles per hour you don’t really feel them, but add a bit more pressure than that then they come on enthusiastically for a millisecond until they judge just how much you want to slow down by then match you somehow. You feel them come on then ease up to match you. Never had that on a trailer before.
The trip home was rather uneventful…. except for the looks that you get… I don’t think we would have got more looks if we had been driving a bright pink soft top Ferrari with a giraffe in the back seat.
A Huge Thanks…
I’m going to say it again. A huge thanks To Simon, George who we initially dealt with and to all the staff at the 5th Wheel Company. This not sponsored, we didn’t get or receive any special discounts and although Simon was aware I wrote a blog, I really don’t think this influenced the way we were received or treated. We spoke to Gary and Helen (our neighbours) and they said the same. The service and level of commitment to the product and their customers is second to none, especially in this industry.
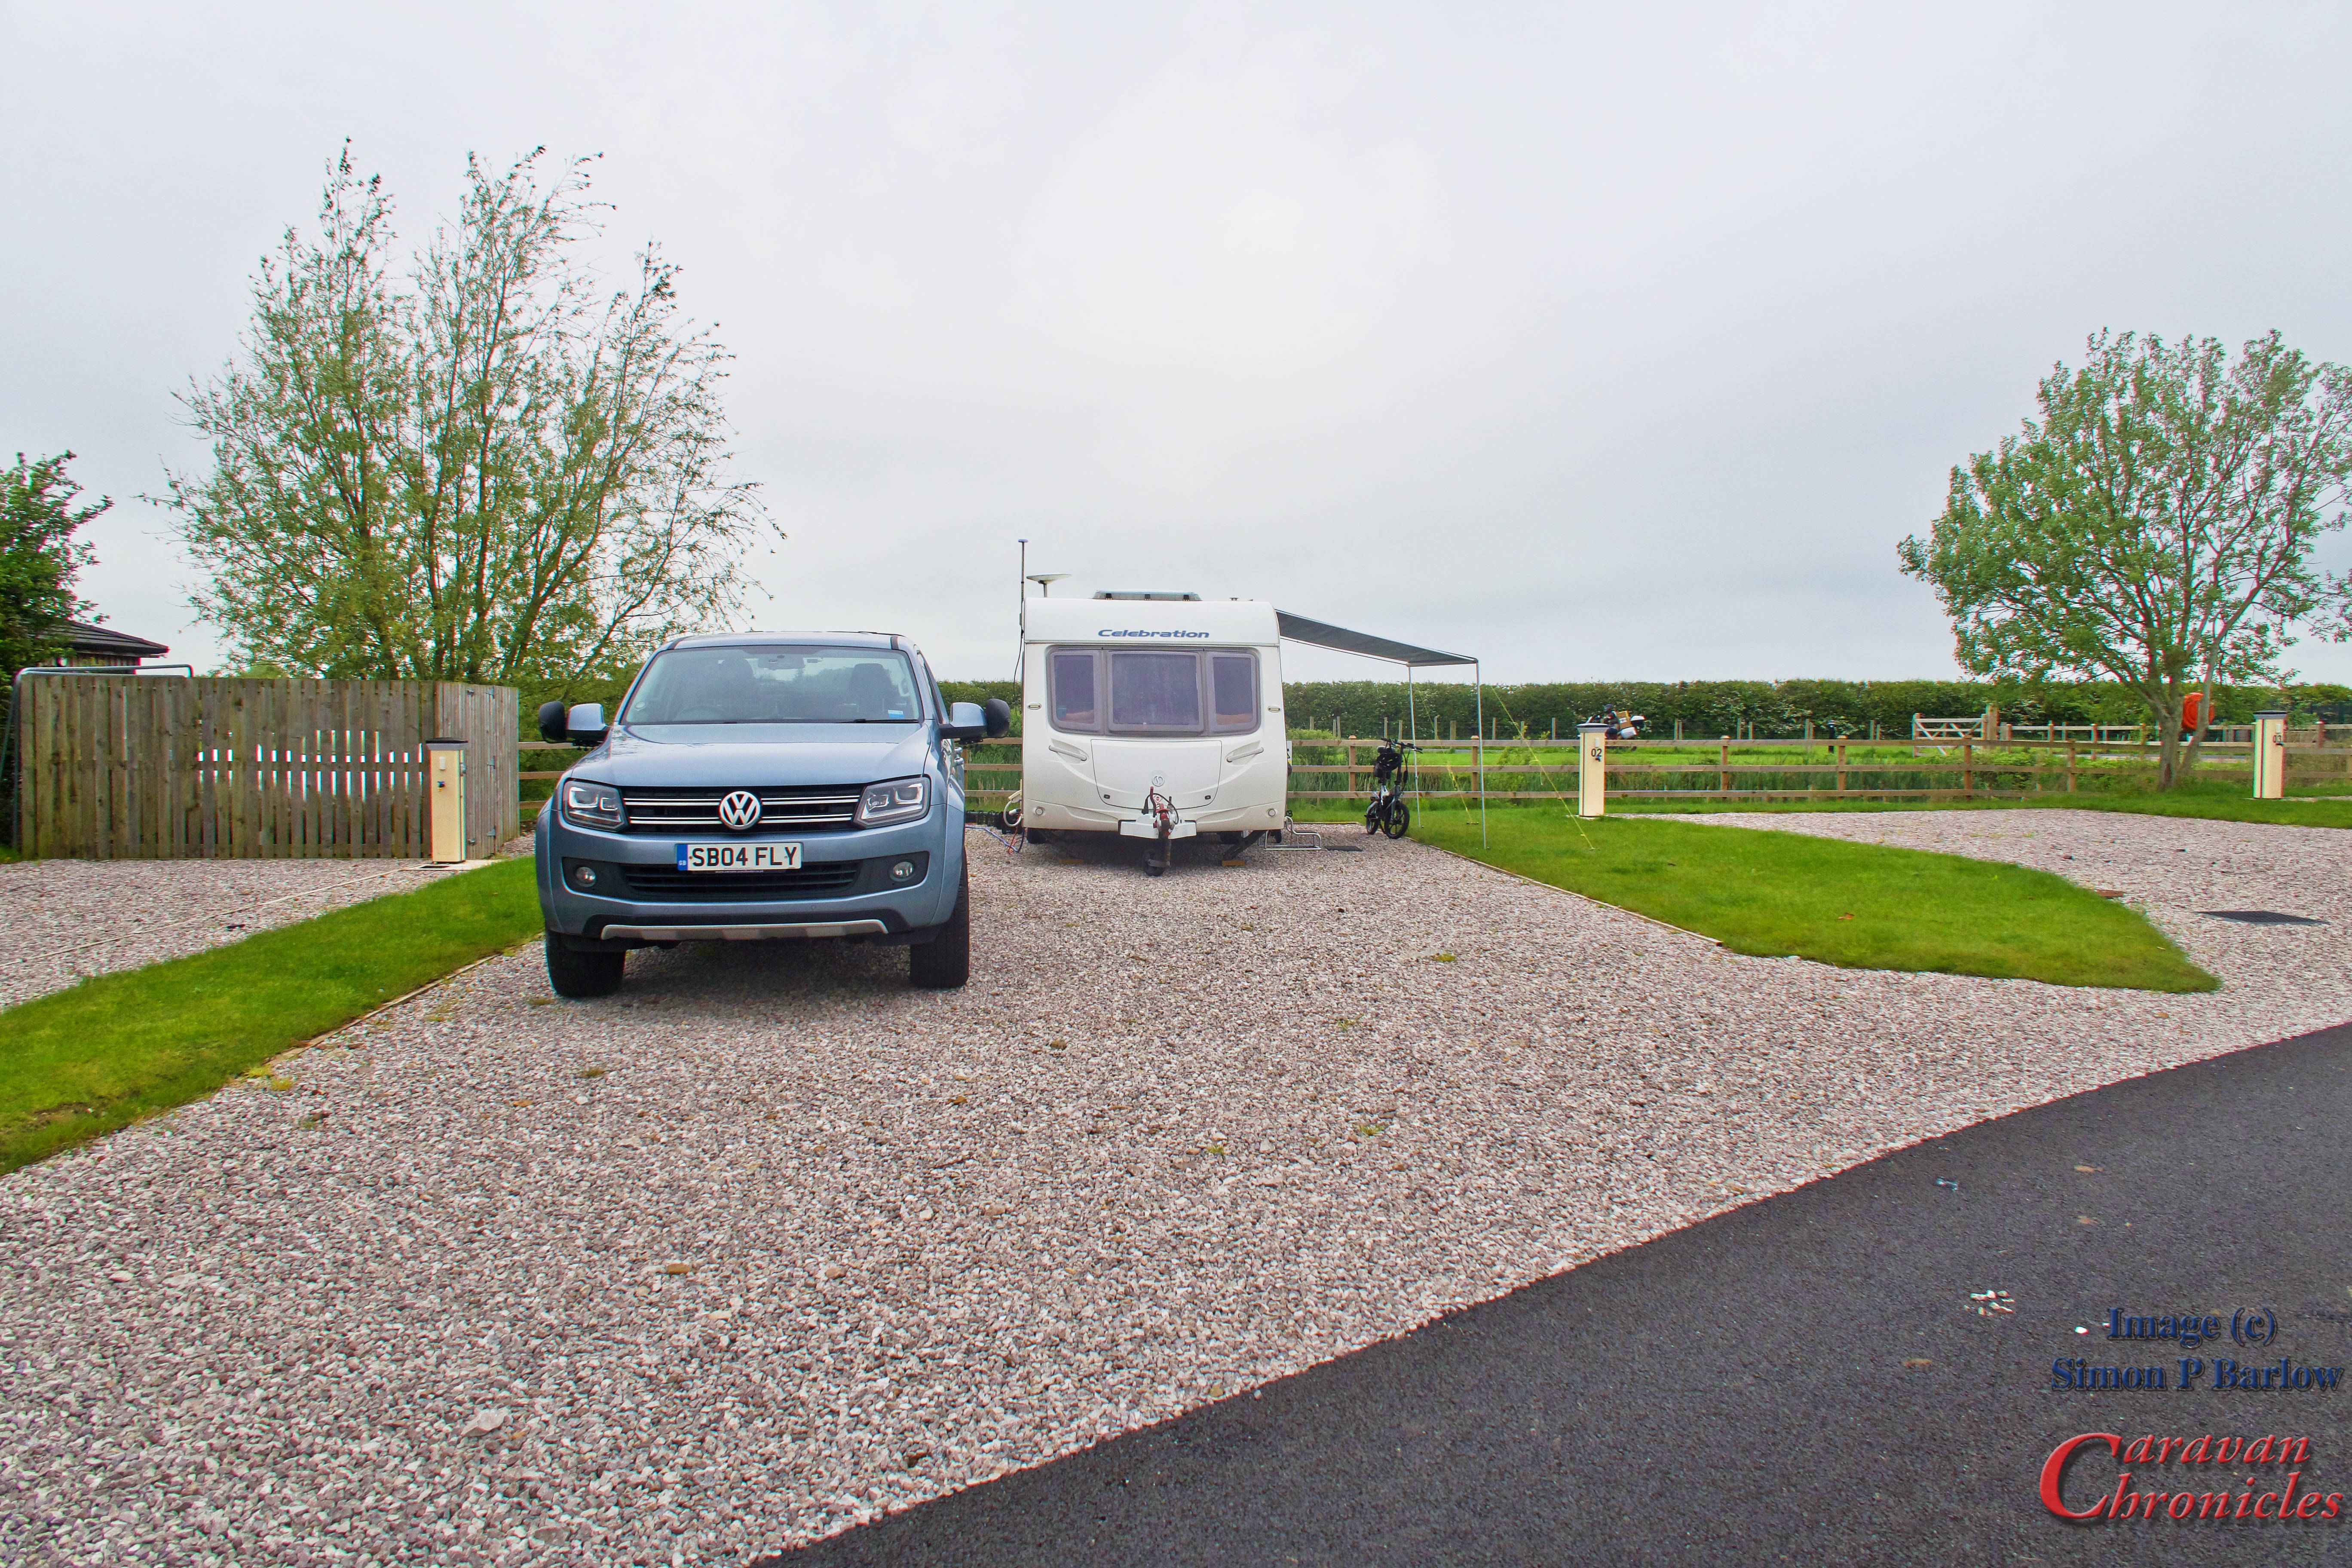
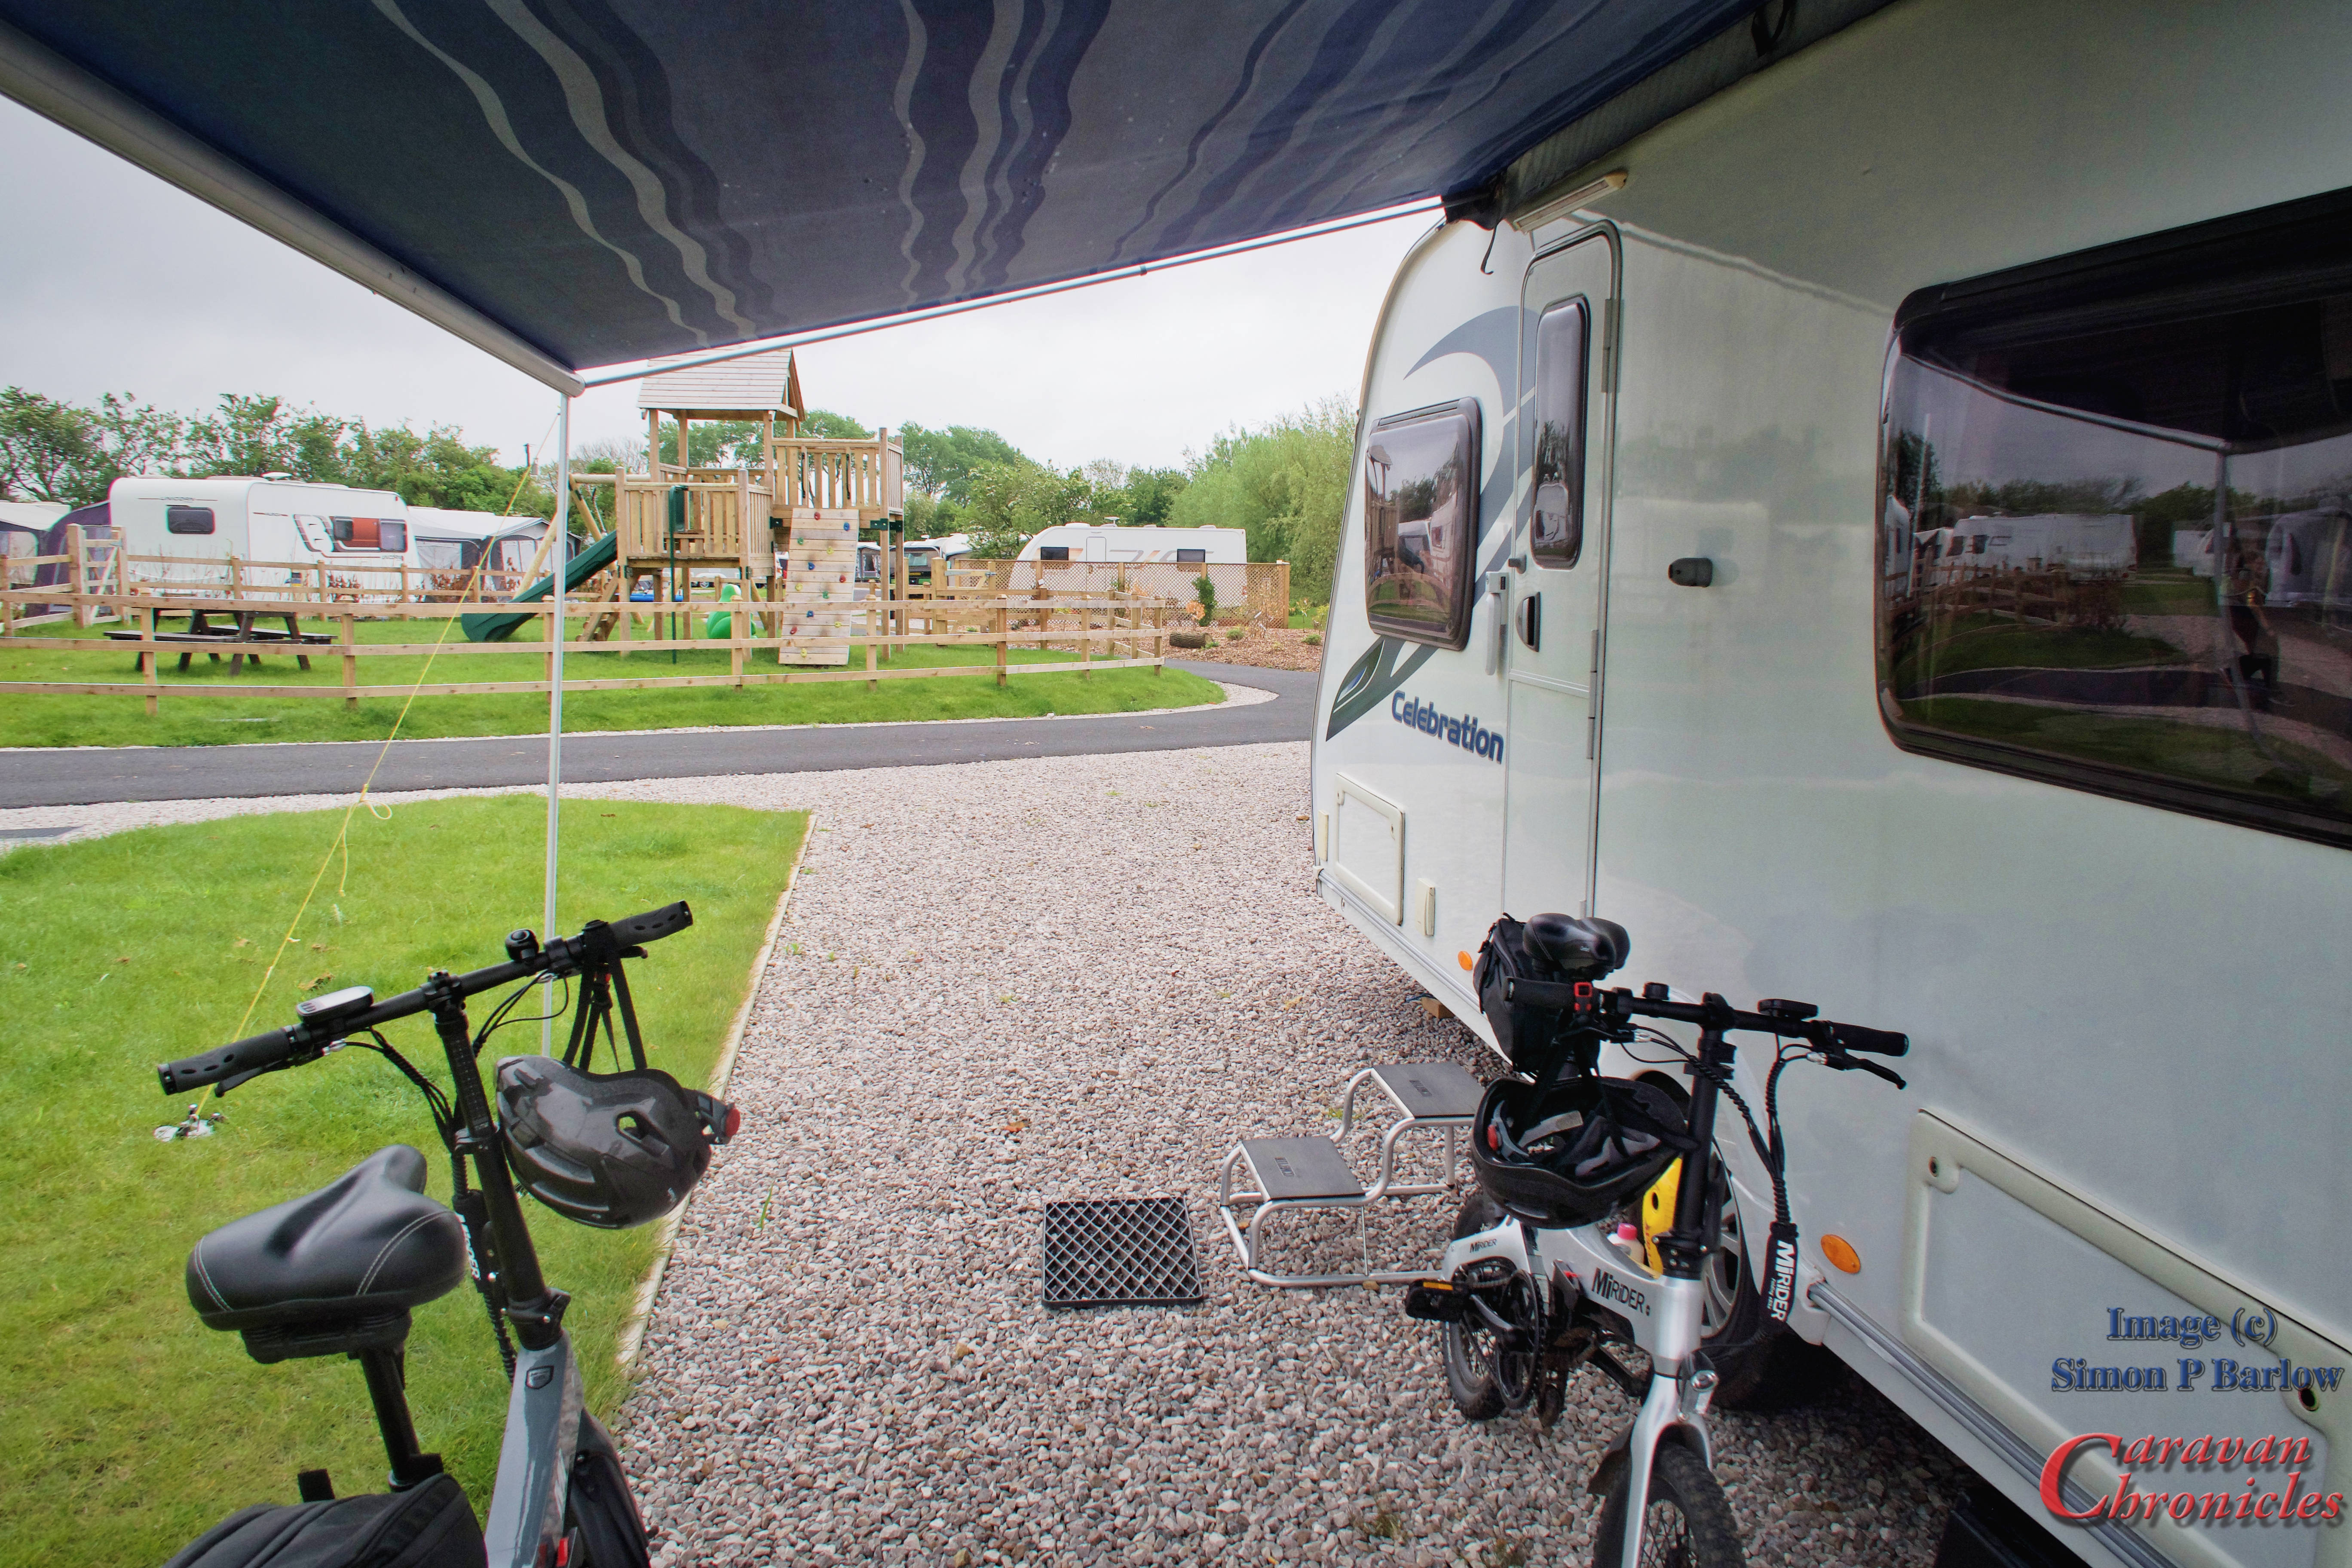
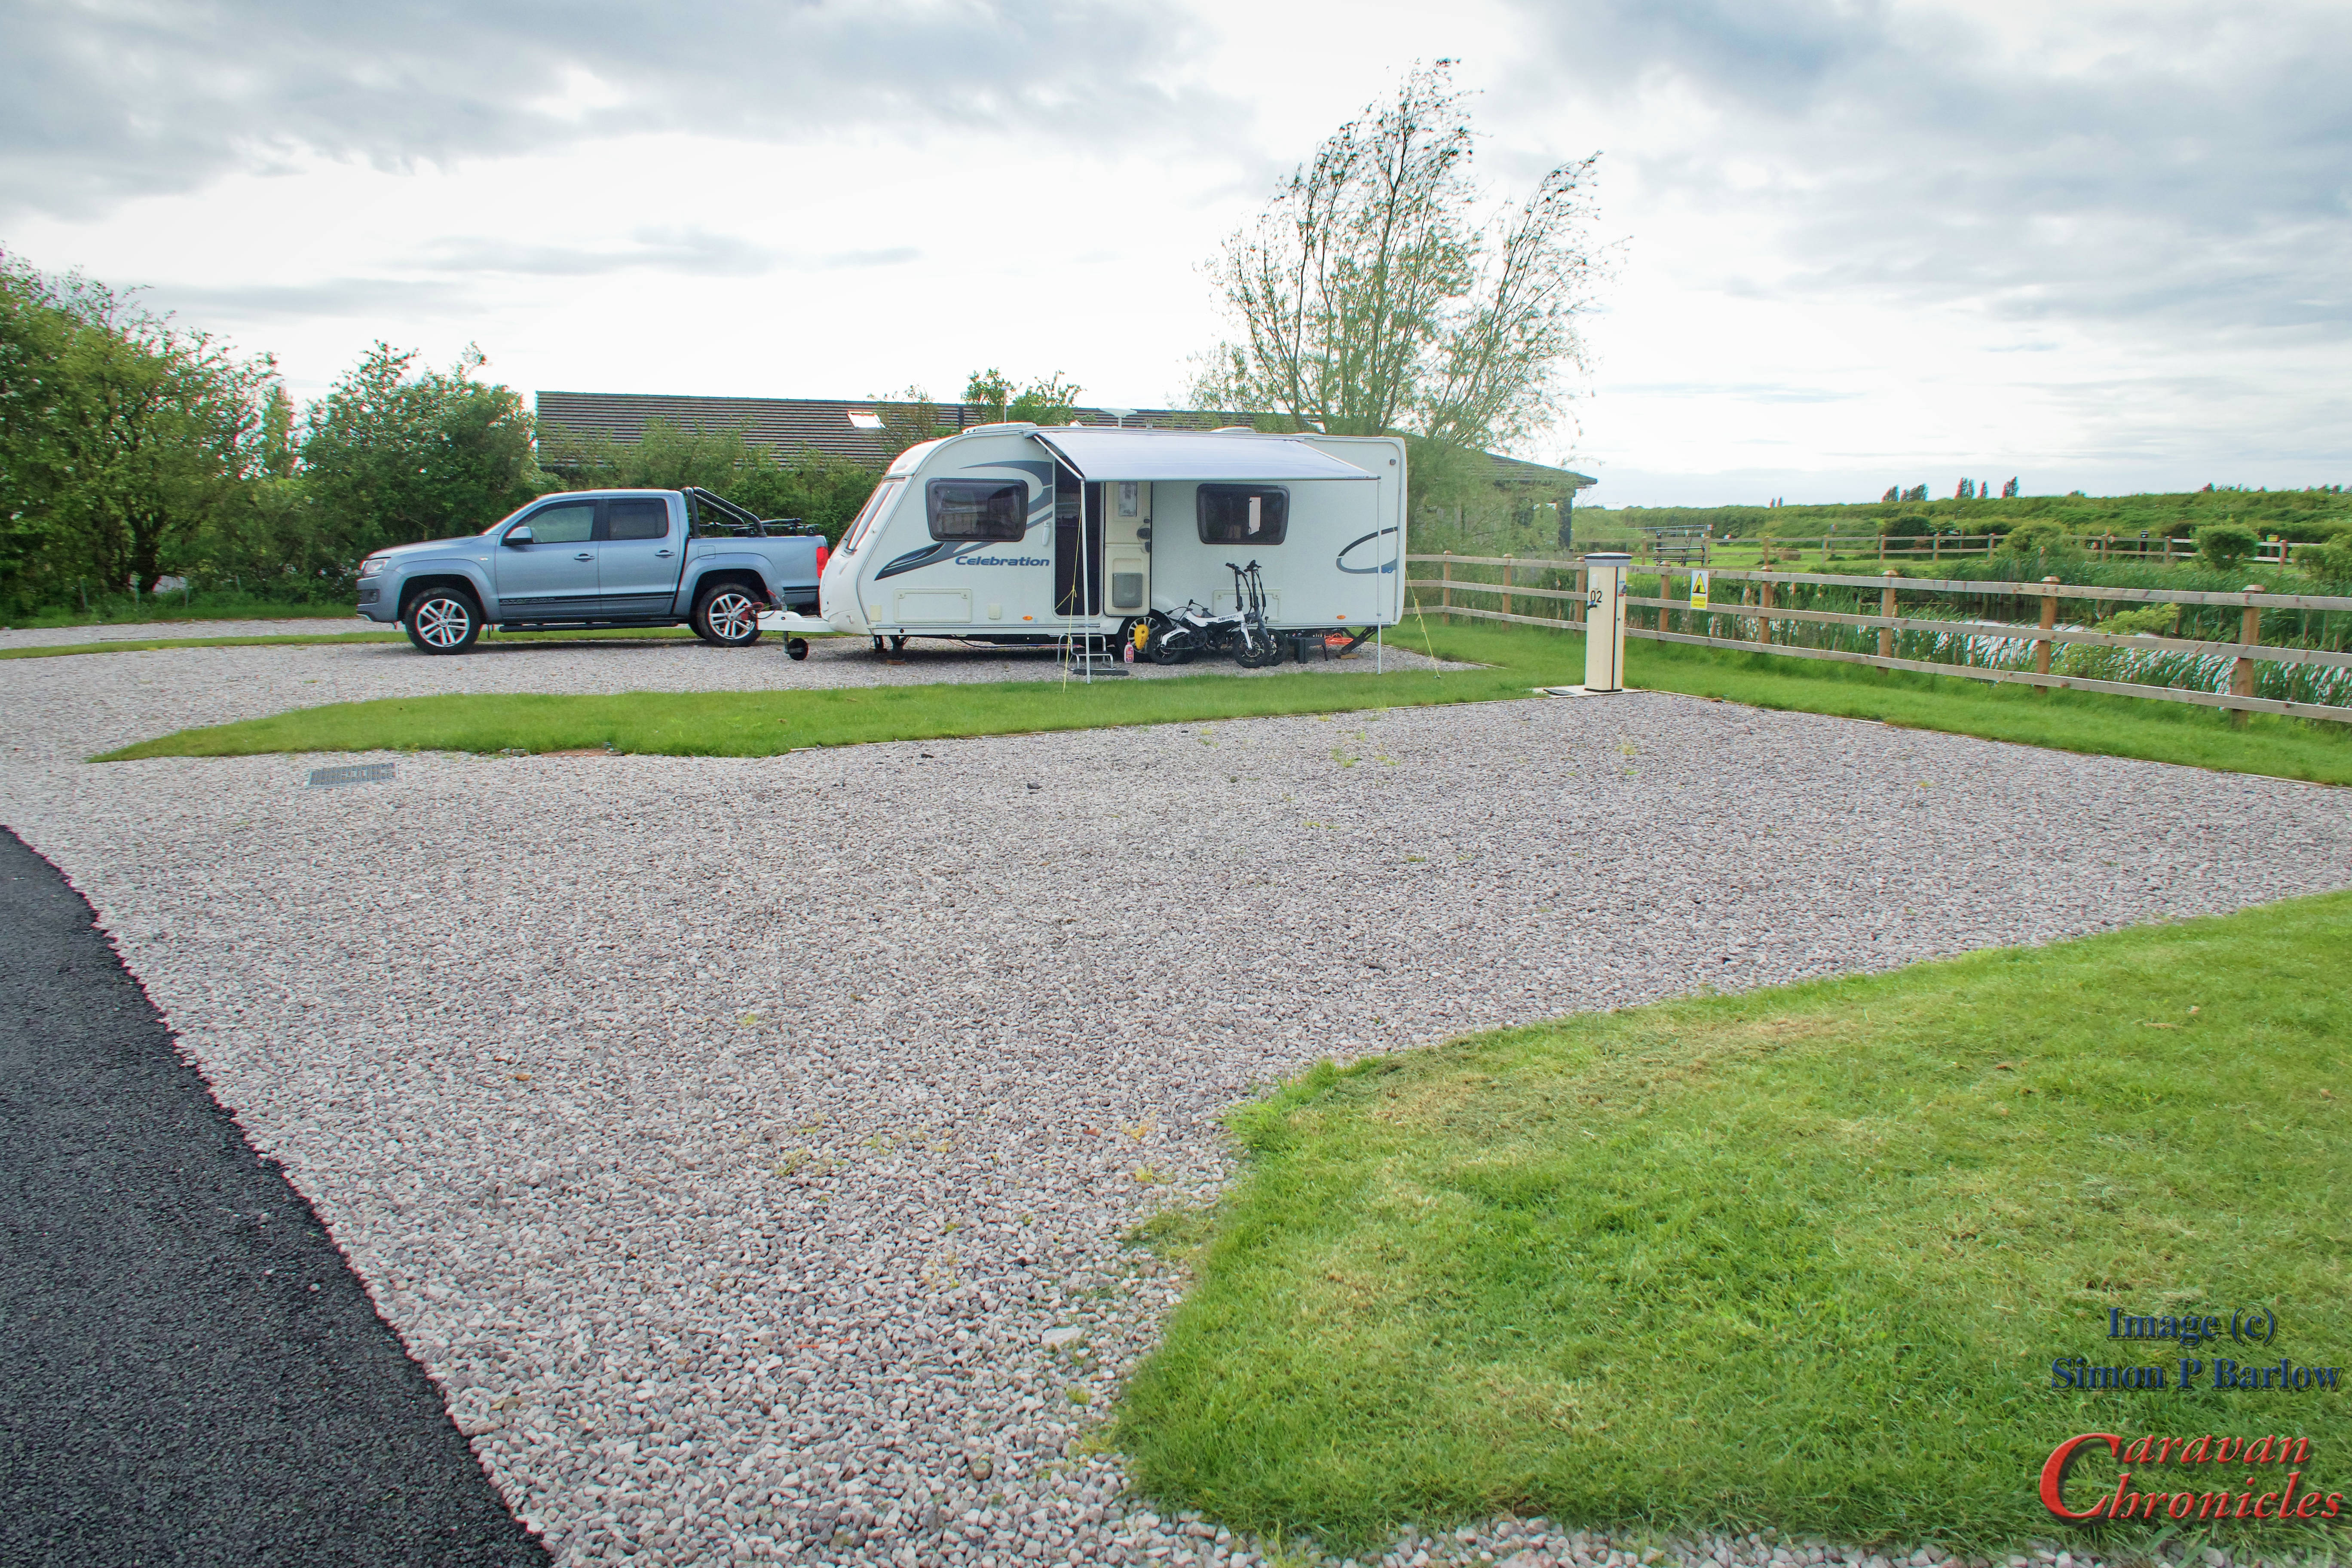
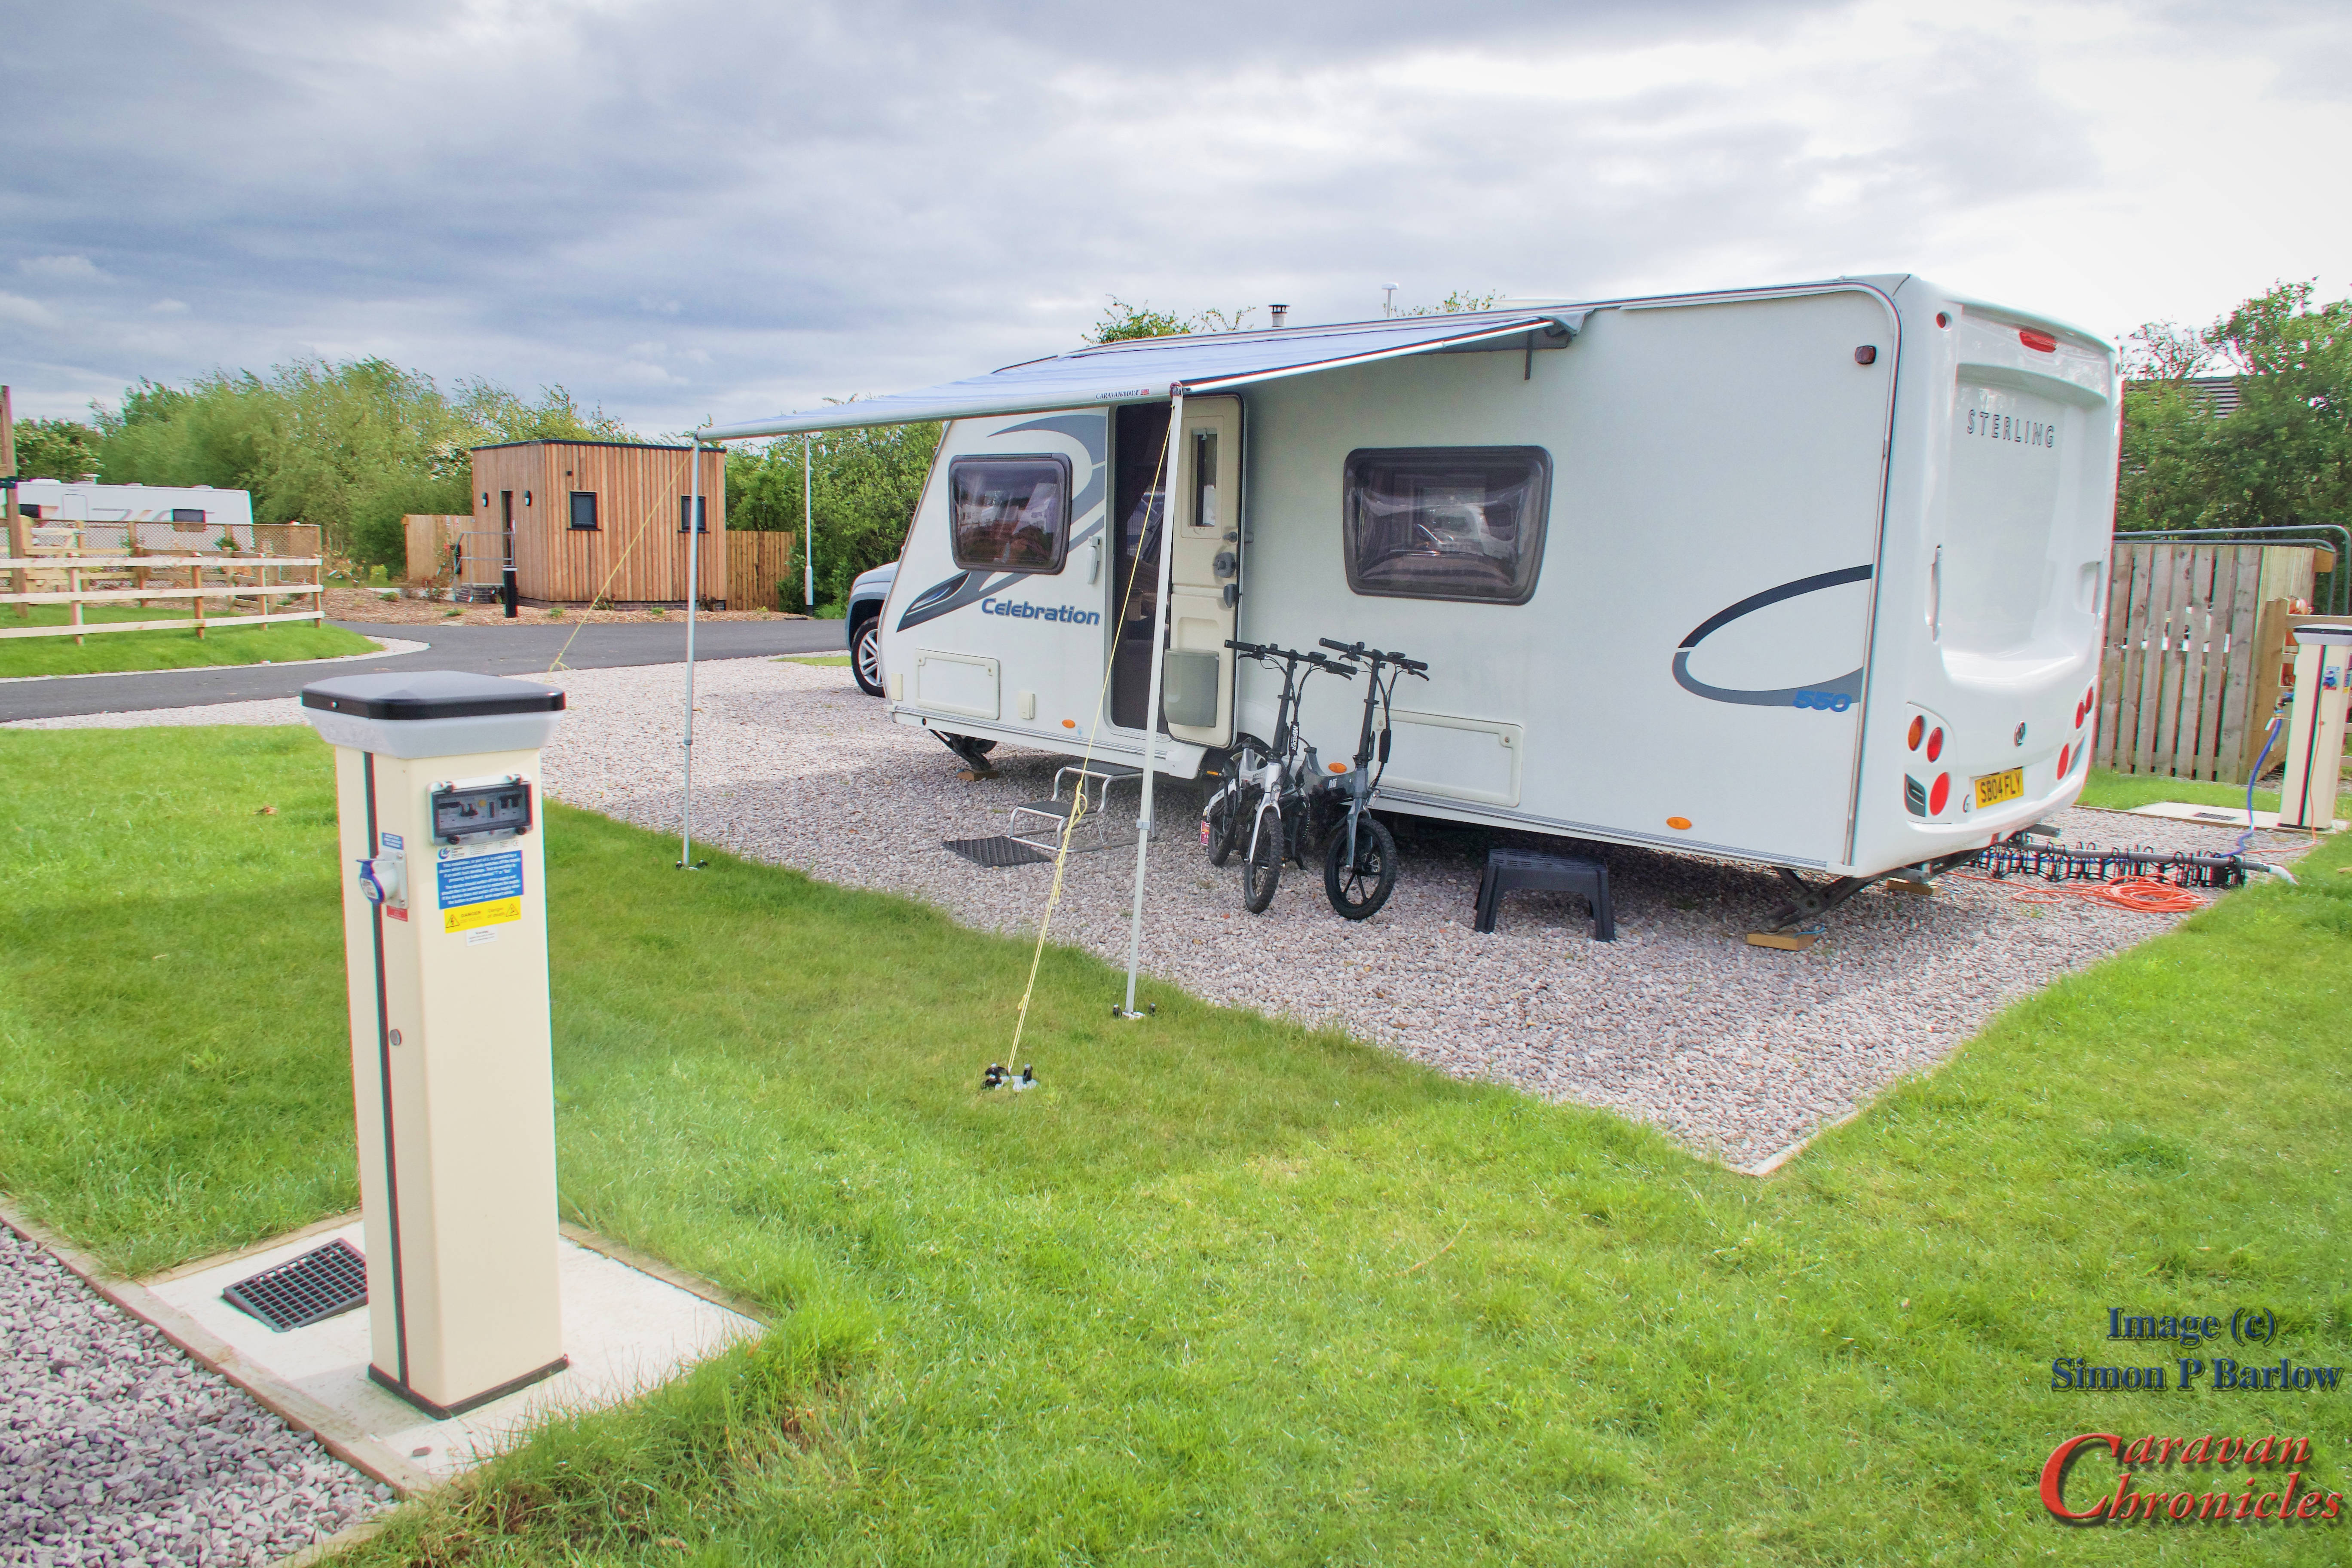
We or more probably me don’t normally do site reviews. That said we recently came back from a few days away at Donkey Creek Farm in Freckleton, and we liked it that much I had to put pen to paper…. or in more modern parlance lay fingers on keys.
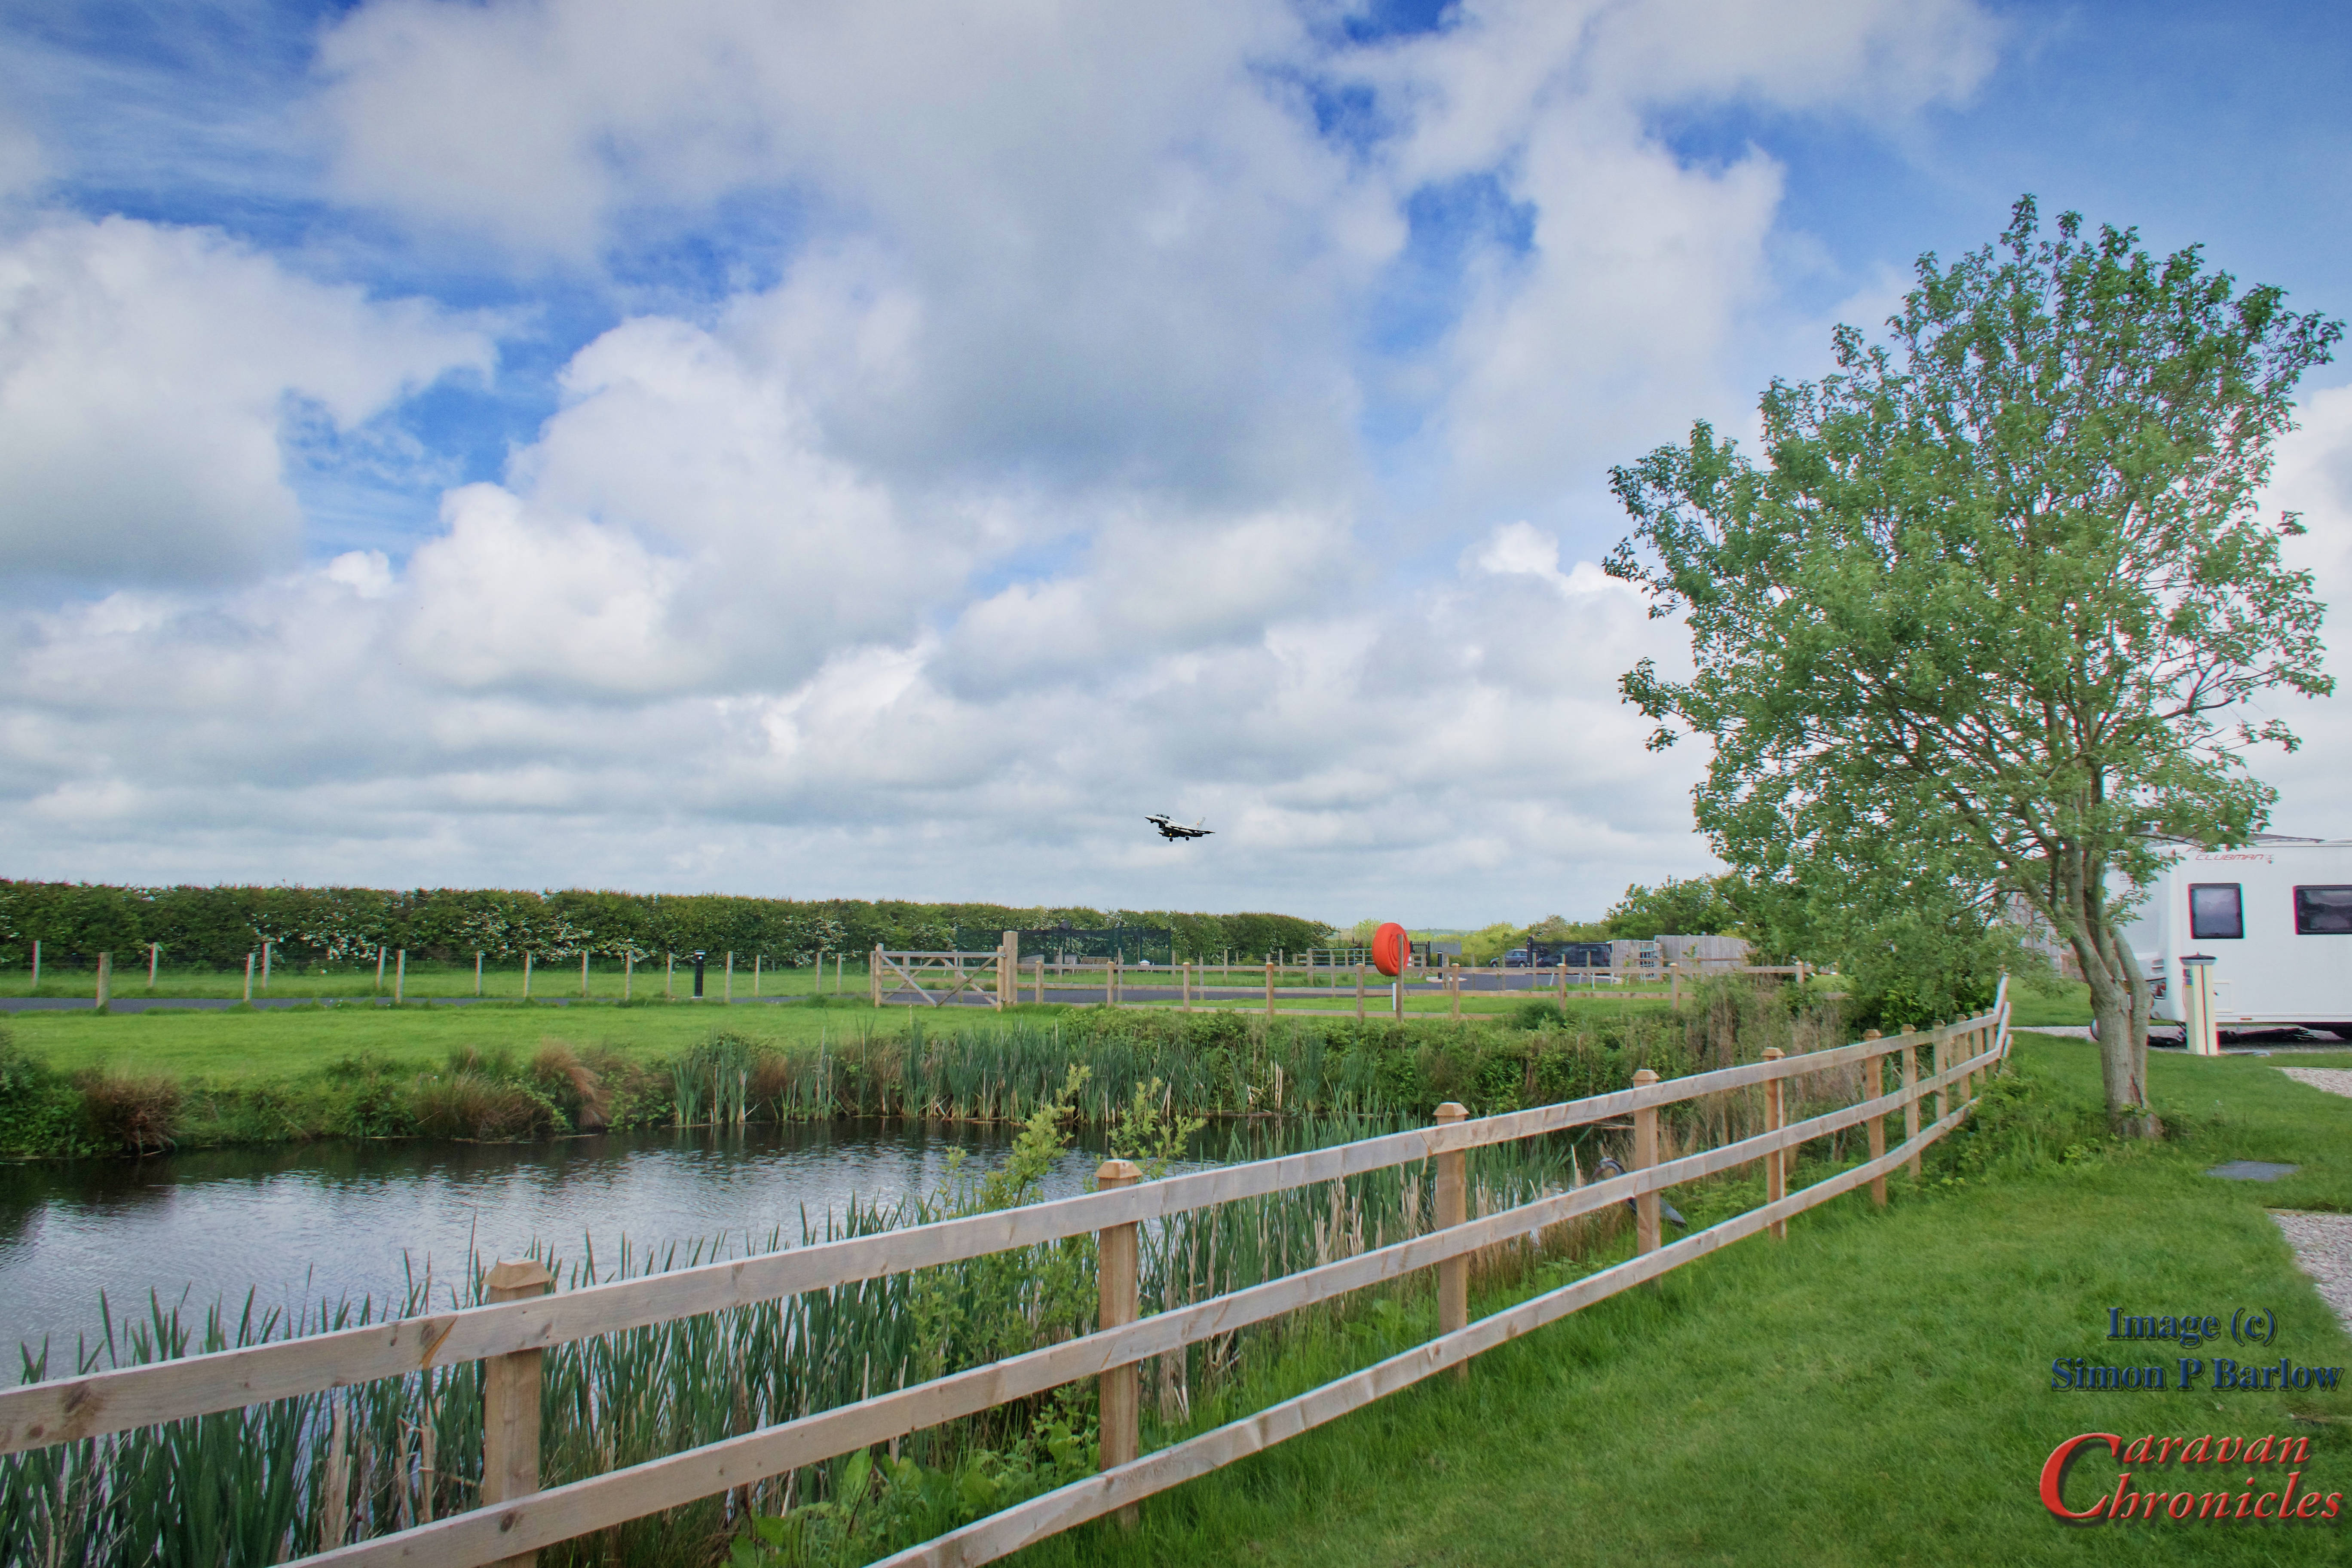
The site is located on Naze Lane East just south of Freckleton and is just the other side of Naze Lane from the eastern end of BAE Warton’s runway. Don’t let this put you off though. At weekends you may get the odd light aircraft doing low approach and go-rounds but in the main it’s quiet. Weekdays, there are a couple of BAE’s scheduled staff planes in the morning and evening and the occasional fast jet. Having spent 7 years working there in the 90’s I don’t notice it.
The site is well laid out and only a few years old so most of the pitches are fully serviced and the facilities first class in every respect. The last time I was impressed this much was when we went to The Old Oaks site at Glastonbury, which at the time I said was the one to beat.
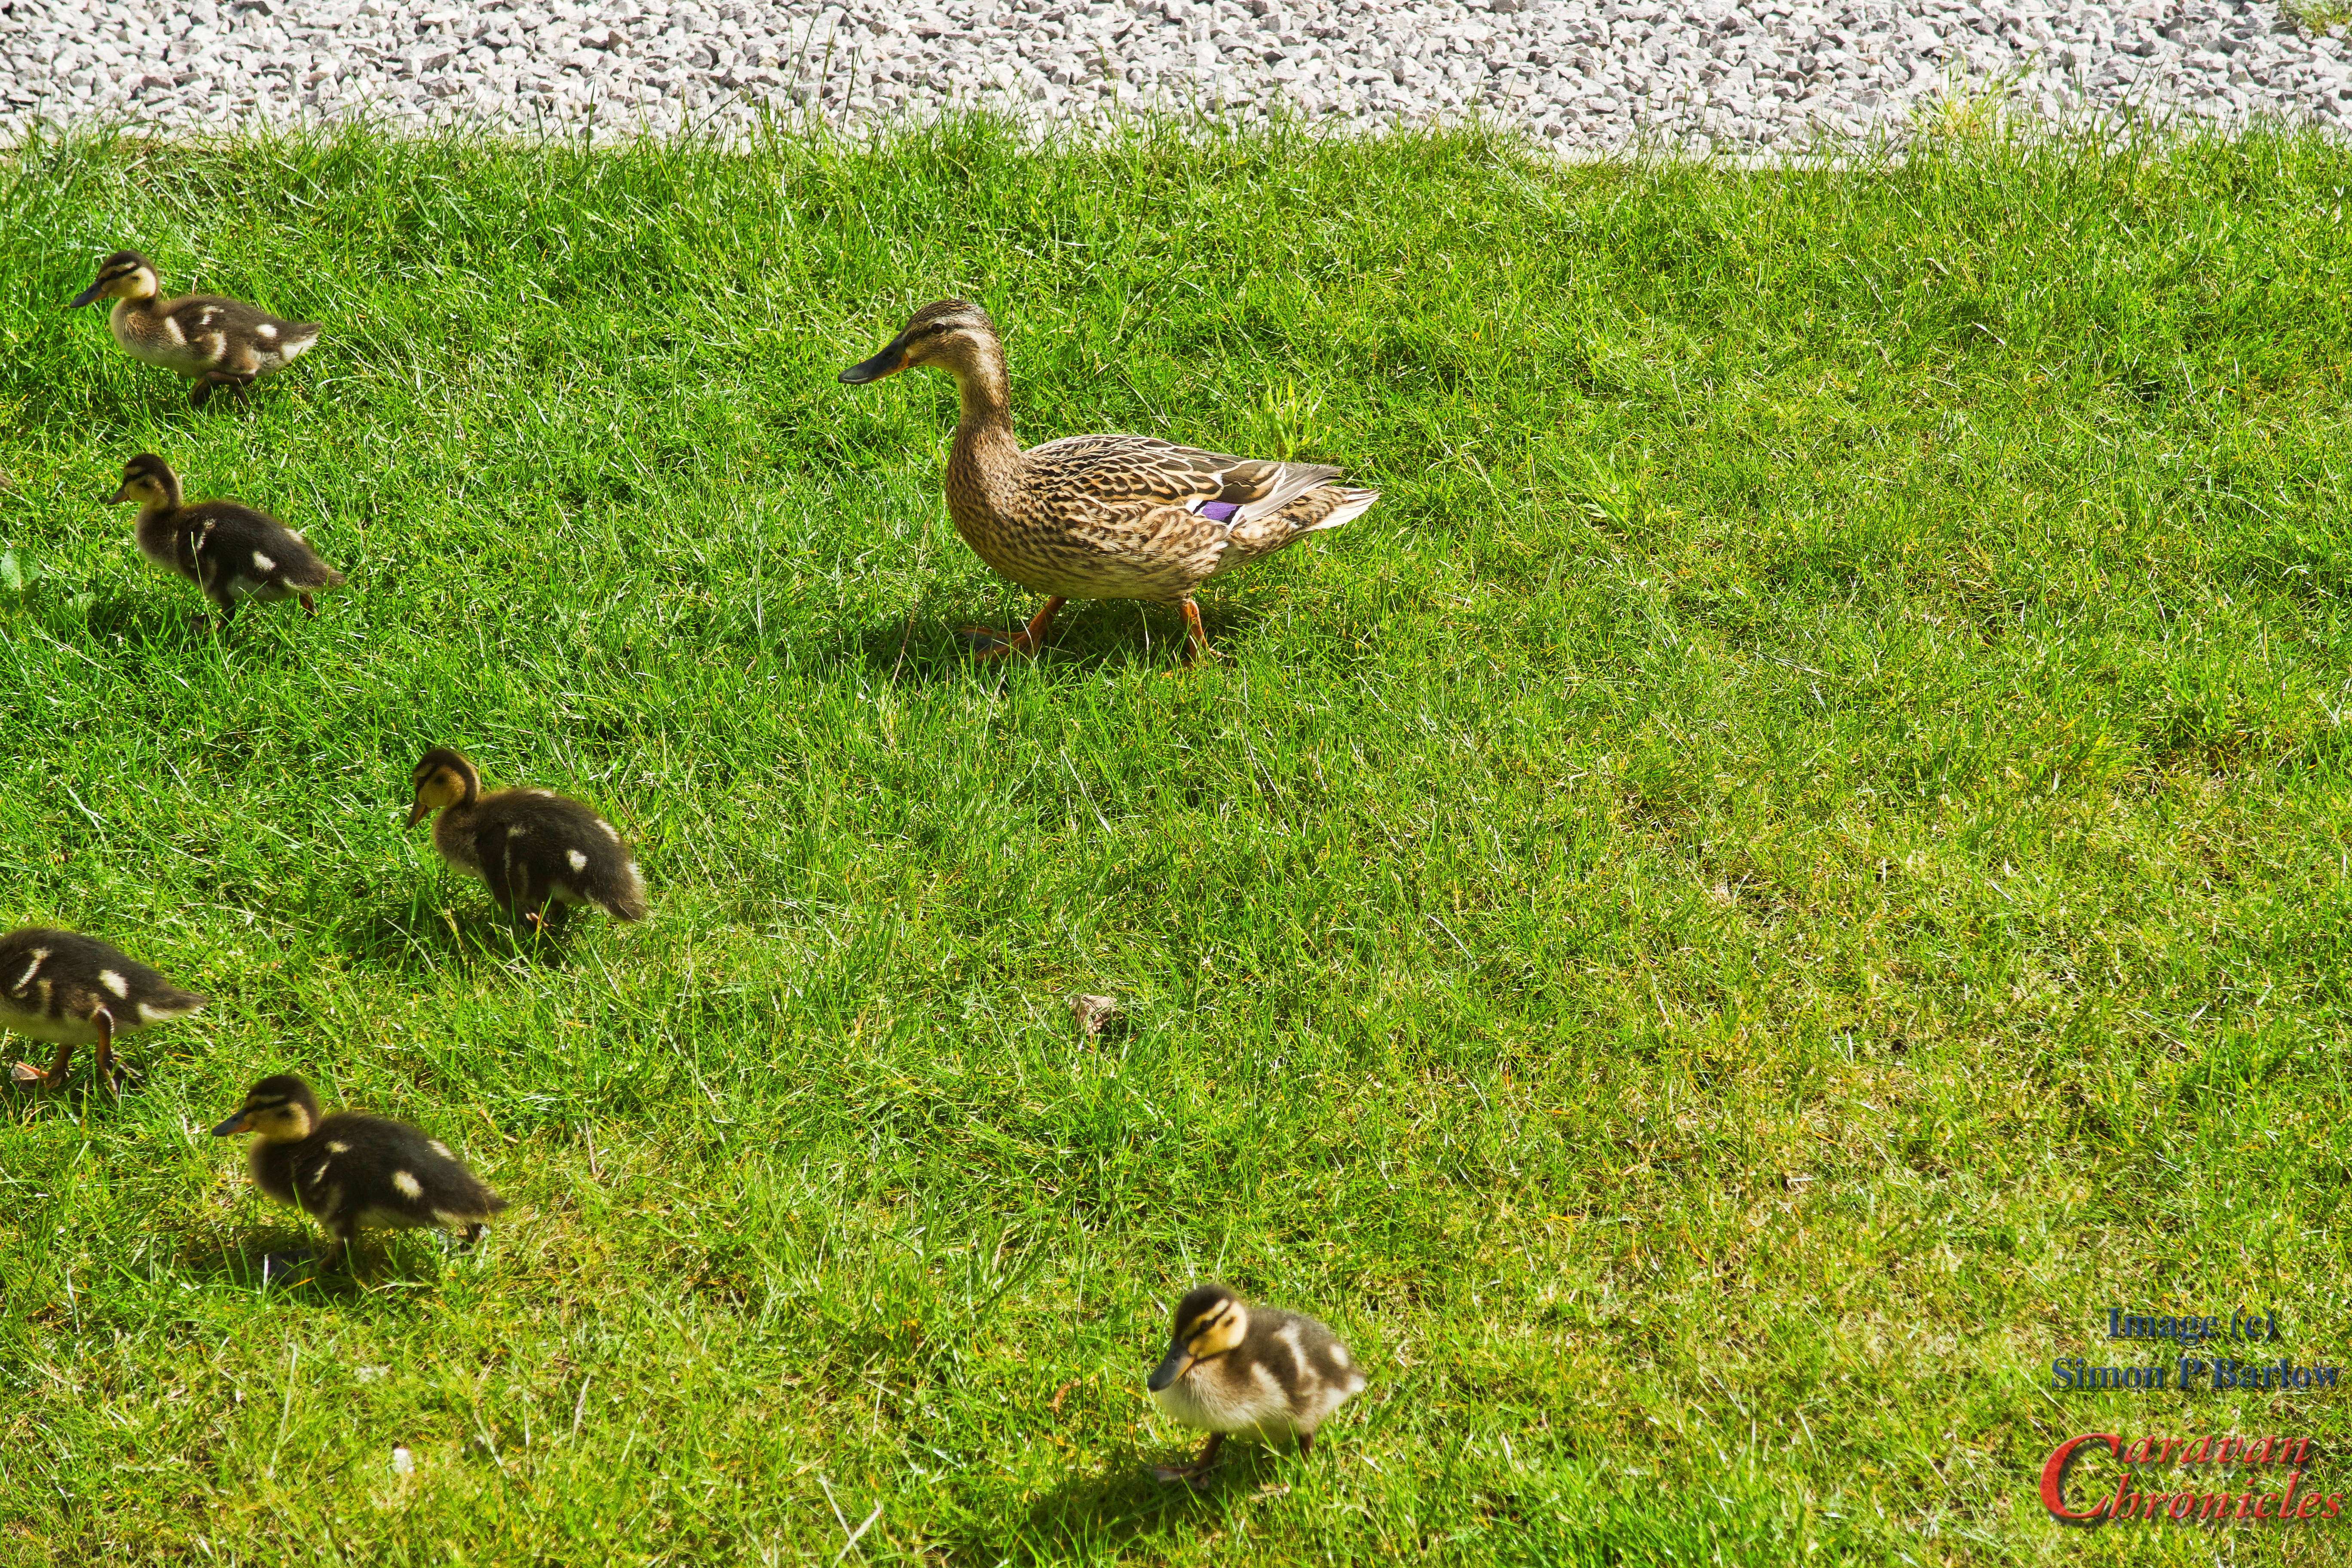
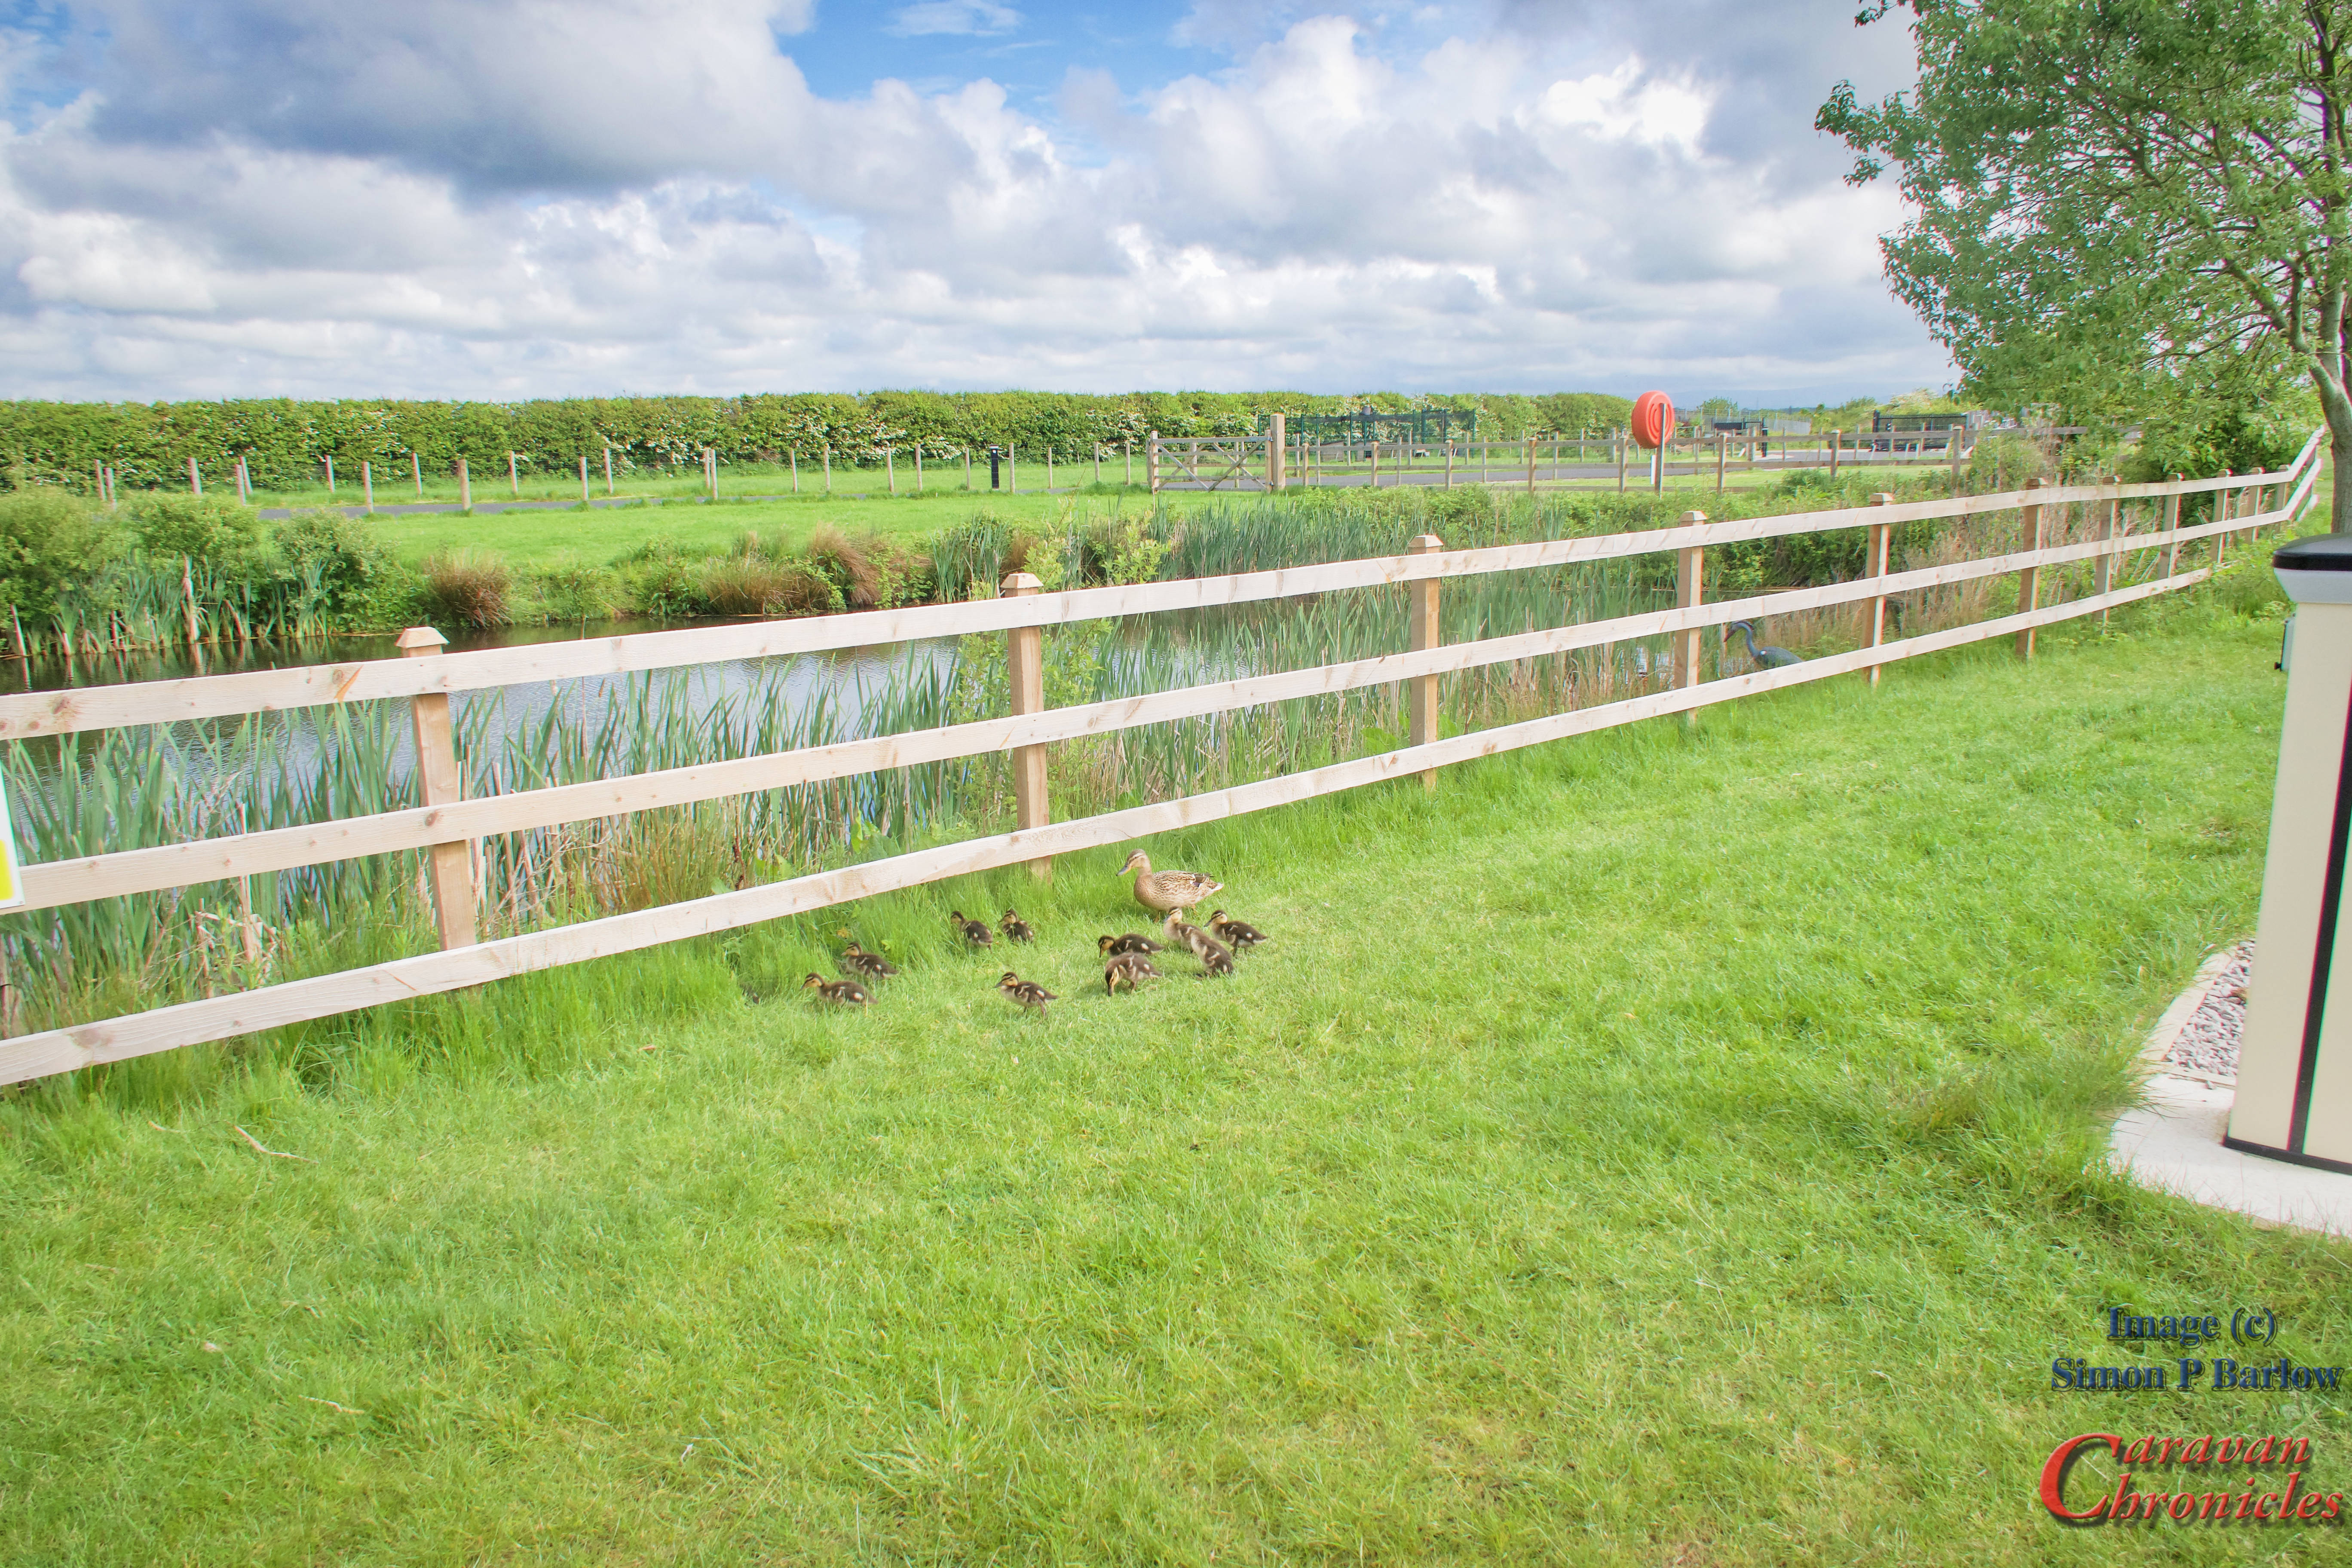
The pitch are level and firm under the gravel, all service roads are tarmac. Our pitch backed onto the small pond which was home to a pair of ducks and twelve ducklings which mother took for a walk umpteen times per day. She seemed to be getting the ducklings used to standing in front of caravan doors as they would all gather outside the door at the slightest sign of activity from within.
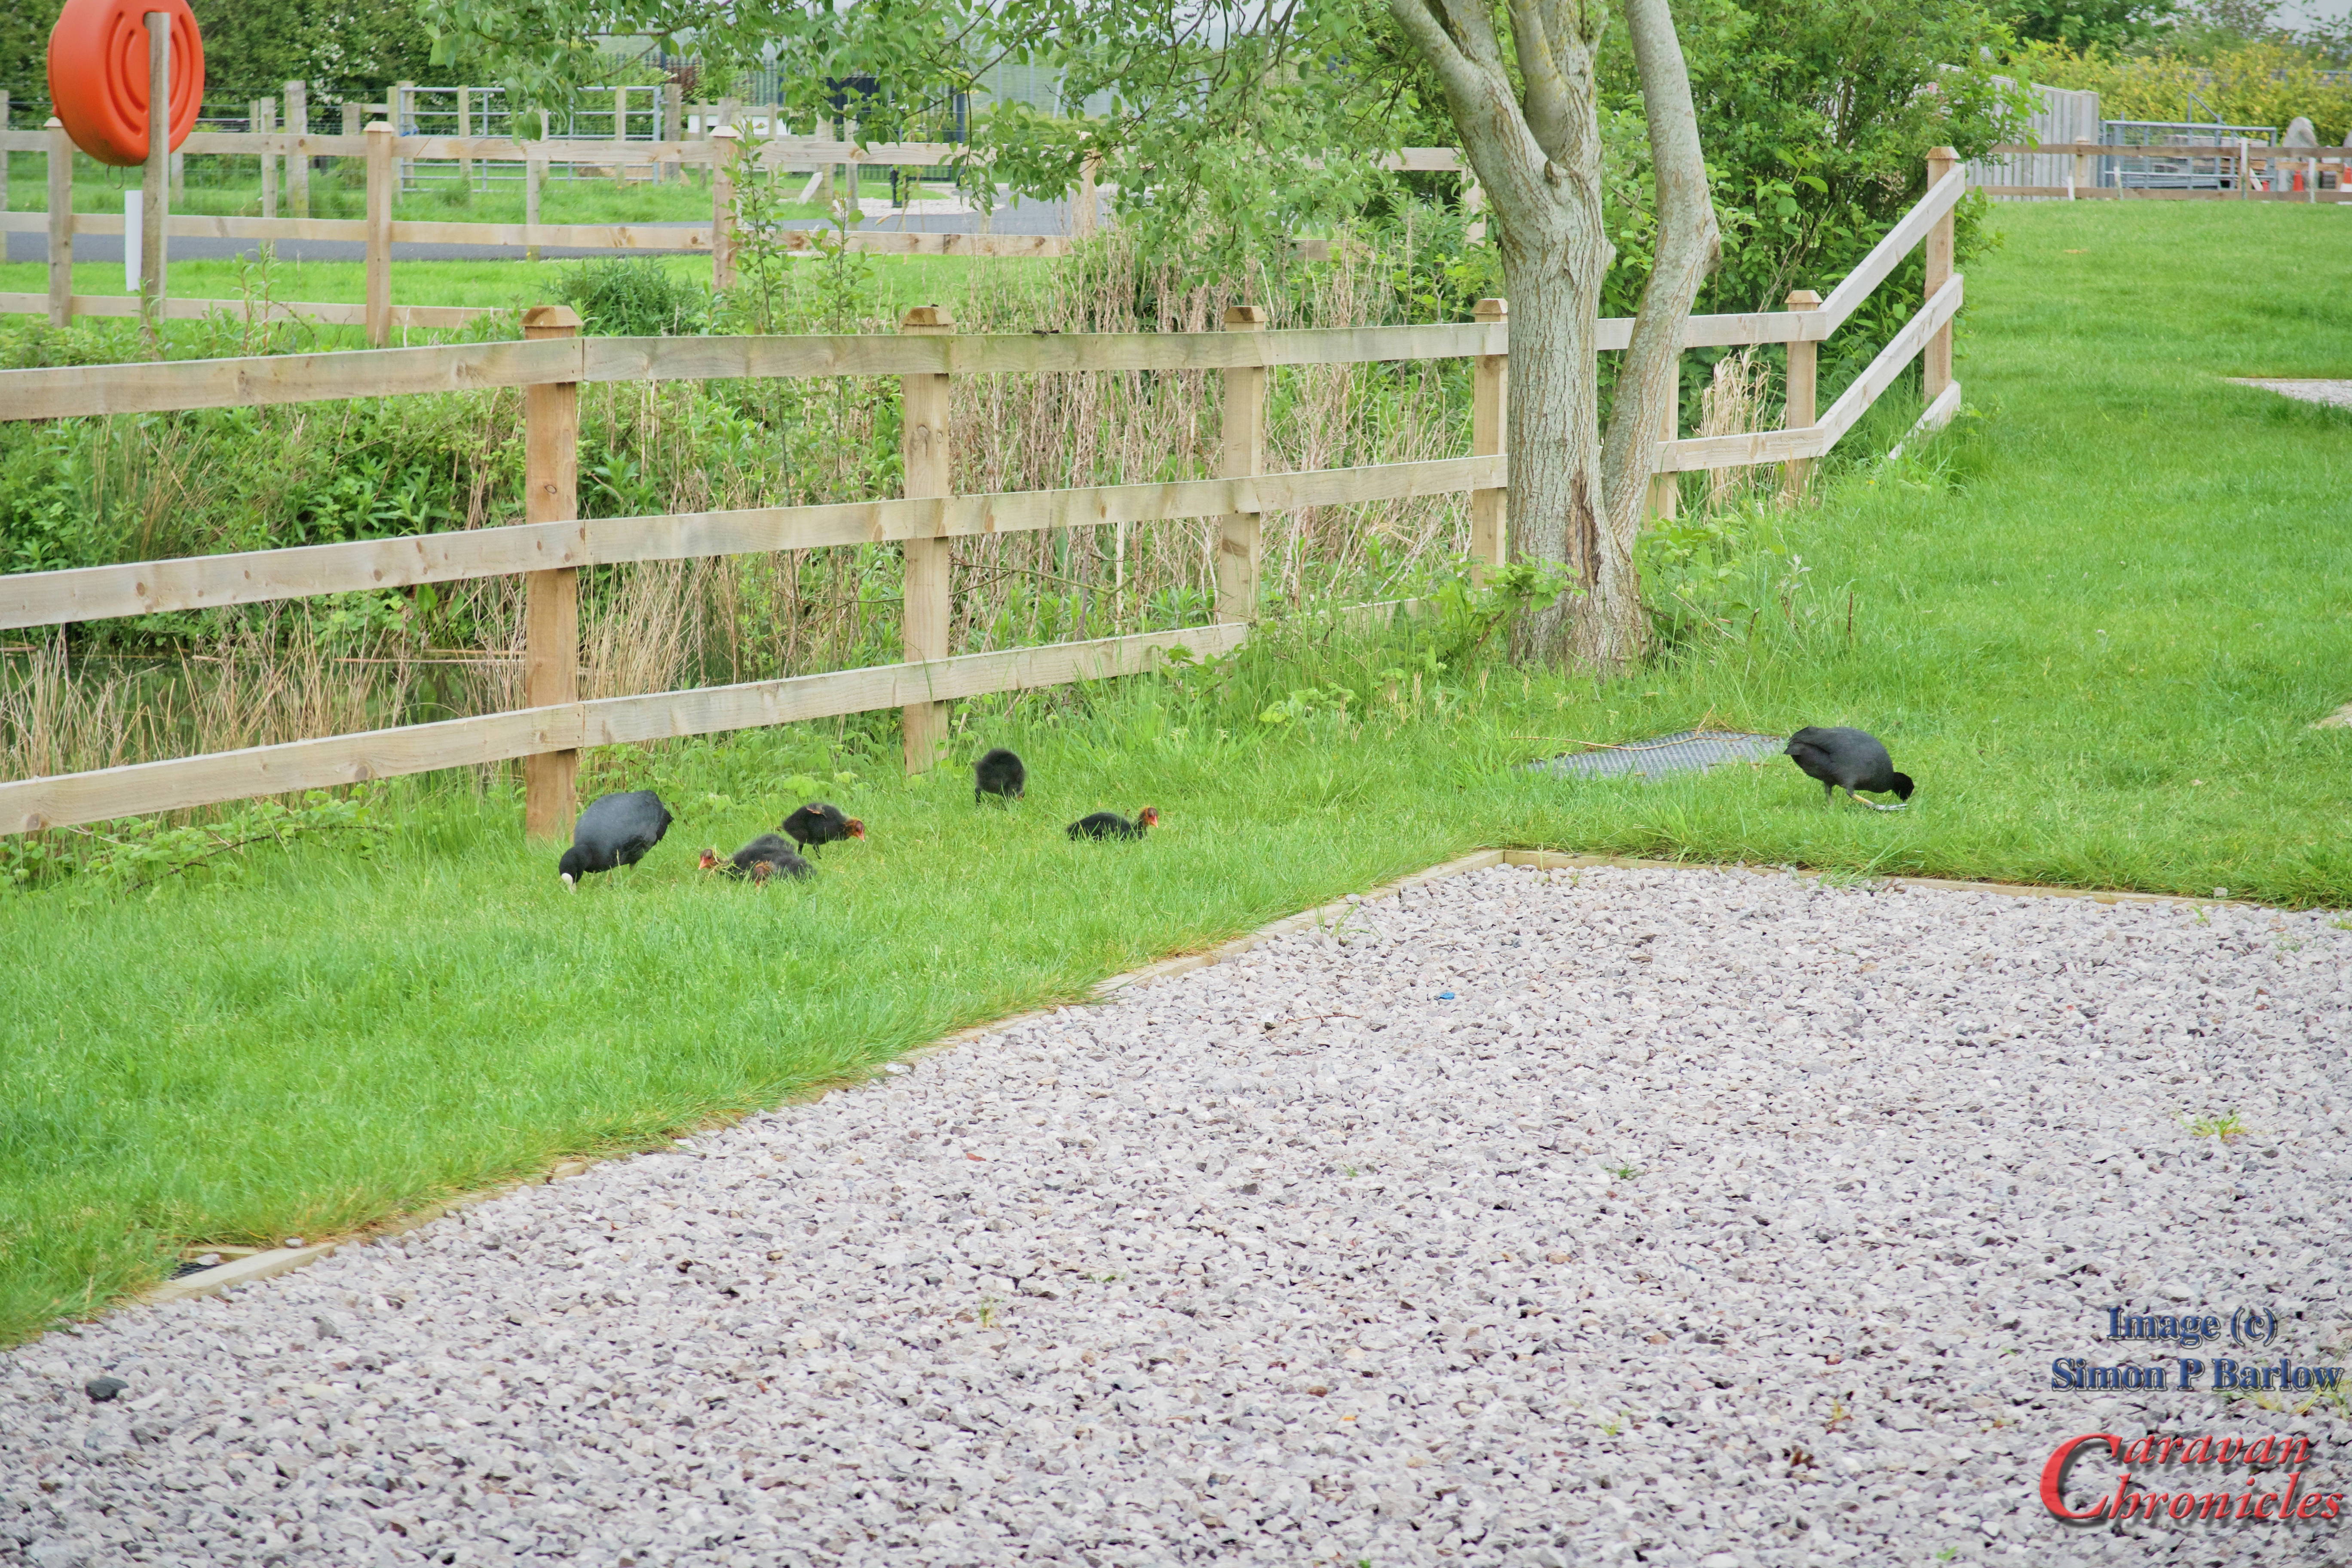
We also had a family of coots as frequent visitors who had also made the pond their home….
As I mentioned earlier, you do get the occasional fast jet through the weekday…
They don’t seem to bother the wildlife and they didn’t bother us…. apart from me scrambling to find my camera…. a retired pilot is still a person with jet A1 running through their veins.
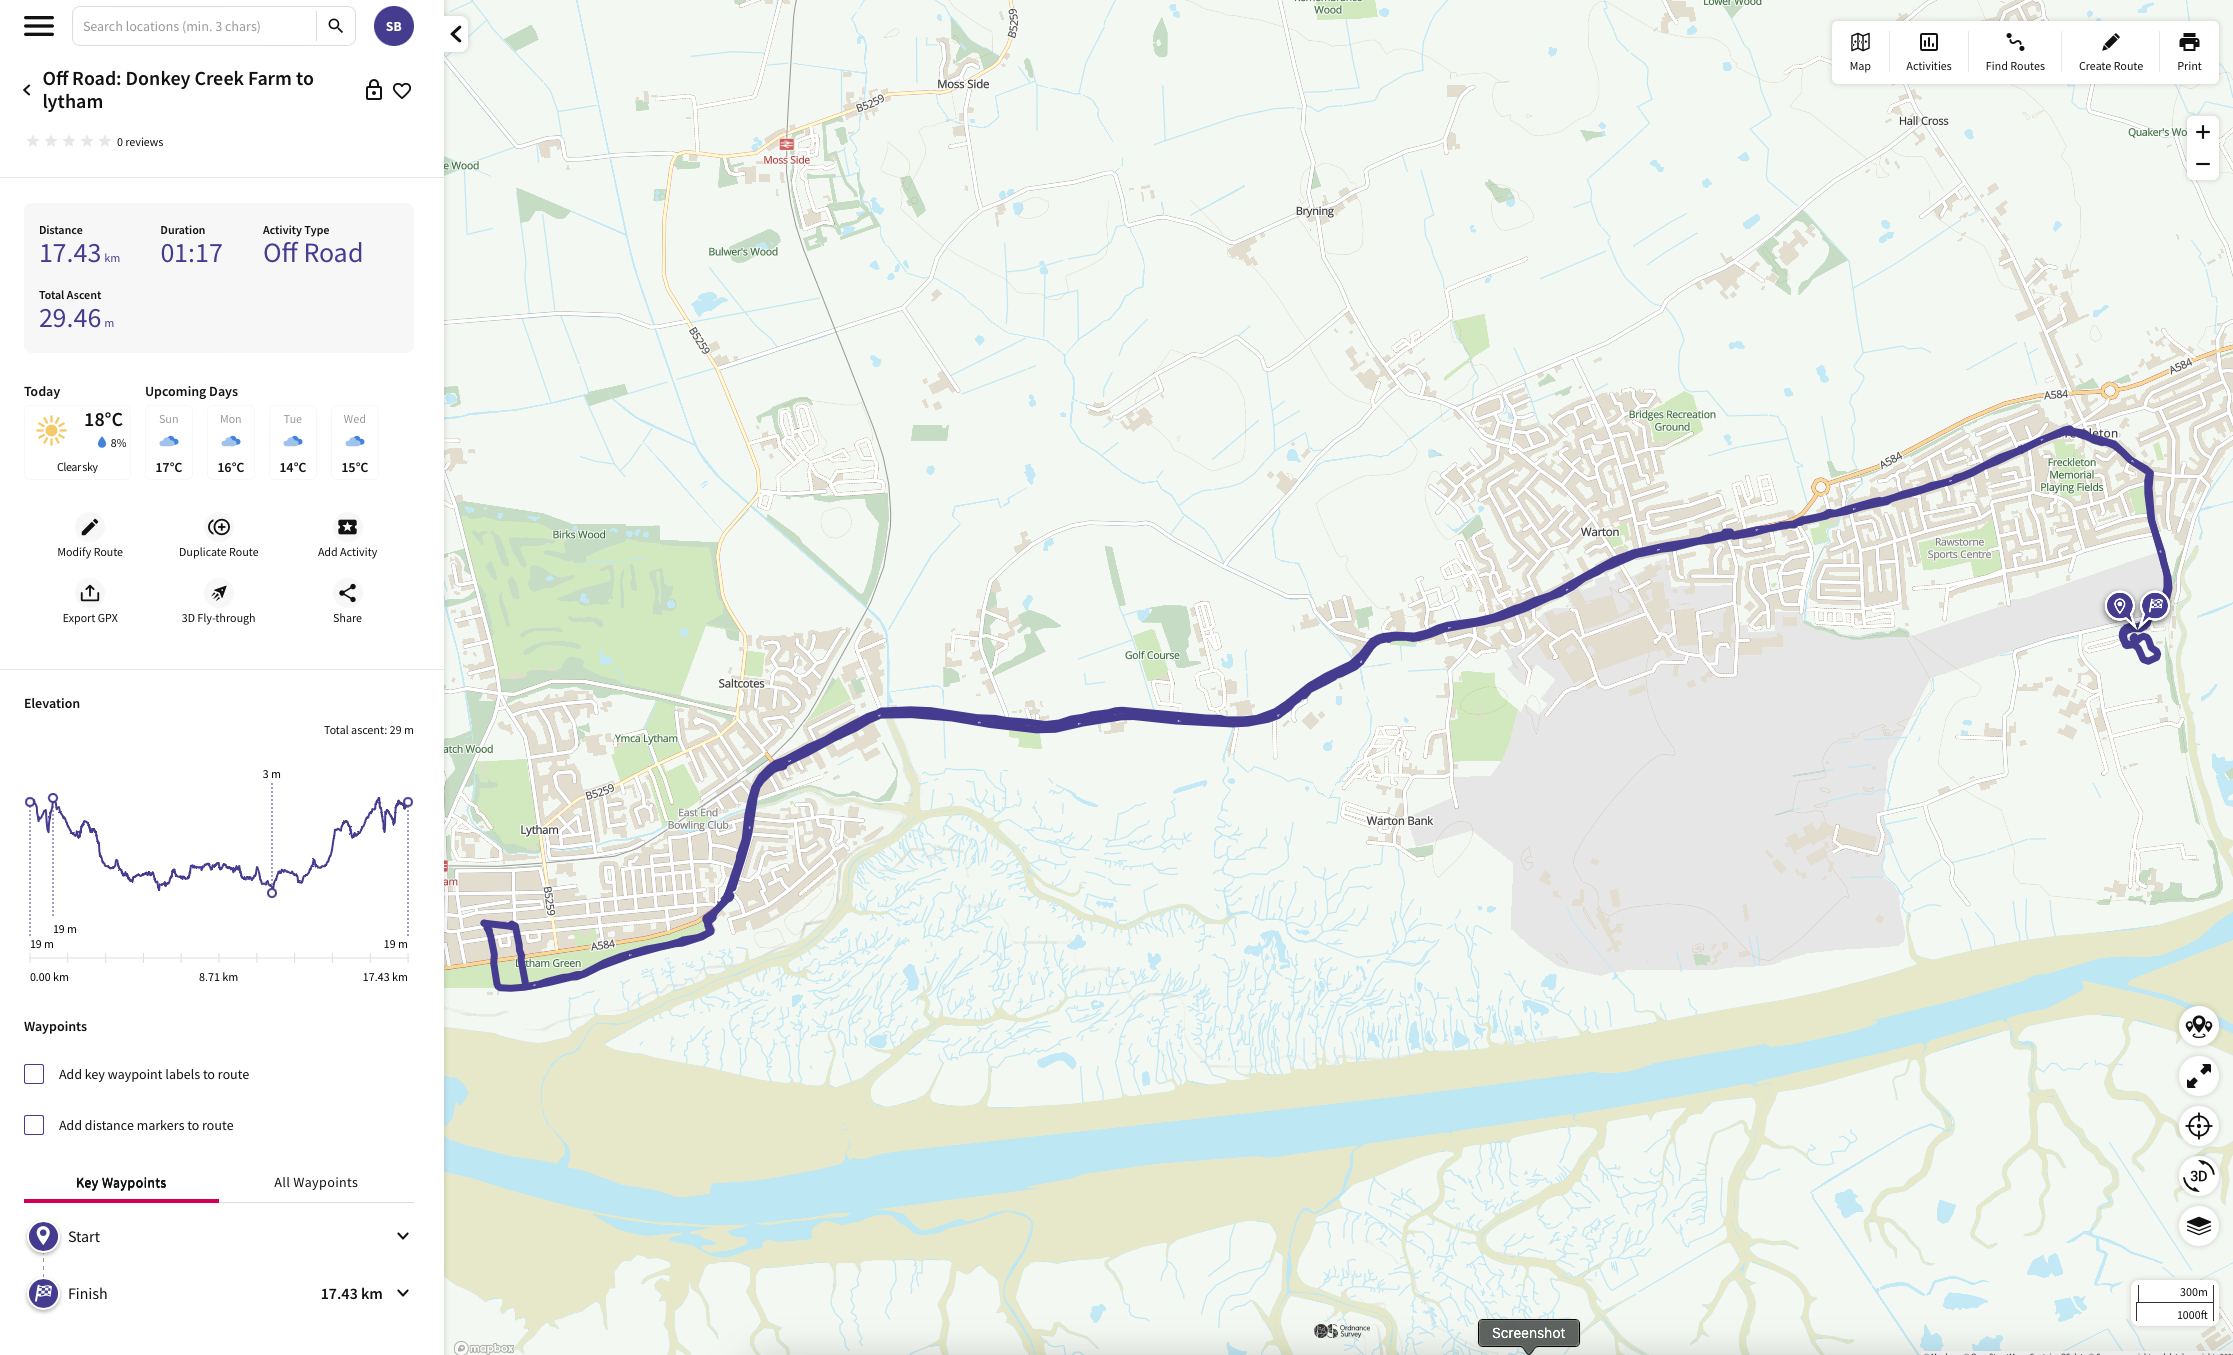
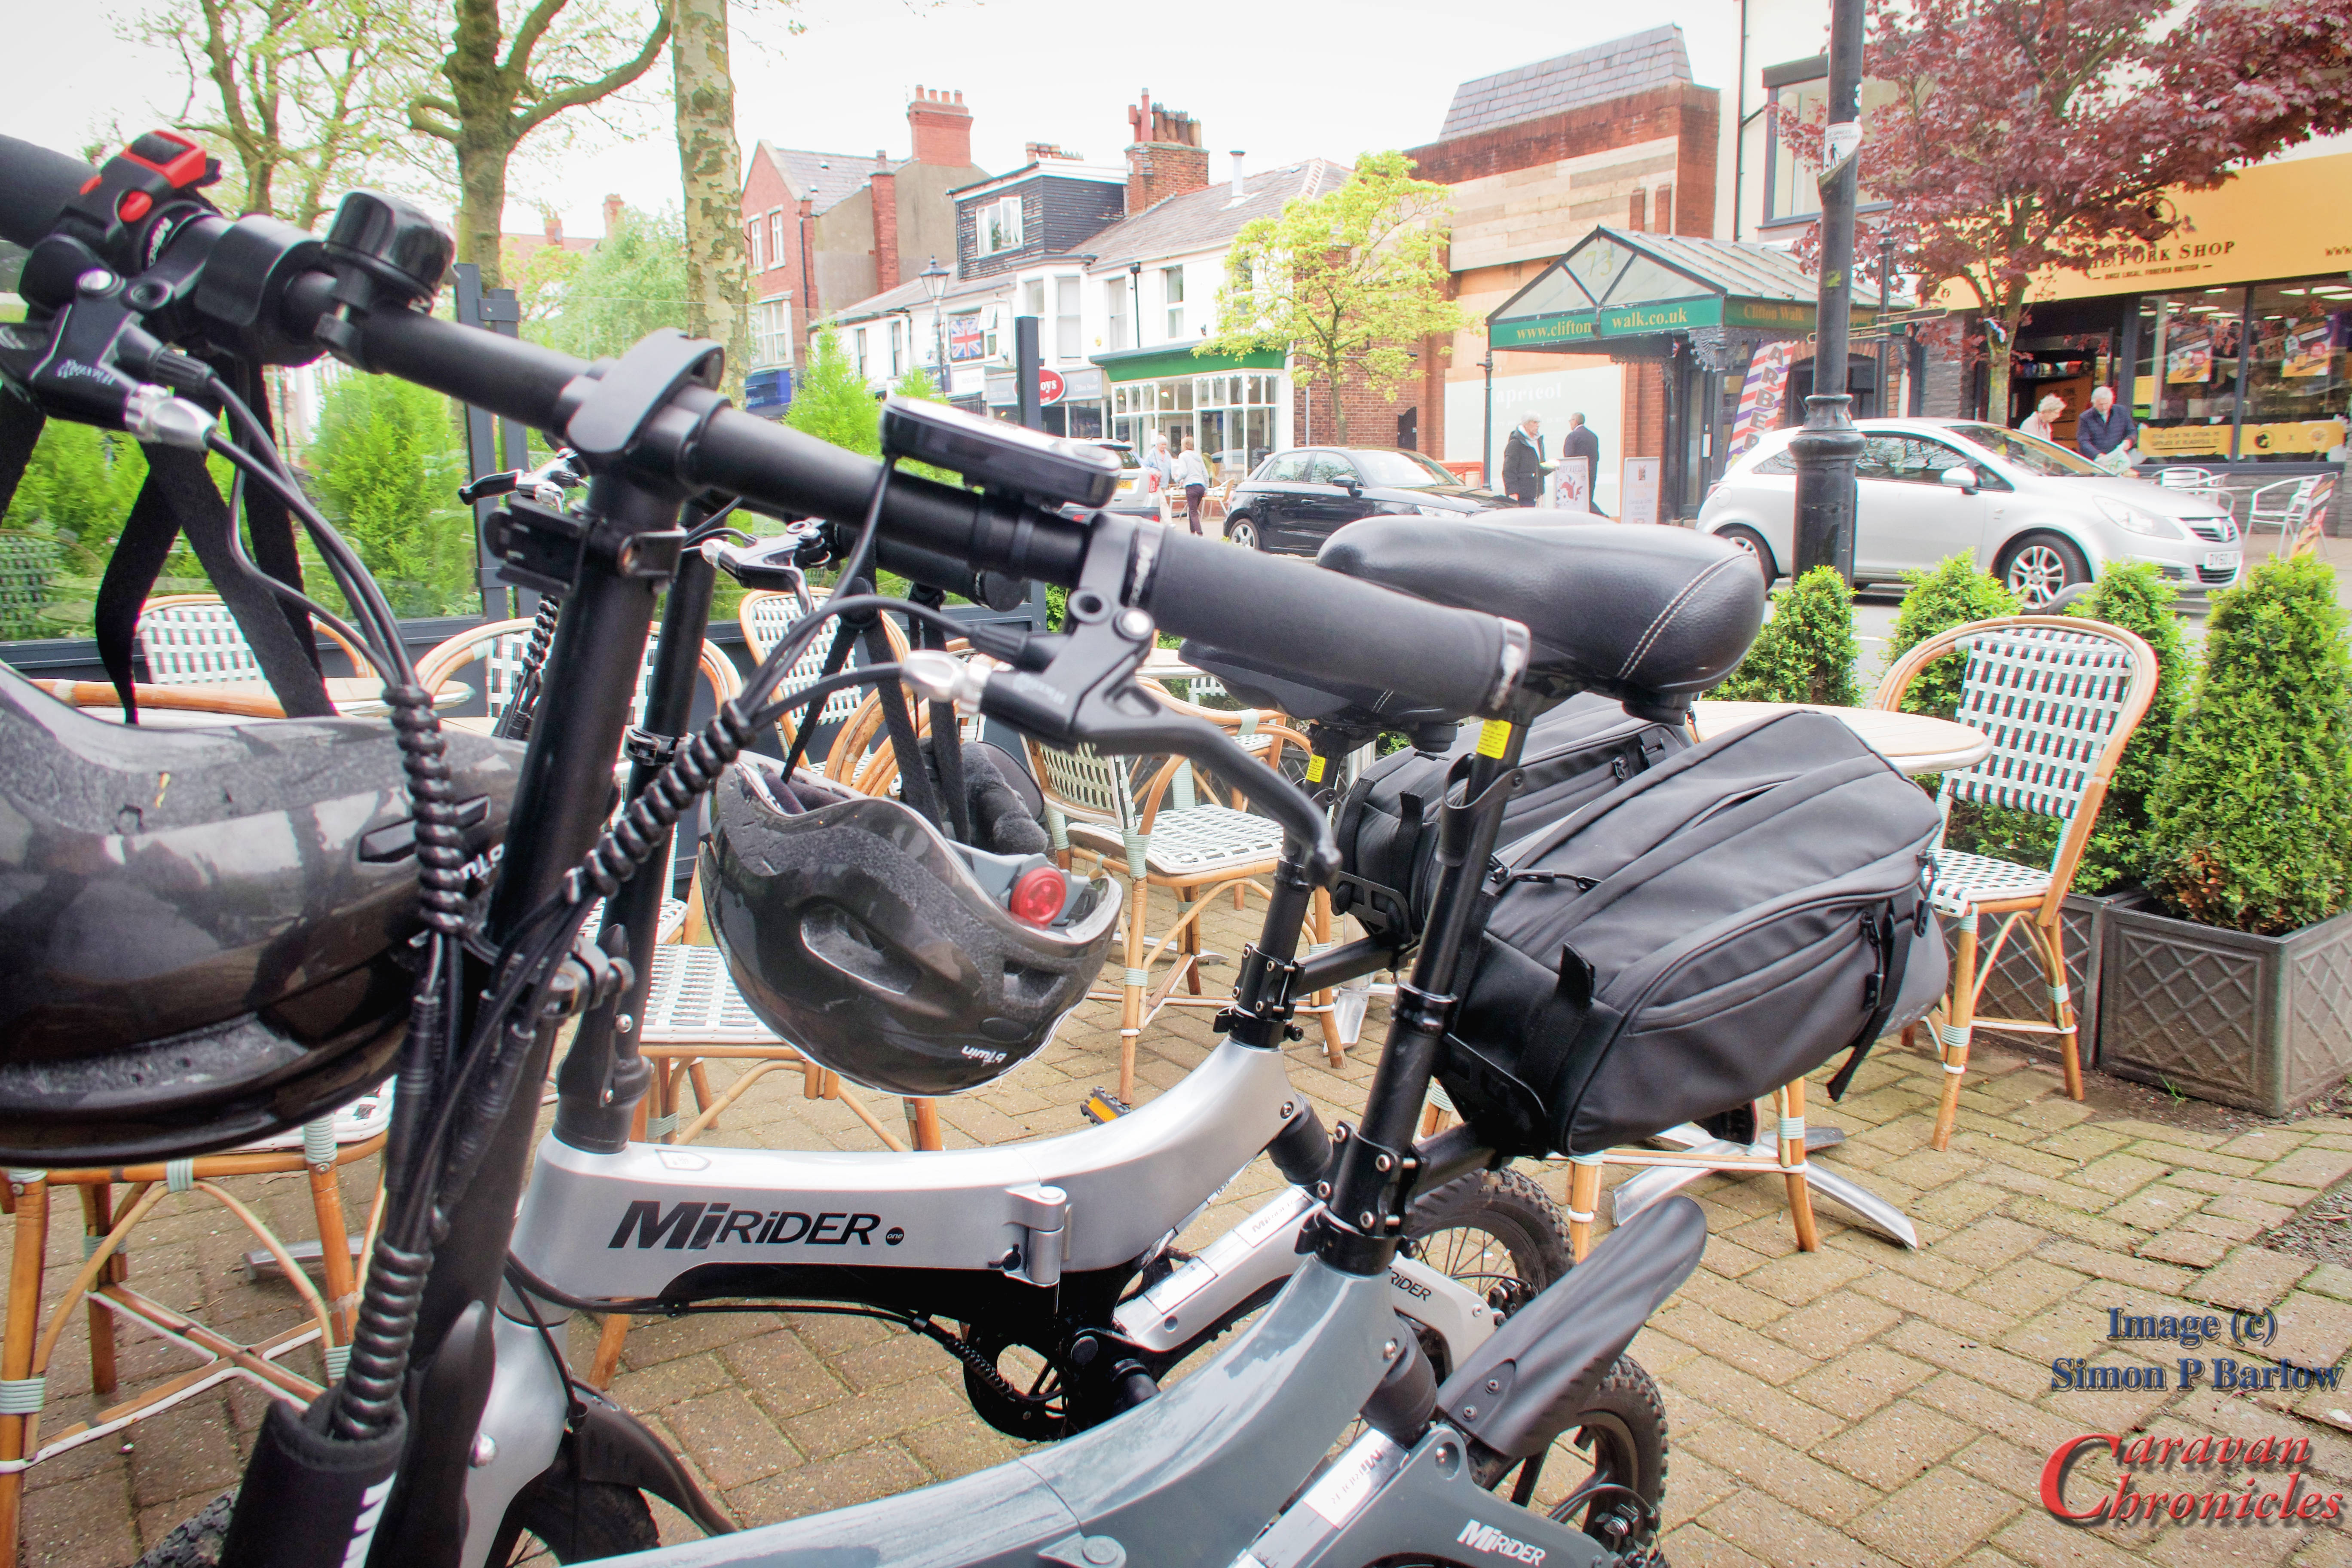
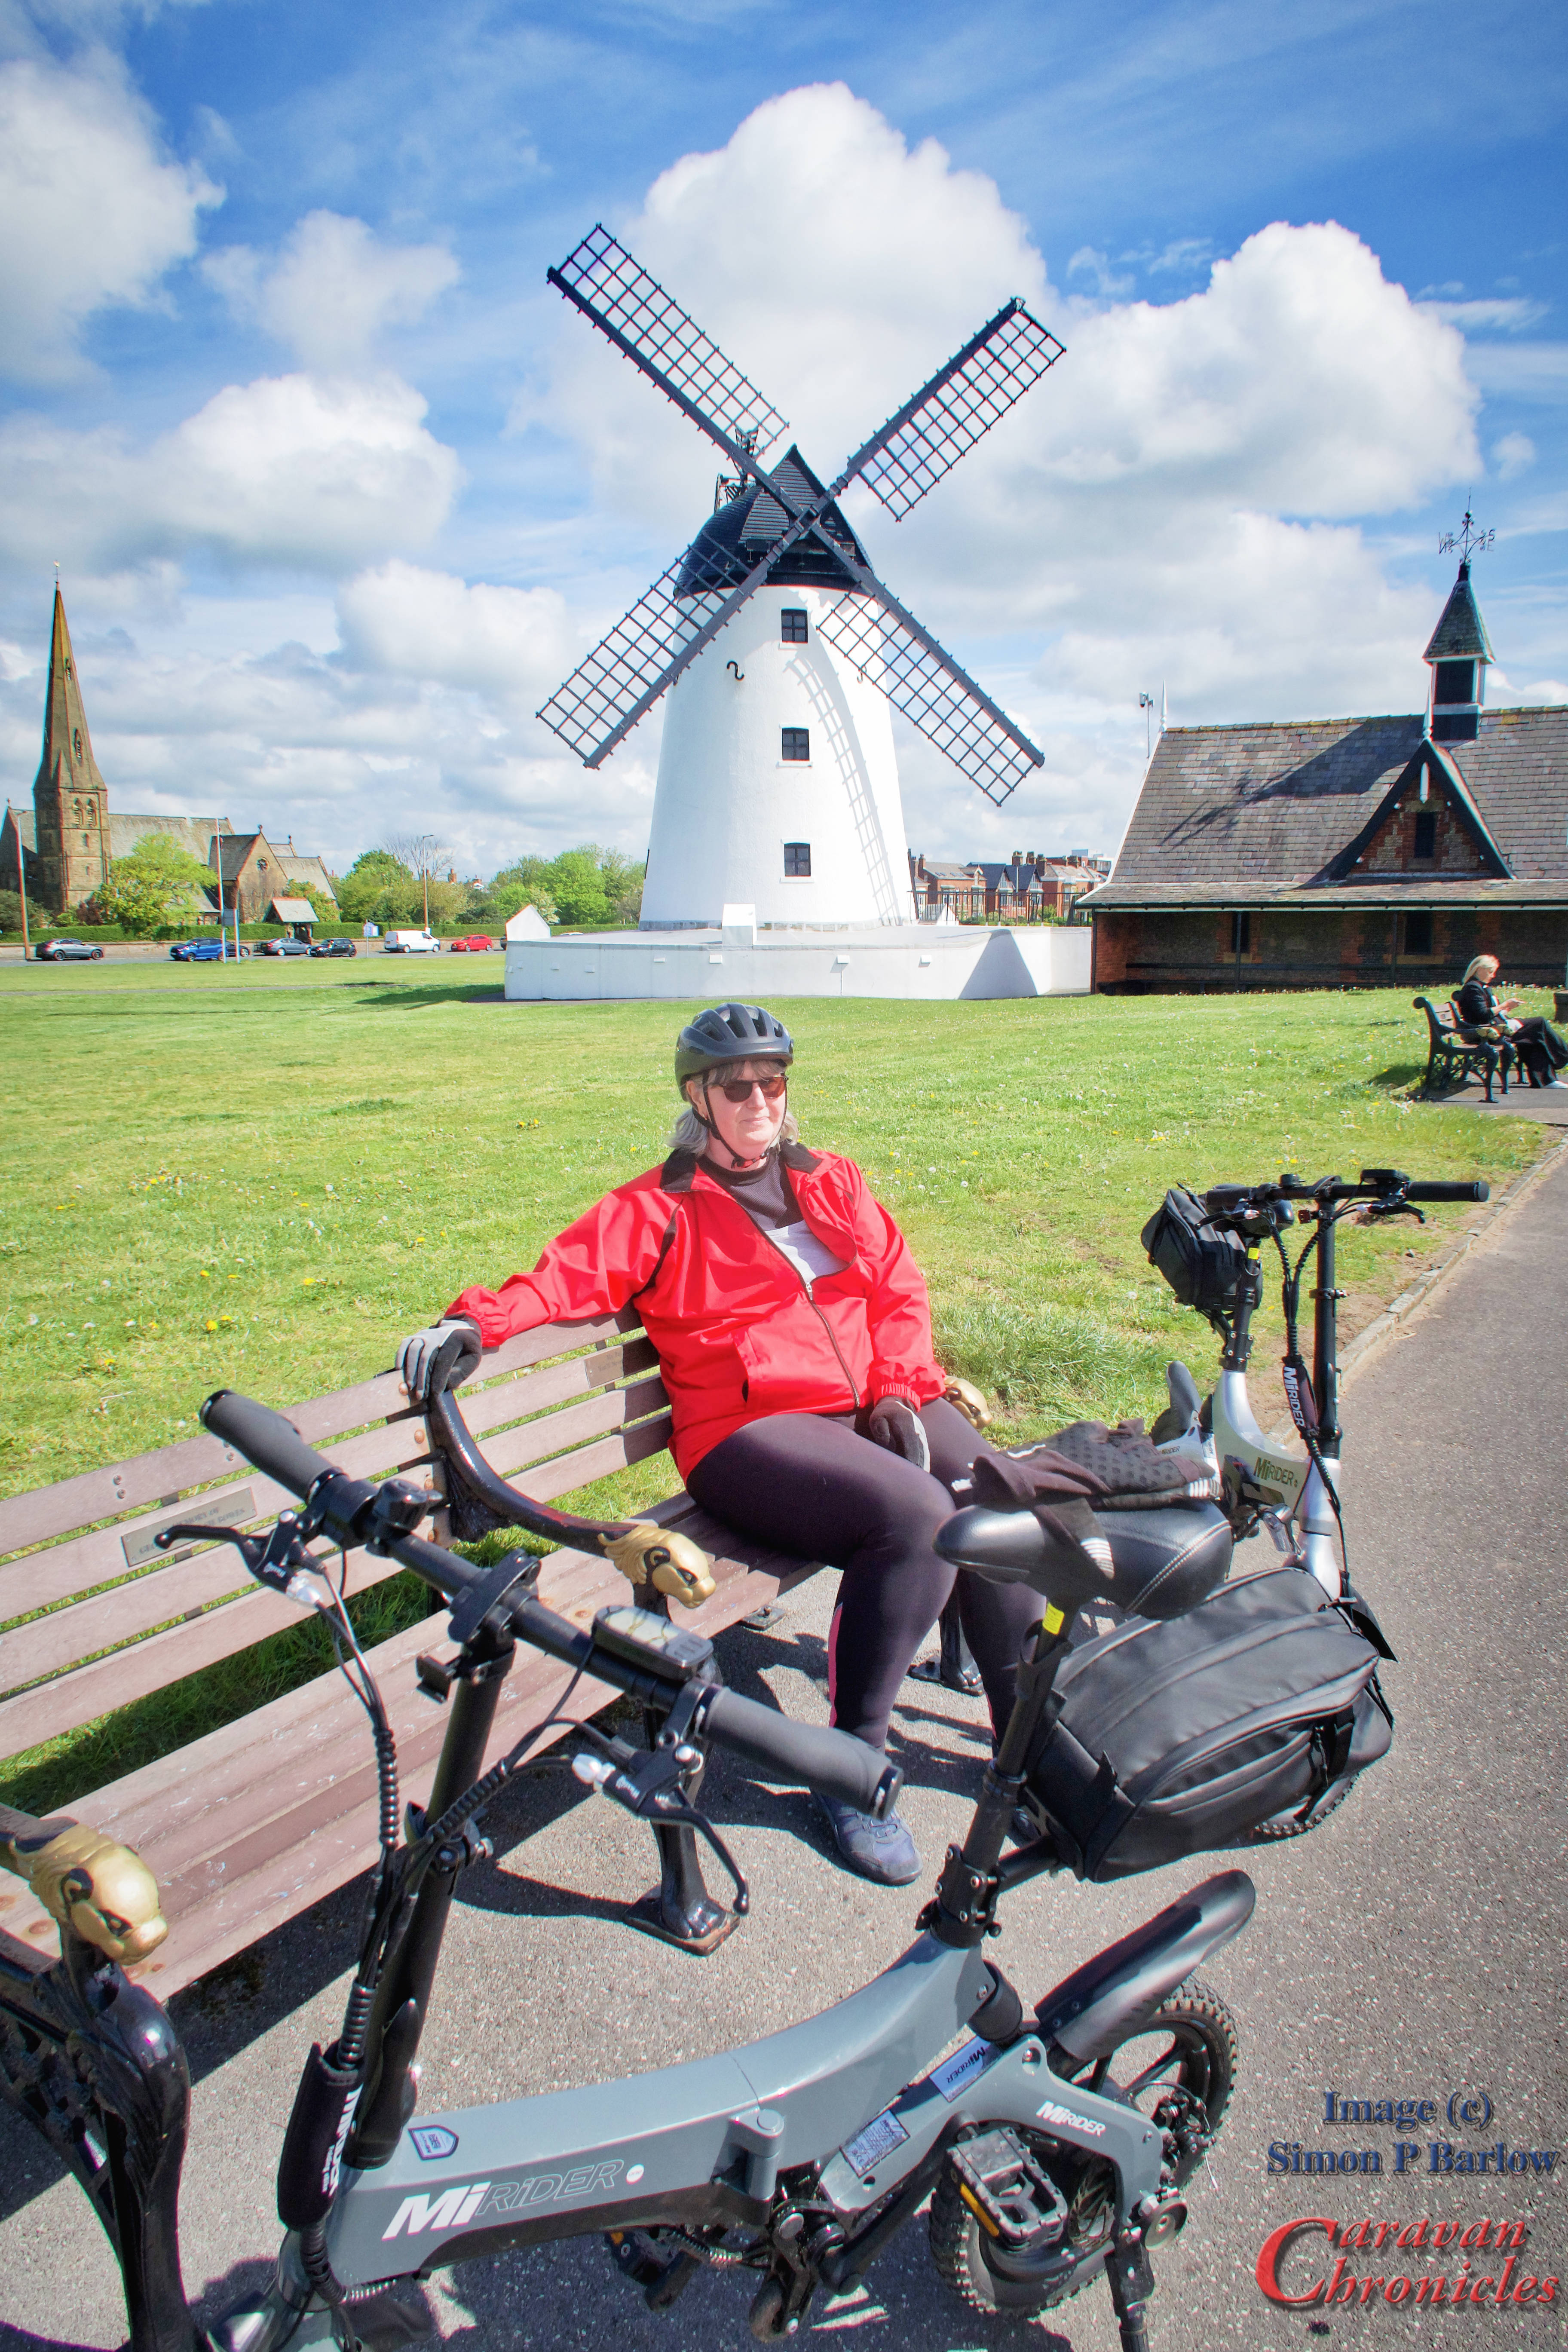
Cycling is quite easy and on the first day we cycled into Lytham for morning coffee. The route from Donkey Creek Farm is an easy ride and from the farm to the Lytham Windmill is exactly 5 miles…
We found a suitable cafe called “Central Beach” on the corner of Bath Street and the main shopping street Clifton Street. We sat and did a bit of people watching while having a coffee and toasted teacake.
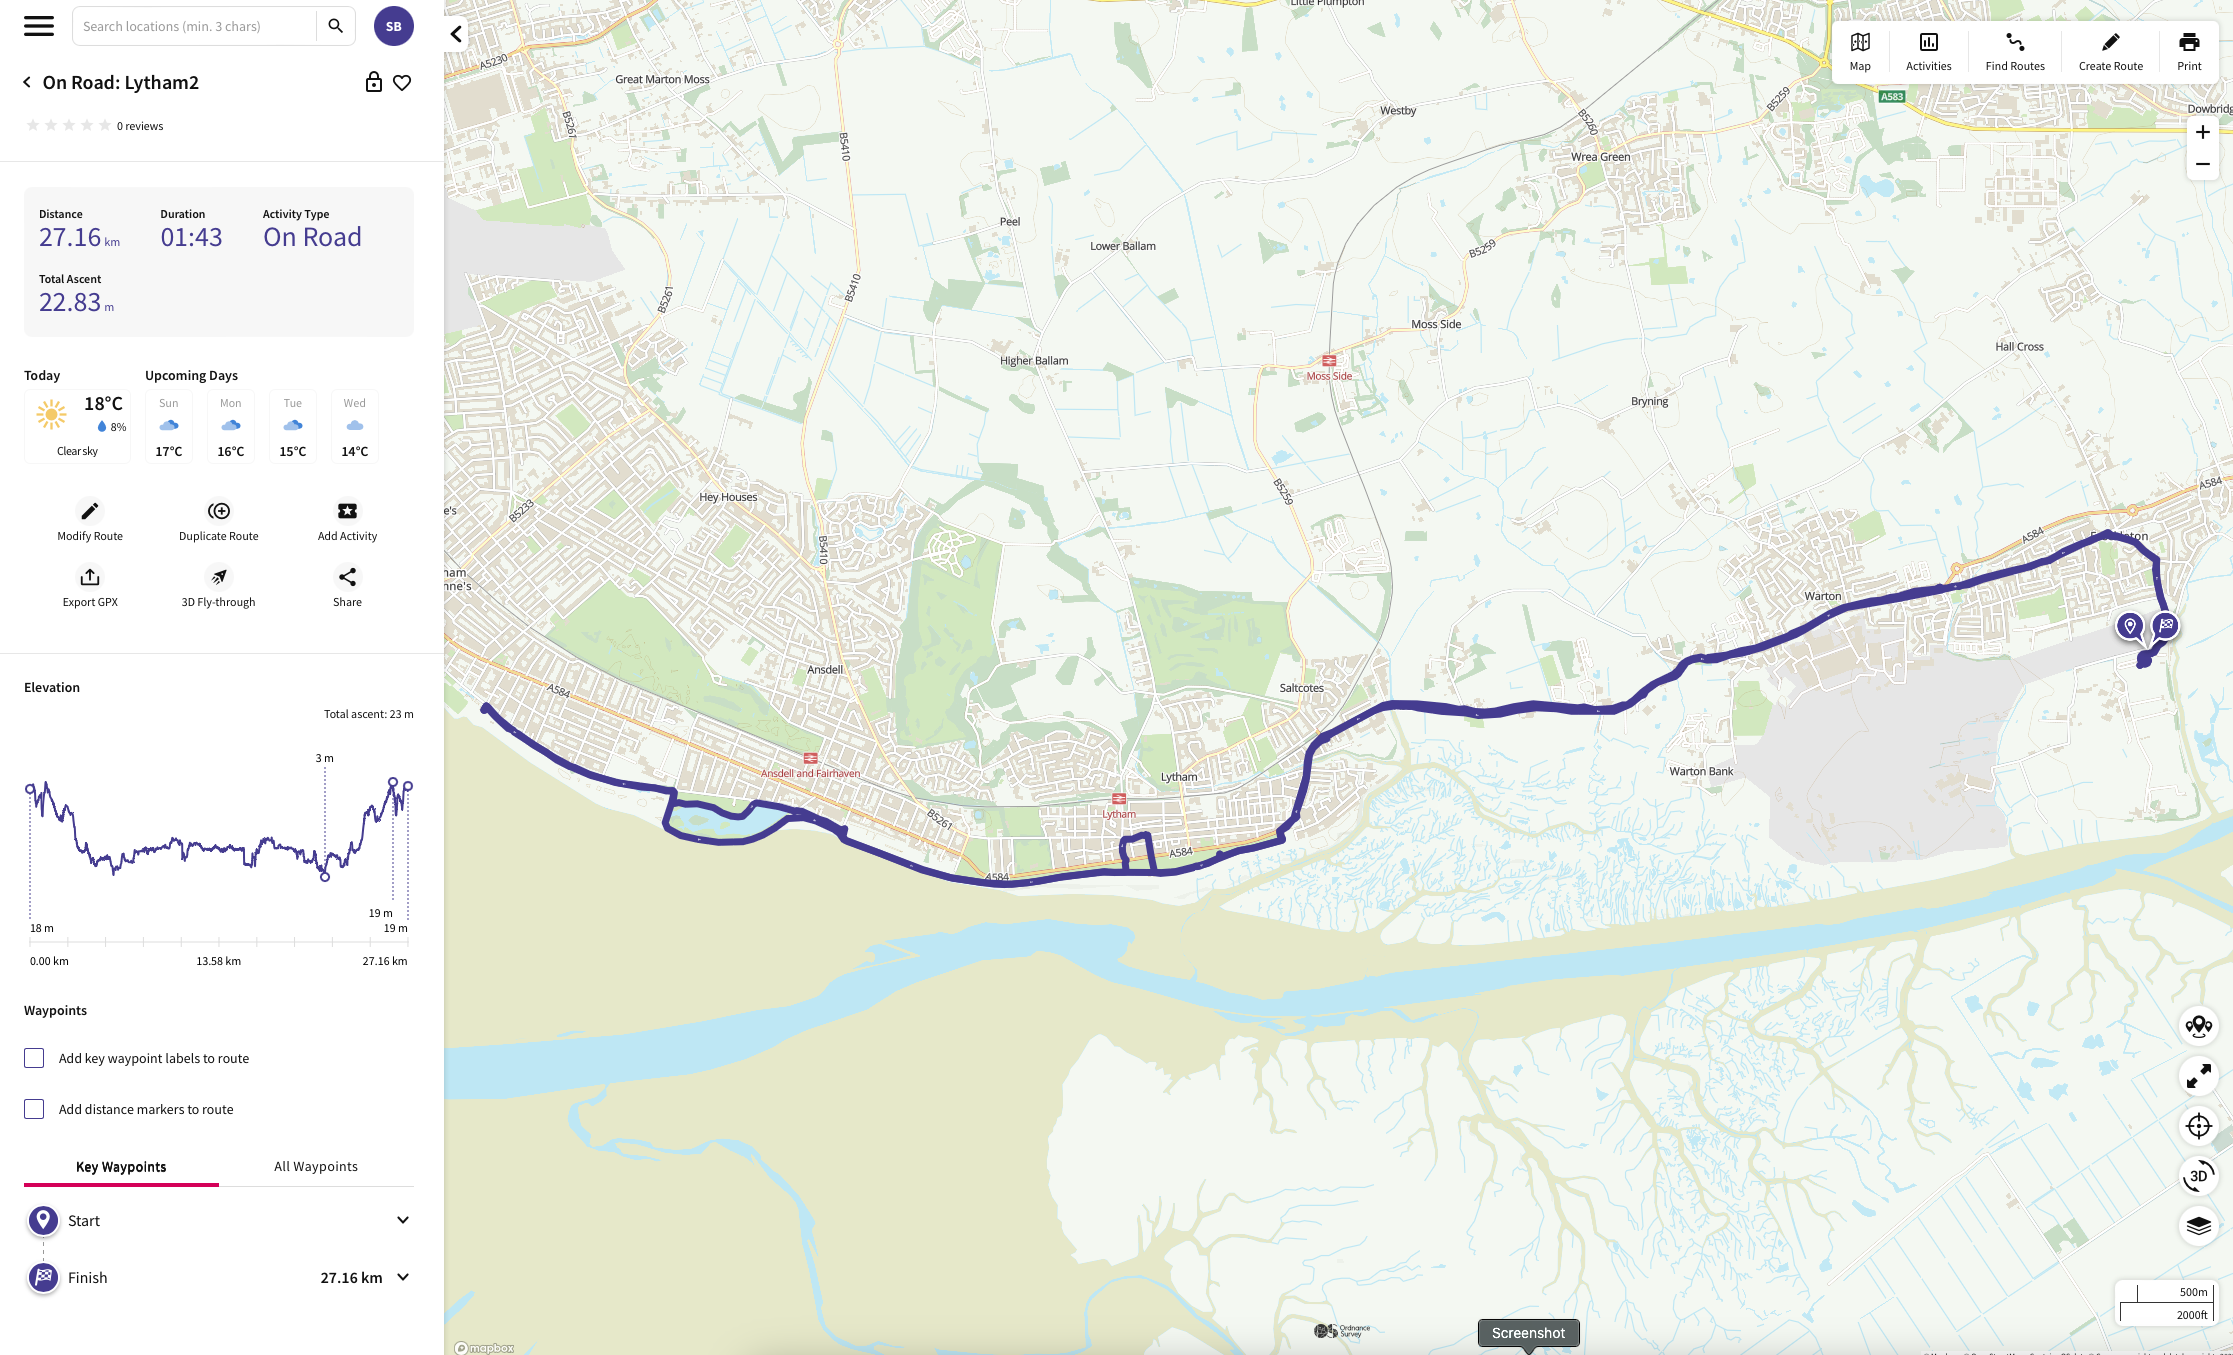
The total round trip only took us 1h and 17m of cycling, a distance of 17.4 km which is a little under 11 miles.
Day two was interrupted by the need to visit a local caravan accessories shop (fell over at the cost of everything!!!) and the odd light shower passing through, but day three was blue skies and worth a bother outing on the bikes…. so we went back into Lytham, a little further this time past Fairhaven Lake to the beach cafe.
An easy ride again totalling 1h 43m of peddling and a distance of 27.16 km (16.8 miles). These are a lot shorter distances than we are used to, but a few months ago Sue was diagnosed with a heart condition…. ironic really considering the job She spent most of her working life doing! So we are building up slowly, on the flat with plenty of options to stop for a rest…
We indulged in a strawberry Cornetto at the beach cafe before heading back to Donkey Creek Farm. The next day we were supposed to be heading home, however the weather was kind, the site superb, the ducklings cute and even Henry was relaxing to the point he didn’t want to get up in the mornings.
So we decided to stay another day, the pitch was available and that gave us the chance to cycle into Lytham one again this time for a lazy lunch at “The One” in Clifton Square. Again sat outside people watching.
Why did we choose Donkey Creek Farm?
We normally kick off our season with a trip to Southport C & M Club site, but when booking for four nights on a serviced pitch had a bit of a shock… £175.20. That seemed a bit steep so I started looking round on Pitchup.com for sites within a 25 mile radius and scrolling through recognised the name Donkey Creek Farm from YouTubers “The Caravan Addies” and “The Caravan Nut“. (Go on tell me I’m name dropping!) Checking the prices for the same 4 nights on a fully serviced pitch was £136.00 a saving of £39.20. Which was a bit of a jaw dropper…. realising just how expensive the C & M Club has become.
I’ve just booked our next trip to Sutton-on-Sea on the east coast…. and this time for 5 nights on a fully serviced pitch I’ve saved £83.50 based on the same dates for a fully serviced pitch on the Sutton C & M Club site. I’ll let you know how we get on soon!
Something that may be happening later this year…
As you may know, since we started caravanning we always try to cycle Blackpool Illuminations. Usually in October and we have done it from 5 different sites. However I was thinking of maybe doing it from Donkey Creek Farm this year.
Set of around lunchtime from Donkey Creek Farm and cycle to Squires Gate or The Pleasure Beach for a coffee. Cycling along the prom past the Tower continueing to Bispham for an afternoon snack somewhere. Around 5 easy cycle along the prom up to Redbank Road ready for the illuminations to come on and start the trip back through Blackpool. We have cycled from Squires Gate to Lytham in the dark and it’s OK as most is on a cycle path… and having cycled Lythan to Donkey Creek Farm several times, cycling that route should not be a problem as it is on a separate cycle path apart form about a mile stretch around the entrance to BAE Warton where it’s a cycle lane on the road but the road is well lit.
We normally do it before the clocks change in the Autumn so it means setting off around 7 from Red Bank Road, I recon it will be about a 2 hour ride back and overall about a 28 mile round trip with 2 or 3 breaks
I’m not going to say it’s an organised ride…. but I’ll work out a bit of detail and a date we are going to do it. It will be mid week and an option of two or three days to allow for weather. Anyone is welcome to join.
A while ago I upgraded the lights on our caravan by changing the functions round and added two new LED reversing lights which I can’t understand why I hadn’t done this years ago. In daylight they are bright… and at night they are really bright… retina burning bright according to reports. Reversing into a dark pitch is a lot easier and safety wise having an additional set of tail and brake lights with two large bright rear fog lights instead of the single factory 21 watt light mounted almost as low as you can get on the rear of the caravan is a vast improvement in my mind. You can read about my changes here… “Put Yer Lights On Mate…“
Following that article I had lots of people contact me letting me know they liked what I had done and considering upgrading themselves. Not a clue if anyone did, but that’s how these things go. I did have another email from a gentleman which was a bit different. Now I’ve edited it a bit as it was originally two emails and included a company name and some specific details which I’m sure they would not wish me to publish to the world…. here’s the gist of it though:
“Hi Simon, been reading your blog for a while and I read your post about upgrading your caravan lights. I was wondering if you might be able to help with something we would like to do with our trailers or could put us in touch with someone who can? We have around eight trailers that are used on various locations separately or as a group and are towed by a variety of vehicles, mostly our own but occasionally by contractors. Most of our trailers have additional side lighting powered off the trailers own batteries which are charged from the vehicle or while on site from generators. A lot of our set up and tear down is done at night and we have had issues at dark locations where the vehicles reversing lights don’t really help. Is there any way we could get the side work lighting to come on when the vehicle reverses but could be controlled from the vehicle without any additional switches or alterations to the vehicles but could be turned on and off as reversing on a public road with them on might not be legal”
From an exchange of emails, I do know what the company does and some of the sorts of places it works. They don’t always have access to mains power when setting up or tearing down and would like something that can easily be installed in a trailer without too much alteration to the electrical services. Nothing could be installed in any of the tow vehicles as the vehicles were not always their own and I first suggested a cheap(ish) remote switch that could be used by the driver to turn them on and off as required. I was told this was not an option as the remote switches would likely get lost/damaged or need batteries or be with the wrong crew, some sites they could not use any radio equipment.
Time to put my thinking cat on…
Polo…. always a great thinking cat, sadly no longer with us.
I had a bit of an idea forming. Something I’d seen on a Class A American RV (Prevost I think) was a set of spotlights set in the side panel of the RV pointing backwards and located near the front wheel. These lit up down the side of the RV and the ground to the side when reversing…. I’d thought about adding a couple of simple cheap LED lights to the underside of the caravan between the wheel and front of the caravan angled outwards by about 60 degrees mounted under the floor… so when I reversed they lit up the caravan wheel and the ground it was going over so I could see it clearly at night in my mirrors. I had pondered how to switch this on and off using the Amarok but not add any more wiring between the caravan and vehicle. So I’d already come up with a solution.
Here is what I came up with…
It’s a simple two relay set up. The two triggers for this to work are the vehicle reversing lights and the rear fog lights. The top relay in the box is activated by the vehicle being in reverse with the reversing lights on. The lower relay is activated by turning the vehicles rear fog lights on. Only when these two conditions are met, is there a circuit across the two relays switches made thus activating the work lights on the trailer.
Quite simply when reversing to turn on the work light simply turn on the rear fog lights and the work lights will come on.
Cables 1, 2 & 3 connect to the road lights. Cables 4 & 5 are for the switched load. The cost was around £15 for the components for each unit and that included Bosch relays & sockets, the die-cast box and fuse holder. I guess putting it in a plastic case and using cheaper eBay sourced relays could halve that cost.
I did also think that as an upgrade or option the relay operated by the reversing lights could be a timer relay. Set it to say 15 seconds, then when reversing you turn on the work lights and they will remain on of 15 seconds after reversing as long as the rear fog lights are on. This would give you time to reverse, pull forward and reverse again. Each time you select reverse the timer would reset and as soon as you disengaged reverse the timer would start its countdown again.
High level work lights could be a boon to reversing into dark pitches or storage sites. Image take from the internet, copyright not mine.
It was as simple as I could get it using existing signals from the vehicle that already pass through to the trailer. I guess it could be used to turn anything on using any combination of lights operating from the vehicle.
The wiring between the road lights and work lights is kept separate as I wasn’t 100% sure how the trailers power system worked and how it was connected to the road lights (if at all) The two relays were installed in a die cast box with a grommet for the 5 cables. All the trailers were fitted with one of these and apparently they have all been working fine for several months.
Why did I opt for reversing lights and fog lights?
I wanted something that would not be used generally through the day so reversing on a public road during daylight or even at night the work lights would not illuminate. Running during the day with lights on and your fog lights will not operate the working lights… and if you are running in weather that requires headlights and rear fog light… then I guess having the working lights come on while you reverse in those inclement weather conditions just makes you more visible to everyone around. So apart from that I don’t think that you will cause a danger on the road with this set-up.
So…. I think I might just have to install one of these on my caravan…. just in case!
Low level scene lights down the side of the trailer can be just as effective as high level work lights. Image taken from the internet, copyright not mine.
Its a fairly simple DIY job to build a box and install it without too much messing about with the original wiring. Now someone asked me about getting the orange side marker lights to flash in time with the indicators…. and remain as side markers when the indicators weren’t being used. Is this something I need to put my thinking cat on for? Let me know in the comments.
A while ago I had an email from a chap called Roy. I thought it was going to be an easy one to sort out but never expected what the eventual issue was.
Rather than try to explain all the steps, which is difficult sometimes trying to diagnose without actually being hands on, Roy did a fantastic job, so I thought I’d simply post the email exchange…..
Hi Simon,
I have a problem with the drivers side lights on my 1997 Bailey Unicorn caravan.
I bought a new BMWW X3 in 2020 and had a BMW tow bar and electrics fitted in the factory.
I towed the caravan with the X3 for the first time this year. After driving using my headlights for about 70 miles the drivers side lights on the caravan stopped working and I got a message on the dash telling me “trailer electrics were overloaded. Trailer not or only partially illuminated, switch off unnecessary electrical consumers in the trailer and have problem checked by your service engineer”. I switched off the fridge but it made no difference.
I bought a 13 pin caravan plug and short piece of 13 pin cable and checked the wiring with a multimeter. I connected the black probe to the white no. 3 pin and the red probe to the black no. 7 pin and I was getting a reading on the multimeter, I then checked the brown no. 5 pin which feeds the drivers side but I didn’t have a reading (I have checked for continuity on the brown cable and that is okay).
I continued to our destination, it was daylight, I had nearside lights on caravan and car but no drivers side lights on caravan.
When we came to leave the caravan site I connected caravan to car and all the lights were working on the caravan but after about 10 miles the nearside caravan lights went off and remained off. I found that if I tried to connect the 13 pin plug the nearside lights on the caravan came on and then immediately went off.
I took the car back to BMW and they can’t find a problem on the car.
I took the car to a caravan dealer and connected up to one of their vans and the lights on their van all worked.
Is this a problem you have come across as I do not know and also the caravan dealer doesn’t what the problem could be.
Kind Regards.
Hi Roy
Not heard of this before, but I think I might know what may be happening.
The number plate lights are usually connected to one side or the other…. near side running lights or off side running lights. The slight load increase because of this ’trips’ the electronic load sensor in the BMW and it shuts down that circuit. It should reset when you shut off the engine and start it up again.
One quick temporary solution would be to remove one of the side running light bulbs from the orange marker lights running down the side of the van.
A longer term solution would be to swop out the incandescent bulbs for LED ones. These have a lot lower power draw. Just changing over the tail lights and number plate lights should do it.
Let me know how you get on
Cheers
Simon
Good morning Simon,
Thank you so much for your very prompt reply.
I shall take your advice and change the bulbs for led ones. I will let you know how I get on but it won’t be for a couple of months as the van is stored for winter.
Thank very much.
Kind regards. Roy
A short while later…
Hi Simon,
Just an update. I collected my car from BMW this afternoon, I asked why if there was no fault found, why I had a reading on my multi meter for the nearside but not the offside. He said that this did sometimes happen with multi meters. He got his meter that they use for MOT’s and this showed that there was current on both sides, he also did a lamp test which showed the same result. This proves that it must be a problem with the caravan so with the help of your articles I will check all the running light electrics on the caravan. Incidentally, the front sidelights and the marker lights are all led units but all the backlights are incandescent bulbs so I will take your advice and change them. Can I replace the incandescent bulbs with led bulbs or will I have to change the whole units?
The light units are available from Bailey’s.
Kind Regards
Roy
Hi Roy
Never known a multimeter to behave in that way…. you can get a voltage reading, but when you try to pass current across the connection if the connection is high resistance, the voltage will drop. That’s why testers usually have a mini trailer board with bulbs in to enable them to test the voltage when the circuits are drawing current.
The existing tail lights can simply be updated with LED bulbs. I replaced all mine …. https://caravanchronicles.com/2021/09/09/finishing-off-a-few-jobs/ I included details for a company I used on this page. I have had mixed results buying LED replacement bulbs in the past so asked some of my readers for their suggestions for companies and this one was suggested by many people. I’ve used them a few times and the products they supply are IMHO the best quality I’ve come across.
Cheers
Simon
Hi Simon,
Thank you for replying to my query so promptly.
Re.the multimeter, I bought a 13 pin caravan plug & a small length of 13 core cable. I have used this with my multimeter to check the current, I have tripled checked the continuity of and all is good. After “witnessing” there is current coming through at the BMW dealers, the dealer was checking using the 13 pin socket on the car I wonder if there is a problem in the 13 pin plug connection supplying current to the o/s caravan lights. I will start checking in that area first. When I took the van in for service earlier this year I had difficulty connecting the 13 pin plug and they fitted a different make for me, I.have checked the wiring in the plug and it is all okay. While I am at it I will rewire the plug.
Re the led bulbs, thank you for that address, I will order a set of bulbs & replace all the incandescent bulbs with led’s. Strange that they fitted incandescent bulbs at the back and led on the side & front, probably cost came into it.
Thank you once again for your knowledge and advice, I will let you know the outcome.
Kind Regards
Hi Roy
Where the 13 pin cable comes into the caravan and terminates there is usually a small fuse board for all the road lights. This is a good place to check the voltages when connected to the vehicle…. as you should be able to pull each fuse and check (with the lights on of course) the voltage being supplied to the fuse from the vehicle then with the fuse inserted the voltage with the circuit ‘live’ and under load. I would not expect more than a 2 volt drop. If it’s more then possibly time to take the 13 pin plug apart.
Hope this helps
Simon
A few months later…
Hi Simon, I wrote to you about 4 months ago asking for your advice re. no offside road lights on my caravan and I thought that I would give you an update. The caravan is a 2017 Bailey Unicorn and I tow with a 2020 BMW X3 diesel, the car has a factory fitted tow bar and 13 pin electrics. The first time that I towed with the car road lights all worked when I connected up but after about 15 miles the off side lights went out and a message came up on the dash telling me that the electrics on the car were overloaded and to speak to my dealer. They stayed off for the rest of our journey but when we came to return home the lights all worked for about 10 miles then again the off side lights went out and I got the message on the dash. I wrote to you and went through all the items you suggested and everything was fine, I even changed the 13 pin plug just in case there was a connection problem. I felt sure that the problem was with the car and not the caravan so I took it to my BMW main dealer. The technician checked everything whilst I was there and everything was was working fine, but when I got home and connected car to caravan I still did not have road lights on the off side. My caravan was due for a yearly service so last week when I took it in I asked the caravan dealer if they would check it out, he said that they had heard of this problem. I got a call a few days later, and the workshop manager said that they thought that they had found the problem. He had spoken to an electrician and he seemed to think that I had been running with the lights on automatic, which was quite probable, he said that it has something to do with the smart alternator. His advice when connecting car to caravan was to switch of the engine and switch the light switch off, connect the 13 pin plug to the car, start the car engine then switch the headlights on (don’t use the automatic headlight function when towing). When I collected my caravan I went through the suggested procedure and the lights were fine. I took the car and caravan for about a 30 mile run and the lights stayed on all the time. Hopefully this has sorted out the problem. I had read on your site about the different problems people are having with smart alternators and as far as I am aware I haven’t come up against any of those, fingers crossed. I think that cars have become far too complicated and even the technicians are baffled with them. Thank you for your advice Simon.
I’m so glad you got back to me with the results…. and even more pleased that you are all sorted!
Your email was quite timely…. I have just received an email from someone towing with a VW Toureg and he is having the same issue…. and as both auto light systems in the BMW and VW are made by Bosch….. I’ll bet it’s the auto light again.
I think this is a bit of important info, so with your permission, I’d like to write a brief article about the problem and steps taken to resolve it.
Cheers
Simon
Hmm….. I have auto lights on my VW Amarok but don’t use them…. I can feel a little testing in the near future!
So…. it was the Auto Light function on the BMW. I have checked on my VW Amarok and this doesn’t happen, I’m waiting for the gentleman that emailed me about a similar problem on his Toureg to get back to me.
If you have a BMW with Auto Light function and this has happened to you can you post in the comments as it will help anyone else when searching on Google for a similar problem.
I get a few of these type of problems emailed to me from time to time and the results never really make it into the blog. As some of them could be useful for other’s with similar problems do you think this type of posting would be useful? Obviously permission is required for me to repost and I did confirm with Roy if I could tell his story… I was going do one of my usual articles, but them thought actually the emails tell a better story just as they are.
I’ve had quite a few people email me asking for more information about the Victron system for a caravan that I was planning mentioned in the previous post. As this seems to have generated a number of questions, rather than give detailed answers to each one I thought I’d post the drawings. For the moment it’s on hold but here are the drawings.
While Victron would seem the obvious choice, there are a number of recent new products from Sterling Power that have rekindled my interest in the project…. watch this space.
After our recent trip to Meathop Fell it was time to say goodbye to an old friend. We have had our leisure battery since 2011 and for 11 years it has given us great service. For the last year or so I have thought hard about converting over to Lithium and drew up plans for a high capacity charging link between the tow vehicle and caravan and converting the caravan over to a Victron based system. However I think that for this caravan it would not be worth it.
We had bought a 120Ah Numax battery (left one above) from ABS and it had worked well, even now it still hold a charge and is sitting in my workshop on trickle charge waiting for a project to come along. I went back to Advanced Battery Supplies and opted to go for a 120Ah AGM. It wasn’t too expensive and hopefully it will give us years of service like it’s predecessor. I’ve used ABS for batteries a number of times over the past 12 or so years and can recommend them. I’m not sponsored by them and I paid for the battery but I have found that for me they give sensible advice and great service. That’s why I’m happy to mention them. You can call in personally or they do ship overnight ordering from their website – https://advancedbatterysupplies.co.uk
Battery taken care of now it was time to head into the workshop for a bit of construction….
Henry’s Conveyance Contrivance…
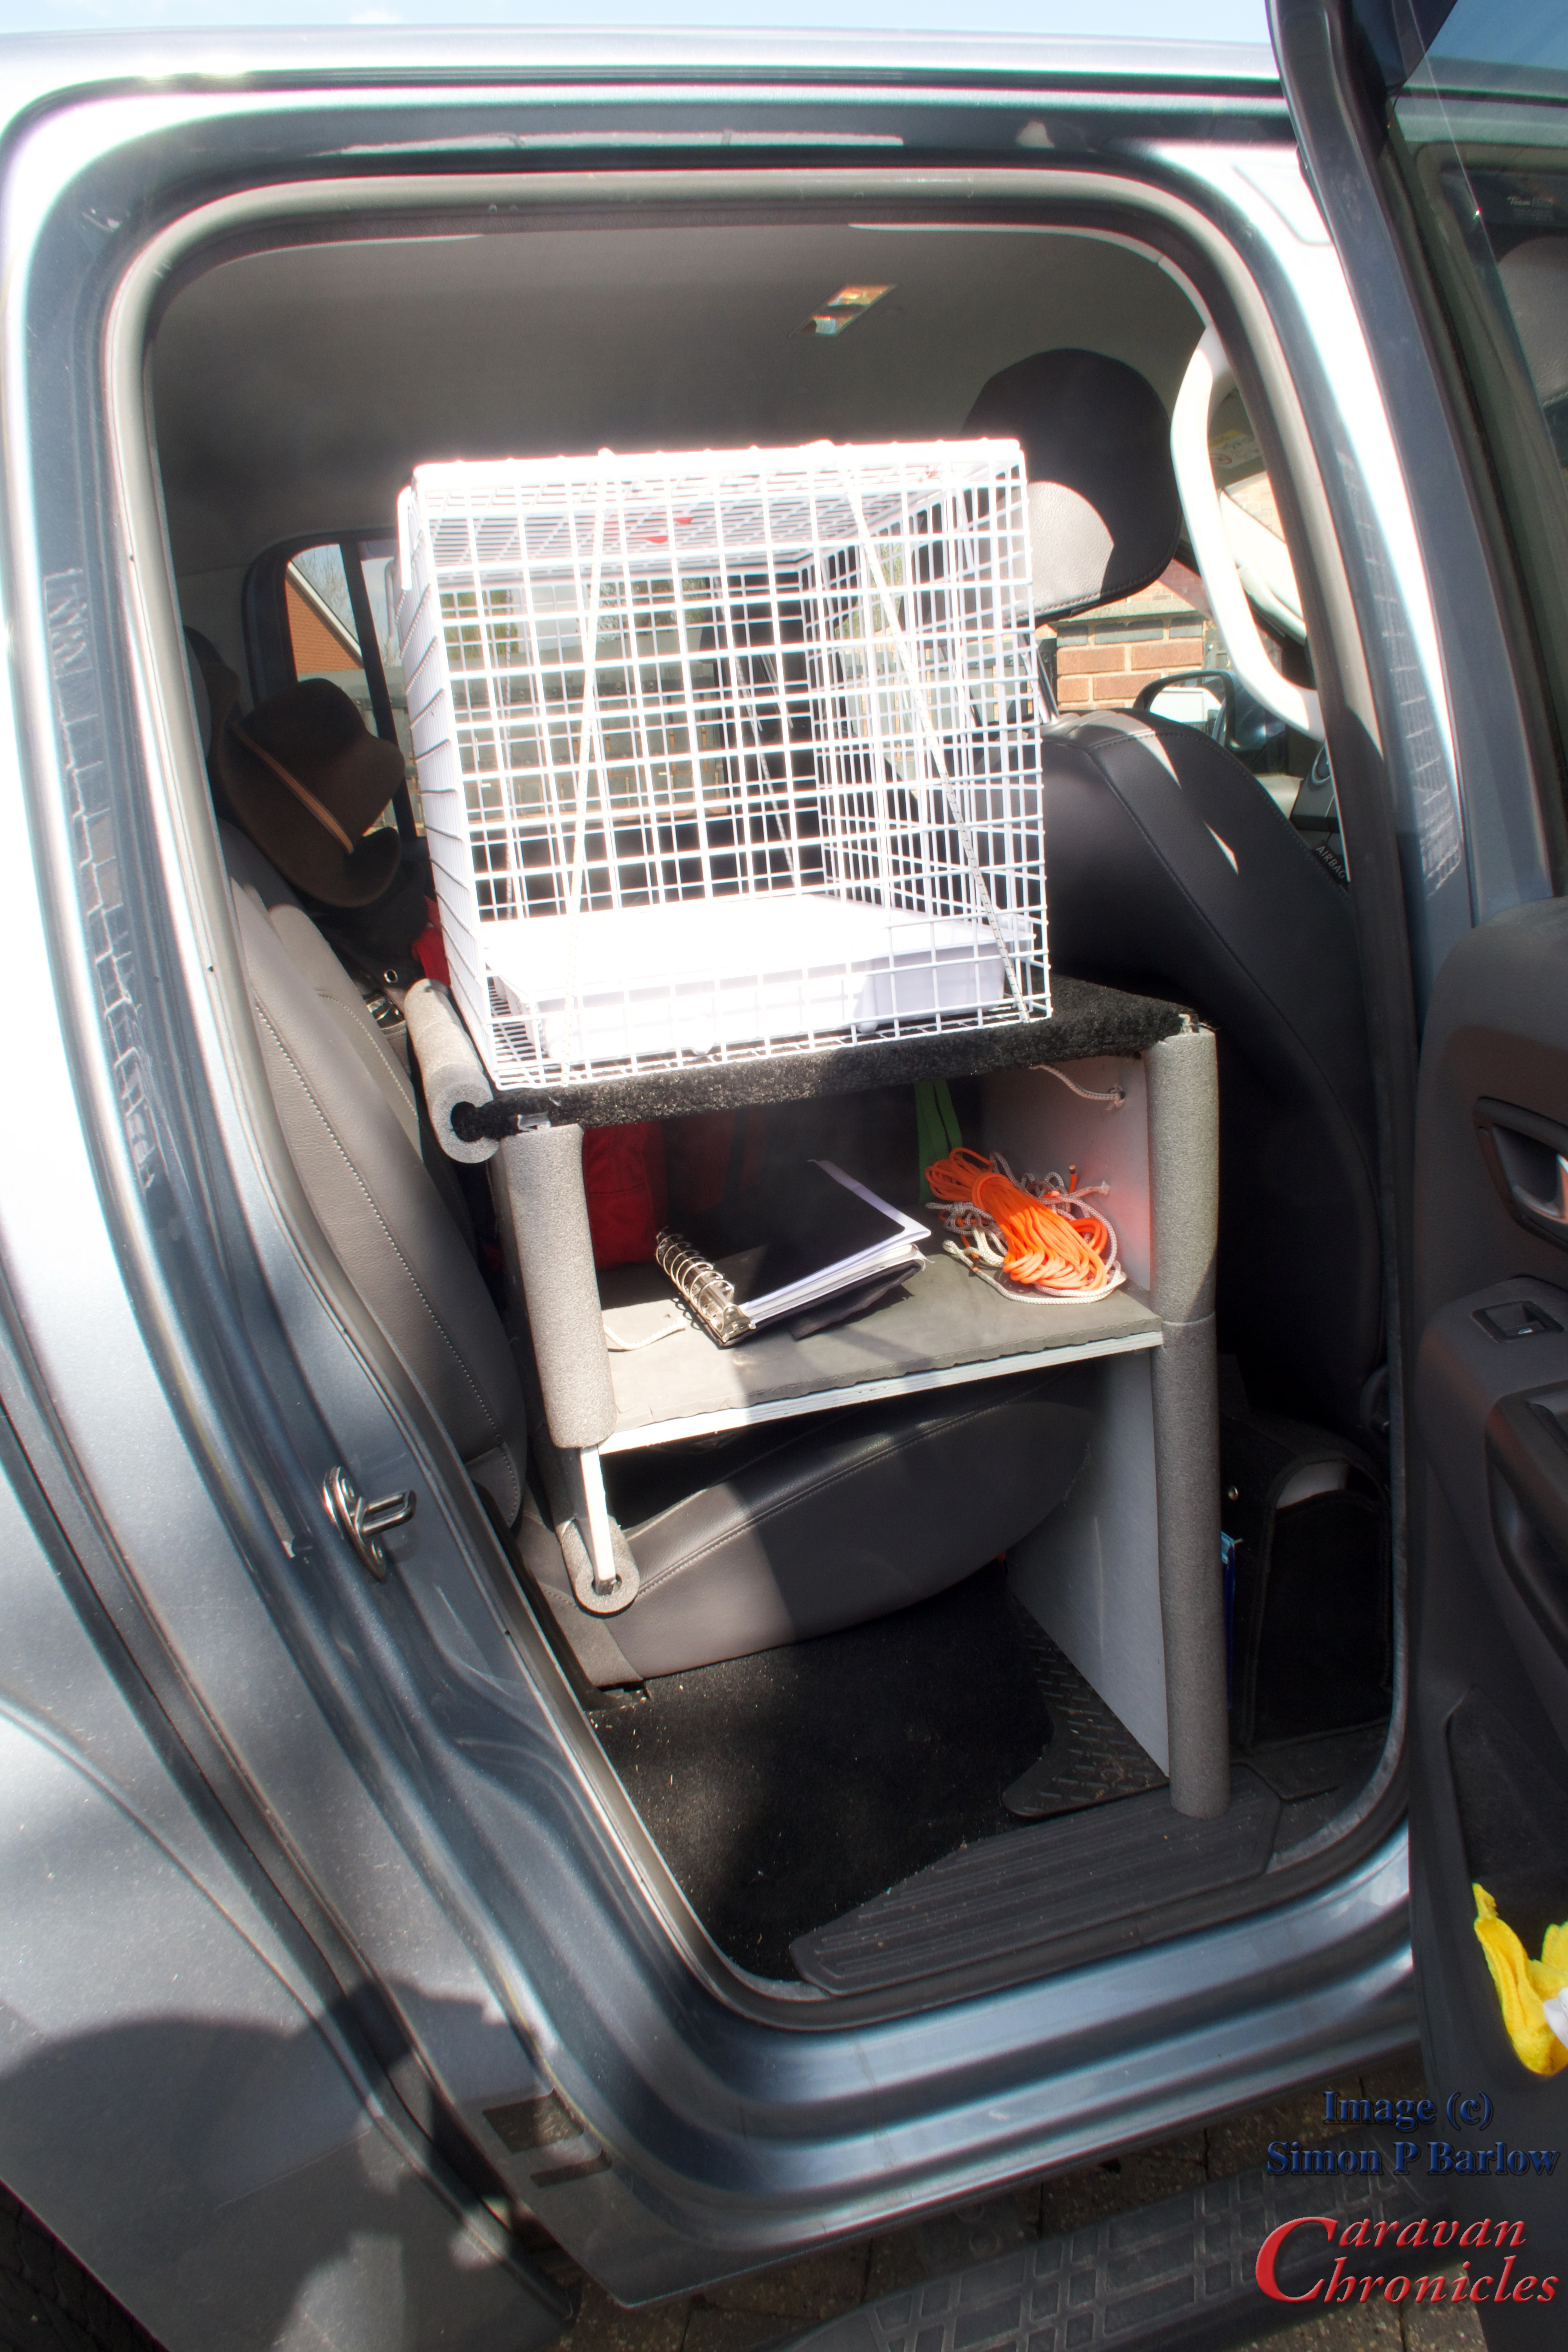
If you have read any of my posts over the last few years you will know that we have Siamese cats…. well sadly Oscar our health and safety officer passed away a while ago leaving us with just his brother Henry. Up to this point we have always had a cat sitter whenever we were away but June has now retired and honestly we could not face the thought of leaving Henry in a cattery or on his own with another cat sitter. So, a couple of exploratory trips up to the caravan for an hour just to let him sit in it and explore round lead us to a two night stay at Burrs Country Park…. only about thirty minutes away from home, that went well and so did the next trip to Meathop Fell. It was now time to build Henry a suitable transport platform for the vehicle.
Henry keeping an eye on the goings on at Meathop Fell
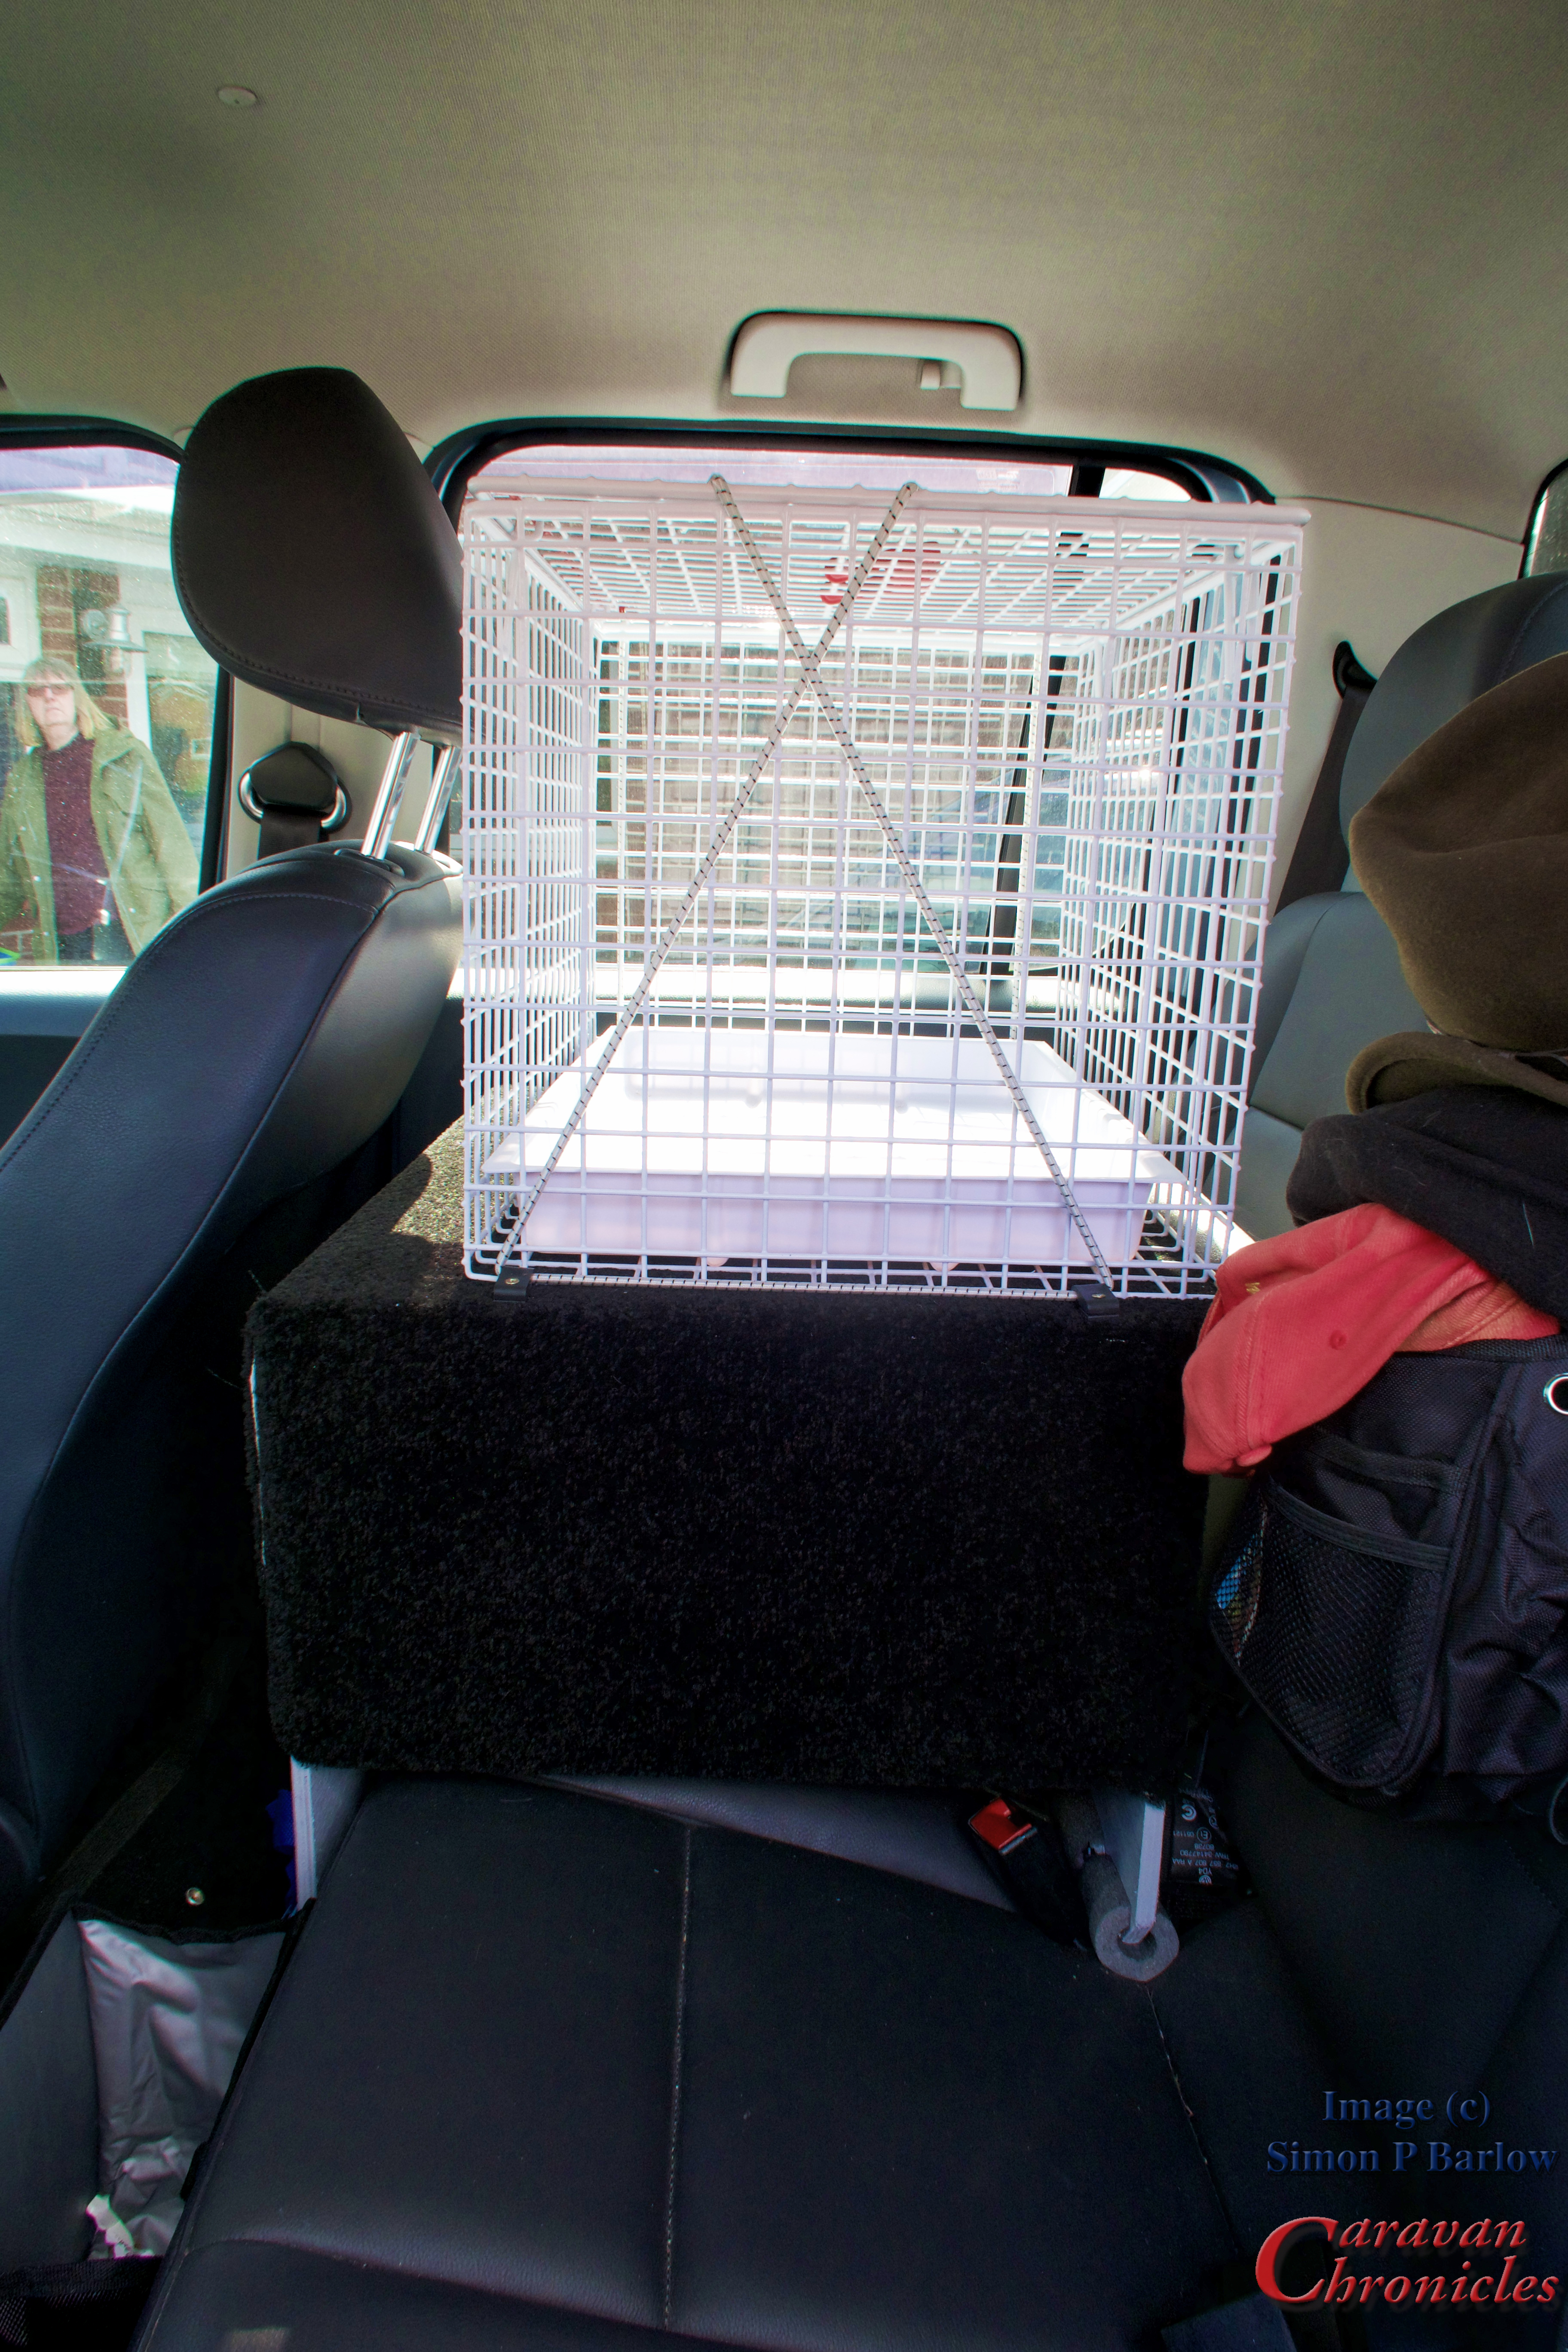
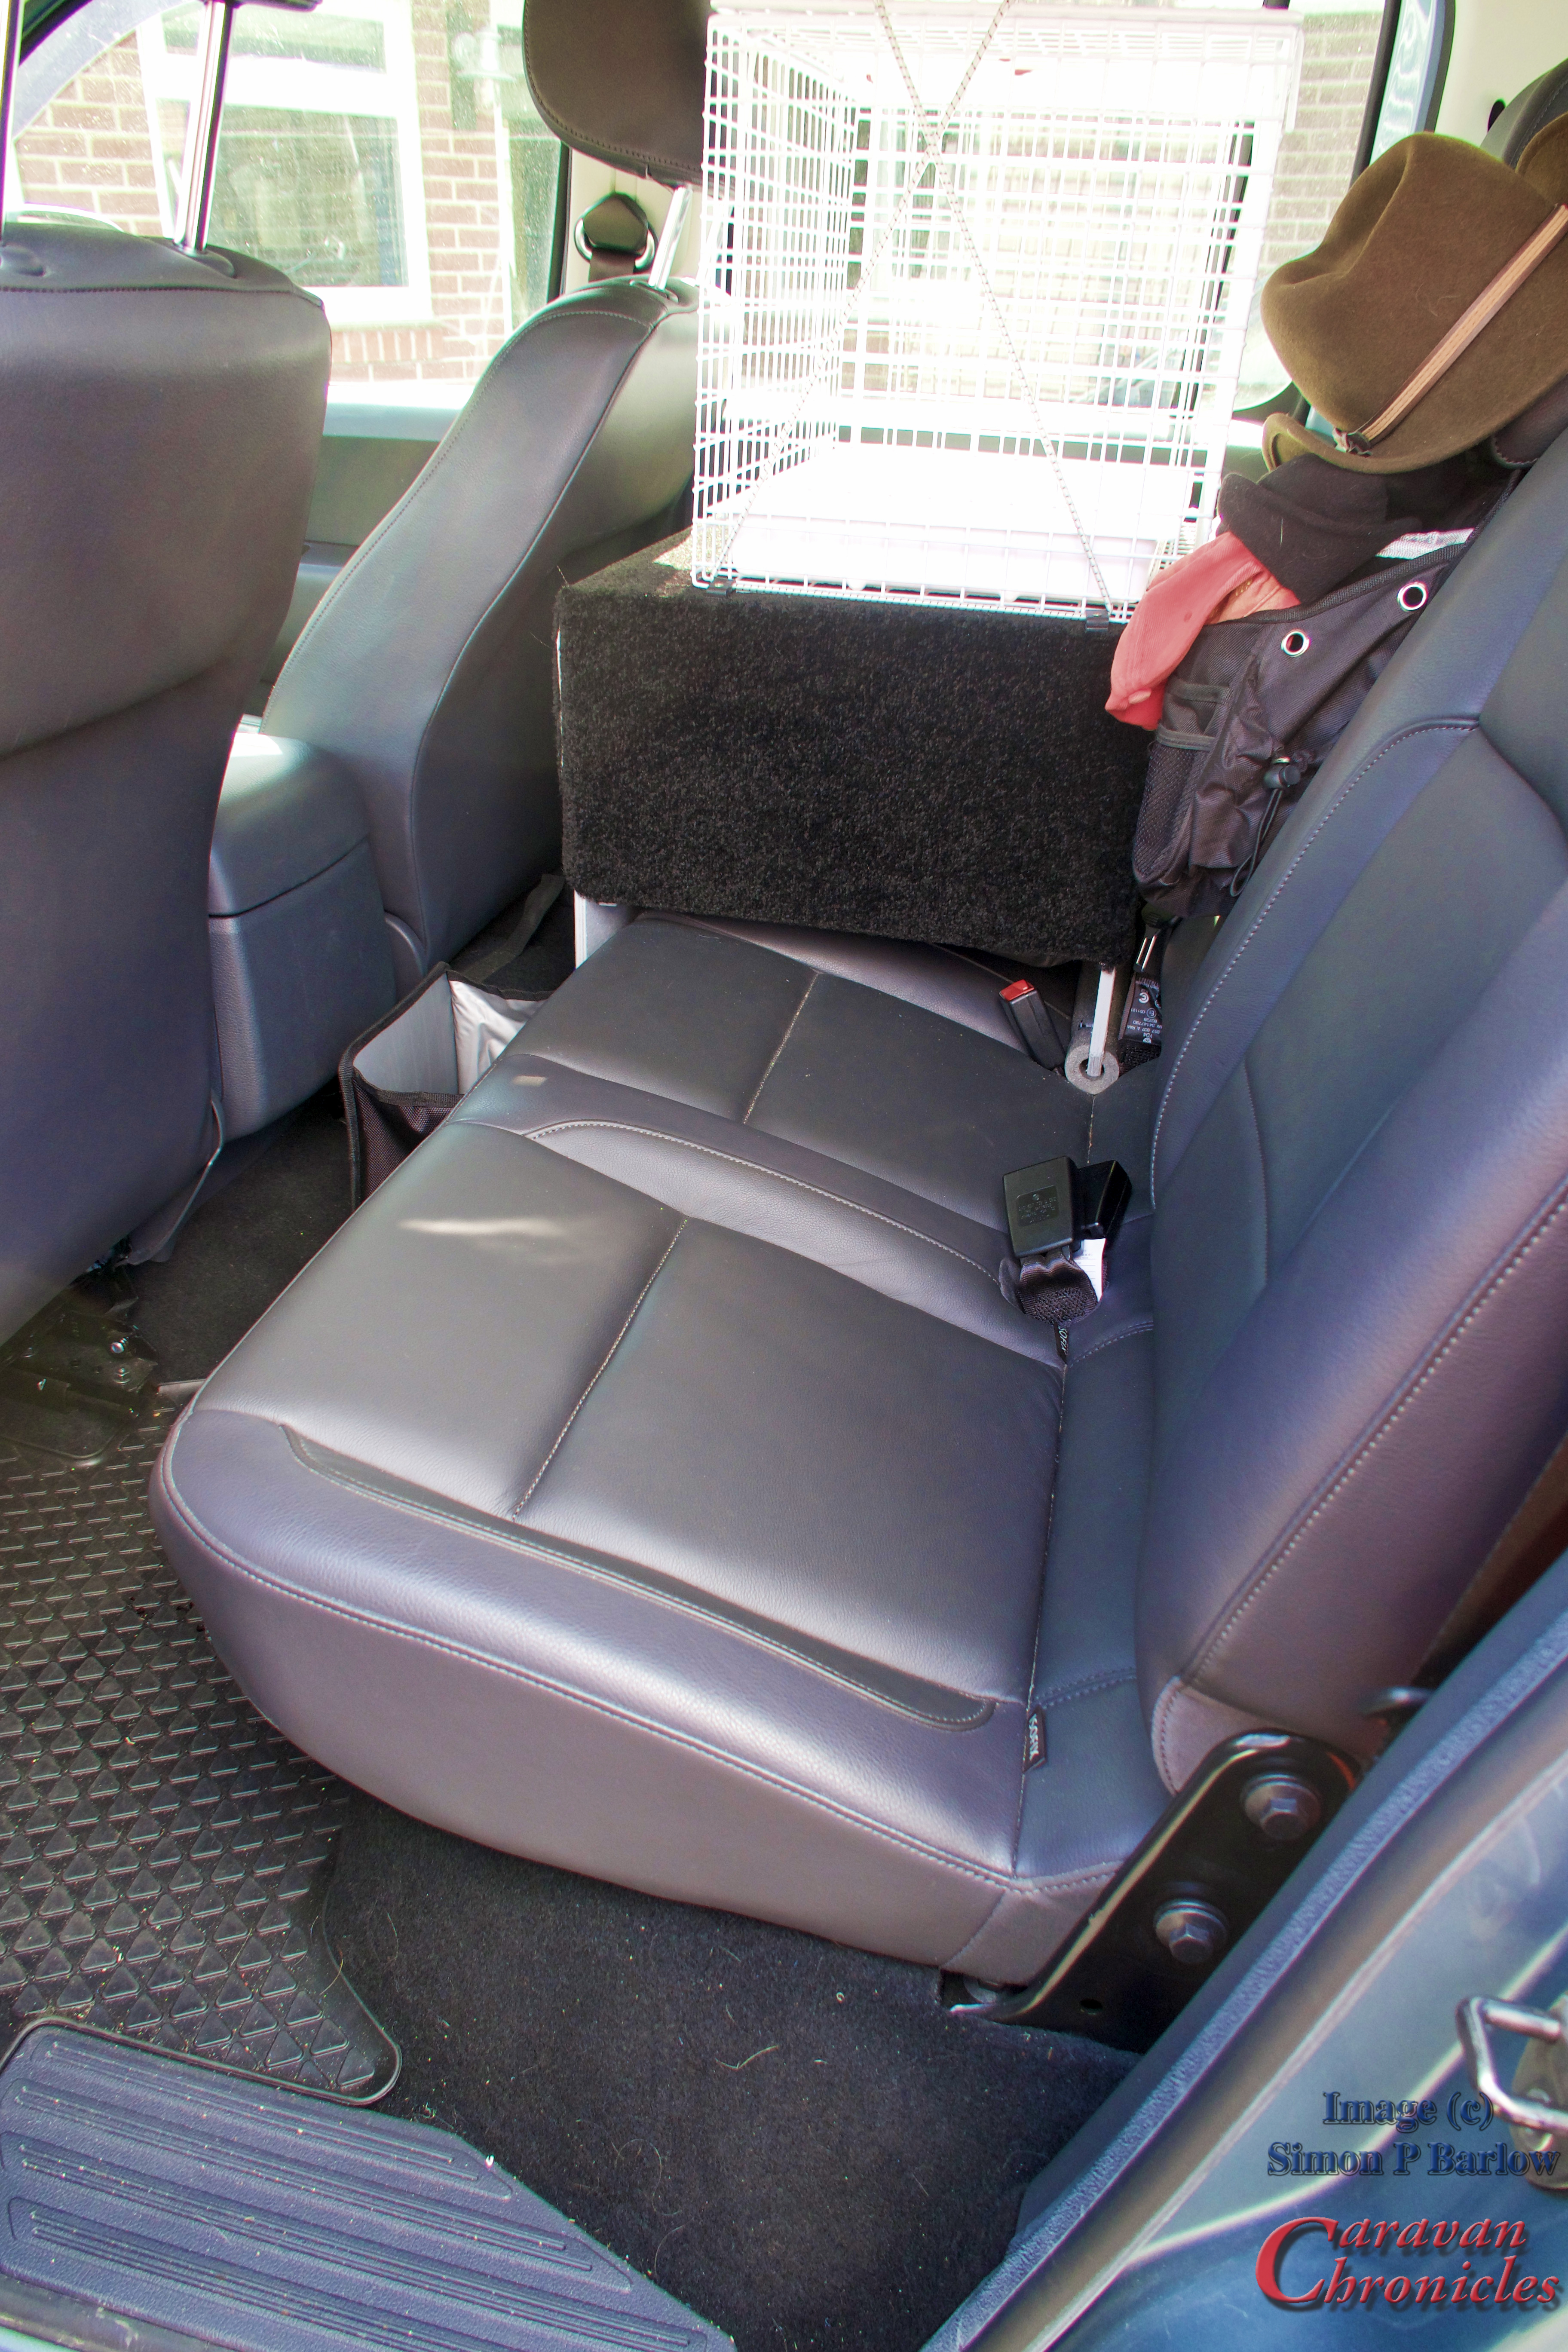
After a bit of head scratching I came up with this….
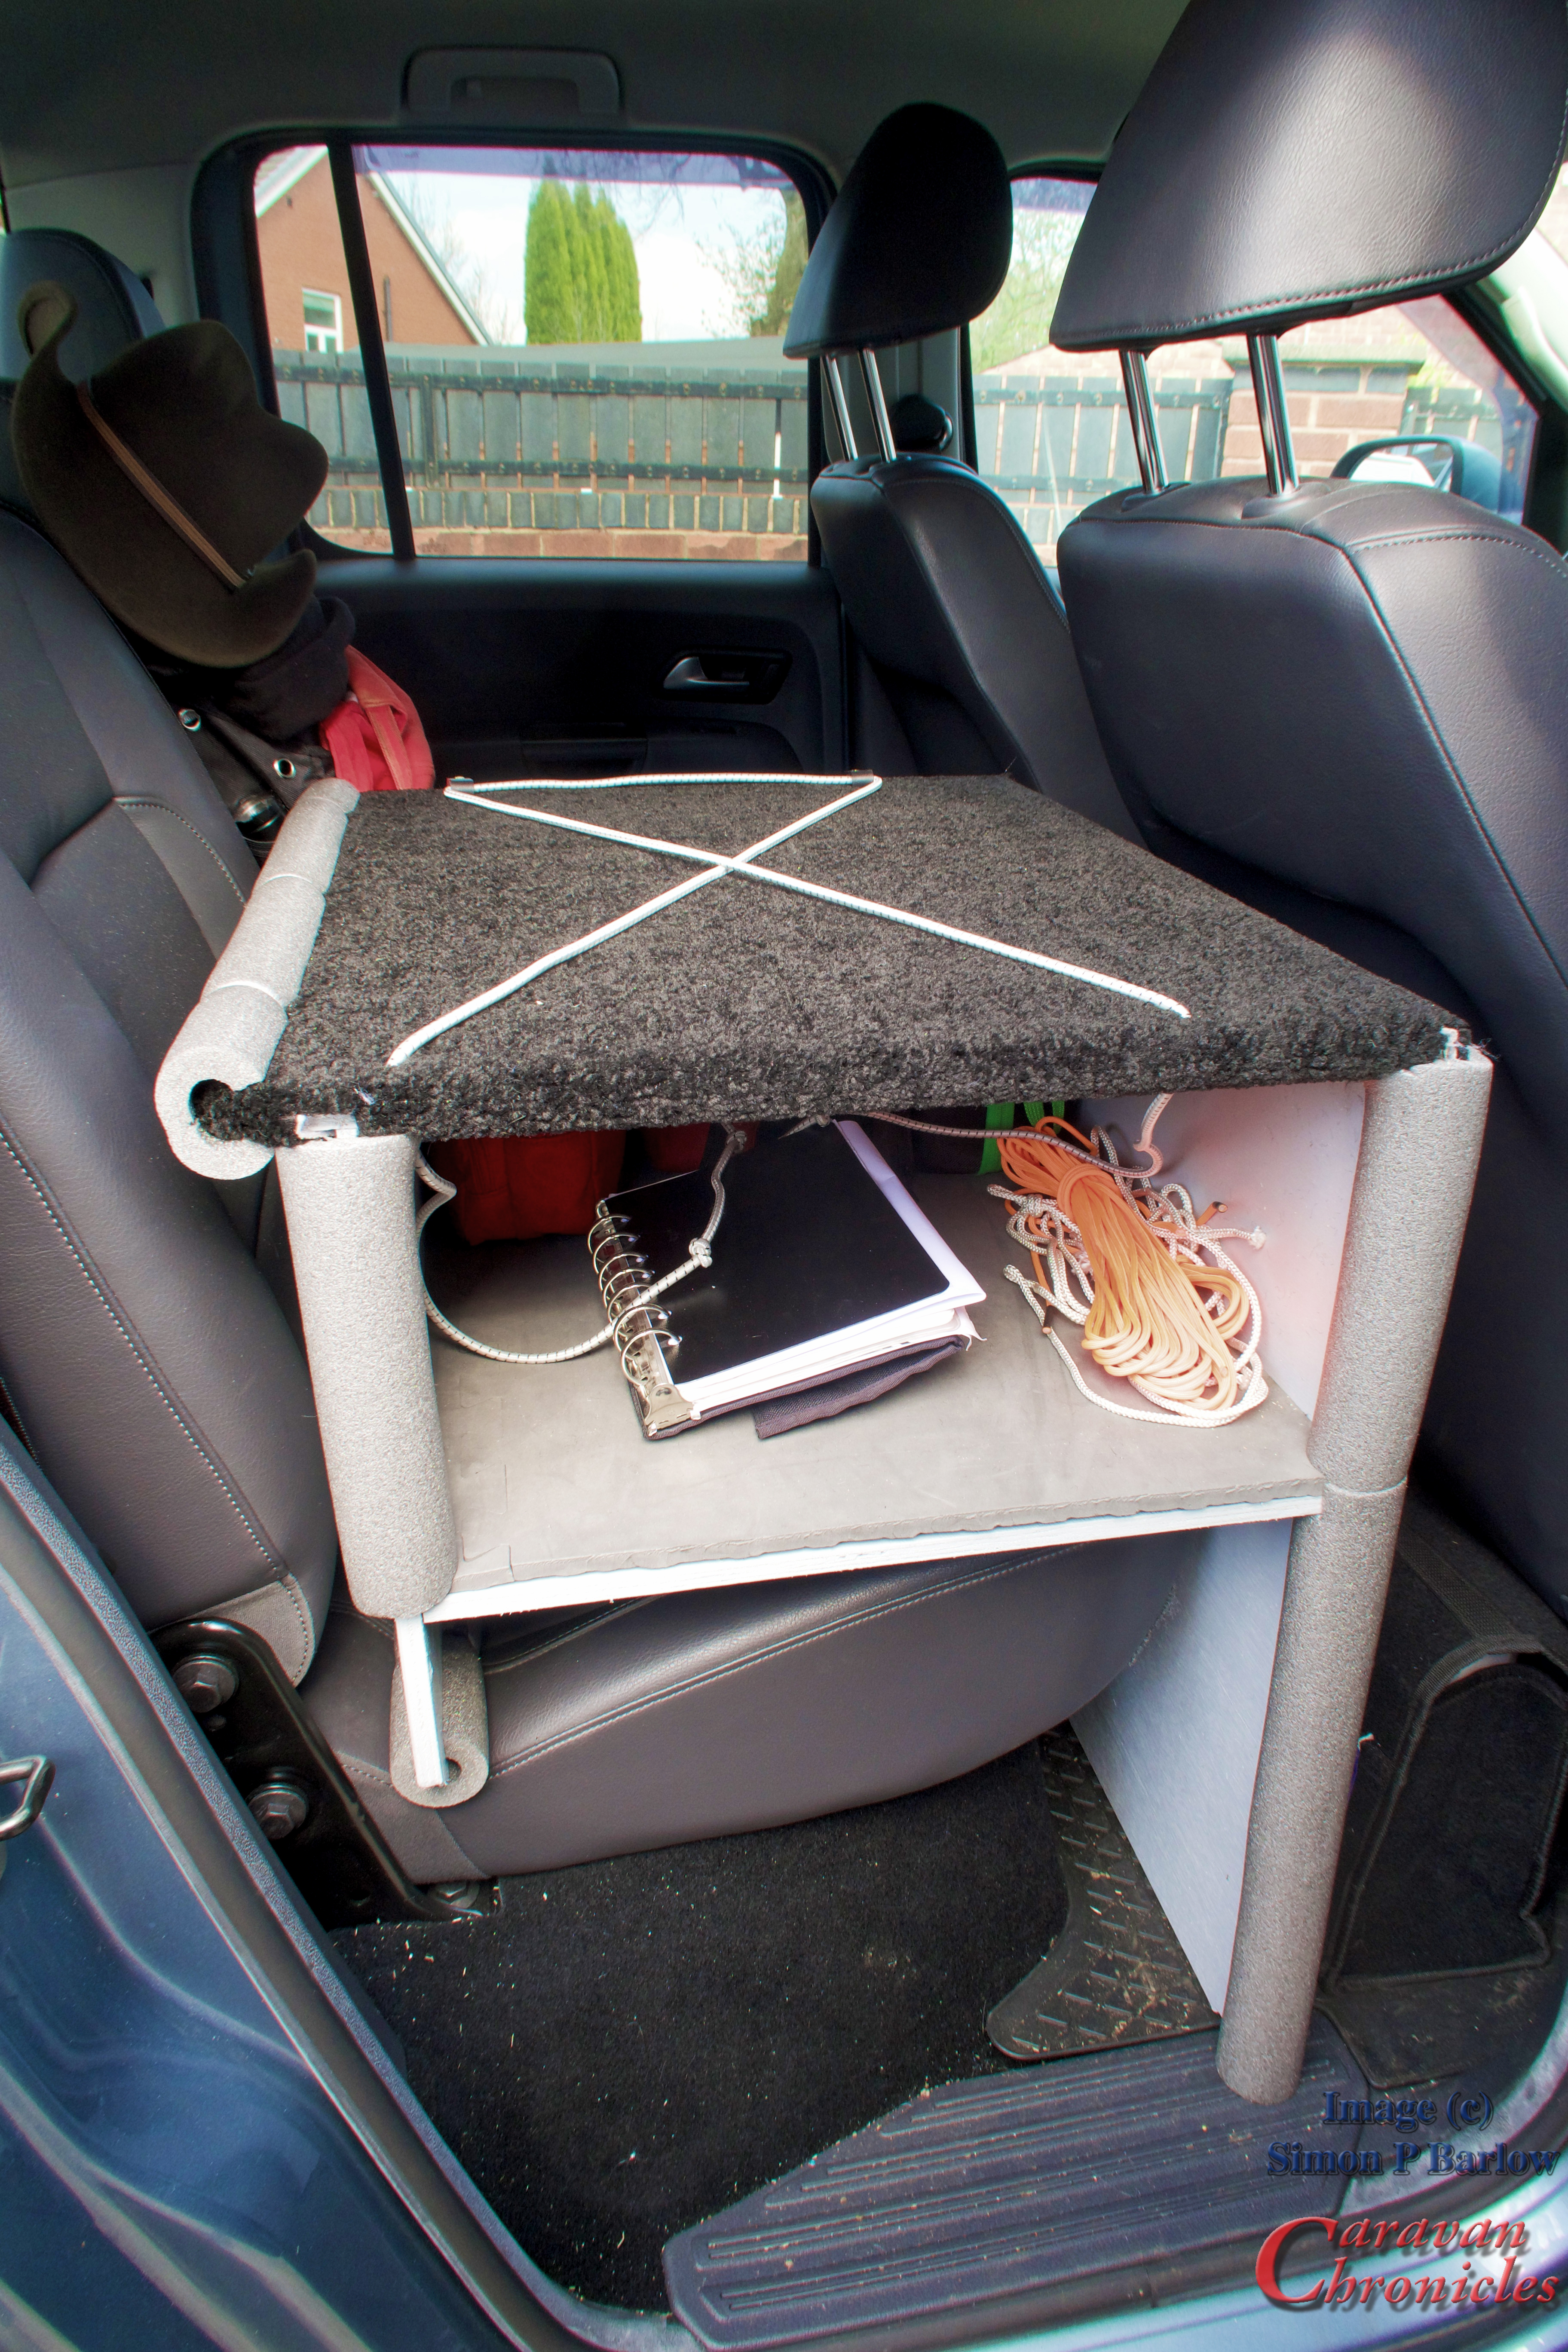
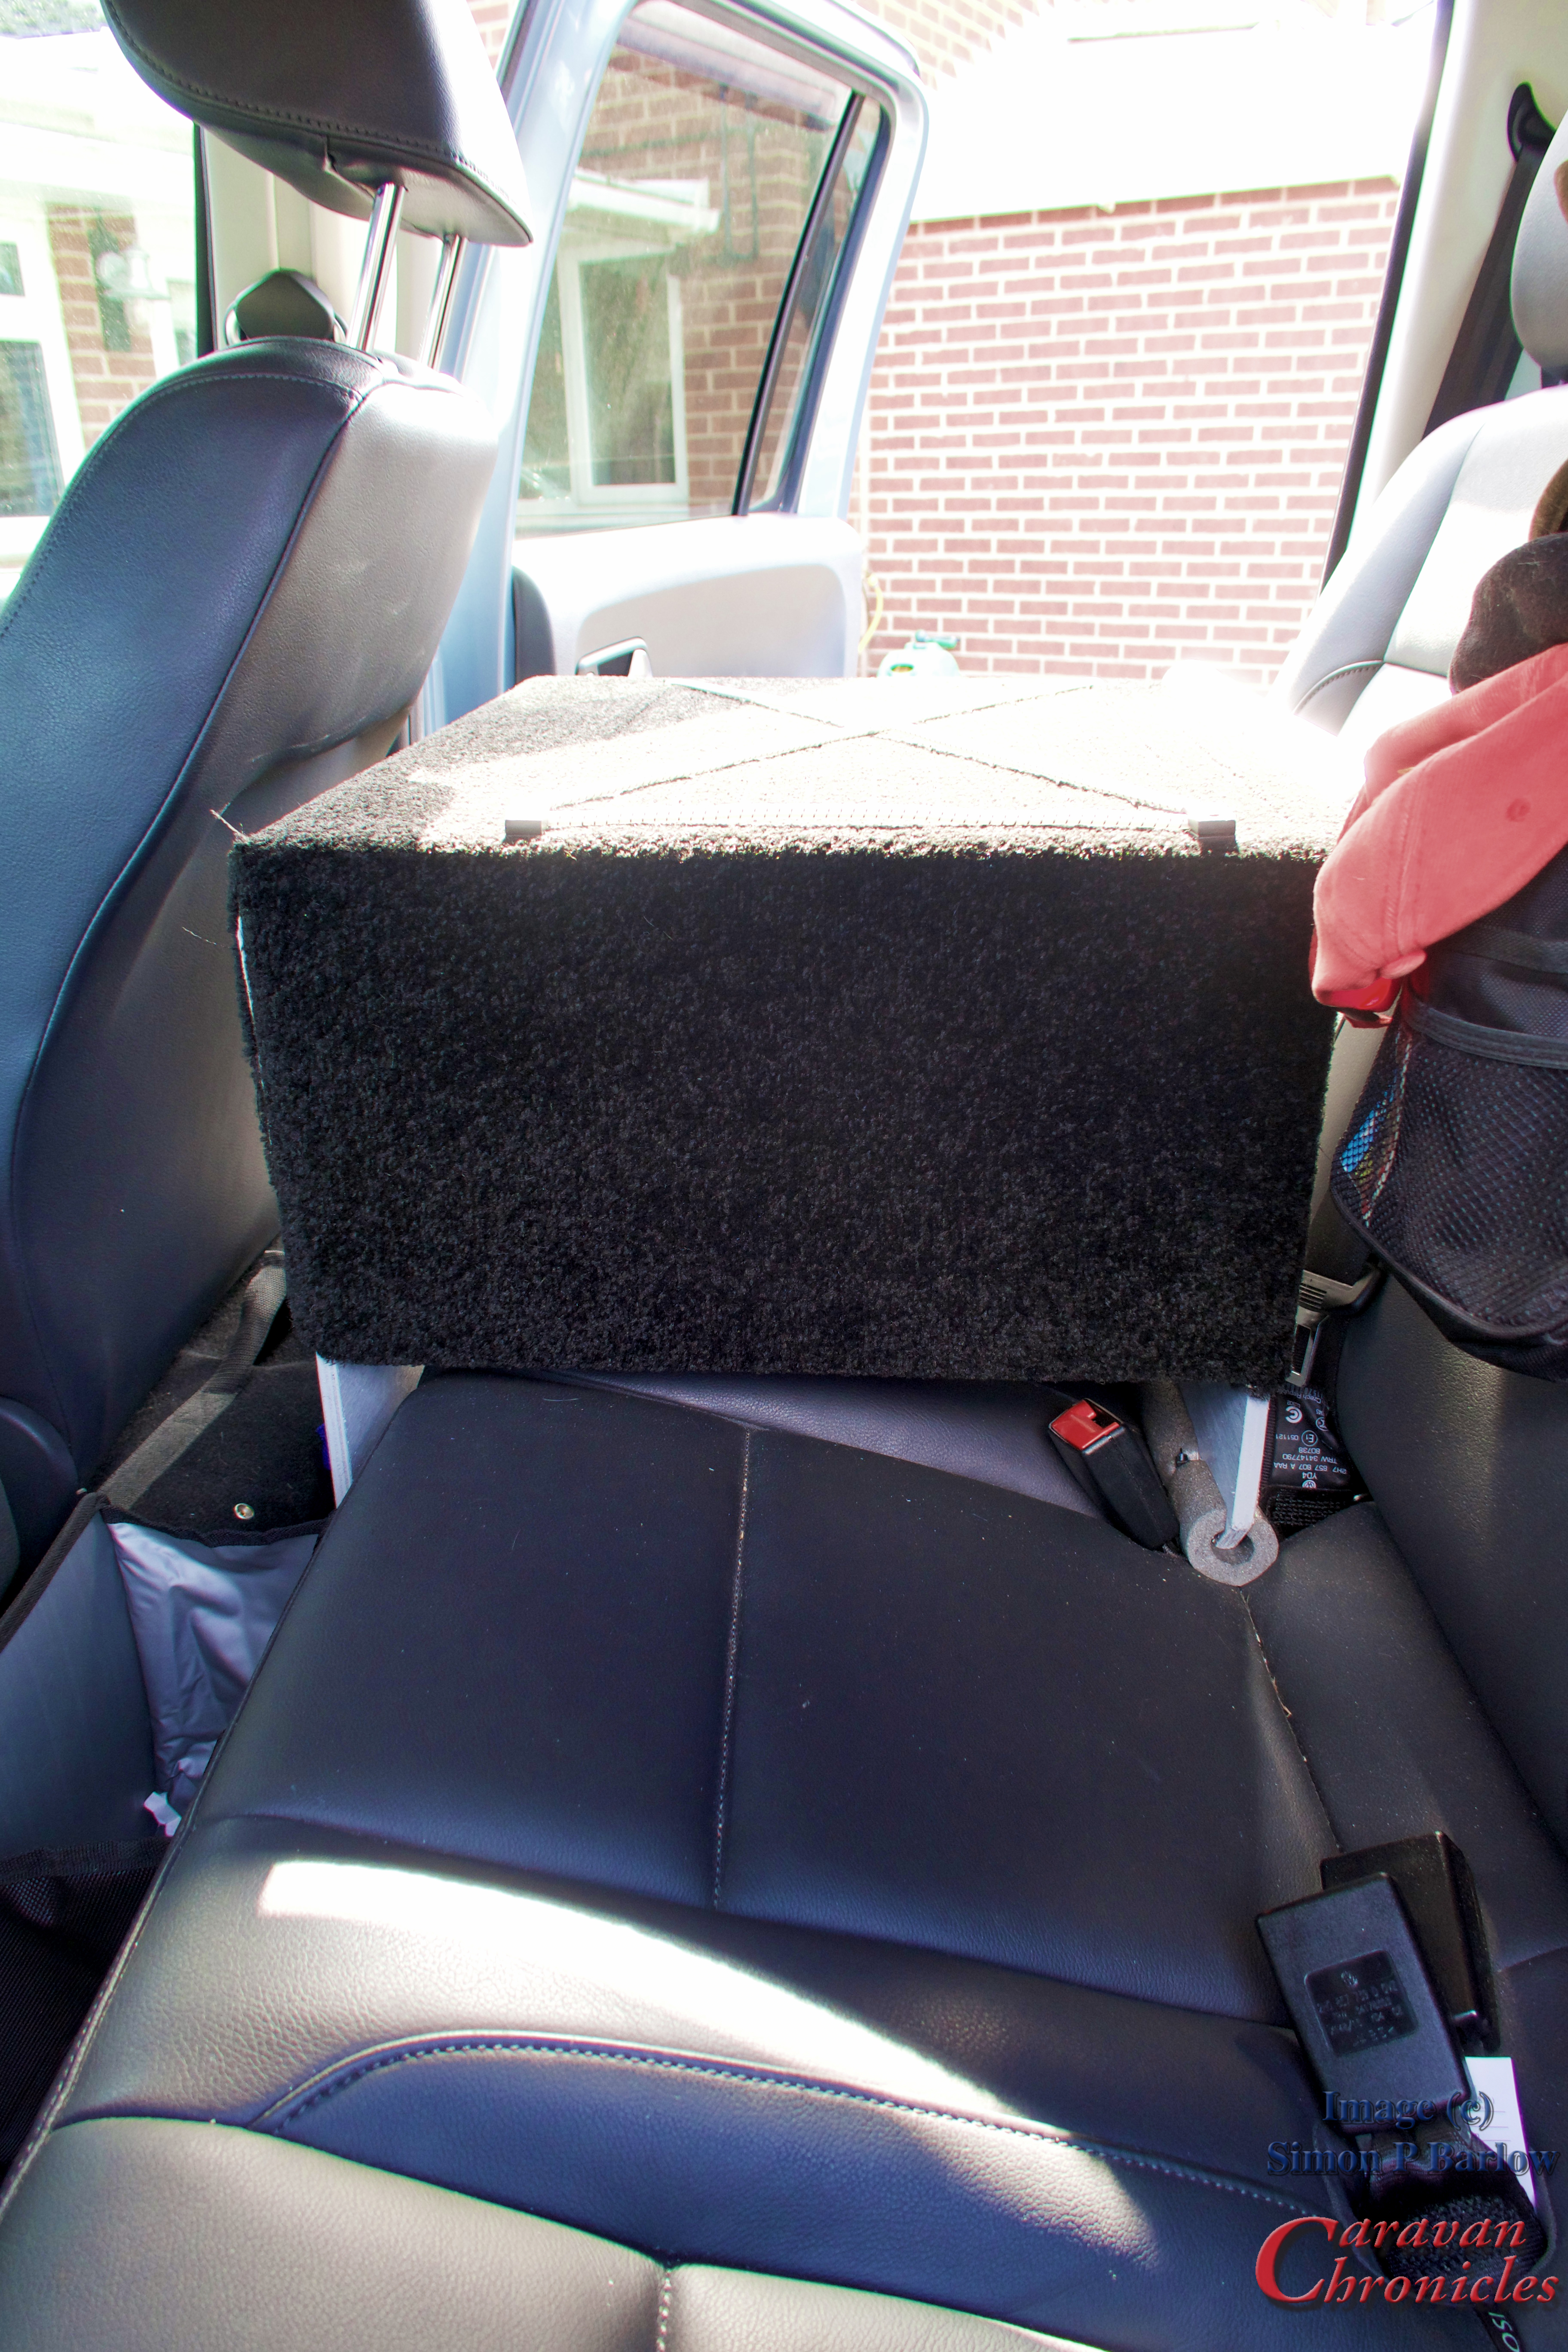
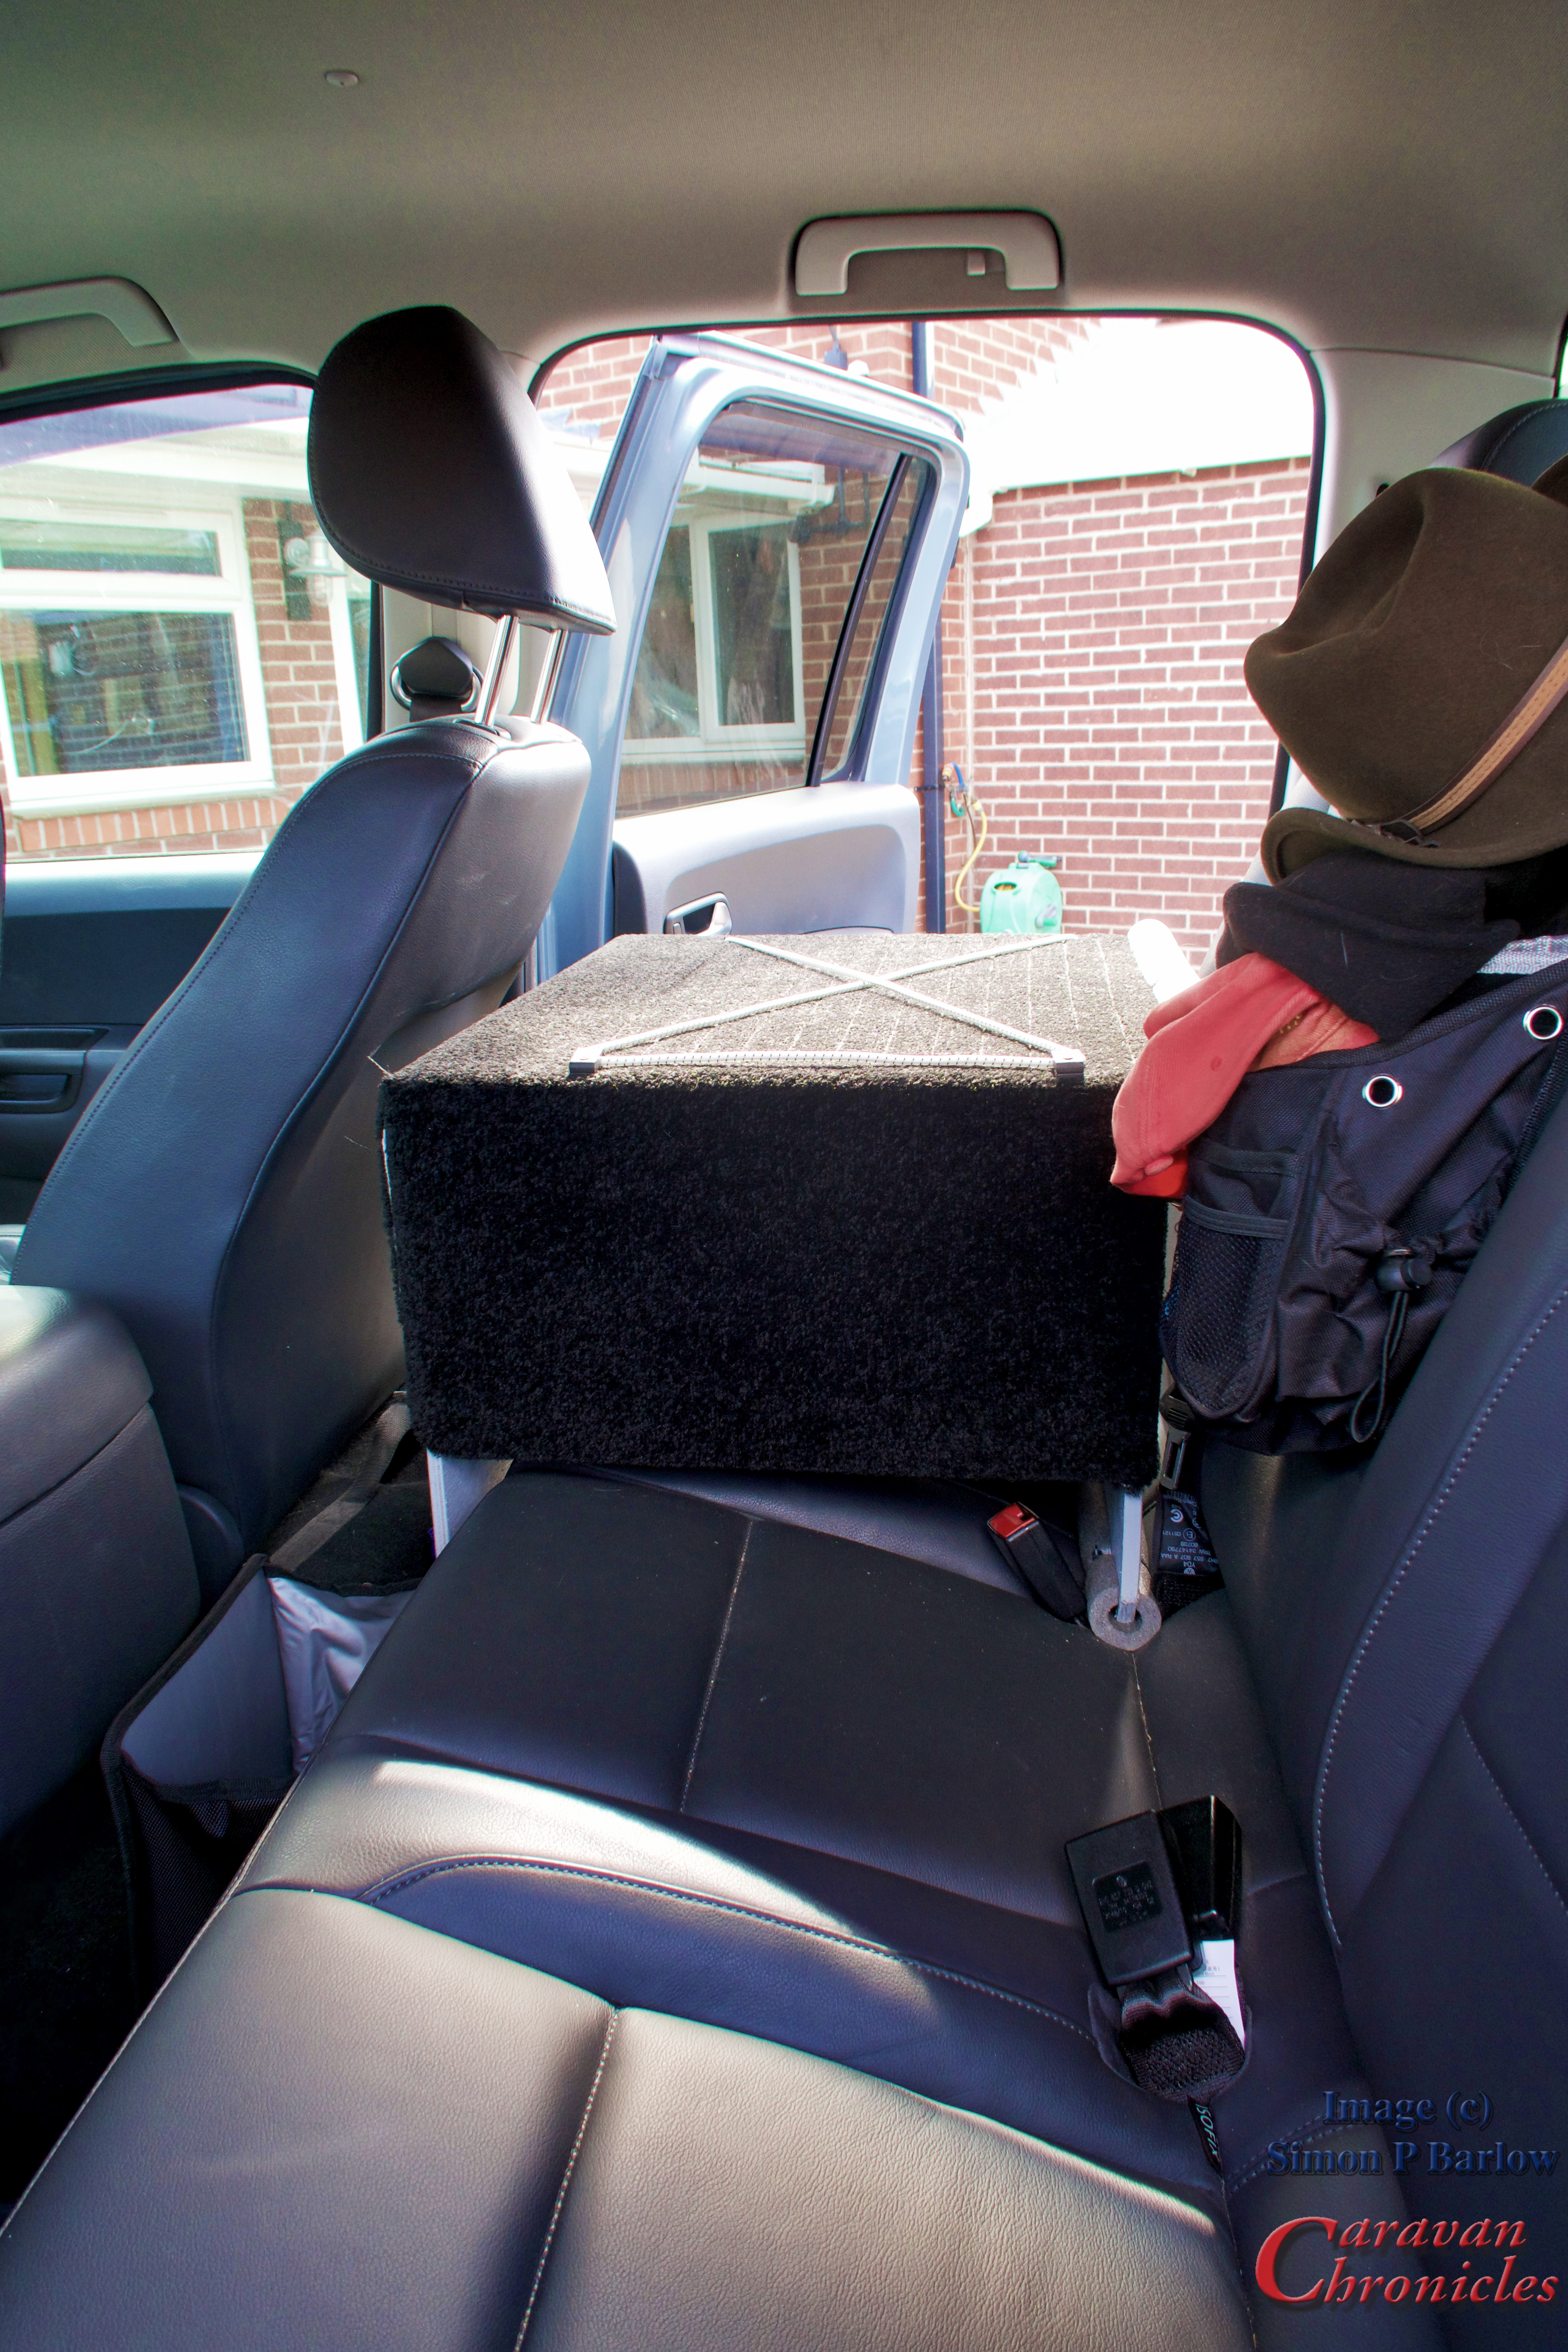
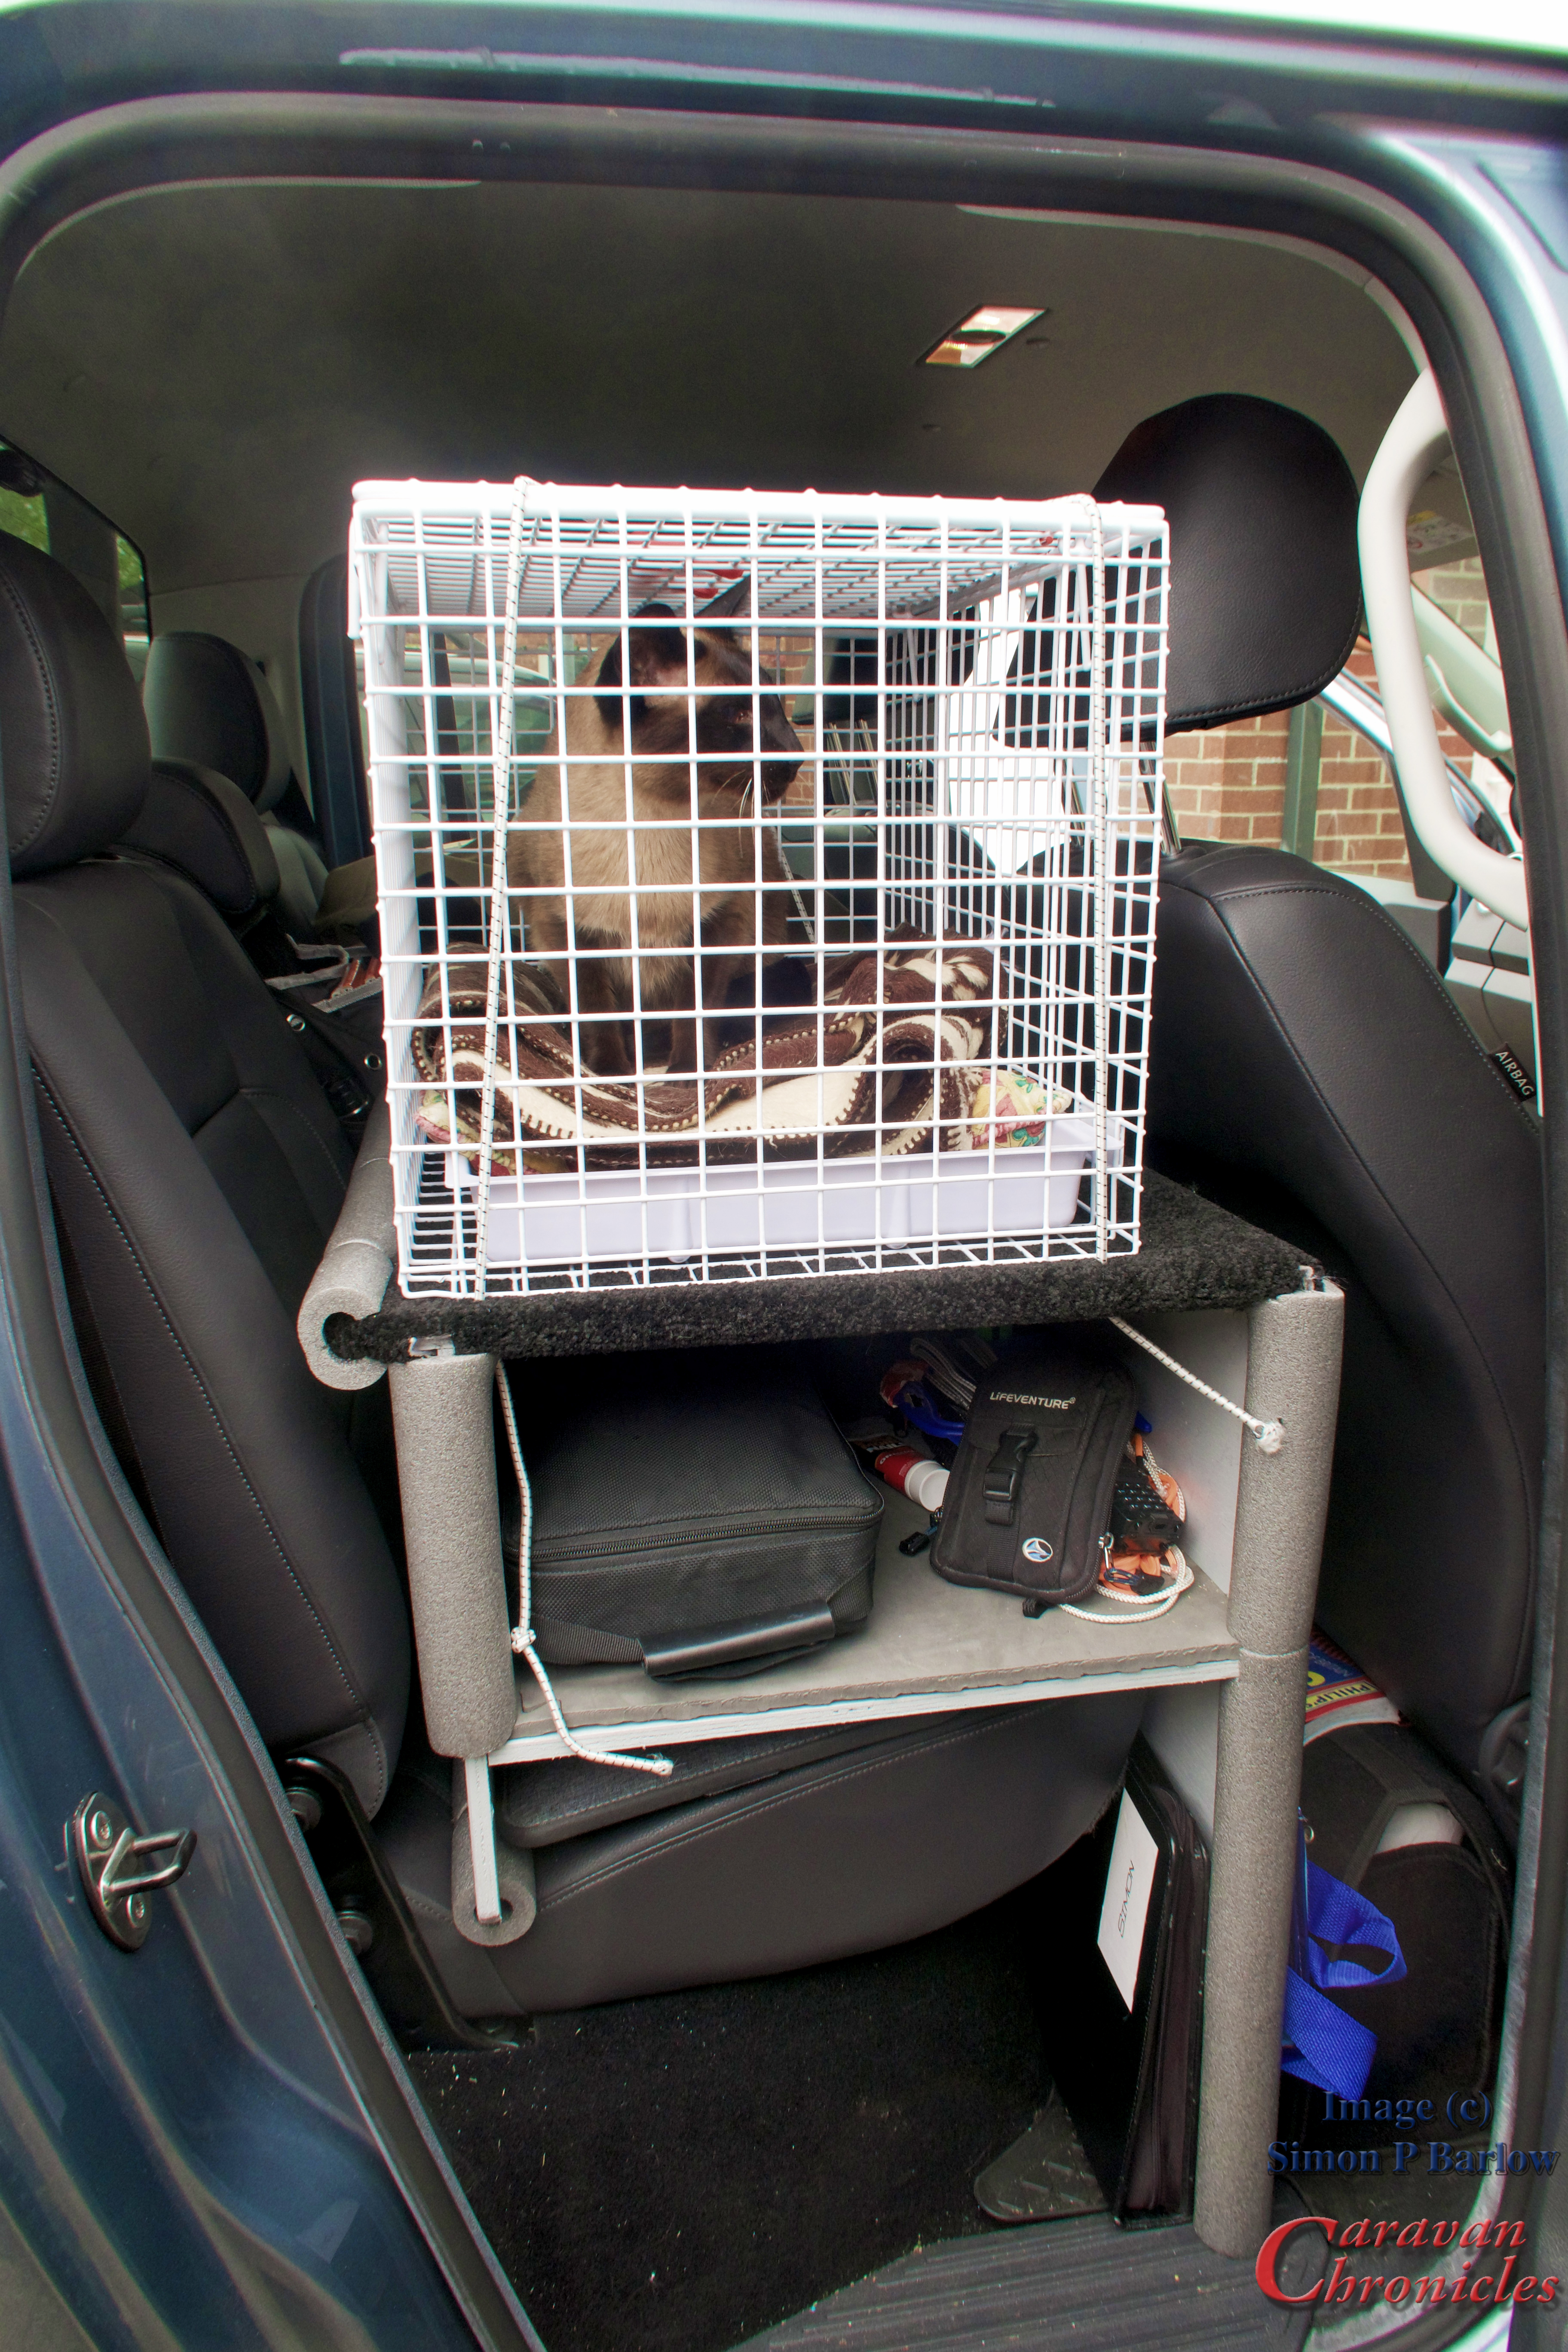
I built it out of 12mm Ply and painted it grey. I used an off cut of black car carpet to cover the top and sides and a couple of lengths of pipe insulation on the edges where it comes into contact with the car seat and door. To secure it I used the ISO FIX points and it takes less than 30 seconds to remove or install. Without Henrys carrying cage it’s a handy place to put things and the space underneath come in super handy for all my bits that I normally have rolling around on the floor behind the drivers seat. It’s high enough for Henry to be able to see out around in all directions and there is still enough space for two people to sit on the back seat and use the seatbelts if required.
We have used it for two trips now and Henry seems to like it. The rear windows are heavily tinted in our Amarok which will cut the heat from the sun and we can open the rear window for fresh air as required. We are looking round for one of the stick on baby sun screen thingy’s if we think the sun is going to be too strong. Of course we would never leave Henry in the vehicle unattended for more than a couple of minutes… the only time we have done this is while we were hitching up the caravan. If you know Siamese then you know they can be noisy talkative beings…. so far he’s not had anything to say about it. Is that a good sign?
Tempting Fate…
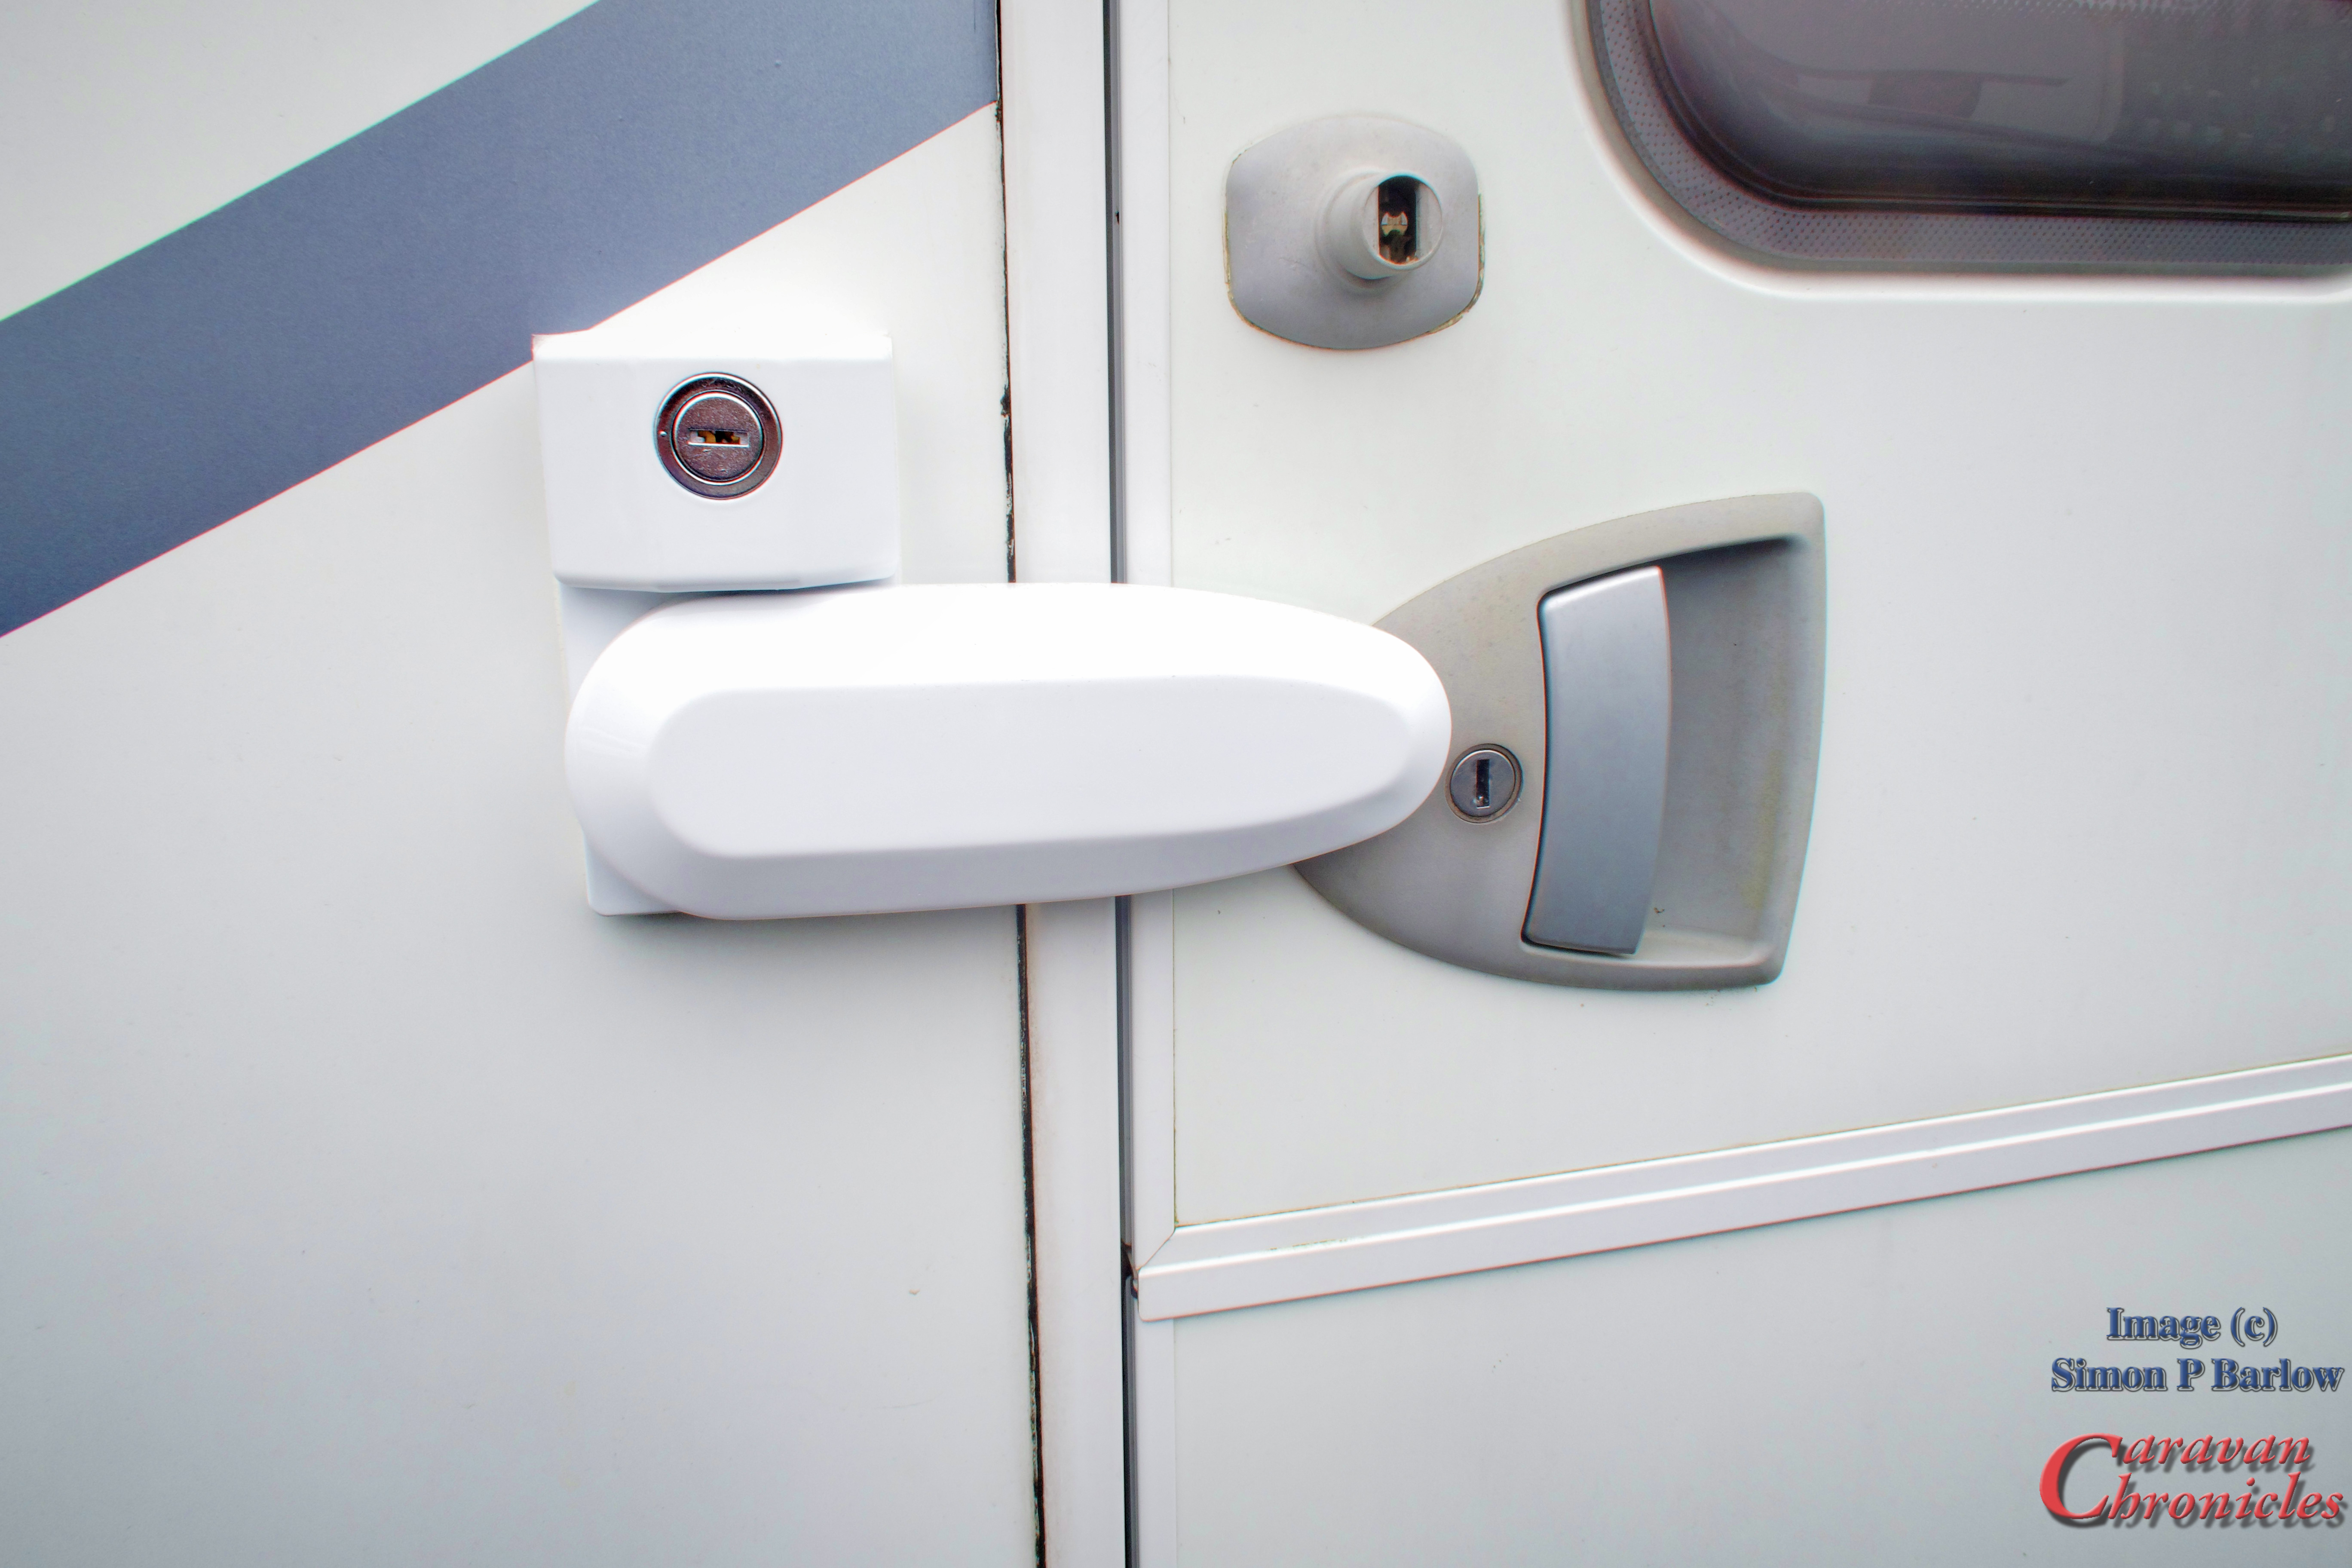
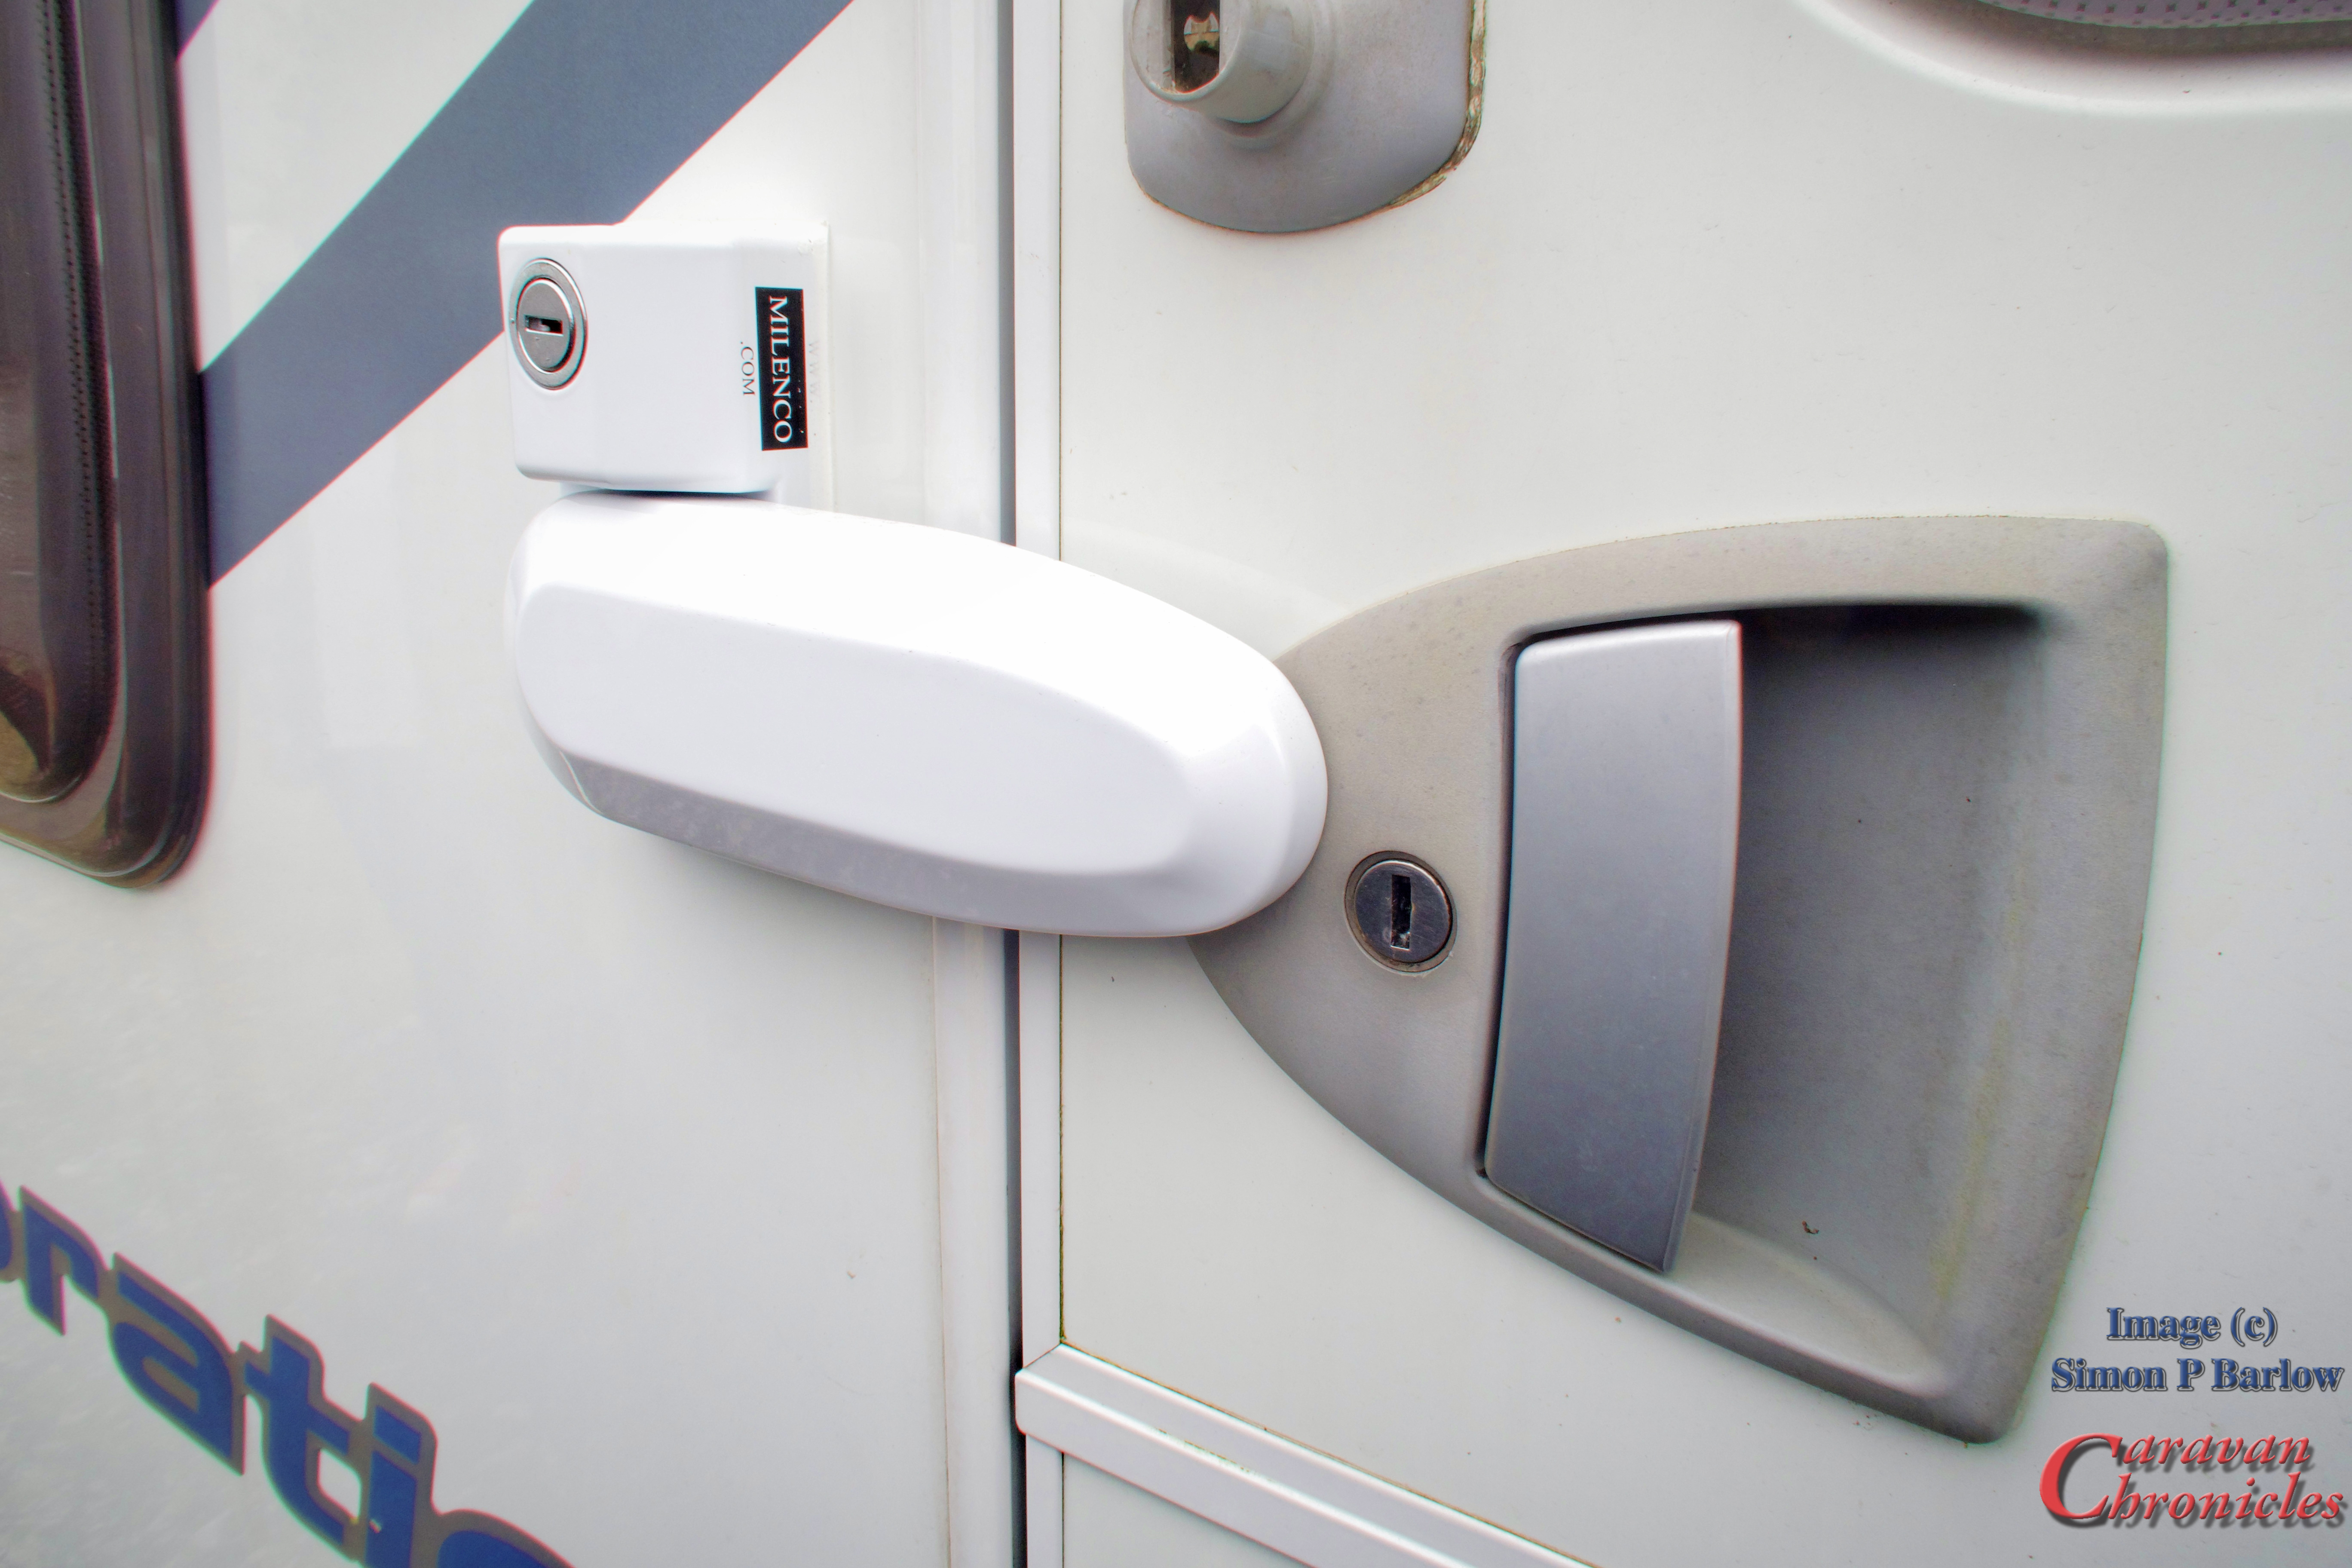
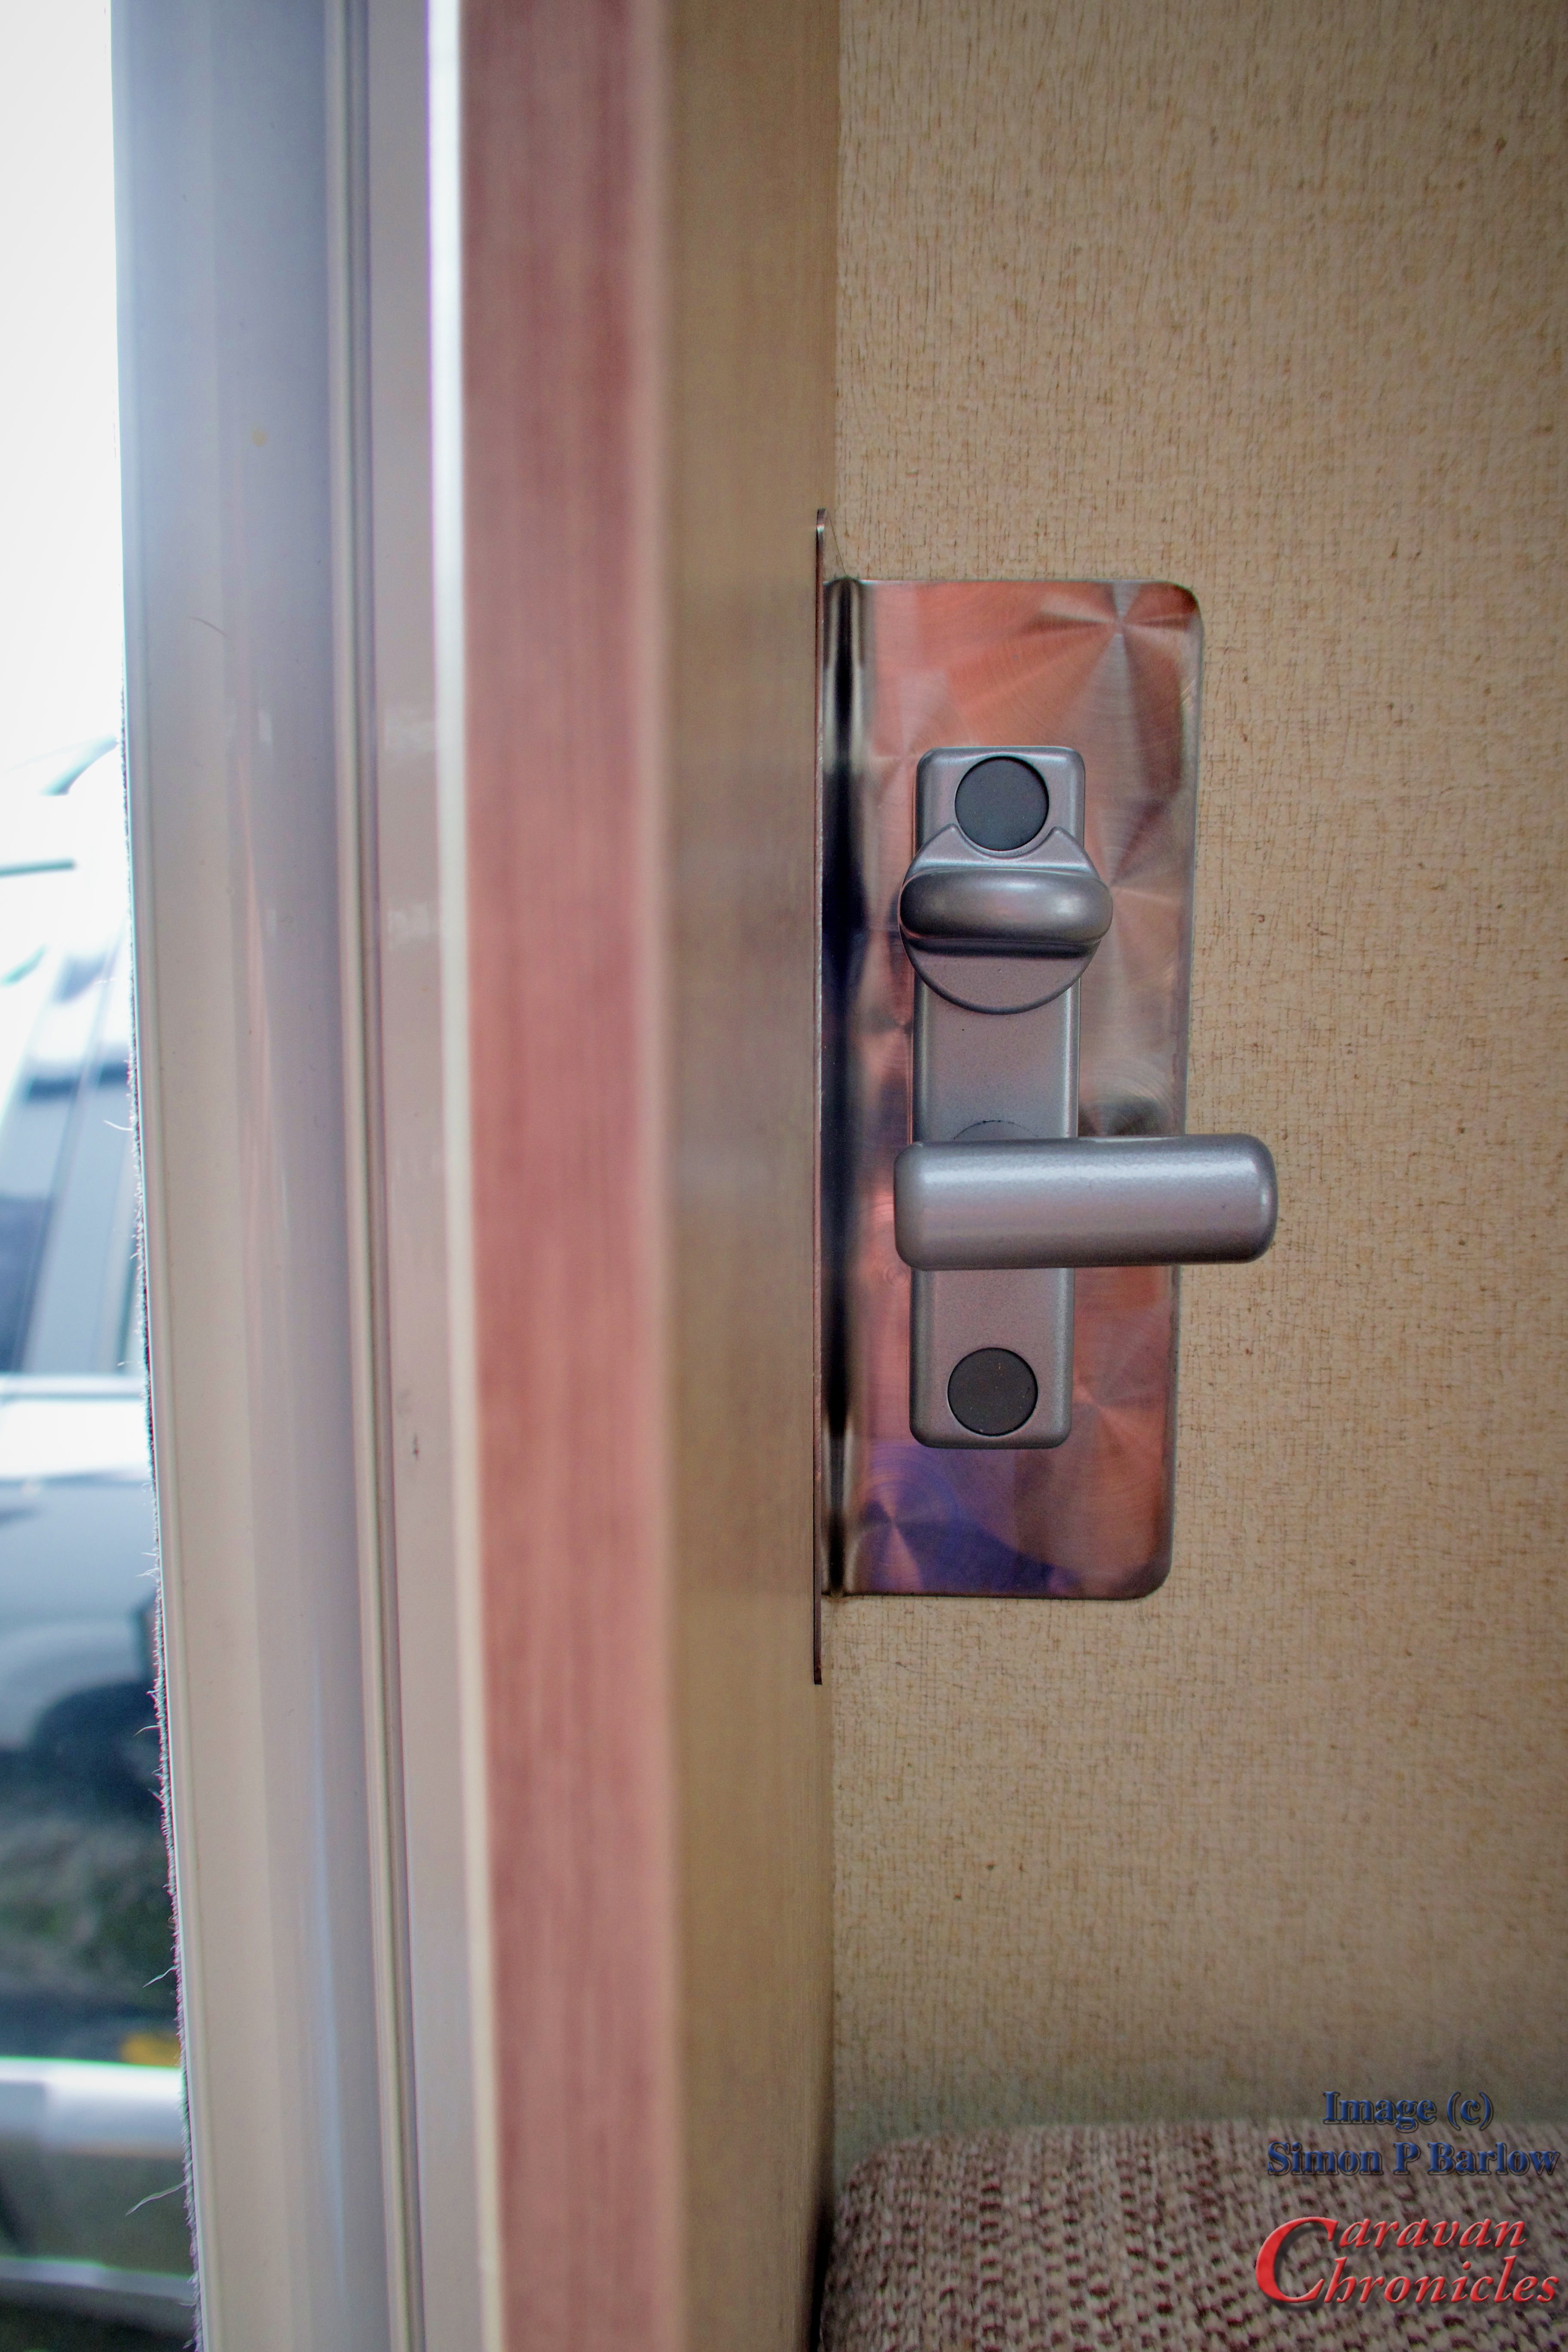
In the eleven years we have been at our storage site we have never had any break-ins but it’s aways in the back of your mind…. and couple that with us sometimes leaving Henry in the caravan while on site I decided a little security upgrade was required (there are others but I’m not going to tell you about them!) I’d looked at the various offerings of additional door locks and after some thinking… and several coffee’s decided to go for the Milenco Door Frame Lock Version 2 offering that allowed us to operate it from inside as well.
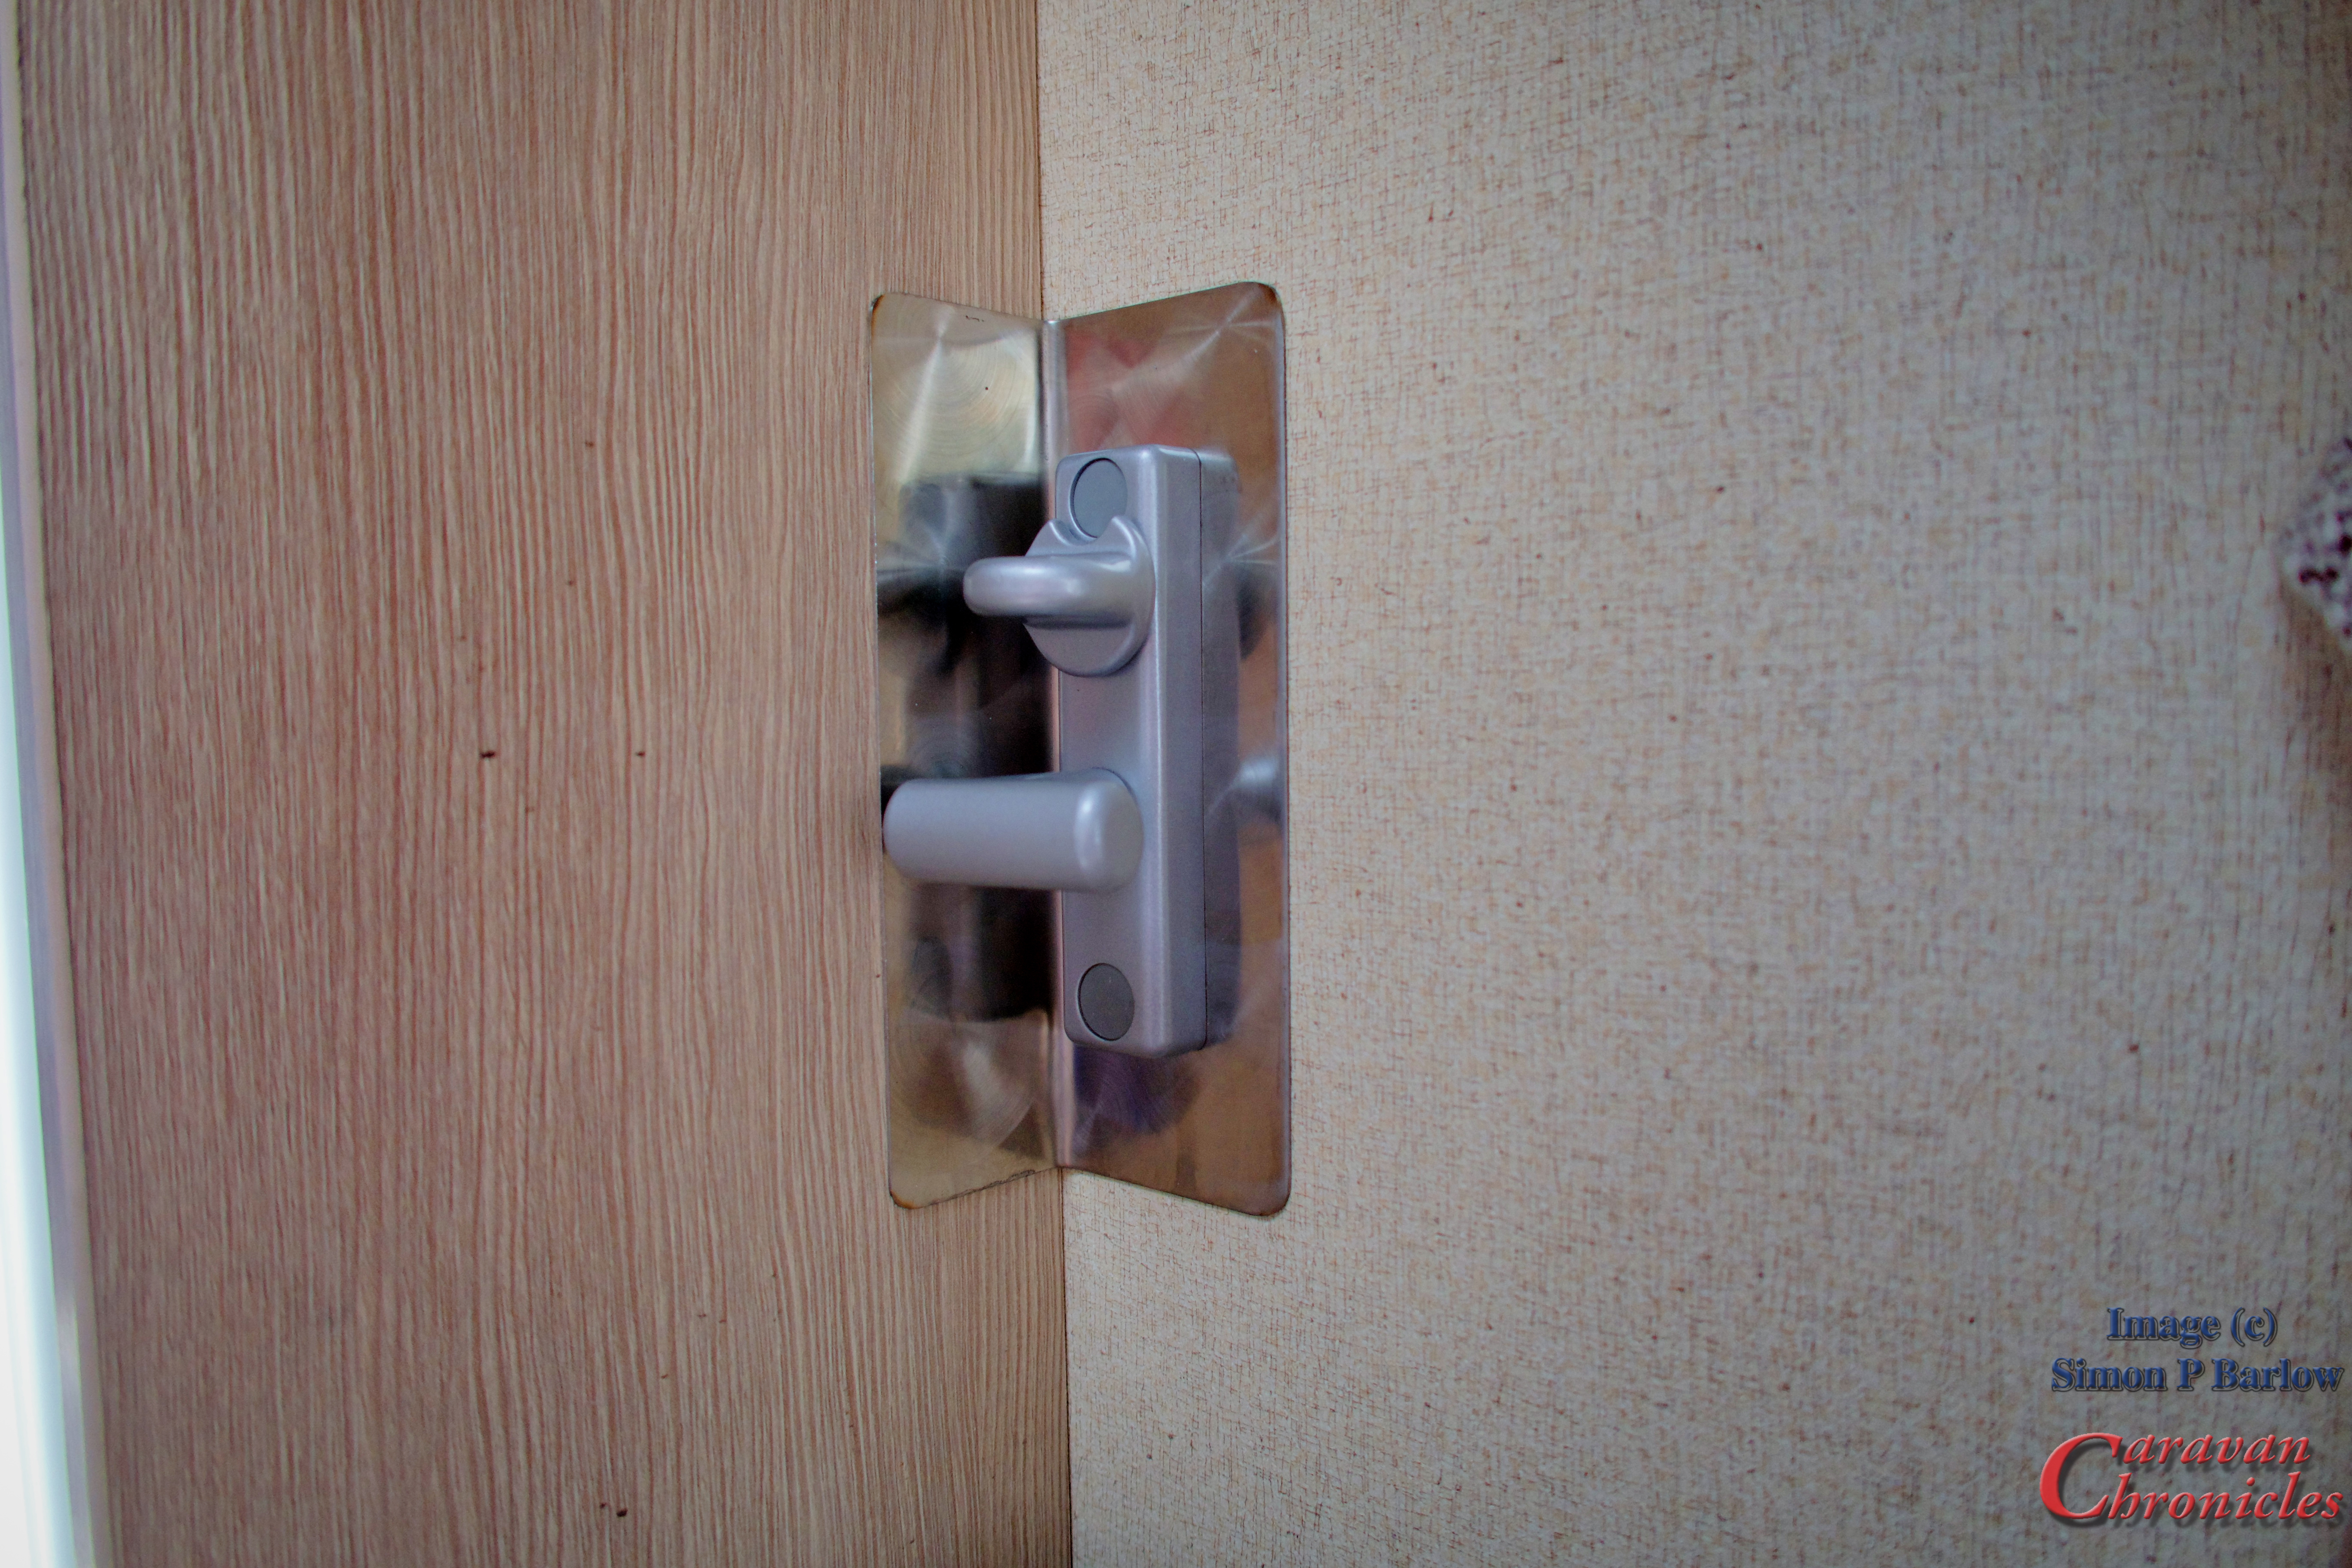
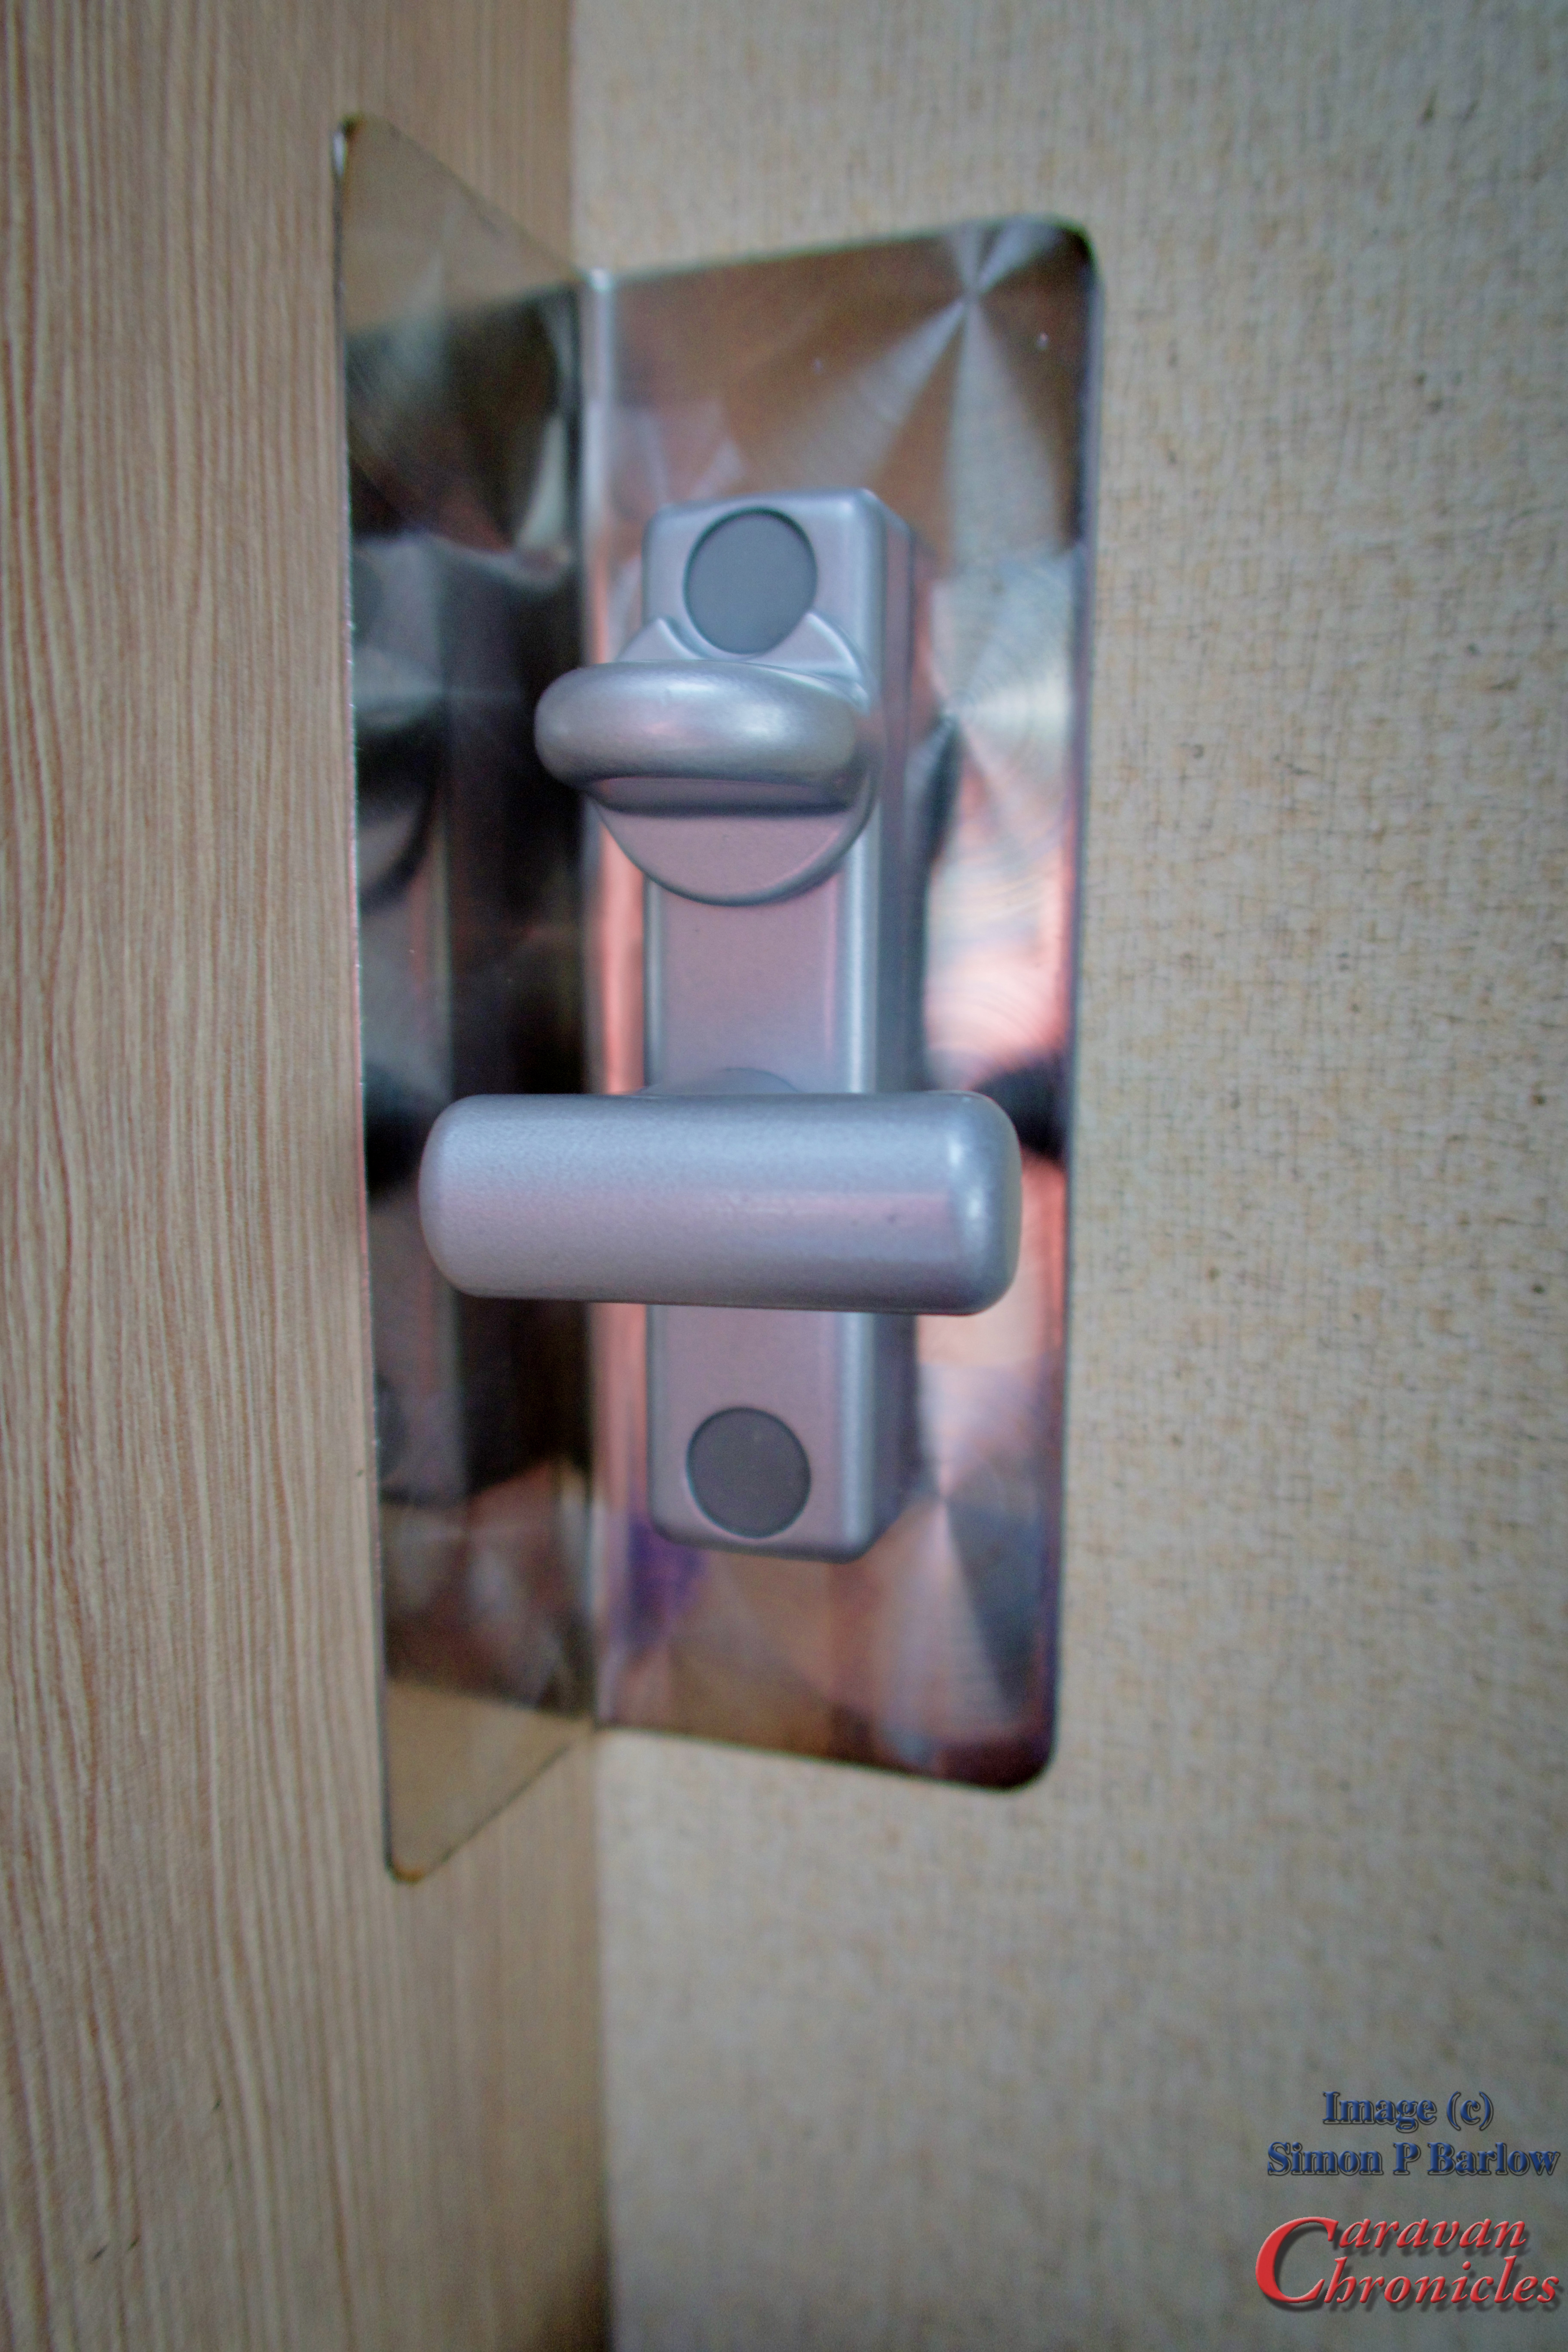
I ordered it via Amazon ( https://amzn.to/3sHywnd )and it arrived within two days. It was easy enough to install but I ‘upgraded’ the interior fitting with a custom stainless steel strengthening plate…
The stainless I used was 1.4mm tooled finish, cut to size and drilled using the template provided with the Milenco lock. After measuring the location, I bent the stainless on my sheet bender in the workshop. I chose the location as this was the strongest part of the door frame where the existing door lock was located and would help protect the original lock so a small extent. Ideally I would have liked the arm to have been a bit longer so it covered up the keyhole for the original lock. But I’m happy with it.
Down the drain…
Long time readers will remember that several years ago I wrote a post about how we solved our connection to the drain while on serviced pitches. After ten years of use It was time for an upgrade and I had seen the COLAPZ products and thought it was a rather nifty idea. Having a mooch round the web I ordered directly from the website https://colapz.co.uk/?ref=yjXJSsLdBkh5d and opted for the Flexi waste pipe kit – 8 pipes for £55.
The first use was great and easy to set up. No modification was needed to my original manifold that connects to the caravan and it seems to drain OK….
However you can alway improve on things…. and if you have ever watched any Youtube videos about American RV’s then you will know that for their ‘stinky slinky’s’ they have a few upgrades…. I ordered one from Amazon….
Camco 43041 15′ Sidewinder Plastic Sewer Hose Support – https://amzn.to/3Fp2elM it cost £44 and came all the way from the great state of New Jersey. It comes with a carrying handle and honestly is really easy to use. I just stretched it out and lifted the pipe on to it. It is designed for a 4 inch sewer pipe… but as I was using basically a 2 inch version it would allow the hose support to stretch even further… I bought the 15 feet version and I recon it would stretch to 20 feet without any problems.
When we were packing up, I ran all the remaining hot water down the sink to flush the pipework out… including the Colapz pipework and honestly when disconnecting everything it really wasn’t that dirty, but breaking it down into individual lengths makes it easy if it does need a brush through it (which you get by the way in the kit).
Again we are not sponsored by either of these two companies but the links above will earn us a few pennies that will help provide biscuits for Henry. You wouldn’t want Henry to mis out on biscuit treats would you….
After all he can’t survive on just belly rubs…. I know it’s blackmail but EVERYONE said you need a cute kitty to get more views!
I hope you all had a great Christmas and the big guy brought you some wonderful gadgets for the RV… yep I’ve been watching way too much stuff from across the pond.
This month Caravan Chronicles celebrates ten years of irrelevant blogging and I designed an eye catching logo… and you can see from it, that I’m not very good at designing logo’s.
I have been asked if we have any “merch” with the Caravan Chronicles logo and….. no. I really can’t see why anyone would want a mug or tee shirt or even a sticker with Caravan Chronicles emblazoned on it. I can’t see my eye catching 10 years of CC logo being any different so there won’t be any mugs, pens or stickers with that on it either. Sue and I did have a couple of shirts with a logo embroidered on for wearing at the caravan shows… but they are now used as coveralls when we are doing a bit of DIY and they are really good for that.
Milestones…
Well I guess I could tell you that in ten years we have had over 42.3 million page views and been read in almost every country in the world…. the one that amazes me is somone in the Marshall Islands reads it… I had to look that up on a map!
Over 2400 of you have left nearly 4000 comments and I have received over 44,000 emails of which about half weren’t trying to sell me something or asking me to help out a recently deceased Nigerian business man’s widow.
In the ten years I have stuck to my ‘no paid content’ through out and have turned down requests for paid reviews. I have been sent a few things to review… some have been returned and some given away… which reminds me the first person to say “Hi” at the next camp site can have an Eco Camel Shower Head.
I do however have an “Amazon Associates” thingy which is great, Amazon pays me and it doesn’t cost you a penny… it all comes from Big Jeff… and as he can afford to go into space I think he can afford to shell out a few pennies to allow me to pay the wonderful people at WordPress to keep this blog up and running. So if you want to encourage Big Jeff to pay me a bit more… use any of the Amazon links in the Caravan Chronicles shop… and buy anything you like.
What’s planned for the future?
Well I am thinking about some sort of smart Q & A system on the blog. I spend quite a bit of time answering technical emails and quite a few cries for help and maybe a searchable Q & A system would work. Only thing is I don’t know how to do it in WordPress so some research needed along those lines. If you have any thoughts on anything that would improve the blog or would like to see let me know in the comments.
So I’d just like to offer a genuine big thank you all for ten amazing years of support and both Sue and I would like to wish you all a Happy New Year and safe travels.
How many of you have driven behind a vehicle in less than ideal conditions… going dark, raining or foggy… and uttered those immortal words “Put you lights on mate” in the vein hope it will do some good only to approach a bit closer to find that the lights are on and are less effective as a couple of Ikea tea lights in jam jars. That is the feeling I get with a lot of caravans. In my opinion a lot for rear lights are less than ideal. In this day and age some of the drivers out there need all the help they can get as they even struggle to notice a big white box in front of them in bright sunshine let alone in inclement weather or in the dark.
Our caravan like a lot of other Swift caravans looks great from the rear with nice big lights and reflectors. Reflectors are good if the following driver has turned his headlights on and not been too busy texting and simply relying on the DRL’s to light the way. The big reversing lights will surly let the driver and anyone else behind know you are reversing… but about as useless as the aforementioned Ikea tea light in a jam jar when reversing at an angle into a pitch at night. The rear fog light however deserves a special mention… the single rear fog light…. can you see it… the tiny Lego brick sized rear fog light… the red thing in the middle down low… difficult to spot on a stationary caravan in daylight let alone from a distance on a road in fog. Mind you when that bit of wire in the bulb warms up it will blind you… honestly it will…. eventually… when you get so close because you didn’t see it from ten metres away.
Its time for a change. An upgrade if you will… to allow me to shine a beacon of light towards all that follow. But… and here’s a the big thing… I have to keep it looking nice. Everyone likes a nice rear don’t they.
OK, I searched for all the replacement options. Swift don’t make it easy. The two panels that the lights are mounted in don’t come out, well not easily and I was cautioned about even attempting to remove them. Changing to smart round LED lights was out. Then it struck me… the reversing lights could become fog lights and I would install new reversing lights. I’d towed a trailer a while ago that had football stadium sized reversing lights and wow what a difference it made. One of the first things I did with the Amarok when we got it was to install LED work lights under the rear bumper as reversing lights and that was a huge improvement so I ordered another set from the same company as I’d fitted to the Amarok.
A bit more searching I found the exact lenses for the existing lights in red to turn the reversing lights into fog lights.. it was actually cheaper to order a pair of complete lights than it was to order two replacement red lenses… I’ll never work that one out.
Ok how was I going to wire this lot up. I made a couple of brackets that fitted under the caravan allowing me to mount the reversing lights up close just inboard of the rear steady jacks. This would offer a modicum of protection from road debris thrown up by the tyres. These could be wired to run off the old fog light which would now become a junction box and the reverse lights would become the fog lights, so simply switching the reverse light and fog light cables over at the road light fuse box in the front of the caravan would have everything working correctly.
I also angled the reversing lights out slightly. I wanted the centre of their light pool to be along an extended side line of the caravan so that looking through my mirrors down each side of the caravan would be the centre of the lit area. This hopefully would provide the best angle of illumination when reversing and performing a reversing turn onto a pitch.
“Hang on lads… I’ve got an idea”
Cue the music… no, no doors were blown off during this mod. Right what if the new rear fog lights could be my brake lights when they weren’t being used as fog lights?
A simple diode blocking bridge using two diodes could do this quite easily. Routing through my electronics spares I found a bag of 10 Amp diodes which would easily cope with the task.
For a quick solution I used two strips of terminal block and built a quick blocking bridge. What happens now is applying the brakes powers up the brake light circuit and the fog lights. The diode in the fog light circuit stops me back feeding current to the tow vehicle fog light circuit.
Turning on the fog lights powers up the fog lights and the diode in the bridge stops it powering the brake lights in either the caravan or back feeding to the tow vehicle. Really simple and when testing I didn’t have any canbus or other errors thrown up by the VW Amarok’s management system. The existing (and original) brake and tail lights work as normal.
I’ll have a look at coming up with a better solution than using two lengths of terminal strip and probably build something in a small electrical project box so it can be mounted securely.
As far as I can tell the changes I’ve made all fall in line with the lighting regs for trailers. While I’m 99% sure, there is always the possibility that I could be corrected and shown the error of my ways and point out I have missed something in my reading of the regs. I’ll let you know.
The next thing…
I’m trying to find some good quality bright LED replacement bulbs for all the rear road lights. I have some, but I suspect they are not correctly marked. If anyone has any recommendations for replacement 25W and 5/25W bulbs that they deem are good options to look at, especially if they are correctly marked, please let me know in the comments. If you are a company that sells LED replacement bulbs and think they are the good enough to pass the Caravan Chronicles testing department (we don’t actually have a testing department… its just me) then challenge me to break them!
Safe travels everyone… and “PUT YOUR LIGHTS ON MATE”