• Home
  • Help Guides
    • Storage Sites
    • Equipment Reviews
  • Document Library
    • Electrical Drawings
  • Photo Gallery
    • Caravan Log
    • MPG
  • Trip Map
  • Shop
  • About Caravan Chronicles…
  • Contact
  • Links

Caravan Chronicles

~ not just another caravan blog

Caravan Chronicles

Category Archives: Gadgets

Happy New Year…

01 Monday Jan 2024

Posted by Simon Barlow in 5th Wheel, Blog updates, Donkey Creek Farm, Gadgets, General, Projects

≈ 10 Comments

Tags

news, Review

Happy New Year to everyone, I hope you have a great touring year ahead.

I’d like to take this opportunity to give you a bit of an update on my personal circumstances and a look forward to a couple of projects I’m planning to kick off our year.

First…

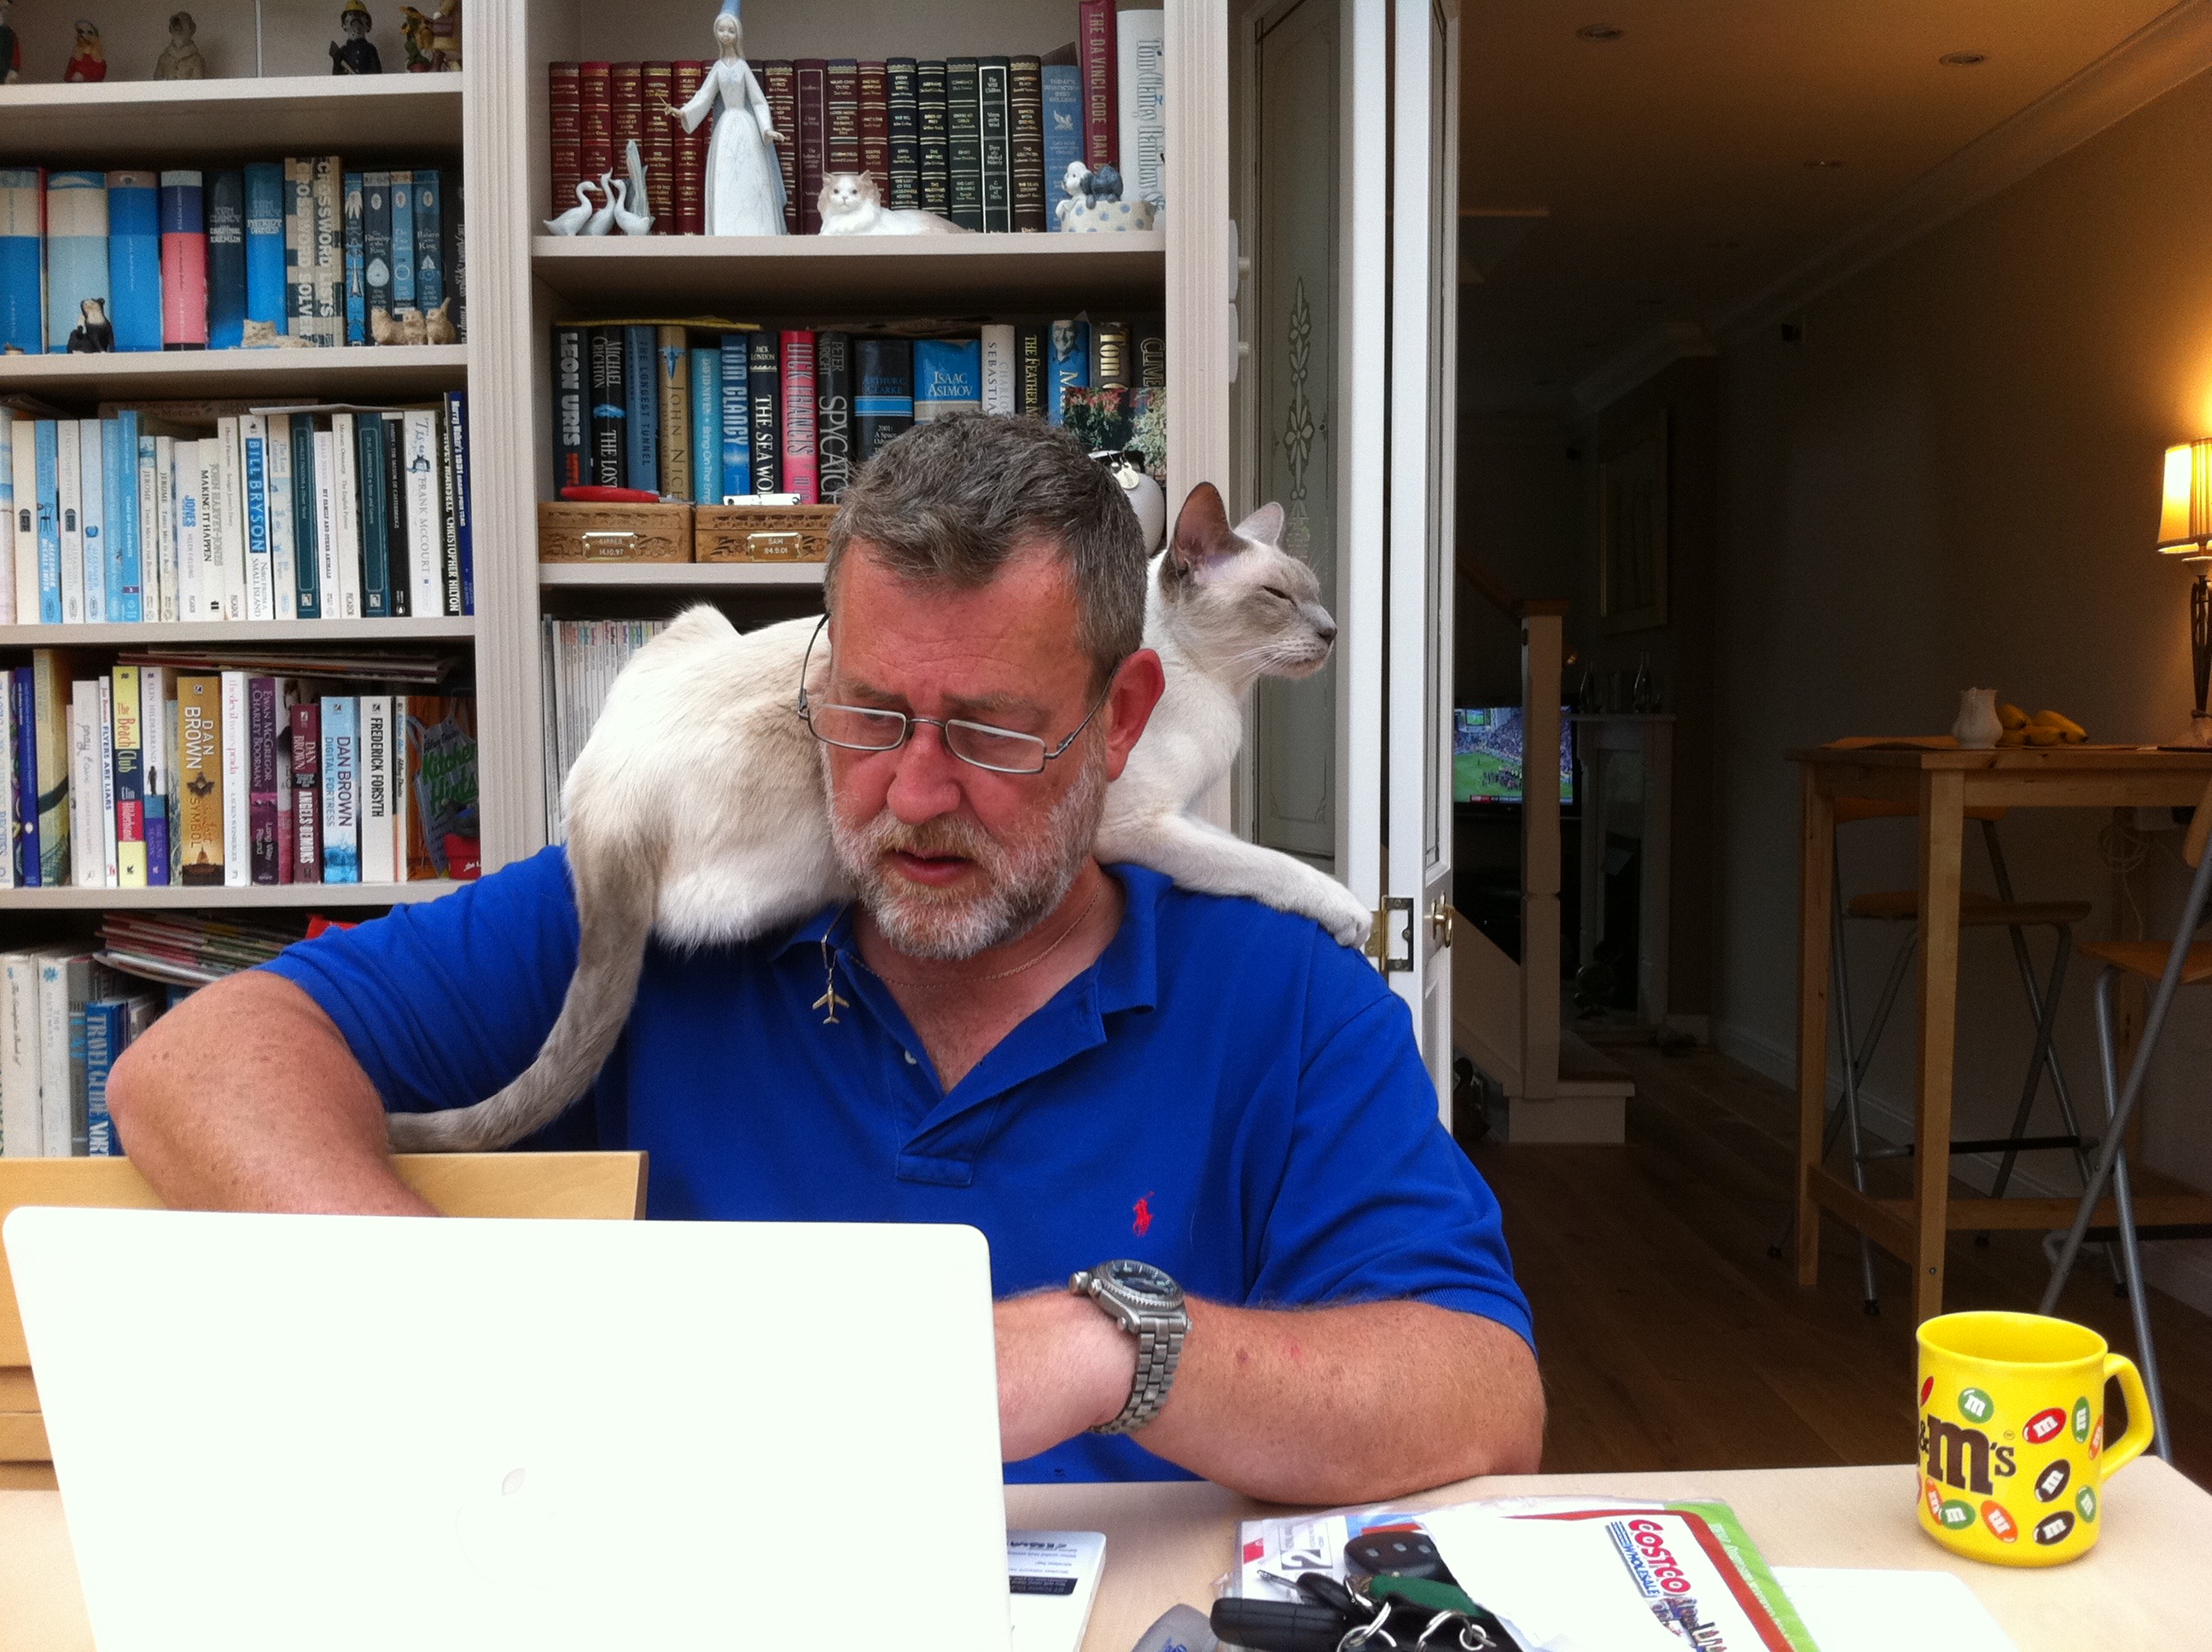
… A HUGE thank-you yo everyone that messaged, email and posted about my cancer diagnosis. Things started off OK and I had a stent installed in my colon to stop it blocking and started chemotherapy. Before I got two cycles of chemo completed my body decided it didn’t like the stent and for what ever reason decided to try and pass the stent to the nearest exit. This resulted me being blue lighted in to Manchester Royal Infirmary on a Saturday afternoon. 24 hours later I underwent an emergency Laparotomy to remove the stent now firmly stuck where it shouldn’t be and part of my transverse colon was removed at the same time. Basically the section where the tumour was. A further five days on the High Dependancy Unit followed and another 13 days on a surgical ward. I remember very little of any of this…. basically I was on another planet drug wise. Apparently it was touch and go a couple of times as my colon was leaking into my body.

Part of the surgery included a colostomy, so now I’m learning to live with that. I was released home late on Christmas Eve so got to spend Christmas with Sue at home.

So far I’m recovering as planned. My body strength is slowly returning… I lost a lot of muscle mass bing in bed for nearly a month. My weight has dropped by around 31kg… so if you see someone dressed in 1980’s gear… it could well be me wearing some of my old stuff. I decided against the platform shoes and petrol blue patch pocket pants though!

I go back on the 10th Jan to The Christie Hospital for checkups and to see when I can resume my chemo treatment.

ONWARDS!

So we are still planning to attend Tourfest North West in May at Donkey Creek Farm and I’m looking towards our first trip away sometime towards the end of this month hopefully. It will only be local and for a couple of days initially.

Future Projects…

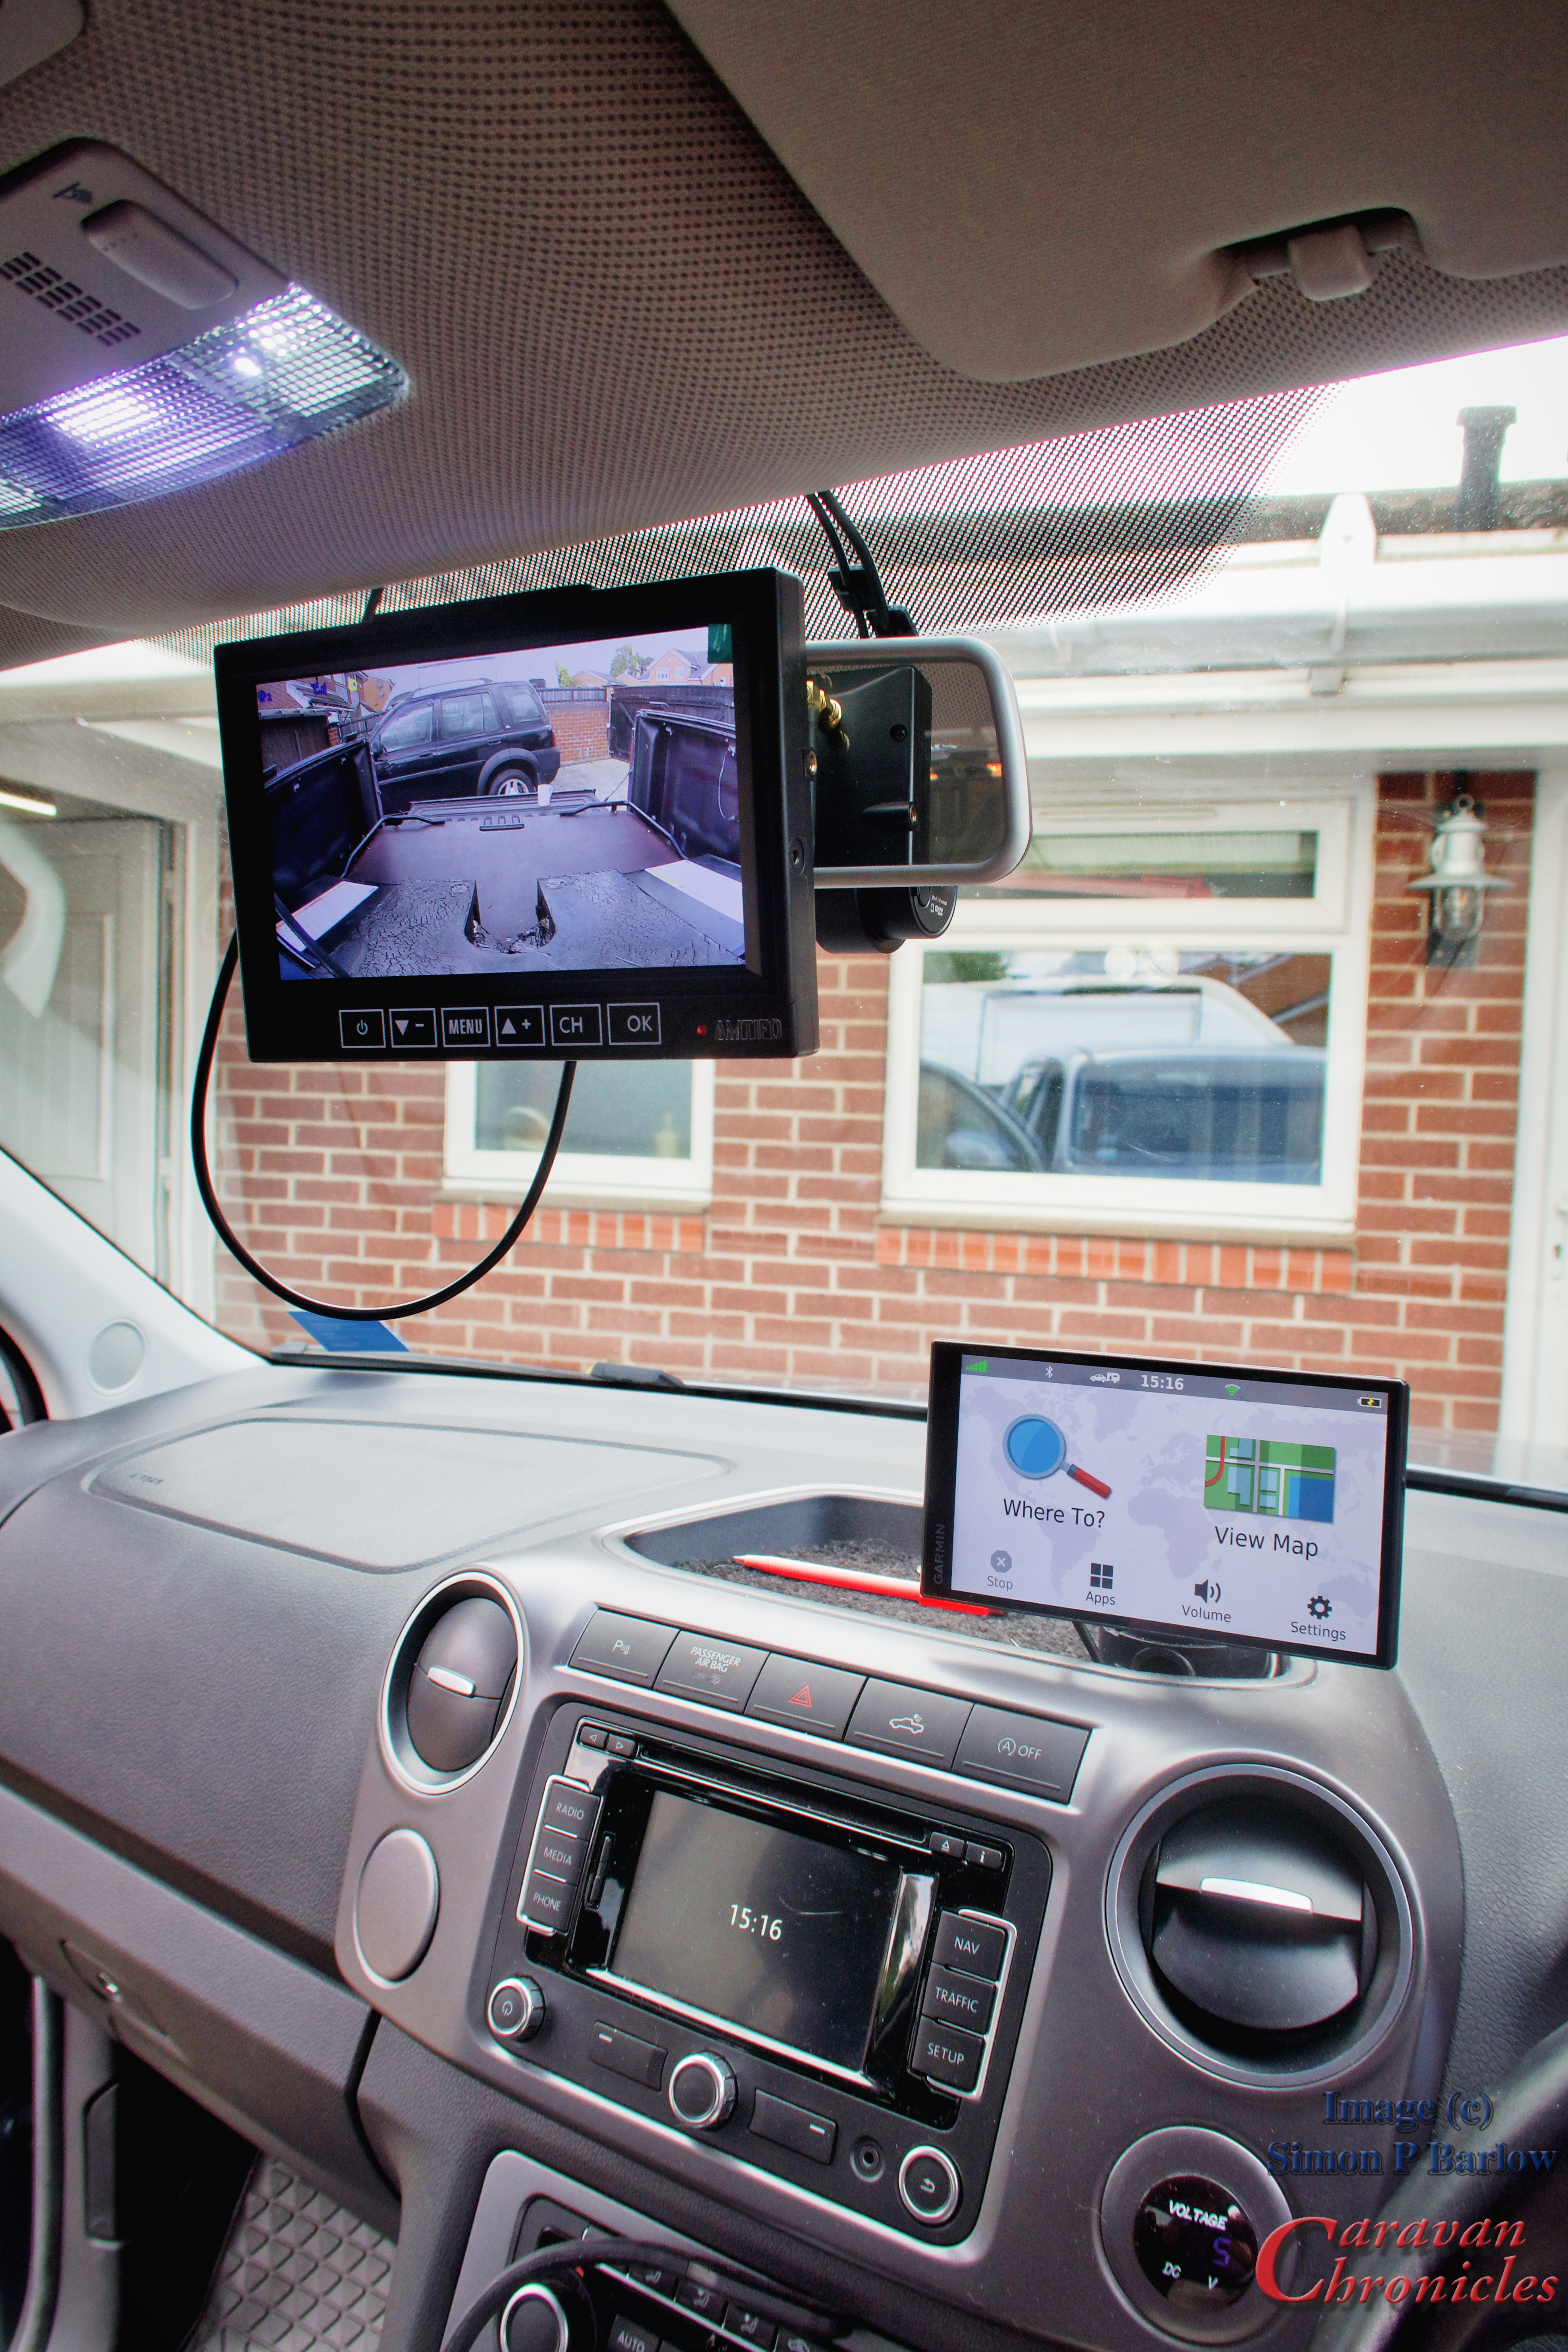
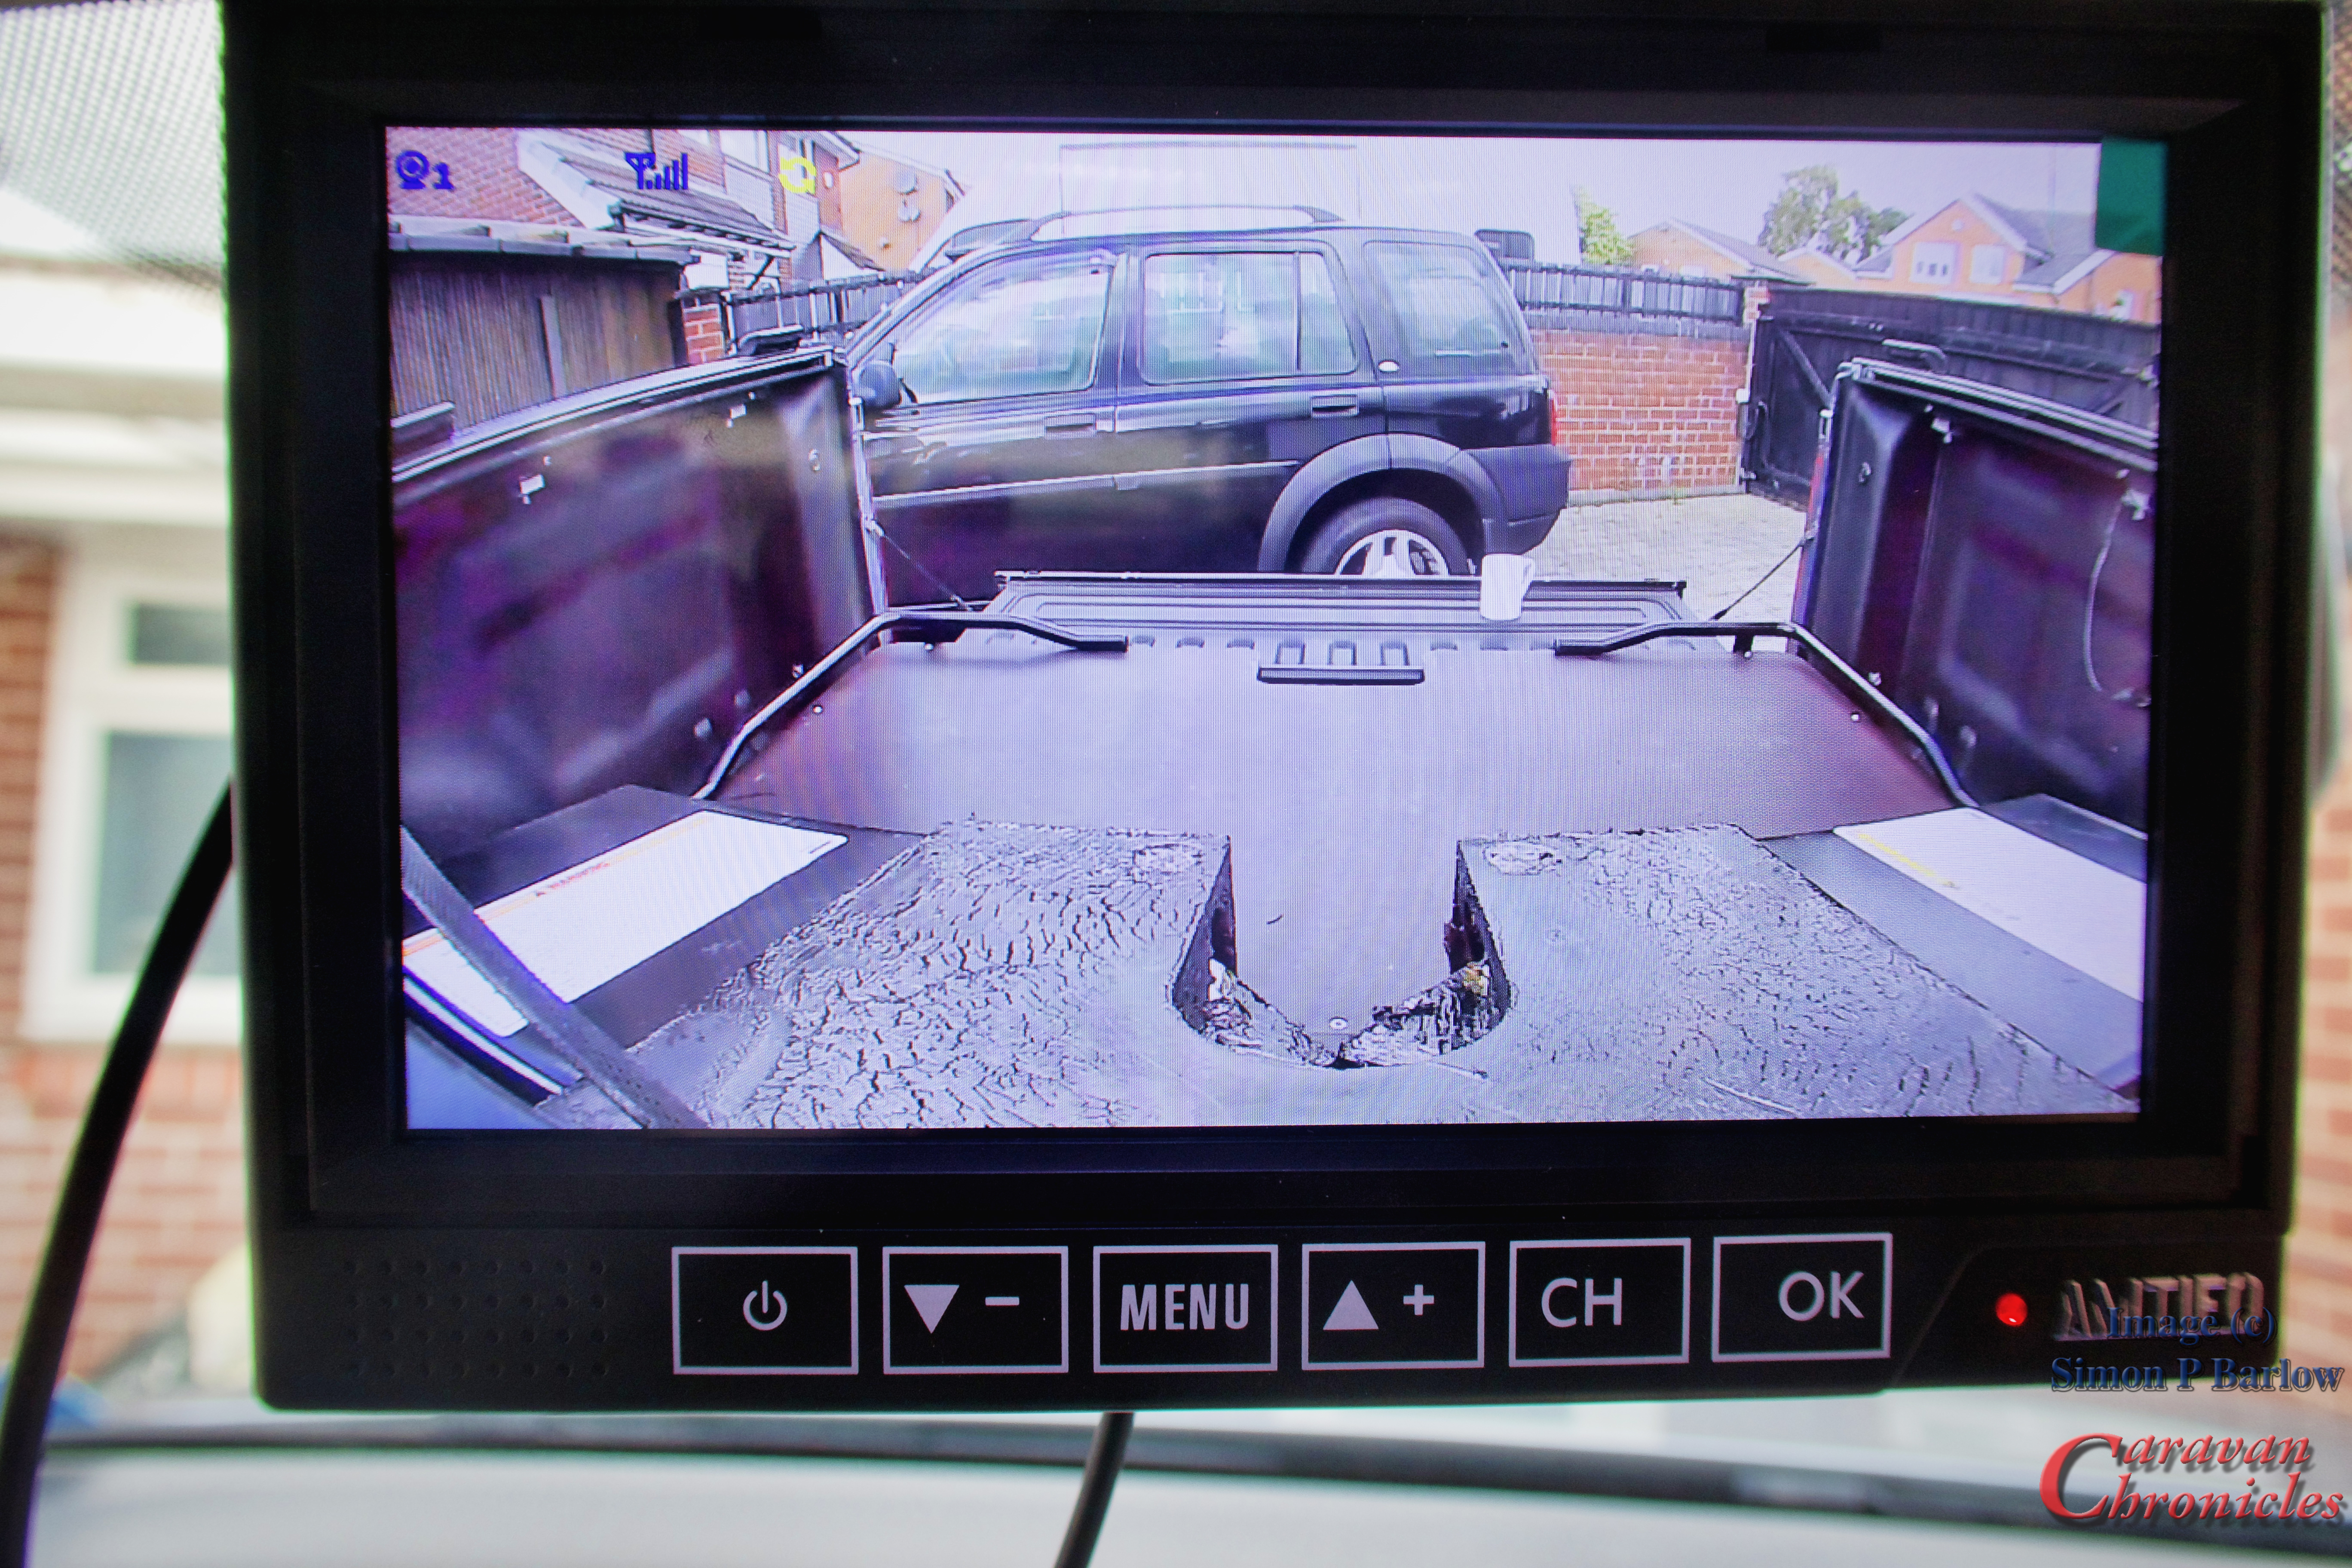
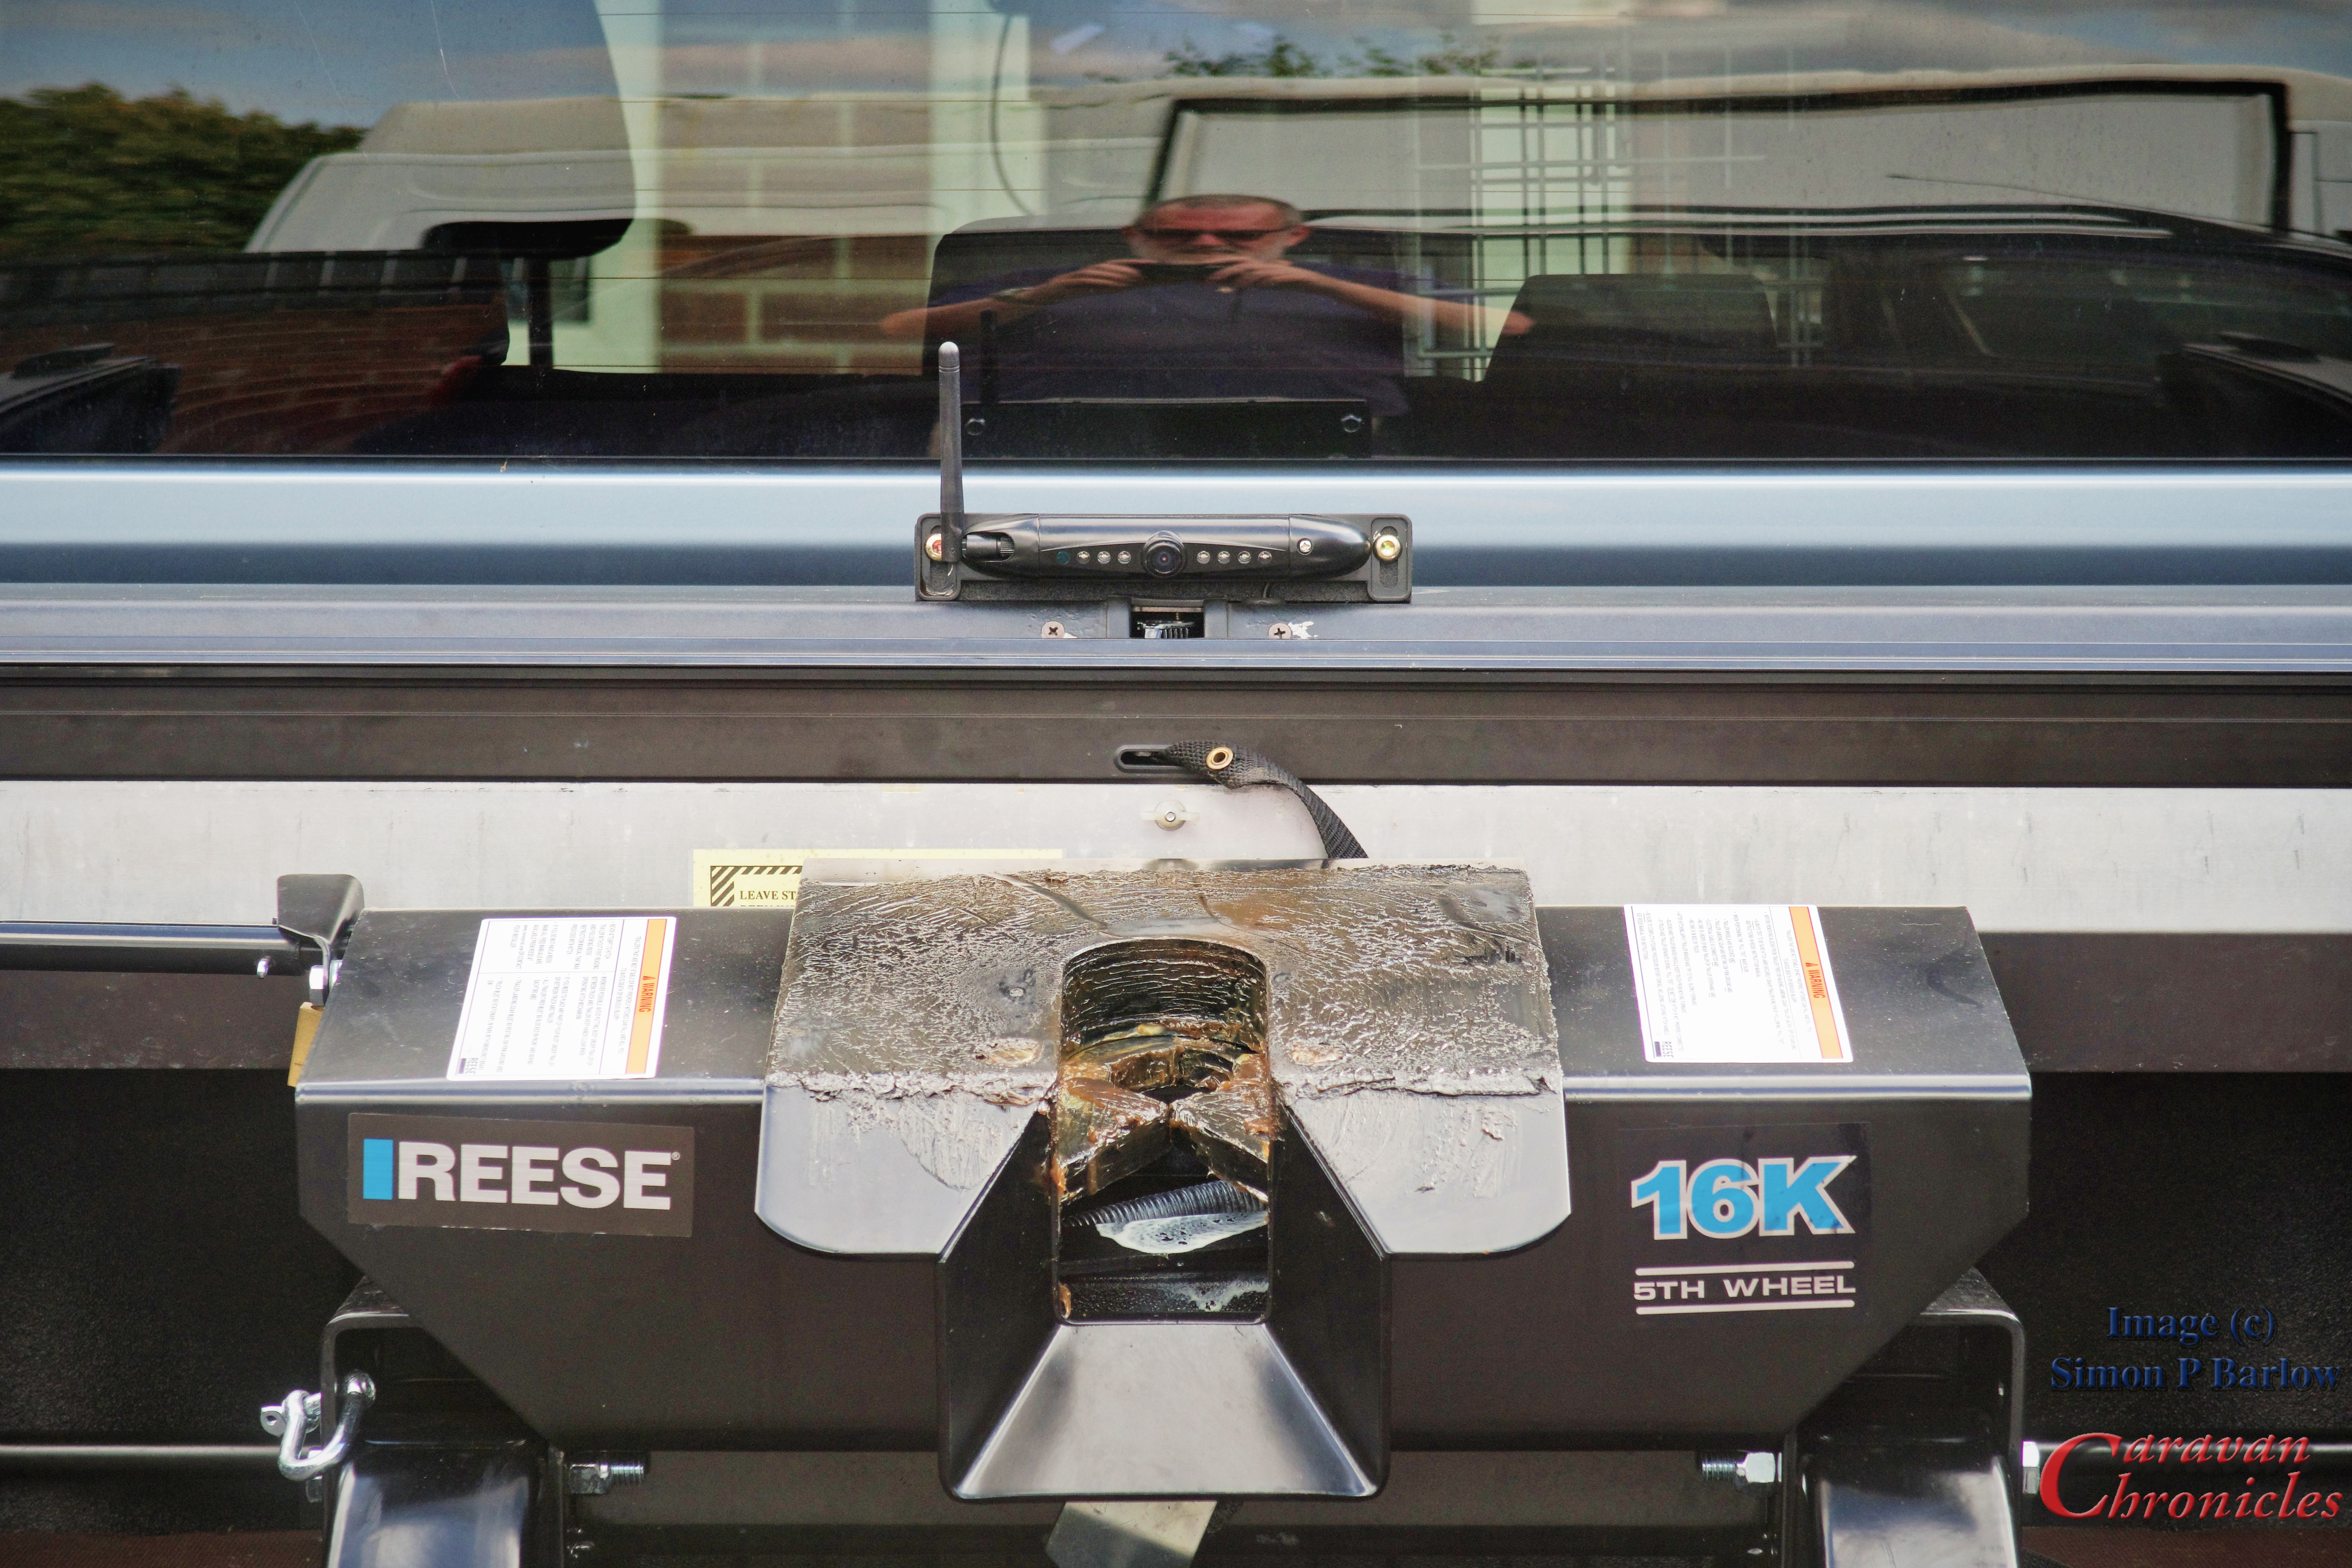
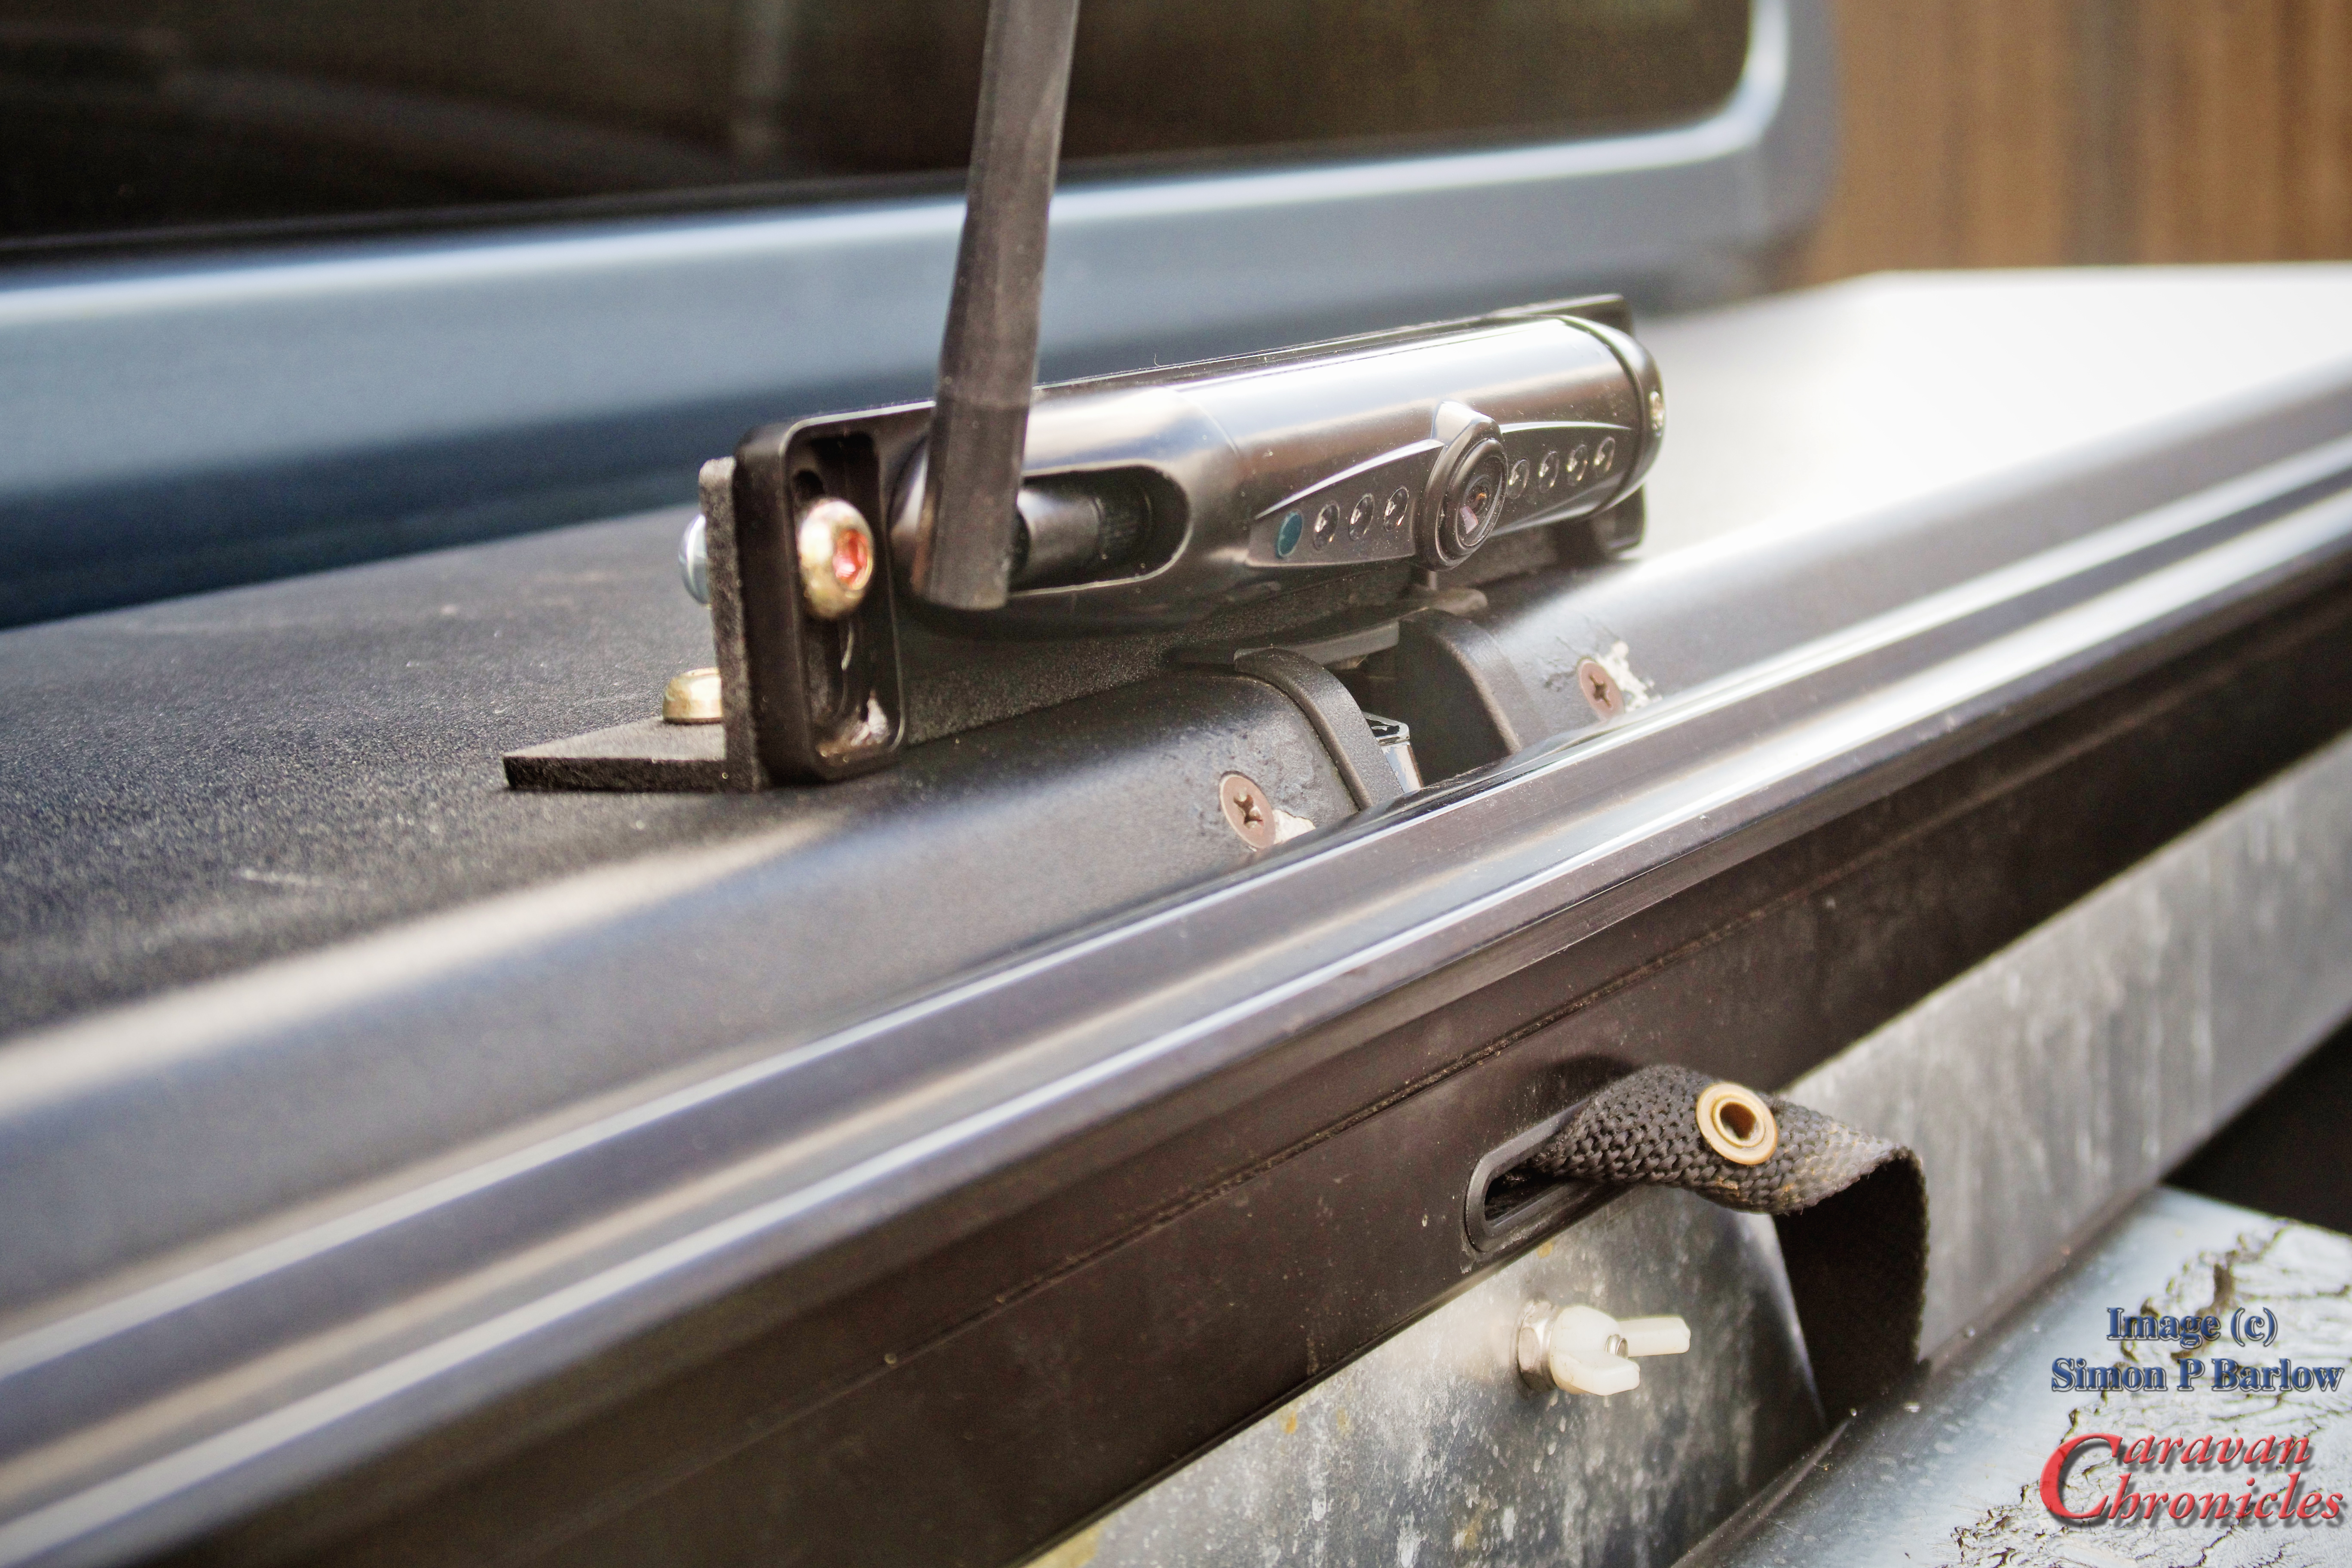
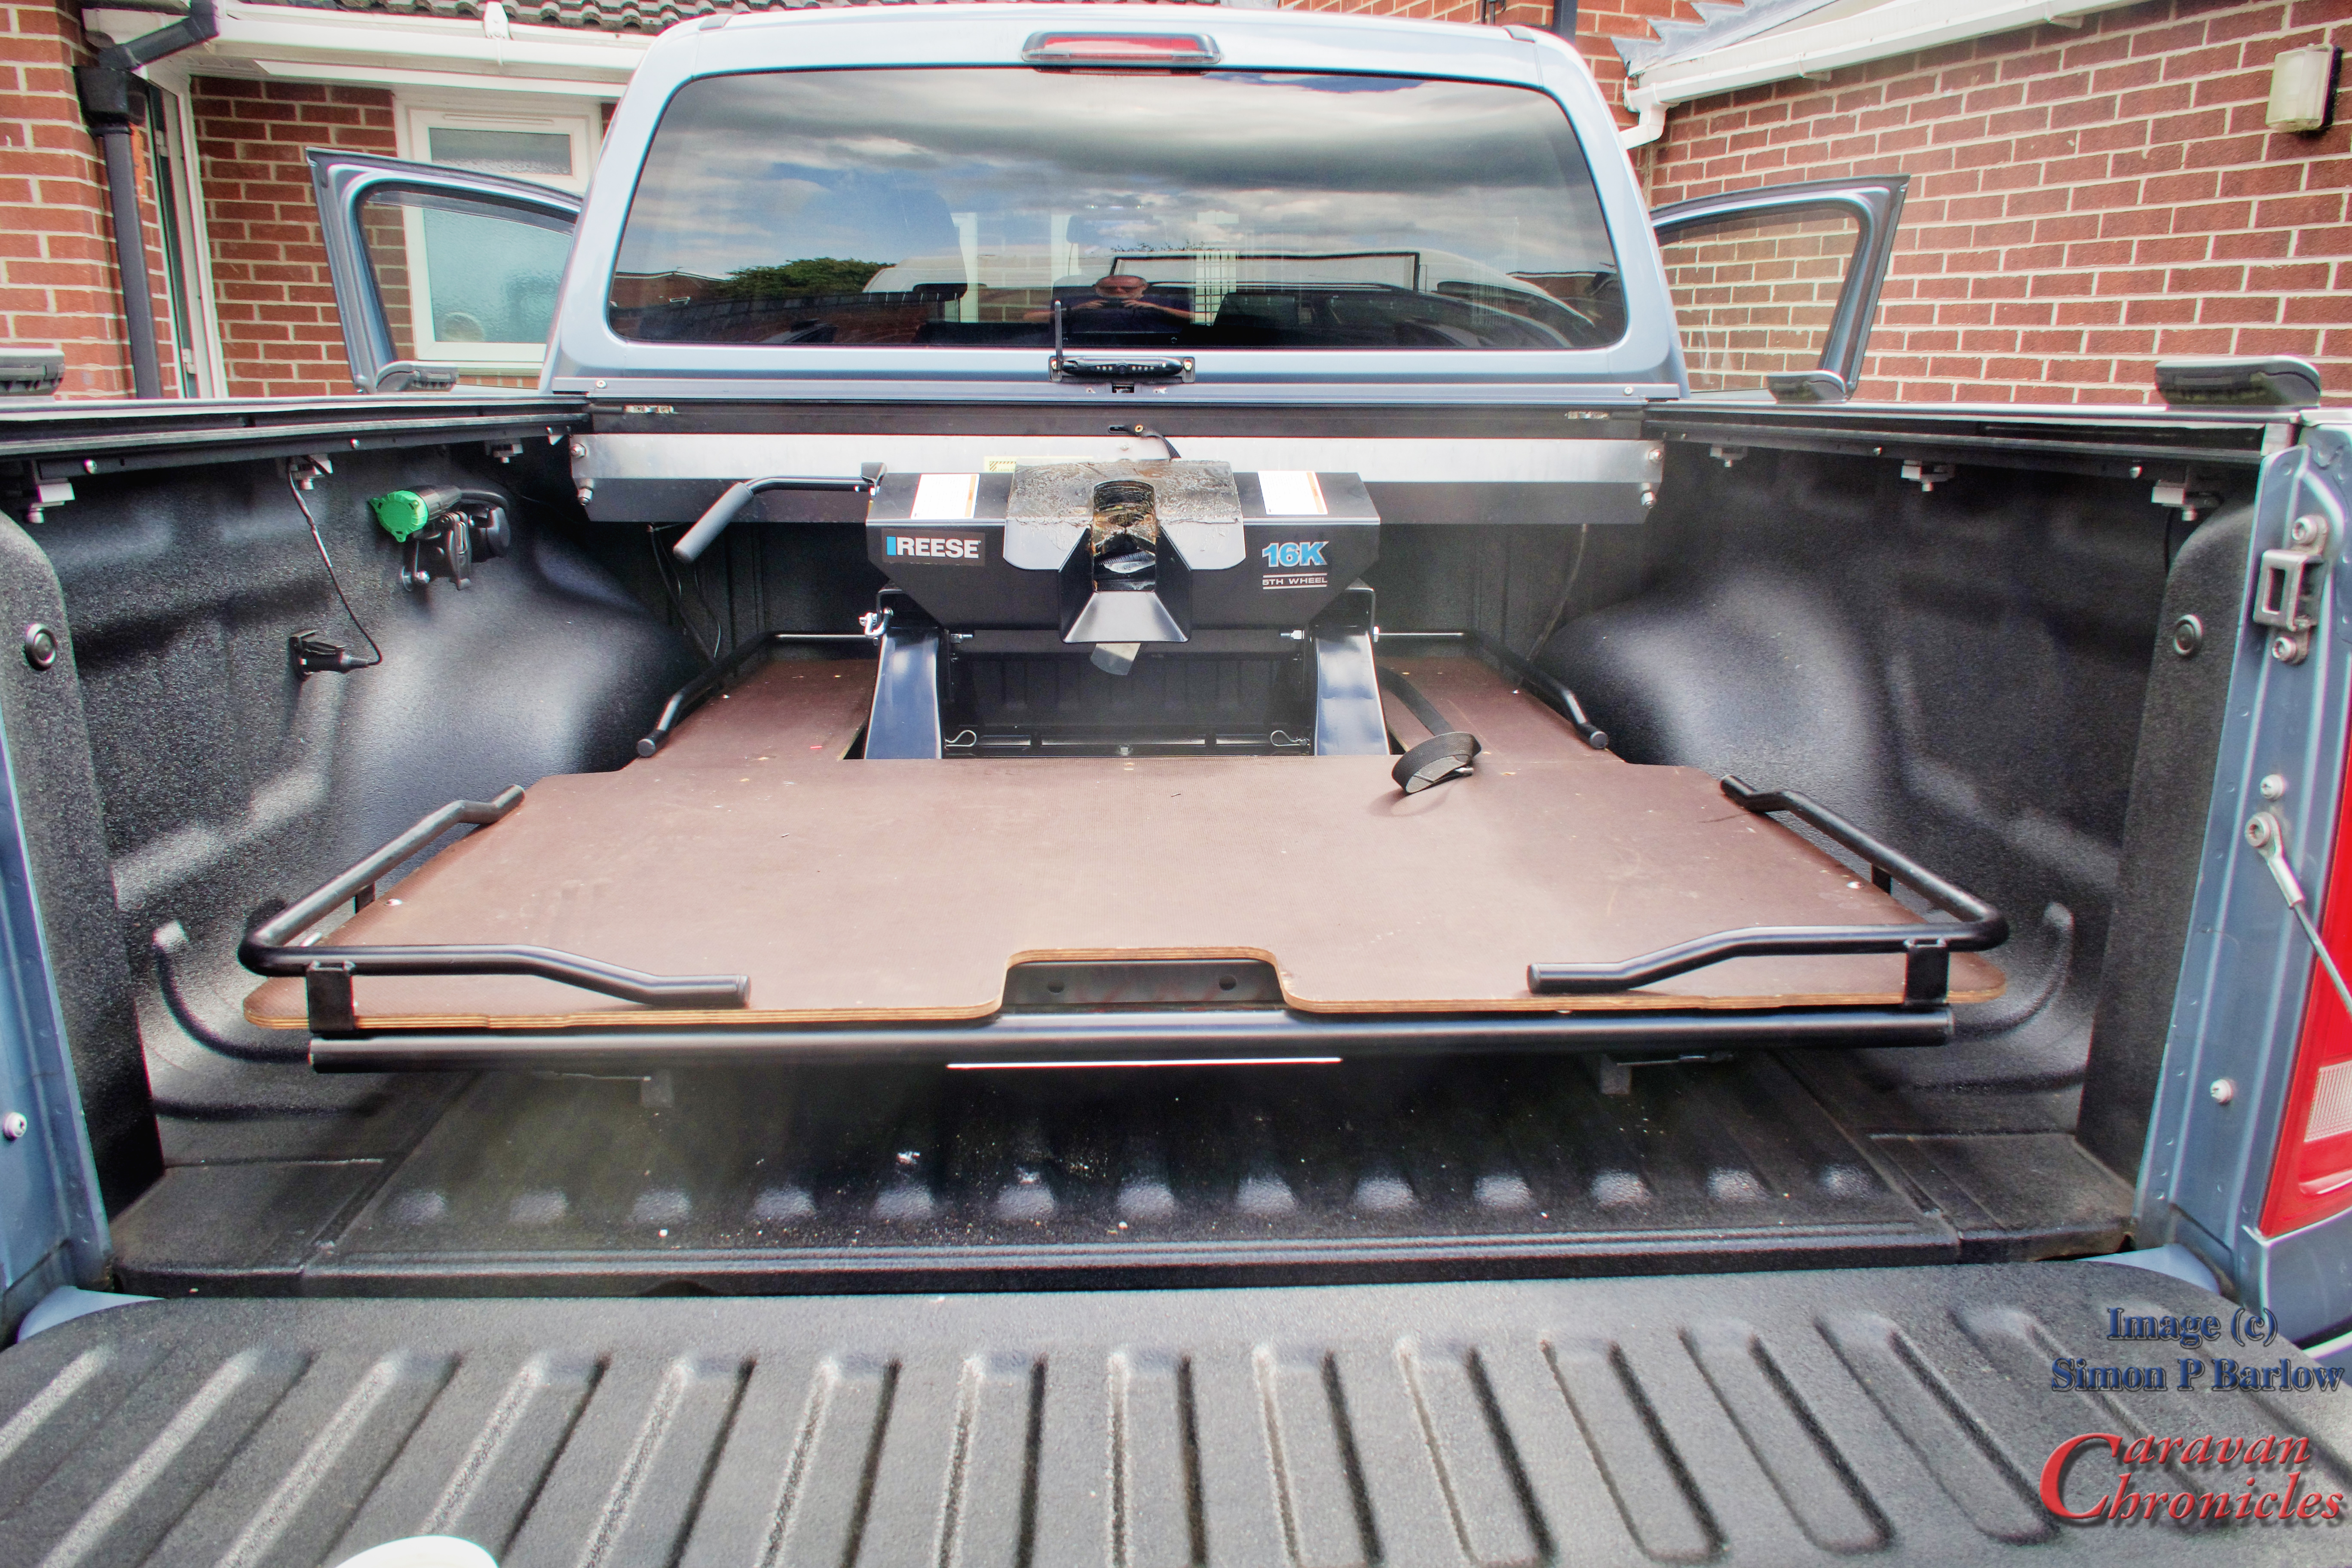
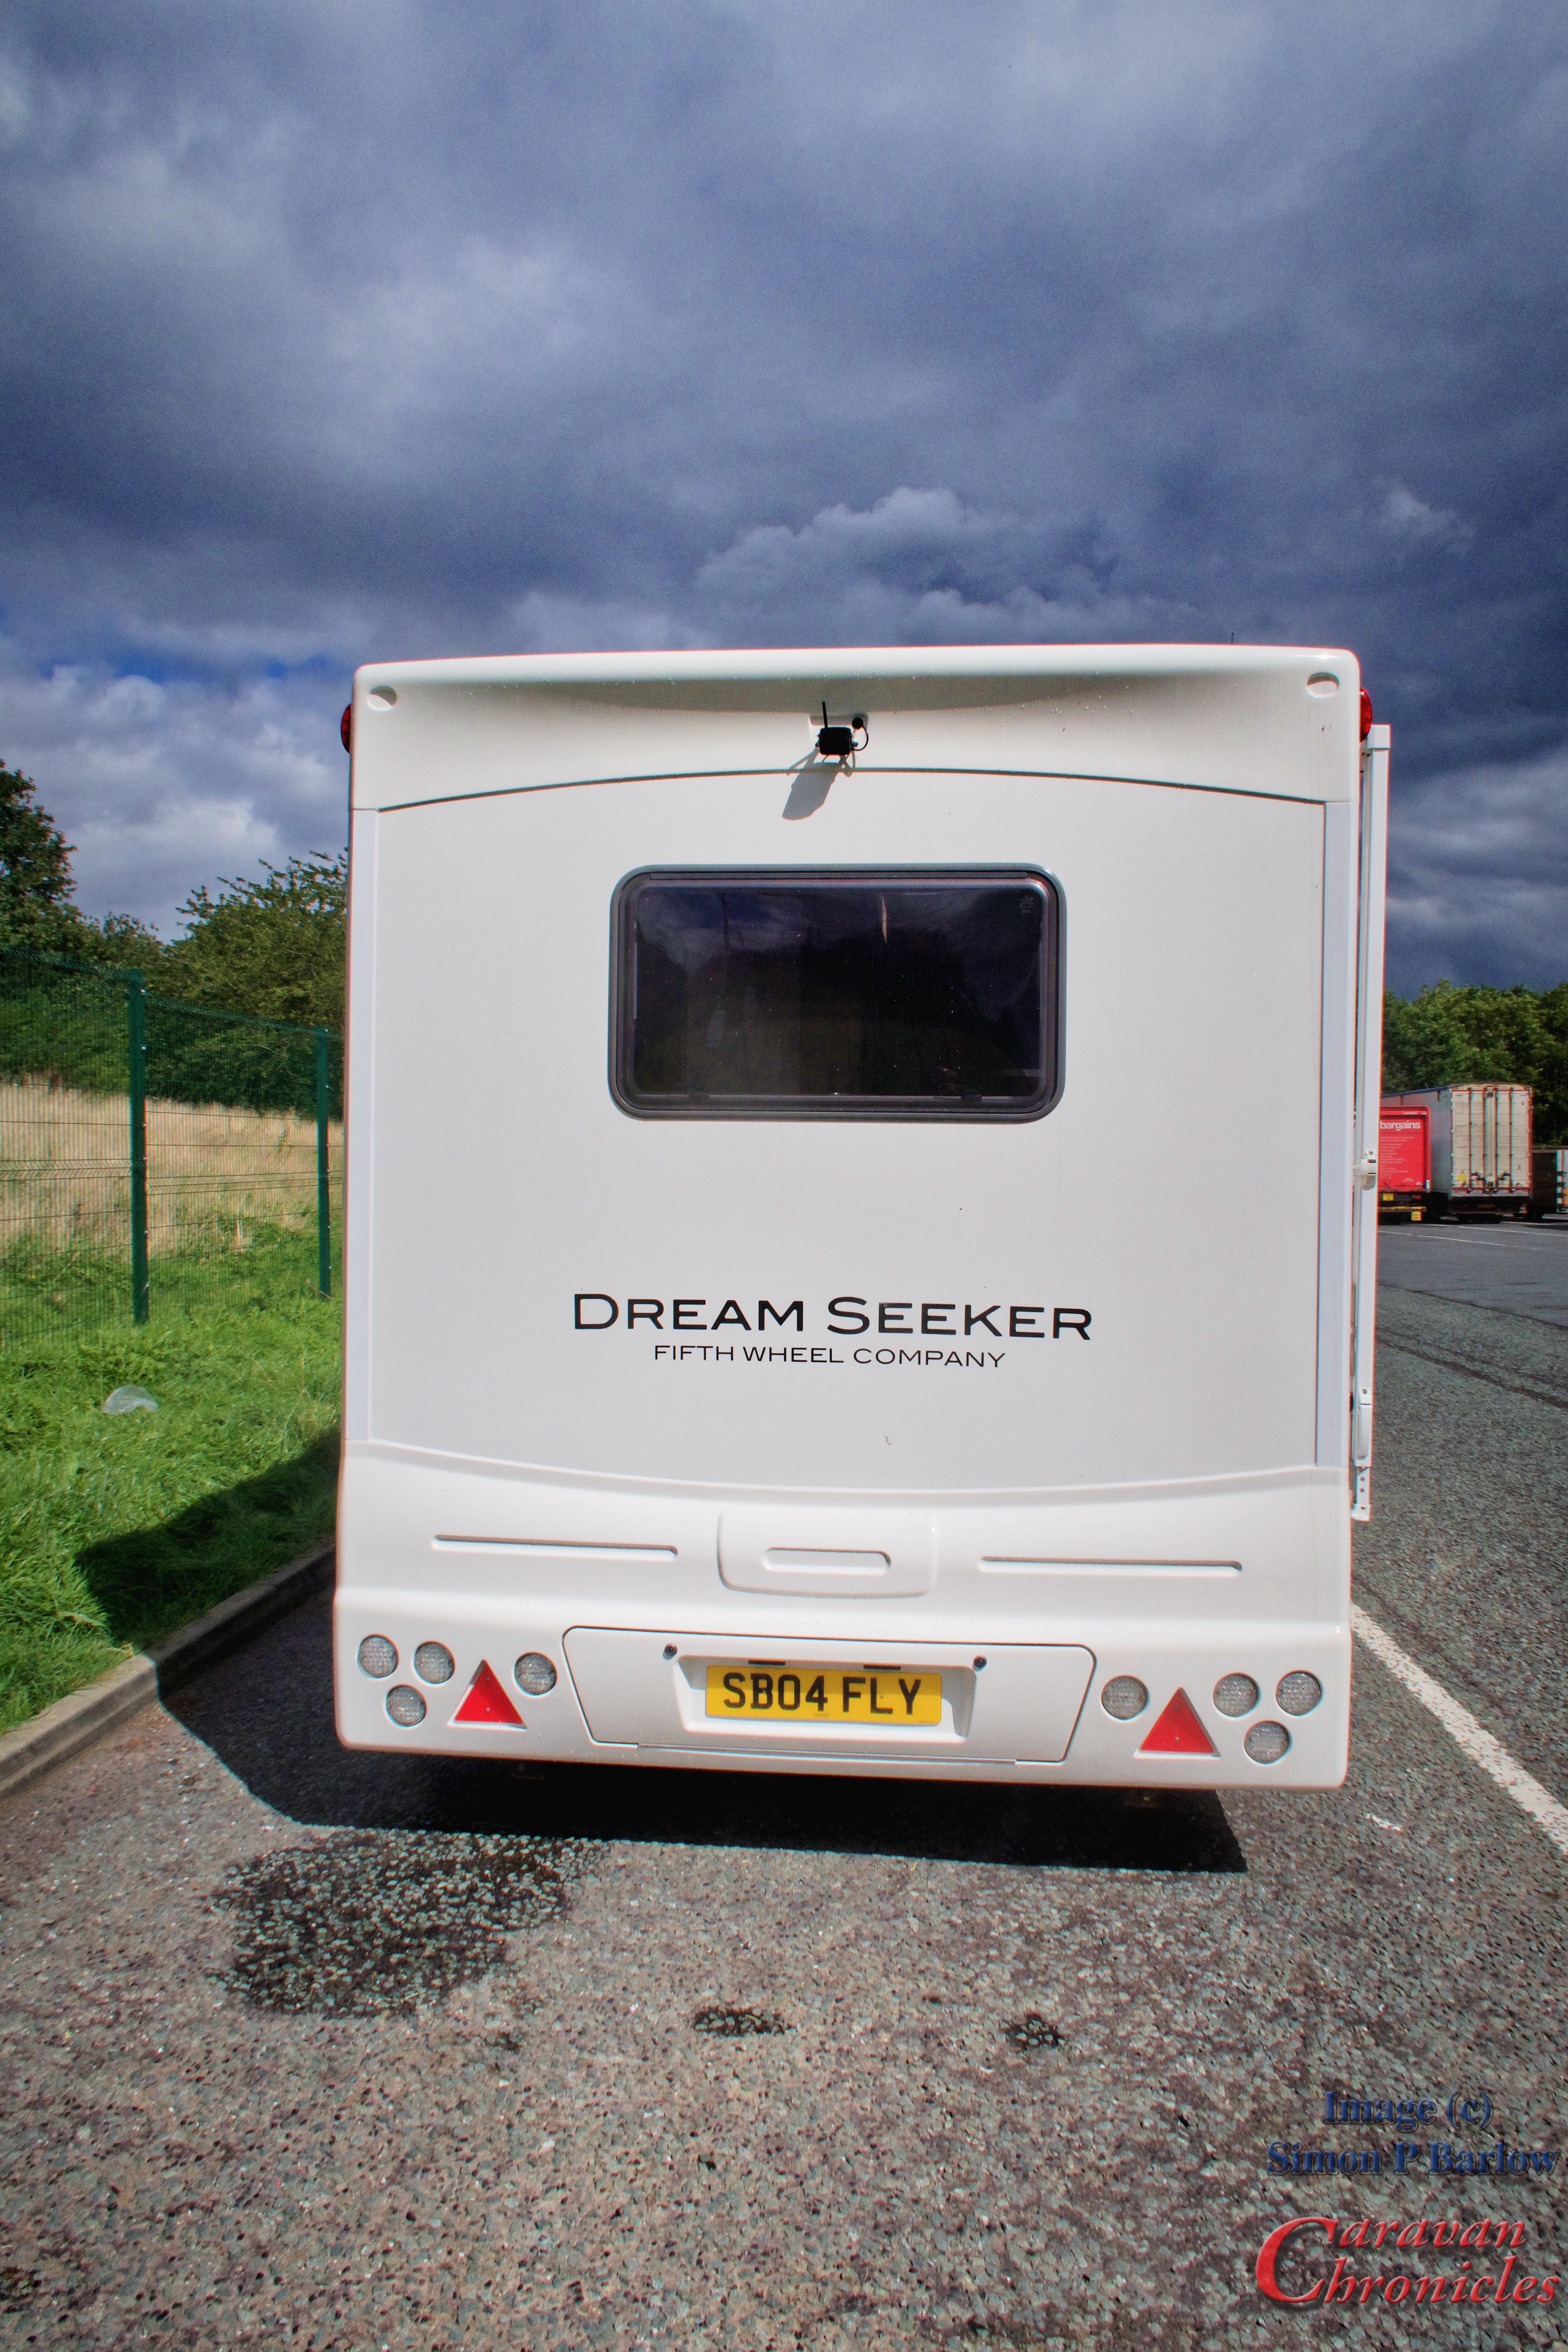
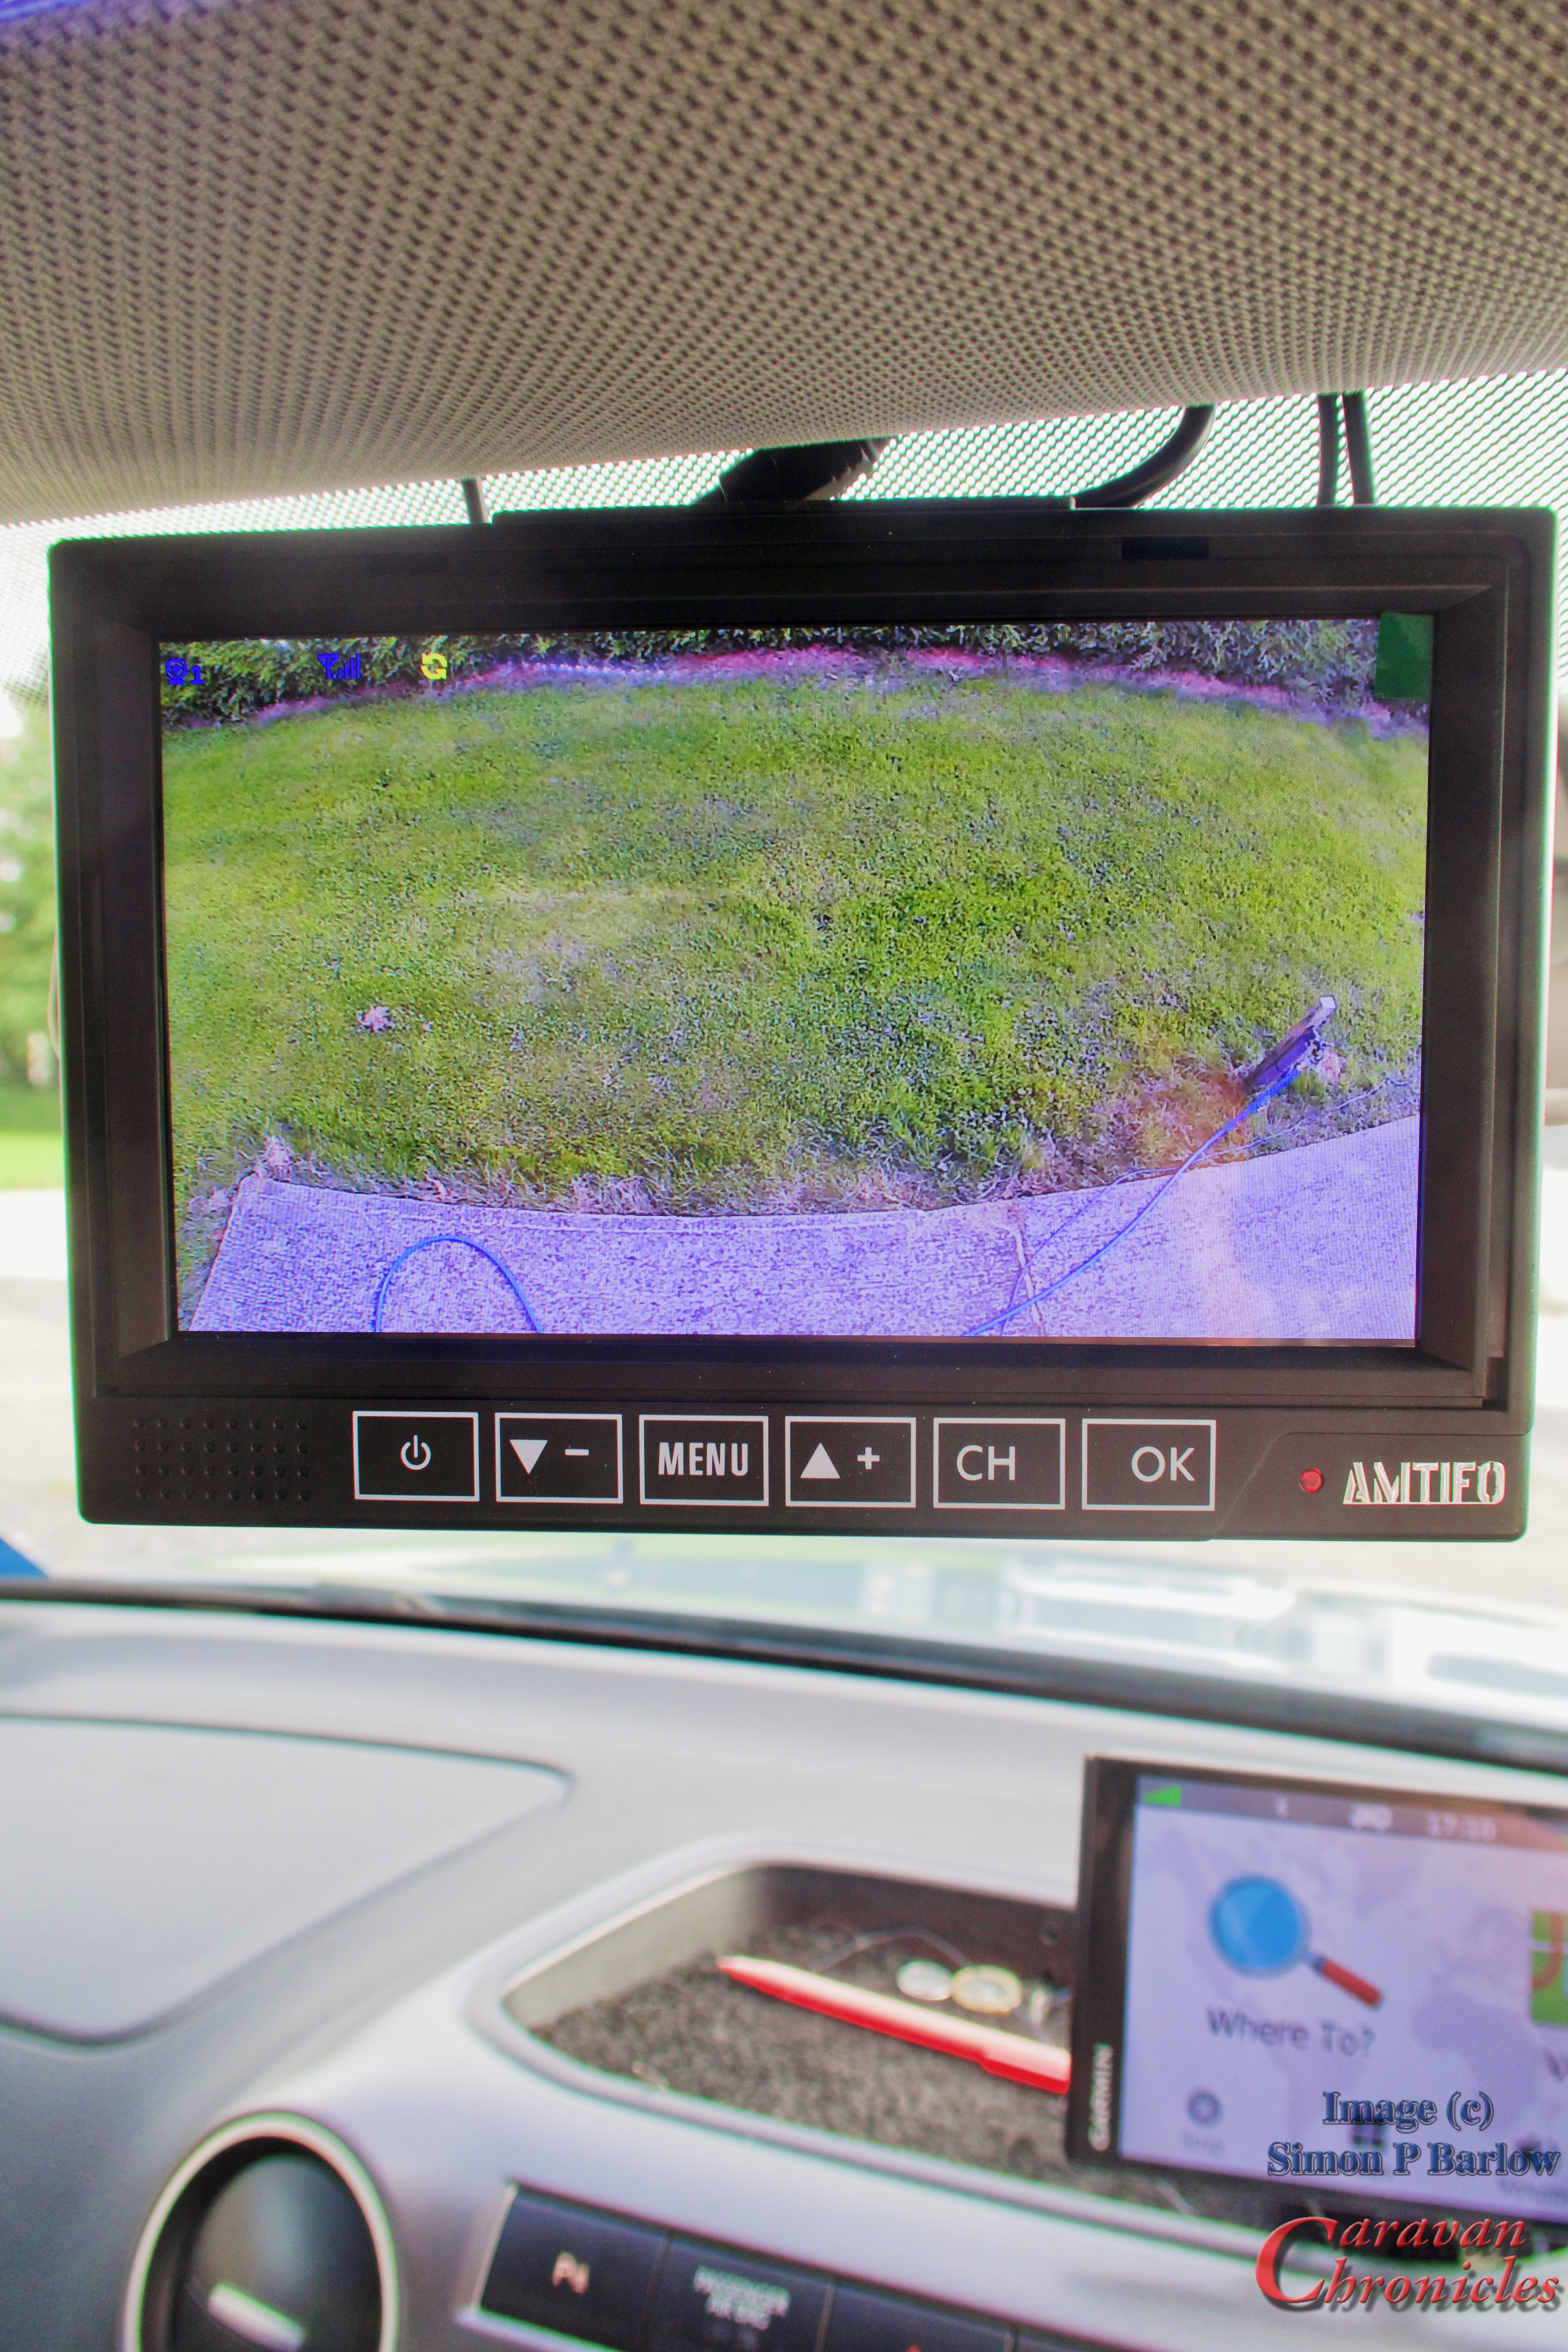
The first big one is a bit unusual. I want to add electronic side view mirrors to the Amarok. These are two screens that mount vertically on each of the A posts and link to cameras where your rear view mirrors are. However I’m adding a twist. I want to mount the rear view cameras on each side of the 5th wheel. This would mean that when looking to the rear view mirror on the passenger door of the amaro I not only see the rear view from the Amarok door mirror but also the rear view from the camera mounted on the side of the trailer. Not a big gain driving down the road you might say, but there are two huge advantages. The first is I will not need to fit extension mirrors to the Amarok when towing as the installed cameras and internal A post mounted screen combo will give me the required view coverage required by law. This has already been accepted and approved for commercial vehicles and coaches and is in use on the road already. To comply with regs though these will have to be connected via a Suzi between the trailer and truck. You cannot have wireless devices.

The second is when reversing I will always have a view down each side of the trailer no matter what angle the Amarok is the the trailer. This has huge advantages when reversing into pitches as effectively there will be no blind side reversing as the combination of rear and side view cameras will always allow me to see the three sides of the trailer.

The next project really is one I came up with while in hospital. My last ‘job’ was ground op’s supervisor at Manchester Airport, a job which occasionally meant I had to oversee the ground start of engines, push backs etc. To do this we used a head set plugged into the aircraft so we could talk to the flight deck. This got me thinking…. I have several Dave Clark headsets from my flying days and thought about adapting these for ground comms between someone directing reversing and the driver.

We have tried mobile phones, cheap hand held radios working on DMR Chanels and a couple of HAM handhelds programmed to an obscure frequency that hopefully won’t get me into trouble with the authorities , as my radio licence is for aviation operation, I gave up my ham licence in the late 70’s.

It’s just an idea that may or may not work out… I have the kit and all it will take is a bit of soldering and making up a small circuit board to get everything working. As I am on restricted duties ( can’t lift anything heavier than a cup of coffee or a ham sammich) for at least ten weeks, sitting at my bench in the workshop is not an issue and it gives me something to tinker about with for a while.

The third project is to get a 12 volt 50 Amp service from the Amarok into the 5th wheel. This is in preparation for installing a dc to dc charger if we decide to move over to lithium. If not we can still install a DC to DC charger for the current AGM battery bank we have. The move to lithium is not yet a proven case for us as we currently don’t do much off grid.

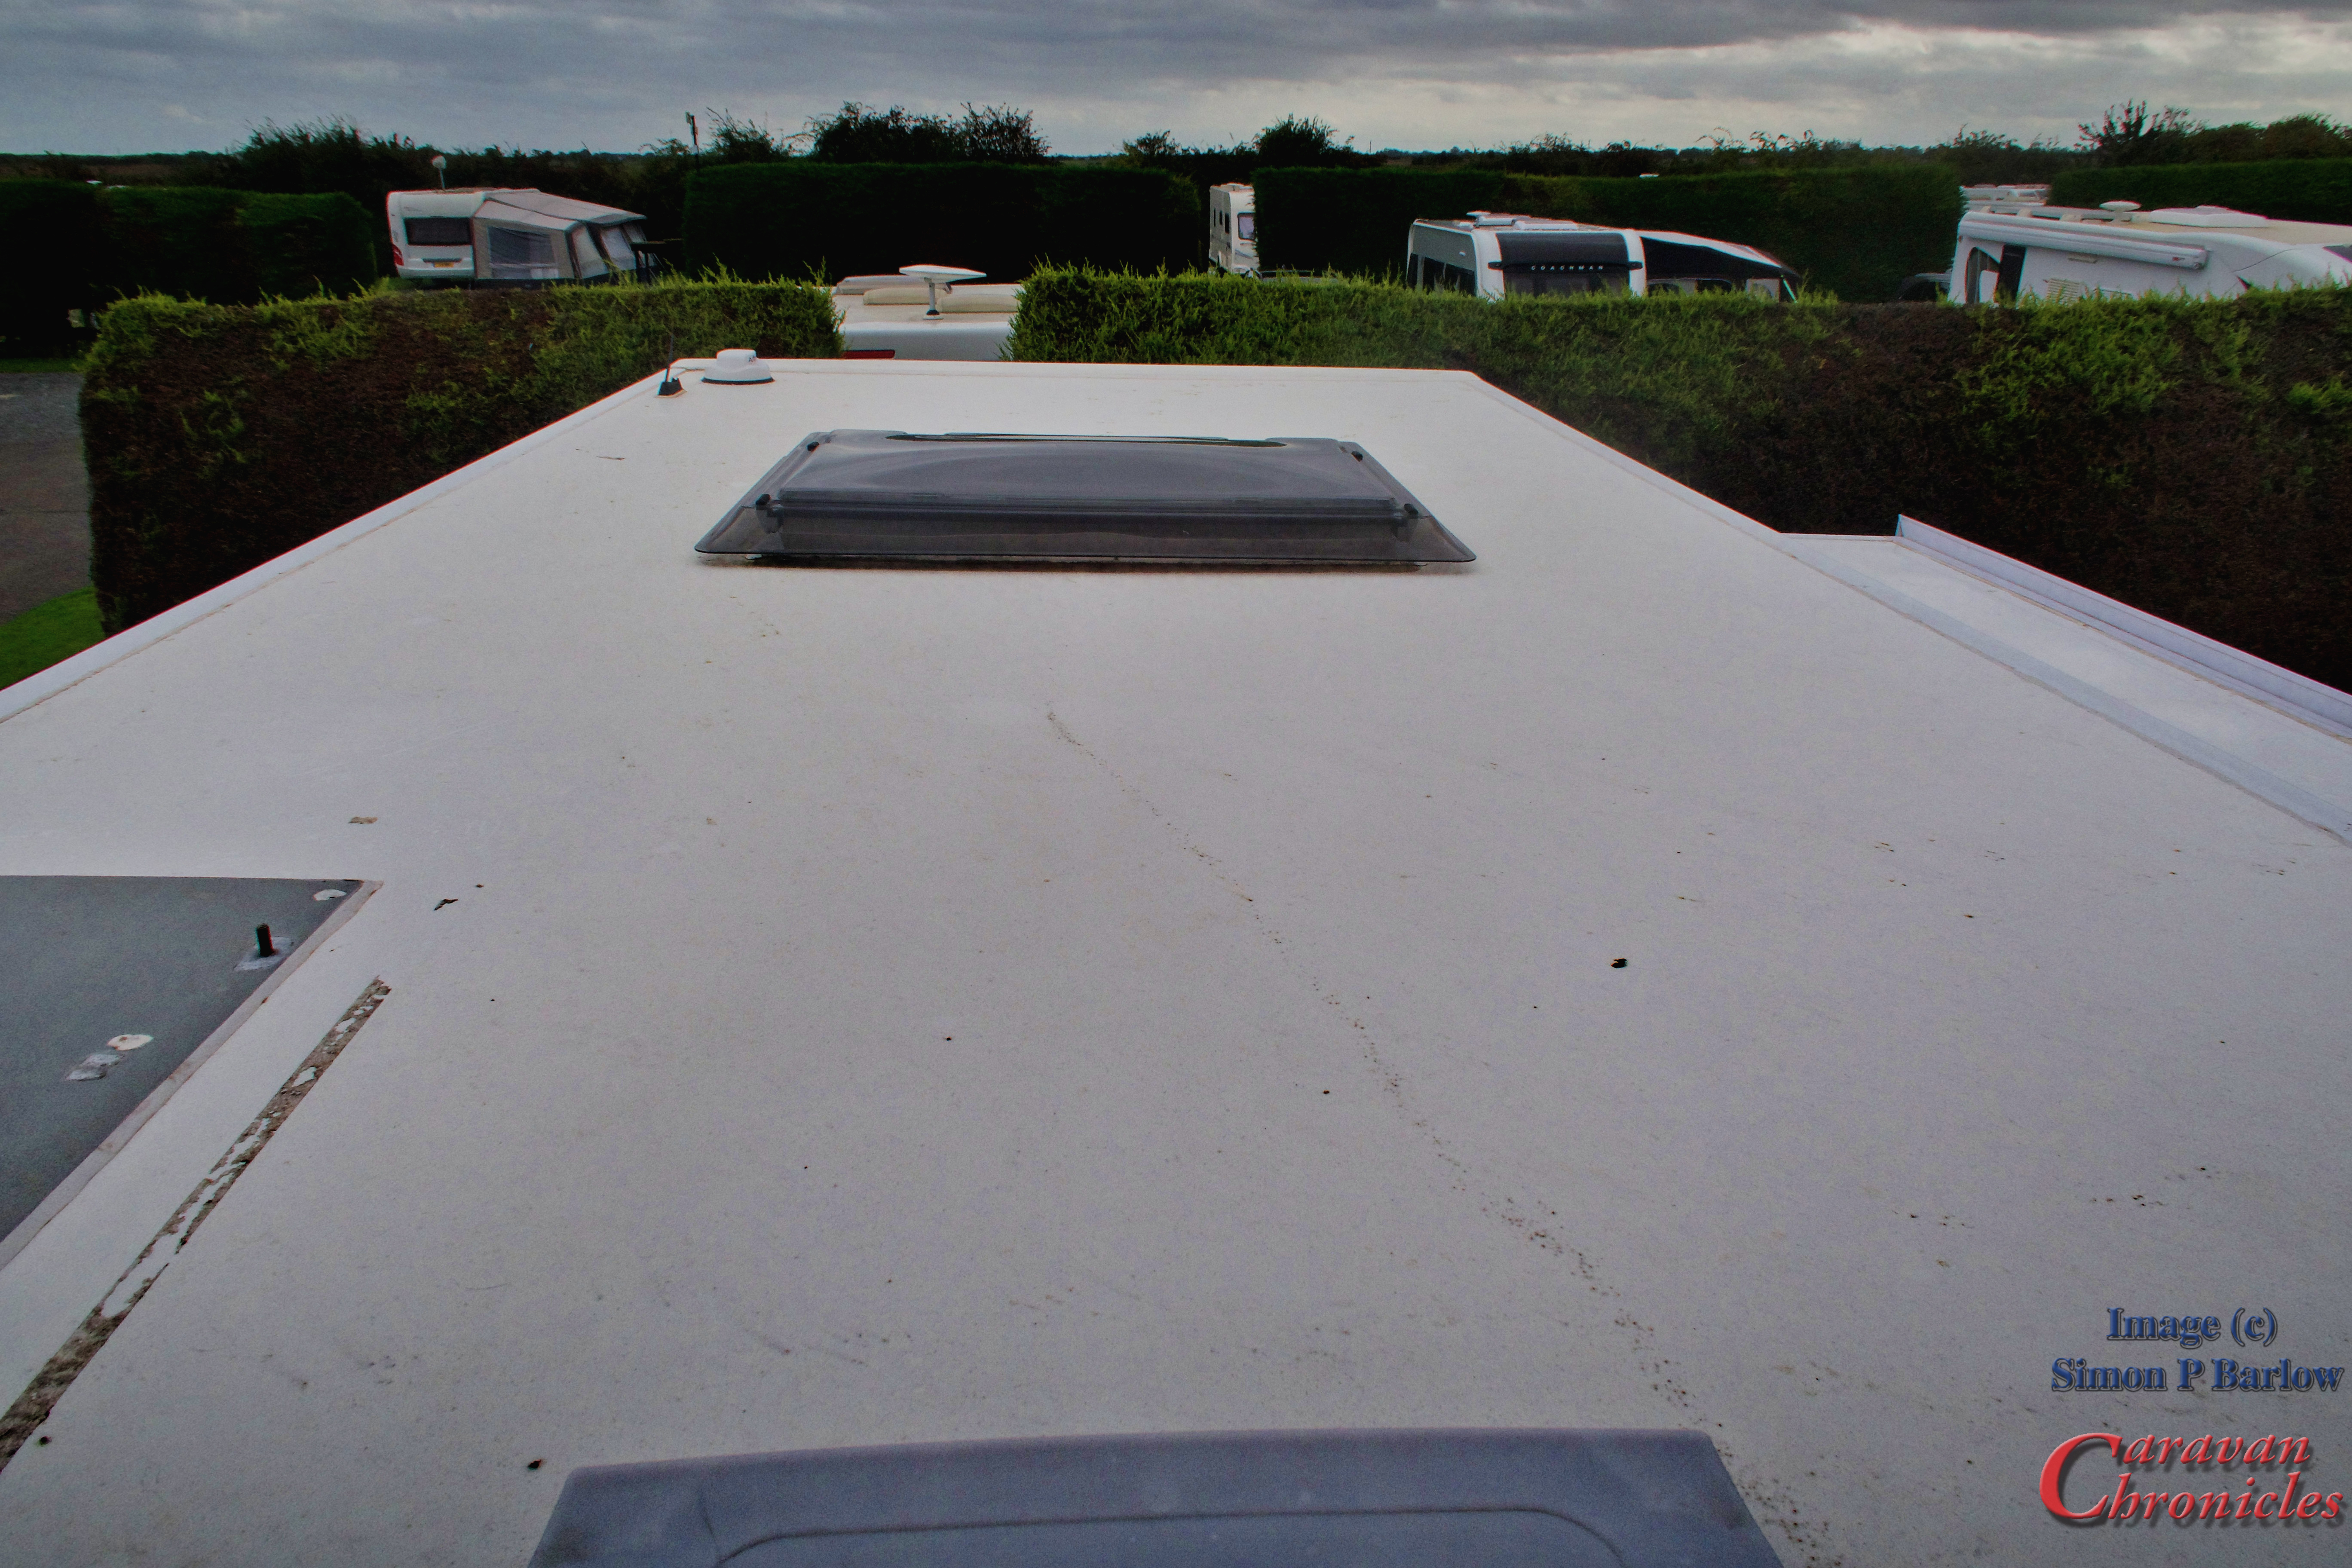
Lastly is installing a couple of big solar panels. Initially this will be to keep our current AGM batteries charged, so thinking about 800 watts should do it and this could be increased in the future. One thing we do have on the 5th wheel is plenty of flat open roof space. At this stage I’m thinking of flexible panels bonded to the roof rather than ridged panels as they weigh a lot less.

Unusually for me… and the blog, I might have to partner up with companies to get a couple of these projects completed as at the moment I’m not in any shape to go crawling round the truck or the 5th wheel. We will see how that progresses though.

Thanks again..

So again a HUGE thank you for all the emails, messages and comments. I apologise if you emailed or posted comments with technical questions and I haven’t replied, but I have been out of it for a while. A huge than-you too to the people that have bought me a cup of coffee via the link. I’m well on the way to covering the cost of paying for the hosting of the blog and domain name for another year.

Both Sue and I hope you all have a fantastic New Year and have a fantastic touring season. Stay safe and hopefully we will see you soon on a site somewhere.

Share this:

  • Click to share on X (Opens in new window) X
  • Click to share on Facebook (Opens in new window) Facebook
  • Click to share on Tumblr (Opens in new window) Tumblr
  • Click to share on Pocket (Opens in new window) Pocket
  • Click to share on Pinterest (Opens in new window) Pinterest
  • Click to share on Reddit (Opens in new window) Reddit
Like Loading...

A Bit Of a Follow Up…

02 Saturday Sep 2023

Posted by Simon Barlow in 5th Wheel, Dash Cam, Hitch Camera, Maintenance

≈ Leave a comment

Tags

5th Wheel Caravan, Hitch Camera, Modifications, Reversing Camera, Towing, Trailer Electrical projects

This is just a bit of a follow up to A Bit Of An Upgrade… really. After installing the new camera on the 5th wheel, I went ahead and installed a new camera for hitching up. Now obviously hitching up a 5th wheel is a bit different to a tow ball and having a camera in the right position makes it so much easier… So the view in the ‘mirror’ is now a bit different!

The cameral is aligned with the hitch centre line so it should make reversing back on to the pin a doddle…. OK I have square it up a bit since taking the photos! The system I opted for allows the addition of up to 4 cameras to the screen and I have the option of displaying any combination of these cameras in single camera, two camera or four camera in various patterns, all easily configurable from the screen. So for the moment I have it configured so that each camera is displayed full screen and I can simply swop between them using the CHannel button.

Mounting the camera was pretty easy…. I used a short length of 50mm aluminium angle and with a deft bit of drilling in the right places it allowed me to mount the slim licence plate style camera on the top of the Roll-N-Lock cover.

From a distance it doesn’t stand out too much. I sprayed the aluminium angle with etch primer then a couple of coats of black bed liner so it almost matches into the black of the Roll-N-Lock… but a quick glance I don’t think you would notice it from the rear.

So I think that is that project finished…. until I decide to do the trailer side view cameras that is!

Share this:

  • Click to share on X (Opens in new window) X
  • Click to share on Facebook (Opens in new window) Facebook
  • Click to share on Tumblr (Opens in new window) Tumblr
  • Click to share on Pocket (Opens in new window) Pocket
  • Click to share on Pinterest (Opens in new window) Pinterest
  • Click to share on Reddit (Opens in new window) Reddit
Like Loading...

A Great Upgrade…

29 Tuesday Aug 2023

Posted by Simon Barlow in 5th Wheel, Accessories, Gadgets, Modifications, Product Review, Vehicle Wiring Projects

≈ 4 Comments

One of the upgrades I wanted to do to the Dream Seeker was to install a good rear view camera. Looking round for options it seemed that you could easily spend a lot of money and end up with something that didn’t achieve what you wanted in terms of reliability and quality.

I did a little research and found that there were options from several manufacturers on Amazon that would fit the bill that seemed to match my basic requirements of being reliable, good vision day and night and durable with the option to upgrade or add to the system in the future.

I chose a wireless AMTIFO kit, 1080P 7 inch LCD display with a range quoted as up to 320 feet with a 150 degree rear camera. I’m not doing unboxing or installation, although installation was really easy and all the hardware you needed comes in the box. The system also records onto an SD card (not included) and the screen can accept up to 4 cameras.

Quick note: I bought this from Amazon, I paid just under £110 for the screen and one camera. This is not a sponsored post and the link to it is here https://amzn.to/44pOB0x if you want to see it and you can also see my review on Amazon… I’m SP

Fitting on the Dream Seeker was quite easy… except I realised just how tall it was!… and it was wired to come on when the vehicle supplied power to the trailer. This means as long as the engine is running the camera is active. I may opt to change this in the future if I add more cameras and a screen in the caravan.

I set the angle of the camera slightly different to convention. Most people set them so they can see the rear bumper, I set it so the bottom of the screen is about two feet from the bumper. My thoughts are if an object is at the bottom of the screen I’m still two feet away and that is close enough! The secondary advantage this gives me is that the top of the screen is effectively seeing further behind… about a cars length in fact. Due to the height of the camera and the angle of view on the motorway for example I can actually see both lanes either side of me and this helps when judging when to pull in after an overtake as I know if I can’t see the vehicle I have overtaken I must be at least one cars length in front of it. Mind you I don’t do much overtaking!

Mounting The Screen…

In the box comes a couple of options for mounting the screen… fixed dash mount or sucker on the windscreen mount. I sat in the truck for ages moving the screen about… then thinking of moving the Sat Nav somewhere else so I could locate the rear view screen in its place. Then I had one of those “Doh” moments…. why not put it where the rear view mirror is as the mirror is really just full of caravan nose cap when towing. I know they do make mirrors with screens in them but I looked at a couple of these at the caravan show and they seemed really small… a honking seven inch screen on you mirror is much better IMHO. I’ve also discovered that located there its still natural to glance at it as you would normally look at your mirror and its also unaffected by sunlight reflections.

I came up with a simple solution that used a tiny elasticated cord and a pad…. it kept the screen off the mirror and gave enough room to angle the two small aerials downwards behind the screen. I installed a power feed via the roof lining and can simply unplug the screen and remove to stow safely when not towing.

Mounting it on the mirror also has a secondary advantage… I can angle the mirror so that Sue in the passenger seat can also see the screen… just incase!

I had never towed with a rear view camera before and after fitting I really can’t understand why caravan manufacturers aren’t fitting these as standard.

How’s It Working Out?

Picture is clear and bright, no drop out or freezing, there are options to change screen layout, number of cameras displayed etc. etc. Even my unconventional screen mounting with the two aerials pointing down doesn’t seem to affect things. The screen recording works great…. I can see this being a great help especially if you have side cameras to compliment your dash cam system in your vehicle.

Adding To The System…

I said that you can add to the system… up to 4 cameras. Well after using it for a few weeks now I will be adding a left and right side rear facing camera so I can see down the full length of the trailer, but first I think I will be adding a rear view camera on the pickup bed to make hitching up a lot easier.

Would I recommend a rear view camera?…. most definitely. Would I recommend this rear view camera?… well based on my experiences so far, yes. For the money… £110 is not a lot to invest in something like this.

Share this:

  • Click to share on X (Opens in new window) X
  • Click to share on Facebook (Opens in new window) Facebook
  • Click to share on Tumblr (Opens in new window) Tumblr
  • Click to share on Pocket (Opens in new window) Pocket
  • Click to share on Pinterest (Opens in new window) Pinterest
  • Click to share on Reddit (Opens in new window) Reddit
Like Loading...

Lighting Up The Scene…

25 Saturday Mar 2023

Posted by Simon Barlow in Accessories, Car Trailer, Caravan Electrics, Caravan Road Lights, Electrical, Gadgets, Maintenance, Modifications, Projects, Technical, Tow Vehicle, Towing, Vehicle Wiring Projects

≈ 7 Comments

Tags

Caravan, Caravanning, Caravans, Maintenance, Modifications, Reversing lights, Scene Lights, Towing, Trailer Electrical projects, Travel Trailer, Travel Trailers, Work lights

A while ago I upgraded the lights on our caravan by changing the functions round and added two new LED reversing lights which I can’t understand why I hadn’t done this years ago. In daylight they are bright… and at night they are really bright… retina burning bright according to reports. Reversing into a dark pitch is a lot easier and safety wise having an additional set of tail and brake lights with two large bright rear fog lights instead of the single factory 21 watt light mounted almost as low as you can get on the rear of the caravan is a vast improvement in my mind. You can read about my changes here… “Put Yer Lights On Mate…“

Following that article I had lots of people contact me letting me know they liked what I had done and considering upgrading themselves. Not a clue if anyone did, but that’s how these things go. I did have another email from a gentleman which was a bit different. Now I’ve edited it a bit as it was originally two emails and included a company name and some specific details which I’m sure they would not wish me to publish to the world…. here’s the gist of it though:

“Hi Simon, been reading your blog for a while and I read your post about upgrading your caravan lights. I was wondering if you might be able to help with something we would like to do with our trailers or could put us in touch with someone who can? We have around eight trailers that are used on various locations separately or as a group and are towed by a variety of vehicles, mostly our own but occasionally by contractors. Most of our trailers have additional side lighting powered off the trailers own batteries which are charged from the vehicle or while on site from generators. A lot of our set up and tear down is done at night and we have had issues at dark locations where the vehicles reversing lights don’t really help. Is there any way we could get the side work lighting to come on when the vehicle reverses but could be controlled from the vehicle without any additional switches or alterations to the vehicles but could be turned on and off as reversing on a public road with them on might not be legal”

From an exchange of emails, I do know what the company does and some of the sorts of places it works. They don’t always have access to mains power when setting up or tearing down and would like something that can easily be installed in a trailer without too much alteration to the electrical services. Nothing could be installed in any of the tow vehicles as the vehicles were not always their own and I first suggested a cheap(ish) remote switch that could be used by the driver to turn them on and off as required. I was told this was not an option as the remote switches would likely get lost/damaged or need batteries or be with the wrong crew, some sites they could not use any radio equipment.

Time to put my thinking cat on…

Polo…. always a great thinking cat, sadly no longer with us.

I had a bit of an idea forming. Something I’d seen on a Class A American RV (Prevost I think) was a set of spotlights set in the side panel of the RV pointing backwards and located near the front wheel. These lit up down the side of the RV and the ground to the side when reversing…. I’d thought about adding a couple of simple cheap LED lights to the underside of the caravan between the wheel and front of the caravan angled outwards by about 60 degrees mounted under the floor… so when I reversed they lit up the caravan wheel and the ground it was going over so I could see it clearly at night in my mirrors. I had pondered how to switch this on and off using the Amarok but not add any more wiring between the caravan and vehicle. So I’d already come up with a solution.

Here is what I came up with…

It’s a simple two relay set up. The two triggers for this to work are the vehicle reversing lights and the rear fog lights. The top relay in the box is activated by the vehicle being in reverse with the reversing lights on. The lower relay is activated by turning the vehicles rear fog lights on. Only when these two conditions are met, is there a circuit across the two relays switches made thus activating the work lights on the trailer.

Quite simply when reversing to turn on the work light simply turn on the rear fog lights and the work lights will come on.

Cables 1, 2 & 3 connect to the road lights. Cables 4 & 5 are for the switched load. The cost was around £15 for the components for each unit and that included Bosch relays & sockets, the die-cast box and fuse holder. I guess putting it in a plastic case and using cheaper eBay sourced relays could halve that cost.

I did also think that as an upgrade or option the relay operated by the reversing lights could be a timer relay. Set it to say 15 seconds, then when reversing you turn on the work lights and they will remain on of 15 seconds after reversing as long as the rear fog lights are on. This would give you time to reverse, pull forward and reverse again. Each time you select reverse the timer would reset and as soon as you disengaged reverse the timer would start its countdown again.

High level work lights could be a boon to reversing into dark pitches or storage sites. Image take from the internet, copyright not mine.

It was as simple as I could get it using existing signals from the vehicle that already pass through to the trailer. I guess it could be used to turn anything on using any combination of lights operating from the vehicle.

The wiring between the road lights and work lights is kept separate as I wasn’t 100% sure how the trailers power system worked and how it was connected to the road lights (if at all) The two relays were installed in a die cast box with a grommet for the 5 cables. All the trailers were fitted with one of these and apparently they have all been working fine for several months.

Why did I opt for reversing lights and fog lights?

I wanted something that would not be used generally through the day so reversing on a public road during daylight or even at night the work lights would not illuminate. Running during the day with lights on and your fog lights will not operate the working lights… and if you are running in weather that requires headlights and rear fog light… then I guess having the working lights come on while you reverse in those inclement weather conditions just makes you more visible to everyone around. So apart from that I don’t think that you will cause a danger on the road with this set-up.

So…. I think I might just have to install one of these on my caravan…. just in case!

Low level scene lights down the side of the trailer can be just as effective as high level work lights. Image taken from the internet, copyright not mine.

Its a fairly simple DIY job to build a box and install it without too much messing about with the original wiring. Now someone asked me about getting the orange side marker lights to flash in time with the indicators…. and remain as side markers when the indicators weren’t being used. Is this something I need to put my thinking cat on for? Let me know in the comments.

Share this:

  • Click to share on X (Opens in new window) X
  • Click to share on Facebook (Opens in new window) Facebook
  • Click to share on Tumblr (Opens in new window) Tumblr
  • Click to share on Pocket (Opens in new window) Pocket
  • Click to share on Pinterest (Opens in new window) Pinterest
  • Click to share on Reddit (Opens in new window) Reddit
Like Loading...

A Few Mods and Updates…

08 Sunday May 2022

Posted by Simon Barlow in Accessories, Gadgets, General, Maintenance, Reviews, Tips, Water & Plumbing

≈ 8 Comments

Tags

Caravan, Caravanning, Caravans, Modifications, Travel Trailer

After our recent trip to Meathop Fell it was time to say goodbye to an old friend. We have had our leisure battery since 2011 and for 11 years it has given us great service. For the last year or so I have thought hard about converting over to Lithium and drew up plans for a high capacity charging link between the tow vehicle and caravan and converting the caravan over to a Victron based system. However I think that for this caravan it would not be worth it.

We had bought a 120Ah Numax battery (left one above) from ABS and it had worked well, even now it still hold a charge and is sitting in my workshop on trickle charge waiting for a project to come along. I went back to Advanced Battery Supplies and opted to go for a 120Ah AGM. It wasn’t too expensive and hopefully it will give us years of service like it’s predecessor. I’ve used ABS for batteries a number of times over the past 12 or so years and can recommend them. I’m not sponsored by them and I paid for the battery but I have found that for me they give sensible advice and great service. That’s why I’m happy to mention them. You can call in personally or they do ship overnight ordering from their website – https://advancedbatterysupplies.co.uk

Battery taken care of now it was time to head into the workshop for a bit of construction….

Henry’s Conveyance Contrivance…

If you have read any of my posts over the last few years you will know that we have Siamese cats…. well sadly Oscar our health and safety officer passed away a while ago leaving us with just his brother Henry. Up to this point we have always had a cat sitter whenever we were away but June has now retired and honestly we could not face the thought of leaving Henry in a cattery or on his own with another cat sitter. So, a couple of exploratory trips up to the caravan for an hour just to let him sit in it and explore round lead us to a two night stay at Burrs Country Park…. only about thirty minutes away from home, that went well and so did the next trip to Meathop Fell. It was now time to build Henry a suitable transport platform for the vehicle.

Henry keeping an eye on the goings on at Meathop Fell

After a bit of head scratching I came up with this….

I built it out of 12mm Ply and painted it grey. I used an off cut of black car carpet to cover the top and sides and a couple of lengths of pipe insulation on the edges where it comes into contact with the car seat and door. To secure it I used the ISO FIX points and it takes less than 30 seconds to remove or install. Without Henrys carrying cage it’s a handy place to put things and the space underneath come in super handy for all my bits that I normally have rolling around on the floor behind the drivers seat. It’s high enough for Henry to be able to see out around in all directions and there is still enough space for two people to sit on the back seat and use the seatbelts if required.

We have used it for two trips now and Henry seems to like it. The rear windows are heavily tinted in our Amarok which will cut the heat from the sun and we can open the rear window for fresh air as required. We are looking round for one of the stick on baby sun screen thingy’s if we think the sun is going to be too strong. Of course we would never leave Henry in the vehicle unattended for more than a couple of minutes… the only time we have done this is while we were hitching up the caravan. If you know Siamese then you know they can be noisy talkative beings…. so far he’s not had anything to say about it. Is that a good sign?

Tempting Fate…

In the eleven years we have been at our storage site we have never had any break-ins but it’s aways in the back of your mind…. and couple that with us sometimes leaving Henry in the caravan while on site I decided a little security upgrade was required (there are others but I’m not going to tell you about them!) I’d looked at the various offerings of additional door locks and after some thinking… and several coffee’s decided to go for the Milenco Door Frame Lock Version 2 offering that allowed us to operate it from inside as well.

I ordered it via Amazon ( https://amzn.to/3sHywnd )and it arrived within two days. It was easy enough to install but I ‘upgraded’ the interior fitting with a custom stainless steel strengthening plate…

The stainless I used was 1.4mm tooled finish, cut to size and drilled using the template provided with the Milenco lock. After measuring the location, I bent the stainless on my sheet bender in the workshop. I chose the location as this was the strongest part of the door frame where the existing door lock was located and would help protect the original lock so a small extent. Ideally I would have liked the arm to have been a bit longer so it covered up the keyhole for the original lock. But I’m happy with it.

Down the drain…

Long time readers will remember that several years ago I wrote a post about how we solved our connection to the drain while on serviced pitches. After ten years of use It was time for an upgrade and I had seen the COLAPZ products and thought it was a rather nifty idea. Having a mooch round the web I ordered directly from the website https://colapz.co.uk/?ref=yjXJSsLdBkh5d and opted for the Flexi waste pipe kit – 8 pipes for £55.

The first use was great and easy to set up. No modification was needed to my original manifold that connects to the caravan and it seems to drain OK….

However you can alway improve on things…. and if you have ever watched any Youtube videos about American RV’s then you will know that for their ‘stinky slinky’s’ they have a few upgrades…. I ordered one from Amazon….

Camco 43041 15′ Sidewinder Plastic Sewer Hose Support – https://amzn.to/3Fp2elM it cost £44 and came all the way from the great state of New Jersey. It comes with a carrying handle and honestly is really easy to use. I just stretched it out and lifted the pipe on to it. It is designed for a 4 inch sewer pipe… but as I was using basically a 2 inch version it would allow the hose support to stretch even further… I bought the 15 feet version and I recon it would stretch to 20 feet without any problems.

When we were packing up, I ran all the remaining hot water down the sink to flush the pipework out… including the Colapz pipework and honestly when disconnecting everything it really wasn’t that dirty, but breaking it down into individual lengths makes it easy if it does need a brush through it (which you get by the way in the kit).

Again we are not sponsored by either of these two companies but the links above will earn us a few pennies that will help provide biscuits for Henry. You wouldn’t want Henry to mis out on biscuit treats would you….

After all he can’t survive on just belly rubs…. I know it’s blackmail but EVERYONE said you need a cute kitty to get more views!

Share this:

  • Click to share on X (Opens in new window) X
  • Click to share on Facebook (Opens in new window) Facebook
  • Click to share on Tumblr (Opens in new window) Tumblr
  • Click to share on Pocket (Opens in new window) Pocket
  • Click to share on Pinterest (Opens in new window) Pinterest
  • Click to share on Reddit (Opens in new window) Reddit
Like Loading...

Finishing Off A Few Jobs…

09 Thursday Sep 2021

Posted by Simon Barlow in Accessories, Caravan Electrics, Caravan Restoration, Caravan Servicing, Caravan Window Repair, Gadgets, General, Modifications, Technical

≈ 7 Comments

Tags

Caravans, LED Lights, Maintenance, Modifications, Window Repair

I’d got a few little jobs still outstanding from our big clean a week or so ago. The big one was to repair the front window. When we were cleaning the caravan I noticed that the bottom edge of the central window was starting to separate. After some lengthy procrastination I’d have preferred to replace it but given the hefty price tag and the “It will be January next year at the earliest before we can get you one” type answers from suppliers and removing the window and shipping to off to a company for repair would cost almost the same as a replacement.

It can’t be beyond a diy task to repair. I did a bit of searching for information relating to repairs and one name kept popping up as the manufacturer of the product used to bond the two sheets together…Bondrite Adhesives Ltd.

After reading through Bondrite Adhesives Ltd website a couple of times to work out exactly with adhesive I’d need I ordered their WC112 acrylic adhesive. The 50ml size was £12.10 plus shipping and VAT bringing the total to £20.52. It arrived within 24 hours of ordering, was really well packaged and came with a detailed technical sheet and guidance notes.

I’m not going to do a blow by blow account of how to repair a delaminated window… as I don’t know if this is even going to work, but my first step was to support the window as flat as I could. The standard recommendation is to remove the window lay it on a flat surface and go from there. I didn’t want to remove the window as all I had to repair was the lower edge.

Improvising I used two stands with a cross beam clamped between them to hold the window horizontal. This should take any flexing stress caused by the window stays out of the equation…. Hopefully!

To hold the gap between he two sheets I used three long needles from syringes… this allowed me just enough wiggle room to slide some blotting paper with a bit of isopropanol alcohol to clean out any contaminates. I’d already tested this to make sure it was safe and it does evaporate very quickly.

You are advised to lay down a 5mm bead of glue… as this was going to be difficult between the two sheets of partially bonded plastic I opted to use a wide bore syringe needle on the glue bottle which allowed me to squeeze glue into the gap… it was a bit fiddly but I managed to achieve what I thought would be the right amount. Sliding the three previous inserted needles out to allow the sheets to come together I used some fairly light clamps to hold the pieces together while they cured. Bondrite do caution about NOT using an excessive clamping force as it can lead to crazing of the sheets.

The data sheet advice is that handling strength is achieved after about 3 hours at 20 deg C. I covered up the glued area with microfibre cloths to protect it from the sun and had a sit down with an iced coffee and a sammich.

Next Job…

If you read my previous post “Put Your Lights On Mate…” then you might have picked up on my request at the end for any recommendations for a UK supplier of good quality replacement LED bulbs. Well Peter Farnham posted in the comments section and recommended Classic Car LEDS Ltd ( https://www.classiccarleds.co.uk ). A couple of days later I dropped them an email with a few questions and Duncan replied back with some details. A few more exchanges of emails ended up with me ordering replacement LED bulbs for the new fog lights, indicator lights and stop/tail lights. This is not a sponsored post and I paid the required number of beer tokens for these.

Not much to say on changing the bulbs over… what was noticeable was though they did have a bit heft to them… they seem really really well made. No flexing, solid and just had that feel about them that made me go “Mmmm” while nodding slowly…. almost in a Joey Tribbiani moment.

I did try to do before and after photos to compare the light output…. even tried a short video with one side changed over and the other side on conventional filament bulbs… all failed…. not as easy as it looks in strong sunlight even though the caravan rear was in shade. However the photo above is one side converted over. This is showing the indicator, tail light and fog light lit. The indicators are really bright. Having the LEDS the same colour as the lens works well. The tail light is a strong red and bright while the fog light looks washed out and white… it’s down to the fact that it is so bright its over exposed…. the exposure is correct for the indicator and tail light but the fog light is amazingly bright.. and red.

On the VW Amarok I haven’t had any canbus warnings… I even plugged in my reader to check… all good and no strobing or hyper flash.

To say I’m chuffed with these LED bulbs is a bit of an understatement… if you suffer from rear light envy as you follow one of those gloriously illuminated trucks down the motorway, drop Duncan an email at sales@classiccarleds.co.uk and tell him I sent you. Sort out your rear lights and never again have someone with four megawatts of light bars and spots flashing you and shouting “Put Your Lights On Mate” as they simulate a starship going into warp drive passing you.

Another small job next…

I’d had this gadget for a while and I can’t remember where I got it from. I think it was from a caravan shop at a dealer near York that we visited a while ago.

Simply it’s a security head bolt with a hardened shroud that replaces the normal jockey wheel clamp handle. When it’s installed it is flush with the A frame cover and pretty difficult to get to. It comes with a short handle and socket that fits the security bolt head. I did try with a couple of sockets but the shroud makes it almost impossible to even knock a socket on with a hammer. So if anyone want’s to nick the caravan they now also have to contend with the hassle of getting round my jockey wheel clamp. As I always leave the caravan nose high in storage you can’t even pick it up and drop it on to a tow ball. Hey if it makes them try elsewhere… it works for me.

Thinking about the next step…

This is going to be a big one. I’ve been planning this for a few weeks now and it involves two or three drawings… some detailed planning and I’ve been checking equipment specs in detail. The last stage was to sit and stare at the space available in the caravan and work out Tetris style how it is all physically going to fit in and how much of the existing kit will be removed. More to come soon!

Back to the window…

OK I bet you have been wondering how I got on. Well after nearly five hours of curing time I disassembled my contraption holding the window open and it seems to have worked OK. I can see that it has bonded all along the bottom edge. I could have put a bit more glue in at one spot and needs a light clean up all along the bottom edge to remove what has oozed out. I’ll leave that for at least another 48 hours before attempting to gently sand it off.

All in all I’m pleased with the result and hope to see that it will stand up to the test of time.

Share this:

  • Click to share on X (Opens in new window) X
  • Click to share on Facebook (Opens in new window) Facebook
  • Click to share on Tumblr (Opens in new window) Tumblr
  • Click to share on Pocket (Opens in new window) Pocket
  • Click to share on Pinterest (Opens in new window) Pinterest
  • Click to share on Reddit (Opens in new window) Reddit
Like Loading...

Here’s Something I Think You Want To Take a Look At…

10 Monday Feb 2020

Posted by Simon Barlow in Accessories, Electrical, Gadgets, General, Maintenance, Modifications, Projects, Technical

≈ 9 Comments

Tags

Batbot, Battery Monitoring, IonOT, Kickstarter Project, Leisure Battery, vehicle battery

Something that caught my eye a couple of days ago really got me excited…. no not a new caravan ( I wish) but a Kickstarter project that I think is one of those simple ideas that has countless applications in all sorts of areas. In fact I keep thinking of more uses for it… and it’s not even my idea!

OK, so what has got me all worked up then? Well imagine getting messages direct to your email or phone telling you the voltage of your leisure battery, motorhome starter battery, canal boat battery, ATV battery, bike battery, solar powered shed battery, aircraft battery, golf cart battery, horse box battery or trailer winch battery. All from a little device that can simply be clipped on or permanently installed. Got you curious?

The company has recently been at the Scottish Caravan and Motorhome Show where they received lots of interest and loads of positive feedback. Still curious?

OK here the disclaimer thingy bit for Caravan Chronicles: I have no connection to these guys except I decided to back the project on Kickstarter. I have taken all the text and images below from IonOT’s kickstarter project page…

If you want to see the full project, follow the link to Batbot and see what you think.

Invented in Scotland by David Richie, Batbot came about from wearing two hats – one, from a career working in the technology sector, and the other, as a livery yard owner. With horse lorries stored on site in between use, he noticed a regular problem occurring. On the day of an outing, more often than not, there would be an early morning knock at the door from liveries needing help… their vehicle battery was indeed… flat. 

They had walked past their lorry every day, but had no idea that the battery was running low. This sparked an idea. Wouldn’t it be great if there was a device that could avoid this problem?! Batbot was born. After many hours, days, weeks and months  developing the concept and prototypes, here we are today, with a brand new product that will ensure flat batteries (and early morning wake up calls) are a thing of the past. 

Batbot is a device that every equestrian, marine enthusiast, motorhome or vehicle owner has missed… until now. 

This clever product monitors your vehicle’s battery and sends alerts to your mobile device or email when the battery requires charging.

How it works

Batbot simply hooks up via two croc clips (provided) to the battery points under your vehicles bonet and can be secured in place with a cable tie. 

Once installed the device then sends your battery’s data to the cloud where alerts are generated and then sent to your mobile device or email address. Unlike other products, Batbot uses the Sigfox or LoRaWAN radio networks to send this data, so no bluetooth connection is required.

Key Benefits of Batbot:

  • Quick and easy to use
  • Keeps track of your battery state
  • Alerts you when action is required
  • Saves destroying batteries with deep discharge
  • Regular daily “All Ok” status for peace of mind
  • No monthly SIM contract
  • First year subscription included
  • Low further yearly subscription (£7 ~ £10)
  • Chose Sigfox or LoRaWAN version of product
  • LoRaWAN has Home Gateway option to provide cover in remote areas
  • Helps identify when your battery or vehicle has an electrical fault. 
  • Avoids the vehicle not starting when needed for emergency or planned use
  • Save’s garage call out charges to jump start your vehicle
  •  24V lorries can be difficult to find a suitable jump start source for, or require a garage call out. Batbot helps you avoid this problem

For all the details and to see the full project go and visit the Batbot Kickstarter page and maybe you too might want to invest a few beer tokens.

Share this:

  • Click to share on X (Opens in new window) X
  • Click to share on Facebook (Opens in new window) Facebook
  • Click to share on Tumblr (Opens in new window) Tumblr
  • Click to share on Pocket (Opens in new window) Pocket
  • Click to share on Pinterest (Opens in new window) Pinterest
  • Click to share on Reddit (Opens in new window) Reddit
Like Loading...

Setting Up the Garmin Camper 770 LMT-D…

04 Saturday May 2019

Posted by Simon Barlow in Gadgets, GPS, Navigation, Sat Nav, VW Amarok

≈ 11 Comments

Tags

Garmin, Garmin Camper 770LMT, GPS, Review, Sat Nav, travel

Following on from my issues with our TomTom (Why I’m ditching TomTom and moving to Garmin… ) our new Sat Nav arrived a few days ago. I did look a the Snooper option, but there were a few limitations that I personally wasn’t comfortable with, but overall it looked a good product. I have had some great feedback from users of the Snooper and the company seems to have a really good customer service department.

I ordered our Garmin Camper 770LMT-D from Amazon ( https://amzn.to/2Vca1j4 ) for £256 and opted to add a SanDisk Extream 32GB microSDHC Memory Card (https://amzn.to/2Jem1JK ) for £10 which should give me flexibility in the future. That said, the internal memory on the 770 is already quite big at 15Gb.

Before the unit arrived, I downloaded Garmin Basecamp – there are downloads available for both Windows and Mac platforms. I also downloaded Garmin Express. Installing on a Mac was straight forward as usual. I can’t comment on the Windows version as we have not owned a Microsoft platformed device for over 13 years.

While writing this I found out what the LMT-D stands for… LMT is Lifetime Maps & Traffic and the D is DAB Radio reception.. it receives traffic updated via the inbuilt DAB radio receiver. No it can’t play DAB radio stations before you ask.

Garmin Basecamp

Screenshot 2019-05-04 at 11.37.53

When you first install Basecamp is comes with a default Global Map….

Screenshot 2019-05-04 at 11.37.25

It is not until you connect your GPS and download the updated map from it does it have all the fine detail and pre installed POI’s.

Screenshot 2019-05-04 at 11.44.12

I have zoomed in to Holyhead here….

All the pre installed POI’s from the GPS show up and it makes it easy to have a mooch round the area from your desk when planning a route. I’m not going to go into too much detail about setting up your own POI’s (although they are really waypoints in Garmin’s world) or setting up Routs, tracks etc. I did find it really easy to follow Garmin’s on line video tutorial. However it took me a couple of go’s to get the information I wanted in the right fields.

Screenshot 2019-05-04 at 11.52.05

Here I set up a waypoint for Southport C & M Club. Really easy and only took less than a minute. By installing Garmin Basecamp before actually receiving the 770, it gave me a chance to sit and play about with the software before getting too distracted by the new gadget. I set up about 50 waypoints, sorting them into various categories – C & M Club, Museums, Ports, Friends etc. As I was unsure what actually came pre-installed I thought it might be best to get a head start on the most common ones.

What’s installed on the Camper 770?

Really I need not have bothered too much. The Garmin Camper 770 comes with ASCI, MHF, Campercontact as well as Trip Advisor & Foursquare databases already pre-installed. As it connects to WiFi and via a phone App to the internet, you can pretty much search for any location or attraction. I’ve set ours up so it connects to the Amarok’s WiFi system for permanent internet access. You can also install Archie’s database too if you think that you need all the bases covering.

First Job – Update the 770

First job was to update the Garmin 770 with the latest maps and databases. To do this you need to install Garmin Express. Once installed, simply connect the GPS with the supplied USB lead and follow the on screen prompts. To get to the point where it starts to update only took a minute or two… inputting an email address really and naming the unit so if you have multiple Garmin products you can easily identify which GPS you have connected. It estimated that it would take around 2 hours to perform the download and all the updates, in reality it took less than 30 minutes.

Screenshot 2019-05-04 at 12.34.38

Setting up the vehicle and vehicle options came next. Again really simple to do. I found the menu system is quite simple to navigate through, and it didn’t take too long to set up our rig…

81976

You may notice the “80” Kmh sign in the top right corner. As you can input the weights of the vehicle, caravan, motorhome into the unit. It will keep an eye on the speed limits on roads. In europe where a lot of countries have lower limits for vehicles or towing combinations above certain weights…. France for example has a 3.5t cut off, above this weight and you have a lower speed limit that say a car and caravan under 3.5t on the same road. I’m sure motorhome owners who regularly travel in Europe will be more aware of these rules.

I could have got away with just the standard CAR setup for the Amarok when not towing, but as the Amarok has a body width of  1954mm (6’5″) and maximum of mirror to mirror with of 2228mm (7’3.5″) (5321mm or 17’5.5″ long if you are playing top trumps!) sometimes on a couple of width restricted roads I have had to really squeeze through, so I thought I’d set up a motorhome setting with the Amarok’s size just so I wouldn’t get caught out. And yes… that weight is correct. The MTPLM of the caravan and MPM of the  Amarok totals 4770 Kgs and there are a couple of  bridges in the UK I can’t legally tow over!

The Installation…

I’m a bit of a…. well I don’t know, when it comes to getting things right. I sat in the truck and moved the 770 around… placing it almost everywhere. I wanted it so it could be reached from either the driver or passenger seats, but not too close as it might fall into that focal length area where it’s just outside the range of either part of my bi-focal’s. I wasn’t happy with all the options available. So I thought tomorrow might bring inspiration. However all tomorrow brought was the same ‘Umm….” and “Nope…..”. The third day however did bring fourth a result….

I still wanted access to the top tray, but placing the GPS on the windscreen with the suppled mount was not an option. One, I hate things stuck to the windscreen and two, neither Sue or I could reach the screen from our normal seating position. So off to the bat cave to come up with a cunning contrivance. Half an hour later after shaping and bending some 1.5mm thick aircraft aluminium and a quick application of anti glare black… (I also followed that up with some anti glare cloth tape we used in aircraft cockpits)

IMG_1630
IMG_1628

It still uses the Garmin quick release mount and has the flexibility to adjust fully either way and tilt down to minimise glare if the sun is reflecting directly on it (the screen is super bright though max and hopefully this won’t be a problem). We can both still reach it and the tray in front as well as being fully accessible is a convenient place to wrest your wrist while inputting info into the GPS. I have found though the Voice Command understands a “Manc” accent really well and i haven’t had any issues using voice command.

What I like…

I do like Basecamp. I’ve found out that I can overlay OS Landranger maps which makes plotting very accurate walking routes and printing them out easy. I can also create accurate Green Lane routes for off road 4 x 4 treks and import them into the 770. You can also convert Google Map routing and import it into Basecamp and your GPS. Now this is really useful. For example… setting off from Manchester about 04:00 going to Dover to catch the 10:00 ferry sailing, however I need to fill with LPG en route. I set my departure point, arrival point and search for LPG closest to my route. I can then pick one see the estimated arrival time at that point (check that the LPG station is open) and adjust my route to take in the LPG waypoint or choose the next LPG station if I am going to arrive too early.  This can then be uploaded to the 770 as a route and will adjust around traffic still directing you first to the LPG station then to your destination.

Within Basecamp you have an option to upload your waypoints to either the 770’s internal memory or the Memory Card. You can also update the memory card by removing it from the 770 and connecting it directly to your desktop device. I’ve chosen to install all my info on to the memory card rather than the 770’s internal memory… did I really need a memory card? At this point probably not but it has allowed me a bit more flexibility and when I ordered the 770 I didn’t know just how much space I’d be left with, at the moment I’ve used about 10Gb of the 15Gb internal memory. You do have the option to install additional maps on to the memory card, so for example if I wanted North America I could install it onto the removable card. There is security built in to stop maps downloaded on one device being transferred to another device.

I found the updating of the 770 using Garmin Express to be really easy too. I have been checking it every day so far just to get a fell of how often the updates come through. So far I’ve had three updates after my initial first download. I tend to suspect that maybe Garmin have a more frequent update policy, which could be a reflection of the aviation side of the business where updates are tightly scheduled and frequent to reflect any airspace and NOTAM updates. I did note that one or two things and functions in route planning within Basecamp seemed strangely familiar… until it clicked…. I’d seen and used them before in flight planning applications.

There is a couple of other features that I’ve not had before. The Garmin 770 records all your tracks… now this is really handy so when Sue say’s “Do you remember we passed such and such the other day… can we go back?” Well, I can usually remember the vague details… but being able to bring up the route we drove and doing a bit of investigation using Garmin Basecamps opens up the possibility of being able to find it again without having to resort to a darkened room, angle poise light and an impression of Herr Flick.

The other is the ability take a snapshot of the screen. I used it for a few screen shots ( like the one above showing the vehicle set up) and a few I’ve taken for a full review. I don’t know if this is a ‘feature’ that is not really a feature as it’s noever gets used…. or if it’s something I might use in the future. Might be handy for quick maps of trips or places, there again it might not. Jury’s out on that one.

I’m not able to give a full review… as we haven’t been anywhere with it yet so I can’t comment on traffic updates, turn by turn instructions, general usability or function. we are off in the next few days for five days so I’ll let you know how we get on.

… and for all those pilots out there the classic ATC…. “Resume own navigation”

Share this:

  • Click to share on X (Opens in new window) X
  • Click to share on Facebook (Opens in new window) Facebook
  • Click to share on Tumblr (Opens in new window) Tumblr
  • Click to share on Pocket (Opens in new window) Pocket
  • Click to share on Pinterest (Opens in new window) Pinterest
  • Click to share on Reddit (Opens in new window) Reddit
Like Loading...

Why I’m ditching TomTom and moving to Garmin…

27 Saturday Apr 2019

Posted by Simon Barlow in Accessories, Gadgets, GPS, Reviews, Sat Nav, Uncategorized

≈ 17 Comments

Tags

Customer Service, Garmin, Grmin Camper 770LMT, Sat Nav, TomTom Go Live Camper & Caravan, TomTom Problems, TomTom Sat Nav

This isn’t one of my usual posts, but if you use or are thinking of a TomTom device, I’d urge you to read on…

We have used TomTom sat nav products for a number of years. I think it was early 2006 when we bought our first TomTom, a TomTom 760. After we had some questionable routing while towing in France and a number of issues with the unit simply failing  to respond to commands on an early morning departure from a site in France in heavy rain in the dark.  In April 2013 we ‘upgraded’ to the TomTom GoLive Camper & Caravan version to take advantage of the features this offered in navigation and database. Something that at the time was not offered on any other device. I wrote a review of the device Review of the TomTom GO LIVE Camper and Caravan Sat Nav and followed that up with an update some time later when they updated their database update platform from “MyTomTom” to “MyDrive”. This change over was not without issues and resulted in me loosing my subscriptions… which involved a lot of back and forth with their support line until I eventually got my subscriptions back. I did post an update to my review with a new conclusion… UPDATE — Review of the TomTom GO LIVE Camper and Caravan Sat Nav. Creating POI’s off line to upload was not straightforward and I followed that up with a ‘how to’…. Create accurate POI’s for your Sat-Nav…

My ‘investment’ in TomTom was not only time, but I came to realise that it was quite a substantial financial investment too. Back when I did the original reviews I commented that the ongoing costs were around £100 per year for the map, traffic and speed camera updates. It wasn’t until recently It dawned on me how TomTom try to hide this cost.

When you buy the unit, you get 12 months updates free. However at some point they have an “offer” where for a slightly reduced cost you can get and extra two map updates.. or an offer that gives you an extra few months ‘free’ for your traffic updates. What this does is move the subscription dates round so instead of paying a £100 for 12 months in one lump sum you pay £20 here and £30 there over the course of a few months. In effect hiding the real annual cost of subscriptions. So if you work it on £100 per annum  from my original review the unit we have currently has actually cost £600 in subscriptions. Add that to the original purchase price of £330 thats a massive £960 “investment” and I’m not including the cost of two additional vehicle mounts and hard wiring them in!

The Final Straw…

A few weeks ago, just before we were off to Meathop Fell Caravan & Motorhome Club site near Grange-over-Sands, I went through my normal routine of firing up MyDrive to check on the number of updates pending, connecting the TomTom and performing the updates. The MyDrive (and previously MyTomTom) have never been particularly fast on either downloading updates from TomTom and in particular pushing the updates to the device. At home I’m on about a 80Mbps broadband connection and generally never have issues moving large files about either on my own network (1Gbps switched Ethernet) or to and from the internet. We have not had a Microsoft driven PC in the house for over 14 years now, but I do have a number of Mac devices to hand. I digress.

I had a new map update pending and the usual cameras and other bits. The map update used to take about 20 minutes to download and around 45 to 50 to push to the device. I left it all connected and waited patently. No more updates pending, I checked the GPS unit and all seemed well, disconnected the Mac (yes I did do it correctly) and all still seemed well.  Check the entry for Meathop Fell to get an idea of expected travel time and it worked fine. So I switched it off.

Couple of days later Sue was going somewhere and telephone me to say the GPS isn’t working. When she returned home I fired up the TomTom… got the usual splash screen picture of the motorhome on the road….… And waited…… and waited a bit more….. Finally….. black screen with the TomTom logo up the left hand side. “Ah” I thought “It has done a full shutdown” so I waited… and behold the splash screen with the motorhome appeared. “Sorted!” thought I. Wrong was I! Back to the black screen with TomTom up the left hand side followed a few seconds later with the splash screen… and it just kept on with this cycle. Oh bugger.

There is a way of doing a hard reset… turn on the unit and continue holding the power button down and clicking it three times,  wait for the spinning cog and connect to a computer running logged in MyDrive… did that too. Best ‘consult’ Google at this point.

Googling “TomTom keeps resetting” brought up the usual links. However one caught my eye…. On the TomTom help forum dated a few days ago… clicked on it. Yo… other people having the same issues with the camper version after the last map update. Now for copyright reasons I can’t post any screen shots from the forum (I do have them) but there were a number of people with a similar issue to me. There were the usual “Try taking it to the southern hemisphere and turning it on there that cured my problem” type replies and a couple that basically said try the same as I’d already tried.

Initial contact with ‘Help Desk’ was…. “you need a new one” which kind of pee’d me off somewhat and so I tweeted and got a reply…..

Screenshot 2019-04-27 at 09.39.53

Now that reply from TomTom is intriguing. They must have known there was an issue as ‘HelpDesk’ first response was “You need to buy a new one” and that means they must have been primed with that answer. A point that might indicate this is the fact in the tweeted reply they say serial numbers starting ST are supported but others are not. Also the final bit “…. which is why support offered a new one.” is wrong…. they said I have to BUY a new one.

Screenshot 2019-04-27 at 09.38.53

At this point TomTom asked me to DM them with a serial number. Which I did.

Screenshot 2019-04-27 at 09.38.22

… and here is their reply (obviously rating forth bottom tweet upwards)…

Screenshot 2019-04-27 at 09.59.13
Screenshot 2019-04-27 at 09.59.42

It was at this point TomTom went quiet on the Twitter front. So I Asked a Question on their web site…. here is the exchange in full. (click on the image to open in a new window if you can’t zoom in to read).

Screenshot 2019-04-27 at 10.07.47
Screenshot 2019-04-27 at 10.08.08
Screenshot 2019-04-27 at 10.08.29
Screenshot 2019-04-27 at 10.08.56
Screenshot 2019-04-27 at 10.09.12
Screenshot 2019-04-27 at 10.09.23

All the way through this there was no hint of “We acknowledge there may be a problem and are looking into it”. I suspect they know there is an issue and are seeing it as an opportunity to sell some more units and make money from continued subscriptions for their services. It is painfully obvious that I’ll not see a refund for the residual of my pre-paid subscriptions (around £70 or £80 in my estimation) or much hope for any other user that has been affected. I counted around ten people on one post in the forum that were reporting issues.  Also at no point was any indication of how much the “discount” on a new unit would be. Plus as the discount would probably be applied to their list price, not the price the unit was generally available for from some on-line stores I suspect it would not be a good deal anyhow.

Why Garmin?

Basically as i understand it there are two other players in this market, Snooper and Garmin. Avetex have a rebadged Garmin. The Snooper I discounted a while ago as back then you could not upload your own POI’s and they didn’t have an update service via a Mac, only a Microsoft PC. This may have changed, but I decided to go for Garmin.

My association with Garmin goes back several years… intact to around 1996 when I bought a hugely expensive (for the time) Garmin 92. The 92 was one of the first hand held aviation GPS units you could clamp to the aircrafts yoke and it came with a database of all the VOR’s, NDB’s, TACAN’s and ground obstacles along with restricted airspace. all displayed on a 2 wide by 3 inch high monochrome LCD display. From that point I’ve always had Garmin GPS in every aircraft I flew and relied on them for RNAV approaches into airports in minimal weather conditions.

SPB_K_002206

The Garmin system in the Bonanza….. and below the same system showing us flying East (090) from Magadan in Russia to Nome, Alaska approaching the international date line…

IMG_1692

So, I’ve got around 23 years experience of Garmin’s aviation navigation products, time to try their earth based stuff!

Looking forward…

I ordered a Garmin Camper 770LMT-D 6.95 inch sat nav with Full Europe Lifetime Maps, Free Lifetime Digital Traffic, Bluetooth and Wi-Fi for £255.27 from Amazon yesterday. Todays Saturday and it’s due to arrive Monday morning. I look forward to testing it out and giving it a bit of a review. I have already downloaded Garmin Basecamp and got the hang of creating way points… really easy in fact. DOn’t quite know the upload to the device process yet!

For those that follow @CaravanChron on Twitter… you may remember that I was offered a Garmin unit by a company to try. Well, I declined. One of the reasons being is I don’t generally like doing reviews or recommendations based on a loaned bit of kit. If I say “yea.. I like it I’d recommend it” and it subsequently turned out to be not as promised, then I’d feel like I’d done you a disservice. If I buy something and say I like it and would recommend it and it turns out to be crap, well I’m in the same boat as you… we both paid for it and we both got stung.

Epilogue

Just as a final ending to this, if perchance TomTom do sacrifice some small fluffy animal and decide the Gods will smile on them again if they sort out my GPS or even offer a refund,  as it is now a point of principle with me about failed customer service, Sue and I agreed any refund will be donated to our local Cat Charity.

I’m sure Oscar and Henry would approve….

IMG_1484

Foot Note

What do I think is wrong. Well I guess in either the map database update or in some additional packet of code that was uploaded designed to update the operating system (OS) of the device [firmware] there was a corruption or error. What is happening with my device (and I can only speak for my device as I’ve not had hands on with any other) is during boot up it is failing some internal OS checksum… which results in a reboot. However it’s now in a loop. This happens before any port is enabled the would allow data transfer. Most system designers build in right at the start of the boot up process a piece of code that states if some ‘condition’ (I.E if this button is held down on start up, boot from external port only) is met. This allows a device to be accessed if it falls into the startup loop. Maybe TomTom have a way of directly connecting at a board level or a number of key presses that allow this interruption to the boot process, but alas I don’t know them. So now it is caught in a loop before any eternal communication from MyDrive can take place and stopped any chance of downloading new firmware or firmware patch.

Share this:

  • Click to share on X (Opens in new window) X
  • Click to share on Facebook (Opens in new window) Facebook
  • Click to share on Tumblr (Opens in new window) Tumblr
  • Click to share on Pocket (Opens in new window) Pocket
  • Click to share on Pinterest (Opens in new window) Pinterest
  • Click to share on Reddit (Opens in new window) Reddit
Like Loading...
← Older posts
Buy Me A Coffee

Blog Stats

  • 45,897,966 hits
Follow Caravan Chronicles on WordPress.com

Follow Caravan Chronicles and receive notifications of new posts by email.

Some previous posts you may like...

My last post….

Many thanks to all my friends. As I write this I’m in the Christi hospital hoping to go home in a few days. I was told about a week ago that I had about 3 months to live and should start preparing my affairs. Which Sue and I are trying to do. I have some…

A Bit Of A Tour…

Well not really a tour, only two locations. The first leg was down from Manchester to Glastonbury and a stay at The Old Oaks. We first went there in 2012 and had five or six more visits in the next four years. So it had been quite a while really. We were located in the…

What’s The Question I Get Asked a Lot?

“What’s in your toolbox when travelling?” Tricky one… I don’t have a tool box anymore. I recently started mooching around the internet for a smaller tool box… or rather a tool bag. I used to use up until a few months ago a Stanley Tool Bag. It was lighter than a tool box, I could…

#Tourfest North West

Tourfest North west was our first time attending anything like a gathering of bloggers, vloggers and the generally like minded. It was organised by The Caravan Addys with a little help from others I’m sure as it must be a time consuming task and hard work to bring everything together. We opted to arrive at…

More Jobs Ticked Off…

OK we are still working on a few bits and pieces but the weather on Friday and Saturday was ideal for cleaning the outside of the 5th Wheel. So while Sue made a start on the cleaning of the nose cap, I finished the first stage of the water pump relocation project and upgraded the…

A Few More Jobs Ticked Off The List…

Like any project, ticking the small stuff off a list is the way to move forward even if it seems like sometimes you have ground to a halt. A bit lacking on photos…. I’m temporarily unsure of their location… pilot speak for I’ve lost them! I’ll correct that in due course. I built a new…

A Few Little Jobs Done…

It seems such a long time since I posted anything. Last time out with the Dreamseeker I noticed that the charging voltage when we were hooked up to the truck was only about 12.1 to 12.3 volts as measured in the Dreamseeker battery box. I know that the VW Amarok puts out 14.6 to 14.8…

Happy New Year…

Happy New Year to everyone, I hope you have a great touring year ahead. I’d like to take this opportunity to give you a bit of an update on my personal circumstances and a look forward to a couple of projects I’m planning to kick off our year. First… … A HUGE thank-you yo everyone…

Sutton-on-Sea In September

Just like to say a huge thank you to so many people that have commented or emailed me over my last post. It has cheered me up no end…. it really has. Enough to rattle this post off! We recently went back to Cherry Tree Springs at Sutton on Sea for an 7 day break.…

This Might Be My Last Post…

Not clickbait…. Three weeks ago Sue and I were cycling between 8 and 10 miles each morning to get a morning coffee. Arrived back home and…. well time stopped. I had received notice that my test sample for Bowel Cancer screening had come back positive. Two days later I underwent a colonoscopy procedure which didn’t…

Something went wrong. Please refresh the page and/or try again.

  1. Dave Hart's avatar
    Dave Hart on How to: Connect two batteries in parallelAugust 27, 2024

    brilliant and so well explained! Thank you, love your work!!

  2. Simon Barlow's avatar
    Simon Barlow on Caravan Road Lights – Basic Fault FindingAugust 25, 2024

    Please look at my very last post on the blog

  3. Martin's avatar
    Martin on Caravan Road Lights – Basic Fault FindingAugust 25, 2024

    martin here caravan lights worked fine for two stop overs I had then hooking up again for my third trip…

  4. Emmy’s Camper Travels's avatar
    Emmy’s Camper Travels on My last post….August 25, 2024

    I’m so sorry. My sincerest sympathies go to you and your wife Sue. Your ideas and advice have been so…

  5. Steve Walsh-Jones's avatar
    Steve Walsh-Jones on My last post….August 22, 2024

    very sorry to hear this. Your posts have been very informative and enlightening providing an in depth view on different…

  6. thetwinaxletouringscouser's avatar
    thetwinaxletouringscouser on My last post….August 22, 2024

    Good heavens above Simon I am ever sorry to hear of such devastating news for both you yourself and Sue.…

  7. Eileen's avatar
    Eileen on My last post….August 22, 2024

    Simon and Sue, thank you both for sharing your passion for caravans with us. The news is extremely sad, our…

  8. Philip Parkes's avatar
    Philip Parkes on My last post….August 22, 2024

    Simon. So sad to read you last post today. Our thoughts are with you and Sue at this time. Whilst…

  9. Philip Parkes's avatar
    Philip Parkes on My last post….August 22, 2024

    Simon. So sad reading your post today. Our thoughts are with you and Sue at this time.

  10. Philip Parkes's avatar
    Philip Parkes on My last post….August 22, 2024

    Simon our thoughts are with you and Sue.

  11. Luke Tarrant's avatar
    Luke Tarrant on My last post….August 22, 2024

    Very sorry to read this and my thoughts are with you both at this time.

  12. Alan Smith's avatar
    Alan Smith on My last post….August 22, 2024

    Dearest Simon. I have never met you, but I feel as though I have some (limited) knowledge of you and…

CaravanChronicles.com Tag’s…

5th Wheel Caravan 13 Pin Plug Accessories AL-KO Avtex Bear Extender Bike Rack Blackpool Blackpool Illuminations blogging Cadac Camping & Caravanning Club Canterbury Caravan Caravan Blog Caravan Club Caravan Electrical Caravan Electrics Caravanning Caravans Caravan Show Caravan Talk Cheltenham Chirk Christmas Market Christmas markets Cleaning design Event City Factory Visit Fiamma France Freelander Glastonbury Glossop Caravans Humor Insync Jonic Bedding Lady Heyes La Tournerie Ferme Leisure Battery Leisure Battery Charging LPG Refilling Maintenance Manchester Caravan & Motorhome Modifications NEC North Western Caravans Ltd OLPRO One Hairy Caravanner Oswestry Oxford Product Review Project Review Safefill Sat Nav Sterling Caravans Sterling Power Wildside Swift Factory Swift Group Swift Talk Technical The Old Oaks Touring Towing Tow Vehicle Trafford Centre travel Travel Trailer Travel Trailers vacation VW Amarok Warwick Racecourse WiFI

Website Powered by WordPress.com.

  • Subscribe Subscribed
    • Caravan Chronicles
    • Join 672 other subscribers
    • Already have a WordPress.com account? Log in now.
    • Caravan Chronicles
    • Subscribe Subscribed
    • Sign up
    • Log in
    • Report this content
    • View site in Reader
    • Manage subscriptions
    • Collapse this bar
 

Loading Comments...
 

    %d