• Home
  • Help Guides
    • Storage Sites
    • Equipment Reviews
  • Document Library
    • Electrical Drawings
  • Photo Gallery
    • Caravan Log
    • MPG
  • Trip Map
  • Shop
  • About Caravan Chronicles…
  • Contact
  • Links

Caravan Chronicles

~ not just another caravan blog

Caravan Chronicles

Category Archives: Caravan Servicing

Getting All Charged Up – Part 2…

26 Wednesday Apr 2017

Posted by Simon Barlow in Caravan Electrics, Caravan Servicing, Electrical, General, Maintenance, Modifications, Projects, Technical, Uncategorized

≈ 10 Comments

Tags

Battery Charging, Leisure Battery Charging, Maintenance, Project, Sterling Power, Sterling Power Wildside, Technical

Planning the Install

Remember the Six P’s… “Proper Planning Prevents Piddling Poor Performance”… or something along those lines! Before we start hacking away at the multitude of cables (and my email inbox fills up with help requests) we need to pull out the relevant electrical schematics from the handbook. Our caravan is a ‘dealer special’ based on a 2011 Swift Europa 550 fitted with a Sargent PSU.

We can see from the schematic below that the 13 pin plug enters into the caravan and terminates with two connectors – FB6 and FB7 on fuse unit C44 which in our caravan is located just next to the front draws near the water pump. FB6 is all the road lights and we can ignore this.

Socket Connections

The cables we are interested in are from pins 9,10,11 & 13 which are coloured Orange, Slate Grey, White/Black and White/Red respectively and terminate in connector FB7. We need to now look for these leaving the Fuse Unit and heading off to the PSU.

The most likely candidate will be connector FB2 with four cables going to connector P1 on the PSU. If they are all 2.5mm²  it’s a good clue these are the ones we want. We will need to check these with a multimeter though to be sure. The colours have changed too so we will need to confirm what the new colour is for each circuit.

Socket Connections 2

So that’s the input side of the Wildside potentially sorted out, now we have to find the fridge connections. Looking at the schematic for the Power Circuits we can see that the fridge is connected via four cables. One directly to Neutral and the other three to P7. We can also see from this schematic that the leisure battery is connected to P2 via a 20 Amp fuse. This tells us two things – the wiring is rated for 20 amps and we will have to upgrade the cable size from the Wildside unit to the leisure battery.

Fridge Circuit

For the fridge… We are interested in the two cables that power the heating element and on the drawing they are coloured W/B and R/Y (White/Black and Red/Yellow) and originate from connector P7 on the PSU.

Fridge Circuit 2

We have now identified on the schematics the cables we need to look for and where they run from and to. Next step is to create a new schematic using the information from these two drawings to show how we are going to connect in the Wildside unit.

To The Bat Cave…. err Drawing Board!

If you are handy at using a drawing package such as Sketch-Up or similar (I use “AUTODESK® Graphic” on my MAC) you can have a go at drawing it out, or simply just use a sheet of paper. The important thing here is you DO draw it out.. this is not an option, its a mandatory task!

TIP: If you are drawing this out by hand on a sheet of paper, it might help to photocopy your caravan schematics and cut out the relevant sections… like the fridge and stick them to your drawing to make it easier.

So here’s my efforts….

Wildside Wiring 01

If you remember in part 1 I said we will need to make five connections…. not including the neutral. Well we have the five connections. After looking at the layout I decided not to cut the current leisure battery connections to upgrade, but to install a new Positive and Neutral cable alongside the original cables. This will mean however I will need to drill a new hole in the battery box and install a sealed cable gland.

The three cables that we cut on P1 that are now unconnected should, in theory not be part of any circuit. However to be sure I’m going to terminate both the neutral cables (originally connected to Pin 11 and Pin 13 to the neutral point on the Wildside unit.

The cable that was originally connected to Pin 9 I’ll just crimp on a blind connector and secure out of harms way. I am not sure if this might need to be connected to a +ve supply. There are a couple of things that I’ll need to check, for example, the toilet flush always works when the caravan is connected to the tow vehicle – with or without the engine running ( handy if a quick P(it) stop is required!).

Now… To The Bat Cave!

Well it might be a couple of days as I have just ordered a few bits and pieces I don’t have in stock in the workshop… and I’m still procrastinating whether to do the install as a video to accompany my written ramblings.

Coming up in part 3. I attempt not to destroy our caravan, do a lot of crimping, consume a lot of coffee and I may be swearing a lot on camera!

Share this:

  • Share on X (Opens in new window) X
  • Share on Facebook (Opens in new window) Facebook
  • Share on Tumblr (Opens in new window) Tumblr
  • Share on Pocket (Opens in new window) Pocket
  • Share on Pinterest (Opens in new window) Pinterest
  • Share on Reddit (Opens in new window) Reddit
Like Loading...

Getting All Charged Up – Part 1…

25 Tuesday Apr 2017

Posted by Simon Barlow in Boondocking, Caravan Electrics, Caravan Servicing, Electrical, Gadgets, General, Maintenance, Modifications, Off Grid, Product Review, Reviews, Technical, Tow Vehicle, Uncategorized, VW Amarok

≈ 6 Comments

Tags

Euro6 Engines, Leisure Battery Charging, Maintenance, Project, Regen Braking, Sterling Power Wildside

If you are a regular reader you may remember a couple of posts I wrote about leisure battery charging in caravans and motorhomes (Smart Alternators: how they affect Caravans and Motorhomes…. and NEC Show Roundup – it’s all technical…) and I linked to a few videos that Charles Sterling from Sterling Power has produced covering charging topics and Euro6 engines. At the recent NEC show Sterling Power were featuring a new product that would soon be available that would solve all the issues for caravan owners that were experiancing towing with vehicles that had “smart alternators” which were are standard on Euro5 and Euro6 engines and the issues around regenerative braking on Euro6 engines. Charles promised to send me one of the first pre-production “Wildside” Battery to Battery chargers specifically designed for caravans.

IMG_1127A couple of days ago I was excited to receive   a package from Sterling Power containing one of the pre-production new “Wildside” units. The unit itself is robustly constructed and weighs in at about the same as a bag of sugar – 1Kg.

It comes with a comprehensive 11 page instruction/installation manual that goes through all the steps that you need to install the units and what all the various lights and connections are on the unit itself. For anyone that is familiar with my electrical drawings, Sterling have based their installation drawings on my format so are easy to understand (in my opinion!).

I’ll state now for the record, Sterling Power have sent me this free of charge to install and evaluate and that is what I’m going to do, but I will be honest and tell you if I think there are any issues with the installation or the unit in the way that it operates.

IMG_1131

Looking at the connections for the unit it all looks straight forward. The circuit board is labelled  exactly as the drawings in the installation manual which is reassuring and the manual goes into the various functions of each connection and the programming of the unit.

Why this unit?

Since we had changed from using our 2006 Land Rover Freelander HSE as our primary tow vehicle to our 2016 VW Amarok Atacama I had noticed that our leisure battery was not getting close to a full charge even after towing for a couple of hours. We don’t have a solar charging system installed and relied on the tow vehicle and EHU when on site to keep our leisure battery topped up. I knew about the limitations of smart alternators and have written about them before and answered lots of emails about problems readers were now experiancing. Up to this point I really didn’t have an answer to most of the problems and I was considering going down the same route as our Australian cousins and installing some hefty cables between the tow vehicle and caravan, connected together with Anderson connectors. Works fine down under and would do here, especially coupled with one of Sterling Power’s B2B units which I had been looking at.

Now this would be ideal for us, but anyone who tows using a company car, a lease vehicle or a vehicle on a LP scheme can’t just go ahead and install stuff willy nilly. Unless it is done right, it has the potential to be a bit of a ticking bomb as well and  if I was going to recommend it as a solution there are very few people with experience to do an installation of this type. I have seen some right botch jobs on heavy-duty cabling by so-called “professionals” when installing simple winches and dual battery systems on 4 x 4 off road vehicles. Using a lump hammer, cold chisel and block of metal is NOT the professional way to crimp battery cables!

I was looking round to see if there were other options and talking to the chaps on the Sterling Power stand at the show told me they had a product in development that might just be the solution…. and here we are!

How does it work?

I’m not going to give you chapter and verse on the internals (some of that would be guessing on my part and some is propriety information anyway) so I’ll simplify it as much as I can.

In current tow vehicles you have two connections that supply power to the caravan – one for the fridge which is only live when the engine runs and one for charging the leisure battery which is usually live all the time.  Now the problem is that as it’s quite a distance from the front of the vehicle where the battery and alternator are to where  the leisure battery and fridge are located in the caravan. The size of the cables providing the connections are key to how efficient it all works.

Nearly all good quality tow bar wiring uses 2.5 mm square (2.5mm²) cable for these circuits and they connect between the tow vehicle and caravan through a 13 pin plug and socket (or 12N & 12S in older vehicles). The problem with all this is down to good electrical ‘laws’. In essence the more current you draw through a length of cable the greater the voltage drop ( I go into a bit of techie detail about it here… Understanding Cable and Cable Sizes ) Some people go to the lengths of re-wiring the circuits in 4mm² or even 6mm² cable, which was OK up to a point… usually the point which is the connection between the vehicle and caravan. With the traditional installation what you end up with is two circuits that the voltage is usually too low to provide a good charging capability for the leisure battery and the fridge circuit that might or might not, depending on voltage drop, have some spare capacity but you can’t use it to charge the leisure battery.

Back to the Wildside unit…

What the Wildside unit does and this is really clever, is it takes over the two power circuits, aggregates them and manages the output. It draws the maximum current available through each of the two circuits and provides an output for the fridge always at the correct voltage to maximise the efficiency of your fridge and protect it from the voltage fluctuations inherent with Euro6 and Regen engines and any spare capacity on this circuit it added to the leisure battery charging circuit, steps up the voltage and provides a separate output via a four stage intelligent battery charger to maximise the charging capability to your leisure battery.

This is a very very simple one paragraph explanation, it does have a few other tricks up its sleeve though.

One feature is the “Remote Mode Select” switch option. This allows you to install a switch that will allow you to turn the unit to “Wildside”, “Boondocking” or “Off Grid” mode and run the fridge as though it was being powered from the vehicle. It is actually being powered from the leisure battery.

Take note though… Most caravans and motorhomes are fitted with absorption fridges which use a heated element that is constantly on to make the fridge work. However some motorhomes ( I don’t know of any caravans) are fitted with the more expensive and vastly more efficient compressor fridges which work exactly like your fridge at home but can’t run on gas. If you are camping off grid for a few days with an absorption fridge, then run it on gas. However if you are worried about your fridge not maintaining temperature on an hours ferry crossing or on a euro tunnel crossing then you can use the switch to keep the fridge running. The period you can power it will depend on the capacity of your battery(s)… I would not advise using it with and absorption fridge on a battery bank with anything less than 110Ah capacity.

If you do use this feature on the Wildside unit, it will protect your battery bank from discharging past the safe point by turning off the fridge when the voltage reduces and reaches a critical point that would damage your battries.

You also have the ability to specifically select the type of leisure battries you have installed – GEL I, GEL II, AGM I, AGM II, Sealed, Open, Calcium, LiFePO4 to get the correct tailored charging and maintenance program for your battery bank.

If you are fortunate to have lithium leisure batteries there are a couple of other connections you will need to check out too.

Installation Considerations…

We know what it does so how do we connect it. Well this is where it could get messy unless we have a plan.

IMG_1132

In essence, what do we need to do? Well we have to cut and divert the incoming pin 9 and pin 10 into the Wildside unit and connect one output to the leisure battery. We also need to disconnect the fridge from the caravan’s original control box and reconnect it to the Wildside unit. As the habitation relay is usually buried inside the original control box we need to be able to control this from the Wildside unit. There is a terminal for this (“CVan Dis Output”) but what do we connect to this to make the habitation relay operate correctly?

The original Pin 10 lead that we cut and diverted into the Wildside unit, the other end of this still goes into the installed control box and this will operate the habitation relay. Remember we disconnected the fridge power lead from the installed control box and reconnected it directly to the FRG+ output on the Wildside unit so all it does now is operate the habitation relay.

So summing up, we have to cut 3 cables and re-terminate 5 ends into the Wildside unit. This of course does not include the neutral connections which will be easy and straight forward.

Other Considerations…

The installation of the Wildside unit must be easily reversible so it can be moved to another caravan at some point in the future.

We must also use the correct size cables to connect to the leisure battery as we will now be charging at higher currents than was possible before, the original cable that was installed in the caravan to connect to the leisure battery may not be of a sufficient rating.

We must document the changes properly so that at some point in the future someone can follow what we have done incase they have to fault find.

We must make sure all the connections and general installation are done to a high standard to ensure the installation is safe.

Finally we must be able to do the install without invalidating any warranty on the original installed control unit (i.e. not opening it up) and retain functionality of all the elements of the caravans electrical system. It’s no use installing the Wildside unit if half the electrical features of you caravan don’t work afterwards!

IMG_1130In Part 2…

In the next part I’ll go through the manufacturers electrical schematics of the caravan and show how to find and trace  which cables we are going to look for when we do the install and how we produce a simple drawing showing the changes.

I’ll also come up with a quick check list for all the additional bits (cable, terminals etc) that we will need for the install.

Share this:

  • Share on X (Opens in new window) X
  • Share on Facebook (Opens in new window) Facebook
  • Share on Tumblr (Opens in new window) Tumblr
  • Share on Pocket (Opens in new window) Pocket
  • Share on Pinterest (Opens in new window) Pinterest
  • Share on Reddit (Opens in new window) Reddit
Like Loading...

Fit2Go Tyre Pressure Checker…

05 Wednesday Apr 2017

Posted by Simon Barlow in Accessories, Gadgets, General, Maintenance, Product Review, Reviews, Technical, TPMS

≈ 6 Comments

Tags

Caravan, Fit2Go, Maintenance, Touring, Towing, TPMS, Tyre Monitoring, Tyre Pressure

Back in December last year I did a write up and little video with Andy Harris from RoadPro about the Fit2Go tyre pressure monitoring system. In the video he promised to send me one of the new Fit2Go Tyre Pressure Checker units as soon as they were released. Well Andy kept his word and yesterday I received a little package from Road Pro.

IMG_1112

I had seen a sneak preview of one of the first early production units available at the NEC show in February and managed to have a quick run through of it very simple operation.

IMG_1113

The unit comes neatly packaged and isn’t contained on one of those damn near impossible to open blister packs thankfully. It arrive complete with a set of AAA size batteries, a holder which has a pad of 3M VHB tape to allow it to be attached and stowed securely inside the vehicle. VHB if you don’t know stands for Very High Bond, so choose your storage location wisely… it might be a bit of a do-dah to move!

IMG_1114  Operation is really simple. Press and hold the on button for five seconds and the unit will power up and display the status of the units own batteries.

IMG_1116

To obtain a pressure reading, simply place the unit’s logo over the tyre pressure sensor and you will feel a slight pull as the internal magnet pulls it towards the sensor, it’s this magnet that ‘wakes up’ the sensor.

IMG_1118

29 PSI is correct for the Amarok running light, and this sensor is showing 3 battery bars.

After a few seconds the Pressure Checker will beep and you can read the pressure for that wheel… and cleverly, you can also check on the battery level in the sensor. The display is in good old PSI, however if you don’t work in PSI and much prefer BAR, while the Pressure Checker is turned on, simply press the on/off button five times in quick succession and it will beep and the reading will now be in BAR. To change it back, simply do the same again to revert to PSI. To turn the Pressure Checker off, simply hold down the power button for 3 seconds and it will beep and turn off.

That is about as complicated as it gets.. really. The only real challenge is to find a spot to stick the holder!

IMG_1115
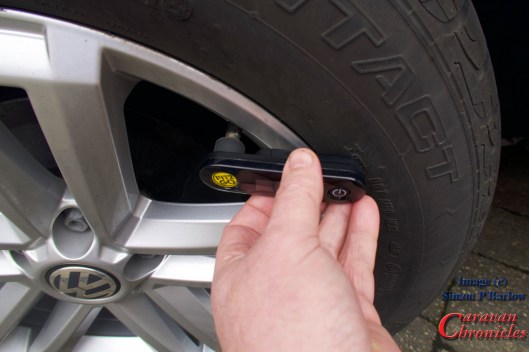
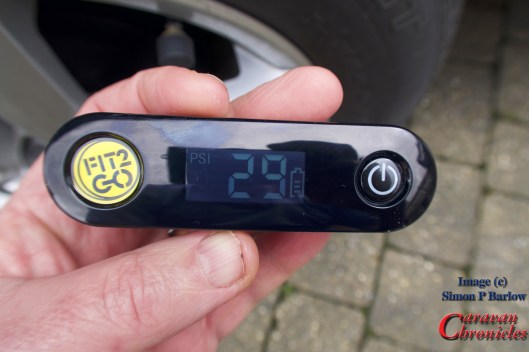
I have tried a few different TPMS ‘solutions’ over the past couple of years and all have plus points and minus points. As I am one of these people who likes to do walk rounds before setting off (throw back to my flying days I guess) I really didn’t want Formula 1 type information thrown at me all the time. I wanted a simple warning system and a simple way to check the pressure without having to remove any sensors. Fit2Go ticks these boxes.

If I did have a negative point about the Fit2Go system it would be the fact that the batteries in the sensors are not user replaceable. At least I do have a way to check the status of them now. The sensors are not too expensive when they need replacing, but  will be more expensive that replacing just a battery. Part of my brain is shouting “recycling” at me… and I do wonder why the manufacturer hasn’t come up with a recycling scheme… exchange your old sensors for new for a few pounds less than buying new and we will recycle them. Or maybe a discount voucher scheme when you recycle?

The Fit2Go Tyre Pressure Checker is available from RoadPro for just under £40 (exc shipping) or you can always find it on Amazon.

Share this:

  • Share on X (Opens in new window) X
  • Share on Facebook (Opens in new window) Facebook
  • Share on Tumblr (Opens in new window) Tumblr
  • Share on Pocket (Opens in new window) Pocket
  • Share on Pinterest (Opens in new window) Pinterest
  • Share on Reddit (Opens in new window) Reddit
Like Loading...

NEC Show Roundup – it’s all technical…

28 Tuesday Feb 2017

Posted by Simon Barlow in Caravan Electrics, Electrical, General, Maintenance, Modifications, Technical, Tow Vehicle, VW Amarok

≈ 9 Comments

Tags

13 Pin Plug, Caravan Electrics, Caravanning, Caravans, Maintenance, Modifications, Sterling Power, Travel Trailer, Travel Trailers

This is really a follow-up to my previous post – Smart Alternators: how they affect Caravans and Motorhomes….

While at the NEC show one of my big tasks was to get a number of technical questions answered by the industry players. One of my first stops was to Westfalia and to meet up with Rick Sykes and his colleague on the Westfalia stand. Rick is the national training manager for Westfalia and I was able to get answers to a number of questions that you have asked me and I’d not been able to answer fully. Continue reading →

Share this:

  • Share on X (Opens in new window) X
  • Share on Facebook (Opens in new window) Facebook
  • Share on Tumblr (Opens in new window) Tumblr
  • Share on Pocket (Opens in new window) Pocket
  • Share on Pinterest (Opens in new window) Pinterest
  • Share on Reddit (Opens in new window) Reddit
Like Loading...

Smart Alternators: how they affect Caravans and Motorhomes….

15 Wednesday Feb 2017

Posted by Simon Barlow in Accessories, Caravan Electrics, Electrical, Maintenance, Motor Home, Technical

≈ 43 Comments

Tags

Battery Charging, Caravanning, Caravans, Leisure Battery, Maintenance, Towing

I have been receiving a lot of emails over the last two or three months from people reporting issues around charging their leisure batteries after changing tow vehicles and a similar number from people who are having problems with performance of the installation of the electrical harness on their new vehicle tow bar.

I’ve spent quite a bit of time answering emails and thought I’d try to sum up what is happening. A lot of this is also going to apply to Motor Homes, especially if they have a new Euro 6 engine. Continue reading →

Share this:

  • Share on X (Opens in new window) X
  • Share on Facebook (Opens in new window) Facebook
  • Share on Tumblr (Opens in new window) Tumblr
  • Share on Pocket (Opens in new window) Pocket
  • Share on Pinterest (Opens in new window) Pinterest
  • Share on Reddit (Opens in new window) Reddit
Like Loading...

Flushed With Success….. Eventually!

13 Tuesday Dec 2016

Posted by Simon Barlow in Blog updates, Caravan Electrics, Caravan Fault Finding, Caravan Servicing, General

≈ 9 Comments

Tags

Caravan, Thetford Toilet, Touring

You know there are times when I think the service industry is going down the pan.

Right… the prologue

We had driven down to Chapel Lane caravan site to do a bit of partaking of the Christmas Markets in Birmingham and to do a bit of filming with the Venerable Andy Harris of motorhome fame (more about that in the next post though!). We had set up and I was pottering round outside sorting the guy ropes for the awning or the Christmas lights, I can’t remember which, when Sue popped her head out of the door and announced with some consternation… “The toilet won’t flush”

I went in and pushed the button… yep it wouldn’t flush, no pump noise, nothing. I emerged from the bathroom and announced “The toilet won’t flush” at which point Sue gave me the “did you think I was pushing the button wrong or something” look.

Right… check the fuses first, all OK. Out came the tool bag and the multimeter. Voltage going to the loo OK… check the fuse in the bottom of the loo behind the cassette. That was OK too.

Now I don’t believe in coincidences and it just so happened a couple of weeks before the caravan had been in to Glossop Caravans to have a spot of damp sorted and they had replaced the wall board that the loo backs onto. It’s got to be that I thought and said to Sue “I’ll bet it’s when they did the damp and took the loo out”

“Give them a ring now while they are still open”

I spoke to one of the service centre receptionists and they said they would get the workshop manager to ring me back and in due course he did. After a brief conversation he assured me it was nothing they had done and if the loo was getting voltage and the fuse in the loo was OK it must be the circuit board. While he was on the phone I managed one handed to peel back the Thetford sticker on the top of the loo and extract the circuit board. A quick voltage check of the pins that connect to the motor revealed that it was zero volts when the button was pushed.

“It defiantly the circuit board then” he said.

The old circuit board top, with the new one below.

The old circuit board top, with the new one below.

I thanked him and started thinking about our next move while answering an email from the afore mentioned Andy Harris. I just happened to say “loos not working need a new circuit board” and Andy emailed back “Try Jonathan at CAK Tanks” A quick phone call and they did have one in stock… just one. I asked them to reserve it and would pop over mid morning. CAK Tanks was only about 18 miles away and took us 30 minutes to get there. After some double checking to make sure it was the right board… Thetford had very usefully changed the part number and not told many people about it. Handily the new part number was a lot cheaper and it cost £19.36 including the non voluntary contribution to the Chancellor of the Exchequer.

Now, you remember when I said I don’t believe in coincidences.  For some reason I thought I’d just check the connections that Glossop Caravans service people would have disconnected.

Its easy to extract the connector through the hole in the floor of the cassette compartment and check the connections….

img_0924

On checking the connections it was apparent that they had been connected the wrong way…. i.e reverse polarity!

img_0925

The plug that was fitted by Thetford is designed to be connected one way, but the wiring harness in the caravan used two spade connectors that could be connected in any orientation and this time the person re-fitting the loo had a 50/50 chance of being right or wrong and in this case got it wrong. I re-connected the two space connectors the right way and went and fitted our old circuit board. It worked!

So the morel of this story is there are no such thing as coincidences and before setting out on a round trip of 36 miles and spending £19.36 on a new circuit board… check the polarity!

I think I’ll go a flush the loo again…. just because I can.

Share this:

  • Share on X (Opens in new window) X
  • Share on Facebook (Opens in new window) Facebook
  • Share on Tumblr (Opens in new window) Tumblr
  • Share on Pocket (Opens in new window) Pocket
  • Share on Pinterest (Opens in new window) Pinterest
  • Share on Reddit (Opens in new window) Reddit
Like Loading...

Little Things….

04 Sunday Dec 2016

Posted by Simon Barlow in Accessories, Caravan Electrics, Electrical, Maintenance, Modifications, Technical

≈ Leave a comment

Tags

Caravan, Caravan Electrics, Maintenance, Modifications

One of the little things that has been on my “must do something about that” list for a while is to address the problem we have with not enough places to plug things in and charge them. When we are in the caravan in the evening the front looks like a tech gadget table top sale… Macbook Pro, WiFi router/MiFi device, two iPhones, camera battery chargers, Fitbit charger and all these needed plugging in. The 4 way surge protected power strip I put there just wasn’t cutting it any more.

It was time to do something about it. A couple of years ago Swift supplied a kit to modify the drop down TV system that was installed in a range of their caravans. Our caravan already had the upgrade, however they did supply a new piece of wood to replace the installed piece as some of the holes had moved when they upgraded the latches. Always wanting to repurpose things I thought that this could be the basis of an upgrade… not to the TV drop down but to the rear of the draw unit. I wanted to install USB charging ports but still required a couple of 240 volt sockets and a brief search on Amazon I came across what I needed. The other thing I wanted was a couple of 12 volt sockets so that I could use our 12 volt plug-in USB chargers if we were pitched off grid.

To The Bat Cave…

The build was fairly simple. I had already converted the draw top from a slide and swing open operation to a pull out so the addition was straight forward.

The top being assembles in the workshop

The top being assembled in the workshop

It was a simple matter of cutting out the two rectangular holes for the 240 volt face plates and opening up the two existing holes intended for the new latches to the right size for the 12 volt sockets. I did intend to use the same electrical fittings as are already installed in the caravan but pricing everything up it came out at nearly four times the cost of what I eventually used here.

The two 240 volt sockets are wired with 2.5mm multi-strand cable and have slim line back boxes to protect them and the 12 volt cabling is all done with crimp connections and protected with heat shrink tubing.

The whole project including installation only took me a couple of hours and made me wonder why I’d been putting it off for so long!

I didn’t want to fasten anything to the structure of the caravan so the piece seems to ‘float’ above the front sill. The wiring was all pre done in the workshop and was easy to connect up to the caravan services as we had a 240 volt and 12 volt outlets nearby in the base of the draw unit.

img_0916

img_0918

img_0921

Plenty of room even with the blind down.

The upgrade now gives me 3 x 240 volt sockets and 6 x USB charging points plus 2 x 12 volt sockets. The space under the sockets can be used to tidy any excess charging cable away while in use.

Shopping...

Use the following bits from Amazon…

Knightsbridge SFAV7USB4MB 13 A 1G Screwless Switched Socket with 5 V DC 5.1 A Quad USB Charger with Chrome Rocker – Matt Black

Knightsbridge SF9902MB 13 A 2-Gang Screwless Switch Socket with Dual USB Charger – Matt Black with Chrome Rocker

The back boxes came from B & Q and the 12 volt sockets came from Go Outdoors caravanning section.

Share this:

  • Share on X (Opens in new window) X
  • Share on Facebook (Opens in new window) Facebook
  • Share on Tumblr (Opens in new window) Tumblr
  • Share on Pocket (Opens in new window) Pocket
  • Share on Pinterest (Opens in new window) Pinterest
  • Share on Reddit (Opens in new window) Reddit
Like Loading...

NEC Show, Caravan Designs and Looking For A Caravan…

05 Saturday Nov 2016

Posted by Simon Barlow in Blog updates, Camping & Caravan Show, Caravan Servicing, Maintenance

≈ 6 Comments

Tags

Caravan Show, NEC

A bit of a belated post about our trip down to the NEC show and looking round at the possibilities of a new caravan and a catch up on the damp situation (thanks to everyone that emailed me about it!)

This year was our first time taking the caravan down to the show, and after some initial over thinking about actually staying on a car park, it turned out really quite a fun experience.

img_0854

I actually spotted someone taking a photo of the Amarok!

Due to both our work commitments we couldn’t leave for the show until Thursday after I’d finished a 12 hour night shift. So after a few hours sleep we left home to collect the caravan around lunchtime. The drive down even in mid-week traffic wasn’t too bad, and towing on a busy motorway with the Amarok is a breeze letting the cruse control pace us with the HGV’s. The instructions for getting to site sent to us by the Caravan Club were easy to follow and got us into the reception area smoothly without any wrong turns.

Surprisingly the N11 car park is fairly level where we were and setup was quick. The Caravan Club had done a sterling job of making sure water and electrics were all sorted and it didn’t take us long to set up. As it was fairly late, we put off going over to the show until the morning.

Friday

Up fairly early, quick shower (loving the Eco Camel shower head!), coffee and we walked the twenty or so feet to the bus stop for the 5 minute bus ride to the NEC. First stop was to the press office to pick up our badges and a quick text to Andrew Ditton who I’d arranged to meet up with again.

img_0838

After being told about the damp in the caravan and the cracked end cap, we had it in mind to look round for a new caravan. Our initial tick list was simple – twin axle, centre  bathroom. Other than that, we would start a list of likes and dislikes as we saw each van based on what we saw.

One thing became clear pretty quickly, we weren’t keen on transverse beds as it meant one or the other of us would have to do some nifty squeezing to get to the bathroom at night.

img_0840

“Hmmm why is this table here exactly?”

Hair Drying…

Sue finds the setup for her in our present caravan works really well for hair drying. There is a light, mirror, shelf and 240 volt power socket conveniently placed so she can sit on the edge of the bed and dry her hair. This was one of the things we were scoring on. We were surprised that in some of the vans this was not possible. Sit on the edge of the bed and watch TV… but no mirror. Or a mirror, shelf and light but nowhere to plug-in a hair dryer or straighteners. While on the subject of TV’s… why do manufacturers insist on installing a TV mount in the bedroom…. but not always in the living area. By choice we would not have a mount fitted in the bedroom but would want one in the living area.

img_0848

… Like the fridge and microwave locations… no cooker hood though.

The other thing that we noticed was Swift are now installing a TV mount in a locker on the outside of the caravan…. methinks someone has been watching too many American RV shows with 40 inch TV’s installed on the outside. Personally I think this is a bad idea. TV’s in awnings have been the source of noise complaints in the past. I do hope this is not going to be a new trend.

Tables…

In our current van, the table is stored under the bed, and to be honest it’s a pain to get out and put away. So we checked out the table locations. Some were great, right in the living area… others were not so good, you had to carry them from the back of the van through to the front. I know it’s only a minor thing but its a thing never the less.

Outside Lockers…

Right, who said “We don’t need outside lockers” then? It seems more and more are dropping the number of outside lockers. The ones that do remain, just how useful are they? A number of the caravans we looked over you would be hard pushed to get a couple of outside chairs in the lockers as the space inside had been sub divided or was a wet locker. Currently we can store our chairs, waste hog and Cadac that are stored under the bed from the outside via a reasonably sized locker hatch only having to carry the Aquaroll inside the caravan to store it under the bed. When you start looking at the practicality of some of the lockers and what you can or can’t fit in through the opening do you realise the limitations.

Sinks we like…

Sinks… not really exciting but getting it right is important. Currently we have a rind sink, which is OK, until you want to use it. we have to find a place to put the sink cover… get out the draining board, make some space on the counter top, drop on the draining board and we are good to go. Afterwards, dry off the draining board, put it away, get out the sink cover and fit it back over the sink. Not too onerous really, but not exactly convenient. Now we both spotted this sink…. (photo below)

img_0845

Now that sink we do like and a solid door between the kitchen are and bathroom.

and both of us commented on what an improvement it was. The lid acted as an additional splash back the draining board was integrated into the sink so water draining off the washed dishes would not go everywhere… except back in the sink and it was a more usable shape. The tap too was handy, it would swing over the hob to allow filling of a pan rather than hiding a pan partly in the sink with one hand while trying to operate the tap with the other. We liked the general layout of this kitchen, the powered roof extractor right above the hob, but the down side was the hight and location of the microwave.

While on the subject of roof fans… why can’t caravan manufacturers install a sensible extracting cooker hood that vents to the outside?

img_0844

… A cooker hood! sadly only a circulation type not a proper extractor and twin beds… only the bathroom is to the rear. Close but no cigar!

After looking round all the manufacturers twin axle offerings we were very tempted… to the point of sitting down with the sales rep from Glossop Caravans and getting a value on our van for a trade in with the Sterling Celebration 635 – a dealer special. It ticked a lot of the boxes but sat in our caravan that evening we went through where we would put what… and it seemed like we were always making compromises about what could go where. and the list of what we would have to change or adapt seemed to get longer and longer. The layout was good… and we did like the fact the transverse bed was on the opposite side… I don’t know why that should make a difference really. But it came down to silly things… like that outside TV locker. That was a complete waste for us, and why didn’t they offer the rear view camera? It was fitted on other spec Swift caravans?

Our Ideal Layout…

We popped in to see the Vanmaster caravan… hand-built luxury, they only build about 12 per year apparently. This was a bit of an eye-opener layout wise for us though. The interior design was not to our taste, but these guys had our perfect layout. Centre bathroom and twin beds to the rear. Solid doors to shut of the bathroom both from the bedroom and the kitchen area.

So here it is, our ‘ideal’ (for the moment!) layout and options…

  • A Centre bathroom with twin beds to the rear. Under each bed, a storage space accessible from the outside, with perhaps on the off side a slightly larger door so that an Aquaroll can be passed through (store the Aquaroll and wastehog on the side it’s going to be used… along with perhaps the mains cable and hose pipe).
  • A solid door between the bedroom and bathroom, and another solid door between the living area and bathroom. The bathroom to have a powered roof fan vent.
  • A service light on the off-side above the EHU plug-in point & water point and a light mounted on the “A” frame to light the front gas locker.
  • Rear view camera.
  • Proper cooker hood.
  • Sensible place to sit and dry hair.
  • No “hunk of iron” screwed to the wall in the bedroom for a TV that we would never fit.
  • Internal water tank.
  • Suitable area for me to work at a laptop.
  • Ability to install a second leisure battery.
  • 100 watts minimum solar panel
  • At least 800mm width of wardrobe hanging space (2 x 400 would be fine)
  • Lounge table stored in the lounge area.
  • A useful ‘user’ load capacity of 200Kg
  • Lockers… lots of lockers that you can actually put stuff in. Also locker doors that open downwards not lift up so you have to get on your hands and knees to peer inside under the open door.

Decisions Decisions….

So what did we decide in the end? Well our caravan went back to Glossop Caravans to have new caps installed and the damp sorted, and while it was there we decided to have the roof light in the bedroom and the one in the bathroom replaced with the new clear tilt lift ones that are now fitted as standard in a number of vans. The old ones were virtually impossible to clean and both were showing cracks in the edges of the outer perspex layer.

I have designed and built a new section for the chest of draws in the lounge that fits between the draws and the front window that will give us two 12 volt sockets, three 240 volt sockets and 6 USB sockets. Once that’s installed and with the new roof lights fitted…. we decided to keep the caravan for another year.

img_0837

Staying at the NEC for the show…

If you haven’t done it… DO IT! For us it was well worth it. It’s not cheap, but being able to wander in and out of the show, planning what to see and going back to check out things in detail was really worth it.

img_0836

That’s us in the distance on the corner…. in front of the tent!…

“In A Tent… In A Car Park…. Next To The NEC….”

We were pitched on the corner right in front of the tent and on the first night the music kicked off… and it was… it wasn’t all that bad, in fact it was pretty good. The next nights music was pretty good also. So not wanting to be missing anything we ventured in and it was packed out…

img_0855

It was a great atmosphere and everyone was enjoying it. It was a different group playing each night. The beer was cold and not too pricy, the food seemed to be going down well too.

img_0856

If you haven’t stayed at the NEC for one of the big shows, it’s well worth it in our opinion, especially if you are looking to buy a new caravan or motor home. It gives you plenty of time to look round, make lists and go back to find exactly what you want.

Oh and by the way…. the catch phrase of the week from the evenings MC…. “In A Tent… In A Car Park…. Next To The NEC“

I’d like to take a second to thank all the Caravan Club staff that make staying at the NEC possible. It looks easy, but I’m sure an awful lot of work has to go into the organisation of it all and hard work by members staffing the site. Remember, if we don’t book and use it, we could lose it!

What’s Next?…

I’ve just taken delivery of a dash-cam for the Amarok. It’s a twin camera unit so I’ll be installing that in the next few days. I’m not sure if I’ll be doing a write-up on the actual installation… unless you would like to read about it. Let me know.

UPDATE… (even before the post is posted!)

It’s taken me a few days to write this article and this morning (5th Nov) we went up to Glossop Caravans to collect our caravan after having the remedial work done for the damp and the two new roof lights installed. The work on the damp seems fine, I guess time will tell with that. The roof lights have been installed and they are exactly what we wanted. However our initial checks didn’t show up an issue. It wasn’t until we got the caravan back to our storage facility that on closer inspection one of the roof lights had a crack in the main body.

The bathroom roof light, perfect, no issues.

The bathroom roof light, perfect, no issues.

img_0865

However on the roof light above the bed there is a crack on the inner frame…

img_0866

At first we thought is was a dirty mark, but on closer inspection it is a fully developed crack…

img_0867

… possibly starting from this over tightened screw maybe?

So, as I was on a night shift last night and asleep most of the day as I’m on nights again tonight (no bonfire for me) I’ll have to drop them an email tonight with a follow-up call on Monday.

Sometimes you really want to just go “AAAAAGHHHHHHHHHH”

Share this:

  • Share on X (Opens in new window) X
  • Share on Facebook (Opens in new window) Facebook
  • Share on Tumblr (Opens in new window) Tumblr
  • Share on Pocket (Opens in new window) Pocket
  • Share on Pinterest (Opens in new window) Pinterest
  • Share on Reddit (Opens in new window) Reddit
Like Loading...

Oh Phooey, Bad News From Glossop Caravans…

21 Sunday Aug 2016

Posted by Simon Barlow in Caravan Servicing, General, Maintenance

≈ 12 Comments

Tags

Caravan, Caravanning, Glossop Caravans, Maintenance

We went to pick up our caravan yesterday from Glossop Caravans after it has had its annual service. Unfortunately we received some bad news… we have damp.

It’s at the rear in the top offside corner. Glossop Caravans have been pro-active and already submitted a warranty claim. This is why it’s so important to get your caravan serviced in line with the manufacturers guidelines.

Scan

It appears we have a crack at the top of the rear end cap. While we were there, they positioned a ladder platform next to the caravan so we could both go up and have a look, and indeed there is a crack right on the radius of the corner, about 75mm long and when you pass your finger across it you can feel a slight step, which to me indicates something is causing one side to be pushed out… either something underneath or a slight twisting pressure on the corner.

I’m not sure how long the warranty claim will take to be accepted (or rejected… but that’s a potential nightmare) but the work apparently will take around three to four weeks.

So, hopefully we will still be going to the NEC in October with the caravan and I’ll keep you updated on progress.

Share this:

  • Share on X (Opens in new window) X
  • Share on Facebook (Opens in new window) Facebook
  • Share on Tumblr (Opens in new window) Tumblr
  • Share on Pocket (Opens in new window) Pocket
  • Share on Pinterest (Opens in new window) Pinterest
  • Share on Reddit (Opens in new window) Reddit
Like Loading...
← Older posts
Newer posts →
Buy Me A Coffee

Blog Stats

  • 45,910,170 hits
Follow Caravan Chronicles on WordPress.com

Follow Caravan Chronicles and receive notifications of new posts by email.

Some previous posts you may like...

My last post….

Many thanks to all my friends. As I write this I’m in the Christi hospital hoping to go home in a few days. I was told about a week ago that I had about 3 months to live and should start preparing my affairs. Which Sue and I are trying to do. I have some…

A Bit Of A Tour…

Well not really a tour, only two locations. The first leg was down from Manchester to Glastonbury and a stay at The Old Oaks. We first went there in 2012 and had five or six more visits in the next four years. So it had been quite a while really. We were located in the…

What’s The Question I Get Asked a Lot?

“What’s in your toolbox when travelling?” Tricky one… I don’t have a tool box anymore. I recently started mooching around the internet for a smaller tool box… or rather a tool bag. I used to use up until a few months ago a Stanley Tool Bag. It was lighter than a tool box, I could…

#Tourfest North West

Tourfest North west was our first time attending anything like a gathering of bloggers, vloggers and the generally like minded. It was organised by The Caravan Addys with a little help from others I’m sure as it must be a time consuming task and hard work to bring everything together. We opted to arrive at…

More Jobs Ticked Off…

OK we are still working on a few bits and pieces but the weather on Friday and Saturday was ideal for cleaning the outside of the 5th Wheel. So while Sue made a start on the cleaning of the nose cap, I finished the first stage of the water pump relocation project and upgraded the…

A Few More Jobs Ticked Off The List…

Like any project, ticking the small stuff off a list is the way to move forward even if it seems like sometimes you have ground to a halt. A bit lacking on photos…. I’m temporarily unsure of their location… pilot speak for I’ve lost them! I’ll correct that in due course. I built a new…

A Few Little Jobs Done…

It seems such a long time since I posted anything. Last time out with the Dreamseeker I noticed that the charging voltage when we were hooked up to the truck was only about 12.1 to 12.3 volts as measured in the Dreamseeker battery box. I know that the VW Amarok puts out 14.6 to 14.8…

Happy New Year…

Happy New Year to everyone, I hope you have a great touring year ahead. I’d like to take this opportunity to give you a bit of an update on my personal circumstances and a look forward to a couple of projects I’m planning to kick off our year. First… … A HUGE thank-you yo everyone…

Sutton-on-Sea In September

Just like to say a huge thank you to so many people that have commented or emailed me over my last post. It has cheered me up no end…. it really has. Enough to rattle this post off! We recently went back to Cherry Tree Springs at Sutton on Sea for an 7 day break.…

This Might Be My Last Post…

Not clickbait…. Three weeks ago Sue and I were cycling between 8 and 10 miles each morning to get a morning coffee. Arrived back home and…. well time stopped. I had received notice that my test sample for Bowel Cancer screening had come back positive. Two days later I underwent a colonoscopy procedure which didn’t…

Something went wrong. Please refresh the page and/or try again.

  1. Dave Hart's avatar
    Dave Hart on How to: Connect two batteries in parallelAugust 27, 2024

    brilliant and so well explained! Thank you, love your work!!

  2. Simon Barlow's avatar
    Simon Barlow on Caravan Road Lights – Basic Fault FindingAugust 25, 2024

    Please look at my very last post on the blog

  3. Martin's avatar
    Martin on Caravan Road Lights – Basic Fault FindingAugust 25, 2024

    martin here caravan lights worked fine for two stop overs I had then hooking up again for my third trip…

  4. Emmy’s Camper Travels's avatar
    Emmy’s Camper Travels on My last post….August 25, 2024

    I’m so sorry. My sincerest sympathies go to you and your wife Sue. Your ideas and advice have been so…

  5. Steve Walsh-Jones's avatar
    Steve Walsh-Jones on My last post….August 22, 2024

    very sorry to hear this. Your posts have been very informative and enlightening providing an in depth view on different…

  6. thetwinaxletouringscouser's avatar
    thetwinaxletouringscouser on My last post….August 22, 2024

    Good heavens above Simon I am ever sorry to hear of such devastating news for both you yourself and Sue.…

  7. Eileen's avatar
    Eileen on My last post….August 22, 2024

    Simon and Sue, thank you both for sharing your passion for caravans with us. The news is extremely sad, our…

  8. Philip Parkes's avatar
    Philip Parkes on My last post….August 22, 2024

    Simon. So sad to read you last post today. Our thoughts are with you and Sue at this time. Whilst…

  9. Philip Parkes's avatar
    Philip Parkes on My last post….August 22, 2024

    Simon. So sad reading your post today. Our thoughts are with you and Sue at this time.

  10. Philip Parkes's avatar
    Philip Parkes on My last post….August 22, 2024

    Simon our thoughts are with you and Sue.

  11. Luke Tarrant's avatar
    Luke Tarrant on My last post….August 22, 2024

    Very sorry to read this and my thoughts are with you both at this time.

  12. Alan Smith's avatar
    Alan Smith on My last post….August 22, 2024

    Dearest Simon. I have never met you, but I feel as though I have some (limited) knowledge of you and…

CaravanChronicles.com Tag’s…

5th Wheel Caravan 13 Pin Plug Accessories AL-KO Avtex Bear Extender Bike Rack Blackpool Blackpool Illuminations blogging Cadac Camping & Caravanning Club Canterbury Caravan Caravan Blog Caravan Club Caravan Electrical Caravan Electrics Caravanning Caravans Caravan Show Caravan Talk Cheltenham Chirk Christmas Market Christmas markets Cleaning design Event City Factory Visit Fiamma France Freelander Glastonbury Glossop Caravans Humor Insync Jonic Bedding Lady Heyes La Tournerie Ferme Leisure Battery Leisure Battery Charging LPG Refilling Maintenance Manchester Caravan & Motorhome Modifications NEC North Western Caravans Ltd OLPRO One Hairy Caravanner Oswestry Oxford Product Review Project Review Safefill Sat Nav Sterling Caravans Sterling Power Wildside Swift Factory Swift Group Swift Talk Technical The Old Oaks Touring Towing Tow Vehicle Trafford Centre travel Travel Trailer Travel Trailers vacation VW Amarok Warwick Racecourse WiFI

Website Powered by WordPress.com.

  • Subscribe Subscribed
    • Caravan Chronicles
    • Join 672 other subscribers
    • Already have a WordPress.com account? Log in now.
    • Caravan Chronicles
    • Subscribe Subscribed
    • Sign up
    • Log in
    • Report this content
    • View site in Reader
    • Manage subscriptions
    • Collapse this bar
 

Loading Comments...
 

    %d