• Home
  • Help Guides
    • Storage Sites
    • Equipment Reviews
  • Document Library
    • Electrical Drawings
  • Photo Gallery
    • Caravan Log
    • MPG
  • Trip Map
  • Shop
  • About Caravan Chronicles…
  • Contact
  • Links

Caravan Chronicles

~ not just another caravan blog

Caravan Chronicles

Tag Archives: Modifications

Finishing Off A Few Jobs…

09 Thursday Sep 2021

Posted by Simon Barlow in Accessories, Caravan Electrics, Caravan Restoration, Caravan Servicing, Caravan Window Repair, Gadgets, General, Modifications, Technical

≈ 7 Comments

Tags

Caravans, LED Lights, Maintenance, Modifications, Window Repair

I’d got a few little jobs still outstanding from our big clean a week or so ago. The big one was to repair the front window. When we were cleaning the caravan I noticed that the bottom edge of the central window was starting to separate. After some lengthy procrastination I’d have preferred to replace it but given the hefty price tag and the “It will be January next year at the earliest before we can get you one” type answers from suppliers and removing the window and shipping to off to a company for repair would cost almost the same as a replacement.

It can’t be beyond a diy task to repair. I did a bit of searching for information relating to repairs and one name kept popping up as the manufacturer of the product used to bond the two sheets together…Bondrite Adhesives Ltd.

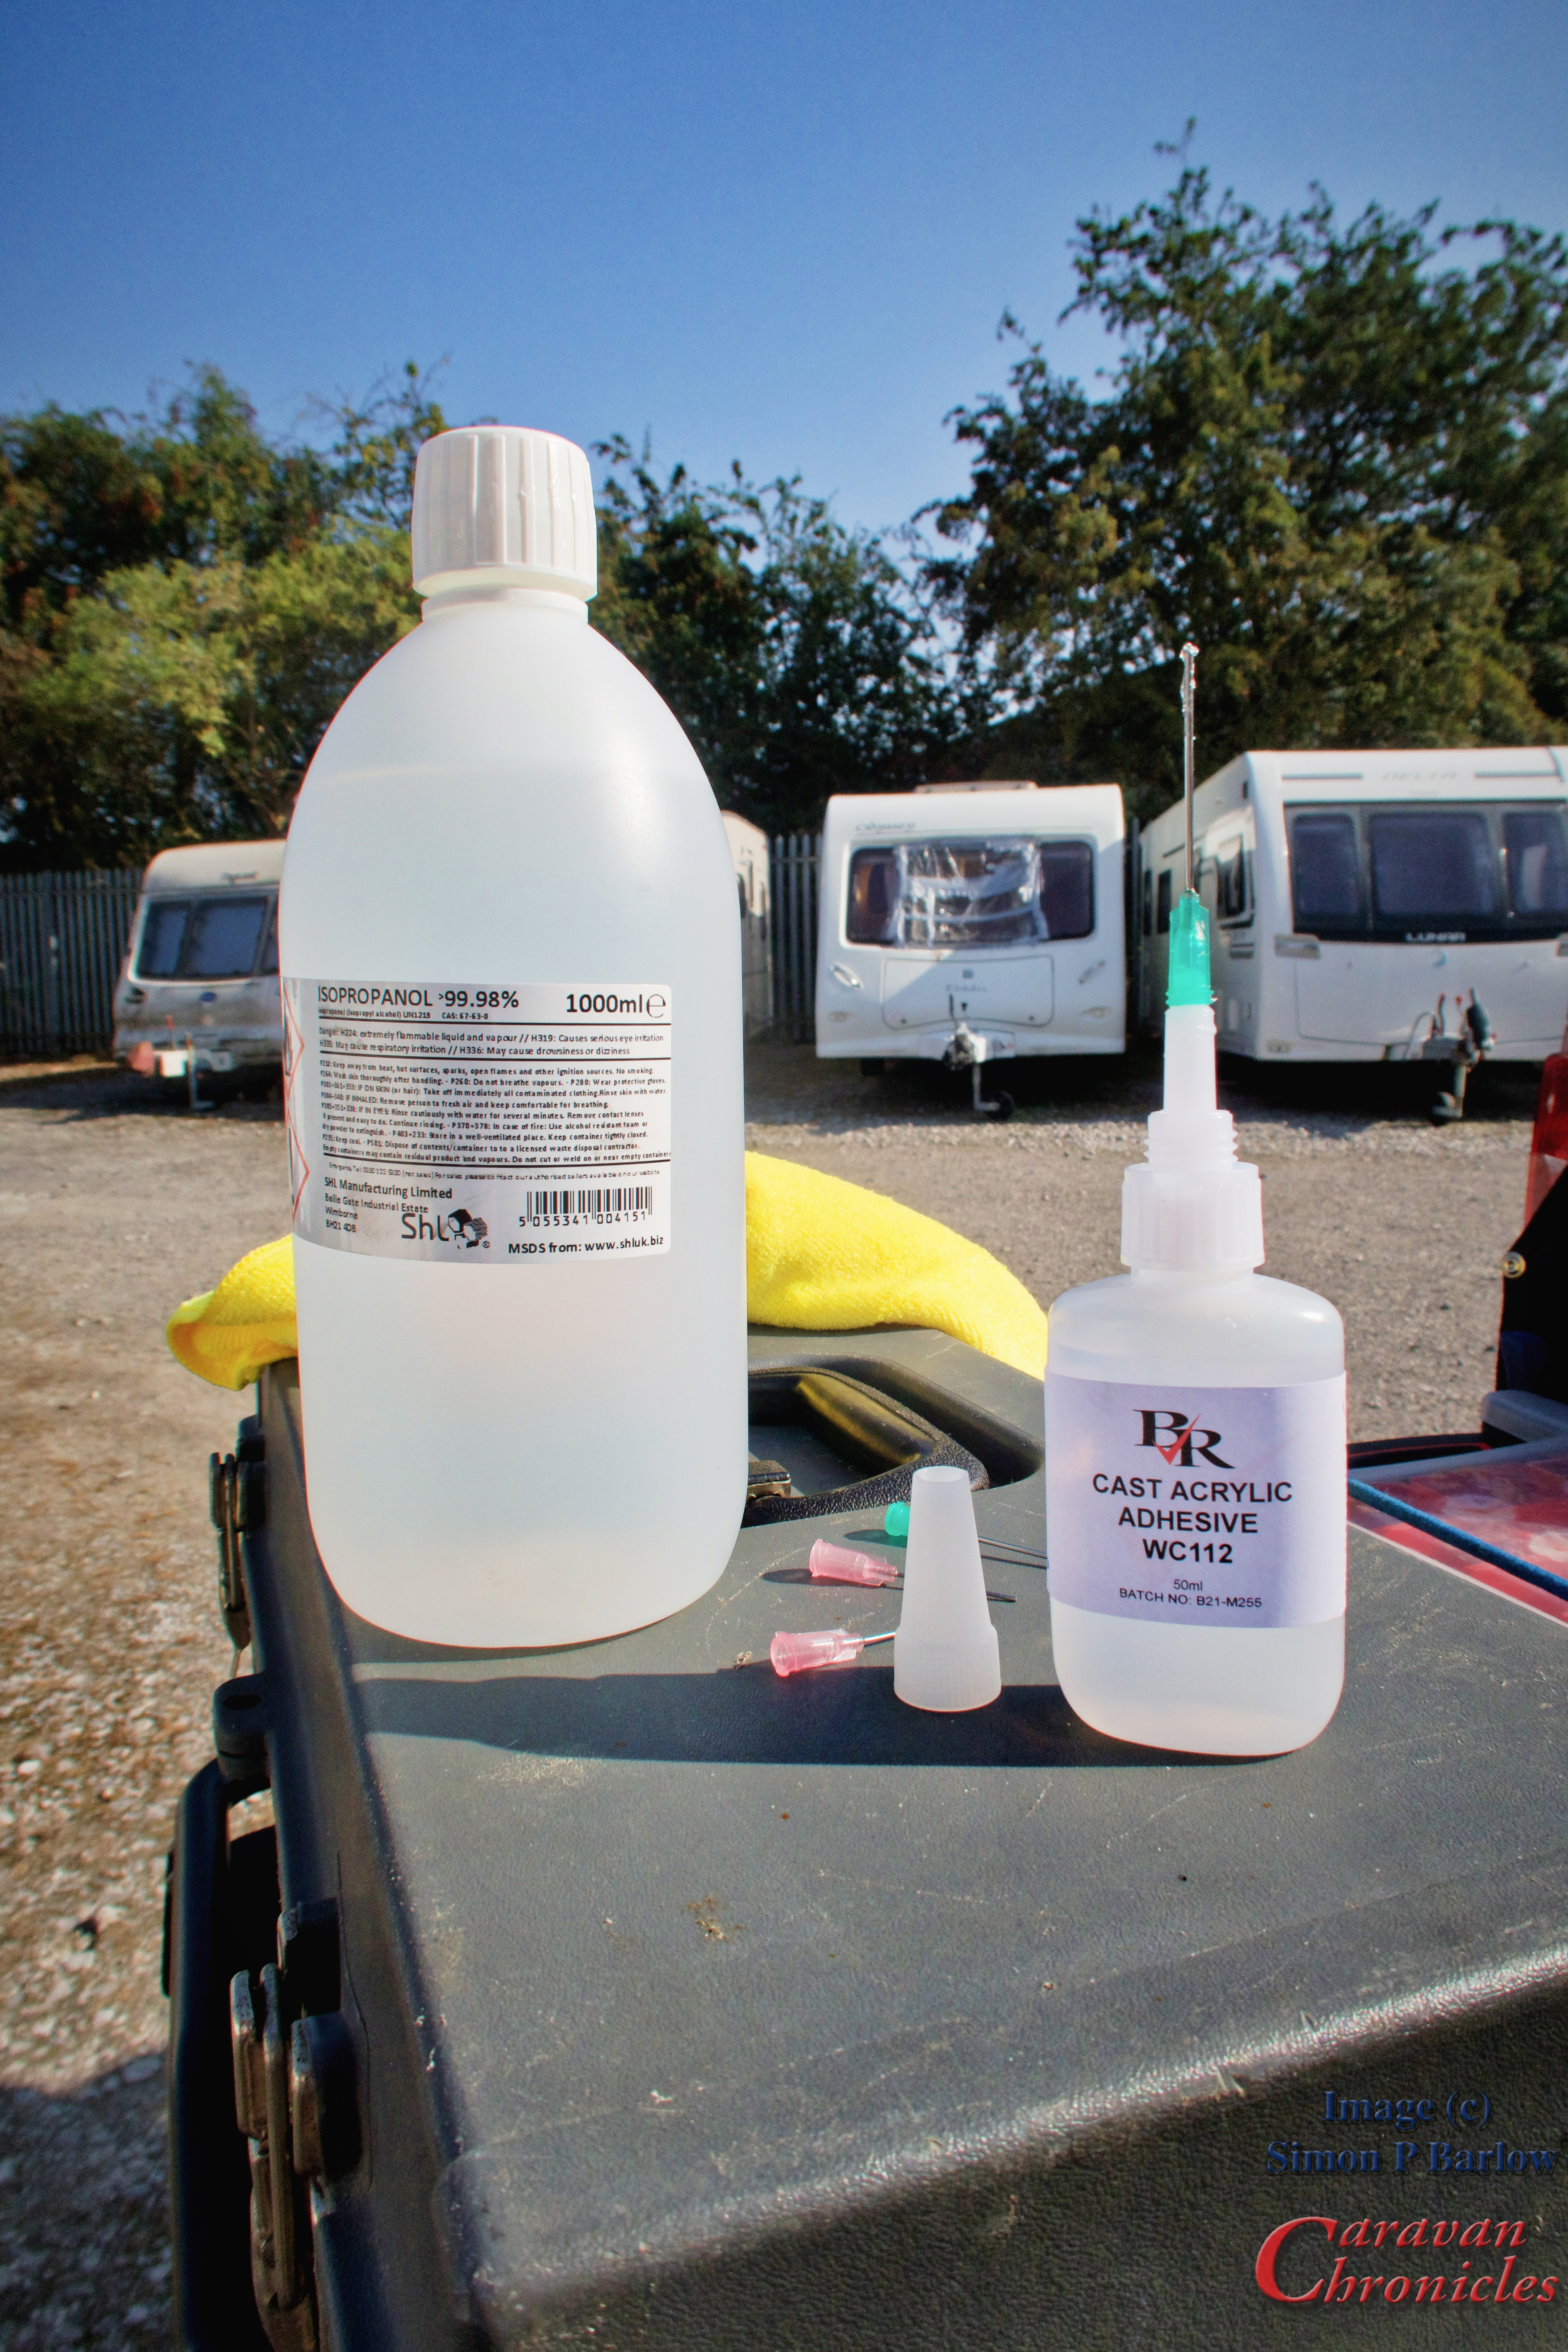
After reading through Bondrite Adhesives Ltd website a couple of times to work out exactly with adhesive I’d need I ordered their WC112 acrylic adhesive. The 50ml size was £12.10 plus shipping and VAT bringing the total to £20.52. It arrived within 24 hours of ordering, was really well packaged and came with a detailed technical sheet and guidance notes.

I’m not going to do a blow by blow account of how to repair a delaminated window… as I don’t know if this is even going to work, but my first step was to support the window as flat as I could. The standard recommendation is to remove the window lay it on a flat surface and go from there. I didn’t want to remove the window as all I had to repair was the lower edge.

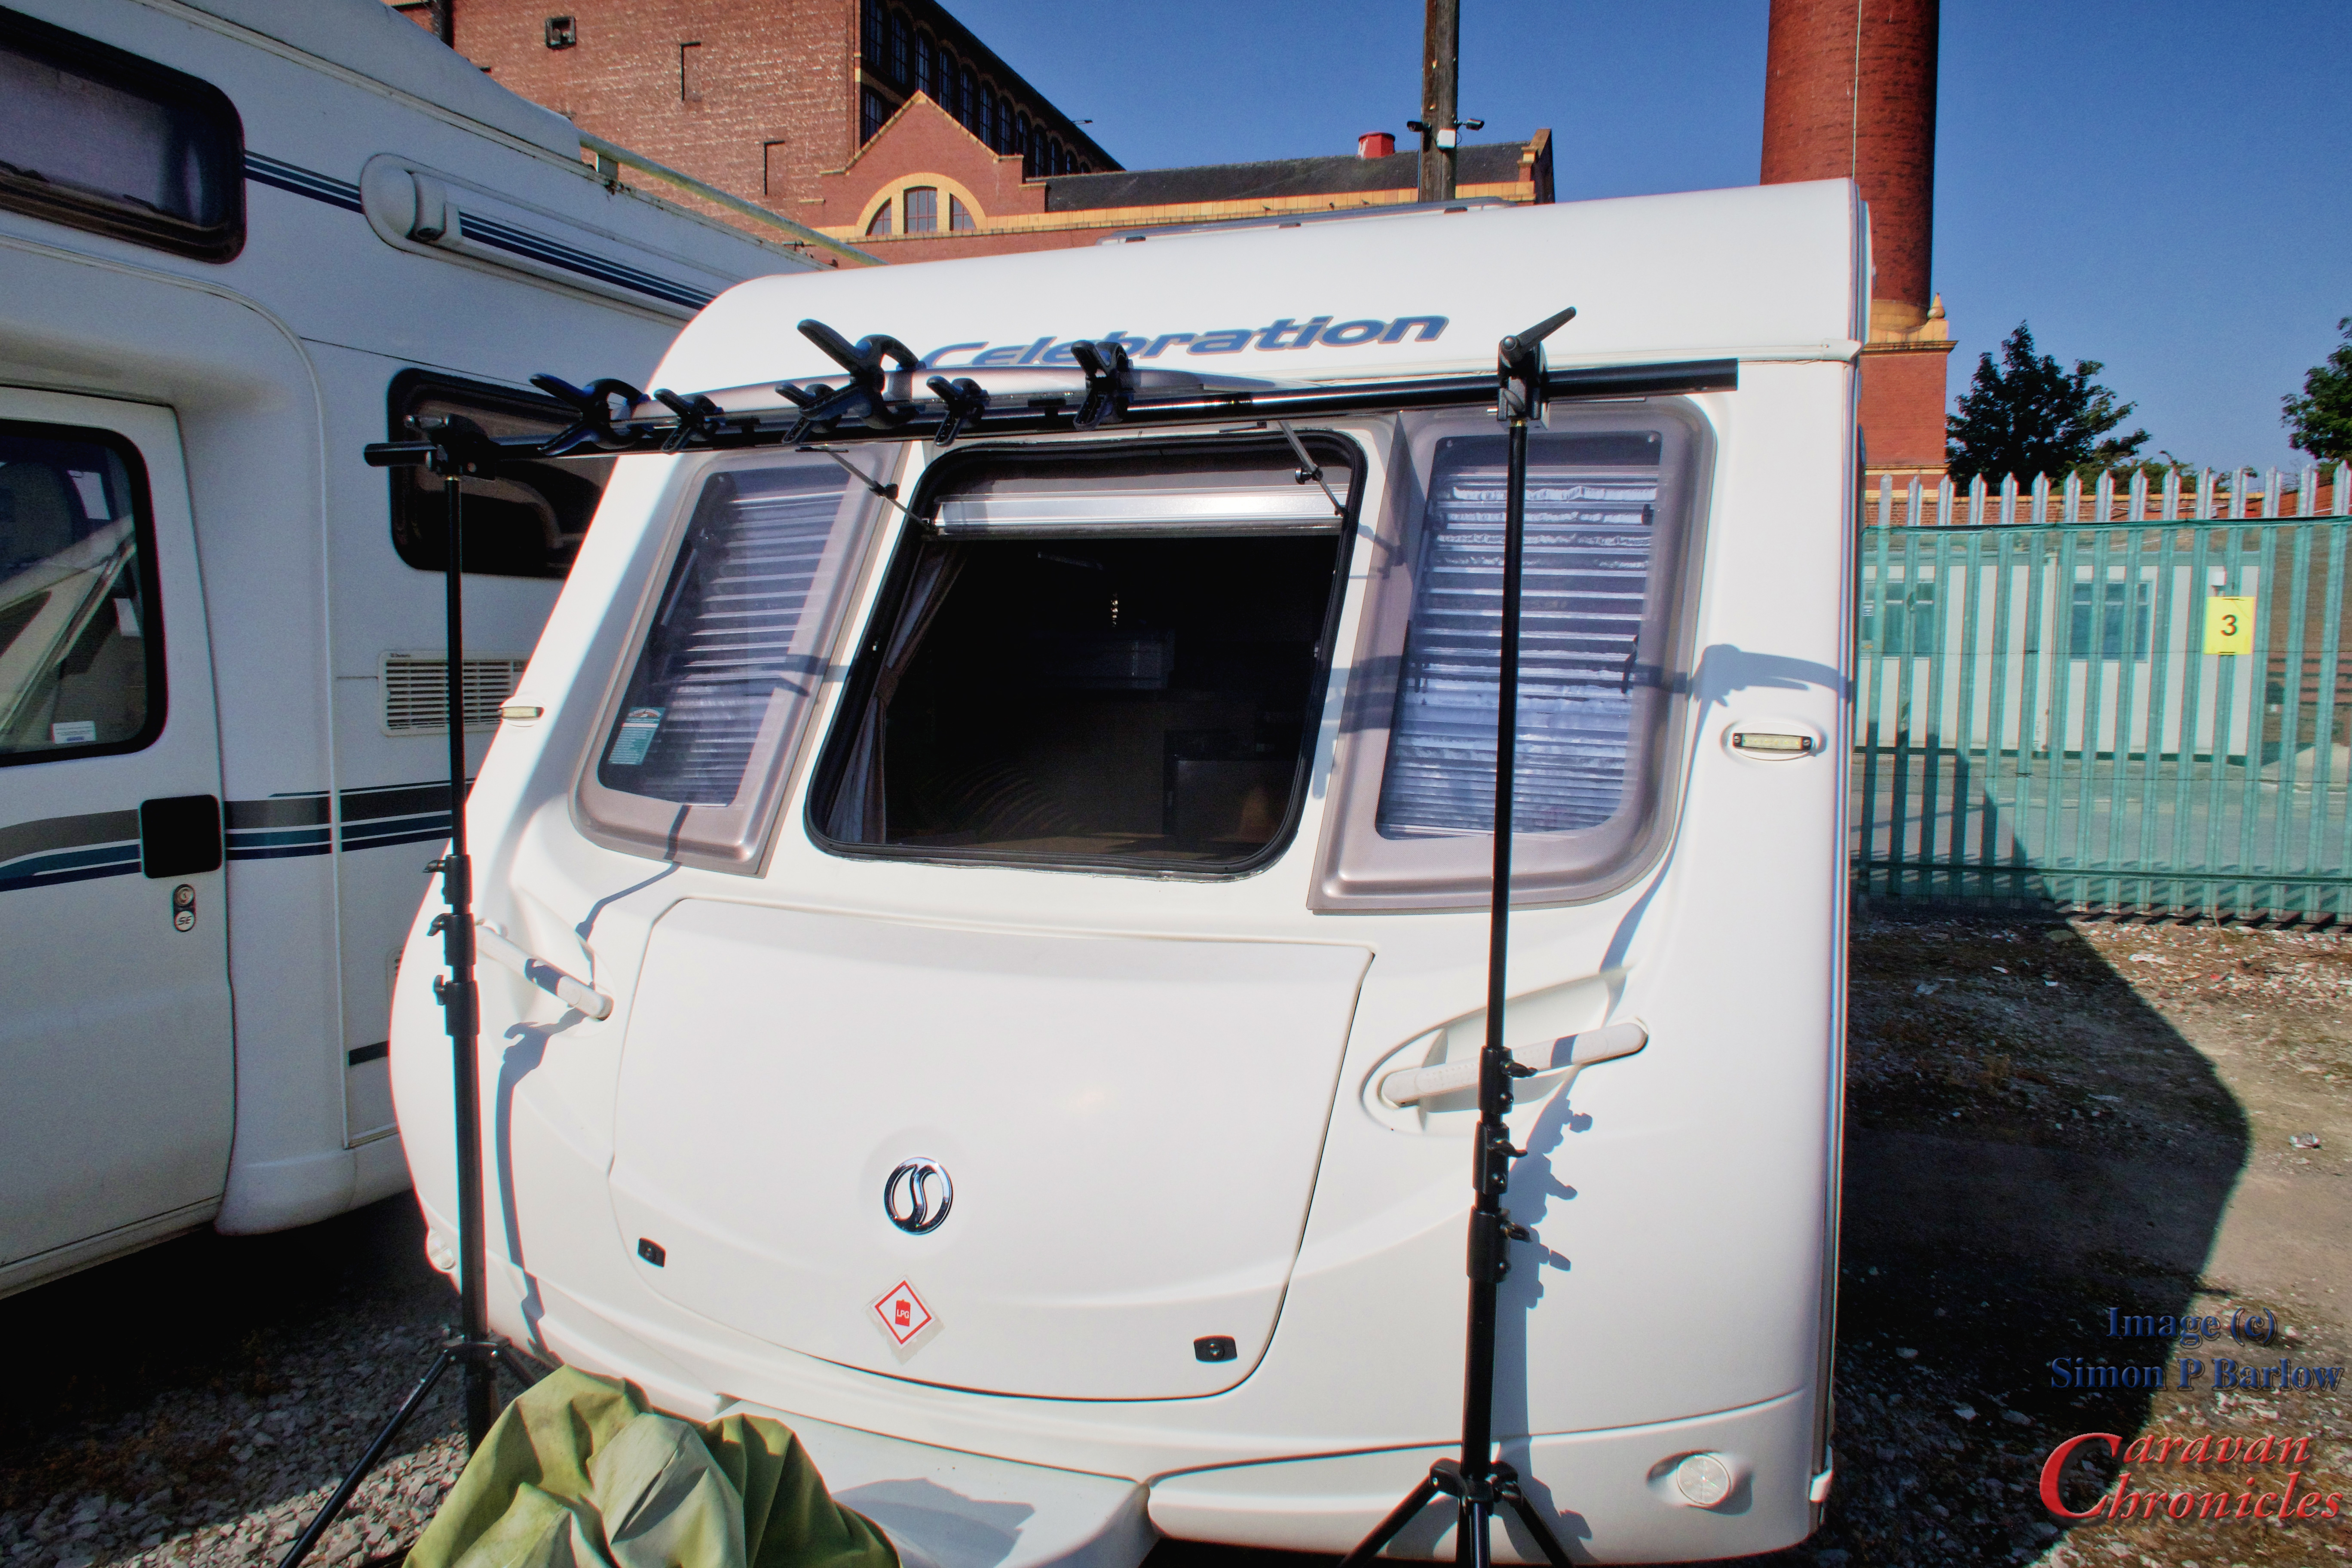
Improvising I used two stands with a cross beam clamped between them to hold the window horizontal. This should take any flexing stress caused by the window stays out of the equation…. Hopefully!

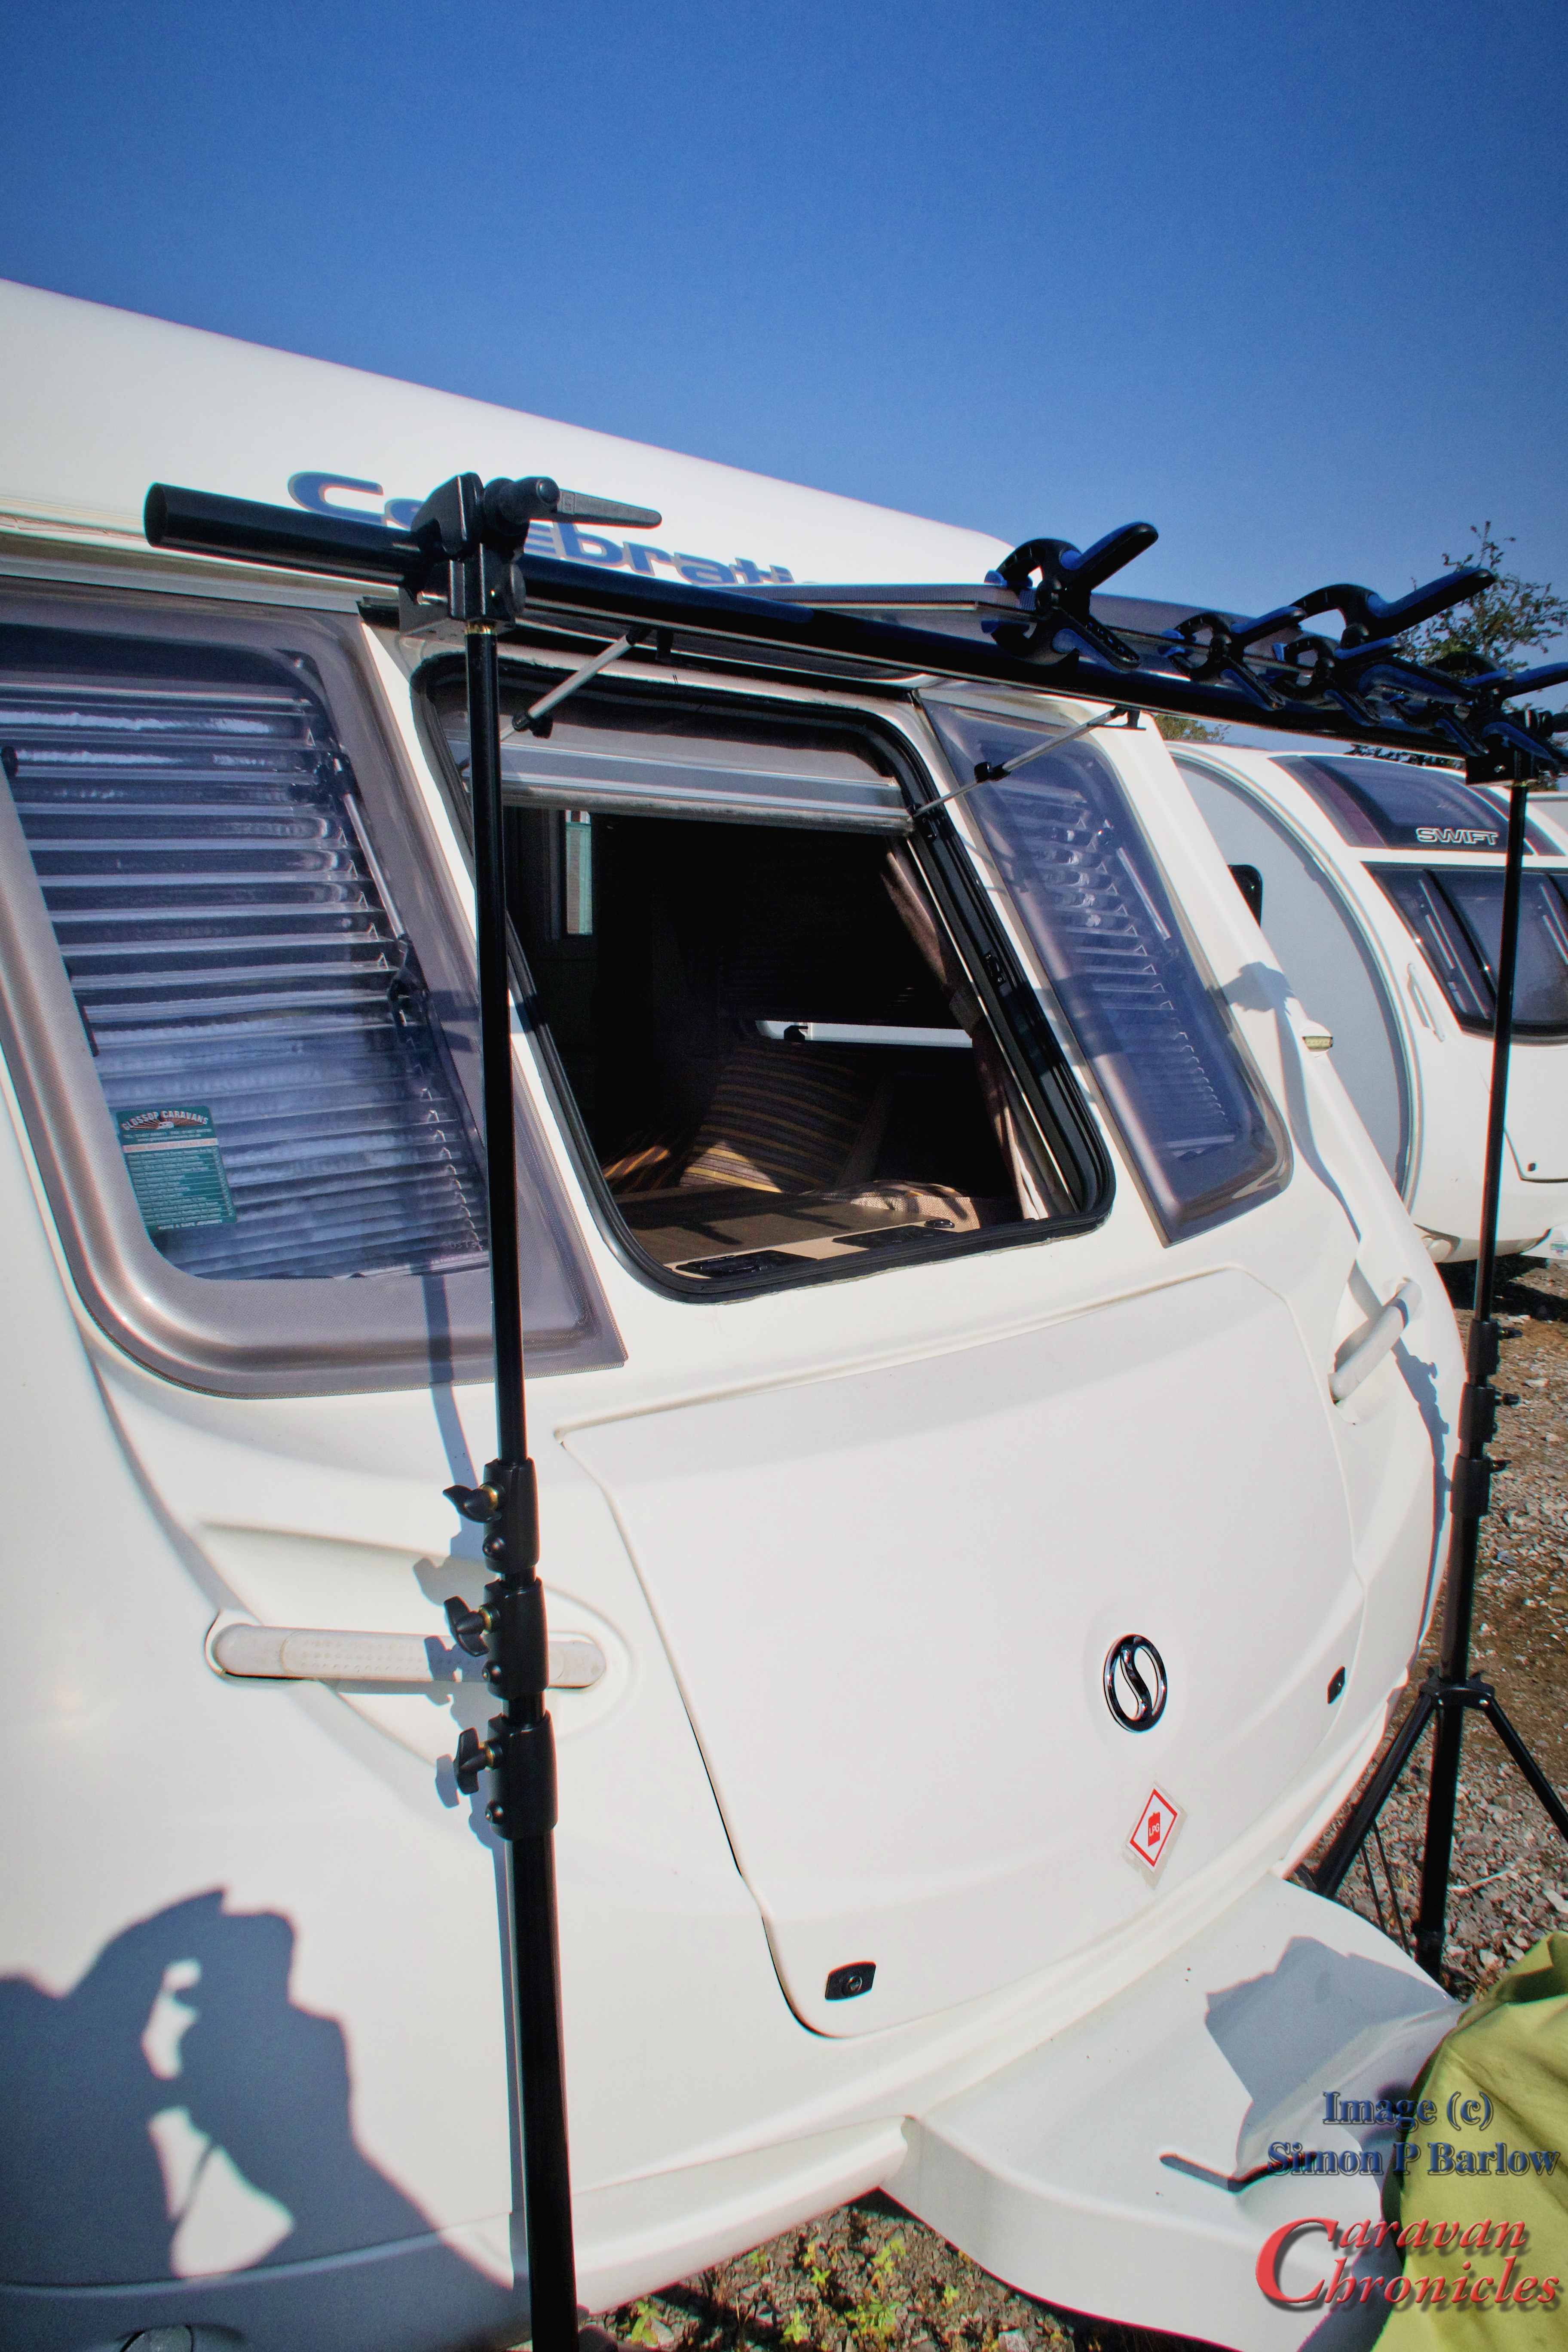
To hold the gap between he two sheets I used three long needles from syringes… this allowed me just enough wiggle room to slide some blotting paper with a bit of isopropanol alcohol to clean out any contaminates. I’d already tested this to make sure it was safe and it does evaporate very quickly.

You are advised to lay down a 5mm bead of glue… as this was going to be difficult between the two sheets of partially bonded plastic I opted to use a wide bore syringe needle on the glue bottle which allowed me to squeeze glue into the gap… it was a bit fiddly but I managed to achieve what I thought would be the right amount. Sliding the three previous inserted needles out to allow the sheets to come together I used some fairly light clamps to hold the pieces together while they cured. Bondrite do caution about NOT using an excessive clamping force as it can lead to crazing of the sheets.

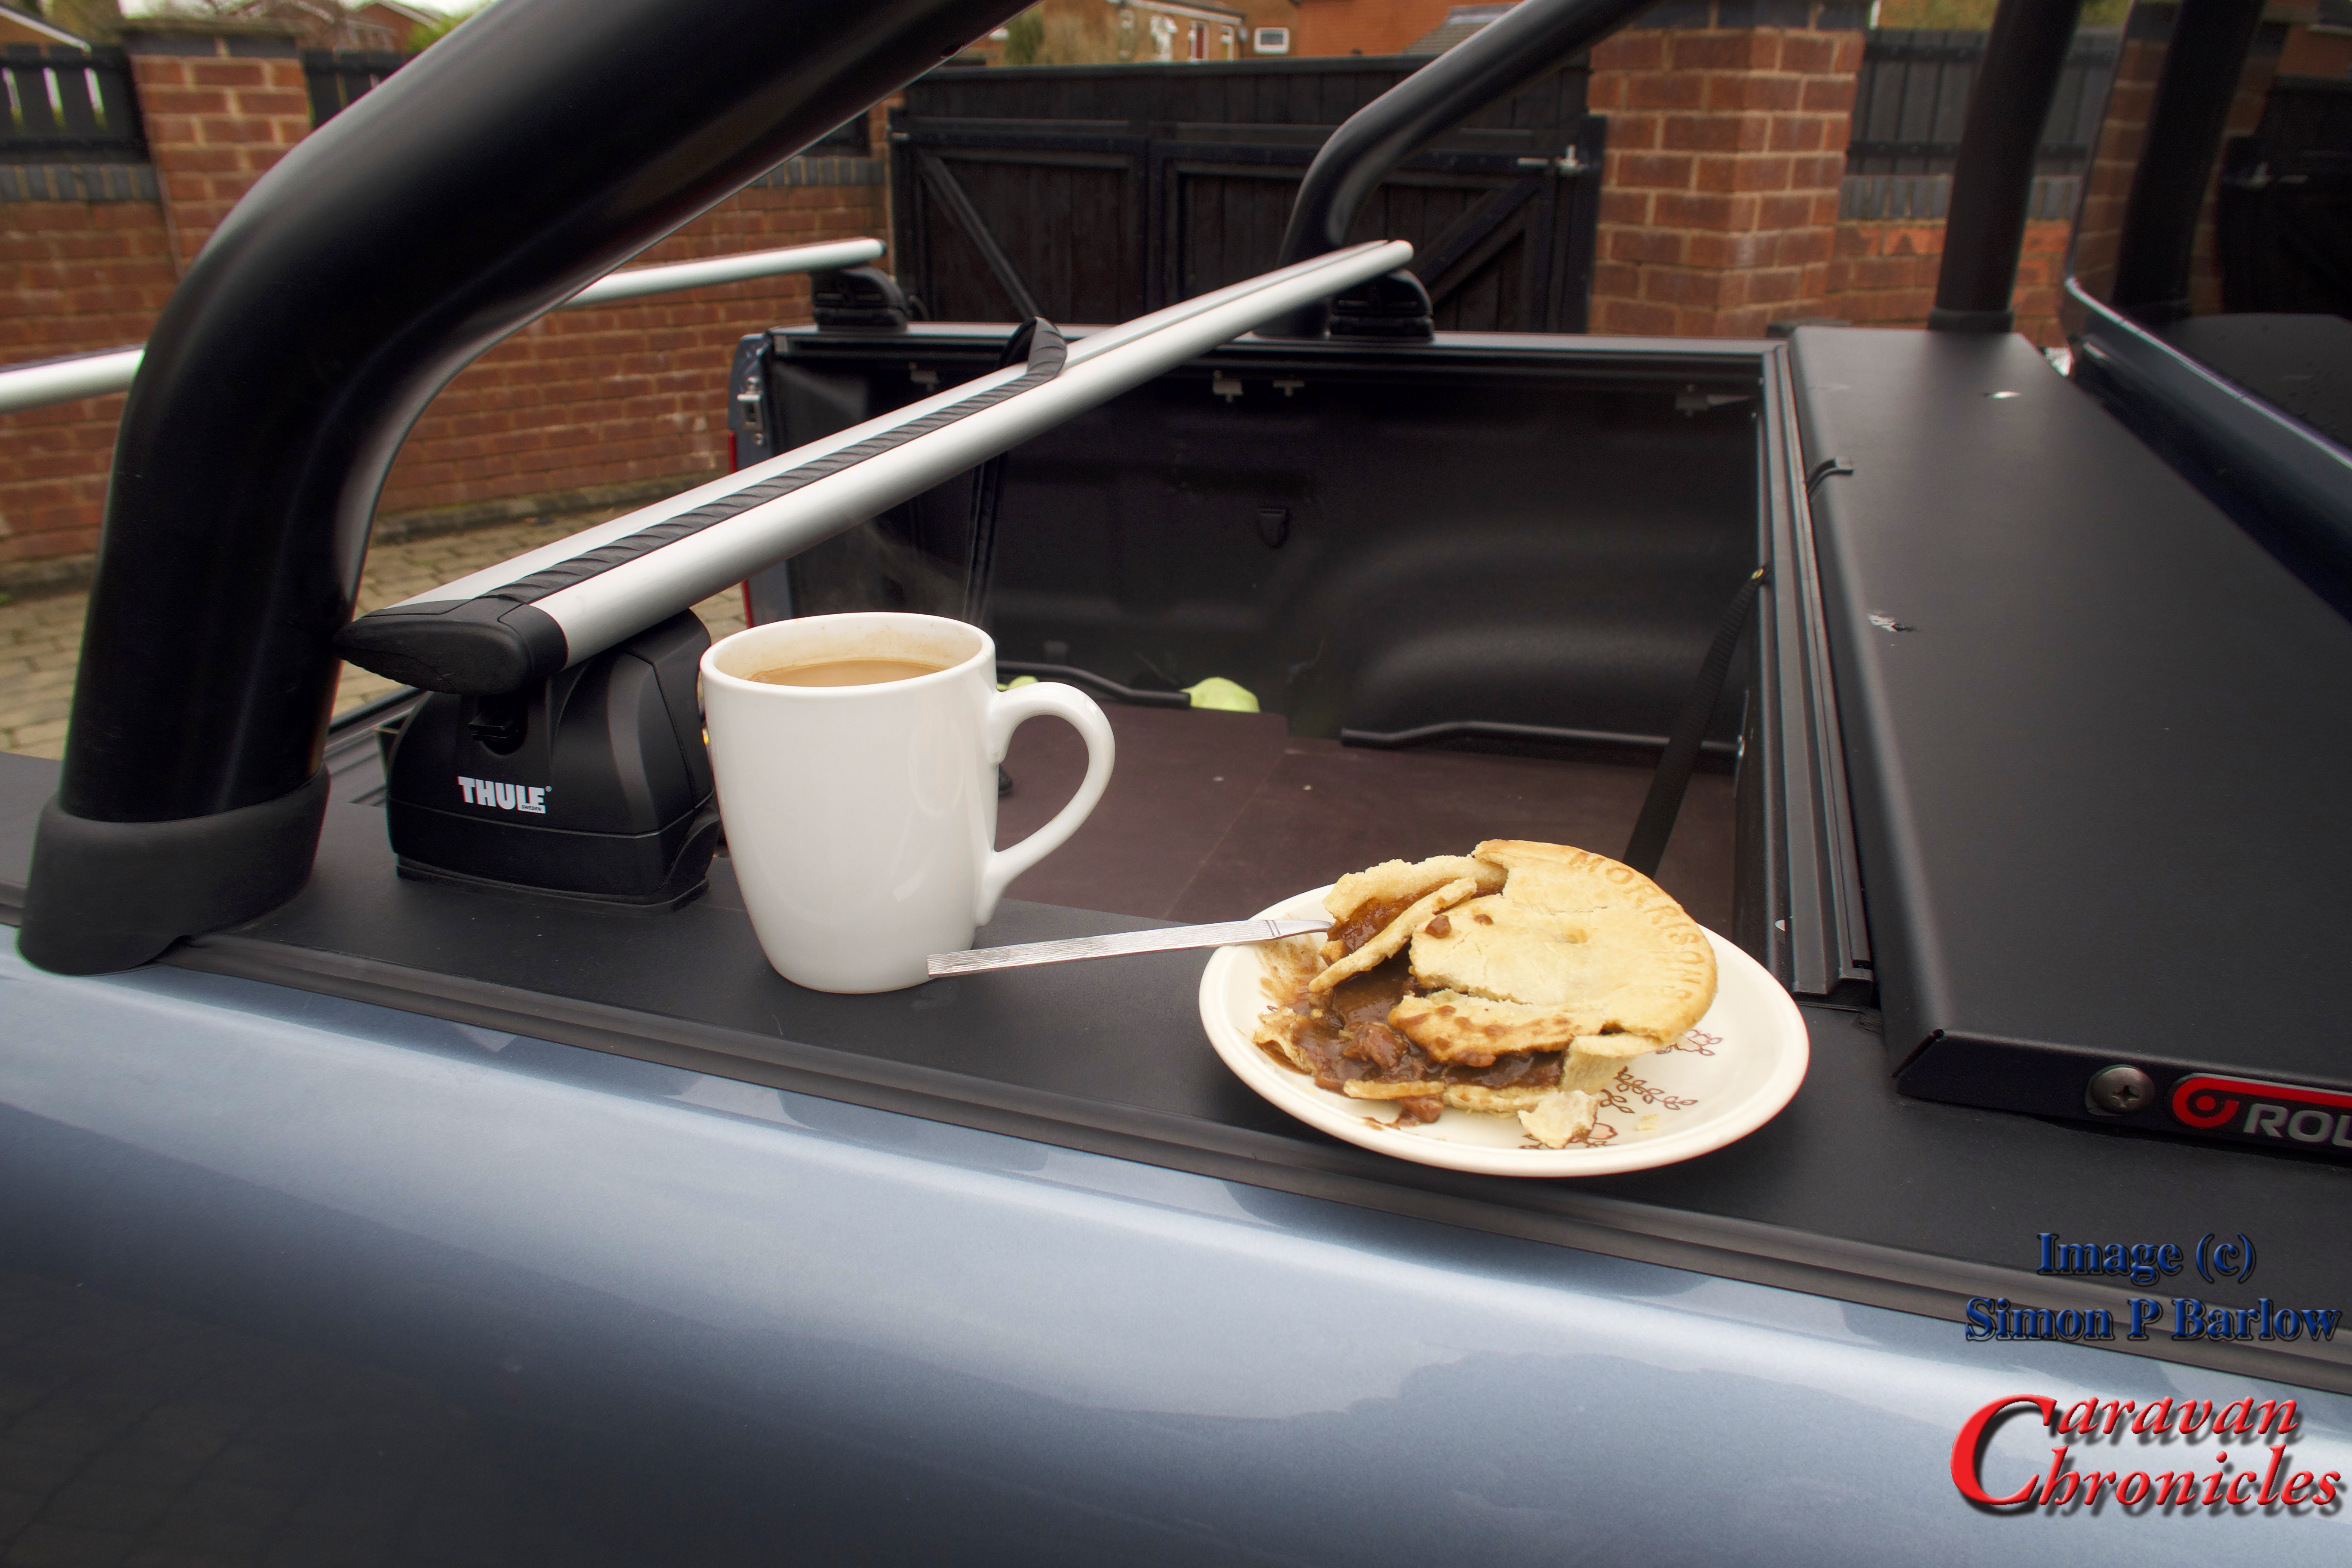
The data sheet advice is that handling strength is achieved after about 3 hours at 20 deg C. I covered up the glued area with microfibre cloths to protect it from the sun and had a sit down with an iced coffee and a sammich.

Next Job…

If you read my previous post “Put Your Lights On Mate…” then you might have picked up on my request at the end for any recommendations for a UK supplier of good quality replacement LED bulbs. Well Peter Farnham posted in the comments section and recommended Classic Car LEDS Ltd ( https://www.classiccarleds.co.uk ). A couple of days later I dropped them an email with a few questions and Duncan replied back with some details. A few more exchanges of emails ended up with me ordering replacement LED bulbs for the new fog lights, indicator lights and stop/tail lights. This is not a sponsored post and I paid the required number of beer tokens for these.

Not much to say on changing the bulbs over… what was noticeable was though they did have a bit heft to them… they seem really really well made. No flexing, solid and just had that feel about them that made me go “Mmmm” while nodding slowly…. almost in a Joey Tribbiani moment.

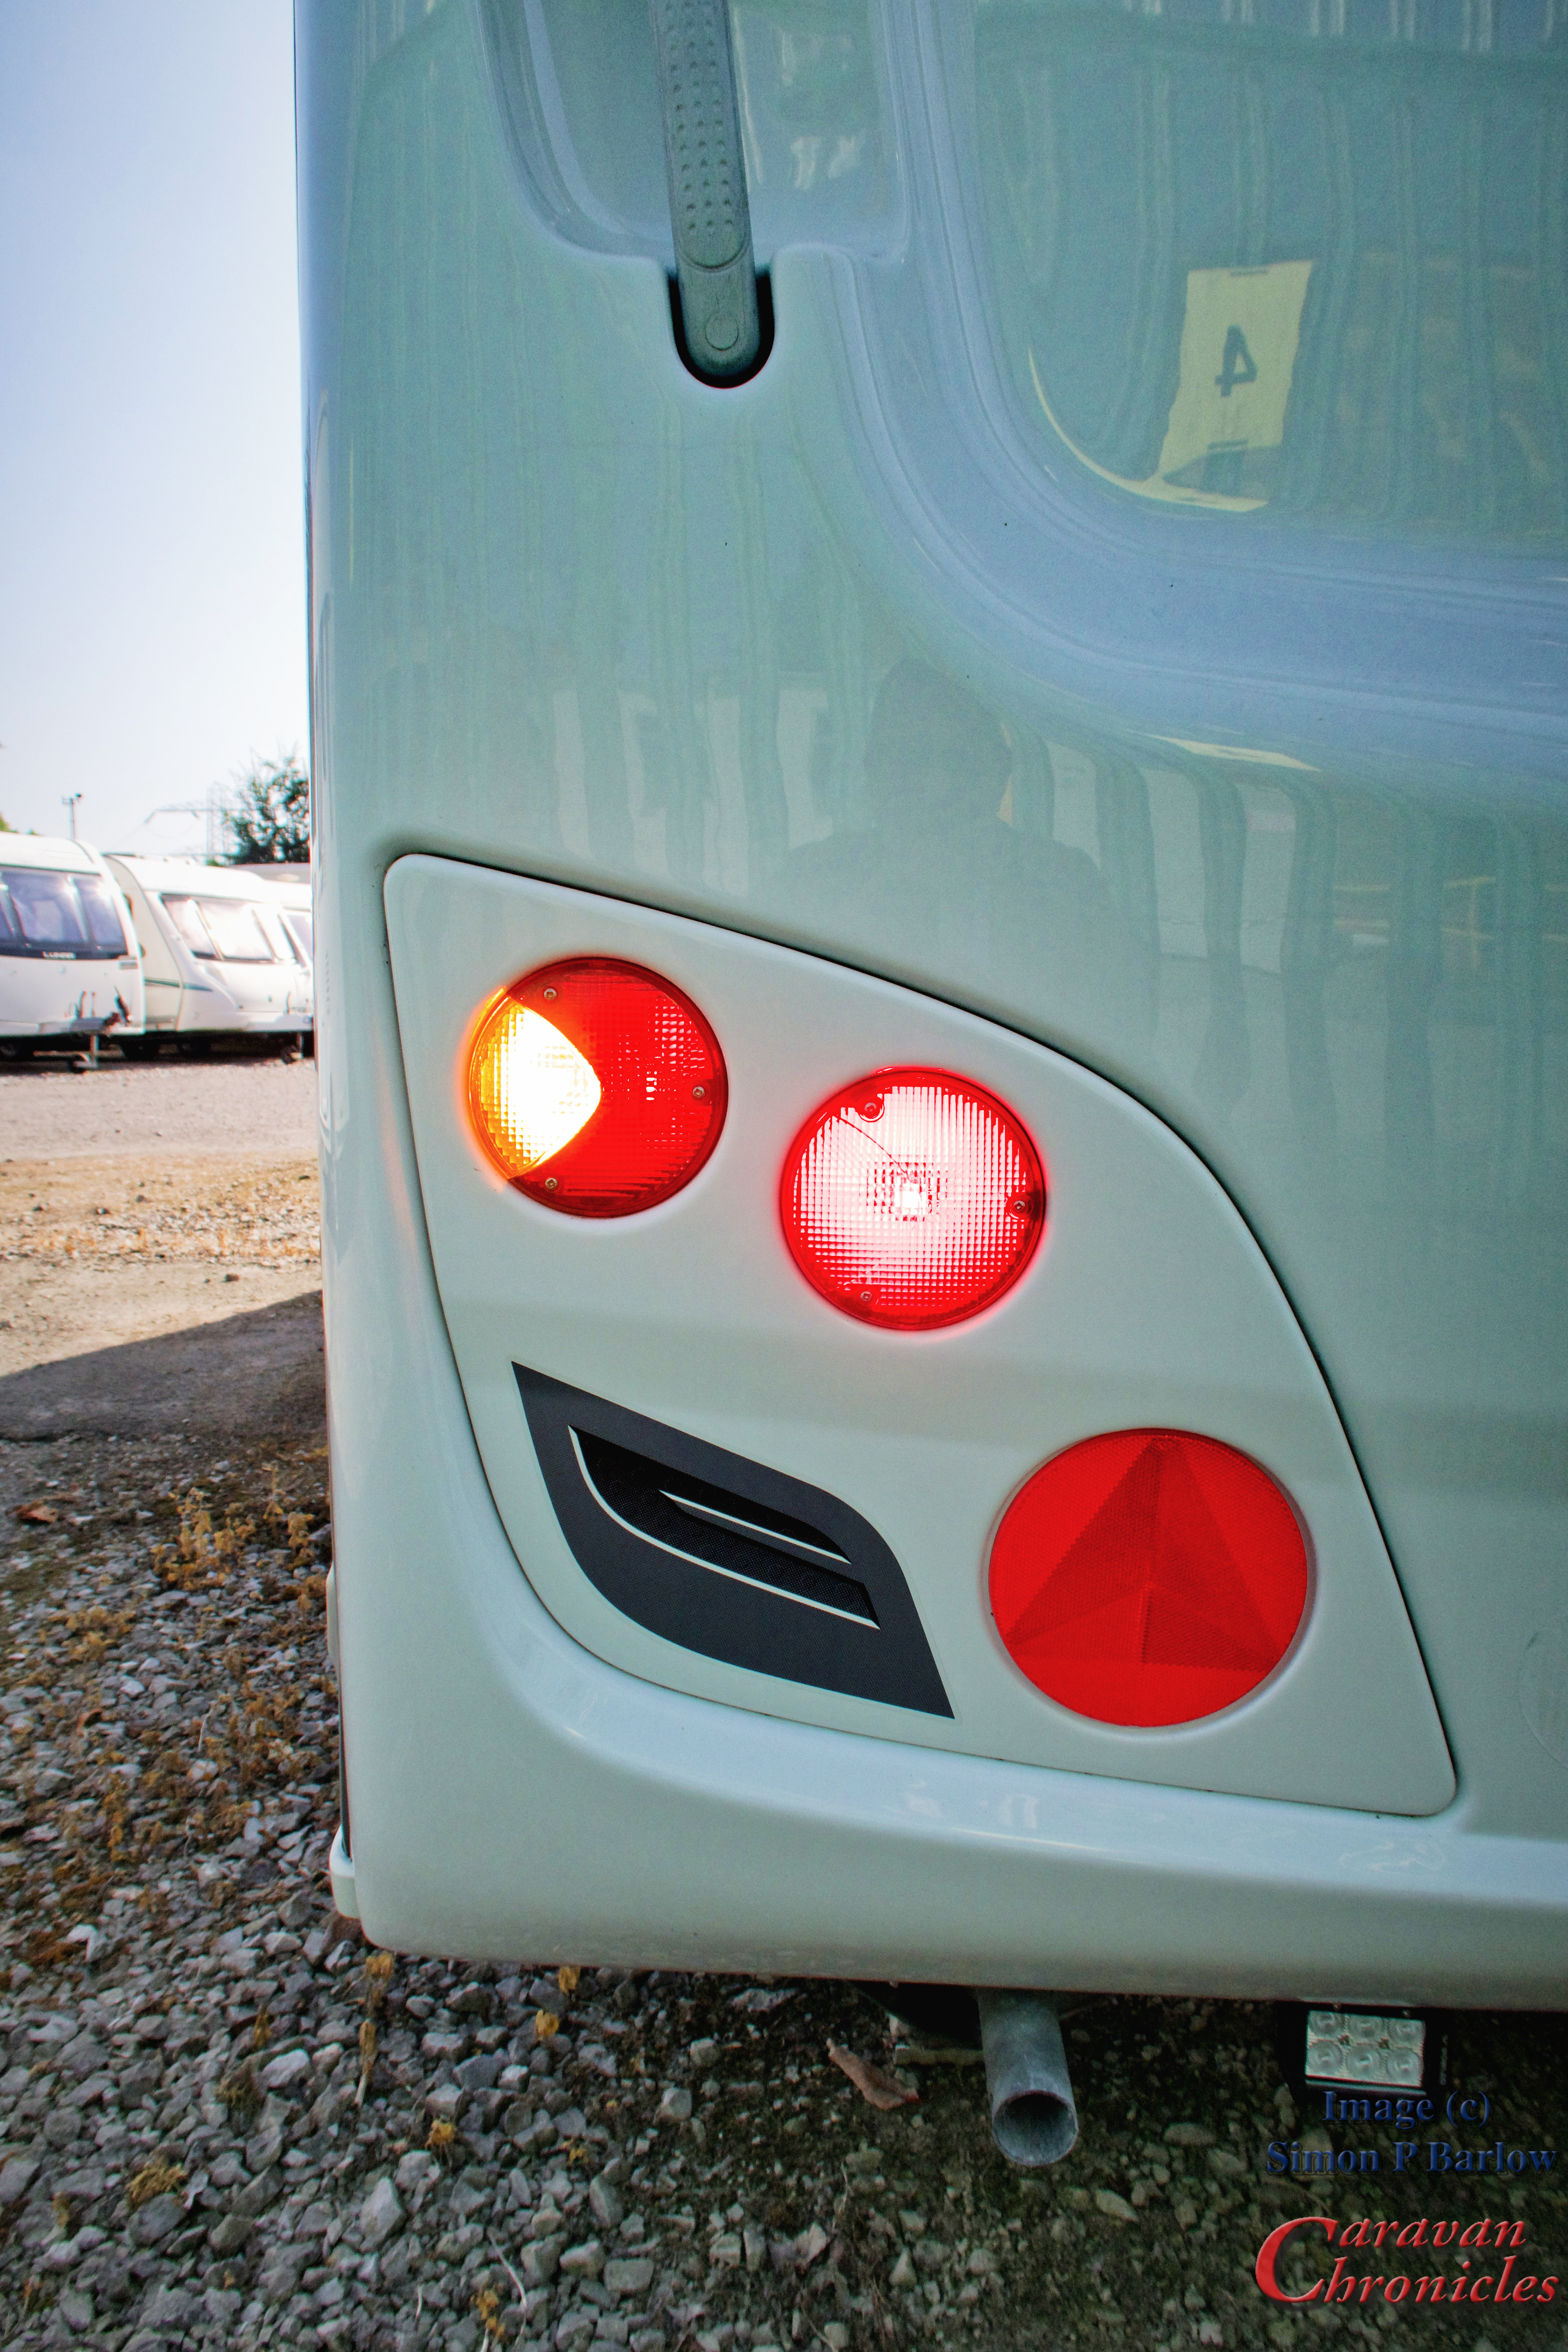
I did try to do before and after photos to compare the light output…. even tried a short video with one side changed over and the other side on conventional filament bulbs… all failed…. not as easy as it looks in strong sunlight even though the caravan rear was in shade. However the photo above is one side converted over. This is showing the indicator, tail light and fog light lit. The indicators are really bright. Having the LEDS the same colour as the lens works well. The tail light is a strong red and bright while the fog light looks washed out and white… it’s down to the fact that it is so bright its over exposed…. the exposure is correct for the indicator and tail light but the fog light is amazingly bright.. and red.

On the VW Amarok I haven’t had any canbus warnings… I even plugged in my reader to check… all good and no strobing or hyper flash.

To say I’m chuffed with these LED bulbs is a bit of an understatement… if you suffer from rear light envy as you follow one of those gloriously illuminated trucks down the motorway, drop Duncan an email at sales@classiccarleds.co.uk and tell him I sent you. Sort out your rear lights and never again have someone with four megawatts of light bars and spots flashing you and shouting “Put Your Lights On Mate” as they simulate a starship going into warp drive passing you.

Another small job next…

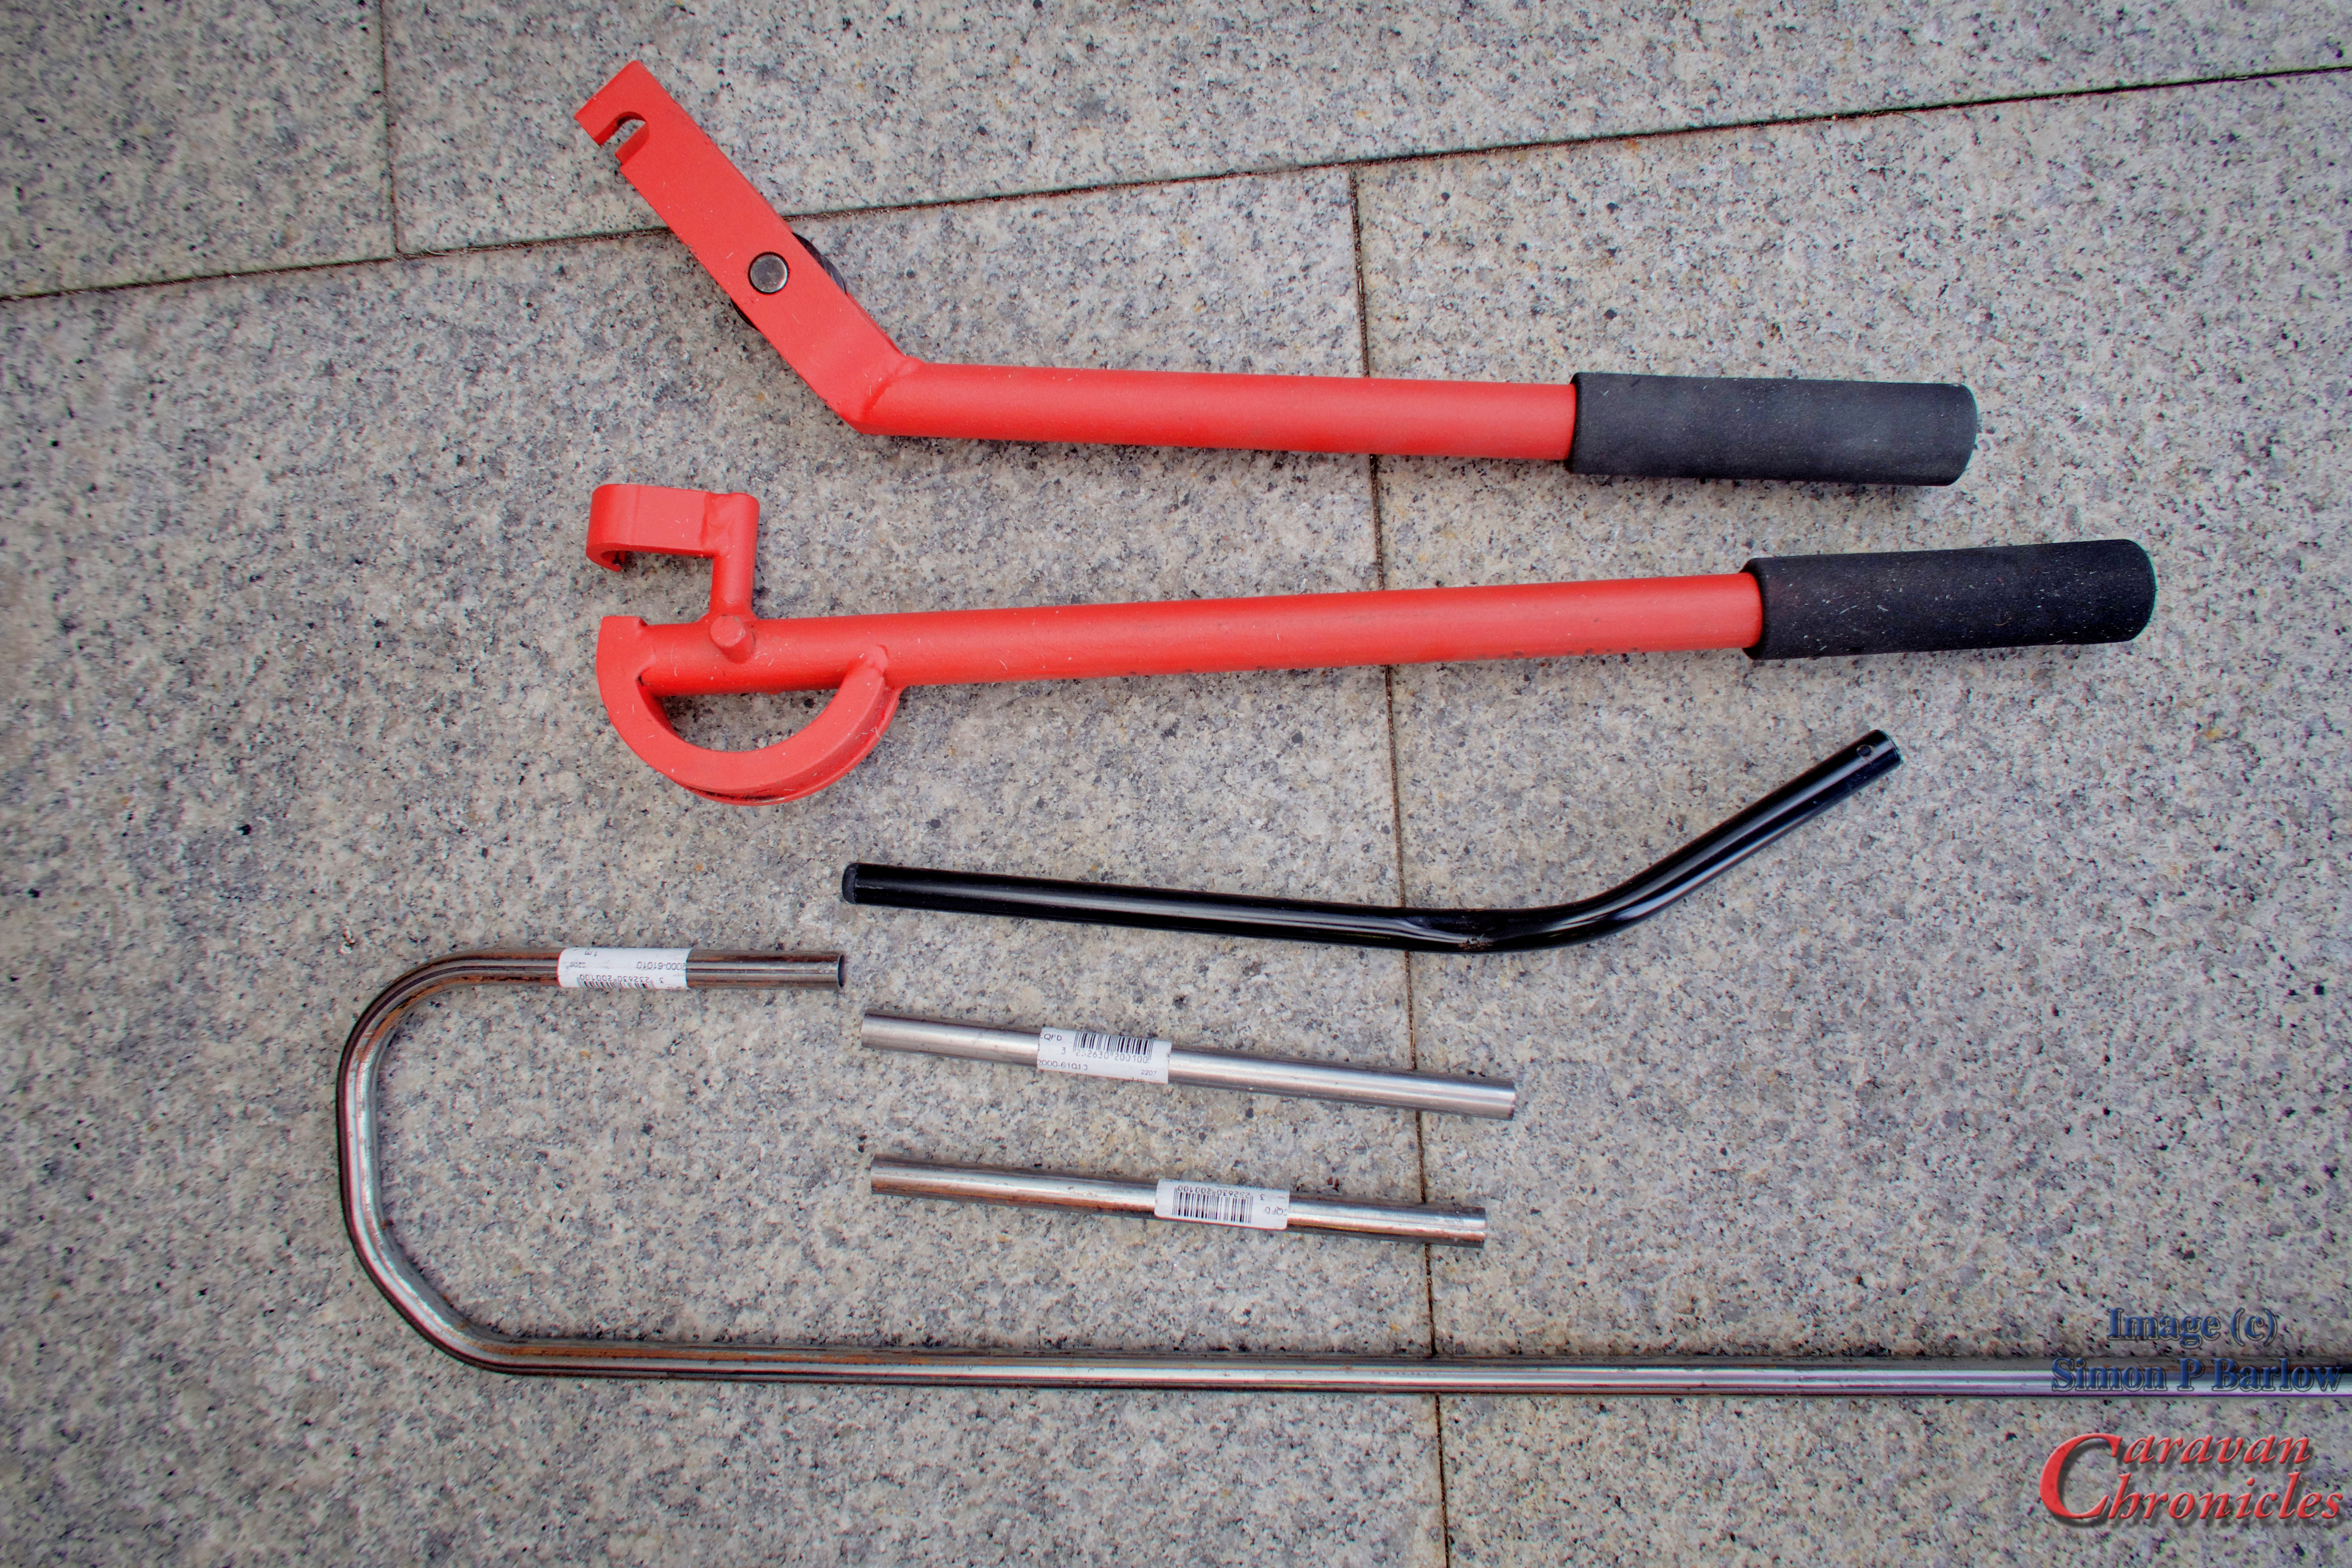
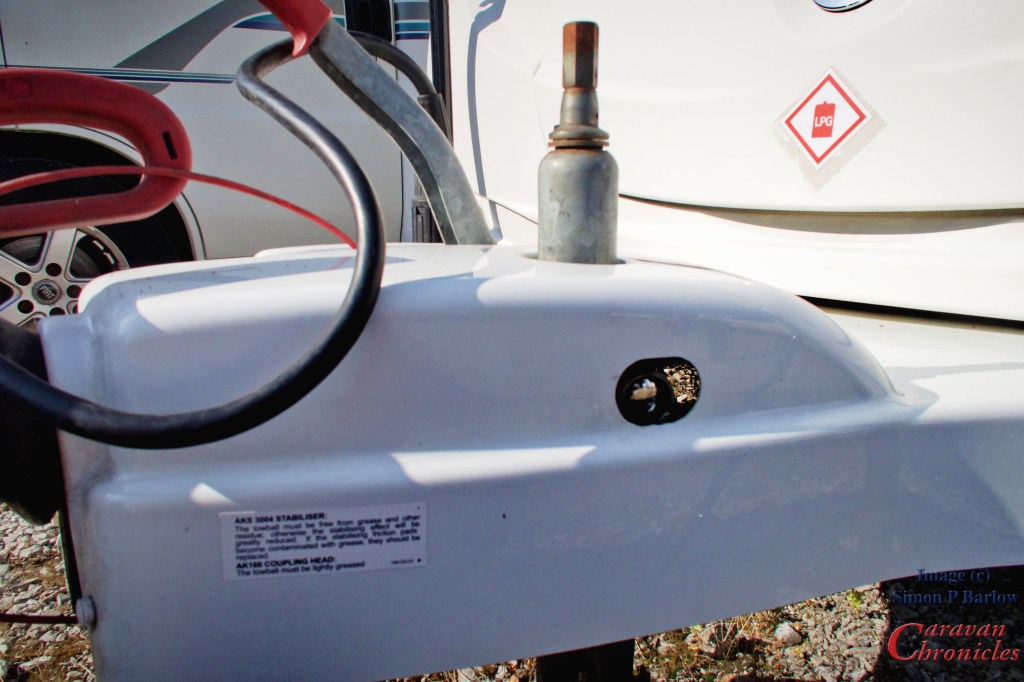
I’d had this gadget for a while and I can’t remember where I got it from. I think it was from a caravan shop at a dealer near York that we visited a while ago.

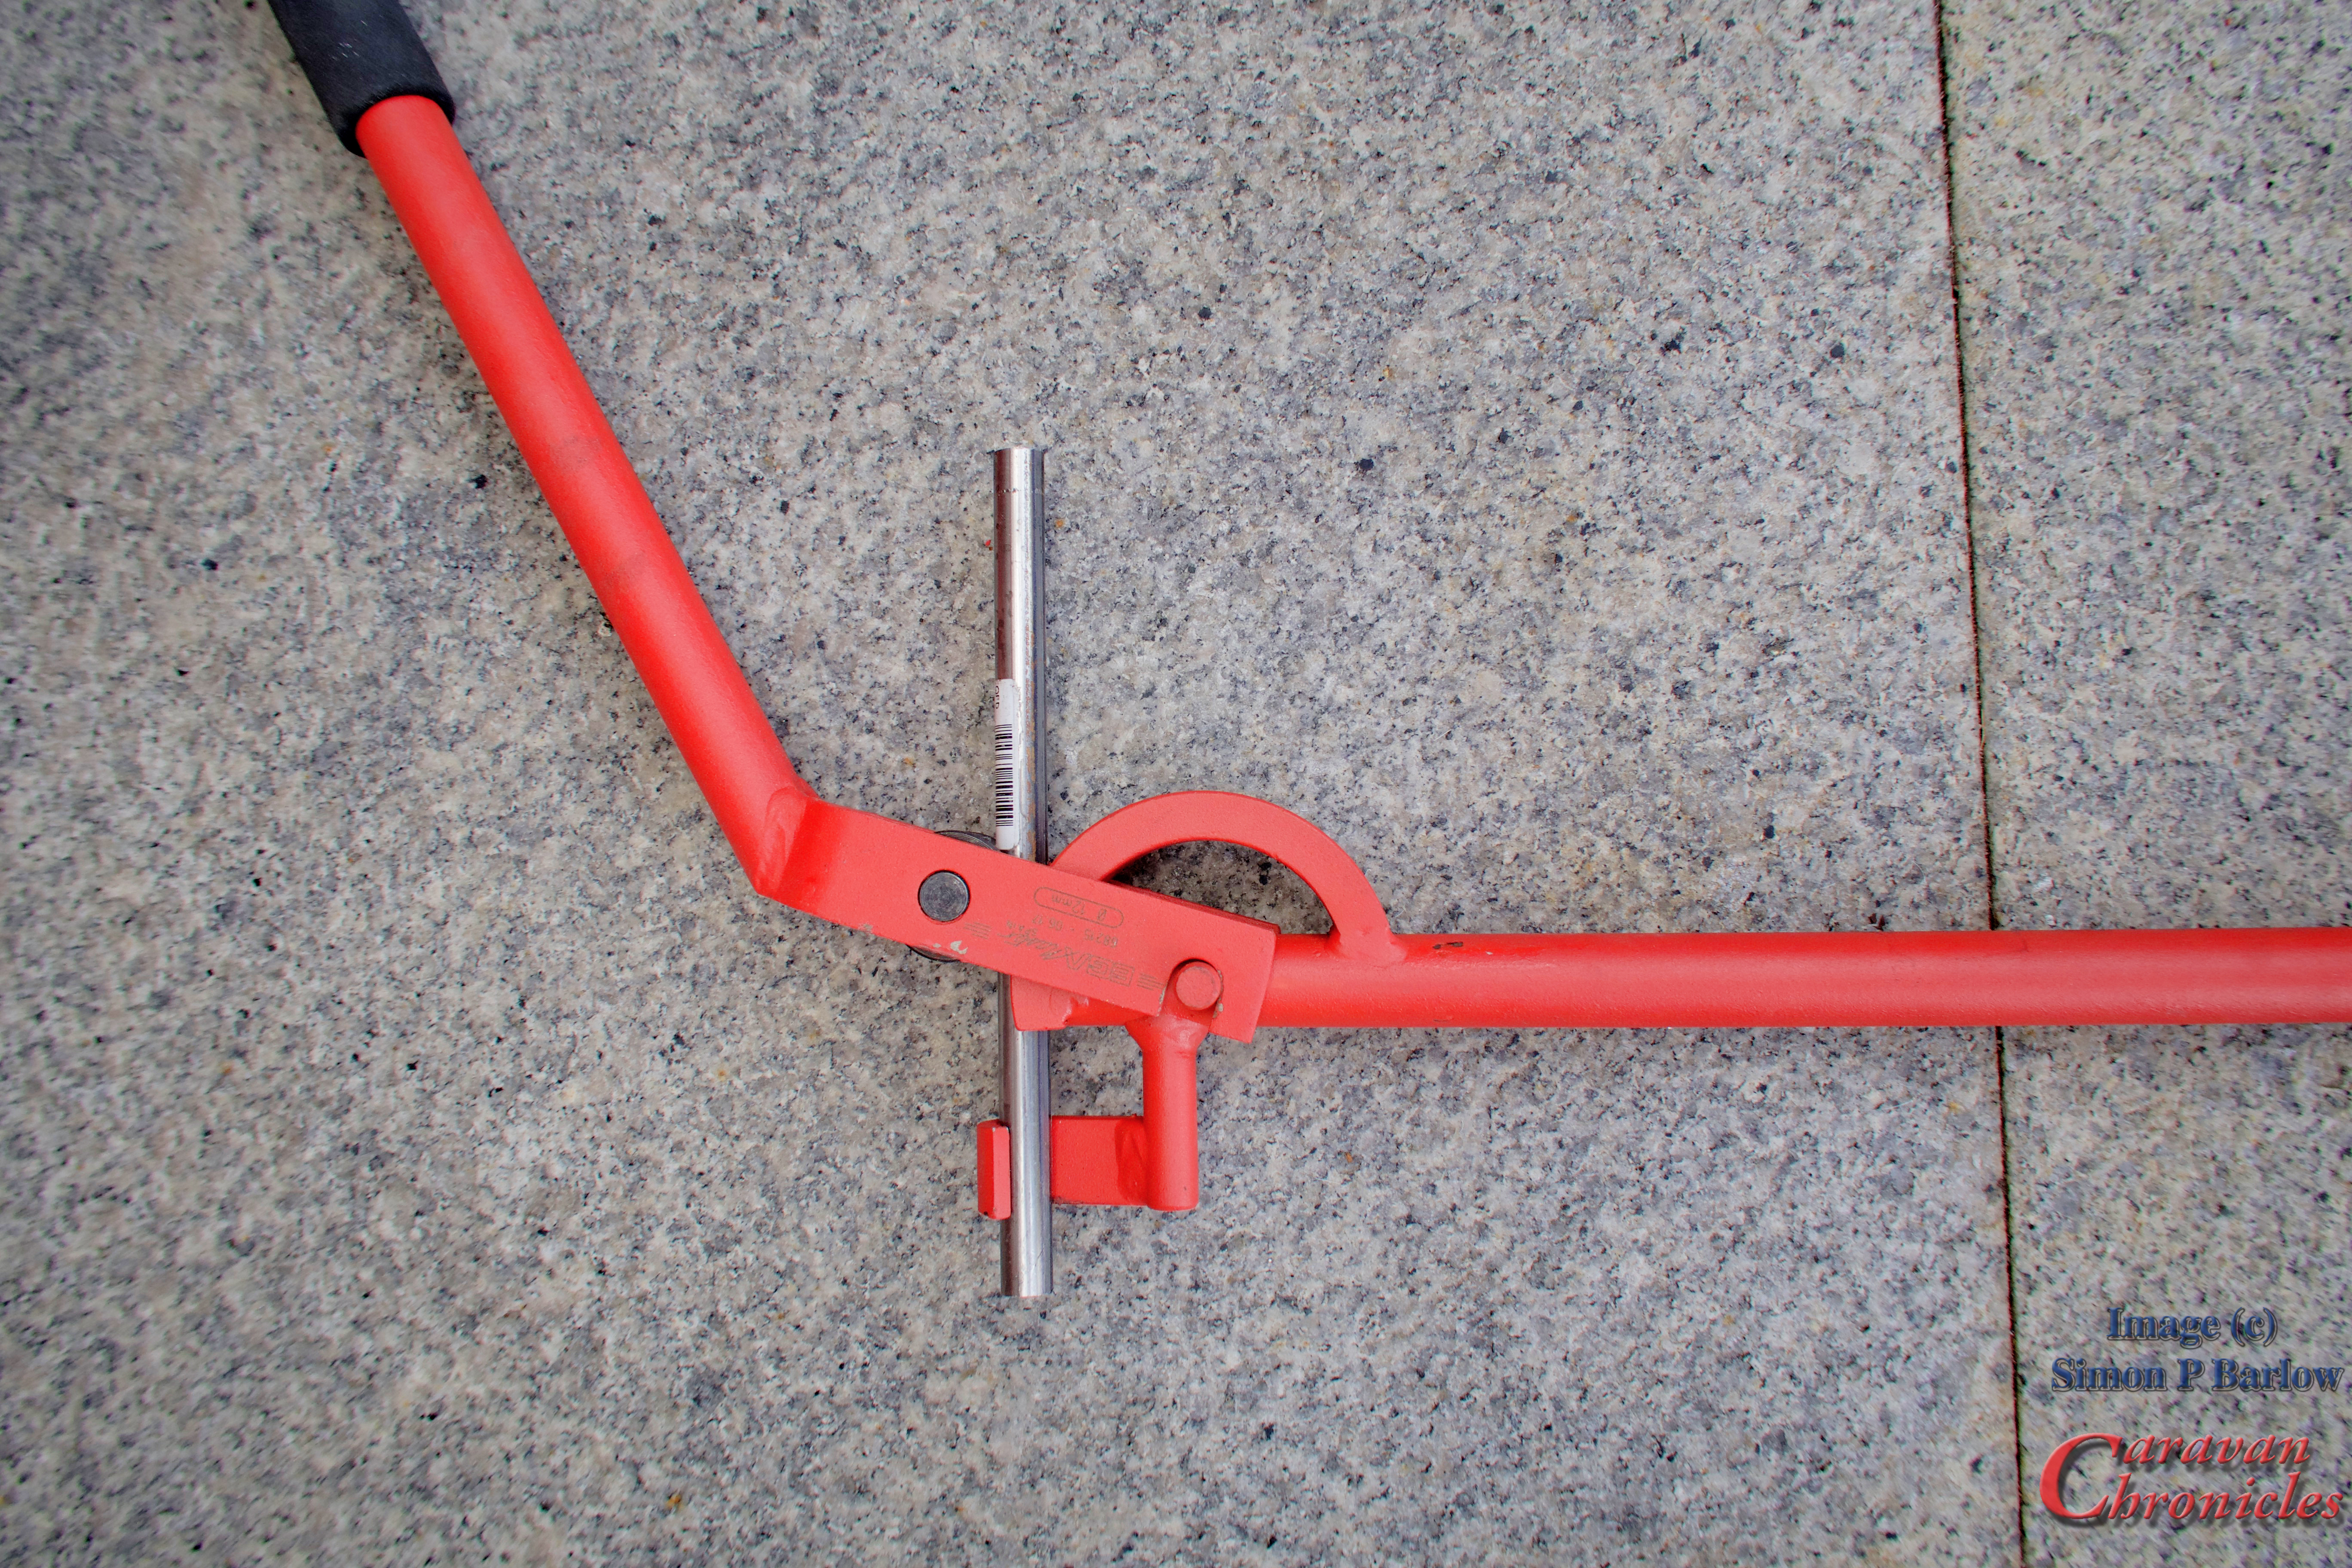
Simply it’s a security head bolt with a hardened shroud that replaces the normal jockey wheel clamp handle. When it’s installed it is flush with the A frame cover and pretty difficult to get to. It comes with a short handle and socket that fits the security bolt head. I did try with a couple of sockets but the shroud makes it almost impossible to even knock a socket on with a hammer. So if anyone want’s to nick the caravan they now also have to contend with the hassle of getting round my jockey wheel clamp. As I always leave the caravan nose high in storage you can’t even pick it up and drop it on to a tow ball. Hey if it makes them try elsewhere… it works for me.

Thinking about the next step…

This is going to be a big one. I’ve been planning this for a few weeks now and it involves two or three drawings… some detailed planning and I’ve been checking equipment specs in detail. The last stage was to sit and stare at the space available in the caravan and work out Tetris style how it is all physically going to fit in and how much of the existing kit will be removed. More to come soon!

Back to the window…

OK I bet you have been wondering how I got on. Well after nearly five hours of curing time I disassembled my contraption holding the window open and it seems to have worked OK. I can see that it has bonded all along the bottom edge. I could have put a bit more glue in at one spot and needs a light clean up all along the bottom edge to remove what has oozed out. I’ll leave that for at least another 48 hours before attempting to gently sand it off.

All in all I’m pleased with the result and hope to see that it will stand up to the test of time.

Share this:

  • Click to share on X (Opens in new window) X
  • Click to share on Facebook (Opens in new window) Facebook
  • Click to share on Tumblr (Opens in new window) Tumblr
  • Click to share on Pocket (Opens in new window) Pocket
  • Click to share on Pinterest (Opens in new window) Pinterest
  • Click to share on Reddit (Opens in new window) Reddit
Like Loading...

“Put your lights on mate…..”

28 Saturday Aug 2021

Posted by Simon Barlow in Accessories, Amarok, Caravan Electrics, Caravan Road Lights, General, Maintenance, Modifications, Projects, Technical

≈ 6 Comments

Tags

Caravan, Caravan Road Lights, Caravan Upgrade, Caravanning, Caravans, Maintenance, Modifications

How many of you have driven behind a vehicle in less than ideal conditions… going dark, raining or foggy… and uttered those immortal words “Put you lights on mate” in the vein hope it will do some good only to approach a bit closer to find that the lights are on and are less effective as a couple of Ikea tea lights in jam jars. That is the feeling I get with a lot of caravans. In my opinion a lot for rear lights are less than ideal. In this day and age some of the drivers out there need all the help they can get as they even struggle to notice a big white box in front of them in bright sunshine let alone in inclement weather or in the dark.

Our caravan like a lot of other Swift caravans looks great from the rear with nice big lights and reflectors. Reflectors are good if the following driver has turned his headlights on and not been too busy texting and simply relying on the DRL’s to light the way. The big reversing lights will surly let the driver and anyone else behind know you are reversing… but about as useless as the aforementioned Ikea tea light in a jam jar when reversing at an angle into a pitch at night. The rear fog light however deserves a special mention… the single rear fog light…. can you see it… the tiny Lego brick sized rear fog light… the red thing in the middle down low… difficult to spot on a stationary caravan in daylight let alone from a distance on a road in fog. Mind you when that bit of wire in the bulb warms up it will blind you… honestly it will…. eventually… when you get so close because you didn’t see it from ten metres away.

Its time for a change. An upgrade if you will… to allow me to shine a beacon of light towards all that follow. But… and here’s a the big thing… I have to keep it looking nice. Everyone likes a nice rear don’t they.

OK, I searched for all the replacement options. Swift don’t make it easy. The two panels that the lights are mounted in don’t come out, well not easily and I was cautioned about even attempting to remove them. Changing to smart round LED lights was out. Then it struck me… the reversing lights could become fog lights and I would install new reversing lights. I’d towed a trailer a while ago that had football stadium sized reversing lights and wow what a difference it made. One of the first things I did with the Amarok when we got it was to install LED work lights under the rear bumper as reversing lights and that was a huge improvement so I ordered another set from the same company as I’d fitted to the Amarok.

A bit more searching I found the exact lenses for the existing lights in red to turn the reversing lights into fog lights.. it was actually cheaper to order a pair of complete lights than it was to order two replacement red lenses… I’ll never work that one out.

Ok how was I going to wire this lot up. I made a couple of brackets that fitted under the caravan allowing me to mount the reversing lights up close just inboard of the rear steady jacks. This would offer a modicum of protection from road debris thrown up by the tyres. These could be wired to run off the old fog light which would now become a junction box and the reverse lights would become the fog lights, so simply switching the reverse light and fog light cables over at the road light fuse box in the front of the caravan would have everything working correctly.

I also angled the reversing lights out slightly. I wanted the centre of their light pool to be along an extended side line of the caravan so that looking through my mirrors down each side of the caravan would be the centre of the lit area. This hopefully would provide the best angle of illumination when reversing and performing a reversing turn onto a pitch.

“Hang on lads… I’ve got an idea”

Cue the music… no, no doors were blown off during this mod. Right what if the new rear fog lights could be my brake lights when they weren’t being used as fog lights?

A simple diode blocking bridge using two diodes could do this quite easily. Routing through my electronics spares I found a bag of 10 Amp diodes which would easily cope with the task.

For a quick solution I used two strips of terminal block and built a quick blocking bridge. What happens now is applying the brakes powers up the brake light circuit and the fog lights. The diode in the fog light circuit stops me back feeding current to the tow vehicle fog light circuit.

Turning on the fog lights powers up the fog lights and the diode in the bridge stops it powering the brake lights in either the caravan or back feeding to the tow vehicle. Really simple and when testing I didn’t have any canbus or other errors thrown up by the VW Amarok’s management system. The existing (and original) brake and tail lights work as normal.

I’ll have a look at coming up with a better solution than using two lengths of terminal strip and probably build something in a small electrical project box so it can be mounted securely.

As far as I can tell the changes I’ve made all fall in line with the lighting regs for trailers. While I’m 99% sure, there is always the possibility that I could be corrected and shown the error of my ways and point out I have missed something in my reading of the regs. I’ll let you know.

The next thing…

I’m trying to find some good quality bright LED replacement bulbs for all the rear road lights. I have some, but I suspect they are not correctly marked. If anyone has any recommendations for replacement 25W and 5/25W bulbs that they deem are good options to look at, especially if they are correctly marked, please let me know in the comments. If you are a company that sells LED replacement bulbs and think they are the good enough to pass the Caravan Chronicles testing department (we don’t actually have a testing department… its just me) then challenge me to break them!

Safe travels everyone… and “PUT YOUR LIGHTS ON MATE”

Share this:

  • Click to share on X (Opens in new window) X
  • Click to share on Facebook (Opens in new window) Facebook
  • Click to share on Tumblr (Opens in new window) Tumblr
  • Click to share on Pocket (Opens in new window) Pocket
  • Click to share on Pinterest (Opens in new window) Pinterest
  • Click to share on Reddit (Opens in new window) Reddit
Like Loading...

Mirror Mirror…

15 Monday Apr 2019

Posted by Simon Barlow in Accessories, Amarok, General, Modifications, Projects, VW Amarok

≈ 8 Comments

Tags

Accessories, Milenco Grand Aero, Modifications, Towing Mirrors

A couple of eagle-eyed mirror aficionados have spotted that we use Milenco Grand Aero 3 towing mirrors… but they also spotted that there was something different about the mounts. OK I’ll have to admit you are an eagle eyed bunch!

On the Amarok, the mirrors are quite big and if I get them adjusted about right I can just see down both sides of the caravan… we’re not 8 foot wide. However, driving without mirrors is more likely to attract attention and it’s easier and safer just to fit a pair. I first went for a brand that I’d used on the Land Rover Freelander, however the Amarok’s mirrors are quite deep and it wasn’t till I tried them that I realised how much of an issue that was….

IMG_1226

The other issue I had… I didn’t particularly like the fitting….. it was about on the limits of extension and about 25% of the mirror was obscured by the Amarok’s door mirror… just at the point the would allow you to see the wheels of the caravan. Not ideal.

IMG_1227

So I looked round for a mirror that would move the face of the mirror rearwards in about the same plane as the normal Amarok mirror. The added depth of the Milenco Grand Aero looked as though it would do the job perfectly.

Actually it was a little too much. As the mounting for the mirror was now on the door mirror plane, not as the previous mirror the back of the mirror housing it shifted the face of the Grand Aero too far rearwards. I liked the vision the Grand Aero gave and the mounting.

To the Bat Cave…

I just happened to have some lengths of 12mm steel tubing and a bending tool. Maybe I could solve the problem without searching round for other products.

I used a welding rod to hand bend a profile that seemed to put the mirror into the right position. I worked out I’d only need two bends to get the mirror in the right position.

IMG_1591

I installed the two mounting brackets on the door mirror in the final position I wanted them and slid a length of tube into them. Marking where I wanted the first bend to be and using an angle finder to approximate the angle that would move the mirror far enough forward so the face was in line with the door mirror face… this then gave me the point to start the bend upwards to get the mirror at the correct height.

Ok before I get a lot of comments asking why installed the mounts on the lower edge of the mirror… two reasons…. if they do move about or squish down on a bit of grit any scratches won’t be seen in the painted area of the door mirrors and from the driving position they don’t obscure my view if I have to look past the top of the door mirrors. I’ve also noticed when its raining I don’t get nearly as much water running down the face of the door mirror. And another reason…. the bottom of the door mirror on the Amarok is not quite as curved and the clamps fitted more securely. I’ve got everything dialed in now to the point where I don’t actually need to adjust the mirrors each time I fit them.

At this point I hadn’t cut the tube to length on the vertical section so I had the chance to adjust the height of the Grand Aero. After a bit of trial and error that involved a clamp and running round to the driver’s seat… and back again to adjust I got what I thought was the right height for me.

IMG_1592

As you can see in the photo above, the reflective face of both mirrors is in near perfect alignment… and for me that makes it easy when driving as I don’t have any perceived shift in focus. The picture below is from the drivers position… I put the camera as close as I could to where my eyes are and I get a great view rearwards. Note that installing the mounting clamps on the bottom edge of the door mirror does not block the forward side view over the door mirror.

IMG_1596

The driver’s side was bent the same… just opposite ‘handed’ and the length worked out right for the height too.

IMG_1589
IMG_1588
IMG_1587

When seen from the front… even though I’m not quite ‘square on’ to the caravan, I’m angled slightly to the left when sat in the drivers seat, the mirror is fully outside the extended side line of the caravan giving me a great view.

To finish…

I gave the now bent and drilled tubes a light emery and de-grease followed by  couple of coats of grey acid etch primer. This was topped off a few days later with a fine bed liner spray.  This game the arms a durable coating plus the bed liner finish is quite ‘grippy’ and allowed the clamps the hold fast without too much yanking on the knobs.

IMG_1598

We have been using these now for about two years and for me they work out just fine.

Shopping…

I had all this stuff in the Bat Cave as it was purchased for other projects, so the mirror arms didn’t really cost me anything. Both arms were made out of one 1 metre length of 12mm steel tube.

The tube bender I paid less than £30 for it about 12 months ago from Amazon. The 12mm Steel tube, again from Amazon was around £4 for a 1 metre length and the Truck Bed Liner paint was around £8.

You can find links to these and other bits I use in the Caravan Chronicles Shop

IMG_1600
IMG_1601

Just for comparison…. the original supplied arm against my contrivance…. and yes… I have now sorted that bit of surface rust out! (I missed a bit when spraying)

IMG_1597

Share this:

  • Click to share on X (Opens in new window) X
  • Click to share on Facebook (Opens in new window) Facebook
  • Click to share on Tumblr (Opens in new window) Tumblr
  • Click to share on Pocket (Opens in new window) Pocket
  • Click to share on Pinterest (Opens in new window) Pinterest
  • Click to share on Reddit (Opens in new window) Reddit
Like Loading...

Is A Euro 6 Engine Killing Your Leisure Battery?…

21 Friday Jul 2017

Posted by Simon Barlow in Accessories, Amarok, Caravan Electrical Fault Finding, Caravan Electrics, Electrical, Maintenance, Modifications, Off Grid, Technical, Tow Vehicle, VW Amarok

≈ 83 Comments

Tags

Caravan Electrics, Euro 6 Engines, Maintenance, Modifications, Sterling Power Wildside

OK… so that title was a bit dramatic! However here’s the thing… I don’t think everything is peachy with Euro 6 engines and charging leisure batteries.

If you are a regular reader, you know I have recently installed one of Sterling Power’s Wildside units (and so far I’m super happy with it!) but I did get an email from someone who had read all my postings about it and asked me if it might cure his problem. Here’s the gist of his email….

Note: I have edited this down a bit…. and withheld the name of the person and vehicle.

“I have recently changed my car to a new 2017 xxxxxxxxxxxx and after several trips with it, on arriving home there is never enough charge in the motor mover to manoeuvre our caravan up our drive (which is on an incline) and park the caravan round the back of the garage. I have to plug the caravan in overnight before I can use the mover.

This only seems to have started happening since we changed to the xxxxxxxxxx. I had the caravan’s battery tested at two garages and they said it is OK and it is only 2 years old. The local caravan service man said he could not find anything wrong with the motor mover.

As we are on mains at the caravan sites we visit for a few days the caravan battery should be fully charged.

Can you help?”

This did have me stumped for a bit. Battery tested OK, no issues with the mover, so what was going on?

While doing some of the prep work for writing about my installation of the Wildside unit, I had spent a few days prodding about our VW Amarok with a multimeter and making a few notes about voltages etc. One thing that I did cotton on to was the cyclic way the vehicles ECU seemed to turn off the alternator…. well I should really say put the alternator into “idle” mode. Now with the caravan attached (pre Wildside unit install) I did notice that  at the start it seemed to take longer for the vehicle’s alternator to go into idle mode but also it seemed to stay in idle for a lot longer and I was in the process of trying to work out why as initially I’d have thought it would have been less as it was running the fridge and charging the leisure battery.

A picture is worth… you know the rest. Here’s one of my excellent drawings!

Euro 6 Problem 01

Right, here we go… The drawing shows a caravan plugged into a tow vehicle that has the engine-turned off. Pin 9 is live as it should be, and the habitation relay in the caravan is effectively off allowing the caravan’s leisure battery to connect and power the caravan’s internal 12 volt systems. As the vehicle engine is off, there is no power on Pin 10 the fridge circuit, as this is controlled by the vehicle’s ECU.

Really this could be any vehicle with any engine. Now let’s have a look at what happens with the engine running…

Euro 6 Problem 02

Pin 10 is live, turned on by the vehicles ECU and this powers the caravans fridge. It also operates the caravan’s habitation relay which now disconnects the leisure battery from the caravan’s 12 volt systems and connects it to Pin 9 so that the vehicle can start to charge it.

Again, this could be any vehicle with any engine. This is how our Land Rover Freelander works with our caravan. All straight forward.

Now lets look at what happens when the Euro 6 engine puts the alternator into “idle” (or Eco mode etc.)

Euro 6 Problem 03

This is where it starts to get interesting. I have taken a few liberties here and made a few assumptions. I have shown the vehicle’s alternator disconnected. In practice the ECU doesn’t disconnect the alternator, it will reduce the field voltage and hence the output, not really disconnecting it but reducing the output to a negligible amount.

The ECU will also monitor the vehicle’s battery voltage and continue to allow the vehicles general electrical system to drain the battery to somewhere around 75% charge (this may be a bit of an arbitrary figure) The ECU will then turn on (or up) the alternators output to recharge the vehicle’s battery to about 80%. Why 80% well it needs the remaining 20% ‘free capacity’ so that when you brake, the excess energy of engine braking (regen) can be dissipated into the vehicle battery. Remember that on a Euro 6 engine the alternator is capable of generating round about 2Kw.

Now at this point it dawned on me that something could be happening here, but the idea was a bit ridiculous…. guys with far more agile grey cells than mine must have worked this out and I dismissed the idea. I must have missed a trick somewhere.

I did a bit more checking. I was using two 17Ah sealed lead acid batteries as my “leisure” battery simply because it was quicker to charge or discharge them than a 120Ah battery. For a fridge load I was using 3 x 50 watt light bulbs and it was all jury rigged to a 13 pin plug so I could just plug it in to either the Freelander or the Amarok to make comparisons. I was using a trusty old AVO 8 meter, a couple of digital multimeters and a clamp meter to measure current so really the whole set up was super sketchy for anything that I could write about. I thought that I must have been missing something somewhere and I actually kind of put it to the back of my mind. I just got on with installing the Wildside unit and writing it up.

“DING” You have mail……

I received an email from Charles Sterling with some very interesting information. During testing he had come across exactly the same issue I was pondering over but had put off further testing. I guess by now you have worked it out. Quite simply you can get current flow in the opposite direction… from caravan leisure battery to vehicle battery. In testing Charles had measured a current of around 6 Amps.

It dawned on me that maybe during my initial testing with my jury rigged set up I hadn’t missed something and the readings I had seen were correct. Both Charles and I quite separately had (in my case ‘stumbled’) on a potential issue with Euro 6 engines and caravans.

Back to the original email earlier. It now made sense. The sender of the email was setting off from their campsite to travel home with a fully charged battery (being on EHU while they were on site) and during the course of the drive home, the vehicles ECU was actually reducing the fully charged leisure battery down to 80% charge as it actually thought that the ‘vehicle’ battery was at 100% charge. Hence when he arrived home, the caravan’s leisure battery didn’t have enough charge to run the motor mover long enough to put the caravan away.

So what does this mean in practice?

Well effectively (give or take a bit of loss due to cabling) the caravan’s leisure battery will only get charged to about 80%. You can now think of the vehicle battery and caravan leisure battery as being one battery bank because that is how the vehicle sees it. If the leisure battery is fully charged its voltage will be higher than the vehicle battery so the vehicle will turn off (or down) the alternator so that the vehicles electrical system can drain it to about 75% ready for accepting the excess energy from regen braking. The caravan’s fridge helps the vehicle by draining the battery bank that bit quicker.

This also answers another question. While I was testing, sometimes I’d plug-in my jury rigged setup and if my two little 17Ah batteries were fully charged I’d get a low current drain indicated on my clamp meter. I’d dismissed this to a certain extent, but now I realise that as my two 17Ah batteries were fully charged and the vehicle battery would be at about 80% charge, there would be enough of a voltage difference for a short while, that the two 17Ah batteries would try to equalise with the vehicle battery by recharging it slightly..

Whats the answer?

Well thankfully I solved my problem when I installed the Wildside unit a few weeks ago.

Finally…

If you have had any electrical issues with a Euro 6 engine and towing please drop a comment below. I’ll try to help.

As an aside, I am trying to arrange attending a tow bar installers electrical course with a couple of the OEM electrical equipment manufacturers and one of the approved bodies so I can hopefully increase my knowledge base and widen the number of vehicles I can cover. It’s a bit up-in-the-air at the moment as it would appear its going to cost a small fortune! (Sponsorship deals gratefully received!)

Share this:

  • Click to share on X (Opens in new window) X
  • Click to share on Facebook (Opens in new window) Facebook
  • Click to share on Tumblr (Opens in new window) Tumblr
  • Click to share on Pocket (Opens in new window) Pocket
  • Click to share on Pinterest (Opens in new window) Pinterest
  • Click to share on Reddit (Opens in new window) Reddit
Like Loading...

Getting All Charged Up – Update

02 Sunday Jul 2017

Posted by Simon Barlow in Accessories, Caravan Electrics, Electrical, Off Grid, Product Review, Projects, Reviews, Technical, Towing, VW Amarok

≈ 20 Comments

Tags

Caravan Electrics, Leisure Battery Charging, Modifications, Sterling Power Wildside, VW Amarok

The best laid plans….

We had originally intended to spend a week down at Glastonbury which would have meant the 5 hour drive down would have been an excellent test for the Sterling Power Wildside unit’s first outing. However we had to cancel the trip literally the day before we were due to set off. In the few days between installing the Wildside unit and our planned trip to Glastonbury I had been exchanging emails and phone calls with Charles Sterling talking about some of the aspects of the Wildside unit and the direction that caravan electrics was heading in.

Continue reading →

Share this:

  • Click to share on X (Opens in new window) X
  • Click to share on Facebook (Opens in new window) Facebook
  • Click to share on Tumblr (Opens in new window) Tumblr
  • Click to share on Pocket (Opens in new window) Pocket
  • Click to share on Pinterest (Opens in new window) Pinterest
  • Click to share on Reddit (Opens in new window) Reddit
Like Loading...

Fitting A Bike Rack to the VW Amarok – Finale…

12 Sunday Mar 2017

Posted by Simon Barlow in Accessories, Amarok, Bike Carrier, Bike Rack, General, Modifications, Tow Vehicle, VW Amarok

≈ 5 Comments

Tags

Bike Rack, Modifications, Touring, Towing, VW Amarok

It’s time to wrap up the bike rack install. I had to wait a few days for the final rack to arrive. Although I had ordered a twin pack of the Thule FreeRide 532 from Holdcrofts via Amazon and they had shipped out a twin pack, it would seem that their courier had ‘lost’ one and to Holdcrofts credit as soon as I emailed them they dispatched another… which the courier took four days to deliver.

IMG_1098 Continue reading →

Share this:

  • Click to share on X (Opens in new window) X
  • Click to share on Facebook (Opens in new window) Facebook
  • Click to share on Tumblr (Opens in new window) Tumblr
  • Click to share on Pocket (Opens in new window) Pocket
  • Click to share on Pinterest (Opens in new window) Pinterest
  • Click to share on Reddit (Opens in new window) Reddit
Like Loading...

Fitting A Bike Rack to the VW Amarok – Part 2…

04 Saturday Mar 2017

Posted by Simon Barlow in Accessories, Amarok, Bike Carrier, Bike Rack, General, Modifications, Projects, VW Amarok

≈ 3 Comments

Tags

Bike Rack, Maintenance, Modifications, Touring, Towing, VW Amarok

OK, so now to fit the actual bike carriers onto the rack I had previously installed a couple of days ago.

We had opted for the Thule FreeRide 532 over the ProRide version. What put me off the ProRide were a couple of videos on YouTube showing just how easy it was to remove a bike supposedly locked on to the rack. The FreeRide 532 has two arms supporting the bike and offered an option for additional security…. which I’m not going to go into for obvious reasons!

I had ordered a twin pack of the FreeRide 532, unfortunately I only received one. It seems the other was lost in transit somewhere according to my enquiries with the supplier. The other thing I found out was they (or it) didn’t come with the “T” track fixings. OK so a quick trip down to my nearest Thule dealer Northwest Towbars to pick up the elusive fixings. They would remain elusive… Northwest Towbars didn’t have any in stock. Not to be out manoeuvred I’d make my own.

To the bat cave again…

I just happened to have some 2mm aircraft grade aluminium handy and cut eight 21mm x 45mm pieces. The FreeRide 532 normally has three mounting locations, but as there was an additional hole that lined up with the “T” track it would be rude not to use it! So I made four for each rack.

img_1069For the threaded bolt I had some dome head bolts handy. The width of the dome head was wide enough so it would not pull through the slot on its own so I was not relying on a 2mm think aluminium plate entirly. To hold the bolts in place I drilled a slightly undersized hole in the aluminium…

img_1074

img_1075img_1077…and used my small press to force the square shoulders of the bolt through the aluminium plate to hold it in place.

img_1078The result was eight “T” track bolts. A quick dressing up on the sanding belt and fine grinding wheel to remove any rough edges finished them off.

img_1079 The excess length of the bolt would be trimmed later.

Fitting the FreeRide 532 Racks

Sliding four of the newly made “T” track bolts in to the WingBars I could place the FreeRide 532 on to the bars.

img_1080I used a couple of nuts to hold the rack in place while I test fitted one of the bikes. It was a bit too tight. The swing up frame section that clamps on to the bike only partially engaged on the bike frame. The whole rack needed moving rearwards by about 10 to 15 mm.

Not a problem, as the WingBar mounting is off set laterally compared to the “T” track, reversing the bar so it faced the other way would solve this and effectively move the “T” track slot rearwards by about 20mm.img_1081

With the WingBar mounted in the other direction the bike was a perfect fit. Also it made it easier opening the end caps of the WingBar as configured the correct way round they were a bit tight against the roll bar.img_1083img_1084img_1082The next thing to address was the overhang. I still had around 50 to 60 mm of adjustment I could make to the rails of the FreeRide rack. Removing everything again and a bit of ‘adjusticating’ with a small rubber mallet soon saw the rails in the correct position. I had not been able to get the rear of the mount flush with the pickup tailgate as was my original hope, but checking with a plumb bob…

img_1090img_1091… It was still shorter than the tow ball and only about 40mm longer than the rear bumper. So the overhang wasn’t anything to worry about.  Even with a bike on the rack it would be clear of the caravan in the tightest of turns. Next it was just a matter of squaring things up and tightening everything down.

img_1092

I ended up locating the rack more to the side than I first planned. This was for two reasons. Firstly, once the second rack is in place it leaves me with nearly 800 mm between the two racks which will allow for the option in the the future of having the ability to install a mesh tray, ski rack, surfboard rack (we don’t ski or surf… ho hum) or slimline roof box if we ever run out of storage in the Amarok. The second reason is it will give the rear view dash cam a relatively unobscured view rearward even with two bikes on the back.

Everything torqued to the correct settings, I topped off the nuts with an additional nylon lock nut to make sure they could not vibrate loose…

img_1093img_1094… and using a Dremmel I cut off the excess thread and ground off any sharp edges.  I need to find a suitable plastic or rubber push on cover for these then I can give them a quick coat of preserving grease.

One thing that I did think about was the prospect of the swing arms bouncing up and down when bikes were not on the rack. A quick rummage in my straps box produced a few of these little blue straps and a handy slot on the mounting plate seemed ideal…

img_1096… problem solved. A simple solution to something that may or may not be a problem.

So one rack fitted, all that is left is to repeat for the other side, when it arrives!

img_1097

Share this:

  • Click to share on X (Opens in new window) X
  • Click to share on Facebook (Opens in new window) Facebook
  • Click to share on Tumblr (Opens in new window) Tumblr
  • Click to share on Pocket (Opens in new window) Pocket
  • Click to share on Pinterest (Opens in new window) Pinterest
  • Click to share on Reddit (Opens in new window) Reddit
Like Loading...

Fitting A Bike Rack to the VW Amarok – Part 1…

03 Friday Mar 2017

Posted by Simon Barlow in Amarok, Bike Carrier, Bike Rack, Modifications, Uncategorized, VW Amarok

≈ 8 Comments

Tags

Bike Rack, Modifications, Touring, Towing, VW Amarok

It’s been a few months since we bought our VW Amarok and I hadn’t originally intended it to take this long to install a bike rack or carrier. What slowed us down was sorting out the bits needed for mounting a bike carrier above the bed of the Amarok. In the USA, pickups are plentiful and there are various companies that make carrier systems and mounts for pickups. My initial thoughts it would be fairly easy and started perusing the Thule website. Unfortunately they did not sell the correct mounting hardware for where I wanted to mount the rack.. on the side rails for the Roll-N-Lock cover.

Searching the internet found plenty of results for the type of mounting I wanted… all in America and the most promising system was produced by Yakimar.

However, trying to find a retailer that would ship to the UK was a bit of a problem as most would only ship to the US and Canada. I did eventually find a company in California that would. The next hurdle was the cost. To buy everything and get it shipped over here would ring up a massive £2180 bill at the checkout. This was not worth it. I out the bike rack on the back burner for a while… and the pound against the dollar slipped in the meantime.

Getting ready for installing the bike rack

I started looking around again at the start of this year and returned to Thule and Fiamma. Could I make up my own “kit of parts” to do the job? Fiamma while having a great selection of racks and bits didn’t provide anything in the way of a roof bar so back to Thule again. While mooching about their website I accidentally got on to the American  area of their site and while looking for mounting feet came across one specifically designed for mounting on to flat roofs. The part was intended for a Fibreglass canopy on a Jeep Wrangler but pictures showed them being used on a number of vehicles and camping trailers. This was exactly the part I needed.

I checked with a number of Thule retailers to see if they had Kit 3113 which was used to mount Rapid Podium Foot Pack 460R on flat surfaces. No one had it, so a quick email to Thule asking if it was obtainable in the UK or Europe was fired off. The answer was a bit surprising. It was an American part produced by the American Division and was not obtainable in Europe.

OK, back to my contact at Worldwide Cyclery in California… did they stock it and could they ship it? It arrived within six days. I also ordered the Foot Pack 460R as it was over £60 cheaper even after paying import duty than buying it in the UK on-line. I now had the means to mount the WingBars(Aeroblade). I just needed to check the size and order these and two FreeRide 232 bike mounts. Before I ordered, I checked the width I’d need. Next problem, The WingBars in the UK were 1500mm wide and in the US being manufactured in English sizes were slightly wider by about an inch. They arrived a few days later from the US!

OK, so now I had all the parts… to the bat cave!

Assembling the 3113 mounting plates

Assembling the 3113 mounting plates

The first task was to assemble everything so I could to a test fit of the whole caboodle on the back of the Amarok before drilling anything… always a good idea! The four Kit 3113’s were assembled first and the four 406R feet were mounted on to them.

img_1048

Assembling the 460R on to one of the 3113 mounting plates.

img_1045

 Once this was done, the sub assemblies were slid on to the ends of the WingBars.

img_1050

Once this was done, I could roughly position the two partially completed WingBars across the bed of the Amarok.

img_1051

I now needed to check the position of the bike on the FreeRide 532 so that would in turn give me the position I needed to mount the WingBars. From the centre line of the mounting plate the front edge of the front wheel is about 550 mm, so the front WingBar needs to be at least 550mm back from the rear of the cab.

img_1044

However, the Amarok’s sport bars have to be taken into consideration as these stop the front wheel of the bike going too far forward and will help protect the cab.

img_1067

This presented a problem. The rear of the FreeRide232 protruded back and hung over the rear tailgate by about 350mm and if possible I wanted everything flush. Not a problem, the two bike wheel mounts can be slid forward and backwards to accommodate various size bike frames and the main mounting point… with a little assistance from a rubber mallet and be slid backwards. So in effect I nudged the two main bars forward so they didn’t protrude over the tailgate and the bike still fitted. You can see my mark as I started to move the main mounting plate on the picture below:

img_1053

While doing the test fitting and adjusting the position of the mountings, I discovered I had a bit of luck. On the Amarok sport bar there are two ABS plastic mouldings that fit round the bars that are designed for mounting spot lights or work lights that just happen to line up and can be used as ‘rub strips’ to stop the front wheels contacting the coated stainless steel sports bars.

img_1065

I could now measure where I wanted the WingBars to be located and marked out the positions. I wanted the rear cross-bar to be as far to the rear as possible (something planned for the future) and worked out the distance from the front bar which had to be located so the bike rack fitted with the front wheel tucked against the roll bar.

img_1054

As the sides of the Roll-N-Lock cover had a slot underneath, I’d previously machined 4 pieces of steel to fit in them and pre drilled and tapped the holes. All I needed to do was drill the sides of the Roll-N-Lock cover.

img_1057

The (supplied) hex bolts passed through and screwed into the steel plates I’d machined. I also added a spreader nut and lock nut underneath… just to be sure! The lock nut wasn’t tightened up to the spreader nut, so if someone tries to undo the hex bolts, they will simply back off a little then spin round.

OK, first one done time to do the other side…

img_1056

Other side complete a quick test fit of the WingBar…

img_1059

While pre-positioning the front bar ready for marking out, I was interrupted by Sue… a welcome coffee and hot pie break!

img_1062

Both rails fitted, it was time to add the covers and rubber strips…

img_1051

A final position check of one of the racks and time to call it a day as the rain set in again.

img_1063

The spacing of the bars will give us lots of options for the future to add a top box, ski mounts – these will allow ski’s to be carried angled upwards over the cab (have to learn to ski first though!) or a mesh tray.

I’ll post part two soon showing the bike carrier mounting and go into some of the little pitfalls I have come across.

Share this:

  • Click to share on X (Opens in new window) X
  • Click to share on Facebook (Opens in new window) Facebook
  • Click to share on Tumblr (Opens in new window) Tumblr
  • Click to share on Pocket (Opens in new window) Pocket
  • Click to share on Pinterest (Opens in new window) Pinterest
  • Click to share on Reddit (Opens in new window) Reddit
Like Loading...

NEC Show Roundup – it’s all technical…

28 Tuesday Feb 2017

Posted by Simon Barlow in Caravan Electrics, Electrical, General, Maintenance, Modifications, Technical, Tow Vehicle, VW Amarok

≈ 9 Comments

Tags

13 Pin Plug, Caravan Electrics, Caravanning, Caravans, Maintenance, Modifications, Sterling Power, Travel Trailer, Travel Trailers

This is really a follow-up to my previous post – Smart Alternators: how they affect Caravans and Motorhomes….

While at the NEC show one of my big tasks was to get a number of technical questions answered by the industry players. One of my first stops was to Westfalia and to meet up with Rick Sykes and his colleague on the Westfalia stand. Rick is the national training manager for Westfalia and I was able to get answers to a number of questions that you have asked me and I’d not been able to answer fully. Continue reading →

Share this:

  • Click to share on X (Opens in new window) X
  • Click to share on Facebook (Opens in new window) Facebook
  • Click to share on Tumblr (Opens in new window) Tumblr
  • Click to share on Pocket (Opens in new window) Pocket
  • Click to share on Pinterest (Opens in new window) Pinterest
  • Click to share on Reddit (Opens in new window) Reddit
Like Loading...
← Older posts
Newer posts →
Buy Me A Coffee

Blog Stats

  • 45,897,966 hits
Follow Caravan Chronicles on WordPress.com

Follow Caravan Chronicles and receive notifications of new posts by email.

Some previous posts you may like...

My last post….

Many thanks to all my friends. As I write this I’m in the Christi hospital hoping to go home in a few days. I was told about a week ago that I had about 3 months to live and should start preparing my affairs. Which Sue and I are trying to do. I have some…

A Bit Of A Tour…

Well not really a tour, only two locations. The first leg was down from Manchester to Glastonbury and a stay at The Old Oaks. We first went there in 2012 and had five or six more visits in the next four years. So it had been quite a while really. We were located in the…

What’s The Question I Get Asked a Lot?

“What’s in your toolbox when travelling?” Tricky one… I don’t have a tool box anymore. I recently started mooching around the internet for a smaller tool box… or rather a tool bag. I used to use up until a few months ago a Stanley Tool Bag. It was lighter than a tool box, I could…

#Tourfest North West

Tourfest North west was our first time attending anything like a gathering of bloggers, vloggers and the generally like minded. It was organised by The Caravan Addys with a little help from others I’m sure as it must be a time consuming task and hard work to bring everything together. We opted to arrive at…

More Jobs Ticked Off…

OK we are still working on a few bits and pieces but the weather on Friday and Saturday was ideal for cleaning the outside of the 5th Wheel. So while Sue made a start on the cleaning of the nose cap, I finished the first stage of the water pump relocation project and upgraded the…

A Few More Jobs Ticked Off The List…

Like any project, ticking the small stuff off a list is the way to move forward even if it seems like sometimes you have ground to a halt. A bit lacking on photos…. I’m temporarily unsure of their location… pilot speak for I’ve lost them! I’ll correct that in due course. I built a new…

A Few Little Jobs Done…

It seems such a long time since I posted anything. Last time out with the Dreamseeker I noticed that the charging voltage when we were hooked up to the truck was only about 12.1 to 12.3 volts as measured in the Dreamseeker battery box. I know that the VW Amarok puts out 14.6 to 14.8…

Happy New Year…

Happy New Year to everyone, I hope you have a great touring year ahead. I’d like to take this opportunity to give you a bit of an update on my personal circumstances and a look forward to a couple of projects I’m planning to kick off our year. First… … A HUGE thank-you yo everyone…

Sutton-on-Sea In September

Just like to say a huge thank you to so many people that have commented or emailed me over my last post. It has cheered me up no end…. it really has. Enough to rattle this post off! We recently went back to Cherry Tree Springs at Sutton on Sea for an 7 day break.…

This Might Be My Last Post…

Not clickbait…. Three weeks ago Sue and I were cycling between 8 and 10 miles each morning to get a morning coffee. Arrived back home and…. well time stopped. I had received notice that my test sample for Bowel Cancer screening had come back positive. Two days later I underwent a colonoscopy procedure which didn’t…

Something went wrong. Please refresh the page and/or try again.

  1. Dave Hart's avatar
    Dave Hart on How to: Connect two batteries in parallelAugust 27, 2024

    brilliant and so well explained! Thank you, love your work!!

  2. Simon Barlow's avatar
    Simon Barlow on Caravan Road Lights – Basic Fault FindingAugust 25, 2024

    Please look at my very last post on the blog

  3. Martin's avatar
    Martin on Caravan Road Lights – Basic Fault FindingAugust 25, 2024

    martin here caravan lights worked fine for two stop overs I had then hooking up again for my third trip…

  4. Emmy’s Camper Travels's avatar
    Emmy’s Camper Travels on My last post….August 25, 2024

    I’m so sorry. My sincerest sympathies go to you and your wife Sue. Your ideas and advice have been so…

  5. Steve Walsh-Jones's avatar
    Steve Walsh-Jones on My last post….August 22, 2024

    very sorry to hear this. Your posts have been very informative and enlightening providing an in depth view on different…

  6. thetwinaxletouringscouser's avatar
    thetwinaxletouringscouser on My last post….August 22, 2024

    Good heavens above Simon I am ever sorry to hear of such devastating news for both you yourself and Sue.…

  7. Eileen's avatar
    Eileen on My last post….August 22, 2024

    Simon and Sue, thank you both for sharing your passion for caravans with us. The news is extremely sad, our…

  8. Philip Parkes's avatar
    Philip Parkes on My last post….August 22, 2024

    Simon. So sad to read you last post today. Our thoughts are with you and Sue at this time. Whilst…

  9. Philip Parkes's avatar
    Philip Parkes on My last post….August 22, 2024

    Simon. So sad reading your post today. Our thoughts are with you and Sue at this time.

  10. Philip Parkes's avatar
    Philip Parkes on My last post….August 22, 2024

    Simon our thoughts are with you and Sue.

  11. Luke Tarrant's avatar
    Luke Tarrant on My last post….August 22, 2024

    Very sorry to read this and my thoughts are with you both at this time.

  12. Alan Smith's avatar
    Alan Smith on My last post….August 22, 2024

    Dearest Simon. I have never met you, but I feel as though I have some (limited) knowledge of you and…

CaravanChronicles.com Tag’s…

5th Wheel Caravan 13 Pin Plug Accessories AL-KO Avtex Bear Extender Bike Rack Blackpool Blackpool Illuminations blogging Cadac Camping & Caravanning Club Canterbury Caravan Caravan Blog Caravan Club Caravan Electrical Caravan Electrics Caravanning Caravans Caravan Show Caravan Talk Cheltenham Chirk Christmas Market Christmas markets Cleaning design Event City Factory Visit Fiamma France Freelander Glastonbury Glossop Caravans Humor Insync Jonic Bedding Lady Heyes La Tournerie Ferme Leisure Battery Leisure Battery Charging LPG Refilling Maintenance Manchester Caravan & Motorhome Modifications NEC North Western Caravans Ltd OLPRO One Hairy Caravanner Oswestry Oxford Product Review Project Review Safefill Sat Nav Sterling Caravans Sterling Power Wildside Swift Factory Swift Group Swift Talk Technical The Old Oaks Touring Towing Tow Vehicle Trafford Centre travel Travel Trailer Travel Trailers vacation VW Amarok Warwick Racecourse WiFI

Website Powered by WordPress.com.

  • Subscribe Subscribed
    • Caravan Chronicles
    • Join 672 other subscribers
    • Already have a WordPress.com account? Log in now.
    • Caravan Chronicles
    • Subscribe Subscribed
    • Sign up
    • Log in
    • Report this content
    • View site in Reader
    • Manage subscriptions
    • Collapse this bar
 

Loading Comments...
 

    %d