After our trip out to Donkey Creek Farm I started procrastinating about the slide out bed we used to have in the Amarok. Did I need it… was it worth it….. should I put it back in? Well my body kind of made the decision for me after loading and unloading some heavy boxes from the bed reaching over the opened tailgate it kind of said “We ain’t doin’ that again big boy“.
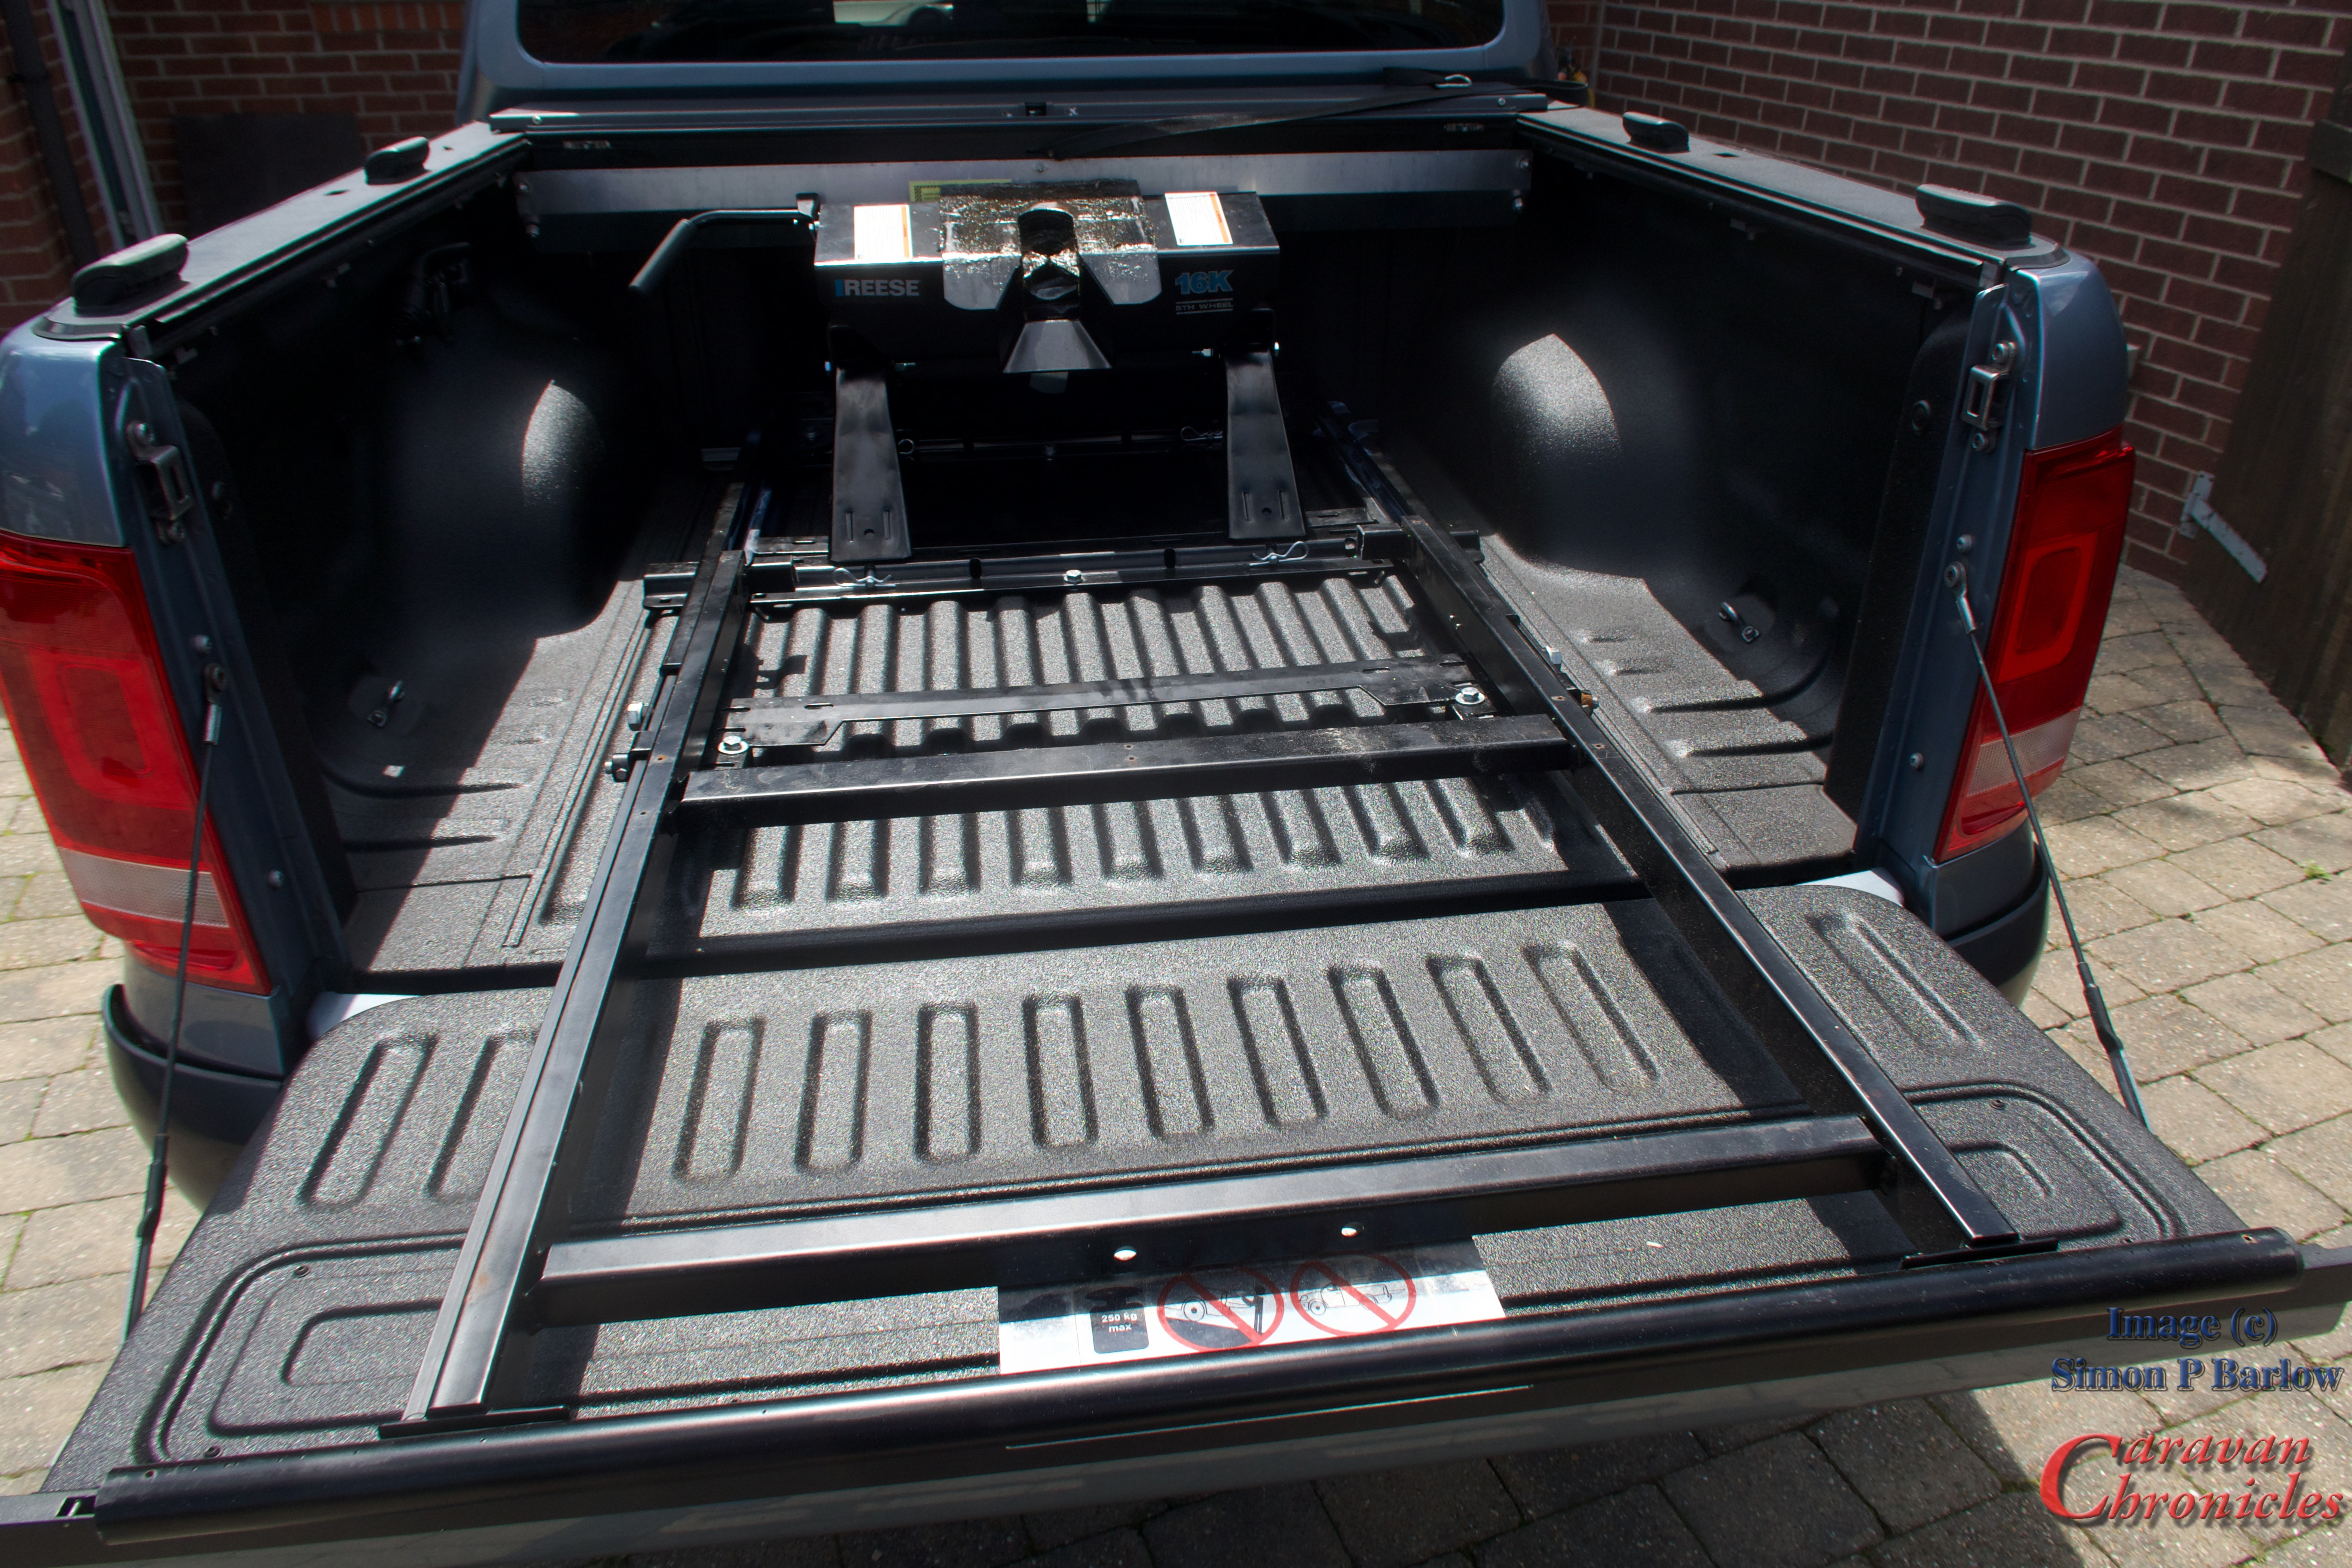
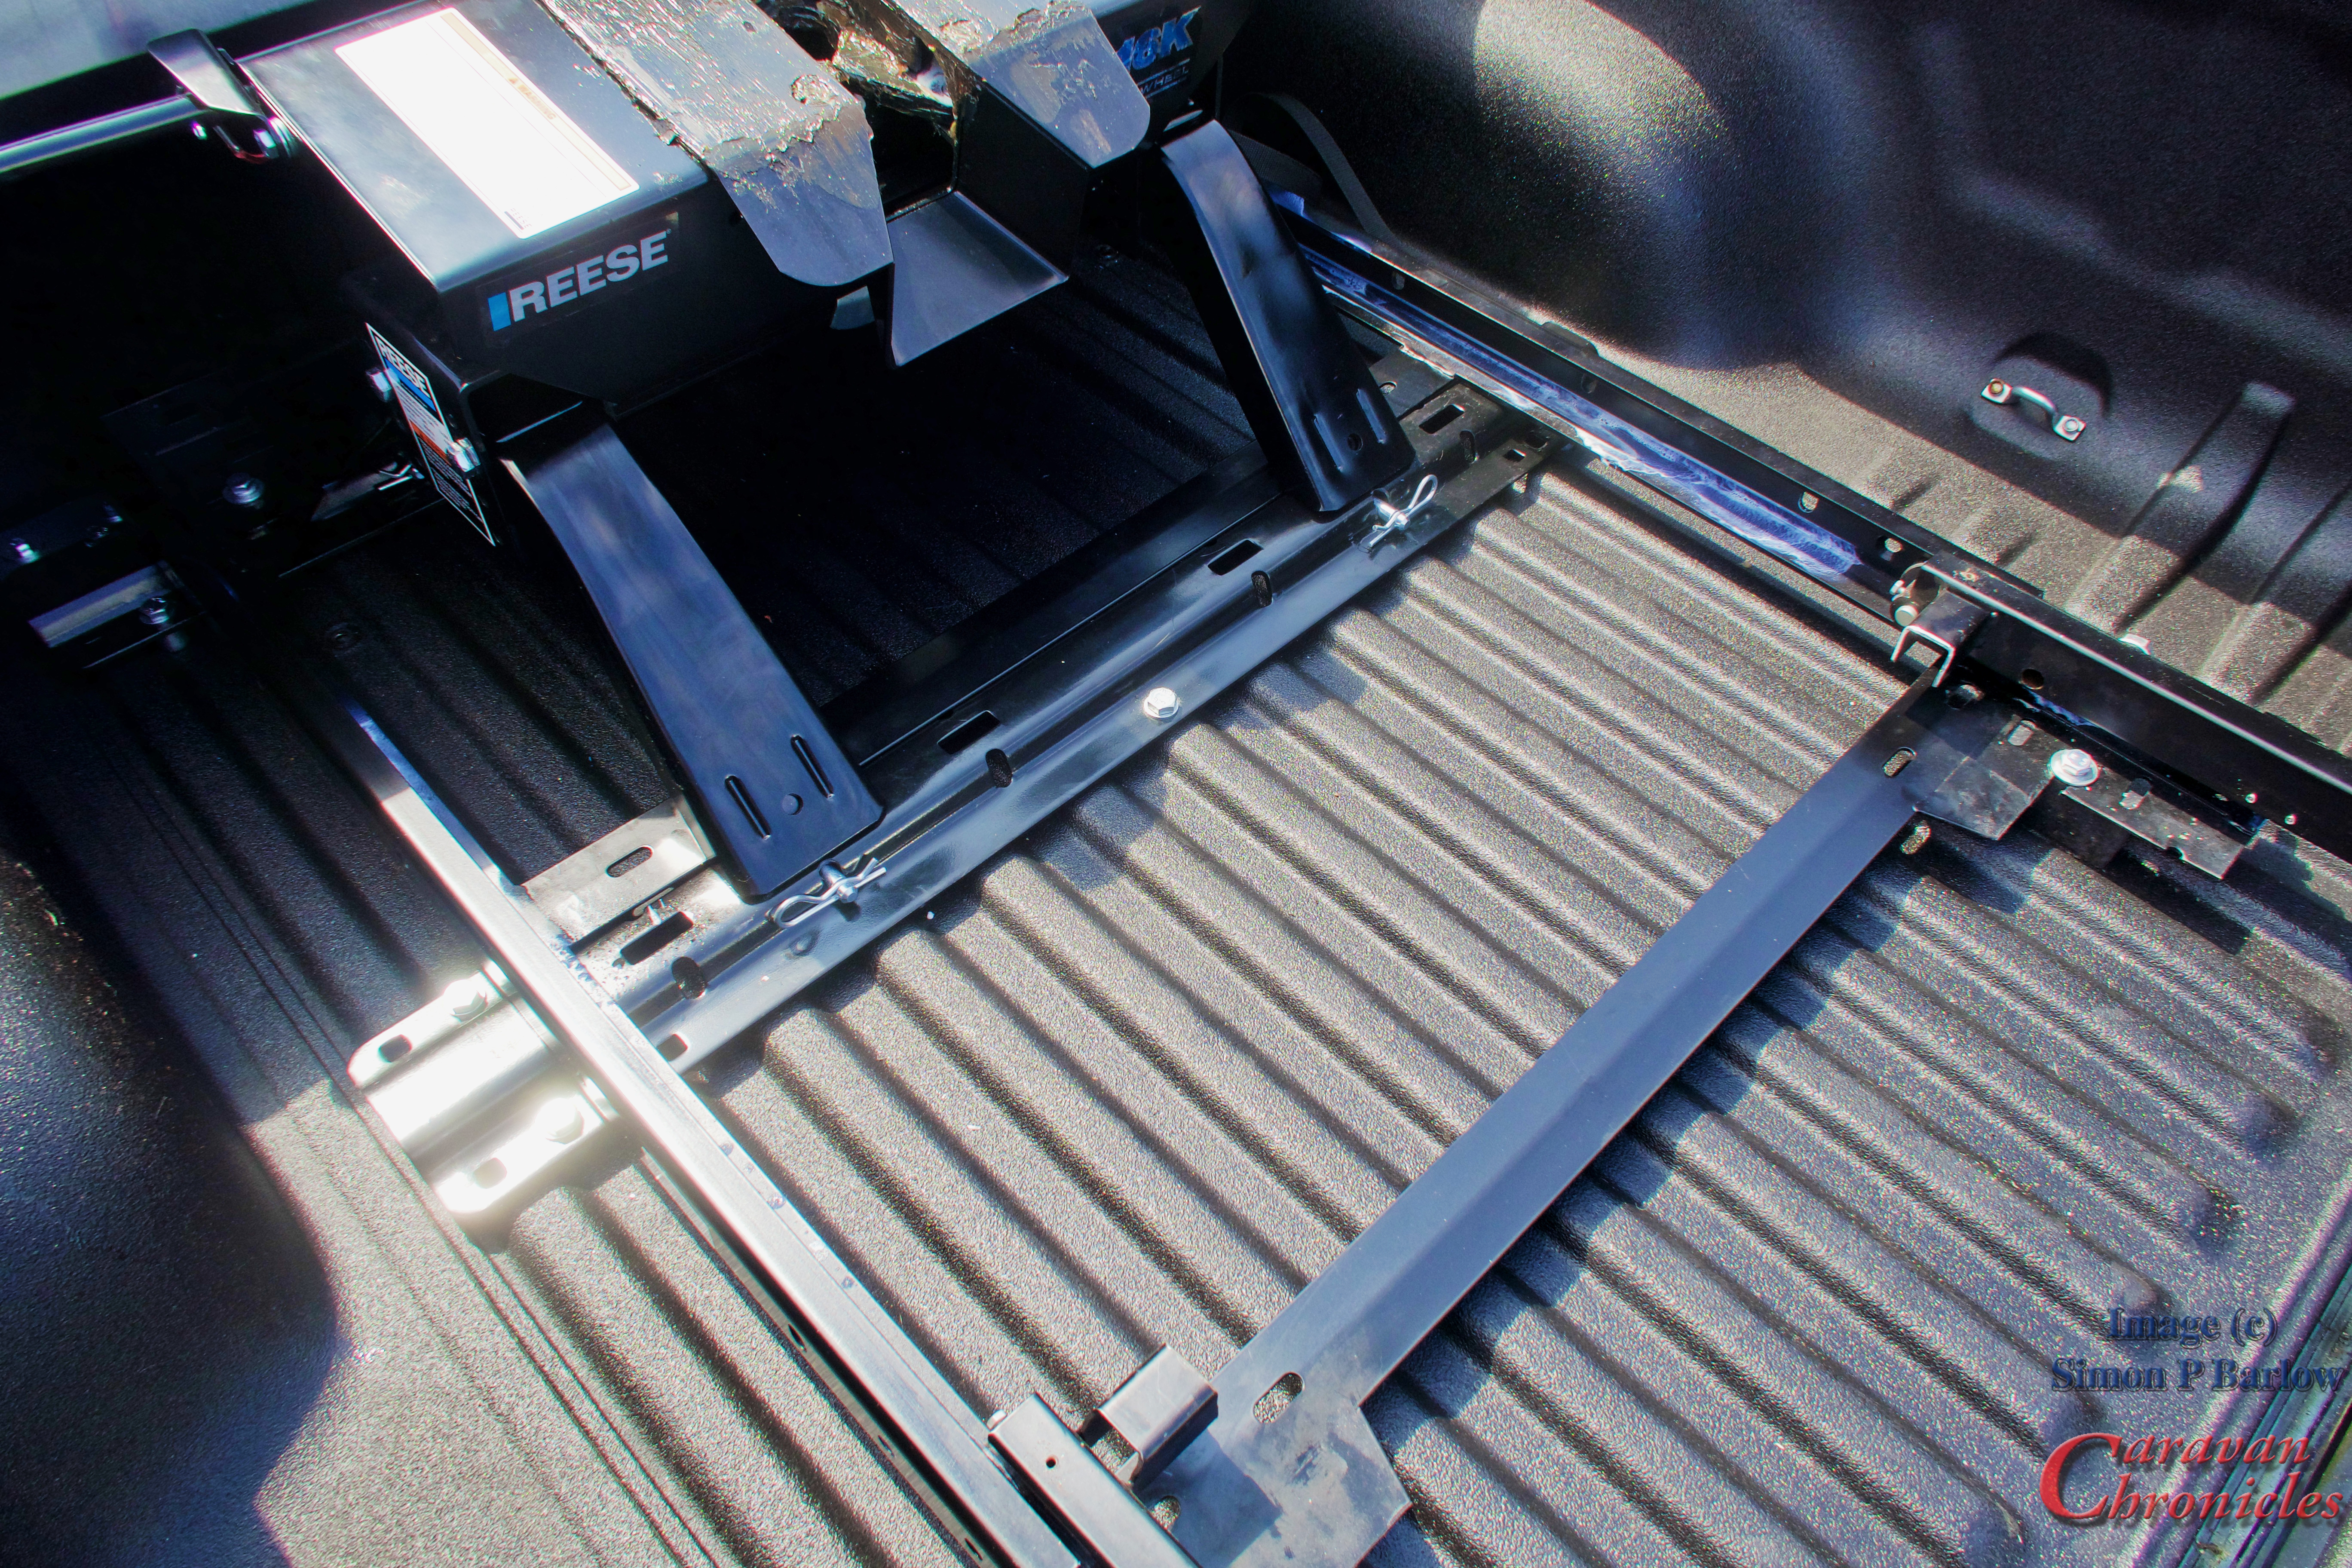
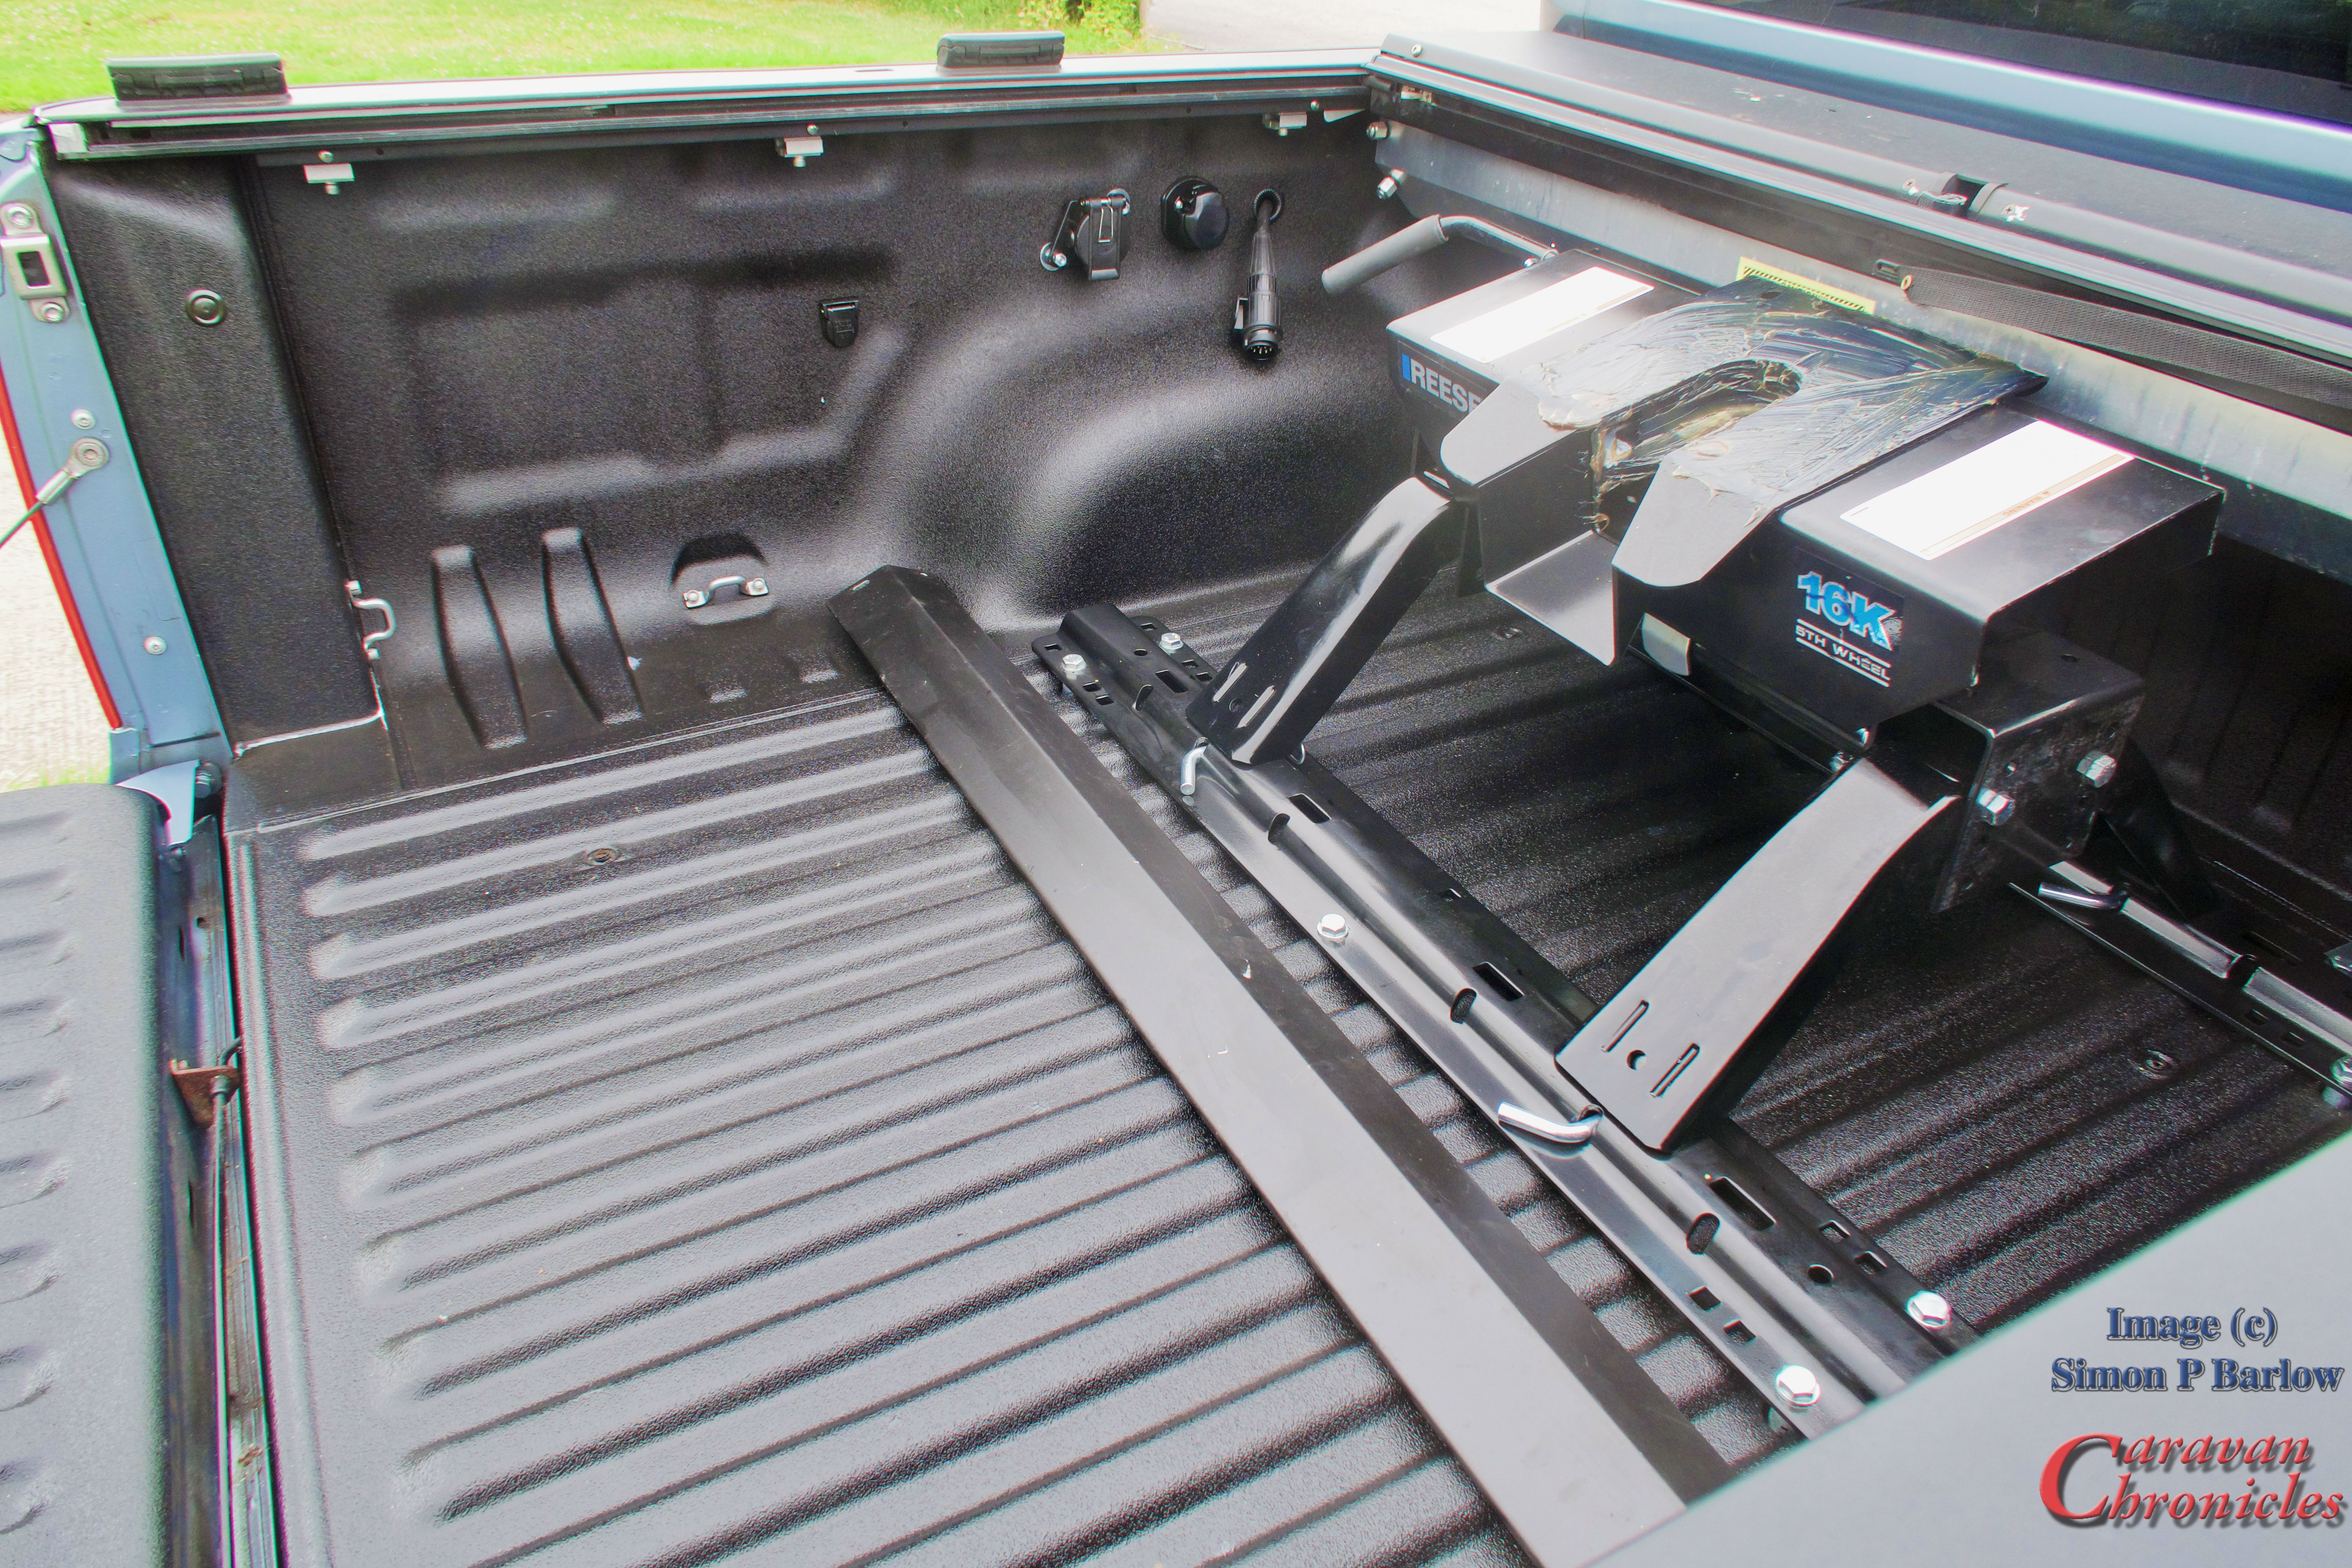
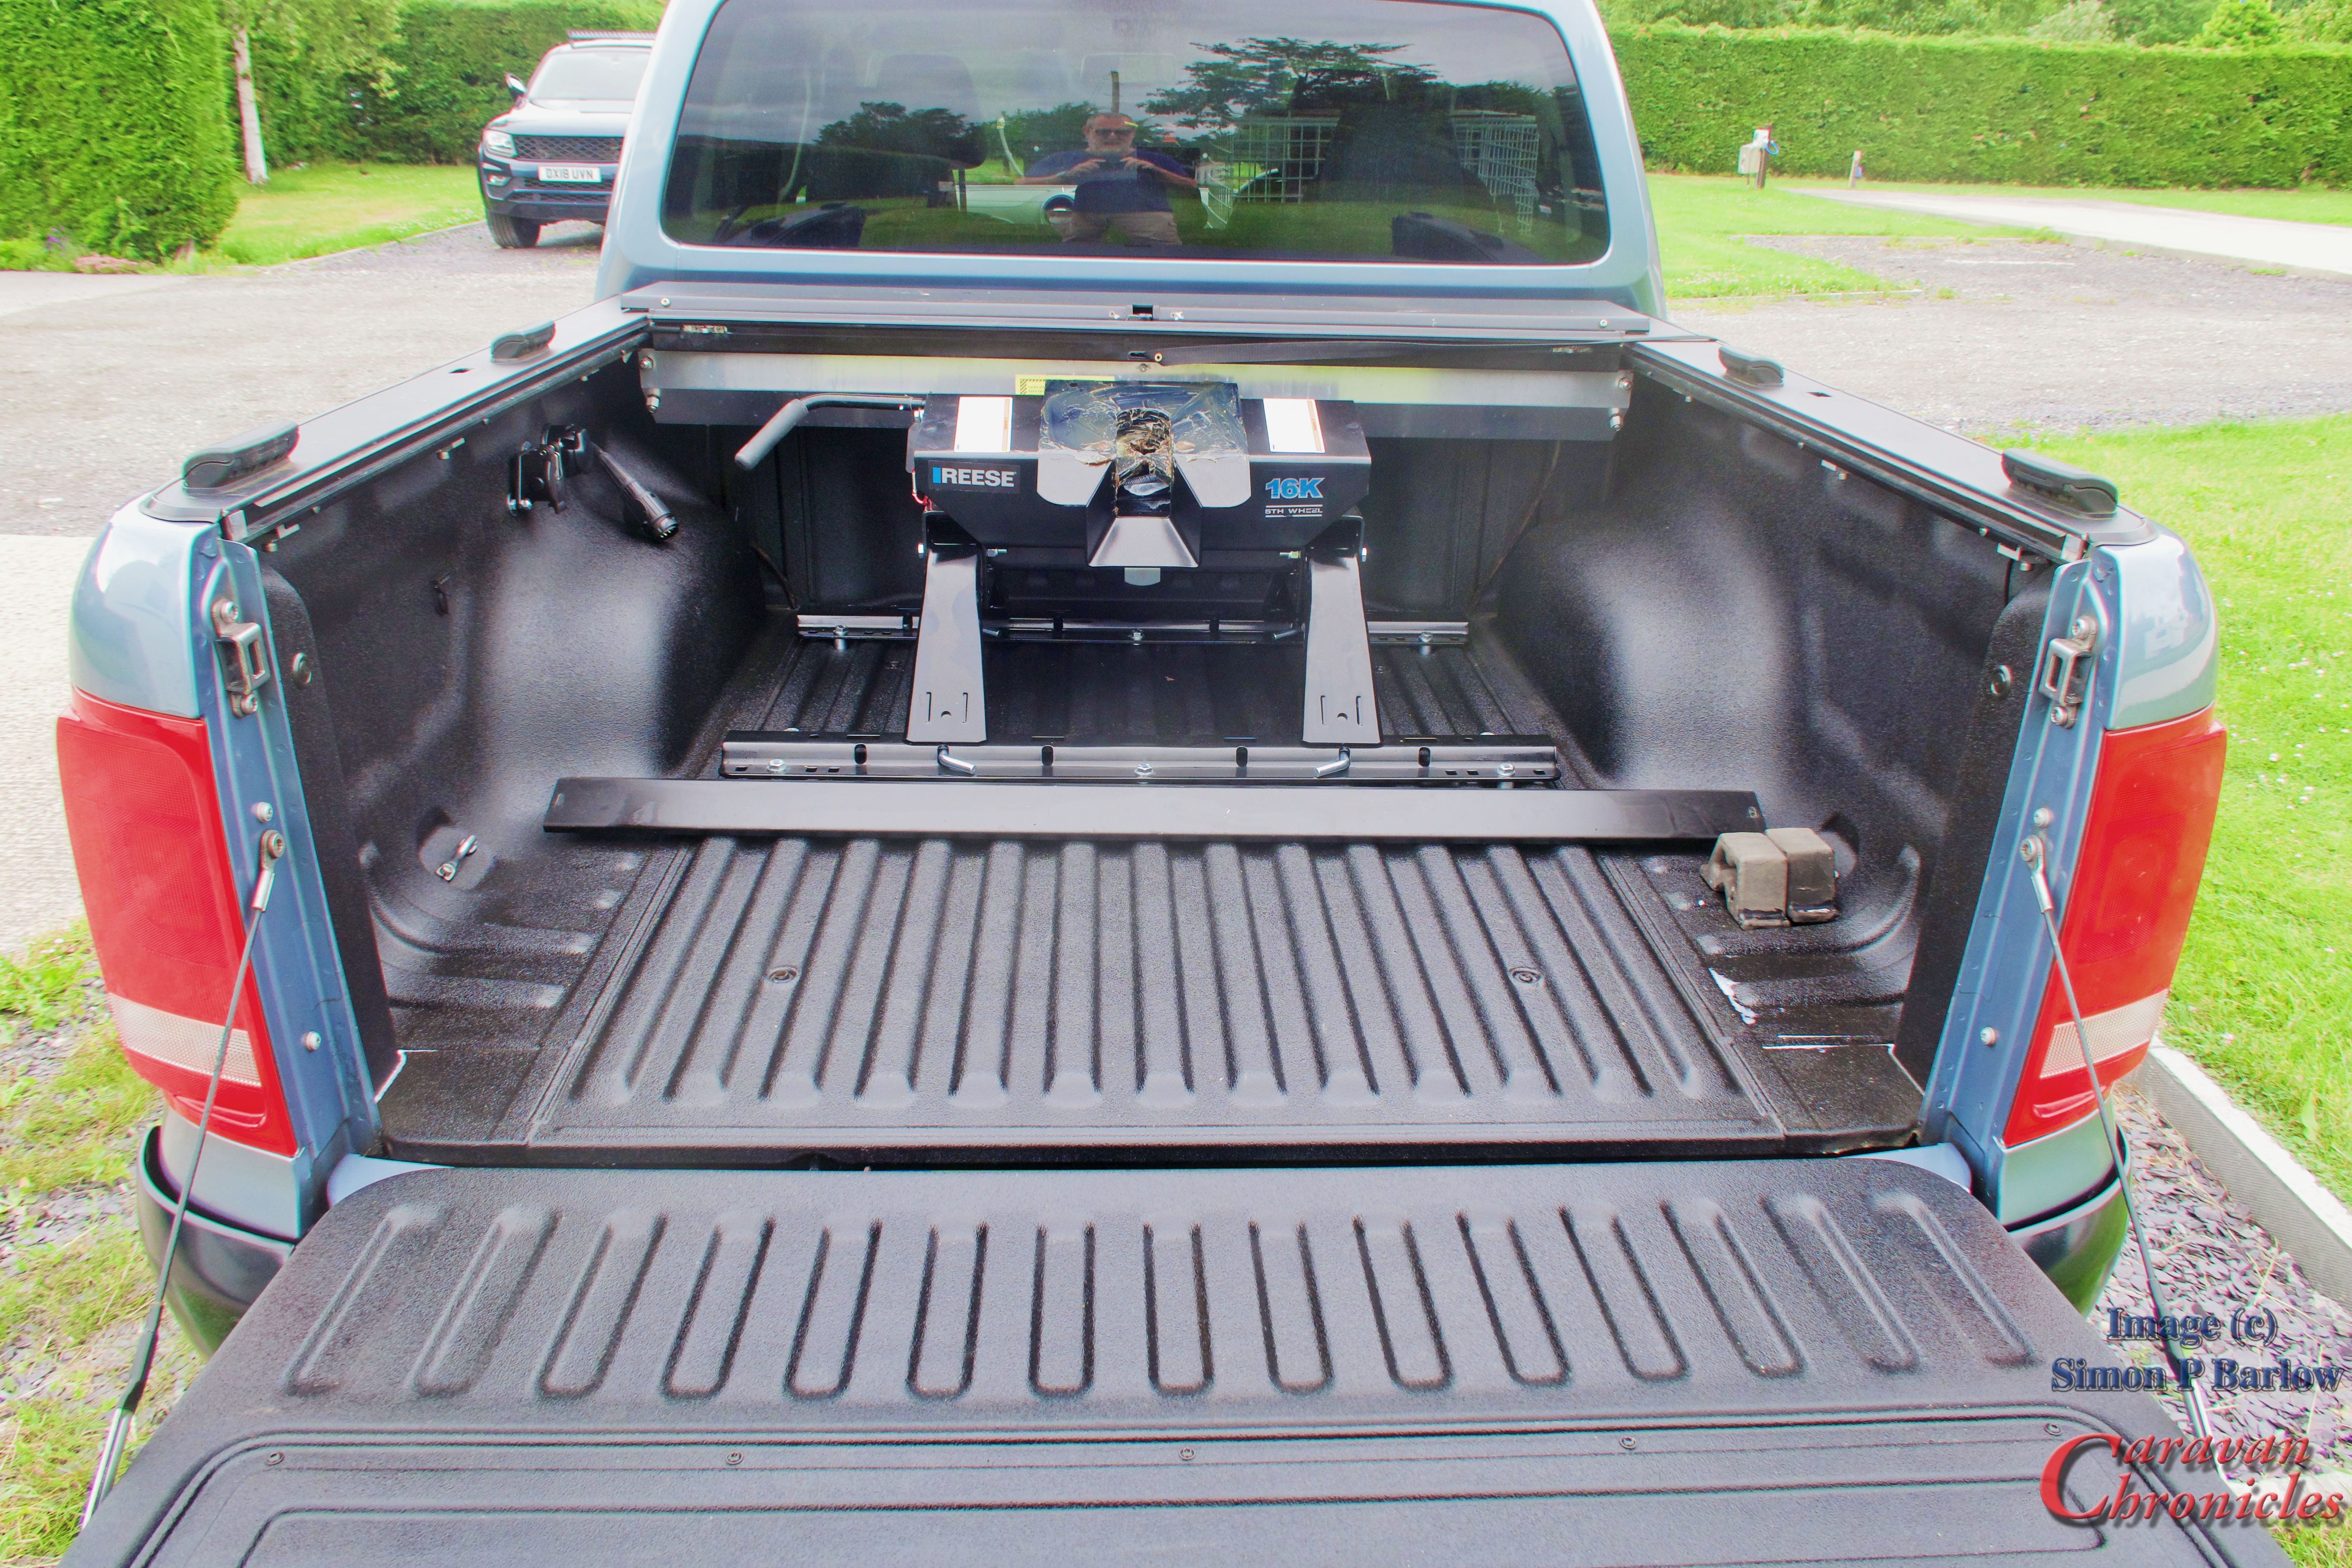
I had to set about working out how to install the base of the slider in and around the Reese 5th wheel hitch and where it could be mounted. It also needed to be raised up 35mm so it would pass over the 5th wheel hitch cross rails and still allow me to pull the pins so the hitch could be lifted out if required.
I got lucky…. with only having to cut out the rear cross bar the slide bed would fit and the original mounting holes lined up with the holes I drilled in the truck bed when I first installed it. Next step was to fabricate some spacers to raise it to the correct height.
I just happened to have a couple of blocks of high density poly in black so cut 4 100mm long by 35mm wide slats to fit under the frame and drilled 10mm holes through them for the mounting bolts. A quick trip to Francis Kirk – my local engineering fastening company. (I’ve been going there since 1976 for all my fastenings) got me four M10 grade 8 bolts of the correct length… I even splashed out on coated ones and nylock nuts.
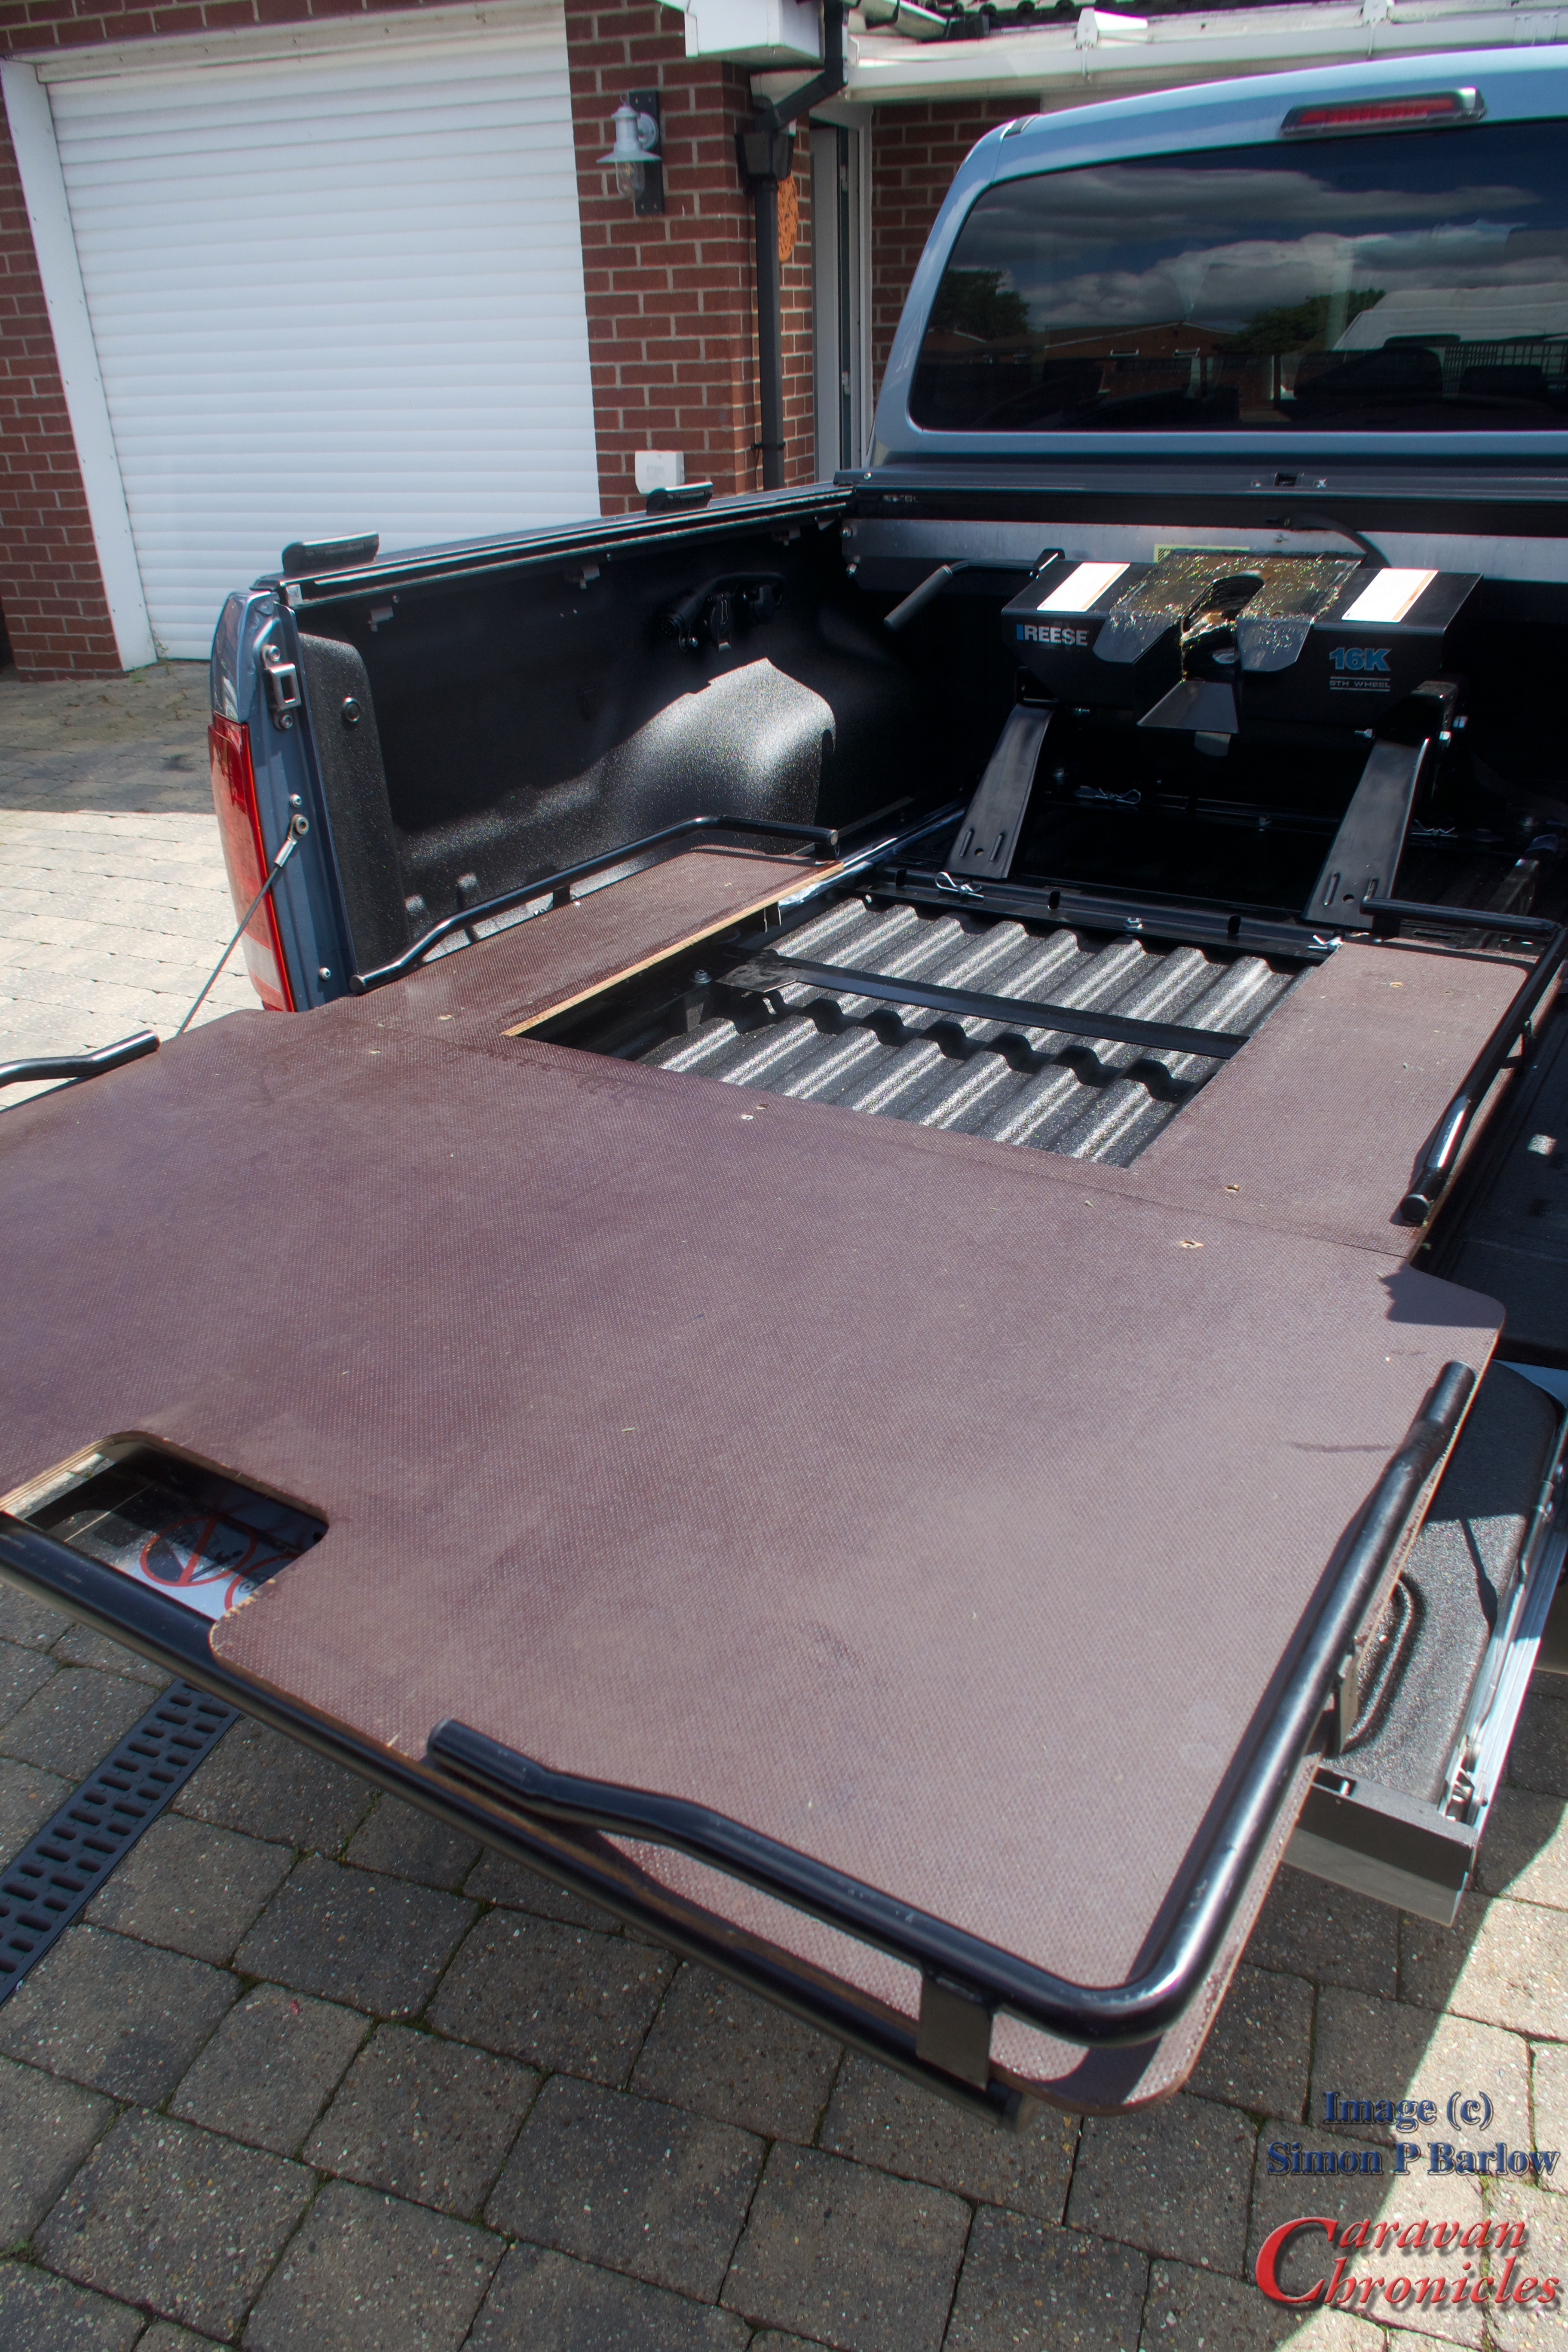
A test fit of the sliding frame allowed me to see where I needed to cut so it would clear the hitch. A bit of quick work with a four inch grinder and cutting wheel and it slid in without any problems. I needed to remove the original locking pin system and a couple of coats of black rust preventative paint on cut areas that I’d smoothed off with a fine grinding disc soon had the sliding tray ready to be fitted again.
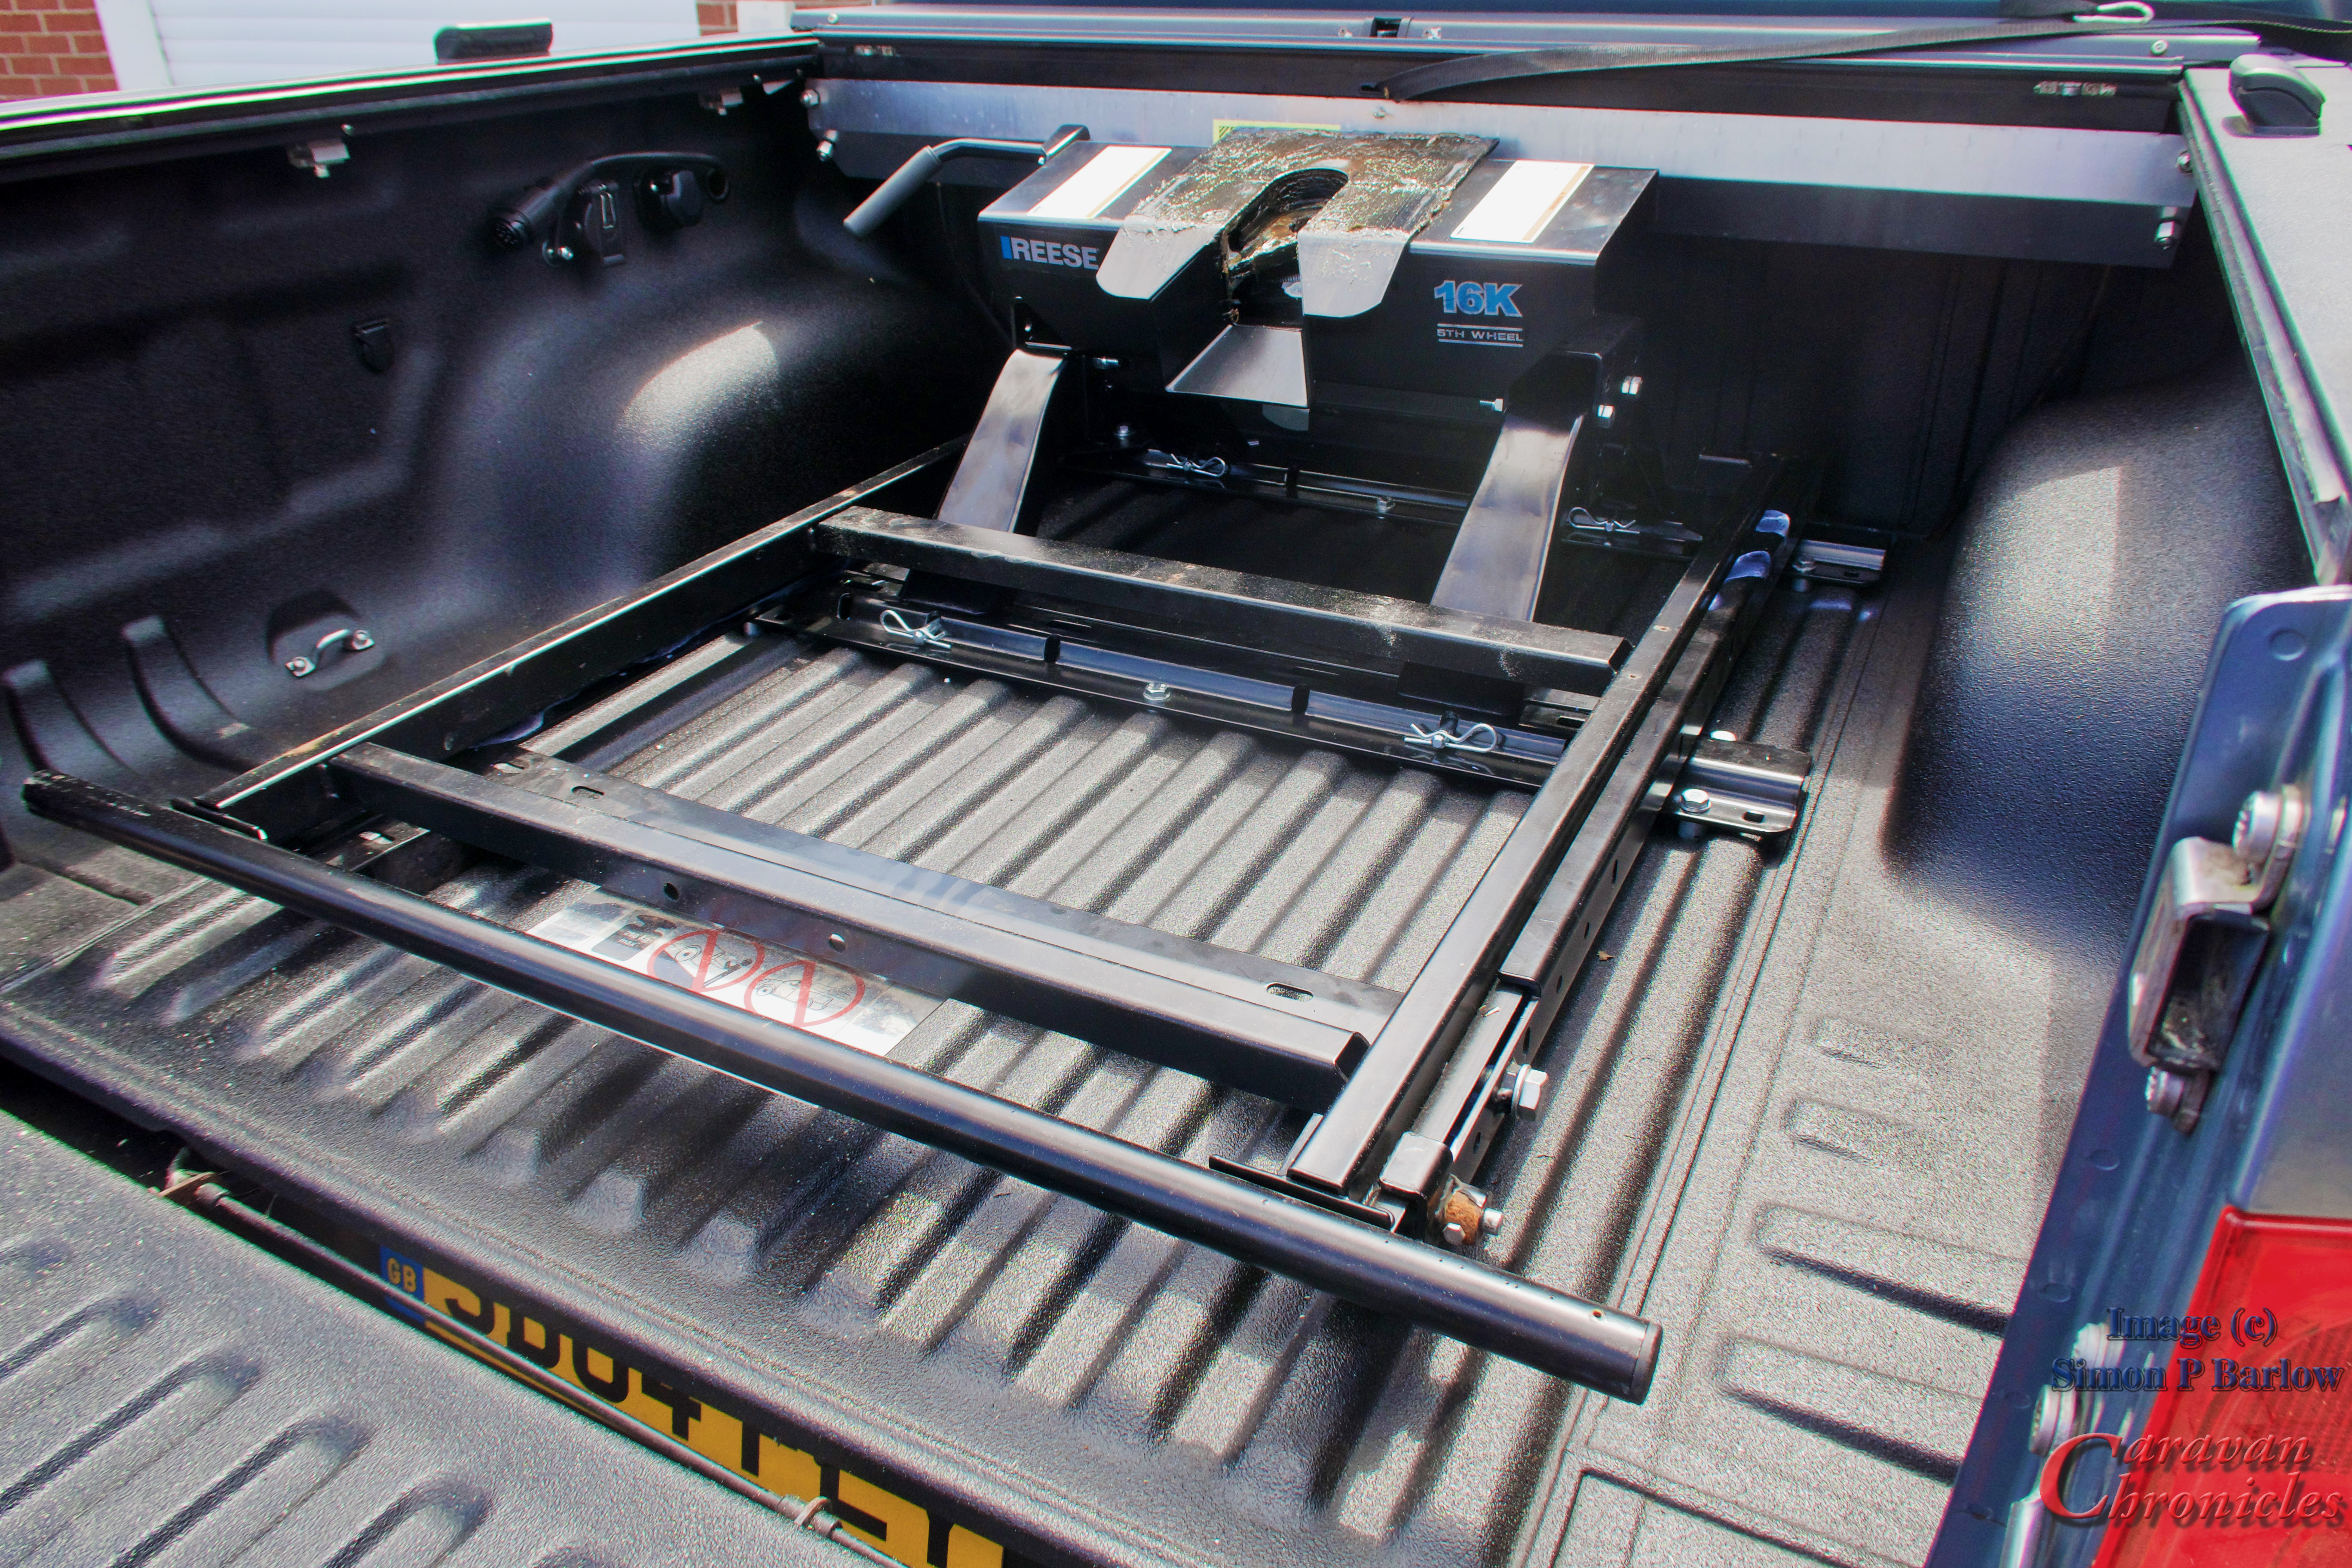
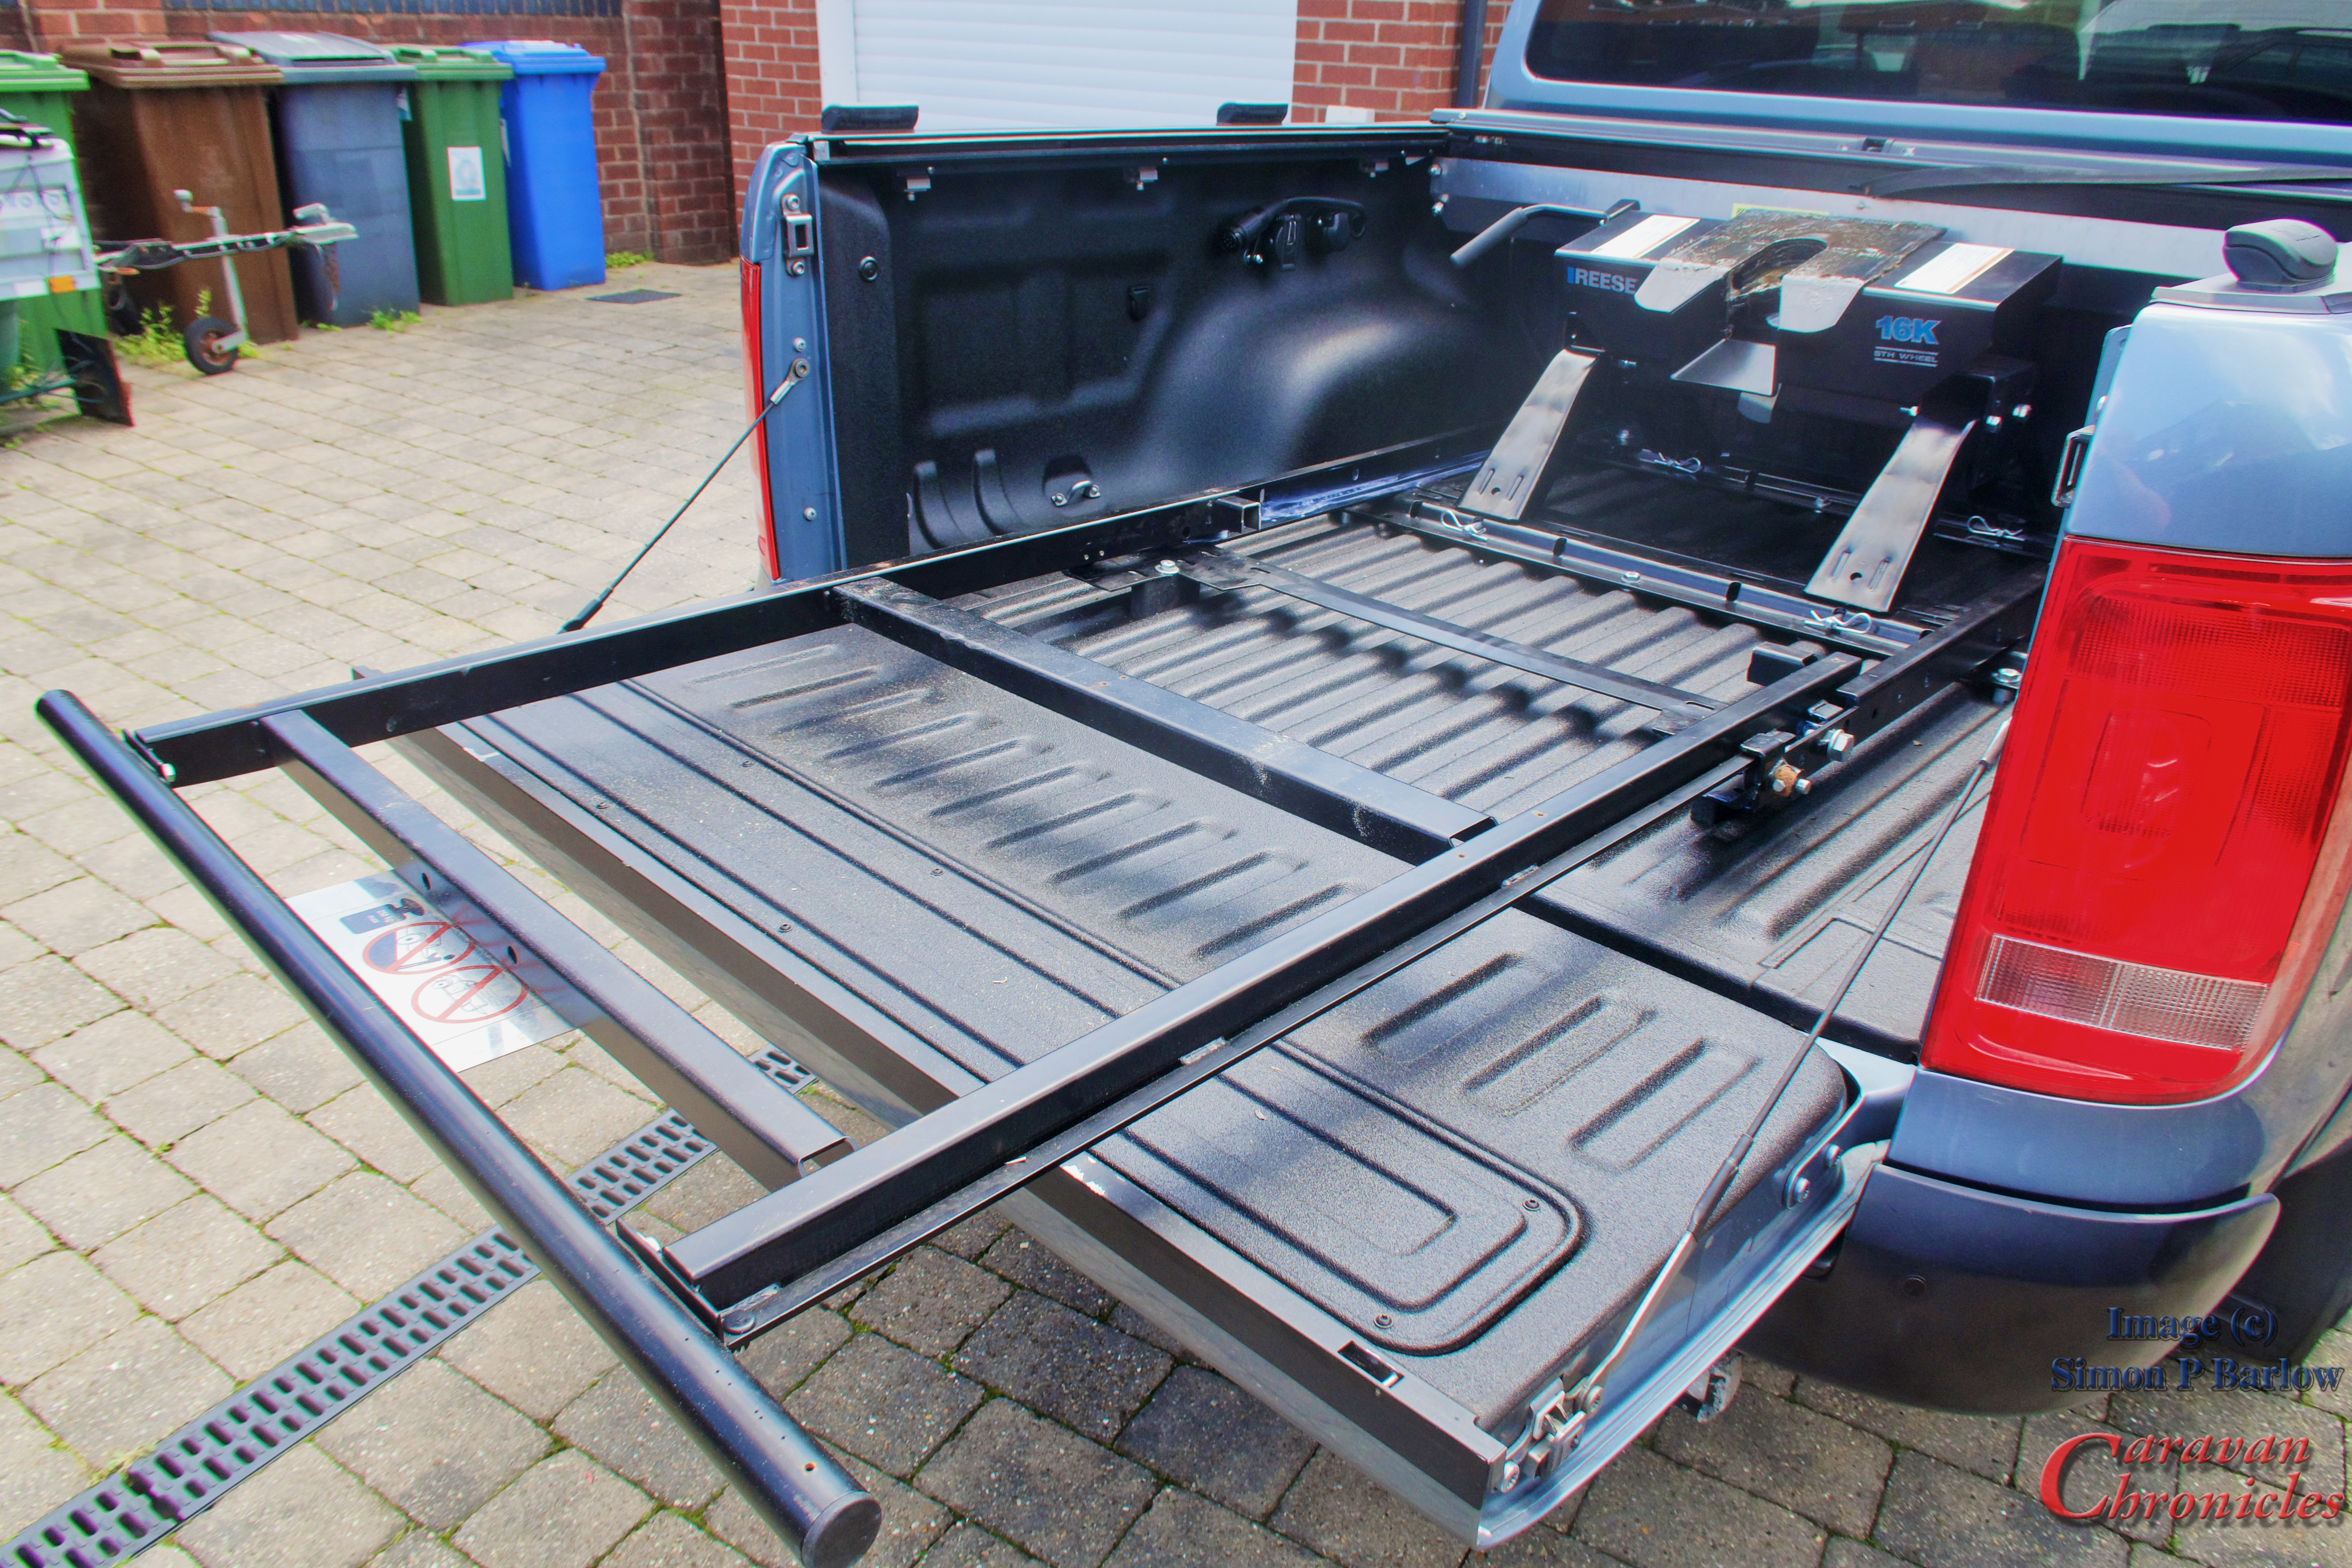
I did a couple of other mods that allowed the ray to slide out further. Previously it only came out about an inch past the tail gate, now it comes out about 10 inches which will have a great advantage… more on that later.
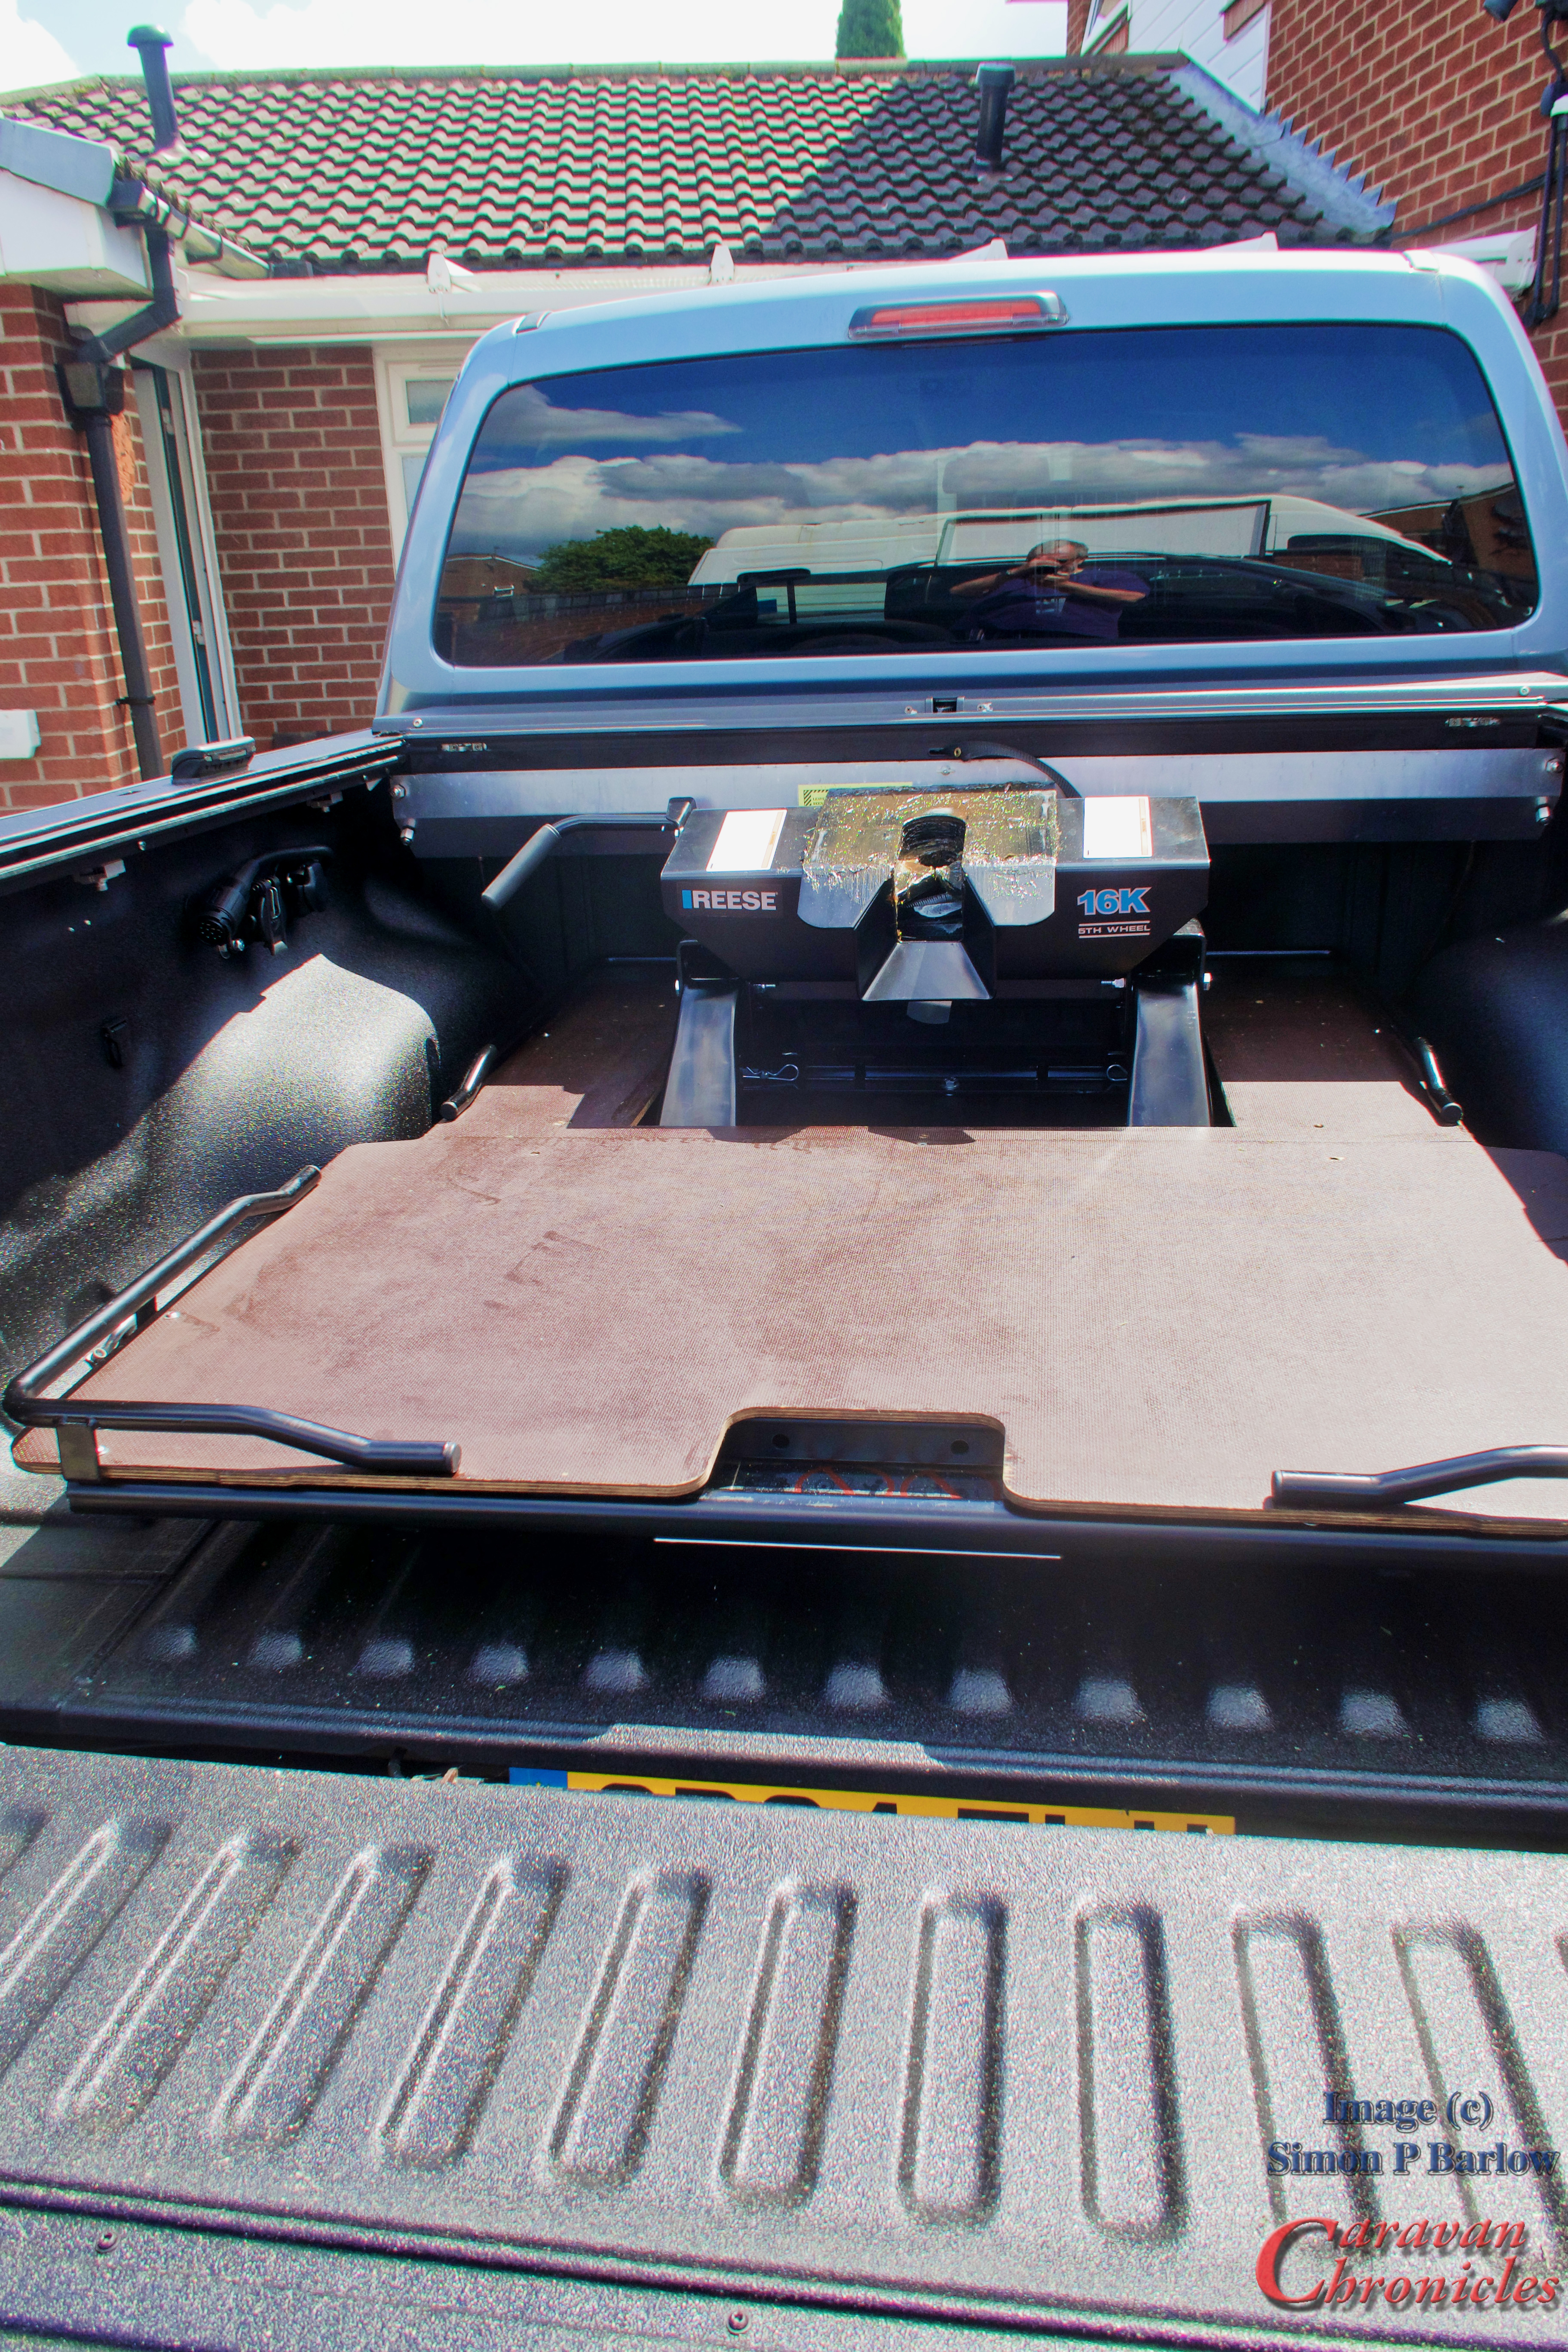
It was now time to refit the decking and do some trimming as required so it would fit around the hitch.
I cut the sheet so that the section in the truck would remain in one piece and if I needed to the hitch could be lifted out and the cut section replaced giving me a full size sliding bed once again. I do like having options!
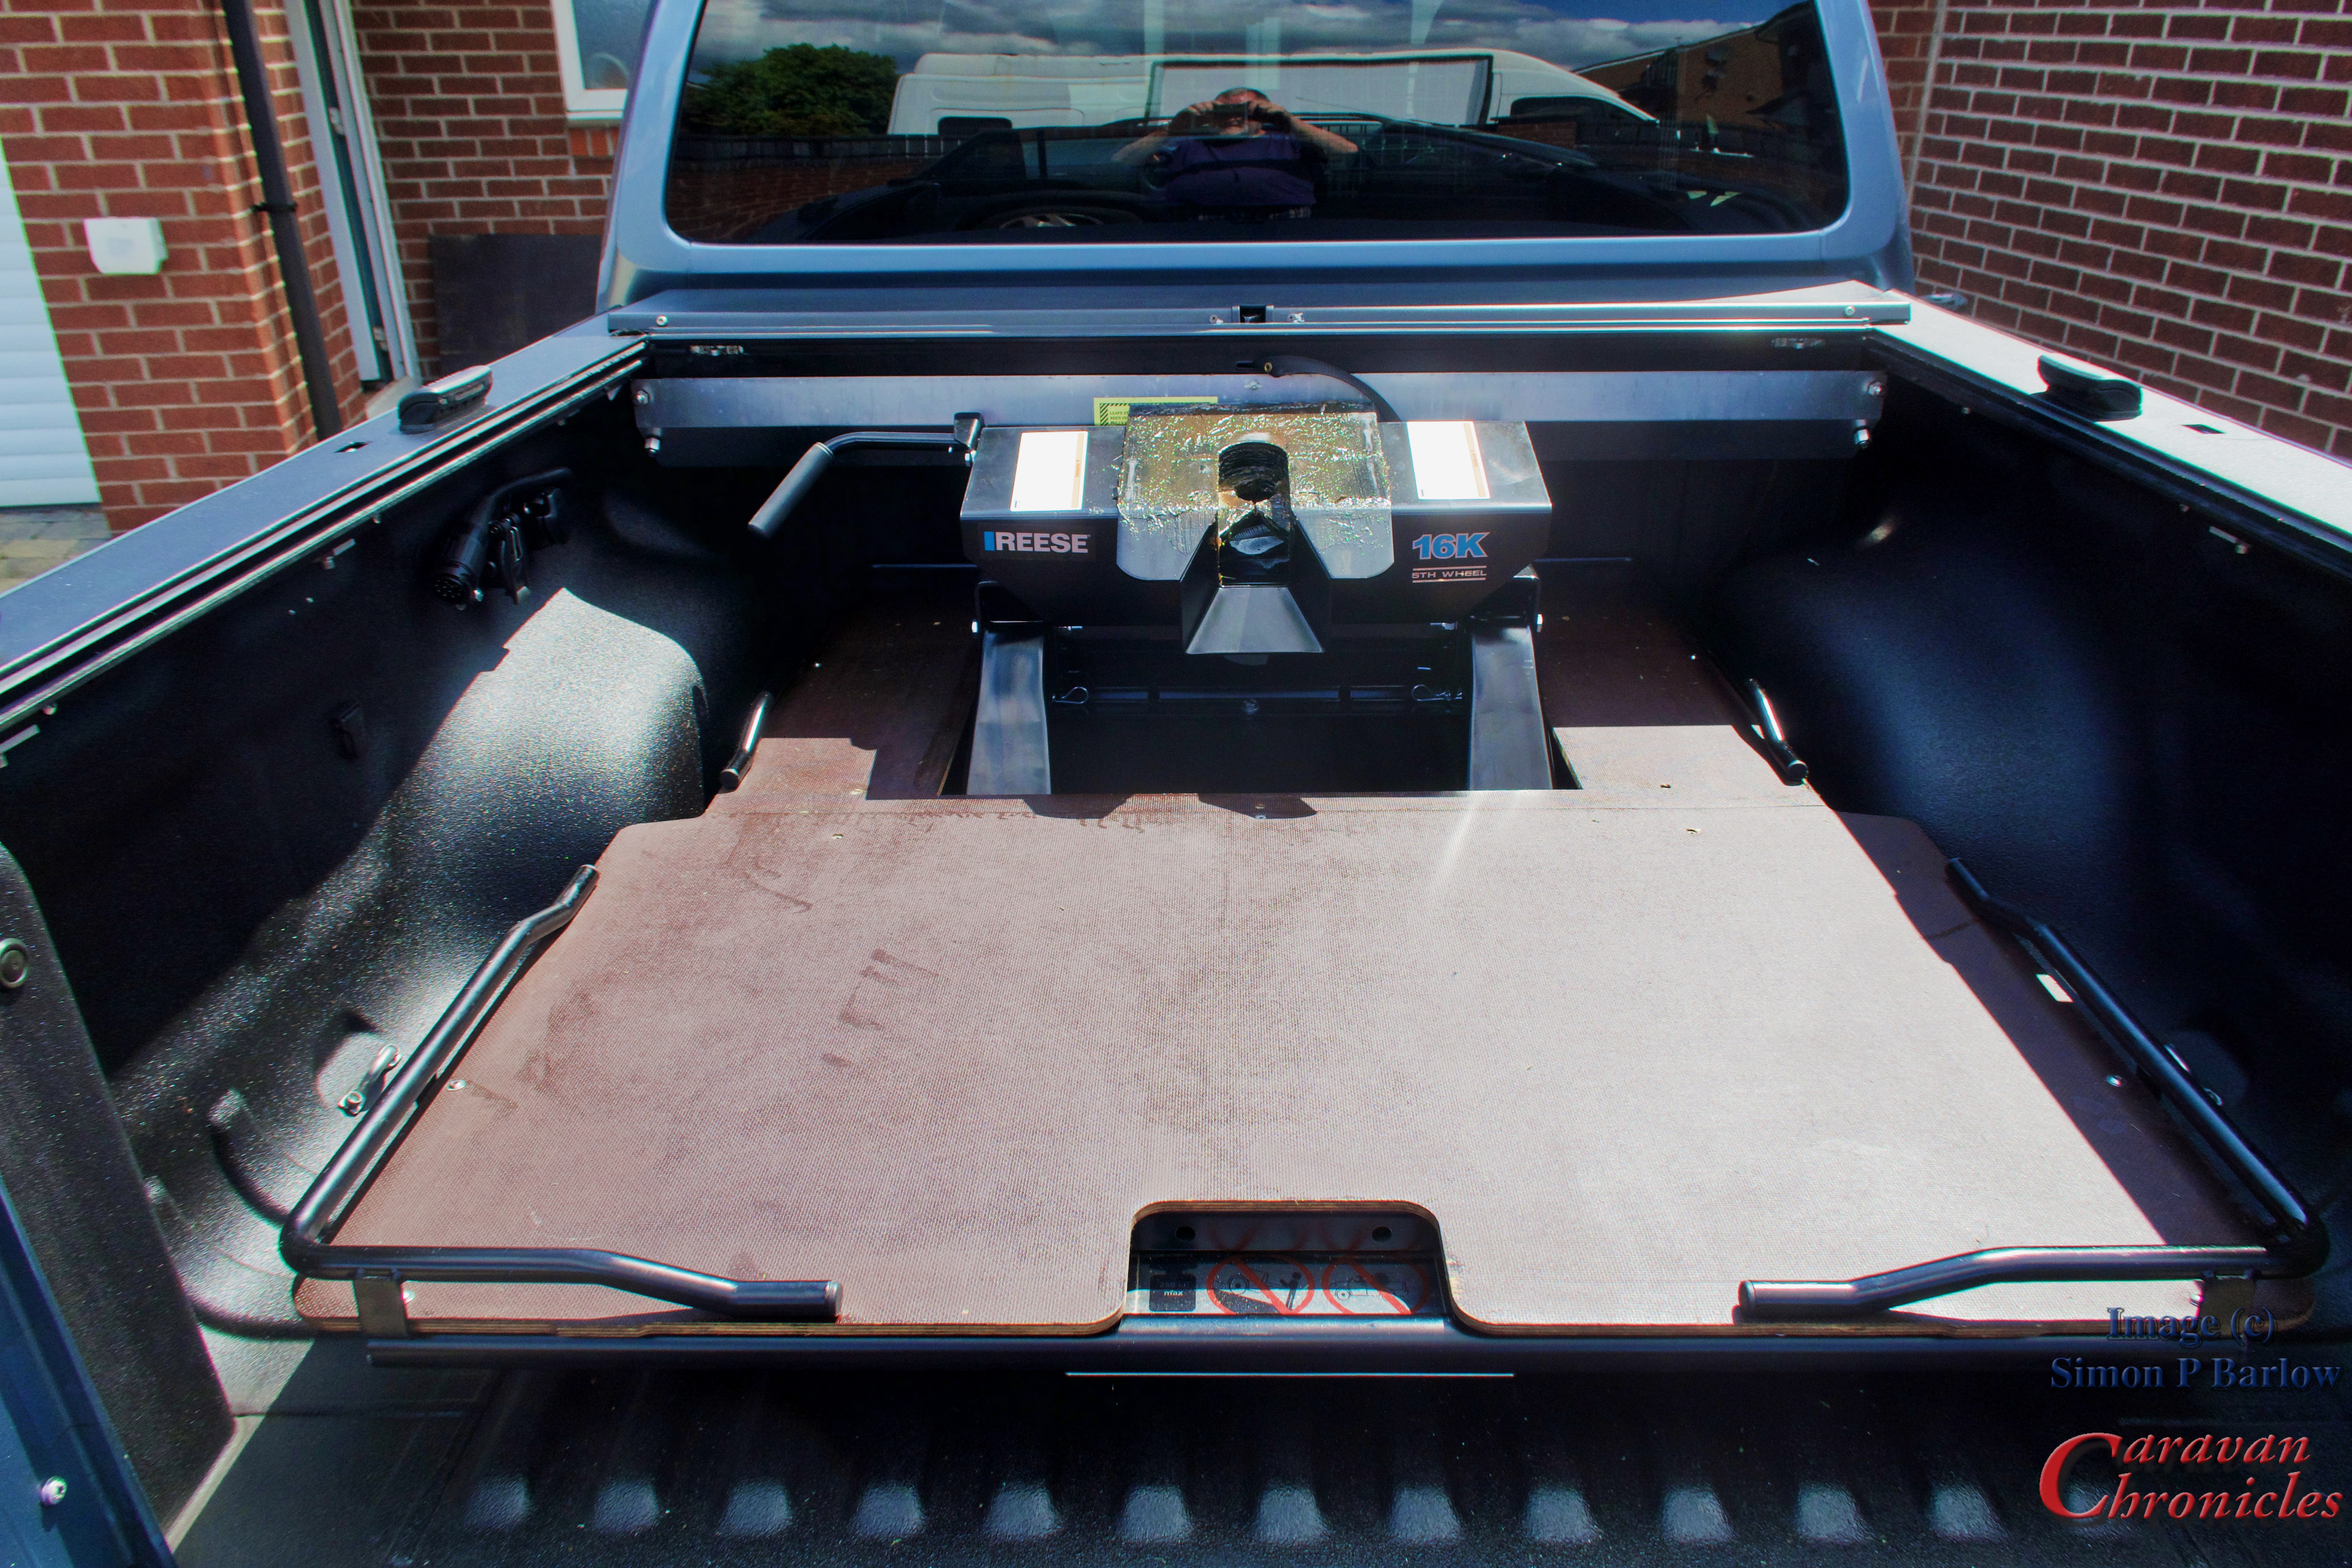
The trimming was actually quite easy. The board is Phenol faced marine ply and quite easy to trim. I gave all the edges, especially the new cut edges several coats of clear brush on wax and let it soak into the ply. I’ve found that this is usually better than any polyurathane edge sealant when it is in an area that is prone to dinks and abrasion. The wax penetrates quite a lot and soaks into the layers protecting them from water.
Everything was given a spray and rubdown with Boeshield as a protective against the elements and looks as good as the day I installed it.
Next little job is to find two waterproof boxes to mount on the sliding bed either side of the hitch for my recovery kit and straps. This is why I wanted to make the slide tray come out further than it originally dis so I would have better / easier access to the two “fingers” either side of the hitch.
I need some low profile narrow boxes 200mm wide, 200mm high and about 600mm long with a hinge lid. I did start looking around at what is out there but I suspect that they might need to be fabricated out of aluminium diamond tread plate.
A couple of bonus things…. there is enough space under the 5th wheel hitch to allow me to store two of the “Really Useful Box” company’s boxes under the hitch which will be fairly secure when the slide tray is stowed.
The second is there is now enough room under the sliding bed to be able to store some kit and it pulls out far enough for me to sit the Cadac on for a bit of tail gate BBQ’ing.
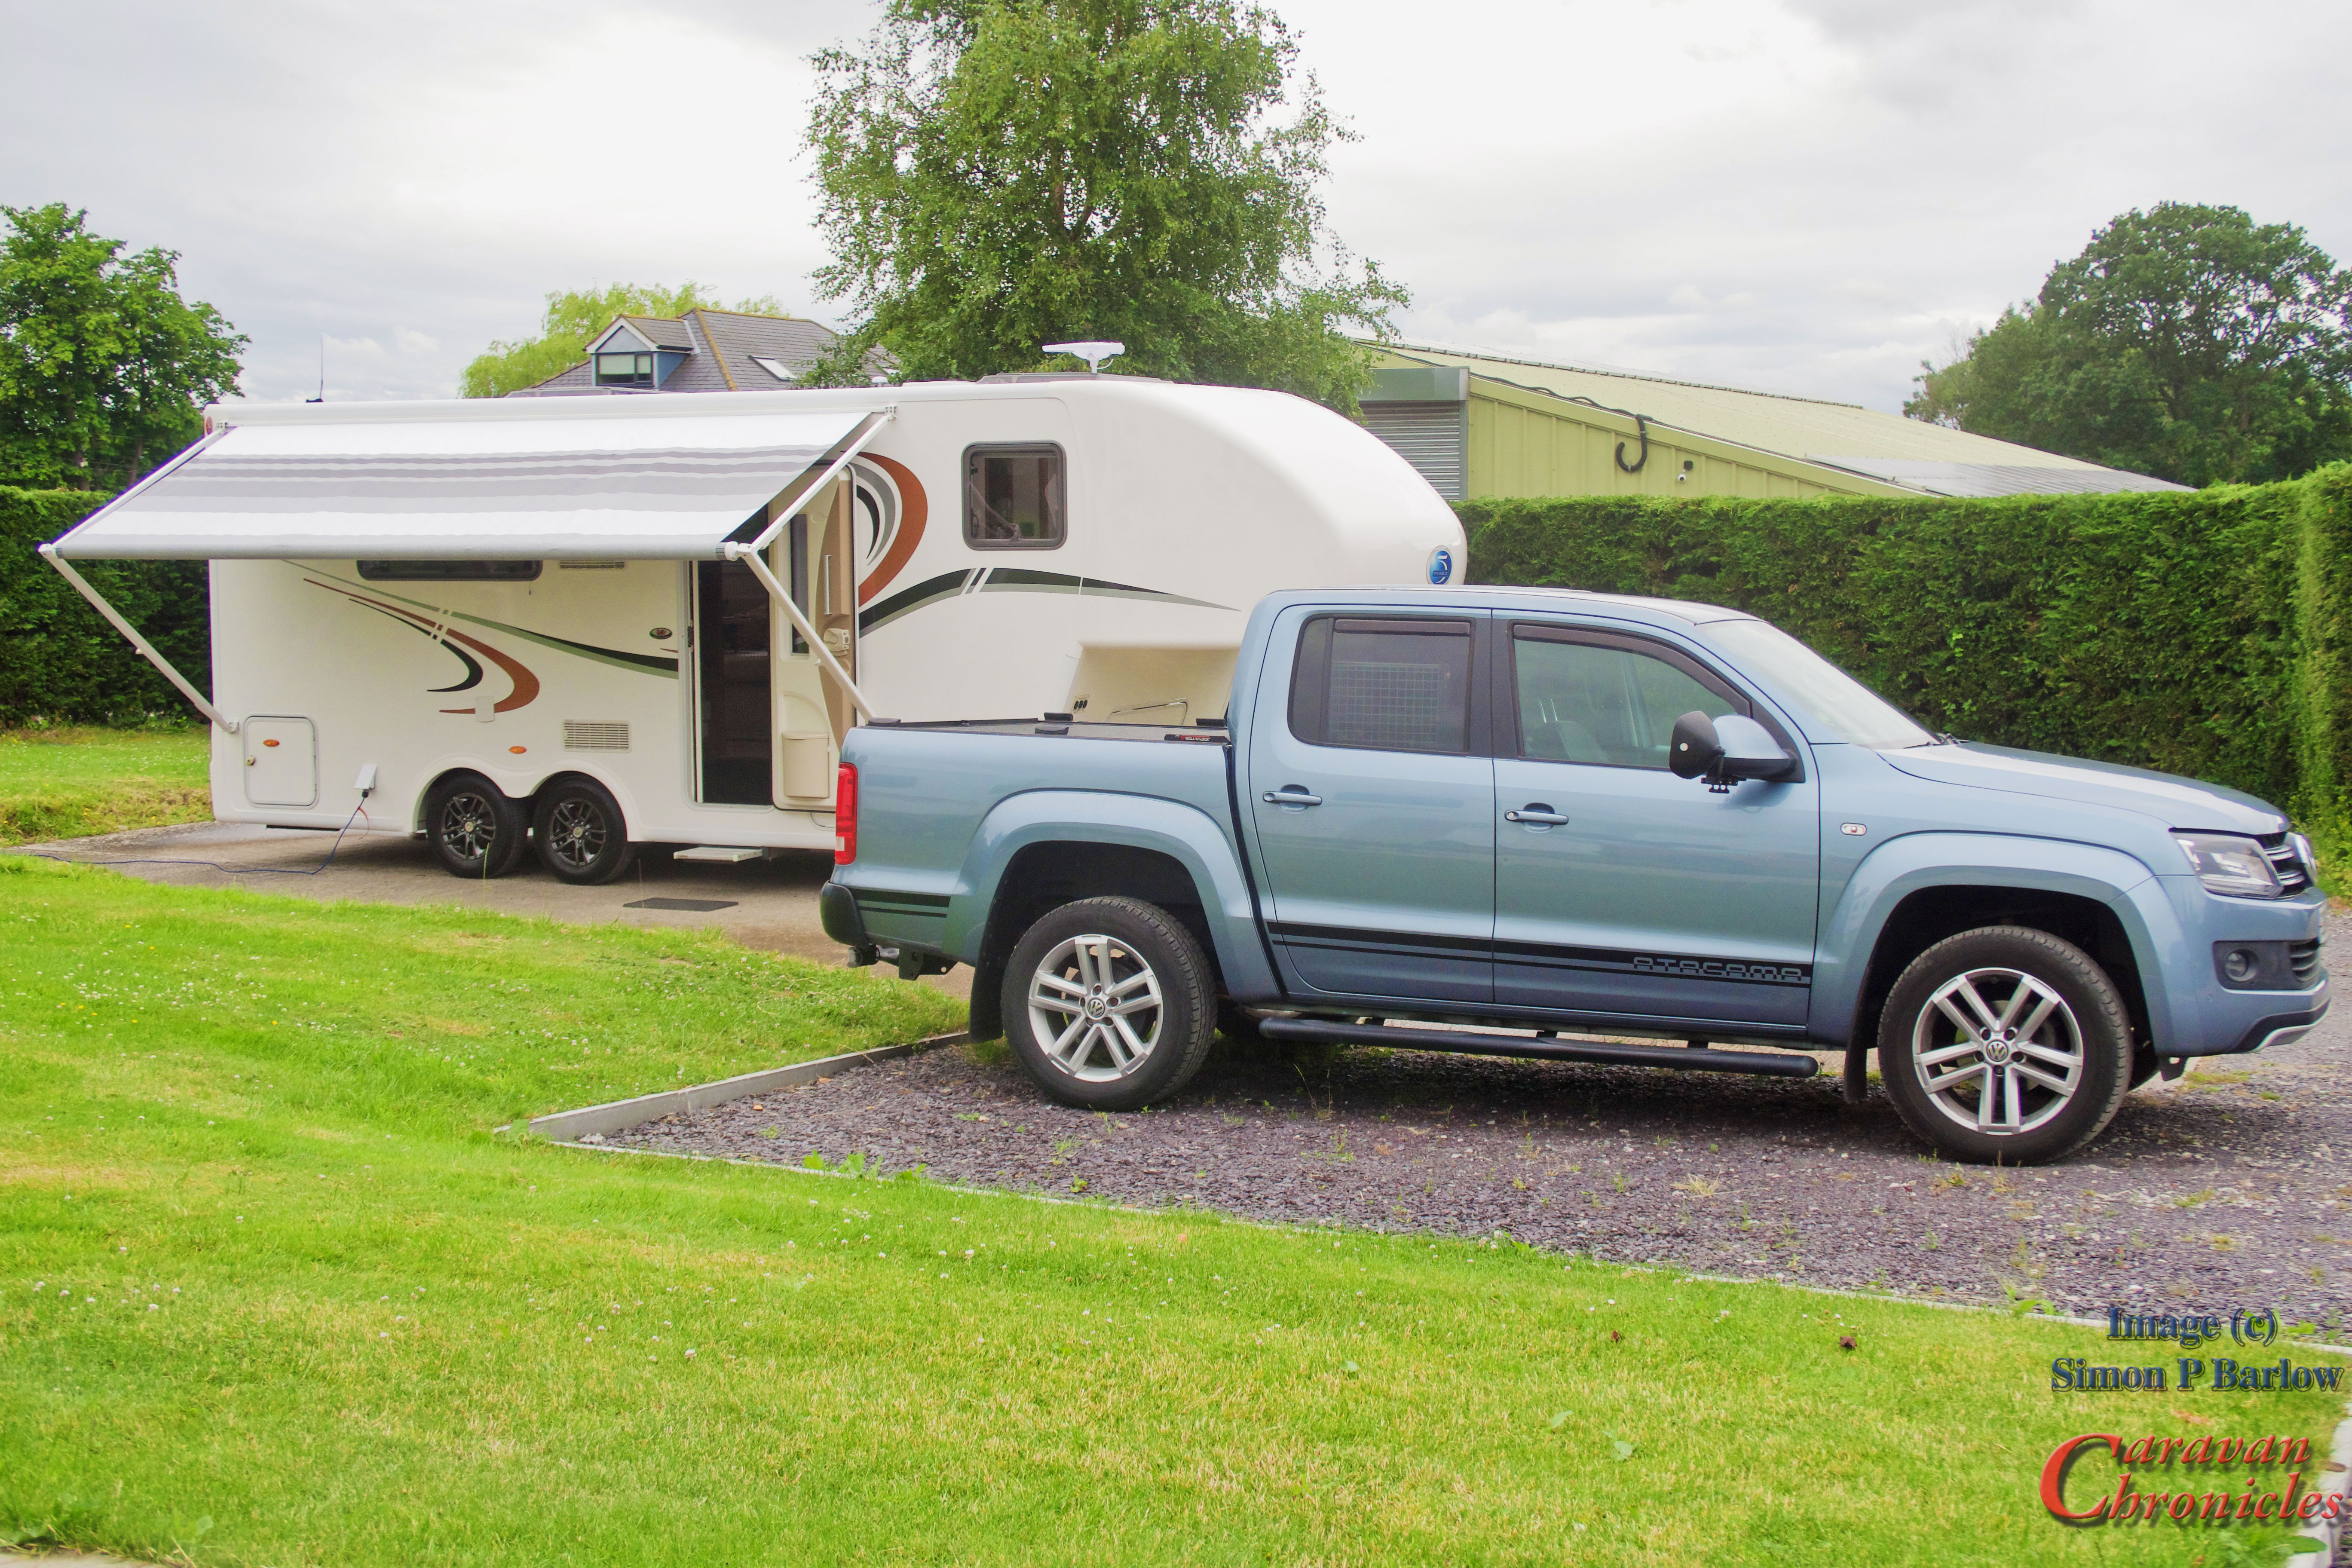
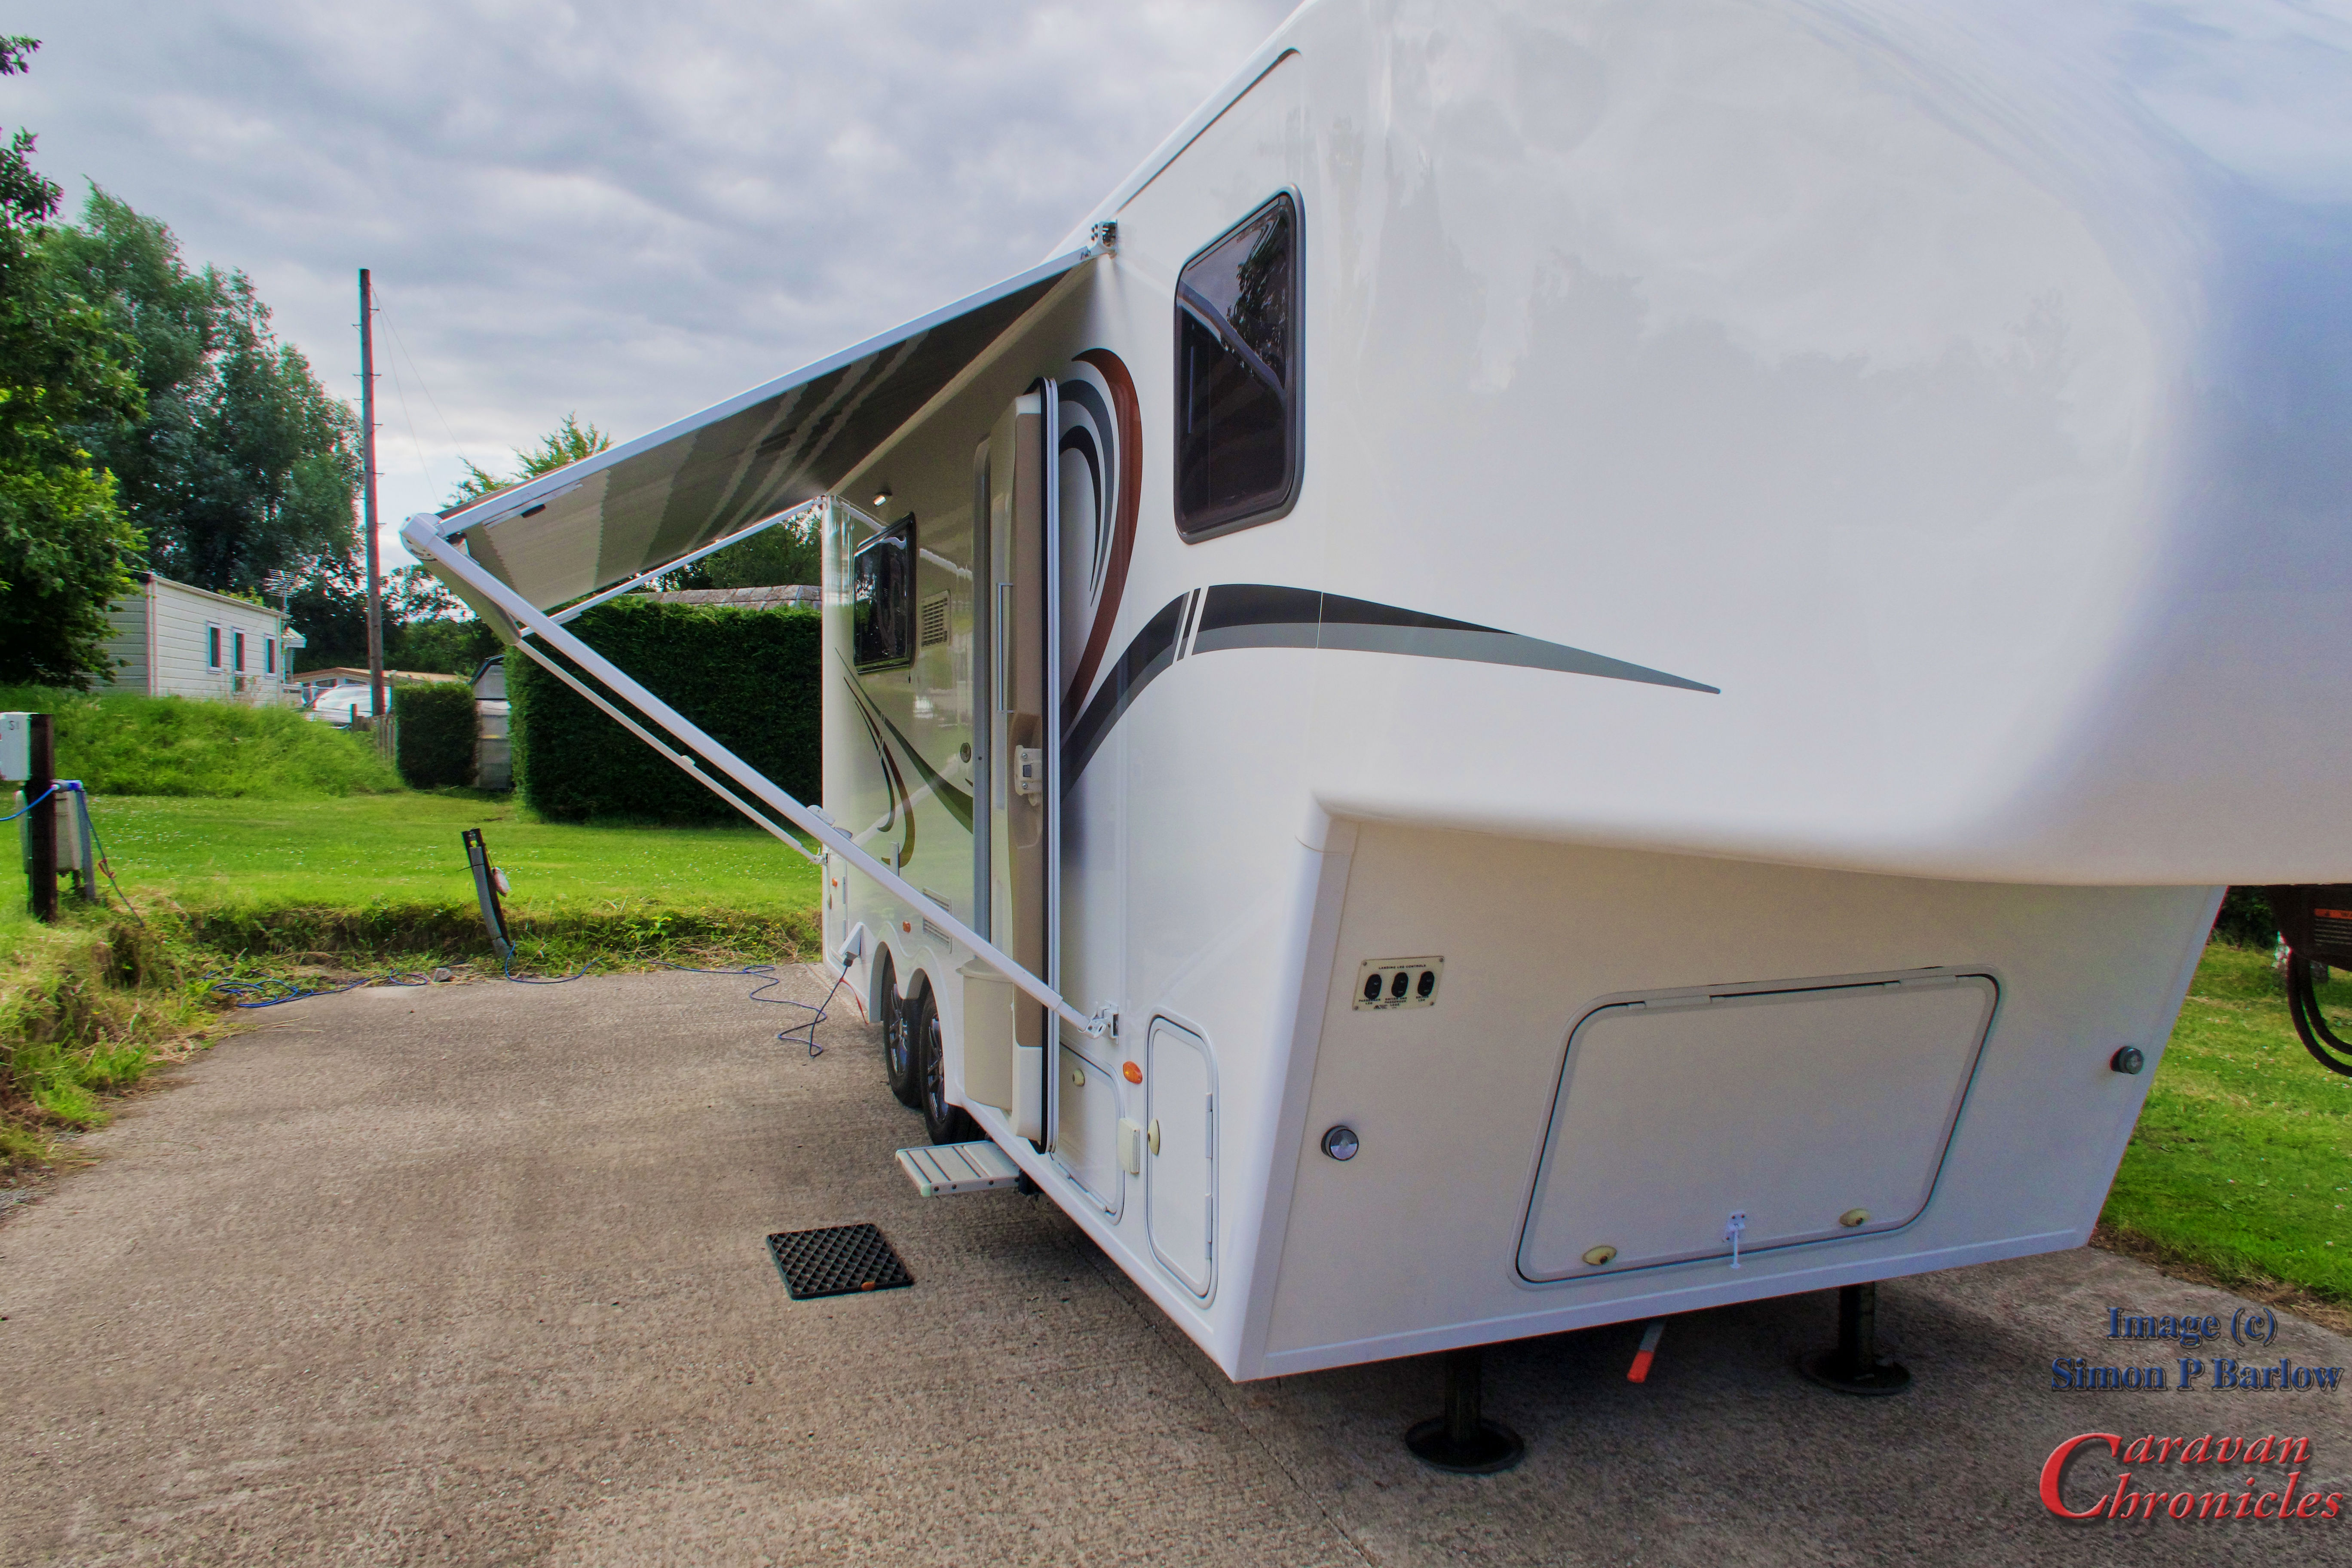
Well, I never expected so many questions as to the weight, size and towing our 5th wheel Dream Seeker. So here are the stats…. now these are for OUR Dream Seeker, and as each one is virtually custom made to the buyers specification, then there will be differences.
As our DreamSeeker is currently configured with an Avtex 4G/5G antenna on the roof it stands 2950mm tall (for bridge clearance my check is 3.2m minimum I would ever attempt and then only with a spotter).
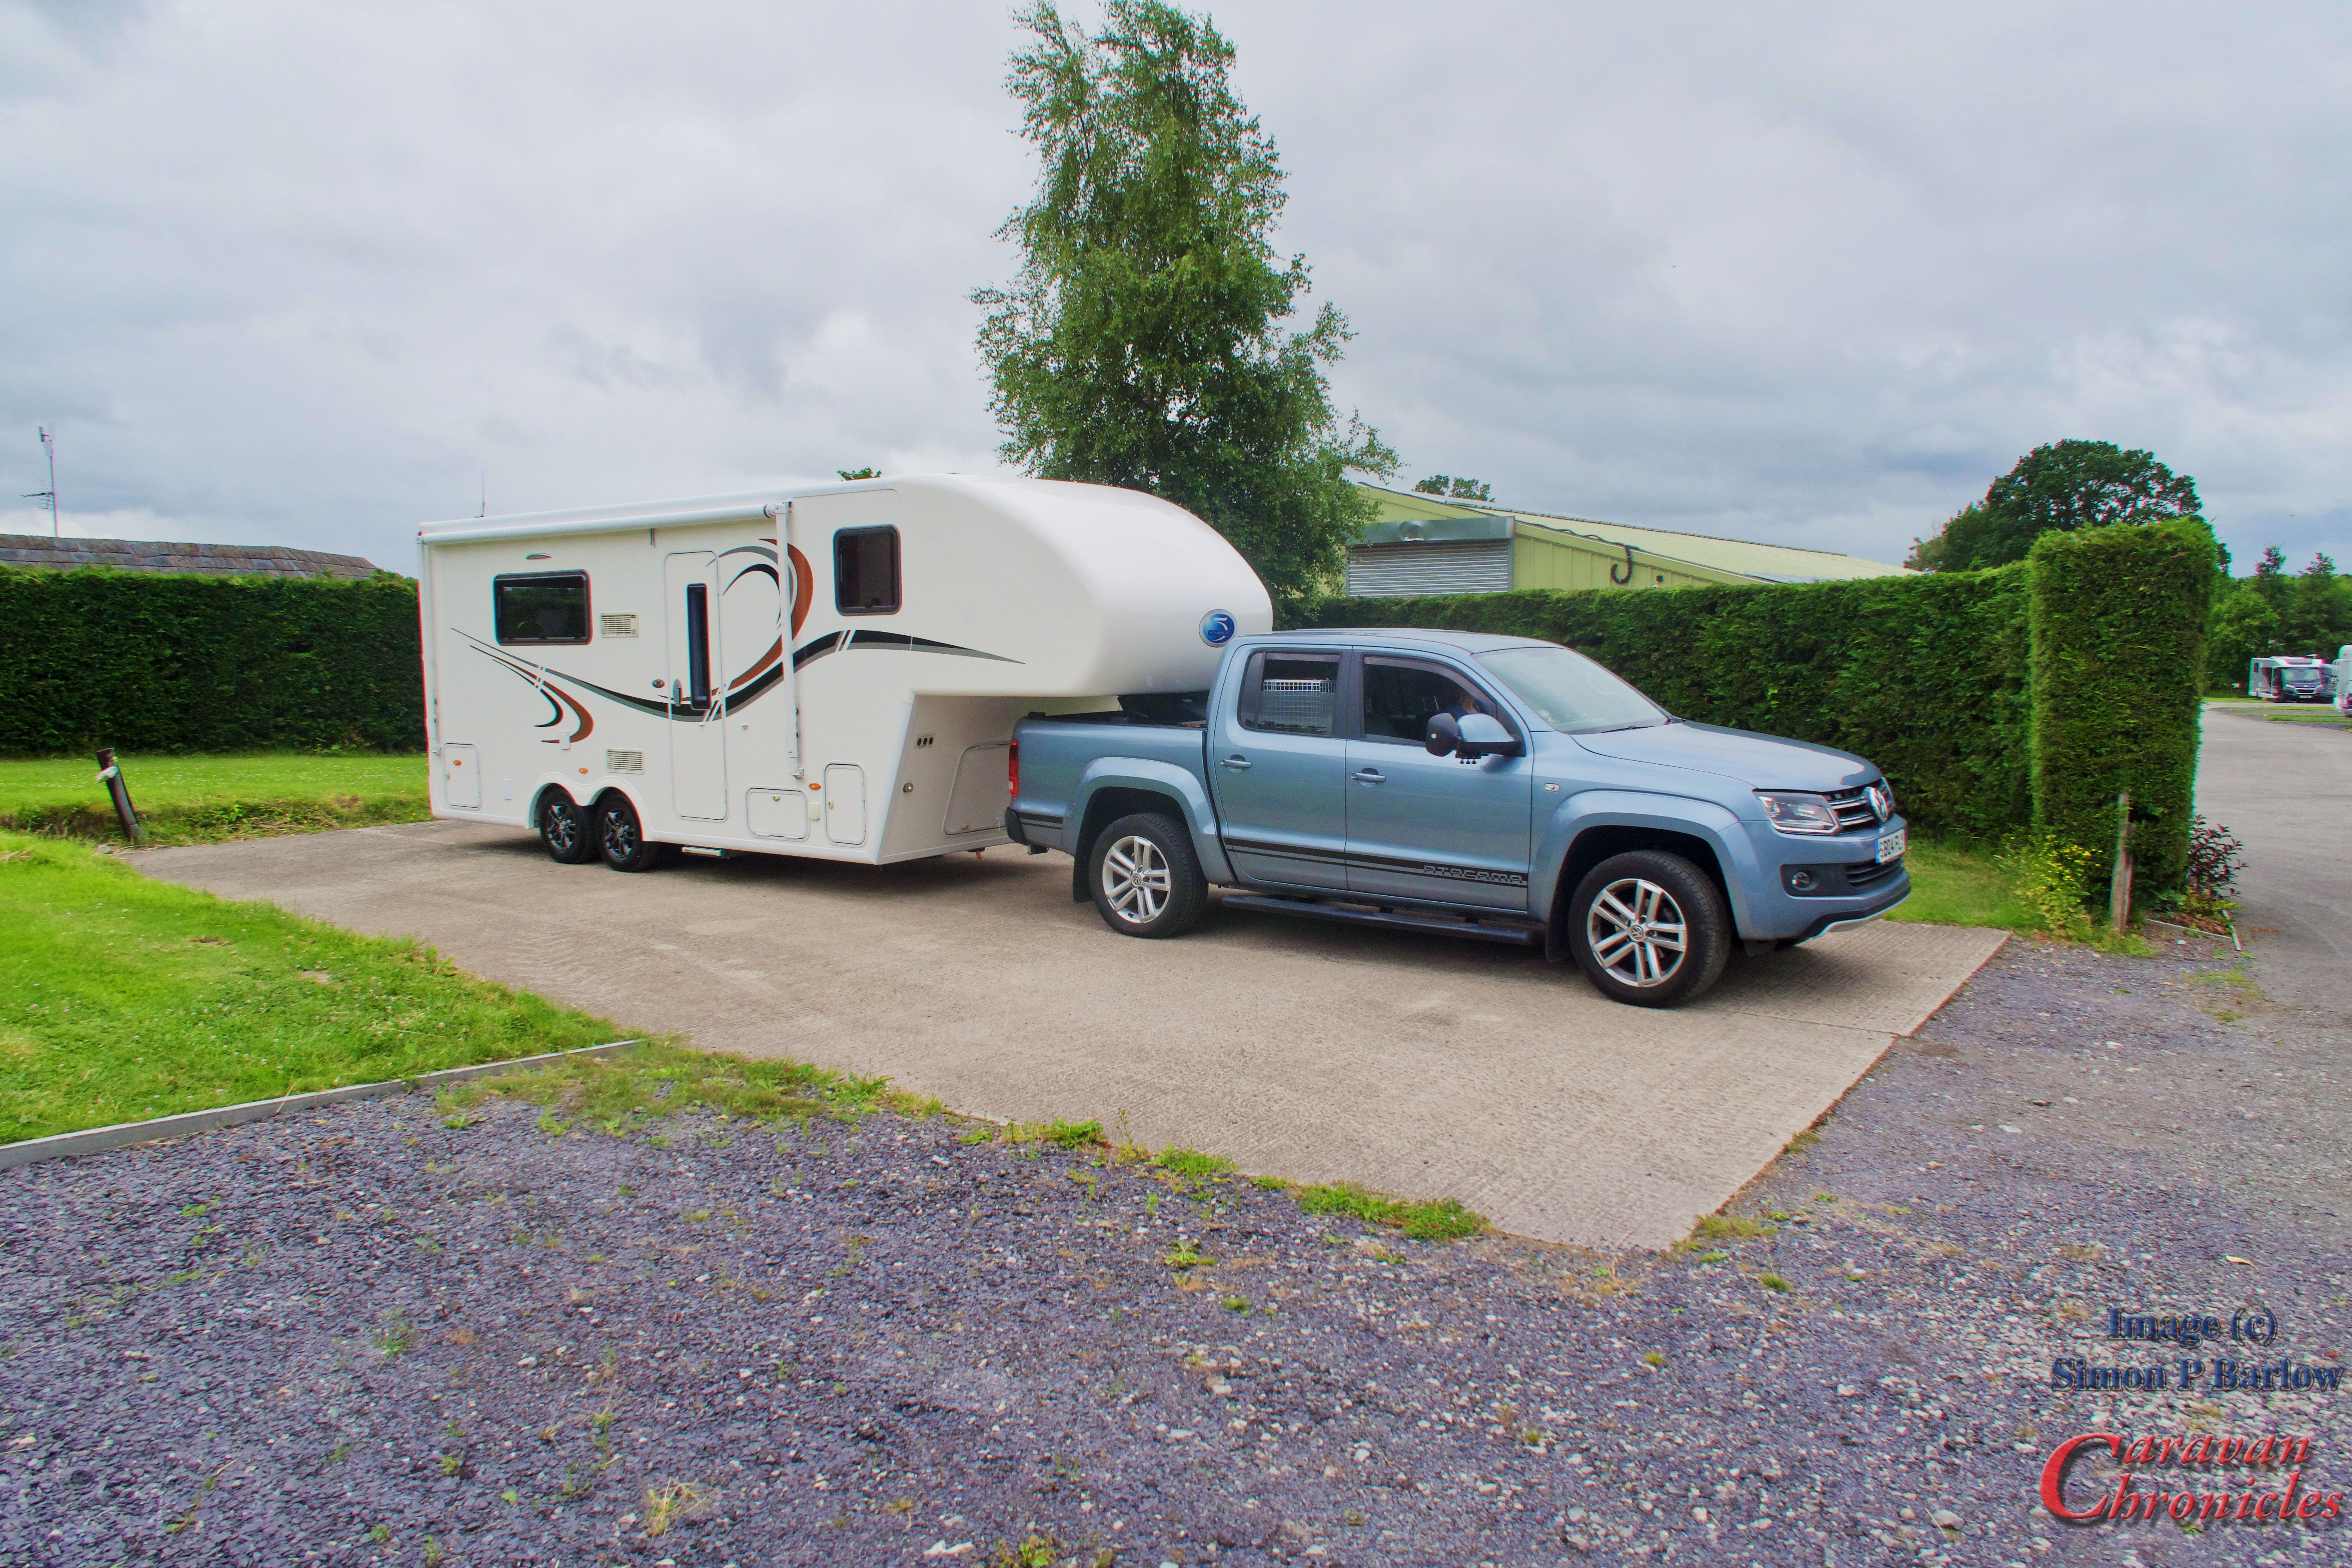
From the rear bumper to the very front of the hitch, uncoupled, it is 7638mm long and 2292mm wide. Now that is not the whole story. The pin box (the bit that sticks out the front and connects to the 5th wheel hitch in the truck) can swing out of the way when on a pitch, so the actual length when pitched is 7517mm, so exactly the same as a 7.5m motorhome.
Now when we are hitched up to the truck, the effective length behind the vehicle becomes 6630mm, which is actually shorter than some twin axle bumper pull caravans.
The Weighty Stuff…
Our Dream Seeker runs on two 1500Kg rated axles and we have a MTPLM of 3750kg. So at max weight we would have 3000kg on the axles and 750kg on the hitch pushing down into the bed of the truck. The hitch in the truck is positioned directly over the rear axle so this mass bares directly onto the rear axle. Our Amarok is rated for 1000kg in the rear pickup bed so we are easily within limits.
Our Dream Seeker as bought was weighed and had 2210kg on the axles and 570kg on the pin hitch totalling 2780kg. If you subtract that from the MTPLM of 3750kg it gives us a user payload of 970kg.
The hitch is installed directly over the rear axle and has plates underneath connecting it directly to the chassis rails and suspension mounts. This Reese hitch is rated up to 800kg pin weight and 4300kg towing capacity.
Now here’s what confuses a lot of people… our Amarok is rated to tow 3200kg and we are hitching up a potential max of 3750kg…. 550kg more than we are rated to pull. Ahh pull… that’s the key word. The rating is based on the vehicle manufacturers tow bar pull capacity. With a 5th wheel hitch you are also carrying some of the weight so for every 1kg of weight that the truck carries on the pin hitch that is effectively deducted from what you are pulling. So at MTPLM of 3750kg I am carrying 750kg and pulling 3000kg (OK I know that we are moving a mass of 3750Kg but that is how the figures are assessed for 5th wheel towing… not a clue as how this calculation was decided on!)
GTW…. Gross Train Weight
On the face of it we are ok… however there is one last thing to take into consideration. GTW or Gross Train Weight. This is the absolute maximum weight the vehicle and trailer can weigh together in any combination of the mass being shared between the vehicle and trailer. Because we were approaching the GTM max for the Amarok if we had the trailer at MTPLM I wanted some extra safety margin and we opted to have the Amarok uprated to a GTM of 6400kg and the rear axle load rating increased to 2180kg. This was a fairly simple process that involved removing the hard rubber bump stops and inserting air bags, which are currently inflated to 7psi. They have increased the hight of the truck at the back be about 20mm but hitched up the truck and caravan are dead level. The only other thing is a new weight plate stuck to the door pillar of the Amarok. All the weight upgrade installation and paperwork were done by the wonderful guys at the 5th Wheel Company for us.
So there you are….
That’s it, on a pitch we are no longer than some motorhomes at 7.5 metres and when hitched up it is only 6.6 metres in additional length…. which is less than some single axle caravans!
As for drivability, well doing 60mph on the motorway and having big vans steam past at 70+ it doesn’t move or even impart any sideways forces I can feel when driving. Road bumps you can just about feel but no where as much as I could towing our single axle caravan.
On corners you just have to be mindful the the rear wheels of the trailer will scribe a smaller arc than the rear axle of the tow vehicle so for example a 90 degree left turn into a street means you need to move more to the right hand side of the lane before the left turn…. but all you class one HGV drivers know this and can definitely teach me a thing or two about 5th wheel driving.
And as for driving round tight spaces…. can you get your caravan 90 degrees to your car?
I’m still new to this and a blind side reverse does have your head swivelling a bit and I can now see why a lot of American 5th wheels have side mounted rear view cameras. I’m just getting used to the novelty of a rear view camera…. so all in good time.
Brakes…
The brakes are something else. They are Electric-Hydraulic units working on 4 massive drums. Once you get the feel of them and learn to keep an eye on the red LED in the truck that lets you know when the brakes are operating, then within a few miles it becomes instinctive. I can now judge how much pressure to apply to get the brakes to just let me bleed off a little speed or apply with some gusto then ease off so the LED goes out and we coast to a gentle stop without giving Sue whiplash at the moment we do stop. I have not tried an emergency stop and intend trying to drive so that I never have to.
While we are still on the subject of brakes…. yes it does have a handbrake that works on all four wheels and like on you over run break away cable we have something similar…. it’s a cable that is attached to a switch… pull it out and a separate 12 volt lead acid battery powers the hydraulic pump and applies pressure to all four drum brakes and maintains that pressure. The other end of this safety cable is clipped exactly as you do a normal break away cable to a secure part of the vehicle. In my case the floor mounting rails of the 5th wheel hitch.
PS…
I’m currently writing this sat in our Dream Seeker at the wonderful Donkey Creek Farm near Freckleton. It’s one of those sites that I don’t want to tell you about so I can just keep it to ourselves. (and no, before The Caravan Vlogger ask’s…. this isn’t a sponsored link!)
EOE (Errors and Omissions Excepted) As I said earlier these figures are based on OUR Dream Seeker and OUR Amarok do not take any of these figures to be a basis of working out any load capacity for any potential vehicle or caravan purchases. Speak to your vehicle dealer and caravan dealer.
It’s Wednesday 28th June, and we have an appointment in Rhuallt… we are going to the Fifth Wheel Company for the big handover when we collect our 5th wheel caravan. This not just a handover, it’s a Fifth Wheel Company handover. Which means 3 days of training, acclimatisation and adjustment to a 5th wheel caravan and the all important hitch installation in the VW Amarok which will be completed by the technical guys at the Fifth Wheel Company.
The previous week…
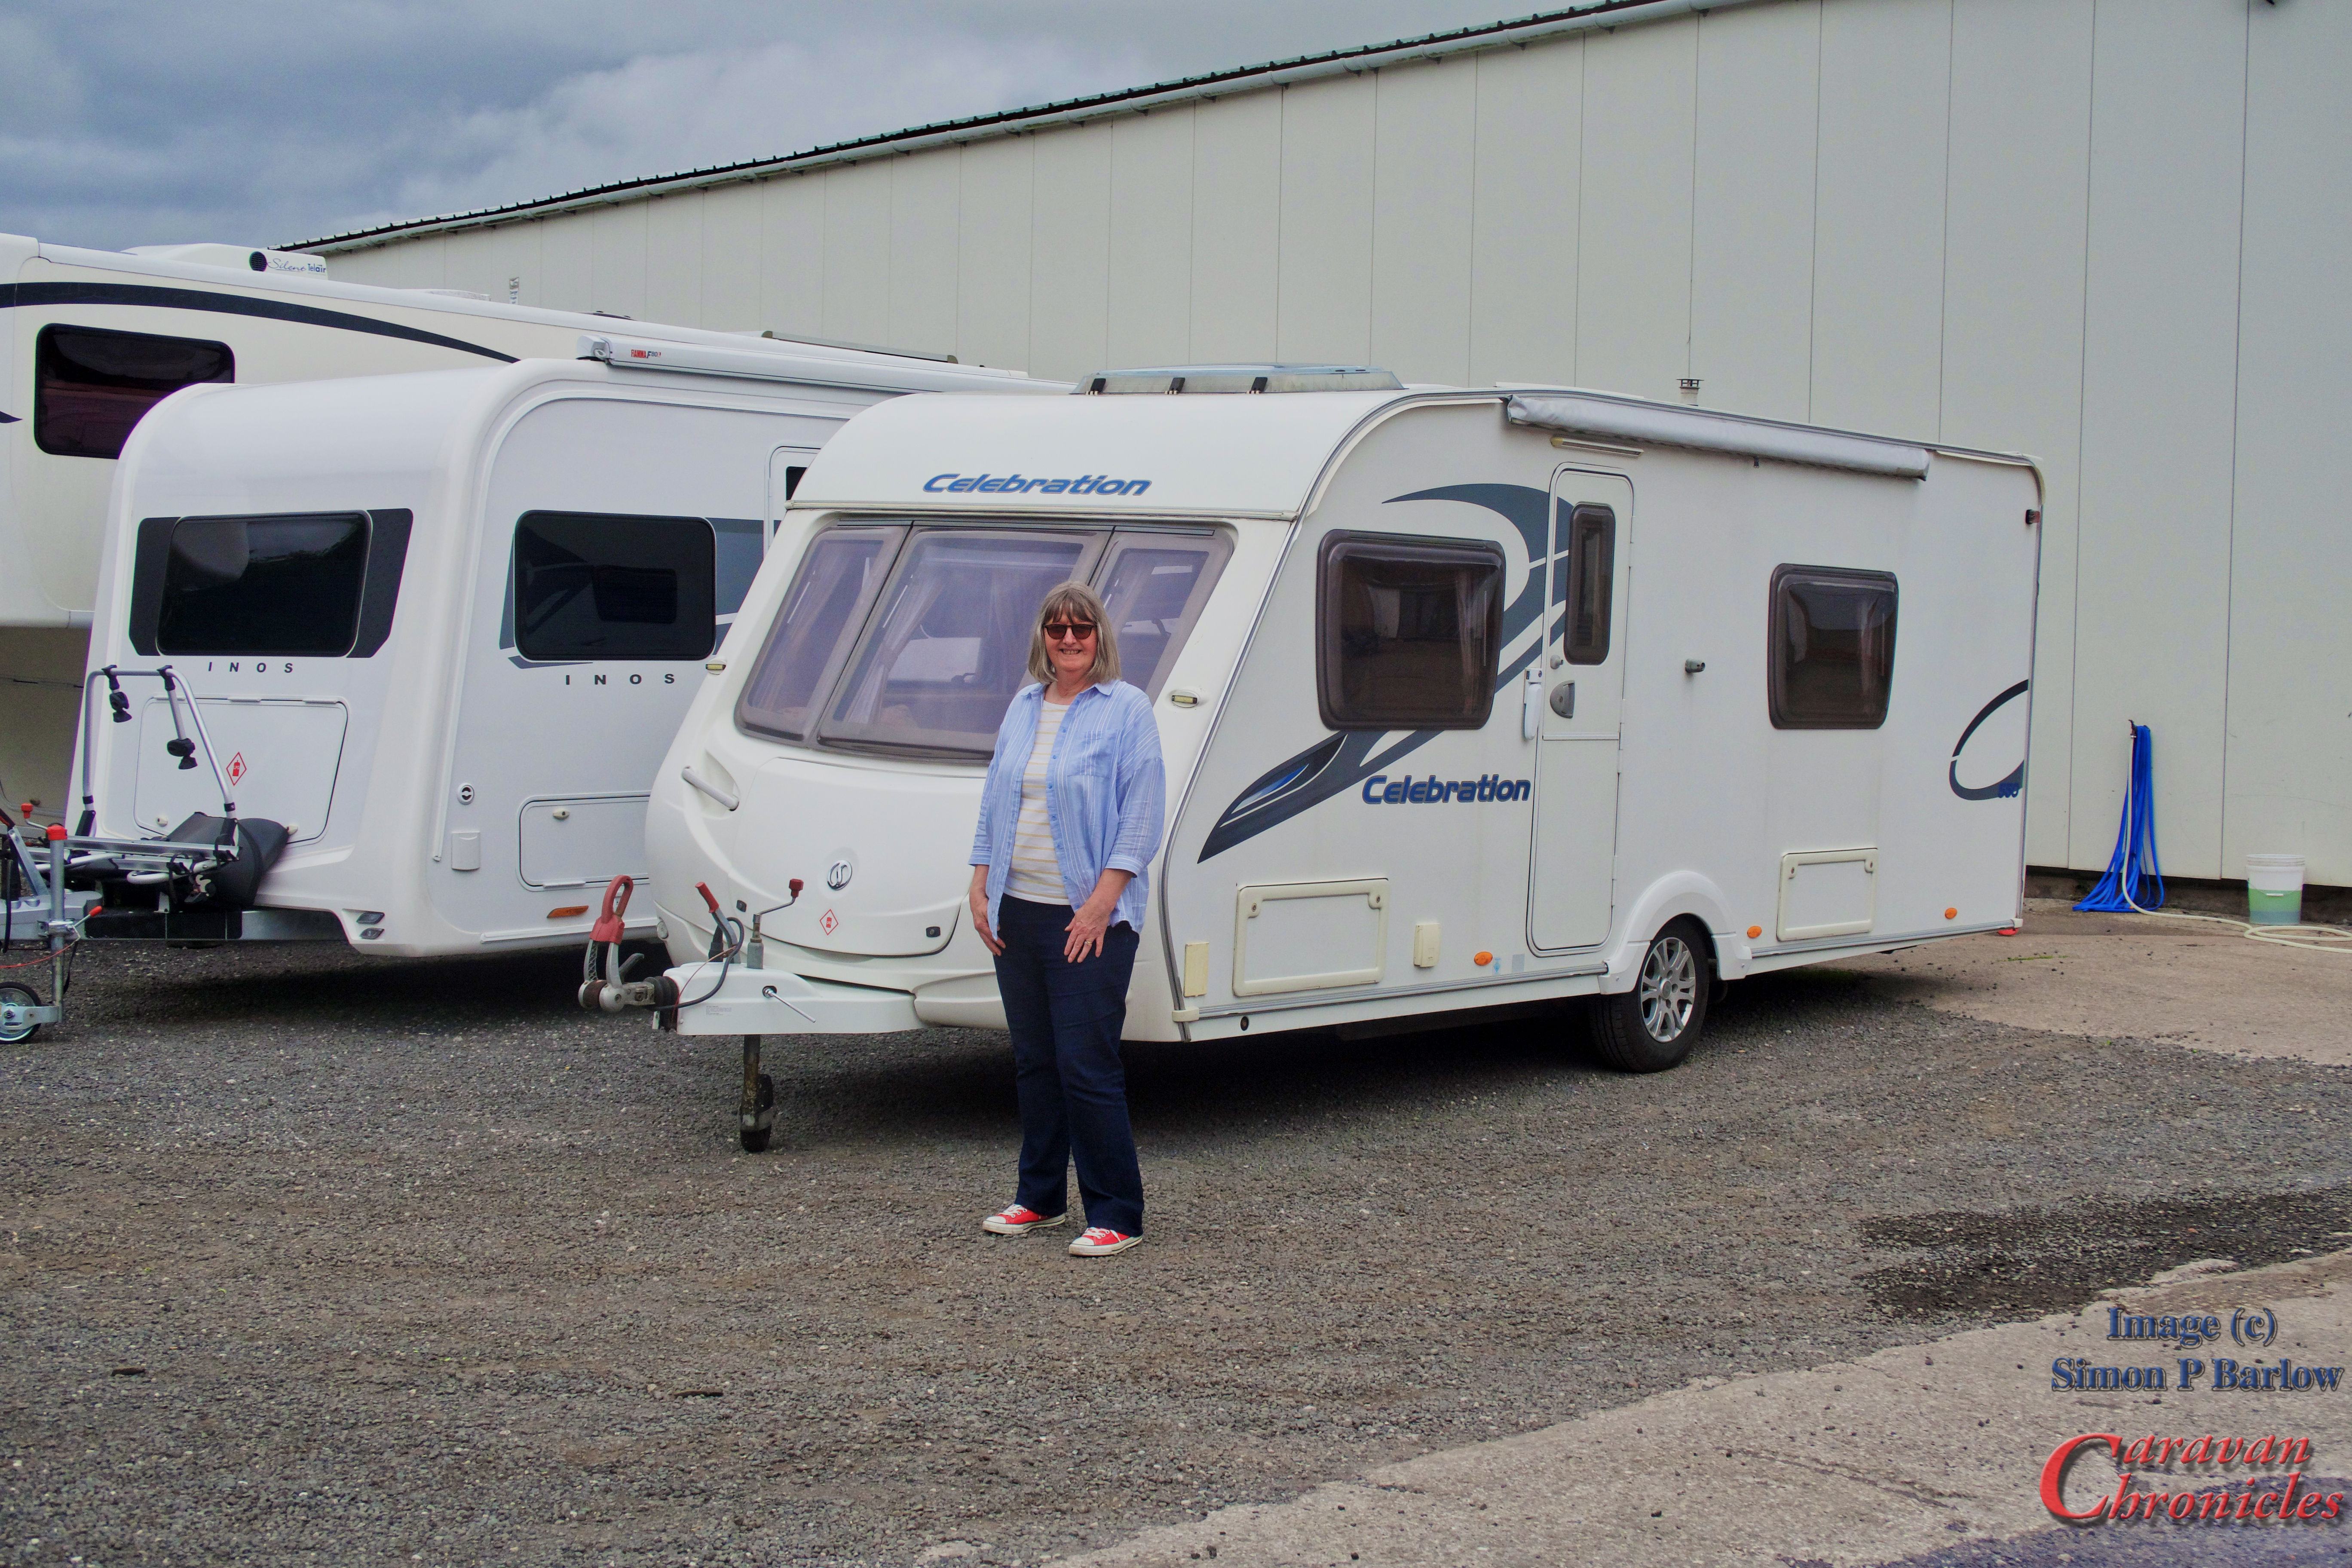
We had spent the previous week unloading our Swift Celebration 550 of its contents…. 12 years worth of touring “stuff” which initially didn’t seem like much, but stacked up it filled my workshop, I mean really filled my workshop. I had also tackled removing the sports bars from the Amarok, along with the bike carrier as well as the sliding bed and inbuilt tool box. I was now out of space in the workshop.
What followed was a cleaning frenzy.. Sue tackled every surface of the caravan, the loo, shower and sinks were cleaned and polished. The carpets were brought home cleaned and vacuumed to within an inch of their lives and returned to the caravan. We removed the Safefill gas cylinder and I started collecting all the original accessories for the caravan…. Alko Hitch Lock, Alko Wheel Lock, Alko Jack (still in its original protective wrapping) and I even had the original braided gas hoses along with the steady winder. As we were leaving the Fiamma sun canopy on it I found all the original bits to go with it. All the original paperwork from Glossop Caravans along with the Folder from Swift that came with the caravan contains all the manuals for the installed equipment was put in the front draws.
The big day…
Even though the pickup bed was completely empty we could not get everything in the truck that we needed to take over so we boxed up everything we thought we would need and loaded the boxes on the floor of the caravan. It was a lot of stuff. It filled the caravan floor forward of the axle and the truck bed.
Henry was put in his carrier and secured in the Amarok. He seems to have got quite used to the journeys now spending his time either looking out the window at passing cars or sleeping. The run over to Rhuallt from our storage site was a little over an hour as the traffic was light especially along the North Wales Expressway.
We pulled into the carpark and leaving Henry in his carrier… with both back windows three quarters down so he could see out and had a bit of a cross breeze went in to meet Simon again. In the reception area was a sign welcoming us by name to the Fifth Wheel Company (We didn’t get that when we picked up our other caravan) Simon showed us into the showroom where our caravan was parked up all shining and the lights on inside. Time for some paperwork to be exchanged along with the required number of beer tokens.
All change…
I pulled our old caravan… that technically was now not ours, up to the showroom roller door and we started the process of transferring all the boxes from our ‘technically not ours” old caravan to the 5th wheel caravan. The plan was to get everything out of one caravan into another then Simon would tow the 5th wheel caravan a couple of hundred metres along the road to Rhuallt Campsite which adjoins The White House Restaurant and Hotel where we could spend the rest of the day transferring everything over from the Amarok and putting everything away.
We parked up our old caravan next to a rather splendid Ineos caravan next to the factory and said our farewell’s to it. Even Henry watched it through the back window as I unhitched and pulled away. I think really he was thinking it was snack time and that is where his snacks usually materialised. 12 years of caravanning, and the reason this blog came into existence was ending but a new chapter was starting. One that had more wheels in it than you could shake a stick at!
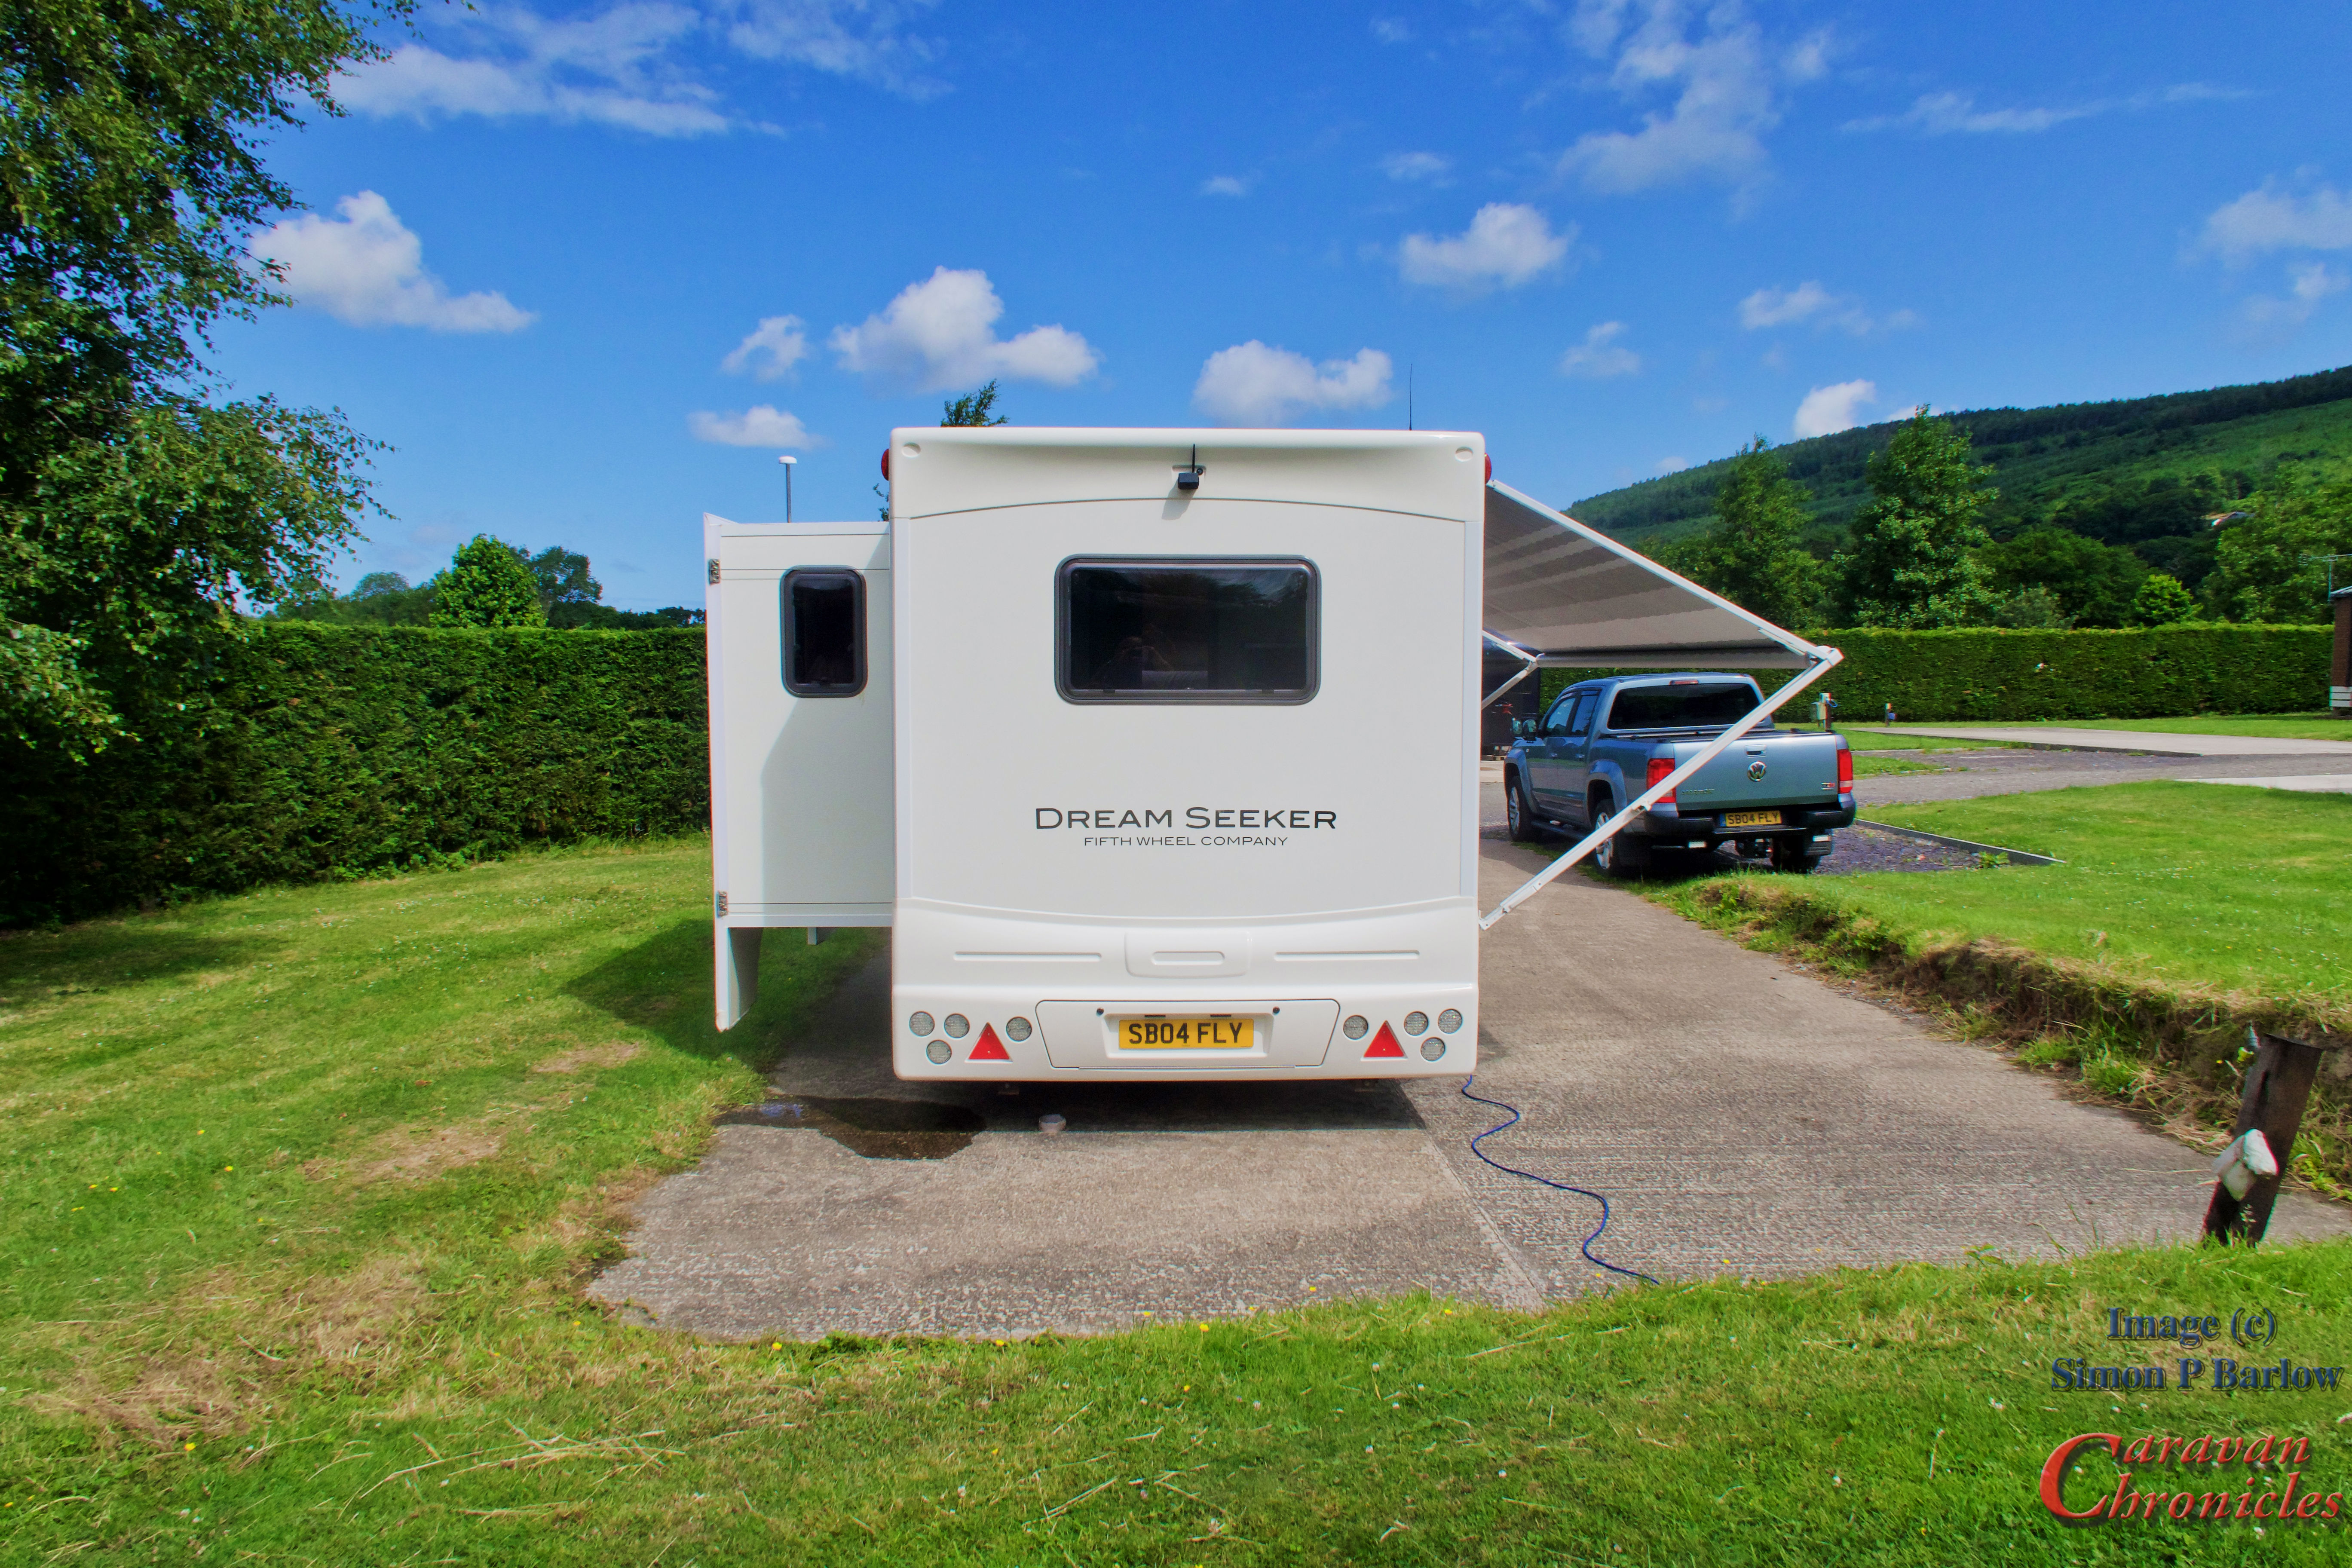
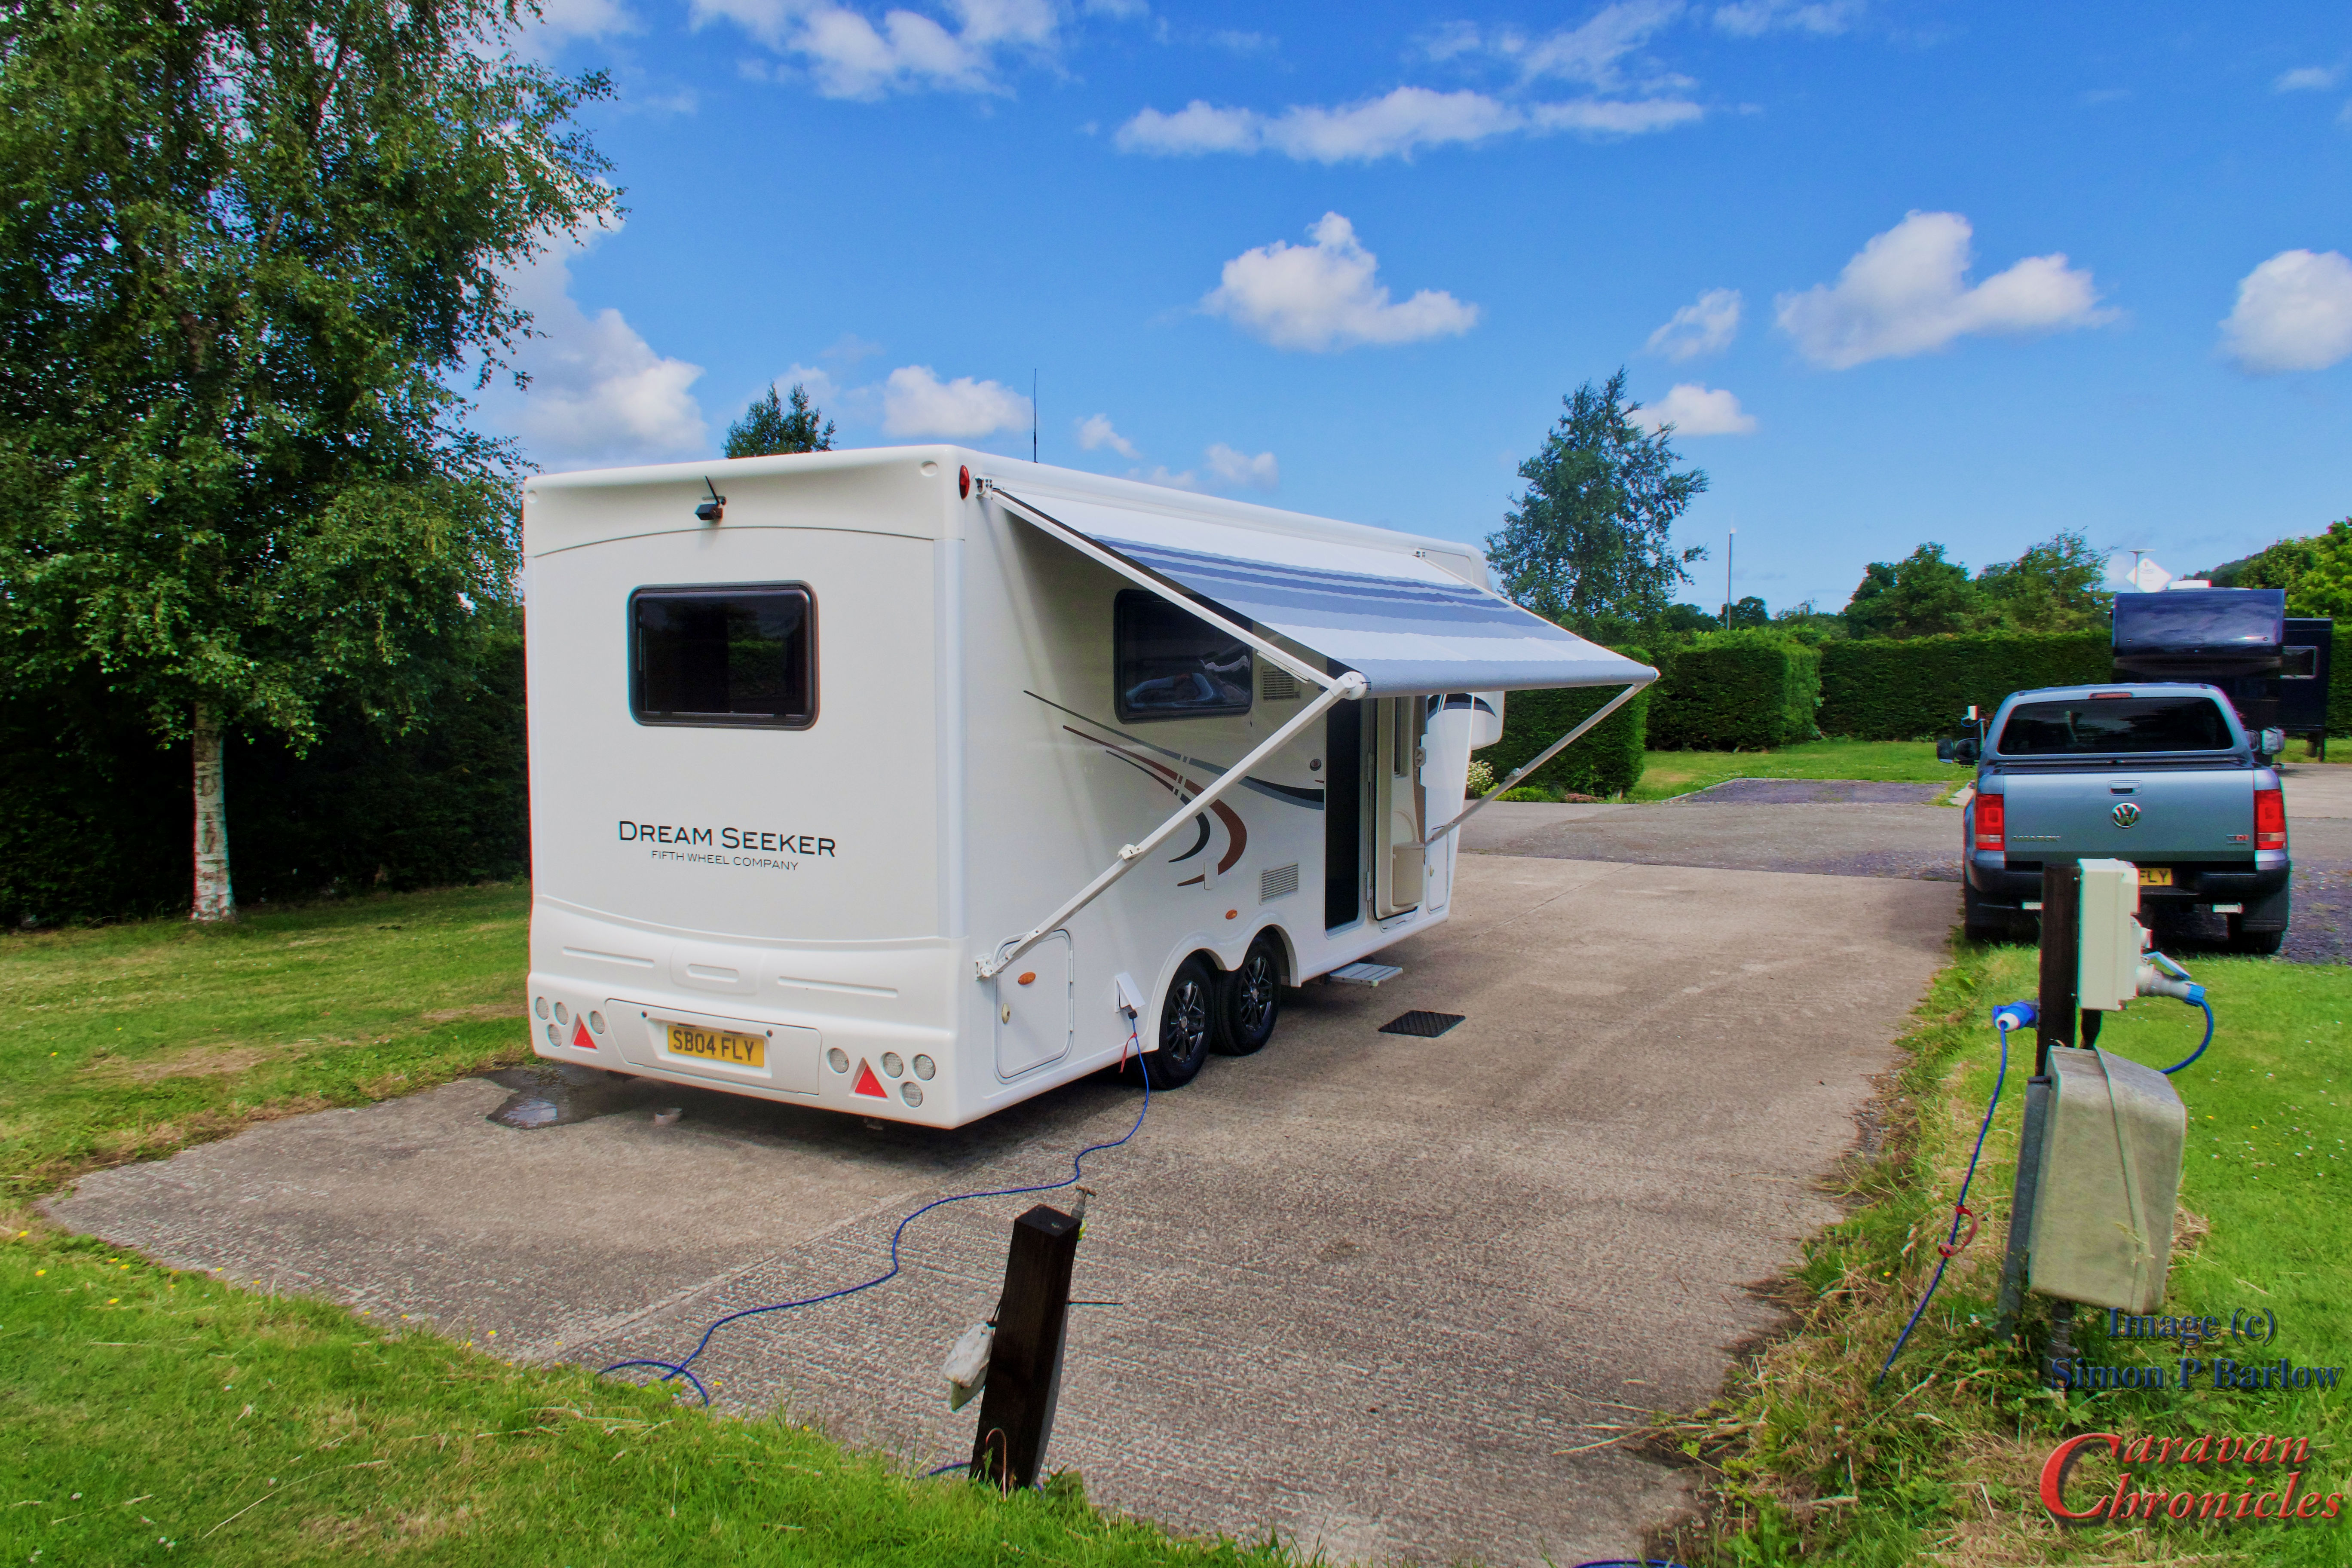
We followed Simon the short distance up the road and pulled into the carpark of the White House which leads through to the camp site. First snag… there was a conference on in the hotel and the car park was packed and Simon could not make it round the 90 degree bend due to two vehicles parked in areas that were not marked parking bays. A short delay, cars were moved and Simon finally got it on to the pitch. There are a number of pitches reserved for 5th Wheel caravan as this is where you can overnight when you bring your caravan for servicing. We went briefly through the unhitching process and then in a little more detail the actual setting up, connection and operating the slide out and a run through of powering up everything. He then left up to start putting everything away and said he would come back in a couple of hours to answer any questions we had and run through anything we were unsure of.
The pitches were obviously designed for 5th wheel units. With power, water and drains set up for dumping grey water tanks. We filled up the 230 litre fresh water tank and turned on the water heater. Our unit is not a new caravan, but it has gone through a full factory refurbishment that included a brand new Truma Combi 4E with iNet controller, brand new Thetford N4000 fridge, new twin 11 litre GasLow refillable bottles and a full reseal as well as lots of other details. It was also fitted with a SOG fan system on the Thetford toilet. It came with a Samsung TV and LG Sound bar installed. The brake system is electric over hydraulic and I was later to find out just how good this was.
Storage… OMG the storage!
We eventually got everything stowed away… everything we had brought with us… and we had not really filled any storage compartment or cupboard. In fact we has storage cupboards and compartments that were still empty. Then we found more storage under the seats in the slide out… and even more behind the wardrobe. It also has a huge under floor locker (As we are now currently set up our available user payload is around 960kg.
Simon called back to see how we were getting on and if we had any questions. I’d noticed a couple of things and he headed off to the factory and returned within 20 minutes with replacements. I will probably repeat this several times but I can’t get over just how good the service and all our dealings have been with everyone from the Fifth Wheel Company. It is exceptional to say the least.
Simon left us to enjoy the rest of the day in our caravan. Tomorrow (Thursday) we have the day to ourselves… which would include a run out to to do a bit of shopping. Friday Simon was going to collect the Amarok and take it down to the factory to have the Reese hitch installed, the electrical conversion and additional systems installed for the electric over hydraulic brake system and air assist bags installed on the suspension which would allow the Amarok to be plated to a GTM of 6400kg.
Henry just checking in with Sue and making sure She knew where the cat biscuits were stored.
During the course of Thursday we had new neighbours arrive in their Celtic Rambler… Gary and Helen, who were also newish to Fifth Wheel life having taken delivery of their unit last November but it was really great to chat to them as they had some really helpful tips about things they discovered since starting out with a 5th wheel. It was also great that Gary spent a little time going through some of the things he had come across hitching and unhitching…. useful information if we ever come up against similar situations.
Friday morning and Simon appeared early to collect our Amarok. As it drove off we set about re-organising stuff we had previously put away as talking the evening before we realised the whole way we had caravanned before would change. I took the opportunity to do a test dump of the grey tank using our colapz waste pipes from the previous caravan and swopped fittings on our blue water hose so I could connect to the tank filler.
That afternoon Simon returned with one of the company vehicles and we went through hitching up and unhitching a couple of times until we had… saying mastered it would be wrong…. become familiar with the sequence might be a better way of putting it. I think we will be using the checklist for a while longer! There are quite a few more steps to hitching, but I’ll swear it is easier than hooking up a caravan on a tow ball. Sue called the list out as I went round going through the process. I guess if I can remember the Emergency checklists for aircraft I’ve flown then this will become as easy as that.
Simon returned late in the afternoon with our Amarok…. all converted, new weight plate fitted and the truck bed was looking really clean. They had managed to install all the connectors in the side of the bed rather than in a box ad it looked really neat.
We still had lots of room in the bed of the truck and one of my future projects is to re-install the slide out tray back in. It will need shortening but I think it will be achievable.
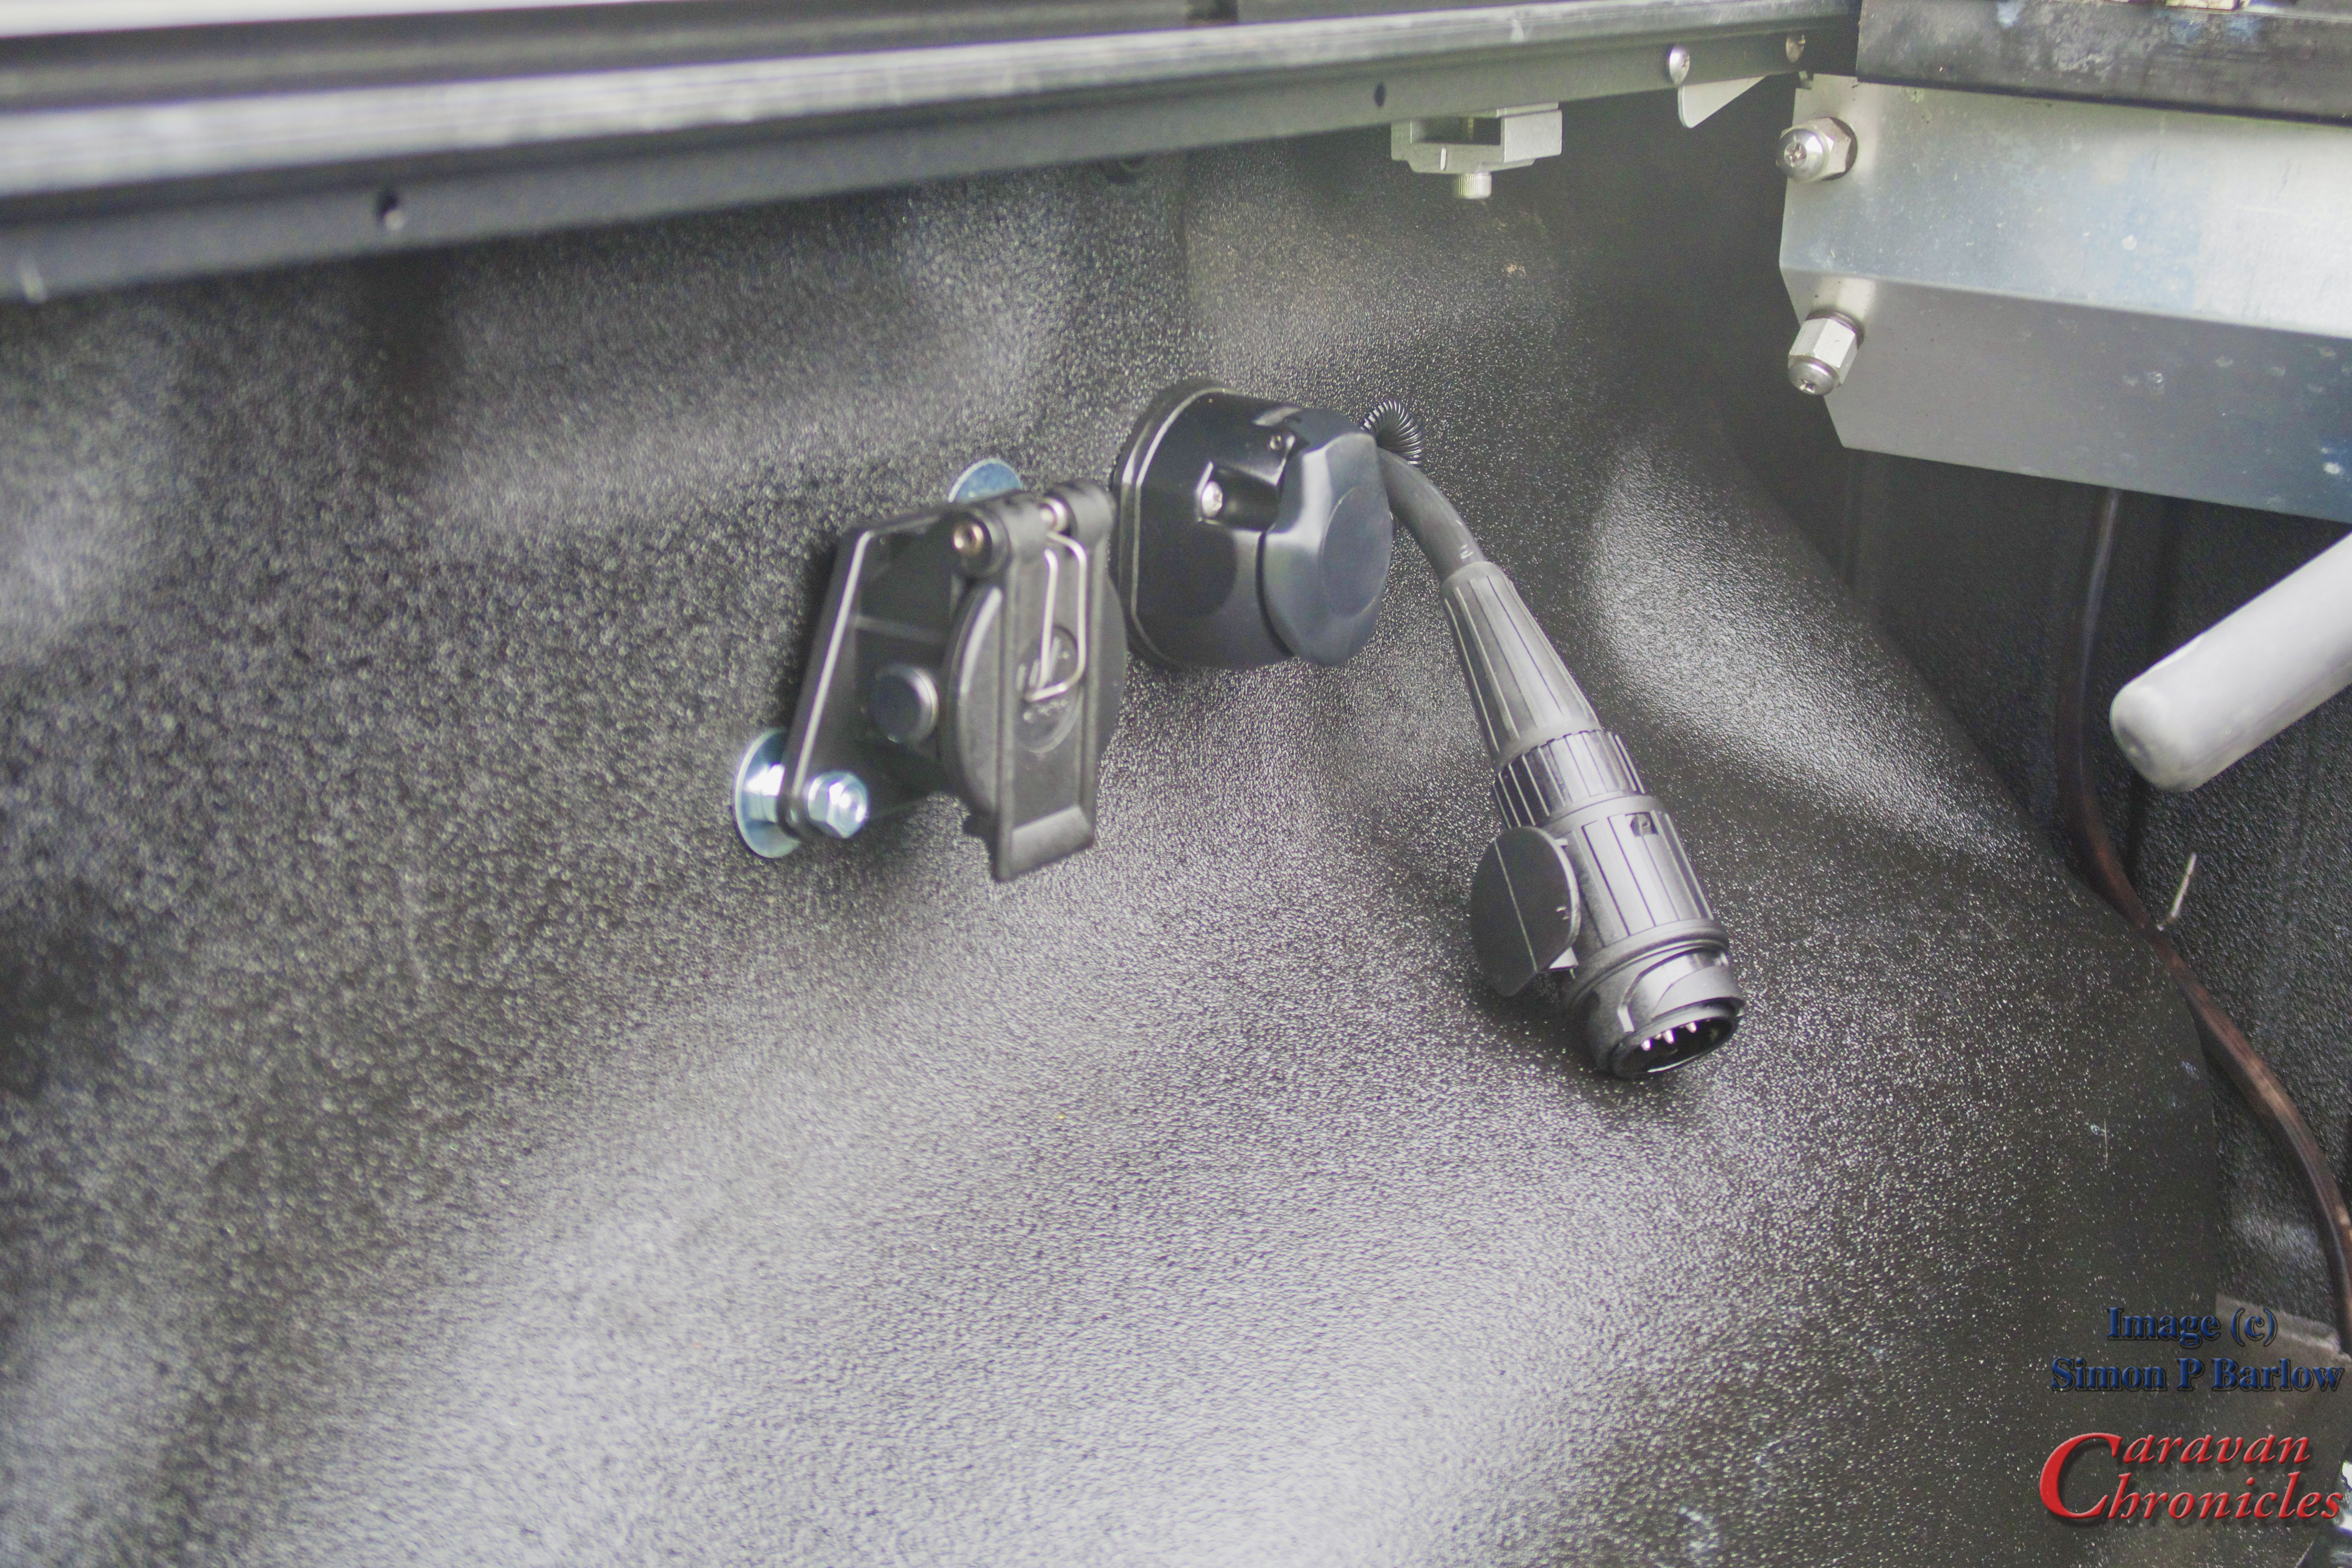
OK, I know you are going to ask….. why is there a 13 pin plug hanging out next to the two sockets? Well part of the installation was to move the connections for the tow bar mounted socket over to the pickup bed so that is the primary connection for the 5th Wheel. The 13 pin plug is effectively a short extension down to the tow bar so I retain all the functions at the ball hitch for towing our trailer. All I have to do is plug it in to the thirteen pin socket in the pickup bed. I have now put a green cap on it and it is secured in a clip.
The installation has also allowed me to continue using our Roll-N-Lock bed cover and as an added bonus, If I want to fit the bike rack on then I can do easily within a few minutes. Obviously we can’t tow the 5th wheel with the bike rack on.
Wagons roll…
Saturday morning arrived…. put the awning away (something that took about 1 minute seriously!) dump the grey and fresh water, turn the gas off. Sue stowed all loose items, bought the slide in, stowed the waste pipe, and dropped the tailgate.
Reversed and aligned up on the hitch adjusted the hitch height using the electrical landing legs, reversed on with a small ‘clunk’ as the jaws closed going the pin. Quick pull test, and as I hooked up the 13 pin plug and the break services plug Sue raised the landing legs. Henry stowed in his carrier… looking quite satisfied with the trip in general as he seems to have found a few new spots to snooze in we were ready to pull out. From the point of us saying “Right shall we make a move” I guess it took less than 30 minutes before we were ready to pull out. It really was easy to break camp.
Final walk round and photo
Pulling out of the site onto the road wasn’t difficult. I need to adjust my mirrors slightly as I’d like to see a bit more of the 5th wheels tyres on the road, especially for cornering. The first real test was approaching a small roundabout a few hundred metres up the road…. I didn’t think we were slowing enough and I was going to overshoot onto the roundabout, so I pressed the brake peele a bit harder… then the trailer decided that meant it must be a sign more brakes were required and it obliged… wow those brakes do work well. I don’t think there is a delay as such, you just have to give them a clear sign of what you want them to do. So a little feathering of the foot brake to shed a few miles per hour you don’t really feel them, but add a bit more pressure than that then they come on enthusiastically for a millisecond until they judge just how much you want to slow down by then match you somehow. You feel them come on then ease up to match you. Never had that on a trailer before.
The trip home was rather uneventful…. except for the looks that you get… I don’t think we would have got more looks if we had been driving a bright pink soft top Ferrari with a giraffe in the back seat.
A Huge Thanks…
I’m going to say it again. A huge thanks To Simon, George who we initially dealt with and to all the staff at the 5th Wheel Company. This not sponsored, we didn’t get or receive any special discounts and although Simon was aware I wrote a blog, I really don’t think this influenced the way we were received or treated. We spoke to Gary and Helen (our neighbours) and they said the same. The service and level of commitment to the product and their customers is second to none, especially in this industry.
Getting to that certain age brings on some restrictions…. My left knee is a bit suspect and Sue’s hip is not as ‘hop’ as it was anymore, This meant of we haven’t been using our bikes as much and as Sue has now officially retired and Henry has settled in to caravanning we are getting out and about more in the caravan.
We had been mulling over e-bikes for a while and after being influenced by John & Mandy who used to live in the next “village” to us, watching Neil and Emma from Urban Vanlife and having a long conversation with a gentleman who was also staying at Wirral Country Park who had bought two MiRider One bikes for himself and his wife lead us to paying a visit to the MiRider factory in Wigan.
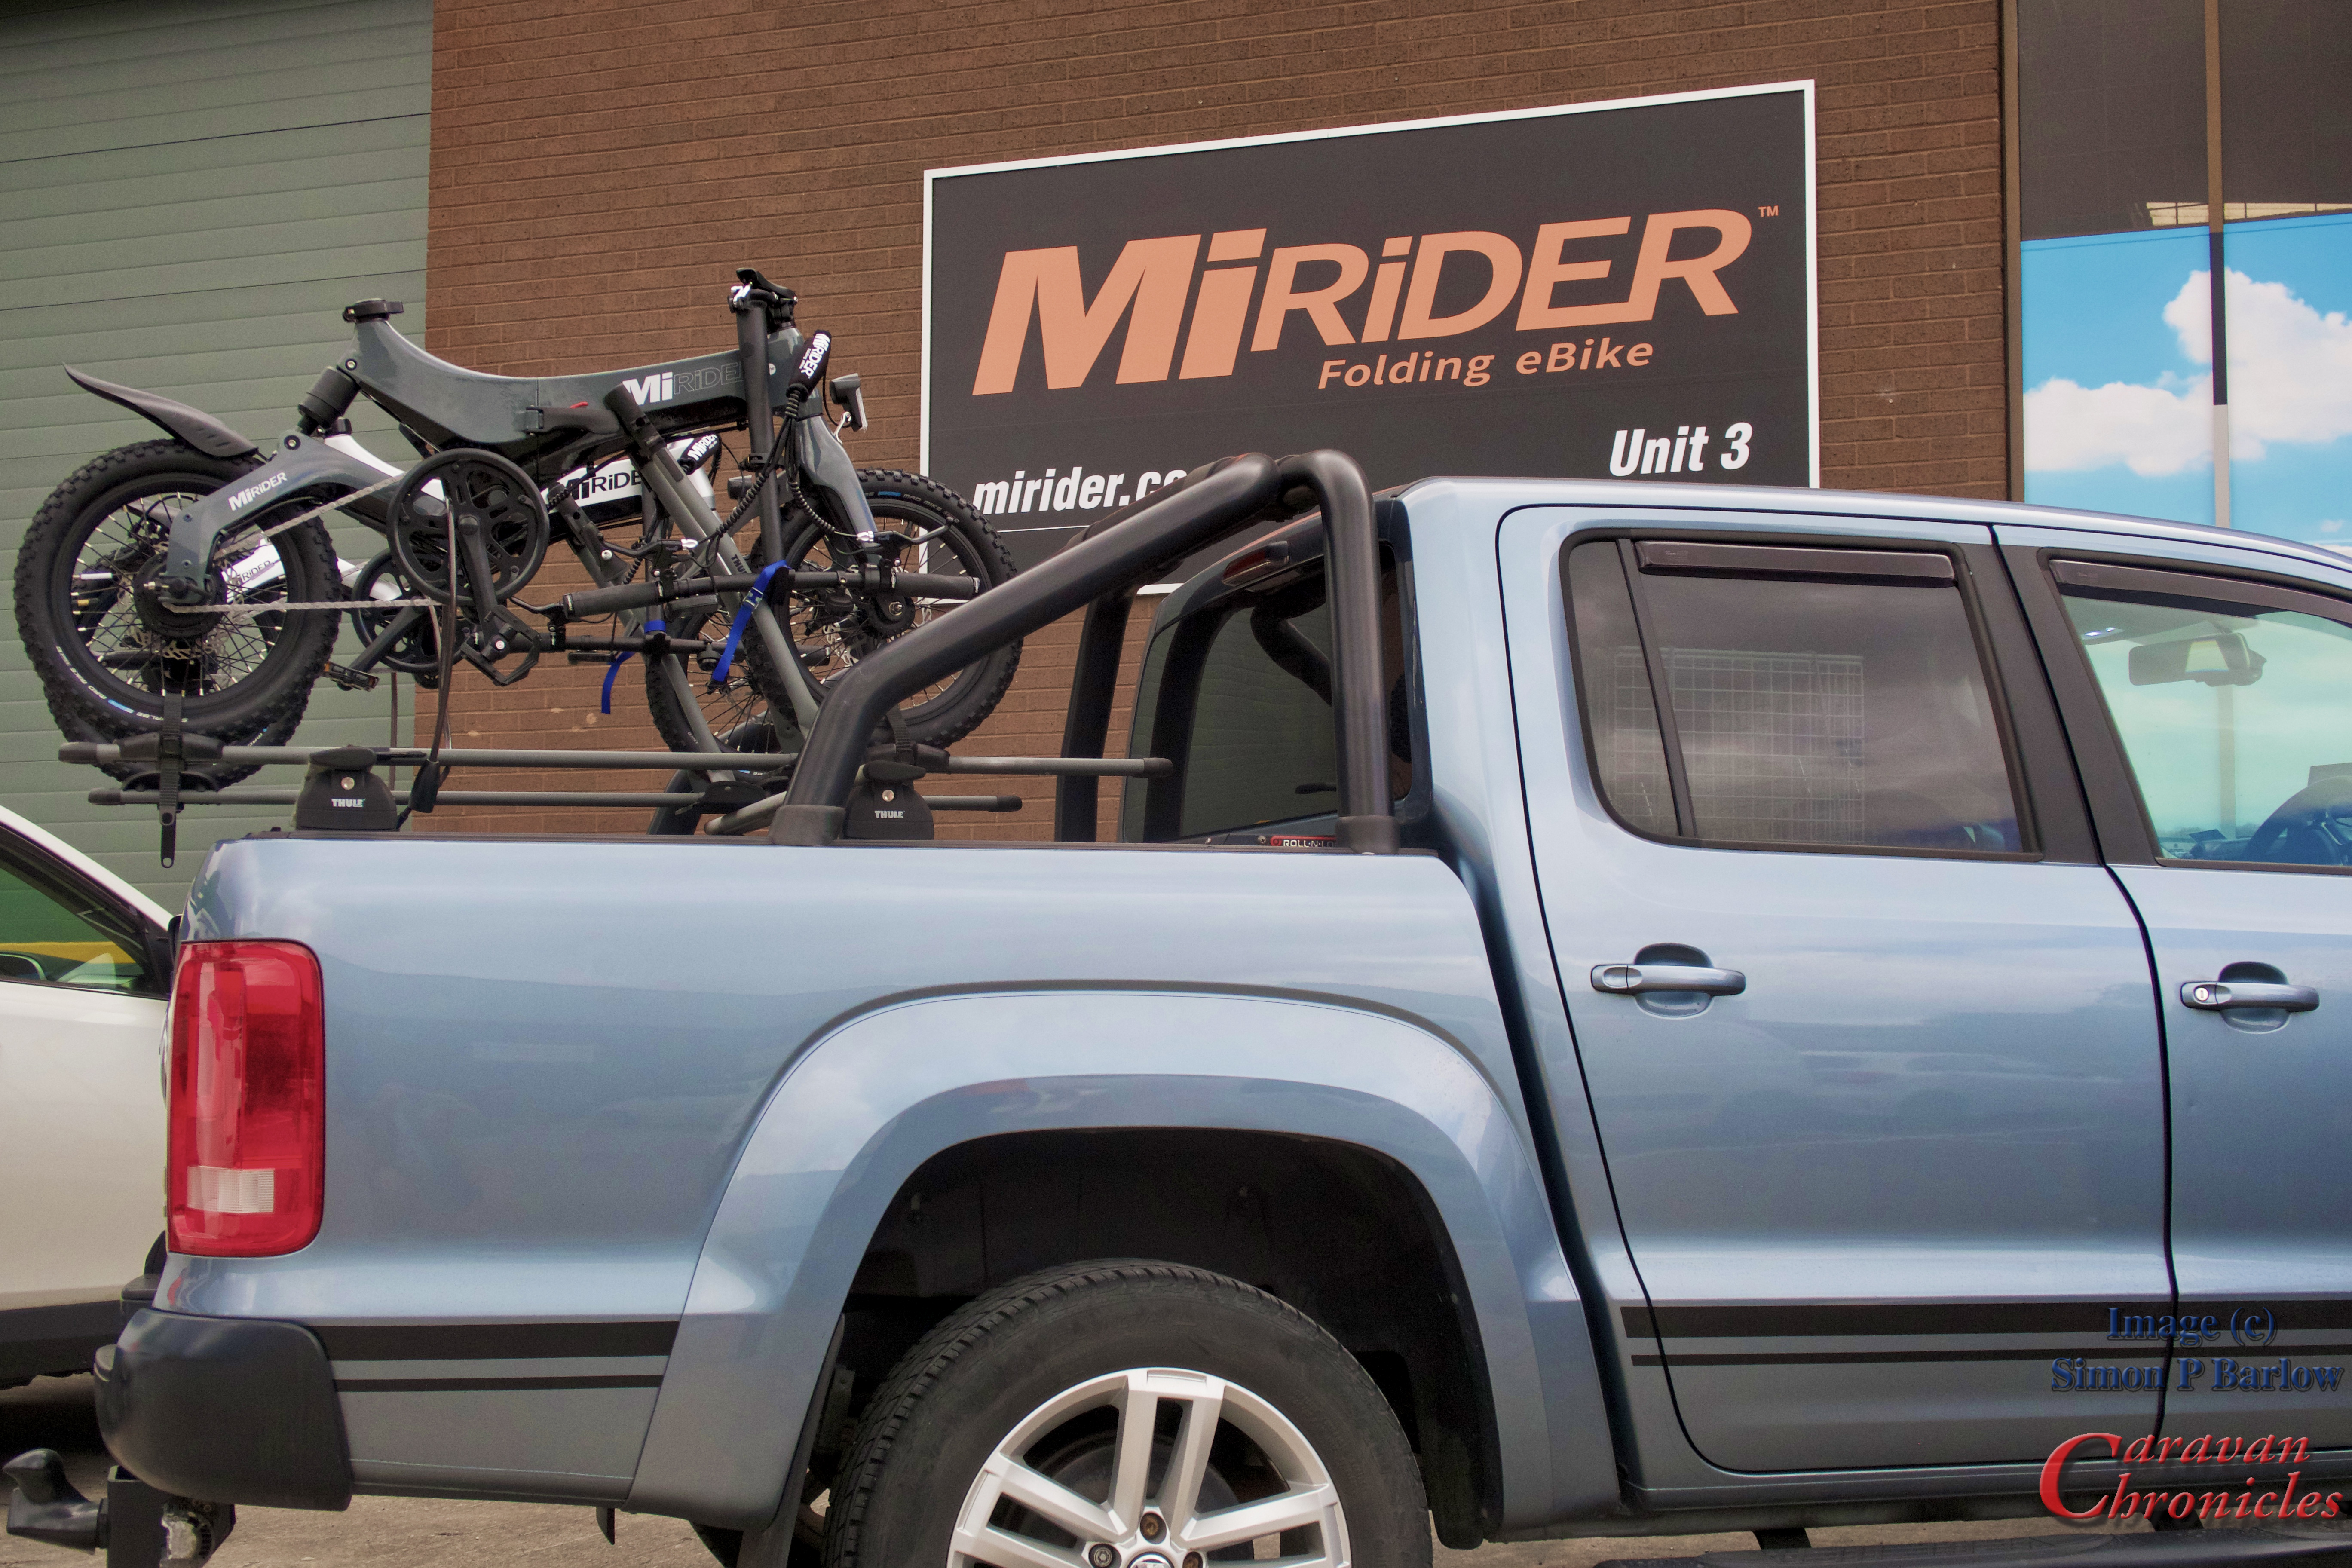
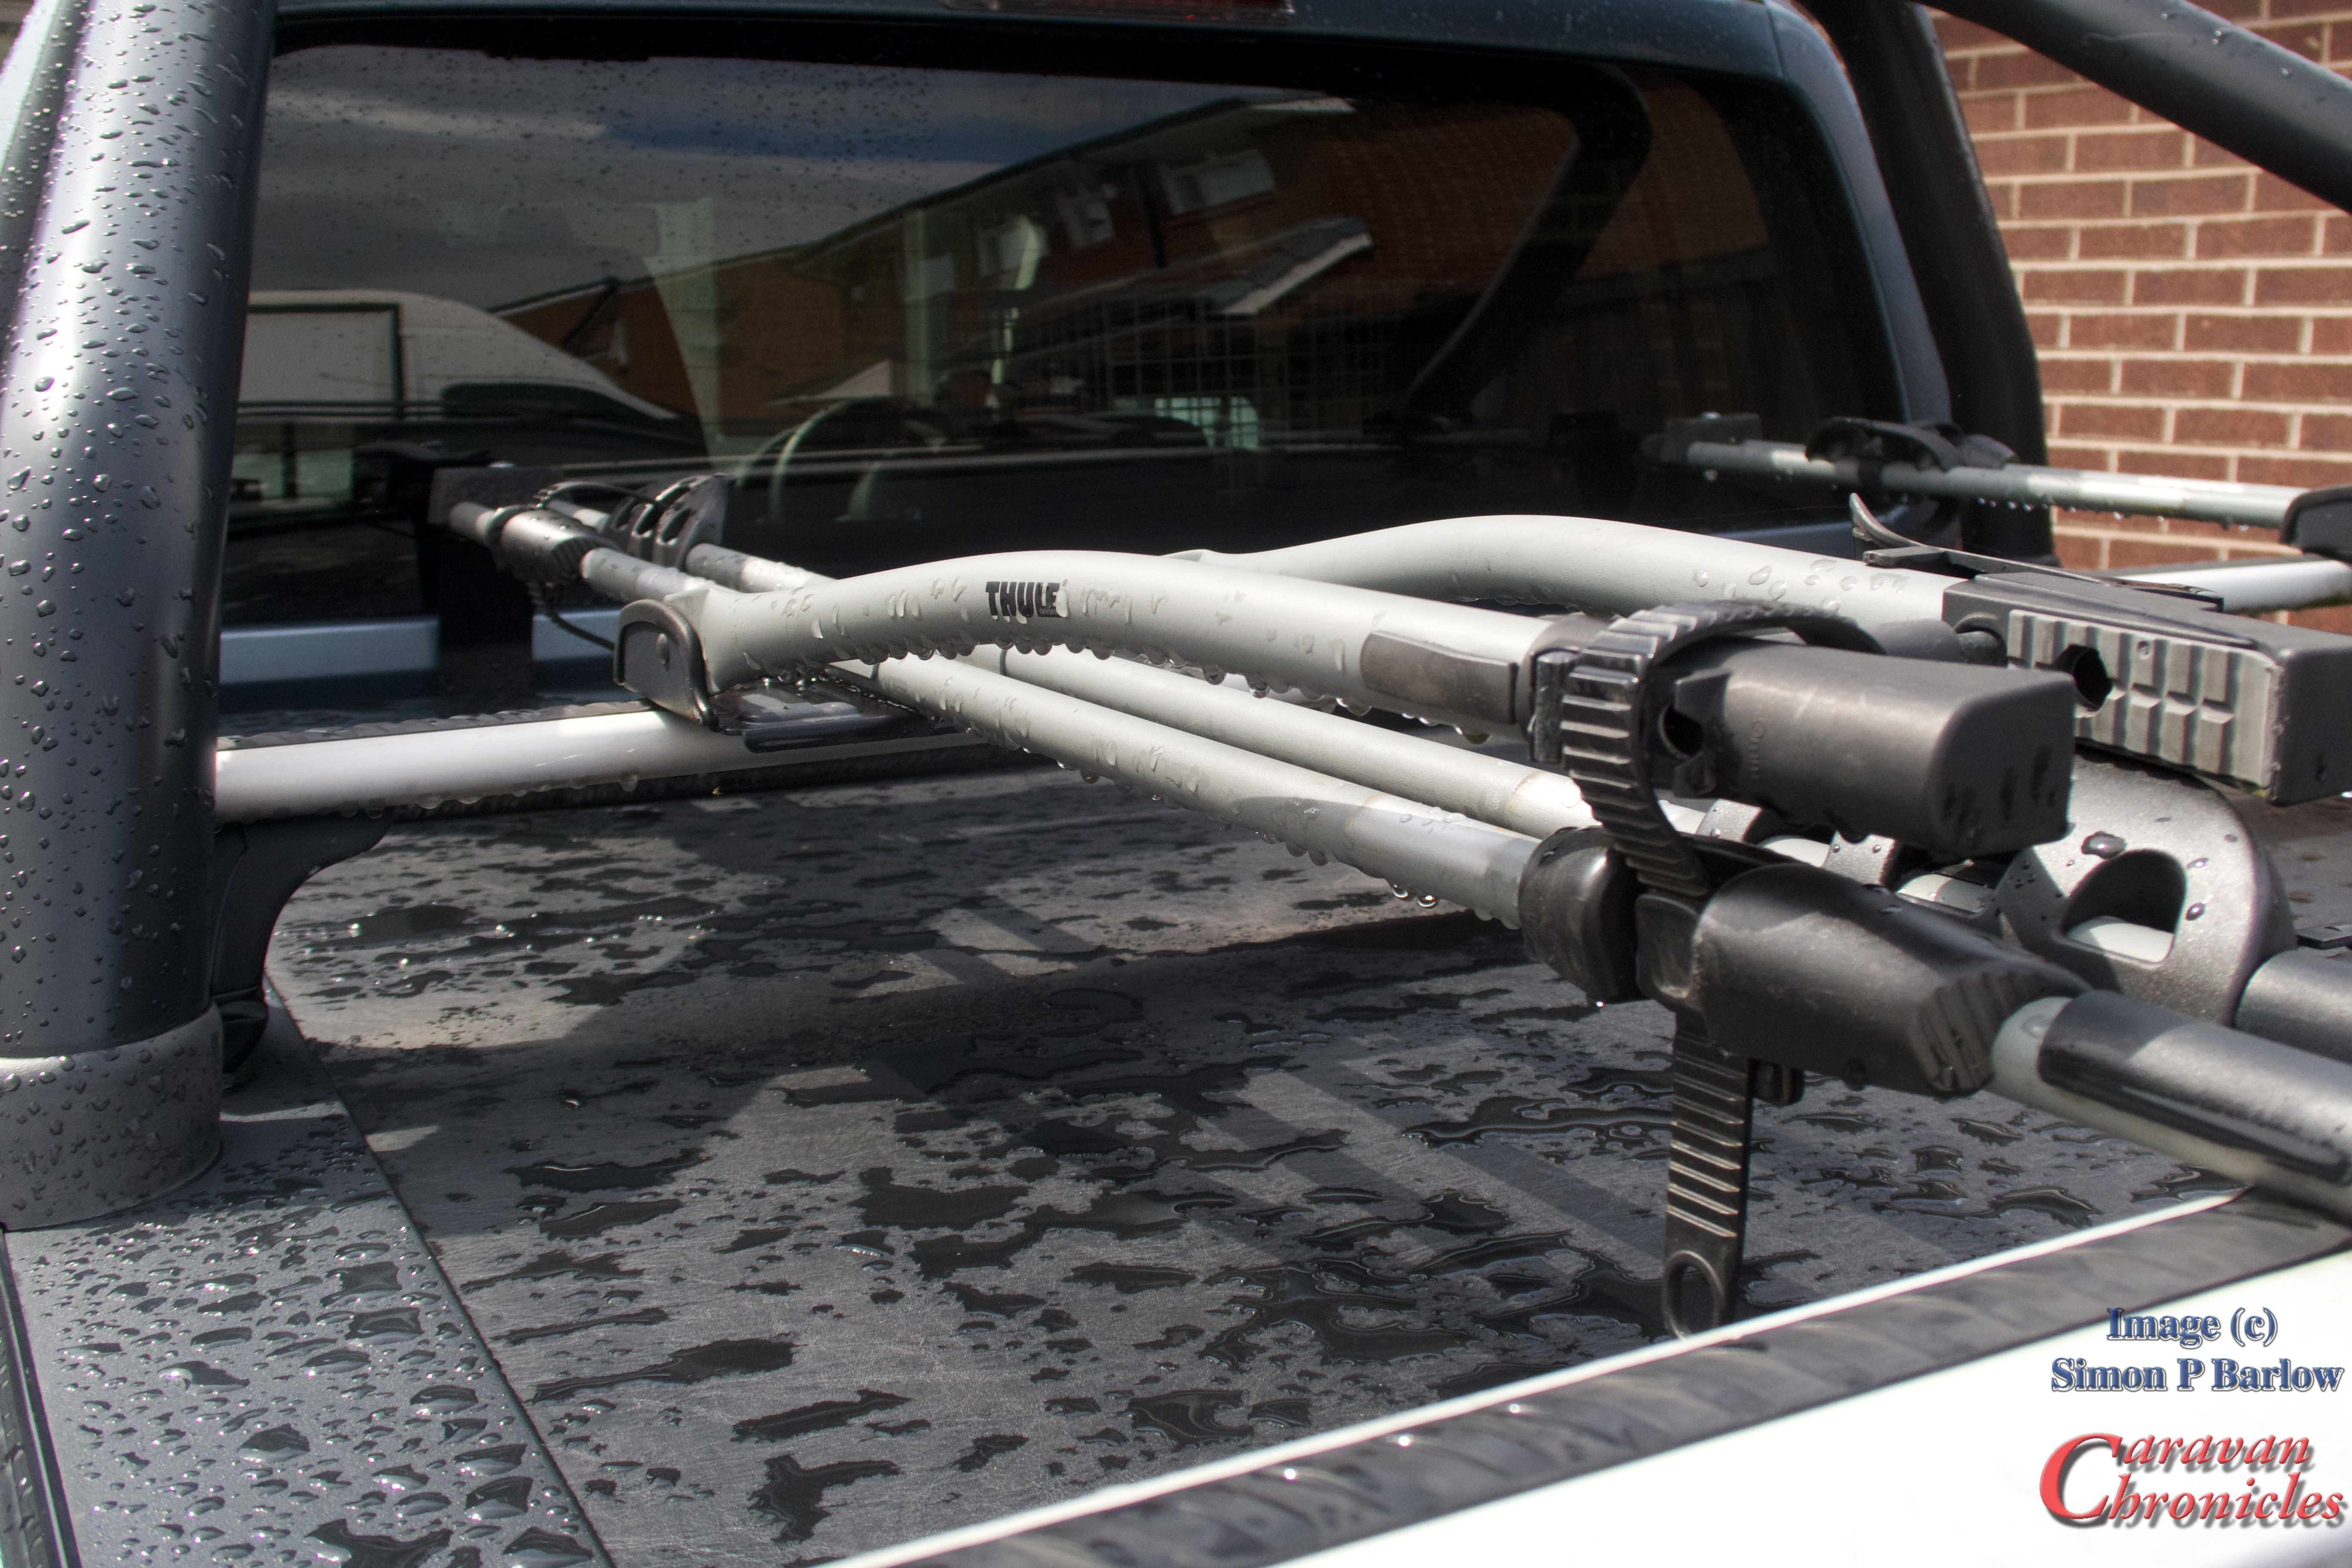
We had a try… and liked them almost immediately. One big question for me was would they mount OK on our existing rack above the bed of the Amarok. The guys there were great and allowed me to fit one of their test bikes and take some photos. It only needed a few tweaks here and there to accept the MiRider bikes without any issues.
Two days later we went back to pick our new bikes up. In the realities of todays internet, full disclosure – we paid full price for these two bikes, no discount, no “freebie’s” etc. so what I will say about them when it comes to a review will be honest comments.
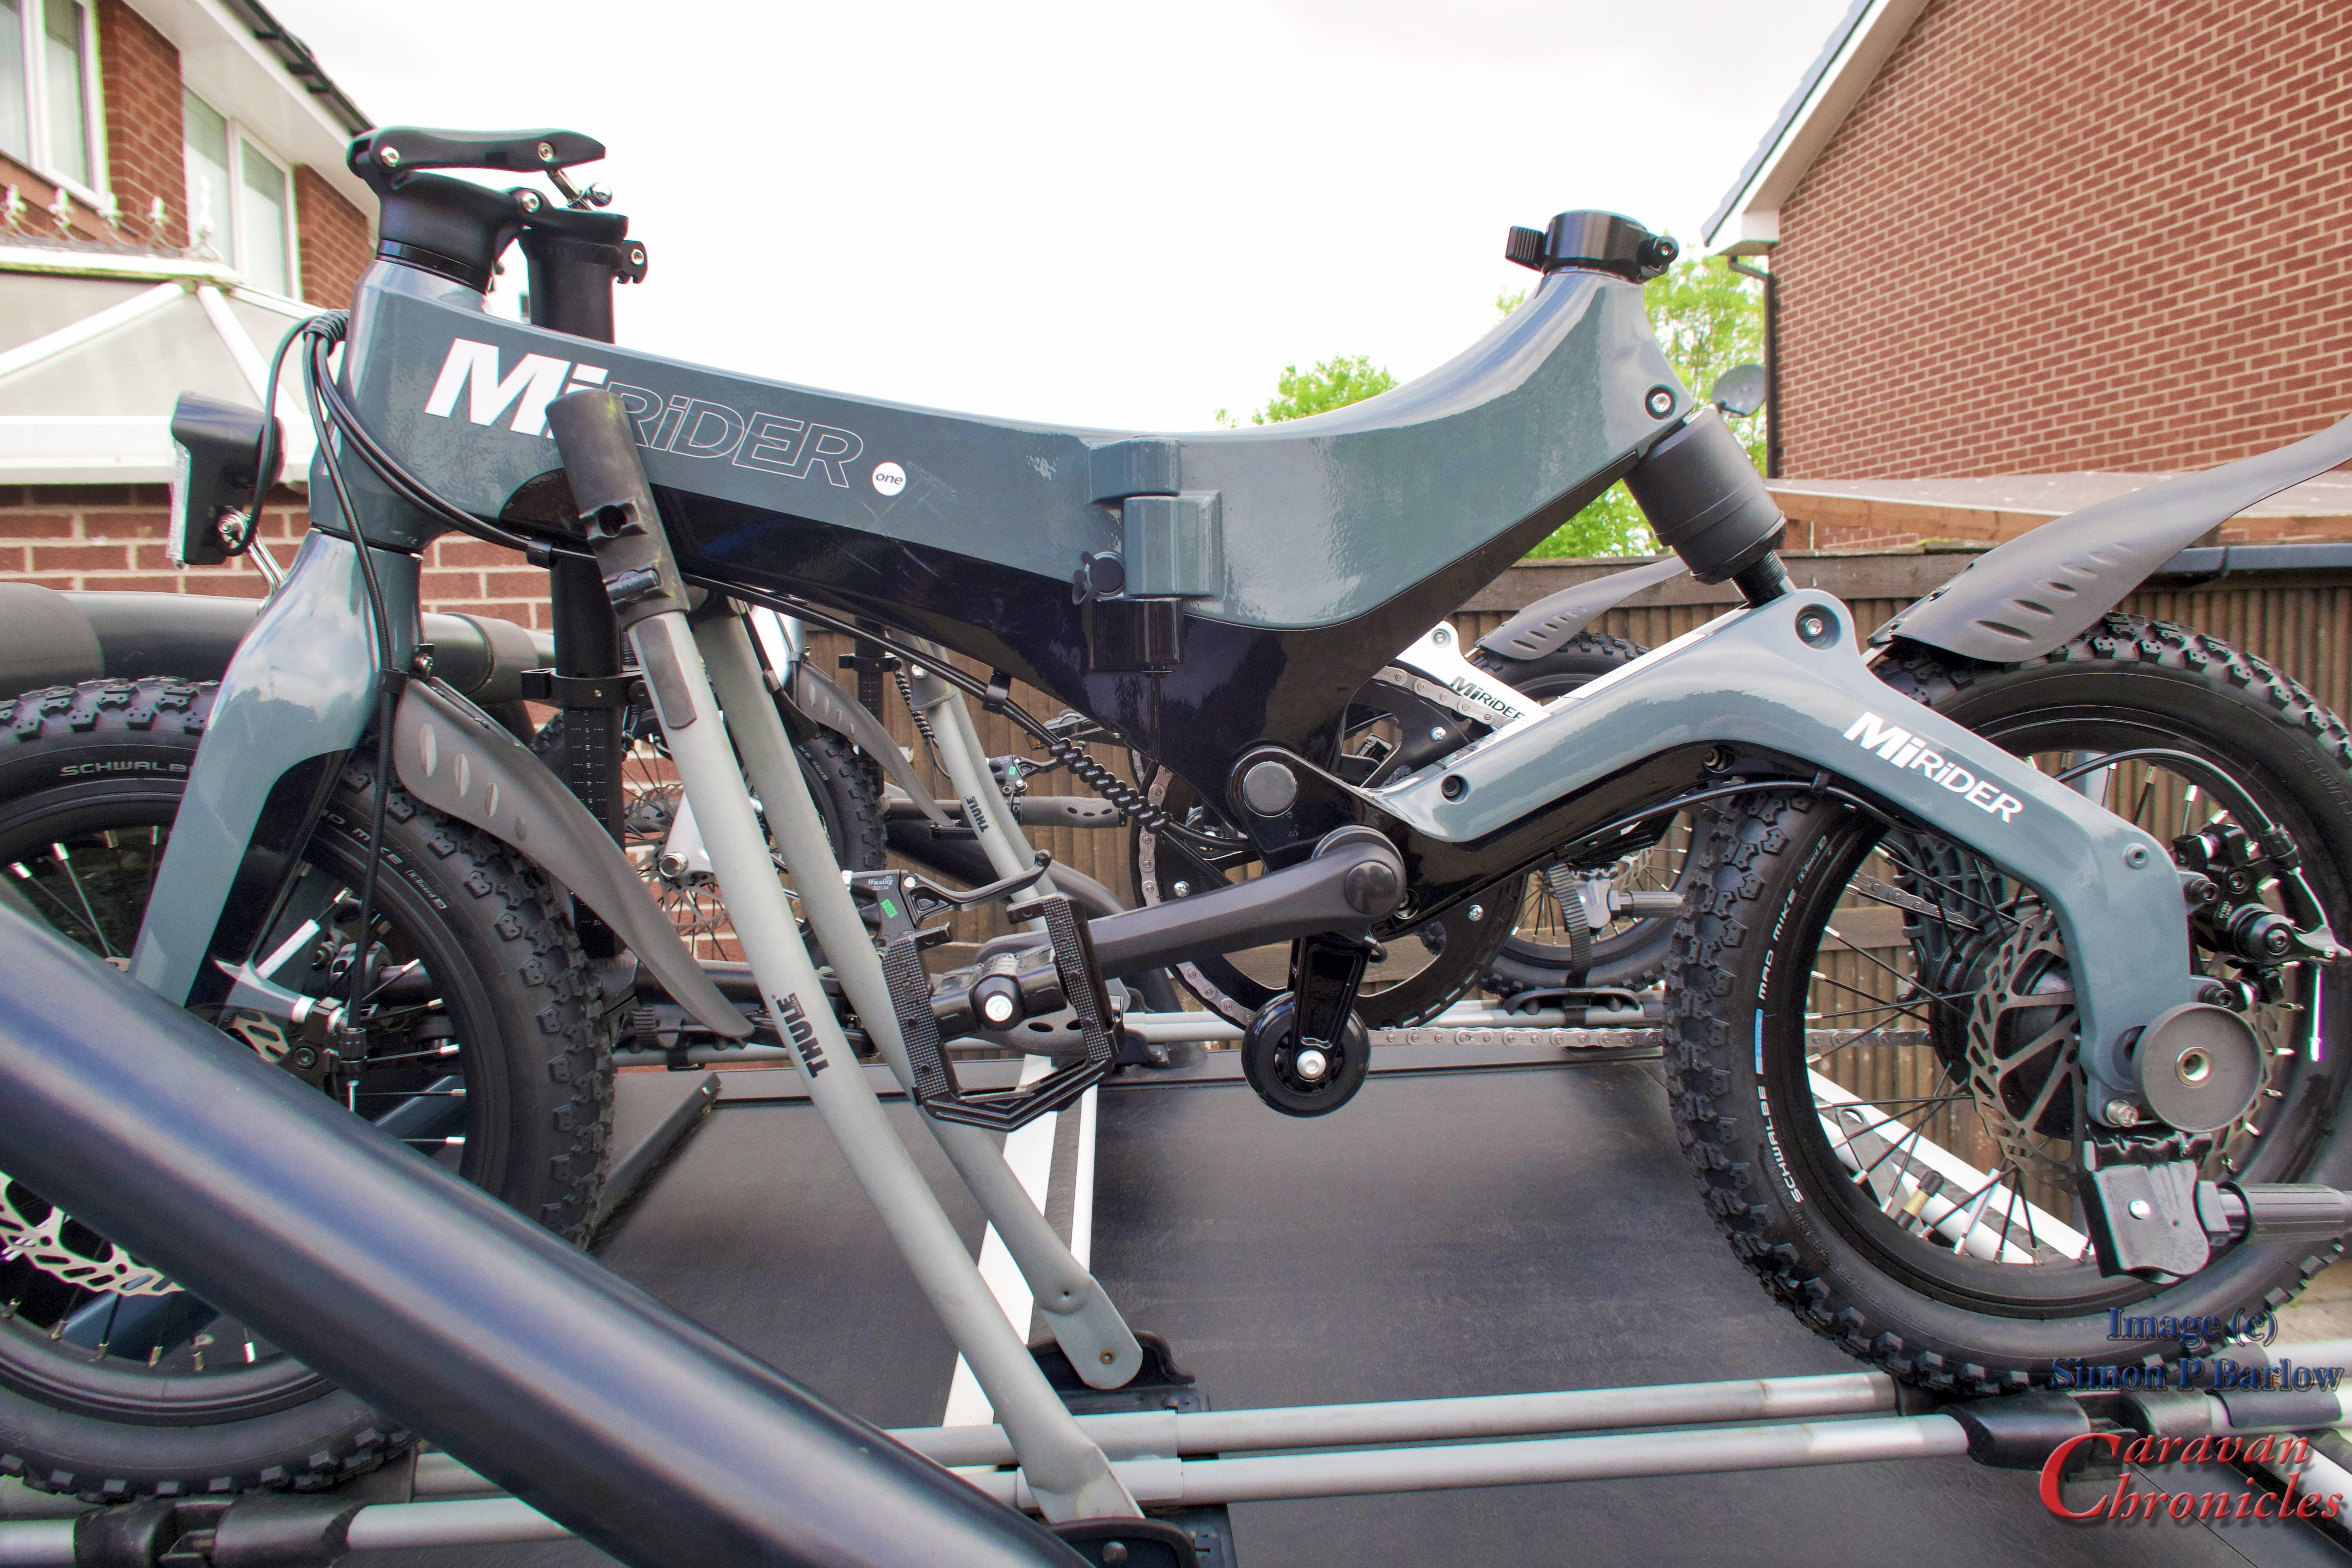
The bikes fitted onto the racks easily, however I did want to move them forward as the existing setup was for two full size cross bikes which required some rear overhang. Moving to the MiRider e-bikes gave me the opportunity to move the bike mounts forward.
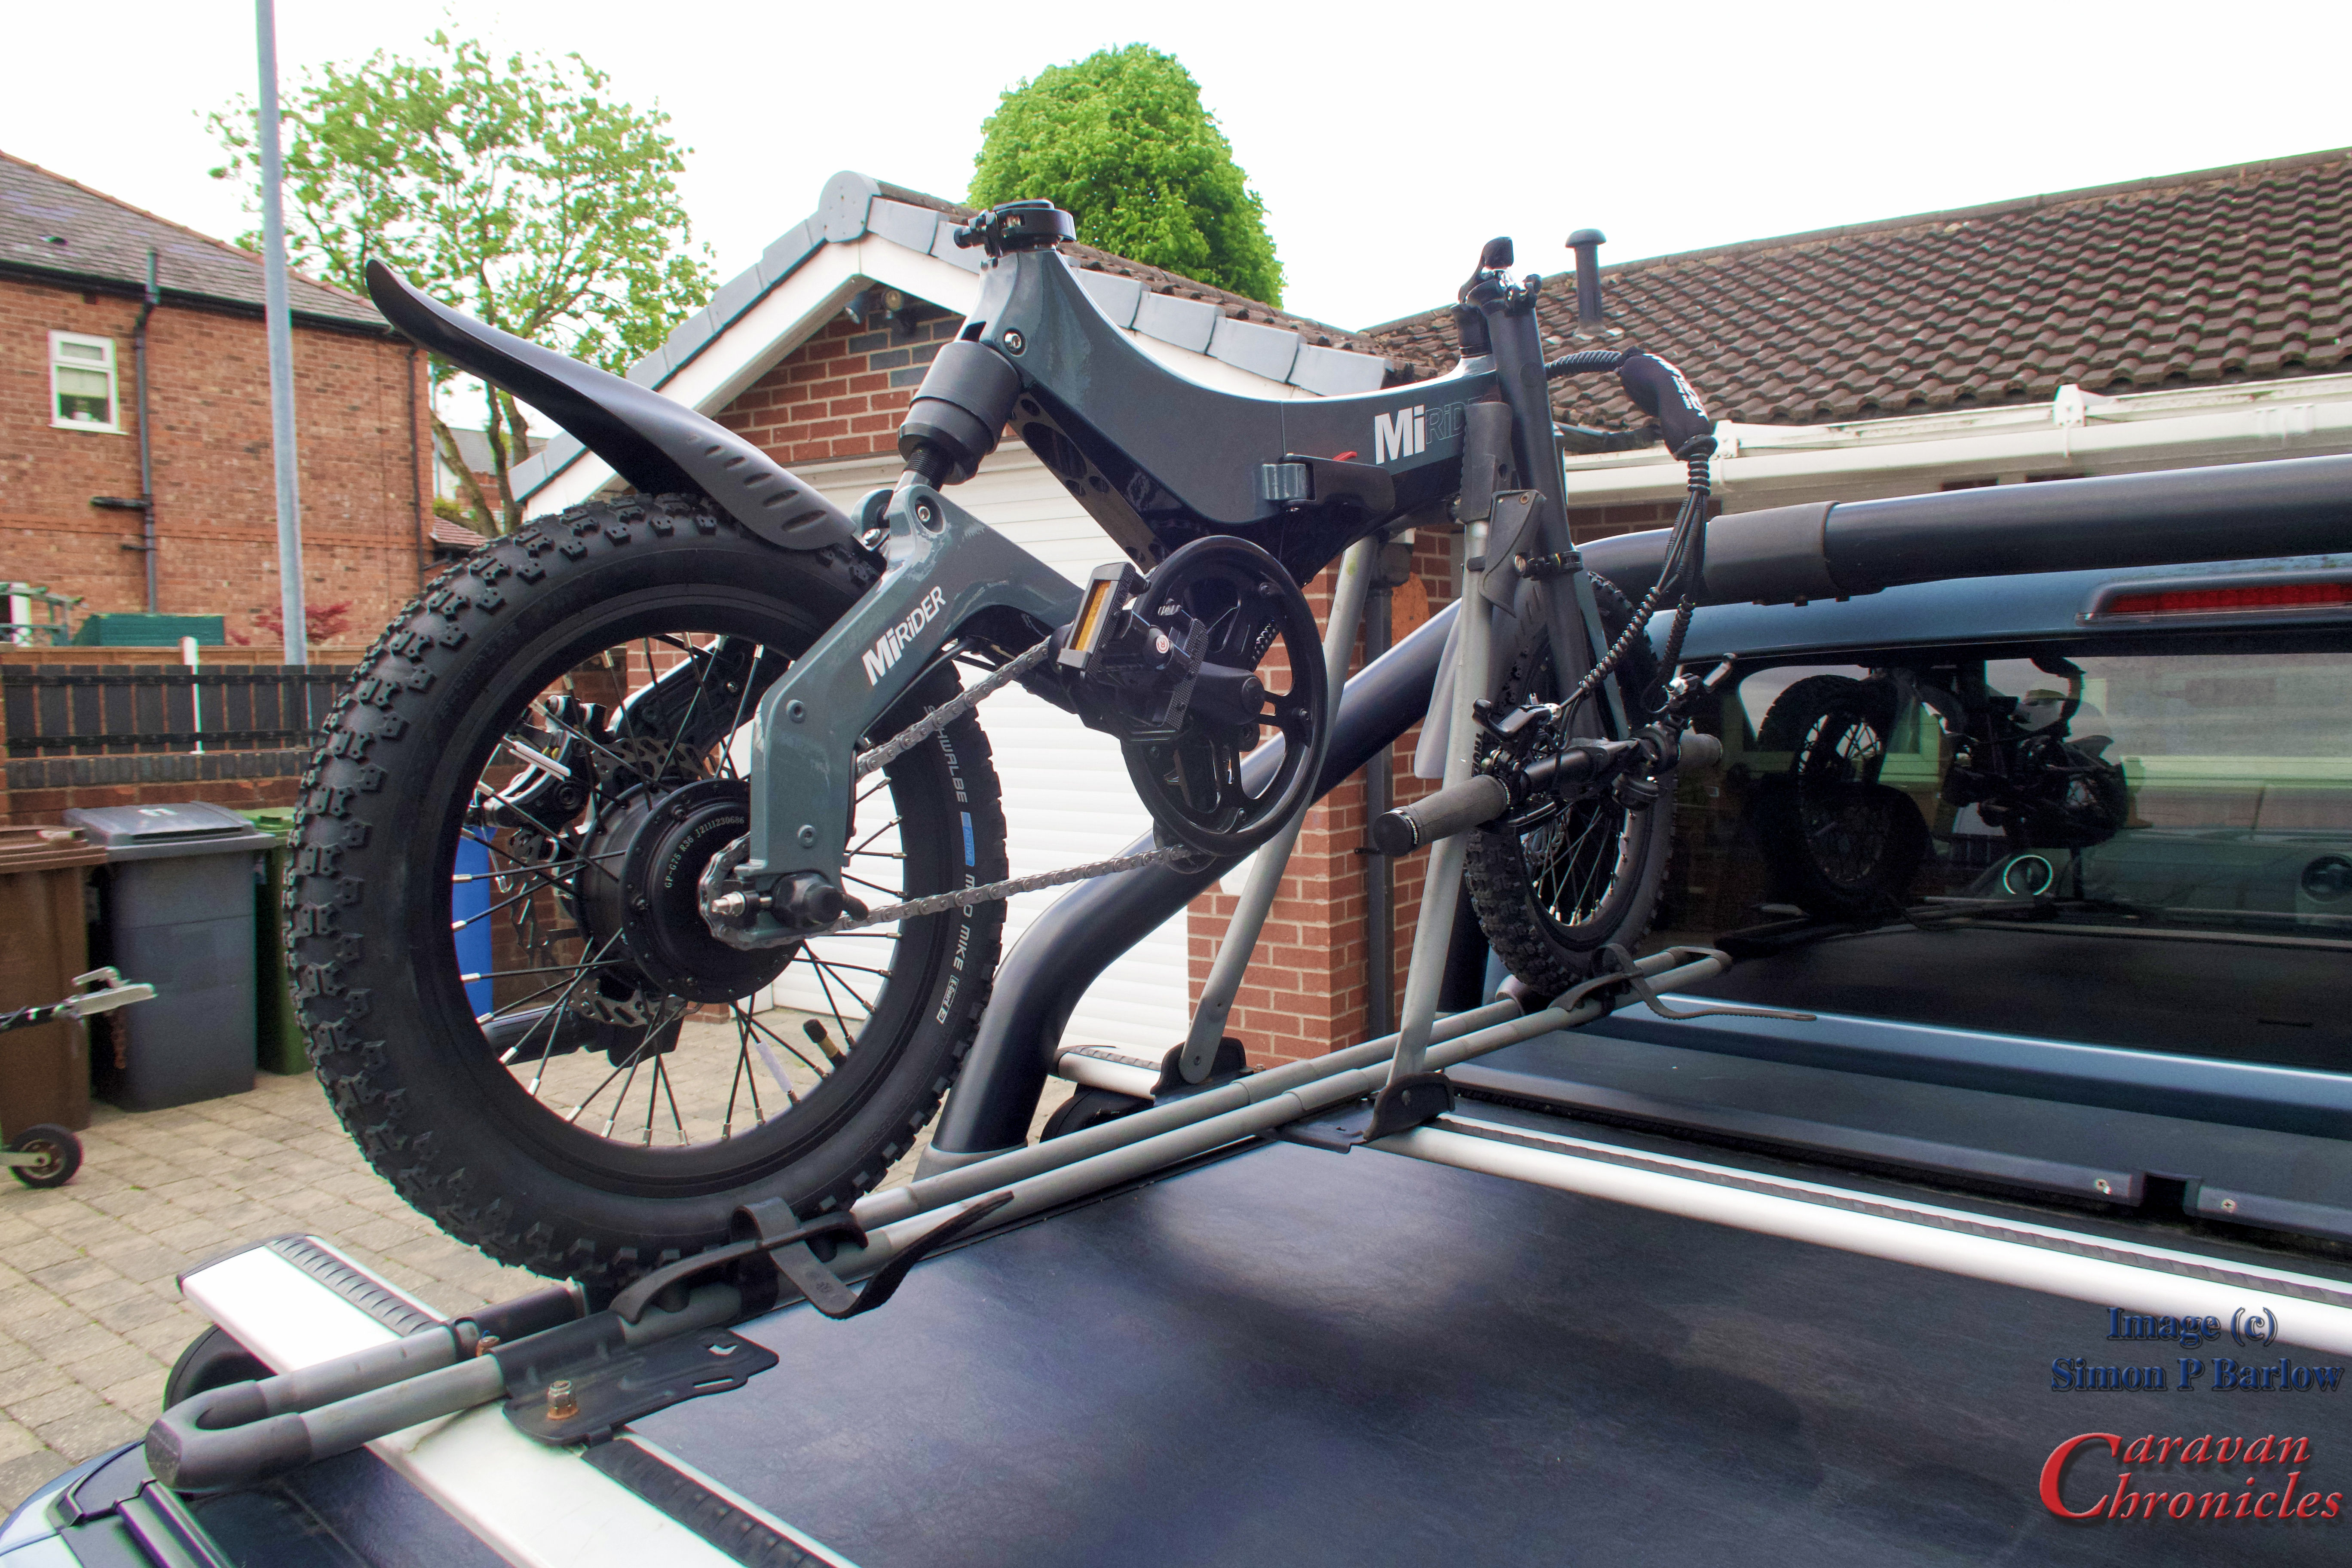
You can see the rear overhang in the photo above and the available space at the front. Sliding the rails forward and relocating the wheel mounts allowed the bikes to easily position forward of the rear tail gate.
The thing that now had me thinking was the weight distribution. The rear wheel is obviously heavier than the front, as it contains the electric motor and the battery is held in the frame forward of the pedal crank so weight across the two wheels is pretty much even. However, the overhang of the mounting rails meant the front wheel was well forward of the main cross bar.
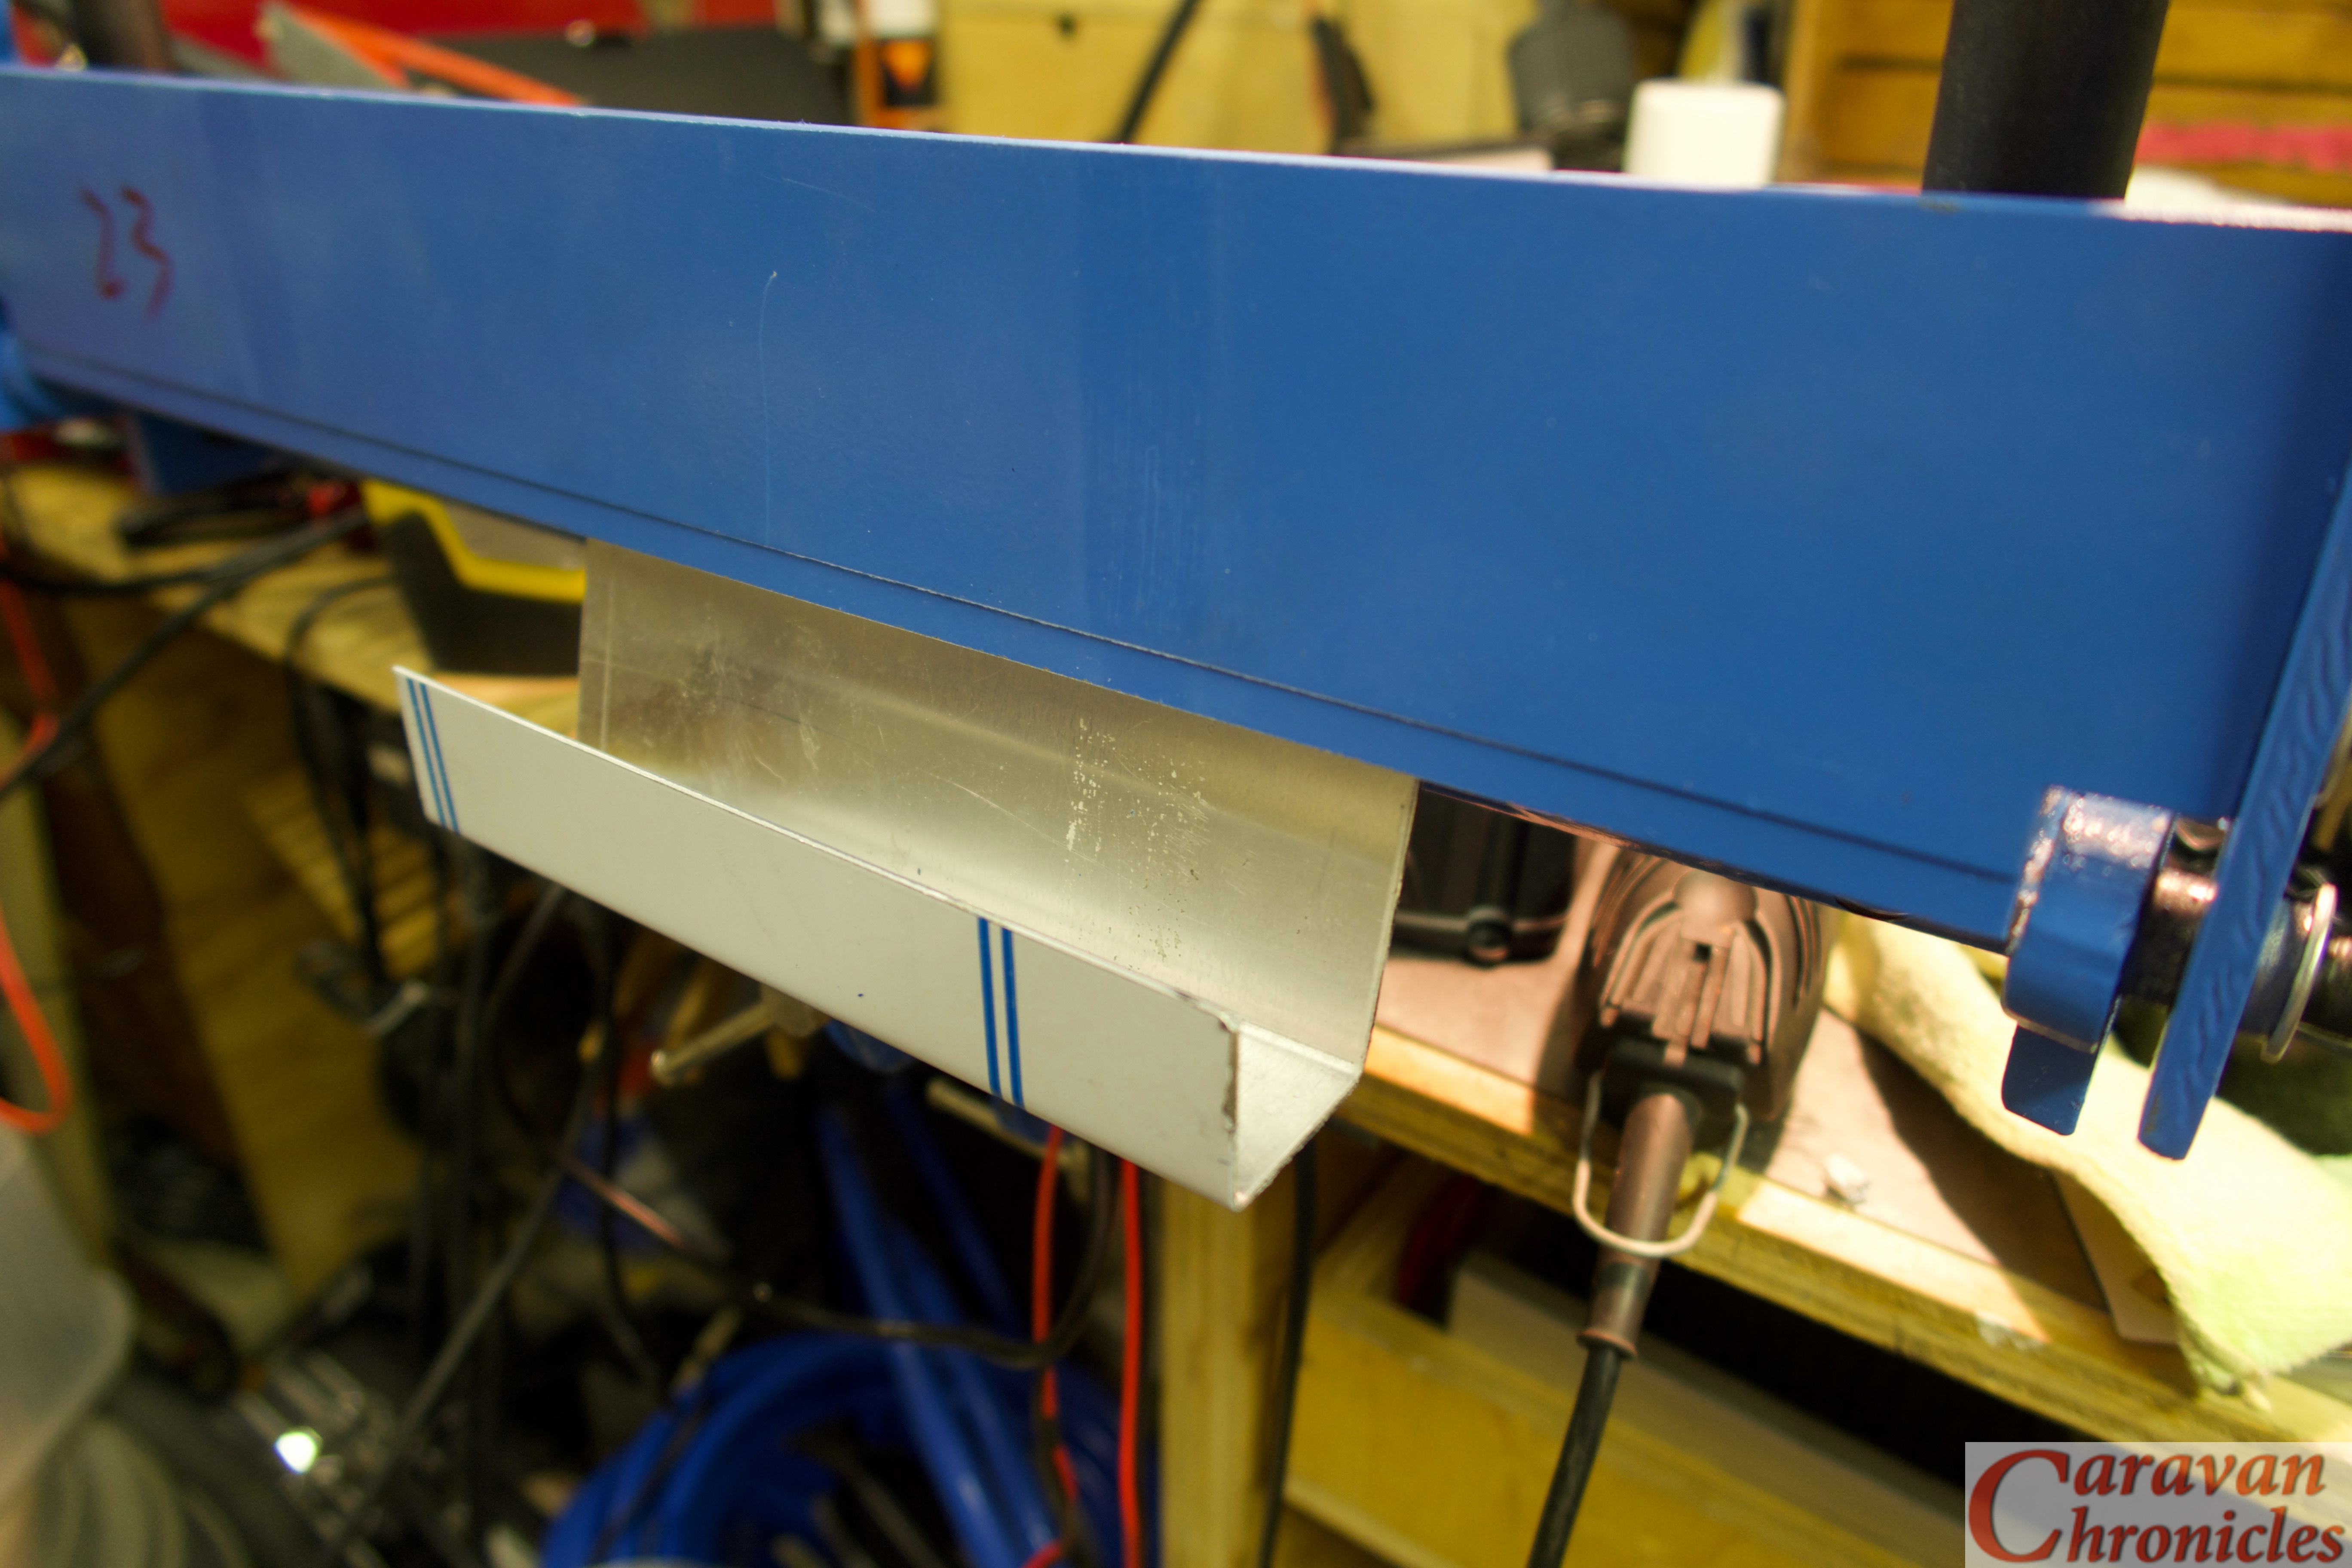
This really could do with a support. So after putting my thinking cat on…. nope Henry wasn’t;t very helpful… In the best Baldrick fashion I came up with a cunning plan. The front of the pickup bed frame is quite strong and the strength was increased by the aluminium box that the Roll-N-Lok cover fits into.
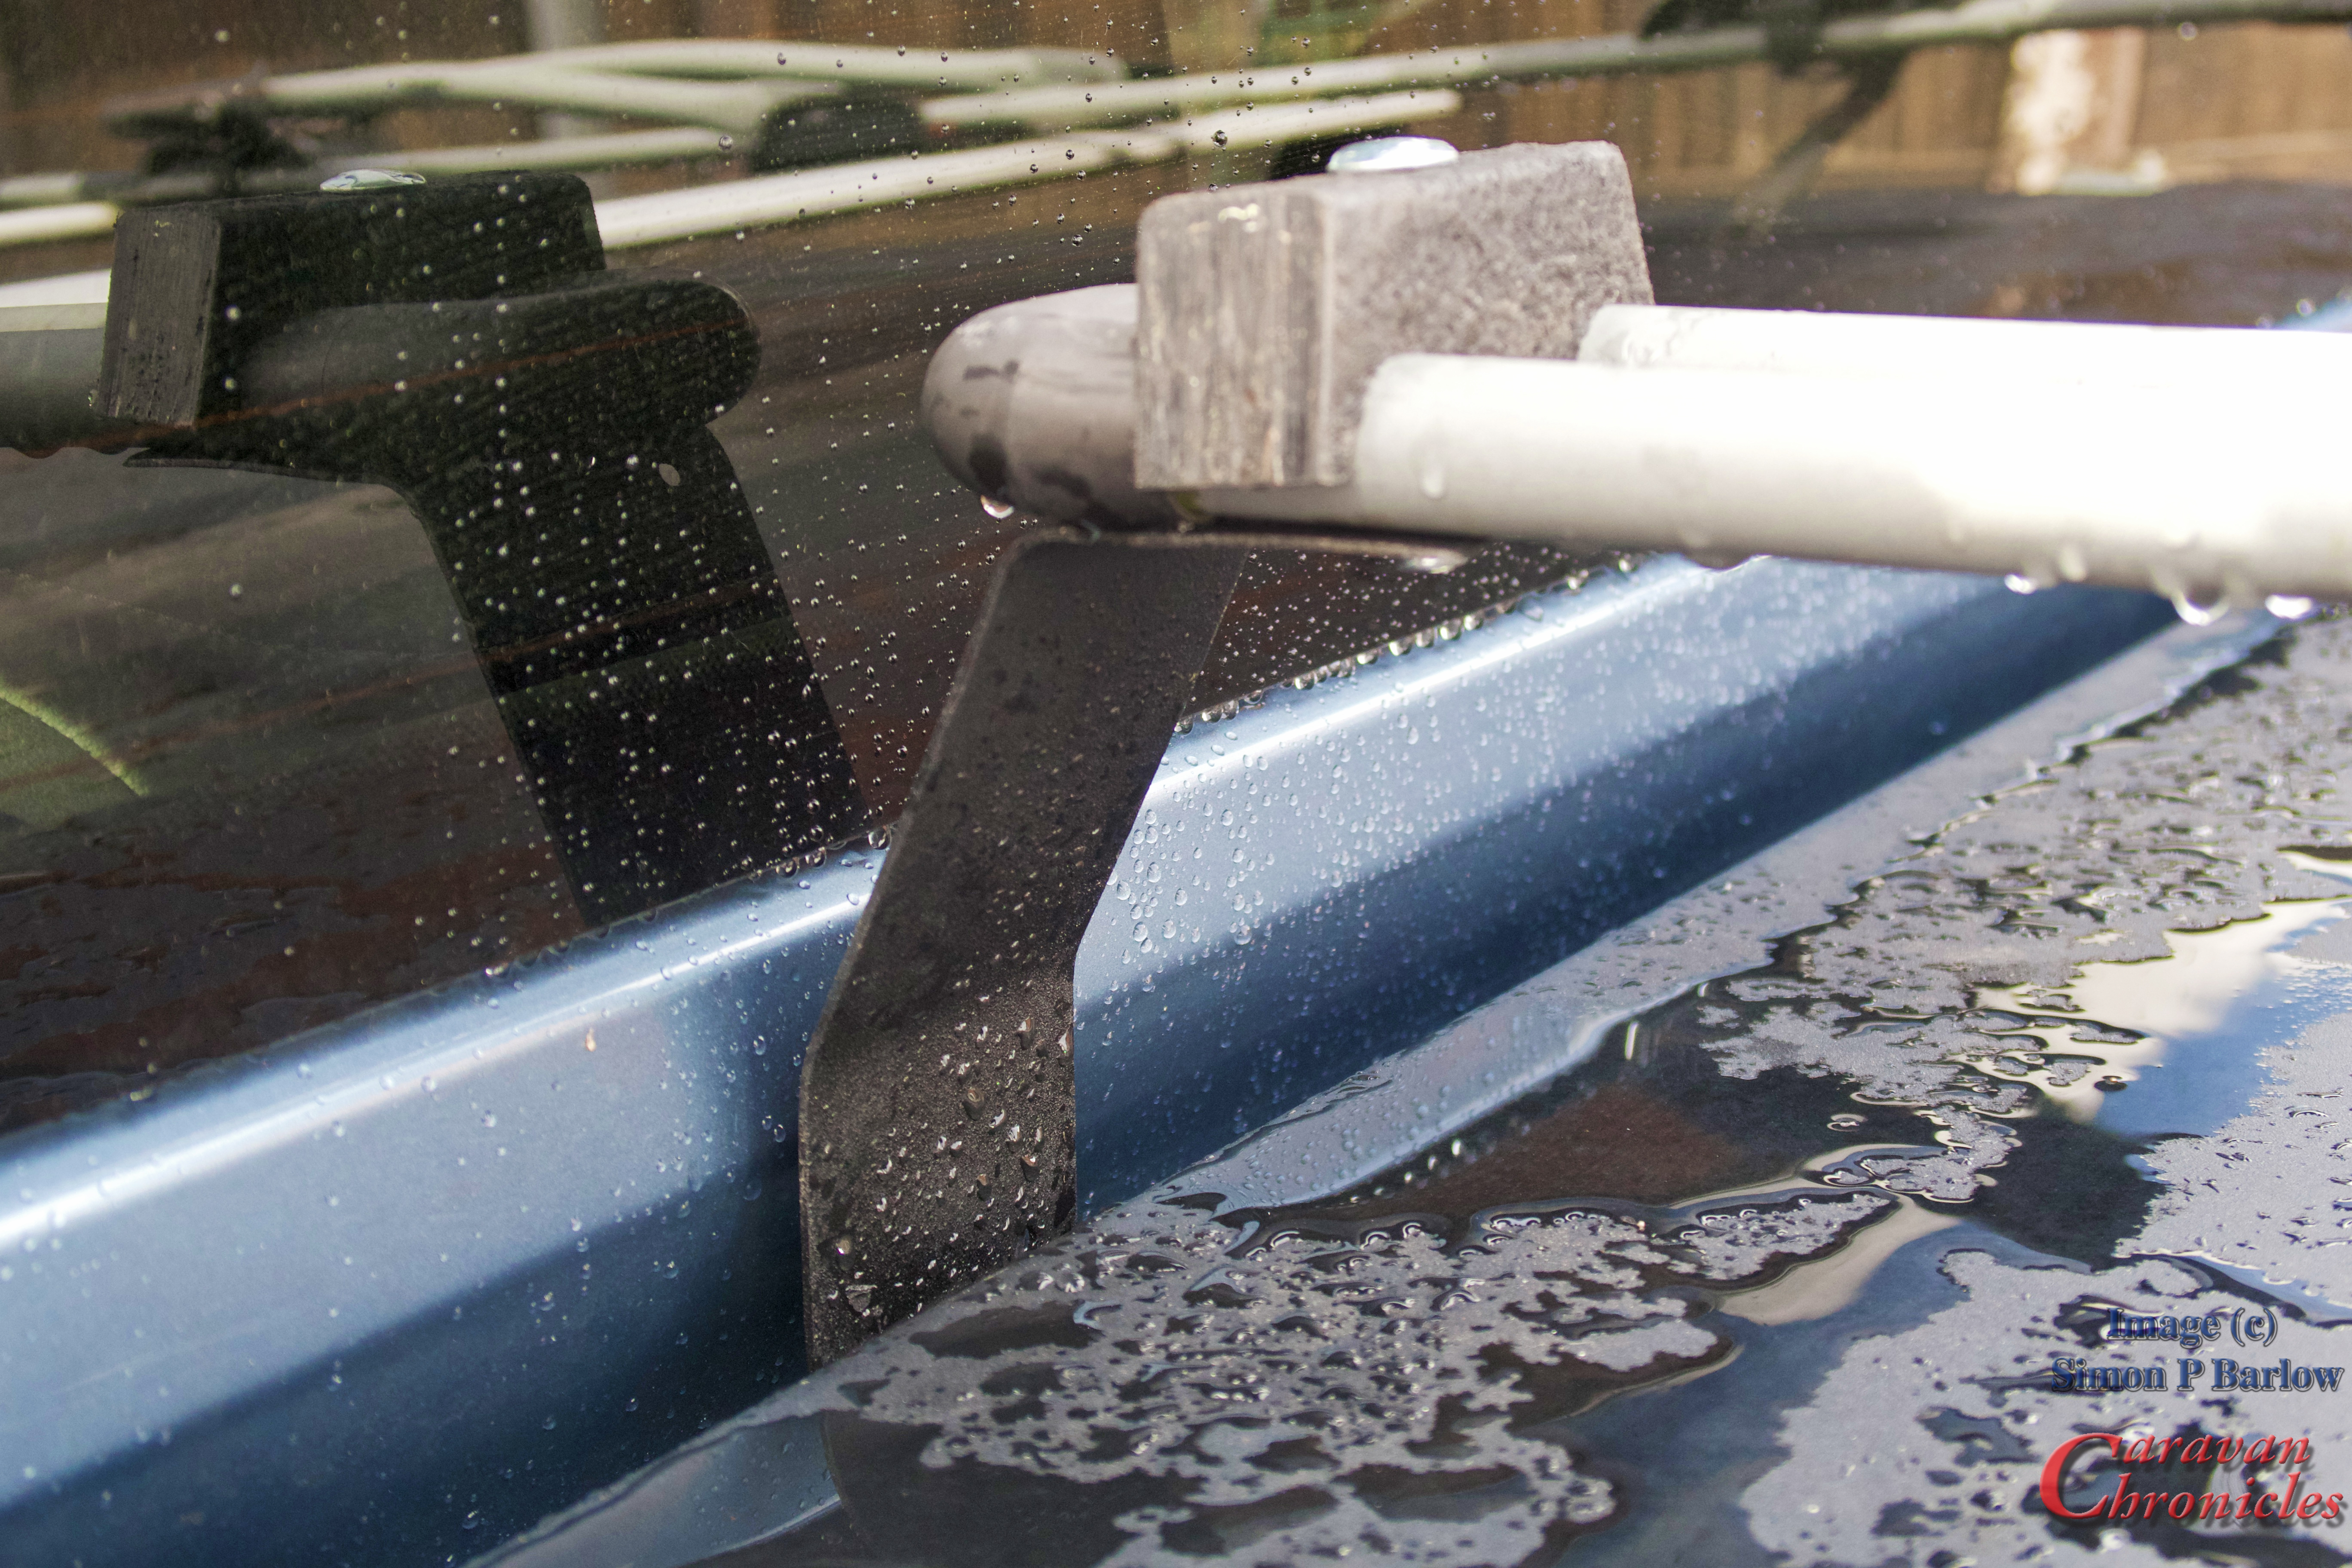
I cut two pieces of 1.5mm steel sheet and bent them so as to fit under the lip of the Roll-N-Lok cover resting on the frame of the pickup bed and bent them to form a support under the bike mount rails. I made a couple of stop blocks out of recycled plastic to hold the supports to the mount rails.
The design means I can still remove the cover for the Roll-N-Lok to service it and I don’t need to use any tools to remove the brackets if I want to remove the whole thing from the pickup bed… just the 4 Thule key locks to release the whole bike rack from he mounting pads.
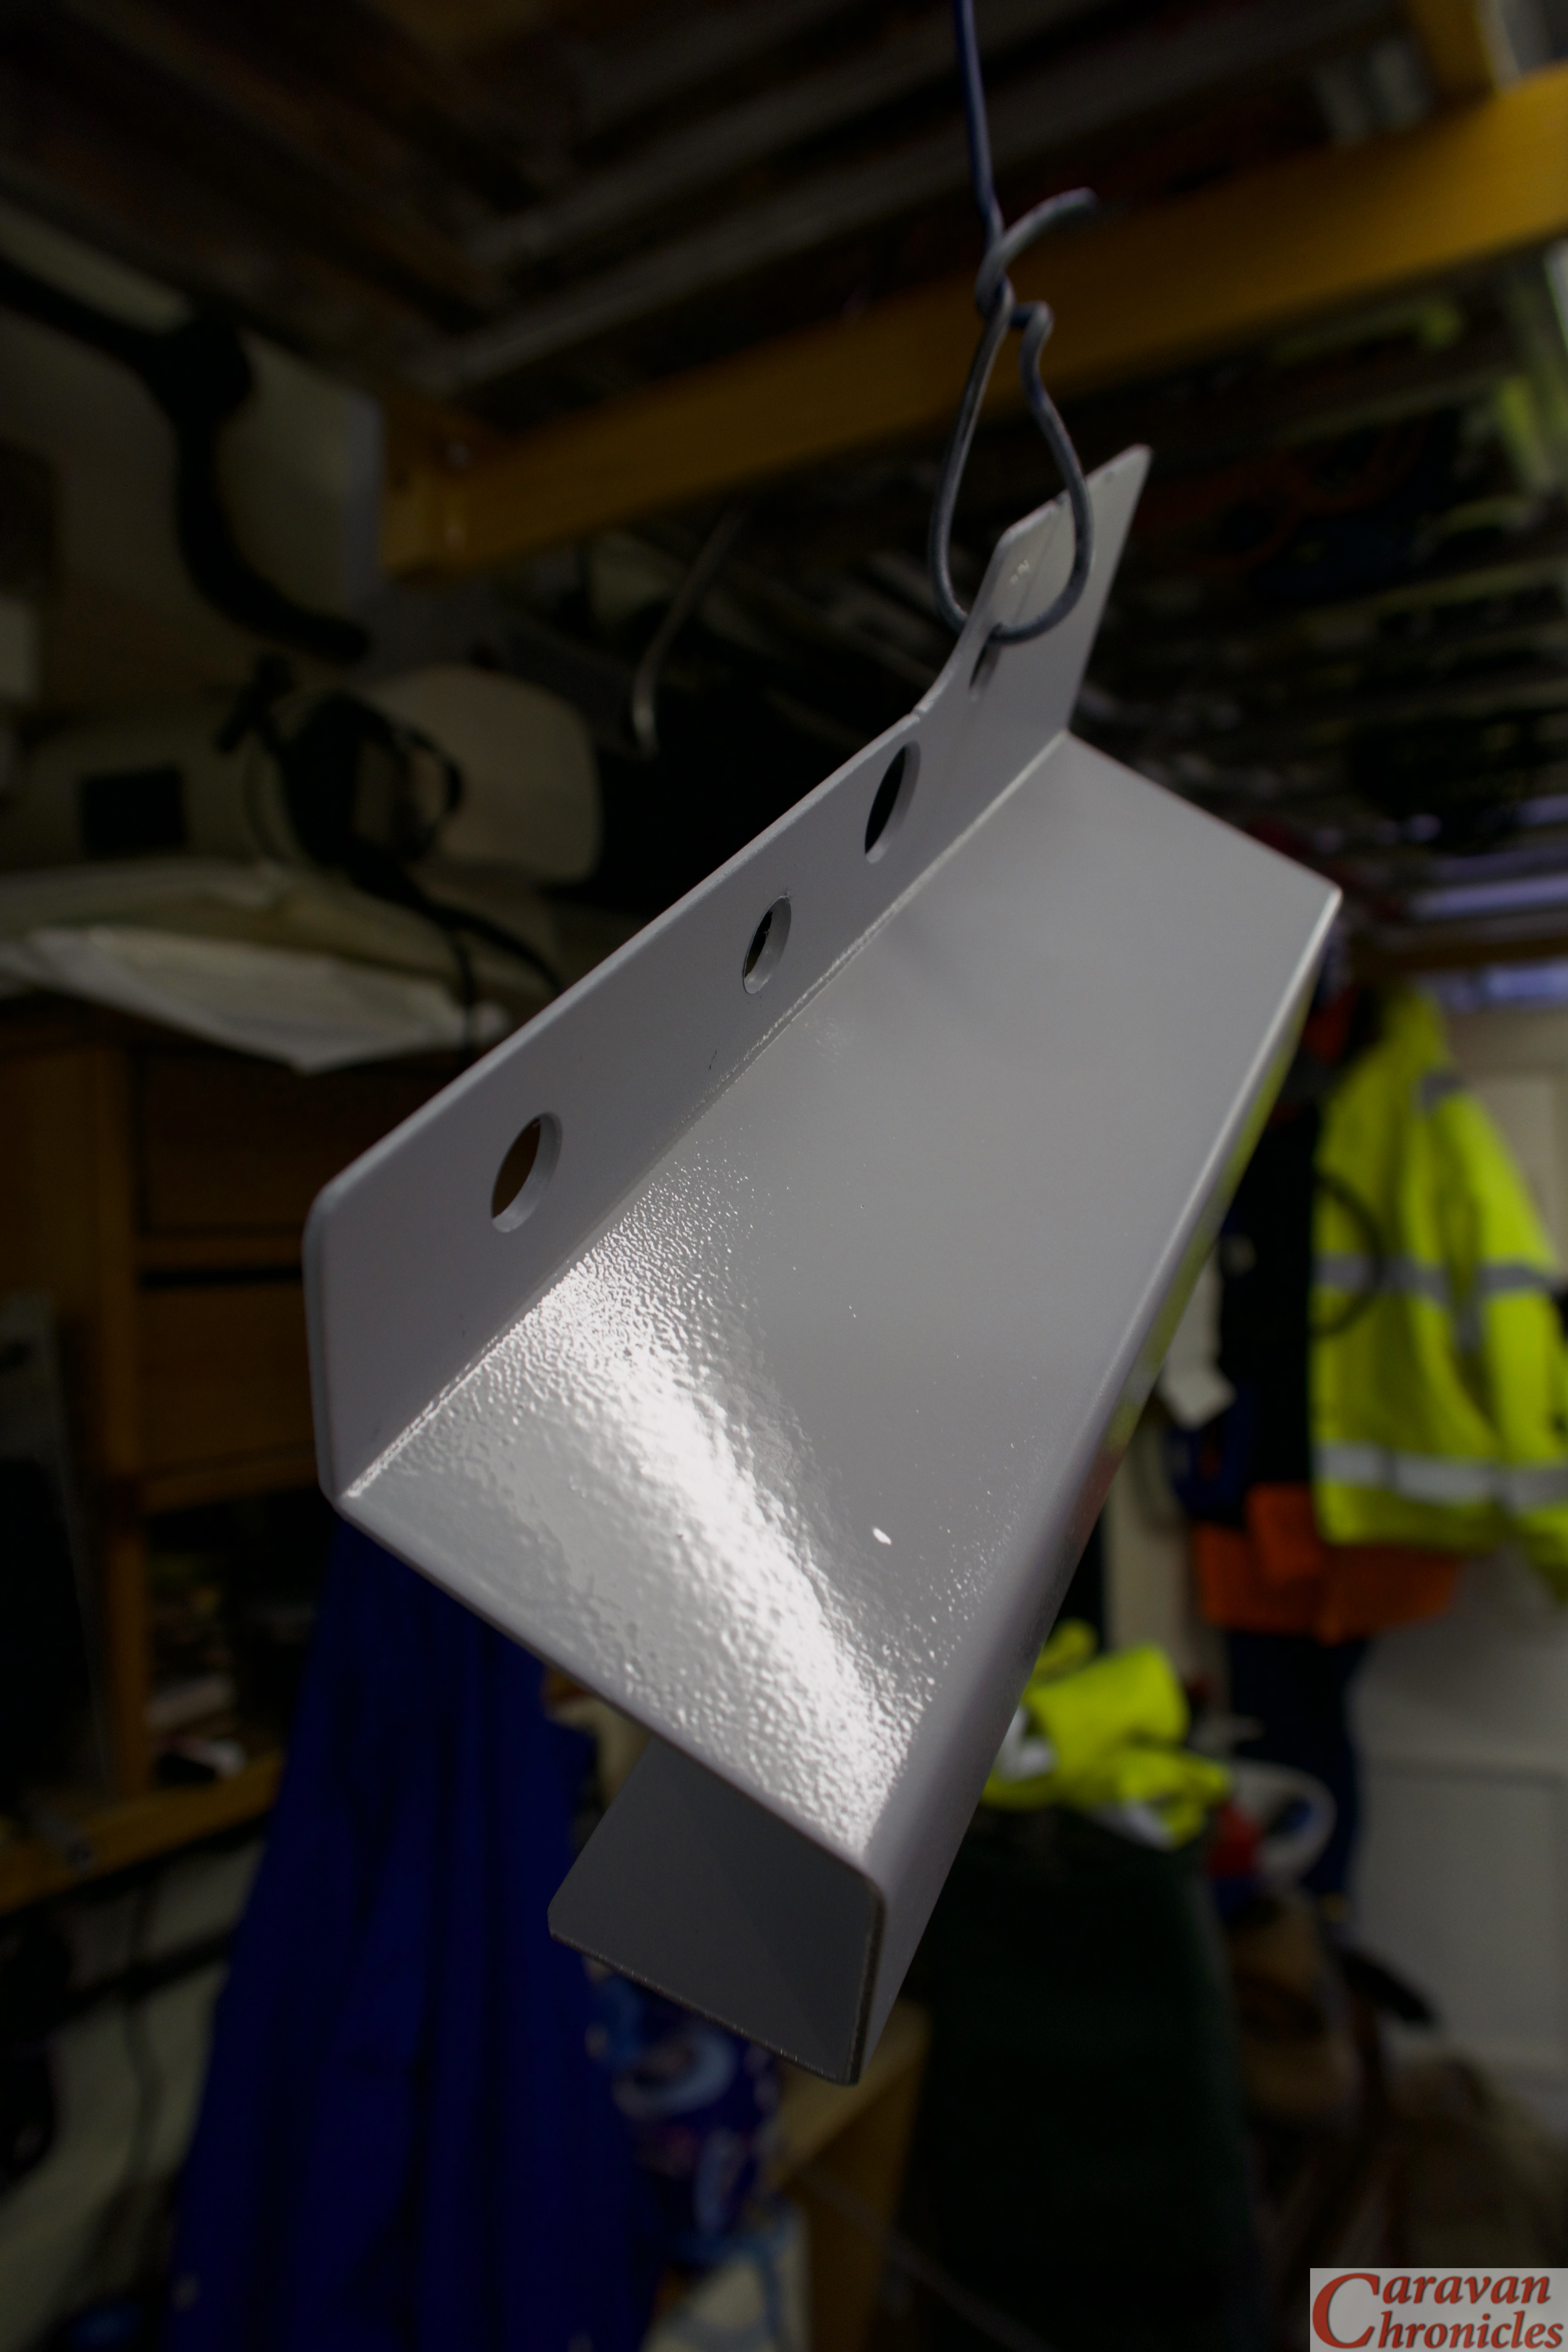
I gave the two brackets three coats of spray-on truck bed liner and let them harden for a couple of days before installing. Hopefully this should be enough.
All in, I think it looks OK and the functionality of everything still works. The bikes are secure with no flexing in the mount. We still have room for a narrow roof box or mesh cargo tray between the two bikes if we need more room. I always have the option of moving the bikes to one side and mounting a standard Thule roof box if we really get pushed for space.
Another little thing we can do is plug the bikes in to charge while travelling. I’m not sure how handy this will be, but its there just in case.
I hope this gives you some ideas for e-bike mounting options of your own. For us, it’s next stop Bridlington for a few days to do a bit of testing.
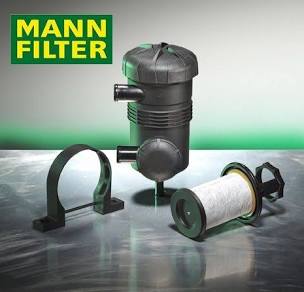
Back in June 2018 I fitted a Man HummelProVent oil catch can to our Amarok. Since then I’ve had a few people asking me how we have been getting on with it and has it actually ‘caught’ anything.
I fitted the ProVent to our VW Amarok when it had done about 8000 miles (12,800Km) and we have now done just over 13,000 miles (21,000Km) a great deal of it towing. I opted initially to drain the ProVent every 600 Miles (1000Km) and the first three each time I got about half a cup of slightly oily water. It was clear like water but when rubbed between your fingers it felt ‘slippy’ a bit like baby oil. I did notice that one draining that covered two long tows up to the Lake District what came out was slightly darker, still about the same quantity though. However I did notice on the last draining I had more of a dark oil content as a separate layer in the lighter clear ‘oily water’. Watching the video below I did find out that this is normal. The filter that is in the ProVent takes a few hundred Km to start working properly, first catching the condensate and then once the filter is saturated does it start to catch and drain the heavy oil.
I did recently remove the hoses on the intercooler (inlet and outlet) just out of curiosity and the interior from what I could see was still clean, with only a light covering deposited from the first 8000 miles (13,000Km) of running without a catch can fitted.
So how much have I got out?
Well in the first 5000 miles (8000Km) I have now filled an old 500ml 2 stroke oil container and just started on my second. I’ll continue to drain at the 600 mile mark. Although I must admit I now drain it before a long towing trip and again when I return home. It only takes about a minute and doesn’t require any tools so really is one of those tasks that is easily accomplished with the minimal of effort. Hopefully this will keep our engine in tip-top condition and not start to suffer from the oily carbon build up that saps power and is prevalent in all diesel engines.
Here’s an excellent video from the guy’s at 4WD Actionwith probably the best explanation I’ve seen so far on the net… (Video (c) 4WDAction.AU)
Following on from my issues with our TomTom (Why I’m ditching TomTom and moving to Garmin… ) our new Sat Nav arrived a few days ago. I did look a the Snooper option, but there were a few limitations that I personally wasn’t comfortable with, but overall it looked a good product. I have had some great feedback from users of the Snooper and the company seems to have a really good customer service department.
I ordered our Garmin Camper 770LMT-D from Amazon ( https://amzn.to/2Vca1j4 ) for £256 and opted to add a SanDisk Extream 32GB microSDHC Memory Card (https://amzn.to/2Jem1JK ) for £10 which should give me flexibility in the future. That said, the internal memory on the 770 is already quite big at 15Gb.
Before the unit arrived, I downloaded Garmin Basecamp – there are downloads available for both Windows and Mac platforms. I also downloaded Garmin Express. Installing on a Mac was straight forward as usual. I can’t comment on the Windows version as we have not owned a Microsoft platformed device for over 13 years.
While writing this I found out what the LMT-D stands for… LMT is Lifetime Maps & Traffic and the D is DAB Radio reception.. it receives traffic updated via the inbuilt DAB radio receiver. No it can’t play DAB radio stations before you ask.
Garmin Basecamp
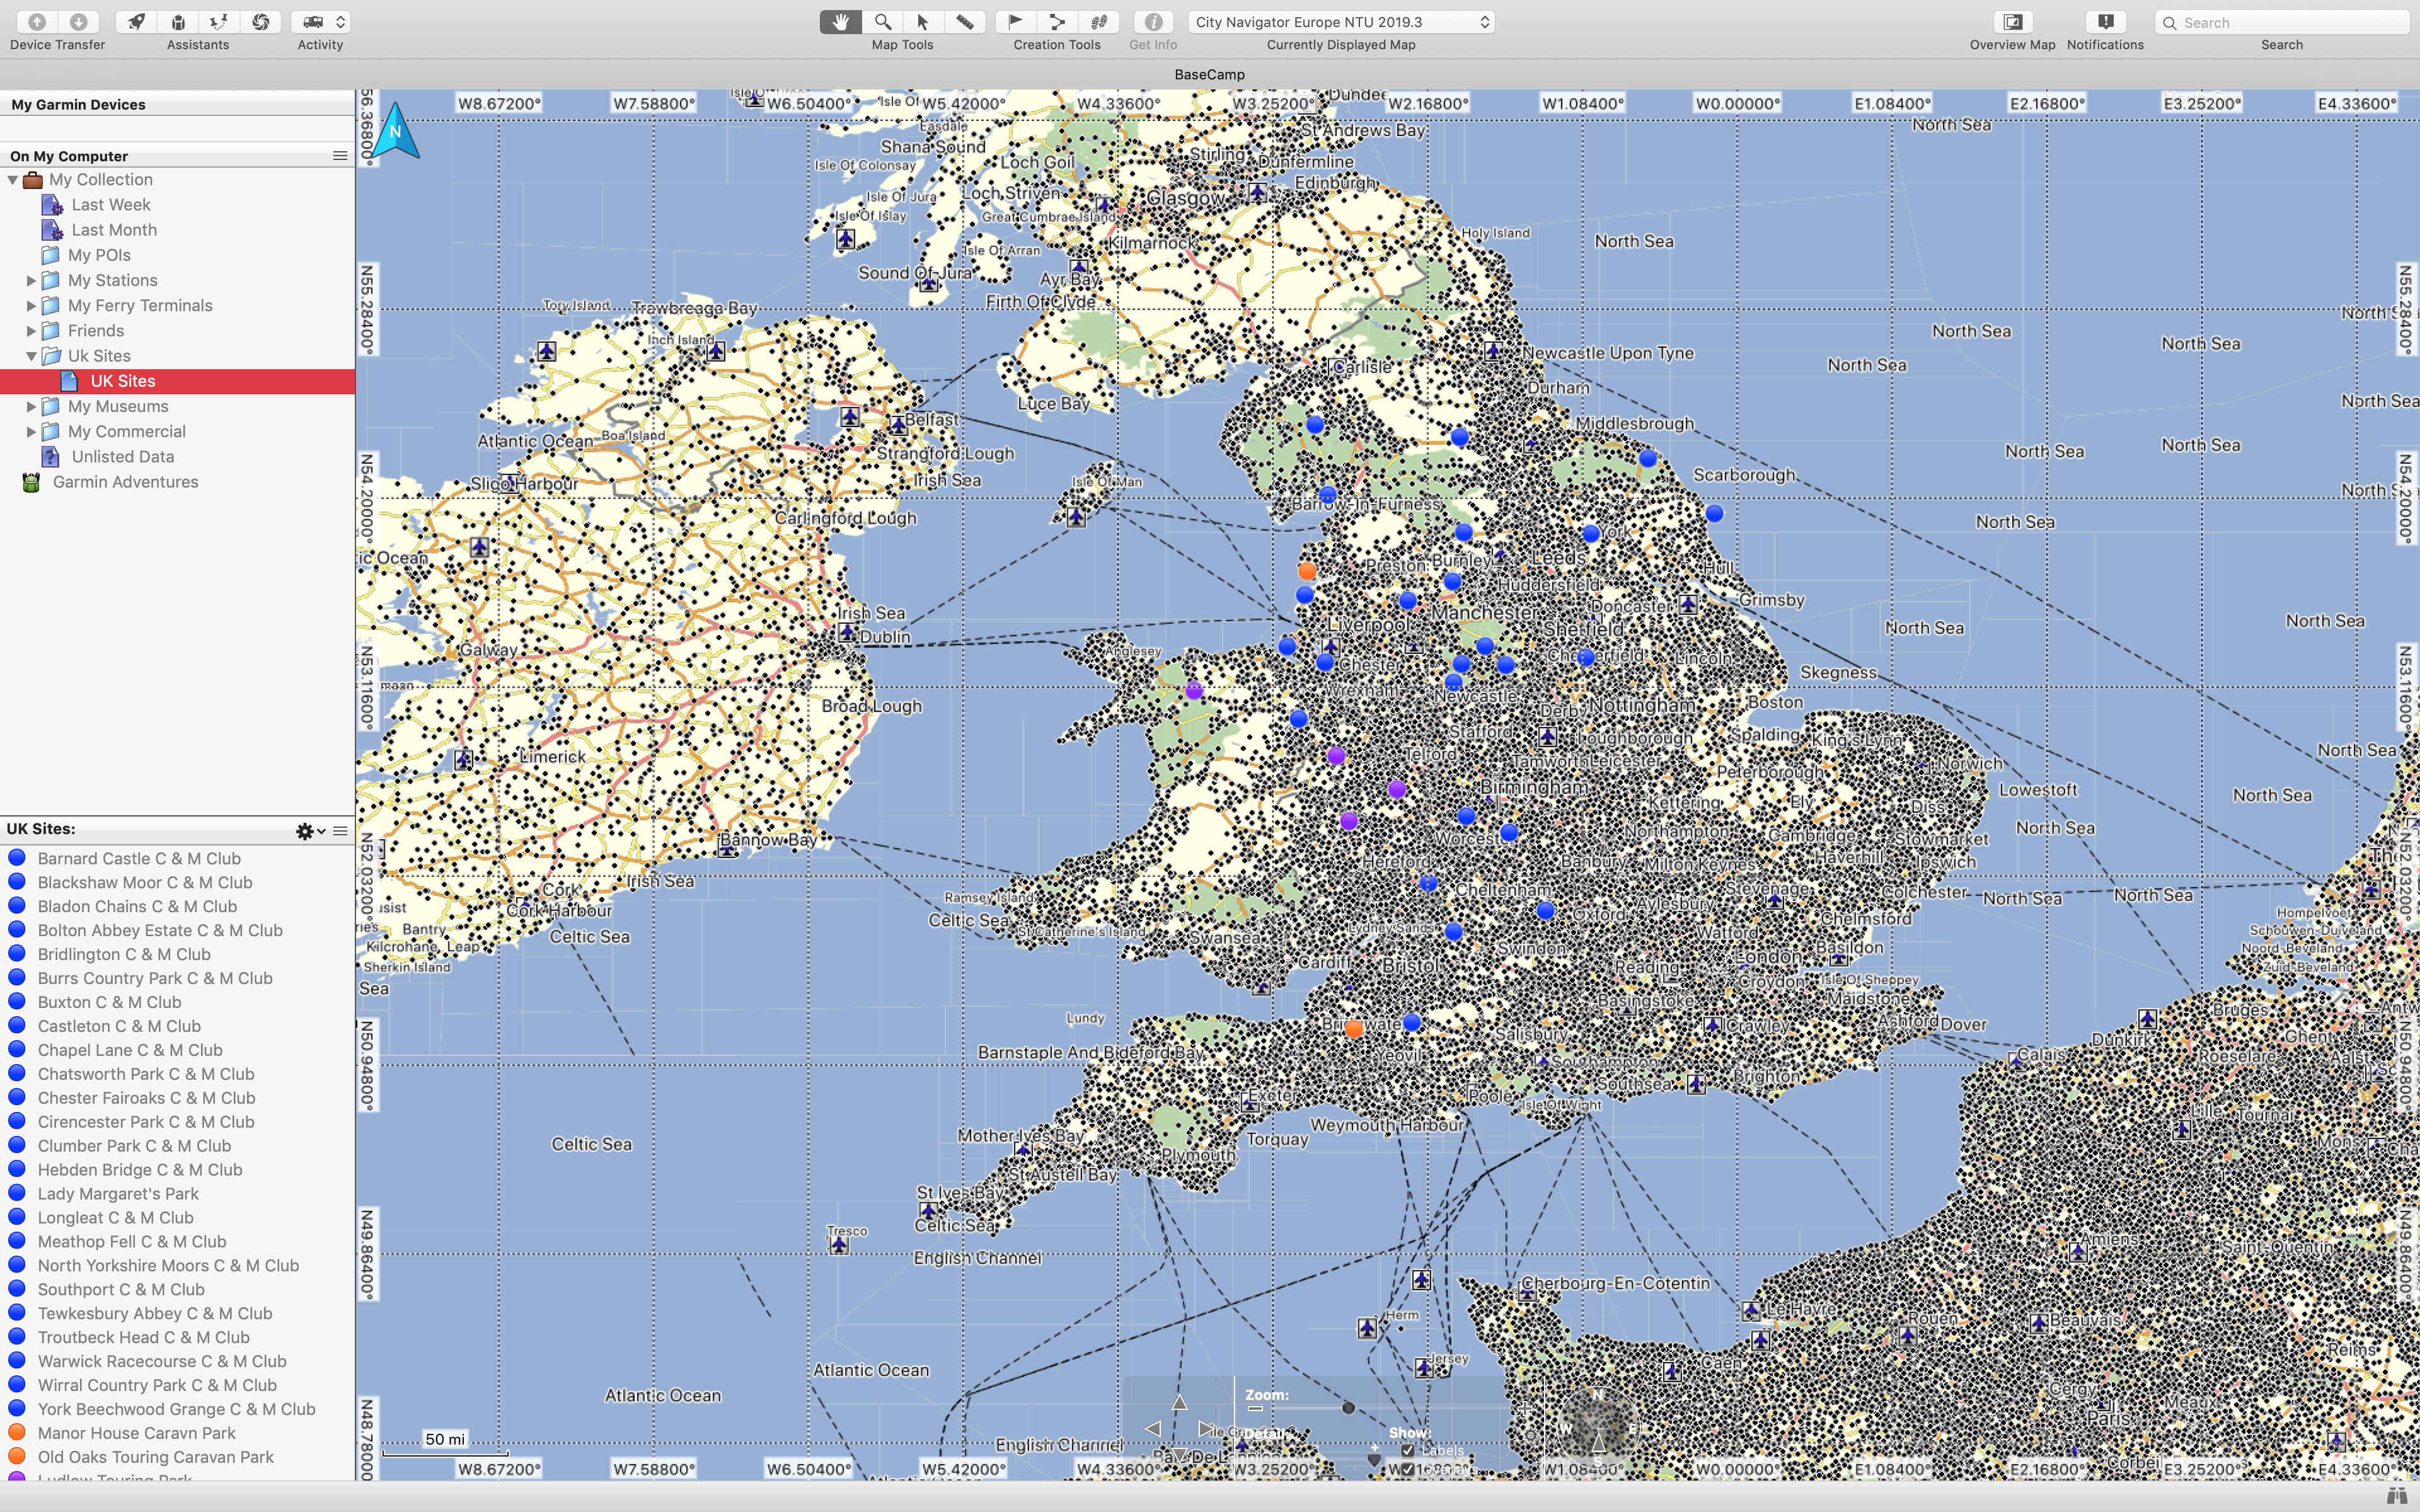
When you first install Basecamp is comes with a default Global Map….
It is not until you connect your GPS and download the updated map from it does it have all the fine detail and pre installed POI’s.
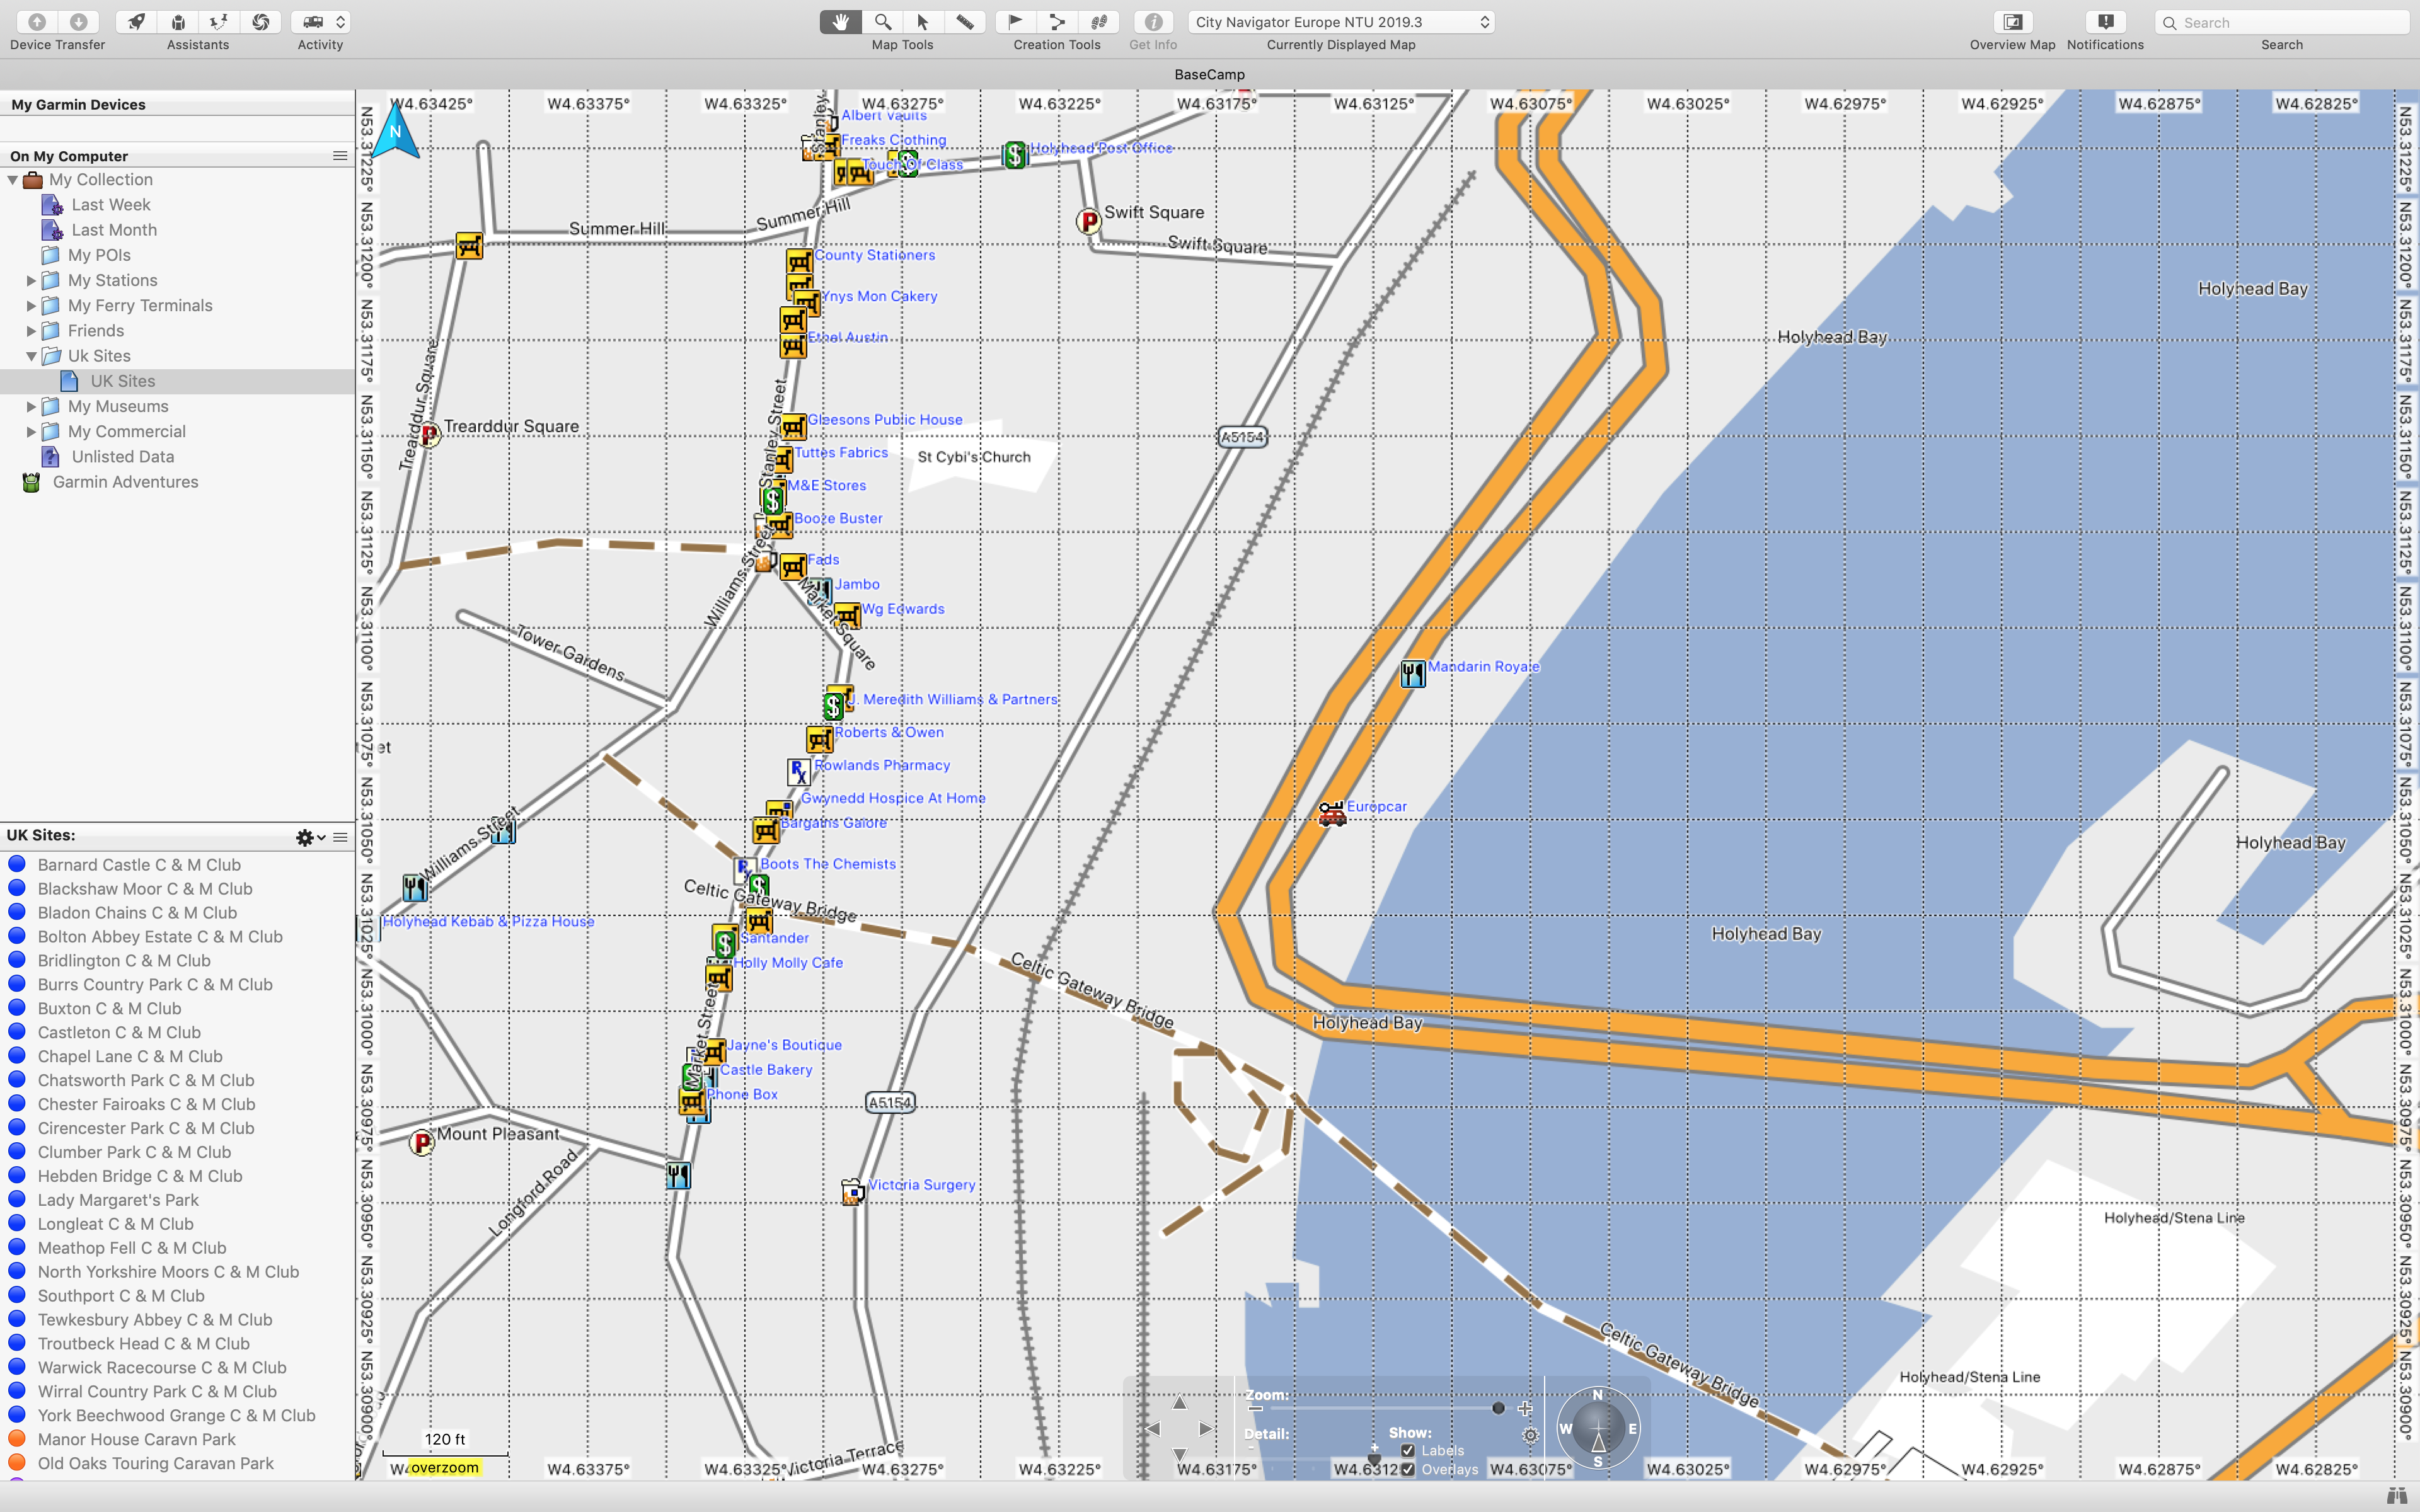
I have zoomed in to Holyhead here….
All the pre installed POI’s from the GPS show up and it makes it easy to have a mooch round the area from your desk when planning a route. I’m not going to go into too much detail about setting up your own POI’s (although they are really waypoints in Garmin’s world) or setting up Routs, tracks etc. I did find it really easy to follow Garmin’s on line video tutorial. However it took me a couple of go’s to get the information I wanted in the right fields.
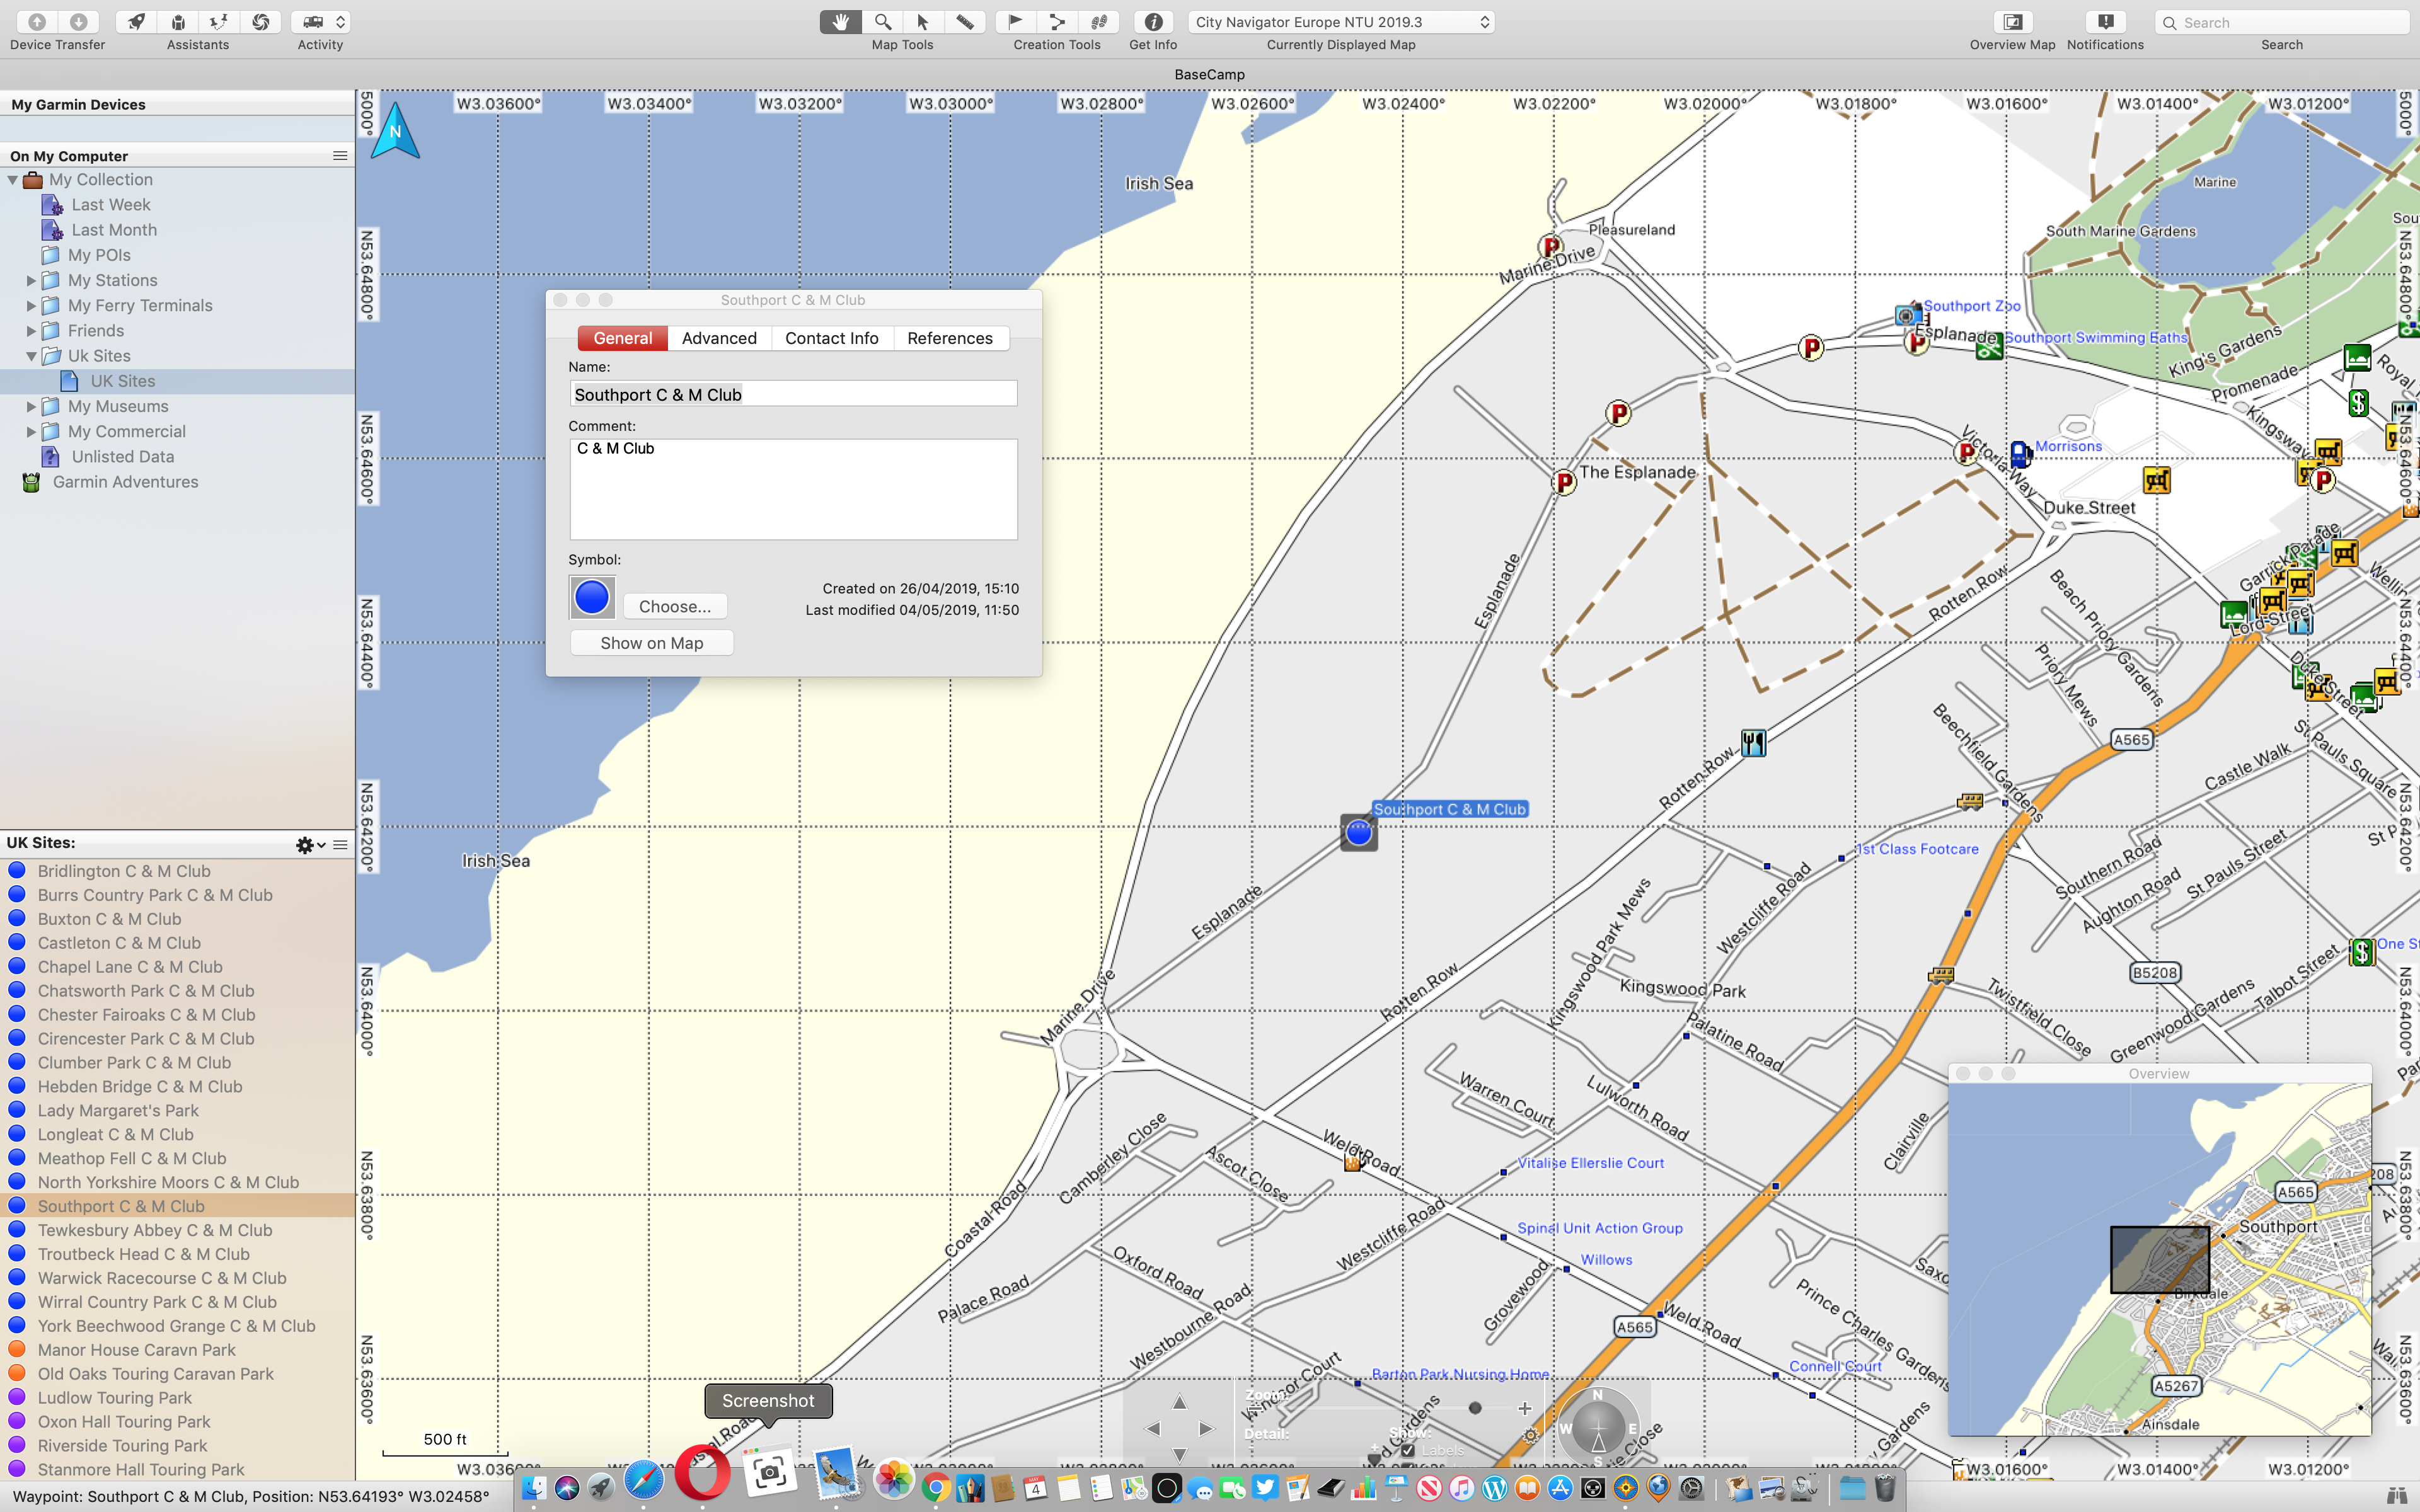
Here I set up a waypoint for Southport C & M Club. Really easy and only took less than a minute. By installing Garmin Basecamp before actually receiving the 770, it gave me a chance to sit and play about with the software before getting too distracted by the new gadget. I set up about 50 waypoints, sorting them into various categories – C & M Club, Museums, Ports, Friends etc. As I was unsure what actually came pre-installed I thought it might be best to get a head start on the most common ones.
What’s installed on the Camper 770?
Really I need not have bothered too much. The Garmin Camper 770 comes with ASCI, MHF, Campercontact as well as Trip Advisor & Foursquare databases already pre-installed. As it connects to WiFi and via a phone App to the internet, you can pretty much search for any location or attraction. I’ve set ours up so it connects to the Amarok’s WiFi system for permanent internet access. You can also install Archie’s database too if you think that you need all the bases covering.
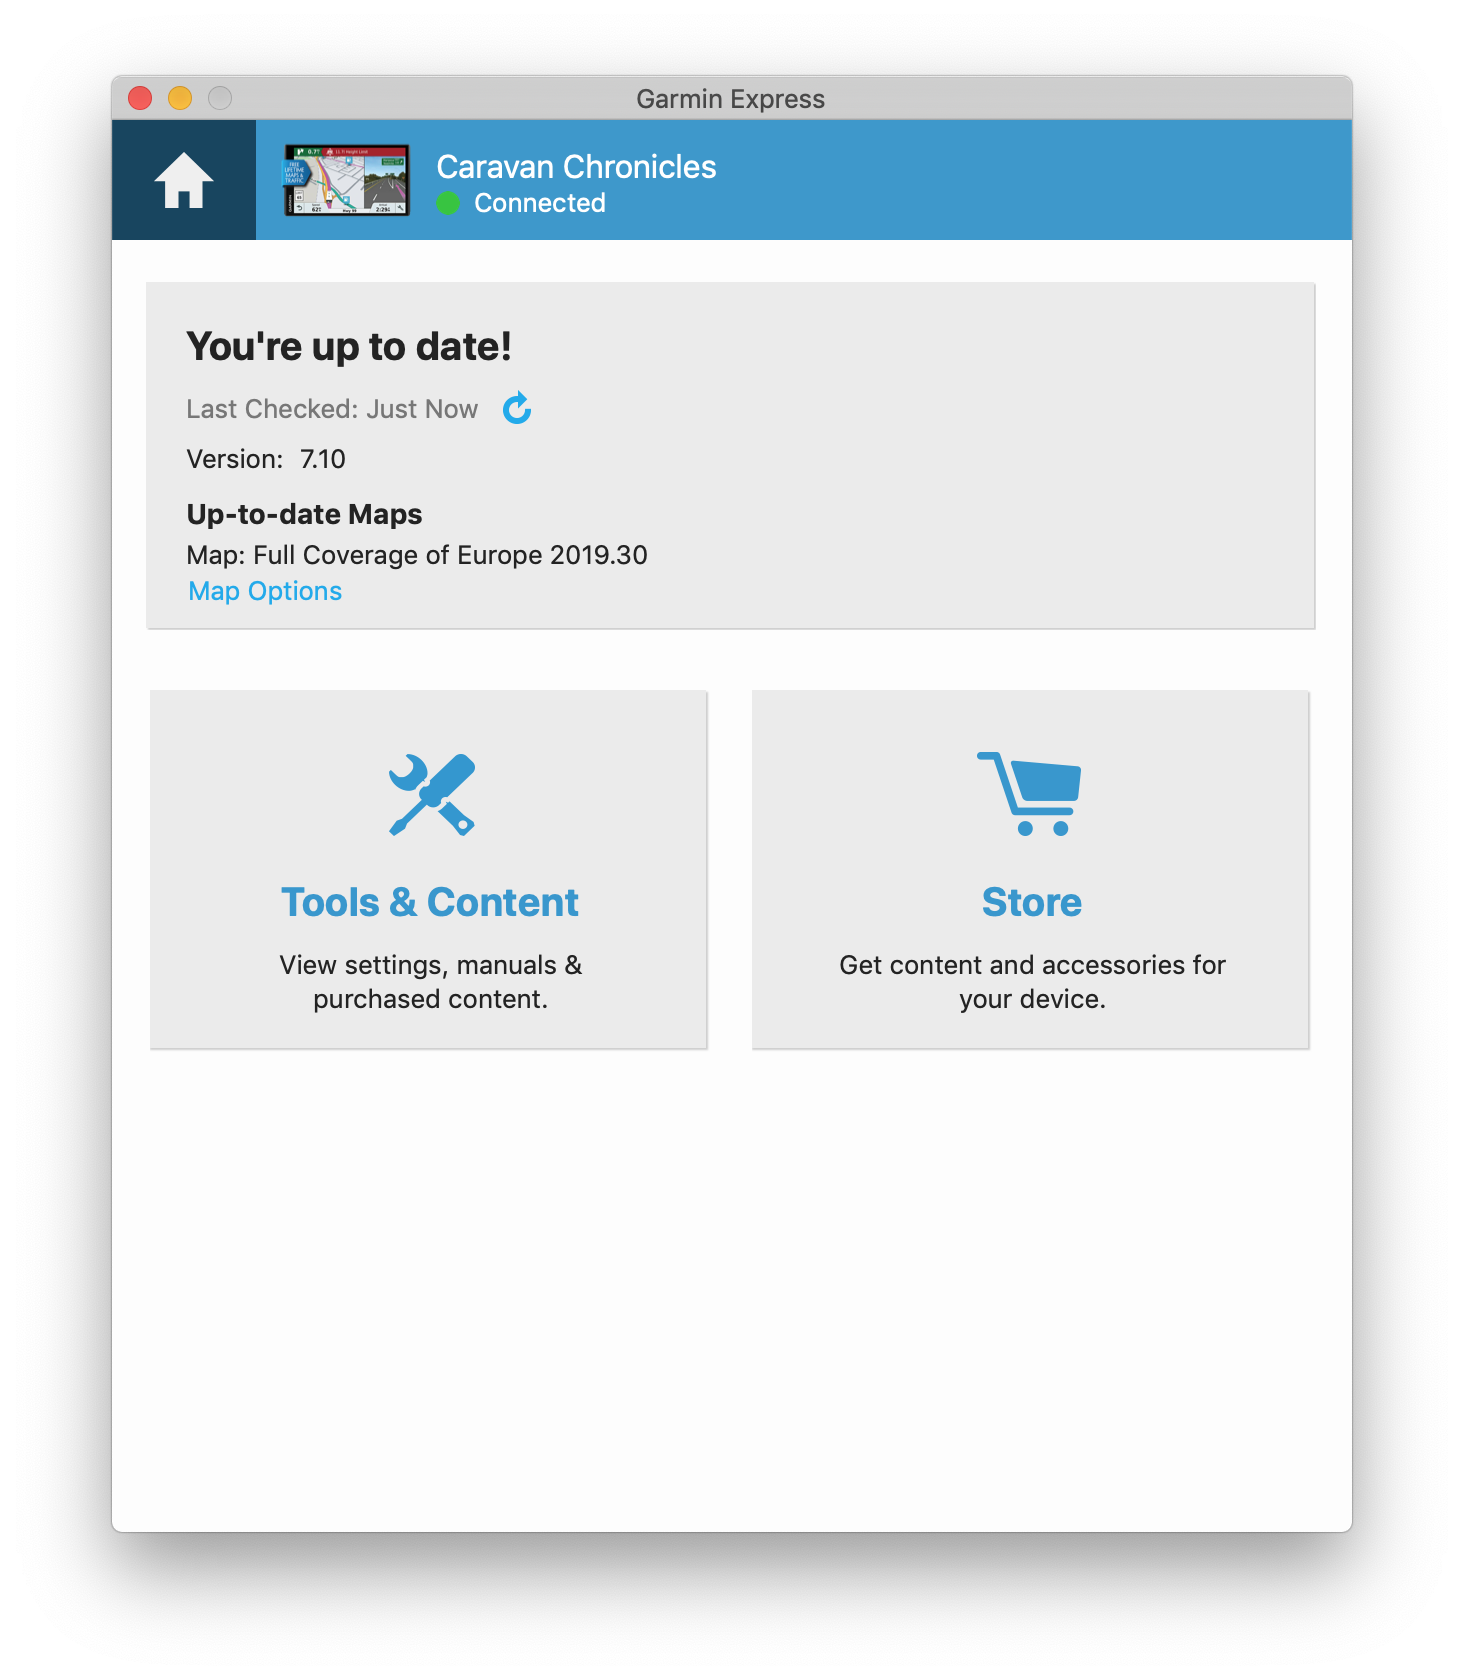
First Job – Update the 770
First job was to update the Garmin 770 with the latest maps and databases. To do this you need to install Garmin Express. Once installed, simply connect the GPS with the supplied USB lead and follow the on screen prompts. To get to the point where it starts to update only took a minute or two… inputting an email address really and naming the unit so if you have multiple Garmin products you can easily identify which GPS you have connected. It estimated that it would take around 2 hours to perform the download and all the updates, in reality it took less than 30 minutes.
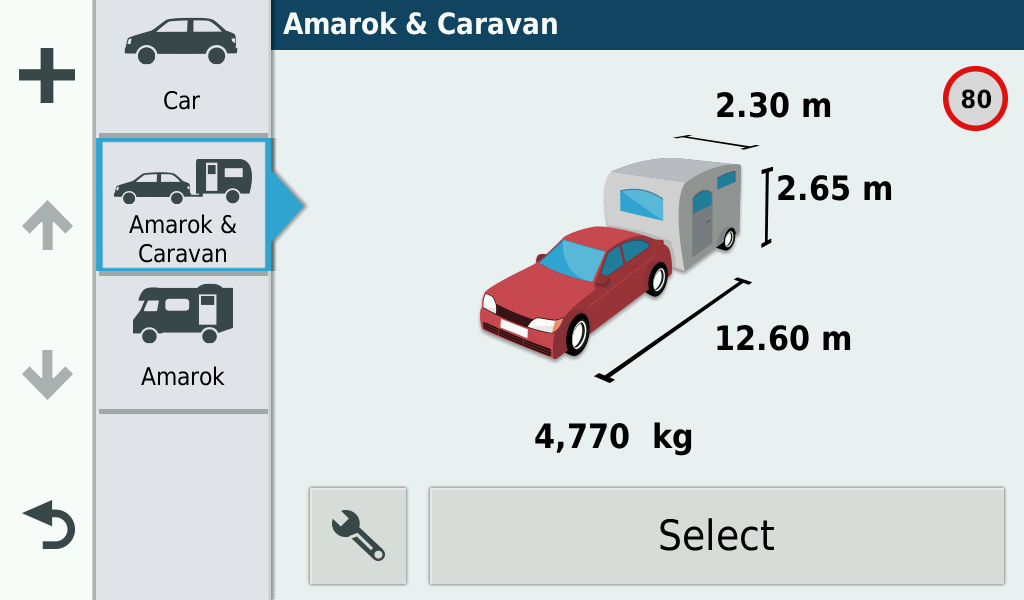
Setting up the vehicle and vehicle options came next. Again really simple to do. I found the menu system is quite simple to navigate through, and it didn’t take too long to set up our rig…
You may notice the “80” Kmh sign in the top right corner. As you can input the weights of the vehicle, caravan, motorhome into the unit. It will keep an eye on the speed limits on roads. In europe where a lot of countries have lower limits for vehicles or towing combinations above certain weights…. France for example has a 3.5t cut off, above this weight and you have a lower speed limit that say a car and caravan under 3.5t on the same road. I’m sure motorhome owners who regularly travel in Europe will be more aware of these rules.
I could have got away with just the standard CAR setup for the Amarok when not towing, but as the Amarok has a body width of 1954mm (6’5″) and maximum of mirror to mirror with of 2228mm (7’3.5″) (5321mm or 17’5.5″ long if you are playing top trumps!) sometimes on a couple of width restricted roads I have had to really squeeze through, so I thought I’d set up a motorhome setting with the Amarok’s size just so I wouldn’t get caught out. And yes… that weight is correct. The MTPLM of the caravan and MPM of the Amarok totals 4770 Kgs and there are a couple of bridges in the UK I can’t legally tow over!
The Installation…
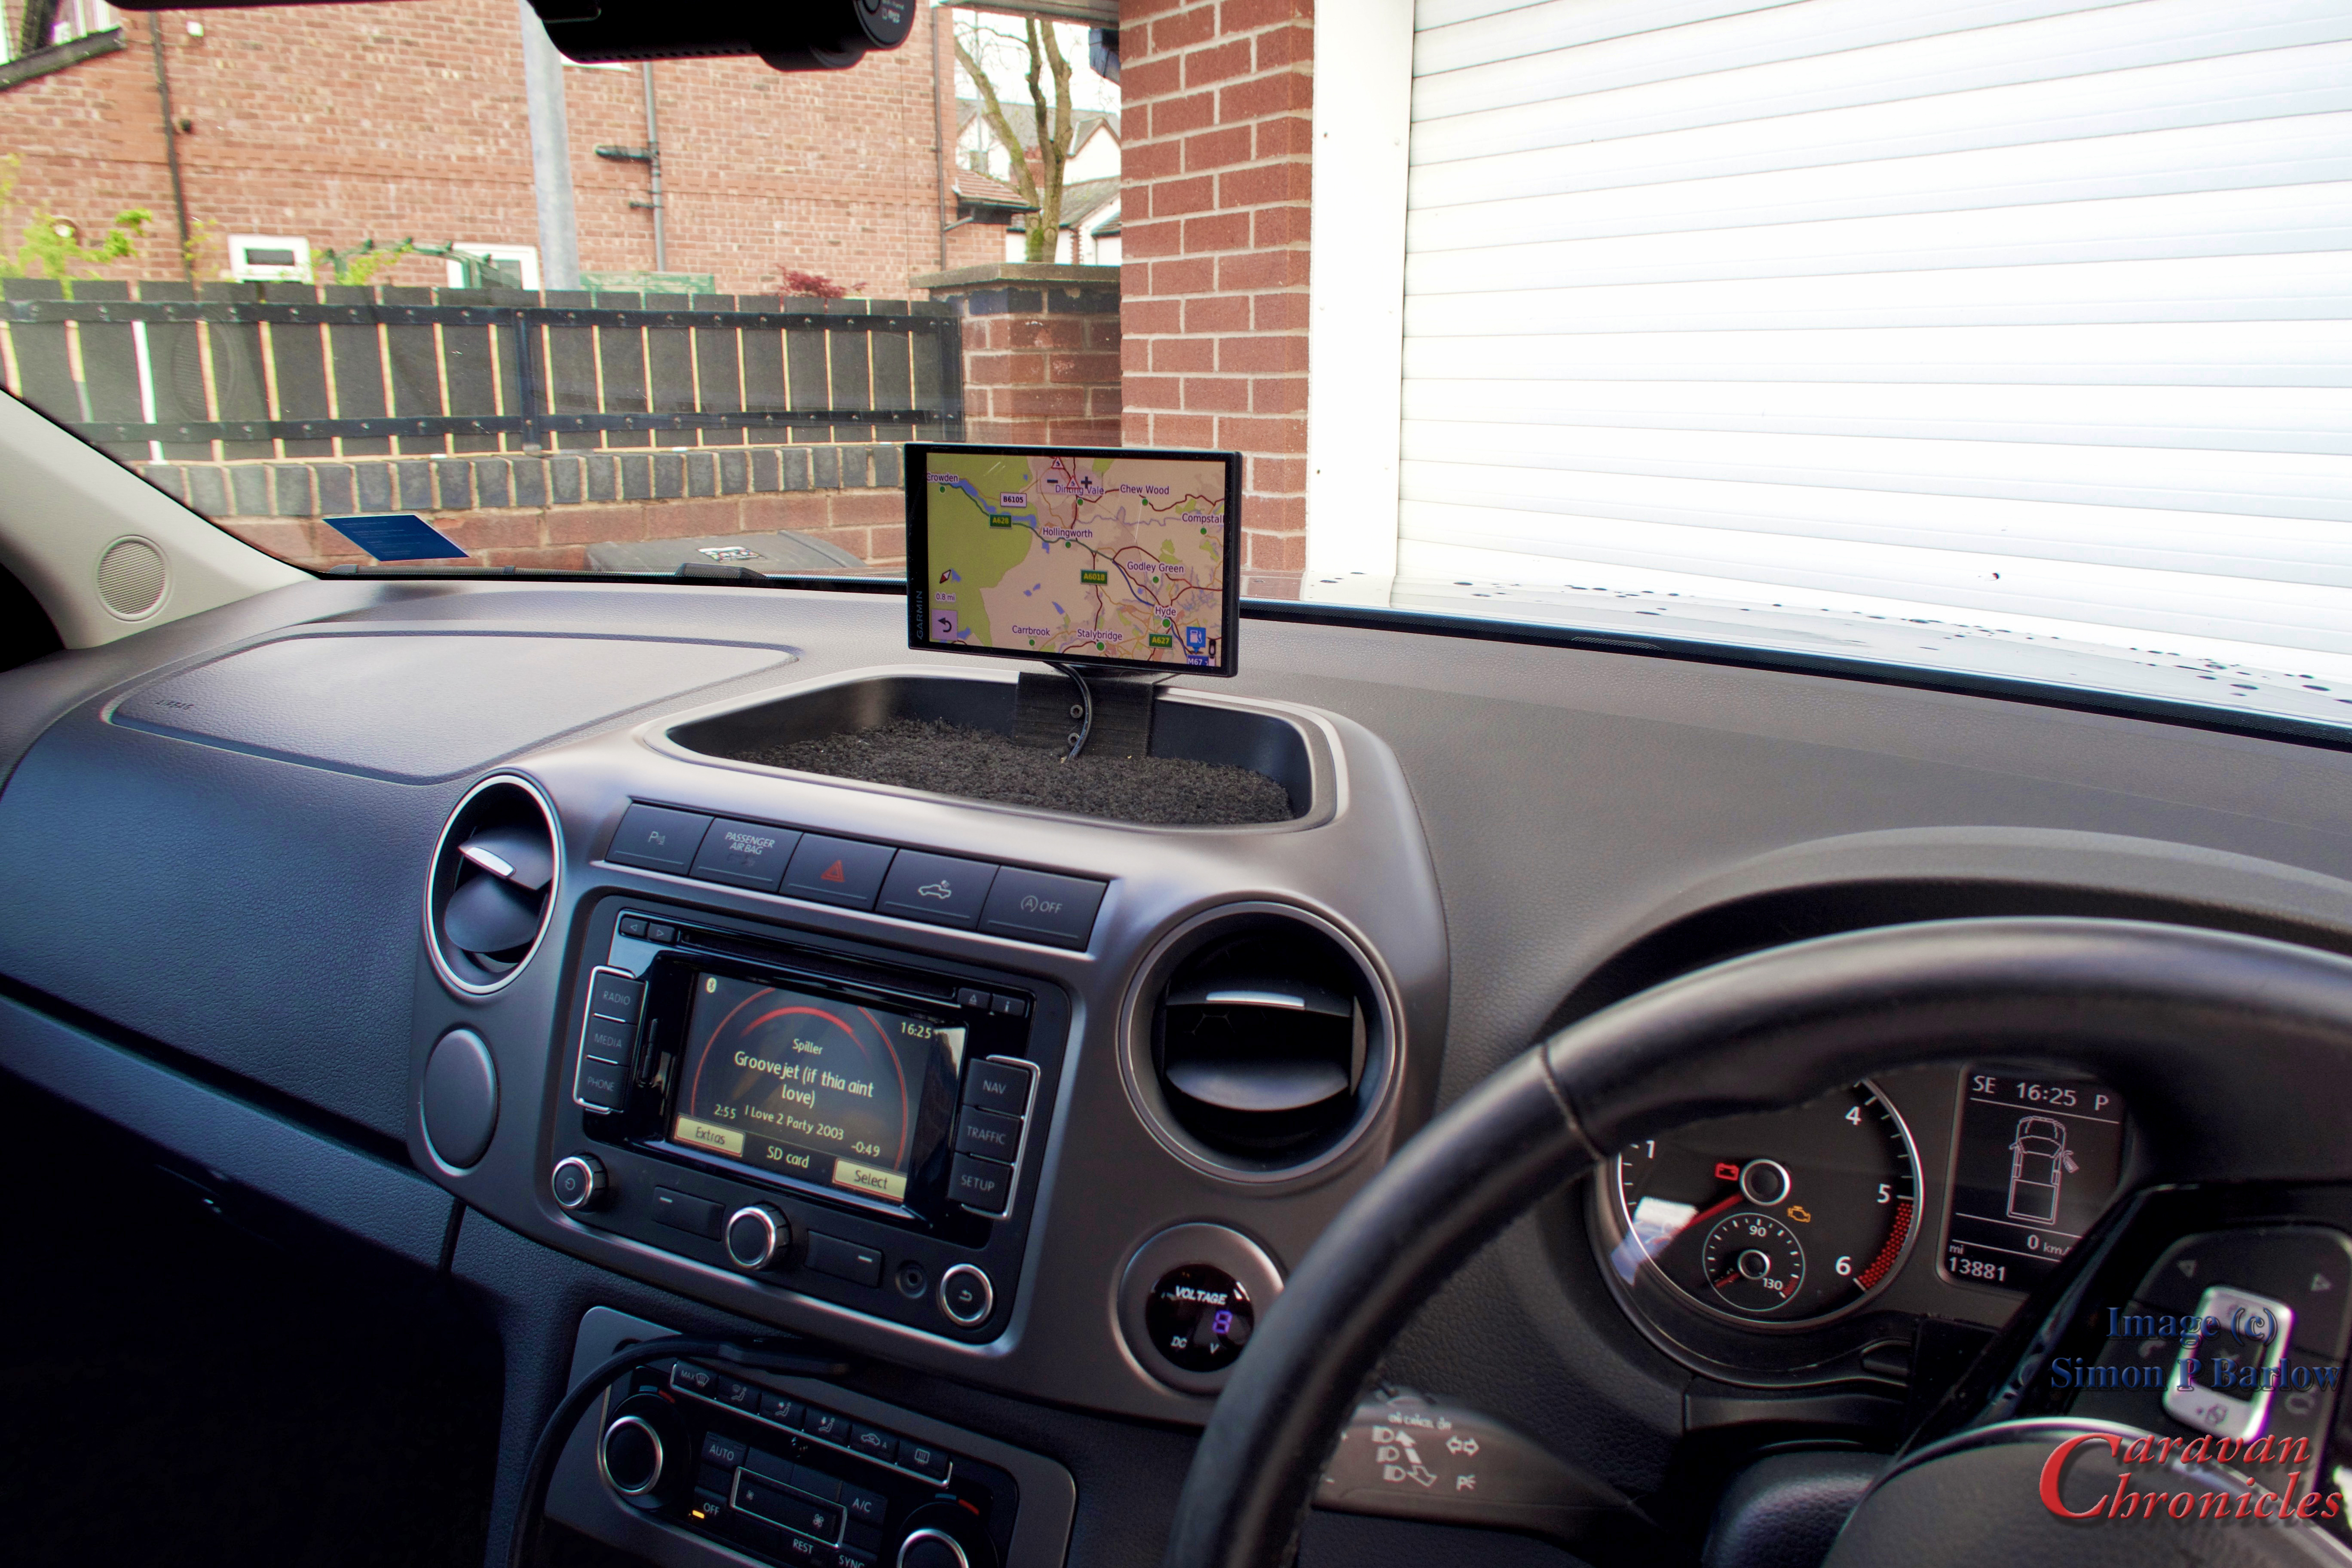
I’m a bit of a…. well I don’t know, when it comes to getting things right. I sat in the truck and moved the 770 around… placing it almost everywhere. I wanted it so it could be reached from either the driver or passenger seats, but not too close as it might fall into that focal length area where it’s just outside the range of either part of my bi-focal’s. I wasn’t happy with all the options available. So I thought tomorrow might bring inspiration. However all tomorrow brought was the same ‘Umm….” and “Nope…..”. The third day however did bring fourth a result….
I still wanted access to the top tray, but placing the GPS on the windscreen with the suppled mount was not an option. One, I hate things stuck to the windscreen and two, neither Sue or I could reach the screen from our normal seating position. So off to the bat cave to come up with a cunning contrivance. Half an hour later after shaping and bending some 1.5mm thick aircraft aluminium and a quick application of anti glare black… (I also followed that up with some anti glare cloth tape we used in aircraft cockpits)
It still uses the Garmin quick release mount and has the flexibility to adjust fully either way and tilt down to minimise glare if the sun is reflecting directly on it (the screen is super bright though max and hopefully this won’t be a problem). We can both still reach it and the tray in front as well as being fully accessible is a convenient place to wrest your wrist while inputting info into the GPS. I have found though the Voice Command understands a “Manc” accent really well and i haven’t had any issues using voice command.
What I like…
I do like Basecamp. I’ve found out that I can overlay OS Landranger maps which makes plotting very accurate walking routes and printing them out easy. I can also create accurate Green Lane routes for off road 4 x 4 treks and import them into the 770. You can also convert Google Map routing and import it into Basecamp and your GPS. Now this is really useful. For example… setting off from Manchester about 04:00 going to Dover to catch the 10:00 ferry sailing, however I need to fill with LPG en route. I set my departure point, arrival point and search for LPG closest to my route. I can then pick one see the estimated arrival time at that point (check that the LPG station is open) and adjust my route to take in the LPG waypoint or choose the next LPG station if I am going to arrive too early. This can then be uploaded to the 770 as a route and will adjust around traffic still directing you first to the LPG station then to your destination.
Within Basecamp you have an option to upload your waypoints to either the 770’s internal memory or the Memory Card. You can also update the memory card by removing it from the 770 and connecting it directly to your desktop device. I’ve chosen to install all my info on to the memory card rather than the 770’s internal memory… did I really need a memory card? At this point probably not but it has allowed me a bit more flexibility and when I ordered the 770 I didn’t know just how much space I’d be left with, at the moment I’ve used about 10Gb of the 15Gb internal memory. You do have the option to install additional maps on to the memory card, so for example if I wanted North America I could install it onto the removable card. There is security built in to stop maps downloaded on one device being transferred to another device.
I found the updating of the 770 using Garmin Express to be really easy too. I have been checking it every day so far just to get a fell of how often the updates come through. So far I’ve had three updates after my initial first download. I tend to suspect that maybe Garmin have a more frequent update policy, which could be a reflection of the aviation side of the business where updates are tightly scheduled and frequent to reflect any airspace and NOTAM updates. I did note that one or two things and functions in route planning within Basecamp seemed strangely familiar… until it clicked…. I’d seen and used them before in flight planning applications.
There is a couple of other features that I’ve not had before. The Garmin 770 records all your tracks… now this is really handy so when Sue say’s “Do you remember we passed such and such the other day… can we go back?” Well, I can usually remember the vague details… but being able to bring up the route we drove and doing a bit of investigation using Garmin Basecamps opens up the possibility of being able to find it again without having to resort to a darkened room, angle poise light and an impression of Herr Flick.
The other is the ability take a snapshot of the screen. I used it for a few screen shots ( like the one above showing the vehicle set up) and a few I’ve taken for a full review. I don’t know if this is a ‘feature’ that is not really a feature as it’s noever gets used…. or if it’s something I might use in the future. Might be handy for quick maps of trips or places, there again it might not. Jury’s out on that one.
I’m not able to give a full review… as we haven’t been anywhere with it yet so I can’t comment on traffic updates, turn by turn instructions, general usability or function. we are off in the next few days for five days so I’ll let you know how we get on.
… and for all those pilots out there the classic ATC…. “Resume own navigation”
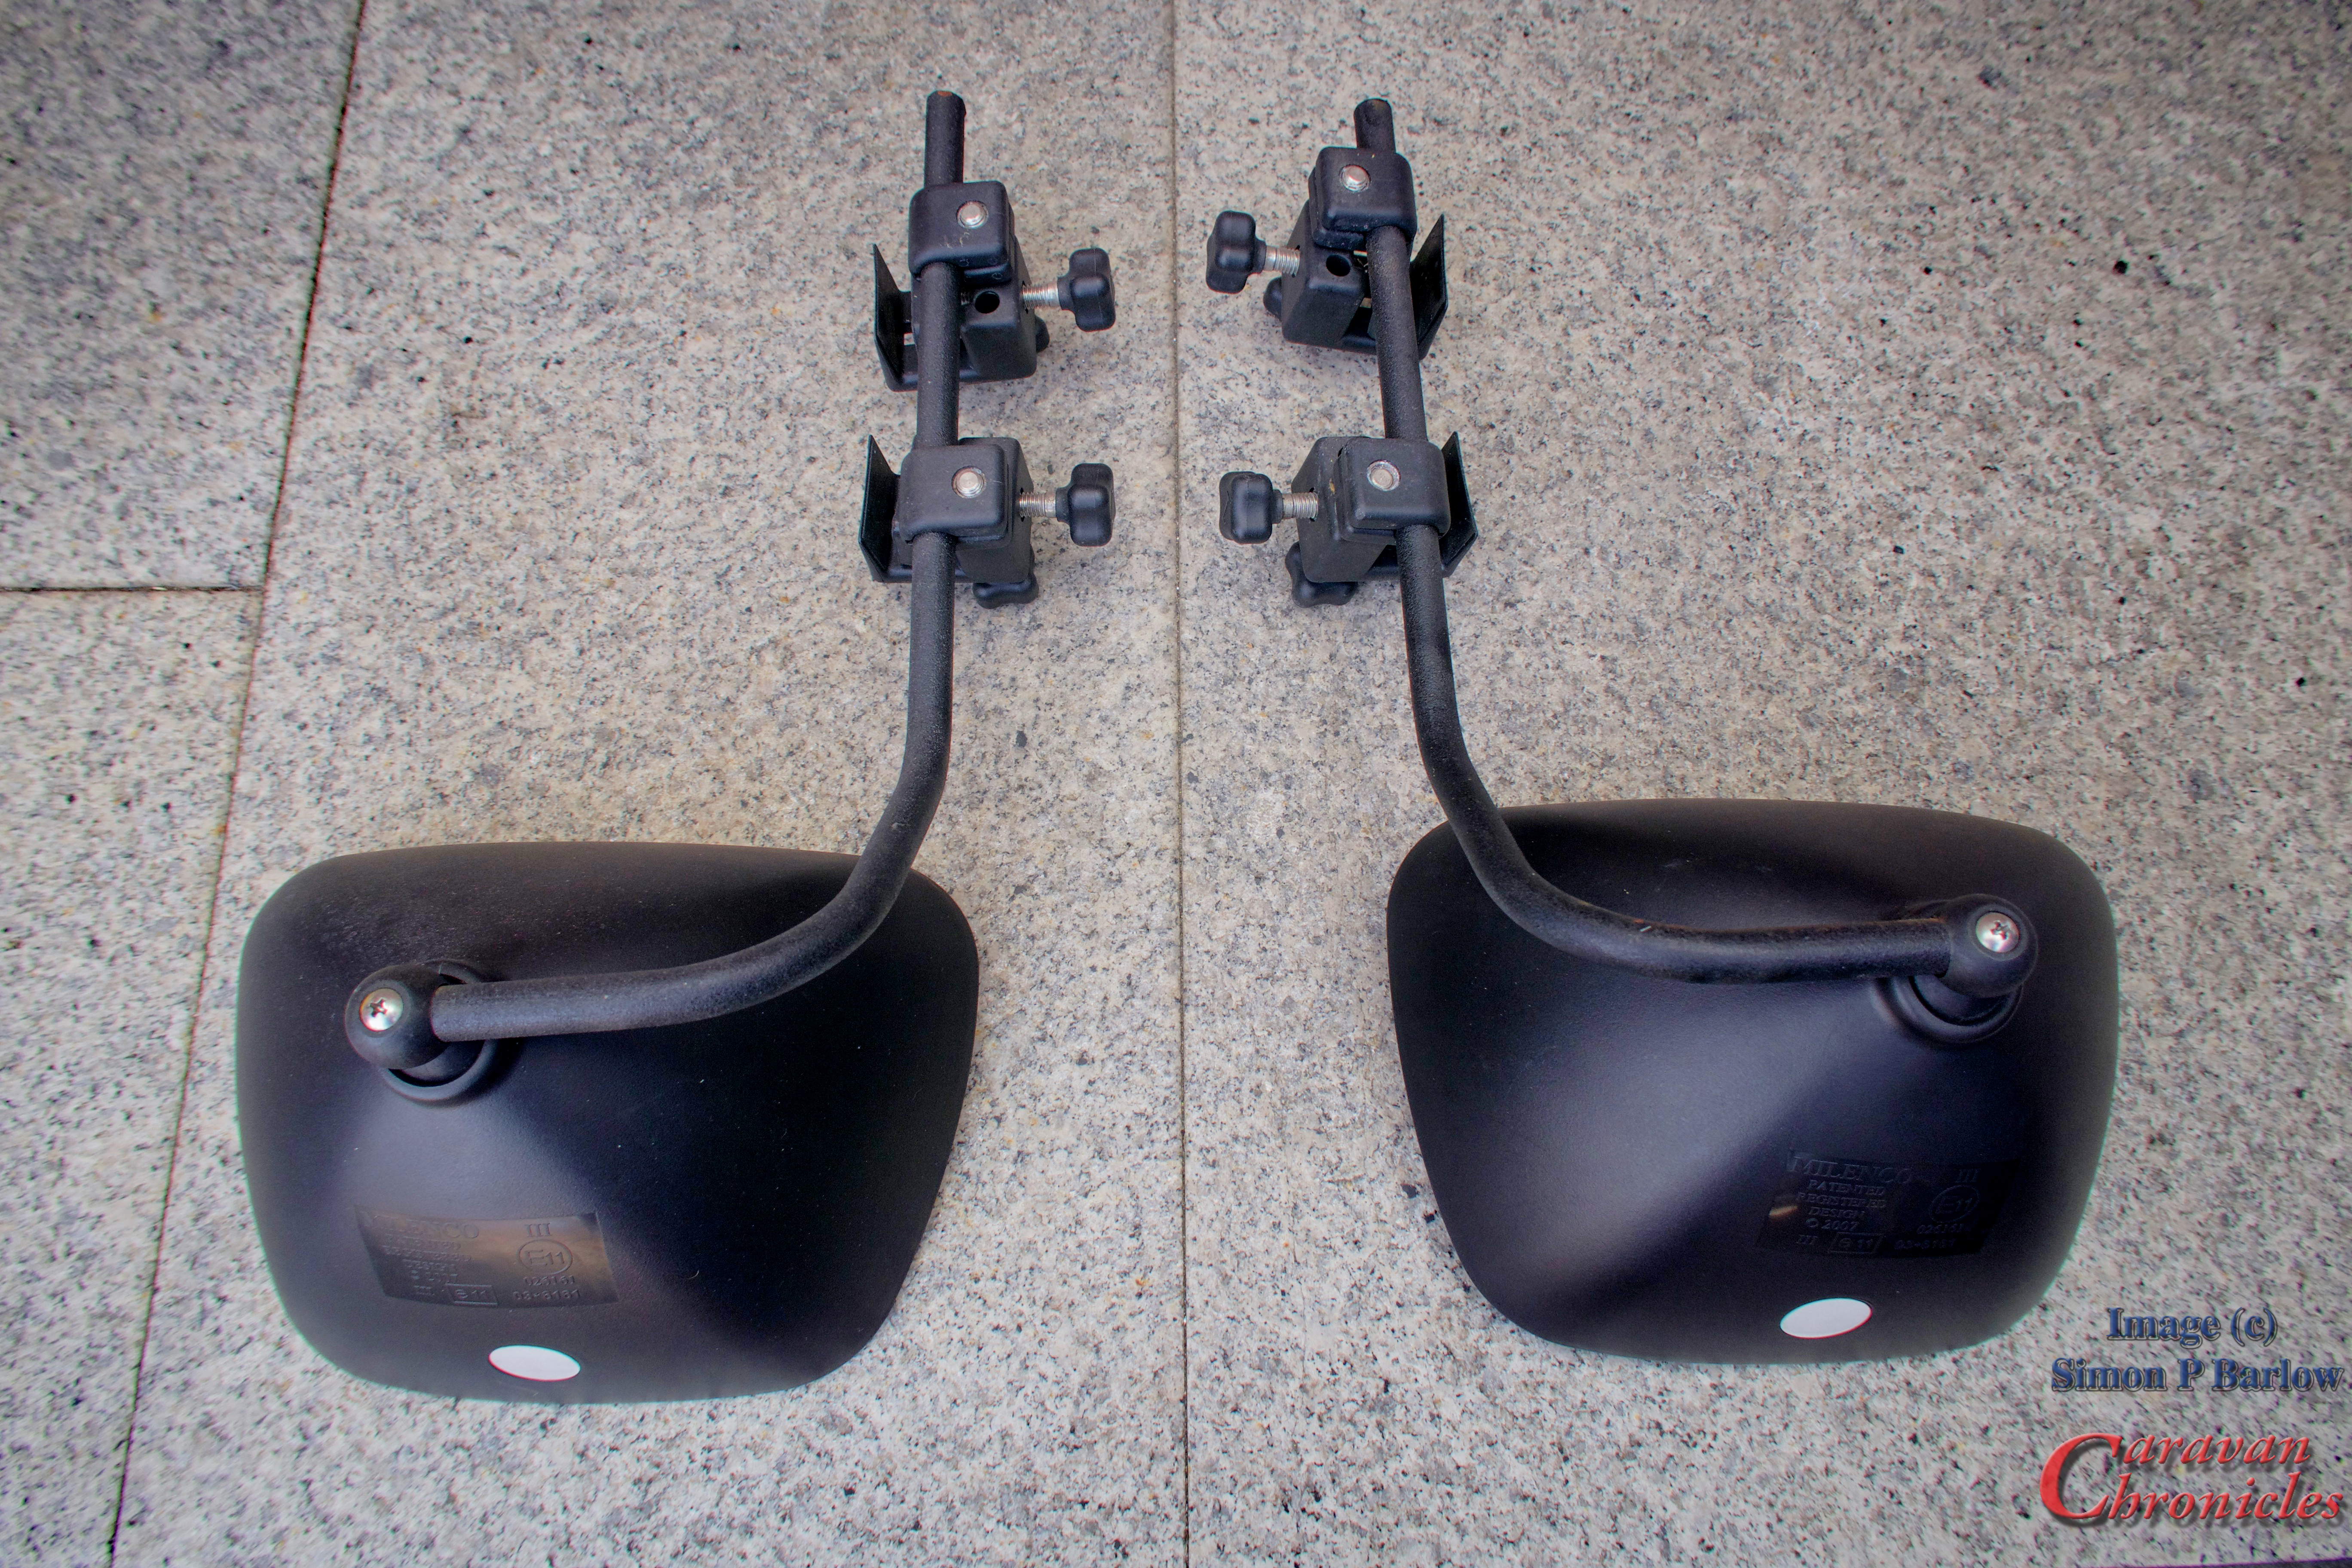
A couple of eagle-eyed mirror aficionados have spotted that we use Milenco Grand Aero 3 towing mirrors… but they also spotted that there was something different about the mounts. OK I’ll have to admit you are an eagle eyed bunch!
On the Amarok, the mirrors are quite big and if I get them adjusted about right I can just see down both sides of the caravan… we’re not 8 foot wide. However, driving without mirrors is more likely to attract attention and it’s easier and safer just to fit a pair. I first went for a brand that I’d used on the Land Rover Freelander, however the Amarok’s mirrors are quite deep and it wasn’t till I tried them that I realised how much of an issue that was….
The other issue I had… I didn’t particularly like the fitting….. it was about on the limits of extension and about 25% of the mirror was obscured by the Amarok’s door mirror… just at the point the would allow you to see the wheels of the caravan. Not ideal.
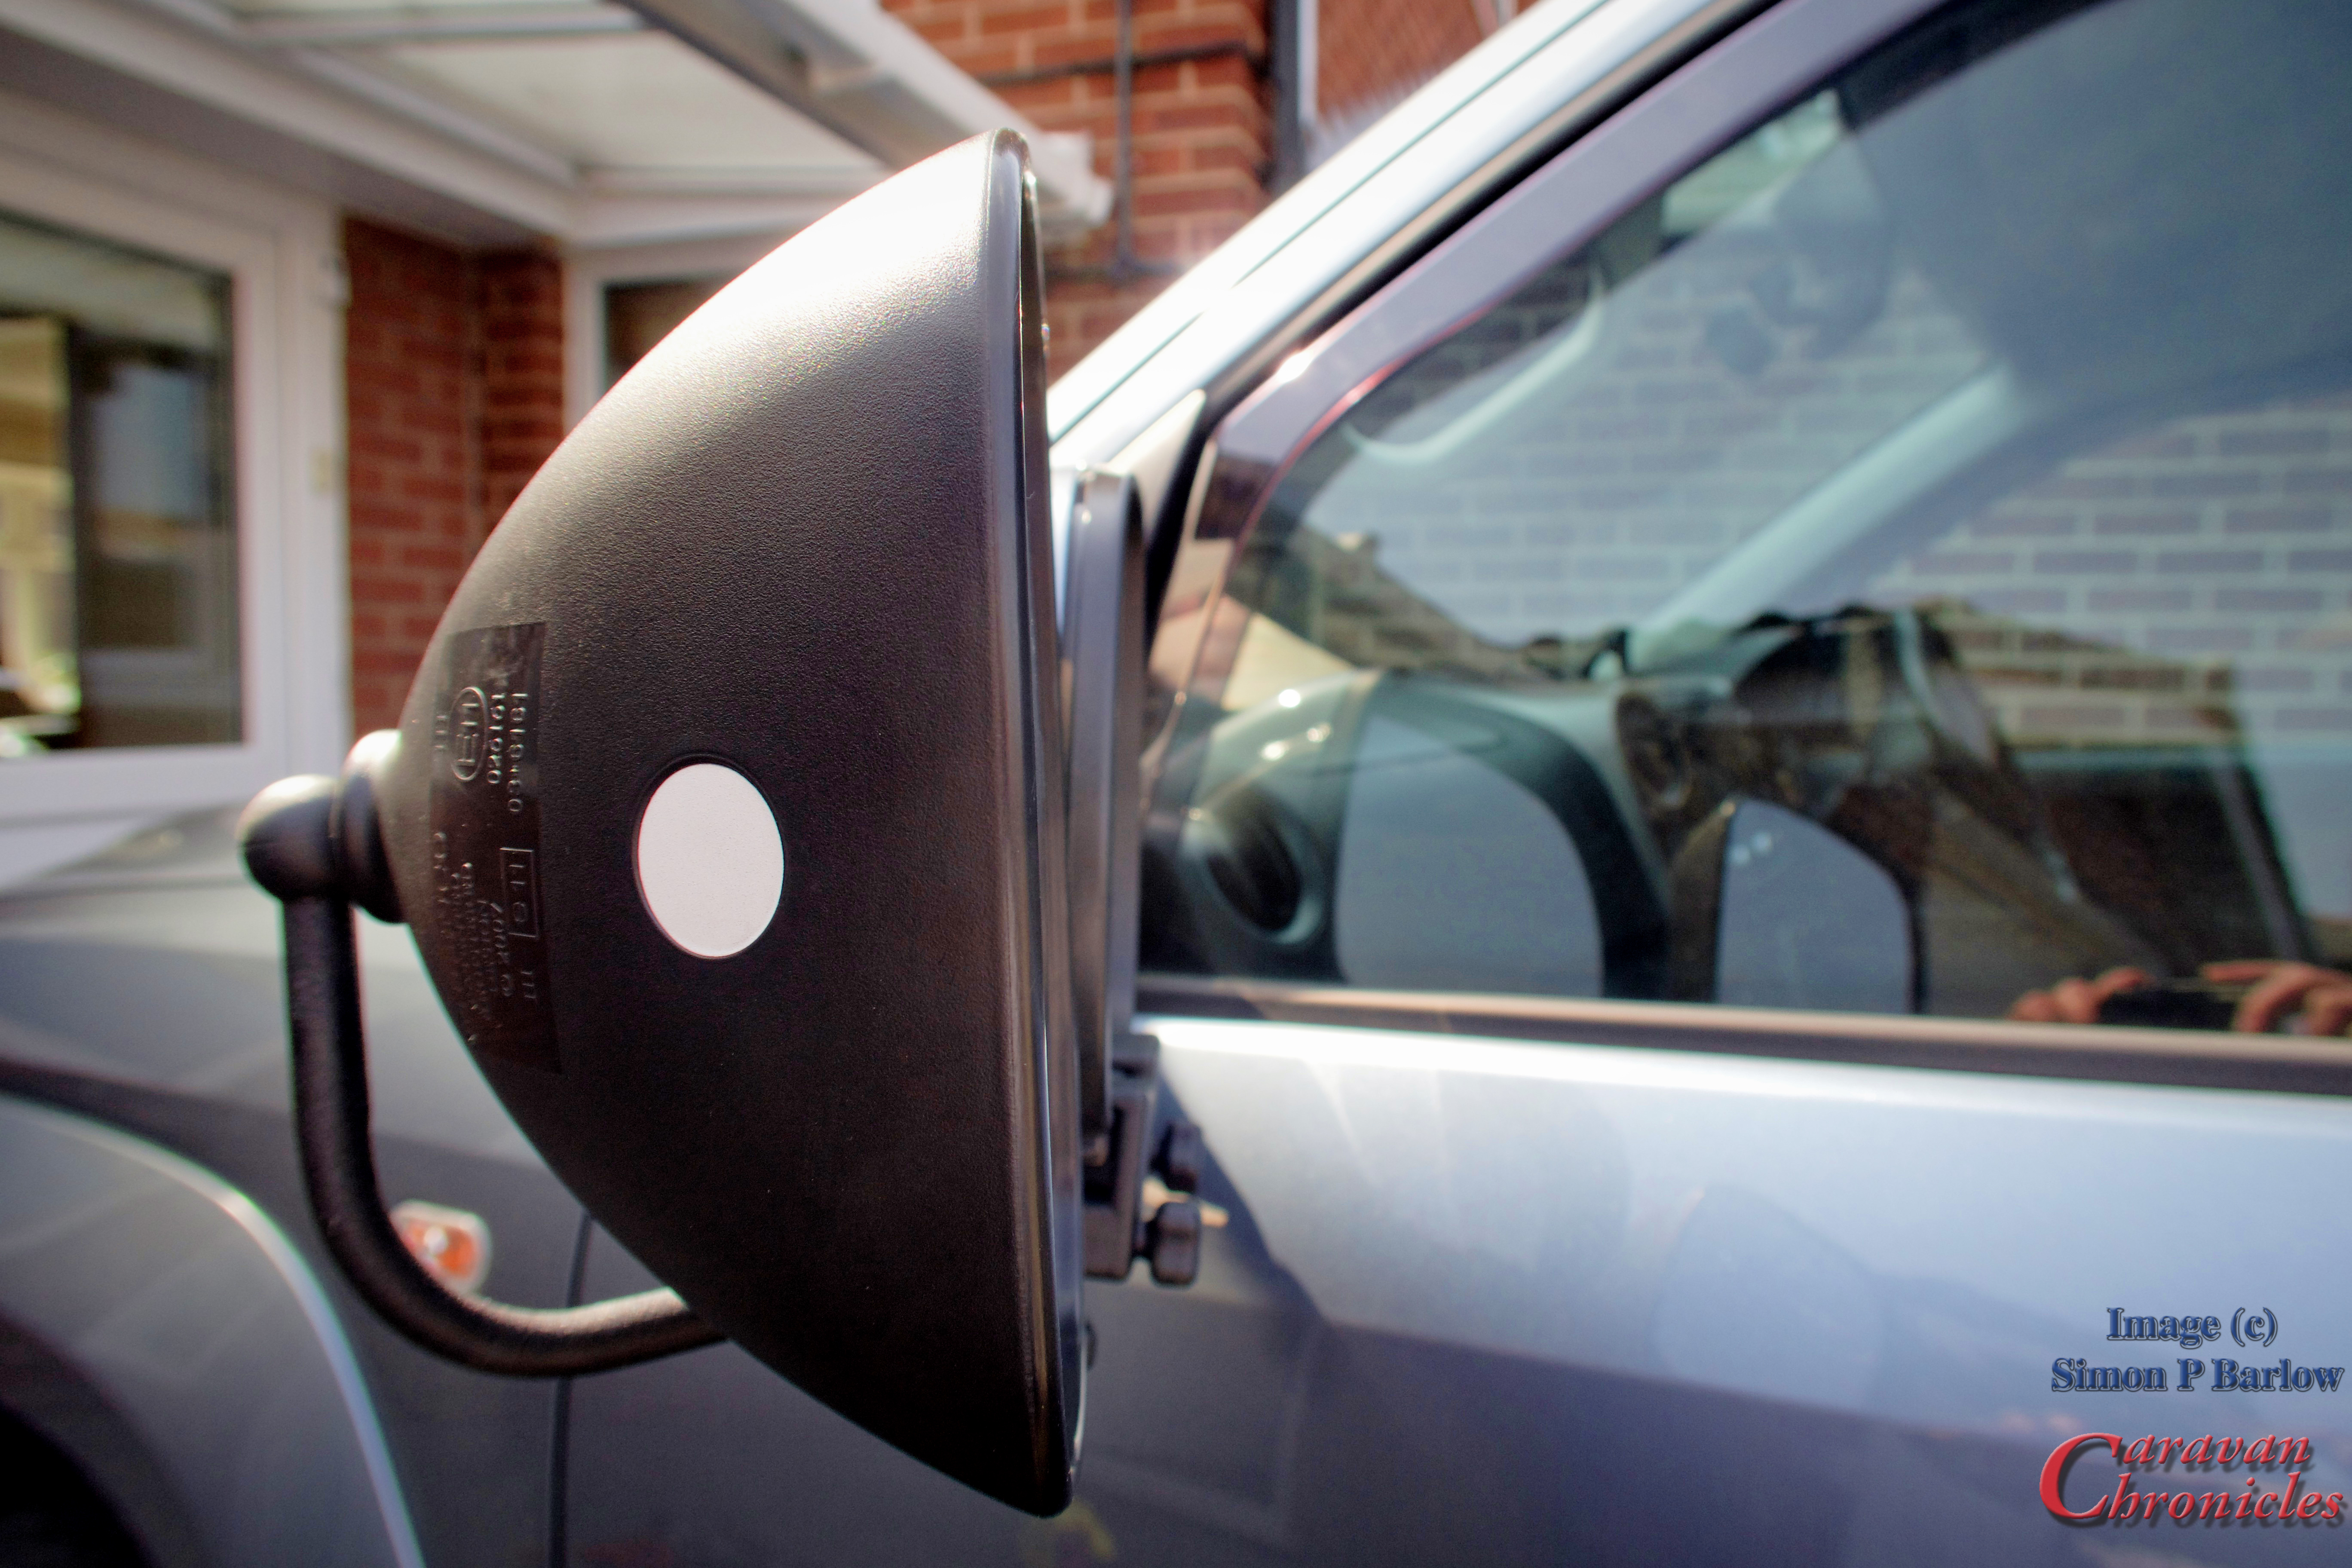
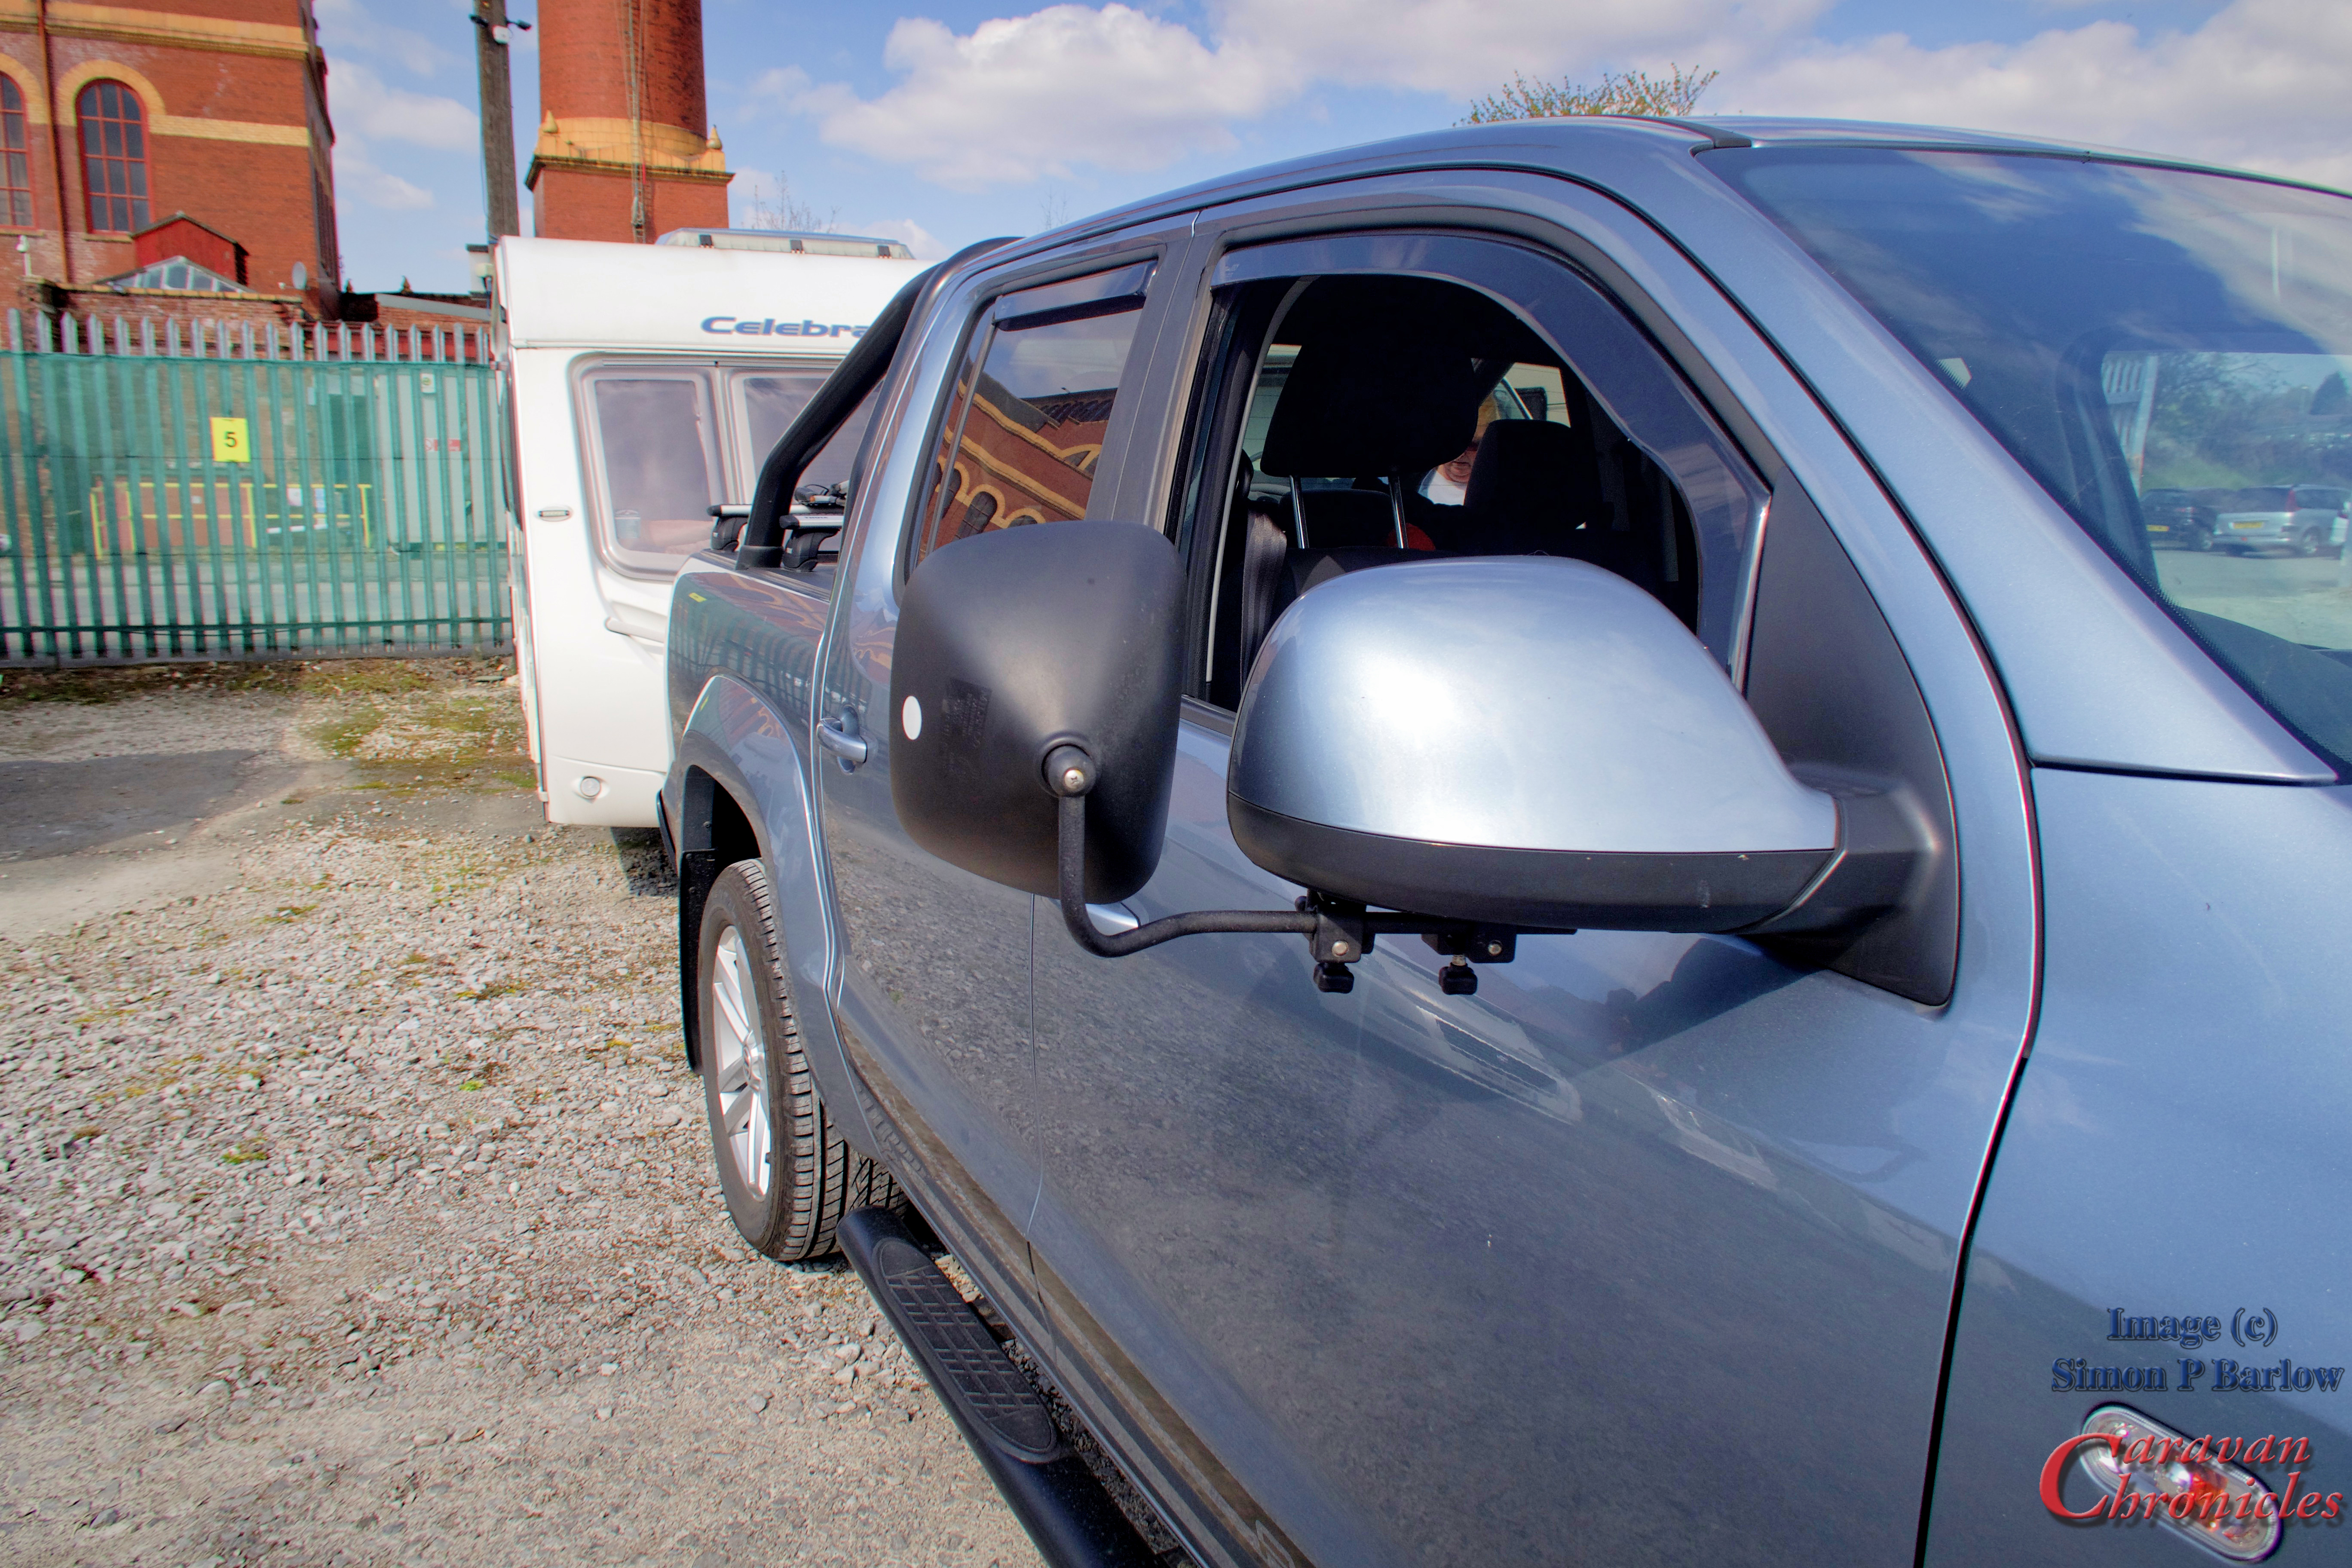
So I looked round for a mirror that would move the face of the mirror rearwards in about the same plane as the normal Amarok mirror. The added depth of the Milenco Grand Aero looked as though it would do the job perfectly.
Actually it was a little too much. As the mounting for the mirror was now on the door mirror plane, not as the previous mirror the back of the mirror housing it shifted the face of the Grand Aero too far rearwards. I liked the vision the Grand Aero gave and the mounting.
To the Bat Cave…
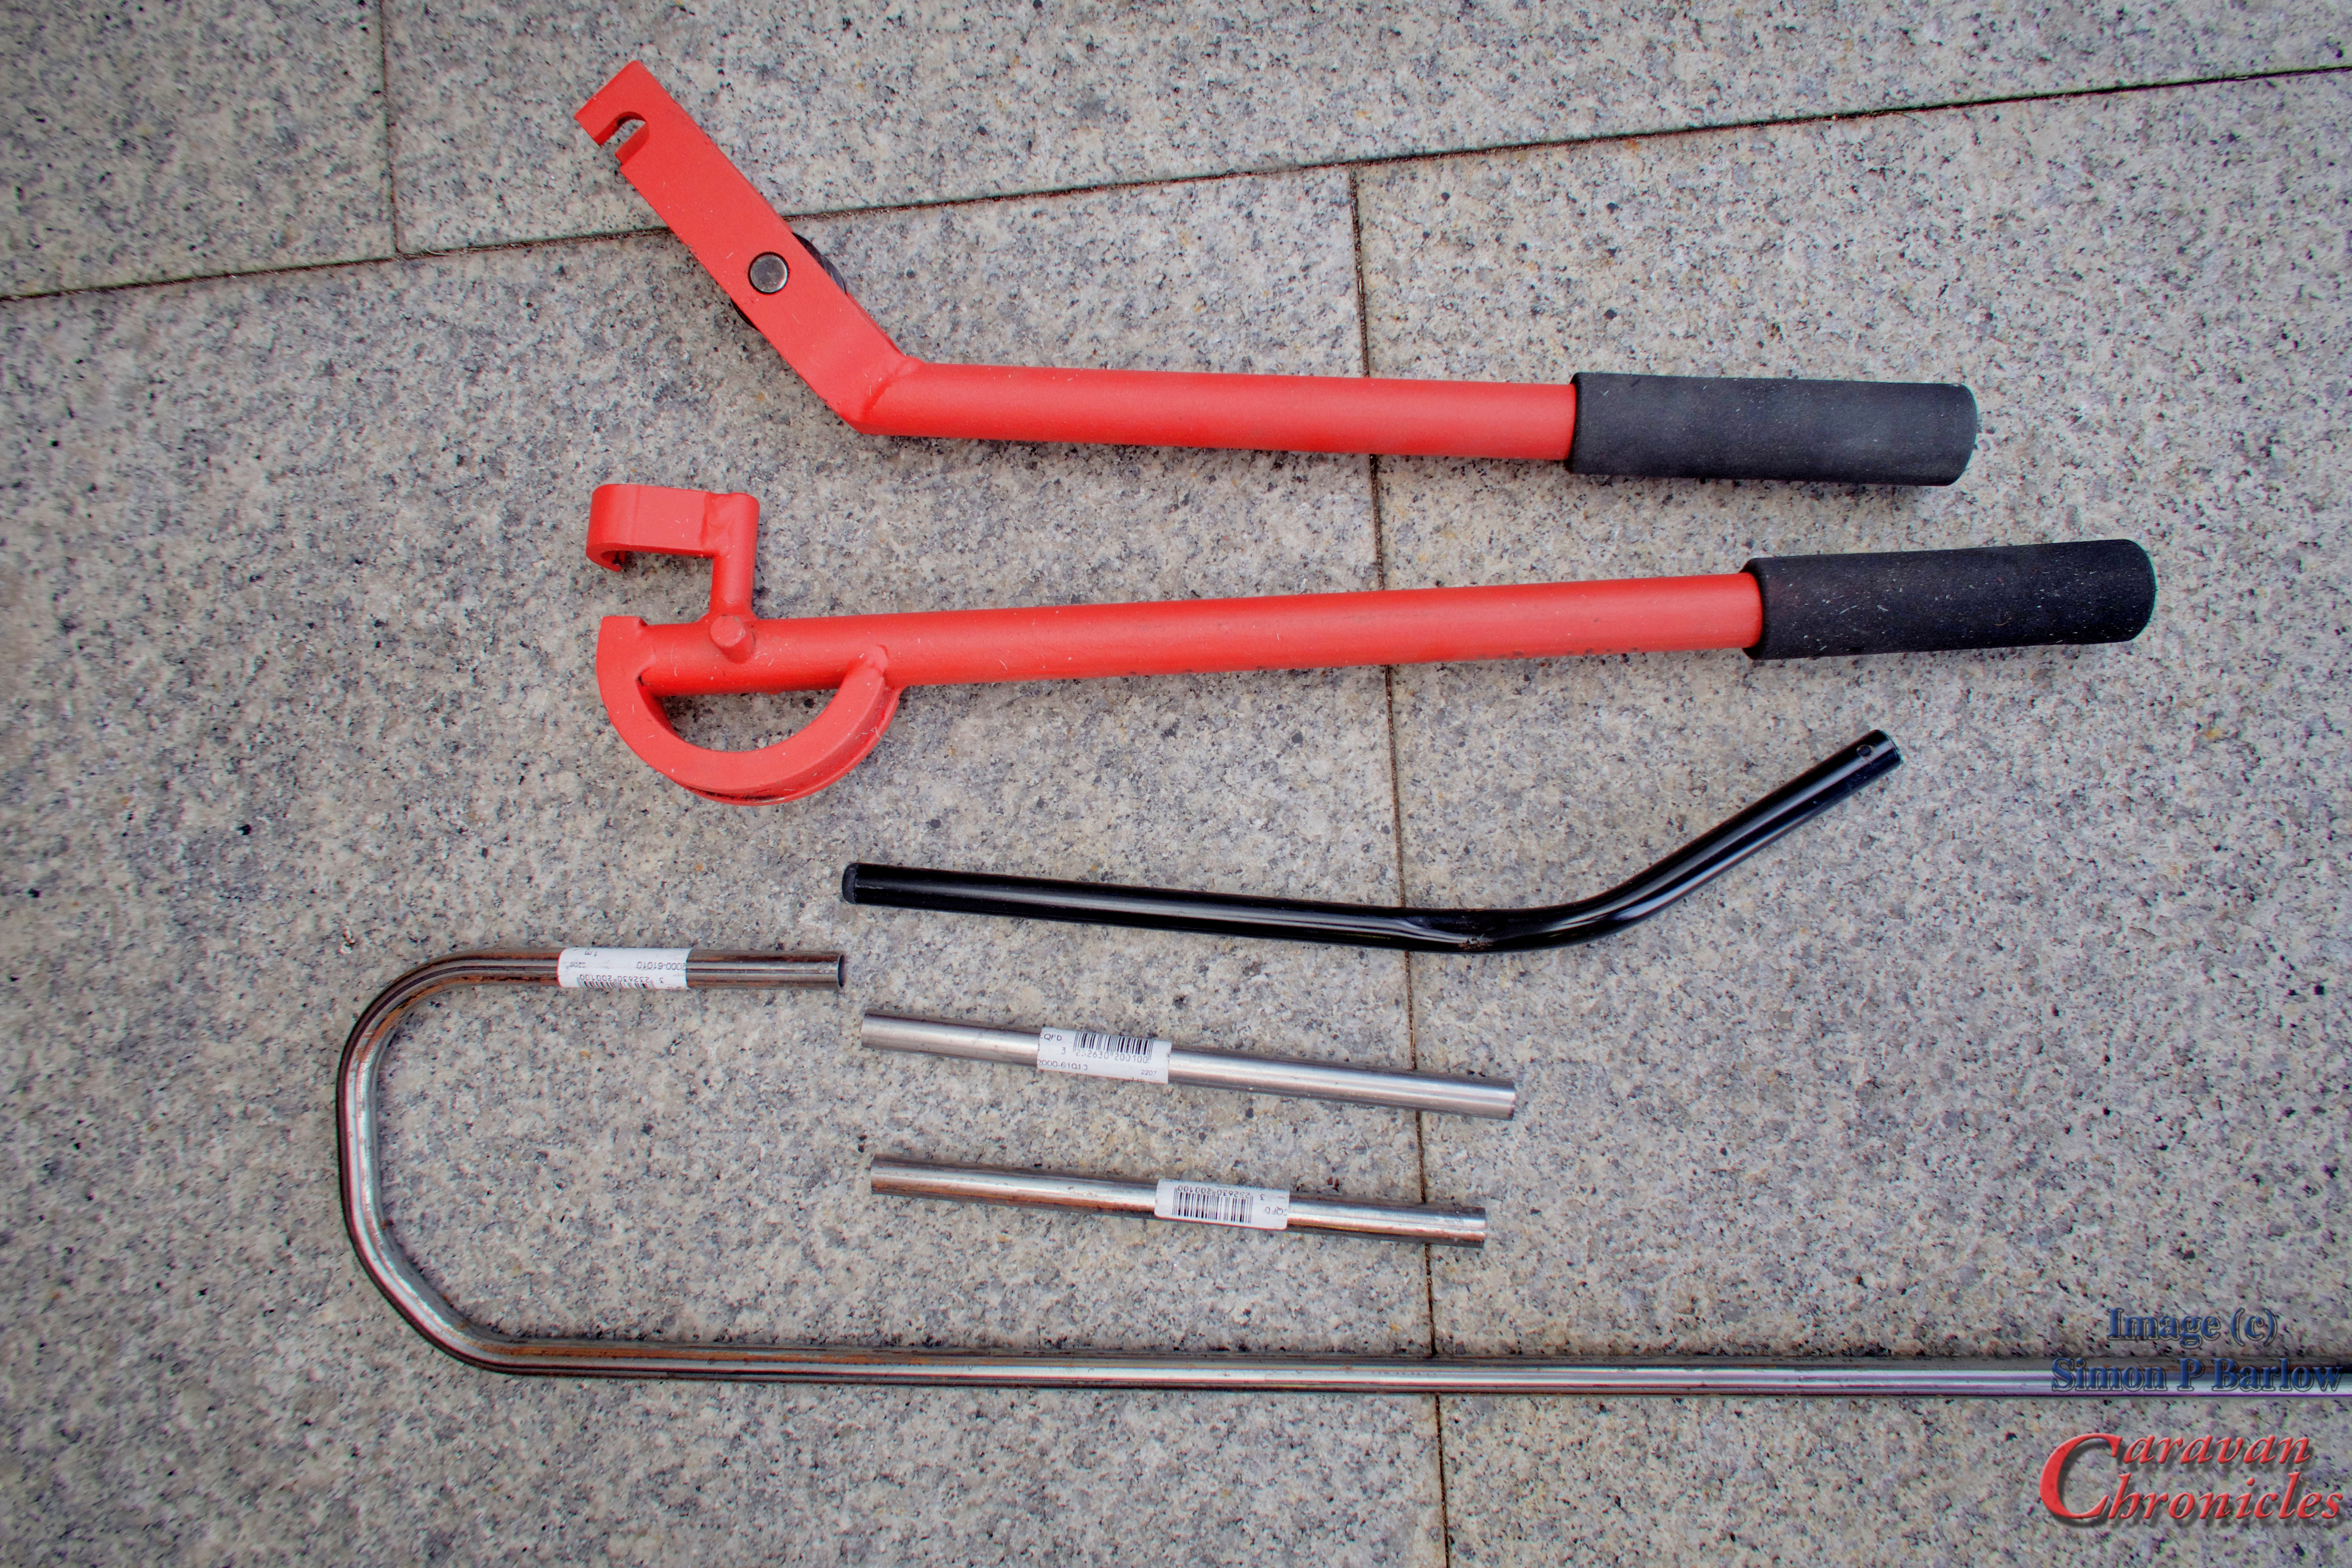
I just happened to have some lengths of 12mm steel tubing and a bending tool. Maybe I could solve the problem without searching round for other products.
I used a welding rod to hand bend a profile that seemed to put the mirror into the right position. I worked out I’d only need two bends to get the mirror in the right position.
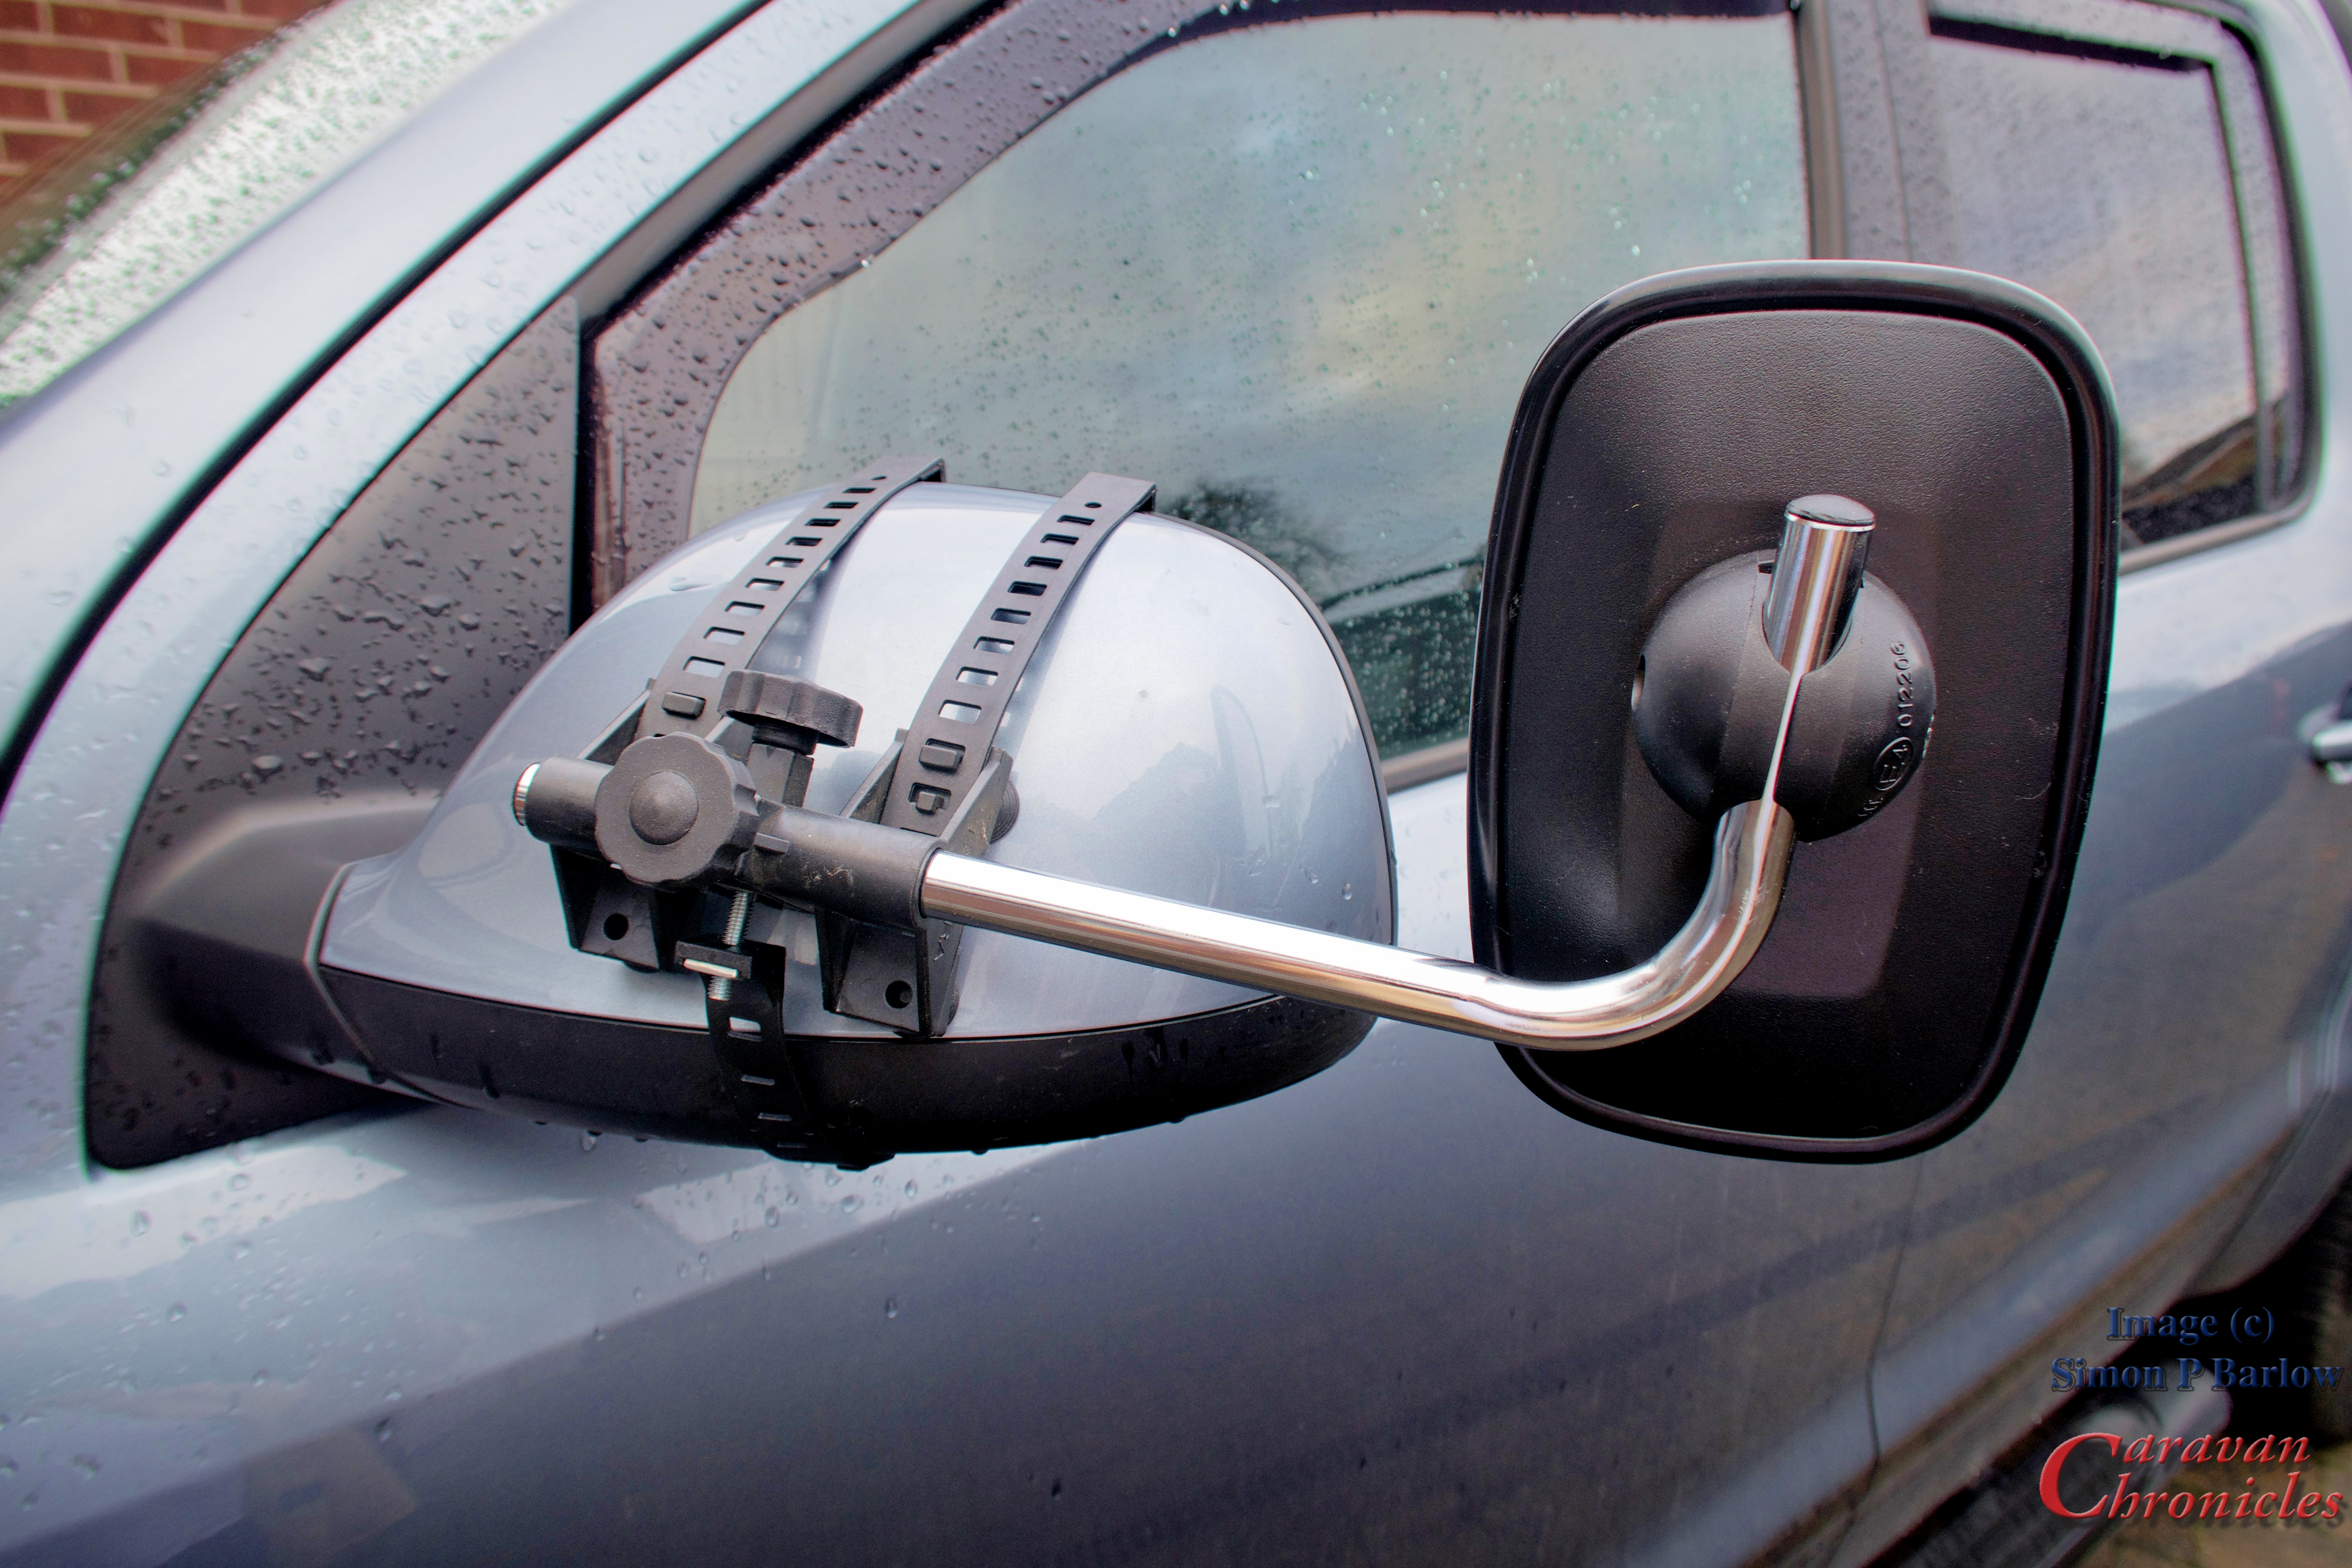
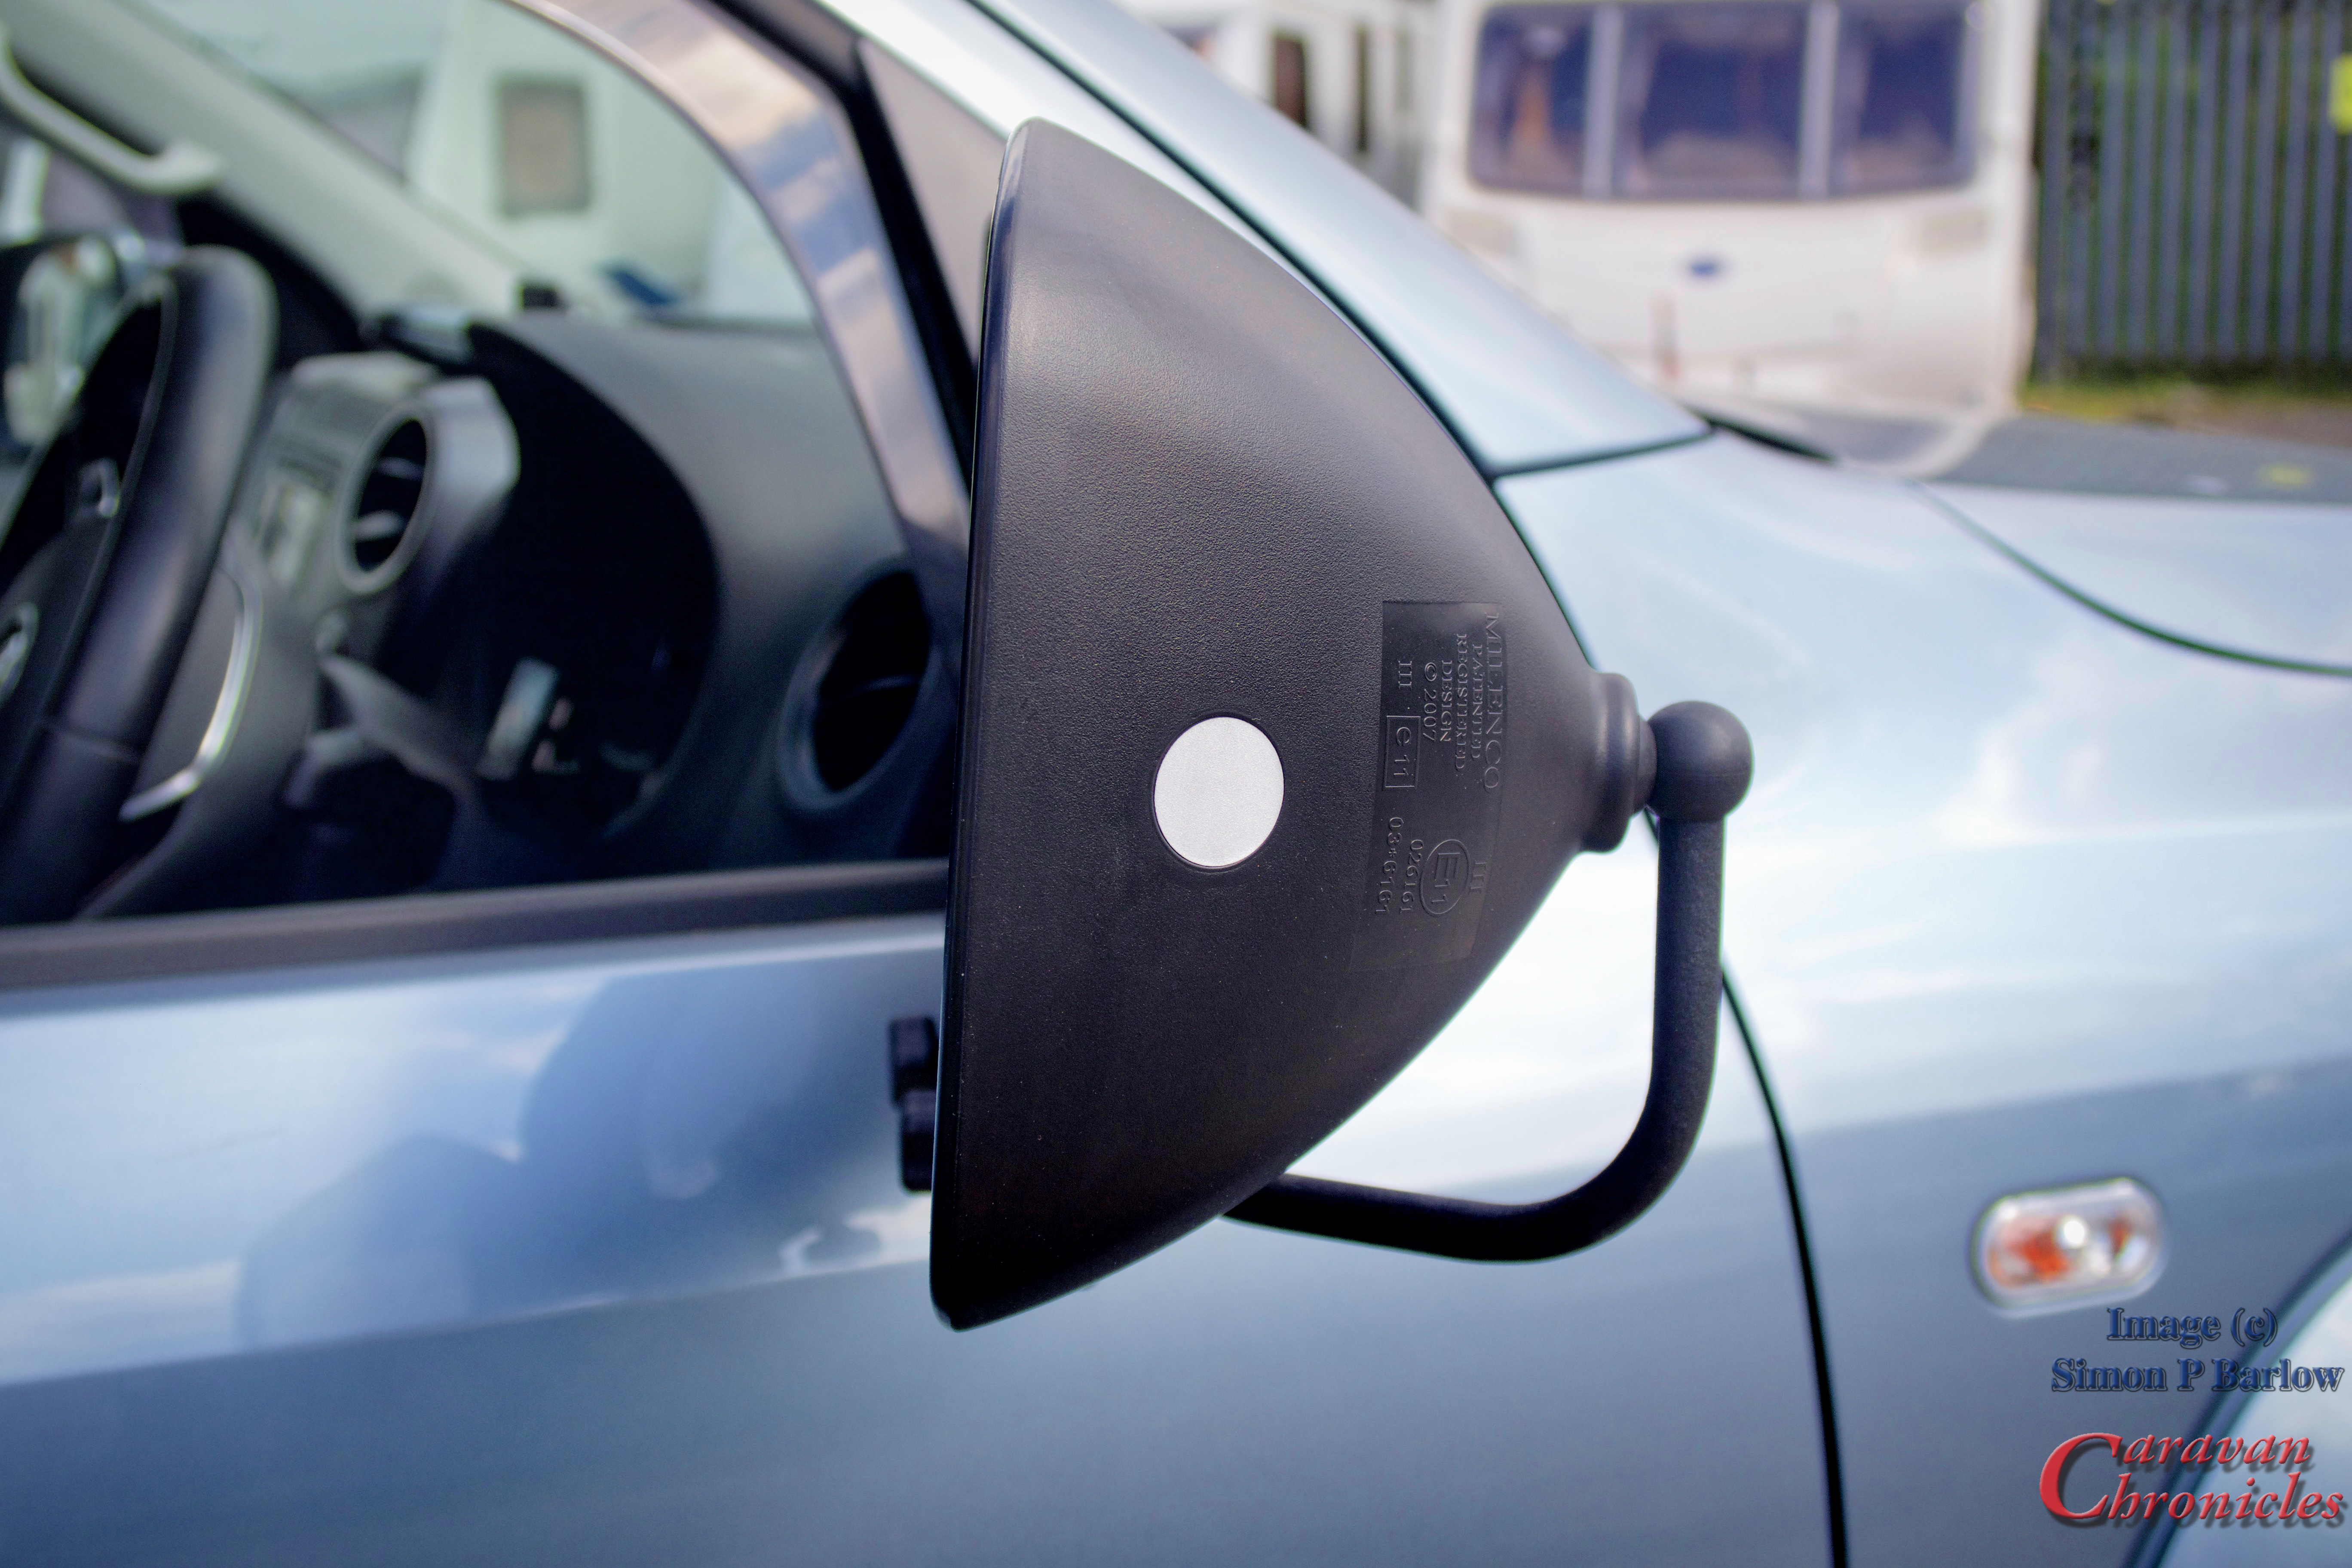
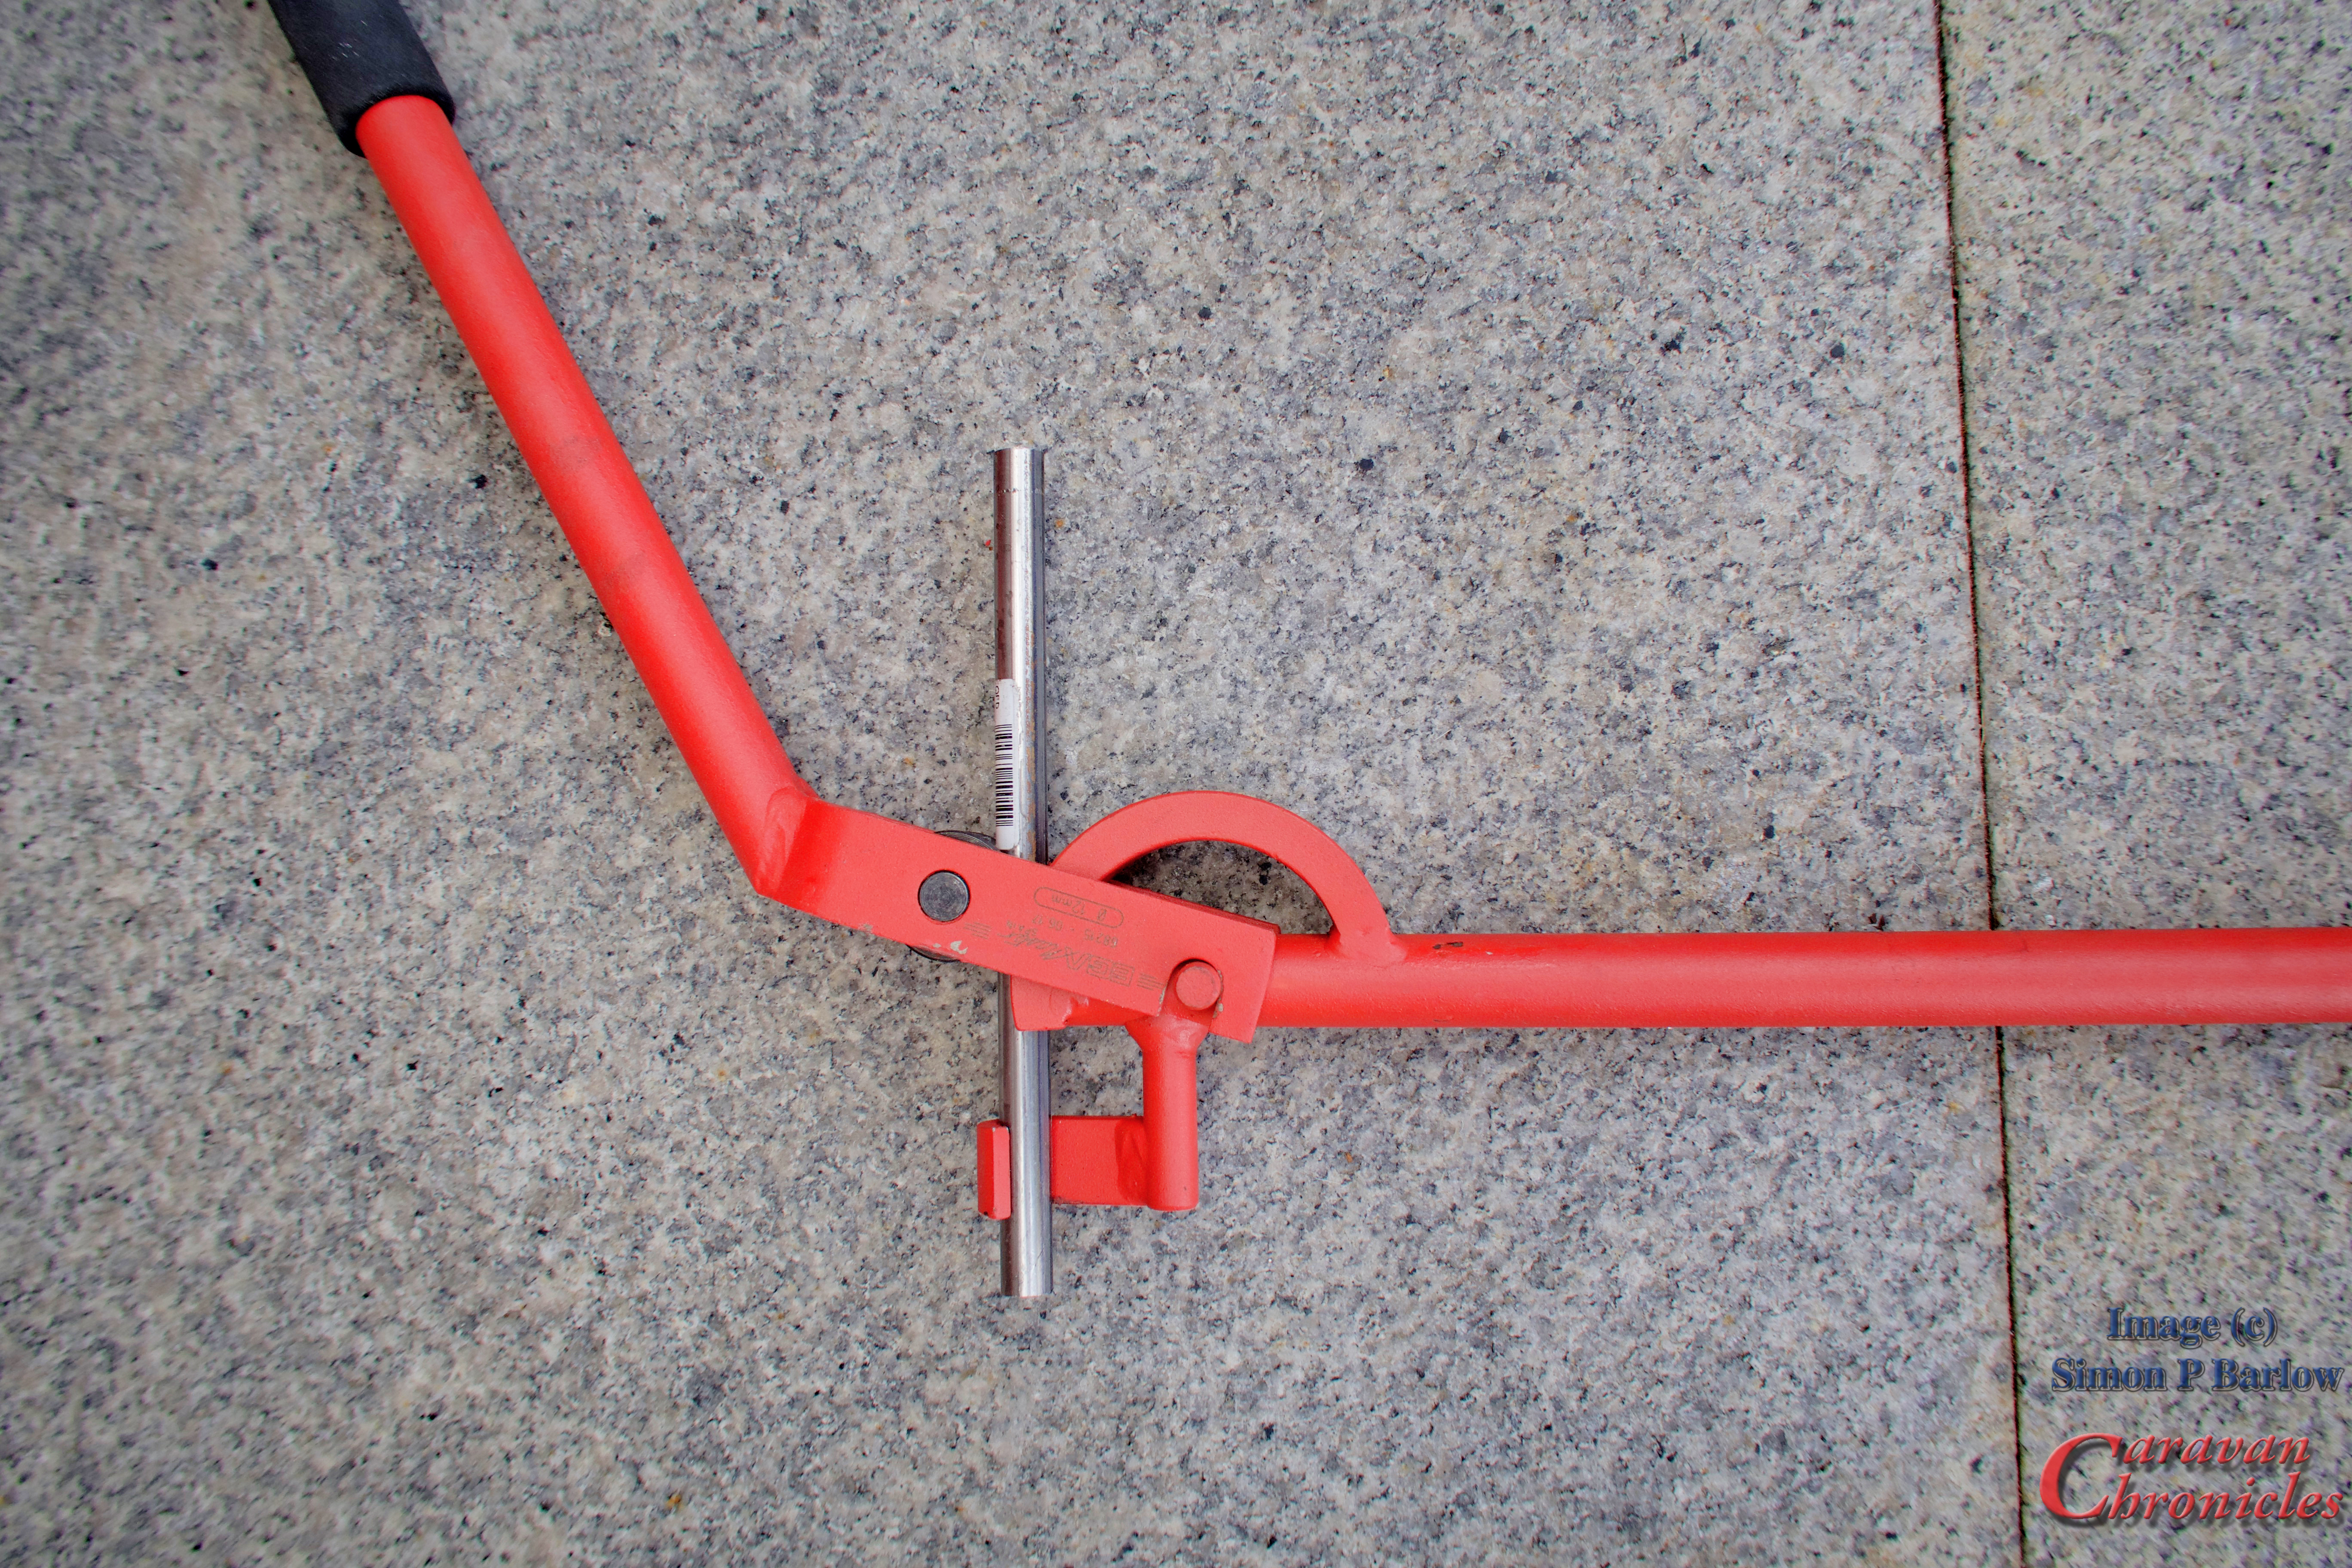
I installed the two mounting brackets on the door mirror in the final position I wanted them and slid a length of tube into them. Marking where I wanted the first bend to be and using an angle finder to approximate the angle that would move the mirror far enough forward so the face was in line with the door mirror face… this then gave me the point to start the bend upwards to get the mirror at the correct height.
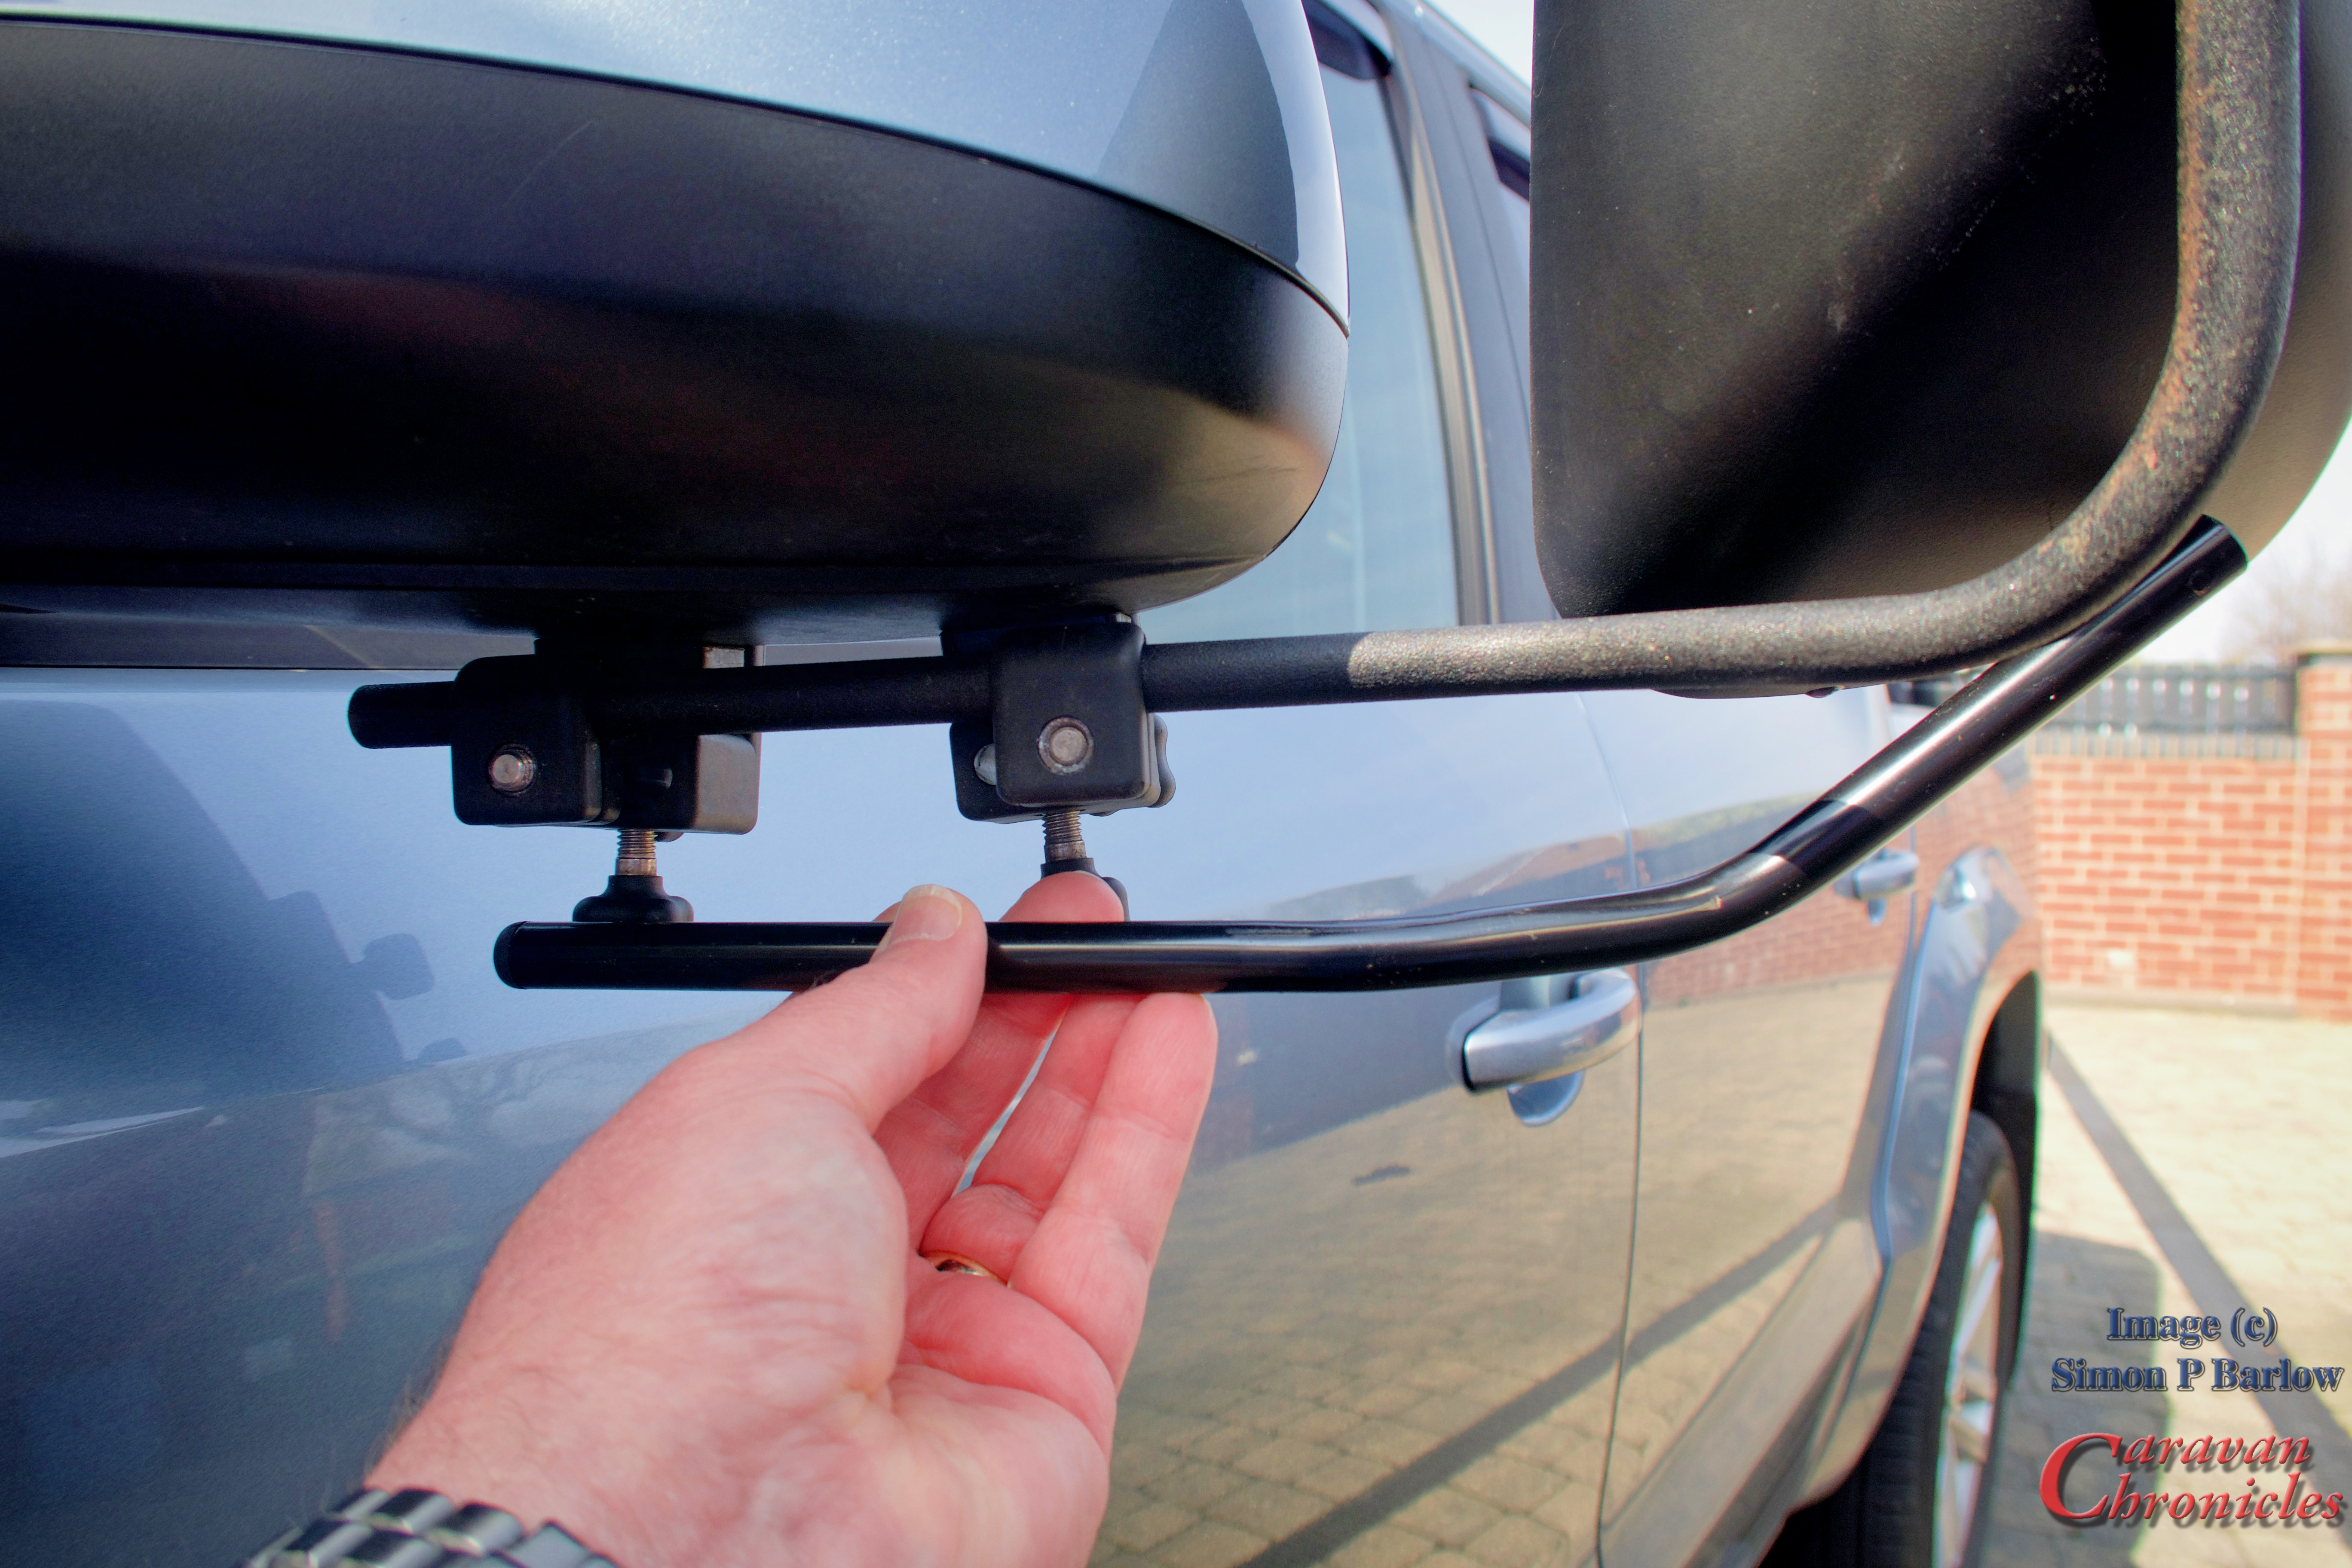
Ok before I get a lot of comments asking why installed the mounts on the lower edge of the mirror… two reasons…. if they do move about or squish down on a bit of grit any scratches won’t be seen in the painted area of the door mirrors and from the driving position they don’t obscure my view if I have to look past the top of the door mirrors. I’ve also noticed when its raining I don’t get nearly as much water running down the face of the door mirror. And another reason…. the bottom of the door mirror on the Amarok is not quite as curved and the clamps fitted more securely. I’ve got everything dialed in now to the point where I don’t actually need to adjust the mirrors each time I fit them.
At this point I hadn’t cut the tube to length on the vertical section so I had the chance to adjust the height of the Grand Aero. After a bit of trial and error that involved a clamp and running round to the driver’s seat… and back again to adjust I got what I thought was the right height for me.
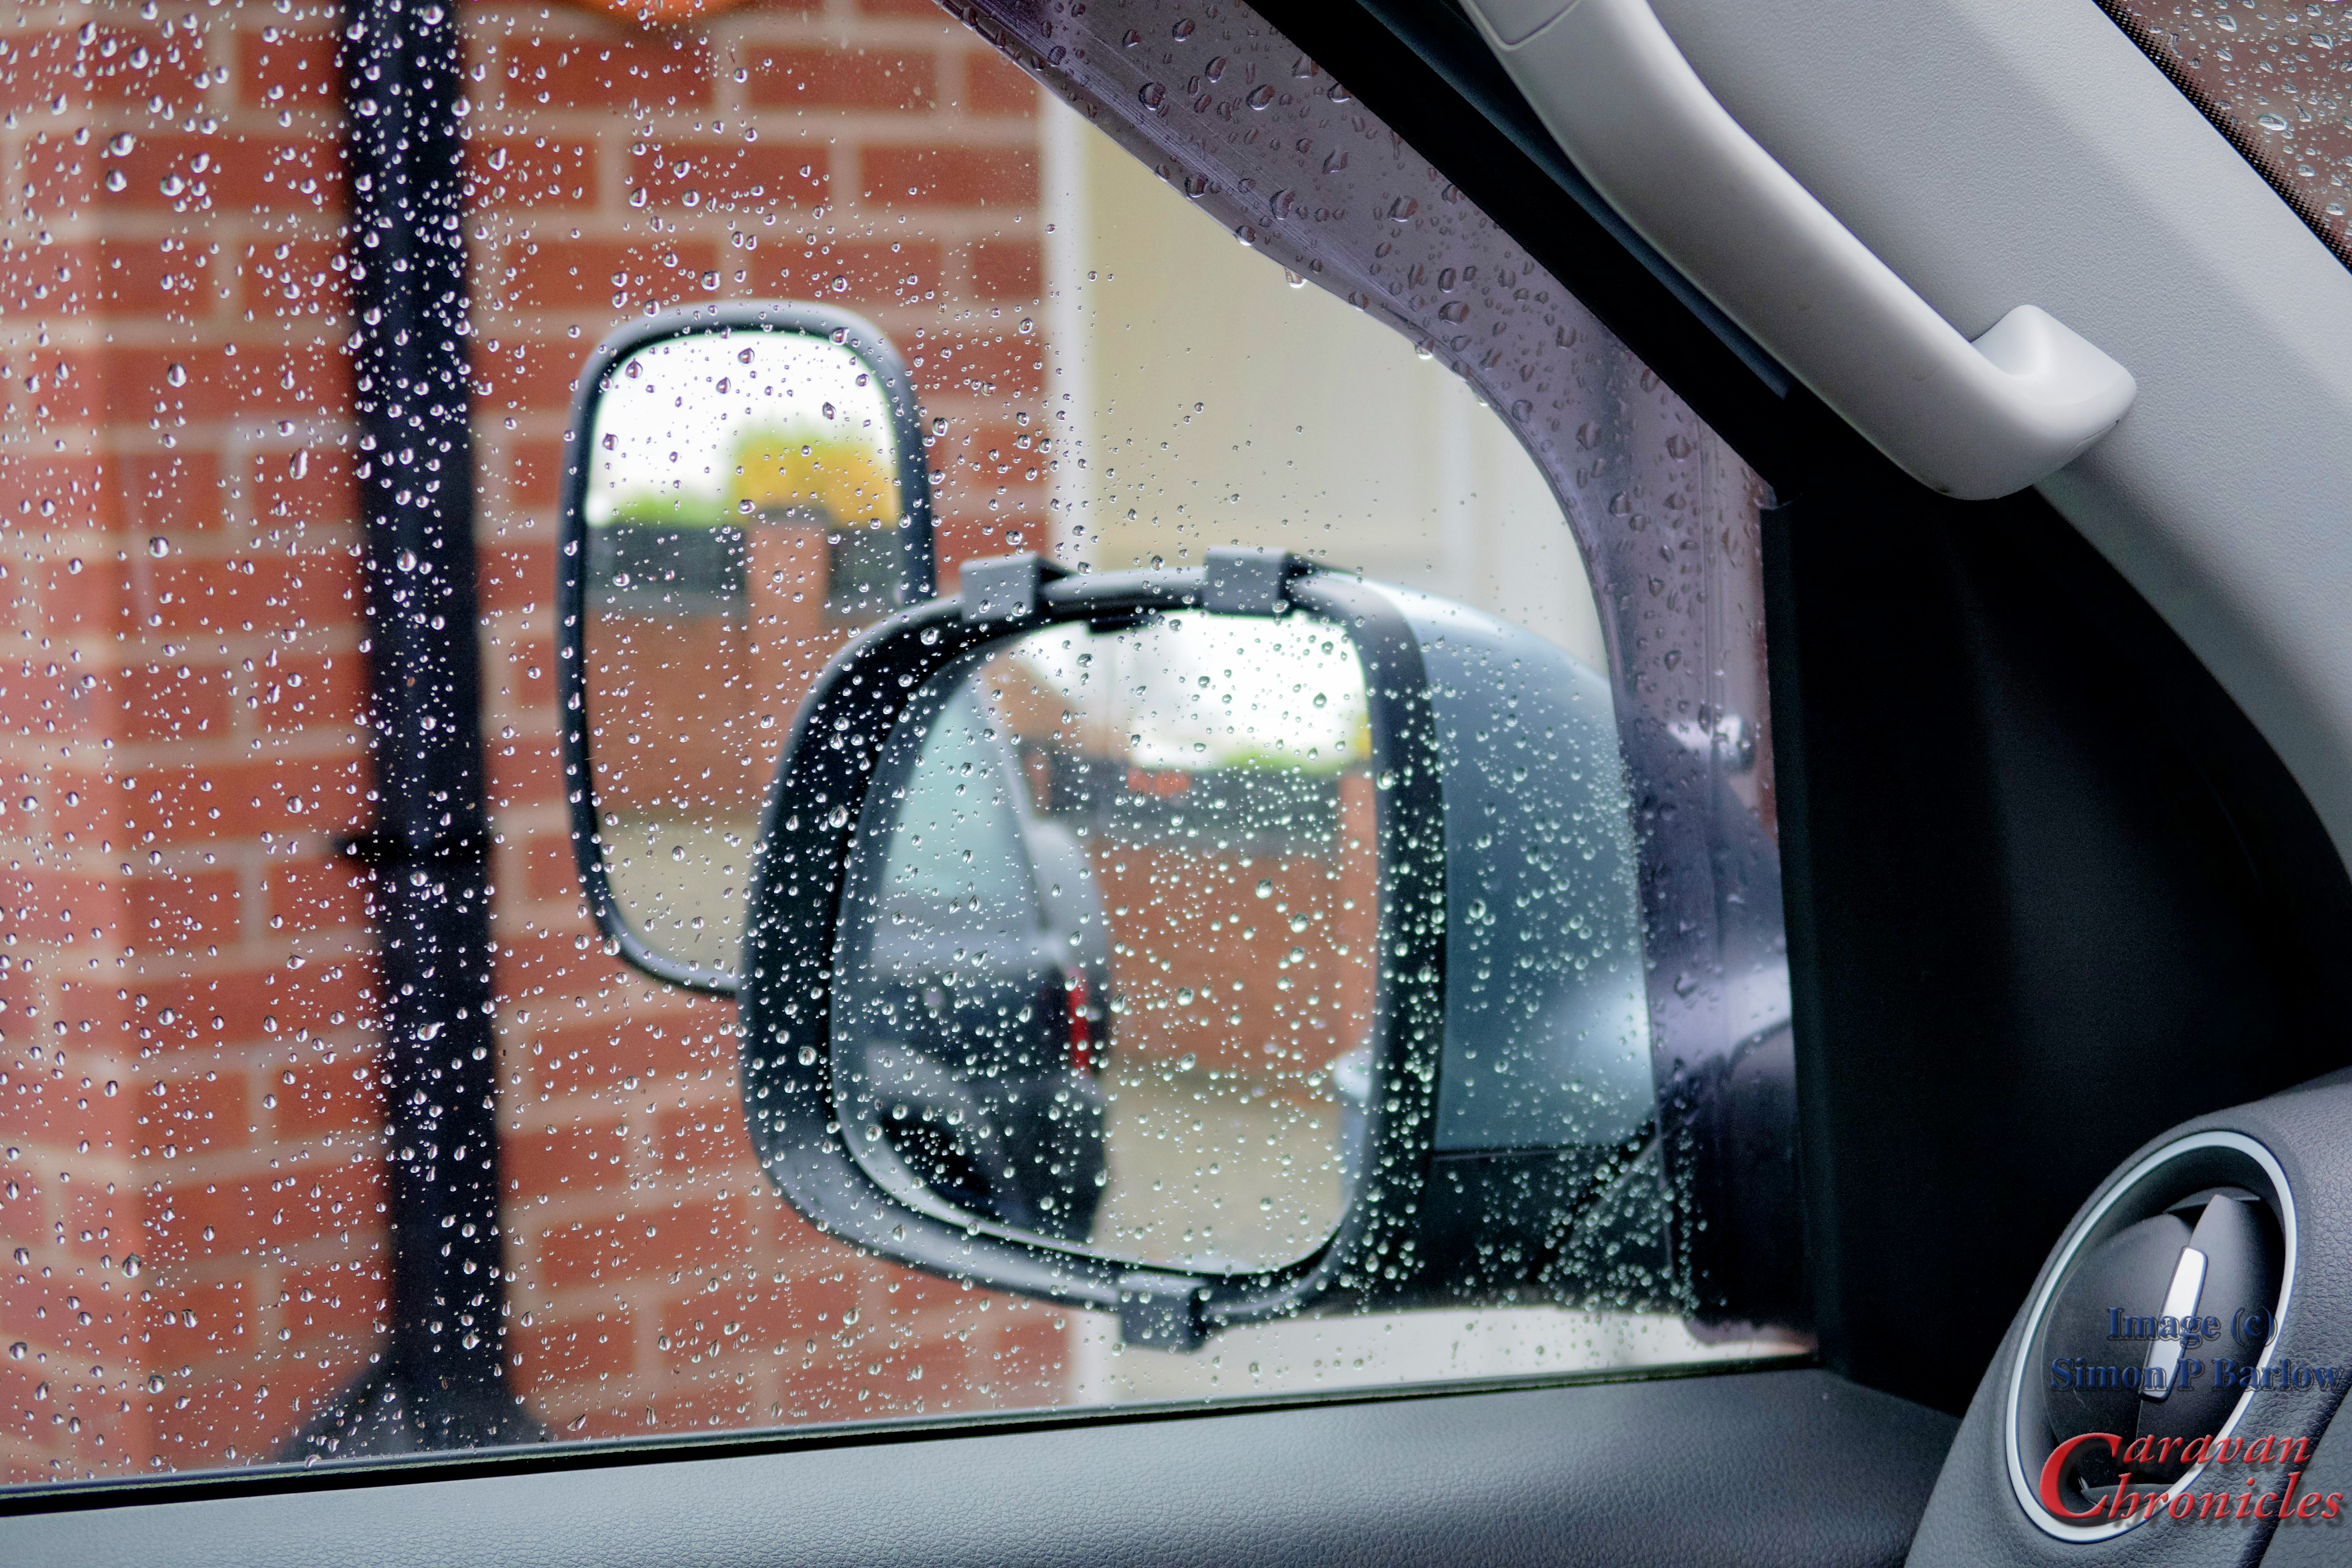
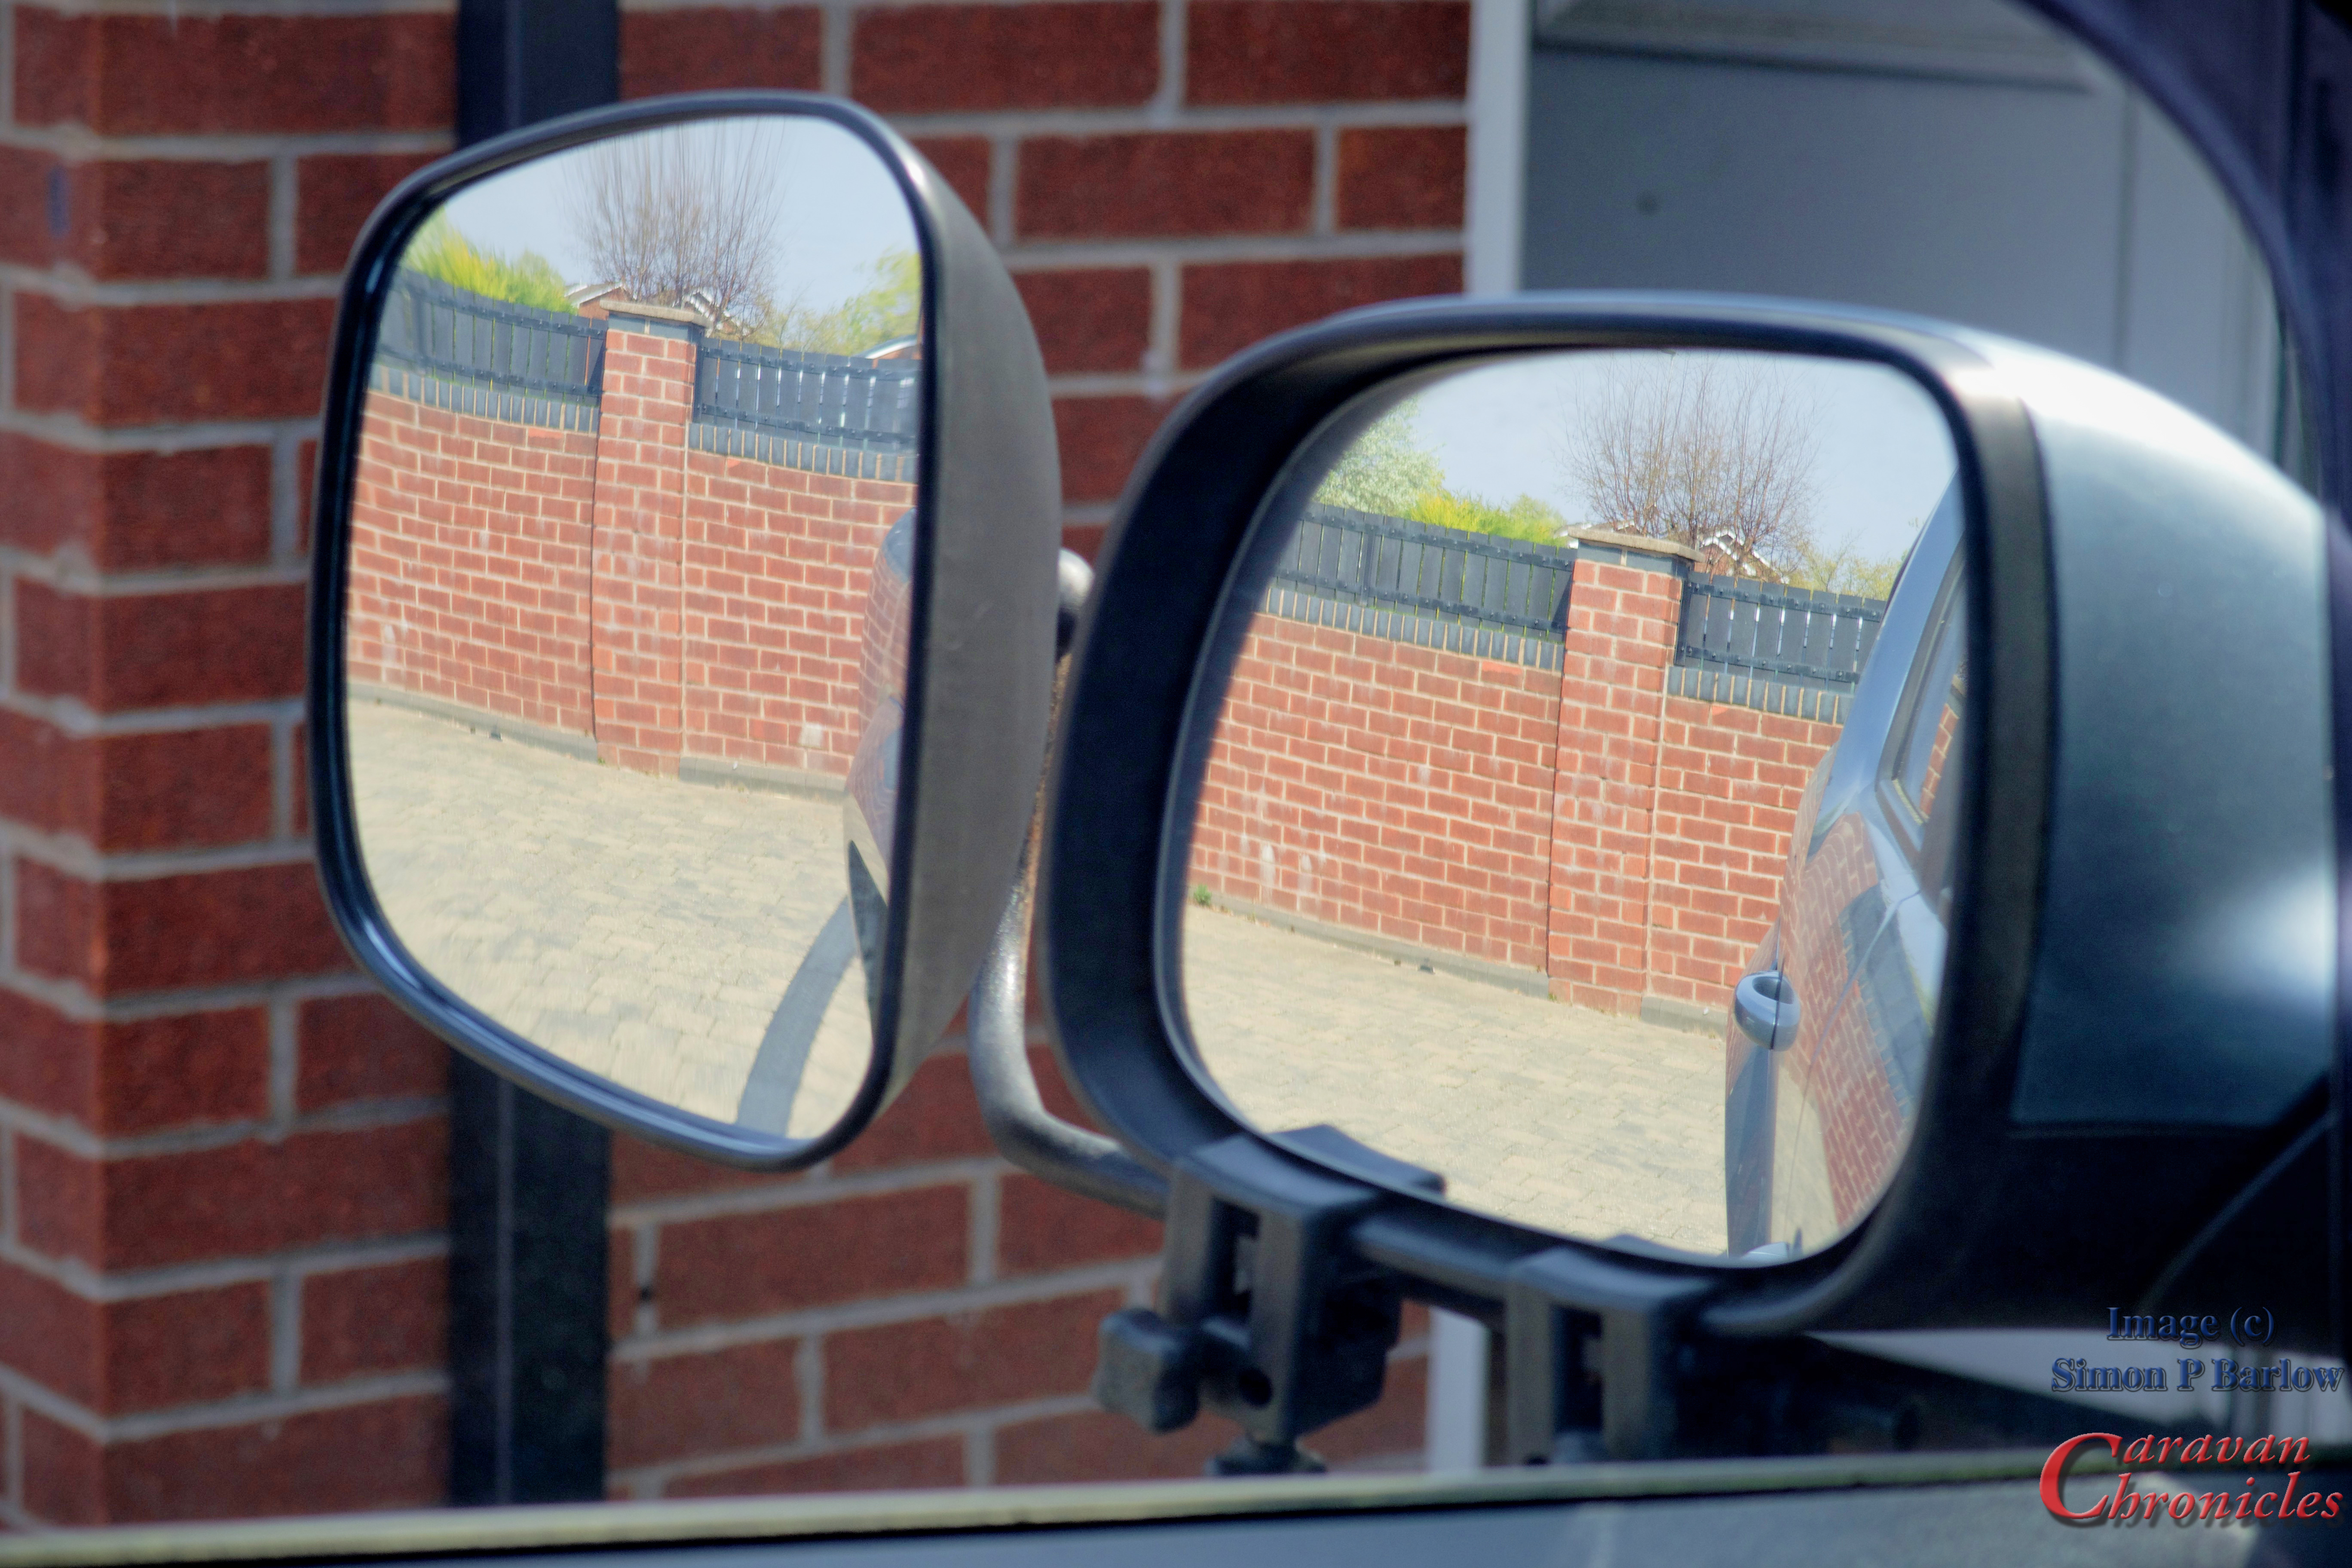
As you can see in the photo above, the reflective face of both mirrors is in near perfect alignment… and for me that makes it easy when driving as I don’t have any perceived shift in focus. The picture below is from the drivers position… I put the camera as close as I could to where my eyes are and I get a great view rearwards. Note that installing the mounting clamps on the bottom edge of the door mirror does not block the forward side view over the door mirror.
The driver’s side was bent the same… just opposite ‘handed’ and the length worked out right for the height too.
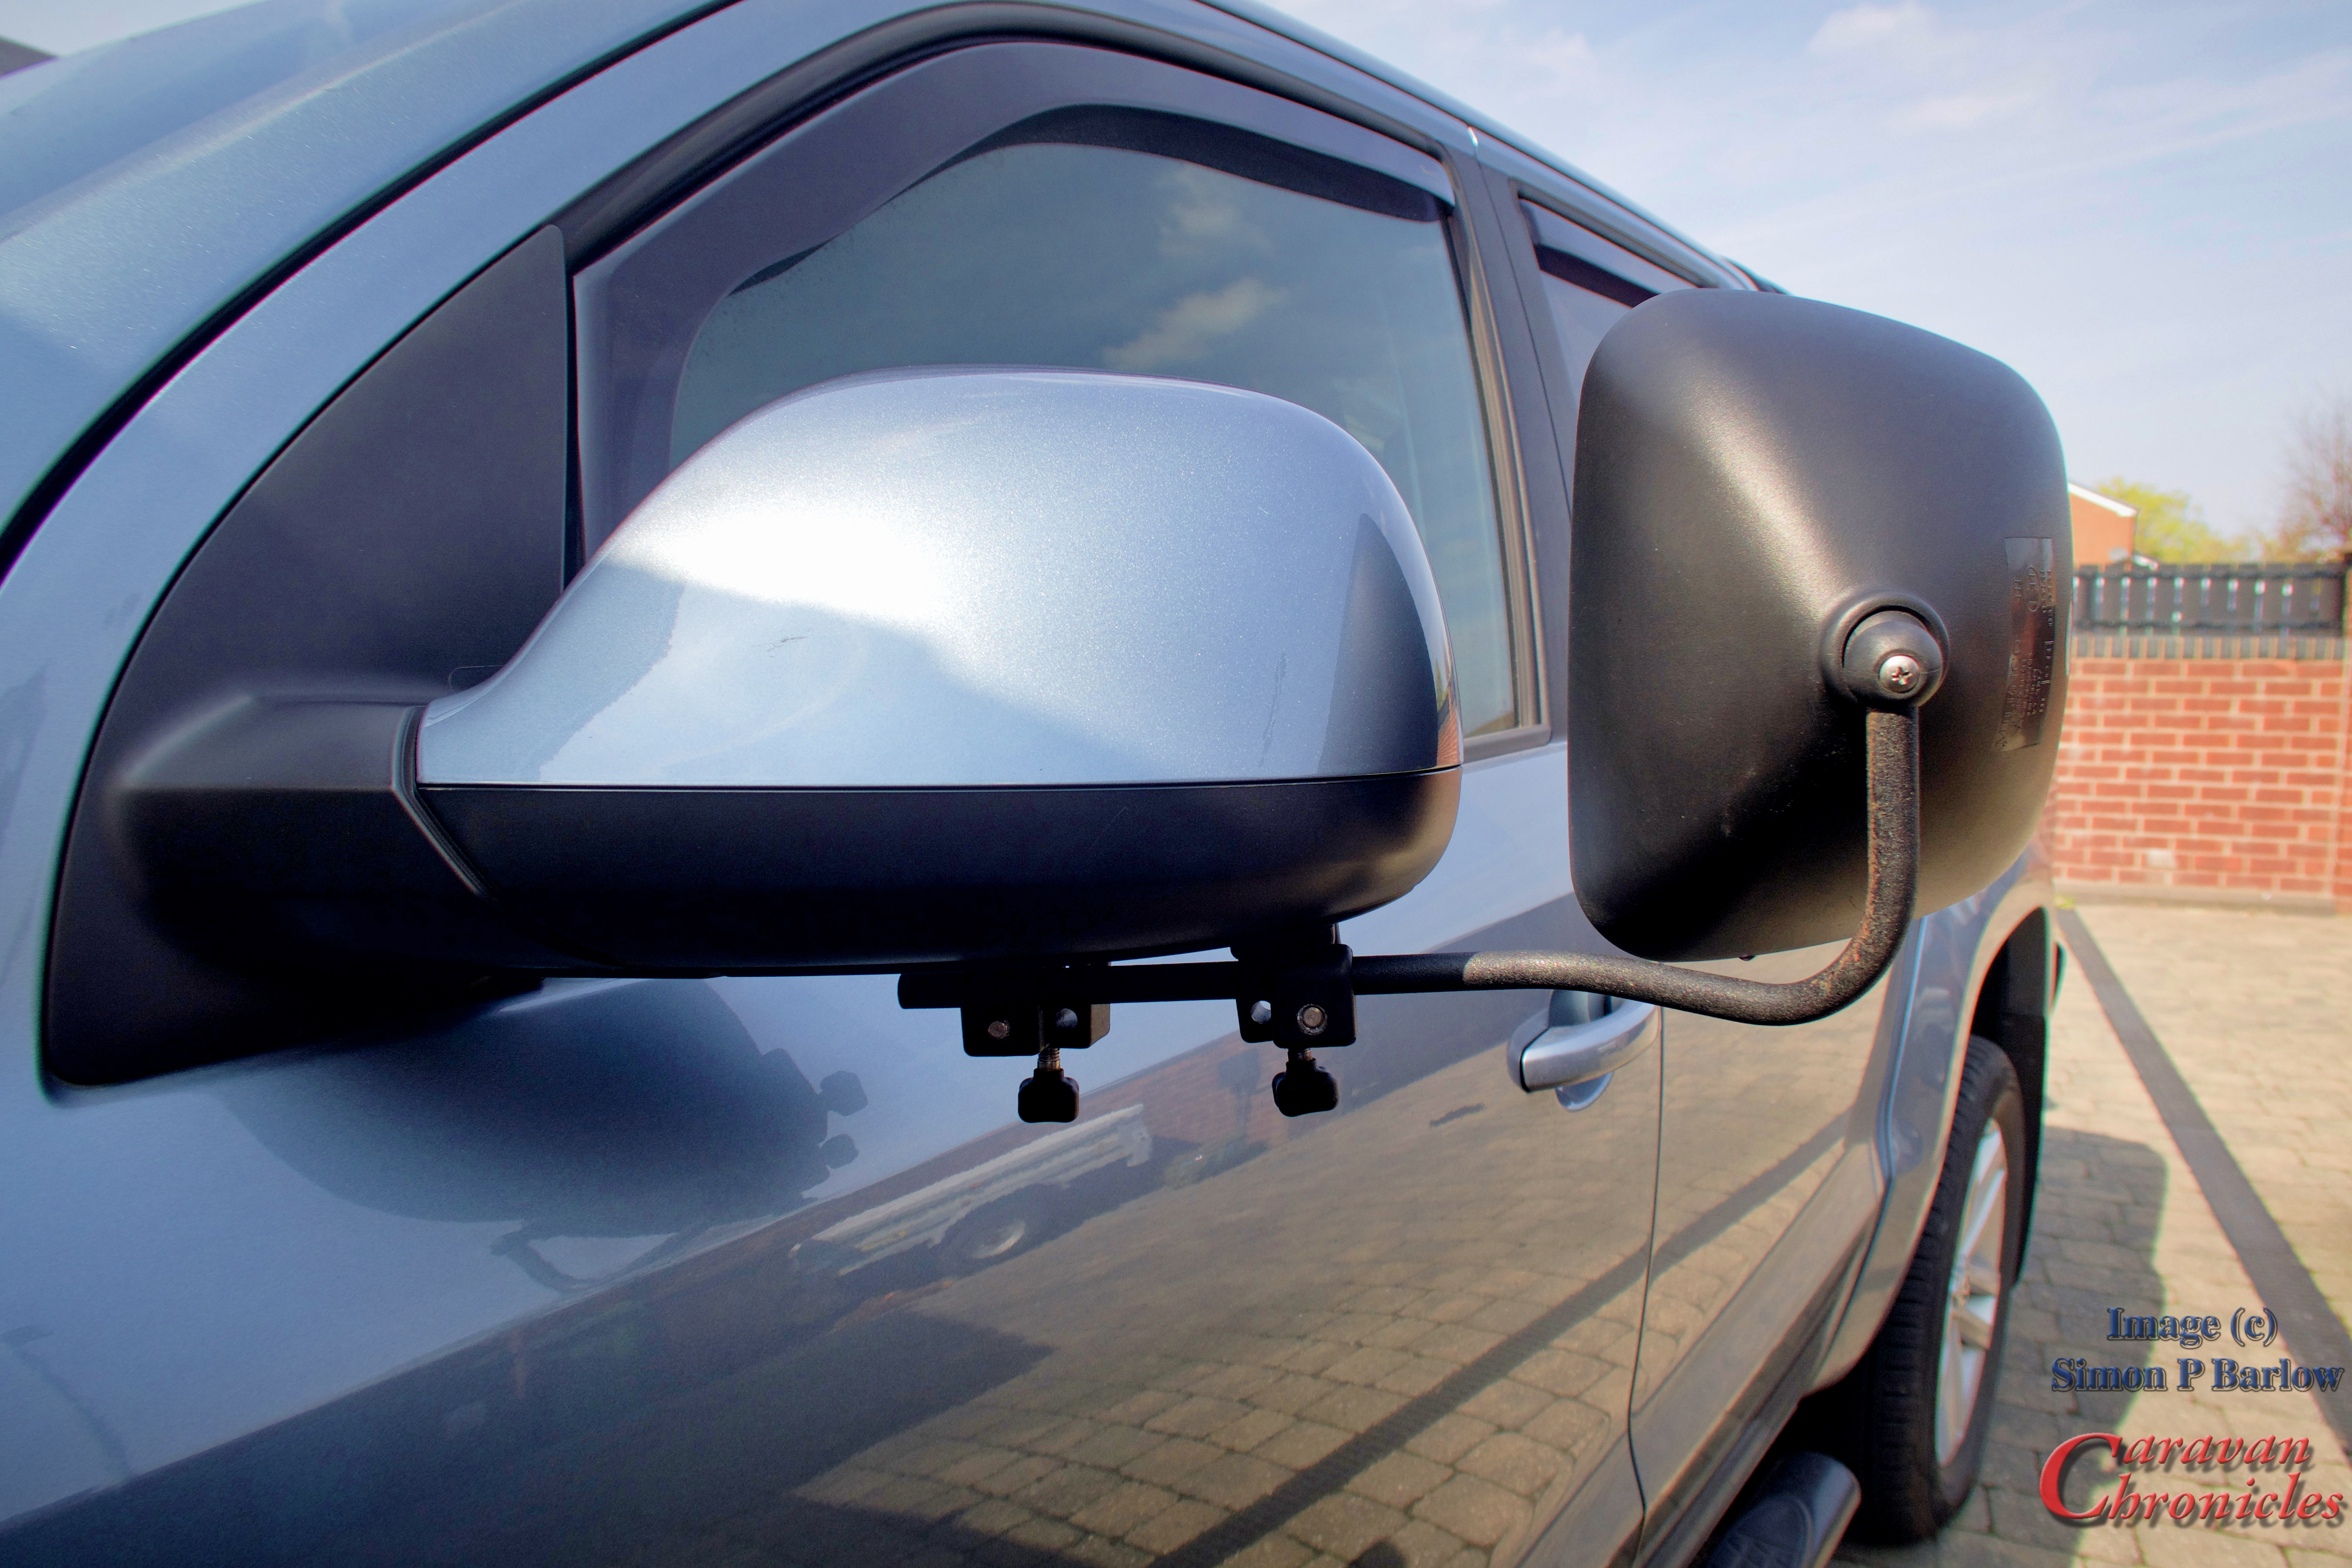
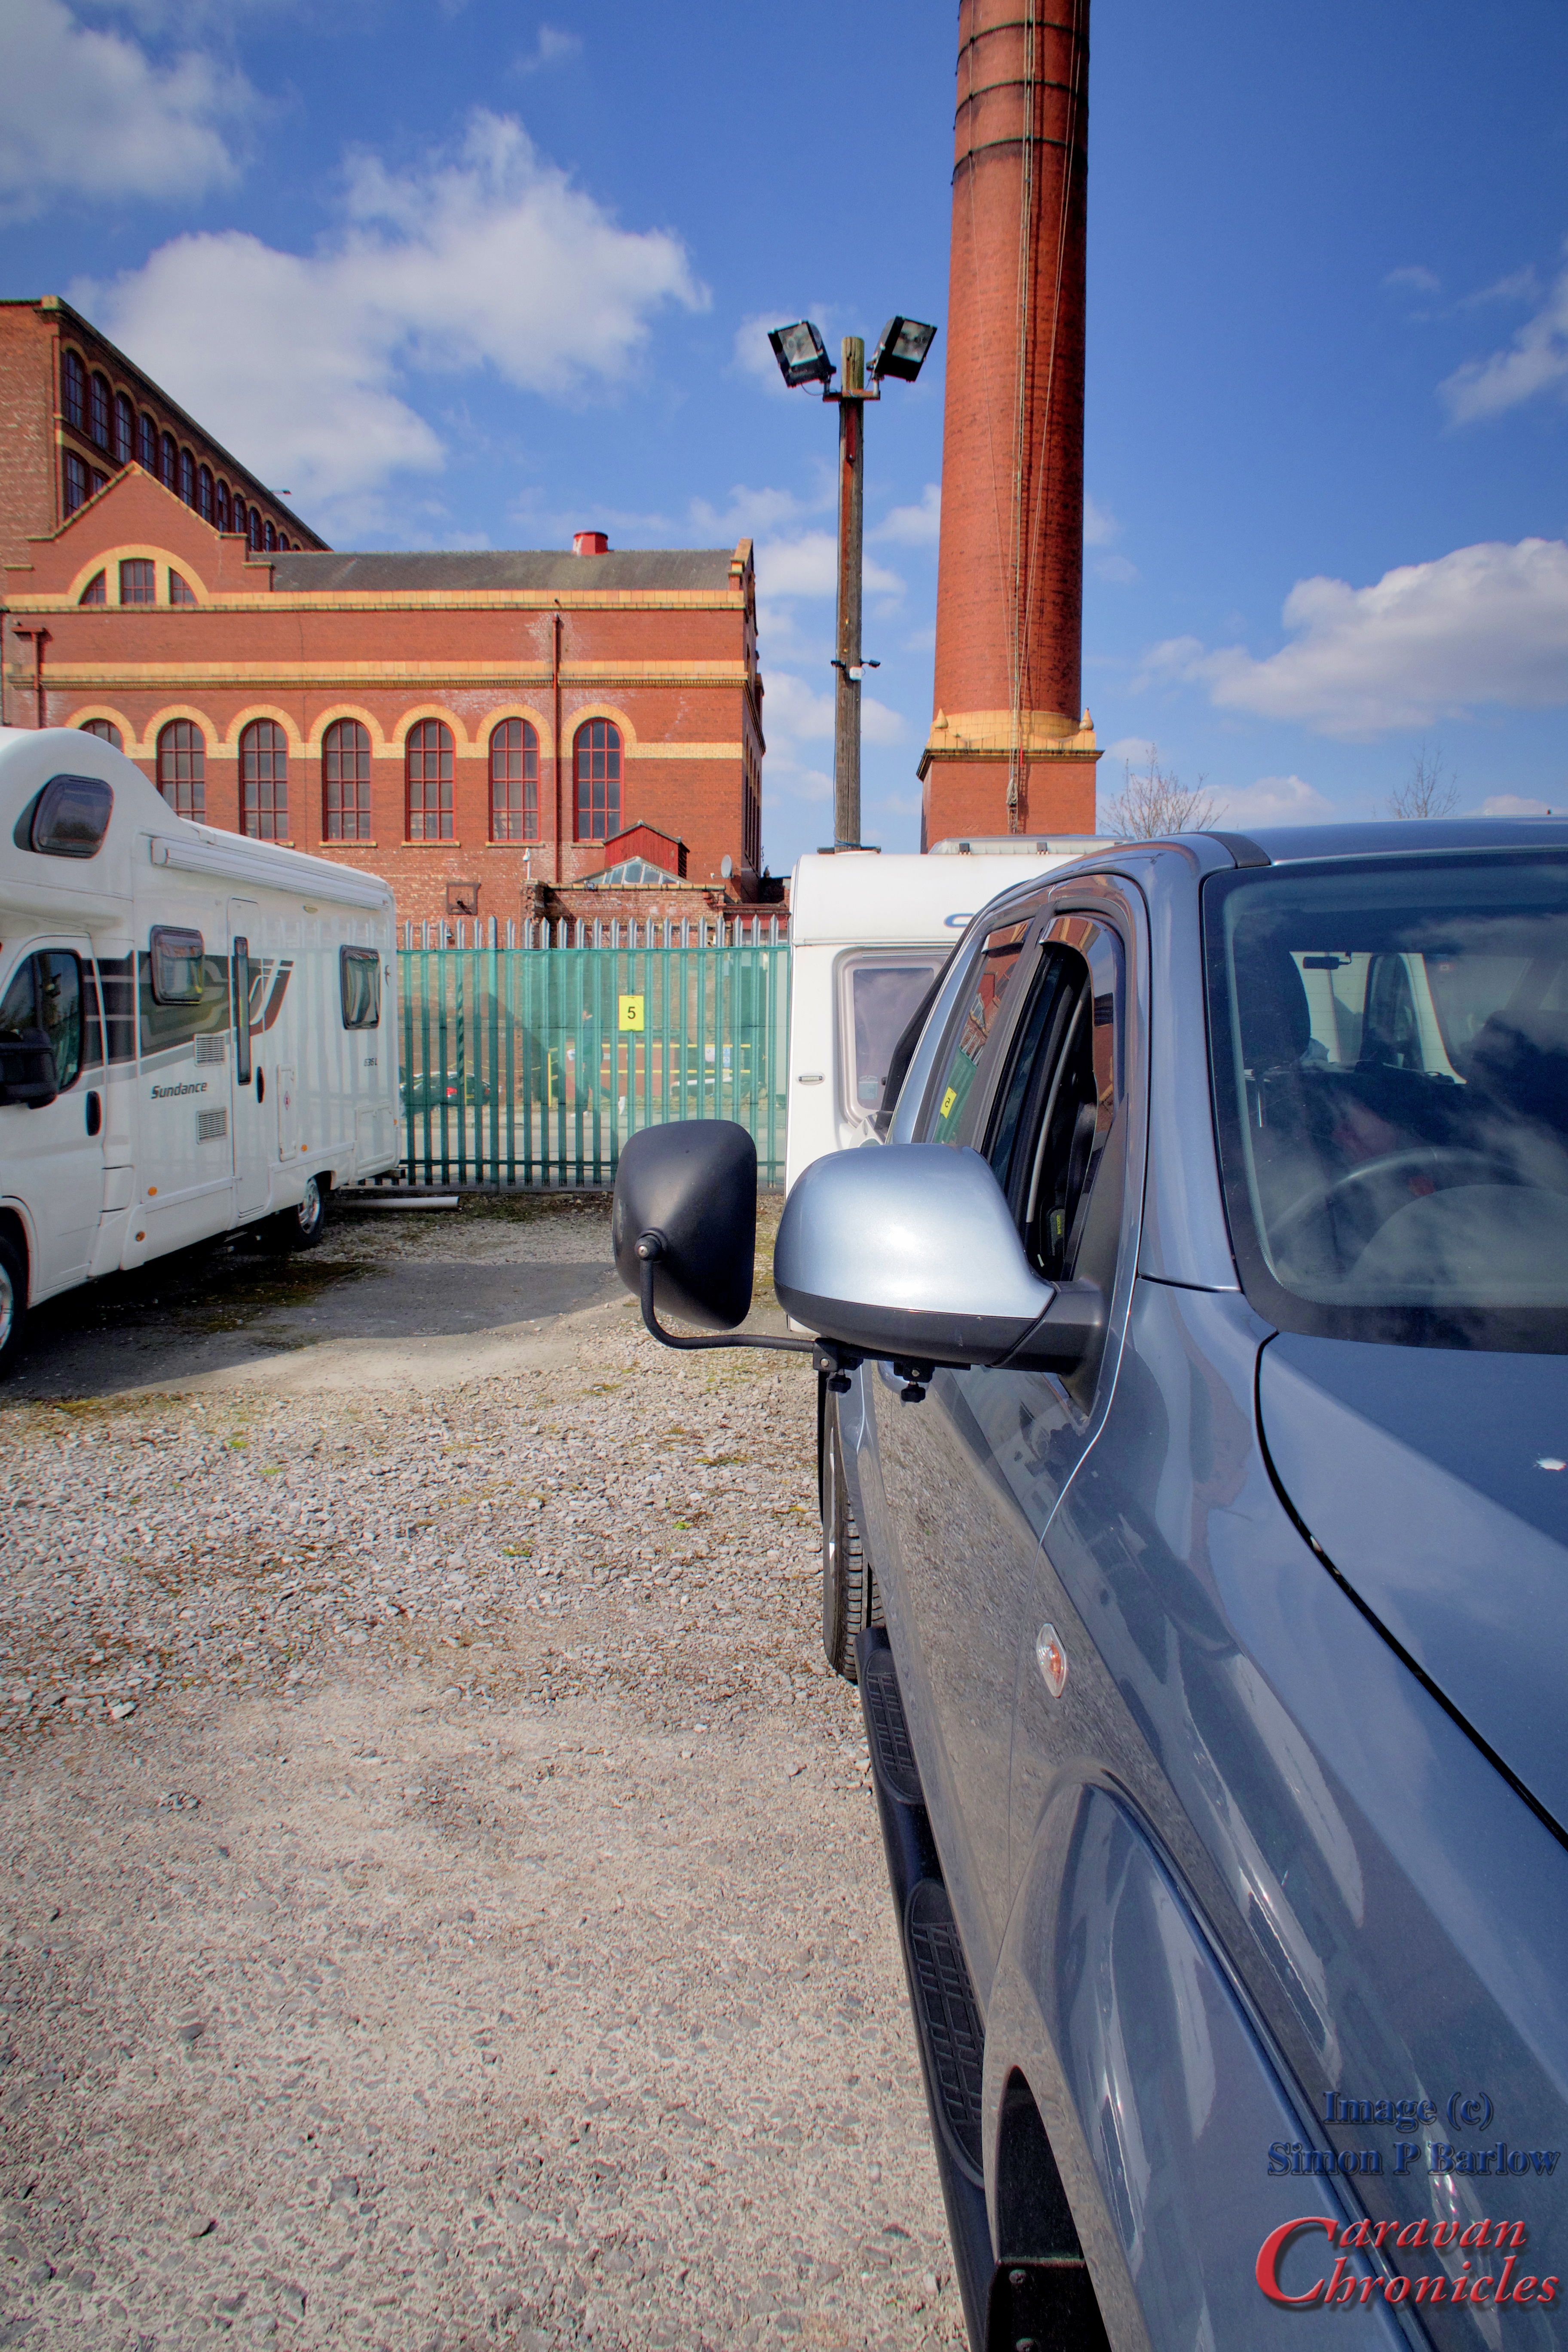
When seen from the front… even though I’m not quite ‘square on’ to the caravan, I’m angled slightly to the left when sat in the drivers seat, the mirror is fully outside the extended side line of the caravan giving me a great view.
To finish…
I gave the now bent and drilled tubes a light emery and de-grease followed by couple of coats of grey acid etch primer. This was topped off a few days later with a fine bed liner spray. This game the arms a durable coating plus the bed liner finish is quite ‘grippy’ and allowed the clamps the hold fast without too much yanking on the knobs.
We have been using these now for about two years and for me they work out just fine.
Shopping…
I had all this stuff in the Bat Cave as it was purchased for other projects, so the mirror arms didn’t really cost me anything. Both arms were made out of one 1 metre length of 12mm steel tube.
The tube bender I paid less than £30 for it about 12 months ago from Amazon. The 12mm Steel tube, again from Amazon was around £4 for a 1 metre length and the Truck Bed Liner paint was around £8.
Just for comparison…. the original supplied arm against my contrivance…. and yes… I have now sorted that bit of surface rust out! (I missed a bit when spraying)
Its been quite a while since I did my first review of a TPMS (Tyre Pressure Monitoring System) back in September 2015 in fact, on a Tyre Pal system sent to me for review. I did like it but it did give me a few things to think about. Later on I got to test out the Fit2Go TPMS and I ran with that for about 12 months. However I still wasn’t convinced this was the one for me.
With the Tyre Pal I did like the information, but on a screen that size I would have liked to be able to see all the pressures and temps altogether rather than scrolling through each wheel. Although it did cross my mind at the time “do I really need all this info” and that’s why I liked the Fit2Go unit. It sat there quietly monitoring the wheels and just occasionally flashed at me to say everything was OK…. or beeped if there was something wrong. I did eventually miss not being able to see the pressure and temp of each wheel and started to think my earlier statement was flawed.
I had an issue with the Fit2Go unit at around nine months of using it. The batteries in one of the wheel sensors failed… and a couple of weeks later a second battery went down. This was a bit of an issue as the sensors on this unit were sealed and the batteries weren’t replaceable (a plus point for the TyrePal here!) Credit to guys at Fit2Go… now re-branded as Michelin – they sent me out a complete new unit and four sensors. I installed the replacement unit and sensors and ran with that for a while.
Going into work at around 04:45 in the morning, I pulled off our drive the unit started beeping, indicating a low pressure tyre. I pulled over and checked the small LED on each sensor… no flashing red indication. Tyres looked good, checked the pressure with the Fit2Go hand-held unit and all as they should be. I carried on. The beeping stopped. A few days later as I had just got onto the motorway it went off again, pulled onto the hard shoulder, checked each sensor and wheel… no flashing LED and all wheels looked OK. I also took the time to check the pressures again, all OK. On the fourth or fifth time this happened I gave up checking. It only seemed to happen with an early morning start and I started to doubt the info I was getting from the unit.
I started looking around for alternatives… mainly in the US for RV TPMS systems as they seemed to have a greater number of options. It wasn’t long after this that I got the e-Trailer unit to test. Which as well as checking the leisure battery voltage, monitoring the fridge temp and a host of other things had TPMS monitoring for your caravan wheels and sent alerts directly to your phone. With this fitted I had at least covered off the important wheels when towing. I just needed something for the truck. Looking around at what was available on Amazon.Com in the USA made me realise how much we are actually paying in the UK for this stuff. There were units branded for the American market that were identical to those in the UK for a lot less even with the poor exchange rate.
This set me thinking… could a cheap TPMS available in the UK be as good… were we paying too much? I found a unit on Amazon.co.uk for £50 and ordered one. https://amzn.to/2wv49TS
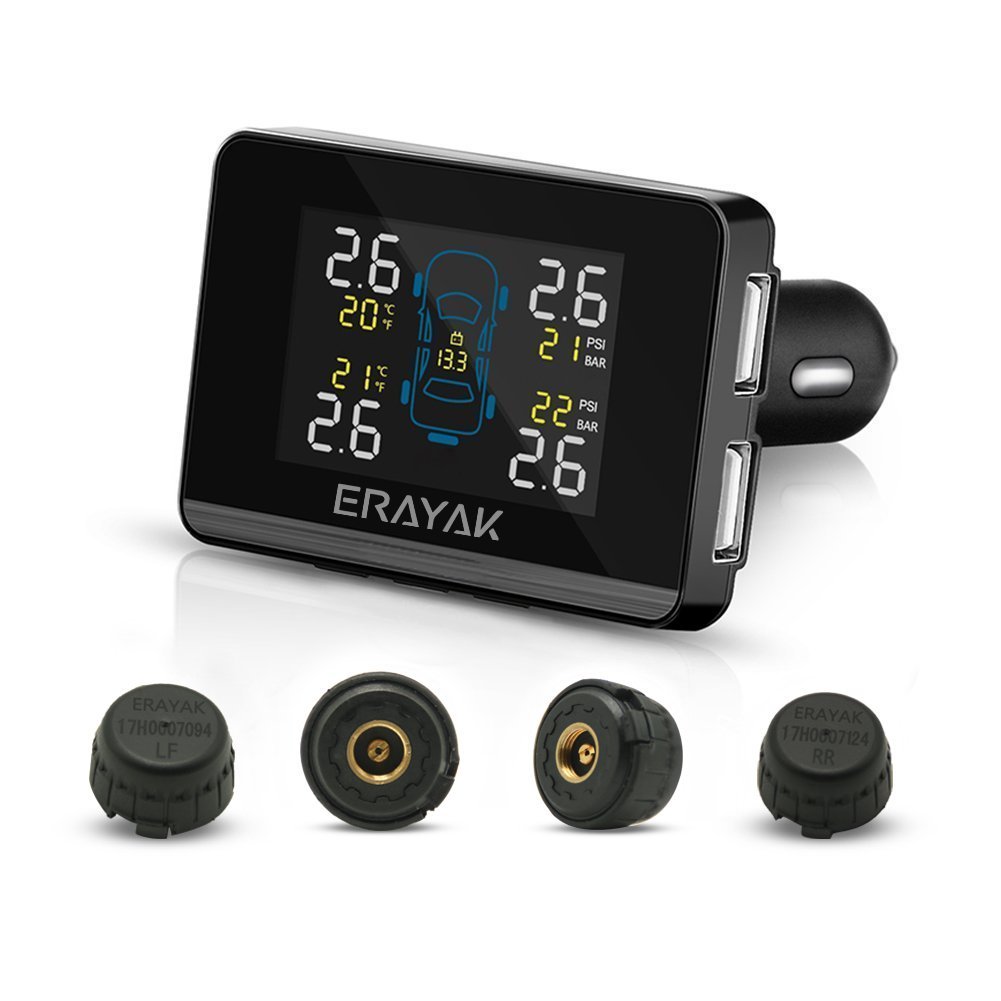
The unit had a couple of options for mounting. The sensors had replaceable batteries and were pre-coded to the unit. Each was marked with the correct location… FL, FR, RL and RR.
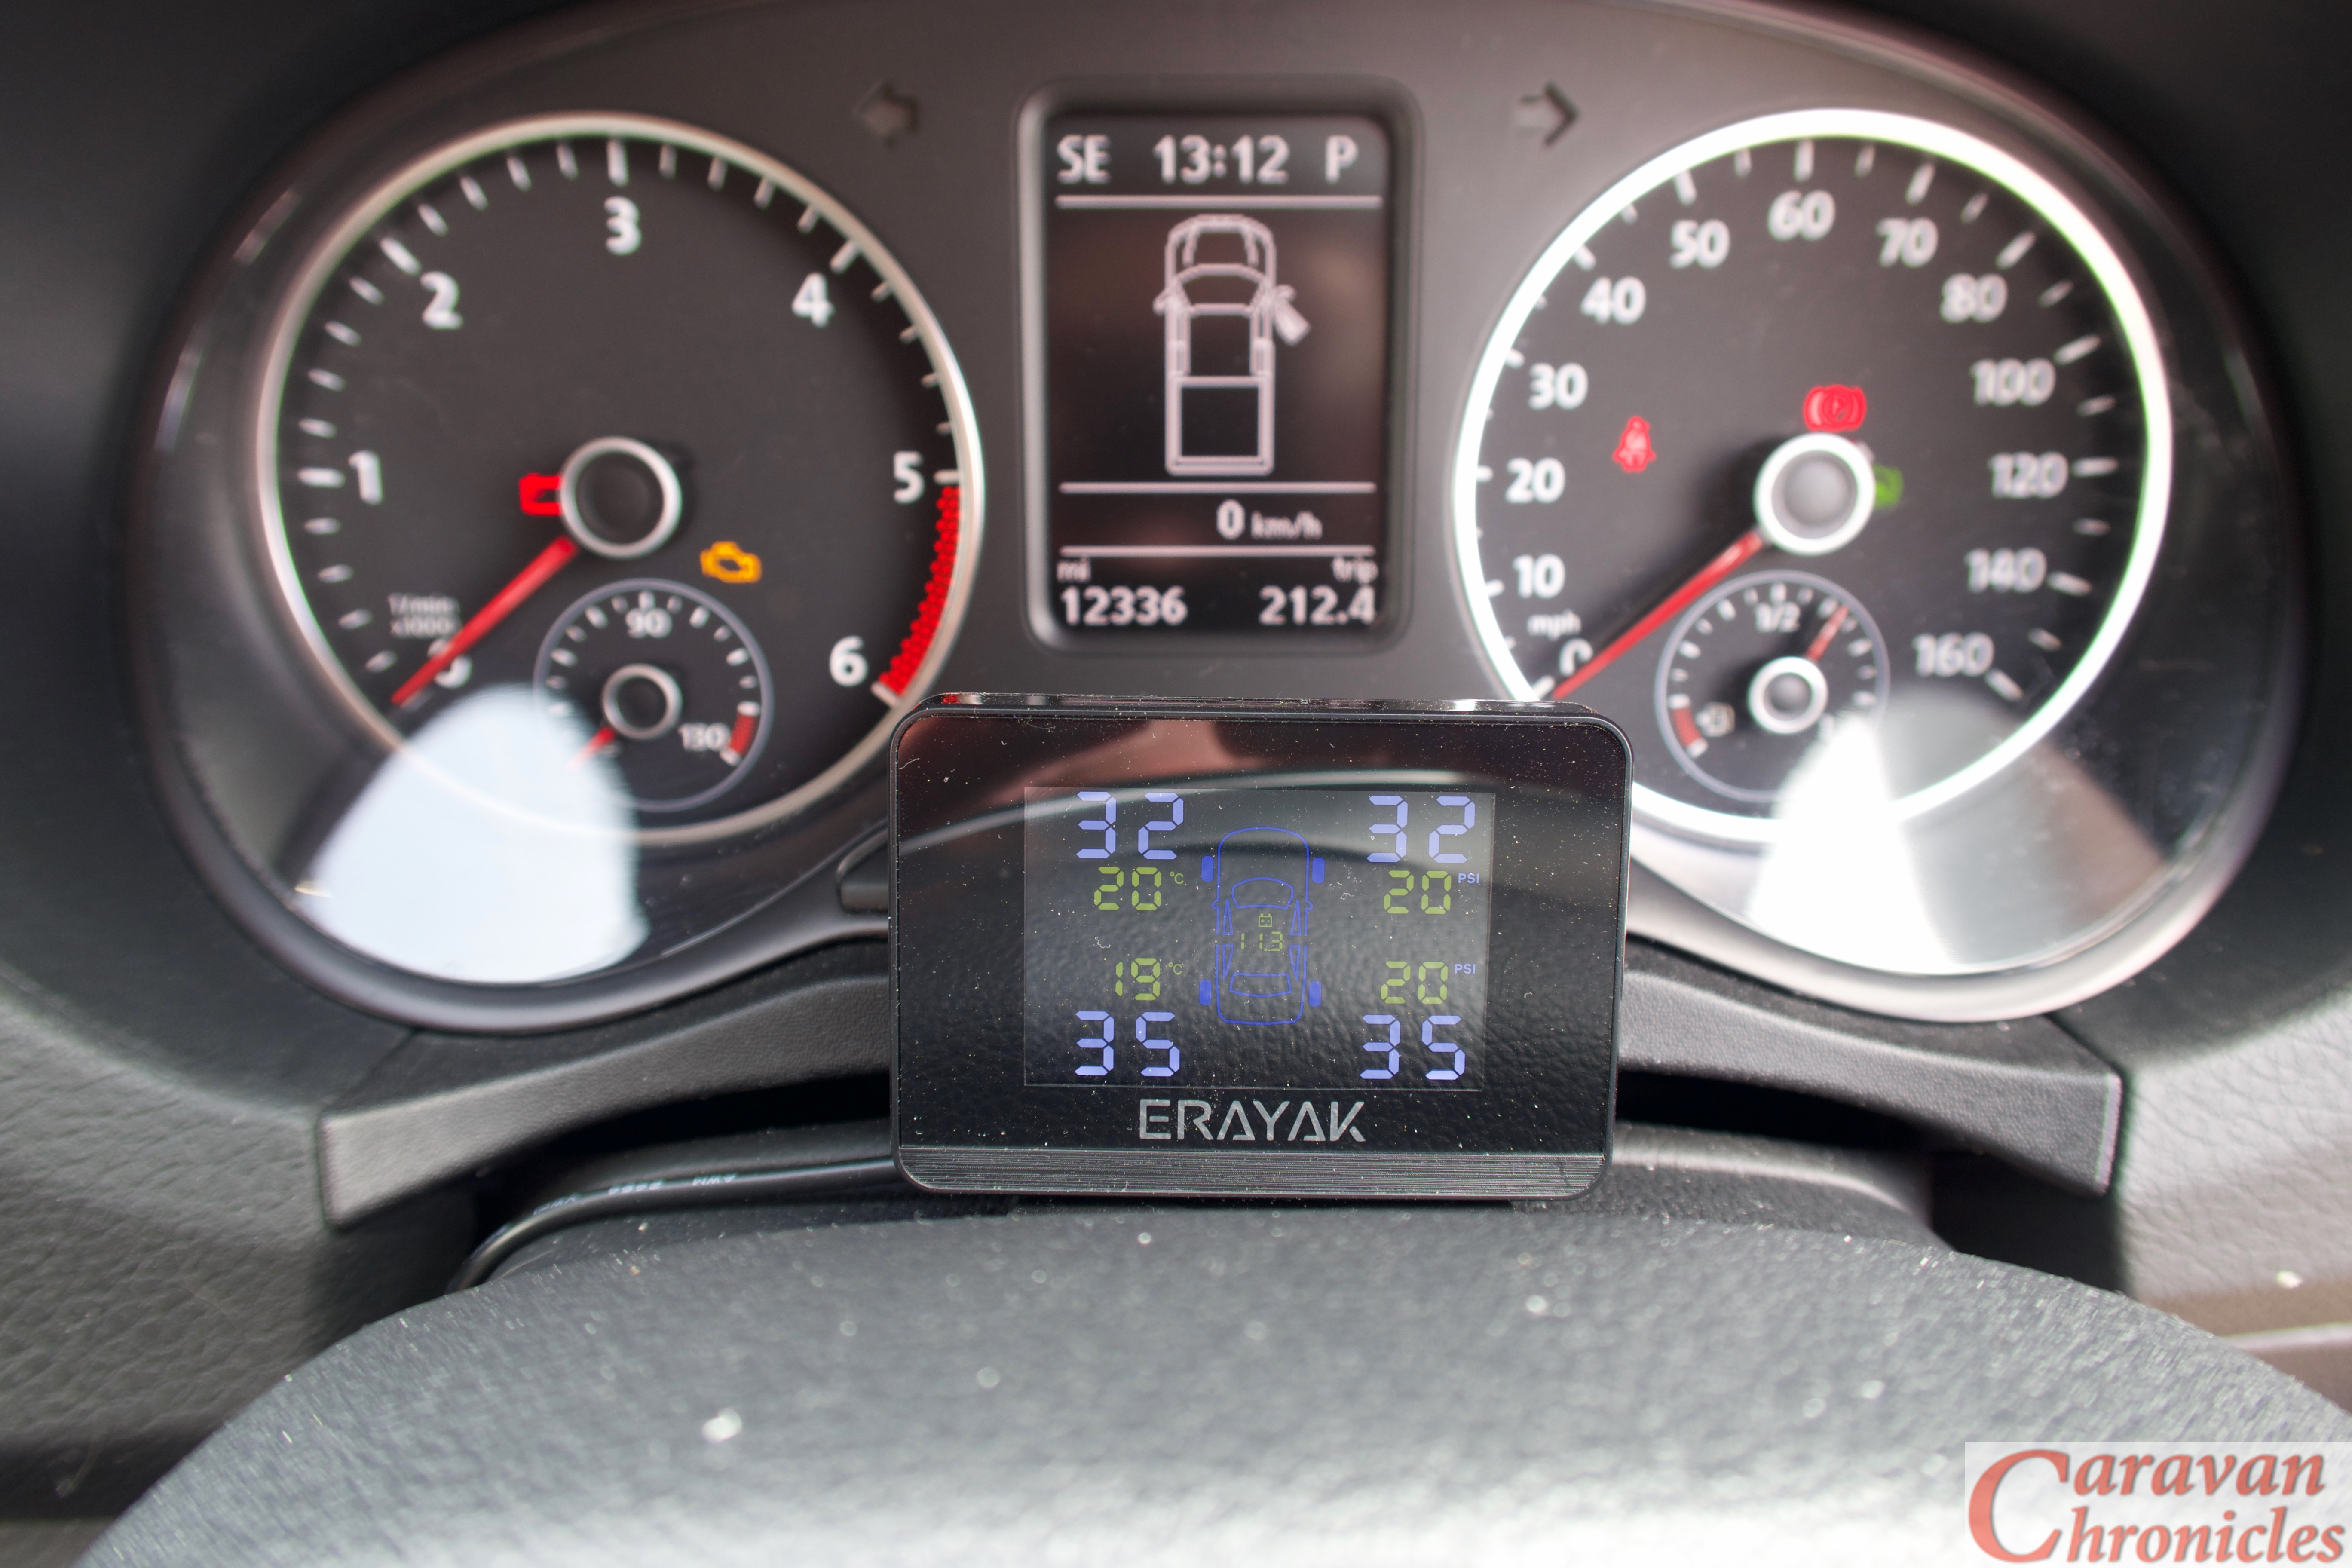
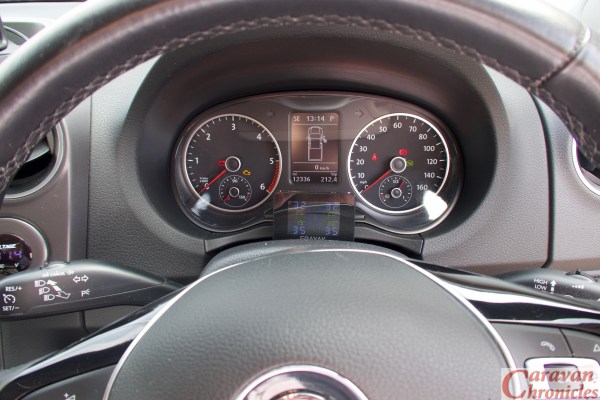
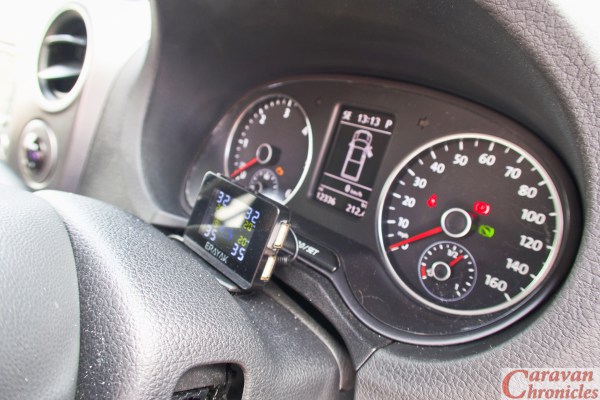
After much procrastination about where to put the display (it’s a man thing) I could not make my mind up so for the time being it sits on top of the steering column….
In the few weeks since I installed it.. which was really easy, it’s worked well. I can set the upper and lower limits for pressure and temp for each wheel and it is fairly accurate on pressure. To test it I used my digital tyre gauge fitted to my compressor in the work shop and checked with a standalone digital check gauge I used to use for aircraft tyres. It always matched the same PSI as both my digital gauges showed and as it didn’t decimal point readings on the PSI setting (you can change it to BAR, as well as from C to F for temp) it seemed to round-up from about .6 which seems acceptable to me. (32.4 PSI would be displayed as 32 and 32.6PSI would be shown as 33)
It comes complete with a small spanner for the lock nuts, a do-hicky for replacing the battery in the sensors and for £50 it seems like reasonable quality. It does what it states on the box, it’s small enough to put almost anywhere (and that’s my problem… where!) and if you have amazing eyesight… it even has a vehicle battery voltage display right in the centre! And if that didn’t clinch the deal… it even alarms when the batteries are low in the sensors.
So was my £50 well spent? Well at the moment I think so. (I reserve the right to change my mind in the future) You know me by now and if I thought it was a jockey wheel with out a handle…. I’d tell you!
So if you don’t yet have TPMS and don’t want to spend a fortune on one this might be a suitable option. If you want one… go on you know you do, here’s my affiliate* link on Amazon UK – https://amzn.to/2PX6a3a
*It won’t cost you any more but you will get that warm fuzzy feeling knowing Amazon are going to give Caravan Chronicles some of their profit.
After a quick four-day break at the Caravan & Motorhome Club’s site at Wirral Country Park (excellent by the way… already trying to work out when we can go back!!) and a bit of work getting in the way it was time to get going again not he catch can… really it should be called the “Air Oil Separator” Install.
Last time, I’d decided if IKB would have been shaking his head… then it wasn’t right. I decided to make a new bracket out of 1.8mm aluminium sheet and go into full on origami mode. (ps.. after the last post someone emailed me asking what IKB was…. Mr Brunel was not pleased).
I wanted to make a bracket that passed under the air con pipe and bonnet cable release fitting so that it cleared everything and gave good access at the same time. As a test I did a trial bend if some 1mm thick steel I had just to get the shape…
Once I’d got the angles and size sorted it was time to move on to the aluminium sheet. My press brake… well I call it a press brake, in reality its a cheap basic hand folding machine but it works very well as long as you know its limits and don’t get daft trying to fold big stuff. It was all about the angles…
The first two were easy and I could form the lip with two folds, the second was less than 90 degrees so I just about got away with enough clearance. However folding the return that would lip over the front cross brace which was also less than 90 degrees also meant that I’d have a problem fitting it in the folder.
However, a little lateral thinking and taking the blade off the folding machine, inserting my workpiece and re-installing the blade meant I could fold in the opposite direction (downward)… result!
A quick trim and rounding off the edges gave me a rough folded bracket. A quick file of the edges and work-over with some fine emery removed all the tool marks… quickly followed up with a coat of etch prime to protect it.
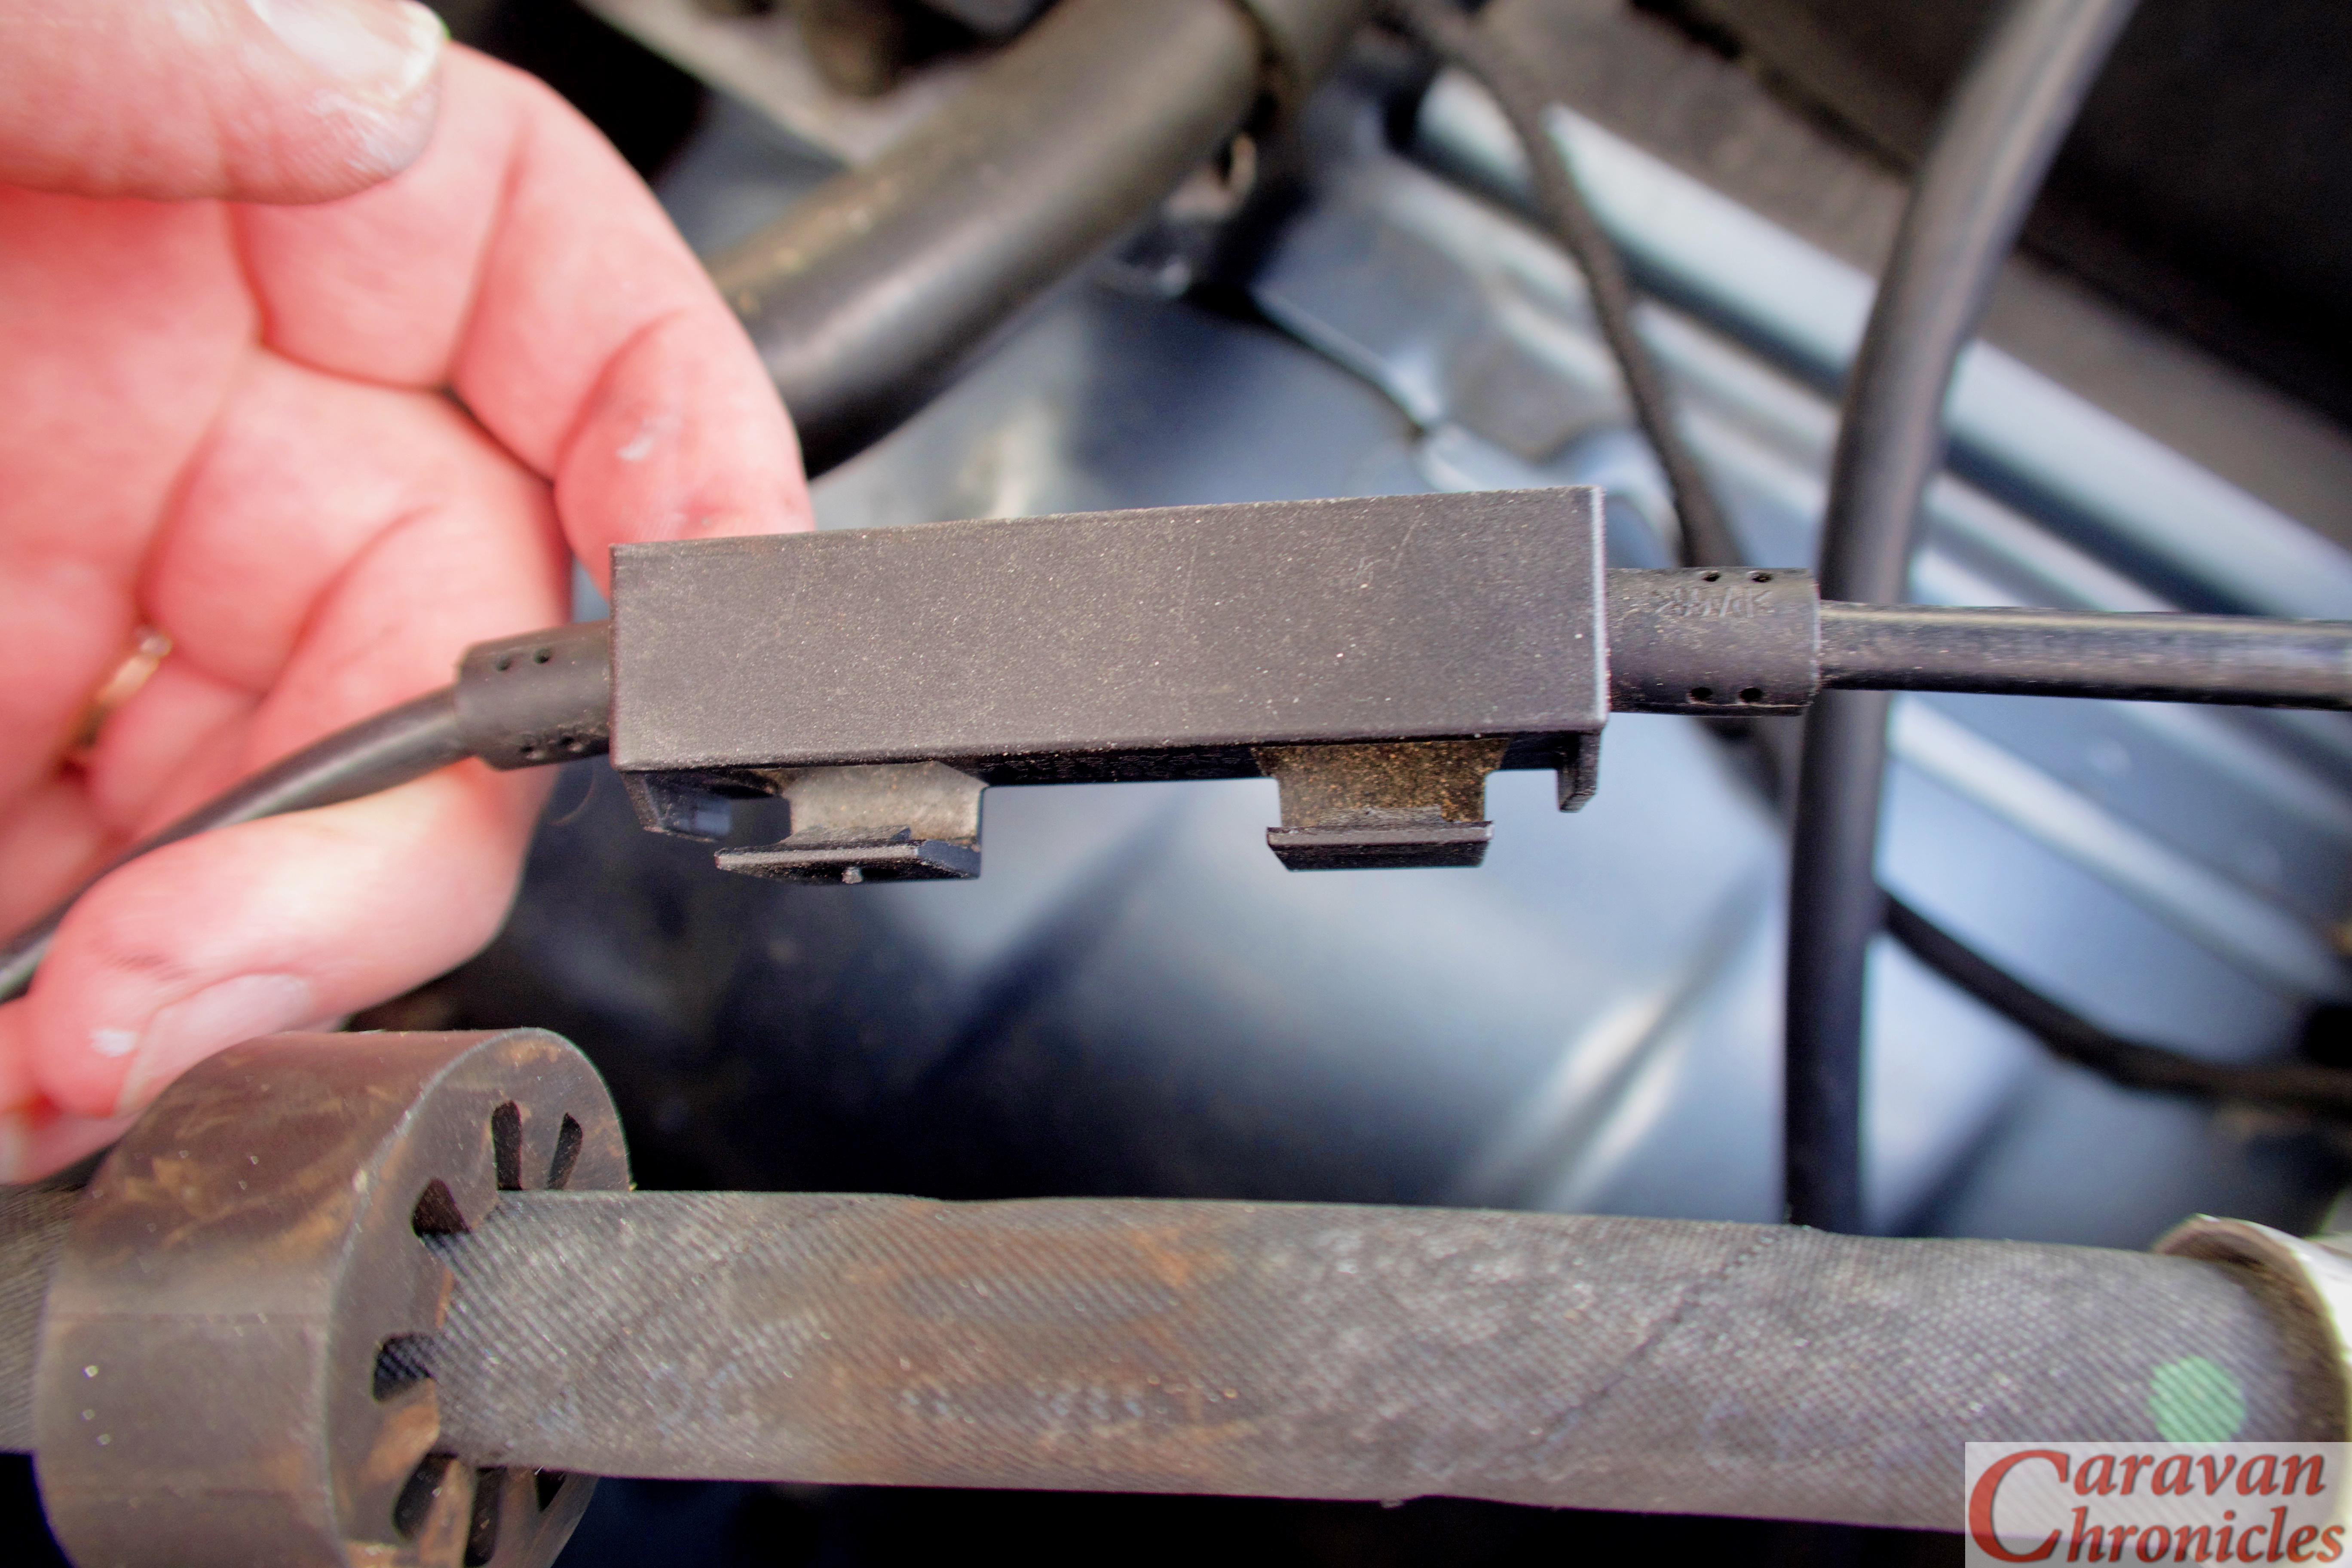
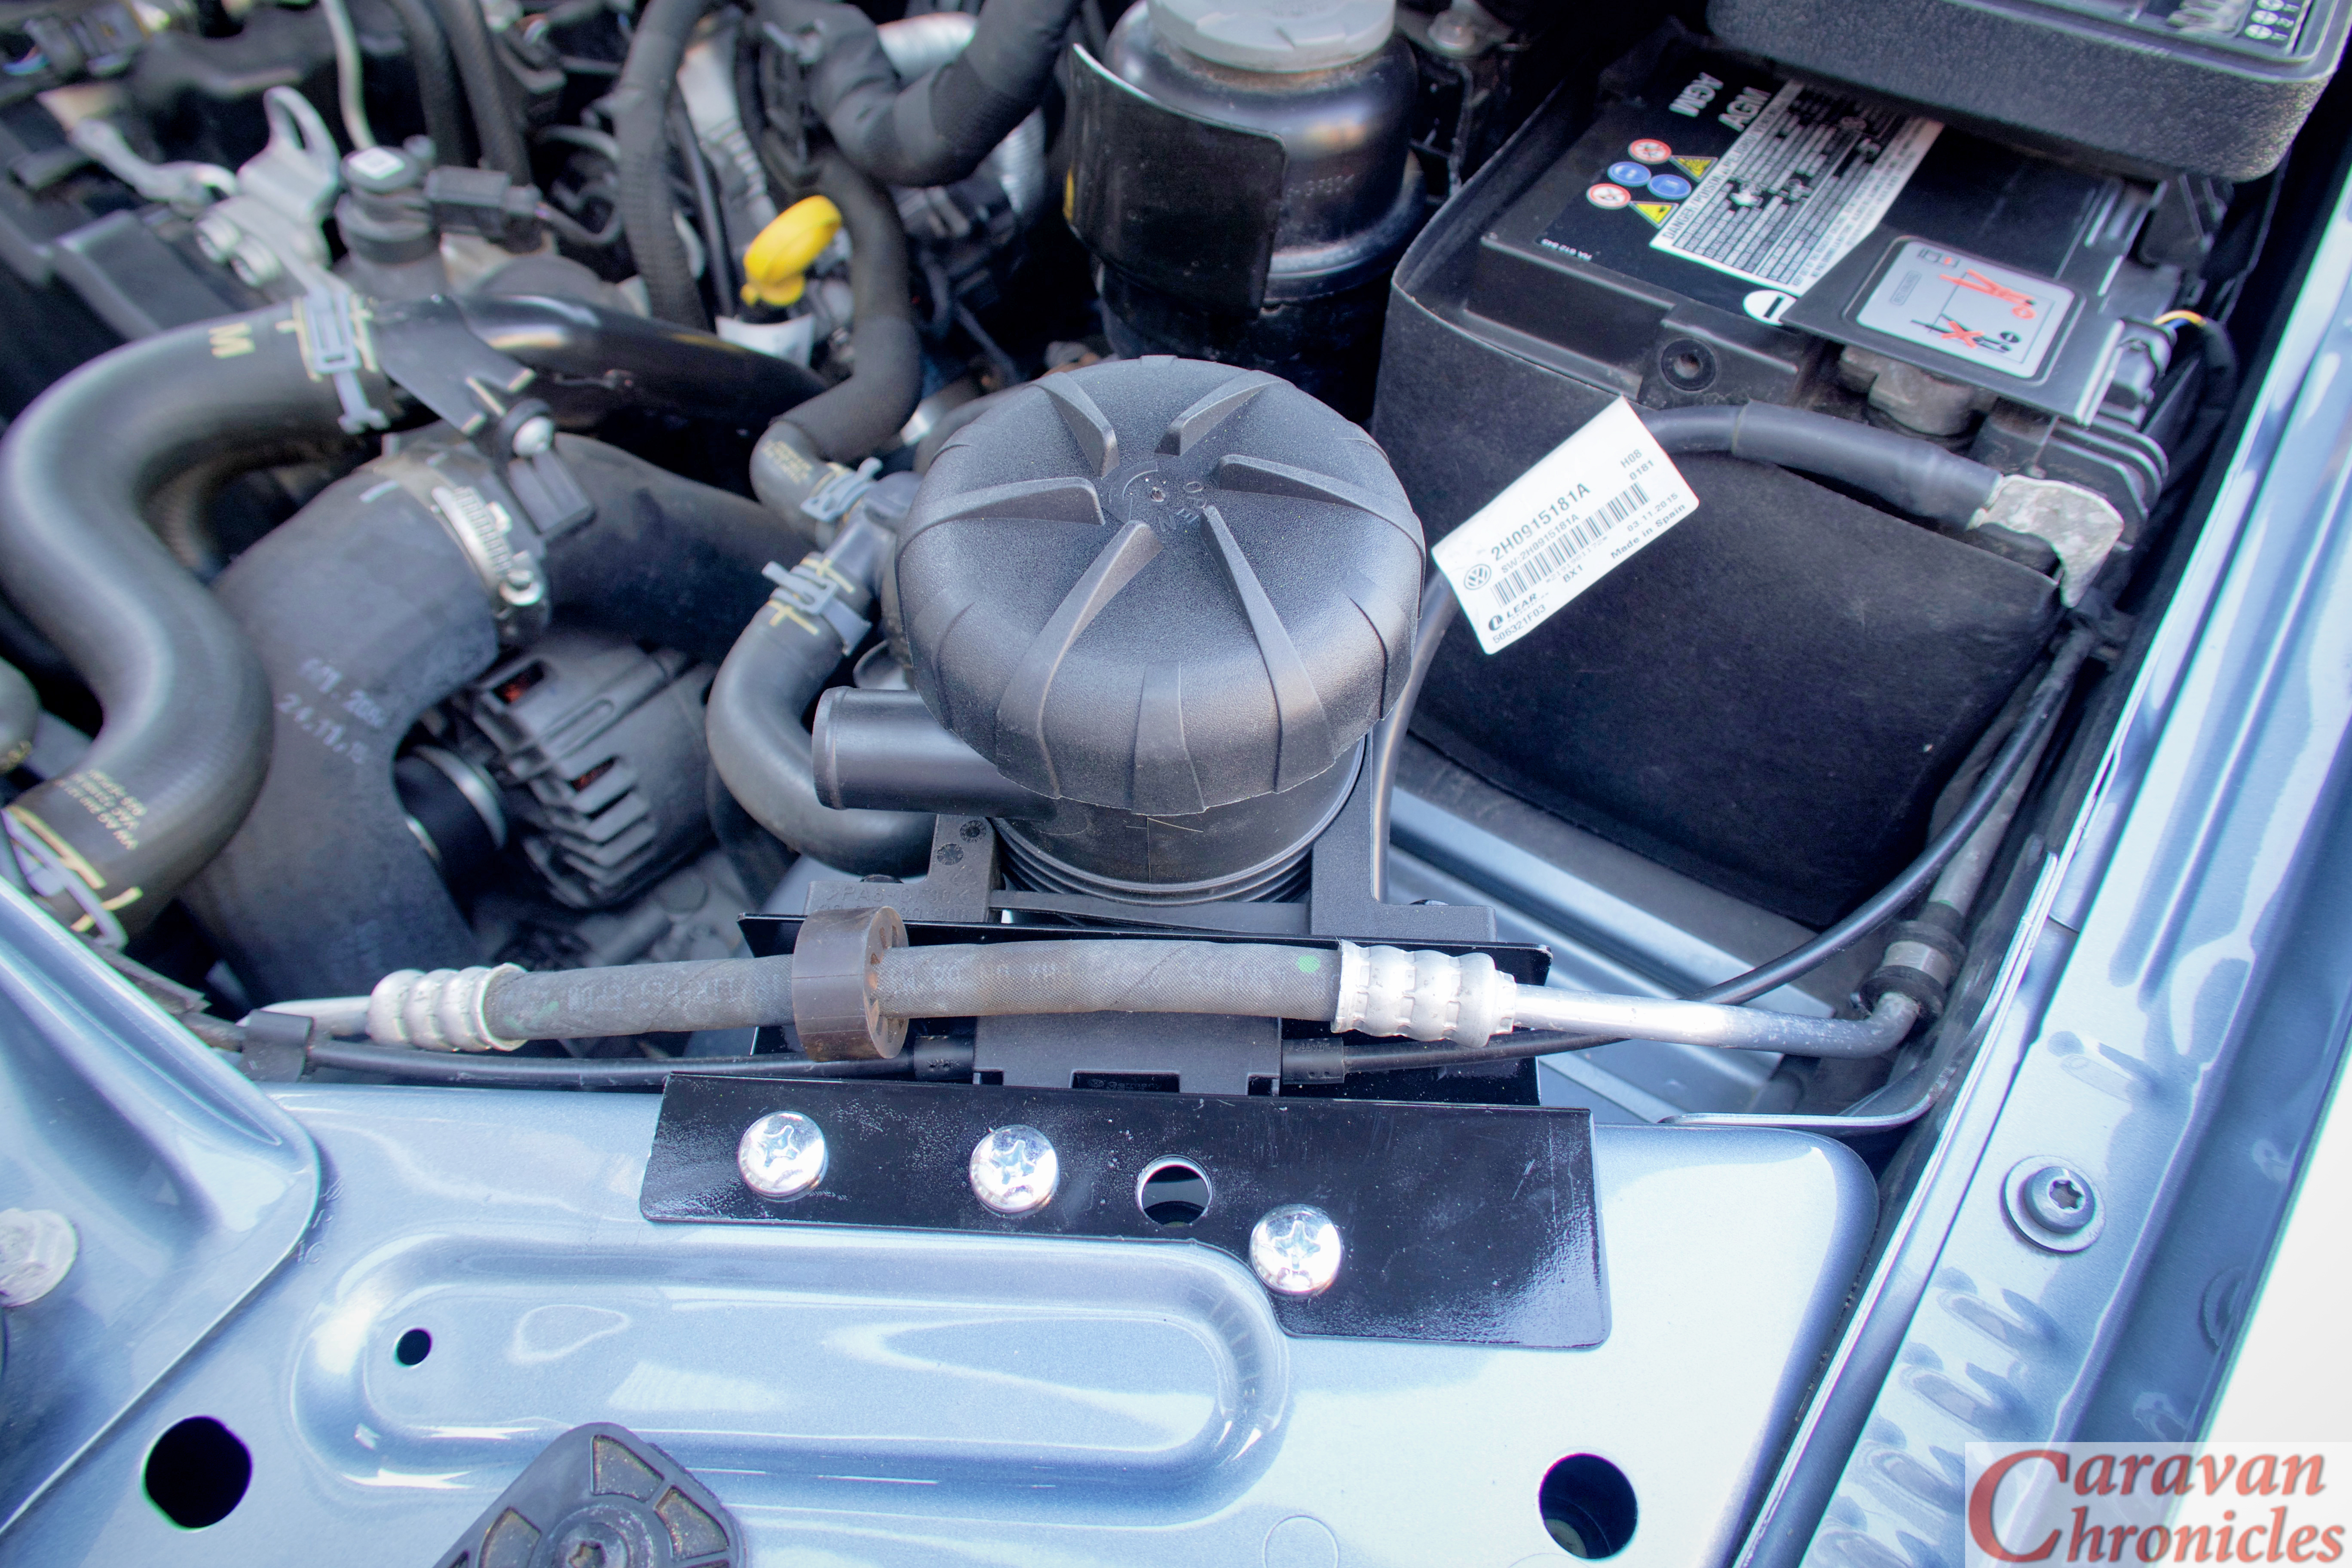
I now had to work out how to mount the plastic housing the bonnet release cables were located in. On the rear of the fitting were two plastic tabs that locked into two square holes punched into the vehicles cross member.
So a few minutes spent with a dremmel and a couple of suitable sized swiss files later…
… and the piece was ready for a final rub over with scotch bright a second coat of etch primer and two coats of black.
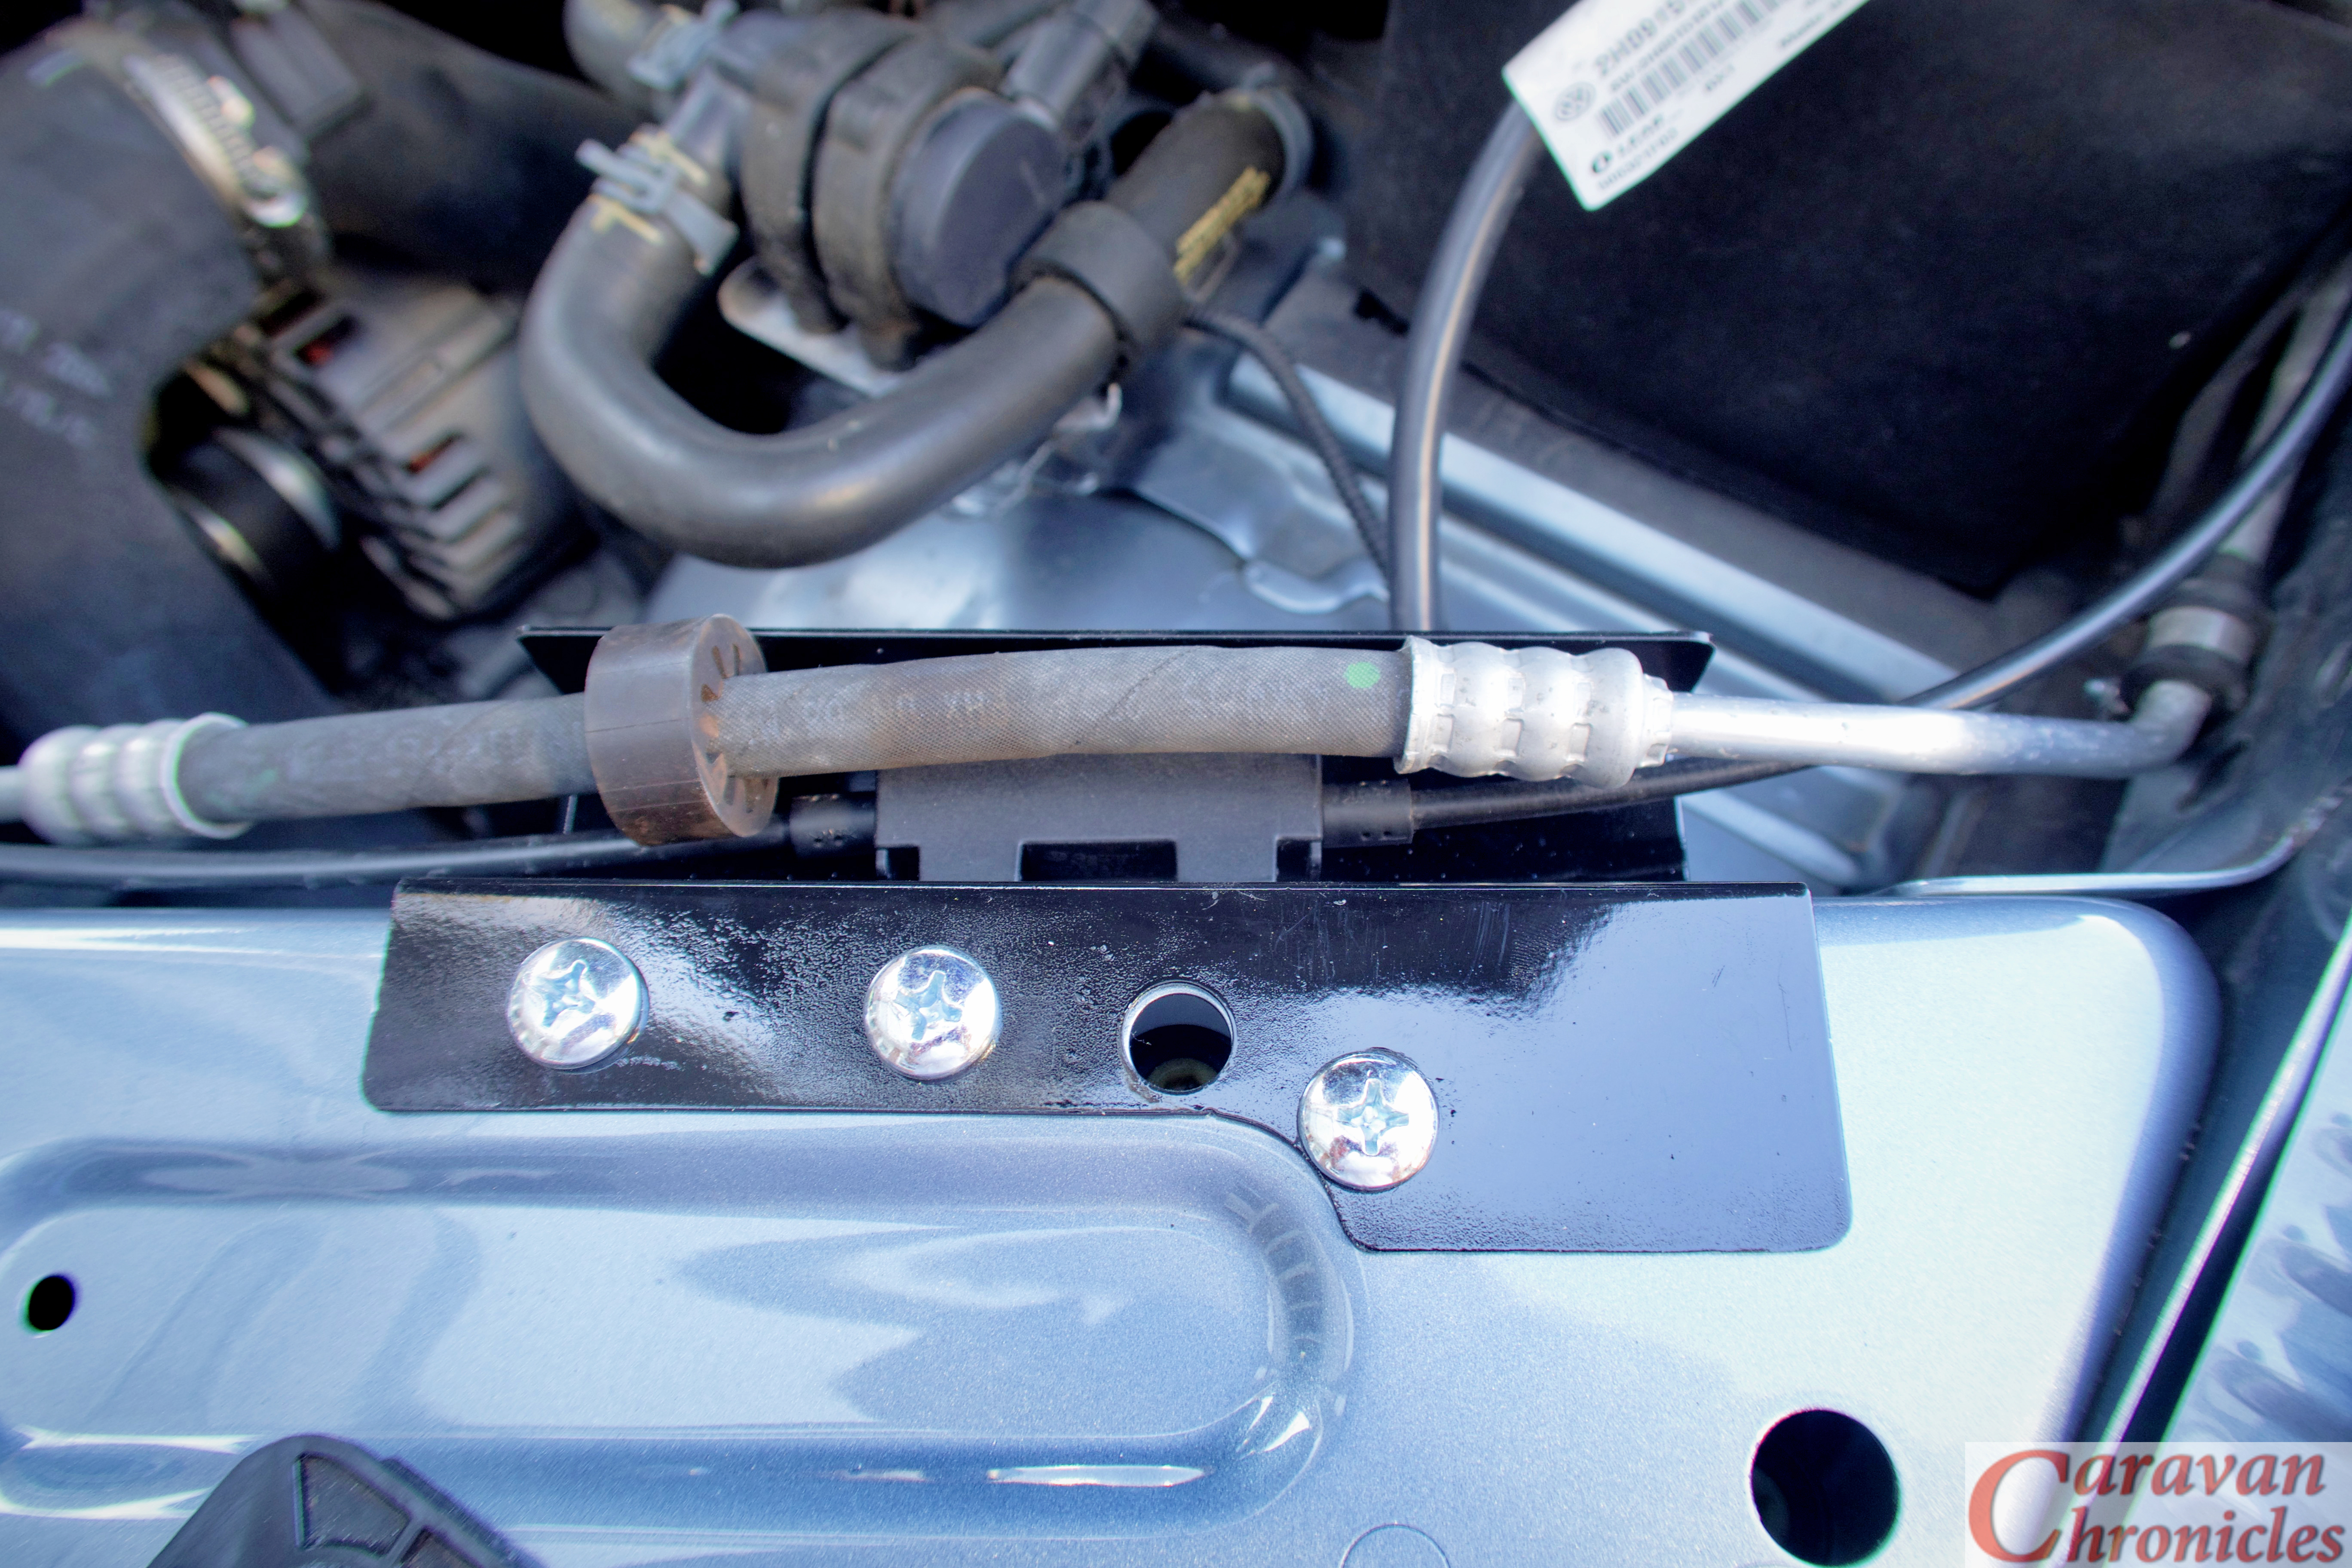
The Installation…
All went a bit easy actually… which is flipping’ unusual for me. I released the bonnet (or ‘hood’ for my American friends) cable fitting and simply clipped it back in to the two new holes I’d made.
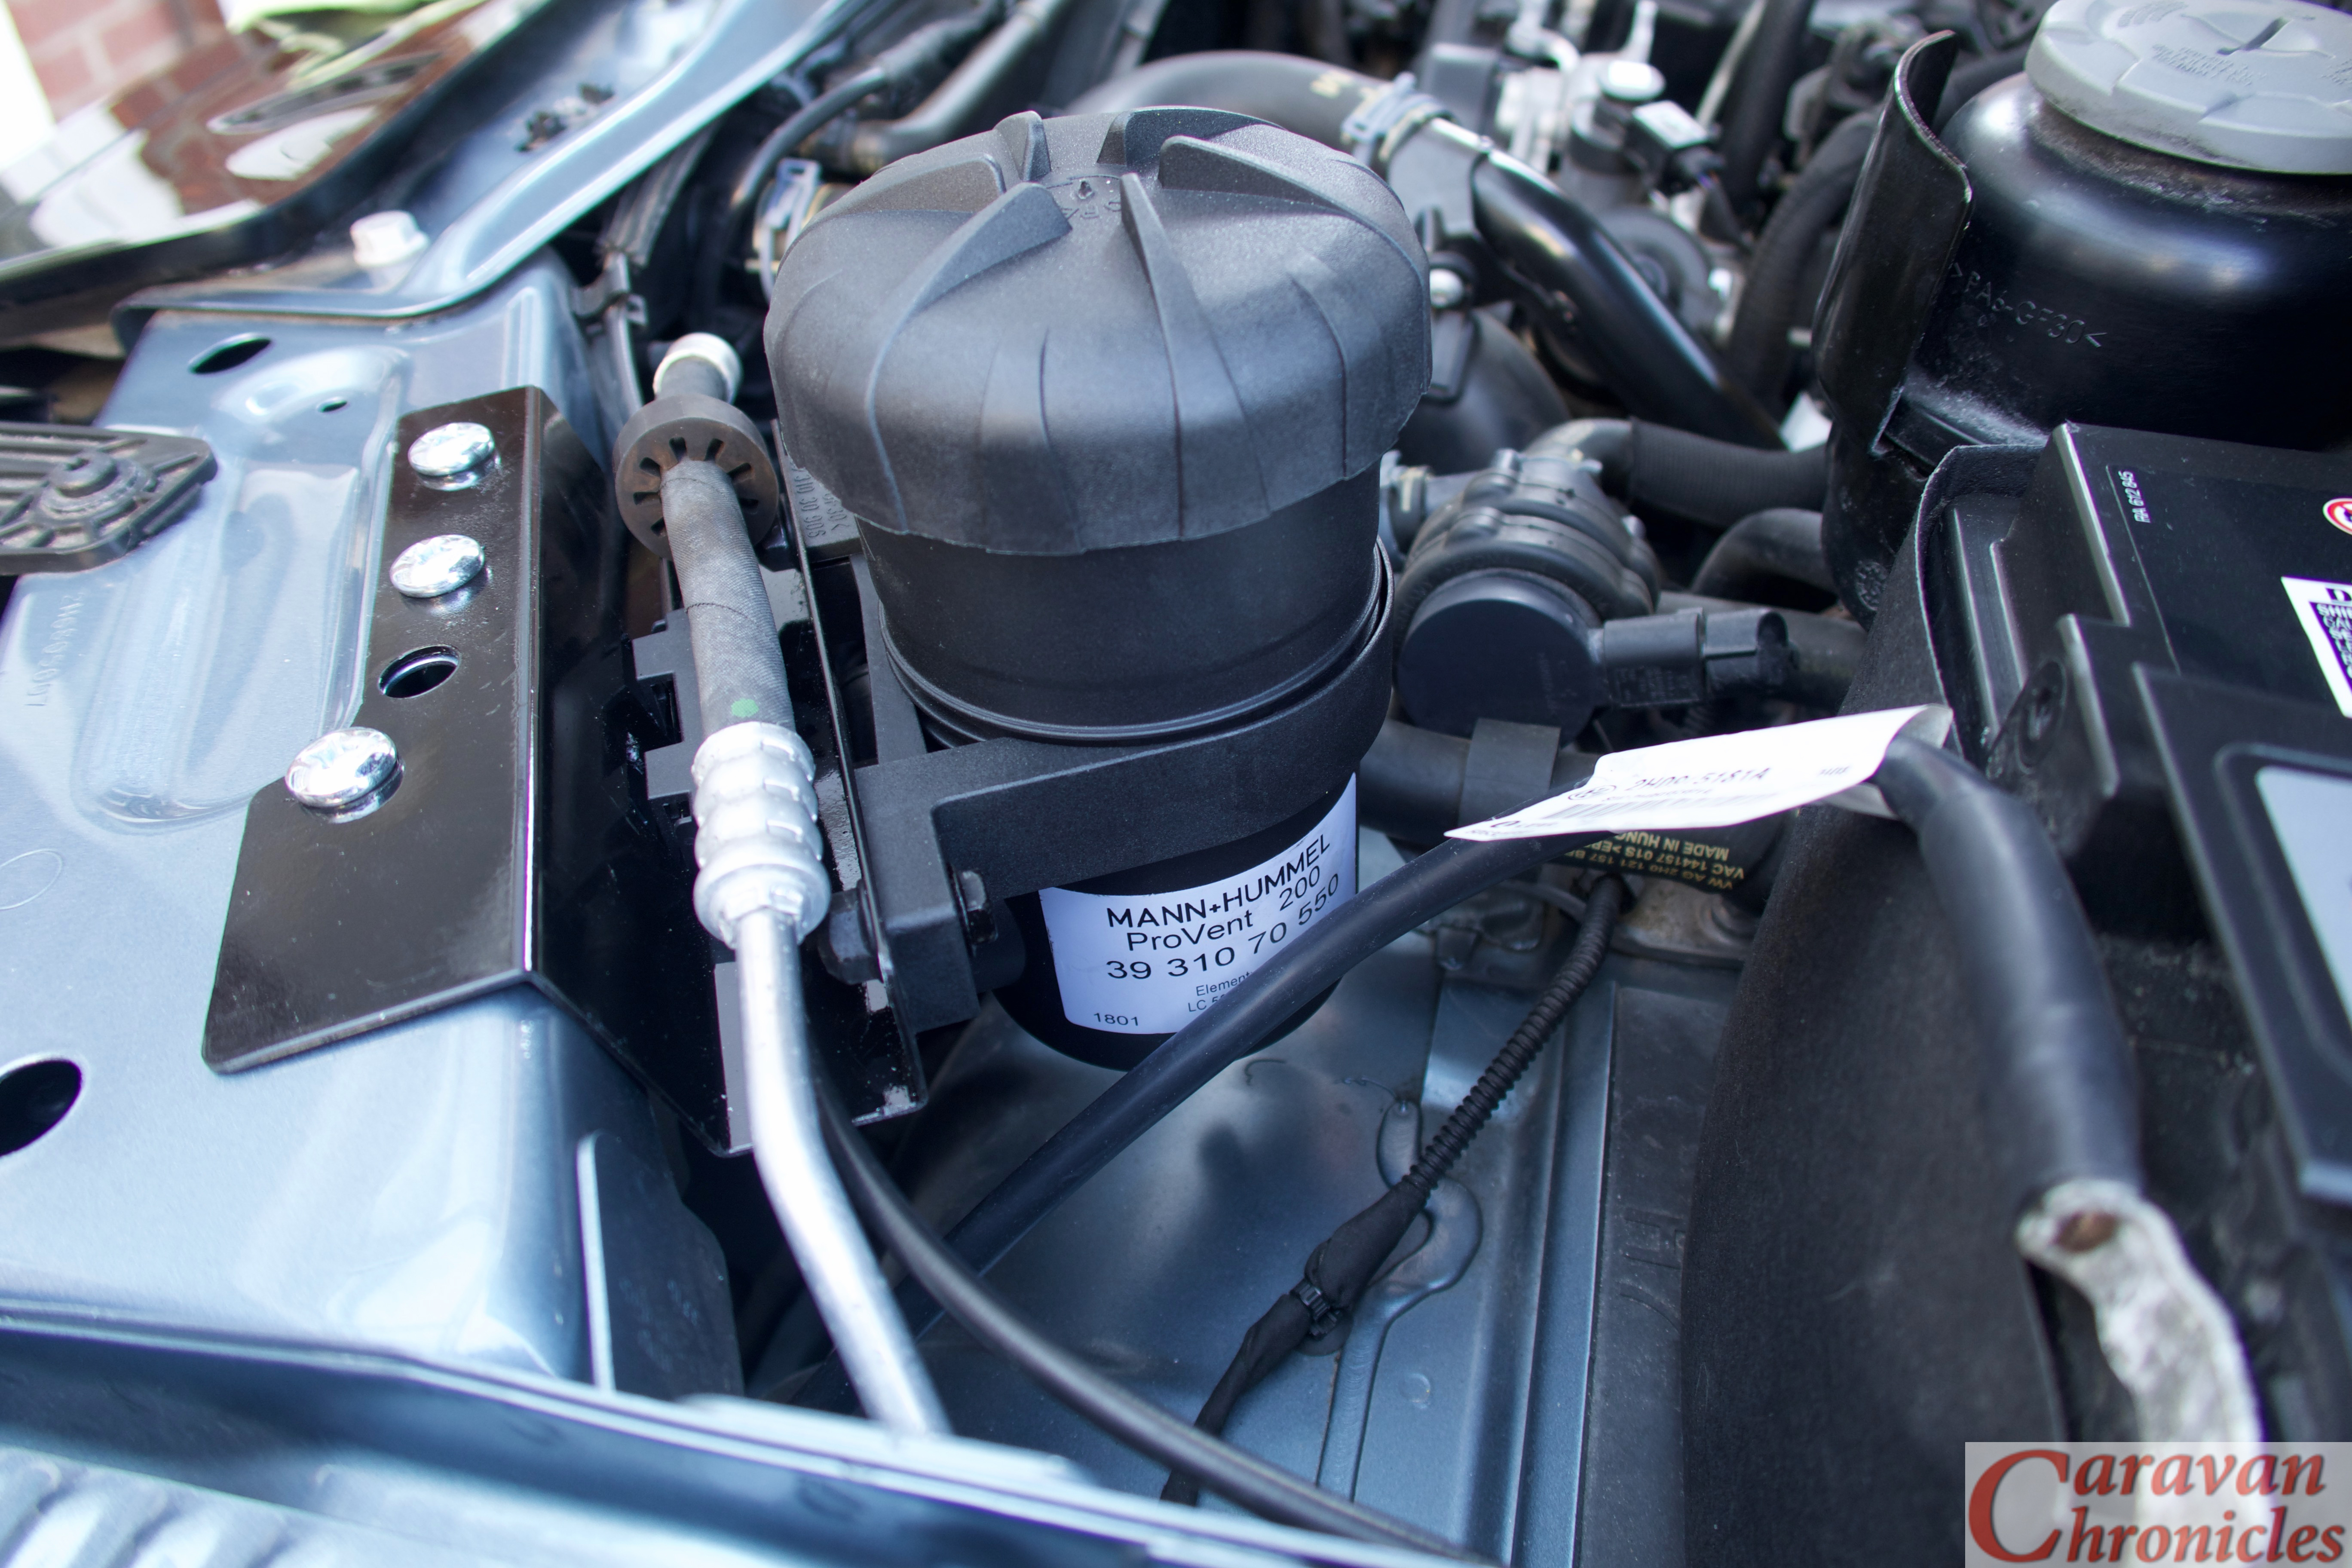
The Provent was installed next…
… again without any issues. Next was to sort out the plumbing.
I’d done a bit of research and asking around and the guys at ASH… AutoSiliconHose.comhad come highly recommended. So a road trip over the Pennines to Mirfield (just east of Brighouse in West Yorkshire) was scheduled.
I had a basic list of what I thought I’d need and the chap behind the counter hooked me up with everything… including the alloy couplers he cut to size while I waited. Great service from ASH and I can definitely recommend them.
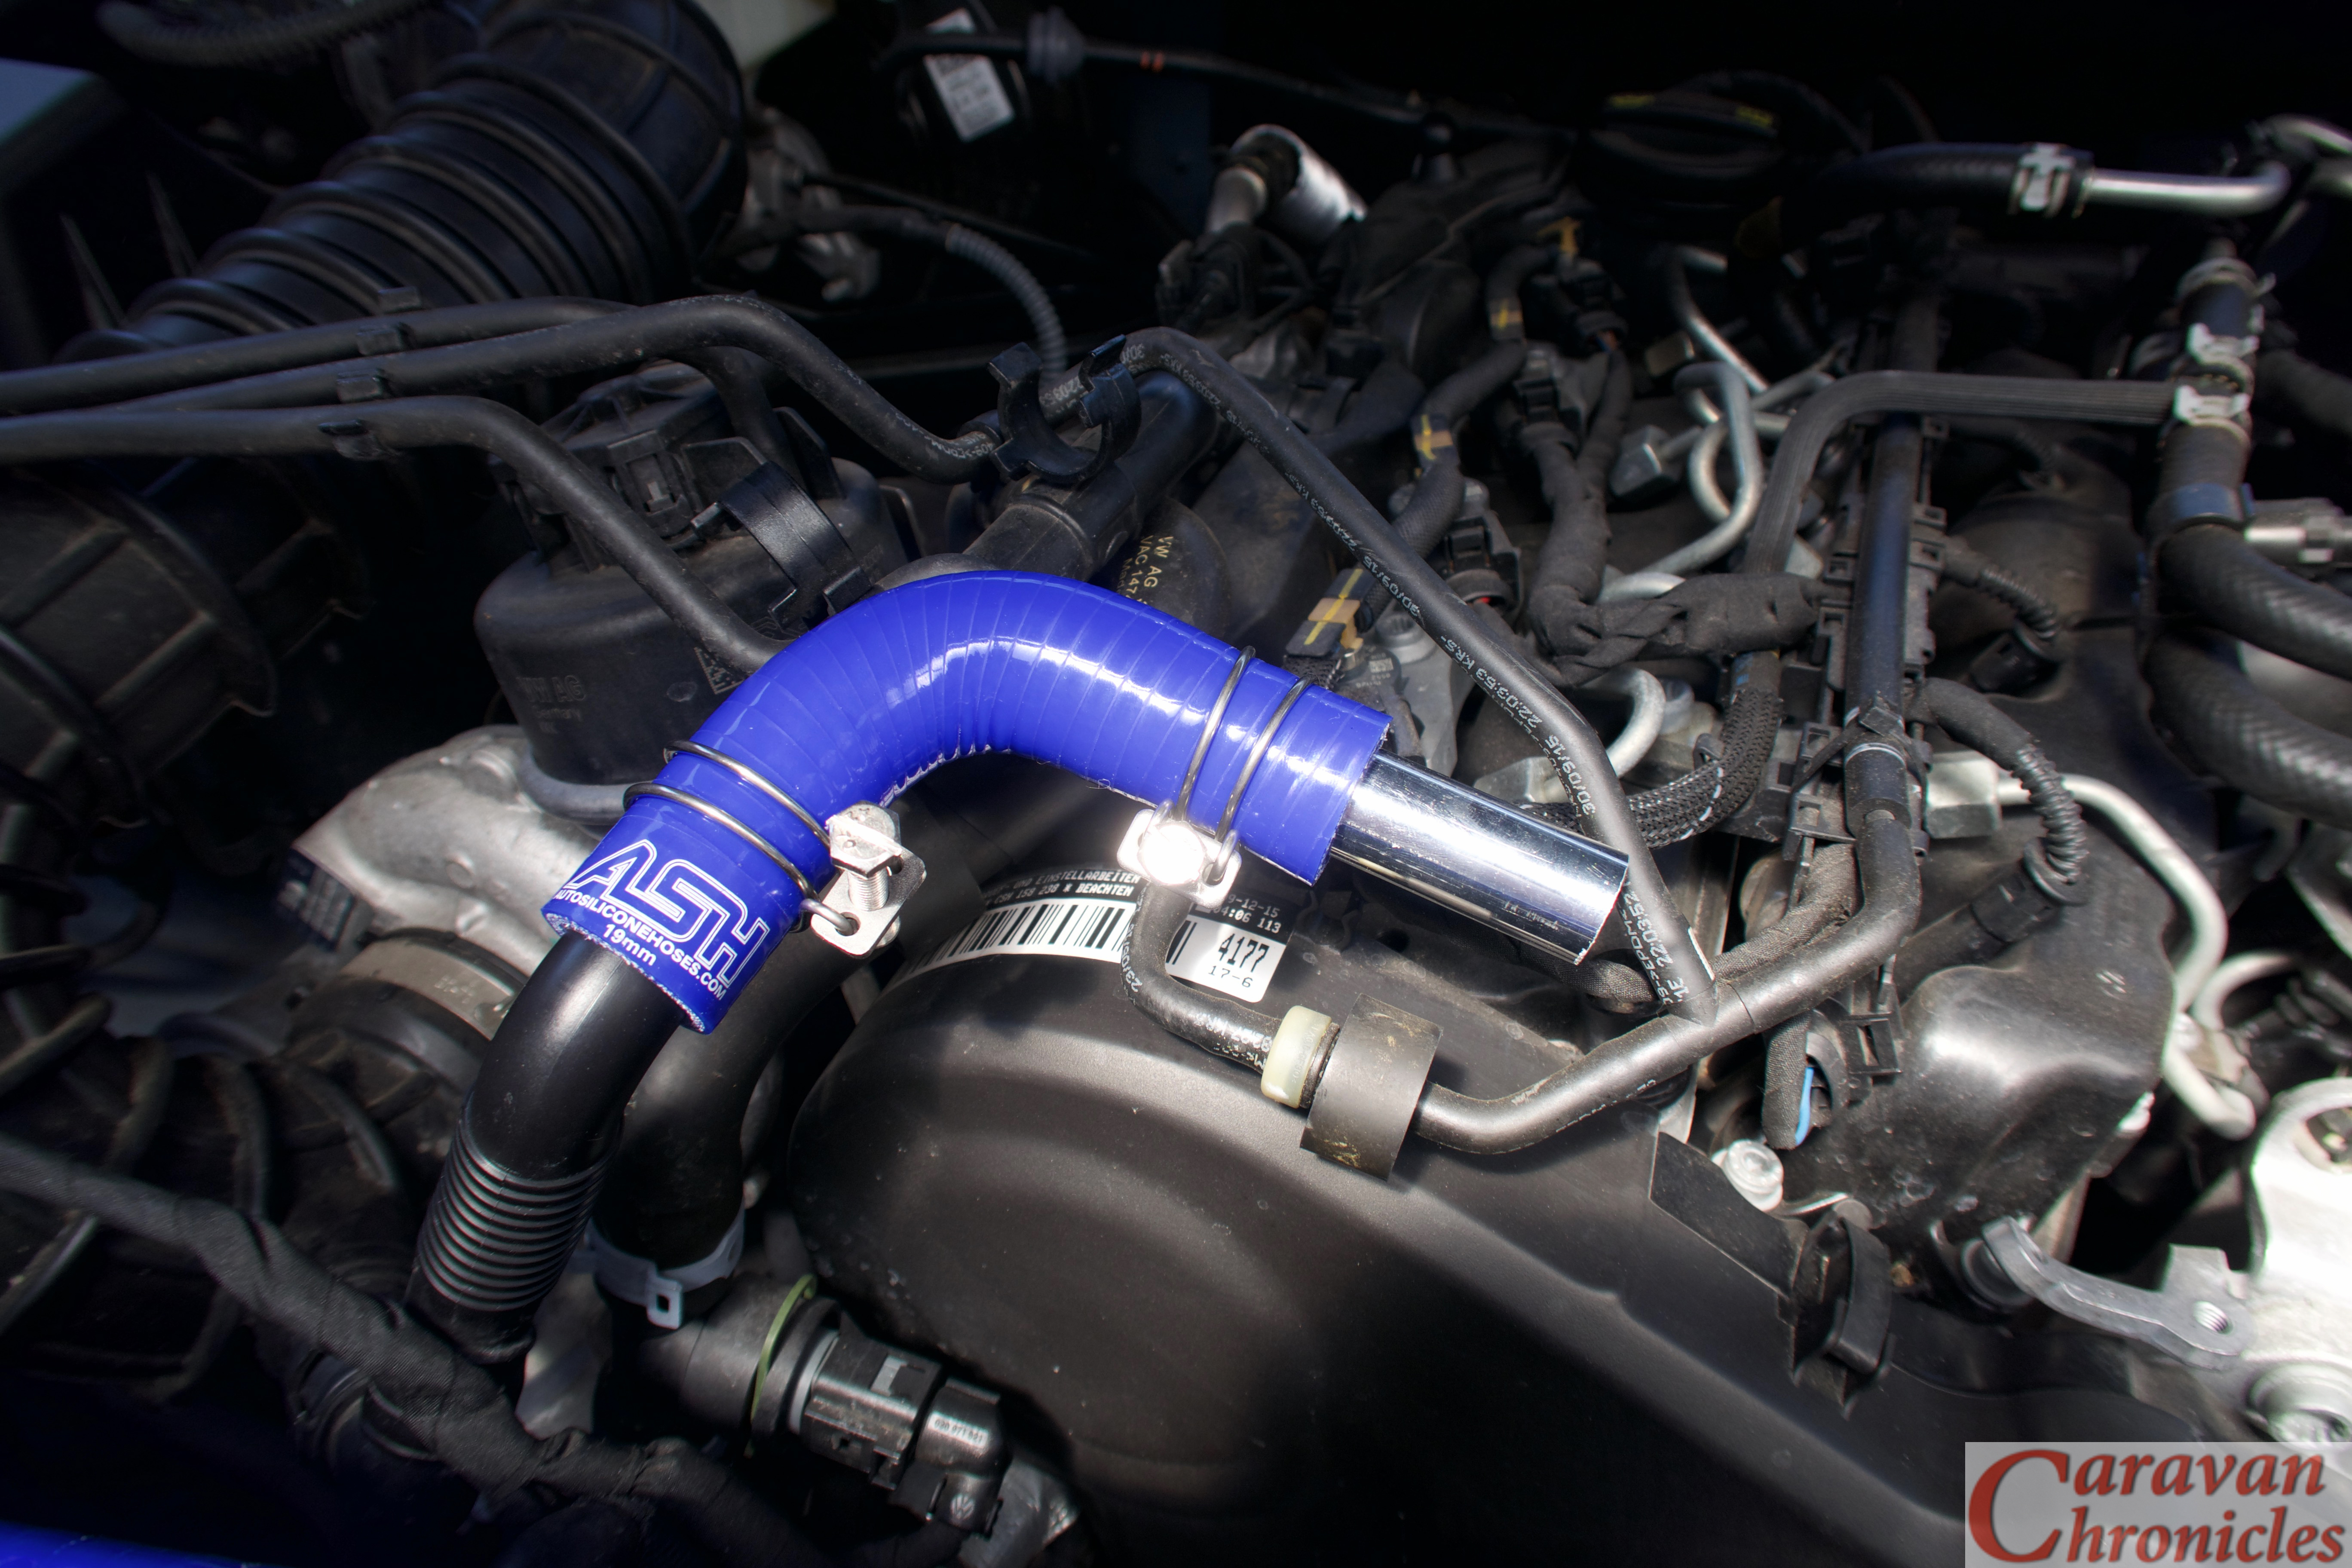
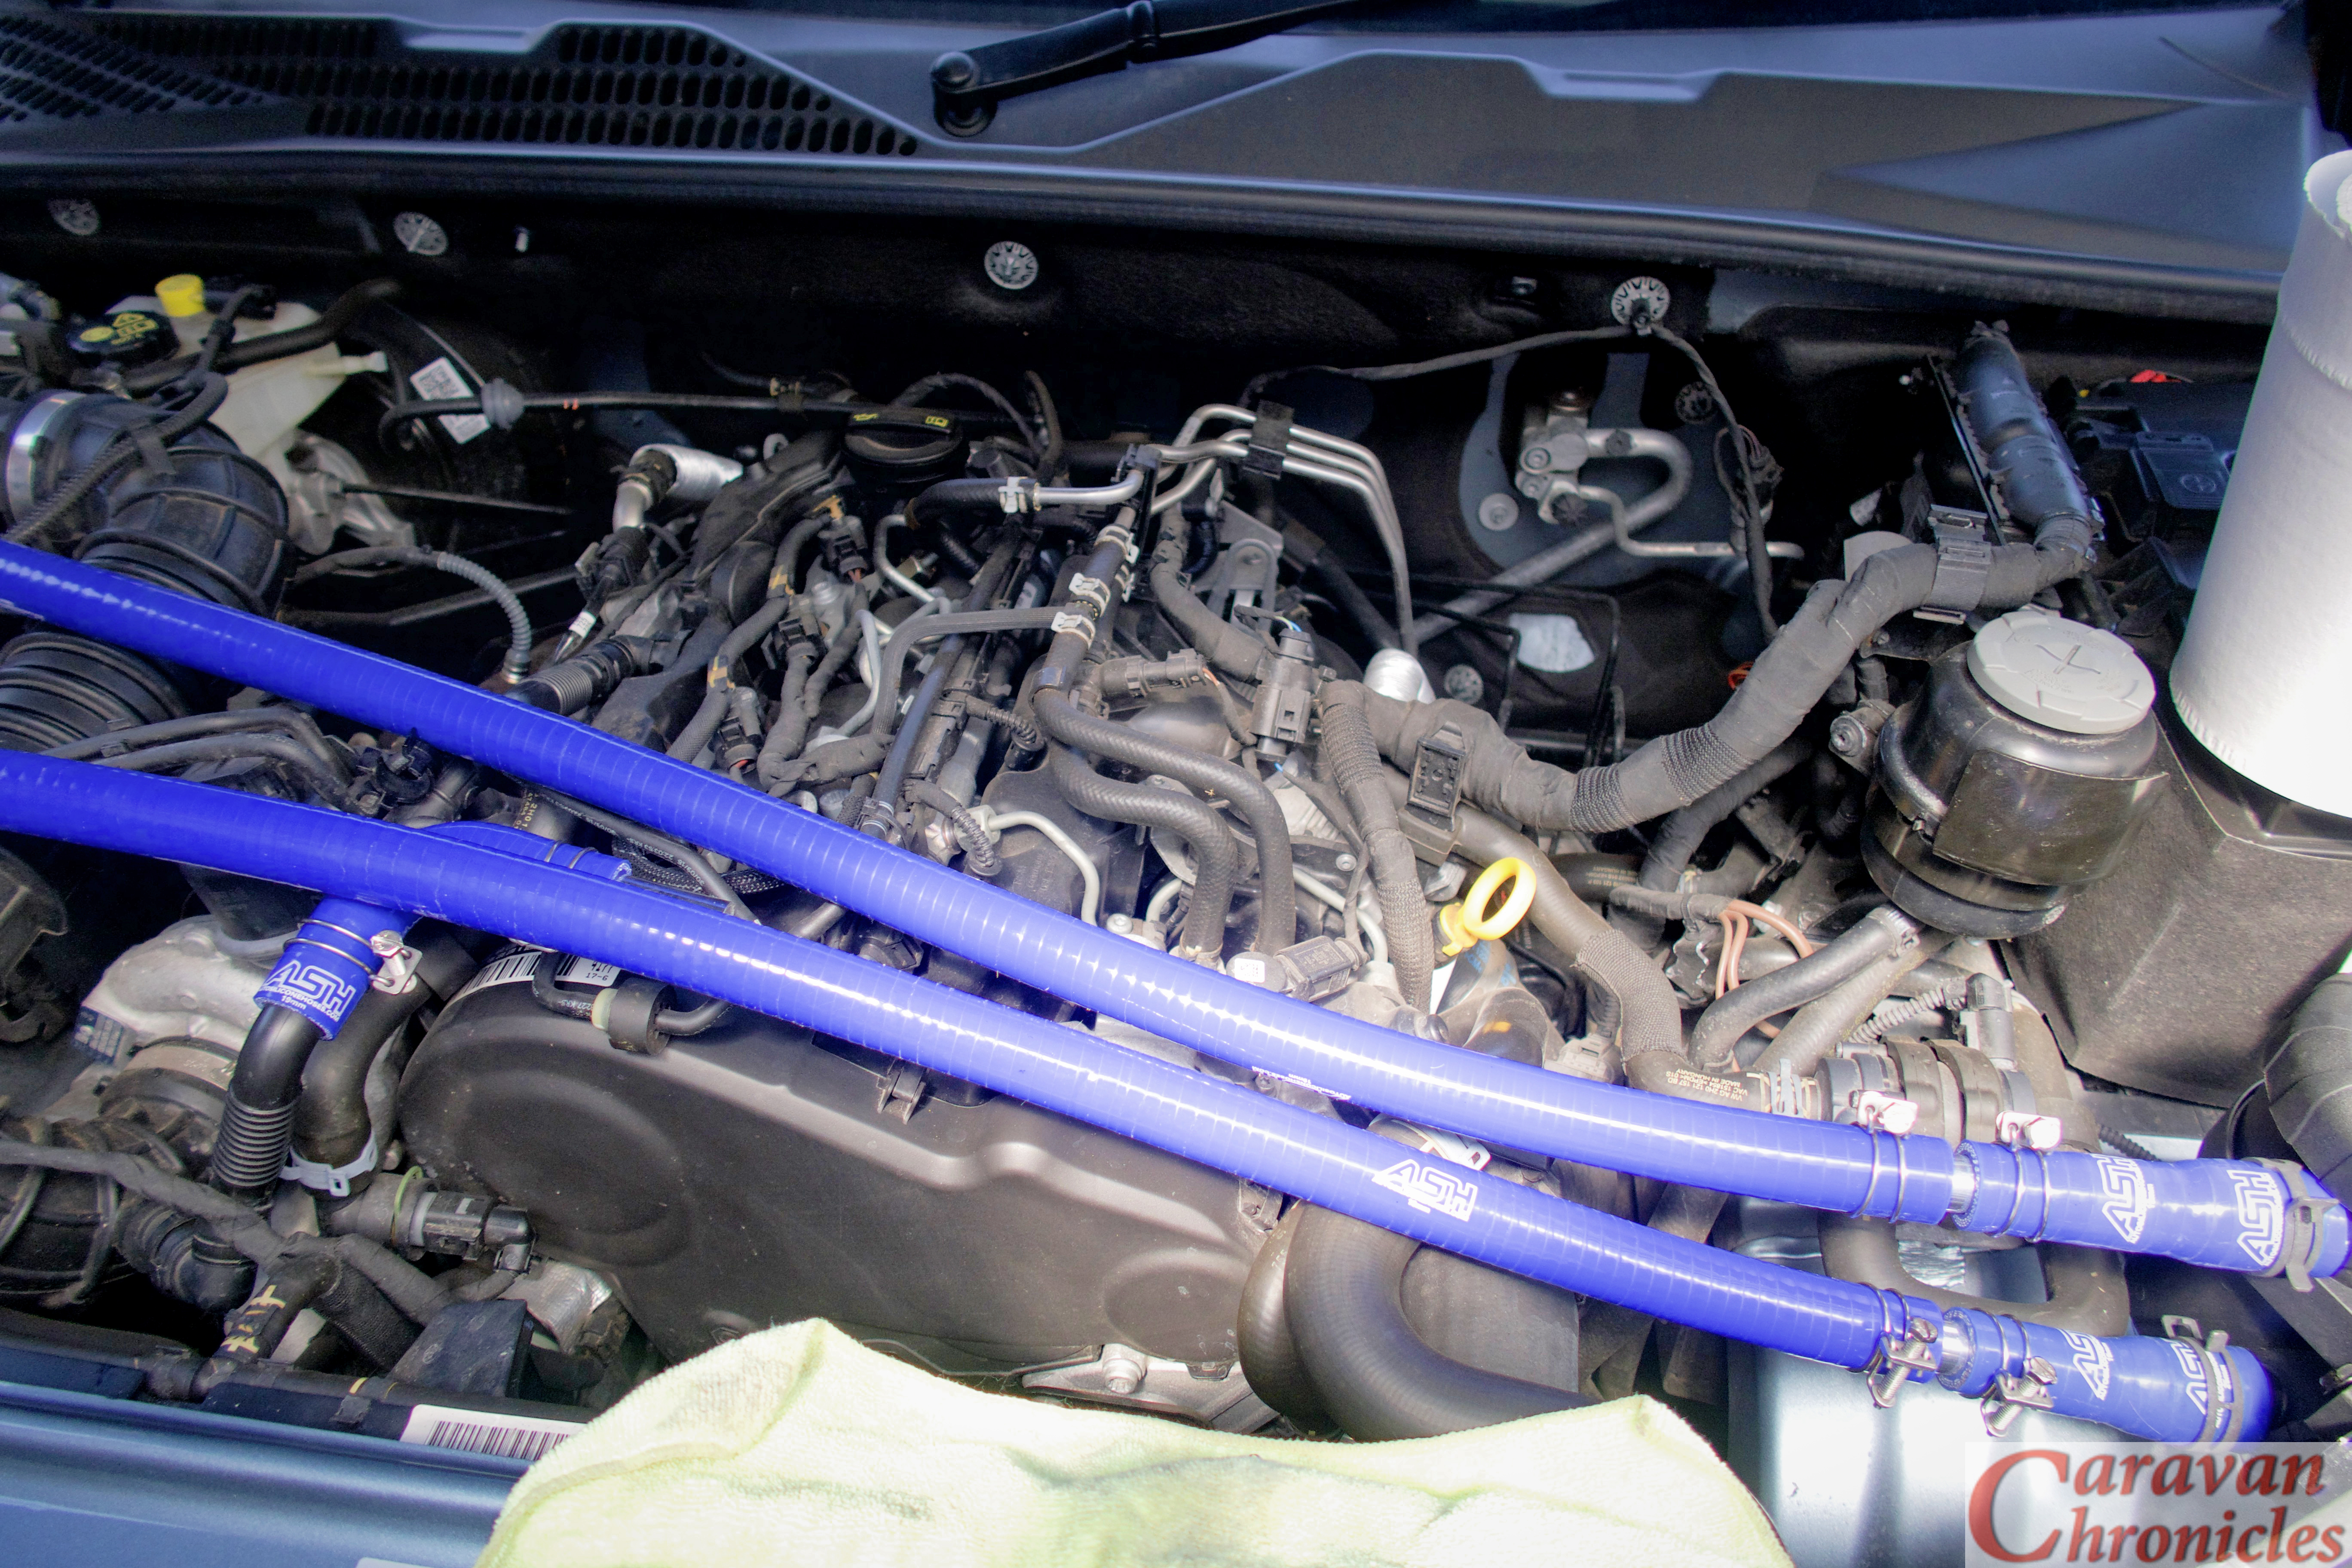
Back home with my shopping, it was time to start on the plumbing.
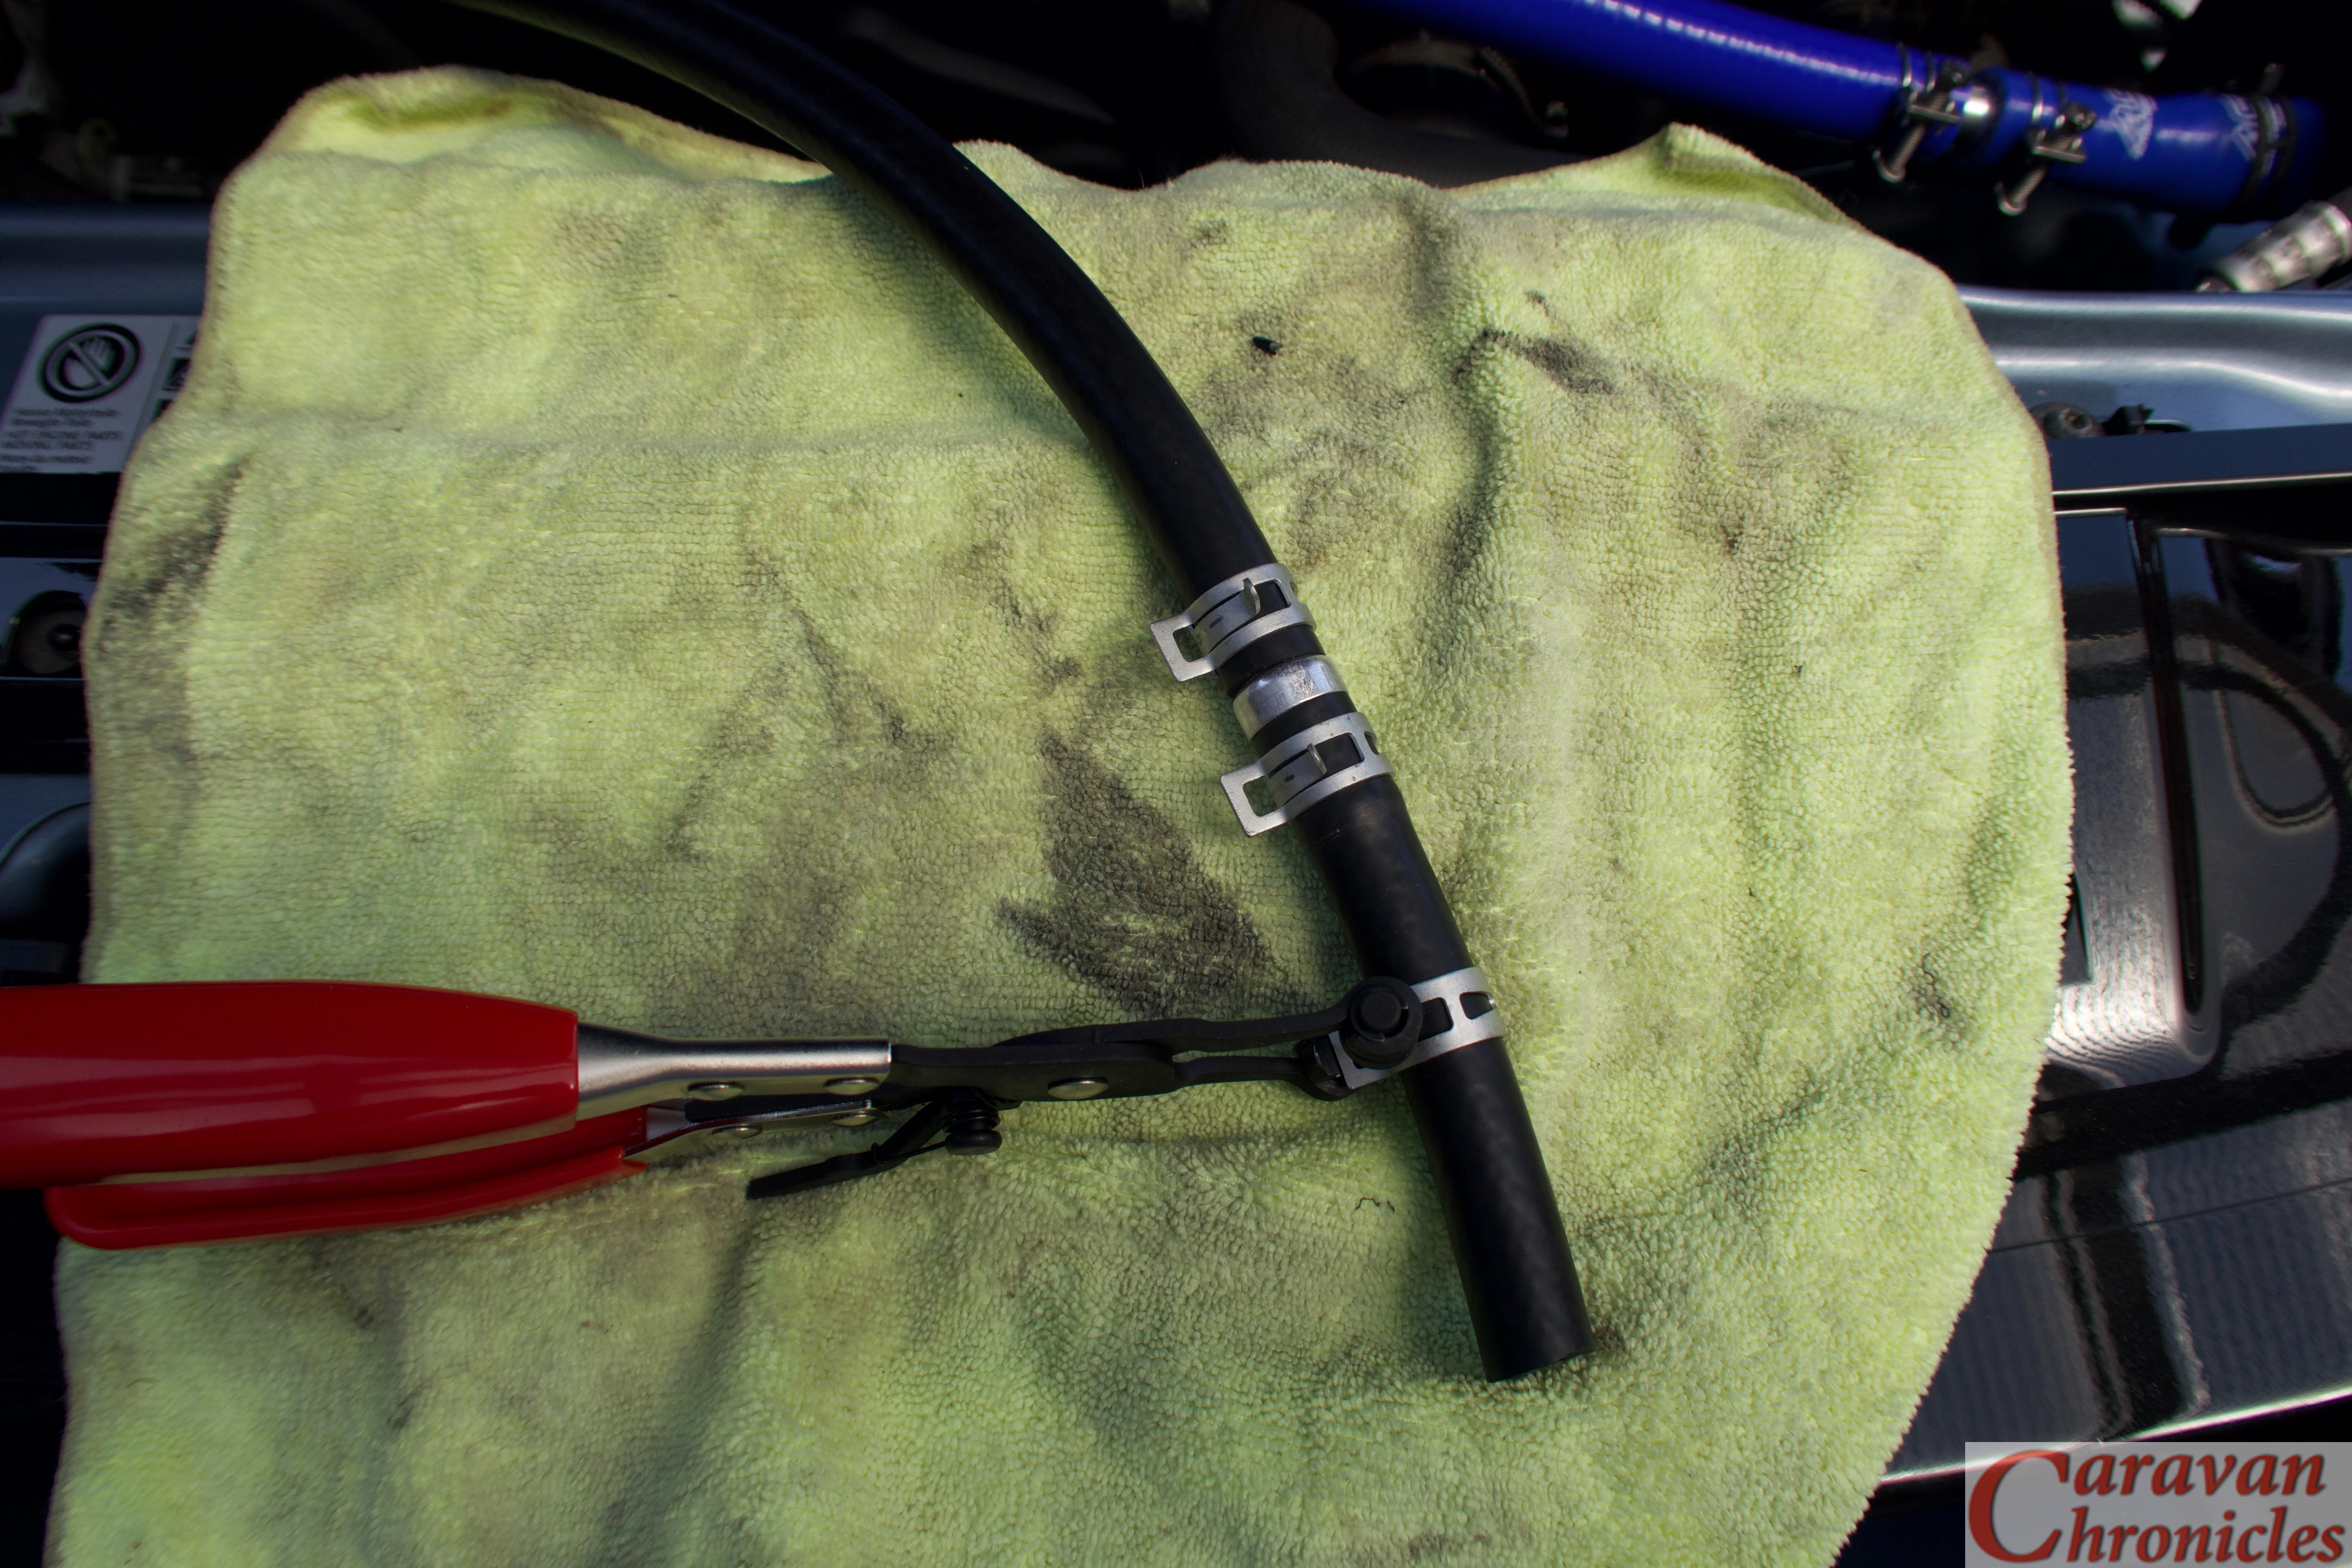
For securing pipes, I personally prefer spring clips… the type you install with special pillars, however the silicon hose OD was slightly too large for may normal stock of clamps so I had to opt for using the wire type. I’ll order some of the correct size and replace the wire clamps as soon as they arrive.
It was really simple now to just assemble the bits, cutting the silicon pipe to length as required. I used a pair of plastic conduit cutters to easily slice through the pipe.
Before I made the final connections to the crank case breather port or the turbo inlet port I blew the pipes clear using a high pressure air line.
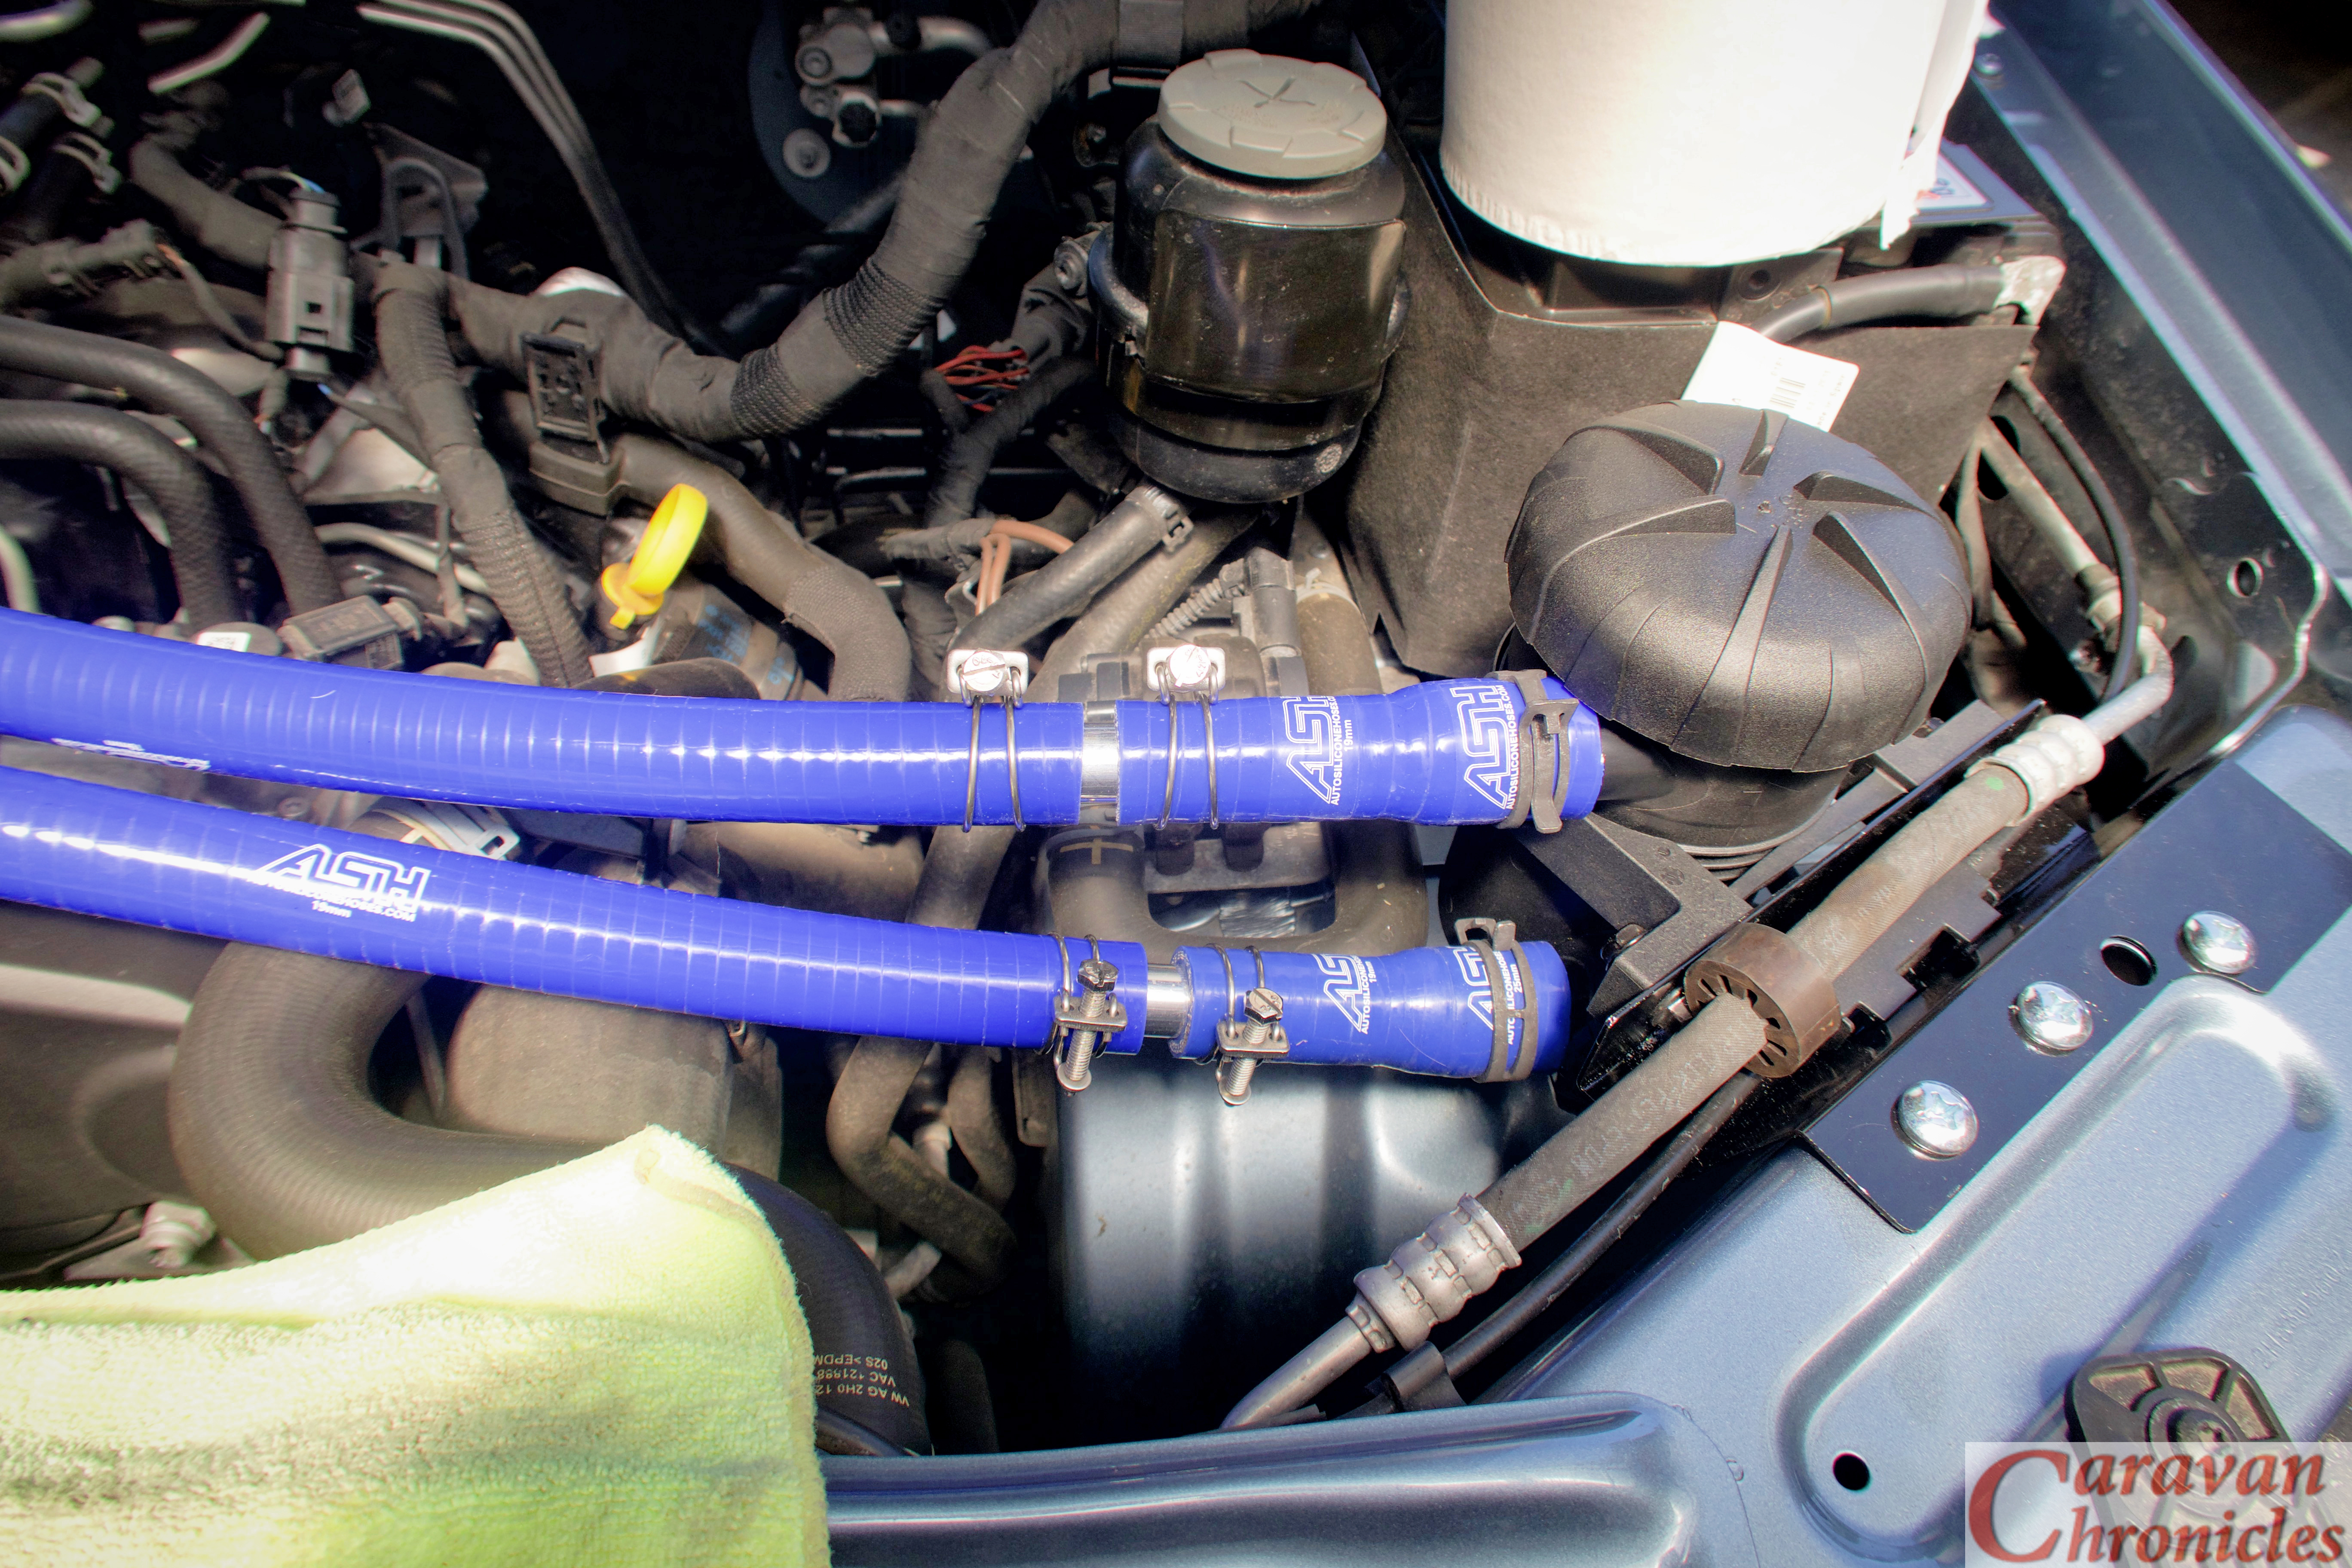
All that was left to do was install the drain hose, one way valve and drain tap. I used normal 20mm oil line for the drain, inserting the one way valve about three inches below the outlet of the Provent catch can. The remainder of the hose was dropped down to chassis level and the drain tap added and secured with a couple of zip ties.
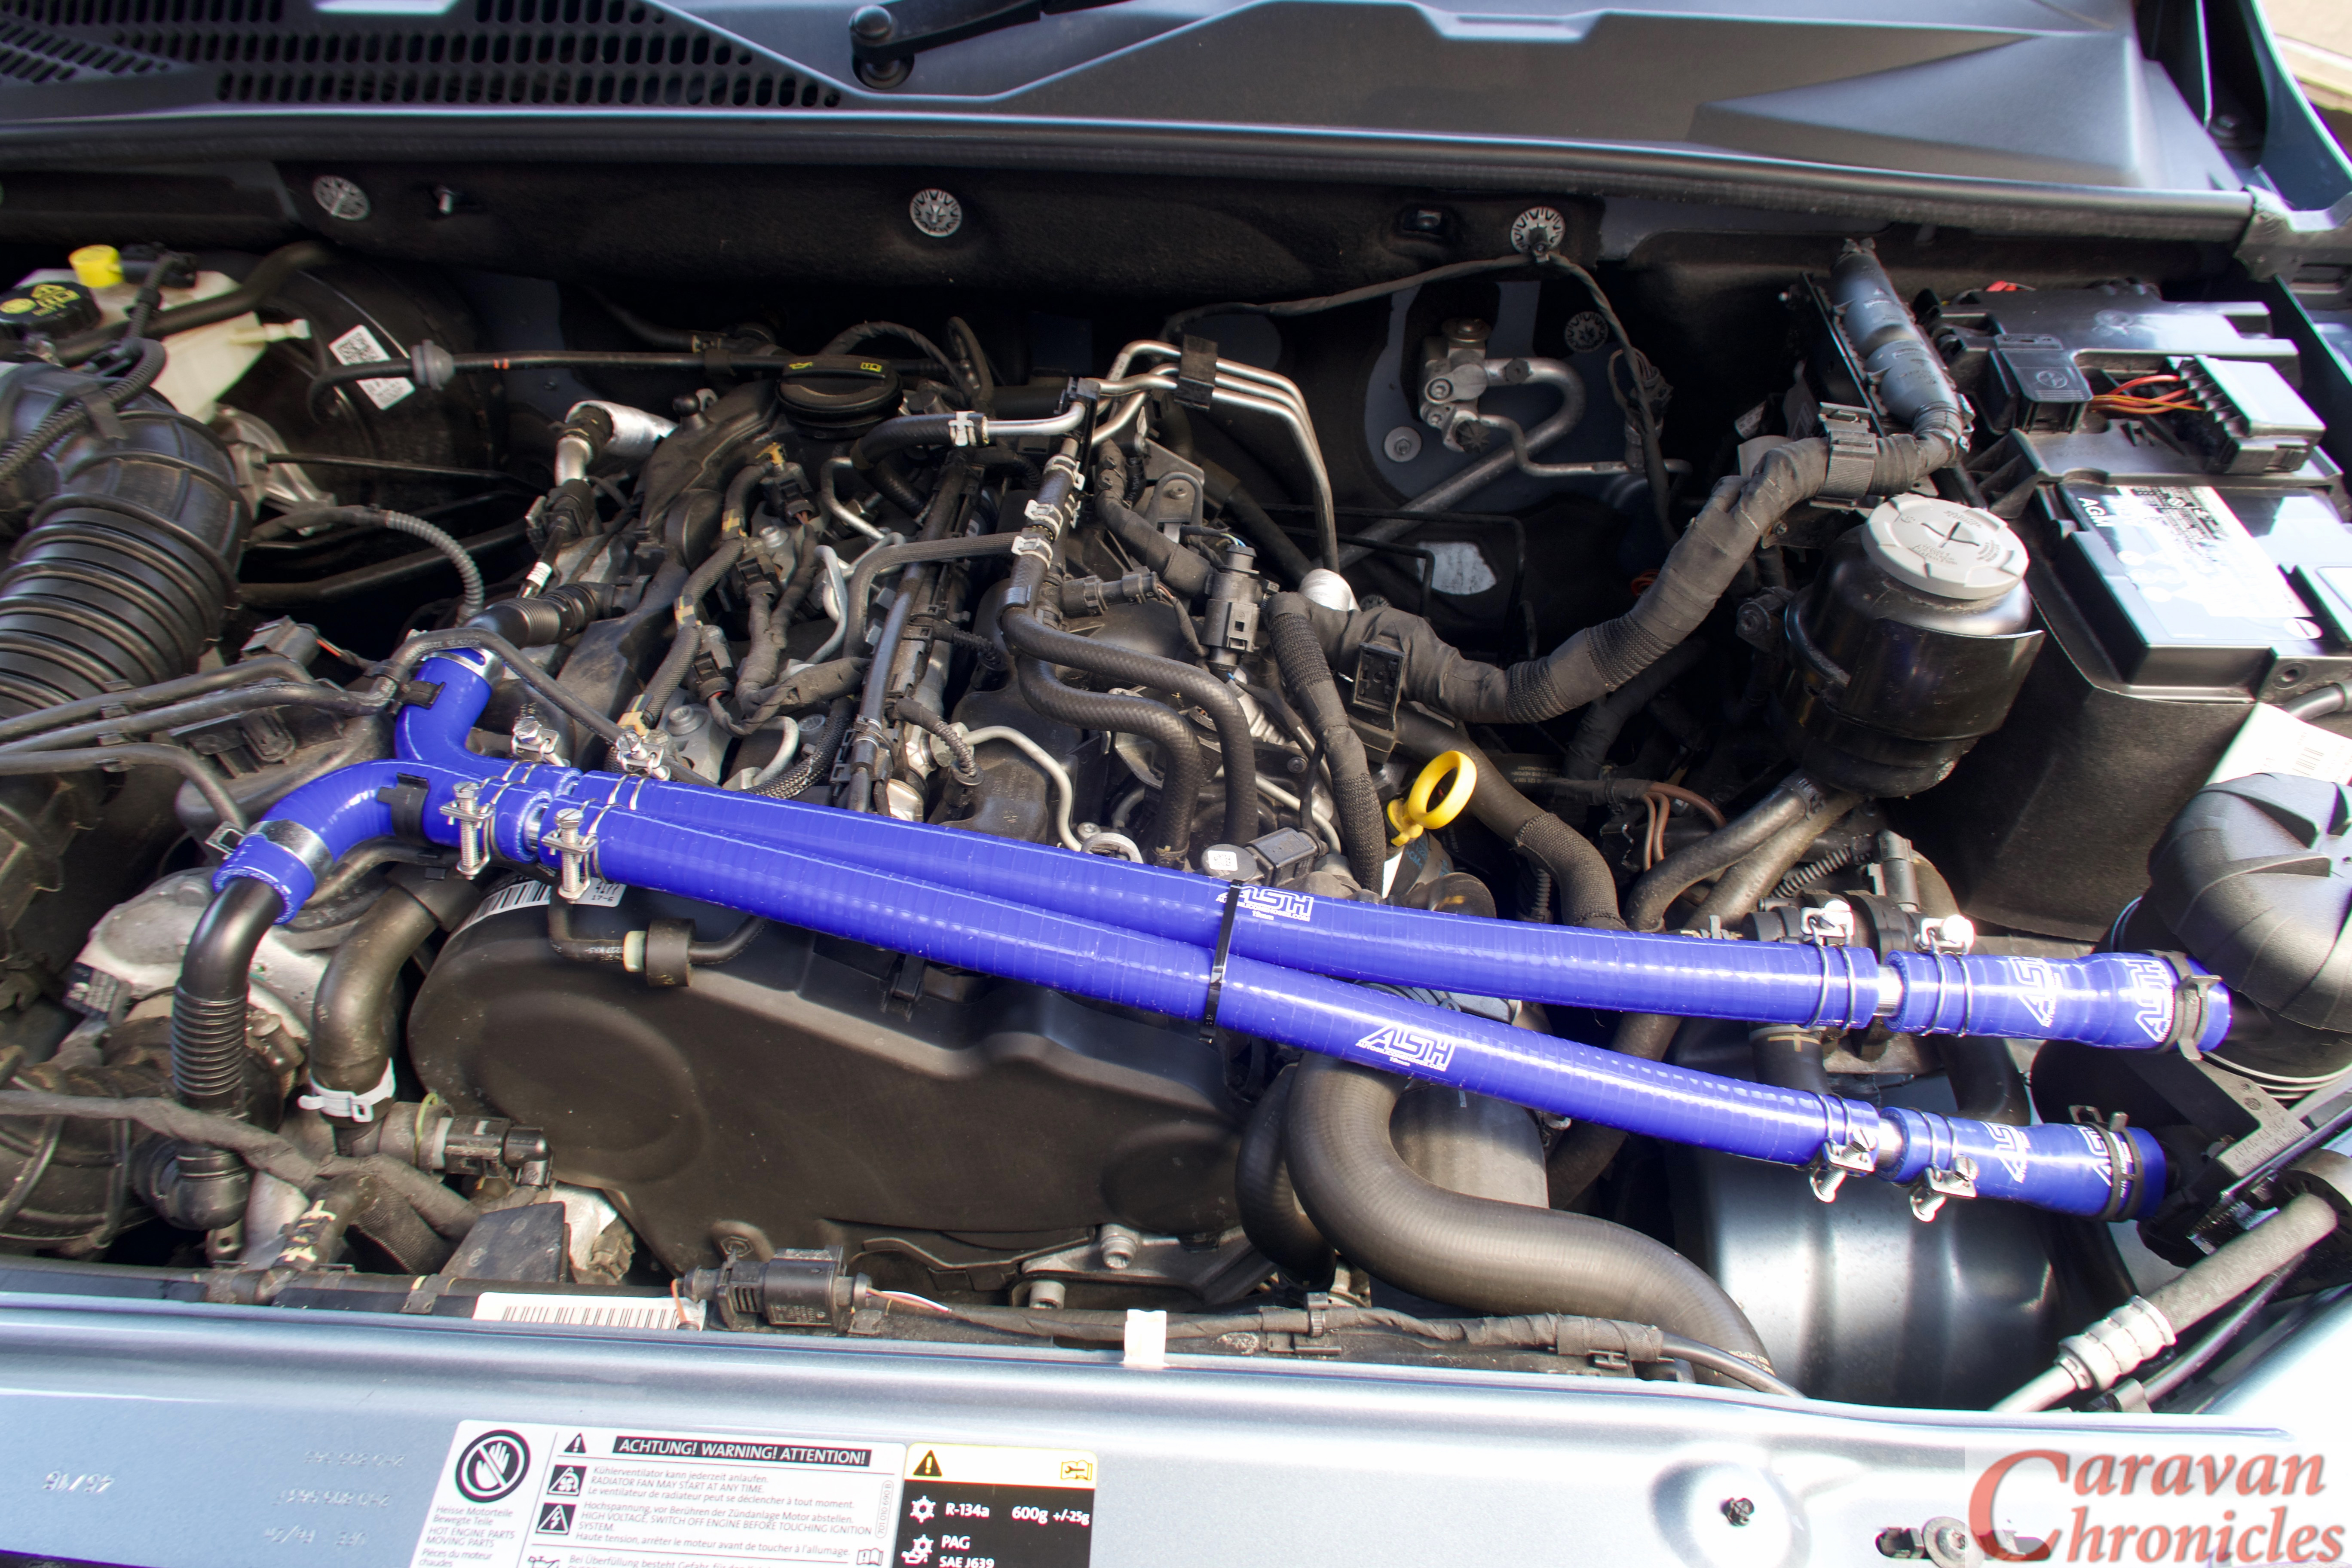
The Finale…
I secured the pipes in a couple of places with zip ties, now I know the route I can make a small stand-off bracket with two rubber lines “P” clips to mount on the engine to hold the pipes, although they are self-supporting because of the short length.
In the photographs above it looks like the piping is tight across the engine, I did do a pull and push test and there is plenty of movement at the 90 degree bends to allow the torque twist of the engine without pulling or pushing on the pipes at the catch can end.
The current mileage is 11,750 or there abouts, so I’ll check the drain and filter in 100 miles and each 100 miles after that so I can get an idea of how the setup is going. I’m not sure how long the filter is designed to last, but Ill put it on the schedule to replace ever main service. The other thing that is an unknown is how much oil I’ll get. I have been watching some YouTube videos made by Berrima Diesel in Australia (if you watch any of the Australian 4 x 4 or off-road channels you will recognise the name). I only found out about their catch can experience when one of the guys from one of the 4 x 4 adventure channels got in touch… even if you don’t think you need a catch can but drive a big diesel their videos are well worth watching.
Ok… I was saying I don’t know how much oil to expect… but it did surprise me that Berrima Diesels posted a video showing a new 4 x 4 with about 6000Km on the clock had produced about 300ml’s of oil using the same Provent catch can. It’s also worth taking look at what the have to say about the current oil specified in diesel engines.
The other thing I noticed was when I left the engine ticking over for about ten minutes. Bearing in mind I had just come back from West Yorkshire via the M62 and M60 and started the pipe install as soon as I got back so the engine was still hot, the difference in temperature between the short length of pipe exiting the crankcase vent and the inlet pipe of the turbo. The pipe exiting the crankcase vent port was almost at the temperature I could not keep my fingers on it, while the inlet pipe I’d connected too was still cool. I’ll have to get my thermomiterbob laser do-hicky out and get some readings… but anything that helps cool gasses going into the turbo has to be of benefit right?
That’s it for now, I know it’s not caravanning related that much… unless you want to get the best out of your diesel while towing. I promise the next one will be caravan related, honest!
As in part one I’d also like to give a shout out to Charles at HumbleMechanic.com for all the information and videos he produces about VW vehicles. Charles has been an absolute gold mine of information for all things VW and if you drive any of VW’s vehicles please be sure to drop in on his YouTube channel and take a look.