
Tags
Caravan, caravan roof vents, Caravanning, Caravans, Maintenance, Modifications, Rooflights, Travel Trailer, Travel Trailers
To help keep the dreaded damp at bay, caravan manufacturers make sure that there is always a good airflow through the caravan. In floor cupboards where there is any gas appliances installed, there have to be “gas drops” that allow any leaking gas to escape through the floor, they also install under floor vents in other lockers to encourage a flow of air to reduce any chances of condensation. Now it’s not much good if the vents are only in the floor, there has to be something at roof level as well.
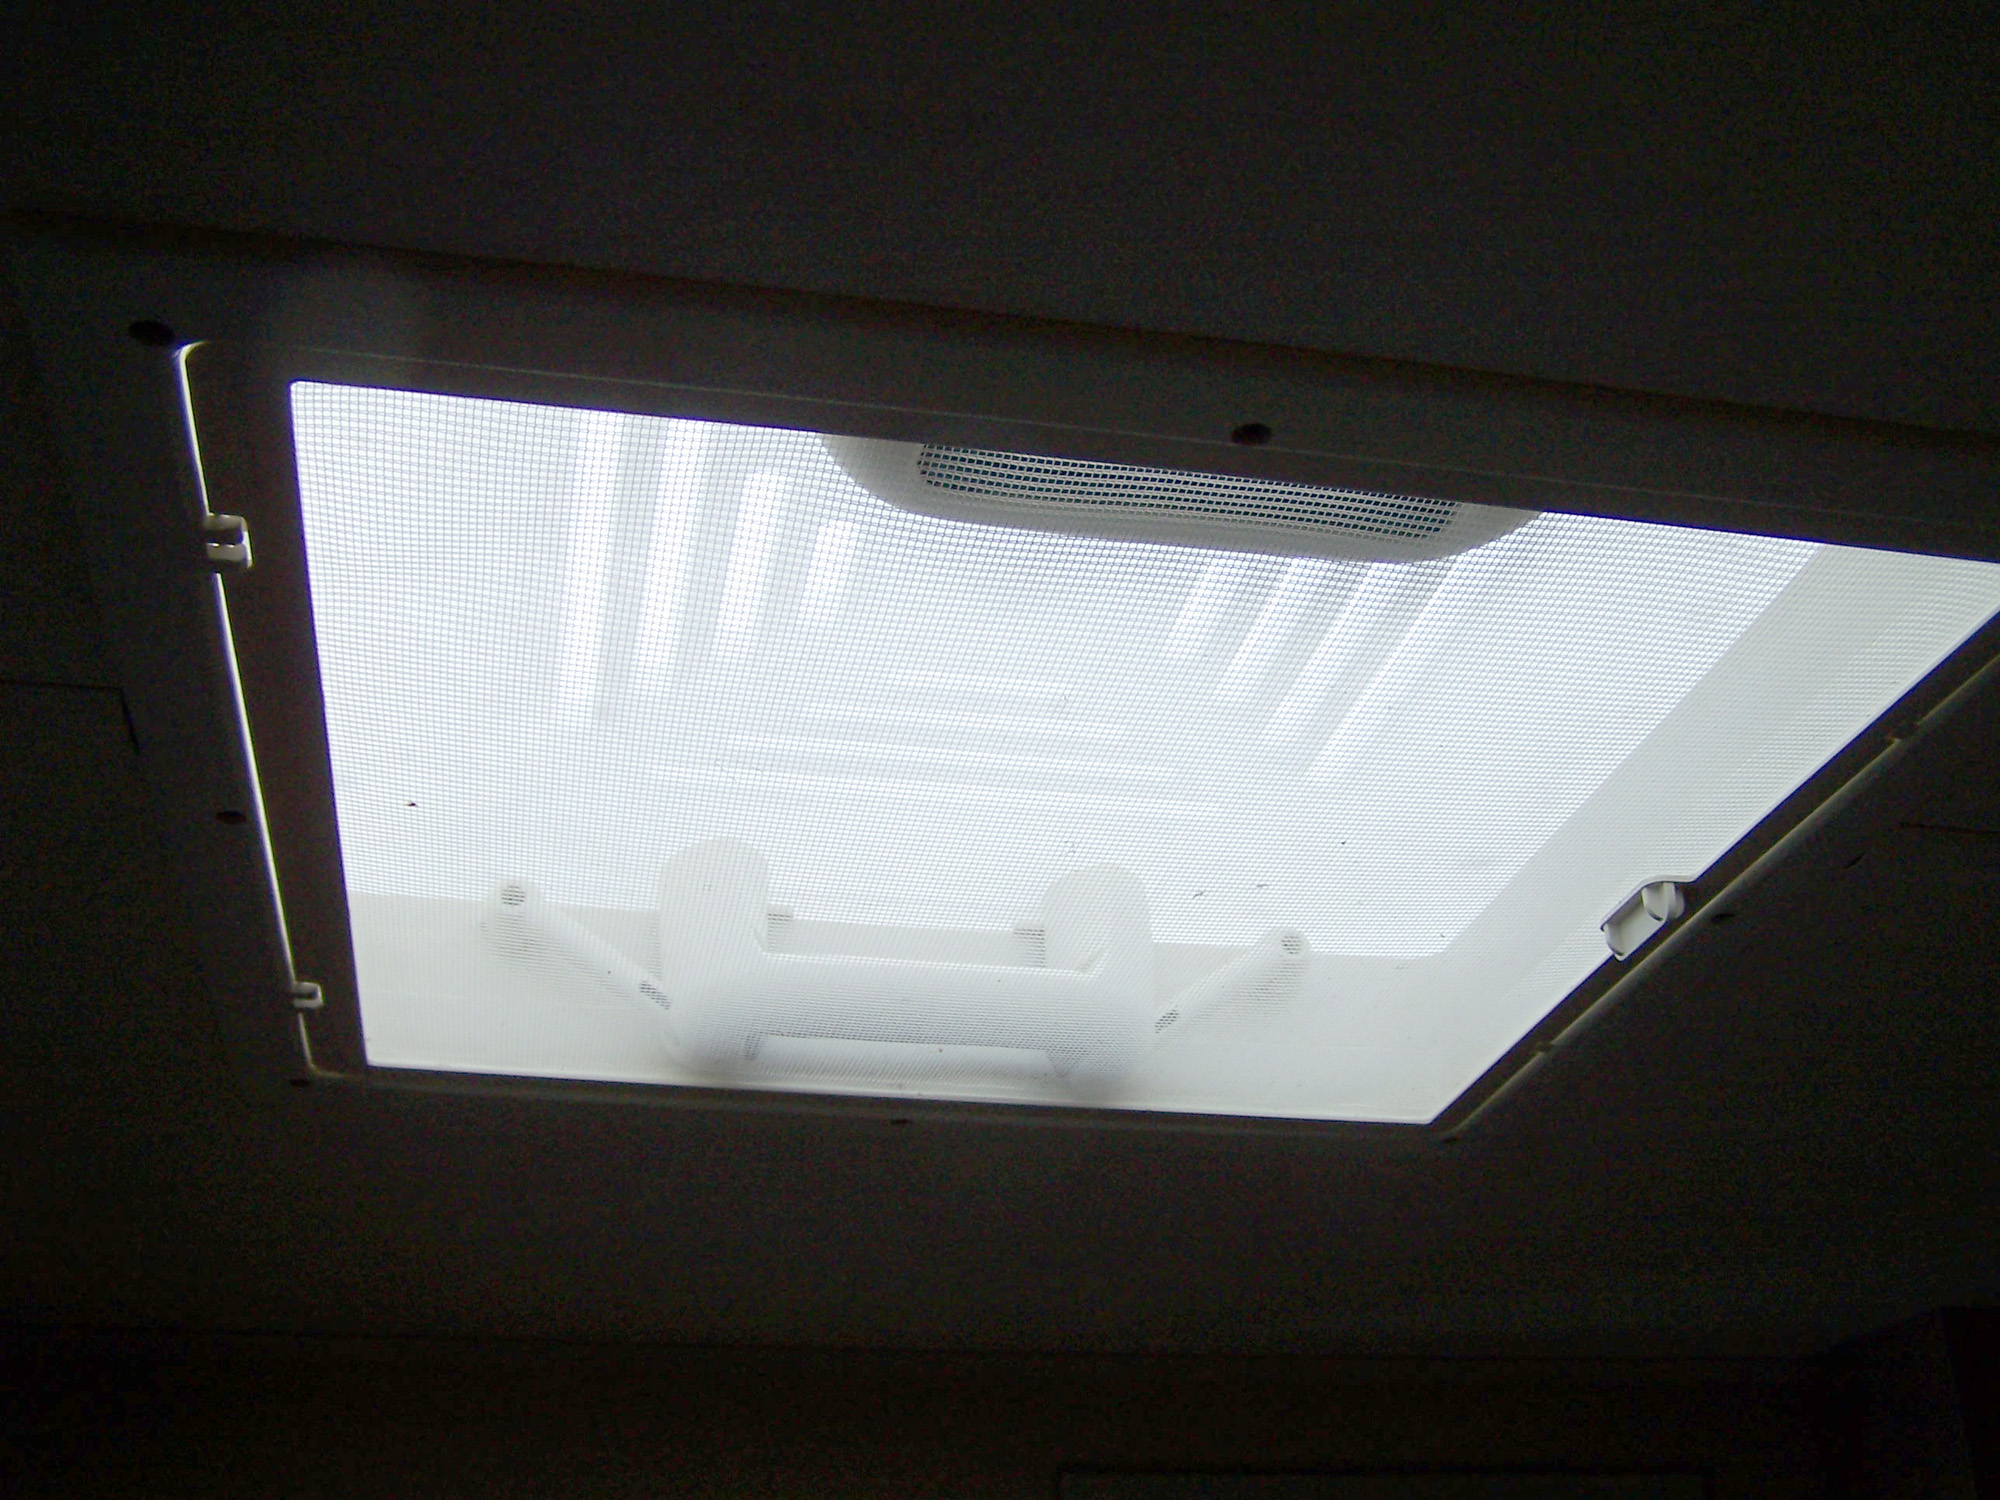
A roof light with permanent ventilation and fly screen built in.
The easiest way of achieving this is to use roof lights that have permanent ventilation built in. All UK built caravan will have one or two roof lights that have this feature. These vents use an effect long well-known to the little prairie dog in America. They dig a ‘U’ shaped burrow with two openings. Round one opening, they pile up the soil so it is higher than the other opening, When a gentle breeze blows across the two holes, because one opening is higher than the other it creates a pressure differential between the two and has the effect of moving the air through the burrow. This is exactly the same effect as a chimney on a fire-place. The caravan roof vents work in exactly the same manner, when a breeze blows, the pressure across the roof vent is slightly lower than the floor vents and has the effect of moving air through the caravan.
This is all good stuff and prevents stale air in the caravan and helps reduce condensation. However, at times we really don’t appreciate this, especially in winter. Our caravan has two of these vented roof lights, one in the bedroom area and the other in the rear bathroom. When we arrive on site, one of the first things we want to do is warm the van up to a temperature that is comfortable so I wanted to reduce the cold airflow through the van. I didn’t however want to block up any of the floor vents, so while cutting the plastic for the shelf fronts (see Caution contents may have moved ) I came up with this little do-hickey…..
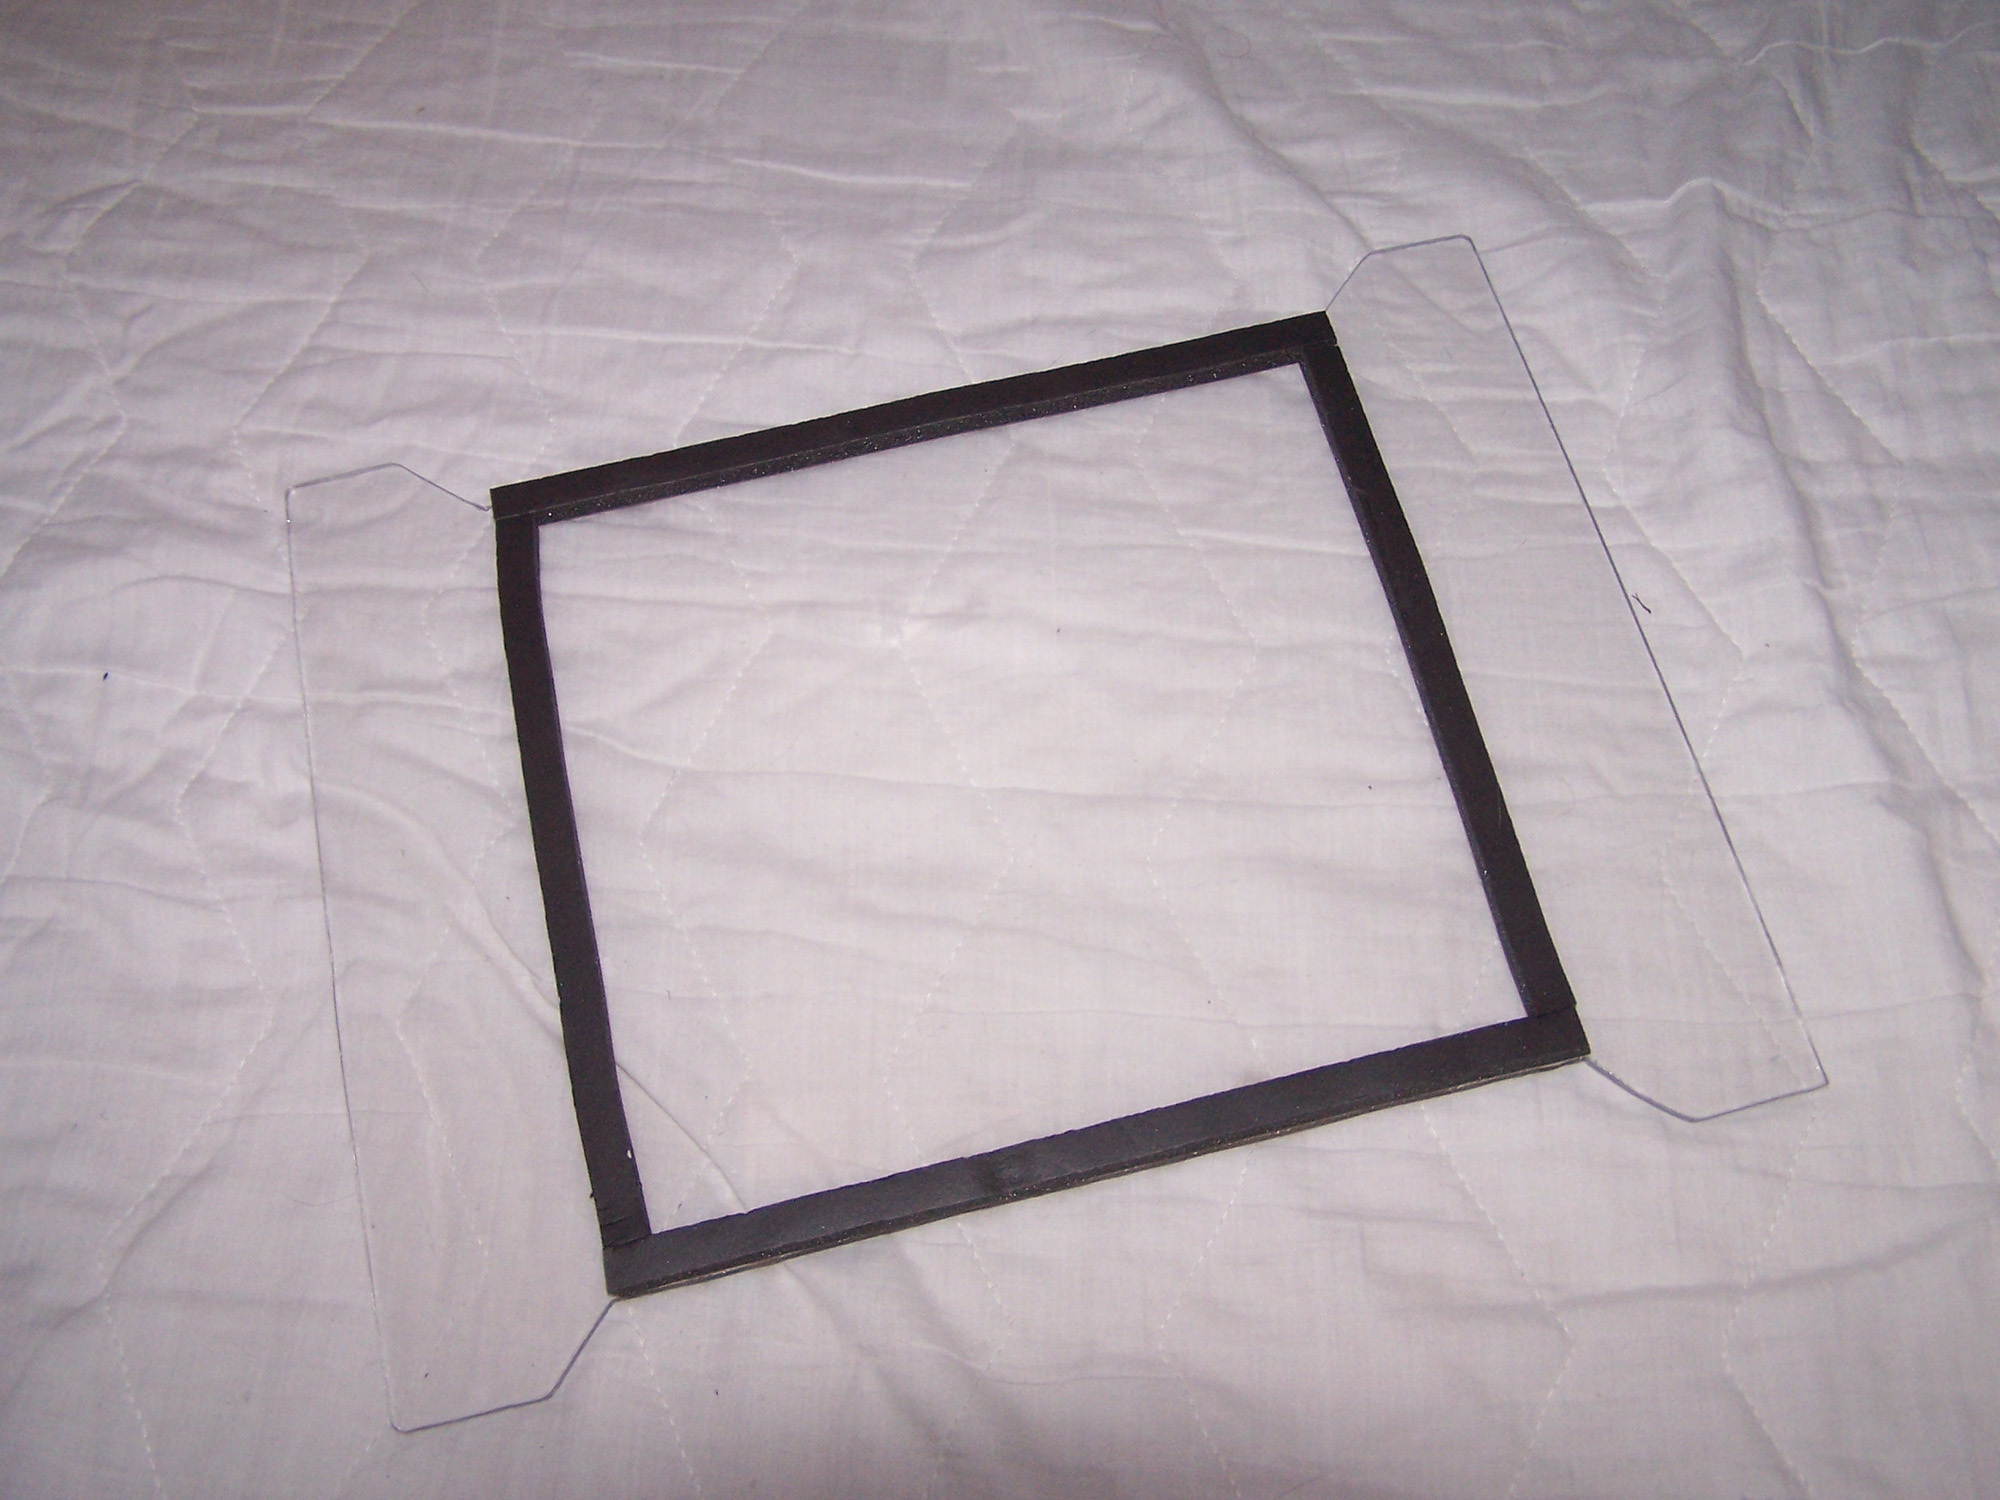
4mm PVC sheet with a foam self adhesive sealing strip
It is cut out of 4mm thick clear acrylic sheet and to provide a seal to the top of the roof light I used a self adhesive 10mm wide foam strip available from B & Q.
To install the do-hickey all I have to do is open the fly screen and feed one end into the gap between the frame and roof light lift it up so that the foam strip contacts the top of the roof light and slide it back slightly so the other end rests on the other side of the frame.
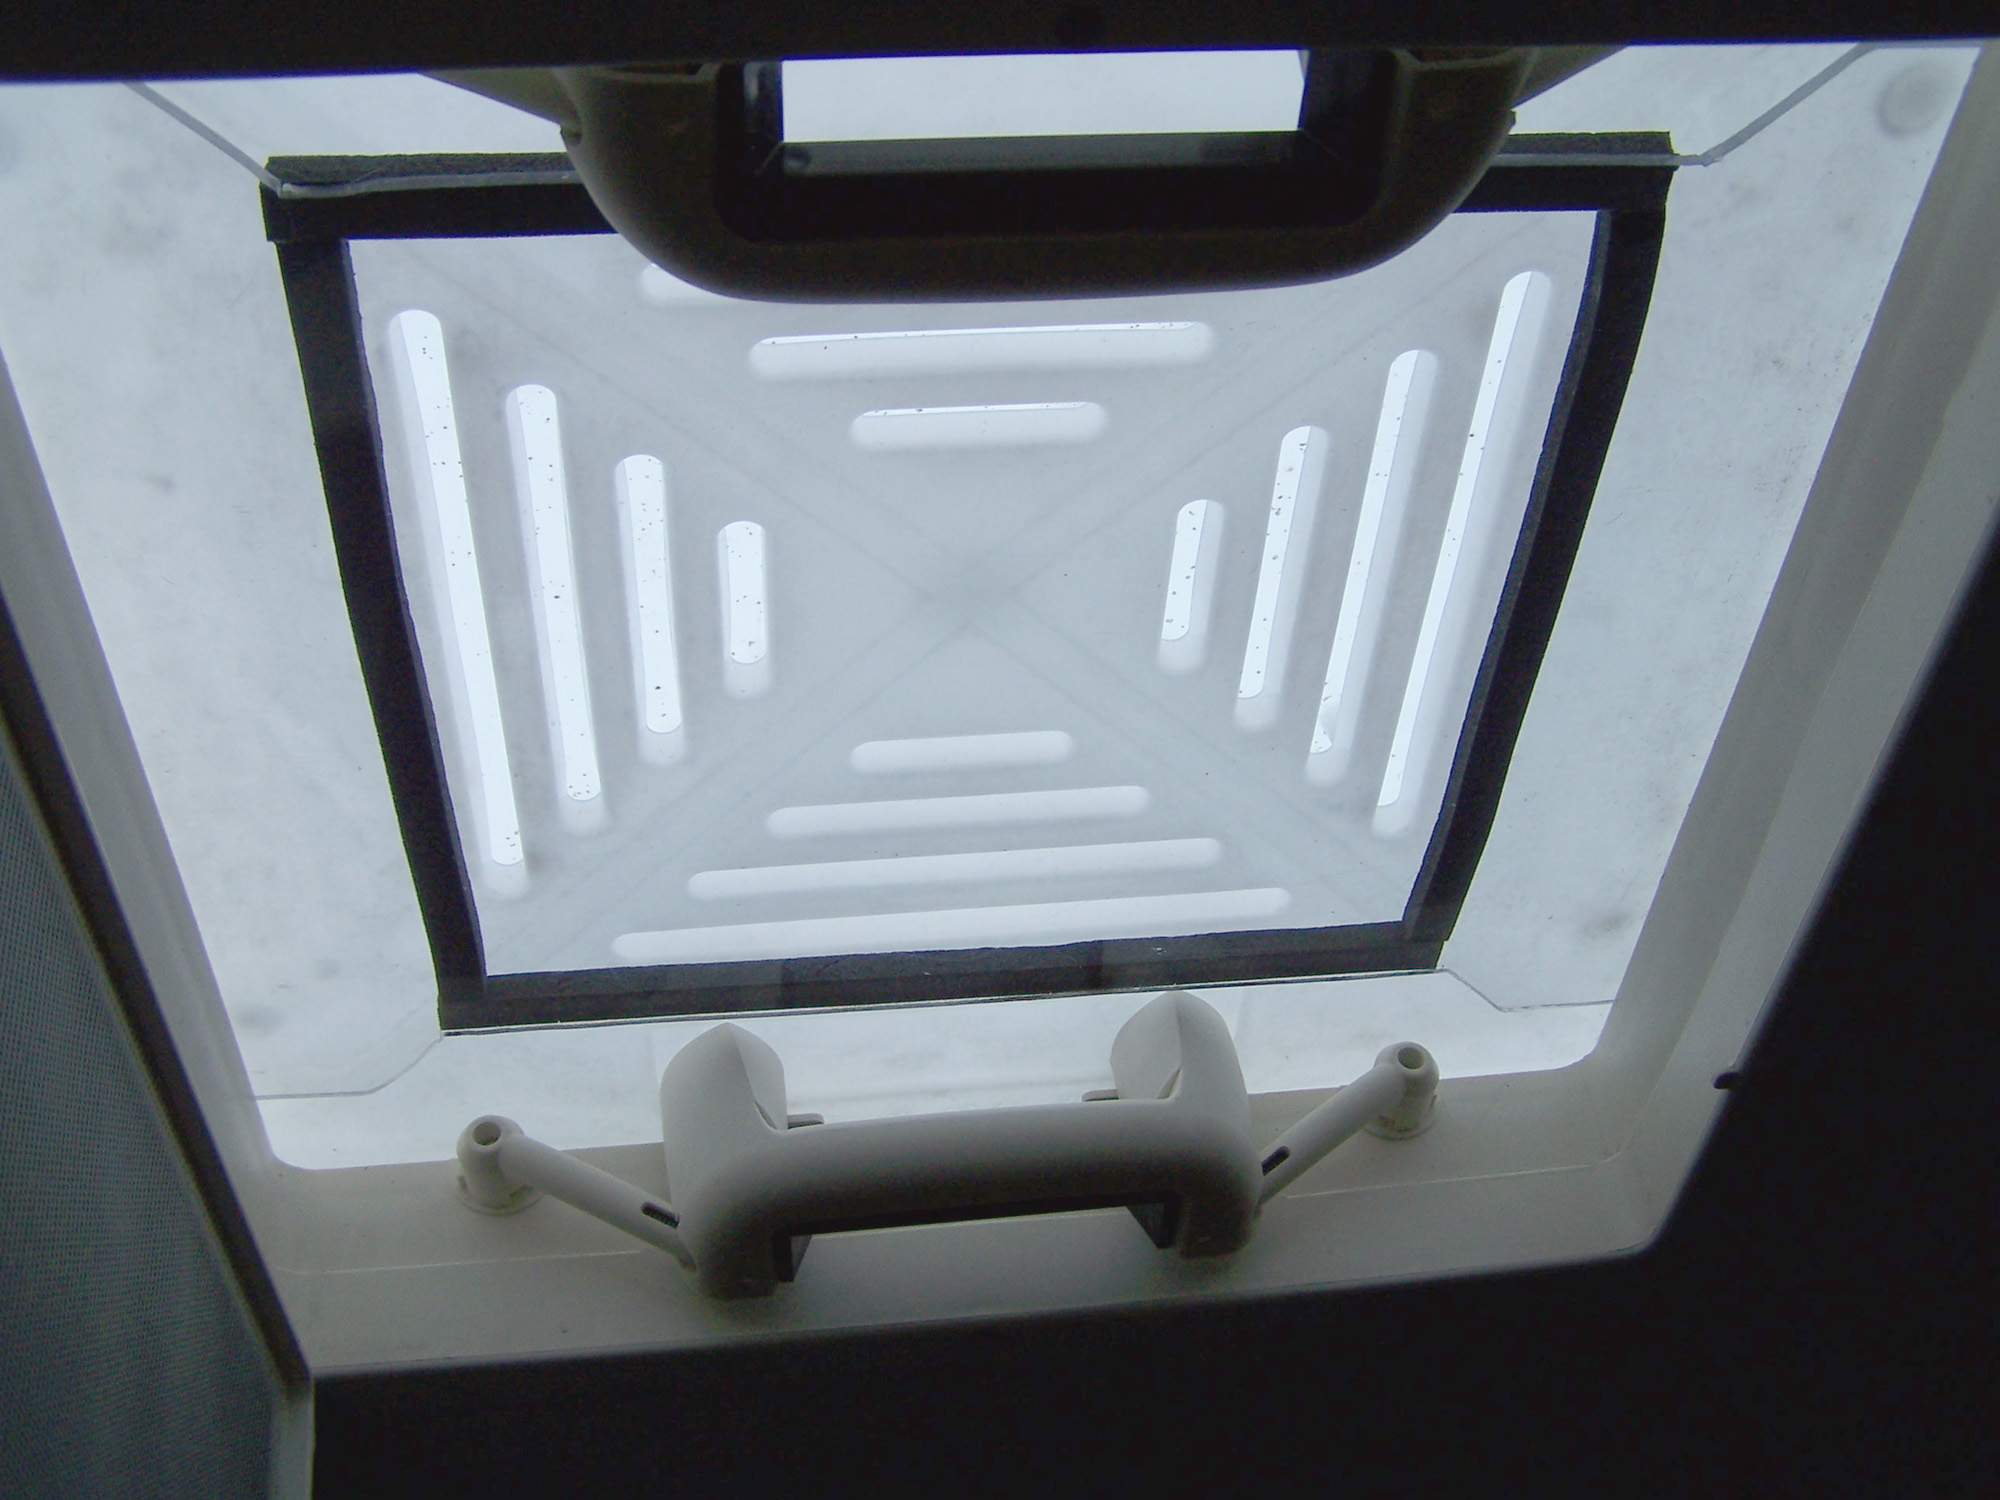
My do-hickey in place
In a quick test, I could warm the bathroom up to a useable temperature using just the blown air heating system in about half the time it took before in similar outside temperatures so I am hoping it will save a little on gas. I know that the electric towel rail we installed can just about keep it warm enough when its down to freezing outside, I’m hoping that this will allow it to be maintained at a slightly higher temperature in similar conditions.
I must stress though, we will only use this for warming the van up. When we have showers etc and when the van is in storage it will not be installed.
S

Pingback: A couple of updates and a problem… | Caravan Chronicles
Pingback: Back to the beginning… | Caravan Chronicles