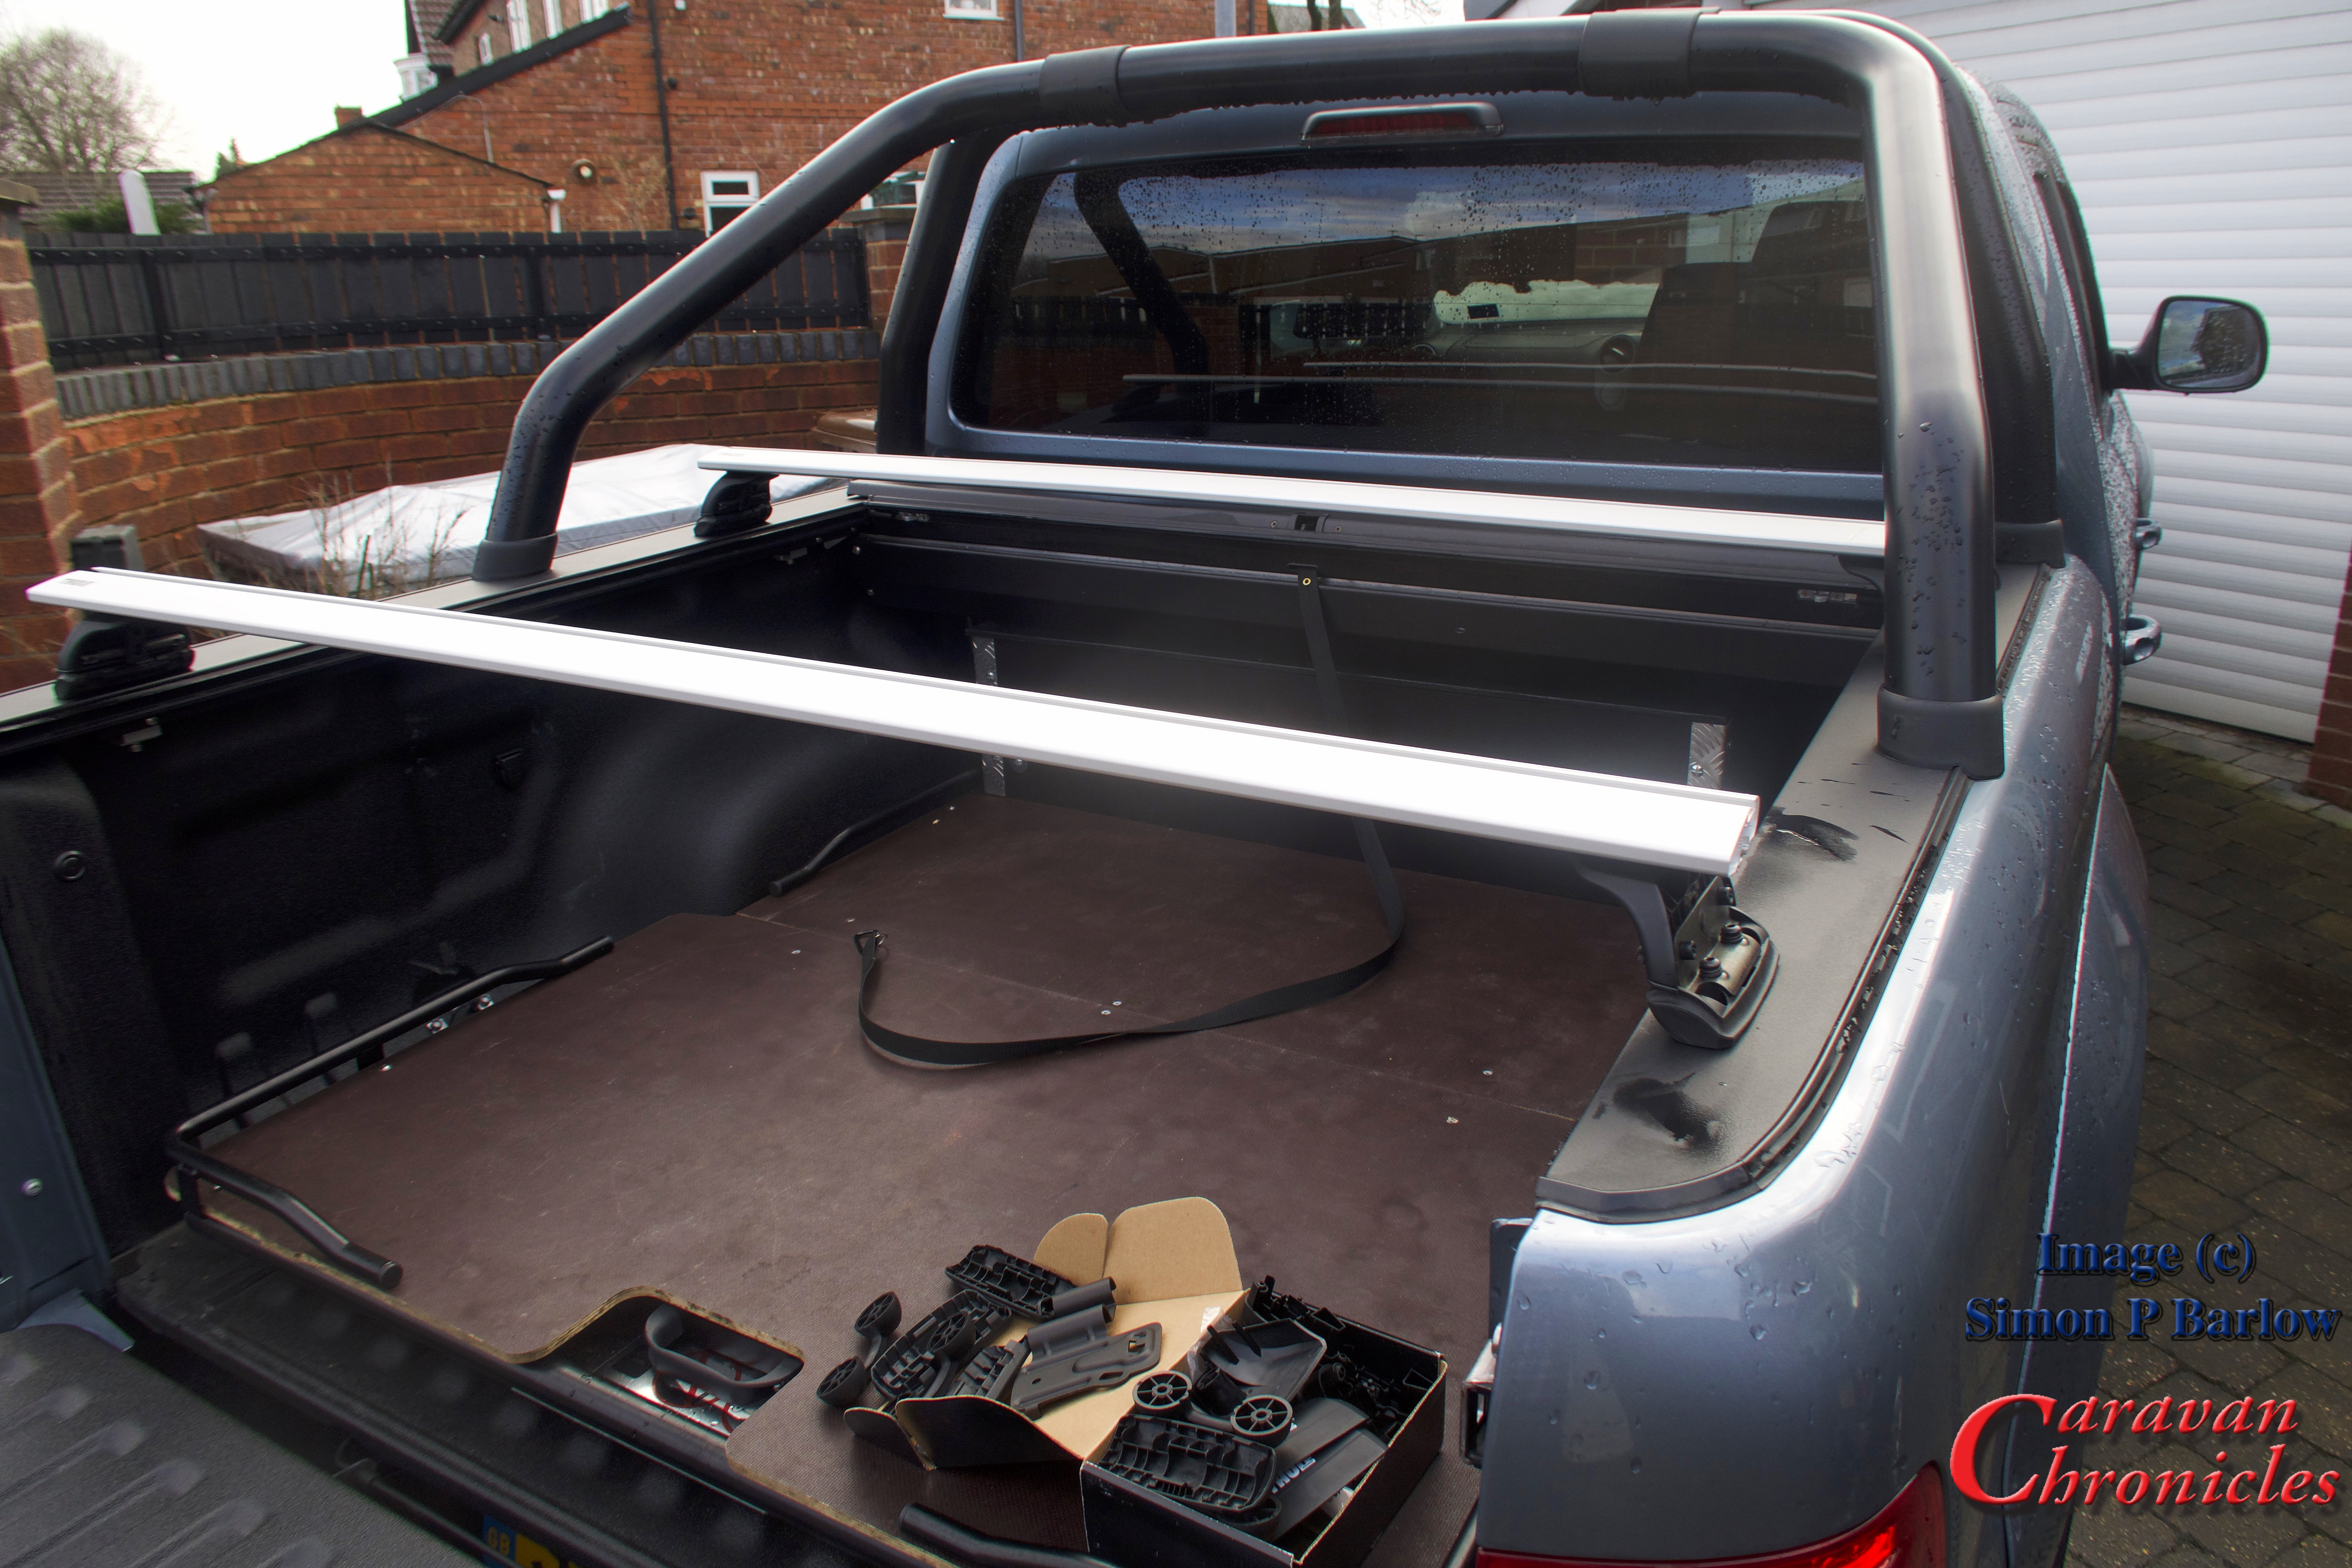
OK, so now to fit the actual bike carriers onto the rack I had previously installed a couple of days ago.
We had opted for the Thule FreeRide 532 over the ProRide version. What put me off the ProRide were a couple of videos on YouTube showing just how easy it was to remove a bike supposedly locked on to the rack. The FreeRide 532 has two arms supporting the bike and offered an option for additional security…. which I’m not going to go into for obvious reasons!
I had ordered a twin pack of the FreeRide 532, unfortunately I only received one. It seems the other was lost in transit somewhere according to my enquiries with the supplier. The other thing I found out was they (or it) didn’t come with the “T” track fixings. OK so a quick trip down to my nearest Thule dealer Northwest Towbars to pick up the elusive fixings. They would remain elusive… Northwest Towbars didn’t have any in stock. Not to be out manoeuvred I’d make my own.
To the bat cave again…
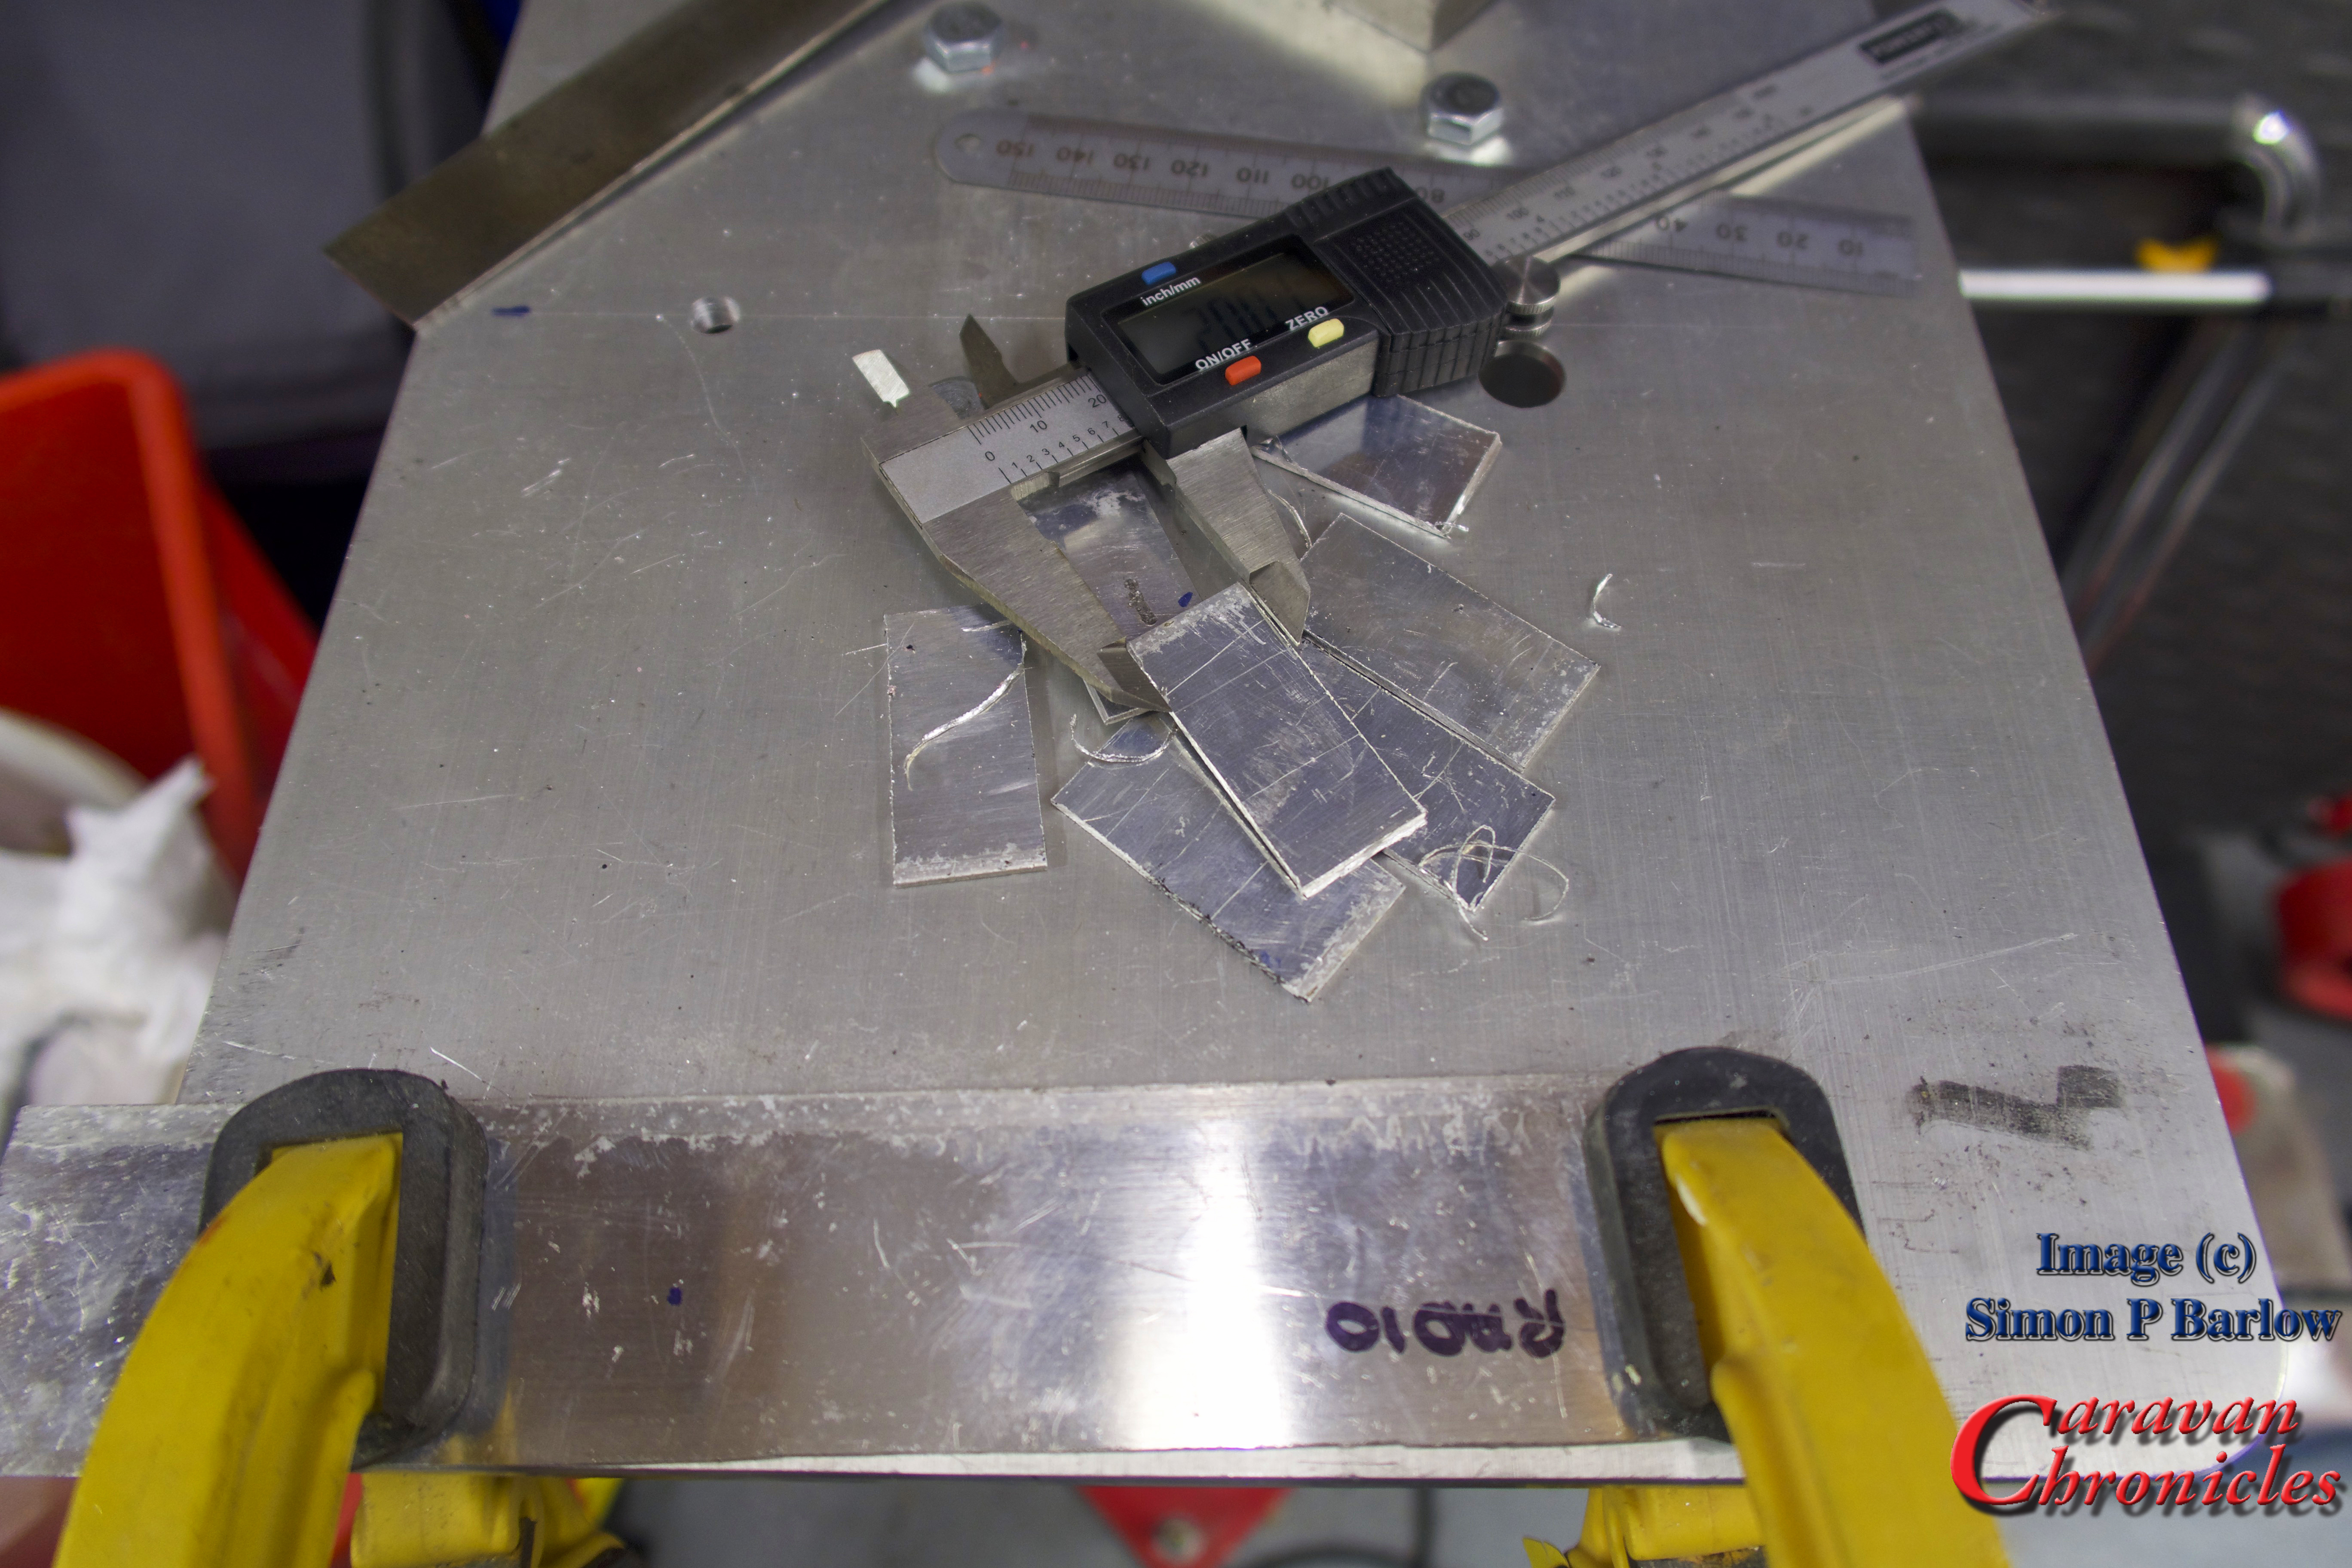
I just happened to have some 2mm aircraft grade aluminium handy and cut eight 21mm x 45mm pieces. The FreeRide 532 normally has three mounting locations, but as there was an additional hole that lined up with the “T” track it would be rude not to use it! So I made four for each rack.
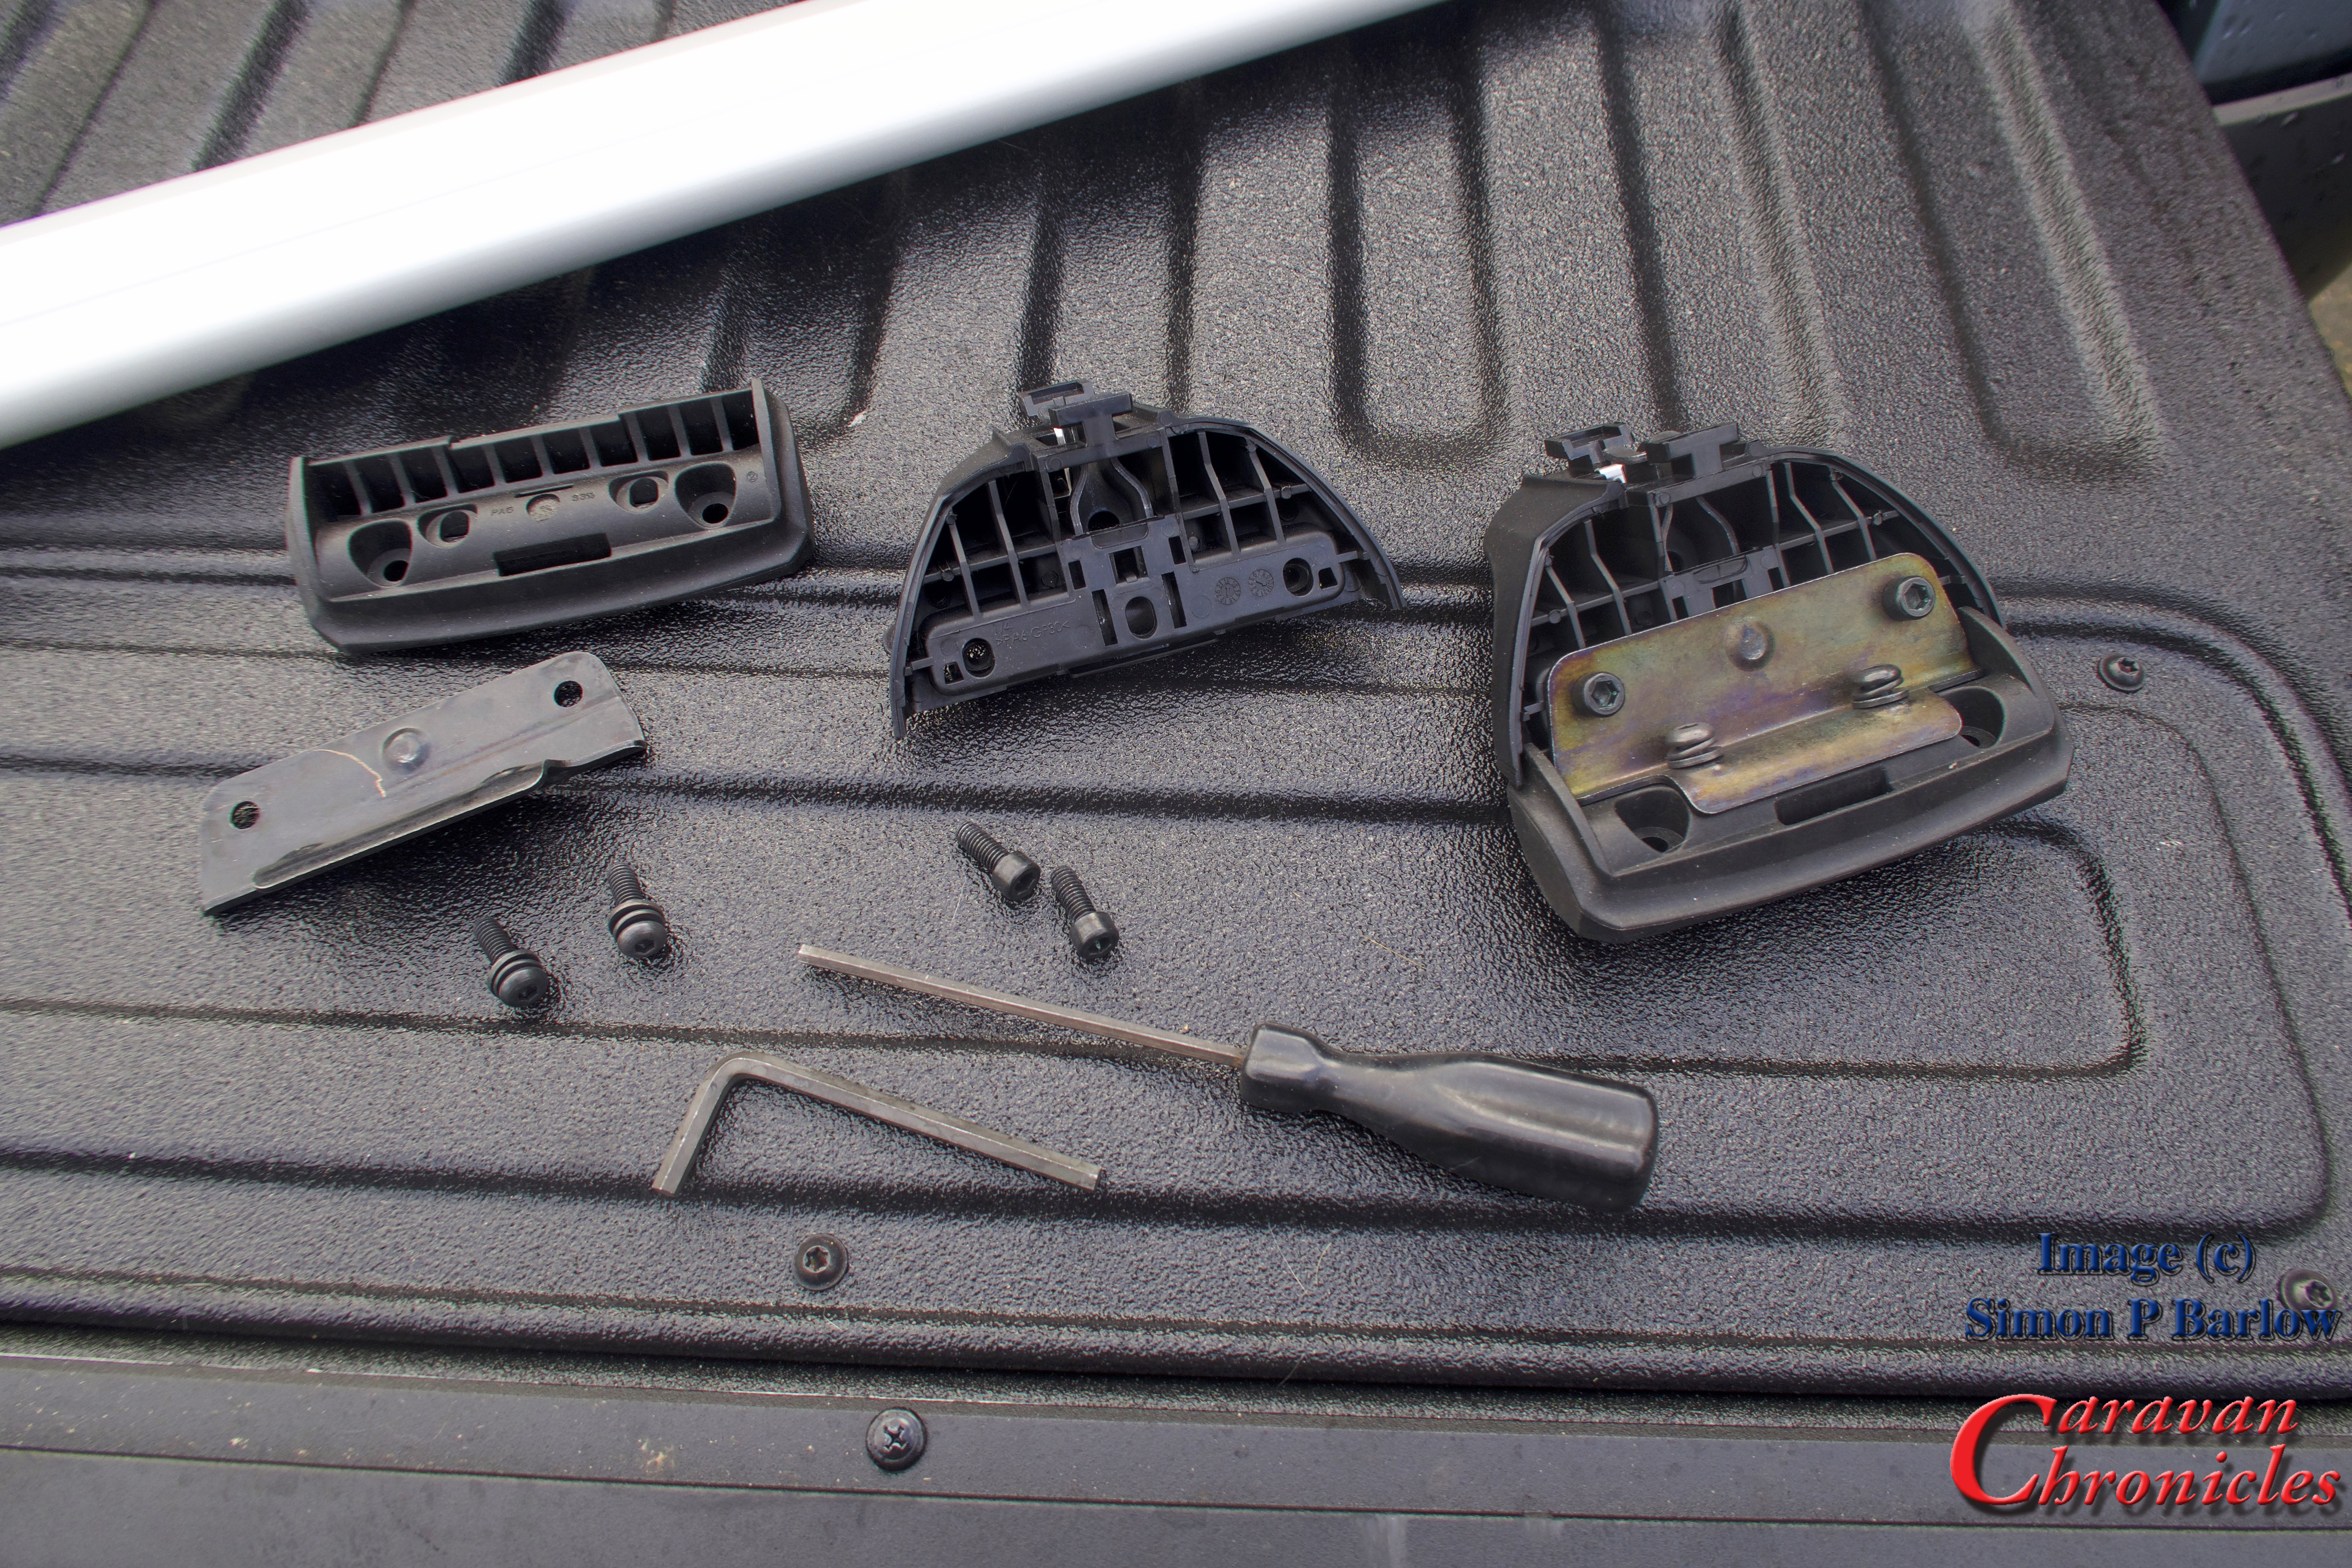
For the threaded bolt I had some dome head bolts handy. The width of the dome head was wide enough so it would not pull through the slot on its own so I was not relying on a 2mm think aluminium plate entirly. To hold the bolts in place I drilled a slightly undersized hole in the aluminium…
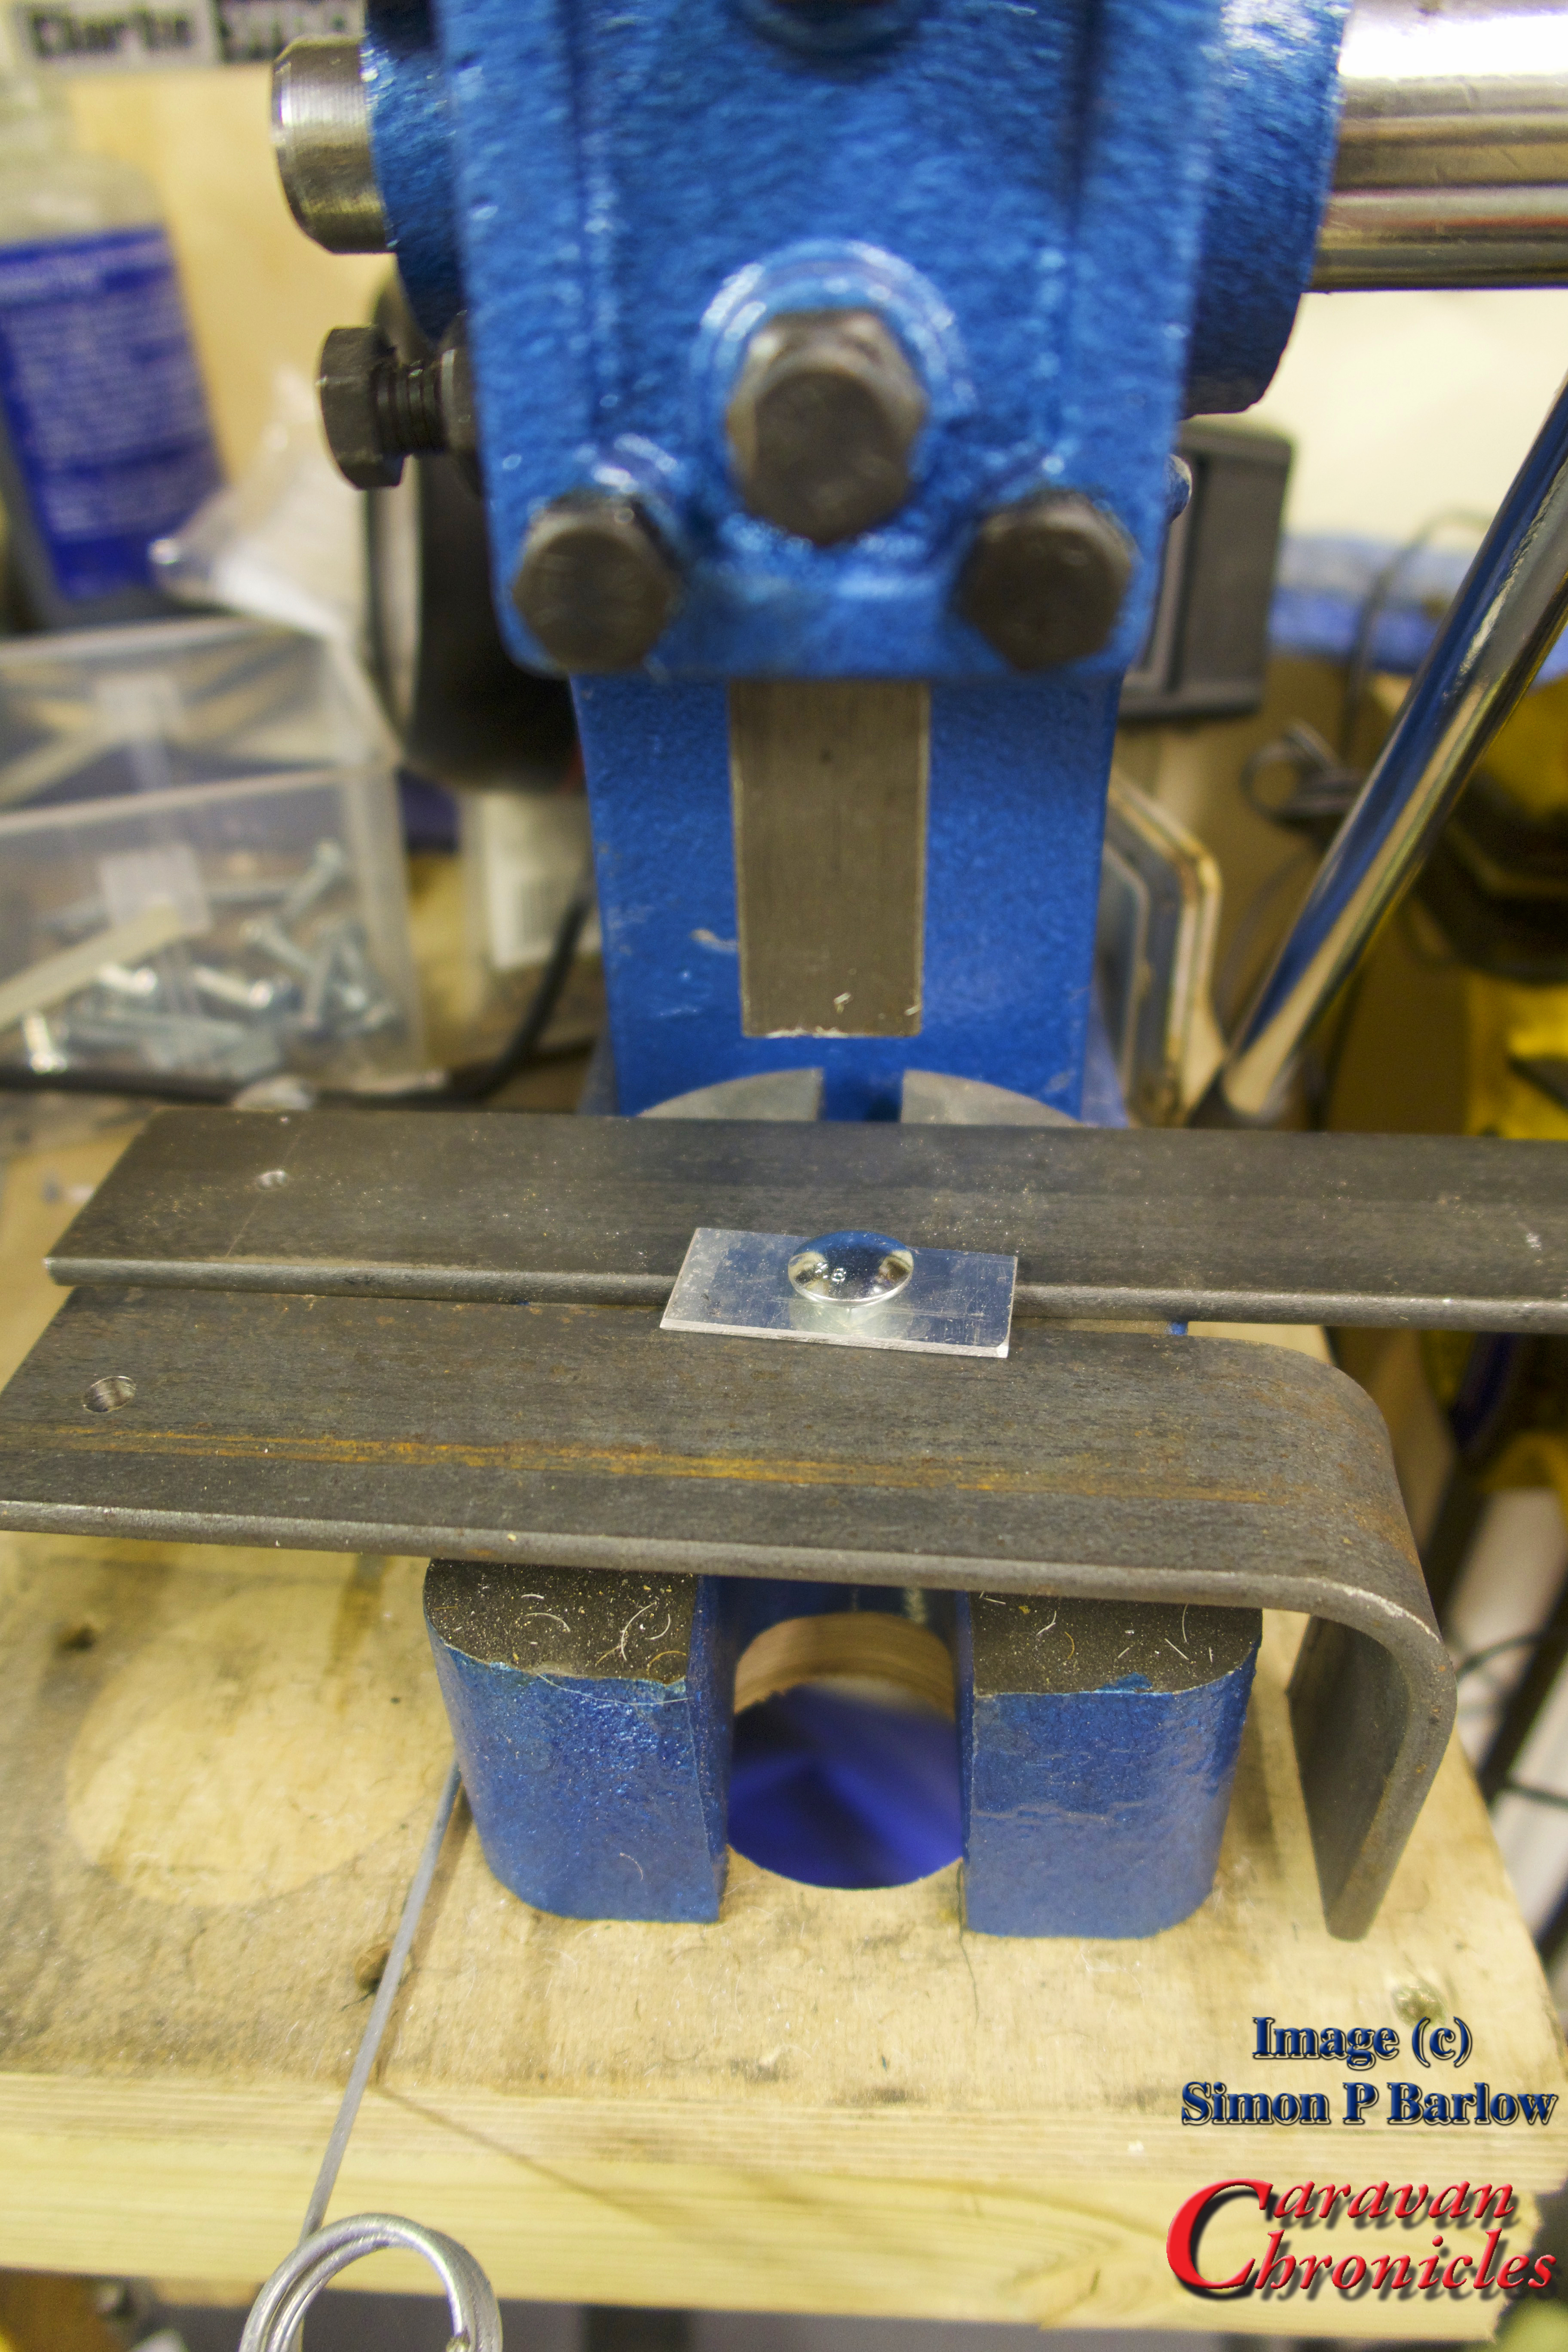
…and used my small press to force the square shoulders of the bolt through the aluminium plate to hold it in place.
The result was eight “T” track bolts. A quick dressing up on the sanding belt and fine grinding wheel to remove any rough edges finished them off.
The excess length of the bolt would be trimmed later.
Fitting the FreeRide 532 Racks
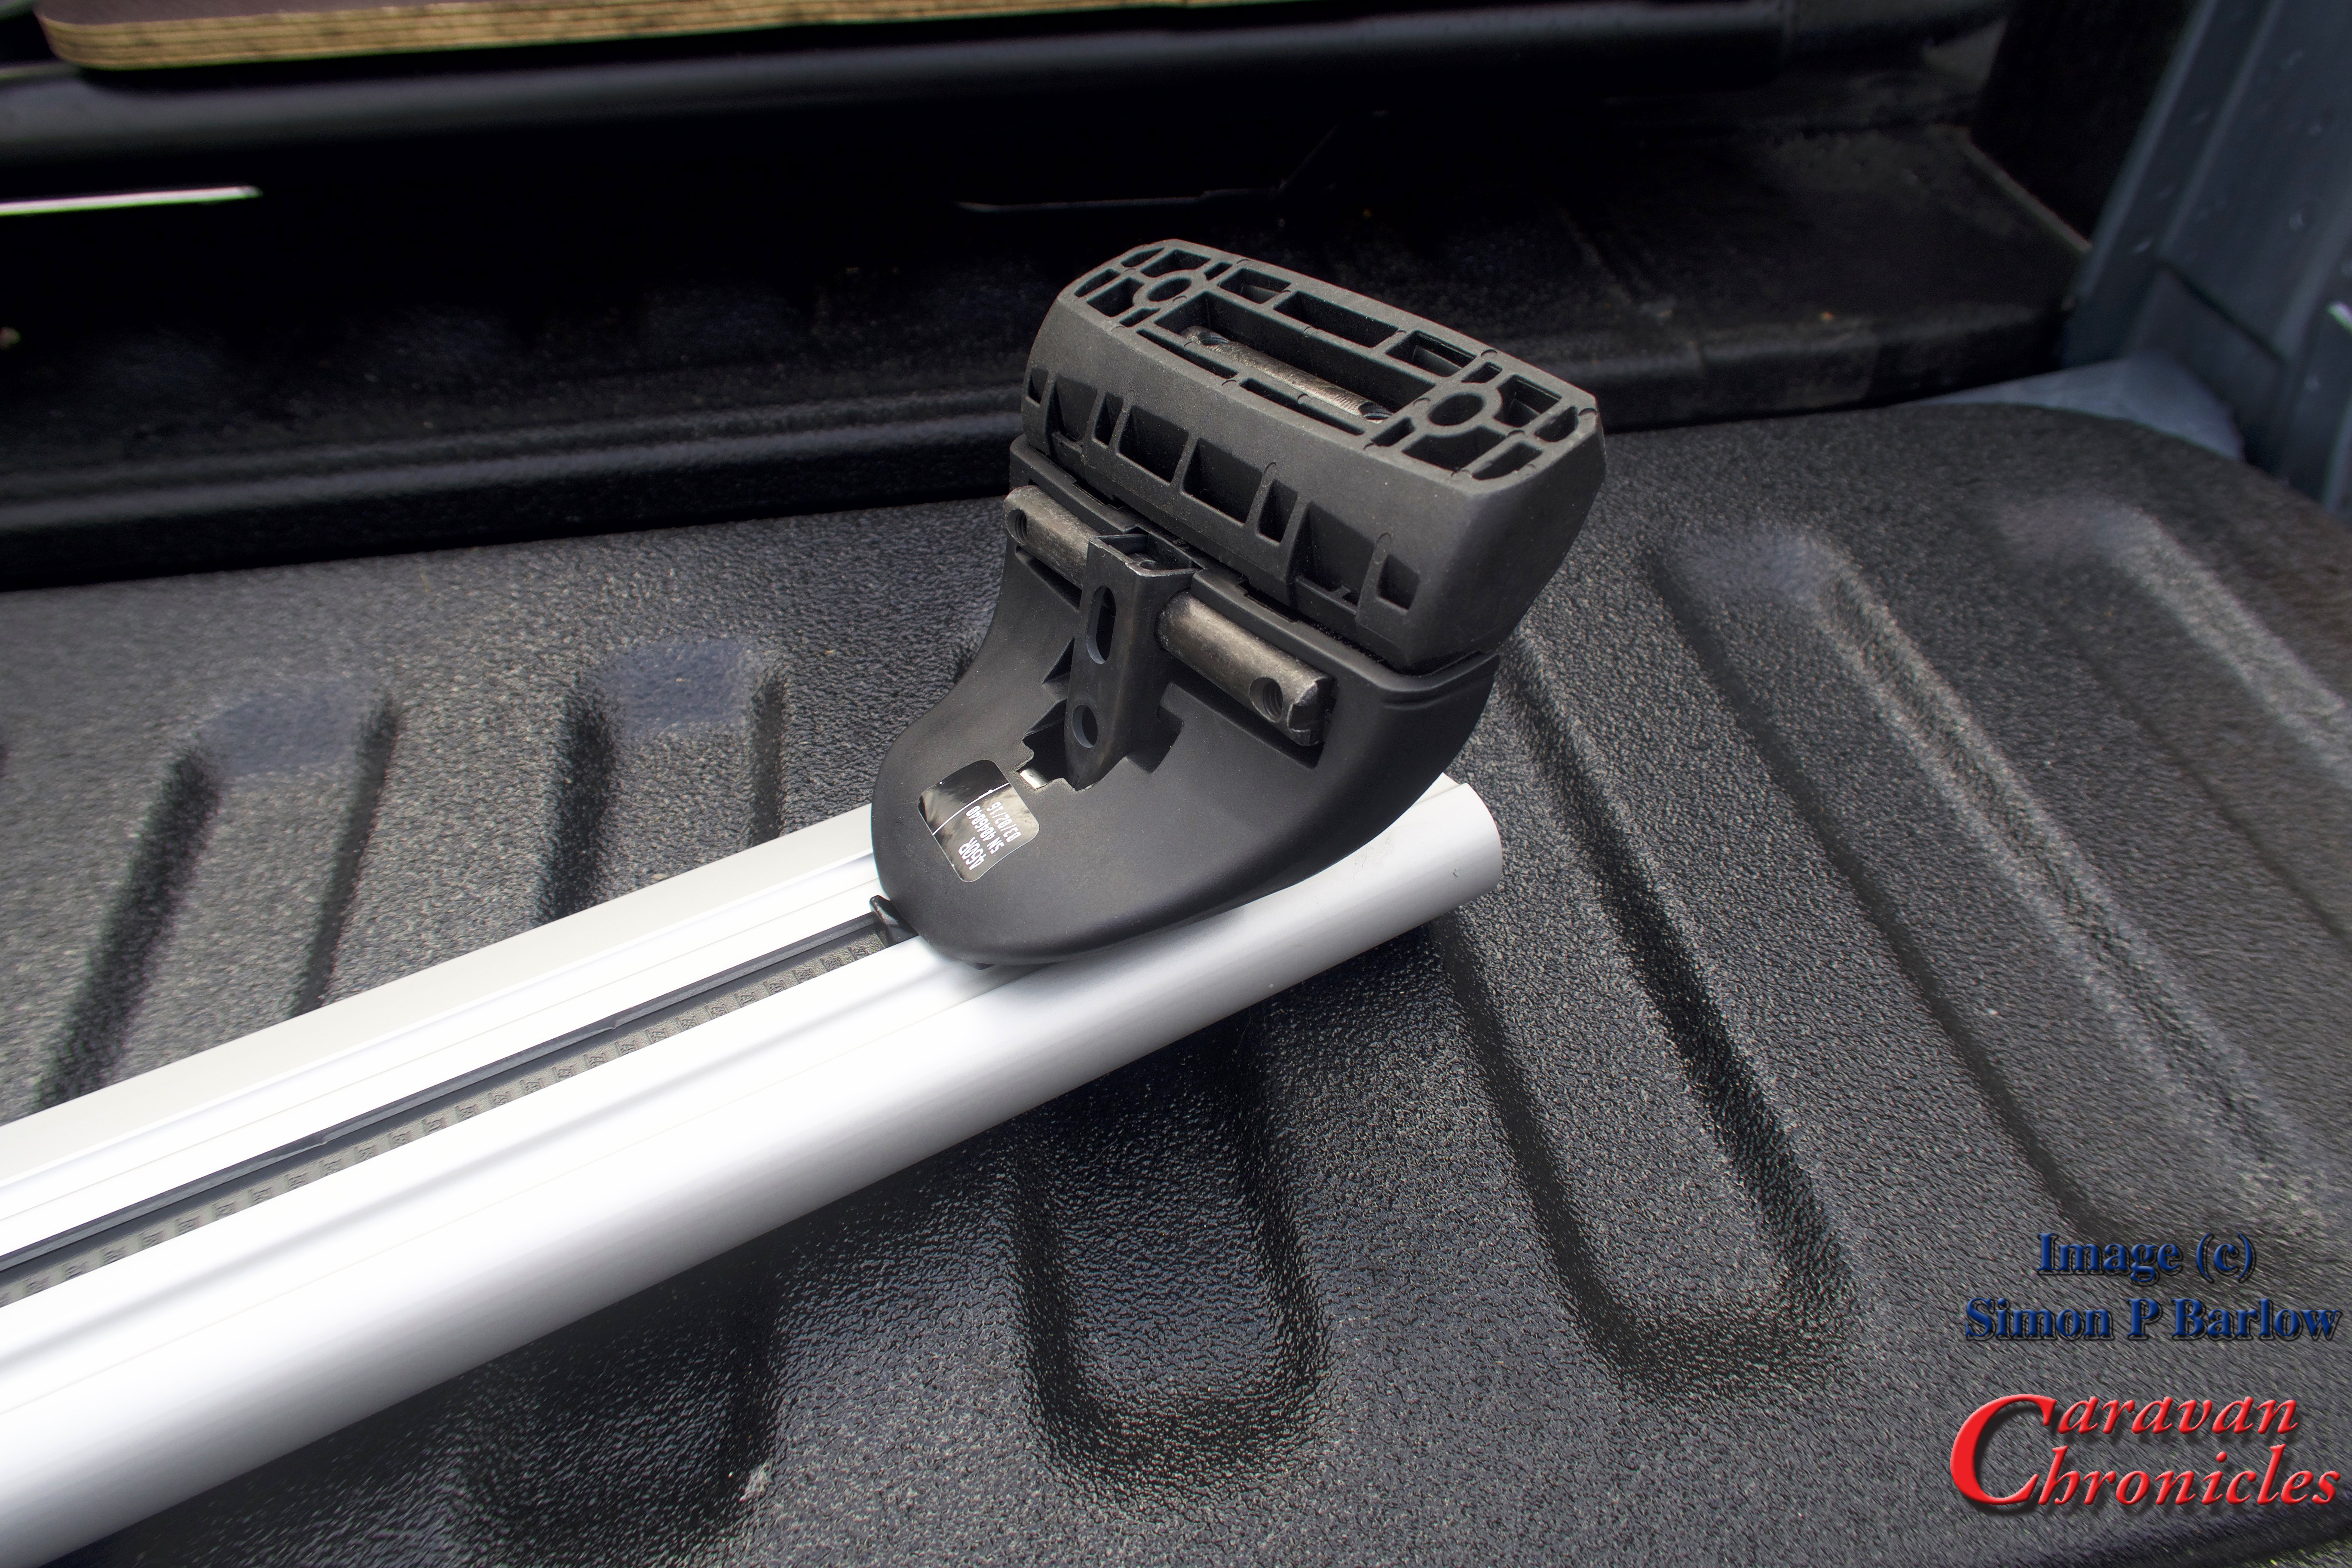
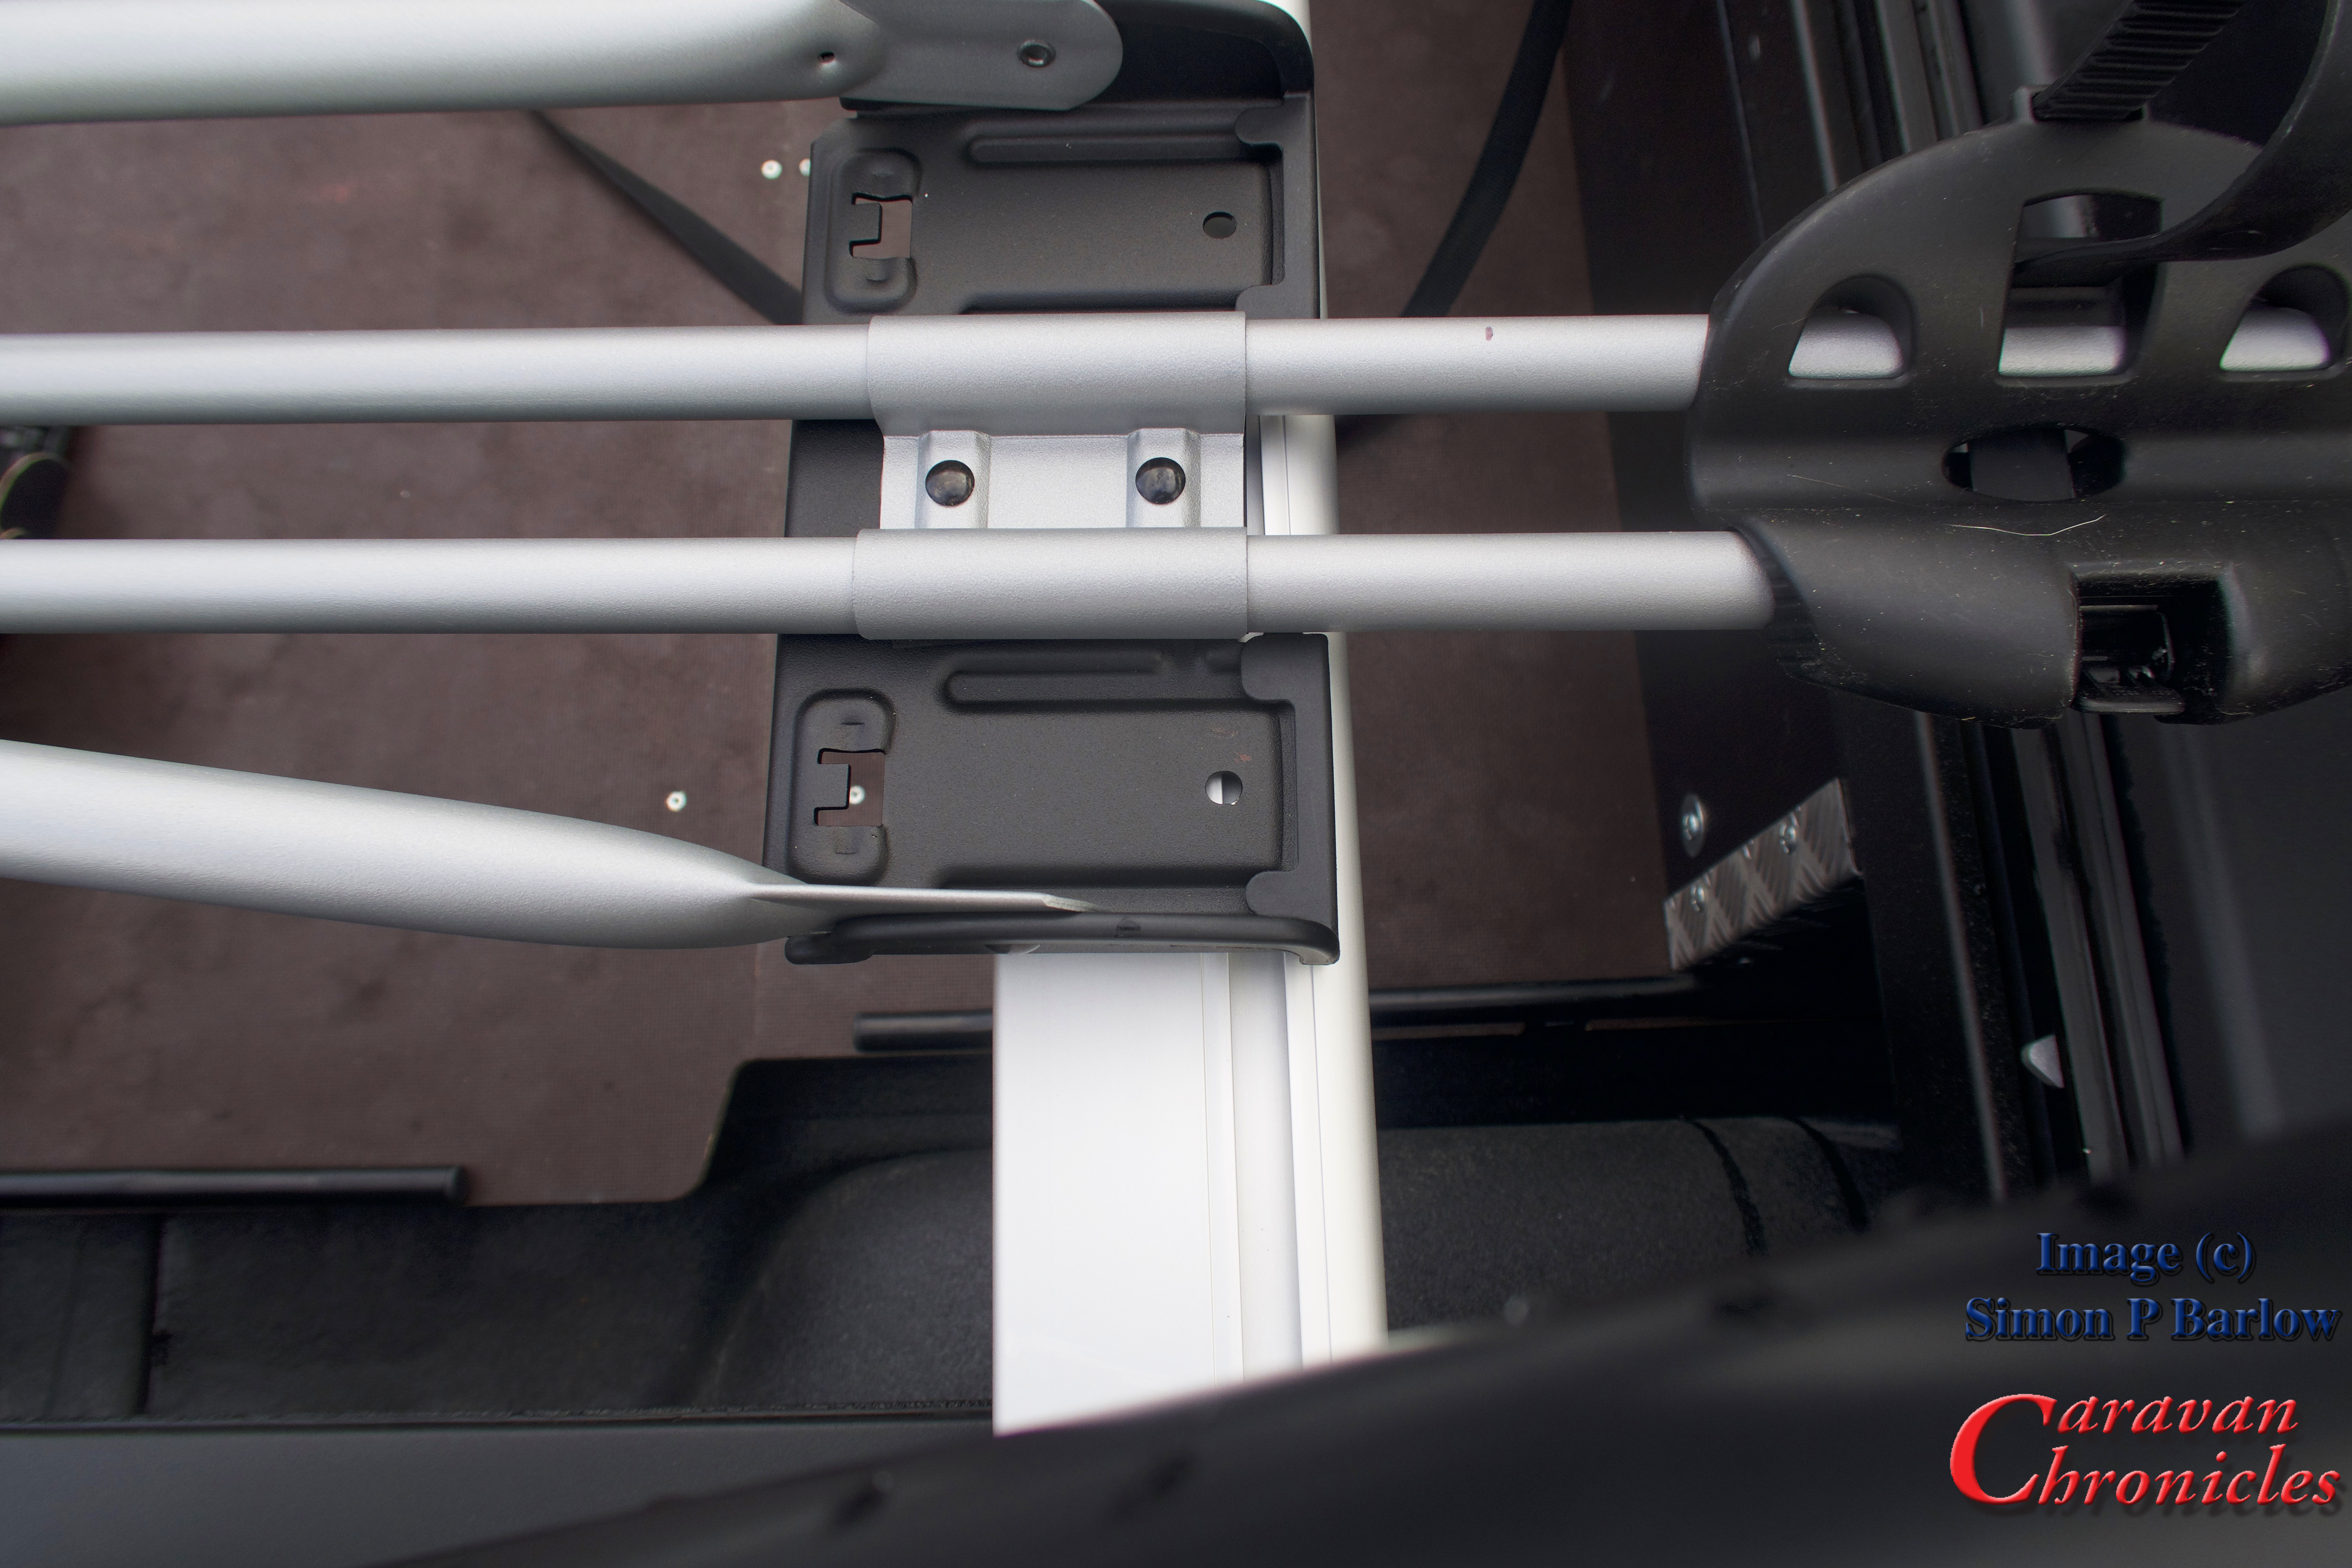
Sliding four of the newly made “T” track bolts in to the WingBars I could place the FreeRide 532 on to the bars.
I used a couple of nuts to hold the rack in place while I test fitted one of the bikes. It was a bit too tight. The swing up frame section that clamps on to the bike only partially engaged on the bike frame. The whole rack needed moving rearwards by about 10 to 15 mm.
Not a problem, as the WingBar mounting is off set laterally compared to the “T” track, reversing the bar so it faced the other way would solve this and effectively move the “T” track slot rearwards by about 20mm.
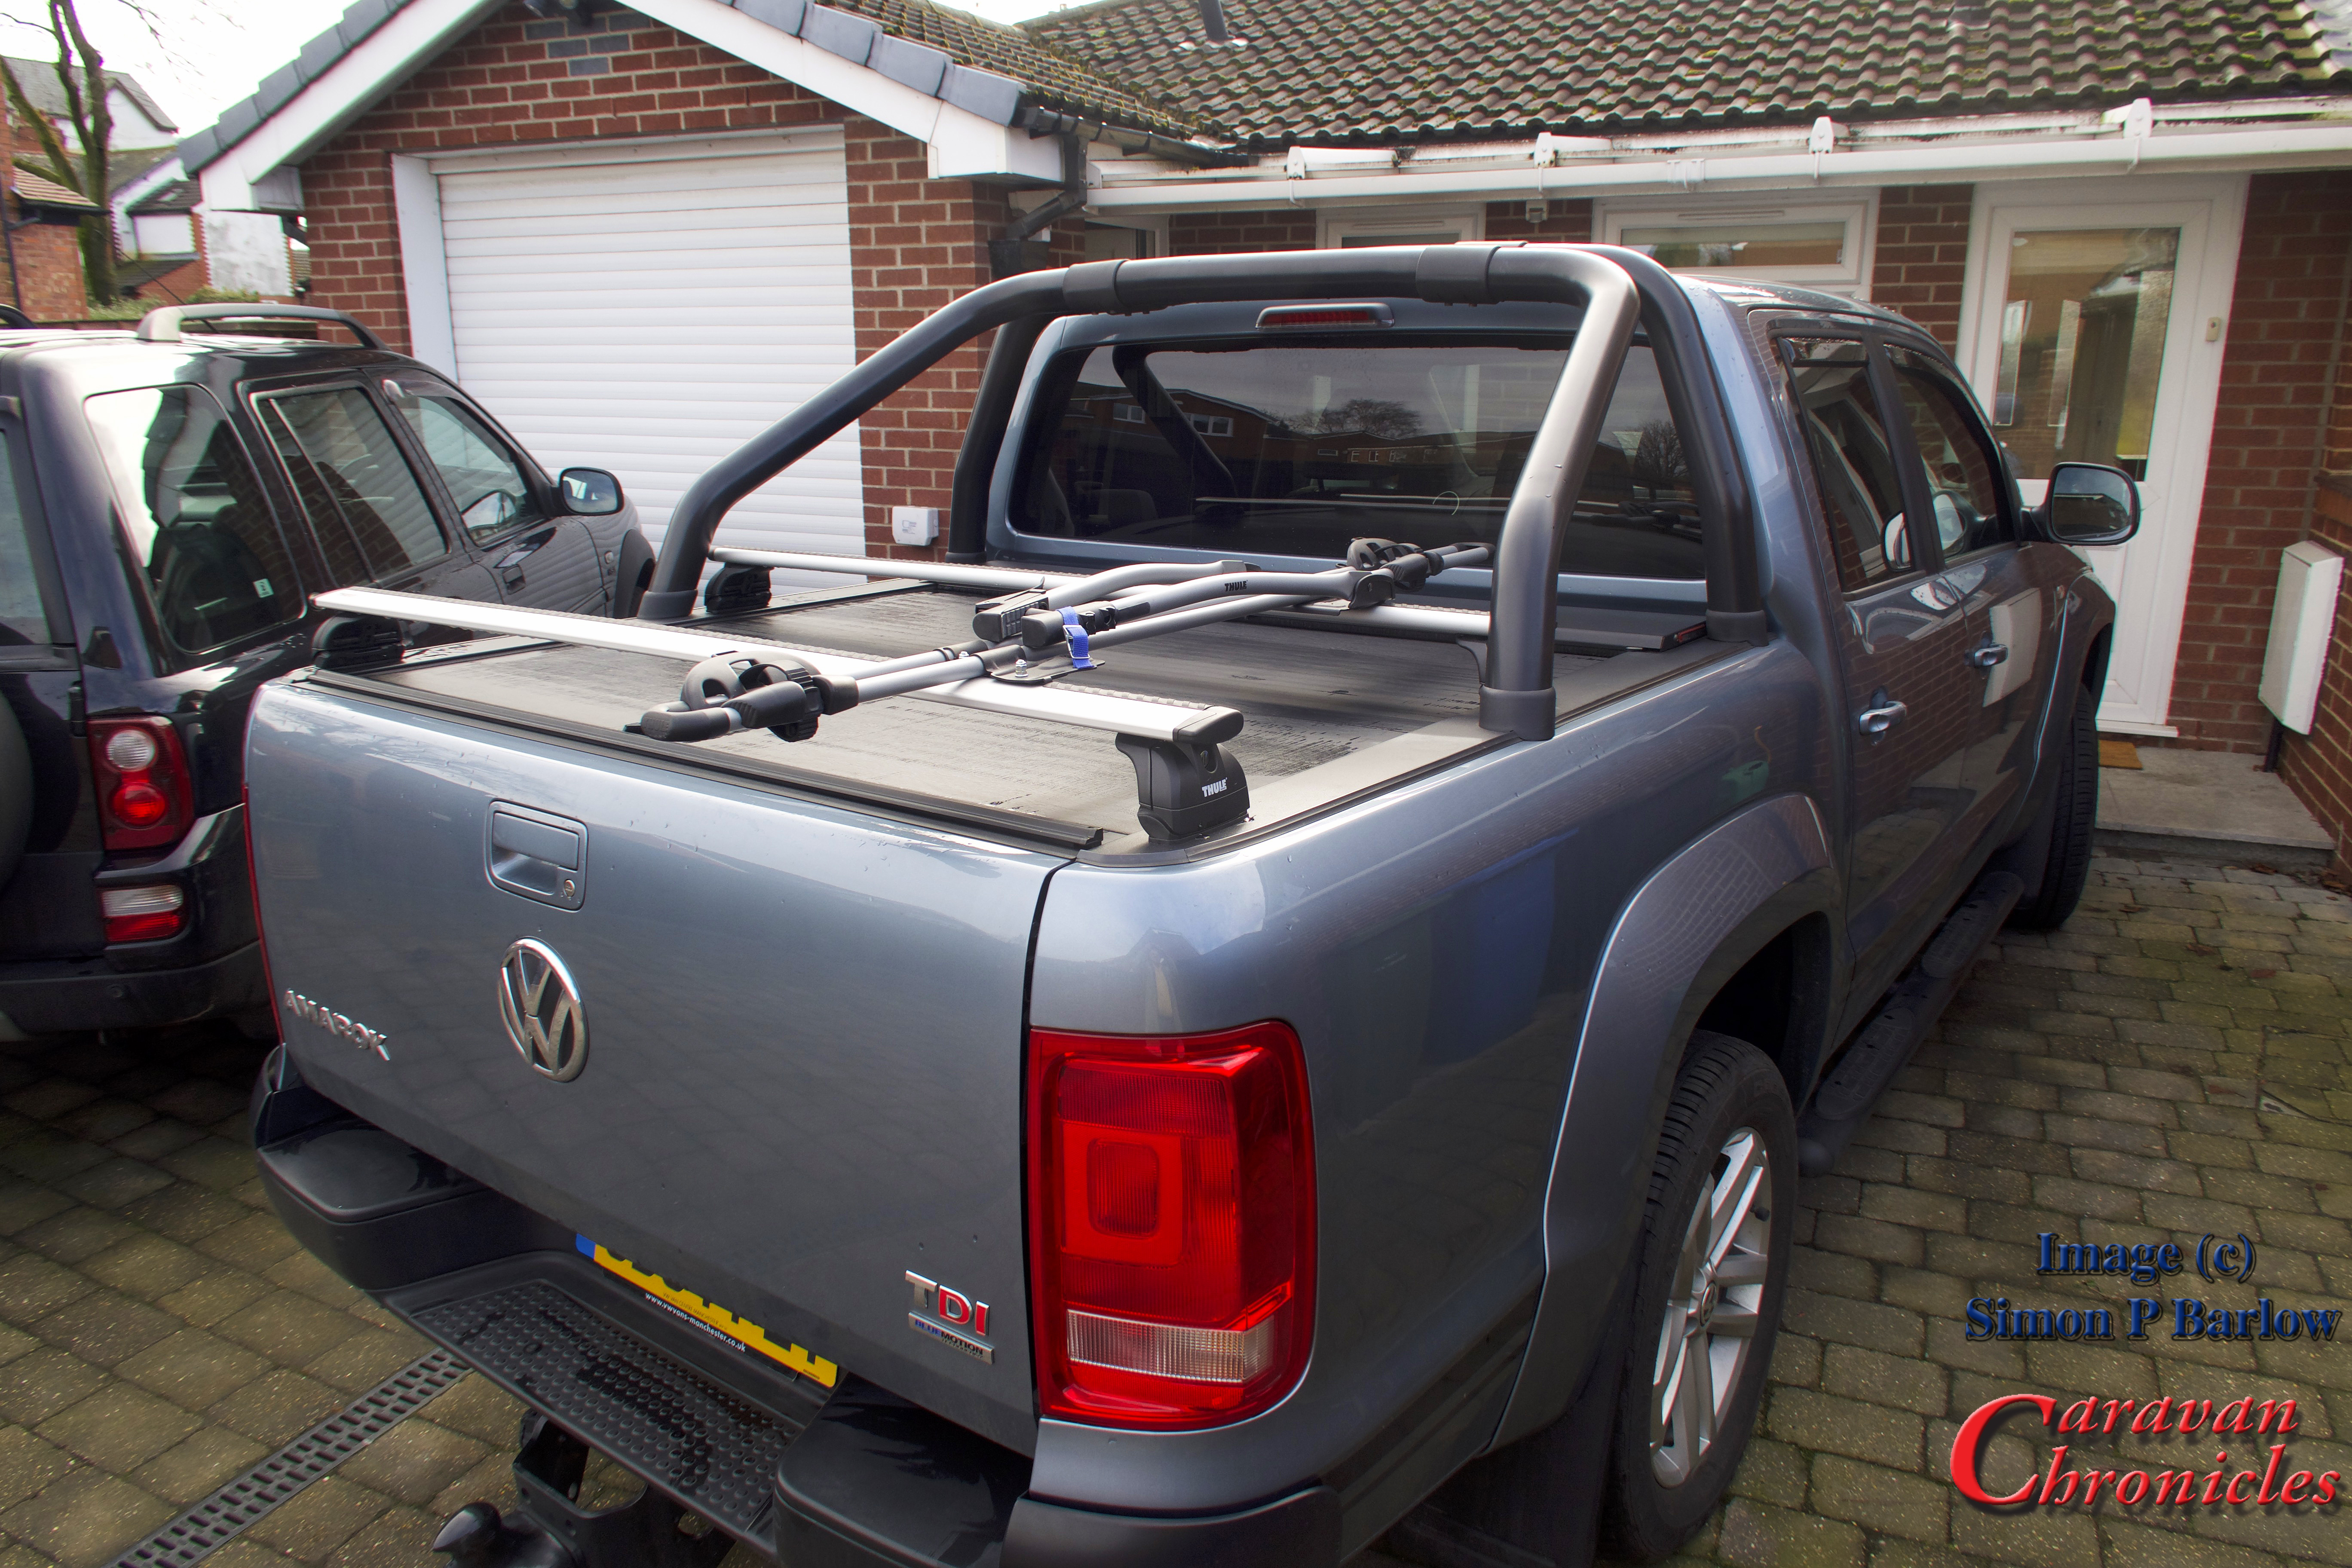
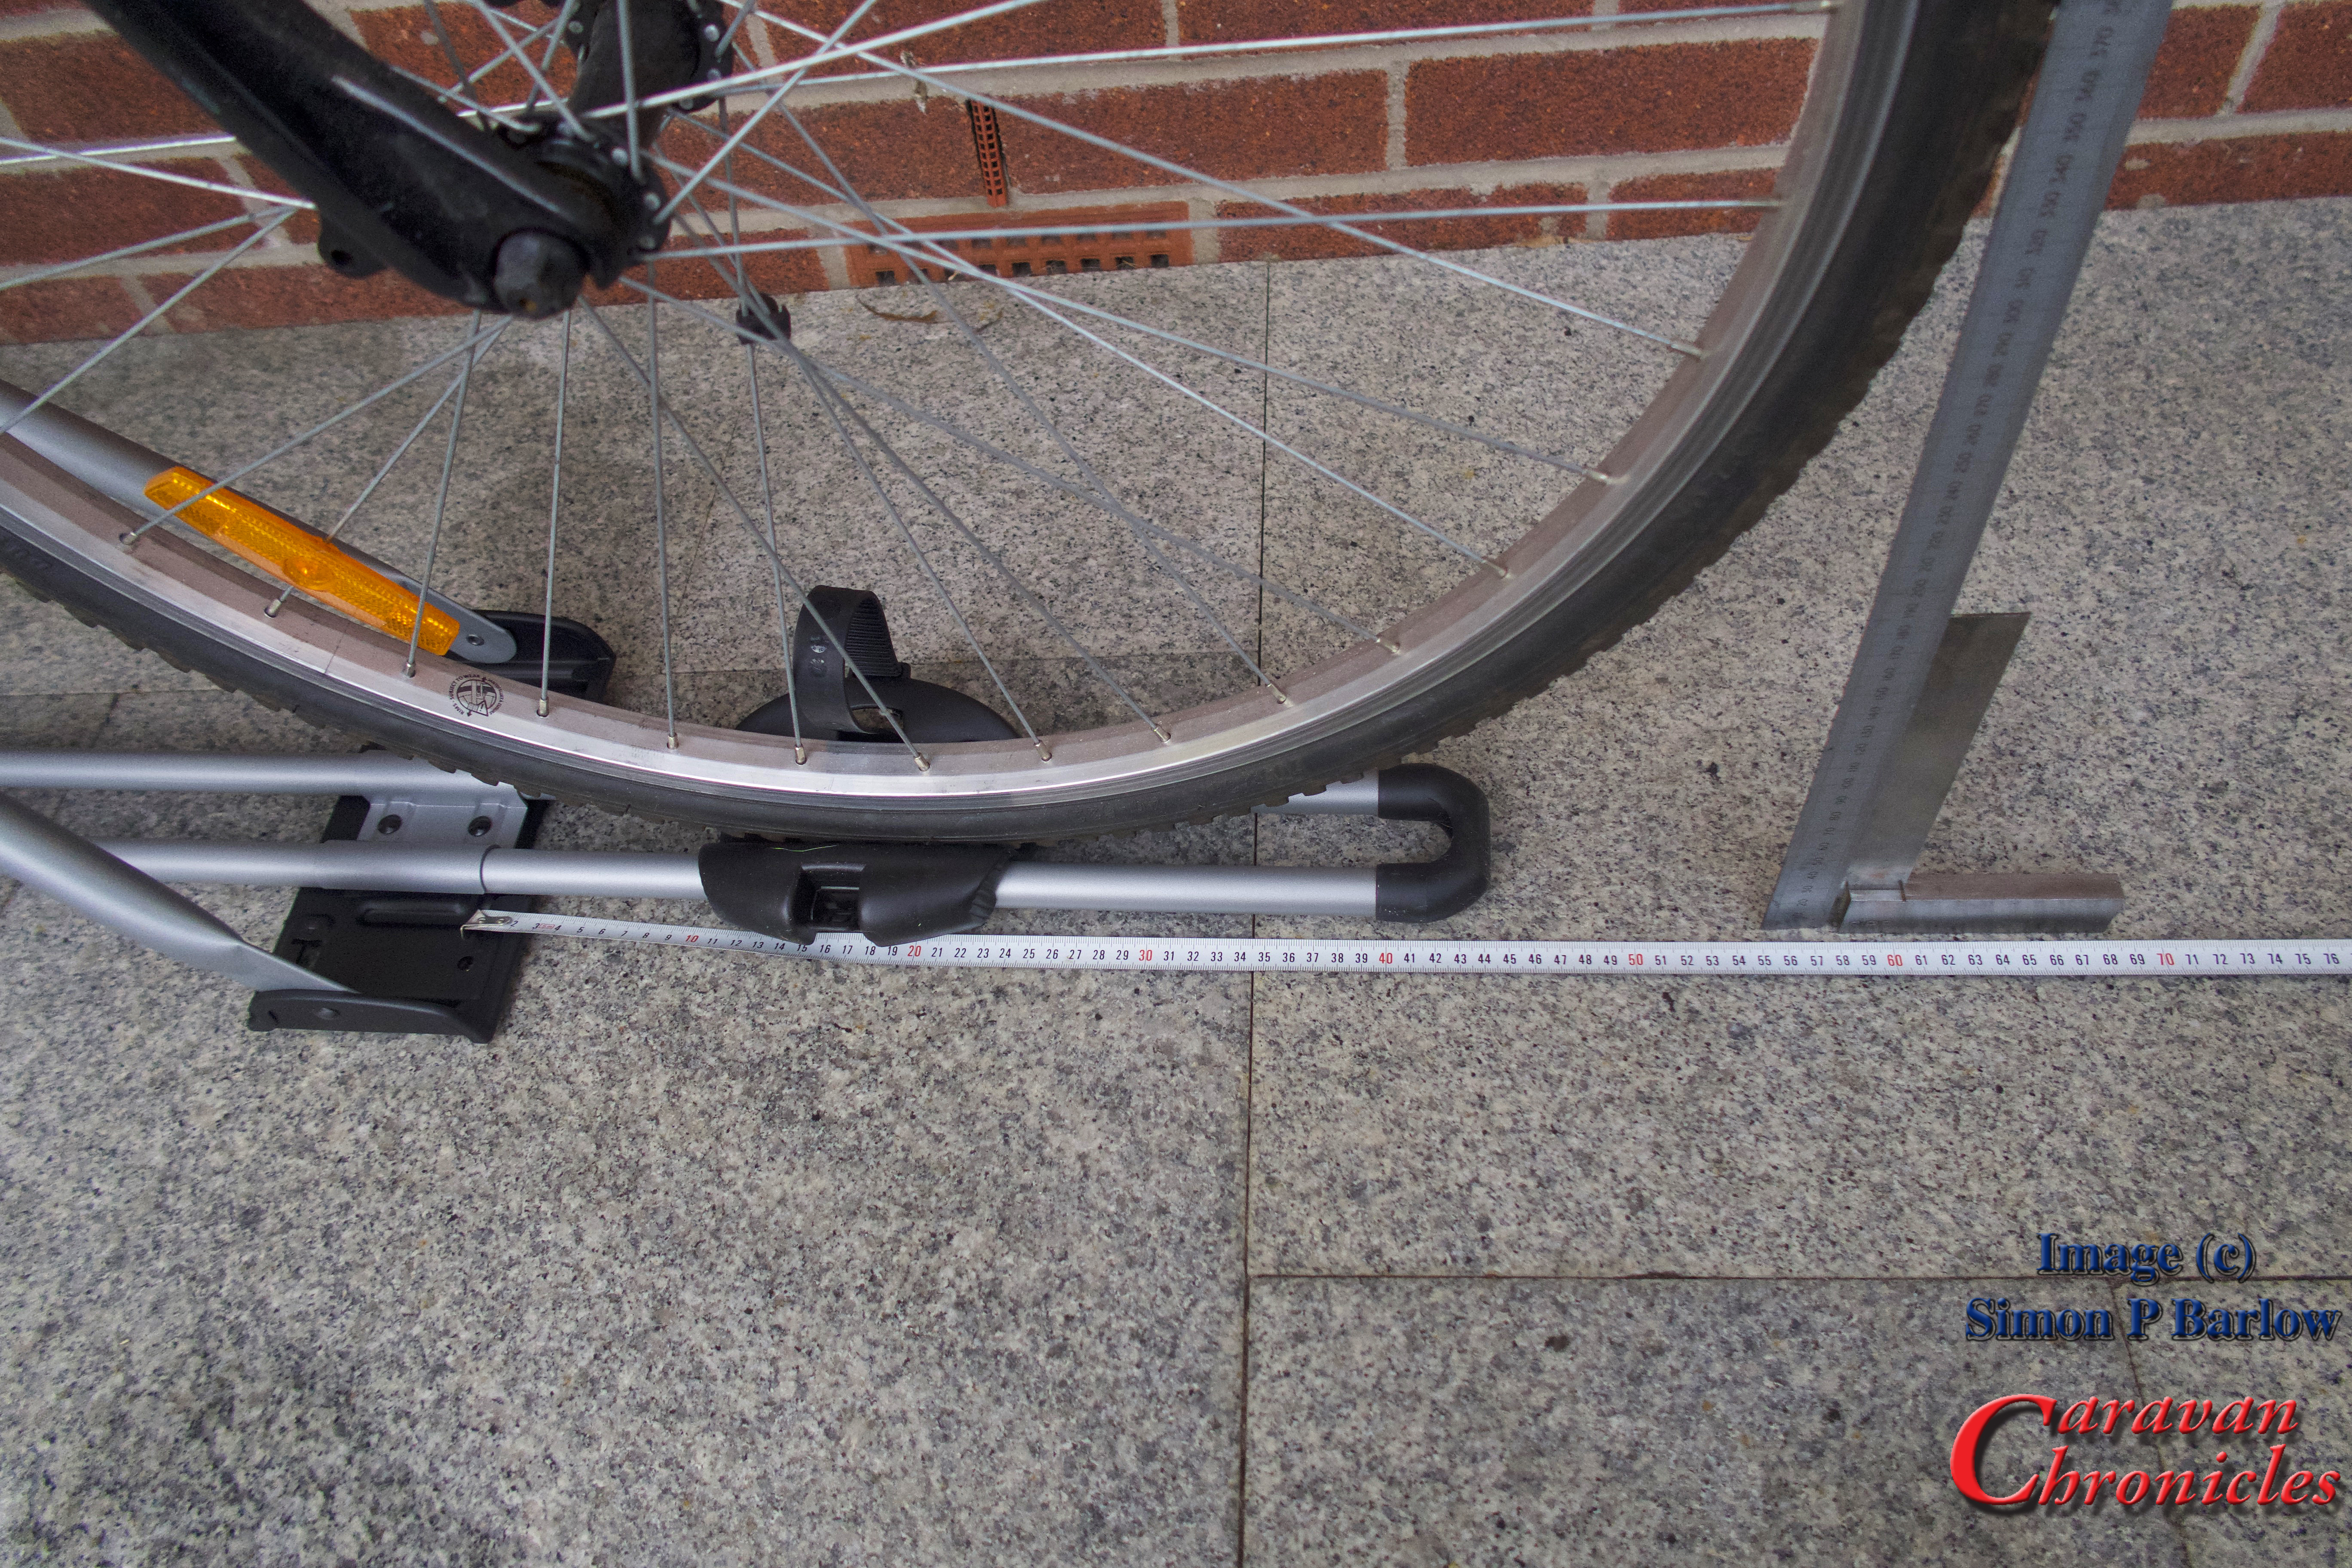
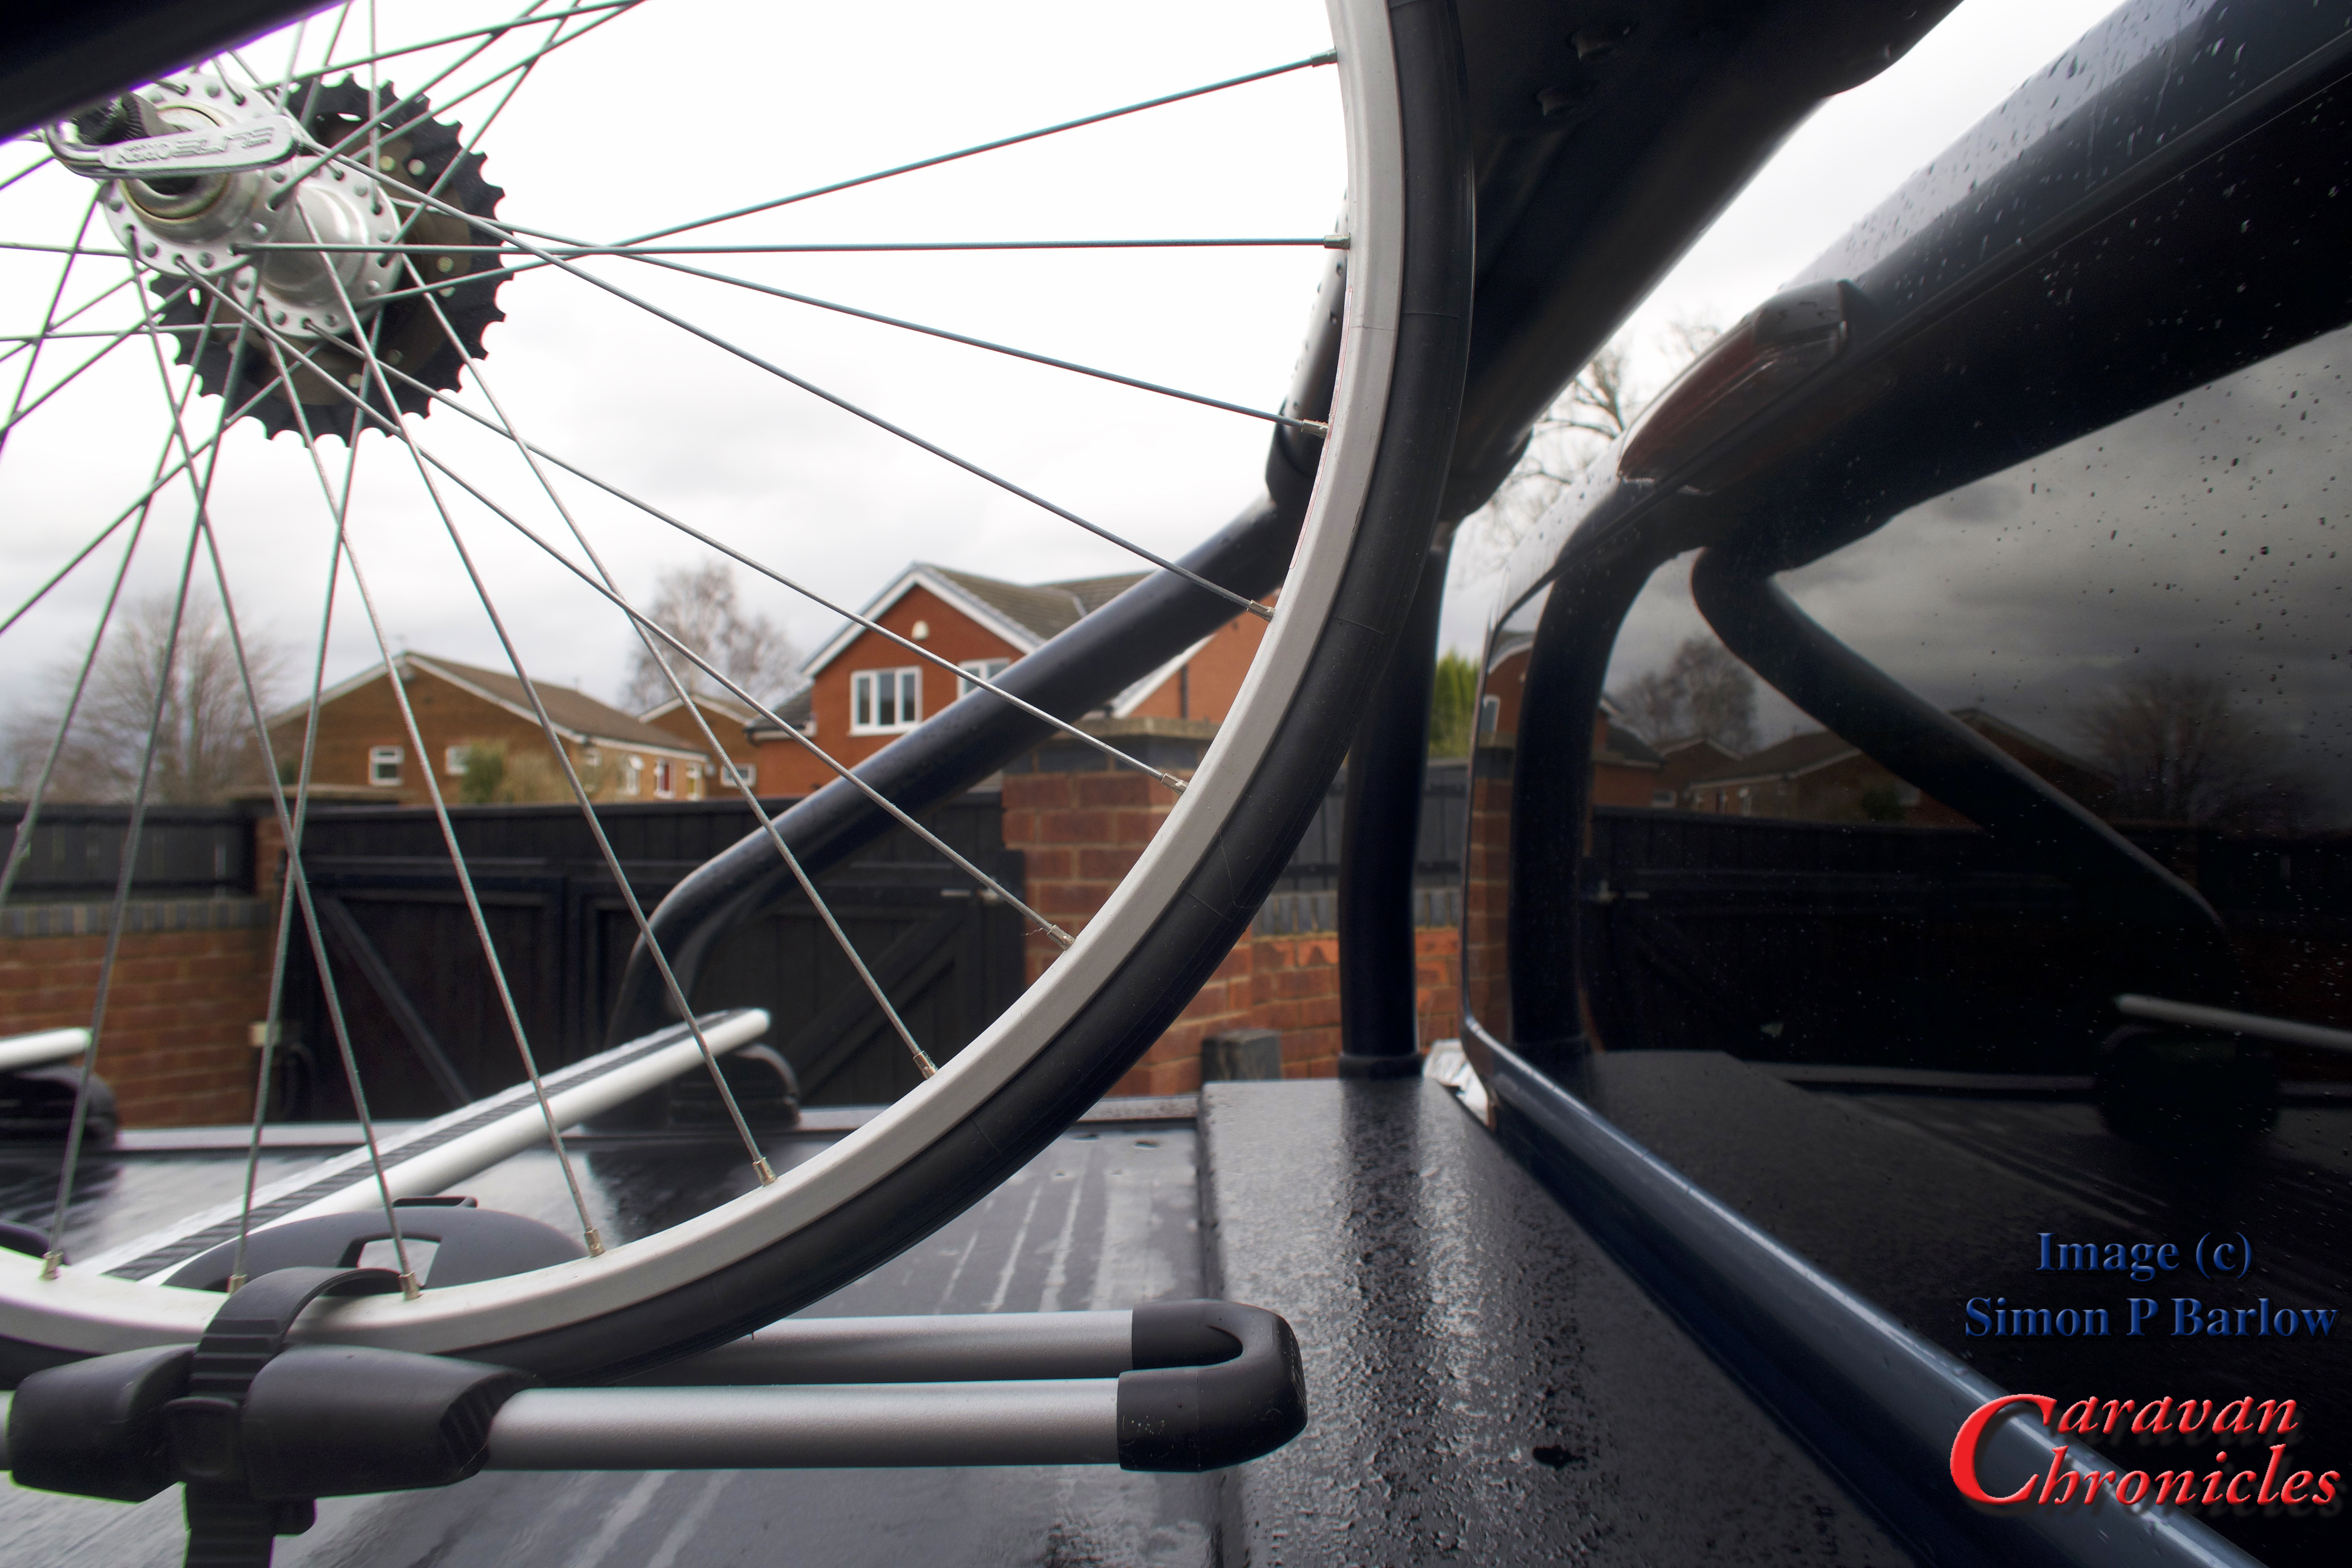
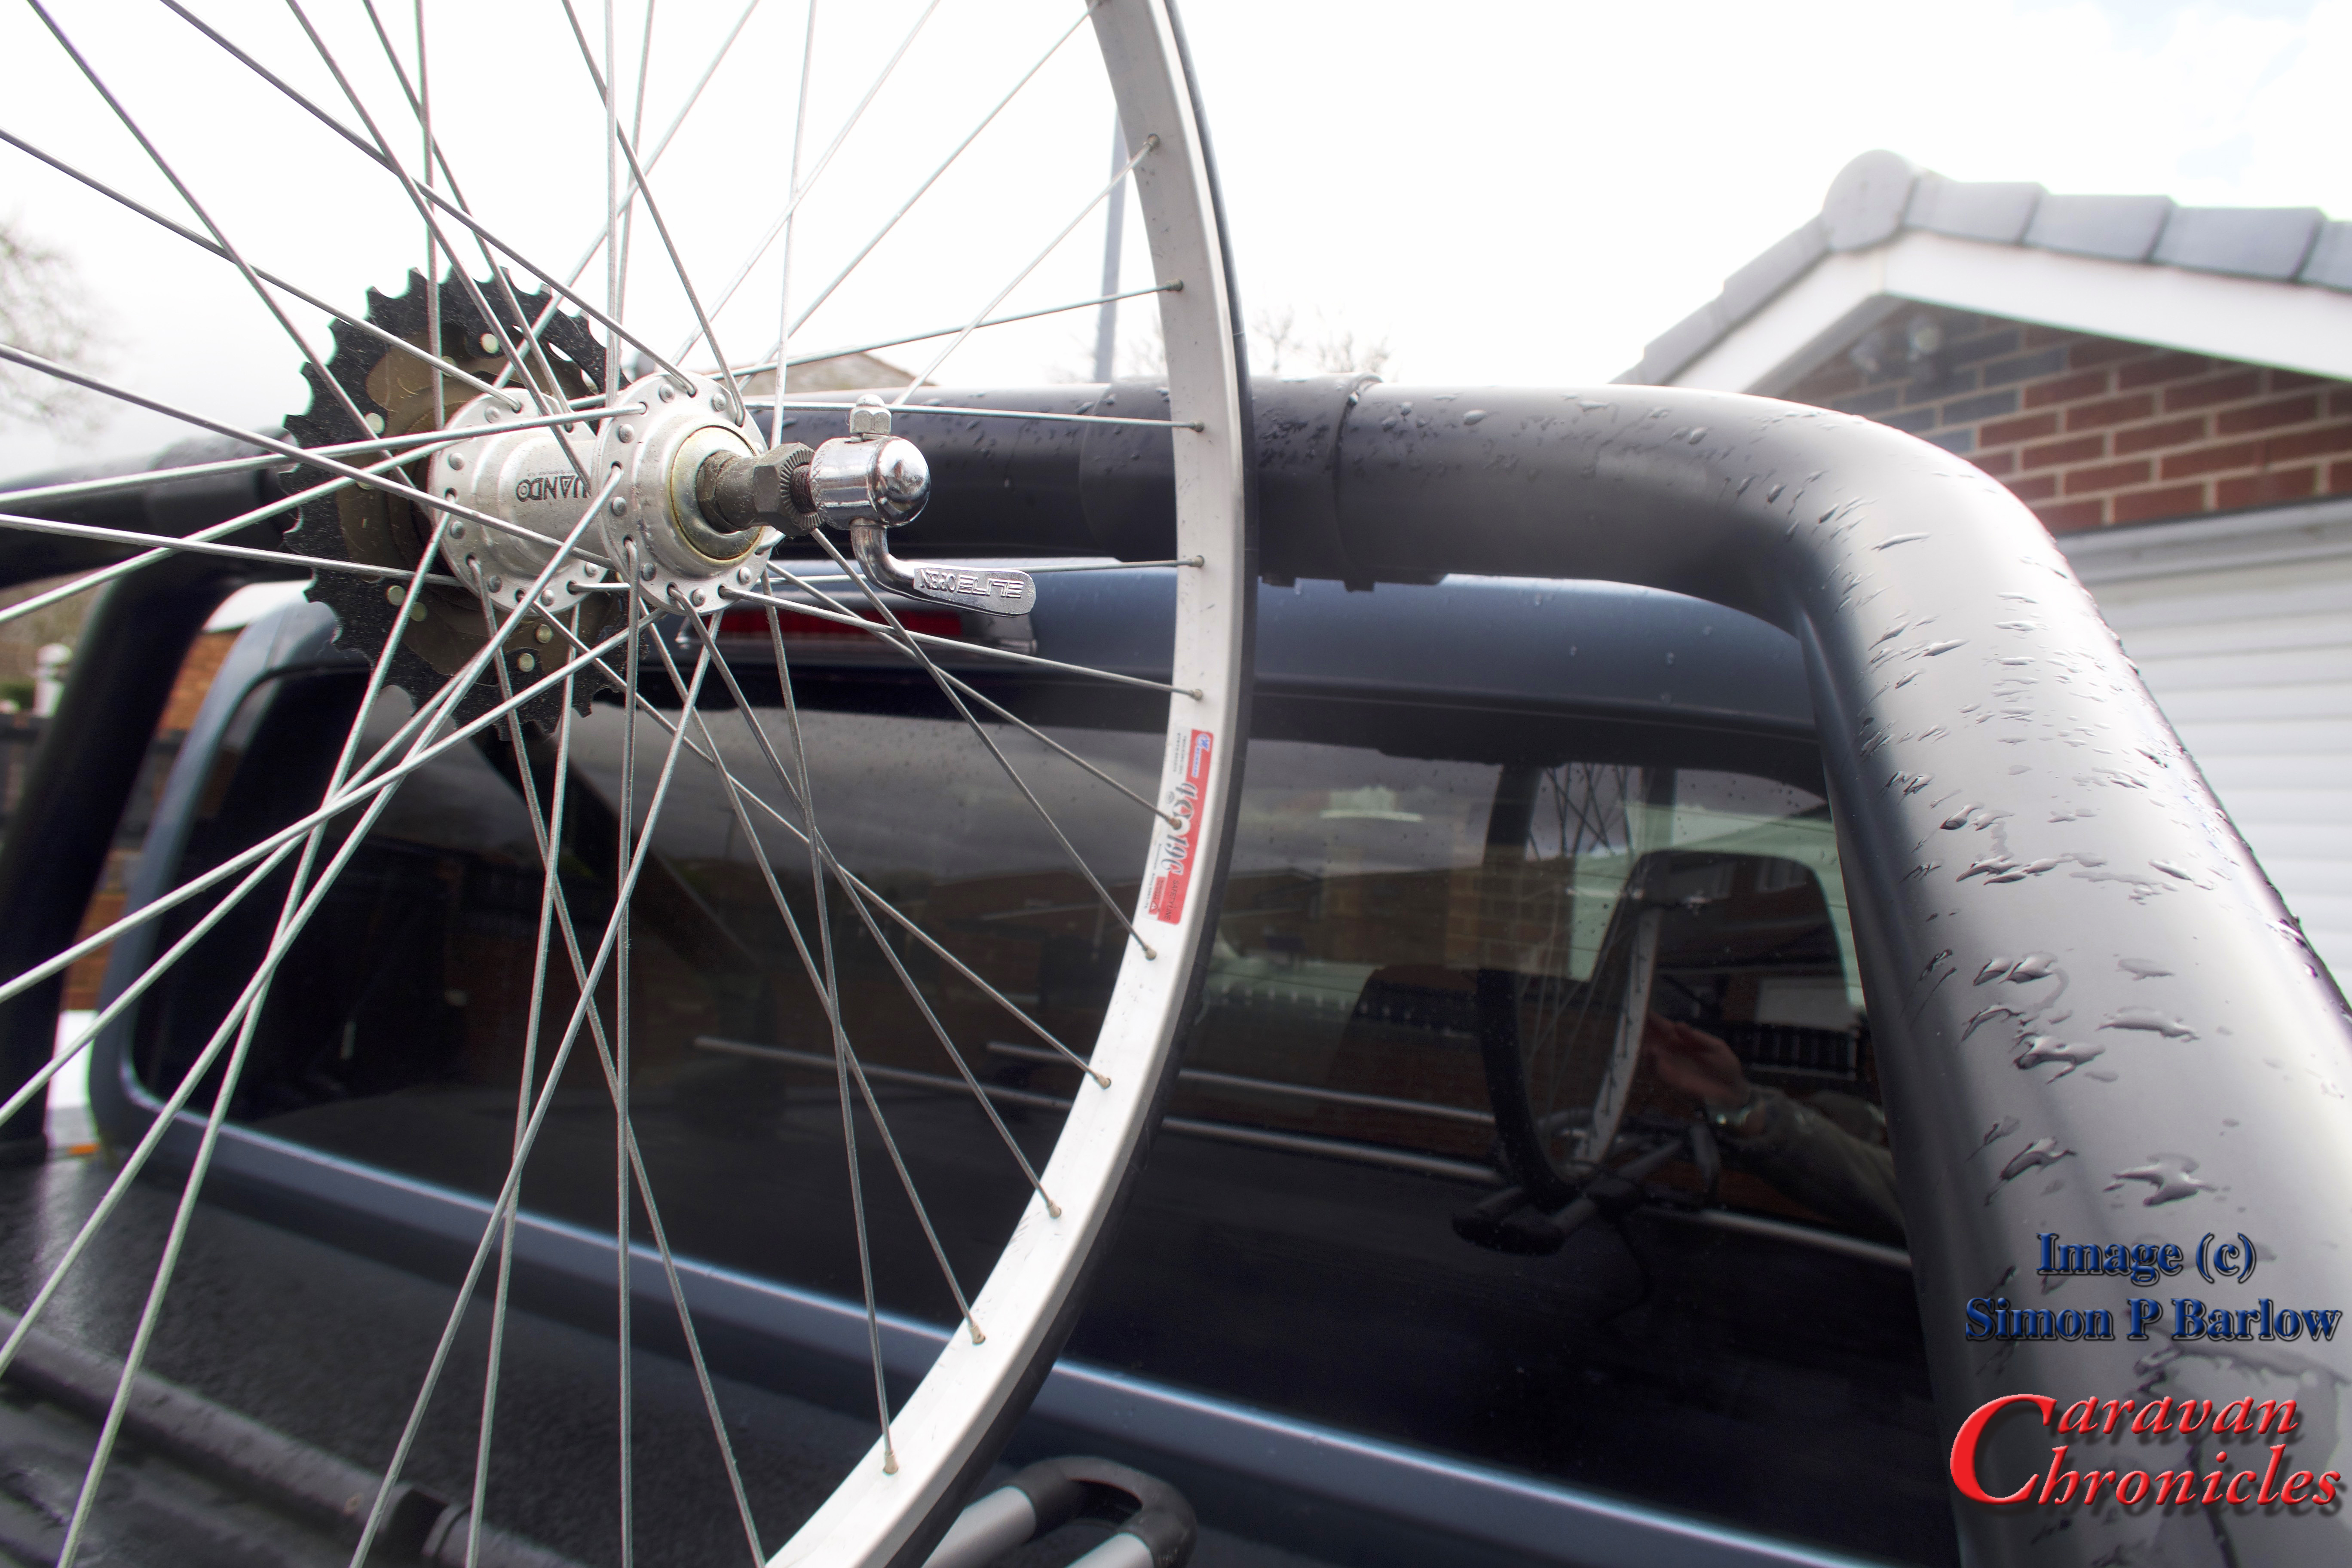
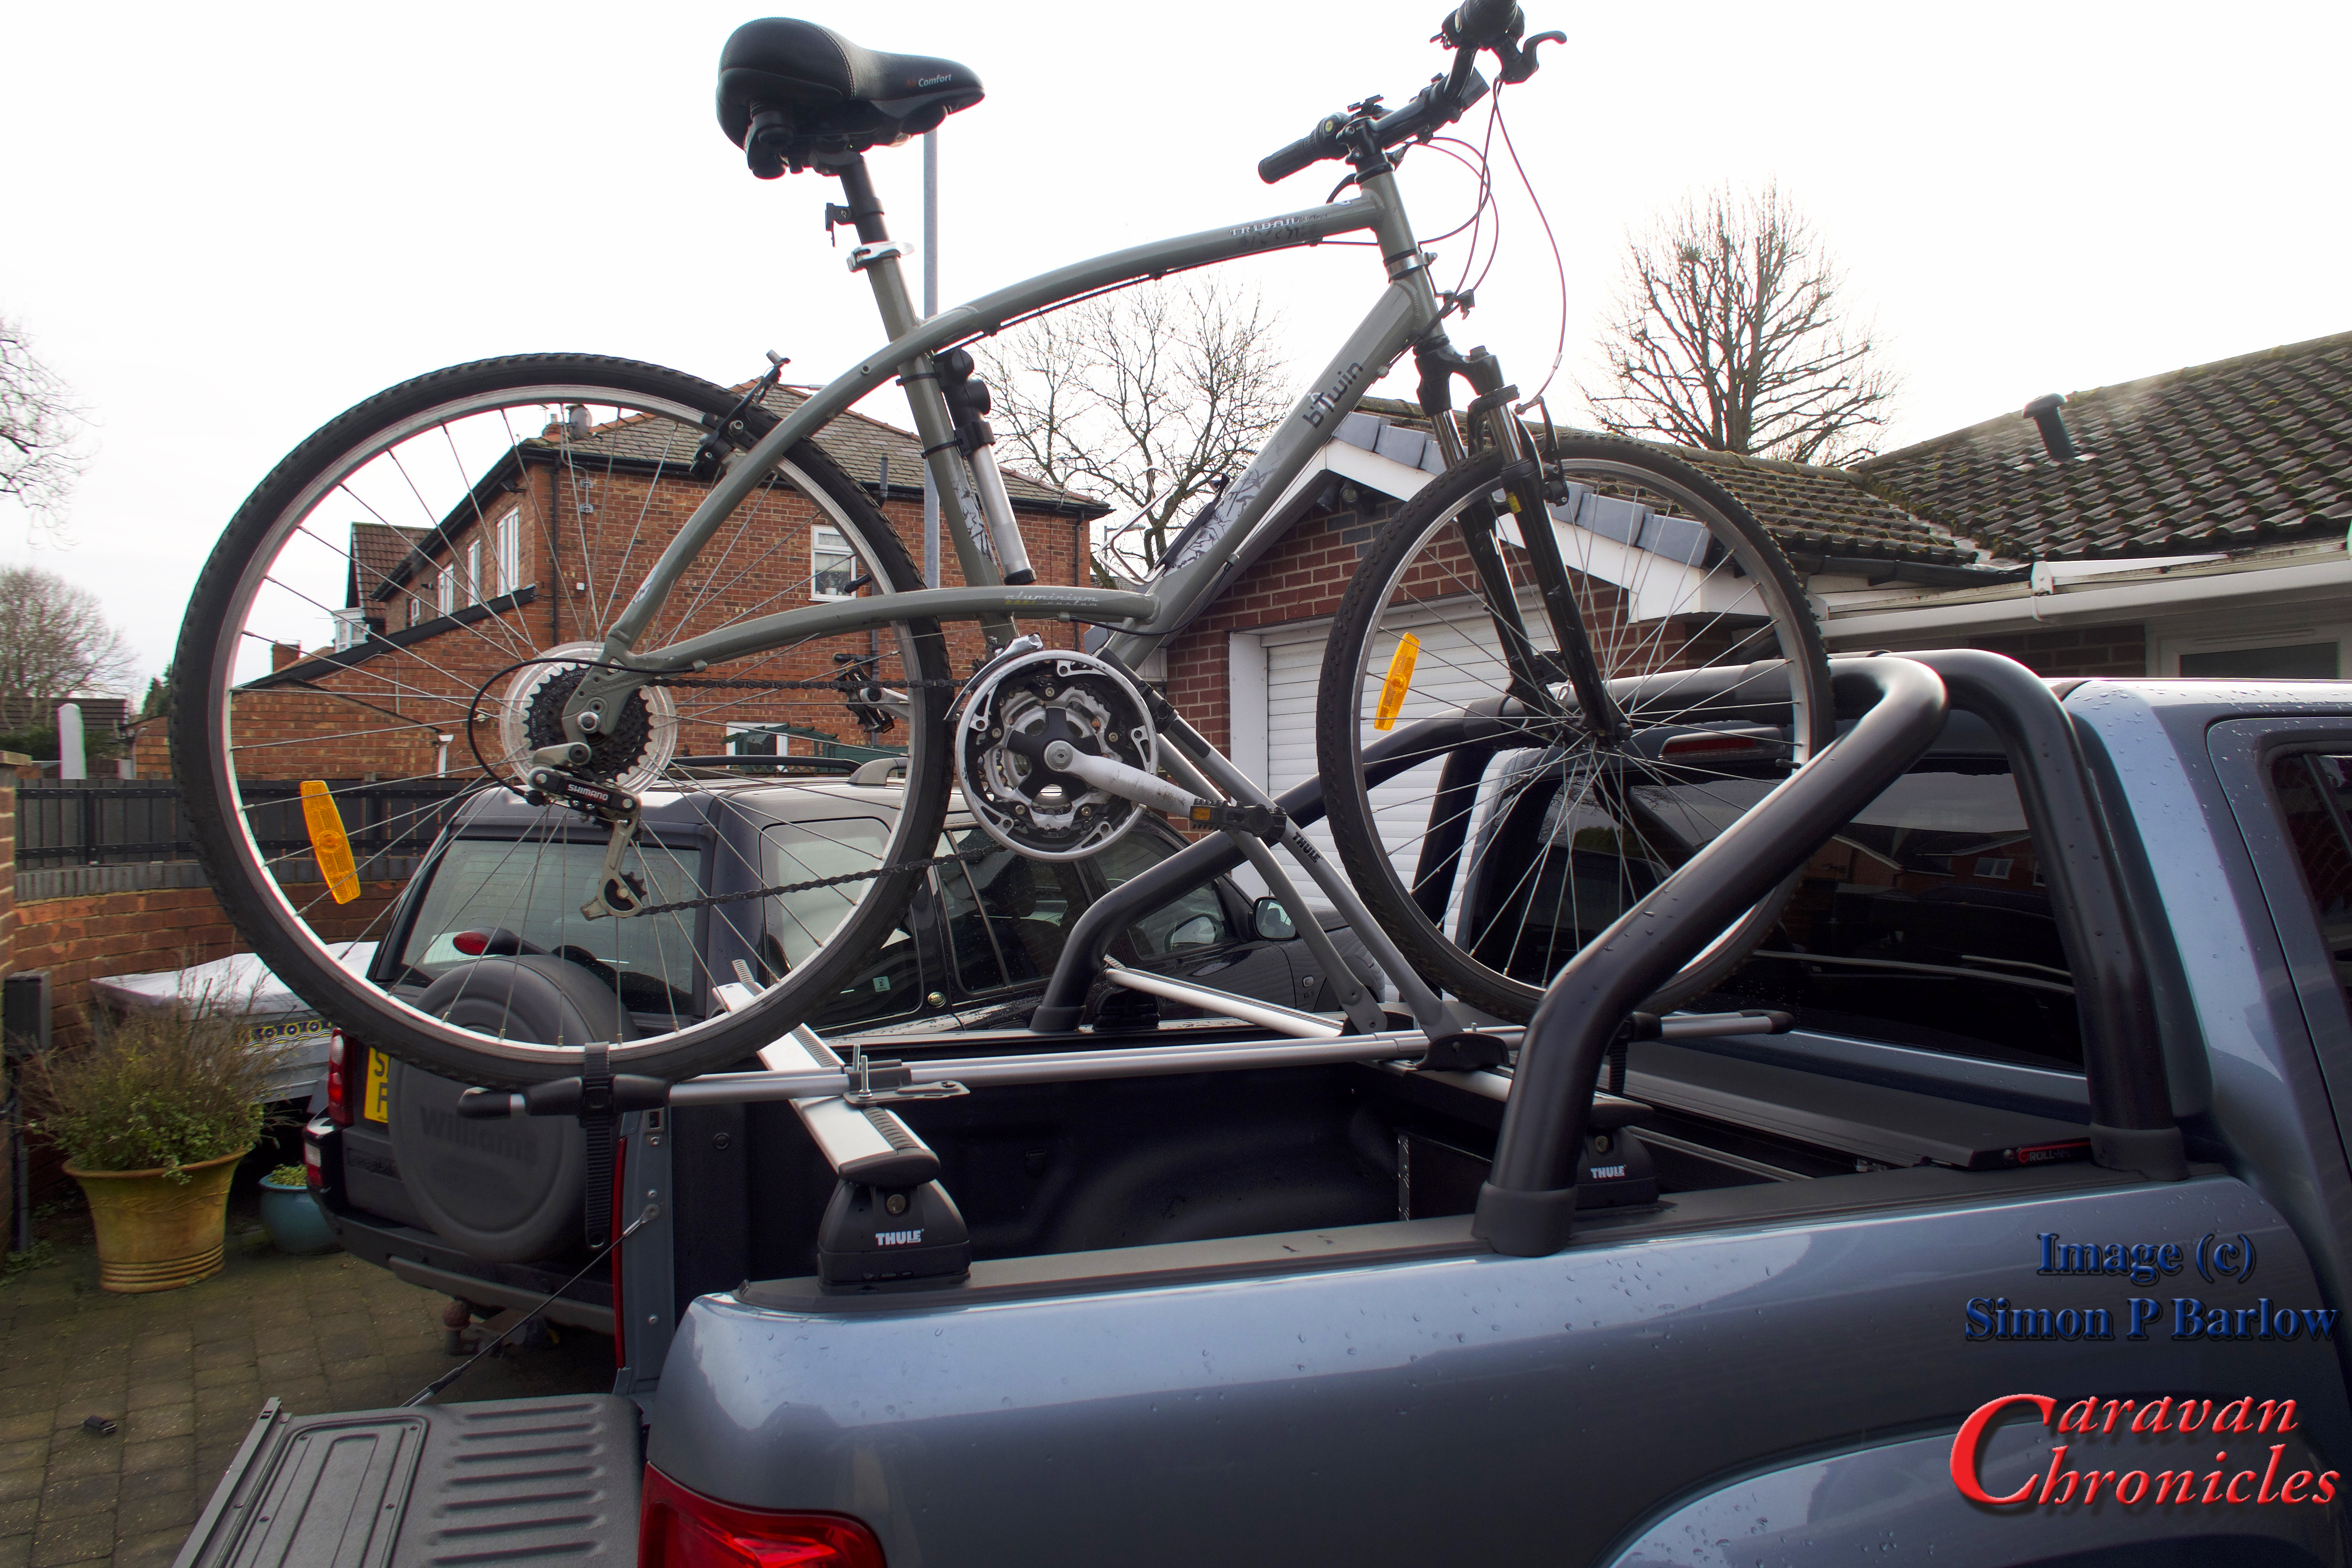
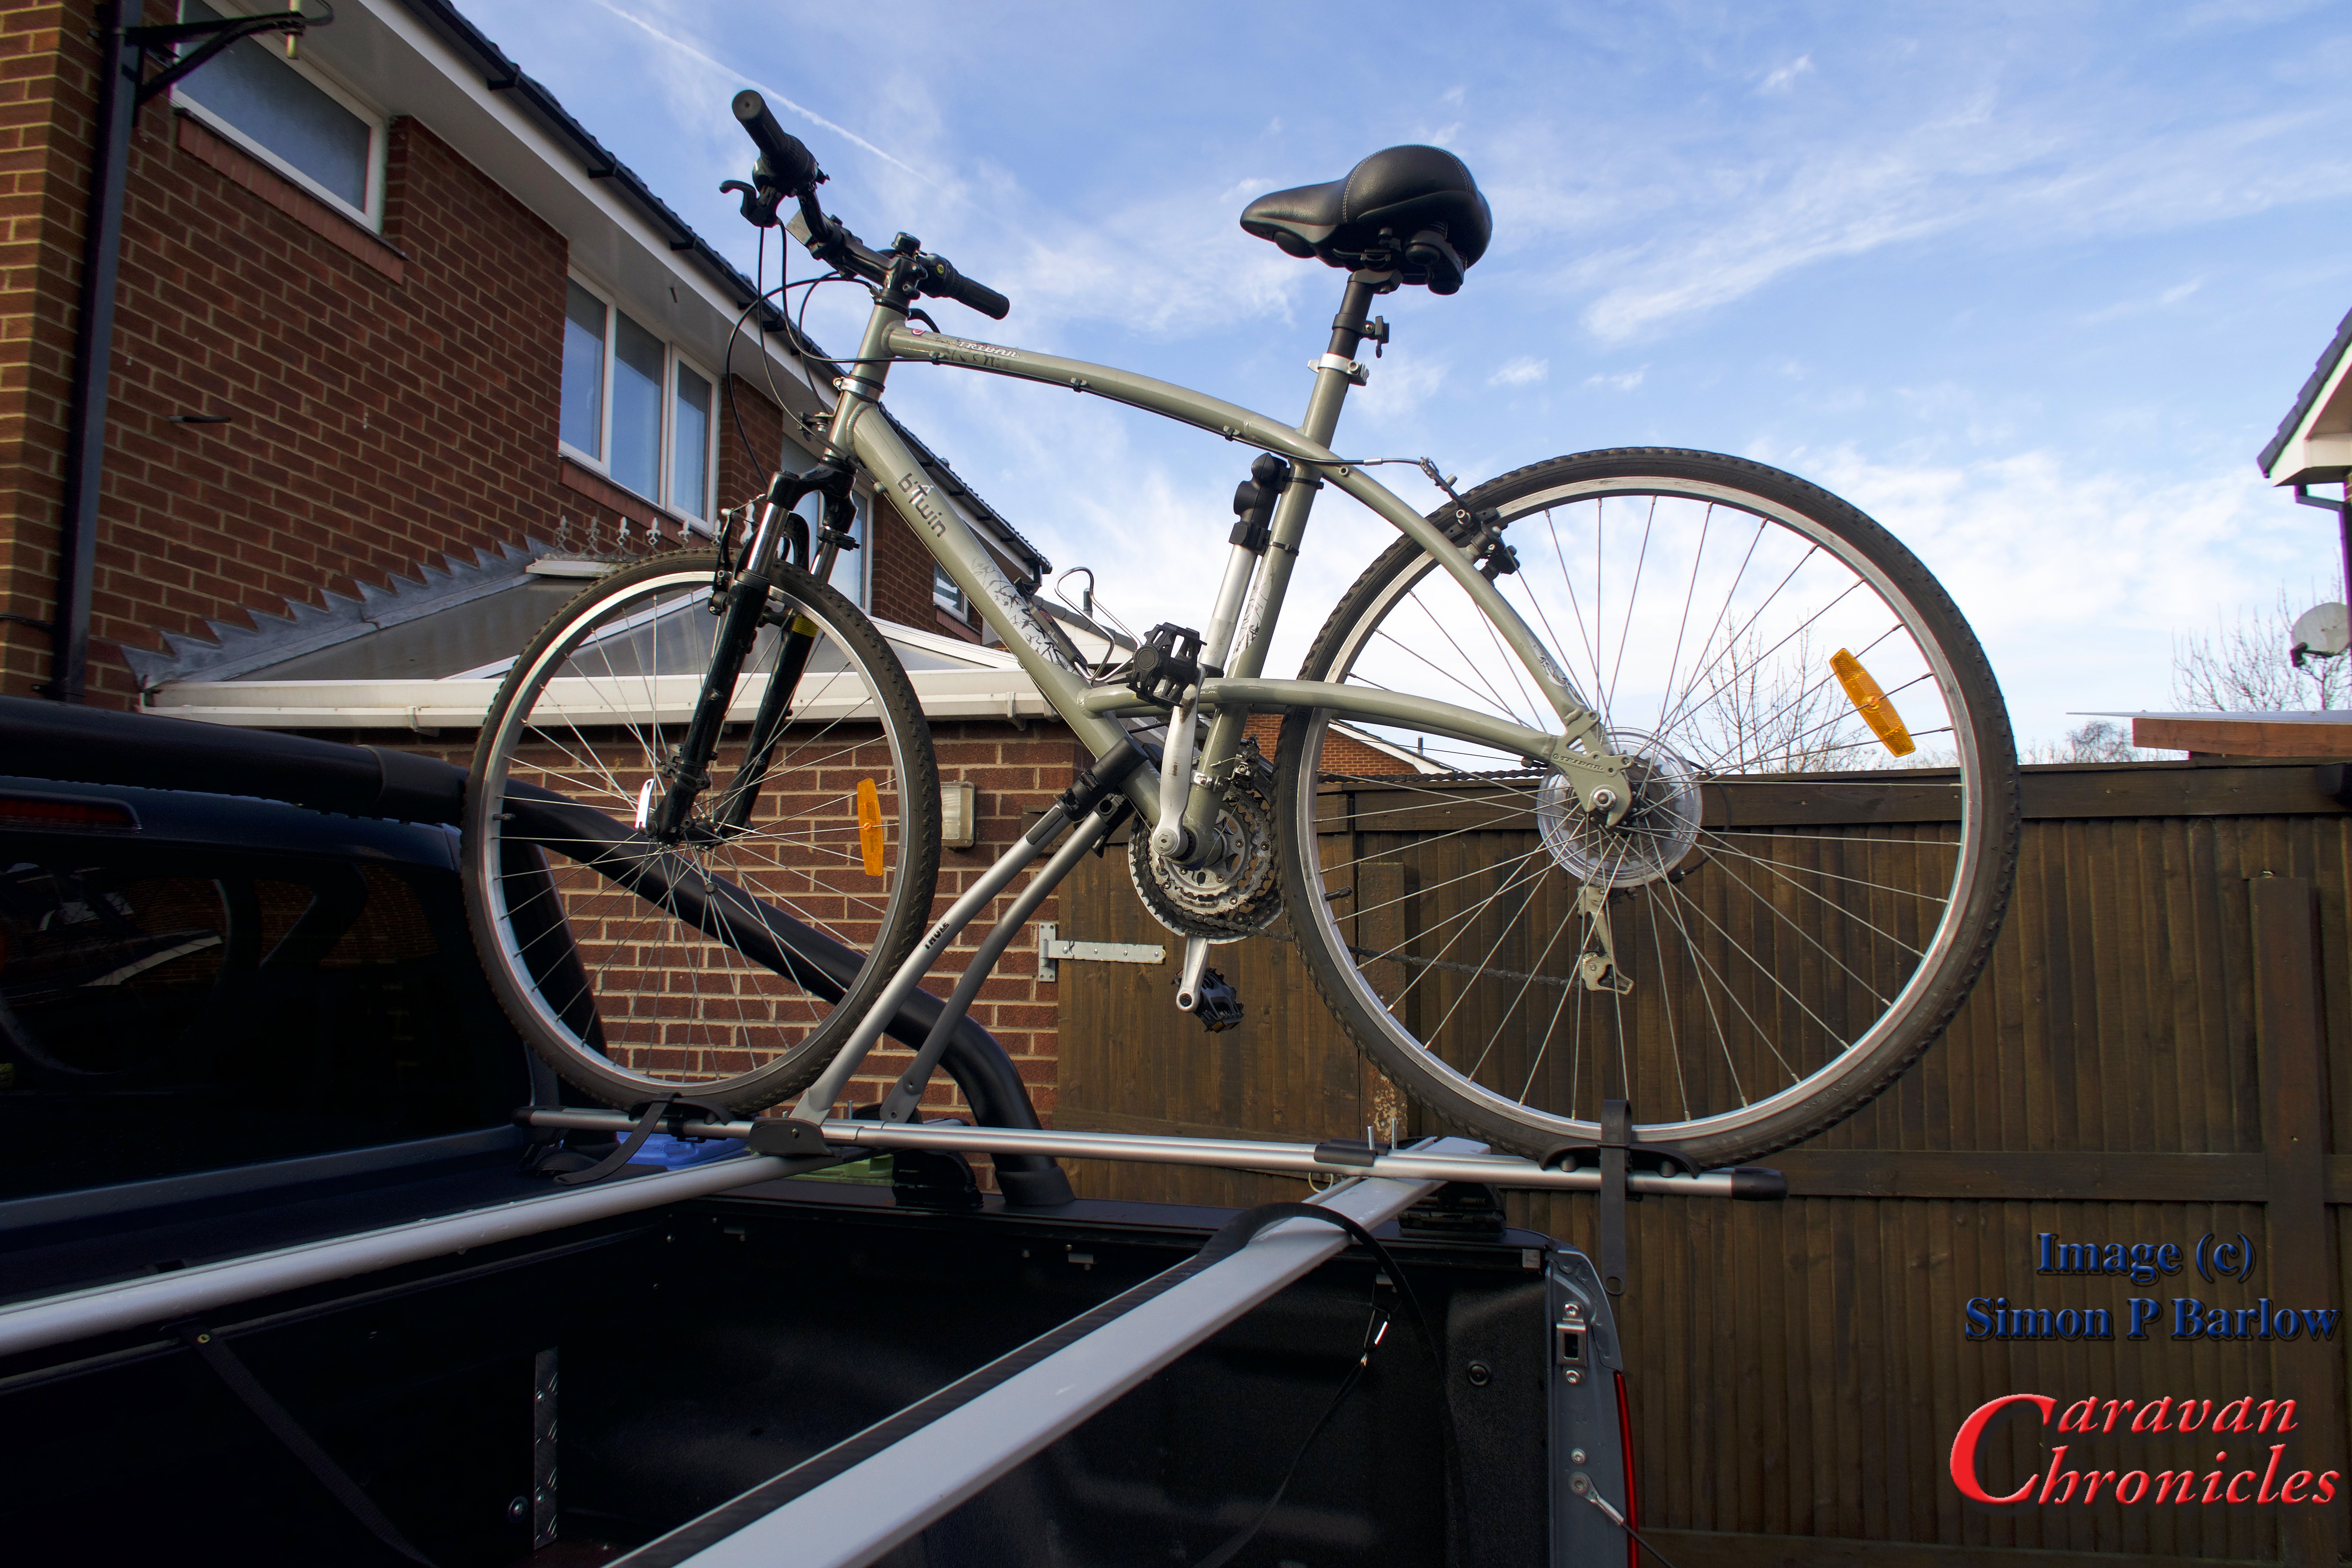
With the WingBar mounted in the other direction the bike was a perfect fit. Also it made it easier opening the end caps of the WingBar as configured the correct way round they were a bit tight against the roll bar.The next thing to address was the overhang. I still had around 50 to 60 mm of adjustment I could make to the rails of the FreeRide rack. Removing everything again and a bit of ‘adjusticating’ with a small rubber mallet soon saw the rails in the correct position. I had not been able to get the rear of the mount flush with the pickup tailgate as was my original hope, but checking with a plumb bob…
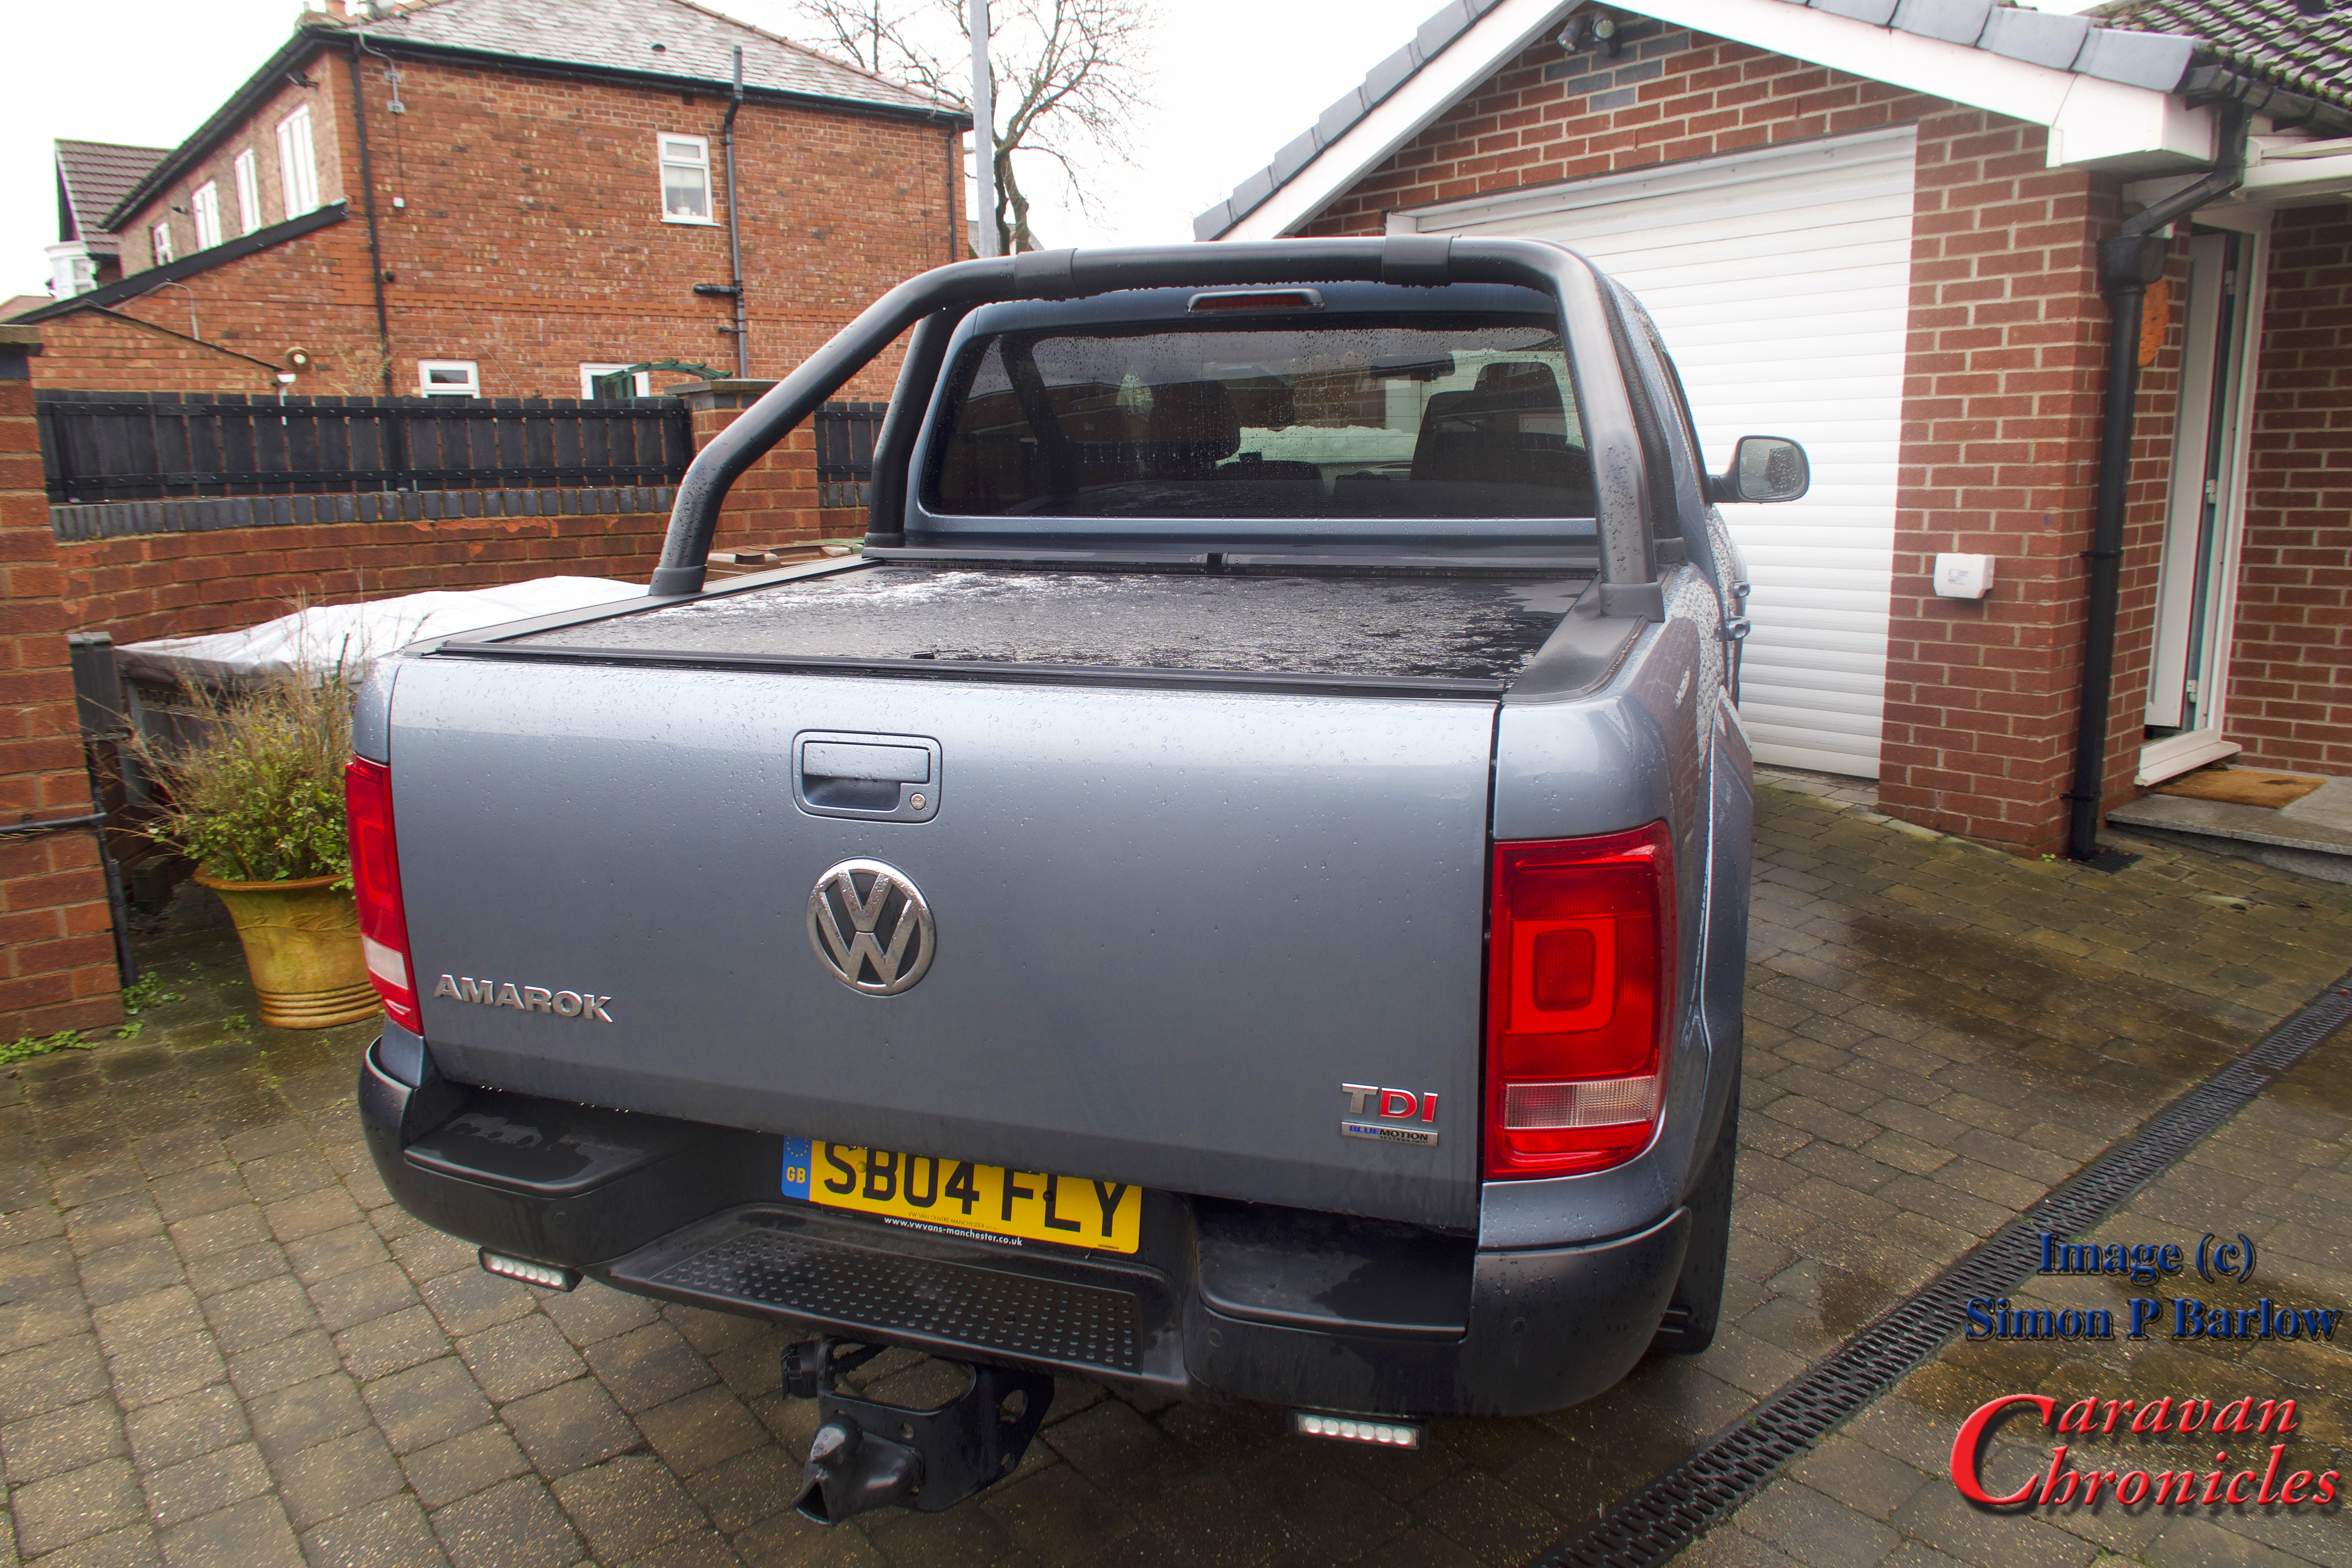
… It was still shorter than the tow ball and only about 40mm longer than the rear bumper. So the overhang wasn’t anything to worry about. Even with a bike on the rack it would be clear of the caravan in the tightest of turns. Next it was just a matter of squaring things up and tightening everything down.
I ended up locating the rack more to the side than I first planned. This was for two reasons. Firstly, once the second rack is in place it leaves me with nearly 800 mm between the two racks which will allow for the option in the the future of having the ability to install a mesh tray, ski rack, surfboard rack (we don’t ski or surf… ho hum) or slimline roof box if we ever run out of storage in the Amarok. The second reason is it will give the rear view dash cam a relatively unobscured view rearward even with two bikes on the back.
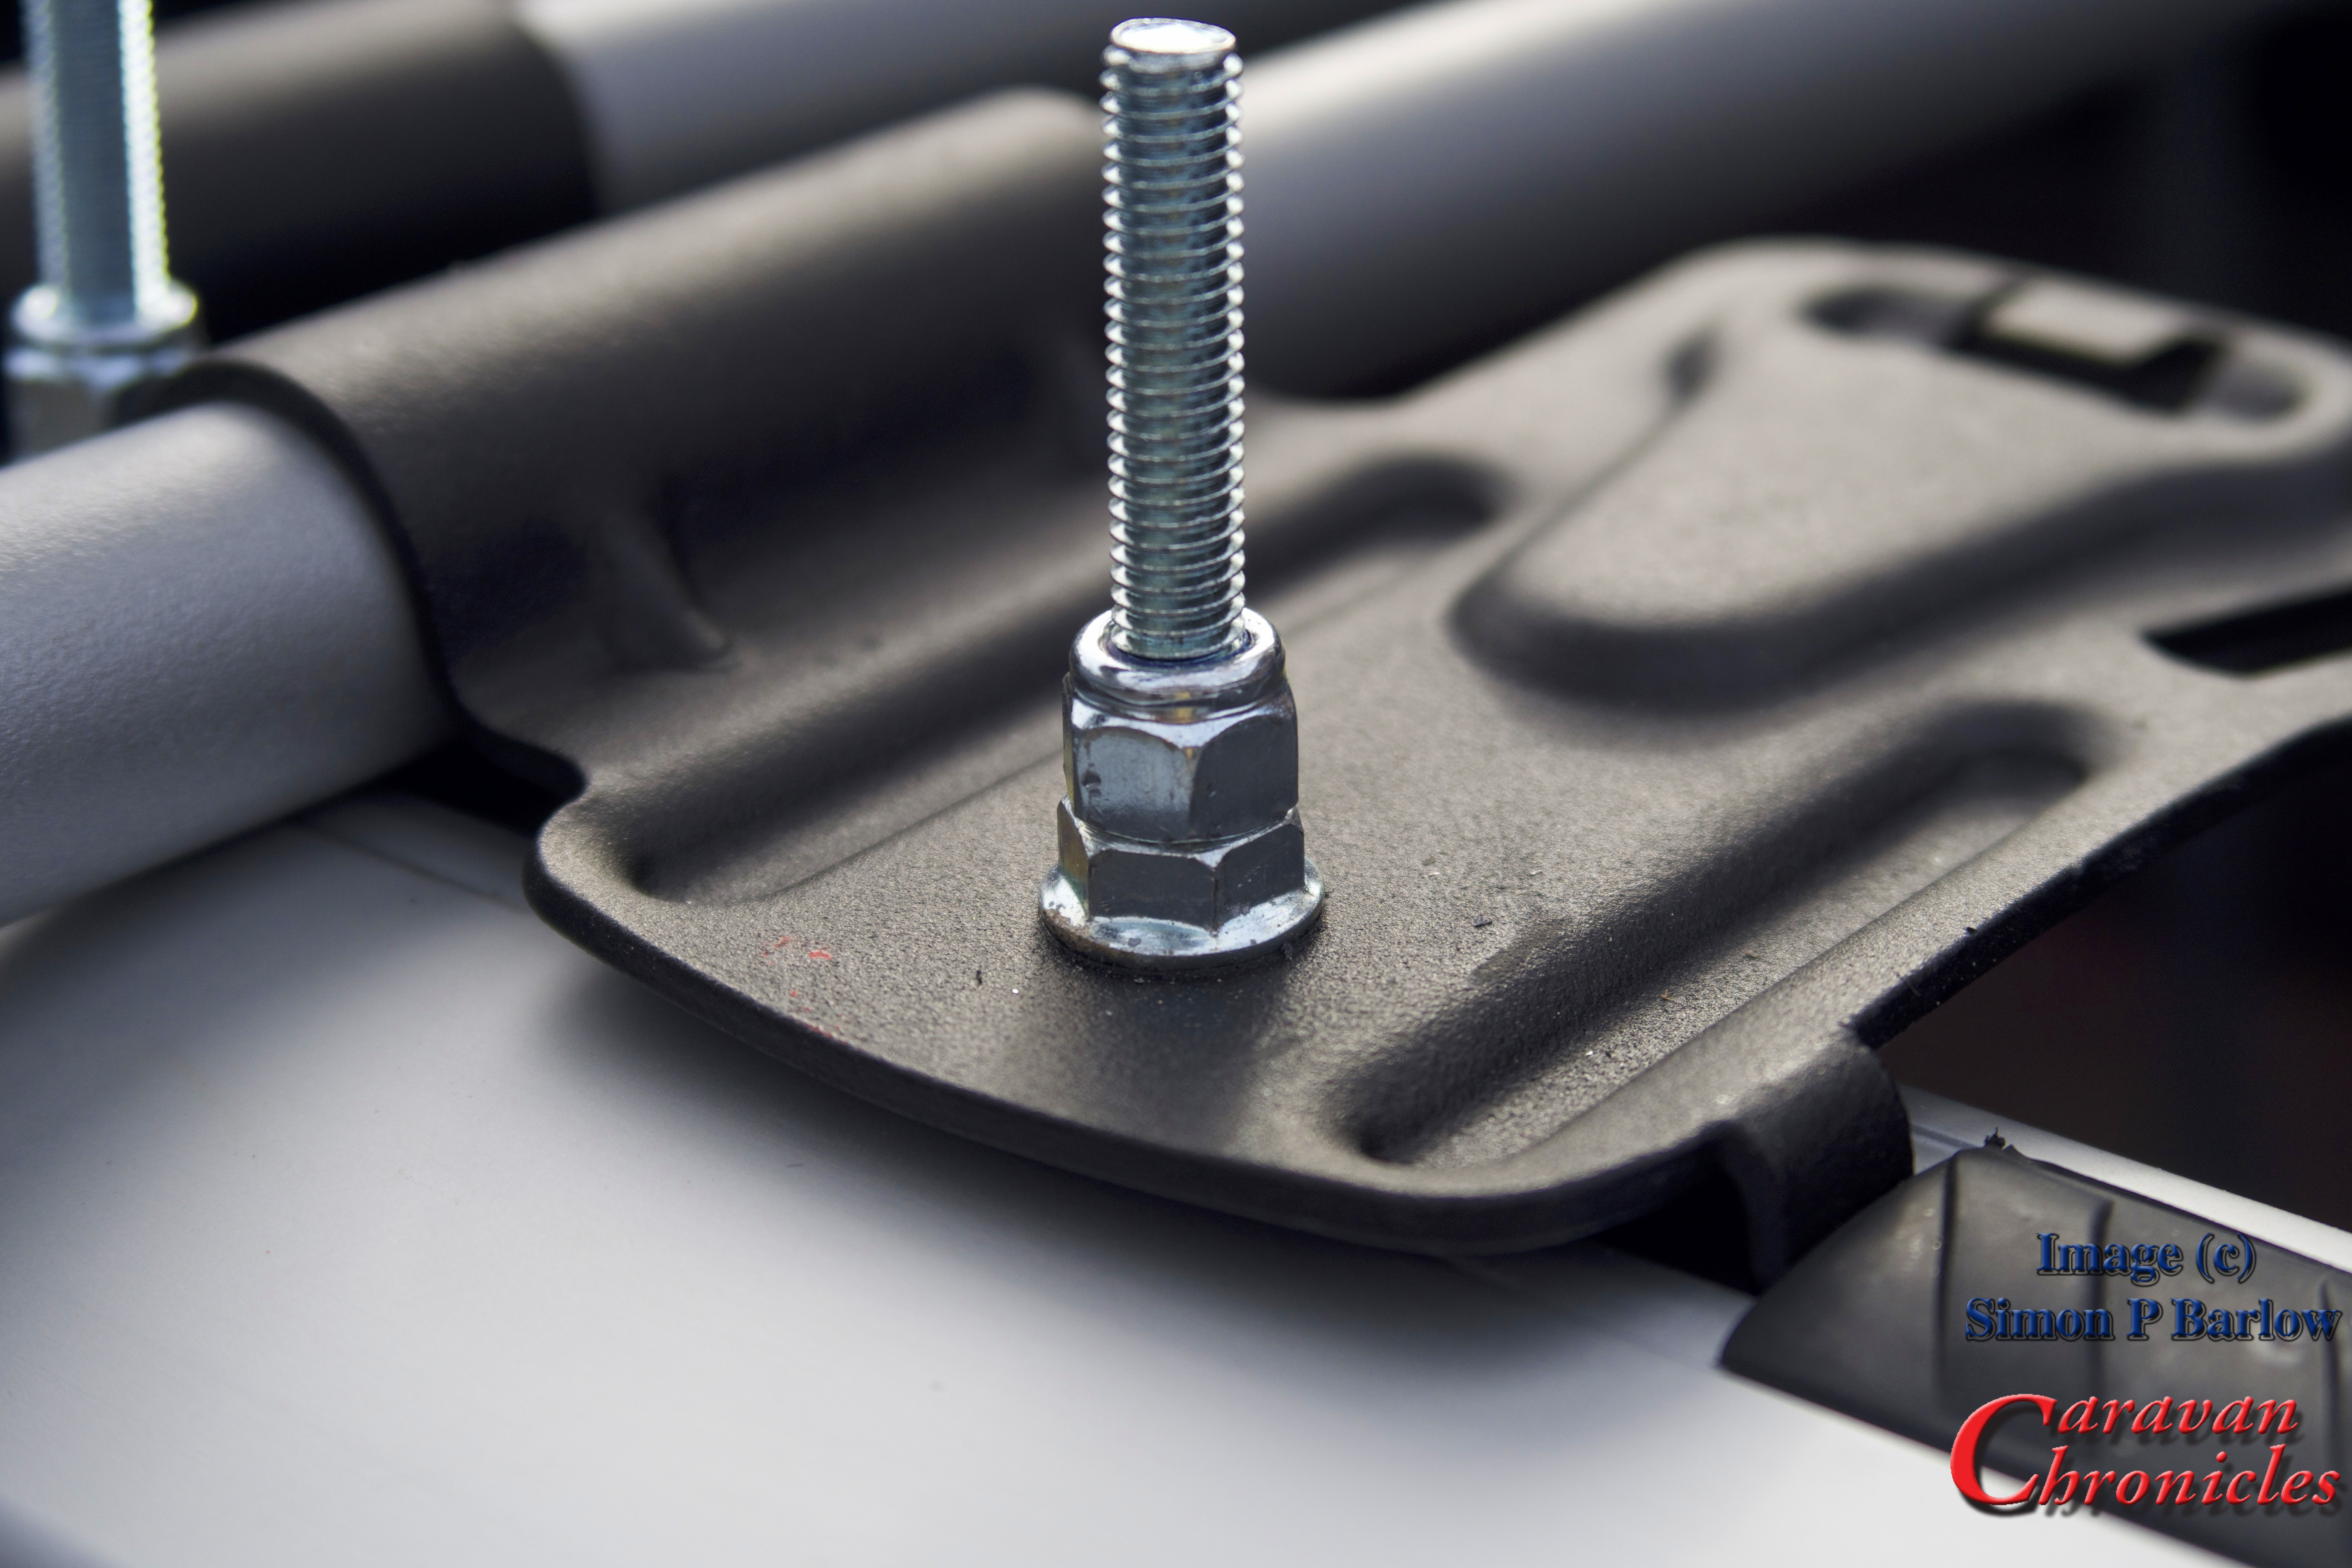
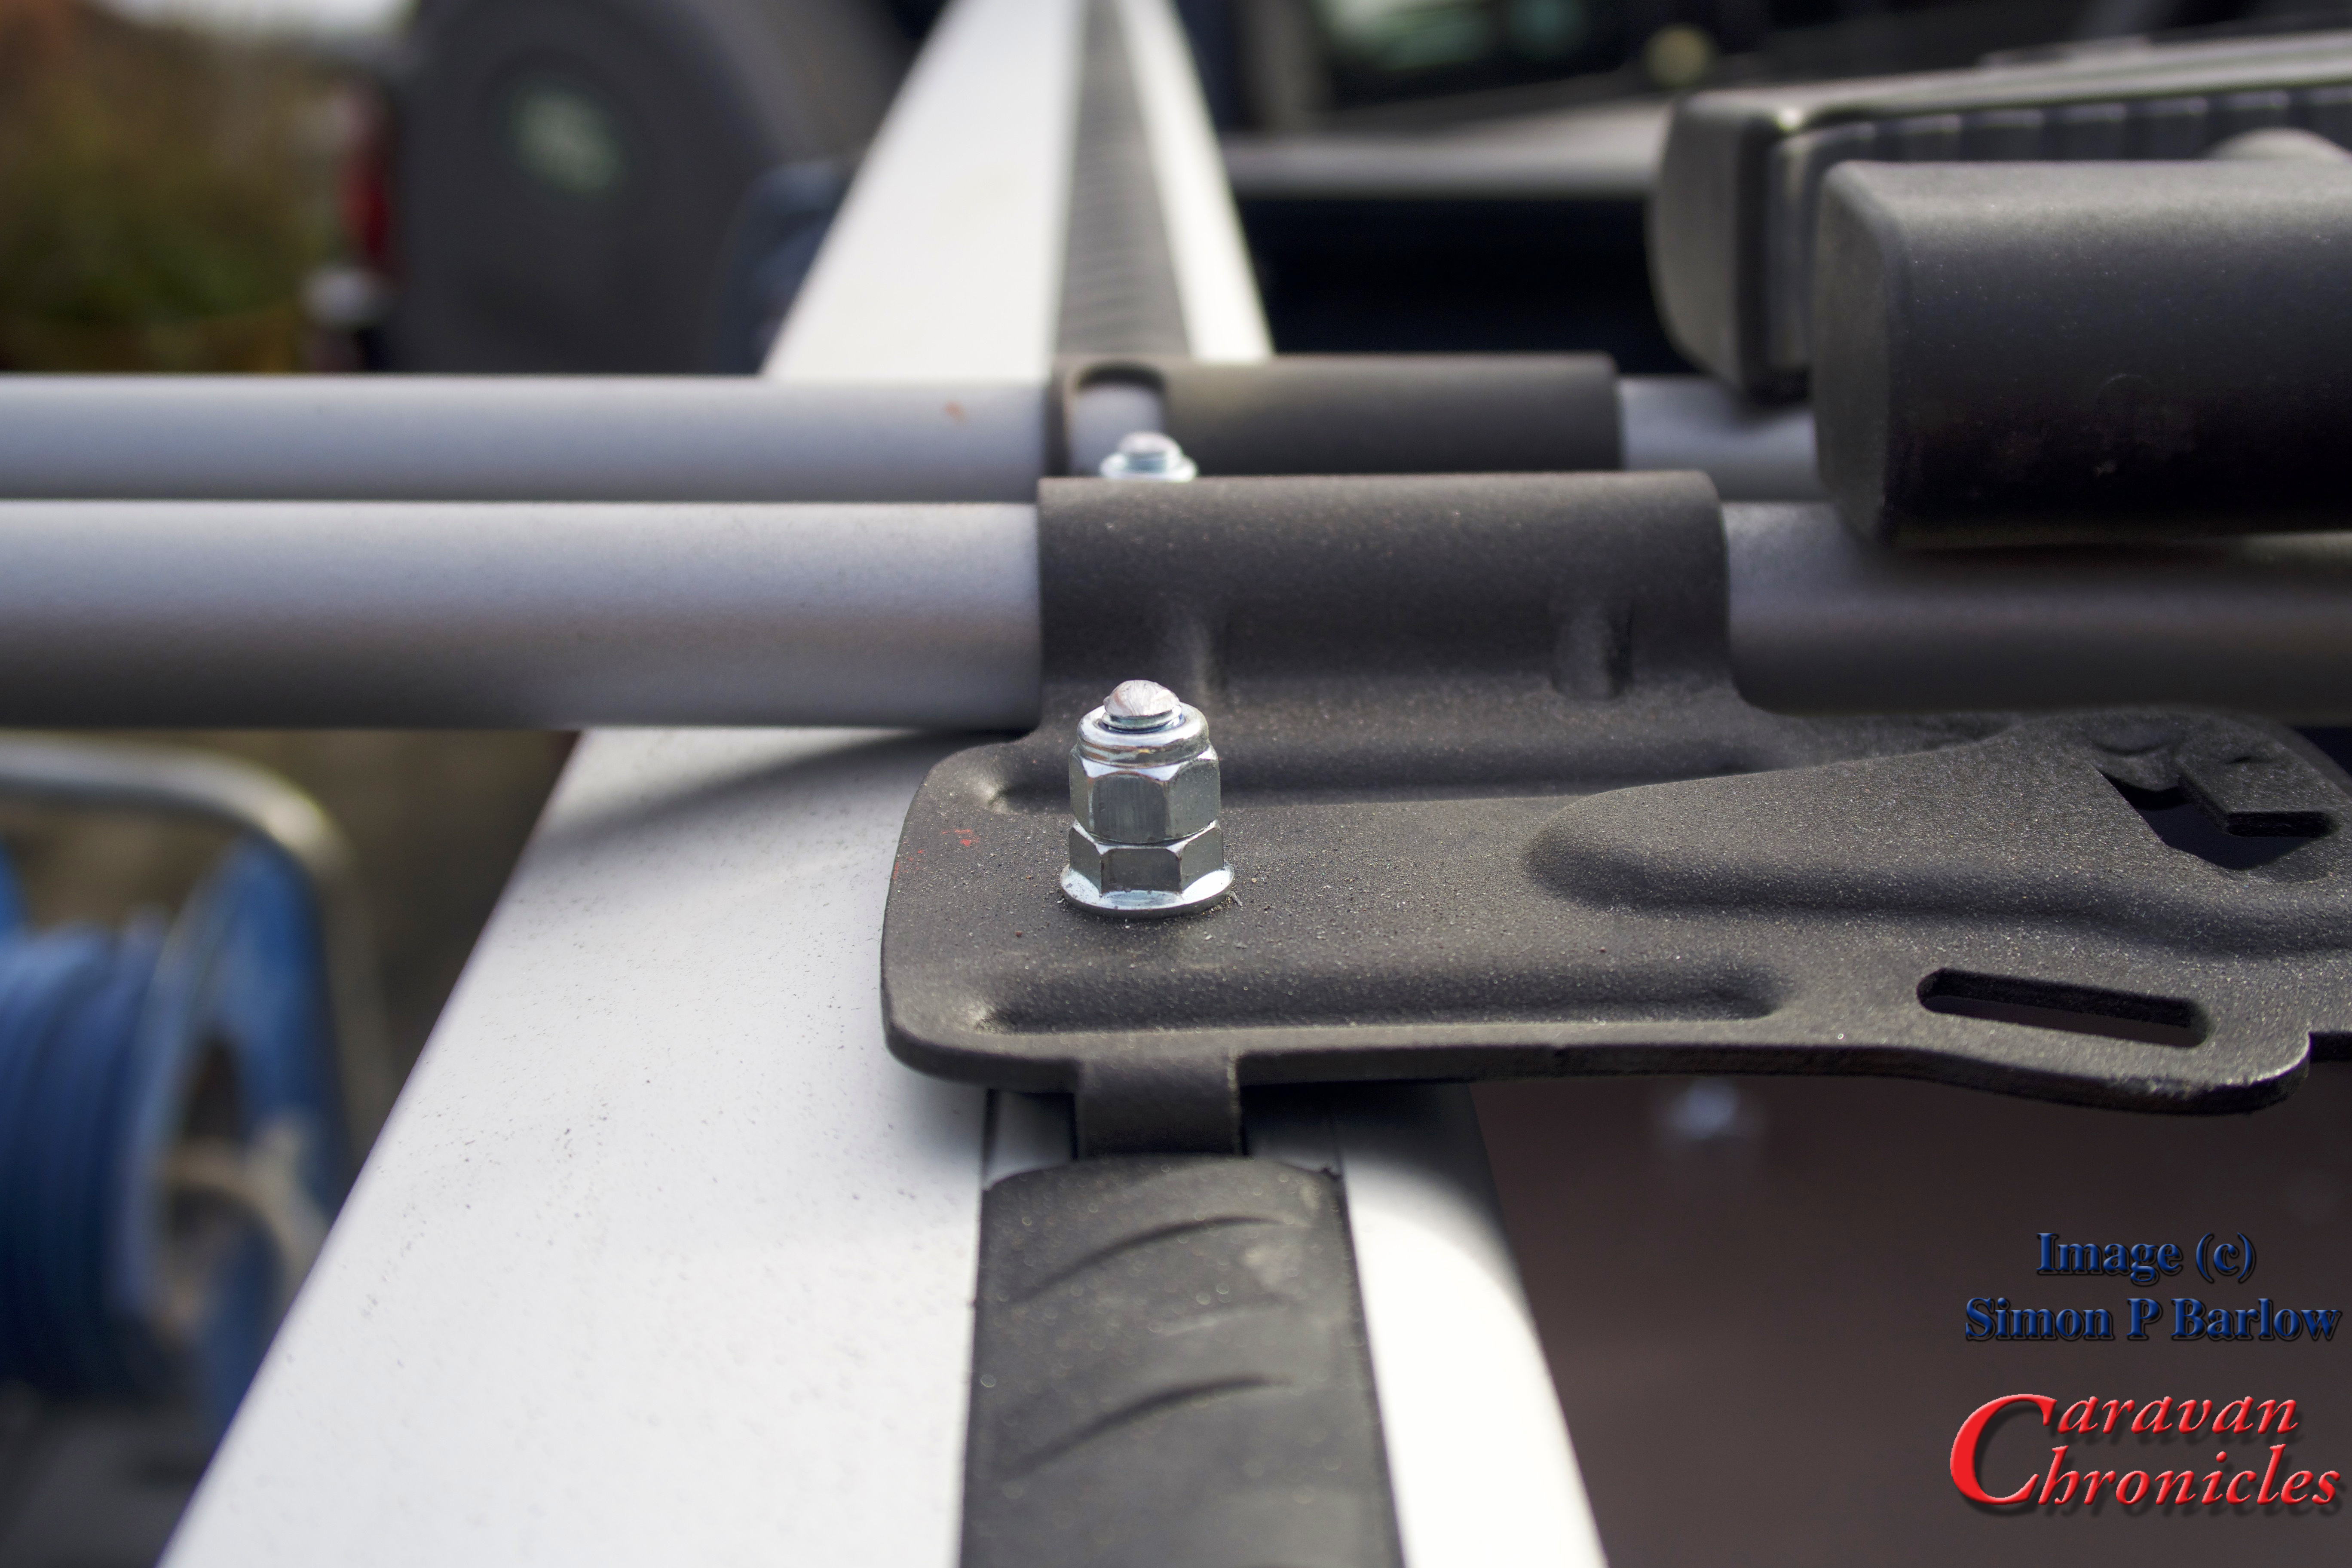
Everything torqued to the correct settings, I topped off the nuts with an additional nylon lock nut to make sure they could not vibrate loose…
… and using a Dremmel I cut off the excess thread and ground off any sharp edges. I need to find a suitable plastic or rubber push on cover for these then I can give them a quick coat of preserving grease.
One thing that I did think about was the prospect of the swing arms bouncing up and down when bikes were not on the rack. A quick rummage in my straps box produced a few of these little blue straps and a handy slot on the mounting plate seemed ideal…
… problem solved. A simple solution to something that may or may not be a problem.
So one rack fitted, all that is left is to repeat for the other side, when it arrives!
It’s been a few months since we bought our VW Amarok and I hadn’t originally intended it to take this long to install a bike rack or carrier. What slowed us down was sorting out the bits needed for mounting a bike carrier above the bed of the Amarok. In the USA, pickups are plentiful and there are various companies that make carrier systems and mounts for pickups. My initial thoughts it would be fairly easy and started perusing the Thule website. Unfortunately they did not sell the correct mounting hardware for where I wanted to mount the rack.. on the side rails for the Roll-N-Lock cover.
Searching the internet found plenty of results for the type of mounting I wanted… all in America and the most promising system was produced by Yakimar.
However, trying to find a retailer that would ship to the UK was a bit of a problem as most would only ship to the US and Canada. I did eventually find a company in California that would. The next hurdle was the cost. To buy everything and get it shipped over here would ring up a massive £2180 bill at the checkout. This was not worth it. I out the bike rack on the back burner for a while… and the pound against the dollar slipped in the meantime.
I started looking around again at the start of this year and returned to Thule and Fiamma. Could I make up my own “kit of parts” to do the job? Fiamma while having a great selection of racks and bits didn’t provide anything in the way of a roof bar so back to Thule again. While mooching about their website I accidentally got on to the American area of their site and while looking for mounting feet came across one specifically designed for mounting on to flat roofs. The part was intended for a Fibreglass canopy on a Jeep Wrangler but pictures showed them being used on a number of vehicles and camping trailers. This was exactly the part I needed.
I checked with a number of Thule retailers to see if they had Kit 3113 which was used to mount Rapid Podium Foot Pack 460R on flat surfaces. No one had it, so a quick email to Thule asking if it was obtainable in the UK or Europe was fired off. The answer was a bit surprising. It was an American part produced by the American Division and was not obtainable in Europe.
OK, back to my contact at Worldwide Cyclery in California… did they stock it and could they ship it? It arrived within six days. I also ordered the Foot Pack 460R as it was over £60 cheaper even after paying import duty than buying it in the UK on-line. I now had the means to mount the WingBars(Aeroblade). I just needed to check the size and order these and two FreeRide 232 bike mounts. Before I ordered, I checked the width I’d need. Next problem, The WingBars in the UK were 1500mm wide and in the US being manufactured in English sizes were slightly wider by about an inch. They arrived a few days later from the US!
OK, so now I had all the parts… to the bat cave!
Assembling the 3113 mounting plates
The first task was to assemble everything so I could to a test fit of the whole caboodle on the back of the Amarok before drilling anything… always a good idea! The four Kit 3113’s were assembled first and the four 406R feet were mounted on to them.
Assembling the 460R on to one of the 3113 mounting plates.
Once this was done, the sub assemblies were slid on to the ends of the WingBars.
Once this was done, I could roughly position the two partially completed WingBars across the bed of the Amarok.
I now needed to check the position of the bike on the FreeRide 532 so that would in turn give me the position I needed to mount the WingBars. From the centre line of the mounting plate the front edge of the front wheel is about 550 mm, so the front WingBar needs to be at least 550mm back from the rear of the cab.
However, the Amarok’s sport bars have to be taken into consideration as these stop the front wheel of the bike going too far forward and will help protect the cab.
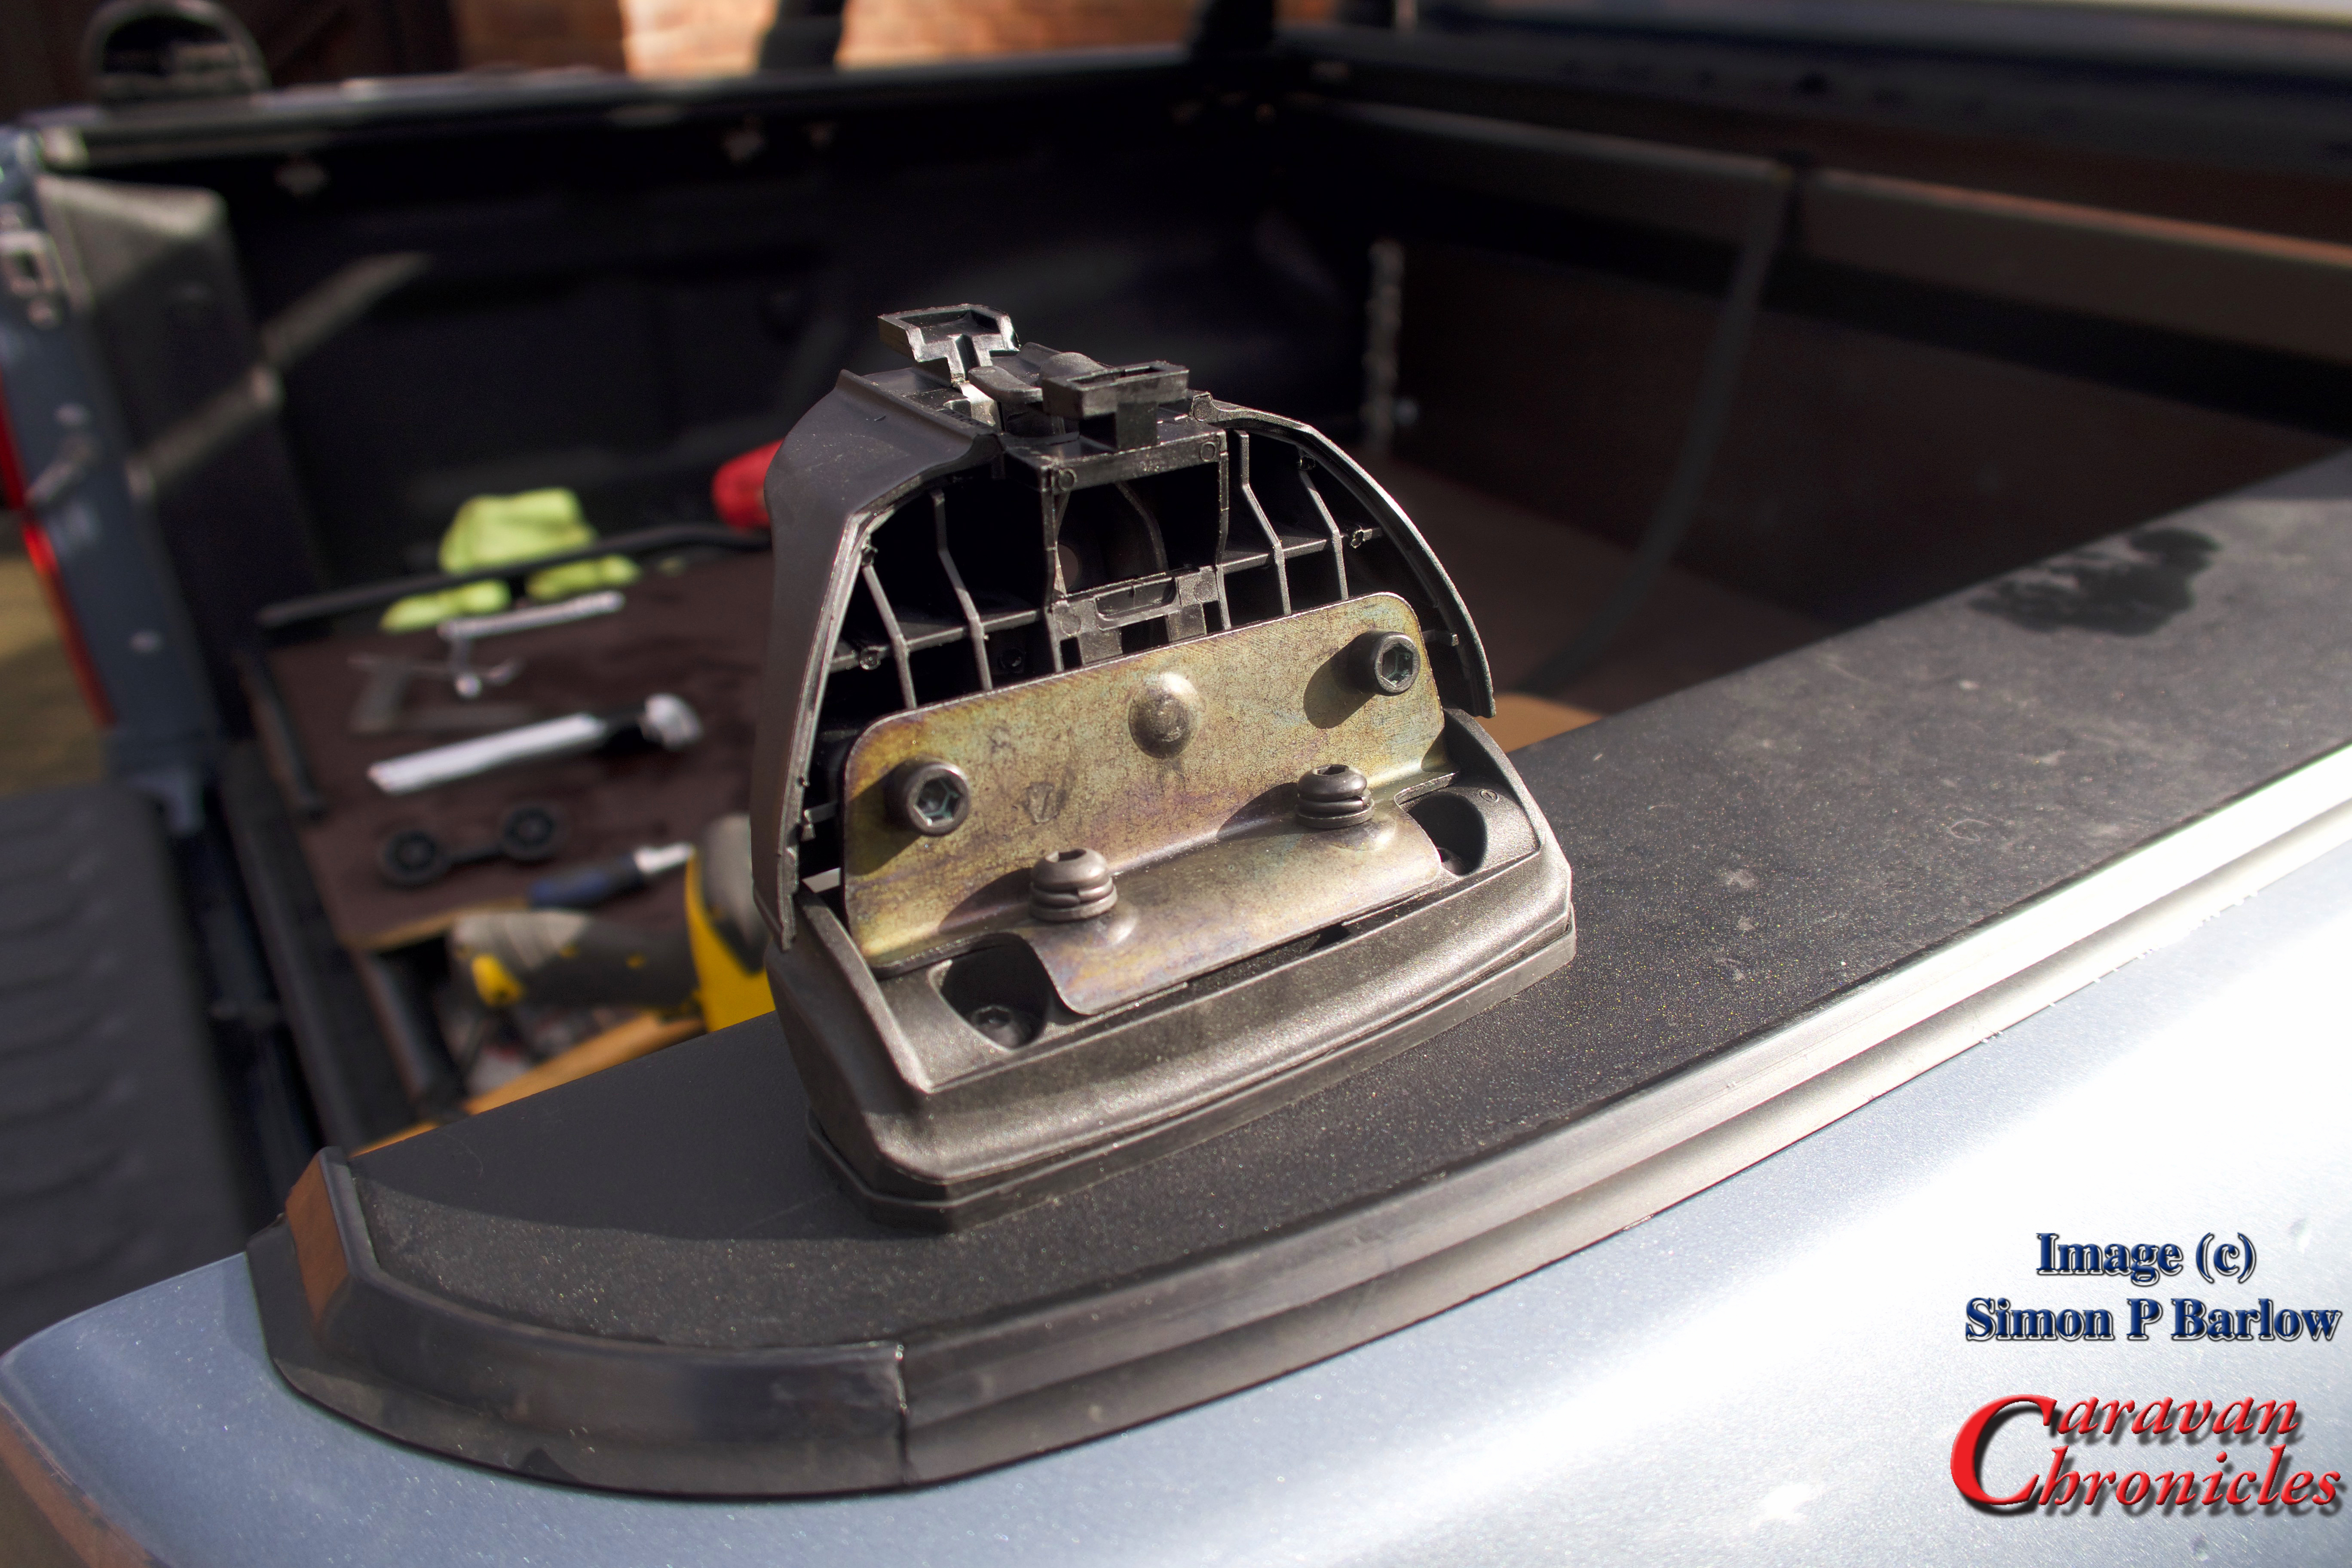
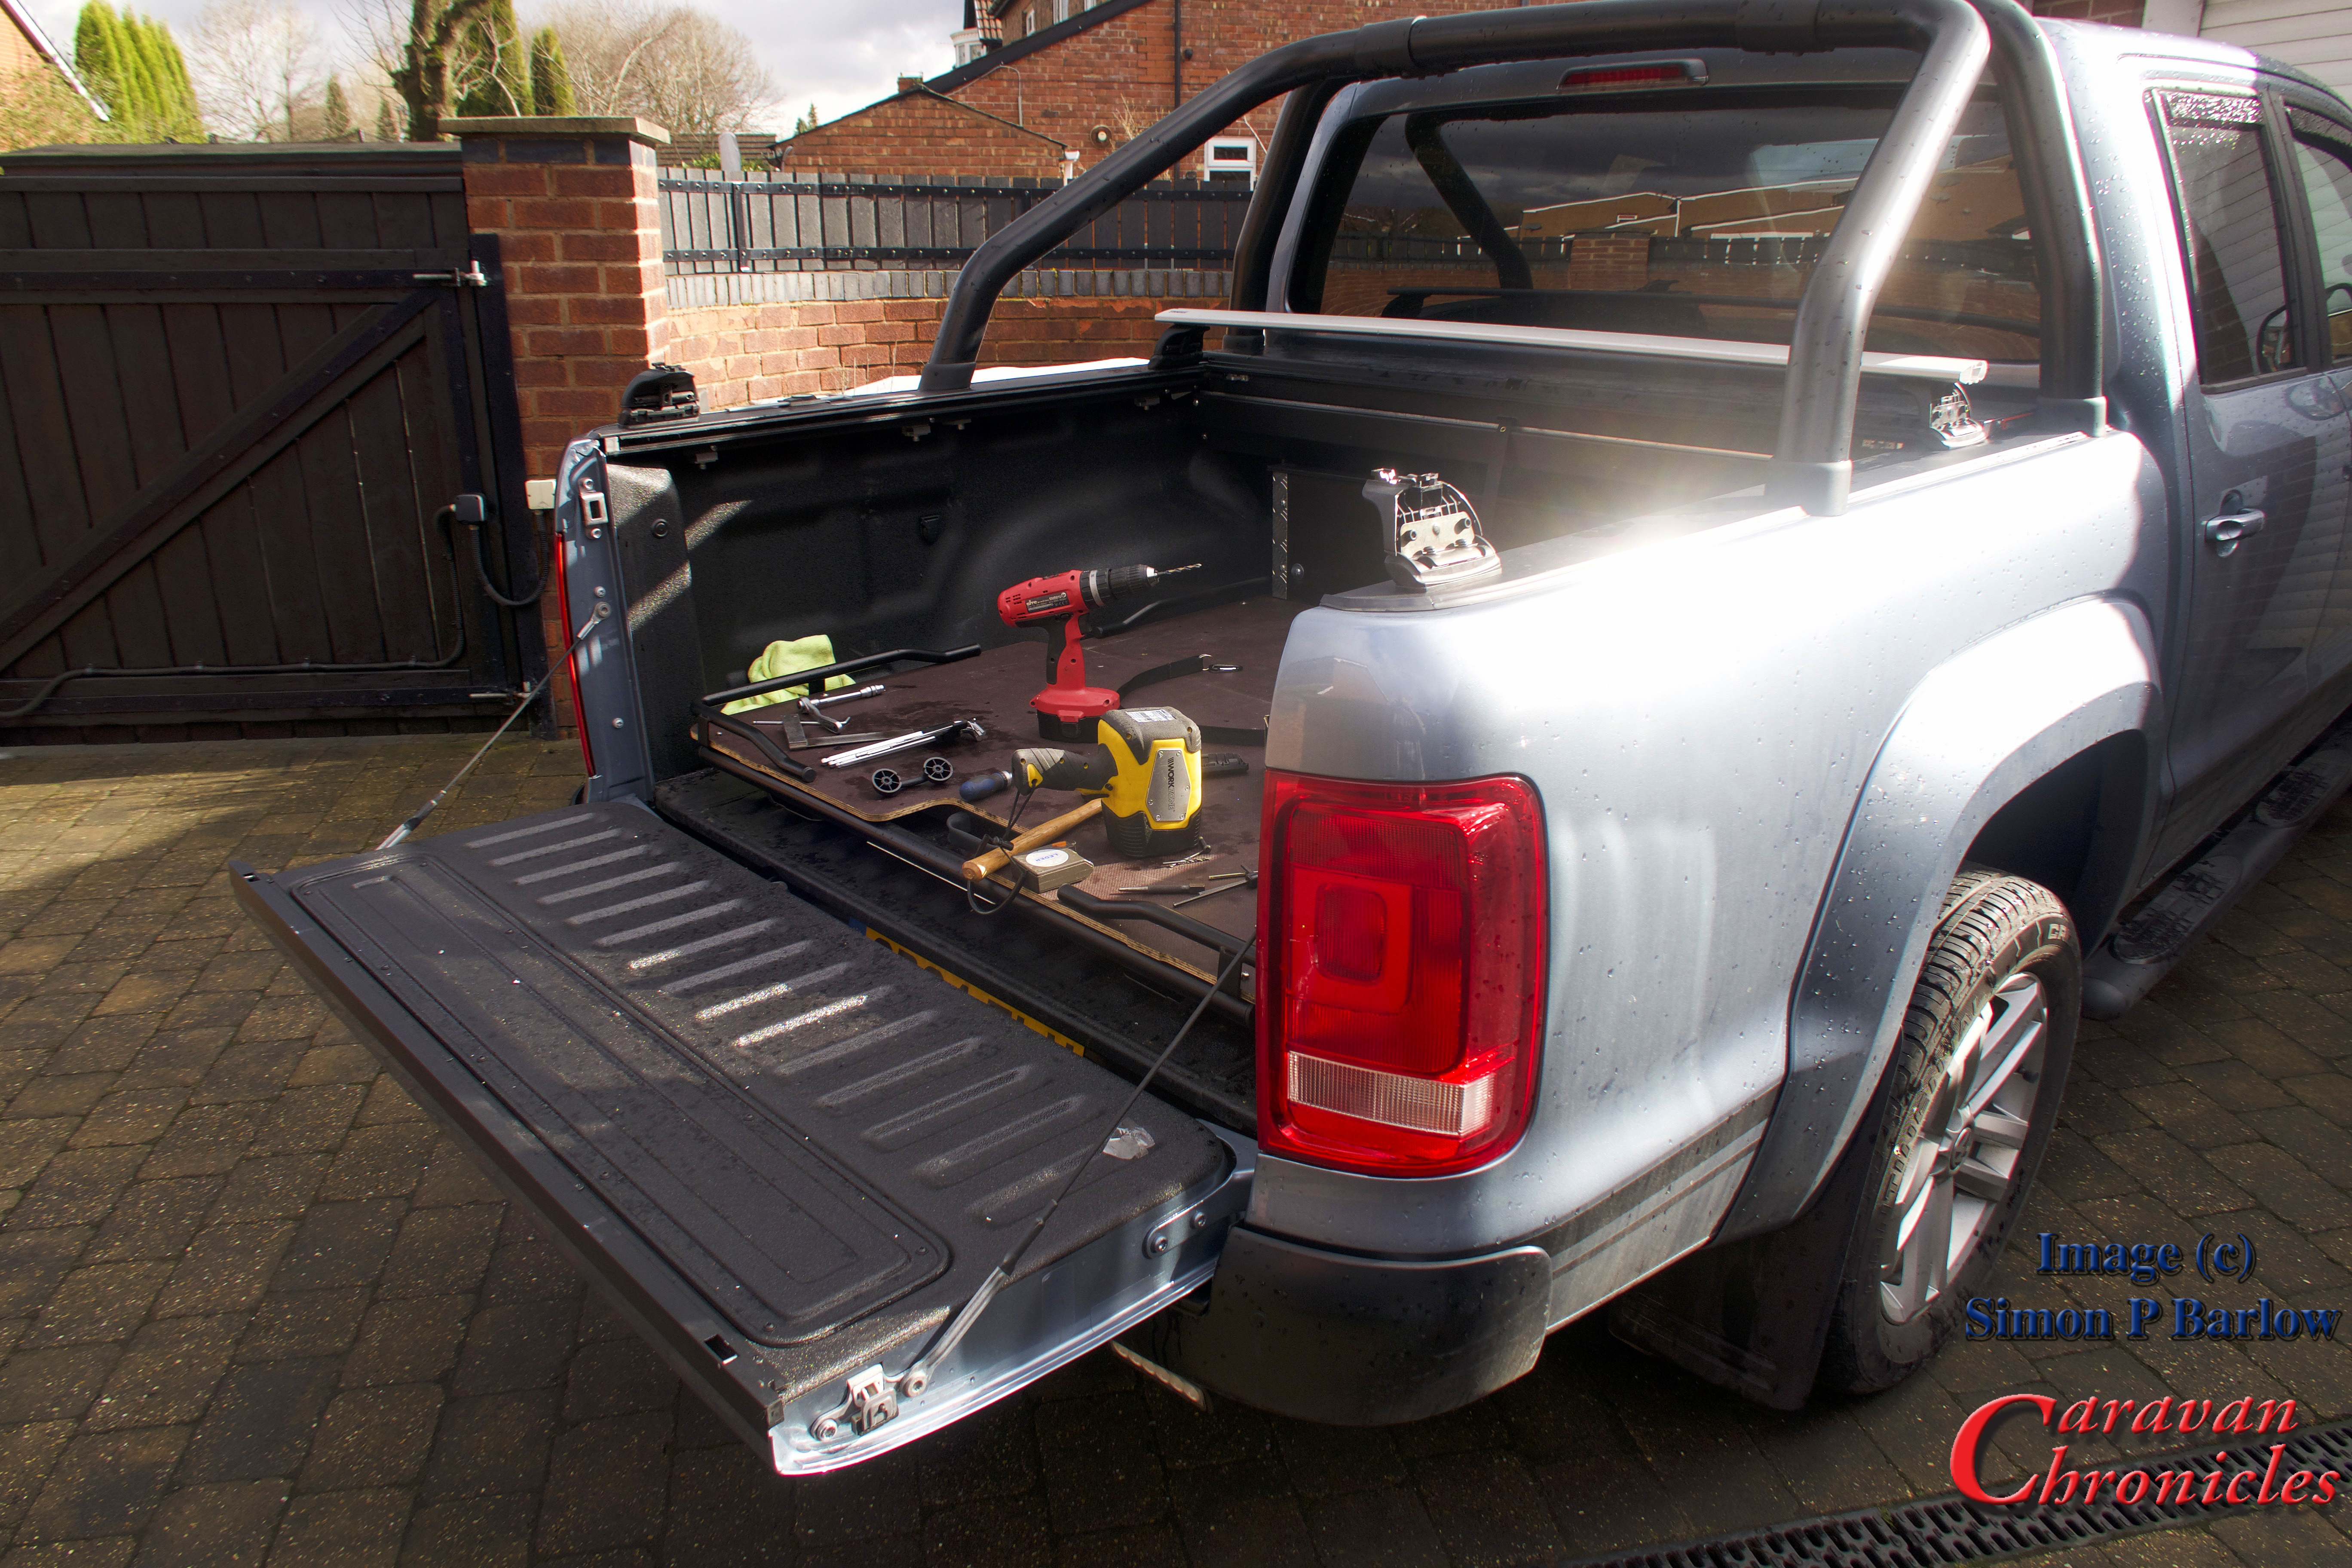
This presented a problem. The rear of the FreeRide232 protruded back and hung over the rear tailgate by about 350mm and if possible I wanted everything flush. Not a problem, the two bike wheel mounts can be slid forward and backwards to accommodate various size bike frames and the main mounting point… with a little assistance from a rubber mallet and be slid backwards. So in effect I nudged the two main bars forward so they didn’t protrude over the tailgate and the bike still fitted. You can see my mark as I started to move the main mounting plate on the picture below:
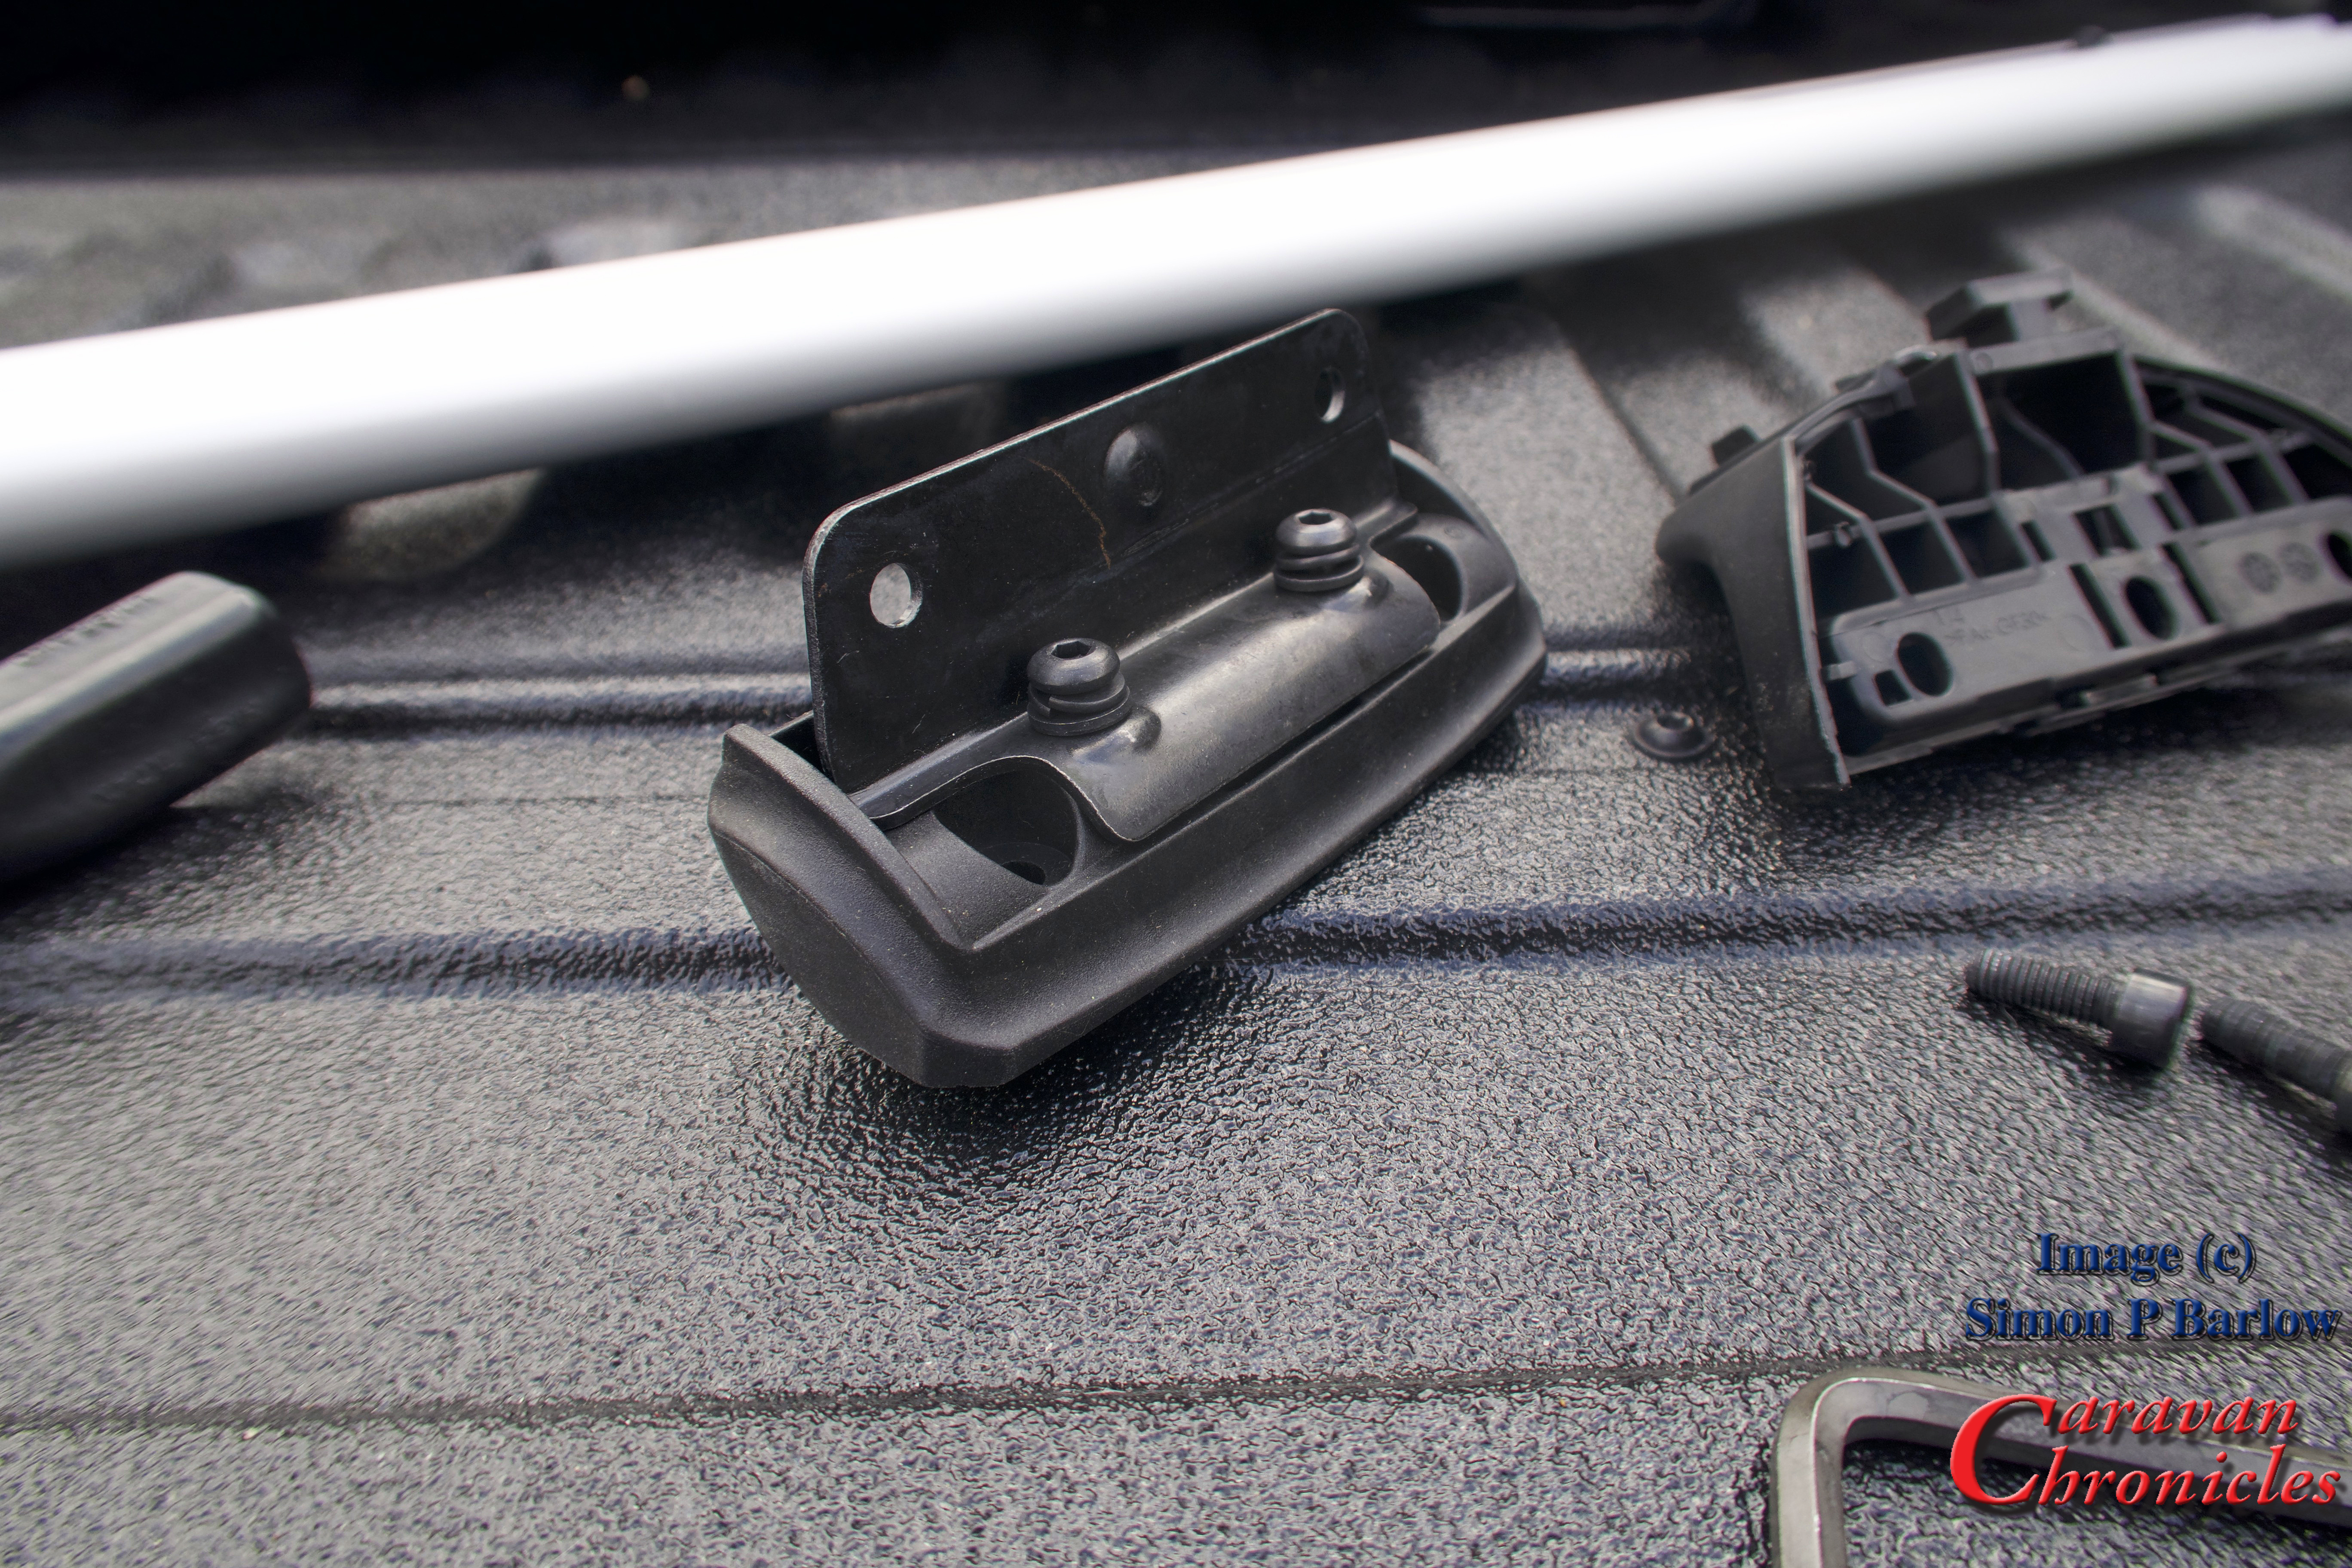
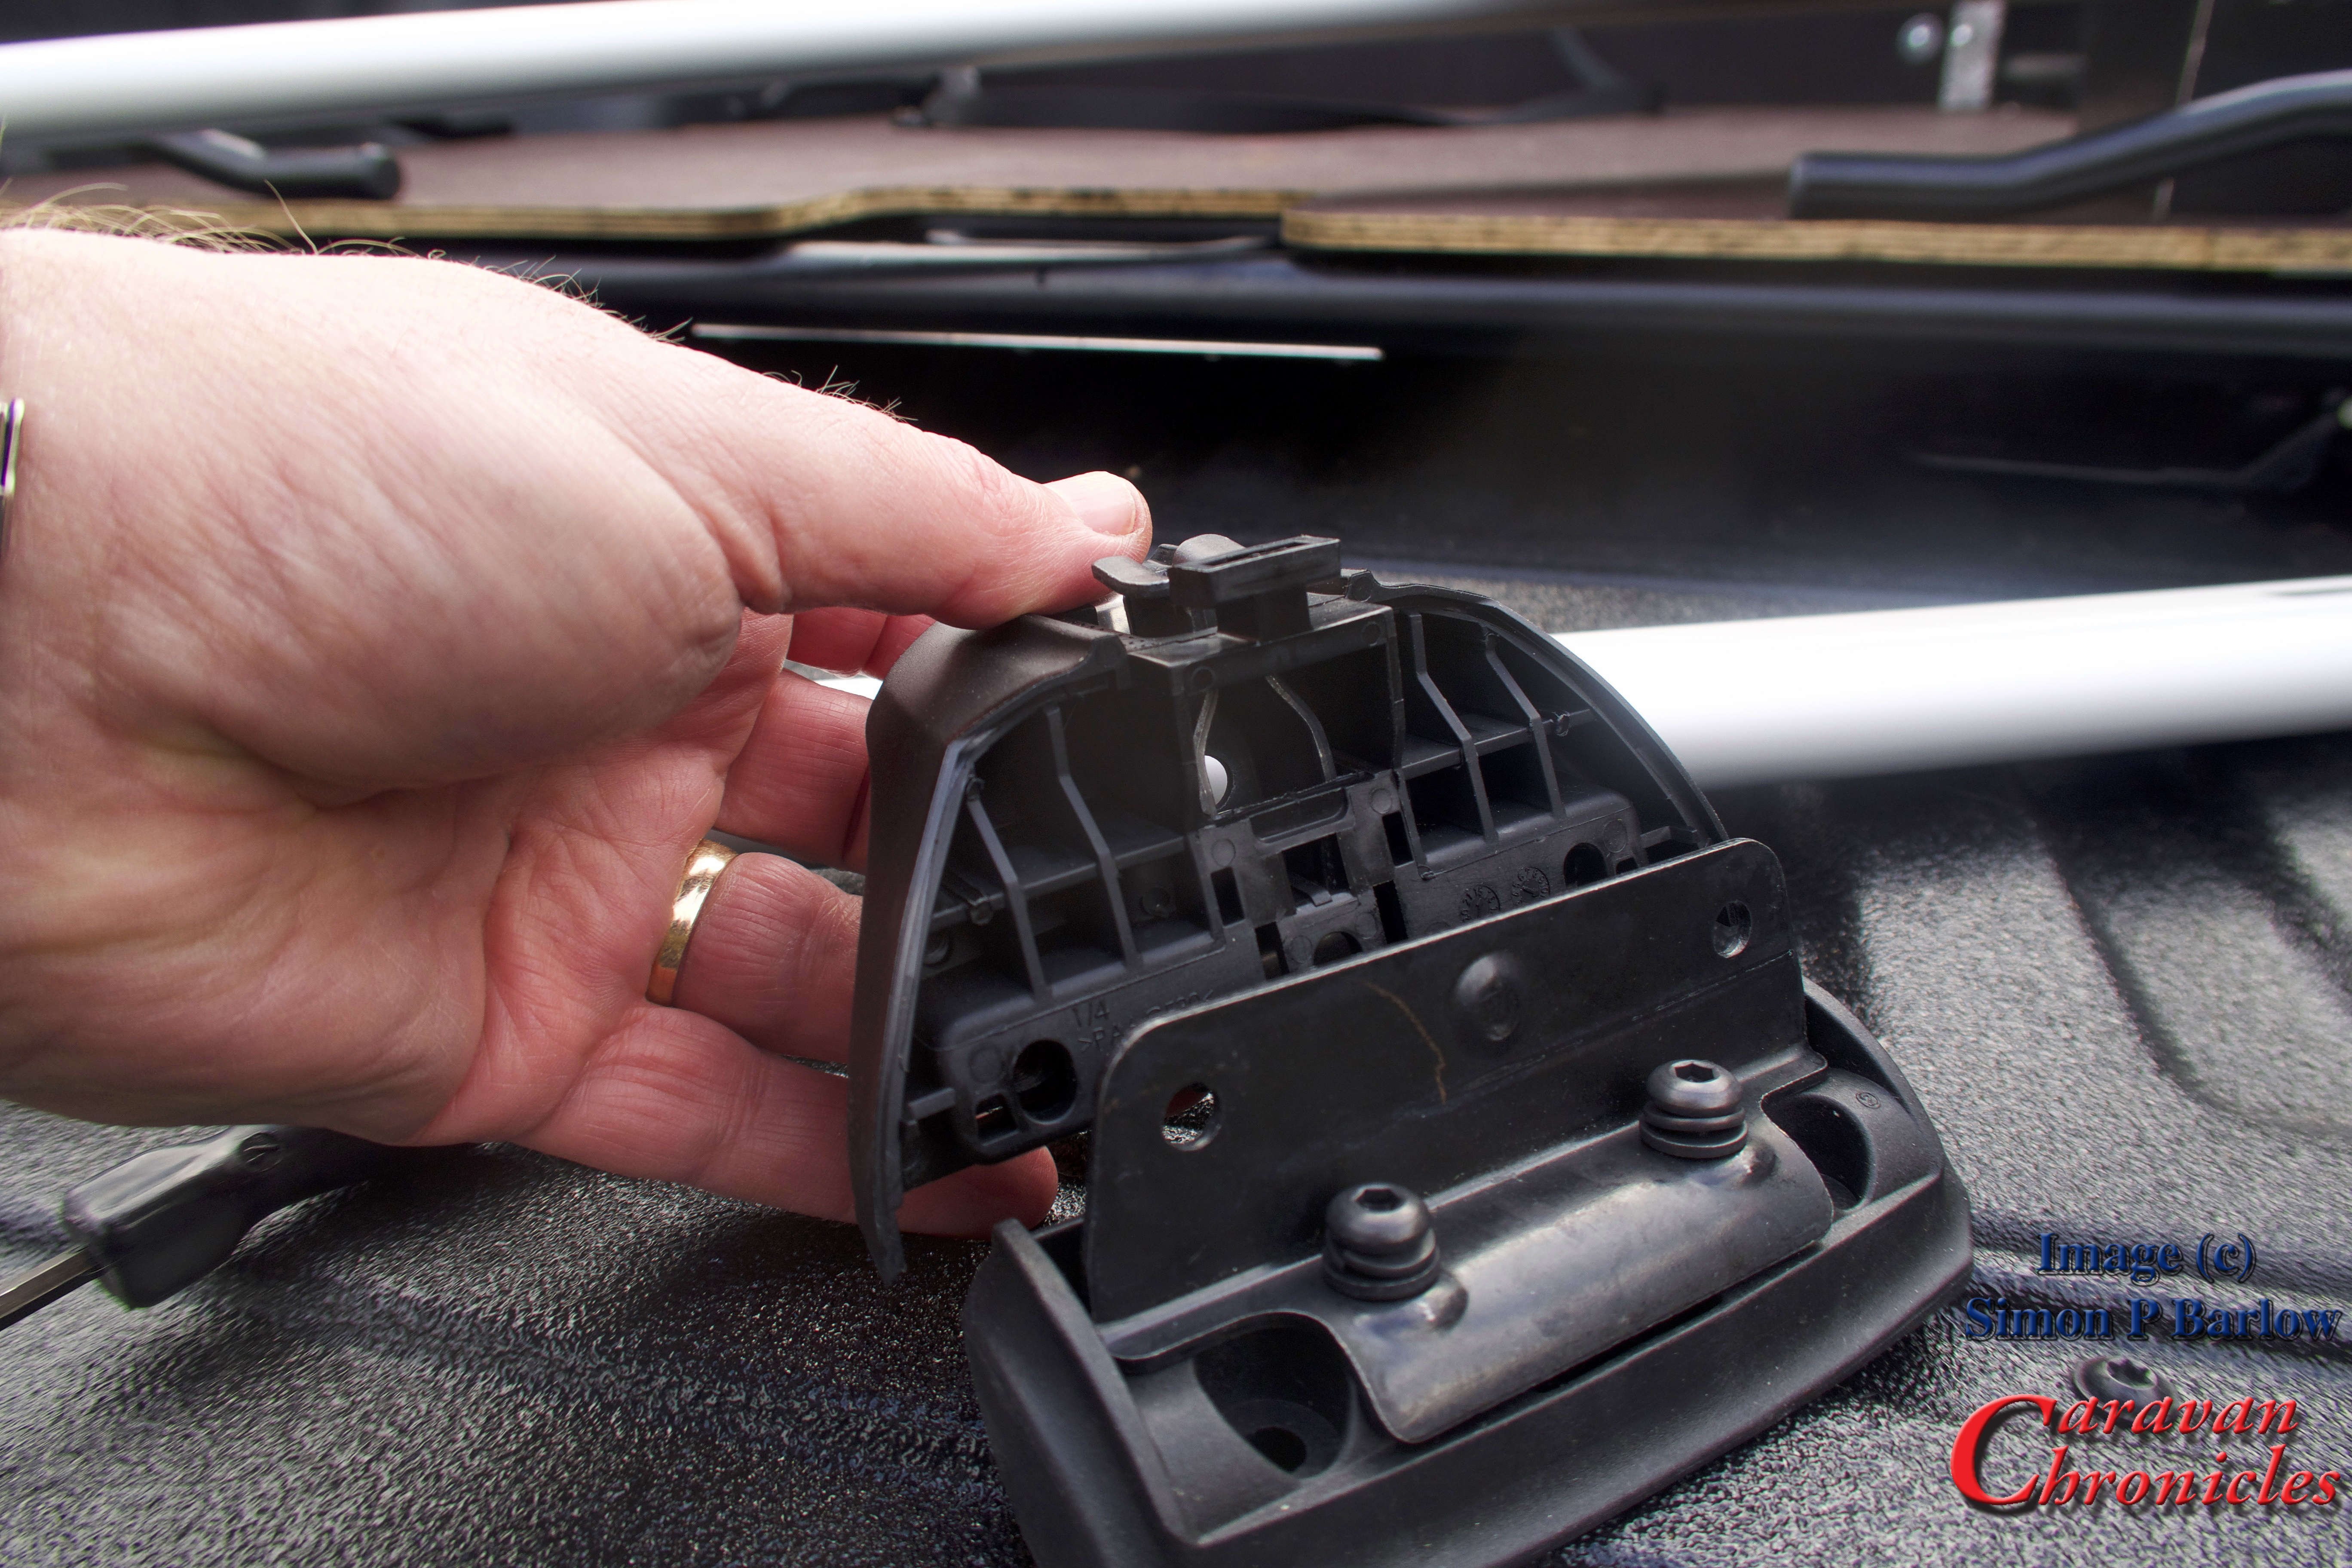
While doing the test fitting and adjusting the position of the mountings, I discovered I had a bit of luck. On the Amarok sport bar there are two ABS plastic mouldings that fit round the bars that are designed for mounting spot lights or work lights that just happen to line up and can be used as ‘rub strips’ to stop the front wheels contacting the coated stainless steel sports bars.
I could now measure where I wanted the WingBars to be located and marked out the positions. I wanted the rear cross-bar to be as far to the rear as possible (something planned for the future) and worked out the distance from the front bar which had to be located so the bike rack fitted with the front wheel tucked against the roll bar.
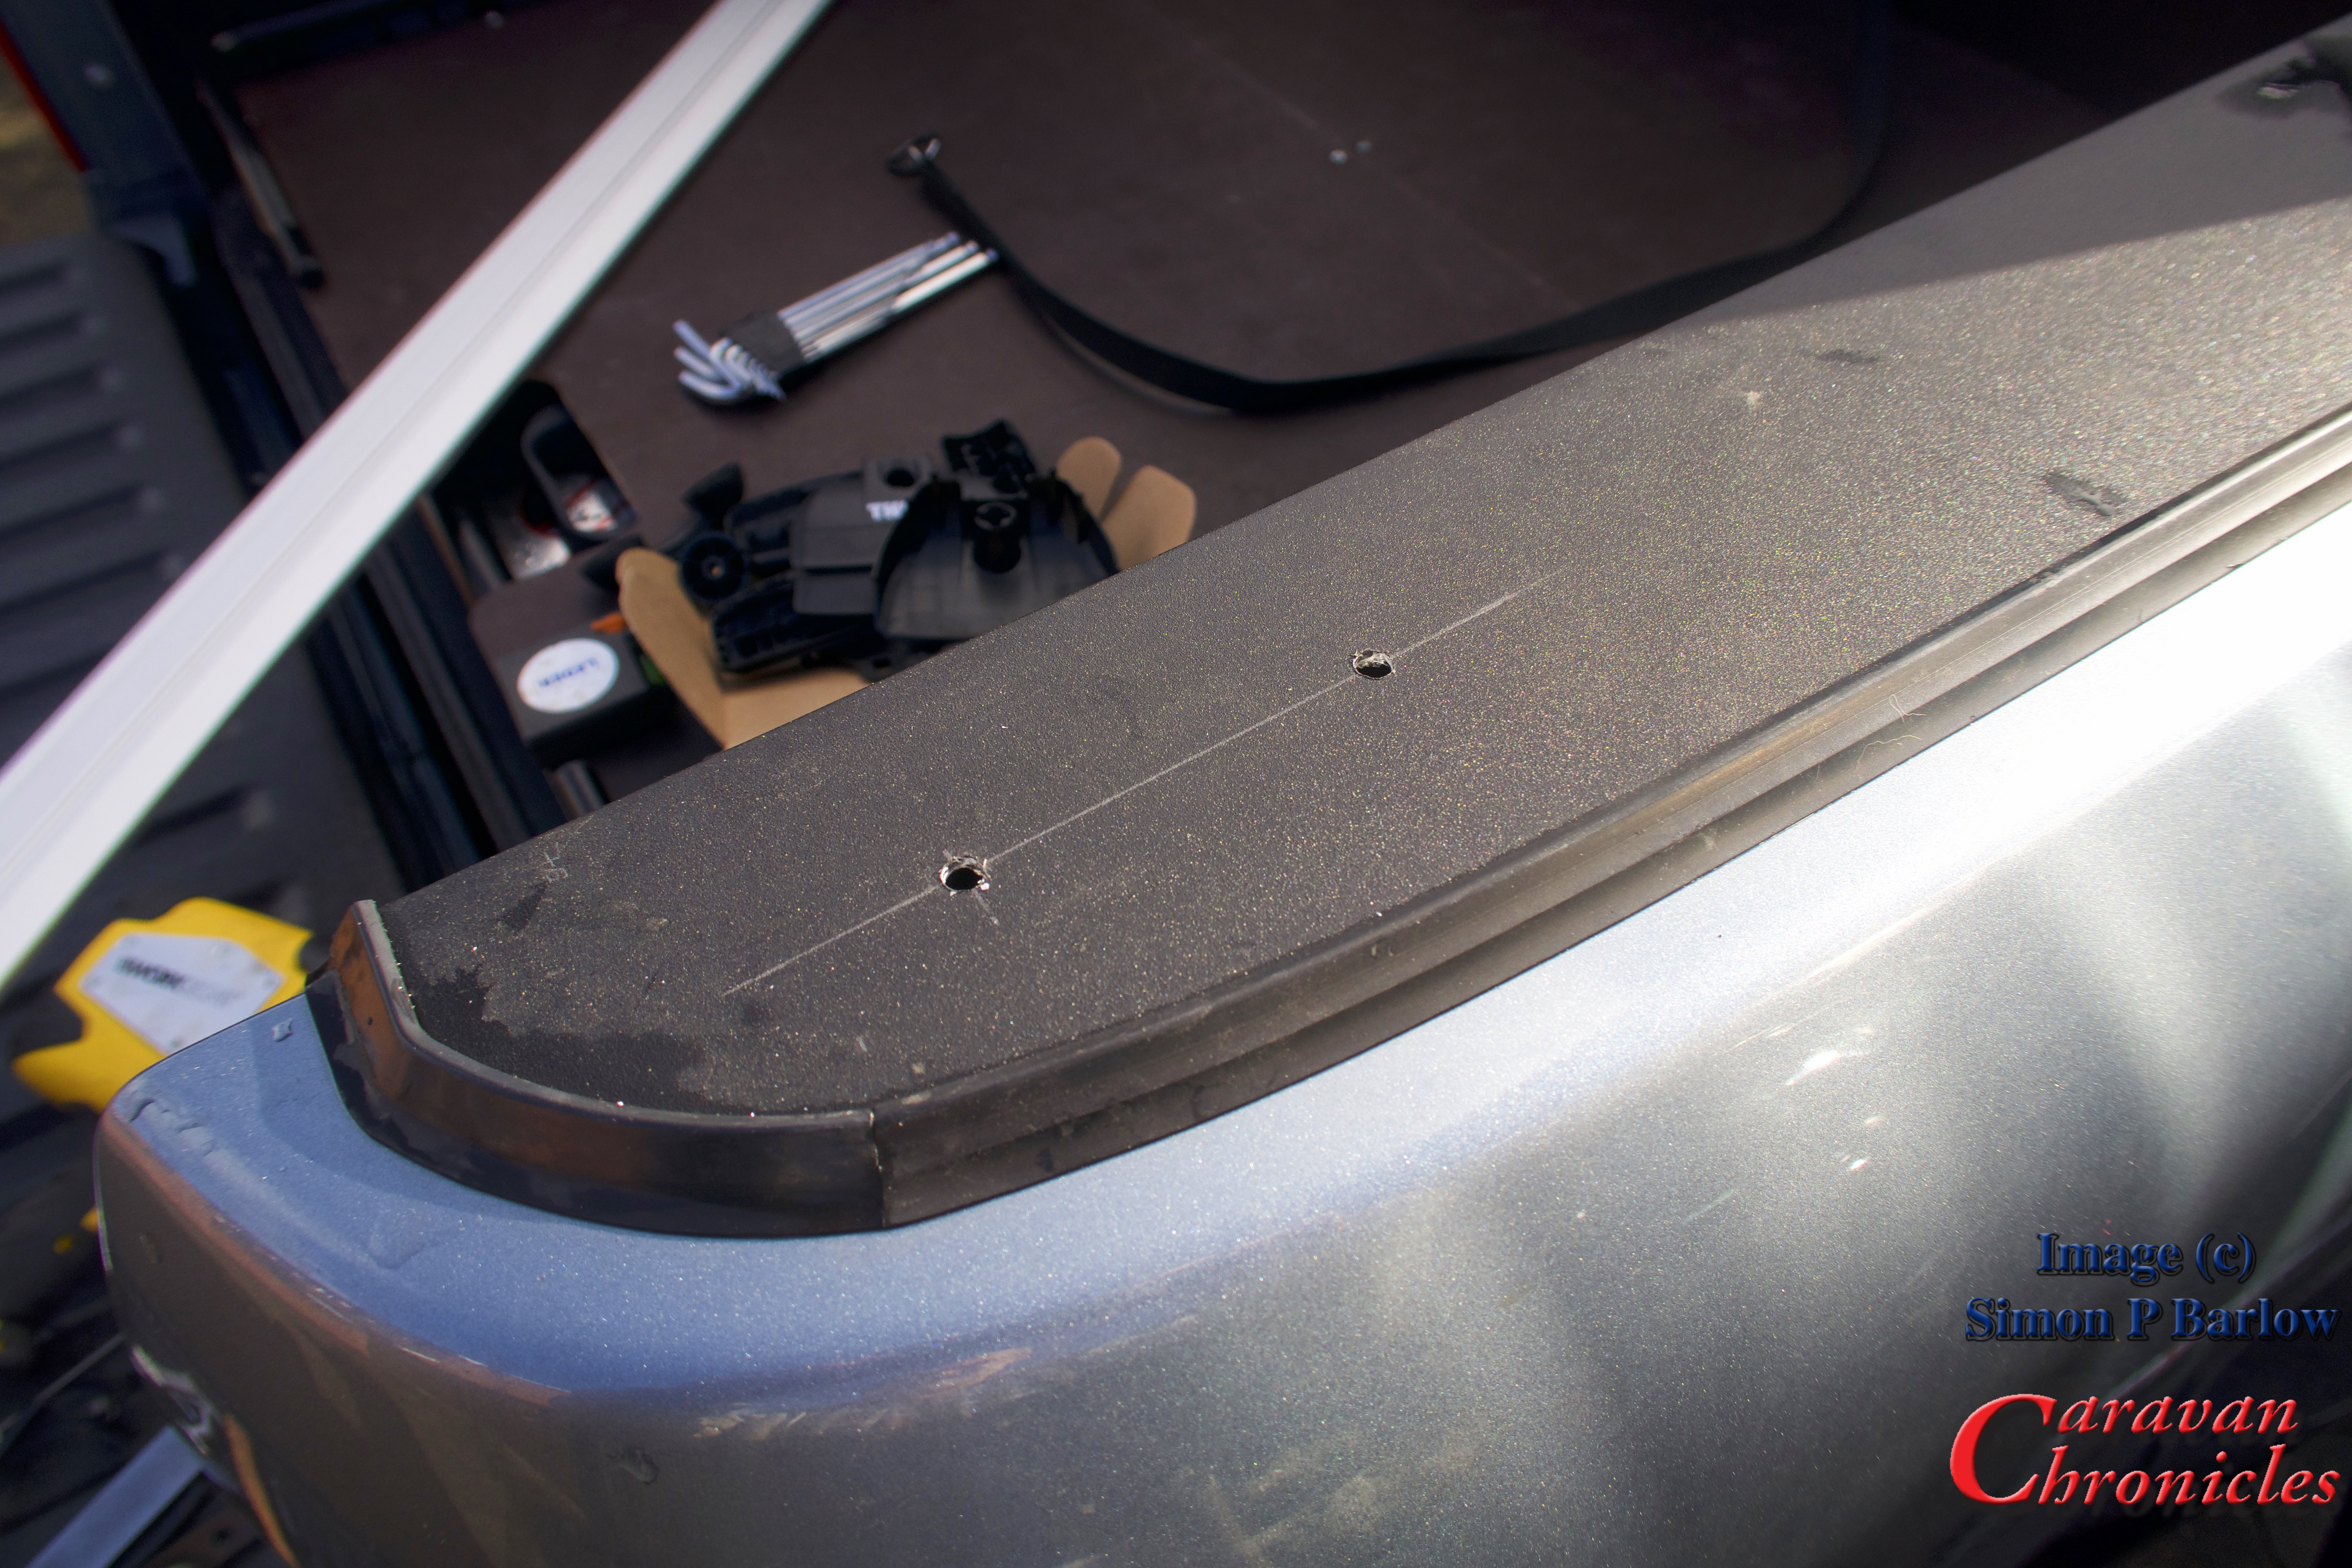
As the sides of the Roll-N-Lock cover had a slot underneath, I’d previously machined 4 pieces of steel to fit in them and pre drilled and tapped the holes. All I needed to do was drill the sides of the Roll-N-Lock cover.
The (supplied) hex bolts passed through and screwed into the steel plates I’d machined. I also added a spreader nut and lock nut underneath… just to be sure! The lock nut wasn’t tightened up to the spreader nut, so if someone tries to undo the hex bolts, they will simply back off a little then spin round.
OK, first one done time to do the other side…
Other side complete a quick test fit of the WingBar…
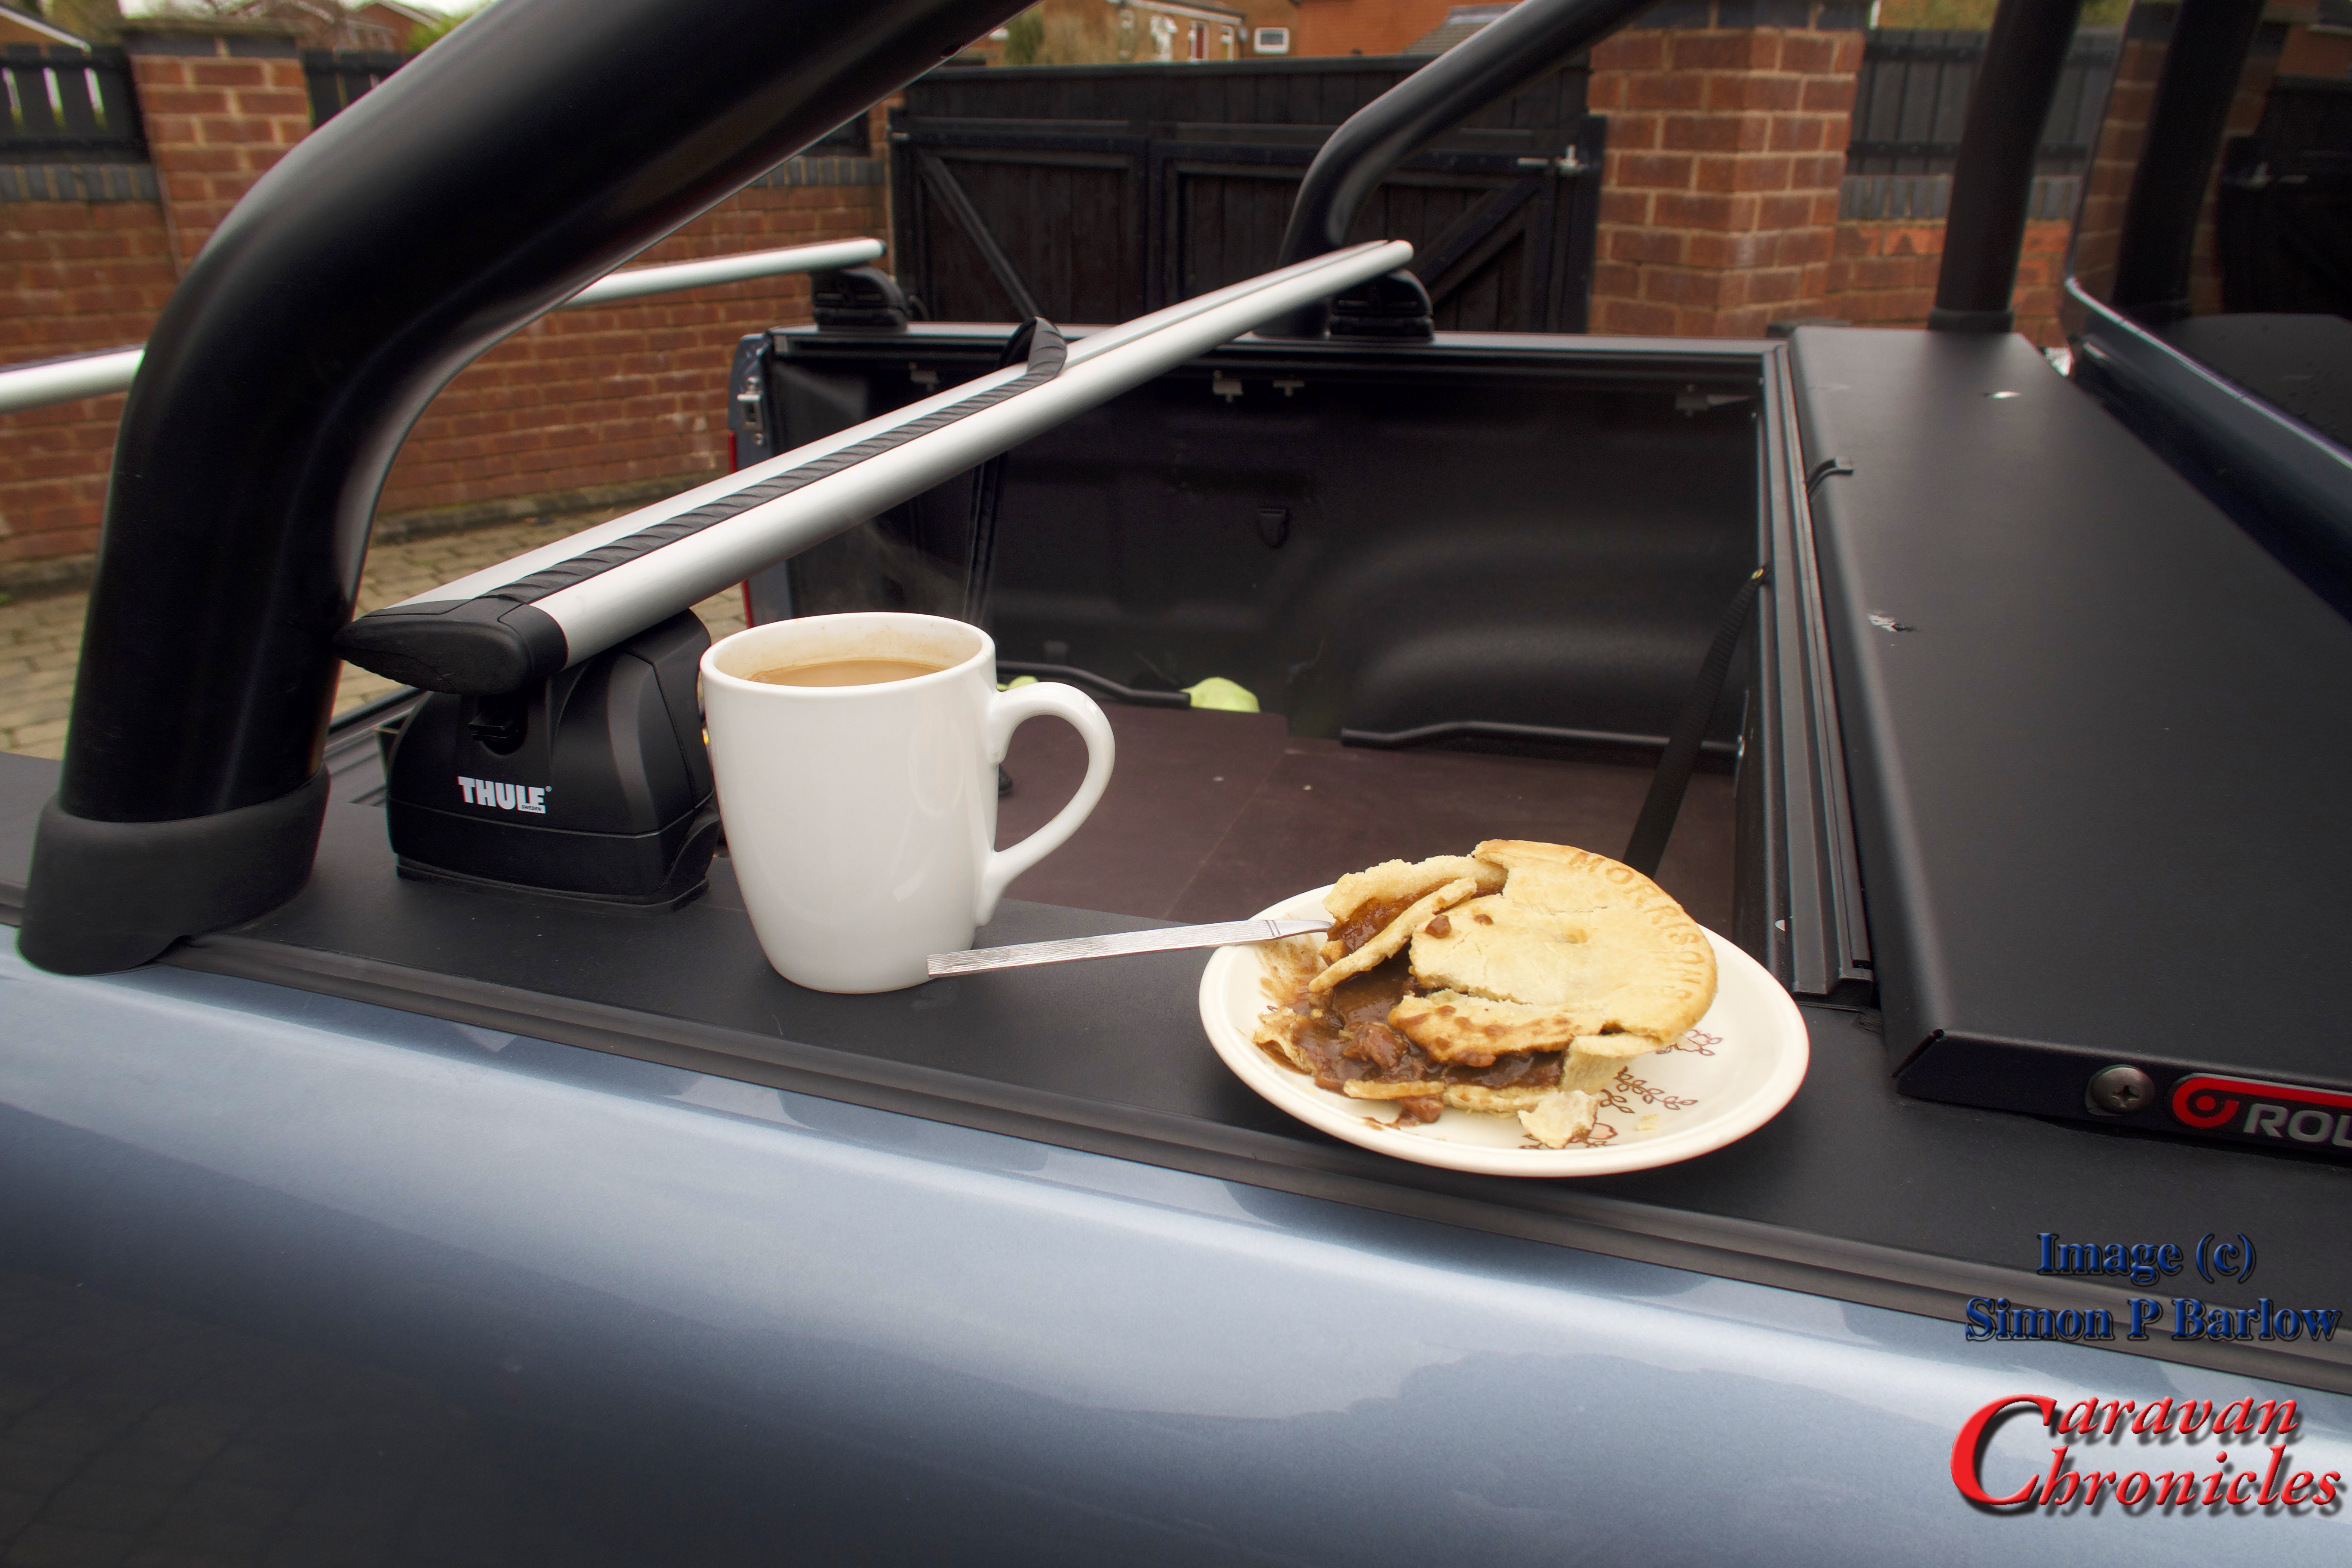
While pre-positioning the front bar ready for marking out, I was interrupted by Sue… a welcome coffee and hot pie break!
Both rails fitted, it was time to add the covers and rubber strips…
A final position check of one of the racks and time to call it a day as the rain set in again.
The spacing of the bars will give us lots of options for the future to add a top box, ski mounts – these will allow ski’s to be carried angled upwards over the cab (have to learn to ski first though!) or a mesh tray.
I’ll post part two soon showing the bike carrier mounting and go into some of the little pitfalls I have come across.
While at the NEC show one of my big tasks was to get a number of technical questions answered by the industry players. One of my first stops was to Westfalia and to meet up with Rick Sykes and his colleague on the Westfalia stand. Rick is the national training manager for Westfalia and I was able to get answers to a number of questions that you have asked me and I’d not been able to answer fully. Continue reading →
I’ve been known as a Land Rover supporter for quite a while now, in fact I started driving Land Rovers 38 years ago back in 1978 and passed my test in one. A lot of people were surprised when I decided to look at something for towing other than a green oval and I have received lots of questions (I mean lots!) about the Amarok.
So far we have done about 1100 miles in ours and I’m still learning about some of its capabilities. One thing that has really impressed me is the awesome eight speed gearbox. One thing that taking any vehicle off-road and sometimes towing on loose or slick surfaces requires is to hold a set RPM while the tyres find traction. With Auto gearboxes normally the gearbox doesn’t like this and shifts up a gear to reduce RPM taking you out of the power band. However, flick the gearbox into manual tiptronic mode and the gearbox will just simply sit in the gear selected until you change. The other thing I found out too was that on slick or icy surfaces, you can select second gear and pull away from stationary to reduce any chance of wheel spin. Do you really need a vehicle that can go off roading with the best… well lets just say you will never have any issues on that sloping grassy CL/CS site!
It would take me far too long to answer all the questions I have been asked and quite frankly it would be flipping boring… akin to reading pi to 20,000 decimal places, so I’ve put together a small collection of YouTube video’s that hope fully will answer a lot of the questions. The first four are courtesy of Miles Continental VW dealers in New Zealand and the first features well-known 4WD professional Pete Ritchie. The fifth video is the inimitable Andrew St.Pierre White of 4xOverland.com (and yes Andrew, they have sorted bluetooth connectivity out) and finally, if nothing else watch the last video… can a two litre engine and auto gearbox pull a road train?
And finally….. if there was any doubt about pulling power……
The additions to the Wolf continue, despite the recent news from Glossop Caravans at our last service, that we have damp in the caravan. Hopefully we will hear soon whether or not its covered by the warranty. So, moving on, a couple of additions to the VW Amarok. After installing the sliding bed, I noticed that there was some space available between the end of the bed and the truck bed at the cab end. It was only 70 mm, but I thought with a bit of creative construction, I could come up with a contrivance to hold some of the stuff and tools that we normally schlep about with us. Using 18mm birch ply phenol finished board I came up with a storage box that is fitted to the bed and projects forward right up to the truck bed front wall… Continue reading →
Our recent trip to the Caravan Club’s Blackshaw Moor site near Leek gave us our first chance to tow with the Amarok.
The Amarok I found has an excellent driving position giving a good all round visibility despite being a large vehicle, 5554 mm long including tow bar and 2228 mm wide. This was brought home when a Discovery Sport pulled up next to me and I was looking down into it! In normal solo driving, the 8 speed automatic gearbox keeps the engine rpm low, not often going above 1800 rpm. Even pushing it quite hard the rpm remains low, showing just how much torque the 2 litre BiTurbo engine has (420 Nm of torque at 1750 rpm). First gear in the automatic box has been designed for off road use and pulling away towing a 3200Kg trailer. Although the rear end is a classic leaf spring suspension although unconventionally the springs are mounted outside the chassis rails to give less roll for a given spring rate, the clever design of the front suspension and the long 3095mm wheelbase keeps everything smooth and even speed humps don’t cause bounce from the rear end and as soon as any load is introduced on the rear bed (and you can put just over a tonne in there!) everything is really quite relaxed and the standard shock absorbers work well. Even in the wet and on roundabouts with no load in the back, everything is under control and so far I’ve not had the Electronic Stability Program kick in. All wheel drive is permanent on the automatic no matter if you are in on-road or off-road mode. The Torsen differential splits the power 40:60 between front and rear wheels and this reduced understeer on wet corners to zero if you are being slightly over enthusiastic. One thing that did surprise me is just how spritely the wolf is.
The Amarok stands on 19 inch rims fitted with 255×55 Continental Crosscontact Extra Load tyres with a load rating of 1090 Kgs which which give it a great footing. We are trying running with the standard pressure of 29 PSI all round for the moment, although the rear tyres can be run at 44 PSI for a maximum load of 5 people and 1000 Kgs load in the rear bed.
Inside everything is functional and seems well laid out. Road and engine noise are minimal even on motorways, especially when the gearbox drops into 8th gear which is classed as overdrive, and at 60 mph the engine is just ticking over at a shade over 1200 rpm. As there is loads of torque available even at this rpm, putting your foot down to accelerate doesn’t always require a downshift to 7th. The brakes are impressive and surprisingly have a lot of feel to them despite the Wolf being a truck. The Amarok is fitted with VW’s brake assist and if you jab on the brakes in an emergency stop situation, it detects how fast you apply the brakes then automatically applies maximum braking effort… it also then starts flashing the brake lights to bring attention to the fact you have just done a full brake emergency stop and then turns the hazard lights on.
When we purchased the Amarok we opted for the Whitter tow bar, which while not the slimmest fitting tow bar available does give us options for adjusting the tow ball height over three settings when required. It’s equipped with an Alko machined head tow ball.
To keep everything secure in the rear bed, we opted for an American made Roll N Lock cover supplied by Up-Country Autoproducts. It arrived in a huge box with a good set of instructions, but if you go onto Roll N Lock’s website there are a couple of good installation instruction videos and after watching them a few times, it took me about two hours to fit on my own and that included removing and refitting the sports bars. Roll N Lock provide an optional fitting kit so you can install the OEM sports bars (as far as I know it’s the only retracting cover that can accommodate the OEM sports bars). The Roll N Lock adds about 30 Kgs to the weight of the Wolf.
As I did’t fancy leaping on and off the tailgate every time I wanted something from the back of the pickup bed, I opted to install a German made Antec Sliding Cargo Tray also from Up-Country Autoproducts. When retracted the bed can support 550Kgs in the driving position and when pulled out to about 75% of the bed length can still support 250Kg in standard form fully extended out and can be upgraded to 350Kg by replacing the bearings. It took just over an hour to fit on my own and again, watching the manufacturers video’s on U-Tube a couple of times filled in a few steps that were not clear in the instructions.
It incorporates tie down rails on all four sides, although I might install a couple of cargo rails that allow you to install multiple anchor rings (the same type as used in aircraft holds). The sliding bed adds another 65Kgs to the weight. I’m still playing about with loading configurations for the bed. We currently use a number of Really Useful Box Company boxes to store everything and these work out well. The only thing I might do over winter is build a custom storage box that fits semi-perminantly at the rear of the slide under the Roll N Lock cover to store all the off road recovery bits, straps, shackles, air compressor etc.
Towing…
Coupled up the whole outfit with our current caravan is 41 feet 6 inches long. Reading through the Wolf’s manual there is quite a big section on towing. One interesting feature I noted is when the caravan is plugged into the Amarok’s 13 pin socket, the alarm system covers the caravan, so if you leave the Amarok and lock the doors turning the alarm on, if anyone tries to unplug the caravan or cuts the cable it will set off the Amarok’s alarm.
VW recommend turning off the engine autostop feature. Although the caravan towing electrics are set up so that if the engine stops, the fridge circuit is switched off until the engine restarts. I’m not sure why they recommend this but I’ll try to find out. While towing, I followed VW’s advice and turned it off.
As soon as you connect the caravan electrics up to the Amarok, the vehicle detects the presence of a trailer and a number of parameters are changed. The rear parking sensors are turned off (and you see a trailer on the sensor display) and the rear vehicle fog light is disabled so the front of the caravan is not lit up bright red in low visibility situations. The other changes are to do with the electronic stability system, ABS, off road and gearbox modes. The handbook recommends shifting the gearbox into sport mode for towing, which extends the rev range in each gear before an upshift is commanded. You can also use the gearbox in manual mode shifting up and down manually between each gear.
With the caravan hitched, sitting in the drivers seat I didn’t feel as though I’d need towing mirrors as I could clearly see down both sides of the caravan. I did opt to fit our towing mirrors however, and I did adjust them so as they were quite close in. This still gave me a great view down both sides of the caravan to the extent I could easily see each of the orange side marker lights in the caravan. I also thought having them fitted would reduce the chance of VOSA and the Police pulling me in for not having them.
Where we store the caravan, pulling out from our spot requires a 270 degree right turn. I didn’t measure it but to felt like the turn was tighter than I could have achieved with the Freelander, despite the Amarok’s greater length. Stopping to double check all the road lights and fridge were functioning correctly, I wasn’t disappointed and the guys at North West Towbars had done a great job of getting everything wired correctly. We pulled out of the storage facility into the centre of Stockport and I’d opted to go via the A6 and then the A523 through Macclesfield to Leek, which is a bit of a mixed road with plenty of bends and some hill climbs. To be honest, and this is probably an over used statement, but after a couple of miles through Stockport and down the A6 I didn’t really notice the caravan. The width of the Amarok meant that after a couple of hundred miles solo I was already use to placing the vehicle the right distance from the kerb and the caravan width meant it was nicely in line all the time. Through Macclesfield there was a section where a lorry was unloading and the road became a single carriageway. The oncoming vehicle flashed me to come through and I put my foot down and the Amarok caught me by surprise, it dropped a gear and took off like a scalded cat. I was used to putting in a lot more accelerator in the Freelander for a similar manoeuvre.
During the journey, the engine temperature remains nailed on 90 degrees and the oil temperature varied between 85 degrees and 99 degrees so I don’t think the engine was working too hard. The gearbox didn’t surprise me with any odd changes (except for my enthusiastic manoeuvre above!) and on a couple of long down hill sections, I flipped the leaver into manual mode and dropped a gear and the Amarok held it’s speed nicely with only minimal use of the brakes. I certainly didn’t have to ride the brakes as you have to with some automatic vehicles when being pushed downhill by 1500 Kgs of trailer. I’m not sure, but I think that sport mode on the automatic gearbox with a trailer attached is different than without a trailer attached.
Arriving at the site, you do realise just how long the unit is and it required a bigger reversing area to get the caravan located on the pitch aligned with the peg, but the good all round visibility helped, especially having the caravan so far away from the rear window, there were no blind spots and I could see the caravan clearly…. and Sue did a good job of guiding me in via the two way radios.
There are a couple of things that I don’t like. The reversing light (yes ‘light’ not ‘lights’) is very poor. VW have thought it only needed one reversing light, and for that matter one rear fog light. The reversing light is on the near side and would not attract a moth at night when its turned on. So one of the mods will be to install two under bumper LED lights via a suitable fused relay. Looking at some of the Amarok forum posts, this seems to be a common mod. The other mod is then to convert the normal reversing light into a near side fog light by replacing the LED unit and changing the wiring over. I’ve already ordered and had delivered the LED units for the reversing lights and will be tackling this job soon.
The second thing is the GPS unit. I guess I have got used to the TomTom unit and programming my own POI’s. The actual map display on the unit is great and the display of the map is really clear. However, the navigational aspect is not a good as our TomTom in my opinion. The other thing I would have thought is as it’s a commercial vehicle, the GPS unit should be able to be programmed with size and weight… and details of a trailer, but alas, no. I think it is the same software that is used in the VW range of cars. Why can’t manufacturers team up with the guys that know about navigation and offer inbuilt TomTom or Garmin products.
I have however recently discovered a web site that allows you to store POI’s on the memory card and access them through the GPS…. apparently you can also set some navigational parameters too. I’ll let you know how I get on.
Cross Country Solo…
Friday gave us chance to have a run out solo across the back roads of the Peak District over to the National Tramway Museum at Crich. I set the TomTom for the shortest route and it directed us up and over some spectacular scenery on B roads and a couple of single lane tracks. A road closed diversion added another eight miles to our trip. The Amarok performed well, most of the milage gained solo so far was on a short motorway commute to the airport so having a chance to throw it a round a bit gave me an insight into its abilities, and I wasn’t disappointed. At no time did I feel it was lacking power and the two litre engine performed like a bigger unit. We came back via the A6 and Buxton which is a bit of a fast twisty road in places and despite its size and weight handled really well, feeling extremely sure footed… well enough for me anyway. I don’t do excitement while driving anymore! The climate control and aircon are great, with Sue being able to adjust her side exactly to her preference and leaving me to do my own thing. I can’t wait for winter now when we could never agree on the setting in the Freelander.
Returning home, the sat-nav wanted us to turn right out of the site and head towards Buxton, then cut across back towards Stockport I opted to return the way we had come through Leek and Macclesfield. The return trip was exactly an hour and the towing again was easy with the Amarok and it feels just as sure footed when making good progress towing through twisty sections of road. I wasn’t going to do the ‘Elk Test’ but I feel that it would not give me any nasty surprises especially as the Electronic Stability Programme works with the ABS when towing. I really think VW should enter this for the tow car of the year awards.
In conclusion, it’s everything I hoped it would be and it has so far exceeded my expectations. It’s comfortable, roomy and has lots of storage inside the cab. The Atacama version is fully featured and I don’t think it misses anything we would need. We are both really please with our choice. I’m looking forward to the motorway tow down to the NEC for the Motorhome & Caravan show in October (unless we get away before then!). If you see us there and would like to have a look round an Amarok or just say Hi, do stop by.
If you think that you might like to try one, go and visit your nearest Commercial VW Centre and if you are anywhere around Manchester, drop in and see Jessica at the Manchester Van Centre VW in Trafford Park and tell her I sent you, she won’t run away… promise!
Still to come…
We have still to fit a few other bits of equipment to source and fit…
Vehicle Tracking System
HD Dash Cam.
Led Reversing Lights.
Thule Bike Rack Mounting System.
For the vehicle tracking system, I’ll be talking to a few of the exhibitors down at the Caravan & Motorhome Show at the NEC in October to see what options there are. The HD Dash Cam is a little easier, There is an excellent website called “TECHMOAN” and the video reviews on there are straightforward and honest and I’m my opinion some of the best reviews on tech equipment. I think I’ll be choosing the DDPai M6+ unit with a battery pack to use the parking features.
So after all the spreadsheets, test drives, sorting insurance and towing electrics, emails and telephone calls, the end was in sight. We had a collection date, the 28th July. Apart from our very first brand new car… a racing red MG Metro back in the early 80’s, Sue had always been the one to collect our cars from the showroom, however this time, it was Sue that was working so I was on my own. It took around half an hour to go through all the paperwork and sign on the dotted line several times. Despite the Manchester drizzle the walk round was in-depth and covered all sorts. Inside, Jessica went through all the systems and paired my iPhone to the audio system, even storing some of my most often used radio stations in the memory.
Jessica waiting to give me the grand tour and hand over the keys.
Handover done, everything explained I said goodbye to Jessica who had been so helpful through the whole process, I turned the key, slipped it into drive and pulled out of the forecourt. The odometer showed exactly 48 miles as I turned “Project Wolf” on to Village Way.
My experience with a Commercial Vehicle Dealer
I have mentioned this before, one of the things a few people expressed concern about was actually dealing with a commercial vehicle dealer. Well having dealt with Manchester Van Centre VW I can only comment on my experience. The customer service on first contact was excellent. The whole buying process was handled by one person, Jessica, who did everything. We weren’t passed off from one person to another through different stages of the buying process. I know we are not (well me actually) easy customers… I like to know the in’s-and-out’s of everything and do like getting into the details and asking awkward questions. Through our initial contact with Manchester Van Centre VW to driving out of the forecourt with our new vehicle took a total of 10 days and I either spoke to Jessica or exchanged emails nearly every day over that period and we were kept fully informed throughout the process. My dealings over a few months with VW UK while doing all the research was not as good, emails often going unanswered. Dealing with VW GmbH in Germany was excellent however and they went the extra mile (or kilometre!) to provide information requested.
Are all VW Commercial Dealers the same? I can’t answer that one. Can I recommend Manchester Van Centre VW? Based on my dealings with them, yes. I’ll let you know how it all goes at the first service and if I need to change my views.
On the way back home I had to call in to the North West Towbar Centre in Stockport. When they originally fitted the tow bar, they were two terminals missing and needed to order them from Westfailia. They did contact me directly to let me know before I picked up the Amarok and I arranged to drop in.
While they were fitting the missing terminals, I had another chat with the guys there. I had already had a look underneath at the tow bar and the standard of fitting… you can tell a lot by the way cables are routed and fixed into place, and these guys had done a good job. Everything was routed away from anything that could chafe the loom, the loom was enclosed in a flexible PVC conduit and secured firmly to the vehicle.
While I was there I also checked out the fittings I’d need for the bike racks. They have a full display of Thule products and I was able to check exactly what bits I’d need. Heading home, I called in to fill up with diesel… 52 miles on the clock and 65.74 litres to fill up. I can now start another spread sheet to record mileage and fuel.
… and of course I need to get the thing weighed on a VOSA weigh-bridge.
The figures given on the V5C are a Mass In Service of 2197 Kgs and a Maximum Permissible Mass of 3170 Kgs. On paper, based on a MIS of 2197 Kgs, the 85% ratio is a trailer MTPLM of 1867 Kgs. Our current caravan calculates at 68%. All that is subject to what it weighs on the scales though.
Our first trip towing will be in a few days and I’ll let you know how we get on and my thoughts. I’ll also show you some of the bit’s that we have added.
If you haven’t already done so, it might be worth reading Pt1 and Pt2 first.
We hadn’t originally set off to visit Manchester Van Centre VW originally, but had gone to Costco to pick up some supplies. However we were early, the queues to check out non-existent and we found ourselves back in the Freelander quicker than expected. It’s not so often that both our time off coincides so neatly so it was a bit of an opportunity to go and have a look at an Amarok. We parked up and walked towards the showroom entrance, Sue said “I like that colour” as we walked past a new Amarok Atacama parked outside. Sue, by now was a dab hand at spotting Amaroks from a wide range of distances!
The choice of vehicle colour is a funny thing, we have had black vehicles for years and I wanted a change. The original Amarok I had seen was all white, with chrome, and I’d got it in the back of my mind as down to either white or silver. But Sue was right, it was a rather nice blue, a colour I’d never even considered. In fact I don’t think we have ever owned a blue vehicle.
Once inside the receptionist introduced us to Jessica, the sales person. Now at this point I have to admit… I am the customer from hell. I know I am. I don’t like sales people in general. You just have this feeling that one half of their brain is working out if they have or will make their sales target and the other half is calculating their commission if they sell you something. What’s left is dealing with you. I asked Jessica a few basic questions and went with both barrels into towing electrics.. and rather than looking like a startled rabbit caught in the headlights, calmly said “I don’t know I’ll go and ask someone” not the usual sales technique of waffling round the subject… a bit like a politician does.
I think I mentioned it in a previous post that a number of people had said that they are unsure about commercial dealers, mainly because they don’t have any experience of them I guess, but my experience in all the dealings we have had with Manchester Van Centre is that they are really friendly and they do know their product range. If you are in the market for a VW Camper, they happen to have a really neat white van set up in the showroom and these things are in big demand. Apparently a couple of the staff also have them and are active campervanners.
Although they didn’t have an Amarok demonstrator available – it was already out and booked up for quite a while, Jessica arranged a test drive in one of the managers cars, so we went off for a drive round in a blue Atacama… big mistake…. I had originally worked everything out on a Trendline, not the special edition Atacama. I now wanted the Atacama, damn, I fell for the classic sales trick!
The test drive was successful, so figures were exchanged…. several times and a couple of days later we placed our order for a shiny blue – the blue Sue said she liked, Amarok Atacama BiTurbo Blue Motion.
The Tow Bar Tango
The next thing was to sort out the tow bar. I wanted a fixed bar… no problem as VW do one, ad 13 pin electrics. Again no problem VW can do this but the fridge and leisure battery charging circuits are not included and VW don’t have a kit for doing this. Ok, not a problem as Jessica said she could arrange for this to be done before we pick up the vehicle. A day or so later in a chance phone conversation with Jessica I asked what type of relay would be fitted, knowing that it needed to be linked into the vehicle electrics and fully integrated with the auto stop start and energy recovery system on the alternator and not a voltage sensitive type. Jessica suggested that I talk directly to the company that would be doing the final bit of the wiring.
After two hours of trying to get through to speak to the right person on the phone I eventually spoke to someone who was supposed to be the contact given to me. The conversation did not inspire me with confidence. I asked about the relay and was told it was a voltage sensitive type. When I asked about integrating with the stop start and energy recovery, the person didn’t have a clue and said they had been fitting these for years without problems. I also asked about the size of the cable and was told the always use 2.5mm. Long story short… I emailed Jessica and said don’t let this company anywhere near the vehicle. Fit the VW side of it and I’d arrange for the remaining two services to be completed after I’d taken delivery.
This got me thinking, there must be a OEM kit for the vehicle. A quick email to my contact in Germany soon elicited a result. Westfaillia do an approved kit. A quick search on the Westfailia website for my nearest supplier came back with North West Towbar Centre in Stockport. Now there was a name I had heard of. They had been given a big thumbs up by a few of the Caravan Chronicle subscribers and I’d also recommended them to a couple of people who had experienced issues and they reported back had their problems resolved successfully. A quick phone call to them confirmed they did have the correct Westfallia kit and they could do the job and it was a switching relay, not voltage sensing.
As it was now late, I fired an email back to Jessica to tell her to cancel the VW tow bar and electrics, I’d get the North West Towbar Centre to do the job after I’d taken delivery. The following morning Jessica rang me. She had been in touch with the guys at North West Towbar Centre and arranged for Manchester Van Centre VW to take our vehicle down on Monday to get it all fitted out ready for us to collect it on Thursday and If I paid them directly, it would be cheaper. Now how’s that for a bit of top dealer service.
The Insurance Waltz
I’d just finished a twelve hour night stint at the airport and arrived home about eight on the Monday morning. Time to arrange the insurance. I’d already arranged to cancel the Mini Cooper insurance arranged through the Caravan Club the previous week and received a shock as I’d expected to just transfer it over to the Amarok. Unfortunately the Caravan Club insurance doesn’t insure pick-up’s. For the life of me I can’t understand why…. or couldn’t at the time.
I started with the well know comparison web sites and immediately got re-directed to their commercial vehicle sections… Pick-up’s are designated as commercial, even if they are privately owned. I filled in the various sections and eventually got some quotes back.
Now you might want to brew up and get yourself comfortable.
As our vehicle was having one of our old registrations transferred on to it, it hadn’t rattled through the DVLA system at this point, so I could not enter the registration, but had to find the exact vehicle description, which I did on all the sites. To actually arrange the insurance I had to ring the various companies. So I started with a quote that seemed reasonable, it had no claims protection, legal cover, a minimum excess, all the usual bits and seemed like good value. I rang the company giving the quote reference number on the screen.
The person on the other end of the phone ran through the details of the information with me. Everything was OK and they could use the registration number I gave them even though it was not on the DVLA system yet. So far, so good. He then asked would I be using the vehicle to commute to a fixed place of work… well yes. Ahh, you only have social and domestic cover ticked, not Social, domestic and commuting. I didn’t see a box to tick for that I said, just social and domestic and I assumed that as it was private use only… a box which I had ticked, would include cover for travelling to work. No, that’s not covered. OK, I need that, so how much does that add… £100. I nearly fell off my chair. So that covers me and my wife for travelling to work then? No… just you. I snorted coffee (which I needed having been awake by now for over 24 hours) over my keyboard. What! If you want your wife adding we can do that…. it will be another £50. This was getting expensive very quickly.
Right, so I’m covered for social, domestic and travelling to a fixed place of work for both myself and my wife then and towing our caravan. Err…. not towing a caravan… that will be extra and we only do third-party fire and theft on that… for another £120. What use is TPF&T on a caravan when I’m towing it… I want fully comprehensive. We don’t do it. I thanked the person and hung up. I was imagining what else would be an extra… Ahh you didn’t mention you wanted to breath in the vehicle… that will be another £50. It’s a bit like the scenes from Carry on Camping… everything was £10 extra.
Right, I’ll ring someone else… and the conversation went in a similar vein. However this person suggested I try ticking the “Carry Own Goods” box instead of “Private Use” box as it might come back with better quotes. I went back to the comparison websites and edited my original information. On checking the “Carry Own Goods” box it then started asking for a trading name… I entered Caravan Chronicles…. although this could lead me into a whole new dark place.. never mind, I continued. ‘Please state the radius of delivery for your own goods’…. well Caravan Chronicles is read in Australia so I guess 20,000 miles would cover it…. it didn’t like that and suggested I try again. I tried various distances and…. well it was crap to say the least. I had now been awake for about 26 hours.
I tried ringing a third company…. this time they person understood my plight and said they would have a word with the underwriters and see if there was anything they could do. They would call me back.
While I was ingesting the last of the caffeine I hadn’t snorted all over the place, I started to flick through a copy of Land Rover Owner magazine that I’d received a few days earlier through the post and as luck would have it I flicked on to a full-page advert for Adrian Flux…. now there was a name that I knew. They specialise in covering all sorts of 4 x 4 and specialist and modified vehicles. Kettle on, fresh coffee in my mug, I sat down for the long haul and gave them a call. I spoke to a very nice gentleman in Norfolk and he understood my situation, took some details and within 15 minutes we were fully insured, with all the bits I wanted and by the time I had finished on the telephone to him, my email inbox had dinged and there were my policy documents and insurance certificate.
The insurance company that said they would call me back….. well I’m still waiting.
So after 4 hours of being on the phone, I now had a sweaty ear from the telephoneium and had been on the go for 28 hours. All I had to do now was hi-tail it over to see Jessica to sign the paperwork and let her have a copy of my driving licence.
‘The Wolf’ at North West Towbar Centre waiting to go in for its towbar and electrics to be fitted.
On the way back, I decided to drop into the North West Towbar Centre in Stockport. The Amarok had been taken over to them that morning to have the tow bar fitted. It was the first time I had been there and it was great to actually see a shop – quite a big one too – stuffed full of actual products that you can touch, pickup and feel the heft of their construction rather than one of these dinky show shops full of nothing and posters.
I introduced myself and spent half an hour or so chatting to one of the guys there. They do know their stuff when it comes to electrics and we talked about some of the problems with modern vehicles and fitting aftermarket equipment to them.
Time to head home…. I had one last task to do, and that was to order the Roll N Lock rear cover, but that’s going to be for another day.
Next time: Picking up the Amarok and starting to fit some kit.
So what happened to scupper all my spreadsheet deliberations in the early hours of the morning while driving to work?
I was on the M60 heading towards the airport thinking about what aircraft were due out… as you do, when a large pickup passed me. Not with one of these truck tops on the rear but a hard cover over the pickup bed and 4 bikes mounted on a rack above the bed. I hadn’t a clue as to what make it was as I wasn’t into pickup’s really but it did look really neat and by the time my brain got into gear to see if I could identify the make, it was gone.
All that morning I was thinking about pickup’s…. maybe I was missing a trick here and a SUV type vehicle wasn’t the way forward, but a pickup was. They seem to be one of the vehicles of choice in the USA for people towing travel trailers, but that’s a whole different market. There are a lot of caravaners in the UK using them too. What was I missing?
A couple of days later I saw what I thought was the same vehicle again on the M60, this time with no bikes on the back. It had a VW badge on the tailgate. I thought VW didn’t make pickup’s. But this got me thinking again, was a pickup the way to go… lots of people use 4 x 4 pickups to tow with, they seem to have plenty of room, be practical, have seating for five and are generally built tough as they are usually designed for commercial use.
A chance conversation about caravans at work with someone who had recently changed his Discovery for a pickup… a VW pickup.
A few days later I started searching on the internet for information about pickups… there is more out there than I thought. My original spreadsheet got a bit of a re-write over the course of a weekend.
A day or so later we were staying down at Plough Lane Caravan Site and we saw another Amarok on the road which was the first time Sue had seen one and it renewed our interest again, and as luck would have it we were near to a VW Commercial Dealership (have a read here https://caravanchronicles.com/2015/09/20/wiltshire-wanderings/) so we dropped in. It was ticking all the boxes, but more research was still required about 4 x 4 pickup’s. My spreadsheet grew.
Now, I’m not going to give you a long list of the ones we looked at and the reasons for dismissing them in our particular case, some people might have chosen them and for them, they tick all the boxes which is great. The others didn’t tick enough of our (well my) boxes and the Amarok did. So “Project Wolf” was born.
“Project Wolf”
I did not know what to call this series of blog posts when I was making my notes, I read that an amarok, or amaroq, is a gigantic gray wolf in Inuit mythology, said to stalk and devour any person foolish enough to hunt alone at night. Unlike real wolves who hunt in packs, amaroks hunt alone. This kind of stuck in my brain and I started scribbling “Project Wolf” at the top of the pages I had in my note-book where I’d written about stuff for the Amarok.
After my first conversation with the dealer in Swindon, I needed lots of questions answering and fired off an email to VW UK. And got a quick reply telling me nothing of what I really wanted to know. So I tried again, this time to VW in Germany. Not telling me much more… but in lots of detail of course. Thankfully the Australians came to the rescue, although the specs are a little different, it helped fill in the blanks.
The start of my growing spread sheet about pick-up’s-v-SUV’s
Searching on the internet it seems that the Amarok is going down a storm down under in Australia and there are lots of videos and information on Australian 4 x 4 forums about the Amarok… as well as quite a bit of stuff from southern Africa and south America. I spent the next couple of months gathering information and adding even more columns to my spread sheet, then going back visiting other manufacturers web sites filling in blank bits for their particular 4 x 4 pickup’s to keep things on a level playing field.
Image (c) VW GMBH
OK… So why choose a pickup?
Glad you asked. Well these are OUR reasons and thoughts. They may not coincide with your particular circumstances, but here’s why… for us.
The loading and storage capacity are huge when compared to most SUV 4 x 4’s. The weight capacity is around 1000 Kg’s and most can take a standard Euro-pallet footprint. That’s a lot of caravanning extras. A lot of pickups can be fitted with a van style top that will allow wet dogs, bikes and other stuff that you wouldn’t put inside a vehicle. Although we don’t particularly want a cab style top but would prefer a flat lid with a bike rack on top. And we don’t have a wet dog. We may have a wet awning though. The tailgate can apparently support 250 Kgs… handy for tailgate BBQ’s! It also makes it easy for me to throw in a big snap-on tool chest and use it as a work bench when tinkering with aircraft electrics.
A lot of pickups are still built on a ladder chassis (like the old Land Rovers) for strength and generally have a longer wheelbase which for towing increases stability. The hitch nose weight limit is generally higher – 150 Kg upwards and generally they are heavier so a lower towing weight ratio can be achieved.
Comparing our Freelander to the Amarok I got:-
Freelander Mass In Service=1723 Kgs, Caravan MTPLM=1490 Kgs, giving a towing ratio of 86.5%
Amarok Mass In Service=2093 Kgs, Caravan MTPLM=1490 Kgs, giving a towing ratio of 71.1%
The Amarok 85% figure is a caravan with a MTPLM of 1779 Kgs and 90% comes in at 1884 Kg’s. The maximum rated towing capacity for a braked trailer is 3200 Kgs.
The other factor for me is the build. Most pick-up’s are built for commercial use and things tend to be a bit beefier. The seats are a bit tougher, the springs, brakes, switches…. everything is designed and made with heavy use in mind. OK this can make them a bit more utilitarian in their design and look inside, but I wanted something that would still look good after 100,000 miles.
The mechanics too tend to be a bit more industrial. The vehicles are not built to a minimum weight just to get good MPG or performance. They are designed for a working life with minimal down time and servicing costs. With all this In mind and much more we (well I) settled on the VW Amarok as the main contender.
OK… so what’s hot about the Amarok?
Here’s a few things I like… mainly taken from the VW literature and I guess is similar to other offerings.
ABS and EBD – Anti-lock Brakes and Electronic Brake Distribution. ABS is pretty standard now but the Amarok ABS also has Off Road ABS as well and is linked to something called EBD which essentially helps prevent lockup of the rear wheels when under less load (i.e. lightly loaded in the back) or when the vehicle’s weight is transferred to the front wheels when braking. Handy for those wet grass campsites.
Hill Hold Assist – handy for hill starts when towing and Hill Descent Control – Available on a lot of 4 x 4’s but the big one for me was unlike the Land Rover version (which is great by the way!) it operates in off-road mode at any speed below 18 MPH when the vehicles ABS is being used. It controls the braking automatically to prevent unintentional acceleration going down hill even in slippery conditions.
Brake Assist – senses how fast you apply the brakes and if it senses you are doing an emergency stop automatically applies the maximum braking effort available.
The 2.0 Litre BiTDI Engine produces 180 PS (132Kw) or 180 Hp in old money which is similar to some larger engines in other makes. The two turbos help the engine give a huge 420 Nm of torque when mated to the 8 speed automatic gearbox, which has first gear optimised for off-road and pulling away when towing heavy trailers. 8th gear is designed as an overdrive to reduce revs and maximise fuel efficiency.
Here’s one from the F1 world…. regenerative braking. When you brake the energy recuperation system uses momentum to turn the alternator and charge the battery, making the most of the energy when you brake.
Permanent “4 motion” four-wheel drive. All wheel drive is permanent on the automatic no matter if you are in on or off-road mode. The Torsen differential splits the power 40:60 between front and rear wheels, but when off-road the system automatically distributes power to the wheels with most grip… and works with hill start and hill descent control.
There were a few other things that I liked… for example you can put a 32Gb SD card in the radio with all your music from your iPod on and the hands free system seemed quite easy to use too. There were more 12 volt power points than you could shake a stick at, including one in the pickup bed, handy for your cool box!
It has all the usual stuff too, leather interior, cruise control, front and rear parking sensors, cup holders everywhere, storage draws under the front seats, inbuilt sat-nav.
It’s not small – 5254 mm long (excluding tow bar) and 2228 wide at the mirrors. With our caravan hitched it will be a total length of around 12.54 metres or about 41′ 2″ in real money.
The MPG figures were OK too…. but that with VW has to be seen in perspective of course.
So with all my geeky and techie boxes ticked…. all we had to do was go and prod one in real life and take it for a wiz round the block!
Now I think VW have missed a trick here, VW Car Dealerships don’t sell Amarok’s, you have to go to a VW Commercial Dealer, and after talking to a few people, this seems to be a bit daunting as a lot have people have never stepped into a commercial dealership before. Our nearest VW Commercial Dealership is Manchester Van Centre VW in Trafford Park where we met the lovely Jessica… but more about that in Part 3.
Here is a sneaky preview of an Amarok from Down Under….

 For the threaded bolt I had some dome head bolts handy. The width of the dome head was wide enough so it would not pull through the slot on its own so I was not relying on a 2mm think aluminium plate entirly. To hold the bolts in place I drilled a slightly undersized hole in the aluminium…
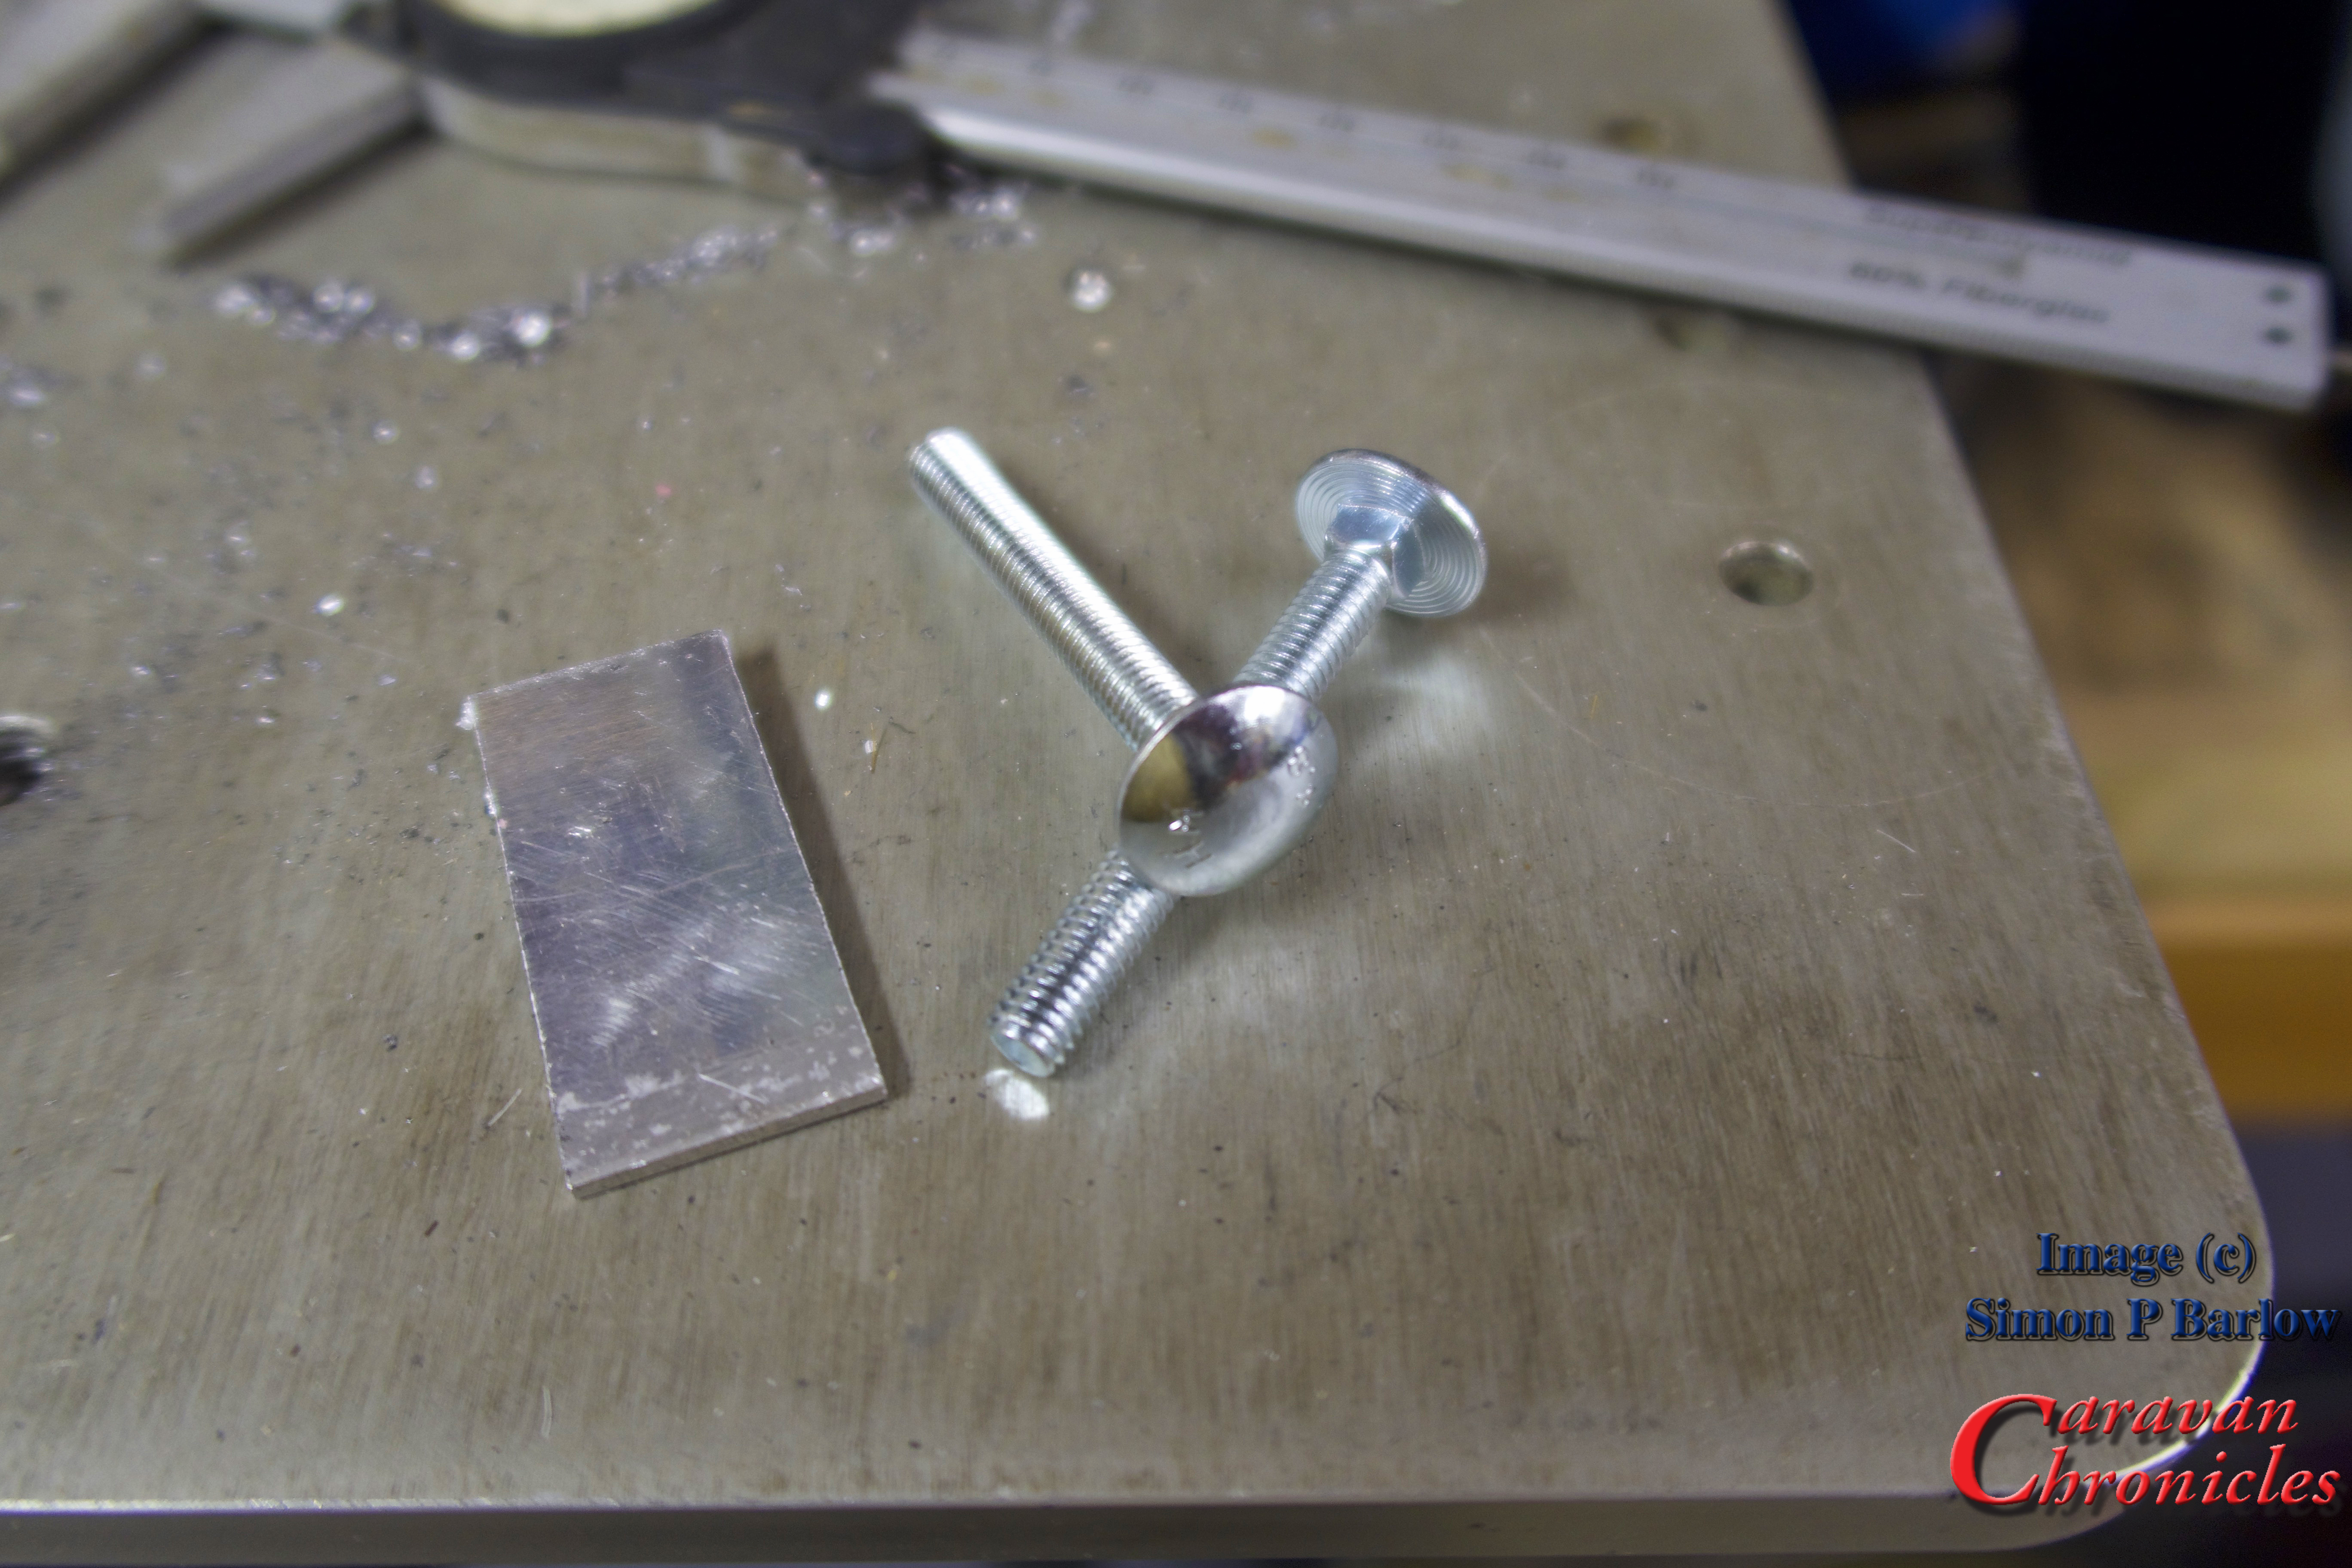
 …and used my small press to force the square shoulders of the bolt through the aluminium plate to hold it in place.
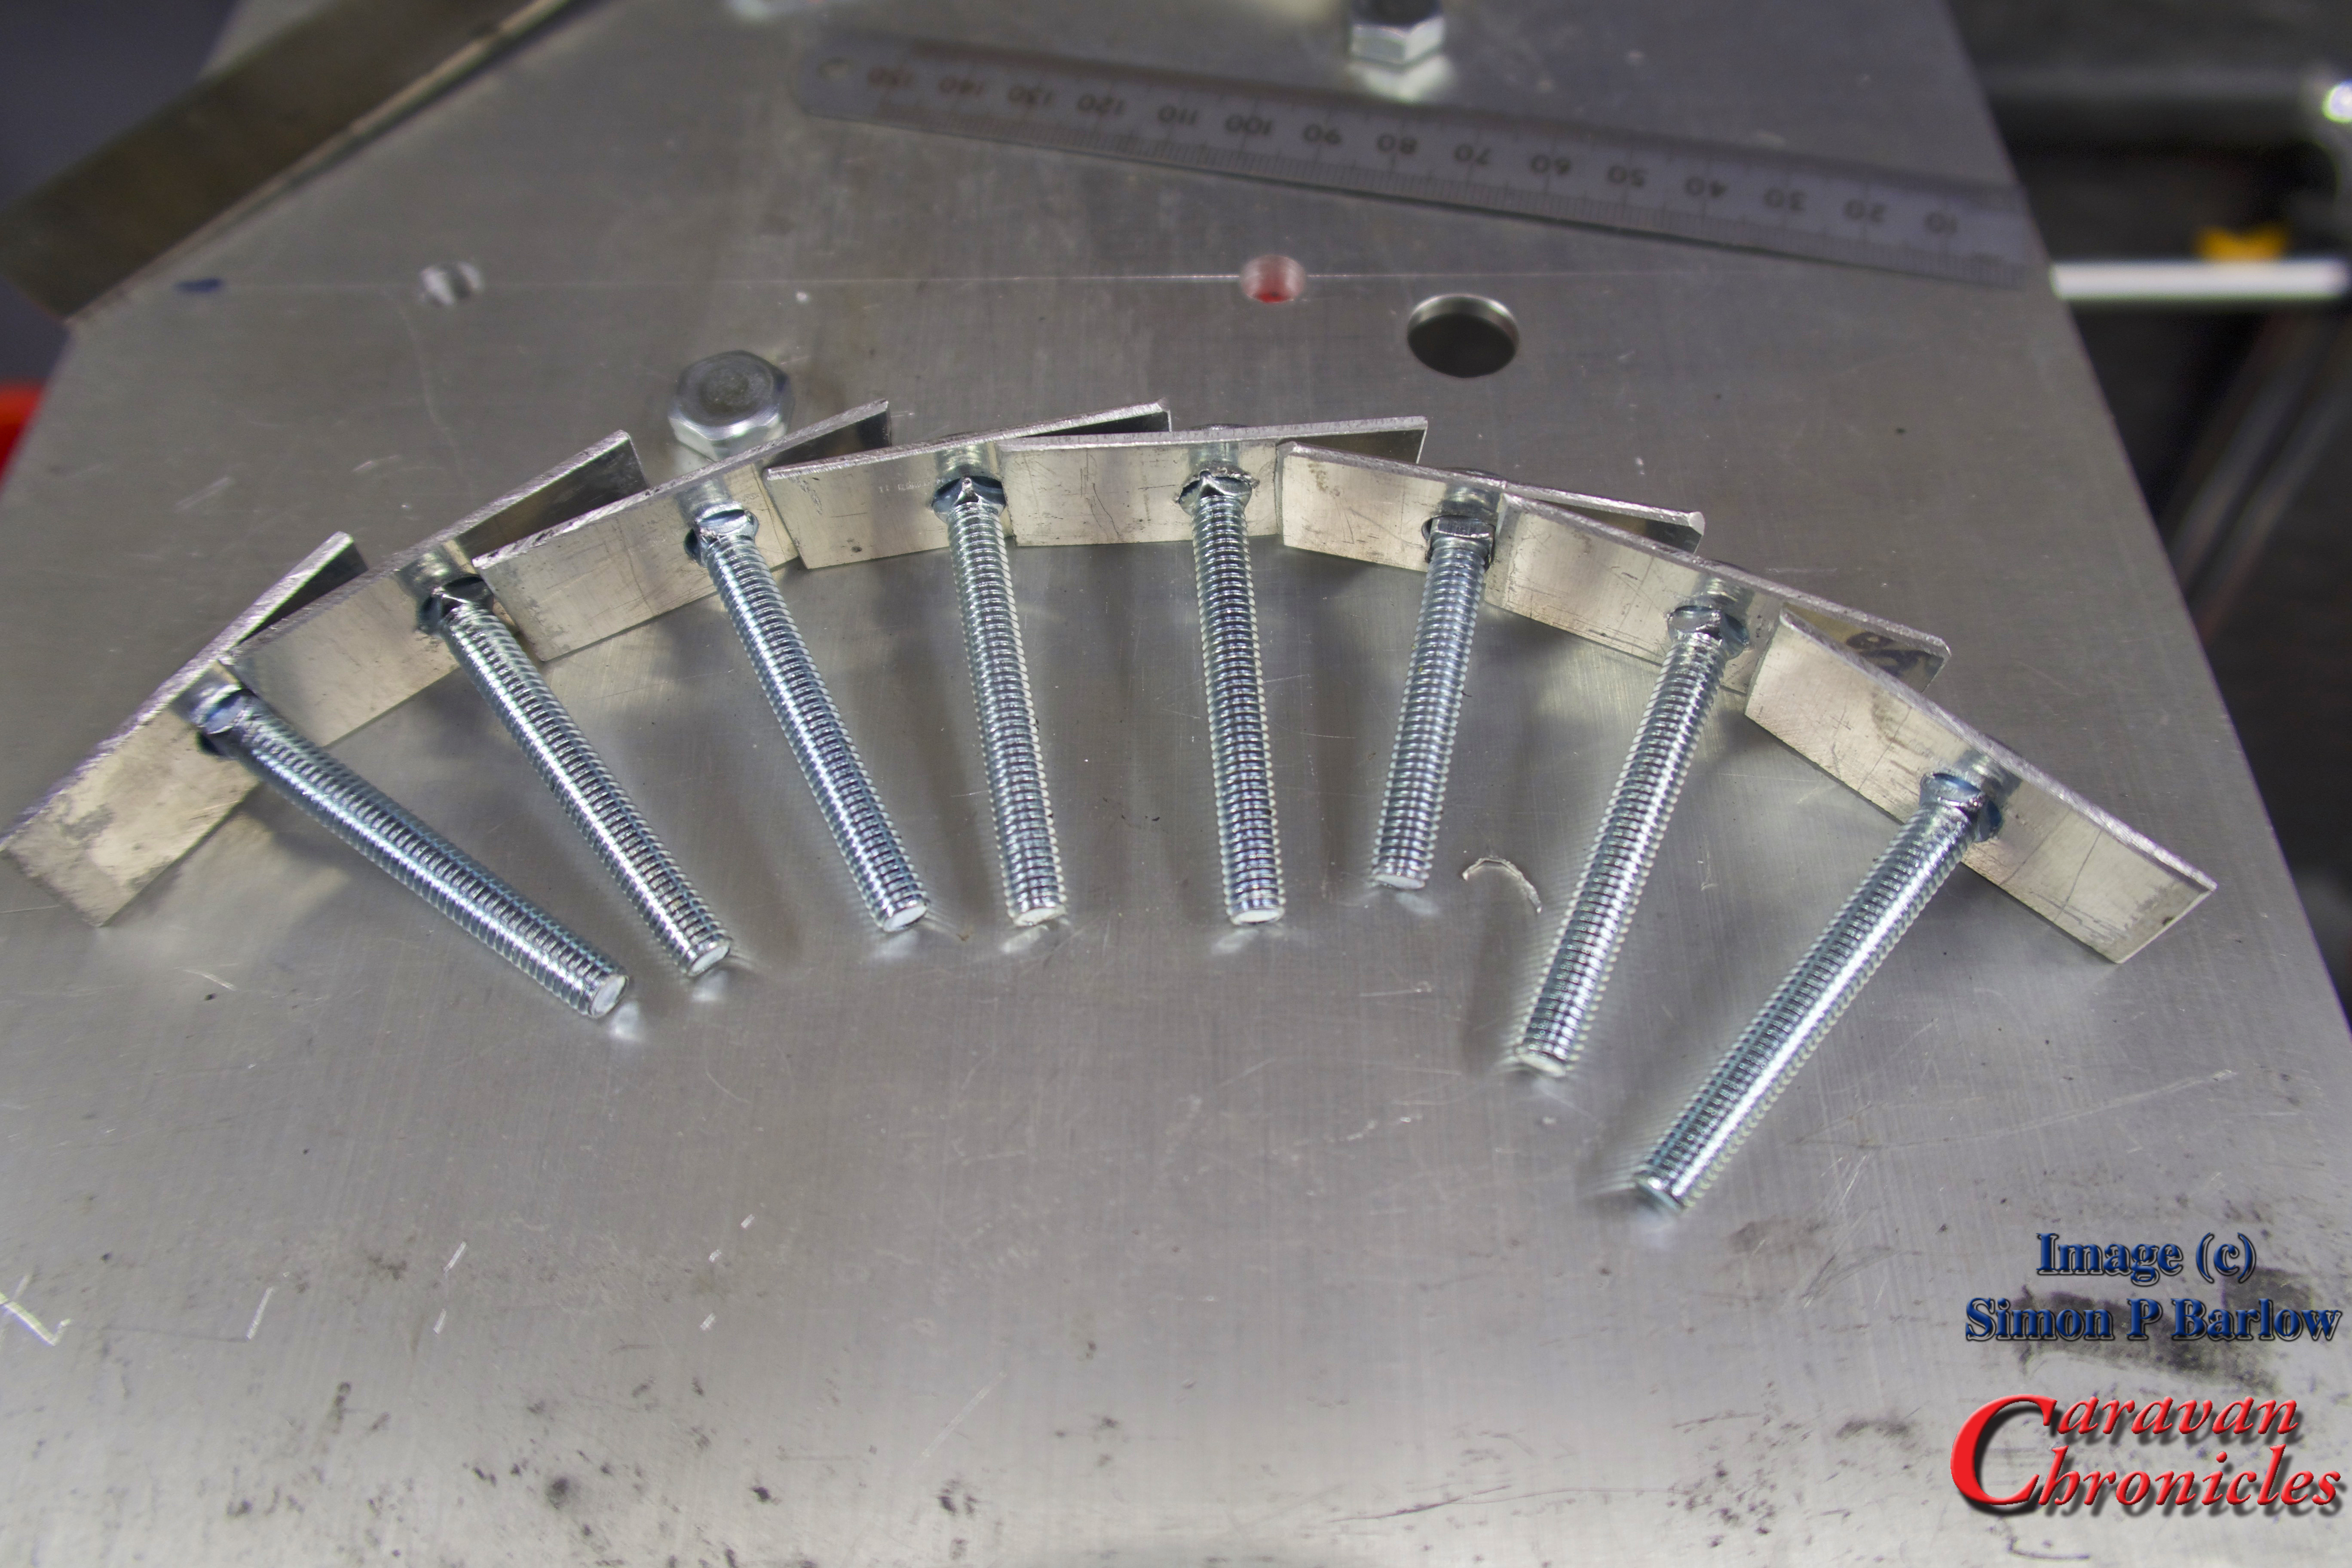 The result was eight “T” track bolts. A quick dressing up on the sanding belt and fine grinding wheel to remove any rough edges finished them off.
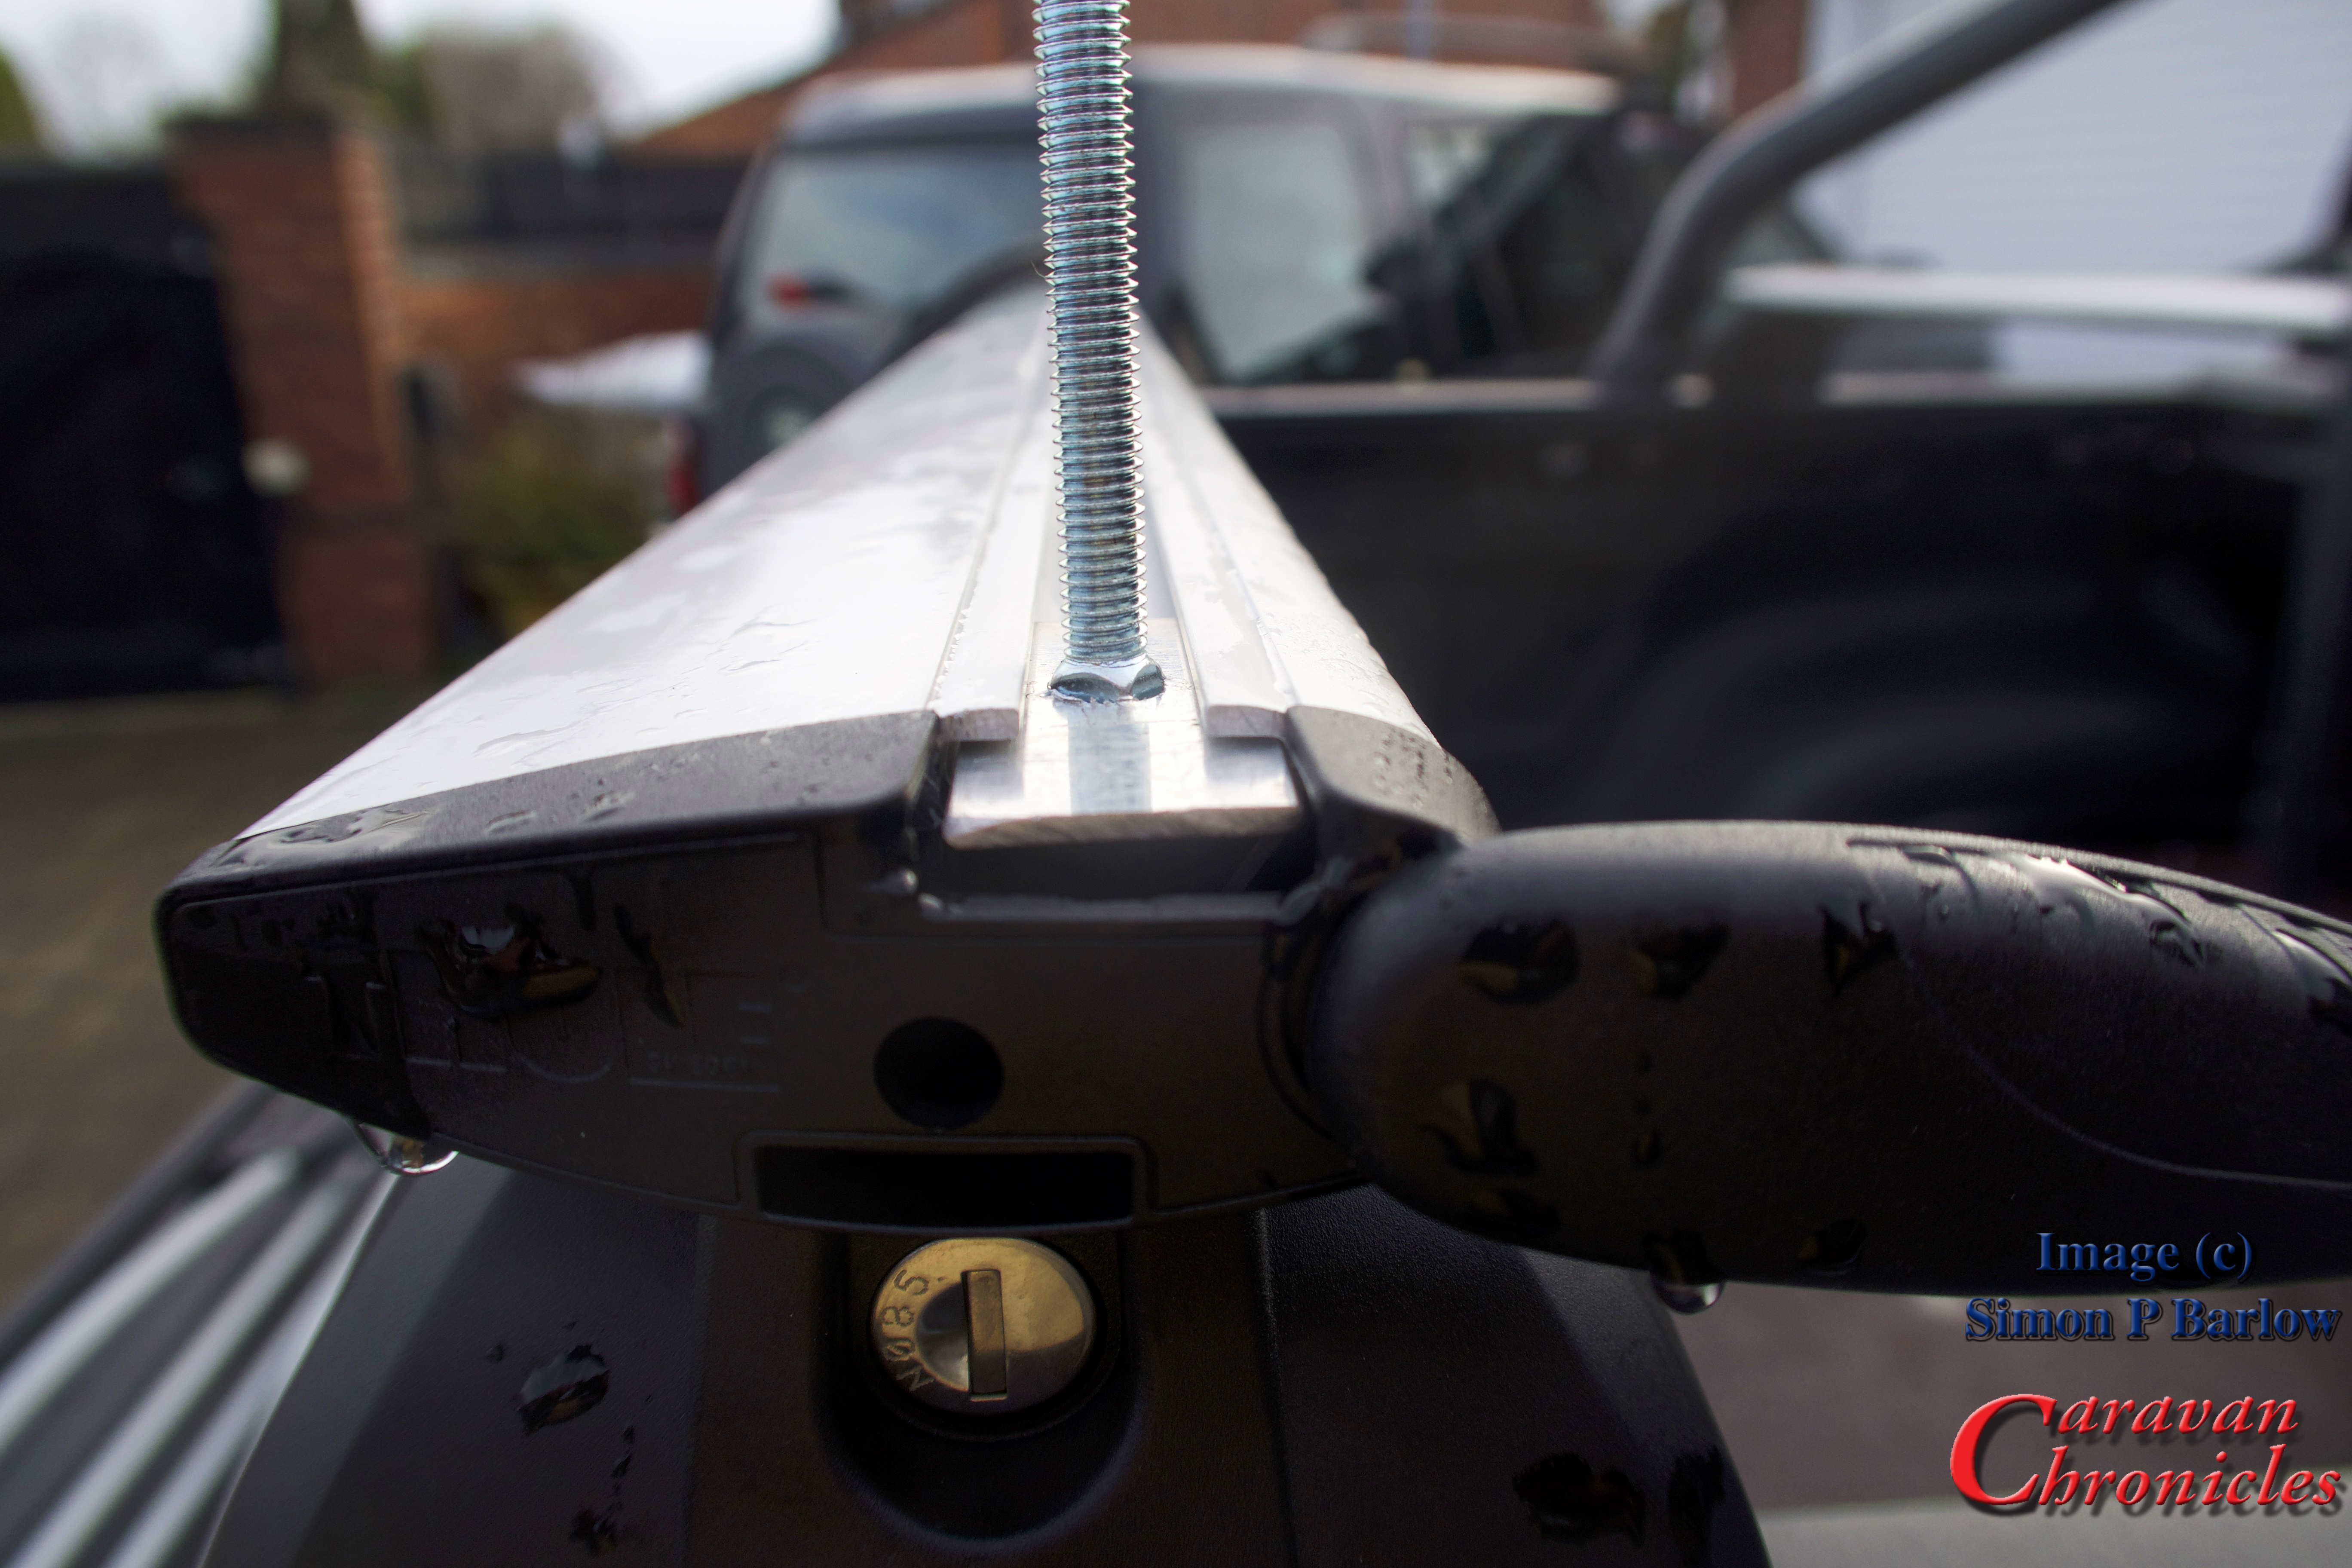 The excess length of the bolt would be trimmed later.
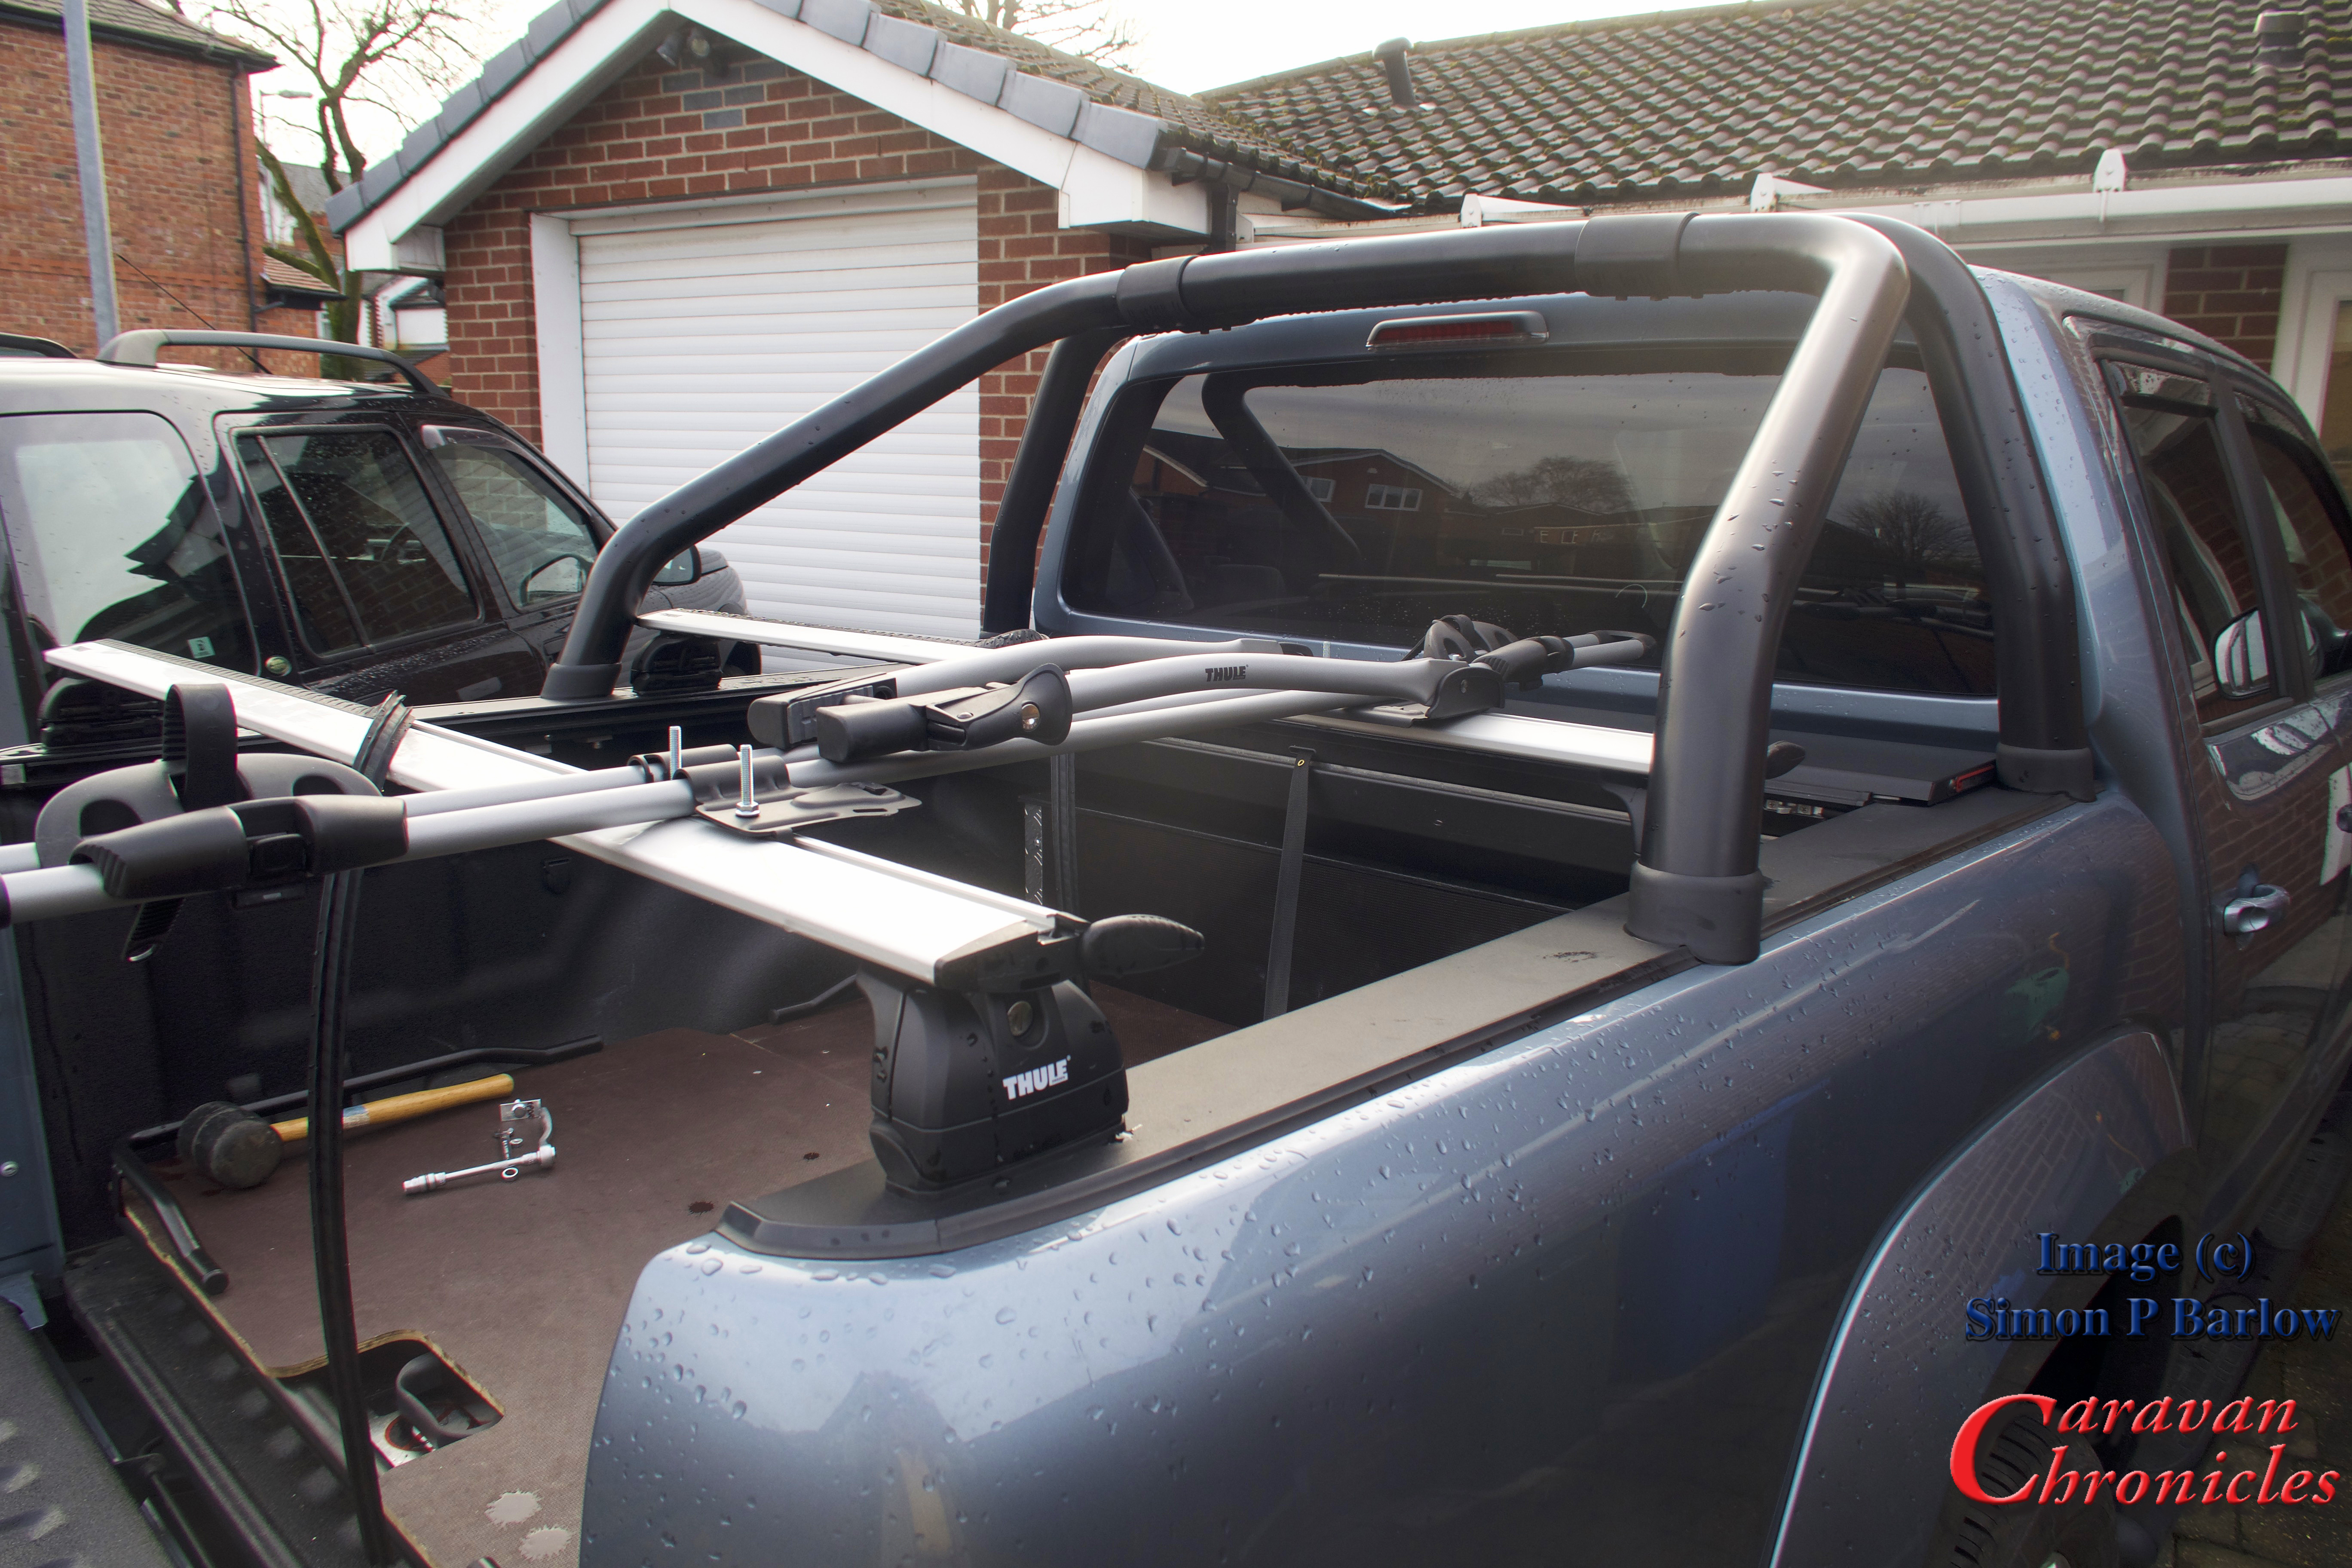 I used a couple of nuts to hold the rack in place while I test fitted one of the bikes. It was a bit too tight. The swing up frame section that clamps on to the bike only partially engaged on the bike frame. The whole rack needed moving rearwards by about 10 to 15 mm.

 The next thing to address was the overhang. I still had around 50 to 60 mm of adjustment I could make to the rails of the FreeRide rack. Removing everything again and a bit of ‘adjusticating’ with a small rubber mallet soon saw the rails in the correct position. I had not been able to get the rear of the mount flush with the pickup tailgate as was my original hope, but checking with a plumb bob…
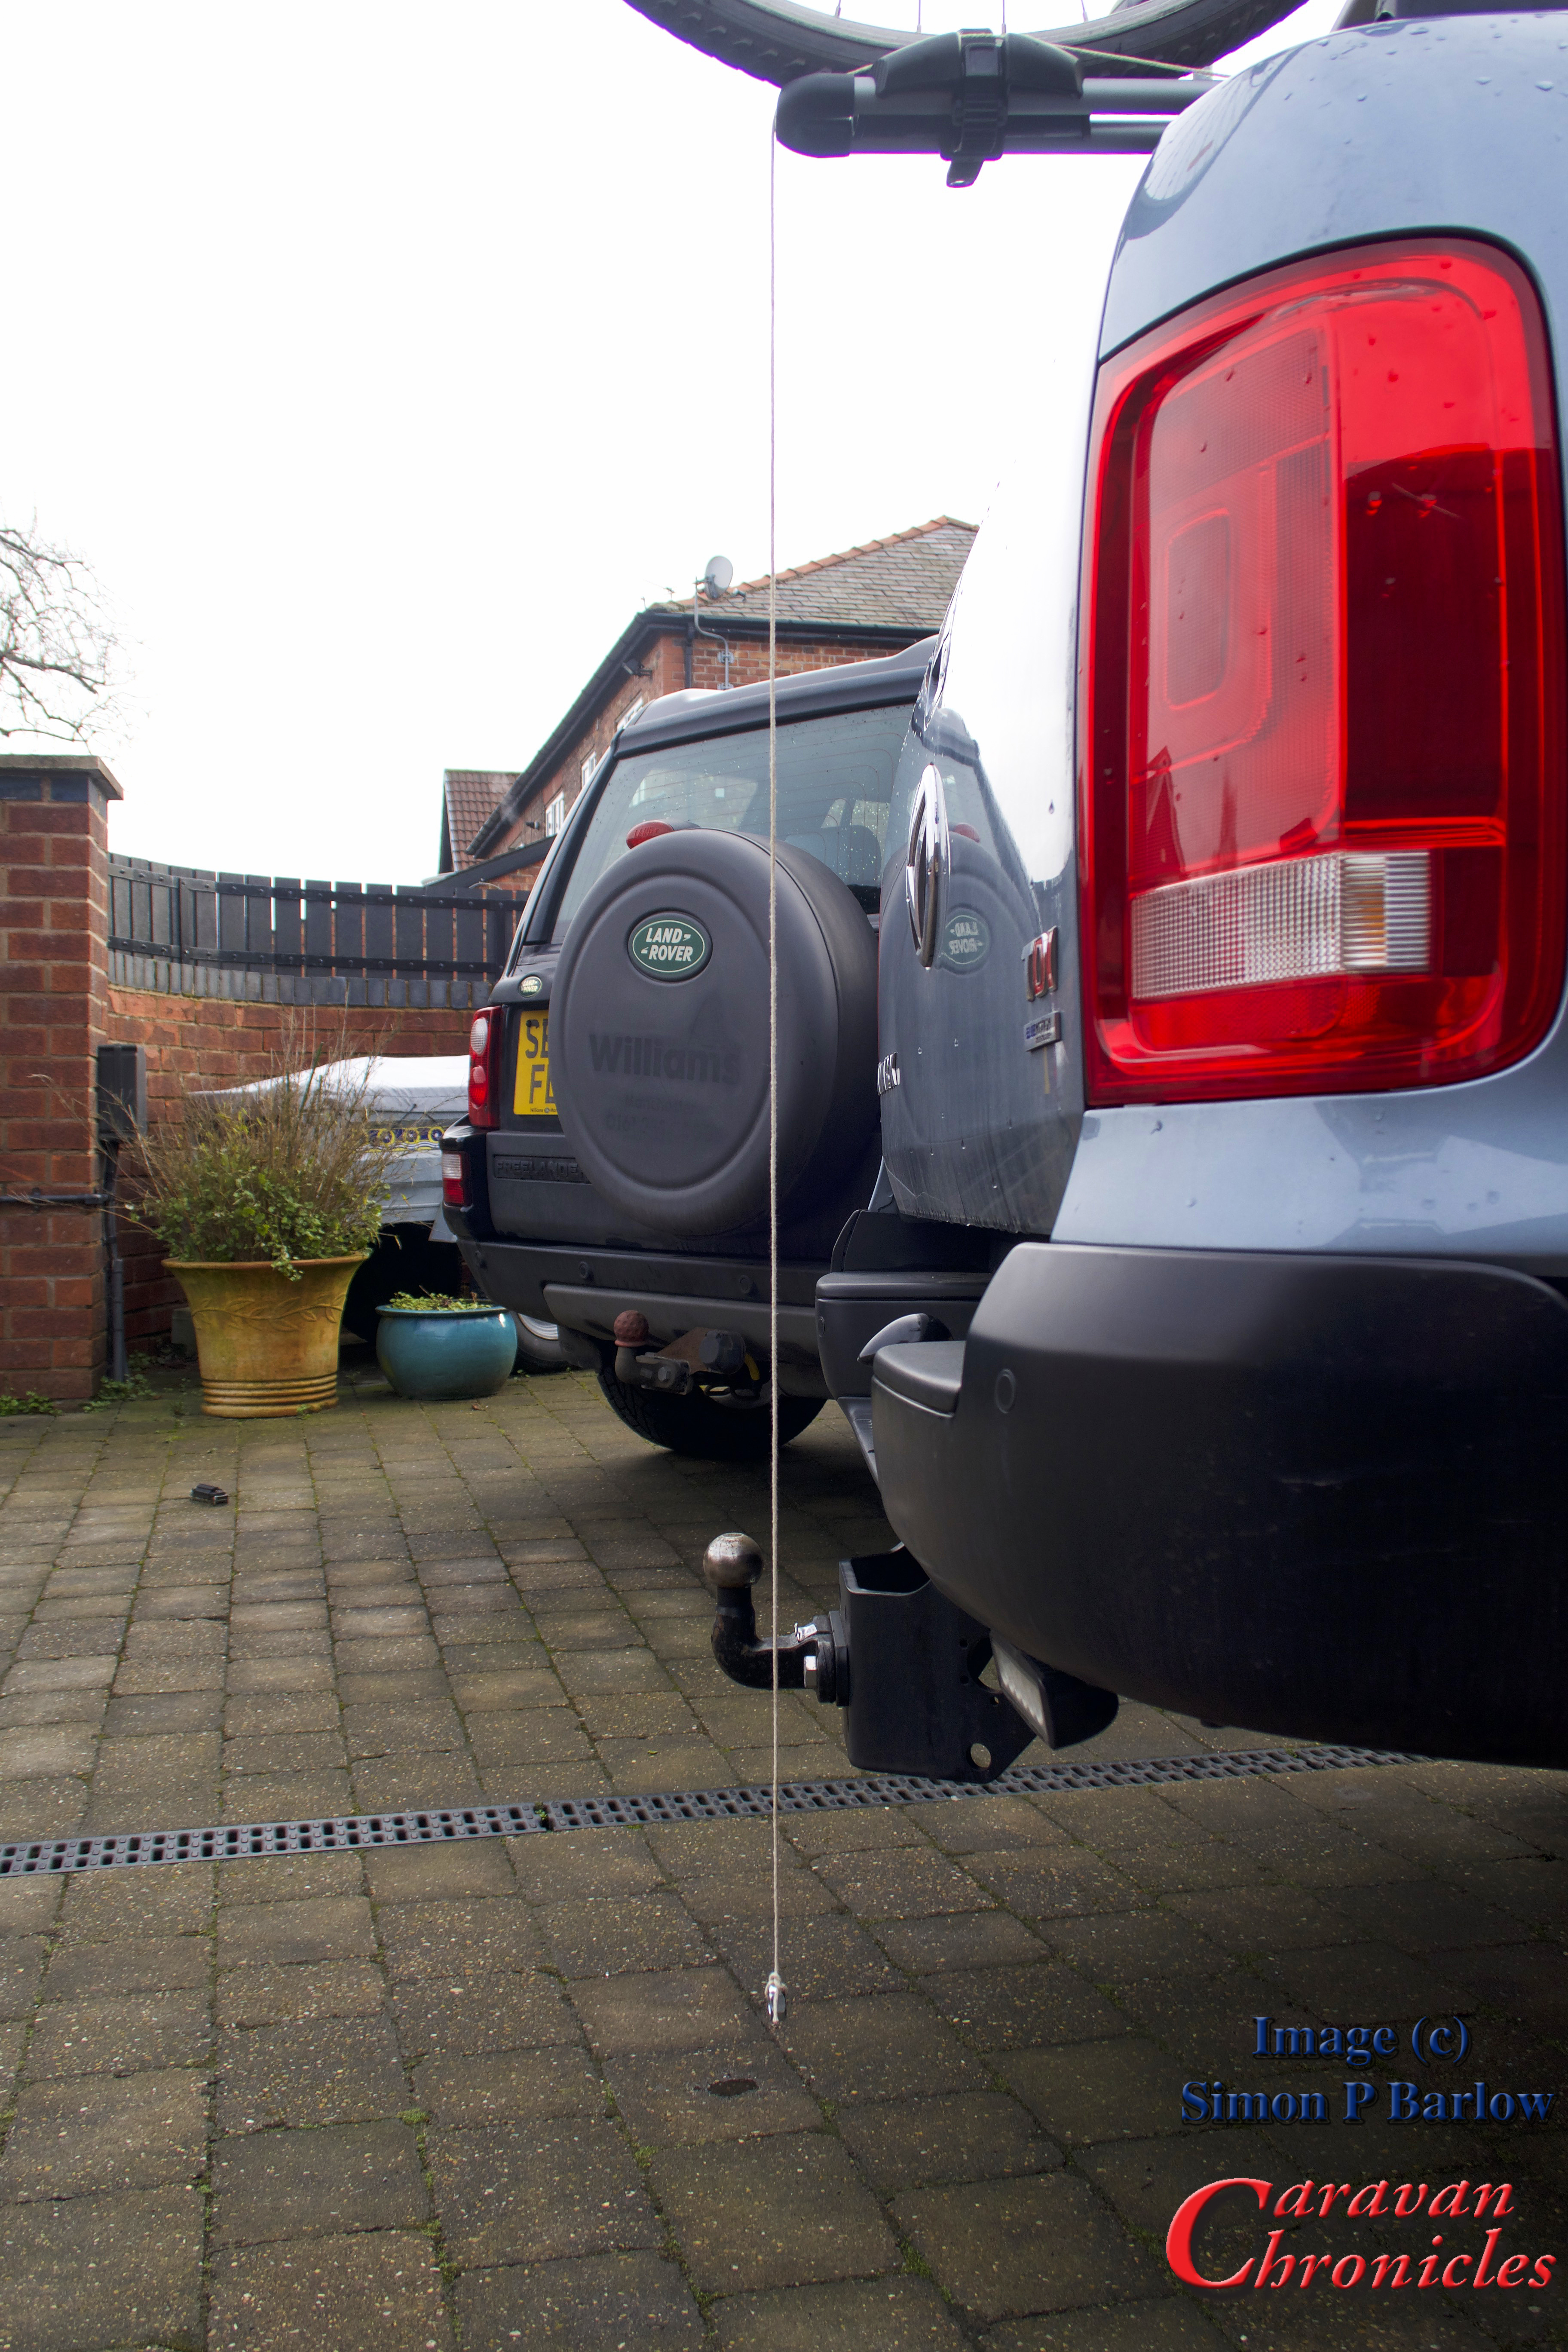
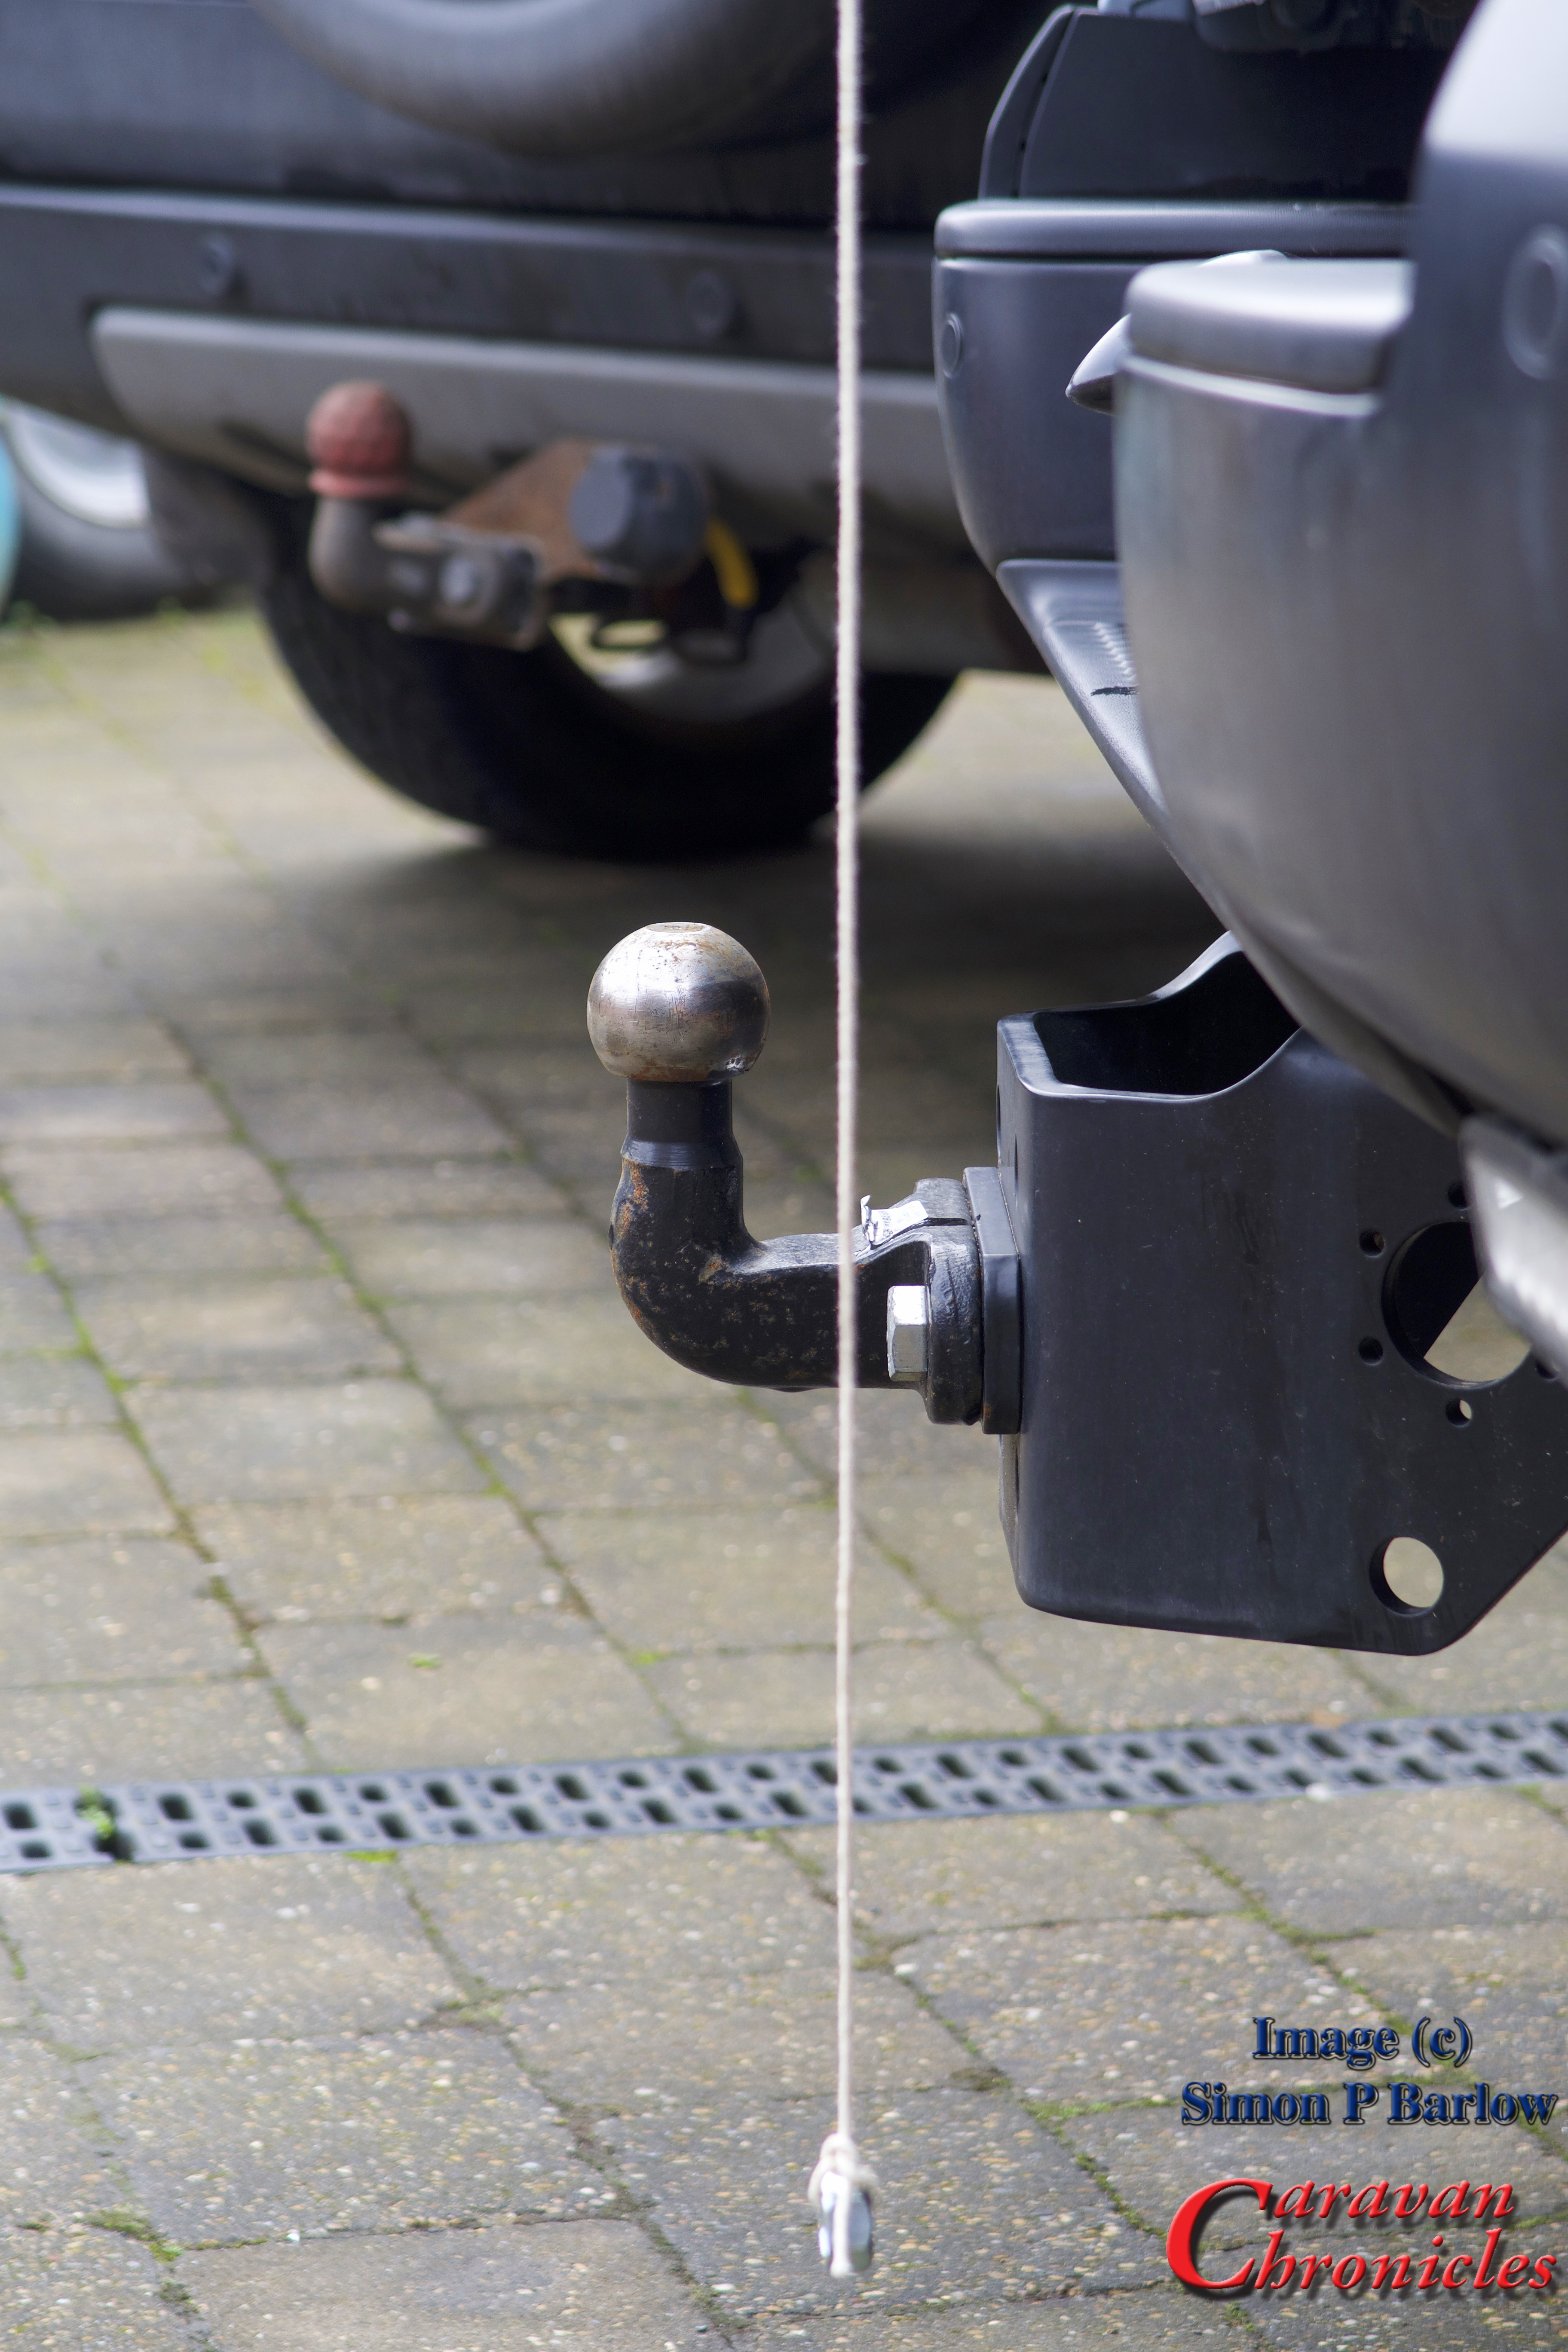 … It was still shorter than the tow ball and only about 40mm longer than the rear bumper. So the overhang wasn’t anything to worry about. Even with a bike on the rack it would be clear of the caravan in the tightest of turns. Next it was just a matter of squaring things up and tightening everything down.
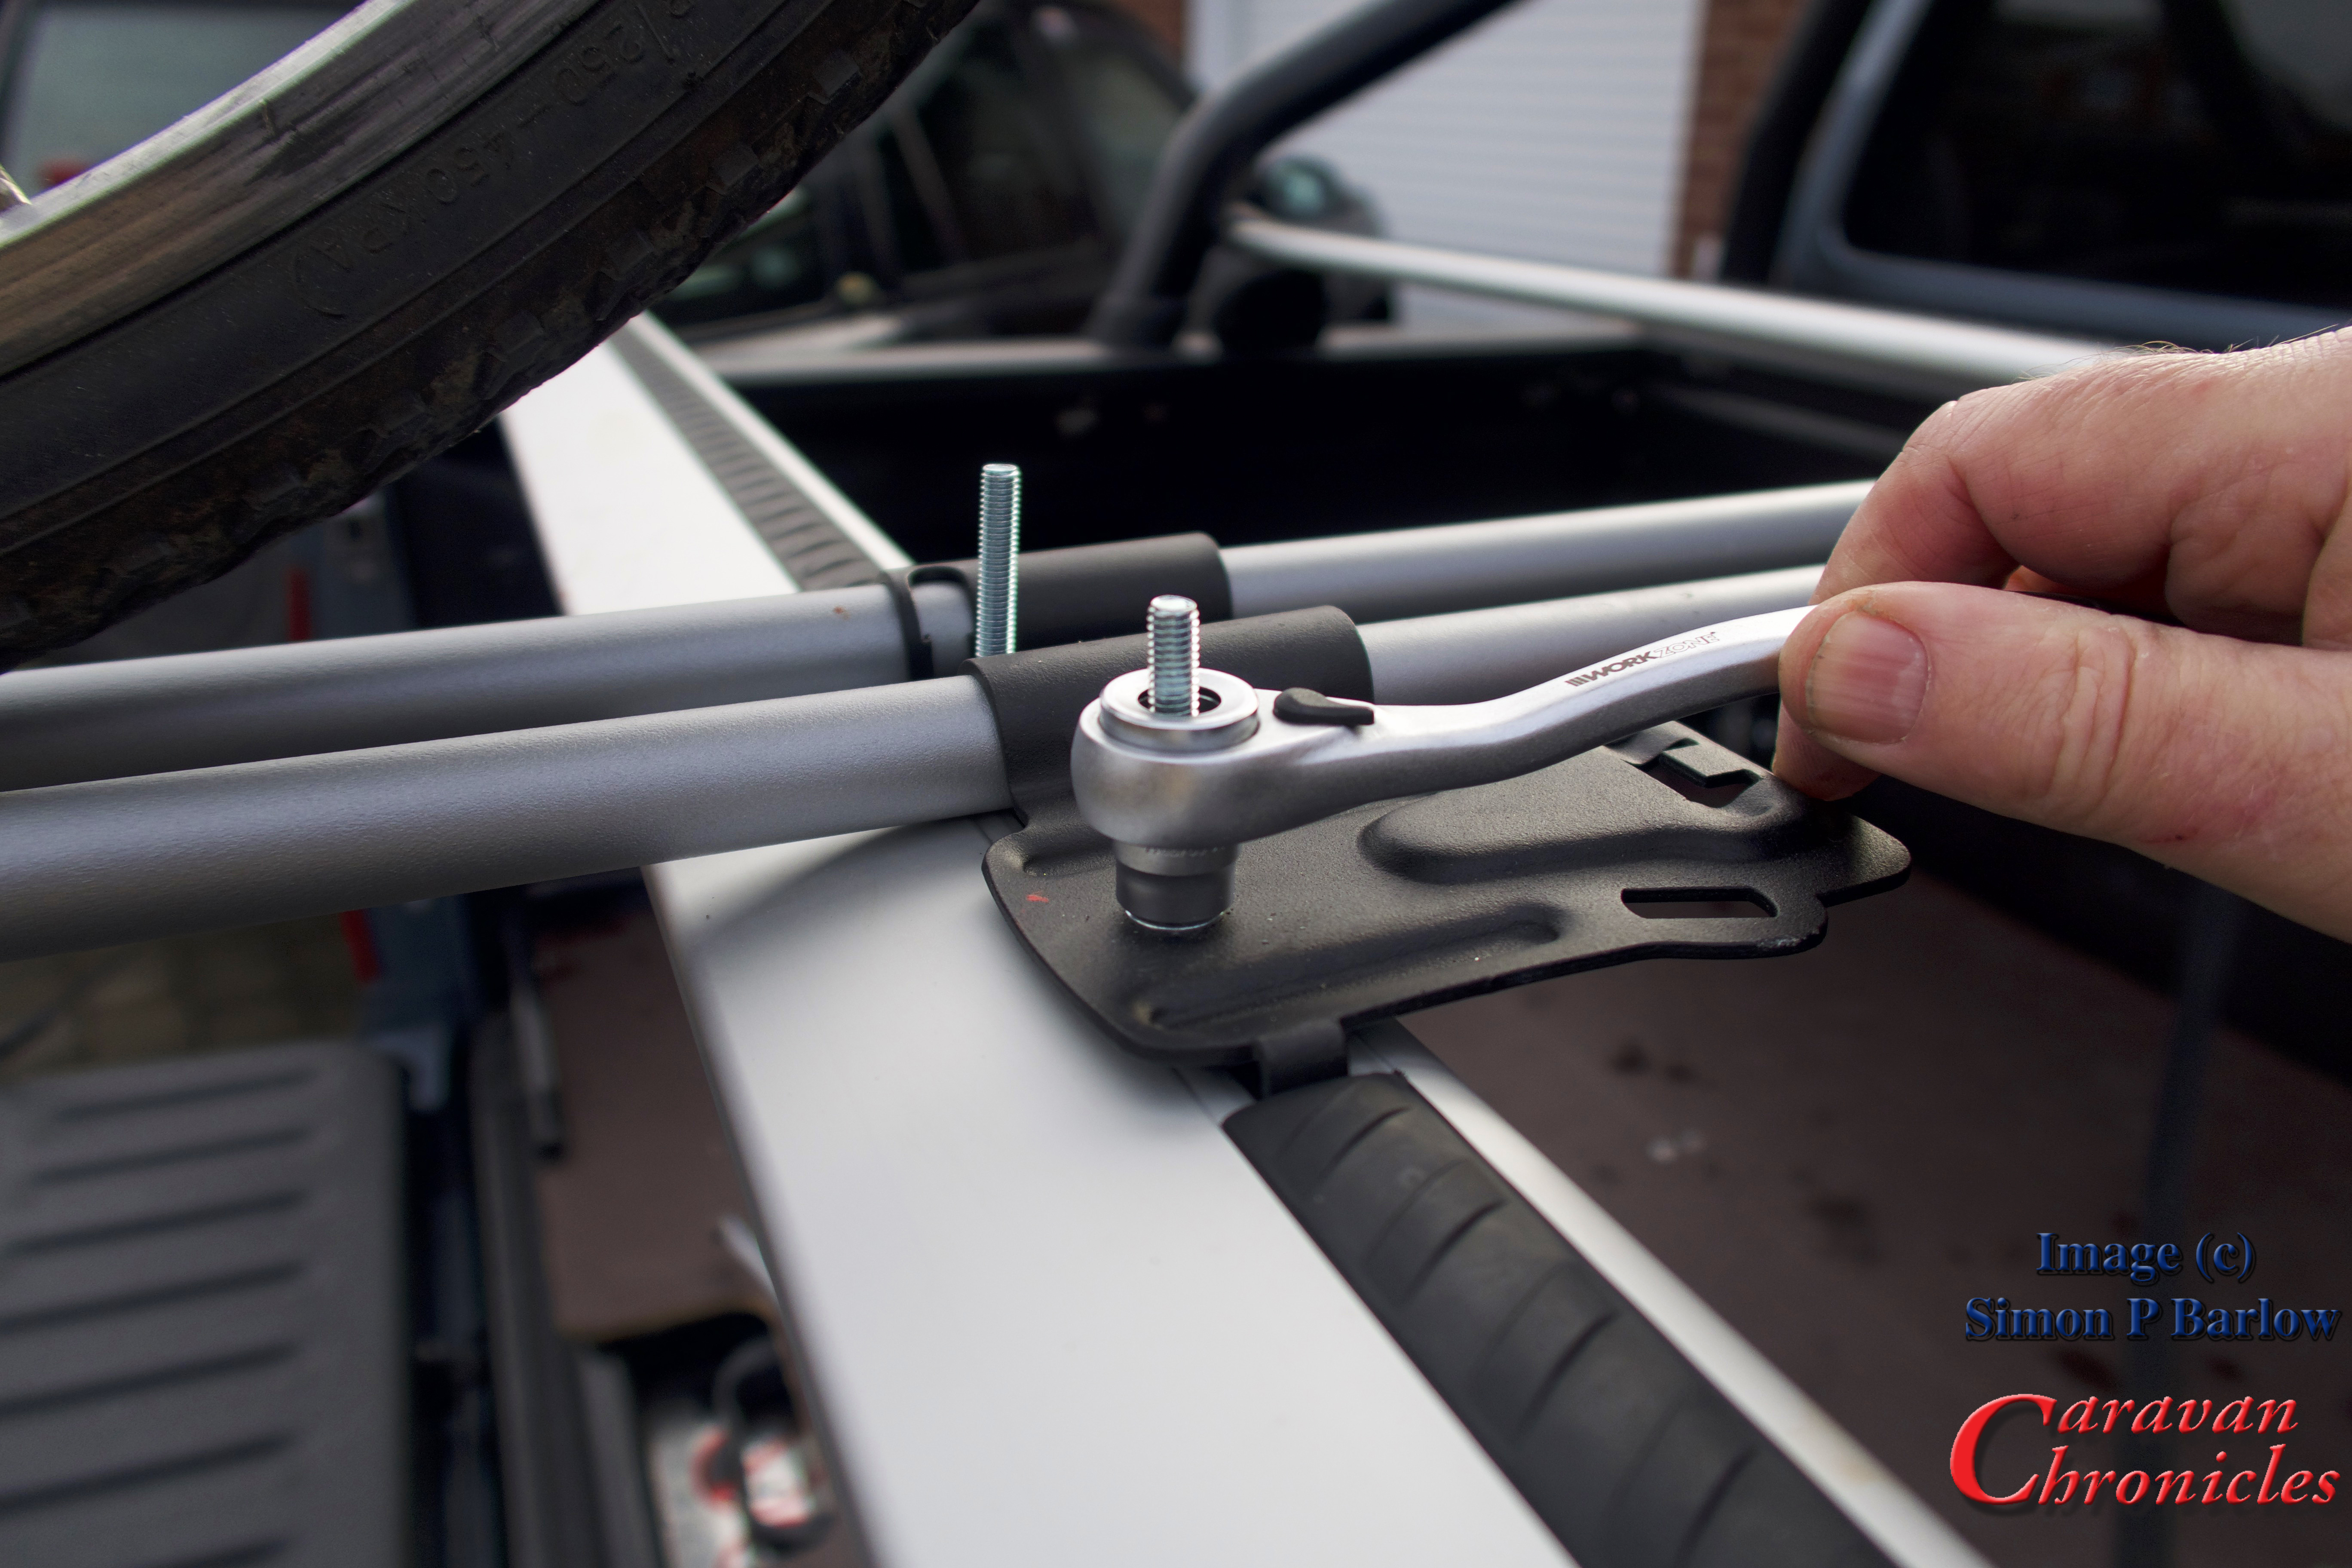
 … and using a Dremmel I cut off the excess thread and ground off any sharp edges. I need to find a suitable plastic or rubber push on cover for these then I can give them a quick coat of preserving grease.
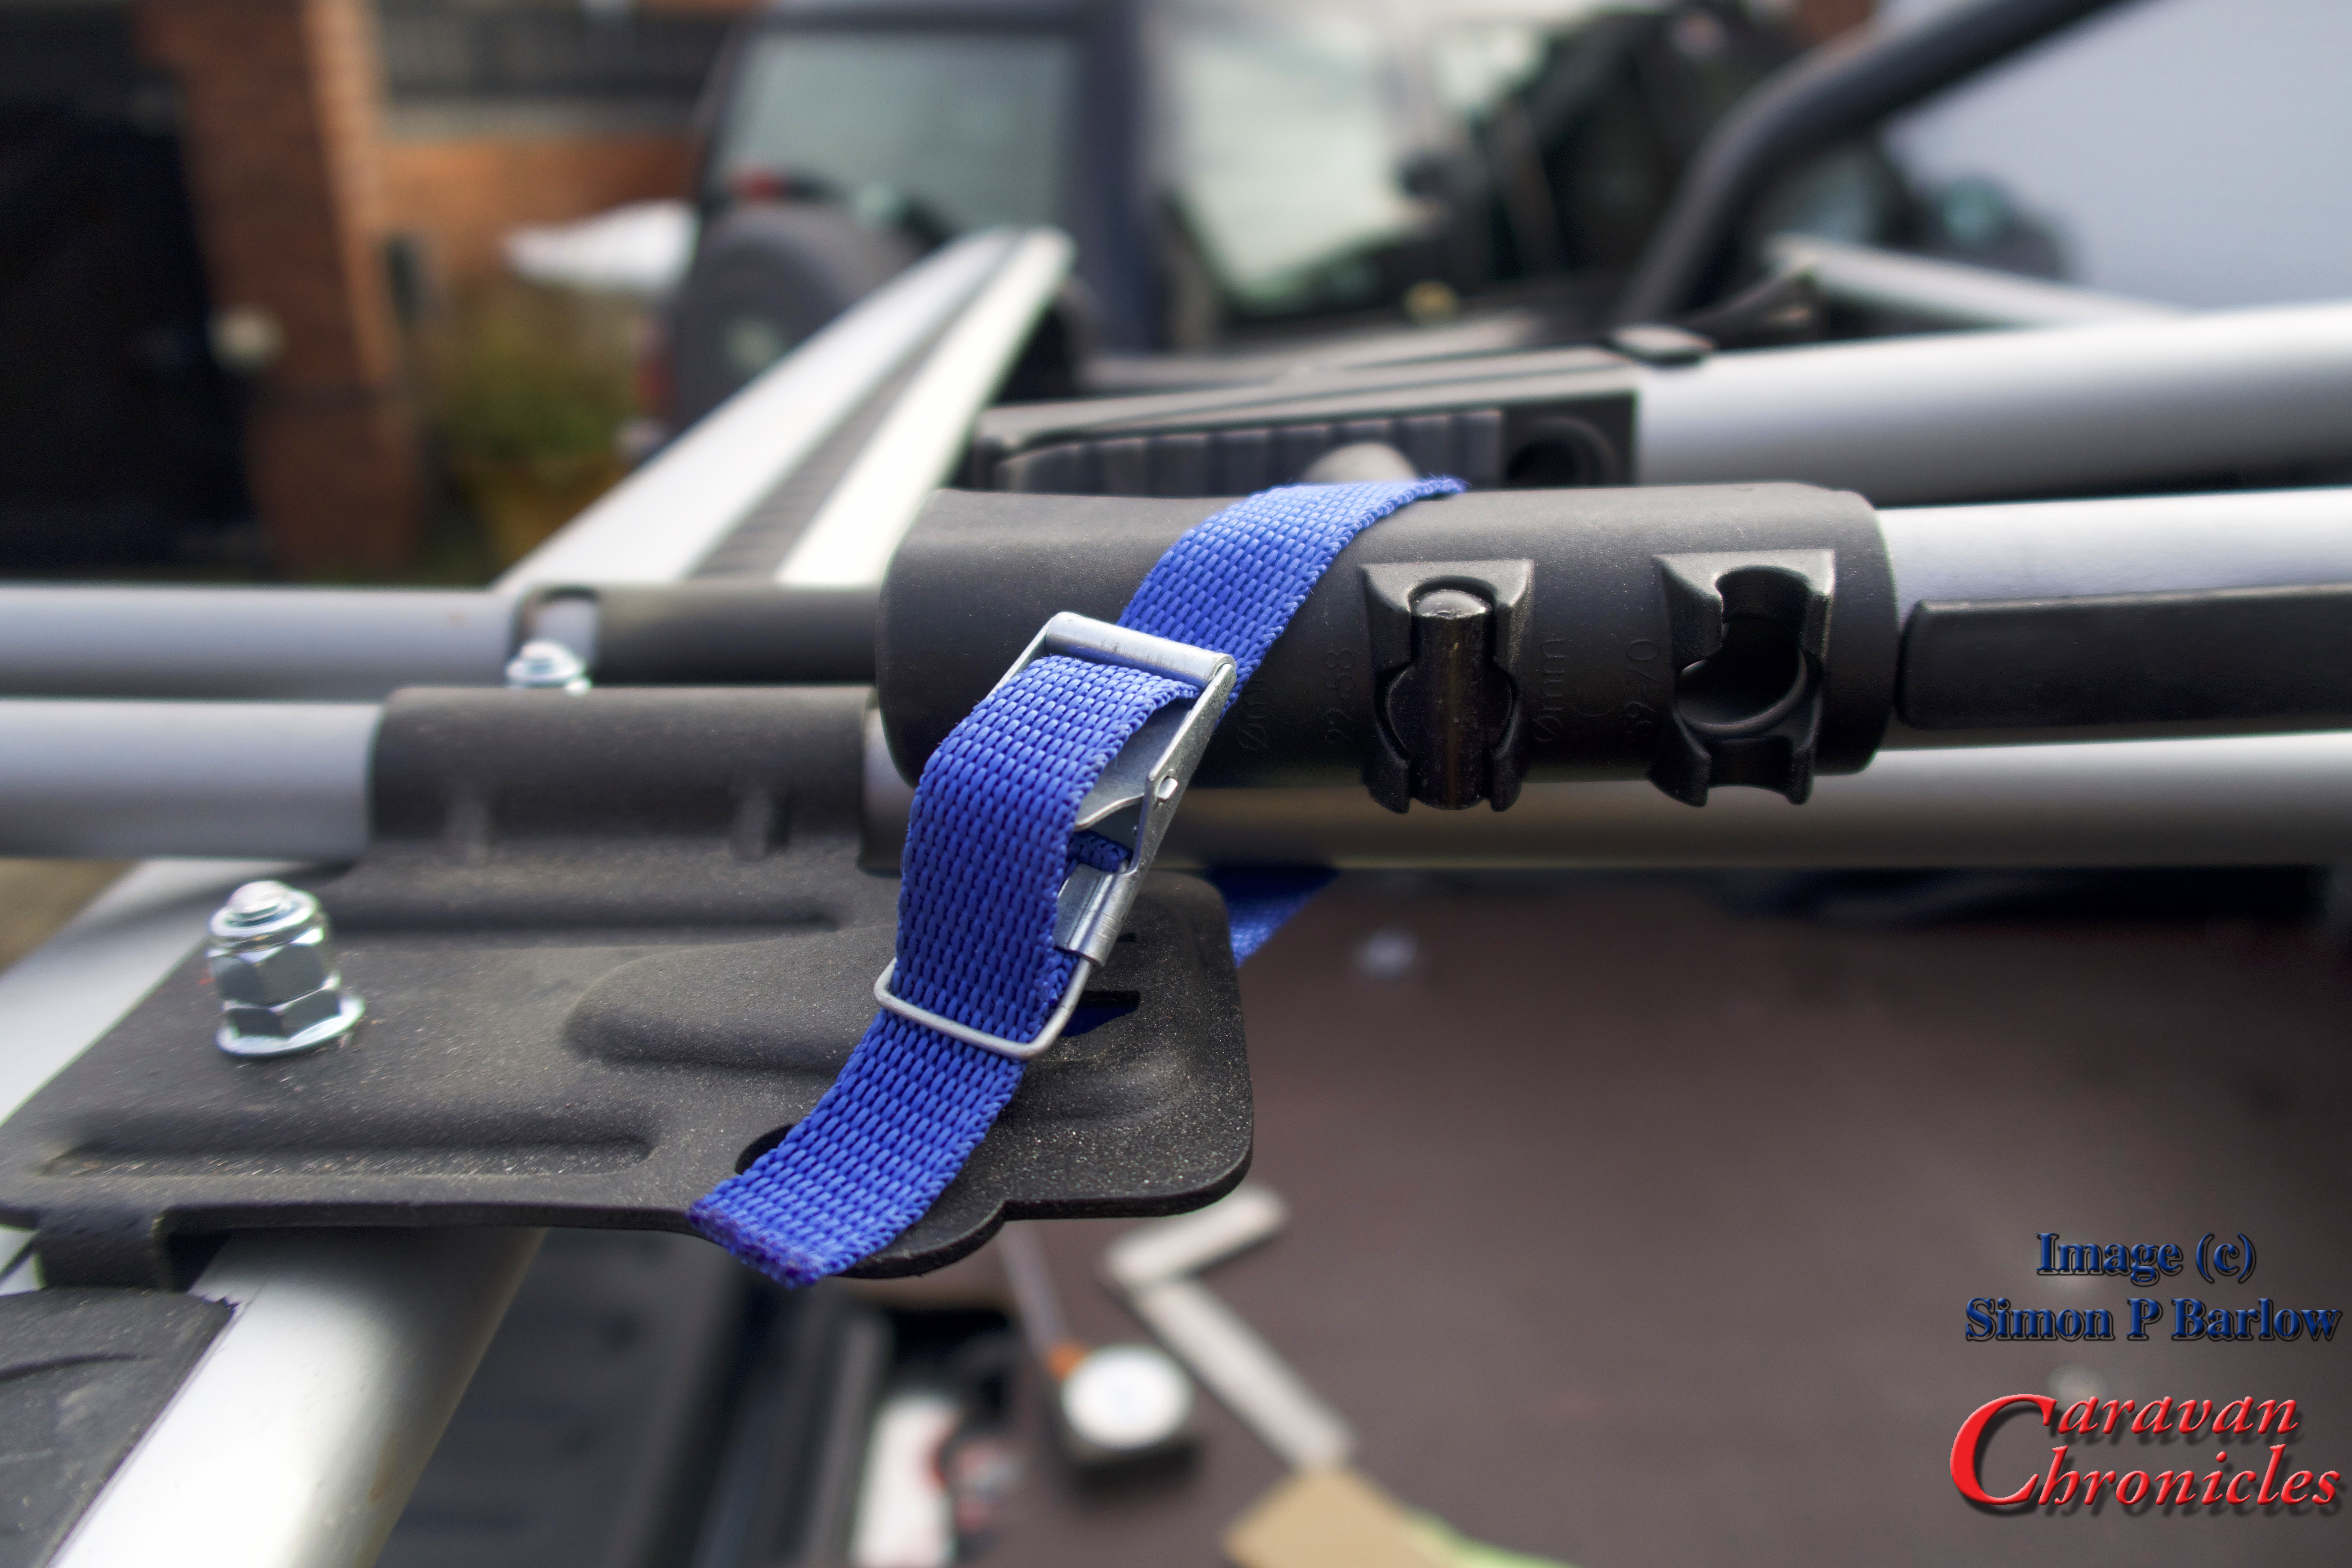 … problem solved. A simple solution to something that may or may not be a problem.