
Tags
13 Pin Socket, Caravan, Caravanning, Maintenance, Modifications, Tow Bracket, Towing, Travel Trailer, Travel Trailers
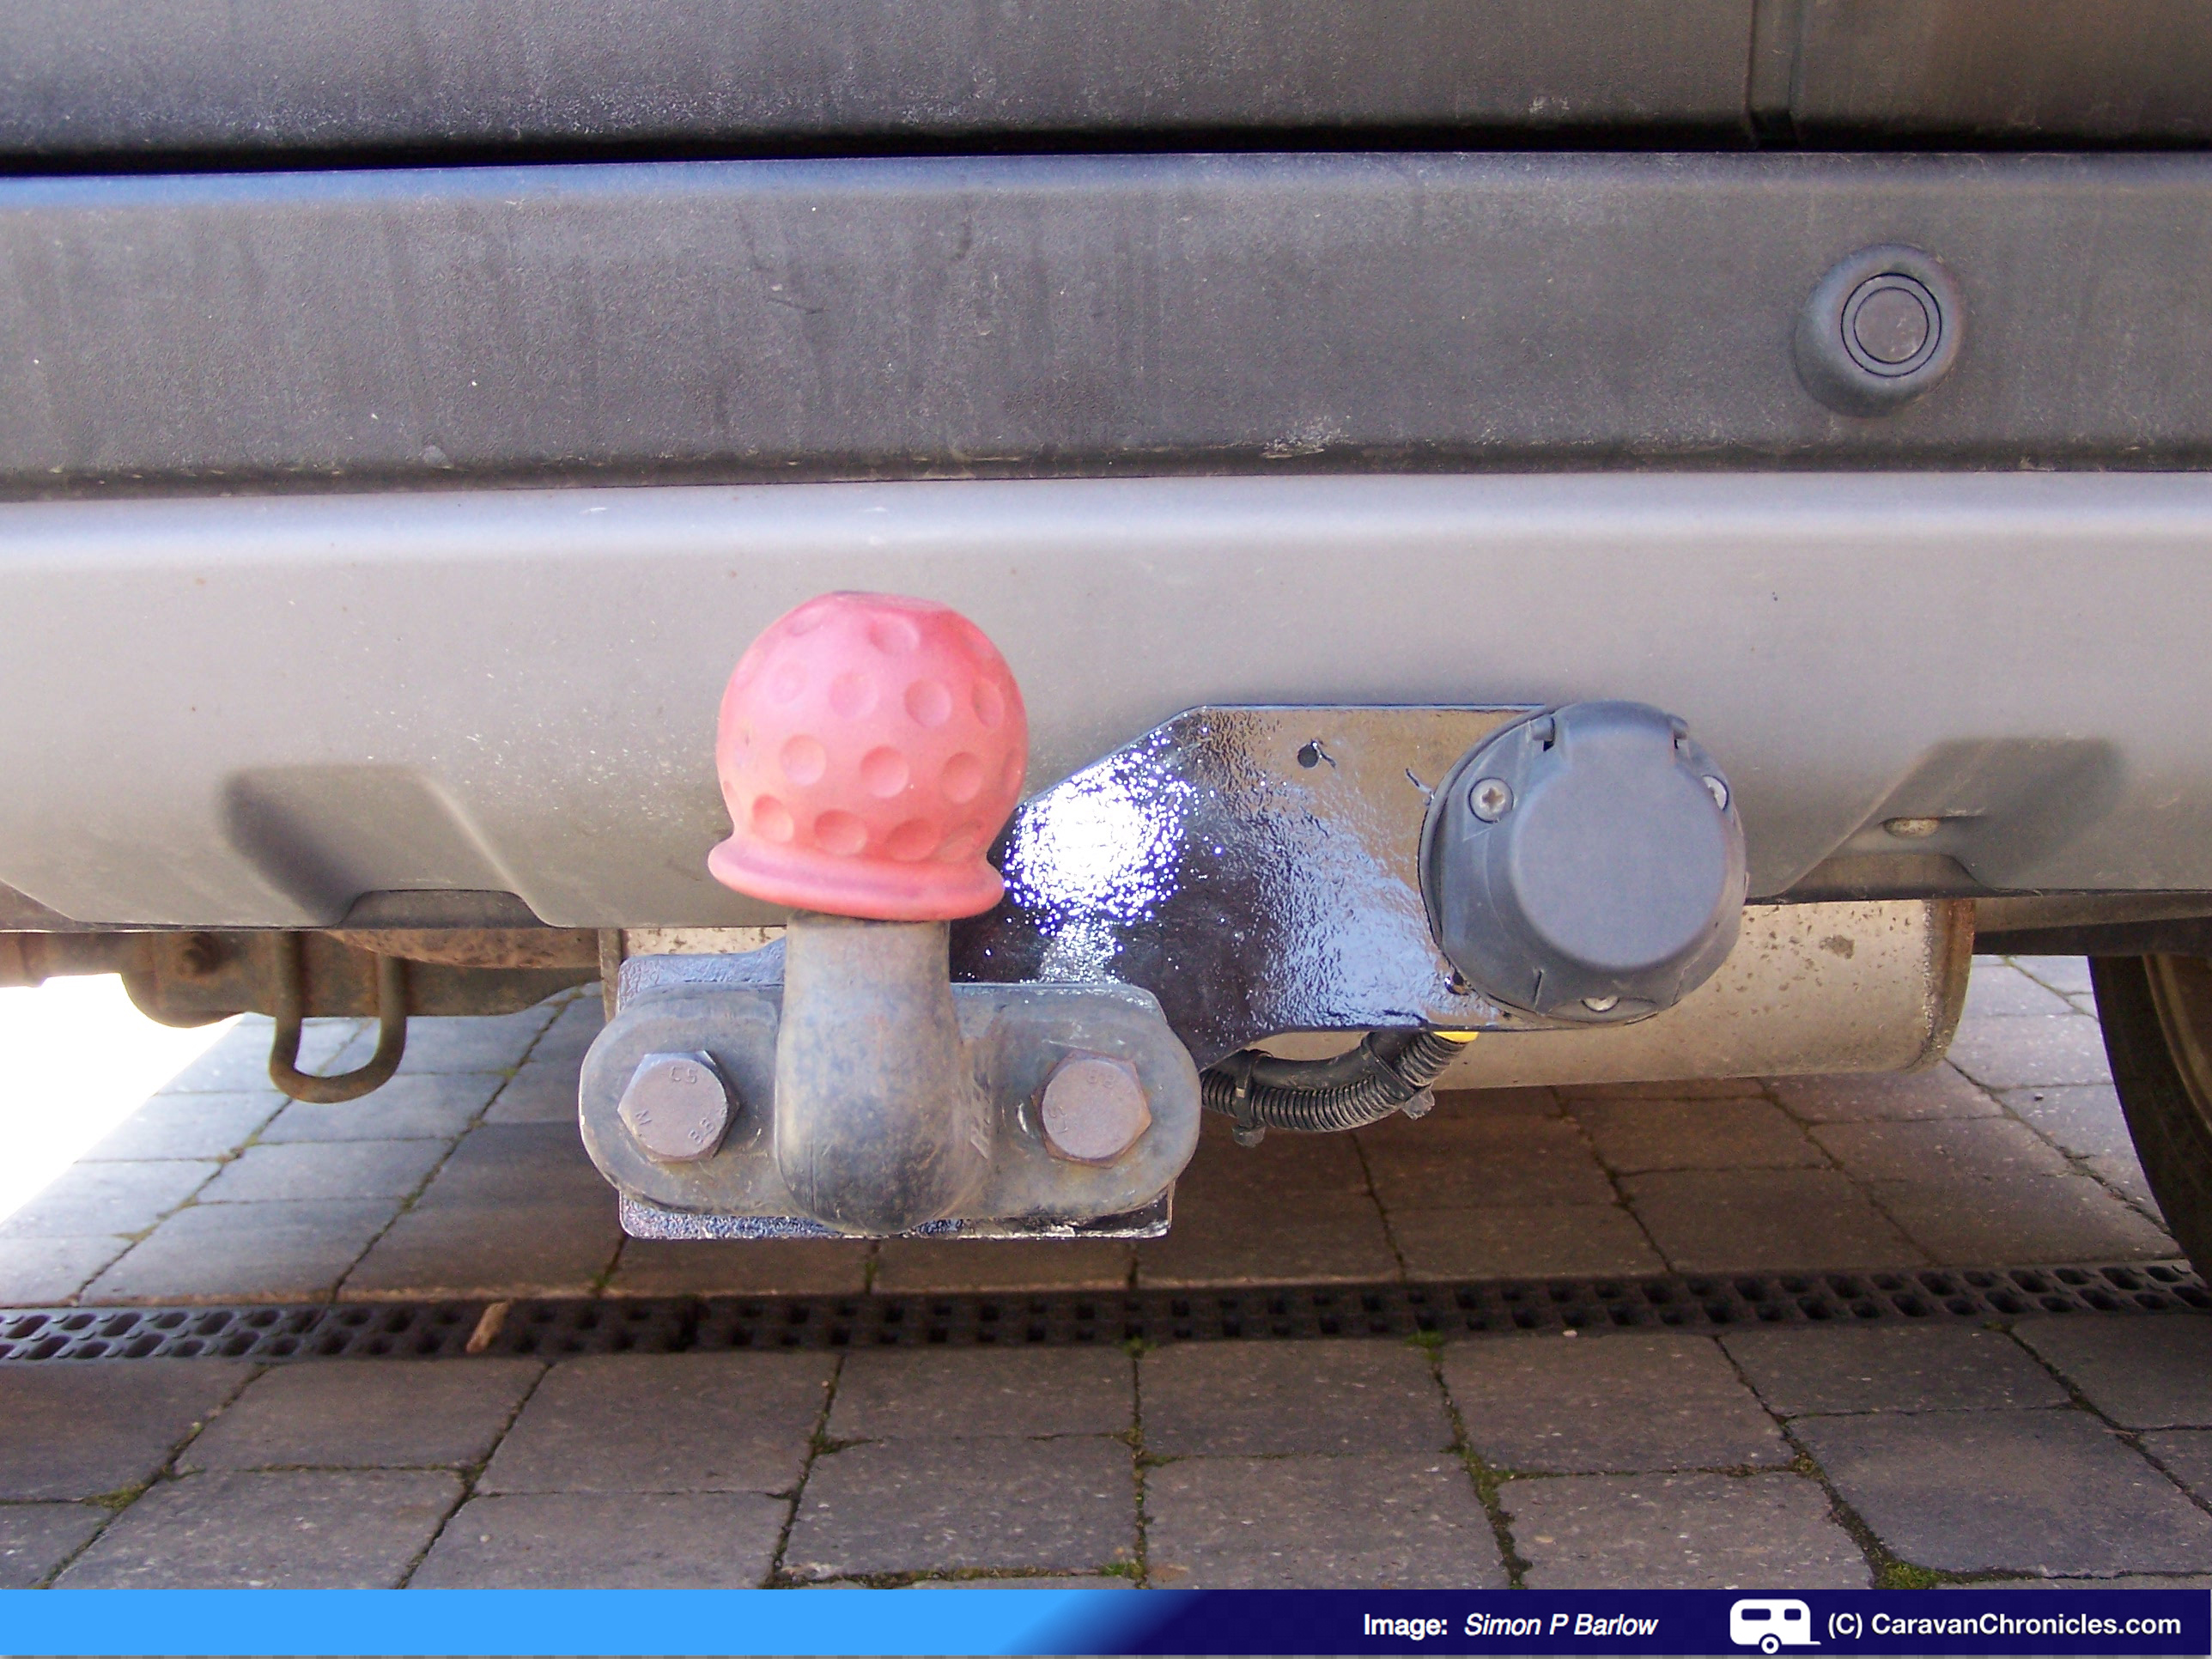
No, I don’t mean getting your departure instructions from ATC….! One of the little jobs on my list was to make a new bracket to hold the 13 pin socket to the tow bar. The existing one was slightly bent from having to reverse the Rotary Christmas Float into a tight space last Christmas and it was also a bit low. I didn’t want the bottom of the socket to be the first point of contact with the ground if travelling down a deep rutted track.

I wanted to move the socket up so it would be at least above the bolts for the tow ball and at the same time distance it from the tow ball so there was less chance of the 13 pin plug coming into contact with the A frame of the caravan (or Santa’s sleigh!) when manoeuvring.
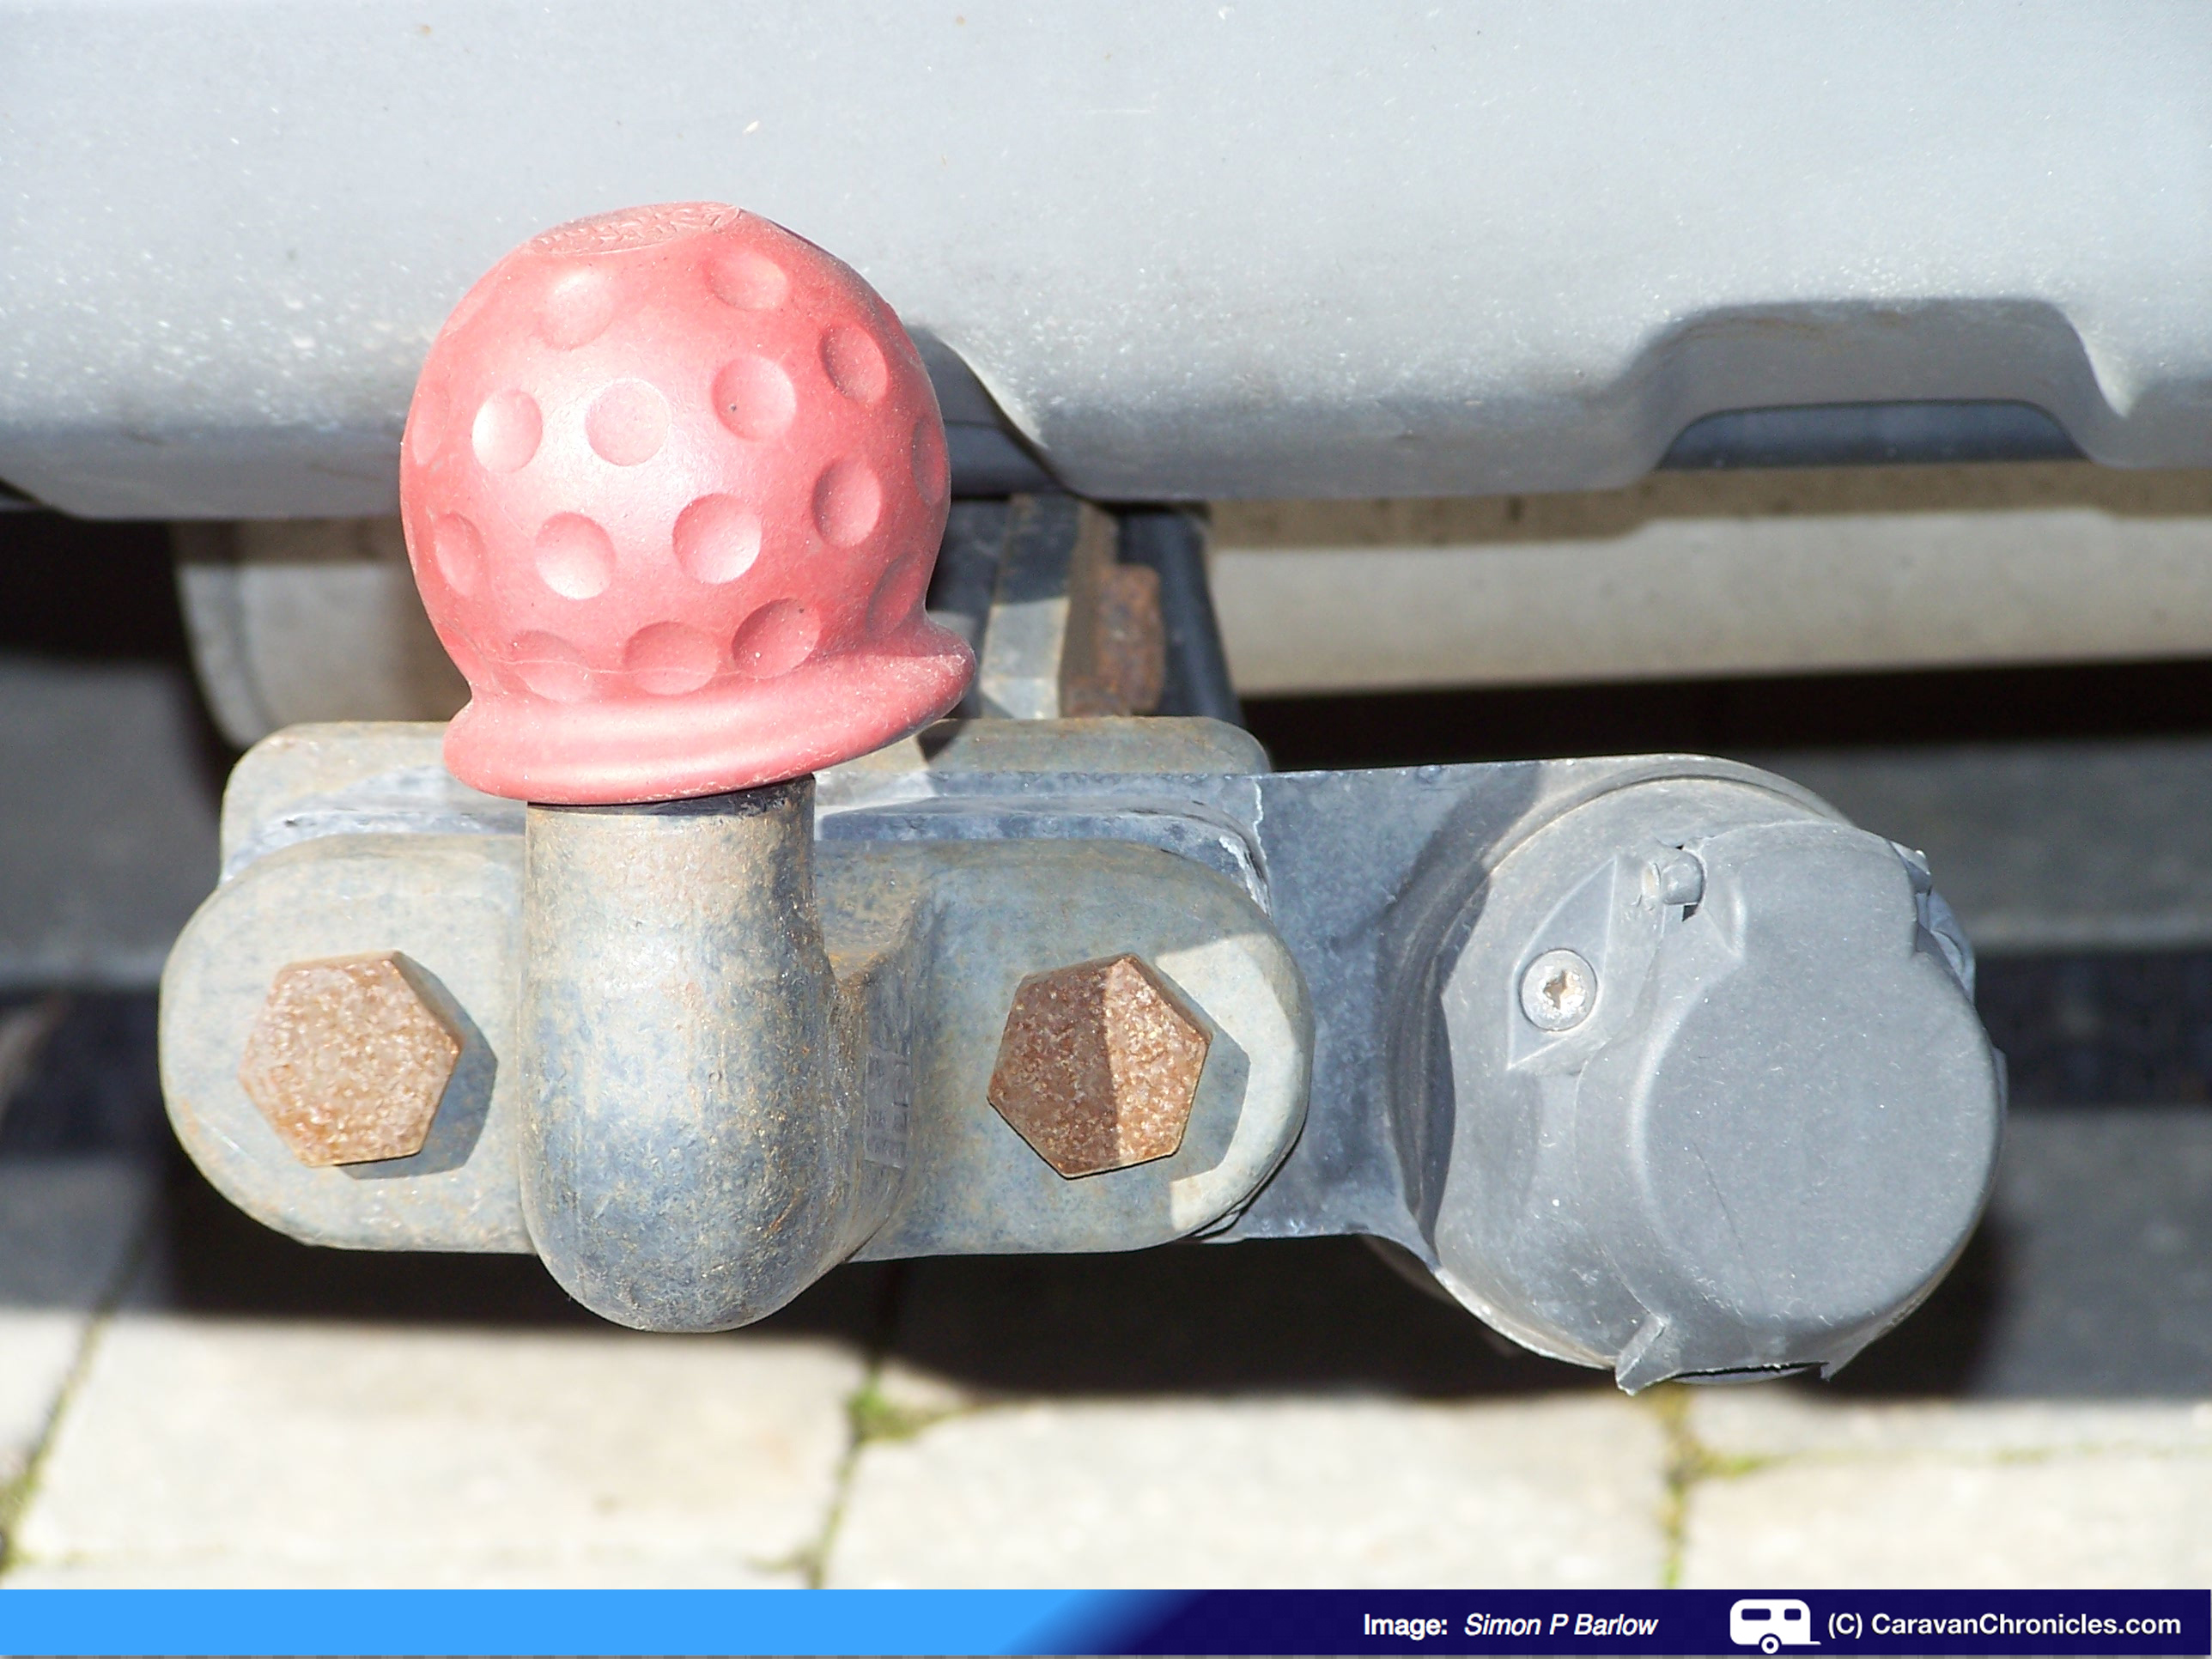
The original bracket was pressed out of 1.3mm thick steel and I guess it was designed to have a bit of ‘give’ in it so it would bend rather than be rigid enough to cause damage to the plug and socket.
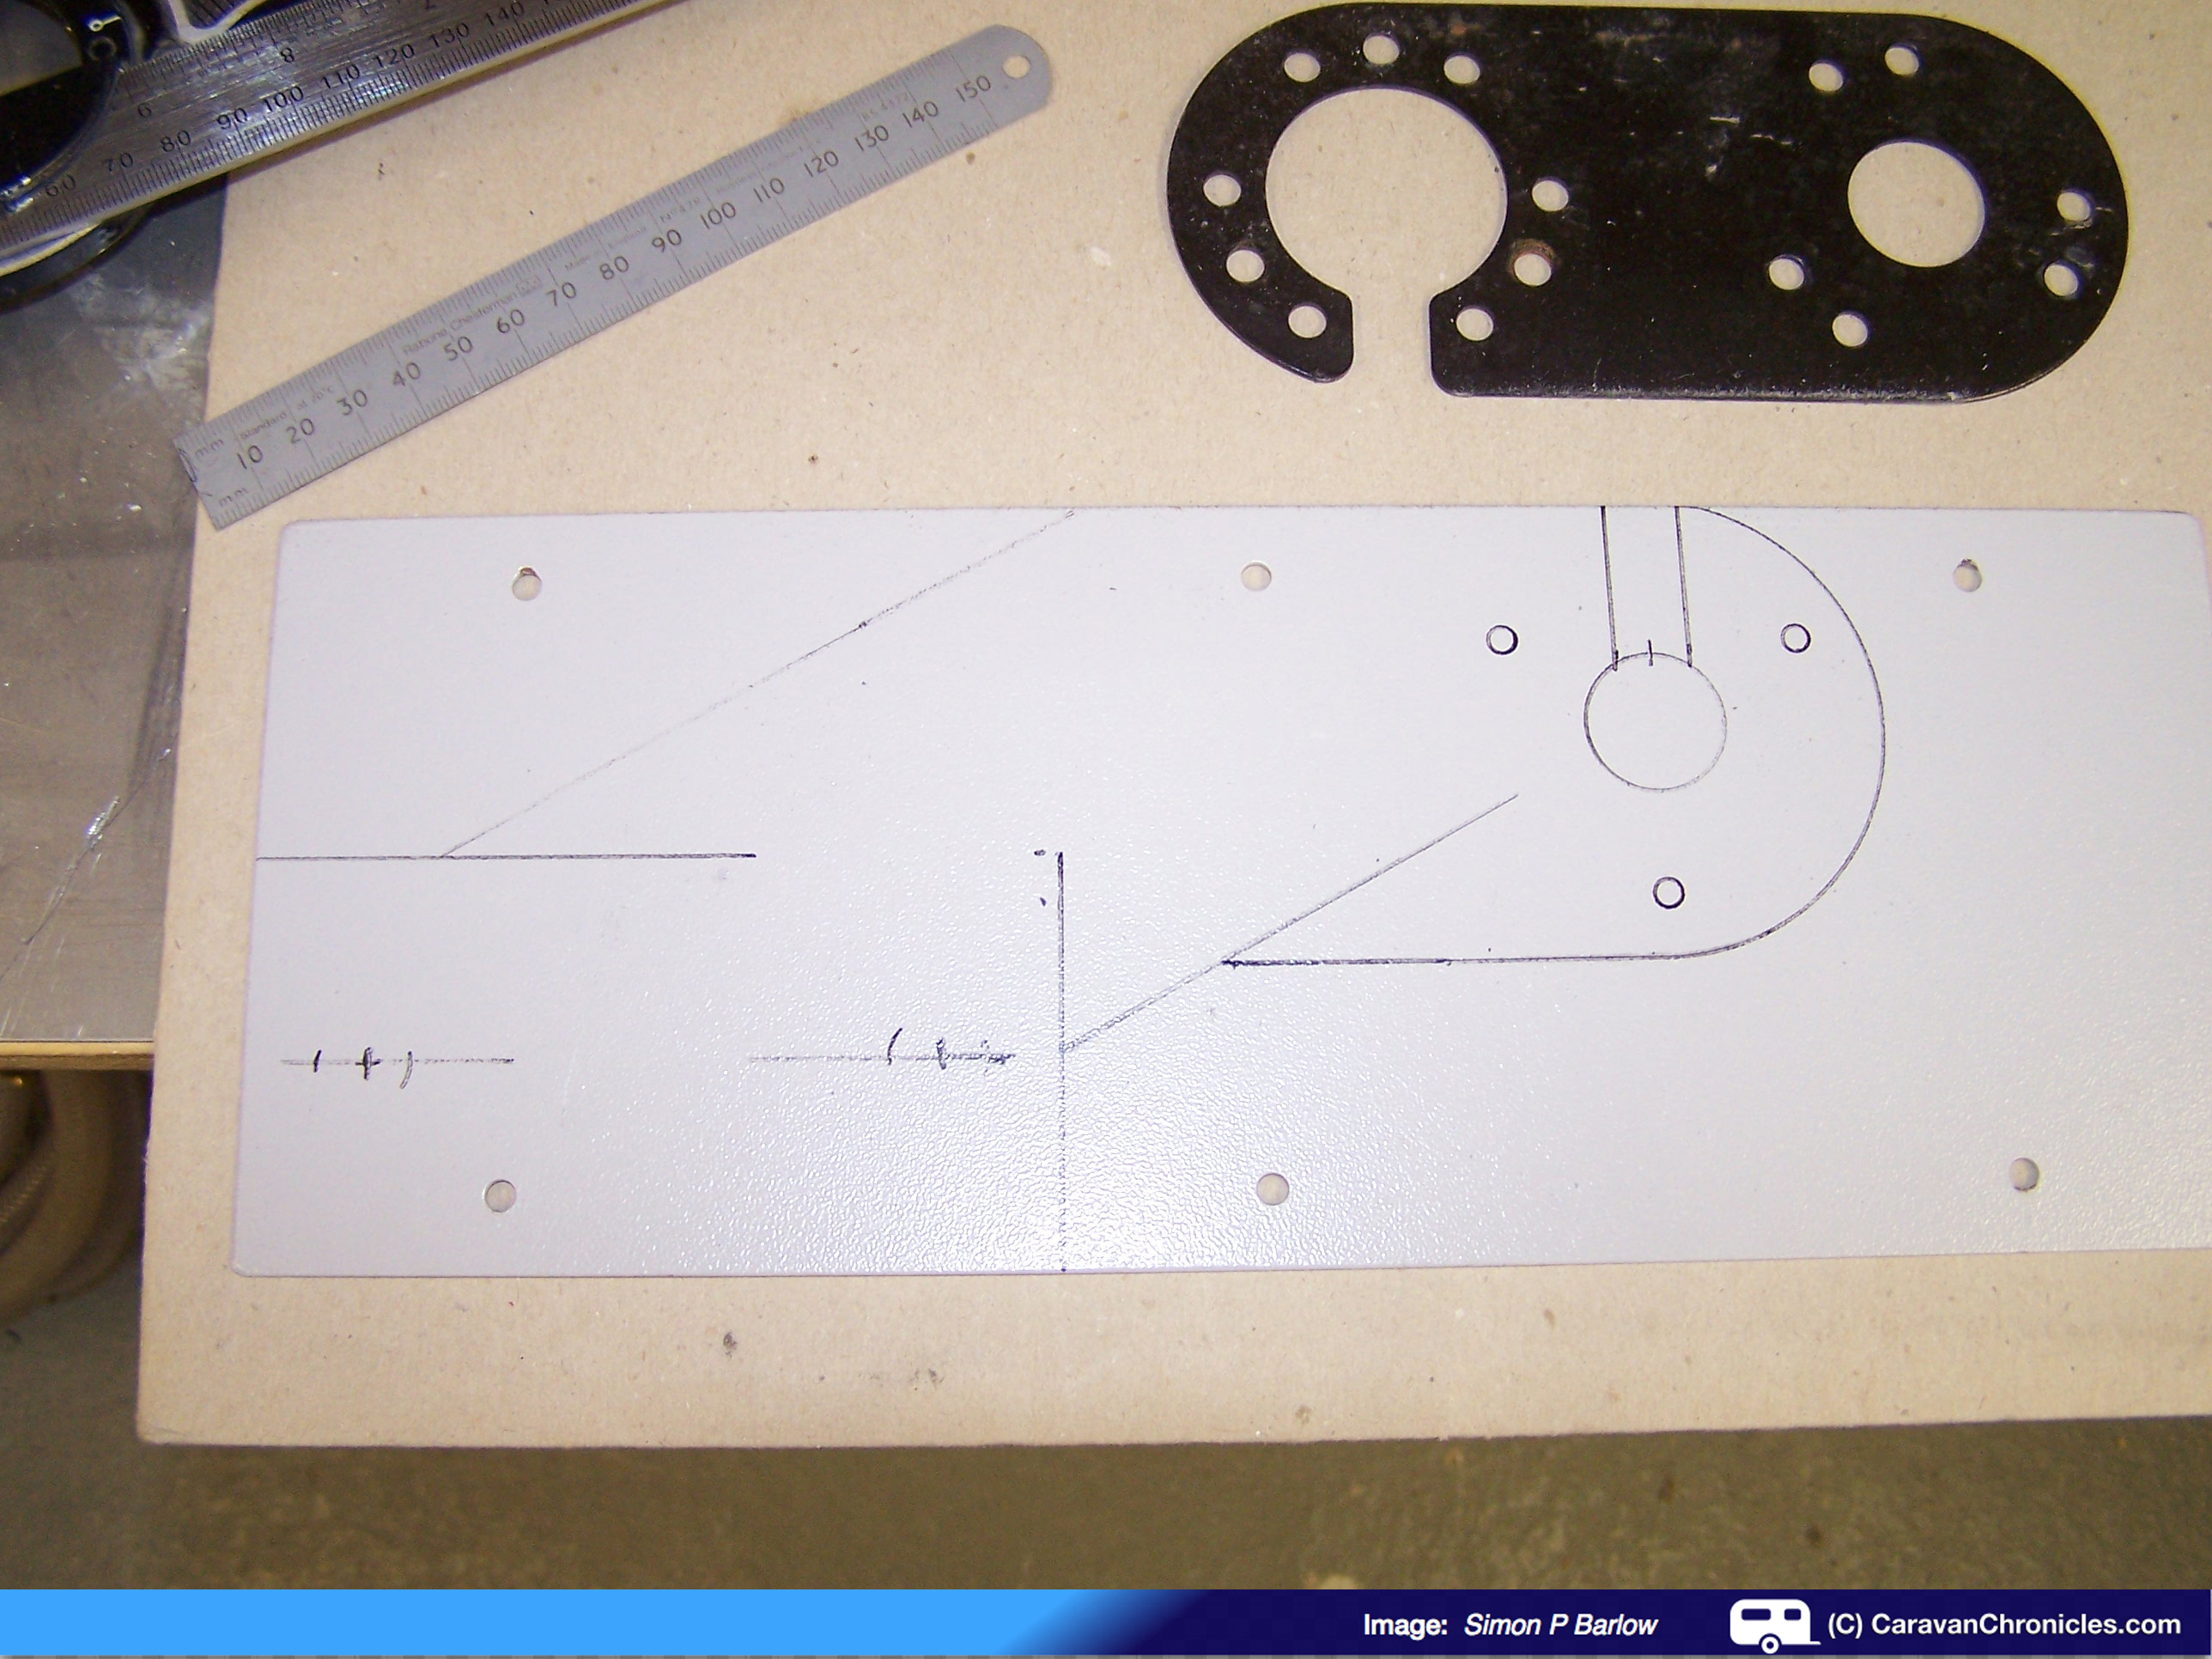
I needed something a bit more substantial due to the extended distance the socket was going to be from the main tow bracket mounting, but still retaining enough ‘give’ if required. I happened to have some pieces of 1.9mm thick steel that were originally cable entry plates for computer racks.
I measured the mounting plate that the tow ball fits onto, 65mm x 135mm, and using a plate that was originally for adding a 12S socket to an existing 12N fitting as a guide marked out the position of where I wanted the socket to be. Again using the extension plate as a guide for width, I marked two lines at 30 degrees… one up from the centre line of the tow ball mounting bolts and the other the same width as the plate. Fortunately the steel stock I had was just the right height! I also marked out the slot I would need to slide the cable through as I wanted to make it so it could be installed/removed without having to disconnect the 13 pin socket.
The next step was to cut out the plate. The easiest way would have been to use a plasma cutter…. unfortunately not a bit of kit I have in my workshop (Sue thinks I already have more kit than ‘International Rescue’) so it was a bit trimming with a band saw.
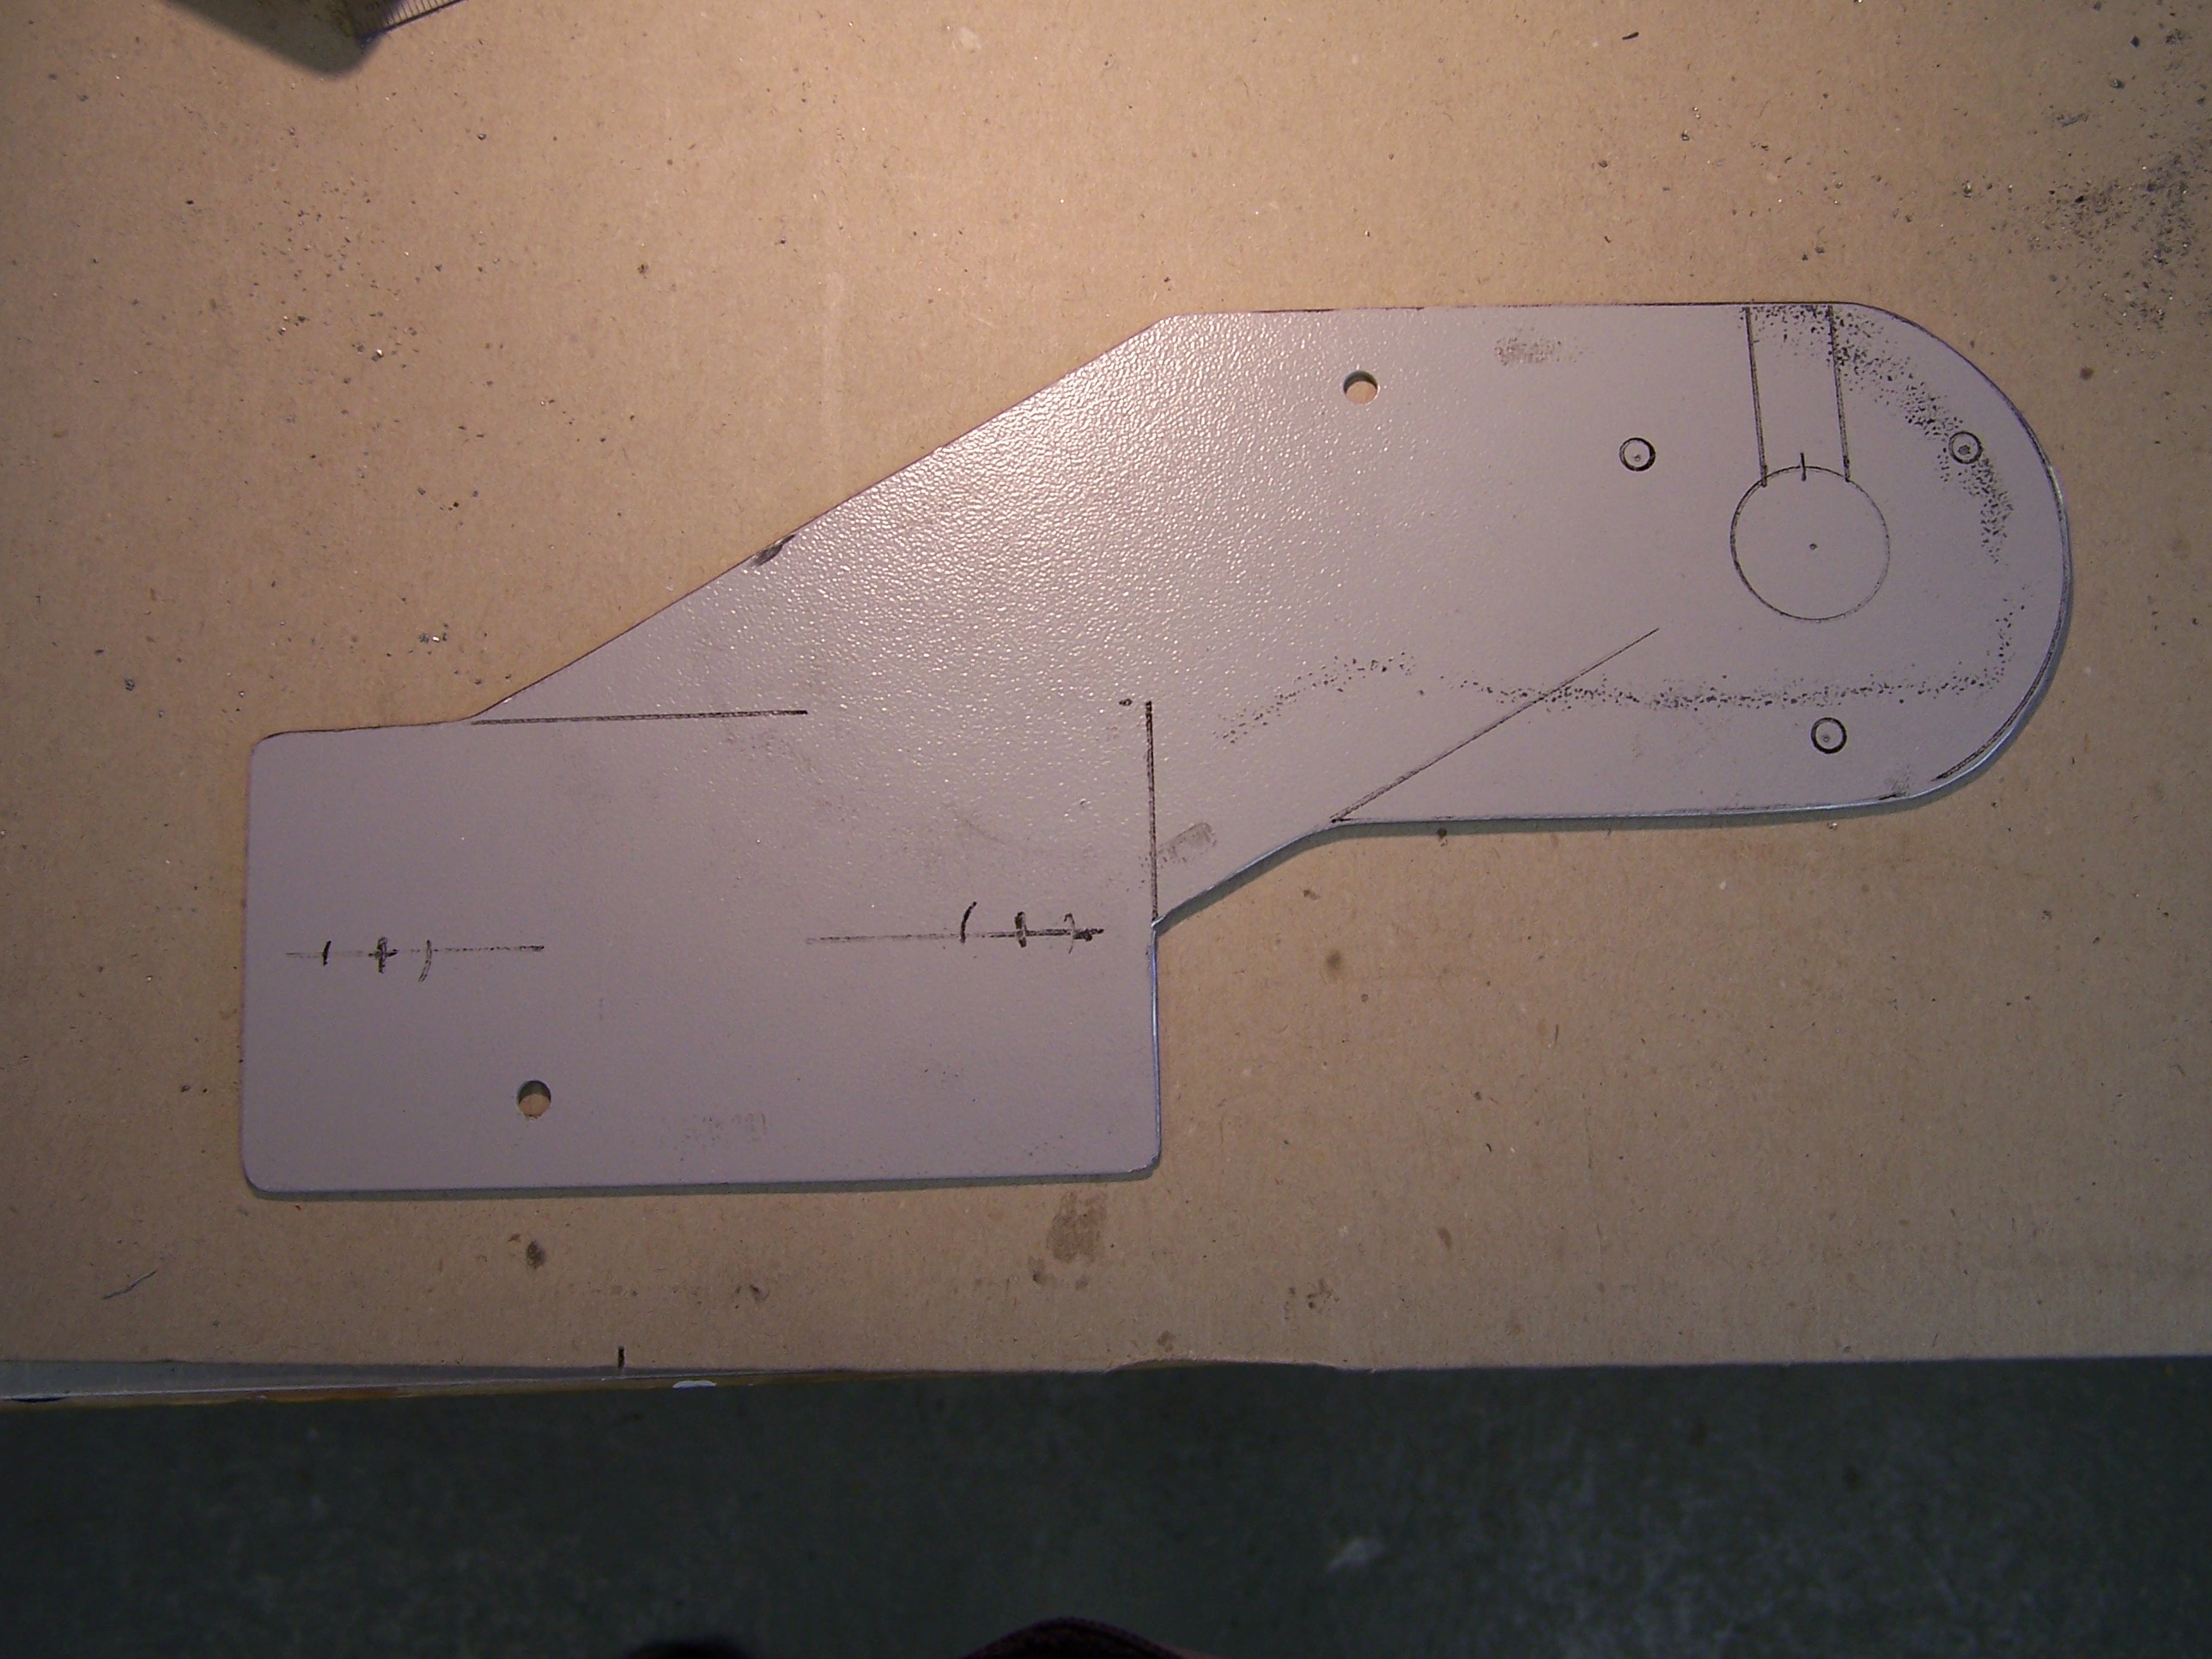
Once cut out, I could now mark on the locations of all the holes and centre punch them ready for drilling, and set about draw filing all the edges. Once all the edges were flat and rounded off it was over to the pillar drill to create some holes. I used a stepped taper drill as there was less chance of grabbing that a large diameter drill bit would do.
With the holes drilled, back to the band saw to cut out the slot and some more filling to smooth and round off the edges of the slot so it could not cause chafing on the cable.
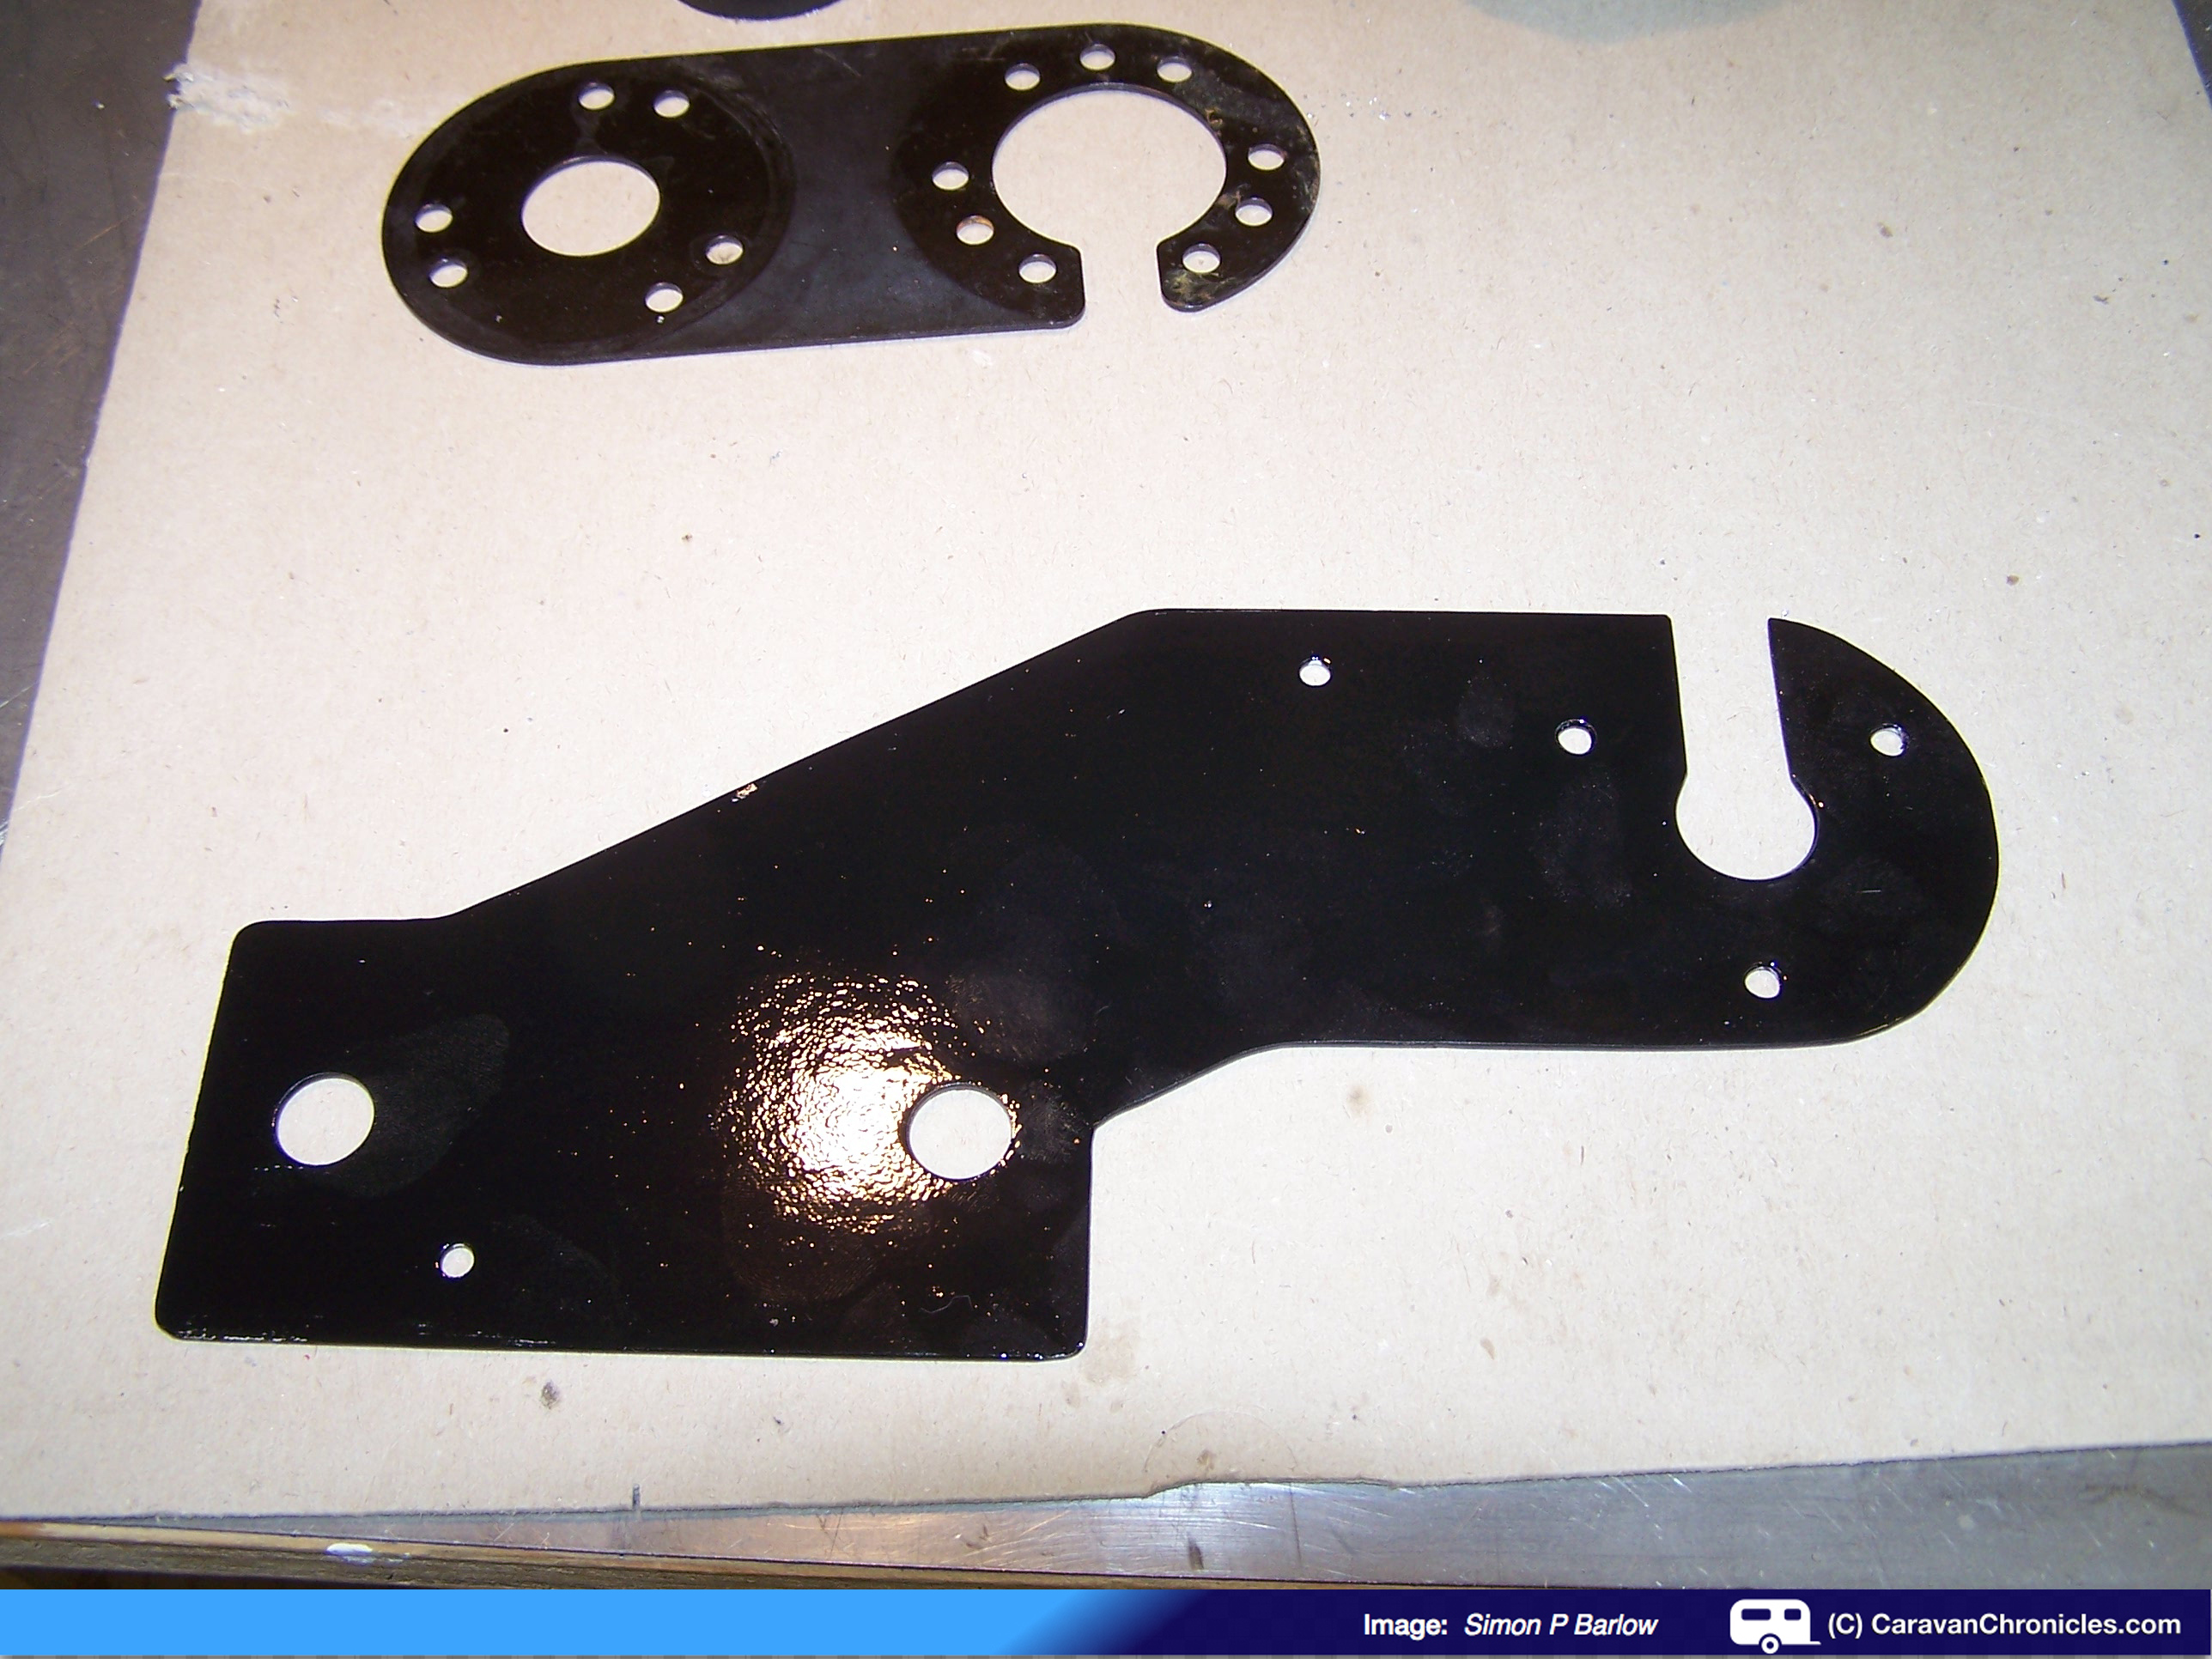
When assembled, there is a small plate that mounts on the back between the two top mounting bolts for the 13 pin socket. This effectively bridges the gap caused by cutting the cable slot.

A quick coat of FORTRESS Black Gloss Metal Paint and it was left a few hours to dry.
The finished bracket installed on the Freelander. The whole job only took and hour (excluding paint drying) and the result is now the socket and cables are clear of the bottom of the tow bracket so there will be less chance of catching it when off roading. The extra spacing will also allow a bit more articulation of the caravan’s A frame without touching socket. The distance is not too much so that the cable from the caravan risks hanging below the coupling too.
The other advantage of raising the 13 pin socket up is the fact it is now less likely to get sprayed with water from under the vehicle when travelling on wet roads, so hopefully reducing future maintenance.
One thing I did find in removing the tow ball to mount the bracket is one of the split washers on the back of the bolts holding the tow ball on had a crack in it. Split washers for this type of application are not reusable items and each time the tow ball is removed and replaced, the split washers should be replaced. I inspected the bolts and nuts closely as they were installed back in 2006 when we bought the Freelander. There was a slight amount of surface rust on the shanks. I used a rotary wire brush in the pillar drill to clean them up and inspecting with a magnifying glass I could see slight pits in the surface. As these take all the strain of towing, I’ve decided the next job this weekend is to replace them with two new bolts and nuts, and of course new split washers. For the sake of a few pounds, it’s better to be safe than sorry.
Before the new bolts are installed and the cable tied up securely
Hope this was a useful little project.
S
UPDATE – 4 May 2013
I have just replaced the bolts holding the tow ball casting on to the tow bar frame. When slackening off one of the old bolts, the split washer that I’d noticed a crack in yesterday fell to the floor in two pieces.
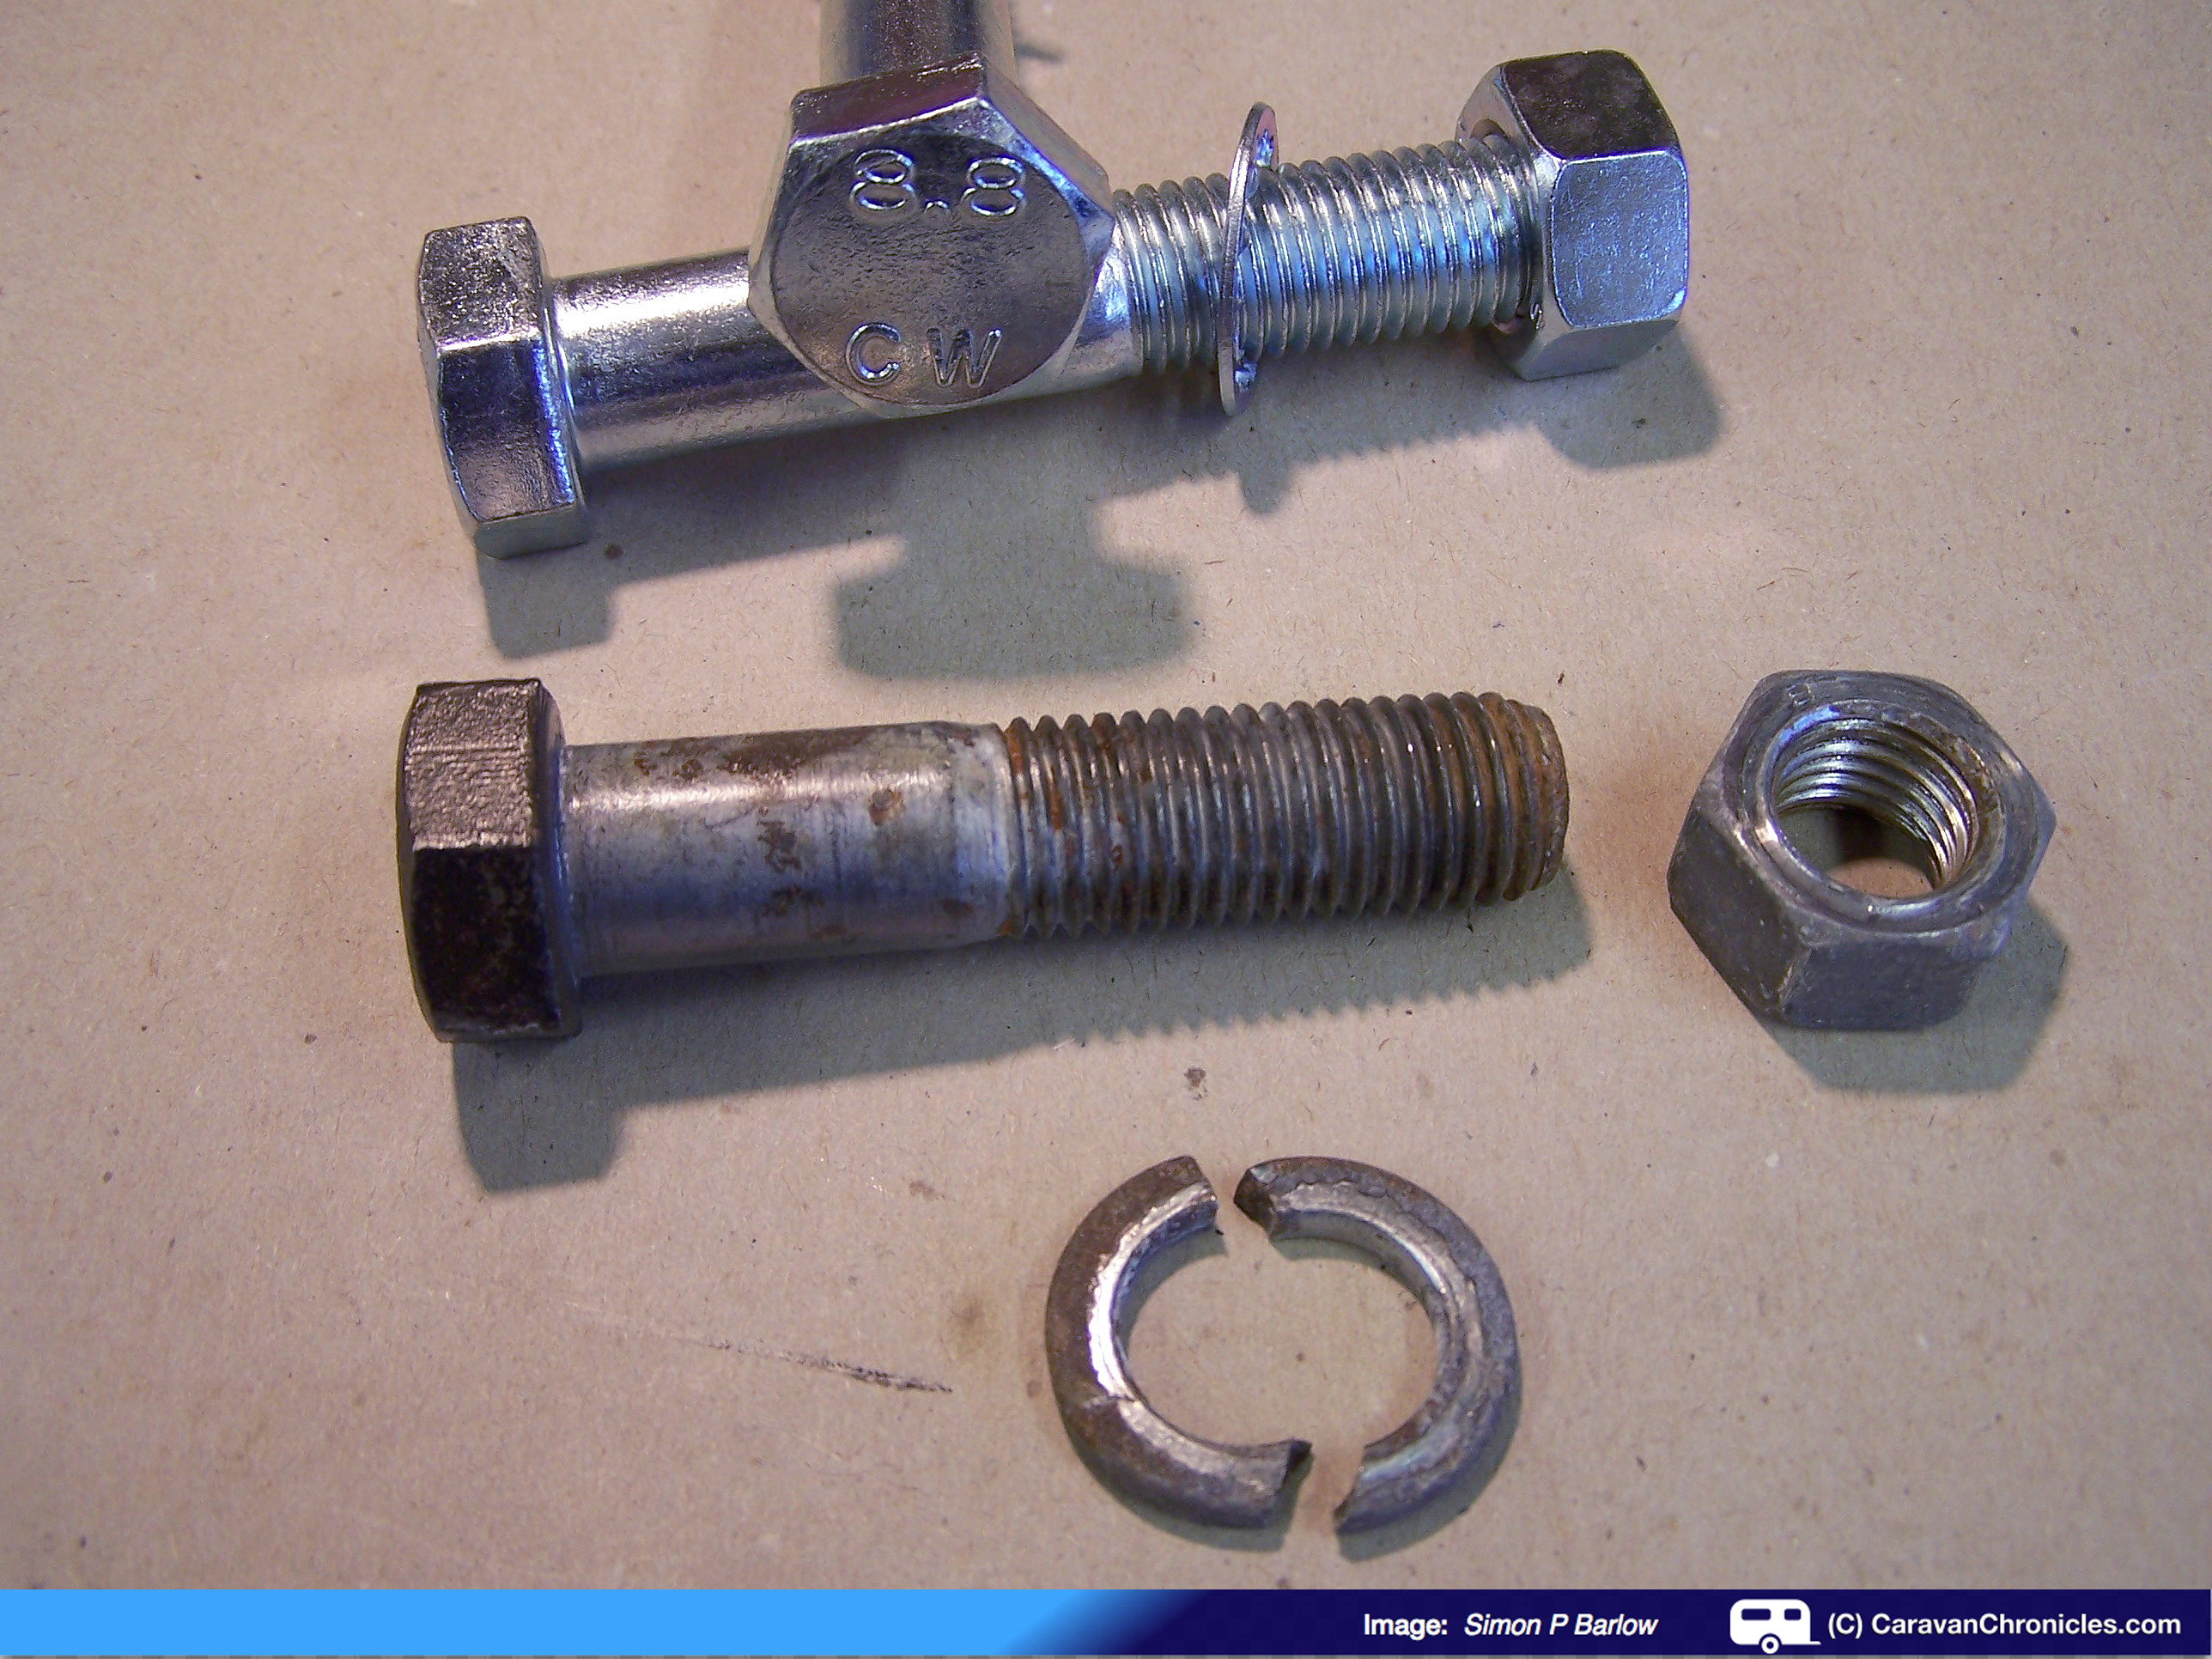
I checked in my “machinist’s handbook” for the correct bolts to select. The original bolts were M16. As the original bolts were only 60 MM, I wanted to make sure the shank of the new bolts passed through as much of the holes as possible leaving the shortest amount of thread in the hole. The correct bolts were 90mm, M16 x 2 8.8 High Tensile. You can see the difference in the new and old bolts in the photo above, along with the old split washer that fell off. I also checked on the correct washer for the application, and again referring to my machinist’s handbook as I would be tightening to the maximum torque of 214 Nm (76KN) it recommended using star washers.
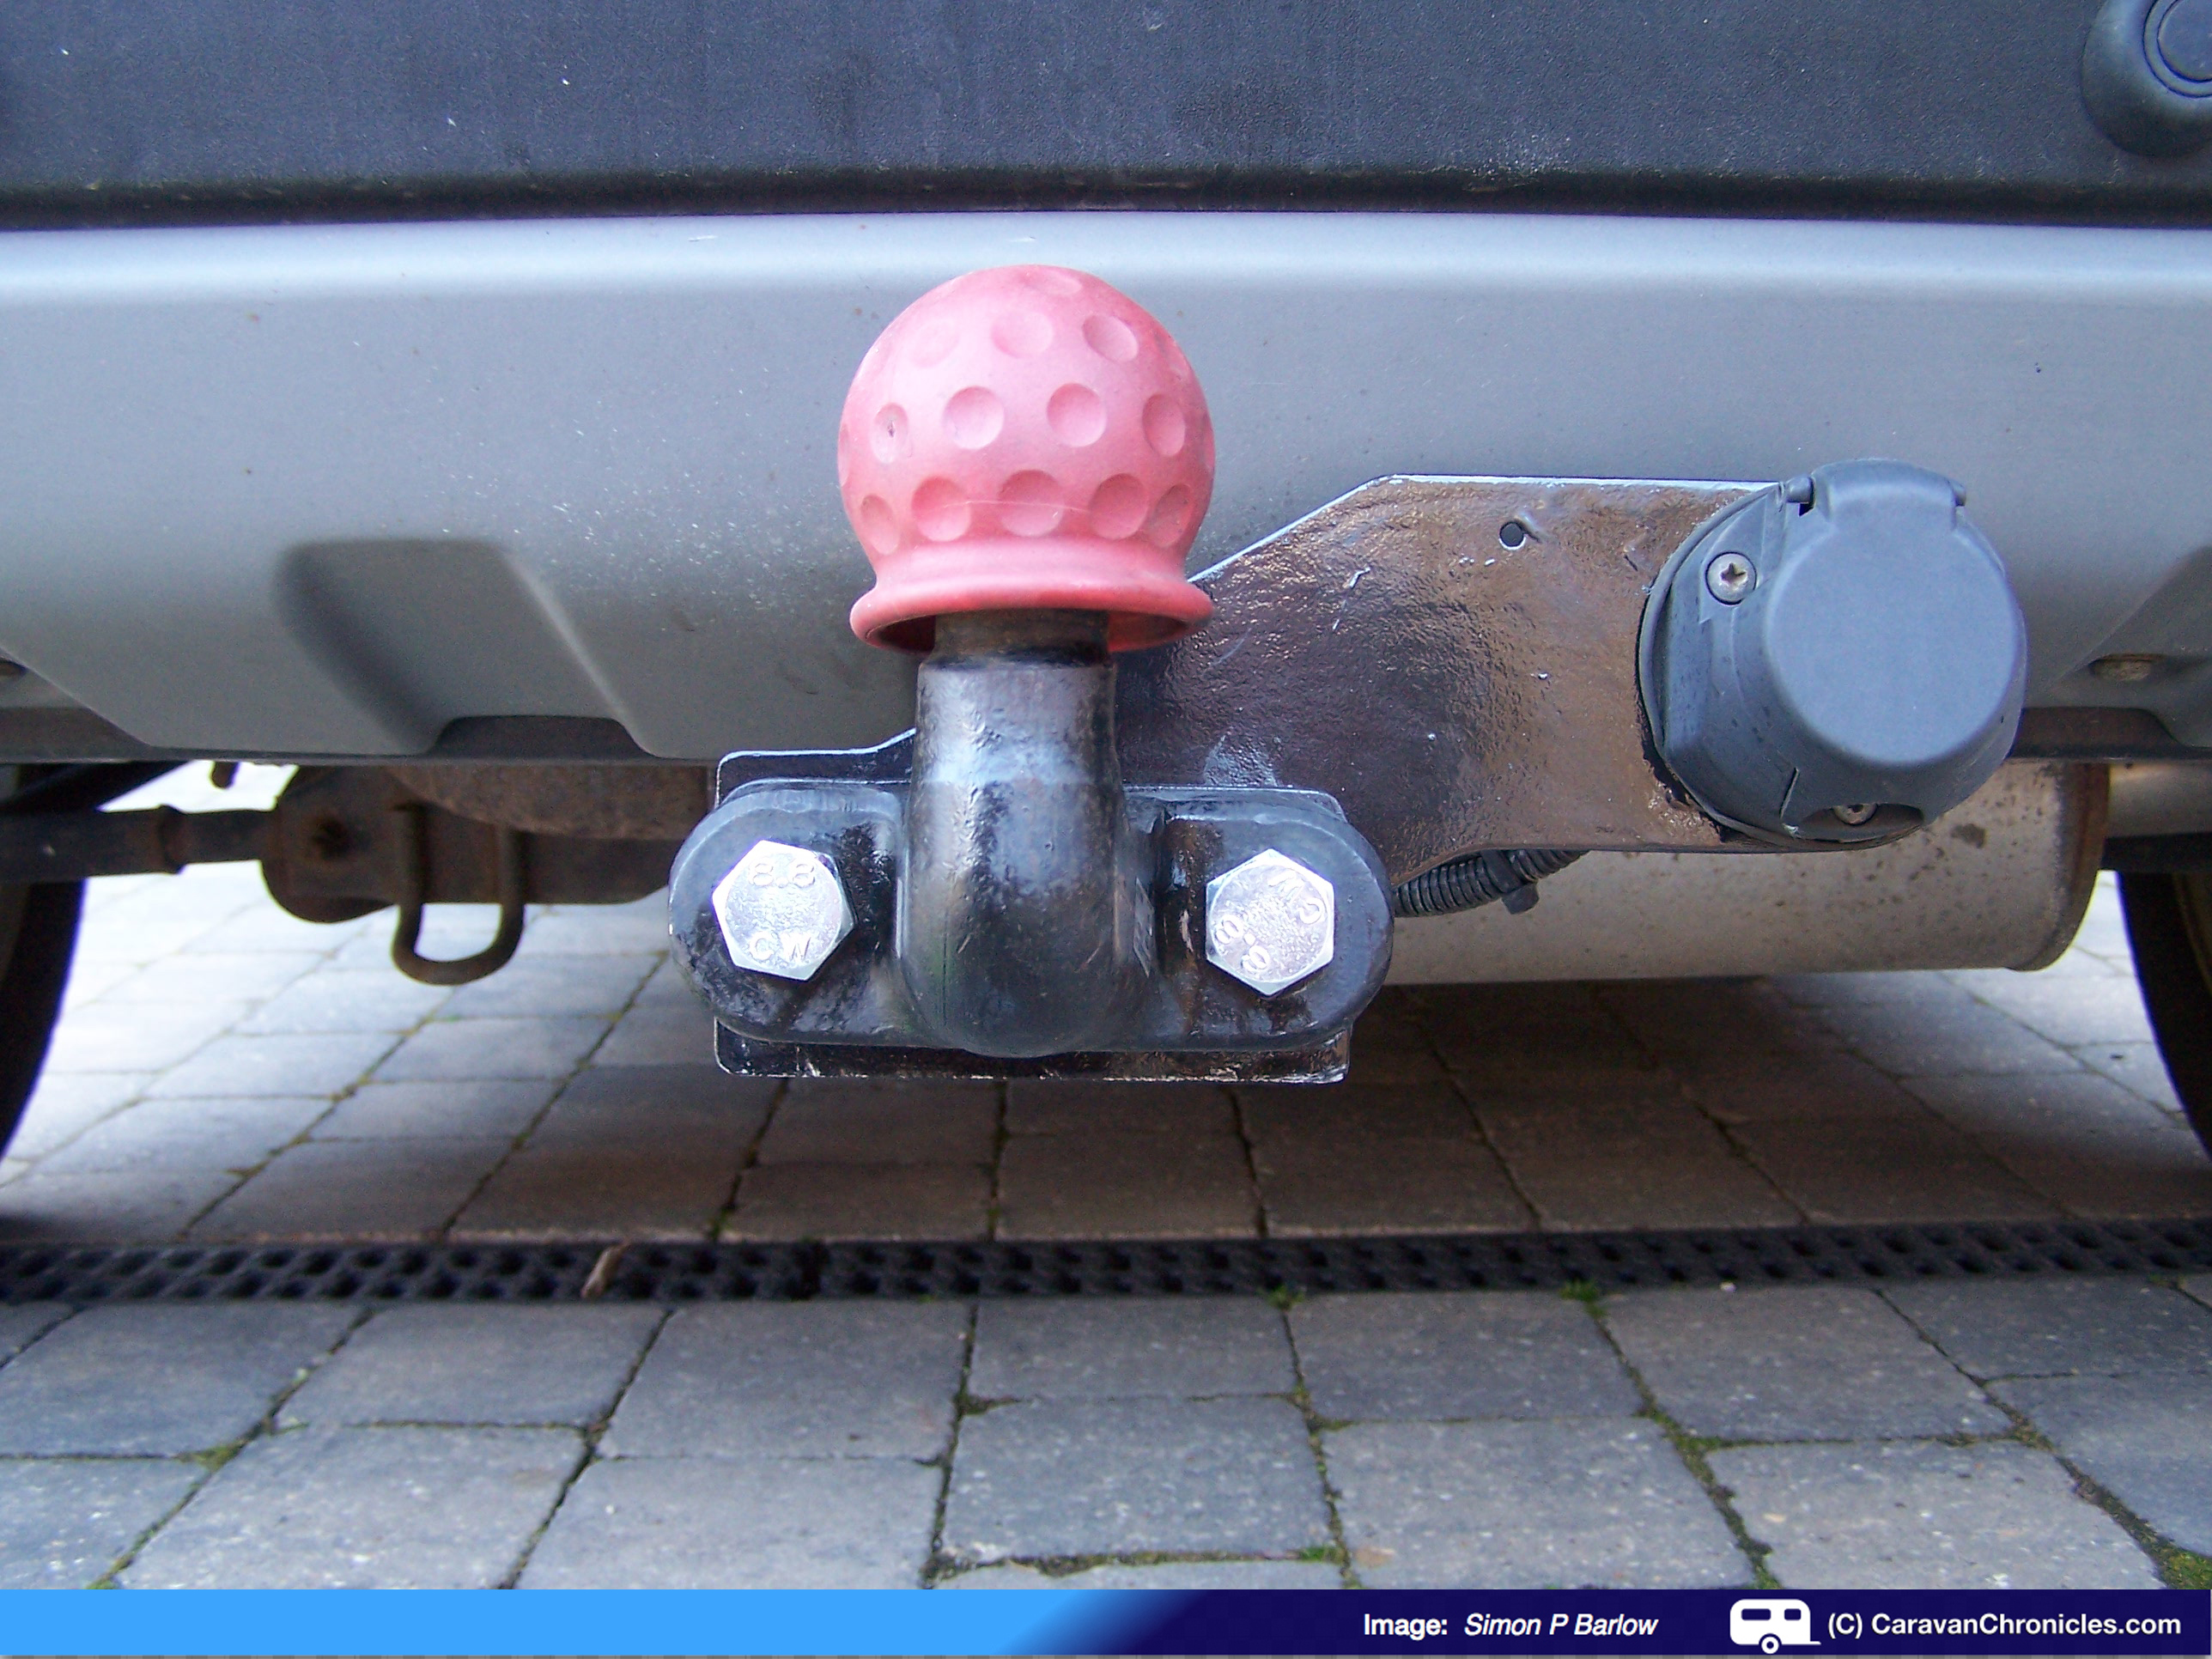
Job done. All I have to do now is check the torque after about 25 to 50 miles of towing once the star washers have bedded in a little.
Only a few days to wait as we are off to Troutbeck Head CC site in a few days time.
S
